Why You’ll Adore This Dish
Let’s face it: busy weeknights can feel like a whirlwind, where cooking often takes a backseat to life’s chaos. But what if I told you that there’s a magical dish that can bring a little calm and comfort back into your kitchen? Enter my Honey Garlic Salmon Poke Bowl—this isn’t just a meal; it’s a vibrant, nourishing experience that’s perfect for those nights when you’re juggling a million things but still want something delicious and satisfying.
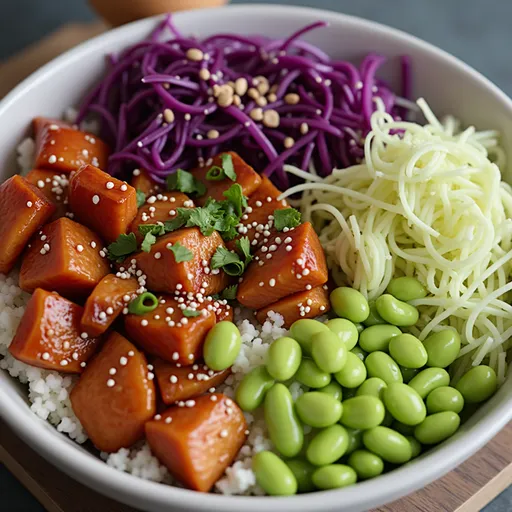
This bowl is a delightful fusion of flavors and textures, featuring sweet and savory salmon, creamy avocado, crunchy veggies, and fluffy jasmine rice. It’s like a hug in a bowl, and I promise, each bite will transport you to a happier place. Plus, it’s versatile enough to adapt to your taste buds and pantry staples, making it your new go-to for busy weeknights.
Overview of Your New Favorite Recipe
With its colorful ingredients and easy preparation, this poke bowl is all about simplicity without compromising on flavor. Whether you’re a seasoned chef or just starting your culinary journey, you’ll find this recipe approachable and rewarding. Here’s what you need to know:
- Difficulty: Easy
- Prep Time: 15 minutes
- Cooking Time: 10 minutes
- Total Time: 25 minutes
- Servings: 2
The Day I Discovered Poke Bowls

Let me take you back to the moment I first fell in love with poke bowls. Years ago, during a sunny trip to the coast, I stumbled upon a little beachside café that specialized in poke. It was love at first bite! The fresh fish, vibrant vegetables, and perfectly seasoned rice made me realize that food can be an adventure. But when I returned home, I quickly discovered that finding sushi-grade tuna in my landlocked city was nearly impossible.
That’s when creativity kicked in. I had a gorgeous piece of salmon in my fridge, and I thought, “Why not?” The results were nothing short of spectacular! By combining my beloved honey garlic sauce with the tender salmon, I created a dish that not only satisfied my craving but also brought a little bit of that coastal magic back to my kitchen.
Gathering Your Ingredients
Now that I’ve whetted your appetite, let’s dive into the ingredients you’ll need to craft this culinary masterpiece:
- 1 lb fresh salmon, diced
- 3 tbsp honey
- 2 tbsp soy sauce
- 2 cloves garlic, minced
- 1 tsp sesame oil
- 2 cups cooked jasmine rice
- 1 avocado, sliced
- 1 cup cucumber, sliced
- 1 cup edamame, shelled
- 1 radish, thinly sliced
- 2 green onions, chopped
- 1 tbsp sesame seeds
- Seaweed salad (optional)
Creating Your Honey Garlic Salmon Poke Bowl
Now, let’s get cooking! Here’s a step-by-step guide to creating your own poke bowl:
-
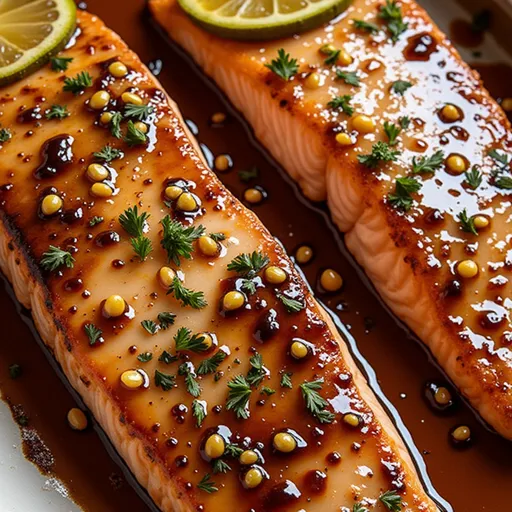
In a bowl, whisk together the honey, soy sauce, minced garlic, and sesame oil to craft a delicious marinade. This sauce is where the magic begins, transforming the salmon into a sweet-savory delight!
-
Add the diced salmon to the marinade and let it sit in the refrigerator for 15-20 minutes. This allows the flavors to meld beautifully while you prepare the other components.
-
While the salmon is marinating, place your cooked jasmine rice into serving bowls. This will be the cozy base for all your delicious toppings.
-
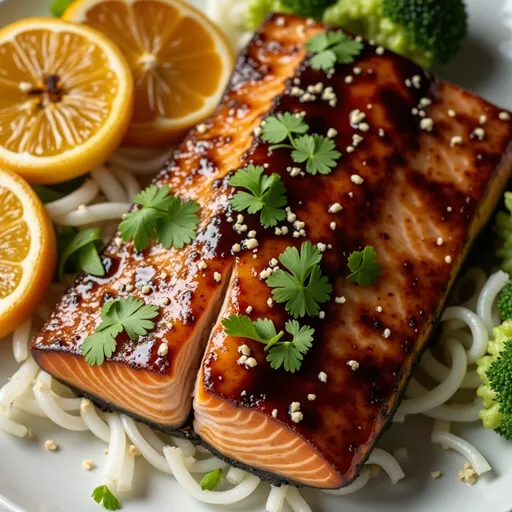
Once your salmon has marinated, top the rice with the honey garlic salmon. It’s time to bring that beautiful salmon to the forefront!
-
Arrange the sliced avocado, cucumber, edamame, radish, and green onions around the salmon, creating a colorful and inviting presentation.
-
Sprinkle sesame seeds on top for a delightful crunch and garnish.
-
For an extra touch, add seaweed salad on the side if desired. It’s a delightful addition that enhances the oceanic essence of your bowl.
-
Serve immediately and enjoy your nourishing, fresh, and flavor-packed poke bowl!
Tips for a Flawless Bowl
Before you rush into your kitchen, here are some helpful tips to ensure your poke bowl is as tasty as possible:
- Freshness is Key: Always use the freshest salmon you can find. Not only does it taste better, but it’s also safer to eat.
- Marinate Wisely: Don’t skip the marination step! This is where the salmon absorbs all those delicious flavors, making each bite a joy.
- Rice Matters: Jasmine rice is my go-to for its fluffiness and subtle fragrance, but feel free to use sushi rice or brown rice for a healthier twist.
- Get Creative: This recipe is a fantastic base. Feel free to add your favorite veggies or toppings—think shredded carrots, radish sprouts, or even pickled ginger!
Fun Variations to Try
Want to switch things up? Here are a few variations to consider:
- Spicy Kick: Add a drizzle of sriracha mayo or a sprinkle of chili flakes to give your poke bowl some heat.
- Vegetarian Version: Substitute the salmon with marinated tofu or tempeh for a plant-based twist.
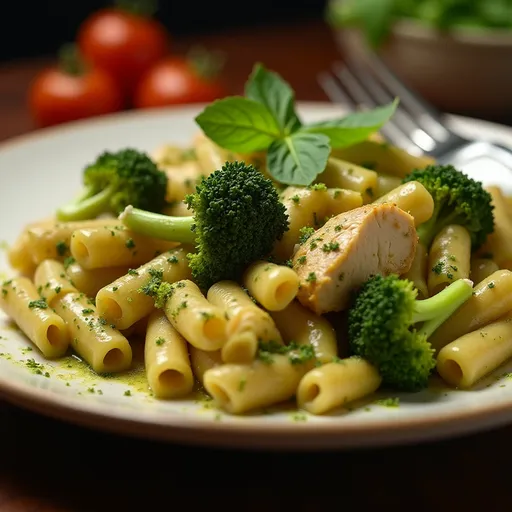
- Different Proteins: Instead of salmon, try this recipe with shrimp or chicken—both are delicious!
Substitutions Made Easy
If you find yourself missing an ingredient or two, don’t fret! Here are some easy substitutions:
- If you don’t have honey, maple syrup works beautifully as a sweetener.
- Low-sodium soy sauce is a great alternative if you’re watching your sodium intake.
- Any creamy avocado substitute will work, such as hummus or yogurt, should you want to cut back on calories.
Essential Equipment
Before you start cooking, gather these kitchen essentials:
- Mixing bowl for the marinade
- Knife and cutting board for prepping the veggies
- Serving bowls for assembling your poke bowl
Storage and Freezing Tips
This dish is best enjoyed fresh, but if you have leftovers, here’s how to store them:
- Store the salmon separately from the rice and veggies in an airtight container in the fridge for up to 2 days.
- While I wouldn’t recommend freezing the assembled bowl, the marinated salmon can be frozen for up to 2 months—just thaw completely before cooking.
FAQs: Your Questions Answered
As I’ve been sharing this recipe with friends and family, I’ve fielded plenty of questions. Here are the most common:
- Can I use frozen salmon? Yes! Just make sure to thaw it completely and pat it dry before cubing and marinating.
- How do I know when the salmon is done? Aim for a nice sear on the outside while keeping the inside tender and slightly opaque.
- What if I don’t like edamame? Feel free to swap it out for another protein source, like chickpeas or cooked quinoa!
Troubleshooting Your Poke Bowl
If things don’t go as planned, here are some troubleshooting tips:
- If the salmon is overcooked, next time reduce the cooking time and check for doneness earlier.
- If your rice is too sticky, rinse it with cold water before cooking to remove excess starch.
In Conclusion: Your Culinary Adventure Awaits
There you have it! My Honey Garlic Salmon Poke Bowl is not just a recipe; it’s an invitation to enjoy a little magic in your kitchen. With its simple preparation and endless possibilities, it’s sure to become a staple in your mealtime repertoire. So, gather your ingredients, unleash your creativity, and let the flavors dance together. Trust me, you’ll be savoring every bite and sharing the love with family and friends in no time. Happy cooking, and here’s to many delicious meals ahead!

Honey Garlic Salmon Poke Bowl : Nourishing, Fresh & Flavor-Packed - Food Meld in 2025
Ingredients
protein
- 1 lb fresh salmon, diced
- 3 tbsp honey
- 2 tbsp soy sauce
- 2 cloves garlic, minced
- 1 tsp sesame oil
base
- 2 cups cooked jasmine rice
toppings
- 1 avocado sliced
- 1 cup cucumber, sliced
- 1 cup edamame, shelled
- 1 radish thinly sliced
- 2 green onions chopped
- 1 tbsp sesame seeds
- optional seaweed salad
Instructions
- Whisk honey, soy sauce, garlic, and sesame oil to make marinade.
- Marinate salmon for 15-20 minutes in the refrigerator.
- Place cooked rice in bowls and top with marinated salmon.
- Arrange avocado, cucumber, edamame, radish, and green onions around the salmon.
- Sprinkle sesame seeds and add seaweed salad if desired. Serve immediately.
Notes
Loved this recipe? Save it to your favorite Pinterest board so you can easily find it later! It’s the perfect way to keep all your sweet ideas in one place. ✨