Why You’ll Love This Recipe
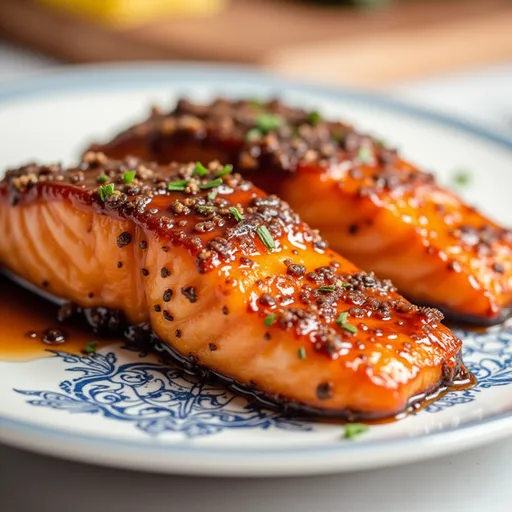
If you’re looking for a dish that’s not only quick and easy but also bursts with flavor, then look no further! This Crispy Air Fryer Honey Garlic Salmon Recipe is a magical combination of sweet and savory that’s bound to become a staple in your kitchen. Imagine juicy salmon fillets, perfectly cooked to tender flakiness, drizzled with a sticky, caramelized honey garlic glaze that will have your taste buds dancing. This is not just dinner; it’s an experience. Plus, the air fryer makes it all so simple, meaning you can enjoy a restaurant-quality meal right at home without the fuss.
Let’s be honest: life gets busy, and sometimes we need meals that won’t consume our whole evening. This dish fits right into that category! In about 30 minutes, you can serve up a plate of salmon that feels special but is effortless to prepare. Whether you’re cooking for family, hosting friends, or treating yourself to a delicious meal, this honey garlic salmon is sure to steal the show.
Key Ingredients & Their Roles
Let’s dive into the magic of the ingredients that make this dish so special:
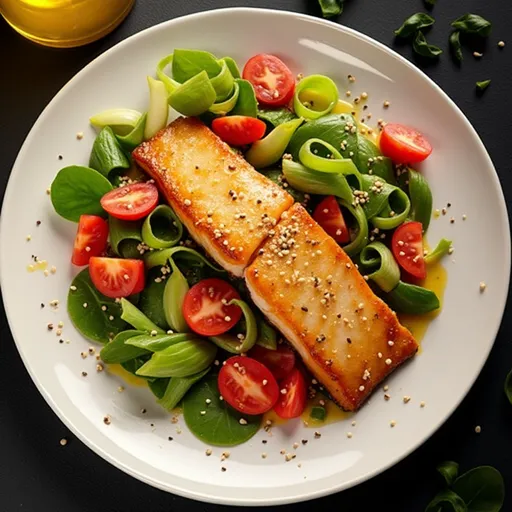
- Salmon Fillets: The star of the show! Fresh salmon is ideal for its rich flavor and flaky texture. You can use skin-on or skinless fillets, depending on your preference.
- Honey: This sweet nectar adds a delightful flavor and helps create that gorgeous glaze. It’s nature’s candy that enhances the dish beautifully.
- Soy Sauce: This salty, umami-rich sauce is crucial for balancing the sweetness of the honey. Low-sodium soy sauce is a great option if you’re watching your salt intake.
- Garlic: Fresh minced garlic gives the dish a punch of flavor. It’s aromatic and pairs perfectly with the honey and soy sauce.
- Olive Oil: A touch of olive oil keeps the salmon moist and helps the glaze adhere beautifully.
- Salt and Pepper: These staples enhance the overall flavor and bring out the best in every ingredient.
- Paprika: Adds a hint of smokiness and a lovely color to the salmon.
- Chopped Green Onions: For garnishing, these add a fresh crunch and a pop of color, taking your dish to the next level.
How to Create the Perfect Glaze

The secret to a sticky, glossy glaze lies in the balance of flavors. Here’s how to ensure your glaze is perfect:
- Combine honey, soy sauce, minced garlic, olive oil, salt, black pepper, and paprika in a small bowl. Whisk them together until they’re well combined. This step is crucial; you want a beautiful, cohesive mixture that coats the salmon wonderfully.
- Let the marinade infuse for at least 15 minutes. This not only allows the flavors to meld but also helps to tenderize the salmon.
Equipment You’ll Need
Cooking this dish requires minimal equipment, making it even more accessible:
- Air Fryer: The star appliance in this recipe! It cooks the salmon evenly and gives it that desirable crispiness.
- Bowl: For mixing your marinade.
- Shallow Dish or Zip-Top Bag: For marinating the salmon—this allows the flavors to penetrate the fish.
- Measuring Spoons: To get those ingredient quantities just right.
- Whisk: For blending the marinade thoroughly.
- Spatula or Tongs: For handling the salmon after cooking.
Step-by-Step Instructions
Ready to make magic happen in the kitchen? Let’s follow these simple steps:
- In a small bowl, mix together 2 tablespoons honey, 2 tablespoons soy sauce, 3 cloves garlic (minced), 1 tablespoon olive oil, 1 teaspoon salt, 1/2 teaspoon black pepper, and 1 teaspoon paprika.
- Place 4 salmon fillets in a shallow dish and pour the honey garlic marinade over them. Make sure each fillet is well-coated. Let it marinate for at least 15 minutes—this is where the magic happens!
- While your salmon is soaking up the flavors, preheat your air fryer to 400°F (200°C) for about 3 minutes.
- Once preheated, place the marinated salmon fillets in the air fryer basket, skin-side down. Ensure they’re not overlapping to allow even cooking.
- Cook the salmon for 8-10 minutes, or until it’s cooked through and has a lovely crispy exterior. The internal temperature should reach 145°F (63°C).
- After cooking, remove the salmon from the air fryer and let it rest for a minute. This step helps the glaze thicken and settle.
- For a finishing touch, garnish with 1 tablespoon chopped green onions before serving. Enjoy your delicious creation!
Flavor Variations & Add-Ins
While this recipe is perfection as is, there are many ways to personalize it:
- Add Ginger: A teaspoon of freshly grated ginger in the marinade adds a delightful zing.
- Spicy Kick: If you enjoy a bit of heat, consider adding red pepper flakes or a dash of sriracha to the marinade.
- Herbs: Fresh herbs like cilantro or parsley can be sprinkled on top after cooking for an extra burst of flavor.
Can I Use Frozen Salmon for This Recipe?
Absolutely! Frozen salmon works perfectly fine. Just ensure you thaw it overnight in the refrigerator before marinating. Pat it dry well to avoid excess moisture, which can affect the glaze’s stickiness.
How to Store Leftover Honey Garlic Salmon
If you find yourself with leftovers (which is rare with this recipe!), store them in an airtight container in the refrigerator for up to 2-3 days. Reheat gently in the air fryer or microwave to keep the salmon moist and the glaze delicious.
Substitutions for Ingredients
Want to make adjustments? Here are some simple substitutions:
- Honey: Maple syrup or agave nectar can be used for a vegan alternative.
- Soy Sauce: Tamari is a great gluten-free option.
- Olive Oil: You could use sesame oil for a nuttier flavor.
What’s the Best Way to Know When the Salmon Is Done?
The salmon is ready when it flakes easily with a fork and reaches an internal temperature of 145°F (63°C). Keep an eye on it during cooking, as air fryers can vary in temperature and cooking time.
Troubleshooting: Common Issues and Solutions
Here are a few common issues you might encounter and how to fix them:
- Salmon is Overcooked: If it’s dry, reduce the cooking time next time and keep an eye on it.
- Glaze Isn’t Sticky: Ensure you’re using enough honey, and consider letting the salmon marinate longer for more flavor absorption.
Conclusion
This Crispy Air Fryer Honey Garlic Salmon Recipe is more than just a meal; it’s a celebration of flavors that brings warmth and joy to your table. The sweet and savory notes create a delightful experience that’s sure to impress anyone lucky enough to share it with you. So, roll up your sleeves, gather your ingredients, and let’s make some delicious memories in the kitchen. Happy cooking, my friends!

Crispy Air Fryer Honey Garlic Salmon Recipe
Ingredients
Salmon
- 4 fillets salmon fillets
- 2 tablespoons honey
- 2 tablespoons soy sauce
- 3 cloves garlic, minced
- 1 tablespoon olive oil
- 1 teaspoon salt
- 0.5 teaspoon black pepper
- 1 teaspoon paprika
- 1 tablespoon chopped green onions (for garnish)
Instructions
- Mix honey, soy sauce, garlic, olive oil, salt, pepper, and paprika in a bowl.
- Marinate salmon in the mixture for 15 minutes.
- Preheat air fryer to 400°F (200°C).
- Place salmon in the air fryer basket, skin-side down, without overlapping.
- Cook for 8-10 minutes until crispy and cooked through.
- Garnish with green onions and serve.
Notes
Loved this recipe? Save it to your favorite Pinterest board so you can easily find it later! It’s the perfect way to keep all your sweet ideas in one place. ✨