Author

Ava

Browsing

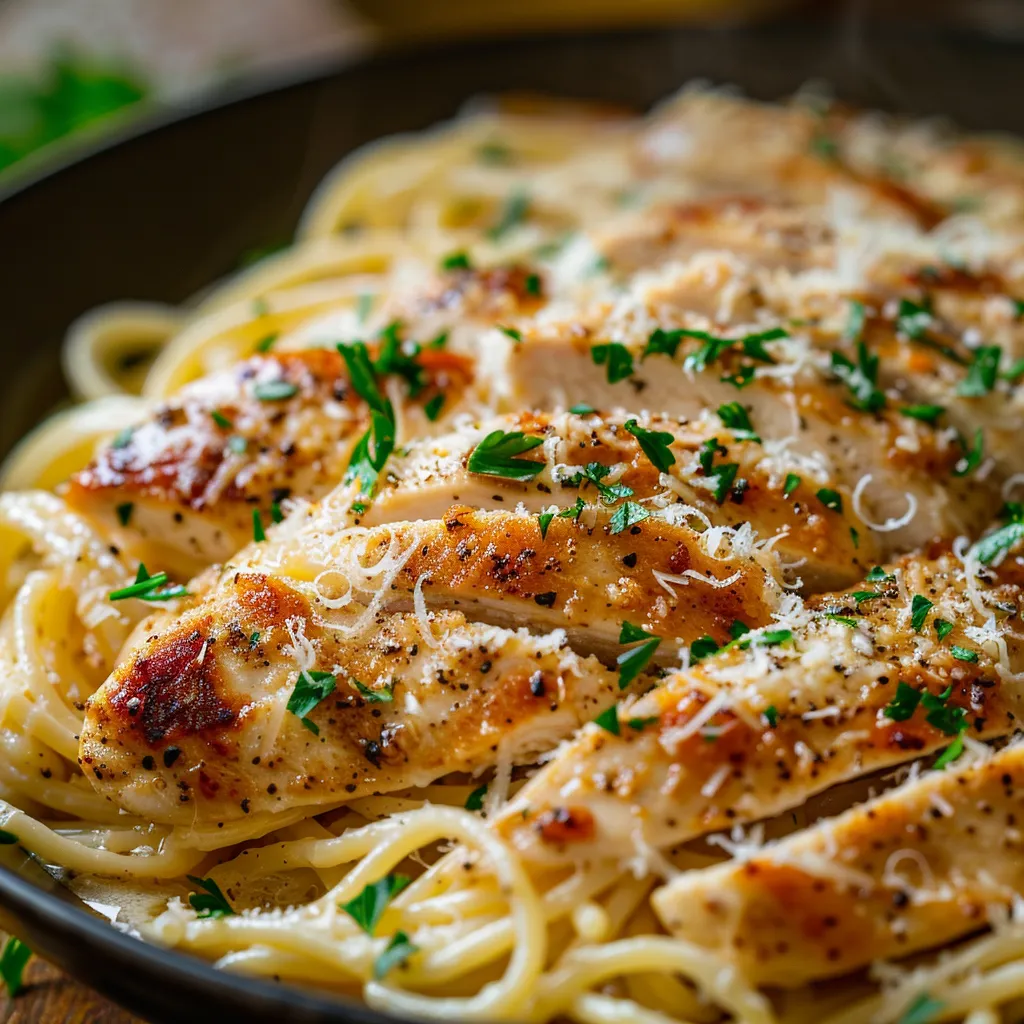
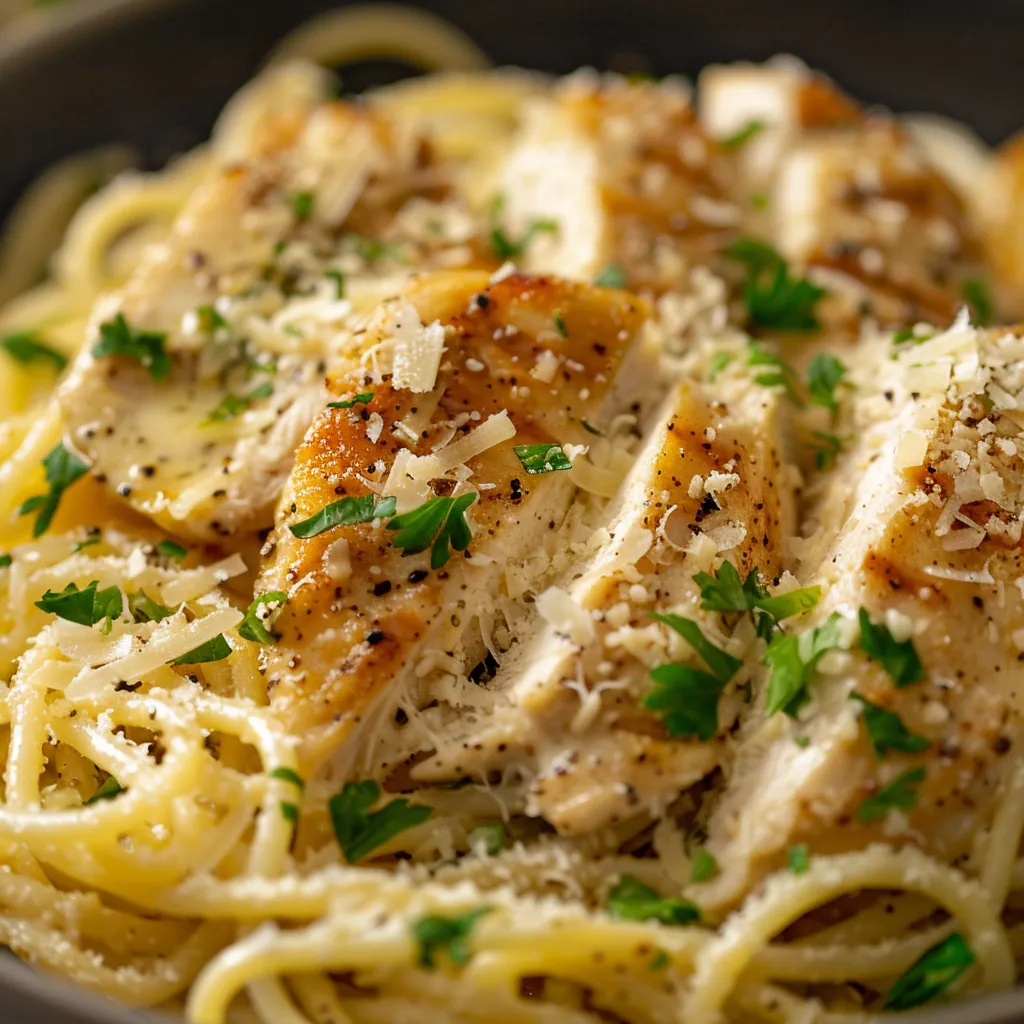
A Cozy Bowl of Easy Parmesan Chicken Pasta That Feels Like Home

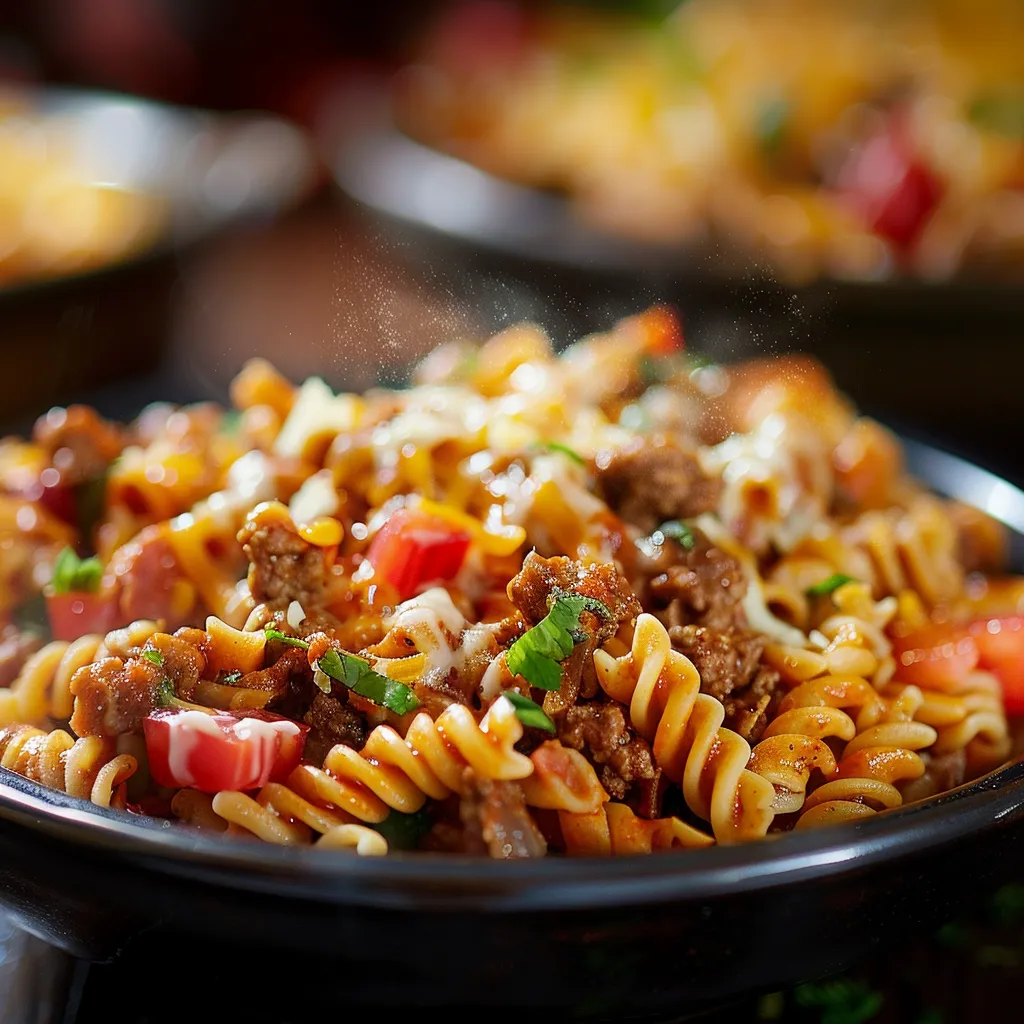
When it comes to comfort food, nothing quite compares to a big bowl of pasta. And if there’s one dish that feels like a warm embrace on a chilly evening, it’s my Easy Parmesan Chicken Pasta. This recipe is not only a delightful concoction of creamy, cheesy goodness, but it also comes together quickly, making it perfect for busy weeknights or those leisurely weekend dinners when you want to impress without the stress. So grab your apron, and let’s dive into this cozy culinary adventure!

Why This Recipe Is a Game-Changer

Picture this: the aroma of garlic sizzling in olive oil starts to fill your kitchen, followed closely by the rich scent of Parmesan melting into a creamy sauce. It’s enough to make anyone’s mouth water! This Easy Parmesan Chicken Pasta is a dish that brings back memories of family dinners where laughter echoed around the table and everyone left with full bellies and happy hearts. It’s the kind of recipe that makes you feel accomplished and keeps your loved ones coming back for seconds.

Ingredients You’ll Need

Eye-level shot of spaghetti topped with chicken and parmesan in warm lighting.

Before we get started, let’s gather our ingredients. Here’s what you’ll need to create this comforting masterpiece:

  • 8 oz spaghetti
  • 2 boneless, skinless chicken breasts
  • 2 tablespoons olive oil
  • 3 cloves garlic, minced
  • 1 cup heavy cream
  • 1 cup grated Parmesan cheese
  • Salt and pepper to taste
  • Fresh parsley, chopped (for garnish)

How to Make Easy Parmesan Chicken Pasta

Let’s roll up our sleeves and get cooking! Follow these simple steps, and you’ll have a delicious meal ready in no time.

  1. Cook the Spaghetti: Begin by boiling a pot of salted water. Add 8 oz of spaghetti and cook according to the package instructions until al dente. Once it’s done, drain it and set aside, but don’t forget to save a little pasta water; it’s liquid gold!
  2. Prepare the Chicken: While the pasta is cooking, season the 2 boneless, skinless chicken breasts with salt and pepper. Heat 2 tablespoons of olive oil in a large skillet over medium heat. Once hot, add the chicken and cook for about 6-7 minutes on each side until it’s golden brown and cooked through. Remove from the skillet and slice into bite-sized pieces.
  3. Make the Sauce: In the same skillet (don’t wash it, we want all that flavor!), add the minced garlic and sauté for about 1 minute until fragrant. Pour in 1 cup of heavy cream and bring it to a gentle simmer, stirring occasionally.
  4. Cheesy Goodness: Gradually stir in 1 cup of grated Parmesan cheese, allowing it to melt into the cream, creating a smooth and luscious sauce. If it seems too thick, you can add a splash of that reserved pasta water to achieve your desired consistency.
  5. Combine: Add the cooked spaghetti and sliced chicken to the skillet, tossing everything together until the pasta is well-coated in that heavenly sauce. Taste and adjust the seasoning with more salt and pepper if needed.
  6. Garnish and Serve: Finish with a sprinkle of chopped fresh parsley for a pop of color and freshness. Serve immediately and watch as everyone digs in!

Tips for Perfecting Your Parmesan Pasta

Now that you know how to whip up this delicious dish, here are some tips to ensure it turns out perfectly every time:

  • Don’t Overcook the Chicken: Cook the chicken just until it’s no longer pink in the center. Overcooking can lead to dry chicken, and nobody wants that!
  • Use Fresh Parmesan: Grating your own Parmesan cheese will give you a fresher flavor and better texture than pre-grated cheese.
  • Save Some Pasta Water: This starchy water is excellent for adjusting the sauce’s consistency without diluting the flavor.
  • Customize the Garlic: If you love garlic as much as I do, feel free to add more! A little extra never hurt anyone.

Variations to Spice Things Up

While this Easy Parmesan Chicken Pasta is delicious as-is, sometimes it’s fun to mix things up! Here are a few variations to consider:

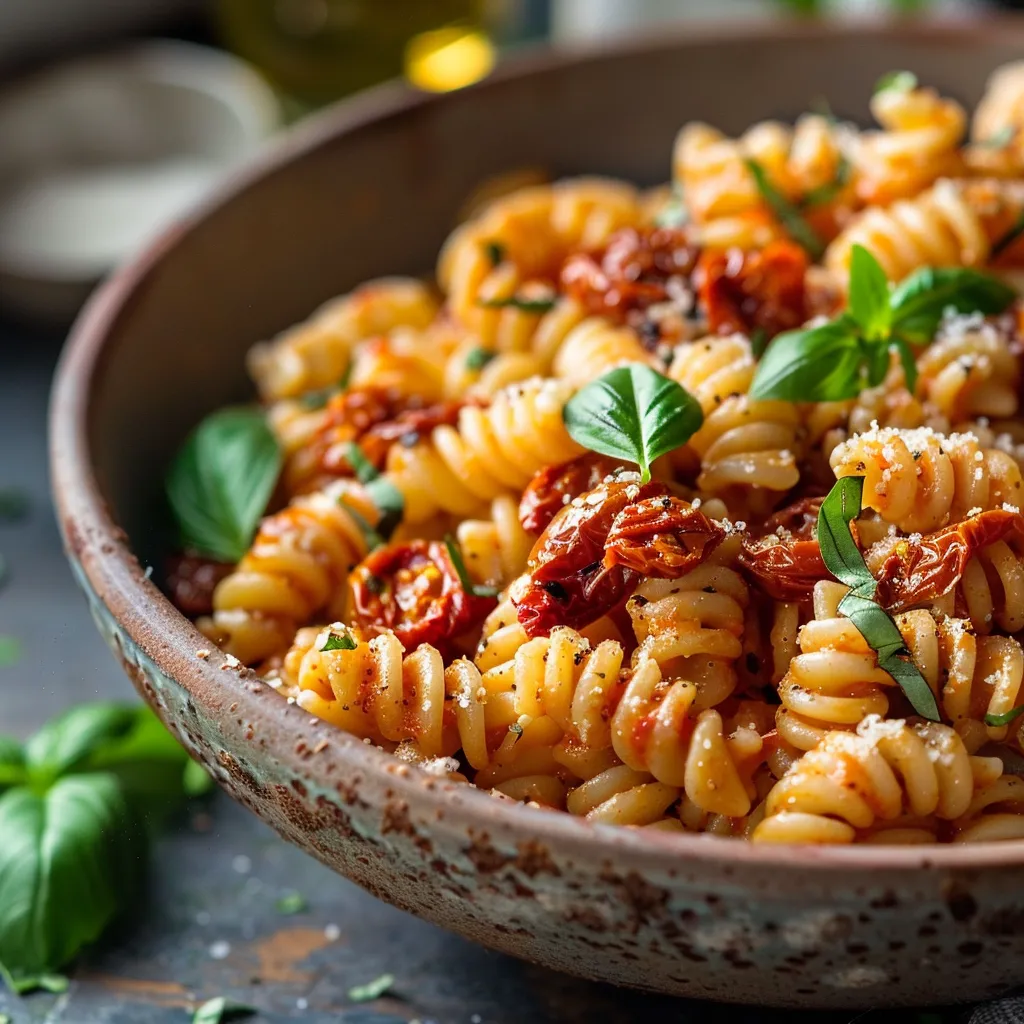
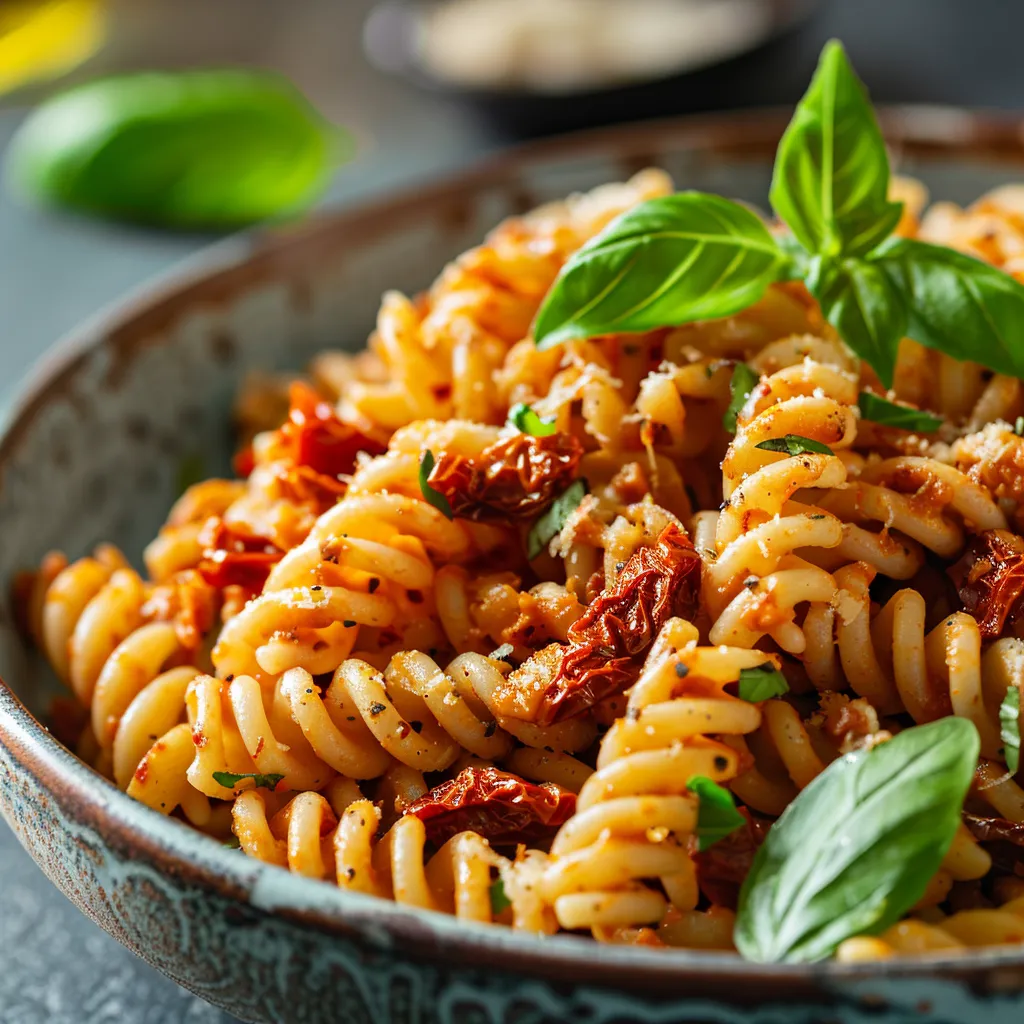
  • Veggie Boost: Add some sautéed spinach, sun-dried tomatoes, or roasted red peppers for a pop of color and nutrition.
  • Spicy Kick: If you’re a fan of heat, toss in some crushed red pepper flakes or a dash of hot sauce while cooking the garlic.
  • Herb Infusion: Try adding fresh basil or thyme to the sauce for a different herbal note.

Substitutions You Can Make

Don’t have everything on hand? No problem! Here are some substitutions that can still yield delicious results:

  • Chicken: Feel free to use shrimp or tofu for a different protein option.
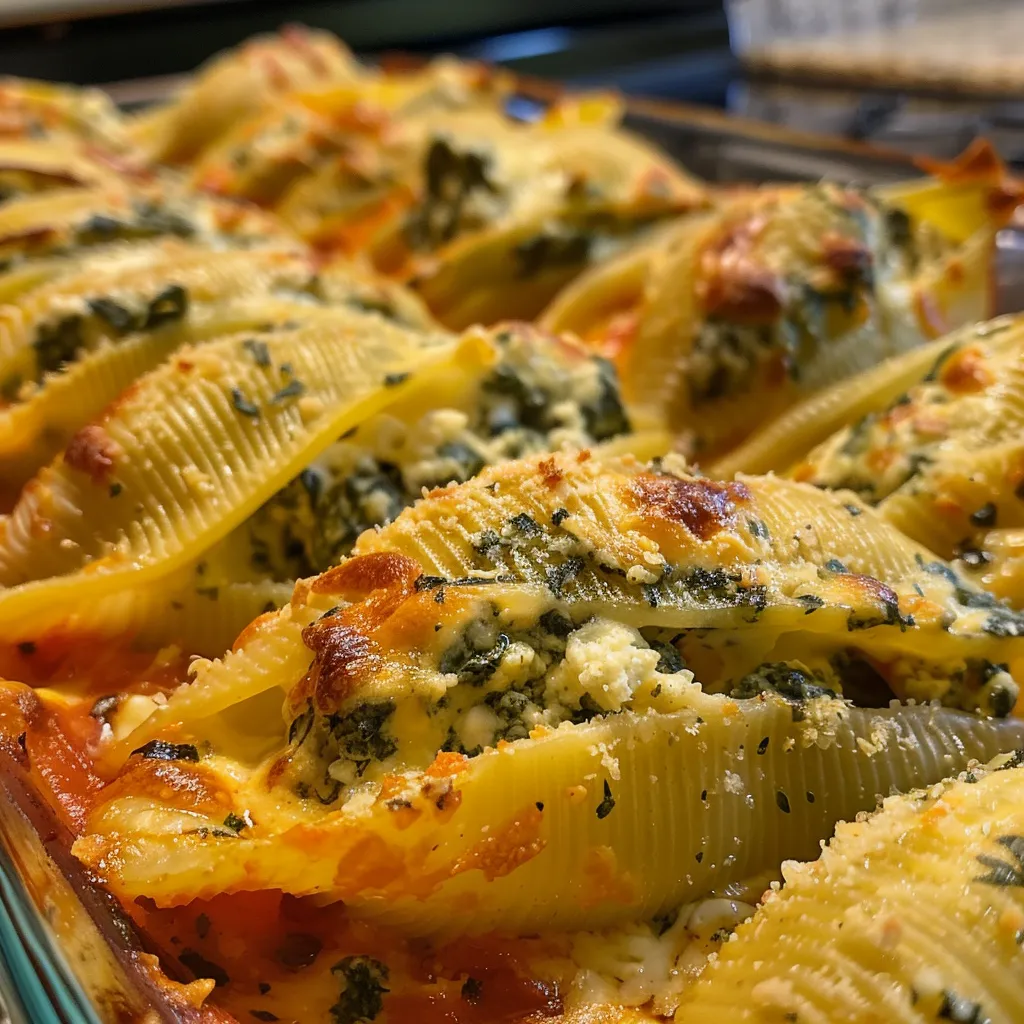
  • Pasta: Any pasta shape works—fettuccine, penne, or even gluten-free pasta are great alternatives.
  • Heavy Cream: If you’re looking for a lighter option, half-and-half or a dairy-free cream can work in a pinch.

Equipment You’ll Need

Before you start cooking, make sure you have the following equipment handy:

  • Large pot for boiling pasta
  • Large skillet for cooking chicken and sauce
  • Sharp knife for slicing chicken
  • Measuring cups and spoons

Storage and Freezing Tips

If you happen to have leftovers (which is rare, but it happens!), here’s how to store them:

  • Refrigerator: Store in an airtight container for up to 3 days. Reheat on the stove with a little extra cream or pasta water to revive the sauce.
  • Freezer: You can freeze the cooked pasta and sauce for up to 2 months. Thaw in the refrigerator overnight before reheating.

FAQs About Easy Parmesan Chicken Pasta

Let’s address some common questions about this recipe:

  • Can I substitute the chicken for something else? Absolutely! Shrimp or even grilled vegetables can work beautifully.
  • How can I make this dish vegetarian? Just omit the chicken and add in more veggies, or use chickpeas for protein.
  • What’s the best way to store leftovers? Ensure they are in an airtight container in the fridge, and remember to reheat gently to avoid drying out.

Conclusion: A Recipe to Cherish

This Easy Parmesan Chicken Pasta isn’t just a meal; it’s a celebration of flavor, comfort, and love. Whether you’re cooking for your family, hosting friends, or simply treating yourself after a long day, this dish is sure to bring smiles and satisfaction. Remember, cooking is about exploration and joy, so don’t hesitate to put your spin on it. As you savor each bite, may you feel the warmth of home and the magic of good food. Happy cooking, my friend!

Easy Parmesan Chicken Pasta

Prep Time 10 minutes
Cook Time 20 minutes
Total Time 30 minutes
Servings 4 servings
Calories 650
A quick and creamy pasta dish featuring tender chicken and Parmesan cheese, perfect for a satisfying weeknight dinner.

Ingredients

Pasta

  • 8 oz spaghetti

Protein

  • 2 pieces boneless, skinless chicken breasts

Sauce

  • 2 tablespoons olive oil
  • 3 cloves garlic, minced
  • 1 cup heavy cream
  • 1 cup grated parmesan cheese

Seasonings

  • to taste salt and pepper

Garnish

  • for garnish fresh parsley, chopped

Instructions 

  • Cook spaghetti according to package; drain.
  • Season chicken with salt and pepper; cook in skillet until golden and cooked through, then slice.
  • Sauté garlic in olive oil, add heavy cream and Parmesan, stir until smooth.
  • Add pasta and chicken to sauce, toss to coat.
  • Season to taste, garnish with parsley, and serve.

Notes

Use freshly grated Parmesan for best flavor.
Calories: 650kcal
Cost: $15
Course: Main Course
Cuisine: Italian
Keyword: Chicken, parmesan, pasta

Loved this recipe? Save it to your favorite Pinterest board so you can easily find it later! It’s the perfect way to keep all your sweet ideas in one place. ✨

Tasty Easy Parmesan Chicken Pasta served in a bowl with garlic and herbs.

Stirring Up Comfort: The Easy Chicken Lo Mein Recipe Your Heart Will Crave

Have you ever had one of those days when you just need a comforting bowl of goodness to lift your spirits? You know the kind I’m talking about—when the world feels a little too heavy, and you just want to retreat to a cozy corner of your kitchen and whip up something magical. That’s where my Easy Chicken Lo Mein Recipe comes in! This dish is not just quick and delicious; it’s like a warm hug in a bowl. With tender chicken, colorful vegetables, and chewy noodles, it’s a delightful symphony of flavors that will make your heart sing.

Why You’ll Love This Chicken Lo Mein Recipe

Let’s be honest—who doesn’t love a good lo mein? It’s the ultimate comfort food that can make any weeknight feel special. This recipe is perfect for a busy evening, requiring minimal prep and cook time while delivering maximum flavor. Plus, it’s incredibly versatile! You can use whatever vegetables you have on hand, making it a fantastic way to clean out your fridge. And let’s not forget about the aroma wafting through your kitchen as it cooks—trust me, it’s pure bliss.

Ingredients for Easy Chicken Lo Mein Recipe

Delicious bowl of Chicken Lo Mein, featuring noodles, chicken slices, and vibrant vegetables.

Before we dive into the cooking, let’s gather our ingredients. Here’s what you’ll need:

  • 8 oz lo mein noodles
  • 1 lb boneless, skinless chicken breasts, sliced
  • 2 cups mixed vegetables (bell peppers, carrots, snap peas)
  • 3 cloves garlic, minced
  • 2 tablespoons soy sauce
  • 1 tablespoon oyster sauce
  • 1 tablespoon sesame oil
  • 2 tablespoons vegetable oil
  • Salt and pepper to taste
  • Green onions for garnish

How to Make Easy Chicken Lo Mein

Alright, let’s get cooking! Here’s a step-by-step guide to creating this beautiful dish:

  1. Cook the Noodles: Start by cooking the lo mein noodles according to the package instructions. Once they’re done, drain them and set them aside. Remember, we want them al dente so they hold up well in the stir-fry.
  2. Heat the Oil: In a large skillet or wok, heat the vegetable oil over medium-high heat. You want it nice and hot to achieve that perfect stir-fry sizzle.
  3. Add the Chicken: Toss in the sliced chicken and season with salt and pepper. Cook until browned and cooked through, about 5-7 minutes. The smell of chicken sizzling in the pan is enough to make anyone’s mouth water!
  4. Stir-Fry the Vegetables: Once the chicken is done, add the minced garlic and mixed vegetables to the skillet. Stir-fry for another 3-4 minutes until the vegetables are tender but still crisp. This is where the colors come alive!
  5. Mix the Sauce: In a small bowl, mix together the soy sauce, oyster sauce, and sesame oil. This sauce is the magic ingredient that ties everything together.
  6. Combine Everything: Add the cooked lo mein noodles to the skillet, pour the sauce over, and toss everything together until well combined and heated through. You want those noodles to soak up all that delicious flavor!
  7. Garnish and Serve: Serve hot, garnished with chopped green onions. And there you have it! A beautiful, fragrant dish that looks as good as it tastes.

Tips and Tricks for Perfect Chicken Lo Mein

Now that you’ve mastered the basics, here are some tips to ensure your dish is a hit:

  • Don’t Overcook the Noodles: Overcooked noodles can ruin the texture. Cook them just until al dente, then rinse them under cold water to stop the cooking process.
  • Fresh Ingredients Make a Difference: Use fresh vegetables for the best flavor and texture. Crisp bell peppers and snap peas add not only taste but also color to your dish.
  • Balance the Flavors: Taste as you go! The right balance of salty, sweet, and savory is key to a standout lo mein. Adjust the sauce based on your preferences.
  • High Heat is Your Friend: Stir-frying requires high heat. Make sure your skillet or wok is hot enough before adding your ingredients to get that perfect char.

How to Serve Your Chicken Lo Mein

This Easy Chicken Lo Mein Recipe is perfect for a quick weeknight dinner or a cozy meal with friends. Serve it in large bowls, garnished with green onions, and maybe a splash of extra soy sauce for those who like it a little saltier. Pair it with some homemade egg rolls or a refreshing cucumber salad for a complete meal that will keep everyone coming back for more!

Make Ahead and Storage

If you’re looking to save some time, you can prep your ingredients ahead of time. Chop your vegetables and marinate your chicken earlier in the day or the night before, keeping everything stored in airtight containers in the refrigerator. When you’re ready to cook, simply follow the steps as outlined.

As for storage, if you have leftovers (which is rare in my house!), let the dish cool completely before transferring it to an airtight container. It will last in the fridge for up to three days. Reheat gently in a skillet over medium heat, adding a splash of water or broth to keep the noodles from drying out.

Suggestions for Customizing Your Chicken Lo Mein

The beauty of this recipe lies in its versatility! Here are some fun variations you can try:

  • Protein Swaps: Don’t have chicken? Feel free to substitute shrimp, beef, or even tofu for a vegetarian option.
  • Vegetable Variations: Use whatever vegetables you have on hand. Broccoli, bok choy, or mushrooms would work beautifully.
  • Spice it Up: If you enjoy a little heat, add a pinch of red pepper flakes or a drizzle of sriracha to the sauce for a spicy kick!

FAQs About Easy Chicken Lo Mein

Can I use other types of noodles?

Absolutely! While lo mein noodles are traditional, you can use spaghetti, udon, or even rice noodles if that’s what you have on hand.

What’s the best way to reheat leftovers?

The best way to reheat lo mein is in a skillet over medium heat. Add a splash of water or broth to keep it from drying out.

Can I make this dish vegetarian?

Yes! Simply omit the chicken and use tofu or tempeh instead. You can also increase the amount of vegetables for a hearty vegetarian meal.

Conclusion

Your search for the perfect comfort food ends here! This Easy Chicken Lo Mein Recipe is not only delightful but also a canvas for your culinary creativity. Whether you stick to the recipe or make it your own, each bite is sure to bring a smile to your face. So gather your ingredients, channel your inner chef, and let’s create something beautiful together. May your kitchen be filled with laughter, love, and the irresistible aroma of freshly cooked lo mein!

Happy cooking, my friends! And don’t forget to share your creations with me—I can’t wait to see what you stir up in your kitchen!

Easy Chicken Lo Mein Recipe

Prep Time 10 minutes
Cook Time 15 minutes
Total Time 25 minutes
Servings 4 servings
Calories 550
A quick and flavorful Chinese-inspired dish featuring tender chicken, fresh vegetables, and savory sauce tossed with noodles.

Ingredients

Noodles

  • 8 oz lo mein noodles
  • 1 lb boneless, skinless chicken breasts, sliced
  • 2 cups mixed vegetables (bell peppers, carrots, snap peas)
  • 3 cloves garlic, minced
  • 2 tablespoons soy sauce
  • 1 tablespoon oyster sauce
  • 1 tablespoon sesame oil
  • 2 tablespoons vegetable oil
  • to taste salt and pepper salt and pepper
  • for garnish green onions green onions for garnish

Instructions 

  • Cook noodles as per package, drain, and set aside.
  • Heat vegetable oil in a skillet, cook chicken with salt and pepper until browned, about 5-7 mins.
  • Add garlic and vegetables, stir-fry until tender, 3-4 mins.
  • Mix soy sauce, oyster sauce, and sesame oil; pour over noodles and toss to combine.
  • Serve hot, garnished with chopped green onions.

Notes

Feel free to customize with your favorite vegetables or protein.
Calories: 550kcal
Cost: $15
Course: Main Course
Cuisine: Chinese
Keyword: Chicken, Noodles

Loved this recipe? Save it to your favorite Pinterest board so you can easily find it later! It’s the perfect way to keep all your sweet ideas in one place. ✨

Eye-level shot of Chicken Lo Mein, garnished with green onions and surrounded by soft natural light.

The Cheesy Taco Pasta That Feels Like a Fiesta in a Bowl

In the world of comfort food, few dishes manage to strike the perfect balance of indulgence and nostalgia like Cheesy Taco Pasta. Picture this: a creamy, cheesy pasta dish bursting with the zesty flavors of your favorite tacos, all in one bowl. It’s the culinary equivalent of a warm hug on a rainy Seattle evening. Growing up in Oregon, I remember the excitement that filled our kitchen when my mom whipped up something special. This pasta dish captures that magic, making it perfect for busy weeknights or casual get-togethers with friends.

Why You’ll Love This Cheesy Taco Pasta

This Cheesy Taco Pasta is more than just a meal; it’s an experience. It’s the kind of dish that brings people together, where laughter and stories flow as freely as the cheese. Here’s why you’ll fall head over heels for it:

  • Quick and Easy: You can whip this up in under 30 minutes, making it a perfect choice for those chaotic evenings when you want something delicious but don’t have hours to spend in the kitchen.
  • Comforting Flavors: The combination of creamy cheese, savory meat, and zesty taco seasoning creates a flavor explosion that’s both familiar and exciting.
  • Customizable: Whether you prefer ground beef, turkey, or even a vegetarian option, this recipe adapts to your tastes and dietary needs.
  • Kid-Friendly: Picky eaters rejoice! The cheesy goodness and familiar taco flavors make this a hit with kids and adults alike.

Ingredients for Cheesy Taco Pasta

A delicious serving of Cheesy Taco Pasta highlighted with creamy sauce and topped with cheese.

Let’s gather our ingredients! Here’s what you’ll need:

  • 8 oz pasta (penne or rotini)
  • 1 lb ground beef or turkey
  • 1 packet taco seasoning
  • 1 cup diced tomatoes (canned)
  • 4 oz cream cheese (softened)
  • 1 cup shredded cheddar cheese
  • 1/2 cup chicken broth (low-sodium)

How to Make Cheesy Taco Pasta

Now, let’s get cooking! Follow these simple steps to create your cheesy masterpiece:

  1. Cook the Pasta: Start by bringing a large pot of salted water to a boil. Add your chosen pasta and cook according to package instructions until al dente. Remember, we want it to have a little bite to it because it will cook a bit more when combined with the sauce. Once cooked, drain the pasta and set it aside.
  2. Brown the Meat: In a large skillet over medium heat, add the ground beef or turkey. Cook until browned, breaking it apart with a wooden spoon as it cooks. If there’s excess fat, don’t forget to drain it to keep the dish light and tasty.
  3. Add the Flavor: Stir in the taco seasoning and diced tomatoes (with their juices). Let everything simmer together for about 5 minutes. This is where the magic happens—the spices start to mingle, and your kitchen will fill with an irresistible aroma.
  4. Make it Creamy: Lower the heat and add the softened cream cheese along with the chicken broth. Stir continuously until the cream cheese melts completely, creating a smooth, luscious sauce that coats the meat.
  5. Combine: Toss the drained pasta into the skillet, mixing well so every piece is enveloped in that cheesy goodness.
  6. Finishing Touch: Sprinkle the shredded cheddar cheese over the top. Cover the skillet for about 5 minutes to allow the cheese to melt into strings of deliciousness.

Tips and Tricks

Here are some handy tips to ensure your Cheesy Taco Pasta turns out perfect every time:

  • Don’t Overcook the Pasta: The key to perfect pasta is to cook it al dente. This ensures you’ll have the right texture and prevents it from becoming mushy in the sauce.
  • Season Well: Taco seasoning is your best friend here! Feel free to adjust the amount based on your spice preference. Taste as you go, and remember that cheese can add saltiness.
  • Use Quality Cheese: For a smooth and creamy sauce, opt for good quality cheddar or a Mexican blend. Freshly shredded cheese melts better than pre-shredded varieties.
  • Add Fresh Veggies: If you want to up the nutrition factor, consider adding diced bell peppers, onions, or even corn. Sauté them with the meat for added flavor and texture.

How to Serve Cheesy Taco Pasta

Serve your Cheesy Taco Pasta hot, straight from the skillet. For an extra special touch, consider garnishing with:

  • Sour cream or Greek yogurt for creaminess
  • Chopped cilantro or green onions for freshness
  • Sliced jalapeños for a spicy kick
  • Avocado slices for a creamy texture

Make Ahead and Storage

This dish is not only quick to make, but it also stores beautifully! Here’s how you can prepare it ahead of time:

  • Make Ahead: You can cook the meat and mix it with the sauce earlier in the day. Just store it in the fridge and then add the pasta and cheese when you’re ready to serve.
  • Storage: Allow leftovers to cool completely before transferring them to an airtight container. They’ll keep in the fridge for 3-5 days. For longer storage, consider freezing portions in freezer-safe containers.
  • Reheating: To reheat, warm up in the microwave or on the stovetop with a splash of milk to maintain creaminess.

Variations and Substitutions

This Cheesy Taco Pasta is highly versatile! Here are some substitutions and variations you can try:

  • Protein Options: Substitute ground beef with ground turkey, chicken, or even a plant-based meat alternative for a vegetarian or lighter option.
  • Pasta Choices: While penne and rotini work great, feel free to use any pasta shape you love—macaroni, fusilli, or even whole wheat varieties.
  • Spice It Up: Want more heat? Add some crushed red pepper flakes or diced green chiles when cooking the meat.
  • Cheese Variations: Experiment with different cheeses like Monterey Jack or pepper jack for a fun twist.

FAQs

Can I make this dish vegetarian?

Absolutely! Simply replace the meat with black beans, lentils, or a plant-based meat substitute, and you’ll have a delicious vegetarian version.

What if I don’t have taco seasoning?

No problem! You can make your own by combining 1 teaspoon each of cumin, chili powder, garlic powder, and onion powder. Adjust according to your taste!

Can I use fresh tomatoes instead of canned?

Yes! Just make sure to chop them finely and add them during the simmering step. You might need a bit more liquid to compensate for the lack of juices from canned tomatoes.

Conclusion for Cheesy Taco Pasta

There you have it—your go-to recipe for Cheesy Taco Pasta that’s guaranteed to please! This dish is not just food; it’s an invitation to gather around the table and share moments with loved ones. Whether you’re cooking for family or entertaining friends, this recipe is a delightful way to bring everyone together. So, grab your ingredients, put on your favorite playlist, and let’s make some magic in the kitchen! And remember, every scoop of this cheesy goodness is a step toward creating memories that last a lifetime. Happy cooking!

Cheesy Taco Pasta

Prep Time 10 minutes
Cook Time 15 minutes
Total Time 25 minutes
Servings 4 servings
Calories 650
A quick and flavorful dish combining pasta, seasoned meat, and cheesy goodness for a satisfying meal.

Ingredients

Pasta

  • 8 oz pasta (penne or rotini)

Meat

  • 1 lb ground beef or turkey

Seasoning

  • 1 packet taco seasoning

Canned Goods

  • 1 cup diced tomatoes (canned)

Dairy

  • 4 oz cream cheese (softened)
  • 1 cup shredded cheddar cheese

Broth

  • 1/2 cup chicken broth (low-sodium)

Instructions 

  • Cook pasta until al dente, then drain.
  • Brown ground meat in a skillet; drain excess fat.
  • Add taco seasoning and diced tomatoes; simmer 5 minutes.
  • Stir in cream cheese and chicken broth until smooth.
  • Mix cooked pasta into the sauce, then top with shredded cheese and cover to melt.

Notes

For extra flavor, add chopped cilantro or a squeeze of lime before serving.
Calories: 650kcal
Cost: $15
Course: Main Course
Cuisine: American
Keyword: cheese, pasta, taco

Loved this recipe? Save it to your favorite Pinterest board so you can easily find it later! It’s the perfect way to keep all your sweet ideas in one place. ✨

Tantalizing bowl of Cheesy Taco Pasta with a focus on the rich texture and colors.

Whisking Up Comfort: My Go-To Creamy Sun-Dried Tomato Vegan Pasta

Welcome back to my cozy corner of the internet! If you’re here, you must be in the mood for something indulgent yet incredibly simple to whip up. Today, I’m sharing a recipe that’s not just a meal; it’s a hug in a bowl: Creamy Sun-Dried Tomato Vegan Pasta. This dish is one of those magical recipes that brings together all the flavors of comfort food, minus any dairy. Trust me, once you try it, you might just forget all about that regular mac and cheese you’ve been clinging to for so long!

What’s So Special About This Dish?

Imagine this: a busy weeknight, and you’re exhausted after a long day. You open your pantry and see a pack of pasta staring back at you. But you want more than just plain noodles. You want something that sings with flavor, something that feels luxurious but is incredibly easy to prepare. This Creamy Sun-Dried Tomato Vegan Pasta fits the bill perfectly! It’s rich, creamy, and bursting with the sweet tang of sun-dried tomatoes, all while being completely plant-based.

This dish is special because it combines the creaminess of coconut or cashew cream with the umami of sun-dried tomatoes, creating a sauce that clings lovingly to your pasta. And let’s not forget the aroma of sautéed garlic wafting through your kitchen—it’s enough to make anyone’s mouth water! Plus, it’s a versatile recipe that you can easily customize based on what you have on hand. Let’s dive into the nitty-gritty of how to make it!

Vegan Creamy Sun-Dried Tomato Pasta Recipe

Delicious bowl of vegan pasta with sun-dried tomatoes and hints of garlic, lit by natural light.

Equipment

  • Large pot for boiling pasta
  • Skillet for sautéing
  • Wooden spoon or spatula
  • Measuring cups and spoons
  • Blender (if making cashew cream)

Ingredients

Here’s what you’ll need to create this delightful dish:

  • 200g pasta of choice (spaghetti, penne, or gluten-free work great)
  • 1 cup sun-dried tomatoes, chopped
  • 1 cup coconut cream or cashew cream (see substitutions below)
  • 2 cloves garlic, minced
  • 1 tablespoon olive oil
  • 1 teaspoon dried basil
  • 1 teaspoon dried oregano
  • Salt and pepper to taste
  • Fresh basil leaves for garnish

Instructions

Ready to make your kitchen smell amazing? Let’s get cooking!

  1. Cook the Pasta: In a large pot, bring salted water to a boil and cook the pasta according to package instructions until al dente. Drain and set aside. Don’t forget to save a cup of the pasta water for later—it can be a lifesaver for adjusting the sauce consistency!
  2. Sauté the Garlic: In a large skillet, heat the olive oil over medium heat. Once hot, add the minced garlic and sauté until fragrant, about 1 minute. Be careful not to let it burn; we want it golden and aromatic!
  3. Add Sun-Dried Tomatoes: Toss in the chopped sun-dried tomatoes and cook for an additional 2-3 minutes, allowing them to soften and release their flavors.
  4. Make the Creamy Sauce: Stir in the coconut cream or cashew cream, dried basil, and oregano. Mix well and let it simmer for about 5 minutes. If the sauce seems too thick, add a splash of the reserved pasta water to reach your desired consistency.
  5. Combine: Add the drained pasta to the skillet, tossing gently to coat it in the creamy sauce. Season with salt and pepper to taste, adjusting the flavors as necessary.
  6. Serve: Plate your pasta, garnishing with fresh basil leaves for a pop of color and freshness. Enjoy hot!

Nutritional Info:

This Creamy Sun-Dried Tomato Vegan Pasta is not only delicious but also packed with nutrients. Each serving offers a good balance of carbohydrates and healthy fats, making it a satisfying meal that’s perfect for dinner. The sun-dried tomatoes provide antioxidants, while the coconut or cashew cream adds creaminess without dairy.

Tips for Perfection

  • Cooking Pasta: For the best texture, make sure not to overcook your pasta! It should be al dente, as it will continue to cook slightly when mixed with the hot sauce.
  • Adjusting Creaminess: If you prefer a lighter sauce, start with half a cup of coconut cream and add more if needed. The reserved pasta water also helps to thin out the sauce without sacrificing flavor.
  • Flavor Boost: For an extra kick, consider adding a pinch of red pepper flakes when sautéing the garlic.

Variations and Substitutions

One of the things I adore about this recipe is how adaptable it is! Here are some ideas to make it your own:

  • Pasta Choices: Use whole wheat, gluten-free, or even legume-based pasta for a protein boost.
  • Alternative Creams: If you don’t have coconut cream, cashew cream works beautifully. To make cashew cream, simply soak 1 cup of raw cashews in water for a few hours, then blend with a little water until smooth.
  • Add Veggies: Toss in some sautéed spinach, kale, or roasted bell peppers for added nutrition and color.
  • Protein Additions: Consider adding chickpeas or lentils for a protein boost. They blend well and complement the flavors beautifully.

Storage & Freezing

This pasta dish is perfect for meal prep! Store any leftovers in an airtight container in the refrigerator for up to 3 days. If you want to freeze it, let the pasta cool completely, then transfer it to a freezer-safe container. It can be frozen for up to 2 months. To reheat, simply thaw in the refrigerator overnight and warm it up in a skillet, adding a splash of water or vegetable broth to loosen the sauce.

FAQs

Can I use fresh tomatoes instead of sun-dried?

Absolutely! If you prefer fresh tomatoes, you can sauté them until soft before adding the cream. Just be aware that the flavor profile will be a bit different.

Is this recipe gluten-free?

Yes, if you choose a gluten-free pasta, this recipe can easily be made gluten-free!

How can I make this dish spicier?

Add red pepper flakes while sautéing the garlic, or stir in a dash of hot sauce for an extra kick.

Why You Need to Try This Recipe

This Creamy Sun-Dried Tomato Vegan Pasta is more than just a meal; it’s a delightful experience that brings comfort and joy. Whether you’re cooking for your family, impressing a date, or just treating yourself after a long day, this dish delivers every time. Its creamy texture, mixed with the sun-dried tomatoes’ tanginess, is bound to make you fall in love with vegan cooking.

So, pull up a chair, grab your favorite spoon, and let’s make something unforgettable together. Don’t forget to check out my other recipes, like Creamy Garlic Tomato Pasta or Wholesome Delights for more flavor-packed ideas!

Final Thoughts

Cooking should always feel like a rewarding adventure, and this Creamy Sun-Dried Tomato Vegan Pasta is the perfect way to explore the flavors of plant-based cuisine. I hope you enjoy every bite as much as I do, and remember—cooking is all about finding joy in the process. Have fun with it, make it your own, and share your culinary creations with those you love. Happy cooking!

Creamy Sun-Dried Tomato Vegan Pasta 🌱🍝

Prep Time 10 minutes
Cook Time 15 minutes
Total Time 25 minutes
Servings 4 servings
Calories 550
A delicious and creamy vegan pasta dish featuring sun-dried tomatoes and aromatic herbs, perfect for a quick and satisfying meal.

Ingredients

Pasta

  • 200 g pasta of choice
  • 1 cup sun-dried tomatoes, chopped
  • 1 cup coconut cream or cashew cream
  • 2 cloves garlic, minced
  • 1 tablespoon olive oil
  • 1 teaspoon dried basil
  • 1 teaspoon dried oregano
  • to taste salt and pepper
  • for garnish fresh basil leaves

Instructions 

  • Cook pasta until al dente, then drain and set aside.
  • Heat olive oil in a skillet and sauté garlic until fragrant.
  • Add sun-dried tomatoes and cook for 2-3 minutes.
  • Stir in coconut or cashew cream, basil, and oregano; simmer for 5 minutes.
  • Add cooked pasta, toss to coat, season with salt and pepper, then serve garnished with basil.

Notes

You can substitute coconut cream with cashew cream for a nutty flavor.
Calories: 550kcal
Cost: $15
Course: Main Course
Cuisine: Vegan
Keyword: pasta, Sun-Dried Tomatoes, Vegan

Loved this recipe? Save it to your favorite Pinterest board so you can easily find it later! It’s the perfect way to keep all your sweet ideas in one place. ✨

Creamy sun-dried tomato pasta featuring rich textures and vibrant colors, set against a blurred background.

Welcome to my cozy corner of the internet, friends! Today, I’m inviting you into my kitchen to share a recipe that feels like a warm hug on a chilly evening—Easy Spinach and Ricotta Stuffed Shells. If you’ve ever wandered the aisles of a grocery store, dreaming of a dish that is both comforting and delicious, look no further. This dish is a celebration of flavors and textures, wrapped in a pasta shell and laced with the goodness of fresh spinach and creamy ricotta. It’s the kind of meal that makes you pause mid-bite and whisper, ‘Wow.’

Growing up in Oregon, my mother often pulled together meals that felt special, no matter how simple the ingredients were. The aroma of roasted vegetables and baked pasta would fill our home, creating a sense of togetherness. As I grew older, I found joy in recreating those comforting dishes, and this recipe is one of my favorites. It reminds me of family dinners filled with laughter and stories. So, grab your apron, and let’s embark on this culinary adventure together!

Why You’ll Absolutely Love This Easy Spinach and Ricotta Stuffed Shells – A Healthy Veggie Dinner

This dish has quickly become a staple in my home, and I know it will be in yours too! Here’s why you’ll absolutely love it:

  • It’s packed with flavor—each bite is a delightful combination of creamy ricotta, savory spinach, and melty cheese.
  • It’s a healthier option for dinner—loaded with veggies and made with wholesome ingredients!
  • Easy to prepare and perfect for meal prep—great for busy weeknights or when you have friends over.
  • Kid-friendly and sure to impress even the pickiest eaters—everyone loves these cheesy pasta shells!

Ingredients You’ll Need

Let’s talk about the star players of this dish! You’ll find that the ingredients are simple yet packed with flavor. I love using fresh spinach because it brings a vibrant color and nutrition to the table. Ricotta cheese adds creaminess, while mozzarella and Parmesan give that cheesy goodness we all crave. And, of course, jumbo pasta shells are the perfect vessel for all this deliciousness.

You’ll find the full ingredient list with measurements in the recipe card below!

How to Make This Easy Spinach and Ricotta Stuffed Shells – A Healthy Veggie Dinner, Step-by-Step

Are you ready to create some magic in your kitchen? Let’s dive into the steps to make these delicious stuffed shells:

  1. Preheat your oven to 375°F (190°C). This is where the magic begins!
  2. Cook the jumbo pasta shells according to package instructions until al dente. Drain and set aside. Be gentle with them; they’re a little delicate but oh-so-worth it!
  3. In a large mixing bowl, combine the chopped spinach, ricotta cheese, half of the mozzarella cheese, Parmesan cheese, egg, garlic powder, Italian seasoning, salt, and pepper. Mix well until combined. Trust me, this filling is heavenly!
  4. Spread a thin layer of marinara sauce on the bottom of a 9×13 inch baking dish. This will prevent the shells from sticking and adds flavor.
  5. Stuff each cooked pasta shell with the spinach and ricotta mixture and place them in the baking dish. Don’t be shy—fill them up!
  6. Pour the remaining marinara sauce over the stuffed shells, then sprinkle with the remaining mozzarella cheese. Who doesn’t love extra cheese?
  7. Cover the dish with aluminum foil and bake for 25 minutes. You want to let all those flavors meld together.
  8. Remove the foil and bake for an additional 10 minutes, or until the cheese is bubbly and golden. This is when your kitchen will start to smell amazing!
  9. Let cool for a few minutes before serving. Enjoy your healthy veggie dinner!
Easy Spinach and Ricotta Stuffed Shells – A Healthy Veggie Dinner

Pro Tips for the Best Results

Before you get started, here are a few pro tips to ensure your stuffed shells turn out perfectly:

  • Don’t overcook the pasta shells; they should be al dente when you stuff them. They’ll continue cooking in the oven!
  • Feel free to customize the filling! Add some sautéed mushrooms or sun-dried tomatoes for an extra flavor kick.
  • For a little crunch, try topping the dish with breadcrumbs before the final baking stage. It adds a delightful texture!

Serving Suggestions

Now that you’ve made these gorgeous stuffed shells, let’s talk about how to serve them! I love pairing them with a fresh green salad dressed in a simple vinaigrette for a balanced meal. You could also serve some garlic bread on the side for that ultimate comfort food experience. And don’t forget a sprinkle of fresh basil or parsley on top for a pop of color!

Storage and Make-Ahead Tips

If you have leftovers (which I doubt, because they’re so good!), you can store them in an airtight container in the refrigerator for up to 3 days. You can also freeze the stuffed shells before baking—just cover the dish tightly with foil, and they’ll last up to 2 months. When you’re ready to enjoy, bake from frozen, adding an extra 10-15 minutes to the baking time. Perfect for those nights when you crave something comforting but don’t want to cook!

Easy Spinach and Ricotta Stuffed Shells – A Healthy Veggie Dinner

Prep Time 15 minutes
Cook Time 35 minutes
Total Time 50 minutes
Servings 4 servings
Calories 350
A delicious and healthy vegetarian dish featuring jumbo pasta shells filled with spinach and ricotta, baked to perfection with marinara sauce.

Ingredients

Pasta

  • 12 pieces jumbo pasta shells

Vegetables

  • 2 cups fresh spinach, chopped

Cheese

  • 1 cup ricotta cheese
  • 1 cup shredded mozzarella cheese, divided
  • 1/2 cup grated parmesan cheese

Other ingredients

  • 1 egg egg
  • 1 teaspoon garlic powder
  • 1 teaspoon italian seasoning
  • salt and pepper to taste salt and pepper
  • 2 cups marinara sauce

Instructions 

  • Preheat oven to 375°F (190°C). Cook shells until al dente, then drain.
  • Mix spinach, ricotta, half mozzarella, Parmesan, egg, garlic, Italian seasoning, salt, and pepper.
  • Spread a thin layer of marinara in a baking dish. Stuff shells with filling and place in dish.
  • Pour remaining marinara over shells, sprinkle with remaining mozzarella, cover, and bake 25 minutes. Uncover and bake 10 more minutes.
  • Let cool briefly before serving. Enjoy!

Notes

You can add extra vegetables or cheese for more flavor.
Calories: 350kcal
Cost: $15
Course: Main Course
Cuisine: Italian
Keyword: pasta, vegetarian

Loved this recipe? Save it to your favorite Pinterest board so you can easily find it later! It’s the perfect way to keep all your sweet ideas in one place. ✨

Easy Spinach and Ricotta Stuffed Shells – A Healthy Veggie Dinner

Welcome to my cozy corner of the internet! I’m Ava, and today, I’m inviting you into my kitchen to experience a dish that’s all about balance and flavor—Crispy Chinese Honey Chicken. Growing up in small-town Oregon, my culinary adventures often revolved around the comforting aromas wafting from my mother’s kitchen. But it wasn’t just the food that brought us together; it was the joy of sharing a meal that made those moments special. Fast forward to now, living in bustling Seattle, I’ve taken those childhood memories and transformed them into recipes that connect us to each other and to the food itself.

Imagine a dish that perfectly balances sweet and savory, with a delightful crunch that makes you pause between bites. That’s the magic of Crispy Chinese Honey Chicken! This dish doesn’t just fill your belly; it fills your heart with happiness. Whether you’re cooking for family, a casual dinner with friends, or just treating yourself, this recipe is sure to impress!

Why You’ll Absolutely Love This Crispy Chinese Honey Chicken

This dish is a true crowd-pleaser, and let me share why it should be your next kitchen adventure:

  • Irresistible Crunch: The crispy coating on the chicken gives you that satisfying crunch you crave, making it a joy to eat.
  • Sweet and Savory Harmony: The honey sauce is a delightful blend of sweet and savory, elevating the dish to something truly special.
  • Quick and Easy: In just about 30 minutes, you can whip up a restaurant-quality meal right at home!
  • Customizable: Feel free to add your favorite veggies or spice levels to the honey sauce for a personal touch!

Ingredients You’ll Need

Let’s talk about the star players in this dish! Each ingredient was carefully chosen to create a mouthwatering harmony of flavors.

  • Chicken Breast: Tender and juicy, the chicken is the perfect canvas for our crispy coating.
  • Cornstarch and Flour: This dynamic duo creates that crunchy exterior we all love!
  • Honey: A natural sweetener that adds depth and richness to the sauce.
  • Soy Sauce: It brings a savory umami flavor that perfectly balances the sweetness.
  • Rice Vinegar and Sesame Oil: These add a delightful tang and nuttiness that make the sauce sing.

You’ll find the full ingredient list with measurements in the recipe card below!

How to Make This Crispy Chinese Honey Chicken, Step-by-Step

Ready to dive into this culinary adventure? Here’s how to make your Crispy Chinese Honey Chicken:

  1. In a bowl, mix the cornstarch, flour, baking powder, salt, and pepper. This mix is key to achieving that crunch!
  2. Dip each chicken piece in the beaten egg, then coat thoroughly in the cornstarch mixture. Take your time here; it’s worth it!
  3. Heat oil in a deep pan over medium-high heat. Fry the chicken pieces until golden and crispy, about 4-5 minutes. Make sure not to overcrowd the pan—give them space to shine. Remove and drain on paper towels.
  4. In a separate saucepan, combine honey, soy sauce, rice vinegar, sesame oil, garlic, and ginger. Bring to a simmer over medium heat and cook for about 3-4 minutes until slightly thickened. Your kitchen will smell heavenly!
  5. Toss the crispy chicken in the honey sauce until well coated, letting every piece soak up that delicious flavor.
  6. Serve hot, garnished with sesame seeds and chopped green onions. Trust me, the presentation will make everyone’s mouths water!
Crispy Chinese Honey Chicken

Pro Tips for the Best Results

Here are a few pro tips to ensure your Crispy Chinese Honey Chicken turns out perfectly:

  • Make sure your oil is hot enough before frying. Test it with a small piece of chicken—if it sizzles immediately, you’re good to go!
  • Don’t skip the draining step! This helps keep the chicken crispy by removing excess oil.
  • If you want to add a bit of heat, consider tossing in some red pepper flakes into your honey sauce for a delightful kick!

Serving Suggestions

This dish shines on its own, but here are some creative serving suggestions to elevate your meal:

  • Serve over a fluffy bed of steamed jasmine rice or fried rice to soak up all that delicious sauce.
  • Add a side of stir-fried vegetables for a pop of color and nutrition. Think bell peppers, snap peas, and broccoli!
  • For a fun twist, serve it in lettuce cups for a fresh, crunchy bite!

Storage and Make-Ahead Tips

If you’re thinking about leftovers (if there are any!), here’s how to store your Crispy Chinese Honey Chicken:

  • Store any leftovers in an airtight container in the fridge for up to 3 days. Reheat in the oven for the best crispiness!
  • If you want to make this ahead of time, you can prepare the chicken and sauce separately and combine them just before serving. This keeps everything fresh!
  • While I wouldn’t recommend freezing the finished dish, you can freeze the uncooked, breaded chicken pieces. Just make sure to separate them with parchment paper to prevent sticking.

There you have it—a delightful journey into the world of Crispy Chinese Honey Chicken! I hope you feel inspired to give this recipe a try and share it with your loved ones. Cooking is all about creating memories, and I can’t wait for you to make this dish a part of yours!

Crispy Chinese Honey Chicken

Prep Time 10 minutes
Cook Time 15 minutes
Total Time 25 minutes
Servings 4 servings
Calories 450
A deliciously crispy chicken dish coated in a sweet honey sauce, perfect for a quick and flavorful meal.

Ingredients

Chicken

  • 1 lb chicken breast, cut into bite-sized pieces
  • 1 cup cornstarch
  • 1 egg beaten egg
  • 1/2 cup all-purpose flour
  • 1/2 tsp baking powder
  • 1 tsp salt
  • 1/2 tsp black pepper
  • oil for frying oil for frying
  • 1/2 cup honey
  • 1/4 cup soy sauce
  • 2 tbsp rice vinegar
  • 1 tbsp sesame oil
  • 1 clove garlic, minced
  • 1/2 tsp ginger, grated

Garnish

  • sesame seeds and green onions (for garnish)

Instructions 

  • Mix cornstarch, flour, baking powder, salt, and pepper.
  • Dip chicken in egg, then coat with dry mixture.
  • Fry chicken until golden, about 4-5 minutes. Drain on paper towels.
  • Simmer honey, soy, vinegar, sesame oil, garlic, and ginger for 3-4 minutes.
  • Toss chicken in sauce, garnish with sesame seeds and green onions.

Notes

Ensure oil is hot enough before frying for crispy chicken.
Calories: 450kcal
Cost: $15
Course: Main Course
Cuisine: Chinese
Keyword: Chicken, crispy, honey

Loved this recipe? Save it to your favorite Pinterest board so you can easily find it later! It’s the perfect way to keep all your sweet ideas in one place. ✨

Crispy Chinese Honey Chicken

Welcome to my cozy kitchen! I’m Ava, and let me tell you, there’s nothing quite like a hearty bowl of creamy pasta to make you feel right at home. Growing up in a small Oregon town, I remember the evenings when the aroma of my mom’s cooking would waft through our home, wrapping us in warmth and comfort. It’s those memories that inspire me to create recipes that not only delight the taste buds but also nourish the soul. Today, I’m thrilled to share with you a recipe that has become a staple in my home: High Protein Creamy Beef Pasta. This dish is perfect for those hectic weeknights when you want something quick, satisfying, and absolutely delicious.

Now, I know what you might be thinking: “A creamy pasta that’s high in protein? How is that even possible?” Well, my friends, it’s all about balancing flavors and textures. With lean ground beef, creamy Greek yogurt, and a few other simple ingredients, this recipe delivers both comfort and nutrition in every bite. So, if you’re ready to impress your family with a dish that feels like a warm hug, let’s dive in!

Why You’ll Absolutely Love This High Protein Creamy Beef Pasta Recipe for Quick Weeknight Dinners

This recipe is a true winner in my kitchen, and I’m confident it will be in yours too! Here’s why:

  • It’s packed with protein, making it a filling meal that keeps you satisfied.
  • Ready in under 30 minutes, it’s perfect for those busy weeknights.
  • The creamy texture and rich flavors make it a family favorite—even the picky eaters will love it!
  • It’s versatile! Add in your favorite veggies or swap the beef for another protein to mix things up.

Ingredients You’ll Need

Let’s talk about the ingredients that make this dish so special. We’re keeping it simple, yet flavorful. Here’s what you’ll need:

  • 8 oz penne pasta: This shape holds onto the creamy sauce beautifully.
  • 1 lb lean ground beef: A great source of protein that keeps the dish hearty.
  • 1 medium onion, chopped: Adds a sweet and savory base.
  • 2 cloves garlic, minced: Because garlic makes everything better!
  • 1 can (15 oz) diced tomatoes (with juices): Brings acidity and brightness to the dish.
  • 1 cup low-sodium beef broth: Enhances the flavor without making it too salty.
  • 1/2 cup plain Greek yogurt: This is our secret to creaminess without the extra calories.
  • 1/4 cup grated parmesan cheese: Adds a nutty flavor that complements the beef.
  • 1 tbsp Italian seasoning: A blend of herbs that brings a comforting aroma.
  • Salt and pepper to taste: Essential for enhancing all the flavors.
  • Fresh basil or parsley for garnish: A pop of color and freshness!
  • Olive oil (for cooking): A healthy fat for sautéing.

You’ll find the full ingredient list with measurements in the recipe card below!

How to Make This High Protein Creamy Beef Pasta Recipe for Quick Weeknight Dinners, Step-by-Step

Now that we have our ingredients, let’s get cooking! Here’s how to whip up this delicious meal:

  1. Start by cooking the penne pasta according to the package instructions. Drain and set aside. Remember to save a bit of that starchy pasta water—it can help adjust the sauce later if needed!
  2. In a large skillet, heat a drizzle of olive oil over medium heat. Add the chopped onion and minced garlic, sautéing until fragrant and golden. Your kitchen will start to smell incredible!
  3. Add the ground beef to the skillet, breaking it apart with a spatula as it cooks. Brown until fully cooked, about 5-7 minutes.
  4. Stir in the diced tomatoes (with juices), beef broth, Greek yogurt, grated parmesan cheese, Italian seasoning, salt, and pepper. Let it simmer for a few minutes, allowing the flavors to meld together.
  5. Finally, add the cooked pasta to the skillet with the beef mixture. Toss everything together until well combined and creamy. If the sauce seems too thick, add a splash of reserved pasta water to reach your desired consistency.
  6. Serve immediately, garnished with fresh basil or parsley for that extra touch!
High Protein Creamy Beef Pasta Recipe for Quick Weeknight Dinners

Pro Tips for the Best Results

Here are a couple of my favorite tips to ensure your creamy beef pasta turns out perfectly:

  • Don’t skip the Greek yogurt! It’s the secret ingredient that gives the sauce its creamy texture without the heaviness of cream.
  • Feel free to customize! Toss in some spinach or bell peppers for added nutrition and color. You can also swap the beef for ground turkey or chicken if you prefer.
  • If you have leftovers, add a splash of milk when reheating to revive the creaminess.

Serving Suggestions

This creamy beef pasta is delicious on its own, but why not elevate the dining experience? Here are some serving suggestions:

  • Pair it with a simple side salad dressed in olive oil and balsamic vinegar for a fresh contrast.
  • Serve with crusty garlic bread to soak up that creamy sauce—trust me, it’s irresistible!
  • For a little crunch, top with toasted breadcrumbs or a sprinkle of crushed red pepper flakes for a hint of heat.

Storage and Make-Ahead Tips

If you find yourself with leftovers (though I doubt it!), you can store this creamy beef pasta in an airtight container in the fridge for up to 3 days. The flavors will continue to develop, making it even more delicious the next day! If you’d like to make it ahead, cook the pasta and prepare the sauce separately. Combine them just before serving for the best texture. You can also freeze the sauce for up to 3 months—just thaw and reheat before serving!

So there you have it, my friends! A hearty, high-protein creamy beef pasta recipe that brings the family together, even on the busiest of nights. I hope you give it a try and make it your own. Happy cooking!

For more comforting recipes, check out my Wholesome Beef and Broccoli Dish or try my One-Pan Wonder: A Cozy Chicken and Potatoes Recipe. And if you’re in the mood for something light and bright, don’t miss my Simple Garlic Parmesan Chicken Pasta.

High Protein Creamy Beef Pasta Recipe for Quick Weeknight Dinners

Prep Time 10 minutes
Cook Time 15 minutes
Total Time 25 minutes
Servings 4 servings
Calories 650
A quick and protein-packed creamy beef pasta perfect for busy weeknights. Delicious, satisfying, and easy to prepare.

Ingredients

Pasta

  • 8 oz penne pasta

Meat

  • 1 lb lean ground beef

Vegetables

  • 1 medium onion, chopped
  • 2 cloves garlic, minced

Canned Goods

  • 1 can (15 oz) diced tomatoes (with juices)

Broth

  • 1 cup low-sodium beef broth

Dairy

  • 1/2 cup plain greek yogurt
  • 1/4 cup grated parmesan cheese

Seasonings

  • 1 tbsp italian seasoning
  • to taste salt and pepper

Others

  • for cooking olive oil

Instructions 

  • Cook the penne pasta according to package instructions. Drain and set aside.
  • In a skillet, heat olive oil, sauté onion and garlic, then add ground beef and cook until browned. Stir in tomatoes, broth, Greek yogurt, Parmesan, Italian seasoning, salt, and pepper. Simmer briefly.
  • Add cooked pasta to the skillet and toss to combine. Serve garnished with fresh herbs.

Notes

For extra flavor, add a sprinkle of fresh herbs before serving.
Calories: 650kcal
Cost: $15
Course: Main Course
Cuisine: Italian
Keyword: Beef, pasta, quick

Loved this recipe? Save it to your favorite Pinterest board so you can easily find it later! It’s the perfect way to keep all your sweet ideas in one place. ✨

High Protein Creamy Beef Pasta Recipe for Quick Weeknight Dinners

Welcome to my cozy corner of the internet! My name’s Ava, and if there’s one thing my kitchen has taught me over the years, it’s that the simplest recipes can pack the most heartwarming punch. Today, I want to share a dish that feels like home—a Cheesy Hamburger Rice Casserole that’s become a staple in my household. Picture this: a bubbling, cheesy casserole that wraps you in warmth and comfort, just like those childhood memories of coming home to the aroma of something delicious wafting through the air.

Growing up in a small town in Oregon, my mother had this magical ability to turn everyday ingredients into something spectacular. I remember the anticipation I felt as I sat at the dining table, eagerly awaiting the first bite of whatever she had concocted that evening. Fast forward to my life in Seattle, and I’ve carried that legacy with me, always on the lookout for recipes that not only nourish the body but also feed the soul. This Cheesy Hamburger Rice Casserole is one of those recipes. It’s not just about the flavors; it’s about the memories and connections we create over a shared meal.

Why You’ll Absolutely Love This Cheesy Hamburger Rice Casserole

If you’re on the hunt for a dish that dazzles without the fuss, look no further! This casserole is a blend of simplicity, flavor, and nostalgia, and here’s why you’ll absolutely love it:

  • Comforting and Satisfying: It’s the kind of meal that feels like a warm hug, perfect for weeknights or lazy weekends.
  • One-Pan Wonder: Everything comes together in one dish, making cleanup a breeze—because who has time for extra dishes?
  • Customizable: You can easily swap in your favorite veggies or add a dash of spice to make it your own.
  • Perfect for Leftovers: This casserole tastes even better the next day, making it an ideal make-ahead meal.

Ingredients You’ll Need

Let’s talk about the ingredients that make this casserole sing! It’s a delightful mix of pantry staples and fresh flavors that come together beautifully. Here’s what you’ll need:

  • 1 pound ground beef: The star of the show, providing that hearty, savory base.
  • 1 cup uncooked white rice: This absorbs all the delicious flavors and adds that comforting texture.
  • 2 cups beef broth: For moisture and depth—trust me, it makes all the difference!
  • 1 can (10.5 oz) cream of mushroom soup: A creamy element that ties everything together.
  • 1 cup shredded cheddar cheese: Because cheese makes everything better, right?
  • 1 cup frozen mixed vegetables: Easy and nutritious; feel free to get creative with your choices!
  • 1 teaspoon garlic powder & 1 teaspoon onion powder: For that aromatic kick.
  • Salt and pepper to taste: Essential for bringing out the flavors.
  • 1 tablespoon olive oil: To cook the beef and add a touch of richness.

You’ll find the full ingredient list with measurements in the recipe card below!

How to Make This Cheesy Hamburger Rice Casserole, Step-by-Step

Now that we’ve gathered our ingredients, let’s dive into making this magical casserole! Follow these simple steps, and I promise you’ll be rewarded with a dish that’s sure to impress:

  1. Preheat your oven to 350°F (175°C). A hot oven is crucial for that perfect bake!
  2. In a large skillet, heat the olive oil over medium heat. Add the ground beef and cook until browned, breaking it apart with a spatula as it cooks. Don’t forget to drain any excess fat for a leaner dish.
  3. Once the beef is browned, stir in the garlic powder, onion powder, salt, and pepper. This is where the magic begins—smell that aroma?
  4. In a large mixing bowl, combine the cooked beef, uncooked rice, beef broth, cream of mushroom soup, and frozen mixed vegetables. Mix everything well until it’s nicely combined.
  5. Transfer this hearty mixture to a greased 9×13 inch casserole dish, spreading it out evenly.
  6. Cover the dish with aluminum foil and bake in the preheated oven for 30 minutes. This allows the rice to cook and absorb all those lovely flavors.
  7. After 30 minutes, remove the foil and sprinkle the shredded cheddar cheese on top. Pop it back in the oven, uncovered, for an additional 10-15 minutes, or until the cheese is melted and bubbly.
  8. Let it cool for a few minutes before serving. I know it’s tempting to dive right in, but trust me—those few minutes will be worth it!
Cheesy Hamburger Rice Casserole

Pro Tips for the Best Results

Here are a few of my tried-and-true tips to ensure your casserole turns out perfectly every time:

  • For added flavor, consider browning the beef with a diced onion and a clove of minced garlic. It adds a wonderful depth!
  • If you want to spice things up, add a teaspoon of chili powder or a splash of hot sauce to the beef mixture.
  • Always let the casserole cool for a few minutes before serving—it makes a world of difference in the texture and allows the flavors to settle.

Serving Suggestions

This Cheesy Hamburger Rice Casserole is delicious on its own, but if you’re looking to elevate your meal, consider serving it with:

  • A fresh green salad drizzled with a tangy vinaigrette to balance the richness of the casserole.
  • Some crusty bread or my Cheesy Garlic Bread for that extra indulgence.
  • Pickled jalapeños or a dollop of sour cream for a tangy kick!

Storage and Make-Ahead Tips

If you’re lucky enough to have leftovers (or if you want to make this ahead of time), here’s how to store it:

  • Cool the casserole completely before covering it tightly with foil or transferring it to an airtight container. It’ll keep in the fridge for about 3-4 days.
  • For longer storage, you can freeze it! Just make sure to wrap it well. It’ll last up to 3 months in the freezer. To reheat, thaw in the fridge overnight and bake in the oven until heated through.

And there you have it! A Cheesy Hamburger Rice Casserole that’s sure to become a beloved dish in your home, just like it is in mine. I can’t wait for you to try it and make it your own! Happy cooking!

Cheesy Hamburger Rice Casserole

Prep Time 10 minutes
Cook Time 40 minutes
Total Time 50 minutes
Servings 6 servings
Calories 650
A hearty and cheesy casserole combining ground beef, rice, vegetables, and melted cheddar for a satisfying meal.

Ingredients

Meat and grains

  • 1 pound ground beef
  • 1 cup uncooked white rice
  • 2 cups beef broth
  • 1 can (10.5 oz) cream of mushroom soup
  • 1 cup shredded cheddar cheese
  • 1 cup frozen mixed vegetables
  • 1 teaspoon garlic powder
  • 1 teaspoon onion powder
  • to taste salt and pepper
  • 1 tablespoon olive oil

Instructions 

  • Preheat oven to 350°F (175°C).
  • Cook ground beef in olive oil until browned; drain excess fat.
  • Mix beef with garlic powder, onion powder, salt, and pepper.
  • Combine beef, rice, broth, soup, and vegetables; transfer to a greased dish.
  • Bake covered 30 mins, then uncover, add cheese, and bake 10-15 mins until bubbly.

Notes

Use lean ground beef for a healthier option.
Calories: 650kcal
Cost: $15
Course: Main Course
Cuisine: American
Keyword: Beef, cheese, Rice

Loved this recipe? Save it to your favorite Pinterest board so you can easily find it later! It’s the perfect way to keep all your sweet ideas in one place. ✨

Cheesy Hamburger Rice Casserole

Welcome to my cozy corner of the internet! I’m Ava, and if you’ve stumbled upon my kitchen, you’re probably here for one thing—the kind of recipes that make people pause mid-bite and say, ‘Wow.’ Today, I want to take you on a delightful journey to one of my absolute favorite comfort foods: Creamy Garlic Tomato Pasta. Growing up in a small town in Oregon, the aroma of roasting garlic and simmering tomatoes often filled our home, creating a sense of warmth and togetherness. Cooking was our way to celebrate life—whether it was a holiday gathering or just a Tuesday night dinner.

Fast forward to my Seattle kitchen, where I often find myself craving that nostalgic flavor combination. This creamy garlic tomato pasta is not just a meal; it’s a hug in a bowl. Ready in under 30 minutes, it’s perfect for those busy weeknights when you want something comforting yet impressive. So grab your apron, and let’s whip up a bowl of joy together!

Why You’ll Absolutely Love This The Best Creamy Garlic Tomato Pasta – Done in Under 30 Minutes

This creamy garlic tomato pasta is sure to become a staple in your kitchen for a multitude of reasons:

  • It’s ready in just 30 minutes, making it a perfect weeknight dinner.
  • The combination of rich cream and savory tomatoes creates a flavor profile that feels indulgent yet simple.
  • It’s versatile! You can easily add protein or veggies to customize it to your liking.
  • With minimal ingredients, it’s budget-friendly while still feeling gourmet.

Ingredients You’ll Need

Let’s talk about the ingredients that make this dish sing. You’ll need:

  • 8 oz pasta (penne or spaghetti) – Choose your favorite type! I often go for penne for that perfect sauce-hugging shape.
  • 2 tablespoons olive oil – A good quality olive oil adds richness and depth.
  • 4 cloves garlic, minced – Because garlic makes everything better!
  • 1 can (14 oz) diced tomatoes – Canned tomatoes are a lifesaver; they’re convenient and packed with flavor.
  • 1/2 cup heavy cream – This is what makes the sauce creamy and dreamy.
  • 1/2 teaspoon red pepper flakes – For a little kick! Adjust to your spice preference.
  • Salt and pepper to taste – Essential for bringing out all the flavors.
  • 1/2 cup grated parmesan cheese – Because cheese makes everything better, right?
  • Fresh basil for garnish – A pop of color and freshness!

You’ll find the full ingredient list with measurements in the recipe card below!

How to Make This The Best Creamy Garlic Tomato Pasta – Done in Under 30 Minutes, Step-by-Step

Now that we have our ingredients ready, let’s dive into the cooking process!

  1. First, cook the pasta according to package instructions until it’s al dente. Drain and set it aside. I like to toss it with a little olive oil to prevent sticking.
  2. In a large skillet, heat the olive oil over medium heat. Add the minced garlic and sauté for 1-2 minutes until fragrant. Be careful not to let it burn—nobody likes bitter garlic!
  3. Next, add the diced tomatoes (with their juices) and red pepper flakes to the skillet. Let it simmer for about 5 minutes. This is when your kitchen will start to smell incredible!
  4. Stir in the heavy cream and cook for another 2-3 minutes until the sauce is heated through. You want it to be warm and inviting.
  5. Add the cooked pasta to the skillet and toss to coat it in that luscious sauce. Season with salt and pepper to taste.
  6. Finally, stir in the grated Parmesan cheese until it melts and creates a creamy coating on the pasta. Voila! You’ve just created magic in your kitchen.
  7. Serve immediately, garnished with fresh basil for that touch of elegance.
The Best Creamy Garlic Tomato Pasta – Done in Under 30 Minutes

Pro Tips for the Best Results

Here are a few tips I’ve learned to elevate this dish even further:

  • For an extra layer of flavor, try roasting your tomatoes before adding them to the sauce. This brings out their natural sweetness.
  • If you love greens, toss in some spinach or kale at the end of cooking for a nutritious boost.
  • Don’t skimp on the cheese! A generous sprinkle of Parmesan not only enhances the flavor but also gives that creamy texture we crave.

Serving Suggestions

This creamy garlic tomato pasta is a star on its own, but here are some ideas to make it even more special:

  • Serve it alongside a fresh garden salad drizzled with balsamic vinaigrette for a refreshing contrast.
  • Pair it with garlic bread for the ultimate comfort meal.
  • For a protein boost, add grilled chicken or shrimp on top of the pasta.

Storage and Make-Ahead Tips

If you’re like me and love meal prep, this pasta can definitely be made ahead of time. Here are some tips:

  • Store any leftovers in an airtight container in the fridge for up to 3 days.
  • To reheat, add a splash of milk or cream to the pasta to loosen the sauce and prevent it from drying out.
  • If you want to freeze it, I recommend leaving out the cream until you reheat it. Creamy sauces can sometimes separate when frozen, so it’s best to add it fresh!

The Best Creamy Garlic Tomato Pasta – Done in Under 30 Minutes

Prep Time 10 minutes
Cook Time 15 minutes
Total Time 25 minutes
Servings 4 servings
Calories 550
A quick and delicious pasta dish with a creamy tomato garlic sauce, perfect for a weeknight dinner.

Ingredients

Pasta

  • 8 oz pasta (penne or spaghetti)
  • 2 tablespoons olive oil
  • 4 cloves garlic, minced
  • 1 can (14 oz) diced tomatoes
  • 1/2 cup heavy cream
  • 1/2 teaspoon red pepper flakes
  • to taste salt and pepper
  • 1/2 cup grated parmesan cheese
  • for garnish fresh basil

Instructions 

  • Cook pasta until al dente, then drain.
  • Heat olive oil, sauté garlic for 1-2 minutes.
  • Add tomatoes and red pepper flakes, simmer 5 minutes.
  • Stir in heavy cream, cook 2-3 minutes.
  • Add pasta, season with salt and pepper, toss to coat.
  • Mix in Parmesan, garnish with basil, serve immediately.

Notes

Use fresh basil for the best flavor and adjust seasoning to taste.
Calories: 550kcal
Cost: $15
Course: Main Course
Cuisine: Italian
Keyword: pasta

Loved this recipe? Save it to your favorite Pinterest board so you can easily find it later! It’s the perfect way to keep all your sweet ideas in one place. ✨

The Best Creamy Garlic Tomato Pasta – Done in Under 30 Minutes

Welcome to my kitchen, friends! Today, I’m excited to share a recipe that has quickly become one of my favorite comfort desserts: the Lockerer Kuchen mit Zucchetti, Apfel und Baumnussen—or in layman’s terms, a delightful Zucchini Apple Walnut Cake. This isn’t just any cake; it’s a whimsical creation that marries the sweetness of apples with the earthy notes of zucchini and the rich crunch of walnuts. It’s the kind of cake that whispers comfort, making it perfect for cozy afternoons, gatherings with friends, or simply a sweet treat to brighten your day.

Growing up in a small town in Oregon, I remember the first time I tasted a cake that made me sigh with delight. It was moist, flavorful, and surprisingly packed with hidden veggies! My mom always had a knack for sneaking in healthy ingredients without sacrificing flavor. Fast forward to today, and I’ve taken that inspiration to heart. This Zucchini Apple Walnut Cake is not only delicious, but it also feels like a warm hug on a plate. So, pull out your mixing bowls, and let’s create something magical together!

Why You’ll Absolutely Love This Lockerer Kuchen mit Zucchetti, Apfel und Baumnussen

When it comes to desserts, this cake is a true winner, and here’s why:

  • It’s a delightful combination of flavors—sweet, nutty, and just a hint of spice.
  • The zucchini keeps the cake incredibly moist, ensuring every slice melts in your mouth.
  • Loaded with wholesome ingredients, it feels decadent without the guilt!
  • Perfect for any occasion, from tea parties to potlucks or simply enjoying with a cup of coffee at home.

Ingredients You’ll Need

Now, let’s talk about the star players in this recipe. We’re using fresh zucchini, crisp apples, and crunchy walnuts. Each ingredient not only adds flavor but also contributes beautifully to the texture of the cake. I love the way zucchini adds moisture without overpowering the other ingredients. Apples bring a natural sweetness and a bit of tang, while walnuts provide that satisfying crunch we all love. It’s a symphony of tastes and textures that will have everyone asking for seconds!

You’ll find the full ingredient list with measurements in the recipe card below!

How to Make This Lockerer Kuchen mit Zucchetti, Apfel und Baumnussen, Step-by-Step

Let’s get our hands a little messy and dive into the baking process! Here’s how to create this delightful cake:

  1. Preheat your oven to 350°F (175°C). Grease and flour a 9-inch round cake pan, or line it with parchment paper for easy removal.
  2. In a large mixing bowl, combine 2 cups of grated zucchini, 1 cup of peeled and diced apples, and 1 cup of chopped walnuts. Set this aside to let the flavors mingle.
  3. In another bowl, whisk together 2 cups of all-purpose flour, 1 teaspoon of baking powder, 1 teaspoon of baking soda, 1 teaspoon of cinnamon, and a pinch of salt.
  4. In a separate mixing bowl, cream together 1 cup of sugar and ½ cup of softened butter until light and fluffy. Add in 3 large eggs, one at a time, mixing well after each addition.
  5. Gradually add the dry ingredients to the wet mixture, alternating with ½ cup of milk. Mix until just combined, being careful not to overmix.
  6. Fold in the zucchini, apples, and walnuts until evenly distributed throughout the batter.
  7. Pour the batter into the prepared cake pan and smooth the top with a spatula.
  8. Bake in the preheated oven for about 45-50 minutes, or until a toothpick inserted into the center comes out clean.
  9. Once baked, allow the cake to cool in the pan for 10 minutes before transferring it to a wire rack to cool completely.
Lockerer Kuchen mit Zucchetti, Apfel und Baumnussen

Pro Tips for the Best Results

To make sure your cake turns out perfectly every time, keep these tips in mind:

  • Make sure to squeeze out any excess moisture from the grated zucchini before mixing it in. This helps prevent the cake from becoming too dense.
  • Feel free to experiment with spices! A dash of nutmeg or ginger can add a lovely warmth to the flavor profile.
  • If you prefer a sweeter cake, increase the sugar by a quarter cup. It’s all about finding your perfect balance!

Serving Suggestions

This cake is delightful on its own, but here are a few serving suggestions to elevate your experience:

  • Serve warm with a dollop of whipped cream or a scoop of vanilla ice cream for a comforting dessert.
  • Dust the top with powdered sugar for a simple yet elegant touch.
  • Pair it with a cup of spiced chai or your favorite coffee for a cozy afternoon treat.

Storage and Make-Ahead Tips

If you find yourself with leftover cake (though I doubt it!), here’s how to store it:

  • Keep the cake in an airtight container at room temperature for up to 3 days.
  • You can also refrigerate it for up to a week, but I recommend bringing it back to room temperature before serving for the best flavor and texture.
  • If you want to make it ahead of time, this cake freezes wonderfully! Wrap slices in plastic wrap and place them in a zip-top bag. They’ll keep well for up to 3 months. Just thaw and enjoy whenever the craving strikes!

Lockerer Kuchen mit Zucchetti, Apfel und Baumnussen

Prep Time 15 minutes
Cook Time 30 minutes
Total Time 45 minutes
Servings 8 slices
Calories 350
Ein nussiger und fruchtiger Kuchen, perfekt zum Kaffee und ideal für eine schnelle Genusspause.

Ingredients

Dough

  • 2 pcs Zucchetti (grated)
  • 2 pcs Apfel (sliced)
  • 100 grams Baumnüsse (chopped)

Other ingredients

  • 150 grams Flour
  • 100 grams Sugar
  • 3 pcs Eggs
  • 100 ml Vegetable oil

Instructions 

  • Preheat oven to 180°C (356°F).
  • Mix flour, sugar, eggs, and oil to form batter.
  • Fold in grated zucchetti, sliced apple, and chopped baumnüsse.
  • Pour batter into a greased baking pan.
  • Bake for 30 minutes until golden brown.

Notes

Use fresh ingredients for best flavor.
Calories: 350kcal
Cost: $12
Course: Dessert
Cuisine: German
Keyword: Zucchetti

Loved this recipe? Save it to your favorite Pinterest board so you can easily find it later! It’s the perfect way to keep all your sweet ideas in one place. ✨

Lockerer Kuchen mit Zucchetti, Apfel und Baumnussen