Author

Ava

Browsing

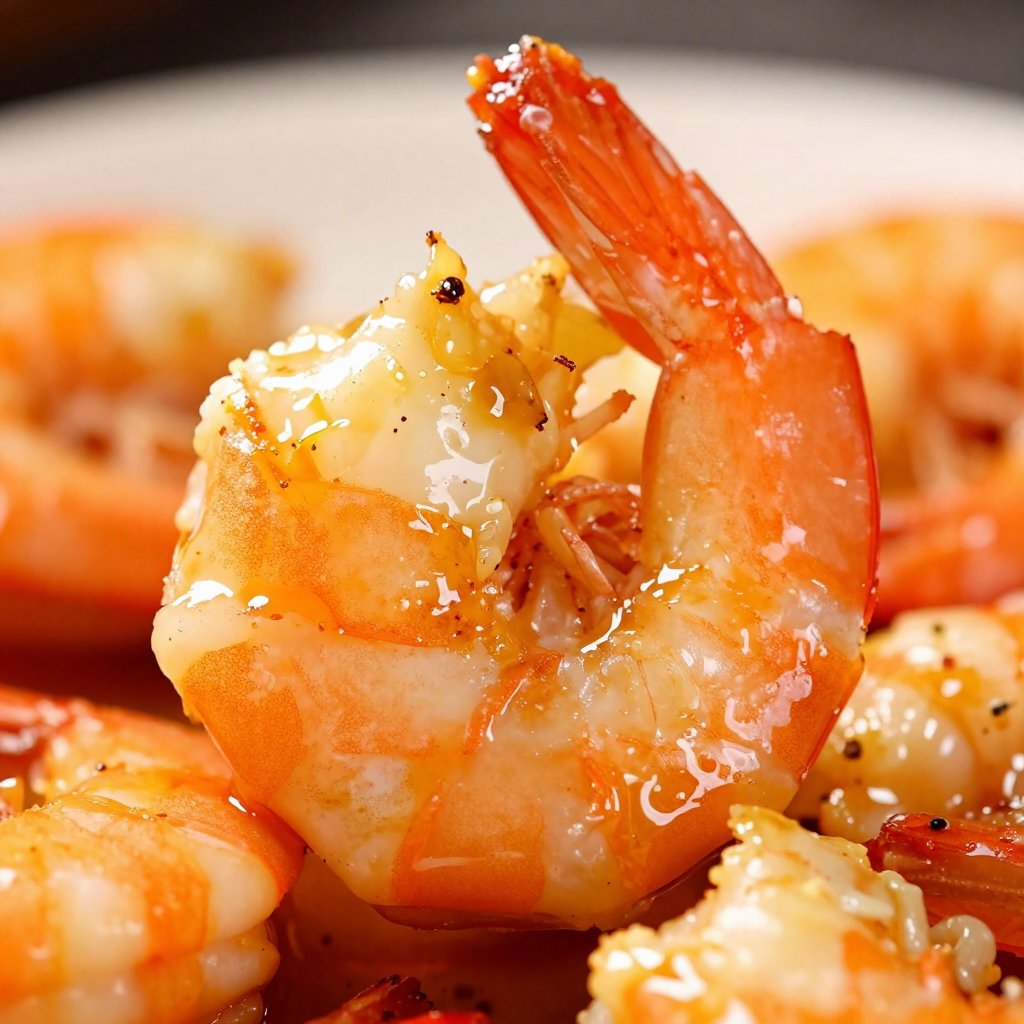
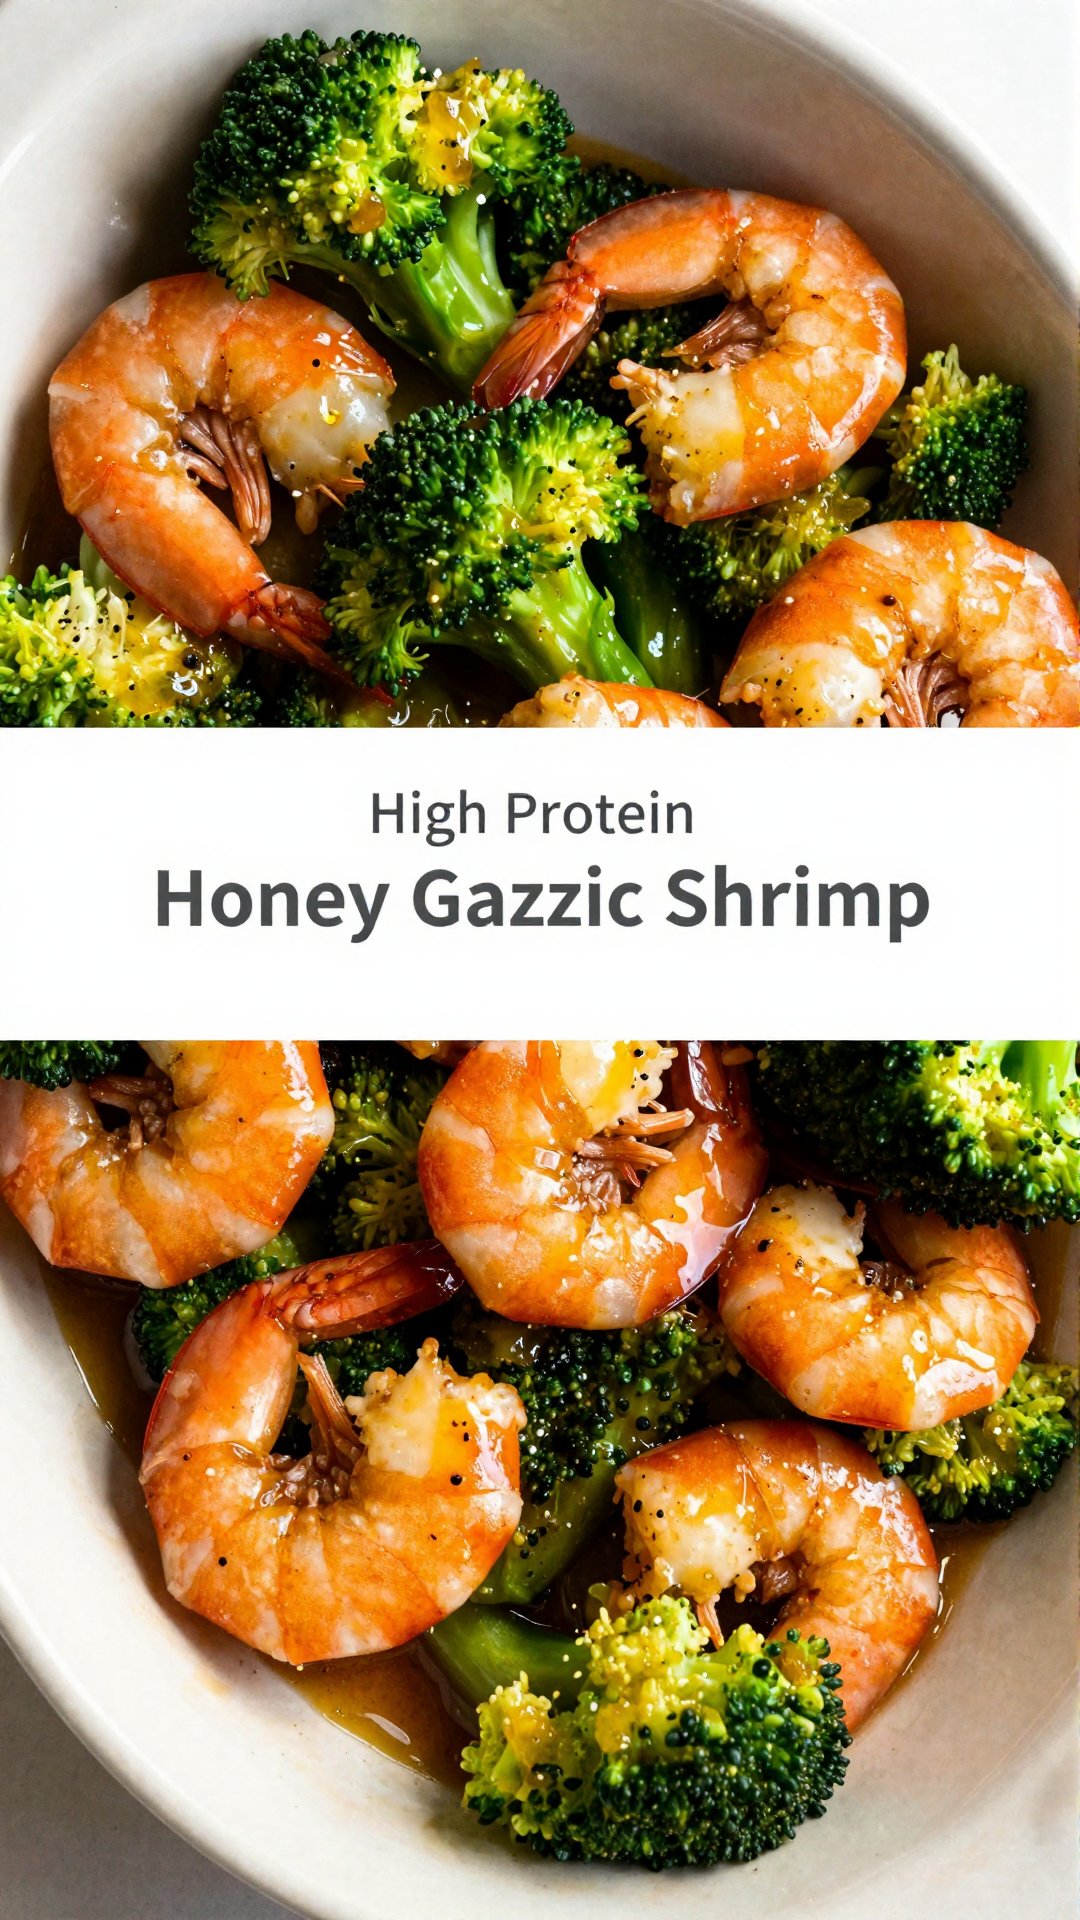
Hey there, friend! Ava here, back from my little corner of Seattle with a recipe that’s been on repeat in my kitchen lately: High-Protein Honey Garlic Shrimp. If you’re anything like me, you’re always on the lookout for meals that are quick, delicious, and, let’s be honest, won’t leave you feeling guilty afterwards. This dish ticks all those boxes and more. Growing up, shrimp was always a treat, something saved for special occasions. Now, I’ve found a way to make it an everyday staple, packed with protein and bursting with flavor.

This isn’t just another shrimp recipe; it’s a culinary hug. I remember one particularly hectic week when I was juggling work, errands, and trying to keep my sanity. I needed something fast, something satisfying, and something that wouldn’t require a mountain of dishes. Enter: Honey Garlic Shrimp. It saved the day, and I knew I had to share it with you. So, whether you’re a seasoned chef or just starting your cooking journey, grab your apron, and let’s dive into this delightful dish together. You’ll be amazed at how simple it is to create something so incredibly tasty.

Why You’ll Love This High-Protein Honey Garlic Shrimp

Seriously, where do I even begin? This recipe is more than just a meal; it’s a life-saver on busy weeknights and a guaranteed crowd-pleaser. It’s a symphony of flavors and textures, all wrapped up in one easy-to-make dish. Let me break it down for you why I think you’ll absolutely adore this high-protein honey garlic shrimp:

  • Quick and Easy: From start to finish, this dish is ready in under 20 minutes. Perfect for those nights when you’re short on time but still want a delicious and healthy meal.
  • High in Protein: Shrimp is an excellent source of lean protein, making this recipe a great choice for muscle gain or simply maintaining a balanced diet. This recipe is a great source of high protein.
  • Delicious Flavor: The combination of sweet honey and savory garlic creates a flavor explosion that will tantalize your taste buds. It’s a perfect balance of sweet, savory, and umami.
  • Versatile: Serve it over rice, quinoa, pasta, or even on its own with a side of steamed vegetables. The possibilities are endless!
  • Healthy: This recipe uses simple, wholesome ingredients and is relatively low in calories. It’s a guilt-free way to enjoy a flavorful and satisfying meal.
  • Customizable: Feel free to adjust the sweetness, spiciness, or add other vegetables to suit your personal preferences. This recipe is a blank canvas for your culinary creativity.

I’ve made this dish countless times, and each time, it brings a smile to my face. There’s something incredibly satisfying about creating a delicious and healthy meal in such a short amount of time. And the best part? Everyone always loves it! Even my picky-eater nephew devours it without complaint. So, trust me, this recipe is a winner.

Ingredients for Your High-Protein Honey Garlic Shrimp

Okay, let’s get down to the nitty-gritty. Here’s what you’ll need to create this magical high-protein honey garlic shrimp dish. Don’t worry, the ingredient list is short and sweet, and you probably have most of these items in your pantry already. Remember, the quality of your ingredients will impact the final flavor, so try to use the freshest ingredients you can find. I always prefer to use fresh garlic over garlic powder, as it provides a much more robust and aromatic flavor.

  • 1 pound shrimp, peeled and deveined (Use fresh shrimp for the best flavor and texture.)
  • 1/4 cup honey (Adjust based on sweetness preference.)
  • 3 cloves garlic, minced
  • 2 tablespoons soy sauce
  • 1 tablespoon olive oil
  • to taste Salt and pepper
  • Cooked rice or vegetables for serving (Serve over rice, quinoa, or favorite vegetables.)
Recipe Image

How to Make High-Protein Honey Garlic Shrimp: Step-by-Step

Alright, now for the fun part! Let’s get cooking. I’ve broken down the process into easy-to-follow steps, so even if you’re a beginner cook, you’ll feel confident whipping up this high-protein honey garlic shrimp. Remember, cooking should be enjoyable, so don’t be afraid to experiment and have fun with it! This recipe is incredibly forgiving, so even if you make a slight mistake, it will still turn out delicious.

  1. Prepare the Shrimp: If using frozen shrimp, make sure it’s completely thawed and patted dry with paper towels. This is crucial because excess moisture will prevent the shrimp from browning properly.
  2. Make the Sauce: In a small bowl, whisk together the honey, minced garlic, and soy sauce. Set aside. This honey garlic sauce is the star of the show!
  3. Sauté the Shrimp: Heat the olive oil in a large skillet over medium-high heat. Add the shrimp in a single layer (don’t overcrowd the pan!) and cook for 2-3 minutes per side, or until pink and opaque. Remember, shrimp cooks very quickly, so keep a close eye on it to prevent overcooking.
  4. Add the Sauce: Pour the honey garlic sauce over the shrimp and cook for another 1-2 minutes, stirring constantly, until the sauce thickens slightly and coats the shrimp evenly. The sauce should be glossy and sticky.
  5. Season and Serve: Season with salt and pepper to taste. Serve immediately over cooked rice, quinoa, or your favorite vegetables. For added flavor, sprinkle with sesame seeds or chopped green onions.

And there you have it! A quick, easy, and delicious high-protein honey garlic shrimp dish that’s perfect for any night of the week. I promise, once you try this recipe, it will become a regular in your dinner rotation. It’s just that good!

Pro Tips for the Best Honey Garlic Shrimp

Okay, so you’ve got the basics down. But if you really want to take this high-protein honey garlic shrimp to the next level, here are a few pro tips that I’ve learned over the years. These little tweaks can make a big difference in the final flavor and texture of the dish. Trust me, these tips are worth their weight in gold!

  • Don’t Overcook the Shrimp: This is the most important tip! Overcooked shrimp is rubbery and tough. Cook the shrimp just until it turns pink and opaque. It should still be slightly tender.
  • Use Fresh Garlic: As I mentioned earlier, fresh garlic provides a much more robust and aromatic flavor than garlic powder. If you don’t have fresh garlic, you can use garlic powder, but reduce the amount to 1/2 teaspoon.
  • Adjust the Sweetness: If you prefer a less sweet dish, reduce the amount of honey. You can also add a squeeze of lemon juice to balance the sweetness.
  • Add Some Heat: For a spicy kick, add a pinch of red pepper flakes to the sauce. You can also add a tablespoon of sriracha or chili garlic sauce.
  • Thicken the Sauce: If the sauce is too thin, you can thicken it by whisking in a cornstarch slurry (1 teaspoon cornstarch mixed with 1 tablespoon water) during the last minute of cooking.
  • Garnish Generously: A sprinkle of sesame seeds, chopped green onions, or fresh cilantro adds a pop of color and flavor to the dish.
  • Marinate the Shrimp: For even more flavor, marinate the shrimp in the honey garlic sauce for at least 30 minutes before cooking.

Common Mistakes to Avoid When Making Honey Garlic Shrimp

We all make mistakes in the kitchen, it’s part of the learning process! But knowing what to avoid can save you time, frustration, and a potentially ruined dish. Here are some common mistakes to watch out for when making high-protein honey garlic shrimp, along with tips on how to avoid them.

  • Overcrowding the Pan: This is a big one! Overcrowding the pan will lower the temperature and cause the shrimp to steam instead of sear. Cook the shrimp in batches if necessary.
  • Using Too Much Oil: Too much oil will make the dish greasy. Use just enough oil to coat the bottom of the pan.
  • Not Drying the Shrimp: Excess moisture will prevent the shrimp from browning properly. Pat the shrimp dry with paper towels before cooking.
  • Burning the Garlic: Burnt garlic is bitter and unpleasant. Cook the garlic over medium heat and keep a close eye on it to prevent burning.
  • Adding the Sauce Too Early: Adding the sauce too early will cause it to burn and the shrimp to become sticky. Add the sauce during the last few minutes of cooking.
  • Not Tasting and Adjusting: Taste the dish before serving and adjust the seasoning as needed. You may need to add more salt, pepper, or honey to achieve the perfect balance of flavors.

Variations to Spice Up Your Honey Garlic Shrimp

One of the best things about this high-protein honey garlic shrimp recipe is that it’s incredibly versatile. You can easily customize it to suit your personal preferences and dietary needs. Here are a few fun and creative variations to try:

  • Lemon Garlic Shrimp: Add the juice and zest of one lemon to the sauce for a bright and tangy flavor.
  • Spicy Garlic Shrimp: Add a pinch of red pepper flakes, a tablespoon of sriracha, or a teaspoon of chili garlic sauce to the sauce for a spicy kick.
  • Coconut Garlic Shrimp: Replace the soy sauce with coconut aminos for a gluten-free option. Add a tablespoon of coconut milk to the sauce for a creamy texture.
  • Pineapple Garlic Shrimp: Add chunks of fresh pineapple to the skillet during the last few minutes of cooking for a sweet and tropical twist.
  • Vegetable Garlic Shrimp: Add your favorite vegetables to the skillet along with the shrimp. Broccoli, bell peppers, onions, and mushrooms all work well.
  • Honey Garlic Chicken or Tofu: If you’re not a fan of shrimp, you can easily substitute chicken or tofu. Just adjust the cooking time accordingly.

How to Store and Reheat Honey Garlic Shrimp

If you happen to have leftovers (which is rare in my house!), here’s how to properly store and reheat your high-protein honey garlic shrimp. Proper storage will ensure that your leftovers stay fresh and delicious. And reheating it the right way will prevent it from becoming dry and rubbery. The shrimp is best when freshly made, but it still tastes great the next day.

  • Storage: Allow the shrimp to cool completely before storing it in an airtight container. Store in the refrigerator for up to 2 days.
  • Reheating: Reheat the shrimp in a skillet over medium heat, stirring occasionally, until heated through. You can also reheat it in the microwave, but be careful not to overcook it.
  • Freezing: I don’t recommend freezing this dish, as the texture of the shrimp can change when frozen and thawed. However, if you must freeze it, store it in an airtight container for up to 1 month. Thaw overnight in the refrigerator before reheating.
  • To keep the shrimp fresh store in an airtight container.
  • The shrimp can be stored for up to two days.
  • For up to one month it can be stored in the freezer.

Frequently Asked Questions About Honey Garlic Shrimp

I’ve compiled a list of the most common questions I get asked about this high-protein honey garlic shrimp recipe. Hopefully, these FAQs will address any concerns or curiosities you may have. If you have any other questions, feel free to leave them in the comments below!

  • Can I use frozen shrimp? Yes, you can use frozen shrimp, but make sure it’s completely thawed and patted dry before cooking. Fresh shrimp is always best, but frozen shrimp works in a pinch.
  • Can I use garlic powder instead of fresh garlic? Yes, you can, but reduce the amount to 1/2 teaspoon. Fresh garlic provides a much more robust flavor.
  • Can I use a different type of sweetener? Yes, you can substitute the honey with maple syrup, agave nectar, or brown sugar.
  • Can I make this dish gluten-free? Yes, you can make this dish gluten-free by using tamari instead of soy sauce. Tamari is a gluten-free soy sauce alternative.
  • Can I add vegetables to this dish? Absolutely! Broccoli, bell peppers, onions, and mushrooms all work well.
  • How do I prevent the shrimp from overcooking? Cook the shrimp just until it turns pink and opaque. It should still be slightly tender.

Serving Suggestions for Your Delicious Shrimp Dish

Now that you’ve mastered the art of making high-protein honey garlic shrimp, let’s talk about how to serve it! This dish is incredibly versatile and pairs well with a variety of sides. Here are a few of my favorite serving suggestions:

  • Over Rice or Quinoa: This is the classic way to serve honey garlic shrimp. Cooked rice or quinoa provides a neutral base that complements the sweet and savory flavors of the shrimp.
  • With Steamed Vegetables: Serve the shrimp with a side of steamed broccoli, asparagus, or green beans for a healthy and balanced meal.
  • In Lettuce Wraps: For a low-carb option, serve the shrimp in crisp lettuce wraps with a drizzle of sriracha mayo.
  • Over Pasta: Toss the shrimp with your favorite pasta and a drizzle of olive oil for a quick and easy pasta dish.
  • In Tacos or Burritos: Use the shrimp as a filling for tacos or burritos, along with your favorite toppings like salsa, guacamole, and sour cream.
  • As an Appetizer: Serve the shrimp as an appetizer with toothpicks for a party or gathering.

No matter how you choose to serve it, I’m confident that this high-protein honey garlic shrimp will be a hit. It’s a delicious, healthy, and easy meal that’s perfect for any occasion. So go ahead, give it a try, and let me know what you think! I can’t wait to hear about your culinary adventures.

Remember, cooking is all about having fun and experimenting with flavors. So don’t be afraid to get creative and make this recipe your own. And most importantly, enjoy the process! Happy cooking, friends!

The shrimp is a very versatile ingredient. You can make many different dishes with it. If you are looking for a healthy dinner with shrimp healthy, this is it! These protein and veggie meal ideas are a fantastic choice! If you need easy dinner shrimp, this is a great option. This is also a great way to have healthy recipes with fish. For those trying to gain muscle this is a great addition for healthy recipes for muscle gain. This is also a great recipe for calorie friendly dinners! This is one of the best supper recipes you can find!

High-Protein Honey Garlic Shrimp

Prep Time 10 minutes
Cook Time 10 minutes
Total Time 20 minutes
Servings 4 servings
Calories 250
Delicious and easy honey garlic shrimp recipe, perfect for a quick and healthy meal. Serve over rice or vegetables for a complete dish.

Ingredients

Ingredients

  • 1 pound shrimp (peeled and deveined (Use fresh shrimp for the best flavor and texture.))
  • 1/4 cup honey ((Adjust based on sweetness preference.))
  • 3 cloves garlic (minced)
  • 2 tablespoons soy sauce
  • 1 tablespoon olive oil
  • to taste Salt and pepper
  • Cooked rice or vegetables (for serving (Serve over rice, quinoa, or favorite vegetables.))

Notes

For extra flavor, marinate the shrimp for 30 minutes before cooking.
Calories: 250kcal
Cost: $18
Course: Main Course
Cuisine: Asian
Keyword: shrimp
pin

Hearty Black Beans and Rice with Sausage: A Kitchen Classic Reimagined

Hey there, friend! Ava here, back in my Seattle kitchen, ready to share a recipe that’s been a staple in my life since those early days in Oregon. Remember the comforting smells of my mom’s cooking? Well, this Hearty Black Beans and Rice with Sausage recipe is a direct descendant of those warm, flavorful memories. It’s a dish that’s both incredibly easy to make and deeply satisfying, a true one-pot wonder that’s perfect for busy weeknights or cozy weekends. If you’re looking for a meal that’s packed with flavor, budget-friendly, and sure to please everyone at the table, you’ve come to the right place.

This isn’t just another beans and rice recipe; it’s a celebration of simple ingredients coming together to create something truly special. I’ve tweaked and perfected it over the years, adding my own little touches to elevate the flavors and make it uniquely mine. And now, I’m sharing it with you, hoping it becomes a beloved part of your kitchen repertoire too.

Why You’ll Absolutely Love This Black Beans and Rice Recipe

Okay, let’s get real. There are a million recipes out there, so why should you choose this one? Well, let me tell you, this Hearty Black Beans and Rice with Sausage is more than just a meal; it’s an experience. Here’s why you’ll fall head over heels for it:

  • Quick and Easy: Seriously, this dish comes together in under an hour. Perfect for those nights when you’re short on time but still want a homemade meal.
  • One-Pot Wonder: Fewer dishes? Yes, please! Everything cooks together in one pot, making cleanup a breeze.
  • Budget-Friendly: This recipe uses affordable ingredients, making it a great option for feeding a crowd without breaking the bank.
  • Flavor Explosion: The combination of smoked sausage, aromatic spices, and hearty black beans creates a symphony of flavors that will tantalize your taste buds.
  • Versatile: You can easily customize this recipe to suit your preferences. Swap out the sausage, add different veggies, or adjust the spice level to your liking.
  • Comfort Food at Its Best: This dish is like a warm hug in a bowl. It’s comforting, satisfying, and guaranteed to put a smile on your face.

I truly believe this recipe has the potential to become a regular in your meal rotation. It’s a dish that’s both simple enough for a beginner cook and flavorful enough to impress even the most discerning palate. So, let’s dive in and get cooking!

The Star Players: Ingredients You’ll Need

Alright, let’s gather our ingredients. Here’s what you’ll need to whip up this delicious Hearty Black Beans and Rice with Sausage:

  • 1 tablespoon olive oil
  • 12 ounces smoked beef sausage (sliced into rounds)
  • 1 small onion (diced)
  • 1 bell pepper (diced)
  • 3 cloves garlic (minced)
  • 1 teaspoon ground cumin
  • 1 teaspoon smoked paprika
  • ½ teaspoon dried oregano
  • ½ teaspoon chili powder
  • 1 cup long-grain white rice (uncooked)
  • 1 can (15 ounces) black beans ((drained and rinsed))
  • 2 cups chicken broth (low sodium preferred)
  • Salt and black pepper to taste
  • ¼ cup fresh cilantro (chopped, for garnish)
  • 1 lime (cut into wedges, for serving)
Recipe Image

Step-by-Step: Bringing It All Together

Now for the fun part! Here’s how to transform those simple ingredients into a flavorful and satisfying meal. Don’t worry, it’s super easy to make, I promise!

  1. Sauté the Sausage: Heat the olive oil in a large pot or Dutch oven over medium heat. Add the sausage slices and cook until browned on both sides, about 5-7 minutes. Remove the sausage from the pot and set aside.
  2. Sauté the Veggies: Add the diced onion and bell pepper to the pot and cook until softened, about 5 minutes. Add the minced garlic and cook for another minute until fragrant.
  3. Spice It Up: Stir in the ground cumin, smoked paprika, dried oregano, and chili powder. Cook for about 30 seconds, until the spices are fragrant. This really wakes up the flavors and adds depth to the dish.
  4. Combine Everything: Add the uncooked rice to the pot and stir to coat it with the spices and vegetables. Pour in the chicken broth and bring to a boil.
  5. Simmer and Dream: Reduce the heat to low, cover the pot, and simmer for 15-20 minutes, or until the rice is cooked and the liquid is absorbed.
  6. Add the Beans and Sausage: Stir in the drained and rinsed black beans and the cooked sausage. Cook for another 5 minutes, until heated through.
  7. Season to Perfection: Season with salt and black pepper to taste. Remember, taste as you go!
  8. Garnish and Serve: Garnish with fresh cilantro and serve with lime wedges. A squeeze of lime juice adds a bright, zesty finish that really elevates the dish.

And there you have it! A delicious and hearty meal that’s ready in under an hour. I hope you enjoy every bite!

Pro Tips for Black Beans and Rice Perfection

Want to take your Black Beans and Rice game to the next level? Here are a few of my favorite pro tips:

  • Toast the Rice: Before adding the broth, toast the rice in the pot with the spices for a few minutes. This enhances the nutty flavor of the rice and adds another layer of complexity to the dish.
  • Use Quality Sausage: The quality of the sausage really makes a difference in this recipe. I prefer smoked beef sausage, but you can also use andouille sausage, chorizo, or even Italian sausage.
  • Don’t Overcook the Rice: Overcooked rice is mushy and unpleasant. Keep a close eye on the rice while it’s simmering and remove it from the heat as soon as it’s cooked through.
  • Adjust the Spice Level: If you like a little heat, add a pinch of cayenne pepper or a dash of hot sauce to the pot. If you prefer a milder flavor, reduce the amount of chili powder.
  • Fresh Herbs are Key: Fresh cilantro adds a bright, fresh flavor to the dish. Don’t skip it!

Remember, cooking is all about experimentation. Don’t be afraid to try new things and find what works best for you.

Common Mistakes to Avoid

Even the simplest recipes can have their pitfalls. Here are a few common mistakes to avoid when making Black Beans and Rice:

  • Not Rinsing the Black Beans: Rinsing the black beans removes excess starch and sodium, which can improve the flavor and texture of the dish.
  • Using Too Much Liquid: Using too much liquid will result in mushy rice. Stick to the recommended amount of chicken broth for the best results.
  • Not Seasoning Properly: Salt and pepper are essential for bringing out the flavors in this dish. Don’t be afraid to season generously.
  • Burning the Garlic: Burnt garlic is bitter and unpleasant. Be sure to cook the garlic over low heat and watch it carefully to prevent it from burning.
  • Not Letting the Dish Rest: Letting the dish rest for a few minutes after cooking allows the flavors to meld together and the rice to absorb any remaining liquid.

Variations: Make It Your Own

One of the best things about this recipe is how easily it can be customized to suit your preferences. Here are a few variations to try:

  • Vegetarian: Omit the sausage and add more vegetables, such as corn, zucchini, or mushrooms.
  • Spicy: Add a jalapeño pepper (diced) to the pot along with the onion and bell pepper.
  • Chicken: Substitute shredded cooked chicken for the sausage.
  • Coconut Milk: Replace half of the chicken broth with coconut milk for a creamy, tropical twist.
  • Quinoa: Substitute quinoa for the rice for a healthier, protein-packed option.

The possibilities are endless! Get creative and have fun experimenting with different flavors and ingredients.

Storage and Reheating Tips

Leftovers? Lucky you! This Black Beans and Rice dish is even better the next day. Here’s how to store and reheat it:

  • Storage: Store the leftovers in an airtight container in the refrigerator for up to 3-4 days.
  • Reheating: Reheat the dish in the microwave or on the stovetop. If the rice is dry, add a splash of chicken broth or water to moisten it.

This dish also freezes well. Store it in a freezer-safe container for up to 2-3 months. Thaw it overnight in the refrigerator before reheating.

Frequently Asked Questions (FAQ)

Got questions? I’ve got answers! Here are a few frequently asked questions about this recipe:

  • Can I use brown rice instead of white rice? Yes, you can use brown rice, but you’ll need to adjust the cooking time and liquid accordingly. Brown rice typically takes longer to cook than white rice.
  • Can I use canned beans instead of dried beans? Yes, canned beans are a convenient option. Just be sure to drain and rinse them before adding them to the pot.
  • Can I make this recipe in a slow cooker? Yes, you can adapt this recipe for a slow cooker. Sauté the sausage, onion, and bell pepper in a skillet before adding them to the slow cooker along with the remaining ingredients. Cook on low for 6-8 hours or on high for 3-4 hours.
  • Can I add other vegetables to this dish? Absolutely! Feel free to add any vegetables you like, such as corn, zucchini, carrots, or spinach.
  • Is this recipe gluten-free? Yes, this recipe is naturally gluten-free.

Serving Suggestions: Complete the Meal

While this Black Beans and Rice dish is delicious on its own, here are a few serving suggestions to complete the meal:

  • Salad: Serve with a simple green salad or a vibrant avocado salad.
  • Cornbread: A slice of warm cornbread is the perfect accompaniment to this hearty dish.
  • Sour Cream or Greek Yogurt: A dollop of sour cream or Greek yogurt adds a creamy, tangy contrast to the flavors.
  • Hot Sauce: For those who like a little heat, a dash of hot sauce is a must.
  • Tortilla Chips: Serve with tortilla chips for dipping.

And there you have it! My go-to Hearty Black Beans and Rice with Sausage Recipe. I hope you love this dish as much as I do. It’s a simple, flavorful, and comforting meal that’s perfect for any occasion. If you try this recipe, be sure to let me know what you think in the comments below. I love hearing from you!

Thanks for stopping by my kitchen! Happy cooking, friends!

Hearty Black Beans and Rice with Sausage

Prep Time 15 minutes
Cook Time 30 minutes
Total Time 45 minutes
Servings 6 servings
Calories 350
A flavorful and satisfying dish featuring smoked sausage, black beans, and rice, seasoned with aromatic spices. Perfect for a quick and easy weeknight meal.

Ingredients

Ingredients

  • 1 tablespoon olive oil
  • 12 ounces smoked beef sausage (sliced into rounds)
  • 1 small onion (diced)
  • 1 bell pepper (diced)
  • 3 cloves garlic (minced)
  • 1 teaspoon ground cumin
  • 1 teaspoon smoked paprika
  • 0.5 teaspoon dried oregano
  • 0.5 teaspoon chili powder
  • 1 cup long-grain white rice (uncooked)
  • 15 ounces black beans (drained and rinsed)
  • 2 cups chicken broth (low sodium preferred)
  • Salt and black pepper (to taste)
  • 0.25 cup fresh cilantro (chopped, for garnish)
  • 1 lime (cut into wedges, for serving)

Notes

Adjust the amount of chili powder to your preferred level of spiciness.
Calories: 350kcal
Cost: $12
Course: Main Course
Cuisine: American
Keyword: sausage
pin

Hey there, food lovers! Ava here, back from my Seattle kitchen with a recipe that’s been a total game-changer in my dinner rotation: Chicken Shawarma with Garlic Sauce. Seriously, this dish is like a flavor explosion in every bite, and the best part? It’s surprisingly simple to make at home. If you’ve ever craved that delicious street food flavor but didn’t want to leave your comfy pants, then you’re in the right place. I’ve tweaked and perfected this recipe over countless late-night cravings, and I’m so excited to share it with you.

Growing up, my mom always said the best meals are the ones made with love, and I truly believe that. This chicken shawarma recipe is packed with both love and flavor. It’s one of those dishes that instantly transports me back to happy memories, and I hope it does the same for you. So, grab your apron, and let’s get cooking!

Why You’ll Love This Chicken Shawarma

Okay, let’s be real—there are a million chicken recipes out there. So, why should you try this one? Here’s the deal:

  • Authentic Taste: We’re talking serious shawarma flavor, just like you’d get from your favorite food truck.
  • Easy Peasy: Forget complicated techniques. This recipe is straightforward and beginner-friendly.
  • Garlic Sauce Magic: The creamy, tangy garlic sauce takes this dish to a whole new level. Trust me; you’ll want to put it on everything.
  • Versatile: Serve it in pita bread, over rice, or on a salad. The possibilities are endless.
  • Crowd-Pleaser: Whether you’re cooking for your family or hosting a dinner party, this chicken shawarma is guaranteed to be a hit.

I’ve made this recipe countless times, and it never fails to impress. The combination of the warm spices, juicy chicken, and that irresistible garlic sauce is simply divine. Plus, it’s a great way to bring a little bit of international flair to your dinner table without spending hours in the kitchen. I m telling you, this recipe is a keeper!

Ingredients for the Best Chicken Shawarma

Alright, let’s gather our ingredients. Here’s what you’ll need to make the magic happen:

  • 1.5 lbs of boneless chicken thighs or breasts, cut into strips
  • 2 tablespoons of olive oil
  • 2 teaspoons of ground cumin
  • 1 teaspoon of ground paprika
  • 1 teaspoon of ground turmeric
  • 1 teaspoon of ground coriander
  • 1 teaspoon of ground cinnamon
  • 2 cloves of garlic, minced
  • 1 tablespoon of lemon juice
  • Salt and black pepper to taste
  • 1 cup of mayonnaise
  • 2 tablespoons of minced garlic
  • 1 tablespoon of lemon juice
  • Salt to taste

Don’t skimp on the spices! That’s where the real shawarma flavor comes from. And if you’re a garlic lover like me, feel free to add an extra clove or two to both the marinade and the sauce. It’s all about customizing the recipe to your taste!

Recipe Image

Step-by-Step Instructions: Making the Perfect Chicken Shawarma

Okay, now for the fun part! Here’s how to bring it all together:

  1. Marinate the Chicken: In a large bowl, combine olive oil, cumin, paprika, turmeric, coriander, cinnamon, minced garlic, lemon juice, salt, and pepper. Mix well. Add the chicken strips and marinate for at least 30 minutes (the longer, the better—up to overnight for deeper flavor).
  2. Cook the Chicken: Preheat your grill or non-stick pan over medium-high heat. Adding a few drops of oil can help prevent sticking and enhance browning. Place the marinated chicken in the preheated pan or grill. Cook for about 5-7 minutes on each side, or until the chicken is golden brown and cooked through. The internal temperature should reach 165°F (75°C).
  3. Make the Garlic Sauce: In a small bowl, whisk together mayo, minced garlic, lemon juice, and a pinch of salt. Make adjustments to taste, adding more garlic for an extra kick, if desired.
  4. Assemble and Serve: Once the chicken is cooked, allow it to rest for a few minutes. Then slice it into bite-sized pieces. Serve the chicken in pita bread or on a plate, drizzled generously with the garlic sauce. Accompany with fresh vegetables, pickled turnips, or a simple salad.

See? I told you it was easy! The key is to get that marinade right and not to overcrowd the pan when you’re cooking the chicken. You want each piece to get nice and golden brown.

Pro Tips for Next-Level Chicken Shawarma

Want to take your chicken shawarma from good to amazing? Here are a few of my go-to tips:

  • Marinate Like a Pro: The longer you marinate the chicken, the more flavorful it will be. I usually aim for at least 4 hours, but overnight is even better.
  • Don’t Overcook: Overcooked chicken is dry and sad. Use a meat thermometer to ensure it reaches 165°F (75°C), and don’t cook it any longer.
  • Char It Up: If you’re using a grill, don’t be afraid to let the chicken get a little charred. It adds a smoky flavor that’s irresistible.
  • Warm Your Pita: Warm pita bread is softer and more pliable. You can warm it in a dry skillet, in the microwave, or even on the grill.
  • Fresh Ingredients: Use the freshest ingredients you can find. It makes a huge difference in the overall flavor of the dish.

These tips are all about maximizing flavor and texture. I’ve learned them through trial and error (and a few burnt pieces of chicken along the way!). I m confident that if you follow these tips, you’ll be making restaurant-quality shawarma in no time.

Common Mistakes to Avoid

We all make mistakes in the kitchen; it’s part of the learning process. Here are a few common pitfalls to watch out for when making chicken shawarma:

  • Not Marinating Long Enough: This is the biggest mistake! The marinade is what gives the chicken its signature flavor.
  • Overcrowding the Pan: If you overcrowd the pan, the chicken will steam instead of browning. Cook it in batches for best results.
  • Using the Wrong Cut of Chicken: Boneless, skinless thighs are my go-to because they stay juicy and flavorful. Chicken breasts can work too, but be careful not to overcook them.
  • Skipping the Garlic Sauce: Don’t even think about it! The garlic sauce is essential.
  • Not Tasting as You Go: Taste the marinade and the garlic sauce as you make them, and adjust the seasonings to your liking.

I ve definitely made all of these mistakes at some point! But the good news is that they’re all easily avoidable. Just take your time, pay attention to what you’re doing, and don’t be afraid to experiment.

Chicken Shawarma Variations: Customize Your Dish

One of the things I love most about this recipe is how easy it is to customize. Here are a few variations to try:

  • Spicy Shawarma: Add a pinch of cayenne pepper or a dash of hot sauce to the marinade for a spicy kick.
  • Lemon Herb Shawarma: Add some chopped fresh herbs like parsley, cilantro, or dill to the marinade, along with extra lemon zest.
  • Vegetarian Shawarma: Swap the chicken for chickpeas or roasted vegetables like eggplant and zucchini.
  • Shawarma Bowls: Serve the chicken over a bed of rice or quinoa with your favorite toppings like hummus, tahini, and pickled vegetables.
  • Shawarma Salad: Toss the chicken with mixed greens, tomatoes, cucumbers, and a lemon vinaigrette.

If you re feeling adventurous, you can even try making your own pita bread! It’s a bit more time-consuming, but it’s so worth it. And if you don t have all the spices on hand, don’t worry. You can use a pre-made shawarma spice blend. The important thing is to have fun and make it your own. Thank you for trying these variations!

How to Store Leftover Chicken Shawarma

If you’re lucky enough to have leftovers (which is rare in my house!), here’s how to store them:

  • Chicken: Store the cooked chicken in an airtight container in the refrigerator for up to 3 days.
  • Garlic Sauce: Store the garlic sauce in an airtight container in the refrigerator for up to 5 days.
  • Reheating: Reheat the chicken in a skillet or in the microwave until heated through.

I don t recommend freezing the chicken, as it can become dry and rubbery. But the garlic sauce freezes surprisingly well! Just thaw it in the refrigerator overnight before using.

Frequently Asked Questions (FAQ)

Got questions? I’ve got answers!

  • Can I use chicken breasts instead of thighs?: Yes, you can, but be careful not to overcook them. Chicken thighs are more forgiving and tend to stay juicier.
  • Can I make this recipe ahead of time?: Absolutely! The chicken can be marinated overnight, and the garlic sauce can be made a day or two in advance.
  • What if I don’t have all the spices?: Use a pre-made shawarma spice blend, or just use what you have on hand. The flavor will be slightly different, but it will still be delicious.
  • Can I grill the chicken instead of pan-frying it?: Yes, grilling the chicken adds a delicious smoky flavor. Just make sure to preheat your grill and oil the grates to prevent sticking.
  • Is this recipe gluten-free?: Yes, as long as you serve it with gluten-free pita bread or over rice.

I hope this answers all your questions! If you have any other concerns, feel free to leave a comment below, and I’ll do my best to help. You so much for reading!

Serving Suggestions: Complete Your Shawarma Feast

Now that you’ve made the perfect chicken shawarma, it’s time to complete the feast! Here are a few of my favorite serving suggestions:

  • Pita Bread: Warm pita bread is a must! Stuff it with the chicken, garlic sauce, and your favorite toppings.
  • Fresh Vegetables: Add some sliced tomatoes, cucumbers, onions, and lettuce for a refreshing crunch.
  • Pickled Vegetables: Pickled turnips, cucumbers, or onions add a tangy and slightly sour flavor that complements the shawarma perfectly.
  • Hummus: A dollop of creamy hummus adds richness and depth of flavor.
  • Tahini Sauce: If you’re not a fan of garlic sauce, tahini sauce is a great alternative.
  • Rice or Quinoa: Serve the chicken over a bed of rice or quinoa for a heartier meal.
  • Salad: Toss the chicken with mixed greens, tomatoes, cucumbers, and a lemon vinaigrette for a lighter option.

I usually serve my chicken shawarma with a combination of pita bread, fresh vegetables, pickled turnips, and a generous dollop of hummus. It’s the perfect balance of flavors and textures, and it’s always a crowd-pleaser. The shawarma with garlic sauce is the best part!

And there you have it—my ultimate Chicken Shawarma with Garlic Sauce recipe! I hope you love it as much as I do. If you make this recipe, be sure to snap a photo and tag me on social media. I can’t wait to see your creations! It s my favorite thing to see! Thank you so much for joining me in my kitchen today. Until next time, happy cooking!

Chicken Shawarma with Garlic Sauce Recipe (Easy & Delicious)

Prep Time 35 minutes
Cook Time 15 minutes
Total Time 50 minutes
Servings 4 people
Calories 450
Enjoy flavorful homemade Chicken Shawarma with a creamy garlic sauce. This recipe is easy to make and perfect for a delicious meal.

Ingredients

Chicken Shawarma

  • 1.5 lbs boneless chicken thighs or breasts (cut into strips)
  • 2 tablespoons olive oil
  • 2 teaspoons ground cumin
  • 1 teaspoon ground paprika
  • 1 teaspoon ground turmeric
  • 1 teaspoon ground coriander
  • 1 teaspoon ground cinnamon
  • 2 cloves garlic (minced)
  • 1 tablespoon lemon juice
  • to taste Salt and black pepper

Garlic Sauce

  • 1 cup mayonnaise
  • 2 tablespoons minced garlic
  • 1 tablespoon lemon juice
  • to taste Salt

Instructions 

  • Combine olive oil, cumin, paprika, turmeric, coriander, cinnamon, minced garlic, lemon juice, salt, and pepper. Add chicken and marinate for at least 30 minutes.
  • Preheat grill or non-stick pan over medium-high heat.
  • Cook chicken for 5-7 minutes on each side, until golden brown and cooked through (165°F/75°C).
  • Whisk together mayo, minced garlic, lemon juice, and salt for the garlic sauce. Adjust to taste.
  • Rest chicken, then slice. Serve in pita bread or on a plate with garlic sauce and vegetables.

Notes

Marinating the chicken overnight will result in a more flavorful dish.
Calories: 450kcal
Cost: $18
Course: Main Course
Cuisine: Middle Eastern
Keyword: Chicken
pin

Hey there, friend! Ava here, ready to spill the beans on a topic that’s been close to my heart (and, let’s be honest, a source of frustration) for years: weight loss and hormone balance. If you’re anything like me, you’ve probably tried countless diets, sweated through endless workouts, and still felt like something was holding you back. Well, guess what? It might be your hormones.

I remember one particularly disastrous attempt at a juice cleanse. I was convinced it would be the magic bullet, but all it did was leave me hangry, exhausted, and utterly defeated. It wasn’t until I started digging into the science of hormones that I realized I was fighting a battle with one hand tied behind my back. So, let’s dive into Twad7, a weight loss approach that actually addresses those pesky hormone imbalances for effective and sustainable results. Trust me, this isn’t just another fad diet; it’s a lifestyle shift that can change everything.

Why You’ll Love This

Okay, so why am I so excited about Twad7? Because it’s not about deprivation or unrealistic expectations. It’s about nourishing your body, understanding your hormones, and making choices that support your overall well-being. Here’s why you’ll fall in love with this approach:

  • Holistic Approach: It addresses the root causes of weight gain, not just the symptoms.
  • Sustainable: No extreme dieting or crazy restrictions. This is about building healthy habits that last.
  • Customizable: Tailored to your individual needs and hormone profile.
  • Delicious: Who says healthy eating can’t be enjoyable? I’m all about flavor and satisfaction.
  • Empowering: You’ll gain a deeper understanding of your body and how it works.

Ingredients for a Hormone-Balancing Smoothie

To kickstart your Twad7 journey, I want to share a simple, delicious smoothie recipe that’s packed with hormone-balancing goodness. This smoothie is quick to make and perfect for breakfast or a post-workout snack.

  • 1 cup mixed berries (antioxidants)
  • 1/2 cup plain Greek yogurt (protein, probiotics)
  • 1 tbsp chia seeds (fiber, omega-3s)
  • 1/4 avocado (healthy fats)
  • 1/2 cup spinach (nutrients)
  • 1/2 cup unsweetened almond milk
  • Optional: Stevia or monk fruit to taste
Recipe Image

Pro Tips for Hormone Harmony

Balancing your hormones isn’t just about what you eat; it’s about how you live. Here are a few pro tips to help you on your journey:

  • Prioritize Sleep: Aim for 7-8 hours of quality sleep each night. Sleep deprivation can wreak havoc on your hormones.
  • Manage Stress: Chronic stress can lead to elevated cortisol levels, which can contribute to weight gain. Try meditation, yoga, or spending time in nature.
  • Stay Hydrated: Drink plenty of water throughout the day. Water helps regulate many bodily functions, including hormone production.
  • Limit Processed Foods: These foods are often loaded with sugar, unhealthy fats, and artificial additives that can disrupt hormone balance.
  • Embrace Healthy Fats: Healthy fats, like those found in avocados, nuts, and olive oil, are essential for hormone production.
  • Incorporate Strength Training: Building muscle can help improve insulin sensitivity and boost metabolism.

Common Mistakes to Avoid

We all make mistakes, especially when trying something new. Here are a few common pitfalls to watch out for:

  • Following Fad Diets: These diets are often unsustainable and can actually do more harm than good in the long run.
  • Ignoring Your Body’s Signals: Pay attention to how different foods and activities make you feel. Your body knows best.
  • Being Too Restrictive: Depriving yourself of your favorite foods can lead to cravings and binge eating.
  • Not Seeking Professional Help: If you suspect you have a hormone imbalance, consult with a doctor or endocrinologist.
  • Neglecting Gut Health: Your gut plays a crucial role in hormone regulation. Focus on eating a diet rich in fiber and probiotics.

Variations to Spice Things Up

Want to add a little excitement to your hormone-balancing routine? Here are a few variations to try:

  • Tropical Twist: Add a handful of mango or pineapple to your smoothie for a taste of the tropics.
  • Chocolate Delight: Mix in a tablespoon of unsweetened cocoa powder for a chocolatey treat.
  • Nutty Goodness: Add a tablespoon of almond butter or peanut butter for extra protein and healthy fats.
  • Spice It Up: A pinch of cinnamon or ginger can add warmth and flavor to your smoothie.
  • Green Power: Experiment with different leafy greens, like kale or collard greens, for an extra boost of nutrients.

Storage Tips for Smoothie Success

Smoothies are best enjoyed fresh, but if you need to store them, here are a few tips:

  • Refrigerate Immediately: Store your smoothie in an airtight container in the refrigerator as soon as possible.
  • Consume Within 24 Hours: Smoothies are best consumed within 24 hours to maintain their freshness and nutritional value.
  • Freeze for Later: Pour your smoothie into ice cube trays and freeze for later use. You can then blend the frozen cubes with a little almond milk for a quick and easy smoothie.
  • Prevent Separation: If your smoothie separates, simply shake or stir it before drinking.

Frequently Asked Questions (FAQ)

Got questions? I’ve got answers! Here are some frequently asked questions about hormone balance and weight loss:

  • What are the signs of hormone imbalance? Common symptoms include weight gain, fatigue, mood swings, irregular periods, and sleep disturbances.
  • Can diet really affect my hormones? Absolutely! What you eat can have a significant impact on your hormone levels.
  • How long does it take to balance hormones? It varies from person to person, but it typically takes several weeks or months to see noticeable improvements.
  • Is exercise important for hormone balance? Yes! Regular exercise can help improve insulin sensitivity and boost metabolism.
  • Should I consult a doctor about hormone imbalance? If you suspect you have a hormone imbalance, it’s always a good idea to consult with a doctor or endocrinologist.

Serving Suggestions for Maximum Enjoyment

Ready to enjoy your hormone-balancing smoothie? Here are a few serving suggestions:

  • Breakfast Boost: Start your day with this smoothie for a nutritious and energizing breakfast.
  • Post-Workout Recovery: Enjoy this smoothie after a workout to replenish your energy stores and support muscle recovery.
  • Mid-Afternoon Snack: Beat the afternoon slump with this smoothie for a healthy and satisfying snack.
  • Dessert Alternative: Satisfy your sweet tooth with this smoothie as a guilt-free dessert.
  • Meal Replacement: On busy days, this smoothie can serve as a quick and easy meal replacement.

Understanding Hormonal Imbalances and Weight Loss

Let’s delve deeper into the connection between hormonal imbalances and weight loss. It’s crucial to understand how hormones influence your body’s ability to shed those extra pounds. **Weight loss** can often feel like an uphill battle, especially when **hormonal imbalances** are at play.

For **many women**, **weight gain** and difficulty losing **her weight** are directly linked to hormonal fluctuations. These fluctuations can stem from various factors, including stress, poor diet, lack of **and exercise**, or underlying medical conditions. Understanding the role of key hormones is **the key** to unlocking sustainable **weight management**.

Insulin Resistance: A Major Culprit

**Insulin resistance** is a common condition where your cells become less responsive to insulin, a hormone that regulates **blood sugar**. When this happens, your pancreas produces more insulin to compensate, leading to elevated **insulin levels**. High **insulin levels were** found **due to** this resistance can promote **fat storage**, particularly around the abdomen. This not only contributes to **weight gain** but also increases the risk of developing type 2 diabetes.

Improving **insulin resistance** through diet **and exercise** is **the most** effective strategies for **weight loss**. Focus on consuming whole, unprocessed foods, limiting sugary drinks and refined carbohydrates, and engaging in regular physical activity. This combination can help improve your body’s sensitivity to insulin and promote healthy **weight management**.

Estrogen Dominance and Its Effects

**Estrogen dominance** occurs when there is an imbalance between estrogen and progesterone levels in the body. This imbalance can lead to various symptoms, including **weight gain**, bloating, mood swings, and irregular periods. **Estrogen dominance** can also increase **fat storage**, particularly in the hips and thighs.

Addressing **estrogen dominance** often involves dietary changes, such as increasing fiber intake and consuming cruciferous vegetables like broccoli and cauliflower. These vegetables contain compounds that help detoxify excess estrogen from **your body**. Additionally, reducing exposure to environmental toxins, such as pesticides and plastics, can help minimize the burden on your hormonal system.

Thyroid Dysfunction: A Silent Saboteur

The thyroid gland plays a crucial role in regulating metabolism. **Thyroid dysfunction**, such as hypothyroidism (underactive thyroid), can slow down metabolism, leading to **weight gain** and fatigue. If you suspect you have a thyroid issue, it’s essential to get your thyroid hormone **levels were** checked by a doctor.

Managing **thyroid dysfunction** typically involves medication to replace the missing thyroid hormone. Additionally, certain nutrients, such as selenium and iodine, are essential for thyroid function. Consult with your doctor or a registered dietitian to determine the best course of action for managing your thyroid health.

The Importance of Personalized Approach

It’s crucial to remember that everyone’s body is different, and what works for one person may not work for another. **Your individual** needs and hormone profile should guide your **weight loss** strategy. Working with a healthcare professional, such as a doctor or registered dietitian, can help you identify any underlying hormonal imbalances and develop a personalized plan to address them.

Understanding your body’s unique needs is **the foundation** for sustainable **weight loss**. Don’t be afraid to experiment with different dietary approaches and lifestyle changes to find what works best for you. Remember, consistency and patience are **the key** to achieving long-term success.

The Role of Diet and Exercise in Hormone Balance

Both **diet and exercise** are essential for maintaining hormone balance and achieving healthy **weight loss**. A balanced diet rich in whole, unprocessed foods provides the nutrients your body needs to produce and regulate hormones effectively. Regular physical activity helps improve insulin sensitivity, boost metabolism, and reduce stress levels.

Focus on incorporating a variety of fruits, vegetables, lean proteins, and healthy fats into your diet. Limit sugary drinks, refined carbohydrates, and processed foods. Aim for at least 150 minutes of moderate-intensity aerobic exercise or 75 minutes of vigorous-intensity aerobic exercise per week, along with strength training exercises at least two days per week.

Practical Steps to Start Balancing Your Hormones Today

Ready to take control of your hormone health and achieve your **weight loss** goals? Here are some practical steps you can start implementing today:

  • Track Your Symptoms: Keep a journal to track any symptoms you’re experiencing, such as fatigue, mood swings, or changes in appetite.
  • Prioritize Sleep: Aim for 7-8 hours of quality sleep each night.
  • Manage Stress: Practice stress-reducing techniques, such as meditation, yoga, or spending time in nature.
  • Eat a Balanced Diet: Focus on consuming whole, unprocessed foods.
  • Exercise Regularly: Incorporate both aerobic exercise and strength training into your routine.
  • Limit Exposure to Toxins: Reduce your exposure to environmental toxins, such as pesticides and plastics.
  • Consult with a Healthcare Professional: If you suspect you have a hormone imbalance, consult with a doctor or endocrinologist.

Remember, balancing your hormones is a journey, not a destination. Be patient with yourself, celebrate your progress, and don’t be afraid to seek support when you need it. With the right knowledge and approach, you can achieve your **weight loss** goals and enjoy a healthier, happier life. And always remember to consult a doctor before making significant changes to your diet or exercise routine. It’s **it s** important to prioritize **your body** and listen to **they re** signals.

Twad7 Lose Weight Hormone Imbalance

Prep Time 5 minutes
Total Time 5 minutes
Servings 1 serving
Calories 350
A delicious and nutritious smoothie designed to support weight loss and hormone balance. Packed with antioxidants, protein, and healthy fats, this smoothie is a great way to start your day or enjoy as a healthy snack.

Ingredients

Ingredients

  • 1 cup mixed berries (antioxidants)
  • 0.5 cup plain Greek yogurt (protein, probiotics)
  • 1 tbsp chia seeds (fiber, omega-3s)
  • 0.25 avocado avocado (healthy fats)
  • 0.5 cup spinach (nutrients)
  • 0.5 cup unsweetened almond milk
  • Stevia or monk fruit (Optional: to taste)

Instructions 

  • Combine all ingredients in a blender.
  • Blend until smooth.
  • Add more almond milk if needed to reach desired consistency.
  • Pour into a glass and enjoy immediately.
  • Consider consulting a doctor about hormone imbalance.

Notes

Adjust sweetness to your preference. For a thicker smoothie, use frozen berries.
Calories: 350kcal
Cost: $5
Course: Breakfast, Snack
Cuisine: Healthy
Keyword: berries
pin

Hey there, friends! Ava here, back from my Seattle kitchen with a dish that’s about to become your weeknight superhero. Forget those complicated recipes with a million steps and a sink full of dishes. This One-Pan Bold Honey BBQ Chicken Rice is all about maximum flavor with minimal effort. Trust me, even on the busiest evenings, you’ve got time to make this magic happen.

I remember one particularly chaotic week when my best friend, Sarah, was juggling work, kids, and a never-ending to-do list. She confessed she was living on takeout and feeling totally drained. I whipped up a batch of this One-Pan Bold Honey BBQ Chicken Rice, and it was like a little ray of sunshine entered her life. Her kids devoured it, she had leftovers for lunch, and the cleanup was a breeze. That’s when I knew I had to share this gem with all of you!

Why You’ll Love This One-Pan Bold Honey BBQ Chicken Rice

Seriously, where do I even begin? This isn’t just another chicken and rice recipe; it’s a flavor explosion in a single pan. Here’s why you’ll be hooked:

  • Effortless Cleanup: One pan means less scrubbing and more time relaxing. Need I say more?
  • Bold Flavors: The combination of honey BBQ sauce, garlic, onion, and smoked paprika creates a symphony of deliciousness.
  • Customizable: Feel free to swap in your favorite veggies or adjust the spice level to your liking.
  • Perfectly Balanced: Chicken, rice, and veggies all in one dish? It’s a complete and satisfying meal.
  • Quick and Easy: From prep to plate, this dish is ready in under an hour, making it perfect for busy weeknights.

This recipe is a testament to the fact that you don’t need complicated ingredients or fancy techniques to create a truly memorable meal. It’s all about using simple ingredients in a way that maximizes flavor and minimizes fuss. So, let’s dive in, shall we?

Ingredients for One-Pan Bold Honey BBQ Chicken Rice

Here’s what you’ll need to create this masterpiece:

  • 1 lb boneless, skinless chicken thighs or breasts: I prefer thighs for their juiciness, but breasts work great too.
  • 1 cup long-grain rice: This type of rice holds its shape well and absorbs the flavors beautifully.
  • 2 cups chicken broth: Adds richness and helps cook the rice to perfection.
  • ½ cup BBQ sauce: Use your favorite brand! I personally love a smoky, slightly sweet variety.
  • ¼ cup honey: Adds a touch of sweetness and helps create that irresistible sticky glaze.
  • 1 cup mixed vegetables (frozen or fresh): Corn, peas, carrots – whatever you have on hand works!
  • 1 tsp garlic powder: Because everything is better with garlic.
  • 1 tsp onion powder: Adds depth and complexity to the flavor profile.
  • ½ tsp smoked paprika: This is my secret weapon! It adds a smoky, savory note that elevates the dish.
  • Salt and pepper to taste: Don’t forget to season generously!
Recipe Image

How to Make One-Pan Bold Honey BBQ Chicken Rice: Step-by-Step

Alright, let’s get cooking! Here’s how to bring this One-Pan Bold Honey BBQ Chicken Rice to life:

  1. Sear the Chicken: In a large skillet over medium heat, sear seasoned chicken for about 5 minutes on each side until browned. This step is crucial for developing a rich, savory crust on the chicken.
  2. Make the Honey BBQ Sauce: Whisk together BBQ sauce and honey in a small bowl; pour over the chicken. Make sure the chicken is nicely coated with the bold honey bbq mixture.
  3. Add Rice and Broth: Add rice and chicken broth to the skillet; stir to combine. Ensure the rice is evenly distributed for even cooking.
  4. Simmer and Cook: Bring to a simmer; cover and cook on low for about 20 minutes until rice is tender. Resist the urge to peek! Keeping the lid on ensures the rice steams properly.
  5. Add Vegetables: During the last 5 minutes of cooking, add mixed vegetables on top to steam. This ensures they’re tender-crisp and not mushy.
  6. Rest and Fluff: Let sit for 5 minutes before fluffing rice with a fork and serving. This allows the rice to absorb any remaining liquid and become perfectly fluffy.

And there you have it! A complete, delicious, and easy meal made in just one pan. The aroma alone is enough to make your mouth water, but the flavor is what will truly win you over.

Pro Tips for the Best One-Pan Bold Honey BBQ Chicken Rice

Want to take your One-Pan Bold Honey BBQ Chicken Rice to the next level? Here are a few of my favorite pro tips:

  • Use a Cast Iron Skillet: If you have one, a cast iron skillet is perfect for this recipe. It distributes heat evenly and creates a beautiful sear on the chicken.
  • Don’t Overcrowd the Pan: Make sure the chicken pieces are not touching each other in the pan. Overcrowding can lead to steaming instead of searing.
  • Toast the Rice: For extra flavor, toast the rice in the pan with a little bit of oil before adding the broth. This adds a nutty, aromatic quality to the dish.
  • Use High-Quality BBQ Sauce: The BBQ sauce is a key ingredient, so choose one that you truly love.
  • Garnish with Fresh Herbs: A sprinkle of chopped parsley or cilantro adds a pop of freshness and color.

These little tweaks can make a big difference in the overall flavor and texture of the dish. Experiment and find what works best for you!

Common Mistakes to Avoid When Making Chicken Rice

Even the simplest recipes can have their pitfalls. Here are a few common mistakes to watch out for when making this One-Pan Bold Honey BBQ Chicken Rice:

  • Not Searing the Chicken Properly: Searing the chicken is essential for developing flavor and texture. Don’t skip this step!
  • Using Too Much Liquid: Too much liquid can result in mushy rice. Stick to the recommended amount of chicken broth.
  • Peeking While Cooking: Resist the urge to lift the lid while the rice is cooking. This releases steam and can affect the cooking time.
  • Overcooking the Chicken: Overcooked chicken can be dry and tough. Use a meat thermometer to ensure it’s cooked to the proper internal temperature (165°F).
  • Not Seasoning Properly: Season generously with salt, pepper, garlic powder, onion powder, and smoked paprika. These seasonings are crucial for adding flavor to the dish.

By avoiding these common mistakes, you’ll be well on your way to creating a perfect One-Pan Bold Honey BBQ Chicken Rice every time. Remember, practice makes perfect, so don’t be discouraged if your first attempt isn’t flawless.

Variations to Spice Up Your One-Pan Bold Honey BBQ Chicken Rice

One of the best things about this recipe is how easily you can customize it to your liking. Here are a few variations to try:

  • Spicy Version: Add a pinch of red pepper flakes or a dash of hot sauce to the BBQ sauce for a spicy kick.
  • Vegetarian Version: Substitute the chicken with tofu or chickpeas for a vegetarian-friendly option.
  • Different Vegetables: Swap in your favorite vegetables, such as broccoli, bell peppers, or zucchini.
  • Different Rice: Experiment with different types of rice, such as brown rice or jasmine rice.
  • Add Cheese: Sprinkle shredded cheese on top during the last few minutes of cooking for a cheesy, gooey delight.

Don’t be afraid to get creative and experiment with different flavors and ingredients. The possibilities are endless!

How to Store and Reheat Leftover One-Pan Bold Honey BBQ Chicken Rice

Got leftovers? Lucky you! Here’s how to store and reheat them properly:

  • Storage: Store leftover One-Pan Bold Honey BBQ Chicken Rice in an airtight container in the refrigerator for up to 3-4 days.
  • Reheating: Reheat in the microwave or in a skillet over medium heat. Add a splash of chicken broth or water to prevent the rice from drying out.

Leftovers are perfect for lunch the next day or for a quick and easy dinner later in the week. They taste just as delicious as the day they were made!

Frequently Asked Questions About Bold Honey BBQ Chicken Rice

Got questions? I’ve got answers! Here are some frequently asked questions about this recipe:

  • Can I use brown rice instead of white rice?: Yes, but keep in mind that brown rice takes longer to cook. You may need to adjust the cooking time and liquid accordingly.
  • Can I use chicken breasts instead of chicken thighs?: Yes, but chicken breasts tend to be drier than chicken thighs. Be sure to cook them to the proper internal temperature (165°F) to avoid overcooking.
  • Can I use frozen vegetables?: Yes, frozen vegetables work great in this recipe. Just add them during the last few minutes of cooking to prevent them from becoming mushy.
  • Can I make this recipe ahead of time?: Yes, you can prepare the chicken and sauce ahead of time and store them in the refrigerator. When you’re ready to cook, simply add the rice and broth and follow the recipe instructions.
  • Is this recipe gluten-free?: Yes, as long as you use a gluten-free BBQ sauce.

Serving Suggestions for One-Pan Bold Honey BBQ Chicken Rice

This One-Pan Bold Honey BBQ Chicken Rice is delicious on its own, but here are a few serving suggestions to make it even more special:

  • Serve with a Side Salad: A simple green salad with a light vinaigrette is a perfect complement to the rich, savory flavors of the dish.
  • Add a Dollop of Sour Cream or Greek Yogurt: This adds a creamy, tangy element that balances the sweetness of the BBQ sauce.
  • Top with Chopped Green Onions: Green onions add a pop of freshness and color.
  • Serve with Cornbread: Cornbread is a classic pairing with BBQ chicken and rice.
  • Add a Side of Coleslaw: Coleslaw adds a crunchy, tangy element that complements the dish perfectly.

And there you have it! My One-Pan Bold Honey BBQ Chicken Rice Recipe is more than just a meal; it’s an experience. It’s a quick supper idea, a yummy cheap dinner, and a simple meal with rice all rolled into one. It’s a way to bring people together, to create memories, and to share a little bit of love through food. So go ahead, give it a try. I promise you won’t be disappointed!

Whether you’re looking for easy but yummy dinners, dinners for a family of 6, quick easy dinners for kids, or good quick dinner ideas, this recipe has you covered. It’s the kind of meal that becomes a regular in your rotation, a go-to when you need something comforting and delicious. So, gather your ingredients, preheat your oven, and let’s make some magic happen!

Happy cooking, friends! And remember, the best recipes are the ones made with love. Enjoy!

One-Pan Bold Honey BBQ Chicken Rice

Prep Time 10 minutes
Cook Time 25 minutes
Total Time 35 minutes
Servings 4 people
Calories 450
This one-pan recipe combines chicken, rice, and vegetables in a flavorful honey BBQ sauce for an easy and delicious meal. Perfect for a weeknight dinner!

Ingredients

Ingredients

  • 1 lb boneless, skinless chicken thighs or breasts
  • 1 cup long-grain rice
  • 2 cups chicken broth
  • 0.5 cup BBQ sauce
  • 0.25 cup honey
  • 1 cup mixed vegetables (frozen or fresh)
  • 1 tsp garlic powder
  • 1 tsp onion powder
  • 0.5 tsp smoked paprika
  • to taste Salt and pepper

Instructions 

  • Sear seasoned chicken in a skillet until browned, about 5 minutes per side.
  • Whisk BBQ sauce and honey; pour over chicken.
  • Add rice and chicken broth; stir to combine.
  • Simmer, cover, and cook on low for 20 minutes until rice is tender.
  • Add mixed vegetables during the last 5 minutes to steam.
  • Let sit for 5 minutes, then fluff rice and serve.

Notes

For extra flavor, marinate the chicken in the BBQ sauce mixture for at least 30 minutes before cooking.
Calories: 450kcal
Cost: $12
Course: dinner
Cuisine: American
Keyword: Chicken
pin

Hey there, friend! Ava here, back from my little Seattle kitchen, and today I’m sharing something that’s become a true weeknight staple: Sheet Pan Garlic Butter Chicken and Veggies. If you’re anything like me, you’re always on the lookout for meals that are easy, delicious, and don’t leave you with a mountain of dishes. This recipe ticks all those boxes and then some. It’s one of those dishes that makes you feel good from the inside out, you know?

I remember the first time I made this. It was a Tuesday, I was running late after a particularly long day at the farmers market, and I needed something quick. I glanced in my fridge and saw chicken breasts, some sad-looking broccoli, and a few potatoes. Inspiration struck, and within an hour, my apartment was filled with the most incredible aroma. The garlic butter chicken and veggies were a hit, and it’s been on repeat ever since.

Why You’ll Love This Sheet Pan Chicken and Veggies

Seriously, what’s not to love? This sheet pan dinner is the ultimate in convenience and flavor. Let me break it down for you:

  • Easy Cleanup: One pan means minimal dishes. Hallelujah!
  • Customizable: Swap out the veggies based on what you have on hand or what’s in season.
  • Flavor Bomb: The garlic butter sauce is seriously addictive. It coats everything in the most delicious, savory goodness.
  • Healthy-ish: It’s packed with protein and veggies, making it a well-rounded meal.
  • Quick: From prep to plate in under an hour. Perfect for busy weeknights.

This is also a great recipe for those who are new to cooking. The steps are straightforward, and there’s plenty of room for improvisation. Plus, the combination of tender chicken and perfectly roasted veggies is always a crowd-pleaser. It’s a comfort food classic with a healthy twist!

Sheet Pan Garlic Butter Chicken and Veggies: The Ingredients

Here’s what you’ll need to whip up this magical sheet pan creation:

  • 2 boneless skinless chicken breasts (or thighs)
  • 1 tbsp olive oil
  • 1 tsp garlic powder
  • 1 tsp paprika
  • ½ tsp salt
  • ½ tsp black pepper
  • 4 tbsp butter melted
  • 3 cloves garlic minced
  • 1 tbsp lemon juice
  • 1 tsp Italian seasoning
  • 1 lb baby potatoes halved
  • 1 ½ cups broccoli florets
  • 1 bunch asparagus trimmed
  • 1 tbsp olive oil
  • ½ tsp salt
  • ½ tsp black pepper
Recipe Image

How To Make Sheet Pan Garlic Butter Chicken and Veggies: Step-by-Step

Alright, let’s get cooking! Here’s how to bring this sheet pan wonder to life:

  1. Prep Time: Preheat your oven to 400°F (200°C) and line a large sheet pan with parchment paper. This makes cleanup a breeze!
  2. Season the Chicken: Pat the chicken dry with paper towels (this helps it get nice and golden). Season both sides with garlic powder, paprika, salt, and pepper. Don’t be shy with the seasoning – it’s what gives the chicken its flavor.
  3. Make the Garlic Butter Sauce: In a small bowl, melt the butter (I usually do this in the microwave). Stir in the minced garlic, lemon juice, and Italian seasoning. This garlic butter sauce is liquid gold, trust me.
  4. Roast the Potatoes: Spread the halved baby potatoes on the prepared sheet pan. Drizzle with olive oil, salt, and pepper. Roast for 15 minutes. This gives the potatoes a head start since they take longer to cook than the chicken and veggies.
  5. Add Chicken and Veggies: After 15 minutes, add the seasoned chicken breasts to the pan, nestling them among the potatoes. Toss the broccoli florets and trimmed asparagus with about half of the garlic butter sauce, then arrange them around the chicken.
  6. Roast to Perfection: Roast for 20-25 minutes, or until the chicken reaches an internal temperature of 165°F (75°C). Use a meat thermometer to ensure it’s cooked through.
  7. Garlic Butter Finish: In the last 5 minutes of cooking, drizzle the remaining garlic butter sauce over everything. This adds an extra layer of flavor and helps everything get nice and golden.
  8. Optional Broil: For a golden, crispy finish, broil for 2-3 minutes, keeping a close eye to prevent burning.
  9. Serve and Enjoy: Let the sheet pan garlic butter chicken and veggies rest for a few minutes before serving. This allows the juices to redistribute, resulting in more tender and flavorful chicken.

Pro Tips for the Best Sheet Pan Garlic Butter Chicken

Want to take your sheet pan game to the next level? Here are a few of my favorite pro tips:

  • Don’t Overcrowd the Pan: Make sure everything is spread out in a single layer. Overcrowding will cause the veggies to steam instead of roast, resulting in soggy vegetables.
  • Use a Meat Thermometer: The best way to ensure your chicken is cooked perfectly is to use a meat thermometer. Insert it into the thickest part of the chicken breast – it should read 165°F (75°C).
  • Dry the Chicken: Patting the chicken dry before seasoning helps it get a nice, golden crust.
  • Pre-cook Potatoes: Giving the potatoes a head start ensures they’re tender and perfectly roasted by the time the chicken is done.
  • Don’t Skip the Lemon Juice: The lemon juice in the garlic butter sauce adds a bright, tangy flavor that balances the richness of the butter.

Common Mistakes to Avoid

We’ve all been there – a recipe gone wrong. Here are a few common mistakes to avoid when making sheet pan garlic butter chicken and veggies:

  • Overcooking the Chicken: Dry, overcooked chicken is a major bummer. Use a meat thermometer and pull it out of the oven as soon as it reaches 165°F (75°C).
  • Under-Seasoning: Don’t be afraid to season generously. The chicken and veggies need plenty of salt, pepper, and garlic powder to bring out their flavors.
  • Not Using Parchment Paper: Trust me, lining your sheet pan with parchment paper is a game-changer. It prevents sticking and makes cleanup a breeze.
  • Adding Veggies That Cook at Different Rates: If you’re using veggies other than potatoes, broccoli, and asparagus, make sure they all have similar cooking times. Otherwise, some might be overcooked while others are undercooked.

Variations and Substitutions

One of the best things about this recipe is how easy it is to customize. Here are a few variations and substitutions to try:

  • Chicken Thighs: Swap out the chicken breasts for boneless, skinless chicken thighs. They’re more forgiving and stay juicy even if you accidentally overcook them a bit.
  • Different Veggies: Get creative with your veggies! Bell peppers, zucchini, Brussels sprouts, and carrots all work well in this recipe.
  • Spicy Kick: Add a pinch of red pepper flakes to the garlic butter sauce for a little heat.
  • Herbs: Experiment with different herbs. Fresh rosemary, thyme, or oregano would be delicious in the garlic butter sauce.
  • Cheese: Sprinkle some grated Parmesan cheese over the chicken and veggies during the last few minutes of cooking for a cheesy, savory finish.

Consider adding some cherry tomatoes for burst of sweetness or some sliced onions for an extra layer of flavor. You can even add a splash of white wine to the garlic butter sauce for a more complex taste.

How to Store and Reheat Leftovers

If you happen to have leftovers (which is rare in my house!), here’s how to store and reheat them:

  • Storage: Let the chicken and veggies cool completely, then store them in an airtight container in the refrigerator for up to 3-4 days.
  • Reheating: You can reheat the leftovers in the microwave, but they’ll be best if you reheat them in the oven. Spread the chicken and veggies on a sheet pan and bake at 350°F (175°C) until heated through.

Frequently Asked Questions (FAQ)

Got questions? I’ve got answers! Here are some frequently asked questions about this sheet pan garlic butter chicken and veggies recipe:

  • Can I use frozen vegetables? Yes, you can, but keep in mind that they might release more moisture during cooking. Make sure to pat them dry before adding them to the sheet pan.
  • Can I make this ahead of time? You can prep the ingredients ahead of time by chopping the veggies and making the garlic butter sauce. Store them separately in the refrigerator and assemble the sheet pan just before cooking.
  • Can I use bone-in chicken? Yes, but you’ll need to adjust the cooking time accordingly. Bone-in chicken takes longer to cook than boneless chicken.
  • Can I add other seasonings? Absolutely! Feel free to experiment with different seasonings to create your own unique flavor profile.
  • Is this recipe gluten-free? Yes, this recipe is naturally gluten-free.

Serving Suggestions

This sheet pan garlic butter chicken and veggies is a complete meal on its own, but here are a few serving suggestions to elevate it even further:

  • Rice or Quinoa: Serve it over a bed of fluffy rice or quinoa to soak up all that delicious garlic butter sauce.
  • Crusty Bread: Serve it with a side of crusty bread for dipping into the sauce.
  • Salad: Pair it with a simple green salad for a light and refreshing side.
  • Mashed Potatoes: For the ultimate comfort food experience, serve it with a side of creamy mashed potatoes.

And there you have it – my go-to Sheet Pan Garlic Butter Chicken and Veggies recipe. I hope you love it as much as I do! Remember, cooking should be fun and stress-free, so don’t be afraid to experiment and make it your own. Happy cooking!

This recipe really is a powerhouse. The garlic butter, when combined with the chicken and veggies, creates a symphony of flavors that’s hard to resist. It’s also incredibly versatile. You can easily adapt the recipe to suit your dietary needs and preferences. For example, if you’re following a low-carb diet, you can swap out the potatoes for cauliflower or zucchini.

Whether you’re cooking for one or for a crowd, this sheet pan garlic butter chicken and veggies is sure to be a hit. And the best part? It’s so easy to make! Just toss everything on a sheet pan, pop it in the oven, and let the magic happen. The result is a flavorful, satisfying meal that’s perfect for any occasion. It’s a great alternative to butter chicken, offering a lighter, healthier option without sacrificing flavor.

So next time you’re looking for a quick and easy dinner idea, give this recipe a try. I promise you won’t be disappointed. And who knows, it might just become your new weeknight staple too!

This sheet pan garlic butter chicken and veggies recipe is a testament to the fact that simple ingredients, when combined with a little love and creativity, can create something truly special. It’s a reminder that cooking doesn’t have to be complicated or time-consuming to be delicious. And it’s a celebration of the joy of sharing good food with the people you love. It’s one of the easy late dinner ideas I often turn to.

So go ahead, gather your ingredients, and get ready to create a meal that will warm your heart and nourish your soul. And remember, cooking is more than just following a recipe – it’s about creating memories, sharing experiences, and making every meal a little bit magical. Because in the end, that’s what really matters.

Happy cooking, friends! And as always, feel free to reach out if you have any questions or just want to share your culinary adventures. I love hearing from you!

Sheet Pan Garlic Butter Chicken and Veggies

Prep Time 15 minutes
Cook Time 25 minutes
Total Time 40 minutes
Servings 4 servings
Calories 450
This easy sheet pan dinner features juicy chicken and tender vegetables roasted in a flavorful garlic butter sauce. It's a quick and healthy meal perfect for busy weeknights.

Ingredients

Chicken

  • 2 boneless skinless chicken breasts (or thighs)
  • 1 tbsp olive oil
  • 1 tsp garlic powder
  • 1 tsp paprika
  • ½ tsp salt
  • ½ tsp black pepper

Garlic Butter Sauce

  • 4 tbsp butter melted
  • 3 cloves garlic minced
  • 1 tbsp lemon juice
  • 1 tsp Italian seasoning

Veggies

  • 1 lb baby potatoes halved
  • 1.5 cups broccoli florets
  • 1 bunch asparagus trimmed
  • 1 tbsp olive oil
  • ½ tsp salt
  • ½ tsp black pepper

Instructions 

  • Preheat oven to 400°F (200°C). Season chicken with garlic powder, paprika, salt, and pepper.
  • Melt butter, stir in garlic, lemon juice, and Italian seasoning.
  • Roast potatoes with olive oil, salt, and pepper for 15 minutes. Add chicken, broccoli, and asparagus tossed with half the garlic butter sauce.
  • Roast for 20-25 minutes or until chicken reaches 165°F (75°C). Drizzle remaining garlic butter sauce over everything. Broil for 2-3 minutes (optional).
  • Serve & Enjoy.

Notes

For extra flavor, marinate the chicken in the garlic butter sauce for at least 30 minutes before cooking.
Calories: 450kcal
Cost: $18
Course: Main Course
Cuisine: American
Keyword: Chicken
pin

My name’s Ava, and if you’ve stumbled upon my kitchen, you’re probably here for one thing—the kind of recipes that make people pause mid-bite and say, ‘Wow.’ Today, we’re diving headfirst into a dish that does just that: a Creamy Keto Philly Cheesesteak Skillet. This isn’t just any low carb dinner; it’s a flavor explosion that’s ready in minutes. Think tender, thinly sliced steak, sautéed peppers and onions, all swimming in a luscious, creamy, cheesy sauce. And the best part? It’s keto-friendly, so you can indulge without the guilt.

Growing up in Oregon, comfort food was a staple. Now, living in Seattle, I’ve taken that love and given it a low-carb twist. This creamy keto Philly cheesesteak skillet is a perfect example. It brings together the classic flavors of a Philly cheesesteak without all the carbs. Trust me, this recipe is a game-changer for busy weeknights or when you just need a little something special.

Why You’ll Love This Creamy Keto Philly Cheesesteak Skillet

Let’s be real, who doesn’t love a good Philly cheesesteak? But the traditional version isn’t exactly diet-friendly. That’s where this recipe comes in. It delivers all the flavor you crave, but with a fraction of the carbs. Here’s why I think you’ll absolutely adore this dish:

  • Quick and Easy: From start to finish, this creamy keto Philly cheesesteak skillet is ready in under 30 minutes. Perfect for those nights when you need a delicious meal on the table fast.
  • Incredibly Flavorful: The combination of tender steak, sweet peppers and onions, and a creamy, cheesy sauce is simply irresistible. Each bite is a burst of flavor.
  • Keto-Friendly: This recipe is low in carbs and high in healthy fats, making it a great option for anyone following a ketogenic diet. It’s a fantastic low carb dinner option.
  • Versatile: You can easily customize this dish to suit your taste preferences. Add different veggies, cheeses, or spices to make it your own. This skillet is a blank canvas for flavor!
  • Comfort Food at Its Best: This creamy keto Philly cheesesteak skillet feels like a warm hug in a bowl. It’s the kind of meal that makes you feel good from the inside out.

Creamy Keto Philly Cheesesteak Skillet Ingredients

Before we get started, let’s gather our ingredients. The beauty of this recipe is that it uses simple, readily available ingredients. Here’s what you’ll need:

  • 1 lb (450 g) thinly sliced ribeye steak or sirloin
  • 1 medium green bell pepper, thinly sliced
  • 1 medium yellow onion, thinly sliced
  • 2 cloves garlic, minced
  • 2 tbsp olive oil or avocado oil
  • 4 oz (115 g) cream cheese, softened
  • ¼ cup (60 ml) heavy cream
  • 1 cup (100 g) shredded provolone cheese
  • Salt and freshly ground black pepper to taste
  • ½ tsp smoked paprika (optional)
  • Fresh parsley, chopped (optional garnish)
  • Red pepper flakes (optional garnish)
Recipe Image

How to Make Creamy Keto Philly Cheesesteak Skillet: Step-by-Step

Alright, let’s get cooking! Here’s how to make this creamy keto Philly cheesesteak skillet, step by simple step:

  1. Prep the Ingredients: Thinly slice the ribeye steak against the grain. Slice the bell pepper and onion into thin strips. Mince the garlic and set aside.
  2. Sauté the Veggies: Heat 1 tablespoon of oil in a skillet over medium heat. Add sliced peppers and onions and cook, stirring occasionally, until softened and slightly caramelized, about 7-8 minutes. Add minced garlic in the last minute, stirring to avoid burning. Season with salt and pepper. Transfer veggies to a plate.
  3. Cook the Steak: Add remaining 1 tablespoon of oil to the skillet and increase heat to medium-high. Add steak slices in a single layer. Let sear undisturbed for 2 minutes, then stir and cook until browned but still juicy, about 3-4 more minutes. Avoid overcrowding.
  4. Make the Creamy Sauce: Lower heat to medium-low. Push steak to one side of skillet. Add cream cheese and heavy cream to the empty side. Stir gently until cream cheese melts into a smooth sauce. Gradually stir in shredded provolone cheese, allowing it to melt. Season with smoked paprika, salt, and pepper.
  5. Combine and Finish: Mix sautéed veggies back into the skillet and fold everything together gently. Cook for another 1-2 minutes to marry flavors.
  6. Garnish and Serve: Garnish with fresh parsley and red pepper flakes if desired. Serve immediately.

Pro Tips for the Best Creamy Keto Philly Cheesesteak Skillet

Want to take your cheesesteak skillet to the next level? Here are a few pro tips I’ve learned along the way:

  • Use High-Quality Steak: The better the steak, the better the flavor. I recommend ribeye or sirloin for their tenderness and flavor.
  • Don’t Overcrowd the Skillet: Cook the steak in batches if necessary to avoid overcrowding. This will ensure it sears properly and doesn’t steam.
  • Soften the Cream Cheese: Make sure your cream cheese is softened before adding it to the skillet. This will help it melt smoothly and evenly.
  • Adjust the Seasoning: Taste as you go and adjust the seasoning to your liking. Don’t be afraid to add a little extra salt, pepper, or smoked paprika.
  • Serve Immediately: This dish is best served hot and fresh. The longer it sits, the more the sauce will thicken.

Common Mistakes to Avoid

Even the best cooks make mistakes. Here are a few common pitfalls to avoid when making this creamy keto Philly cheesesteak skillet:

  • Overcooking the Steak: Overcooked steak is tough and dry. Aim for medium-rare to medium for the best texture.
  • Burning the Garlic: Garlic burns easily, so add it in the last minute of sautéing the veggies.
  • Using Cold Cream Cheese: Cold cream cheese won’t melt properly and will leave you with a lumpy sauce.
  • Overcrowding the Skillet: Overcrowding the skillet will cause the steak to steam instead of sear.
  • Not Seasoning Enough: Seasoning is key to bringing out the flavors of this dish. Don’t be afraid to be generous with the salt, pepper, and smoked paprika.

Variations to Try

One of the best things about this recipe is how easy it is to customize. Here are a few variations to try:

  • Add Different Veggies: Try adding mushrooms, jalapenos, or banana peppers for extra flavor and spice.
  • Use Different Cheeses: Provolone is classic, but you can also use mozzarella, cheddar, or even a blend of cheeses.
  • Spice It Up: Add a pinch of red pepper flakes or a dash of hot sauce for a little extra heat.
  • Make It Dairy-Free: Use dairy-free cream cheese and shredded cheese to make this recipe dairy-free.
  • Add a Keto-Friendly Bun: Serve the cheesesteak filling in a keto-friendly bun for a more traditional Philly cheesesteak experience.

How to Store and Reheat

If you have leftovers (which is rare!), here’s how to store and reheat them:

  • Storage: Store the leftover creamy keto Philly cheesesteak skillet in an airtight container in the refrigerator for up to 3 days.
  • Reheating: Reheat the skillet in a skillet over medium heat, stirring occasionally, until heated through. You can also reheat it in the microwave, but the texture may be slightly different.

Frequently Asked Questions (FAQ)

Here are some common questions about this creamy keto Philly cheesesteak skillet:

  • Can I use a different type of steak?: Yes, you can use any tender cut of steak, such as sirloin, flank steak, or even skirt steak.
  • Can I make this ahead of time?: While this dish is best served fresh, you can prep the ingredients ahead of time. Slice the steak and veggies, and store them in separate containers in the refrigerator until ready to cook.
  • Can I freeze this?: I don’t recommend freezing this dish, as the sauce may separate and the texture may change.
  • Is this recipe really keto-friendly?: Yes, this recipe is low in carbs and high in healthy fats, making it a great option for anyone following a ketogenic diet.
  • Can I add more vegetables?: Absolutely! Feel free to add any low-carb vegetables you like, such as mushrooms, spinach, or zucchini.

Serving Suggestions

This creamy keto Philly cheesesteak skillet is delicious on its own, but here are a few serving suggestions to make it a complete meal:

  • Serve with a side salad: A simple green salad with a vinaigrette dressing is a great way to add some extra veggies to your meal.
  • Serve with cauliflower rice: Cauliflower rice is a low-carb alternative to regular rice and pairs perfectly with this dish.
  • Serve in lettuce wraps: For a truly low-carb meal, serve the cheesesteak filling in lettuce wraps.
  • Top with avocado: Sliced avocado adds a creamy, healthy fat to this dish.
  • Serve with a side of roasted vegetables: Roasted broccoli, Brussels sprouts, or asparagus are all great options.

There you have it – my Creamy Keto Philly Cheesesteak Skillet recipe! I hope you enjoy making and eating this as much as I do. This dish, with its creamy, cheesy goodness and perfectly cooked steak, is guaranteed to become a family favorite. Remember, cooking should be fun and experimental. Don’t be afraid to tweak this recipe to make it your own. And most importantly, enjoy the process and the delicious results!

If you liked this recipe, you might also enjoy my easy-steak-fajitas or my best-skillet-steak-fajitas-recipe-easy-delicious. Happy cooking!

Creamy Keto Philly Cheesesteak Skillet

Prep Time 15 minutes
Cook Time 20 minutes
Total Time 35 minutes
Servings 4 servings
Calories 450
Enjoy a delicious and easy low-carb dinner with this Creamy Keto Philly Cheesesteak Skillet recipe. It's a quick and satisfying meal perfect for any night of the week.

Ingredients

Ingredients

  • 1 lb thinly sliced ribeye steak or sirloin
  • 1 medium green bell pepper (thinly sliced)
  • 1 medium yellow onion (thinly sliced)
  • 2 cloves garlic (minced)
  • 2 tbsp olive oil or avocado oil
  • 4 oz cream cheese (softened)
  • 0.25 cup heavy cream
  • 1 cup shredded provolone cheese
  • Salt and freshly ground black pepper (to taste)
  • 0.5 tsp smoked paprika (optional)
  • Fresh parsley (chopped (optional garnish))
  • Red pepper flakes (optional garnish)

Instructions 

  • Thinly slice steak, bell pepper, and onion. Mince garlic.
  • Sauté peppers and onions in oil until softened. Add garlic, salt, and pepper. Transfer to a plate.
  • Sear steak in oil until browned but juicy. Avoid overcrowding.
  • Lower heat. Add cream cheese and heavy cream to skillet. Stir until smooth. Stir in provolone cheese, smoked paprika, salt, and pepper.
  • Mix sautéed veggies back into the skillet. Cook for 1-2 minutes.
  • Garnish with parsley and red pepper flakes if desired. Serve immediately.

Notes

For best results, use high-quality ribeye steak and fresh ingredients.
Calories: 450kcal
Cost: $20
Course: dinner
Cuisine: American
Keyword: Steak
pin

One-Pot Creamy Spicy Garlic Butter Steak & Pasta: A Weeknight Wonder

Hey there, kitchen adventurers! Ava here, ready to whisk you away to a land of flavor where dinner is quick, easy, and utterly delicious. If you’re anything like me, you appreciate a meal that doesn’t require a ton of dishes or hours slaving away in the kitchen. That’s where this One-Pot Creamy Spicy Garlic Butter Steak & Pasta comes in. Picture this: tender steak, perfectly cooked pasta, and a creamy, spicy garlic butter sauce that’s so good, you’ll want to lick the plate clean. Yes, really. This is one of those recipes that feels like a warm hug on a chilly evening.

Growing up, my mom always had a knack for turning simple ingredients into something extraordinary. This recipe is my homage to her—a celebration of simple flavors that come together to create something truly special. It’s the kind of dish that makes weeknights feel a little less hectic and a lot more cozy. Plus, it’s a guaranteed crowd-pleaser, whether you’re cooking for your family, impressing a date, or just treating yourself to a little bit of comfort.

Why You’ll Absolutely Love This One-Pot Steak & Pasta

Seriously, what’s not to love? This one-pot wonder is more than just a meal; it’s an experience. Here’s why it’s about to become your new go-to:

  • One-Pot Magic: Fewer dishes mean less cleanup. Who doesn’t love that?
  • Flavor Explosion: The combination of garlic butter, red pepper flakes, and parmesan cheese creates a symphony of flavors that dance on your taste buds.
  • Quick & Easy: From start to finish, this dish is ready in under 30 minutes. Perfect for those busy weeknights!
  • Customizable: Feel free to swap out the steak for chicken or shrimp, or add your favorite veggies. This recipe is your canvas!
  • Comfort Food at Its Finest: This creamy, spicy, and oh-so-satisfying pasta is the ultimate comfort food.

This creamy dish has become a favorite in my household. I’ve made it countless times, and each time, it’s a hit. I especially love how versatile it is. Sometimes I’ll add mushrooms or spinach for a little extra nutrition, or swap out the parmesan for pecorino romano for a sharper flavor. The possibilities are endless!

The Ingredients You’ll Need

Let’s gather our ingredients! Here’s what you’ll need to create this masterpiece:

  • ‘1 lb steak (sirloin or ribeye), cut into bite-sized pieces’
  • ‘2 tablespoons butter (divided)’
  • ‘4 cloves garlic, minced’
  • ‘1/2 teaspoon crushed red pepper flakes (adjust to taste)’
  • ‘1 cup heavy cream’
  • ‘1/2 cup grated parmesan cheese’
  • ‘8 oz rotini pasta (or any short pasta)’
  • ‘2.5–3 cups water or broth’
  • ‘Salt and black pepper, to taste’
  • ‘Chopped parsley, for garnish (optional)’
Recipe Image

Step-by-Step: Making Your One-Pot Creamy Spicy Garlic Butter Steak & Pasta

Alright, let’s get cooking! Here’s how to bring this delicious dish to life:

  1. Sear the Steak: Heat 1 tablespoon of butter in a large skillet over medium-high heat. Add steak pieces, season with salt and pepper, and sear for 2–3 minutes per side until browned. Remove and set aside. The goal is to get a nice crust on the steak while keeping it tender.
  2. Sauté the Garlic & Red Pepper Flakes: In the same skillet, add the remaining tablespoon of butter. Stir in garlic and red pepper flakes, cooking for 1–2 minutes until fragrant. Be careful not to burn the garlic! You want it to be golden and aromatic.
  3. Create the Creamy Sauce: Pour in the heavy cream and stir to combine. Simmer for 3–4 minutes, allowing the sauce to thicken slightly. This is where the magic happens!
  4. Add the Parmesan: Stir in the parmesan until melted into the sauce. This will make the sauce even creamier and richer.
  5. Cook the Pasta: Add the uncooked pasta and water or broth. Bring to a boil, then reduce heat and cover. Simmer for 10–12 minutes, stirring occasionally. Make sure to stir the pasta to prevent it from sticking to the bottom of the skillet.
  6. Combine Everything: Once the pasta is al dente and the sauce has thickened, return the steak (and its juices) to the skillet. Stir to coat everything in the sauce.
  7. Season & Garnish: Taste and adjust seasoning. Garnish with parsley and more parmesan if desired.
  8. Serve & Enjoy: Serve hot and enjoy immediately.

When I first made this, I was amazed at how quickly it came together. The aroma of the garlic butter sauce filled my kitchen, and I knew I was onto something special. The final result was even better than I imagined—the steak was tender, the pasta was perfectly cooked, and the sauce was bursting with flavor.

Pro Tips for the Perfect One-Pot Pasta

Want to take your one-pot pasta to the next level? Here are a few pro tips:

  • Use High-Quality Steak: The better the steak, the better the dish. I recommend using sirloin or ribeye for the best flavor and tenderness. Season the steak well before searing.
  • Don’t Overcook the Garlic: Burnt garlic can ruin the entire dish. Keep a close eye on it and remove it from the heat if it starts to brown too quickly.
  • Adjust the Spice Level: If you’re not a fan of spicy food, reduce the amount of red pepper flakes. Or, if you like it extra spicy, add a pinch of cayenne pepper.
  • Use the Right Amount of Liquid: The amount of water or broth you need will depend on the type of pasta you use. Start with 2.5 cups and add more if needed. The pasta should be cooked al dente, not mushy.
  • Don’t Forget to Season: Seasoning is key to bringing out the flavors of the dish. Don’t be afraid to add a little extra salt and pepper to taste.

Common Mistakes to Avoid

Even the best cooks make mistakes! Here are a few common pitfalls to watch out for:

  • Overcooking the Pasta: Nobody likes mushy pasta. Be sure to check the pasta frequently and remove it from the heat when it’s al dente.
  • Burning the Garlic: As mentioned earlier, burnt garlic can ruin the dish. Keep a close eye on it and remove it from the heat if it starts to brown too quickly.
  • Using Too Much Liquid: Using too much water or broth can result in a watery sauce. Start with less and add more if needed.
  • Forgetting to Season: Seasoning is essential for bringing out the flavors of the dish. Don’t forget to add salt and pepper to taste.

I remember one time I accidentally added too much water, and the sauce was super thin. It was a total disaster! But I learned from my mistake and now I always measure the liquid carefully.

Variations to Spice Things Up

Want to put your own spin on this recipe? Here are a few variations to try:

  • Add Vegetables: Sauté some mushrooms, spinach, or bell peppers along with the garlic for a boost of nutrients and flavor.
  • Swap the Protein: Use chicken, shrimp, or sausage instead of steak. Just adjust the cooking time accordingly.
  • Change the Cheese: Try using a different type of cheese, such as pecorino romano, asiago, or mozzarella.
  • Add Herbs: Fresh herbs like basil, oregano, or thyme can add a burst of flavor to the dish.
  • Make it Creamier: Add a dollop of mascarpone cheese or sour cream to the sauce for extra creaminess.

Storing and Reheating Your Leftovers

If you happen to have any leftovers (which is unlikely!), here’s how to store and reheat them:

  • Storing: Allow the pasta to cool completely before transferring it to an airtight container. Store in the refrigerator for up to 3 days.
  • Reheating: Reheat the pasta in a skillet over medium heat, adding a splash of water or broth to prevent it from drying out. You can also reheat it in the microwave, but be careful not to overcook it.

Frequently Asked Questions (FAQ)

Got questions? I’ve got answers!

  • Can I use a different type of pasta? Absolutely! Any short pasta, such as penne, farfalle, or rigatoni, will work well in this recipe.
  • Can I use a different type of steak? Yes, you can use any cut of steak that you like. Just adjust the cooking time accordingly.
  • Can I make this recipe ahead of time? While this dish is best served fresh, you can prepare the sauce ahead of time and store it in the refrigerator for up to 2 days. When you’re ready to eat, simply cook the pasta and combine everything.
  • Is this recipe gluten-free? No, this recipe is not gluten-free as written. However, you can easily make it gluten-free by using gluten-free pasta.

Serving Suggestions: Complete Your Meal

This one-pot pasta is delicious on its own, but here are a few serving suggestions to complete your meal:

  • Side Salad: A simple green salad with a vinaigrette dressing is the perfect complement to this rich and creamy pasta.
  • Garlic Bread: Because you can never have too much garlic!
  • Roasted Vegetables: Roasted broccoli, asparagus, or Brussels sprouts are a healthy and delicious addition to the meal.
  • Wine Pairing: A crisp white wine, such as sauvignon blanc or pinot grigio, pairs perfectly with this dish.

And there you have it! My One-Pot Creamy Spicy Garlic Butter Steak & Pasta recipe. I hope you love it as much as I do. Remember, cooking is all about having fun and experimenting with flavors. So don’t be afraid to get creative and put your own spin on this dish. Happy cooking, friends!

One-Pot Creamy Spicy Garlic Butter Steak & Pasta

Prep Time 5 minutes
Cook Time 20 minutes
Total Time 25 minutes
Servings 4 people
Calories 650
A delicious and easy one-pot pasta dish featuring tender steak, creamy garlic butter sauce, and a spicy kick. Perfect for a quick and satisfying weeknight meal!

Ingredients

Ingredients

  • 1 lb steak (sirloin or ribeye) (cut into bite-sized pieces)
  • 2 tablespoons butter (divided)
  • 4 cloves garlic (minced)
  • 0.5 teaspoon crushed red pepper flakes (adjust to taste)
  • 1 cup heavy cream
  • 0.5 cup grated parmesan cheese
  • 8 oz rotini pasta (or any short pasta)
  • 2.5 cups water or broth (–3 cups)
  • Salt and black pepper (to taste)
  • Chopped parsley (for garnish (optional))

Instructions 

  • Sear steak pieces in butter until browned. Remove and set aside.
  • Sauté garlic and red pepper flakes in butter until fragrant.
  • Pour in heavy cream and simmer.
  • Stir in parmesan until melted.
  • Add pasta and water/broth. Simmer until pasta is al dente.
  • Return steak to skillet and stir to coat.
  • Taste and adjust seasoning. Garnish with parsley and parmesan if desired.
  • Serve hot and enjoy immediately.

Notes

Adjust the amount of red pepper flakes to control the spiciness. For a richer flavor, use bone broth instead of water.
Calories: 650kcal
Cost: $20
Course: Main Course
Cuisine: American
Keyword: Steak
pin

Hey there, friends! Ava here, back in my Seattle kitchen and ready to share one of my absolute go-to recipes: the High-Protein Burger Bowl. If you’re anything like me, you crave those juicy burger flavors but sometimes want something a little lighter, a little healthier, and definitely just as satisfying. That’s where this recipe comes in. It’s a deconstructed burger, packed with protein, bursting with flavor, and completely customizable. Plus, it’s perfect for meal prep! Think of it as all the best parts of a burger, without the bun. Let’s dive in!

Why You’ll Love This High-Protein Burger Bowl

I’ve been making variations of this burger bowl for years, and it never gets old. Here’s why I think you’ll be just as obsessed:

  • High Protein Powerhouse: Packed with lean ground beef and Greek yogurt-based sauce, this bowl will keep you feeling full and energized.
  • Low Carb Delight: Ditching the bun makes this a fantastic option for those watching their carb intake.
  • Customizable: Swap out ingredients to suit your taste or dietary needs. The possibilities are endless!
  • Meal Prep Friendly: Make a big batch on Sunday and enjoy healthy lunches all week long.
  • Quick & Easy: Ready in under 30 minutes, this recipe is perfect for busy weeknights.

Seriously, what’s not to love? This isn’t just a recipe; it’s a lifestyle. A delicious, healthy, and convenient lifestyle!

Ingredients for Your High-Protein Burger Bowl

Here’s what you’ll need to whip up these amazing burger bowls. Don’t worry, you probably have most of these ingredients already!

  • For the Potatoes:
    • 3 medium Yukon gold potatoes, diced into small cubes
    • 1 tbsp olive oil
    • 1/2 tsp garlic powder
    • 1/2 tsp smoked paprika
    • Salt and black pepper to taste
  • For the Special Sauce:
    • 1/4 cup plain Greek yogurt (or light mayo)
    • 2 tbsp ketchup
    • 1 tsp Dijon mustard
    • 1/2 tsp garlic powder
    • 1/2 tsp smoked paprika
  • For the Bowl Assembly:
    • 2 roma tomatoes, diced
    • 2 cups chopped romaine lettuce
    • 1 avocado, sliced
  • For the Beef:
    • 1 lb lean ground beef (90/10)
    • 1/2 tsp onion powder
    • 1/2 tsp garlic powder
    • 1/2 tsp paprika
    • Salt and pepper to taste
Recipe Image

How to Make the Ultimate High-Protein Burger Bowl: Step-by-Step

Alright, let’s get cooking! Here’s how to assemble these delicious high protein burger bowlsare:

  1. Roast the Potatoes: Preheat oven to 425°F (220°C). Toss potato cubes with olive oil, garlic powder, smoked paprika, salt, and pepper. Spread evenly on a baking sheet and roast 20–25 minutes until crispy and golden. I like mine extra crispy, so I sometimes broil them for the last minute or two, but keep a close eye on them!
  2. Cook the Beef: Heat a skillet over medium heat. Add ground beef and season with onion powder, garlic powder, paprika, salt, and pepper. Cook until browned and fully cooked, about 7–8 minutes. Drain any excess grease. Nobody wants a soggy burger bowl!
  3. Make the Special Sauce: In a small bowl, whisk together Greek yogurt, ketchup, Dijon mustard, garlic powder, and smoked paprika until smooth. This sauce is the secret weapon! If you’re not a fan of Greek yogurt, light mayo works too. But trust me, the Greek yogurt adds a tangy creaminess that’s just divine.
  4. Assemble the Bowl: In each bowl, layer roasted potatoes, ground beef, chopped romaine, diced tomatoes, and avocado slices. This is where you get to be creative! Arrange everything however you like.
  5. Add the Finishing Touches: Drizzle with special sauce and serve immediately. Don’t be shy with the sauce! It ties everything together.

And there you have it! A delicious, healthy, and satisfying high-protein burger bowl. So easy, right?

Pro Tips for the Best Burger Bowl Ever

Want to take your burger bowl game to the next level? Here are a few of my tried-and-true tips:

  • Choose Quality Beef: Lean ground beef (90/10) is the way to go. You get plenty of flavor without excess grease.
  • Don’t Overcrowd the Potatoes: Make sure the potato cubes are spread out on the baking sheet. Overcrowding will cause them to steam instead of roast.
  • Toast the Spices: Before adding the spices to the beef, toast them in a dry skillet for a minute or two. This will enhance their flavor and add a little extra depth to the dish.
  • Taste as You Go: Adjust the seasonings to your liking. Cooking is all about intuition, so trust your taste buds!

Common Mistakes to Avoid

Even though this recipe is super simple, here are a few common pitfalls to watch out for:

  • Overcooking the Beef: Nobody likes dry, crumbly beef. Cook it just until it’s browned and fully cooked.
  • Soggy Potatoes: Make sure the potatoes are crispy before adding them to the bowl. Soggy potatoes are a major bummer.
  • Skimping on the Sauce: The special sauce is what brings everything together. Don’t be afraid to be generous!

Variations to Keep Things Exciting

One of the best things about this recipe is how easy it is to customize. Here are a few ideas to get you started:

  • Spice It Up: Add a pinch of cayenne pepper to the beef or sauce for a little extra heat.
  • Add Cheese: Sprinkle some shredded cheddar, Monterey Jack, or crumbled feta on top.
  • Go Veggie: Substitute the ground beef with crumbled veggie burgers or seasoned black beans.
  • Add Some Crunch: Top with crispy fried onions or crushed tortilla chips for added texture.
  • Try Different Potatoes: Sweet potatoes or red potatoes also work well in this recipe.

Whether you’re following a specific diet or just looking to try something new, these bowls are the perfect base to try it. Remember, cooking is all about experimenting and having fun!

How to Store Leftovers

These burger bowls are fantastic for meal prep, but here’s how to store them properly:

  • Storage: Store each component (potatoes, beef, sauce, veggies) separately in airtight containers in the refrigerator.
  • Shelf Life: The potatoes and beef will last for up to 3-4 days. The veggies are best if used within 1-2 days.
  • Reheating: Reheat the potatoes and beef in the microwave or oven until warmed through. Assemble the bowl with fresh veggies and sauce just before serving.

Storing everything separately ensures that nothing gets soggy and that your bowls stay fresh and delicious all week long.

Frequently Asked Questions (FAQ)

Got questions? I’ve got answers!

  • Can I use ground turkey instead of ground beef? Absolutely! Ground turkey is a great lean alternative. Check out my turkey-burgers recipe for inspiration!
  • Can I make this recipe ahead of time? Yes! This is perfect for meal prep. Just store the components separately and assemble when you’re ready to eat.
  • Can I freeze the cooked ground beef? Yes, you can freeze the cooked ground beef for up to 2-3 months. Thaw it in the refrigerator overnight before using.
  • Is this recipe gluten-free? Yes, this recipe is naturally gluten-free, as long as you use gluten-free ketchup and Dijon mustard.
  • Can I add other toppings? Of course! Feel free to add any toppings you like, such as pickles, onions, or jalapeños.

Don’t be afraid to experiment and make this recipe your own!

Serving Suggestions

These high protein burger bowlsare a complete meal on their own, but here are a few serving suggestions to round out your meal:

  • Side Salad: Serve with a simple green salad for extra veggies.
  • Coleslaw: A creamy coleslaw pairs perfectly with the burger flavors.
  • Corn on the Cob: Grilled corn on the cob is a classic summer side dish.
  • Sweet Potato Fries: If you’re feeling indulgent, sweet potato fries are a delicious addition.

Whether you’re serving these bowls for a quick weeknight dinner or a casual get-together, they’re sure to be a hit! Each bowl is packed with flavor. If you want to know how to make a great hamburger-patty, check out that resource!

Final Thoughts on This High-Protein Delight

So there you have it, my friends! My go-to High-Protein Burger Bowl recipe. It’s healthy, delicious, customizable, and perfect for meal prep. What more could you ask for? These high protein burger, without the bun, makes this a great low carb option. It’s one of those recipes that I make over and over again because it’s just so darn good and easy. Plus, it’s a great way to satisfy those burger cravings without feeling weighed down. The combination of lean ground beef, crispy roasted potatoes, fresh veggies, and tangy special sauce is simply irresistible. And let’s not forget the protein boost from the ground beef and greek yogurt! It’s a win-win. These bowls are also ideal for turkey-burger-recipe fans!

I hope you give this recipe a try and love it as much as I do. And remember, cooking is all about having fun and experimenting. So don’t be afraid to get creative and make this recipe your own. If you’re watching your macros, you can easily adjust the ingredient amounts to fit your needs. These bowls can easily be adapted to be high protein and carb meals, or even just a healthy eating aesthetic dinner. You can easily create healthy food inspo dinner bowls that even have that healthy dinner recipes aesthetic we all strive for!

Happy cooking! And as always, feel free to reach out with any questions or comments. I love hearing from you all!

High-Protein Burger Bowl

Prep Time 15 minutes
Cook Time 25 minutes
Total Time 40 minutes
Servings 2 bowls
Calories 650
Enjoy a healthy and delicious burger bowl packed with protein and flavor. This recipe combines seasoned ground beef, roasted potatoes, fresh veggies, and a creamy special sauce for a satisfying meal.

Ingredients

For the Potatoes:

  • 3 medium Yukon gold potatoes (diced into small cubes)
  • 1 tbsp olive oil
  • 1/2 tsp garlic powder
  • 1/2 tsp smoked paprika
  • to taste Salt and black pepper

For the Special Sauce:

  • 1/4 cup plain Greek yogurt ((or light mayo))
  • 2 tbsp ketchup
  • 1 tsp Dijon mustard
  • 1/2 tsp garlic powder
  • 1/2 tsp smoked paprika

For the Bowl Assembly:

  • 2 roma tomatoes (diced)
  • 2 cups chopped romaine lettuce
  • 1 avocado (sliced)

For the Beef:

  • 1 lb lean ground beef ((90/10))
  • 1/2 tsp onion powder
  • 1/2 tsp garlic powder
  • 1/2 tsp paprika
  • to taste Salt and pepper

Instructions 

  • Roast the Potatoes: Preheat oven to 425°F (220°C). Toss potato cubes with olive oil, garlic powder, smoked paprika, salt, and pepper. Spread evenly on a baking sheet and roast 20–25 minutes until crispy and golden.
  • Cook the Beef: Heat a skillet over medium heat. Add ground beef and season with onion powder, garlic powder, paprika, salt, and pepper. Cook until browned and fully cooked, about 7–8 minutes.
  • Make the Special Sauce: In a small bowl, whisk together Greek yogurt, ketchup, Dijon mustard, garlic powder, and smoked paprika until smooth.
  • Assemble the Bowl: In each bowl, layer roasted potatoes, ground beef, chopped romaine, diced tomatoes, and avocado slices.
  • Add the Finishing Touches: Drizzle with special sauce and serve immediately.

Notes

For a lower-carb option, substitute the potatoes with cauliflower rice or extra lettuce.
Calories: 650kcal
Cost: $12
Course: Main Course
Cuisine: American
Keyword: Beef
pin

Hey there, friend! Ava here, back in my Seattle kitchen, and today we’re whipping up something that’s become a serious staple in my life: Easy Chicken Pesto Pasta Salad. Seriously, this recipe is my go-to when I need something quick, satisfying, and bursting with flavor. Think of it as sunshine in a bowl – vibrant, fresh, and utterly delicious.

I don’t know about you, but sometimes I crave a meal that’s both healthy and comforting. You know, something that doesn’t leave you feeling sluggish but still hits the spot. That’s where this chicken pesto pasta salad comes in. I’ve been making versions of this for years, tweaking and perfecting it until it’s just right. And now, I’m sharing my secret with you!

What I love most about this recipe is how adaptable it is. You can use whatever pasta you have on hand, swap in different veggies, and even play around with the type of cheese. But trust me, the combination I’m about to share is pure magic. So, grab your apron, and let’s get started!

Why You’ll Love This Chicken Pesto Pasta Salad

Okay, let’s get real. There are a million pasta salad recipes out there, so why should you try this one? Well, let me tell you why this chicken pesto pasta salad has earned a permanent spot in my recipe rotation:

  • Quick and Easy: From start to finish, this dish is ready in just 25 minutes. Perfect for those busy weeknights or last-minute lunches.
  • Flavor Explosion: The combination of creamy pesto, juicy chicken, sweet cherry tomatoes, and salty cheese is a taste sensation.
  • Healthy and Satisfying: Packed with protein, veggies, and healthy fats, this salad is both nutritious and filling.
  • Versatile: You can easily customize this recipe to suit your tastes and dietary needs.
  • Great for Meal Prep: This salad holds up beautifully in the fridge, making it ideal for meal prepping.

Seriously, this isn’t just a meal; it’s a lifesaver. It’s that reliable friend who always shows up when you need a pick-me-up. And honestly, who doesn’t need a little sunshine in their bowl?

Ingredients for the Perfect Pesto Pasta Salad

Alright, let’s talk ingredients. Here’s what you’ll need to create this masterpiece:

  • 2 cups cooked chicken breast (grilled, shredded, or rotisserie)
  • 3 cups pasta of choice (fusilli, penne, or bowtie)
  • 1 cup cherry tomatoes (halved)
  • ½ cup fresh mozzarella balls or crumbled feta cheese
  • ¼ cup red onion (thinly sliced)
  • 1 cup baby spinach or arugula
  • ¼ cup pine nuts or almonds (for crunch)
  • 2 cups fresh basil leaves
  • 2 garlic cloves
  • ½ cup grated Parmesan cheese
  • ⅓ cup olive oil
  • 1 tablespoon lemon juice
  • ¼ cup pine nuts
  • Salt & pepper to taste
Recipe Image

Step-by-Step: Making Your Chicken Pesto Pasta Salad

Okay, friend, listen up! I’m walking you through this, step-by-step. Don’t worry; it’s easier than making toast (and way more delicious!).

  1. Cook the Pasta: Cook your pasta according to the package directions. Make sure to salt the water generously – it makes a world of difference! Once cooked, drain the pasta and rinse it with cold water to stop the cooking process. This also helps to prevent the pasta from sticking together.

  2. Prepare the Pesto: While the pasta is cooking, prepare the pesto. If you’re using store-bought pesto, feel free to skip this step. But if you’re feeling adventurous, homemade pesto is the way to go! Simply combine the fresh basil leaves, garlic cloves, Parmesan cheese, olive oil, lemon juice, and pine nuts in a food processor. Pulse until smooth and creamy. Season with salt and pepper to taste.

  3. Combine Ingredients: In a large bowl, combine the cooked pasta, chicken breast, cherry tomatoes, mozzarella balls (or feta cheese), red onion, and baby spinach (or arugula). Add the pesto and toss everything together until well coated.

  4. Add Crunch: Sprinkle the pine nuts (or almonds) over the salad for added crunch and texture.

  5. Season to Taste: Give the salad a taste and adjust the seasoning as needed. Add more salt, pepper, or lemon juice to brighten up the flavors.

  6. Chill and Serve: For the best flavor, chill the salad in the refrigerator for at least 15 minutes before serving. This allows the flavors to meld together and the salad to cool down.

Pro Tips for the Best Pesto Pasta Salad

Alright, let’s dive into some pro tips that will take your chicken pesto pasta salad from good to absolutely amazing:

  • Pasta Perfection: Don’t overcook your pasta! Aim for al dente – it should be firm to the bite. Overcooked pasta will become mushy and ruin the texture of the salad.
  • Pesto Power: If you’re using store-bought pesto, opt for a high-quality brand. The flavor of the pesto is crucial to the overall taste of the salad. Alternatively, making your own pesto is surprisingly easy and tastes so much better!
  • Chicken Choices: Rotisserie chicken is a lifesaver for this recipe. It’s quick, convenient, and adds a ton of flavor. But if you have the time, grilling your own chicken breast is even better. Just make sure not to overcook it – dry chicken is a no-no.
  • Veggie Variety: Feel free to get creative with your veggies! Sun-dried tomatoes, bell peppers, cucumbers, and artichoke hearts all work well in this salad.
  • Cheese Please: Fresh mozzarella balls (also known as bocconcini) add a creamy, milky flavor that’s hard to resist. But if you’re not a fan, crumbled feta cheese is a great alternative.
  • Acid is Key: Don’t skimp on the lemon juice! It brightens up the flavors and balances the richness of the pesto.
  • Chill Out: Chilling the salad before serving is essential. It allows the flavors to meld together and the salad to cool down, making it even more refreshing.

Trust me, these little tweaks will make a world of difference. It’s all about paying attention to the details and using quality ingredients to create something truly special.

Common Mistakes to Avoid

Okay, let’s talk about some common mistakes people make when making chicken pesto pasta salad. I’ve definitely been there, done that, and learned from my oops moments. So, let me help you avoid these pitfalls:

  • Overcooking the Pasta: This is the number one mistake! Overcooked pasta becomes mushy and ruins the texture of the salad. Always cook your pasta al dente.
  • Using Too Much Pesto: Pesto is delicious, but it can be overpowering if you use too much. Start with a small amount and add more as needed, until the pasta is lightly coated.
  • Skipping the Lemon Juice: Lemon juice is essential for balancing the flavors of the salad. Don’t skip it!
  • Not Seasoning Properly: Always taste and adjust the seasoning as needed. Salt and pepper are your friends!
  • Adding Warm Chicken to the Salad: Let the chicken cool down before adding it to the salad. Warm chicken will wilt the spinach and make the salad taste less fresh.

Avoiding these mistakes will ensure that your chicken pesto pasta salad turns out perfect every time. Remember, cooking is all about learning and experimenting. So don’t be afraid to try new things and have fun in the kitchen!

Variations: Spice Up Your Pesto Pasta Salad

One of the best things about this chicken pesto pasta salad is how versatile it is. You can easily customize it to suit your tastes and dietary needs. Here are a few variations to try:

  • Vegetarian Version: Omit the chicken and add more veggies, such as roasted bell peppers, zucchini, or eggplant.
  • Gluten-Free Version: Use gluten-free pasta to make this salad suitable for those with gluten sensitivities.
  • Spicy Version: Add a pinch of red pepper flakes to the pesto for a little kick.
  • Mediterranean Version: Add Kalamata olives, sun-dried tomatoes, and feta cheese for a Mediterranean twist.
  • Italian Version: Add artichoke hearts, roasted red peppers, and sun-dried tomatoes for a more traditional Italian flavor.

Don’t be afraid to experiment and create your own unique version of this salad. The possibilities are endless!

Storage Tips: Keeping Your Salad Fresh

This chicken pesto pasta salad is perfect for meal prep because it stores well in the fridge. Here are a few tips for keeping your salad fresh:

  • Store in an Airtight Container: Transfer the salad to an airtight container and store it in the refrigerator.
  • Consume Within 3-4 Days: For the best flavor and texture, consume the salad within 3-4 days.
  • Add Dressing Before Serving: If you’re making the salad ahead of time, wait to add the dressing until just before serving. This will prevent the pasta from becoming soggy.
  • Revive Wilted Greens: If the spinach or arugula wilts in the fridge, simply add a few ice cubes to the salad and let it sit for a few minutes. The cold water will help to revive the greens.

Frequently Asked Questions (FAQ)

Got questions? I’ve got answers! Here are some frequently asked questions about chicken pesto pasta salad:

  • Can I use store-bought pesto? Yes, absolutely! While homemade pesto is delicious, store-bought pesto is a convenient option. Just be sure to choose a high-quality brand.
  • Can I make this salad ahead of time? Yes, you can make this salad ahead of time. Just wait to add the dressing until just before serving to prevent the pasta from becoming soggy.
  • Can I freeze this salad? I don’t recommend freezing this salad. The pasta and vegetables will become mushy when thawed.
  • Is this salad healthy? Yes, this salad is packed with protein, veggies, and healthy fats. It’s a great option for a quick and nutritious meal.
  • Can I use a different type of pasta? Yes, you can use any type of pasta you like. Fusilli, penne, and bowtie pasta all work well in this salad.

Serving Suggestions: What to Serve with Your Salad

This chicken pesto pasta salad is delicious on its own, but it also pairs well with a variety of other dishes. Here are a few serving suggestions:

  • Grilled Bread: Serve the salad with a side of grilled bread for dipping in the pesto sauce.
  • Caprese Skewers: Caprese skewers (cherry tomatoes, mozzarella balls, and basil leaves) make a refreshing and colorful appetizer.
  • Grilled Vegetables: Grilled vegetables, such as zucchini, bell peppers, and eggplant, add a smoky flavor that complements the salad.
  • Fruit Salad: A light and refreshing fruit salad is the perfect way to end the meal.

And there you have it – my go-to recipe for Easy Chicken Pesto Pasta Salad. I hope you love it as much as I do! Remember, cooking is all about having fun and experimenting. So don’t be afraid to put your own spin on this recipe and make it your own. Happy cooking, friend!

Easy Chicken Pesto Pasta Salad (25-Minutes)

Prep Time 15 minutes
Cook Time 10 minutes
Total Time 25 minutes
Servings 6 servings
Calories 450
A quick and delicious chicken pesto pasta salad perfect for a light lunch or dinner. Ready in just 25 minutes!

Ingredients

Chicken Pesto Pasta Salad

  • 2 cups cooked chicken breast (grilled, shredded, or rotisserie)
  • 3 cups pasta of choice (fusilli, penne, or bowtie)
  • 1 cup cherry tomatoes (halved)
  • 0.5 cup fresh mozzarella balls (or crumbled feta cheese)
  • 0.25 cup red onion (thinly sliced)
  • 1 cup baby spinach (or arugula)
  • 0.25 cup pine nuts (or almonds (for crunch))

Pesto

  • 2 cups fresh basil leaves
  • 2 garlic cloves garlic cloves
  • 0.5 cup grated Parmesan cheese
  • 0.333 cup olive oil
  • 1 tablespoon lemon juice
  • 0.25 cup pine nuts
  • to taste Salt & pepper

Notes

Add a squeeze of lemon for extra flavor!
Calories: 450kcal
Cost: $18
Course: dinner, Lunch, Main Course
Cuisine: Italian
Keyword: Chicken, pasta, Pesto
pin