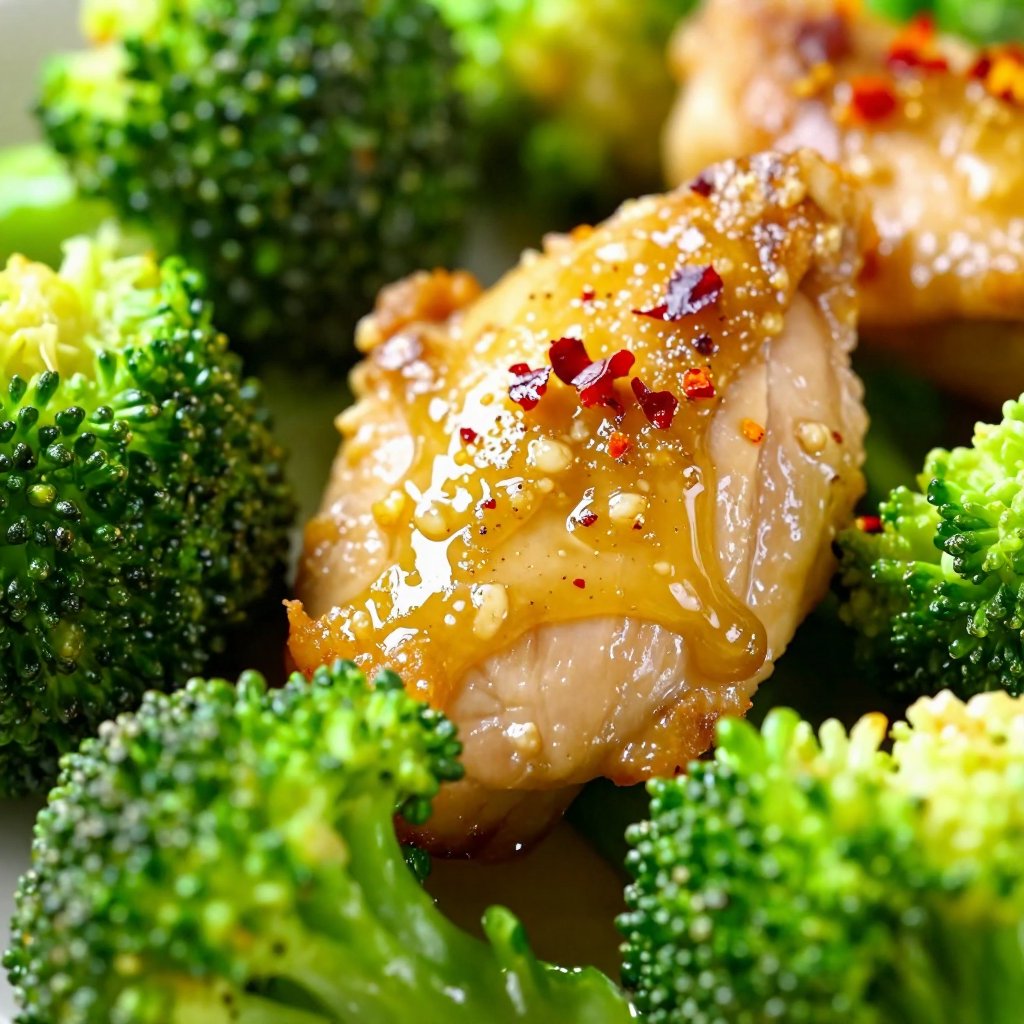
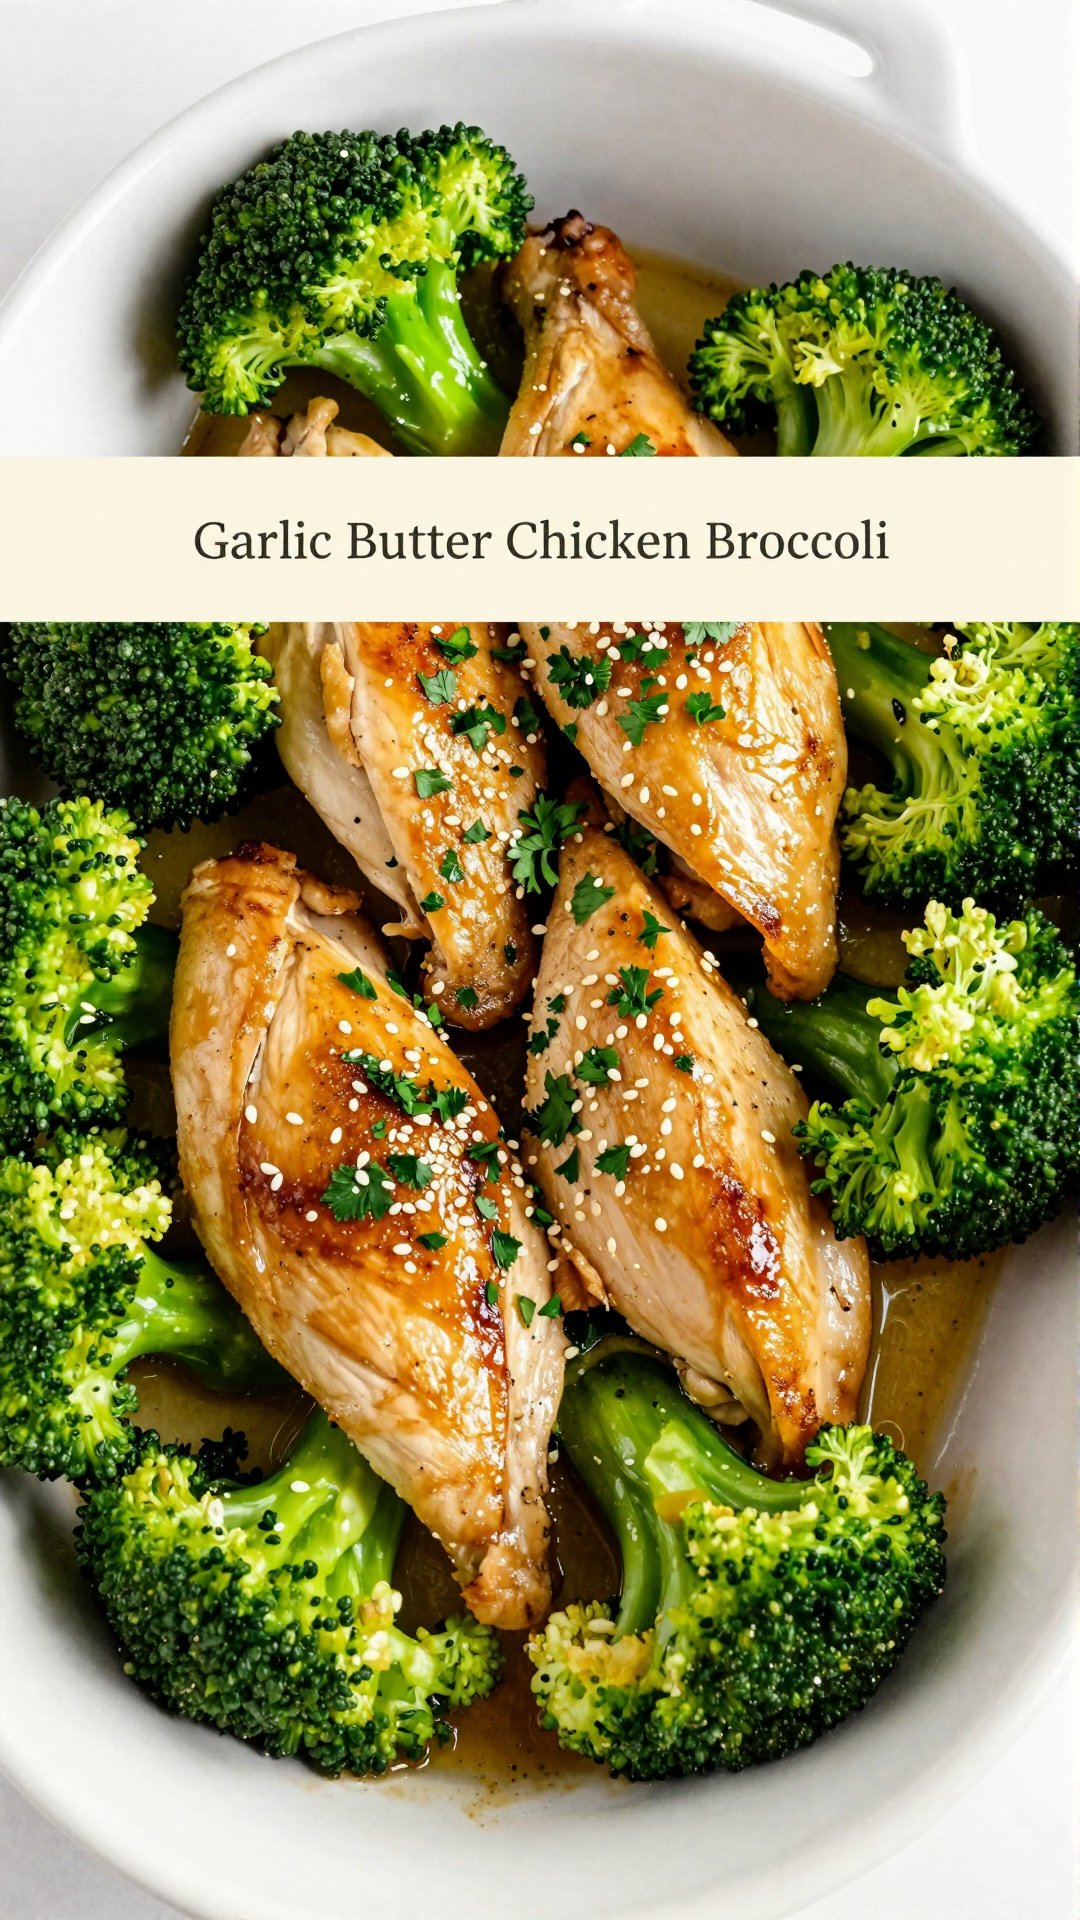
Author

Ava

Browsing

Hey there, dessert lovers! Ava here, and I’m about to let you in on a little secret that’s been making waves in my kitchen: Healthy Cottage Cheese Brownies. Yes, you read that right. We’re talking about decadent, fudgy brownies… with cottage cheese! I know, I know – it sounds a bit unconventional, but trust me on this. These aren’t just any brownies; they’re a game-changer for anyone craving a sweet treat without the guilt. I’ve been experimenting with healthier dessert options for a while now, and these cottage cheese brownies have quickly become a staple. They satisfy my chocolate cravings while packing a surprising protein punch. If you’re anything like me, you’re always on the lookout for ways to indulge smartly, and these brownies are the answer.

Growing up, my mom always said the best recipes are the ones that surprise you, and these brownies definitely fit the bill. The first time I made them, I was skeptical. But one bite, and I was hooked. The cottage cheese creates an incredibly moist and fudgy texture that you won’t believe. Forget dry, crumbly brownies – these are melt-in-your-mouth amazing. Plus, adding cottage cheese also boosts the protein content, making them a satisfying and guilt-free treat. I’ve shared these with friends and family, and everyone is always amazed at how delicious they are, especially when I reveal the secret ingredient!

Why You’ll Love These Cottage Cheese Brownies

Let’s be honest, we all love brownies. But sometimes, you want something that’s a little bit better for you. That’s where these cottage cheese brownies come in. Here’s why you’ll absolutely adore them:

  • Incredibly Fudgy Texture: The cottage cheese creates a texture that’s unbelievably moist and fudgy.
  • High in Protein: Adding cottage cheese boosts the protein content, making these a more satisfying dessert.
  • Guilt-Free Indulgence: These brownies are a healthier alternative to traditional brownies, so you can indulge without the guilt.
  • Easy to Make: This recipe is simple and straightforward, perfect for beginner bakers.
  • Delicious Flavor: The subtle tang of cottage cheese complements the rich chocolate flavor perfectly.
  • Versatile: You can easily customize these brownies with different mix-ins and toppings.

If you’re looking for a way to enjoy brownies that actually align with your health goals, you’re in the right place. These brownies are a testament to the fact that healthy doesn’t have to mean boring. I’ve made countless batches, tweaking the recipe until it was just right. Now, I’m so excited to share it with you!

Ingredients for the Best Cottage Cheese Brownies

Here’s what you’ll need to whip up a batch of these amazing brownies:

  • 1 cup cottage cheese
  • 1/2 cup unsweetened cocoa powder
  • 1/2 cup granulated sugar
  • 1/4 cup honey or maple syrup
  • 2 large eggs
  • 1/3 cup all-purpose flour
  • 1/2 teaspoon baking powder
  • 1/2 teaspoon vanilla extract
  • 1/4 cup chocolate chips (optional)
Recipe Image

How to Make Cottage Cheese Brownies: Step-by-Step

Ready to get baking? Here’s how to make these delicious cottage cheese brownies:

  1. Prepare: Preheat oven to 350°F (175°C) and grease an 8×8-inch baking pan or line with parchment paper.
  2. Blend Cottage Cheese: Blend cottage cheese until smooth and creamy in a food processor or mixer. This is key to getting that perfect texture! If you don’t blend the cottage cheese until smooth, you’ll end up with a grainy texture, and nobody wants that.
  3. Combine Wet Ingredients: Add granulated sugar, honey/maple syrup, and vanilla extract to the cottage cheese and mix until smooth.
  4. Add Eggs: Add eggs one at a time, mixing well after each addition.
  5. Combine Dry Ingredients: In a separate bowl, whisk together cocoa powder, flour, and baking powder.
  6. Combine Wet and Dry: Gradually combine dry ingredients with the wet mixture until just incorporated. Don’t overmix!
  7. Add Chocolate Chips (Optional): Fold in chocolate chips if using.
  8. Bake: Pour the batter into the prepared pan and spread evenly. Bake for 25-30 minutes, checking with a toothpick for moist crumbs.
  9. Cool: Let cool in pan for 10 minutes, then transfer to wire rack to cool completely before cutting.

And there you have it! Delicious, healthy cottage cheese brownies ready to enjoy. I’ve found that letting them cool completely is crucial for the best texture. If you try to cut them while they’re still warm, they might be a bit too gooey.

Pro Tips for Perfect Cottage Cheese Brownies

To ensure your brownies turn out perfectly every time, here are a few of my tried-and-true tips:

  • Use Full-Fat Cottage Cheese: For the best texture and flavor, use full-fat cottage cheese. The extra fat adds richness and moisture.
  • Blend Thoroughly: Make sure to blend the cottage cheese until it’s completely smooth. Any lumps will affect the final texture of the brownies.
  • Don’t Overmix: Overmixing can lead to tough brownies. Mix the wet and dry ingredients until just combined.
  • Check for Doneness: Use a toothpick to check for doneness. The toothpick should come out with moist crumbs attached, not wet batter.
  • Cool Completely: Let the brownies cool completely before cutting. This allows them to set properly and prevents them from falling apart.
  • Add a Pinch of Salt: A pinch of salt enhances the chocolate flavor and balances the sweetness.

These little tweaks can make a big difference in the final result. I’ve learned these tips through many batches of trial and error, so you don’t have to! If you’re looking for that perfect brownie texture, these tips are your golden ticket.

Common Mistakes to Avoid

Even with the best recipe, mistakes can happen. Here are some common pitfalls to avoid when making cottage cheese brownies:

  • Not Blending the Cottage Cheese Enough: This is the most common mistake. Lumpy cottage cheese will result in a grainy texture.
  • Overbaking: Overbaking will lead to dry, crumbly brownies. Check for doneness a few minutes before the recommended baking time.
  • Using Low-Quality Cocoa Powder: The quality of your cocoa powder matters. Opt for a high-quality, unsweetened cocoa powder for the best flavor.
  • Not Measuring Accurately: Baking is a science. Use measuring cups and spoons to ensure accurate measurements.
  • Skipping the Cooling Time: Impatience can ruin your brownies. Let them cool completely before cutting for the best texture.

I’ve made all of these mistakes at some point, so I speak from experience! Don’t worry if your first batch isn’t perfect. Keep practicing, and you’ll get there. Remember, every “oops” moment is just a learning opportunity.

Variations to Spice Things Up

One of the best things about these cottage cheese brownies is how versatile they are. Here are some fun variations to try:

  • Peanut Butter Swirl: Swirl peanut butter into the batter before baking for a delicious peanut butter chocolate combination.
  • Espresso Powder: Add a teaspoon of espresso powder to the dry ingredients to enhance the chocolate flavor.
  • Nuts: Fold in chopped walnuts, pecans, or almonds for added crunch.
  • Cream Cheese Frosting: Top the cooled brownies with a creamy cream cheese frosting for an extra indulgent treat.
  • Salted Caramel: Drizzle salted caramel over the cooled brownies for a sweet and salty delight.
  • Chocolate Chunks: Use chocolate chunks instead of chocolate chips for a more intense chocolate experience.
  • Spices: Add a dash of cinnamon or nutmeg to the batter for a warm, spiced flavor.

I love experimenting with different flavors and textures. Don’t be afraid to get creative and try your own variations! If you re feeling adventurous, try adding a pinch of cayenne pepper for a spicy kick. These cottage cheese brownies are a blank canvas – let your imagination run wild!

How to Store Your Brownies

If you happen to have any brownies leftover (which is a big if!), here’s how to store them:

  • Room Temperature: Store in an airtight container at room temperature for up to 3 days.
  • Refrigerator: For longer storage, store in an airtight container in the fridge for up to a week.
  • Freezer: To freeze, wrap individual brownies in plastic wrap and store in a freezer-safe bag for up to 2 months. Thaw in the fridge before enjoying.

I usually store mine in the fridge because I love the fudgy texture when they’re cold. But if you prefer them warm, just pop them in the microwave for a few seconds. The fridge is your friend when it comes to keeping these treats fresh!

Frequently Asked Questions (FAQ)

Here are some common questions I get about these cottage cheese brownies:

  • Can I use low-fat cottage cheese?: Yes, but the texture might be slightly drier. Full-fat cottage cheese provides the best moisture and flavor.
  • Can I use a different sweetener?: Yes, you can substitute the sugar and honey/maple syrup with other sweeteners like stevia or erythritol. Adjust the amount to your preference.
  • Can I make these gluten-free?: Yes, you can substitute the all-purpose flour with a gluten-free flour blend. Make sure to choose a blend that’s designed for baking.
  • Can I add other mix-ins?: Absolutely! Feel free to add nuts, dried fruit, or any other mix-ins you like.
  • Why are my brownies dry?: Overbaking is the most common cause of dry brownies. Check for doneness a few minutes before the recommended baking time.
  • Why are my brownies grainy?: This is usually due to not blending the cottage cheese enough. Make sure to blend it until it’s completely smooth.

If you have any other questions, feel free to leave a comment below! I’m always happy to help.

Serving Suggestions

These cottage cheese brownies are delicious on their own, but here are some fun ways to serve them:

  • With a Scoop of Ice Cream: Top a warm brownie with a scoop of vanilla or chocolate ice cream for an extra indulgent treat.
  • With Fresh Berries: Serve with a side of fresh berries for a burst of freshness and color.
  • With Whipped Cream: Top with a dollop of whipped cream for a light and airy topping.
  • With a Drizzle of Chocolate Sauce: Drizzle chocolate sauce over the brownies for an extra dose of chocolate goodness.
  • With a Cup of Coffee: Enjoy a brownie with a cup of coffee for a perfect afternoon pick-me-up.

Whether you’re enjoying them as a midday snack or a decadent dessert, these cottage cheese brownies are sure to satisfy your sweet tooth. I hope you love this recipe as much as I do! If you make these brownies, be sure to tag me on social media – I can’t wait to see your creations! Happy baking!

Cottage Cheese Brownies

Prep Time 10 minutes
Cook Time 30 minutes
Total Time 40 minutes
Servings 12 brownies
Calories 120
These fudgy cottage cheese brownies are a healthy and delicious treat. They're easy to make and packed with protein!

Ingredients

Ingredients

  • 1 cup cottage cheese
  • 0.5 cup unsweetened cocoa powder
  • 0.5 cup granulated sugar
  • 0.25 cup honey or maple syrup
  • 2 large eggs
  • 0.33 cup all-purpose flour
  • 0.5 teaspoon baking powder
  • 0.5 teaspoon vanilla extract
  • 0.25 cup chocolate chips ((optional))

Instructions 

  • Preheat oven to 350°F (175°C) and grease an 8×8-inch baking pan.
  • Blend cottage cheese until smooth.
  • Add sugar, honey/maple syrup, and vanilla to cottage cheese and mix.
  • Add eggs one at a time, mixing well after each.
  • Whisk together cocoa powder, flour, and baking powder.
  • Combine dry ingredients with the wet mixture until just incorporated.
  • Fold in chocolate chips if using.
  • Pour batter into pan and spread evenly.
  • Bake for 25-30 minutes, checking with a toothpick.
  • Let cool in pan for 10 minutes, then transfer to wire rack to cool completely.

Notes

For a richer flavor, use dark chocolate chips.
Calories: 120kcal
Cost: $8
Course: Dessert
Cuisine: American
Keyword: cottage cheese
pin

Hey there, friend! Ava here, ready to whisk you away to a world of simple, delicious, and oh-so-satisfying cooking. Remember those days when dinner felt like a chore? Well, get ready to say goodbye to that, because I’ve got a recipe that’s about to become your new weeknight hero. It’s my Easy One-Pan Chicken, Broccoli & Rice, and trust me, it’s a game-changer.

Growing up, my mom had a knack for creating meals that were both comforting and nourishing, often with minimal fuss. This recipe is inspired by her spirit of making something amazing out of simple ingredients. It’s the kind of dish that fills your kitchen with mouthwatering aromas and brings everyone to the table with smiles. So, grab your apron, and let’s get started!

Why You’ll Love This One-Pan Wonder

Okay, let me tell you why this recipe is about to become your new best friend. First off, it’s incredibly easy. We’re talking minimal prep time and maximum flavor. But that’s not all:

  • One-Pan Magic: Fewer dishes mean more time to relax. Everything cooks together in a single pan, making cleanup a breeze.
  • Flavor Explosion: The chicken, broccoli, and rice all soak up the delicious flavors of the broth and seasonings, creating a symphony of taste in every bite.
  • Healthy and Wholesome: Packed with protein, veggies, and whole grains, this dish is a complete and balanced meal.
  • Customizable: Feel free to swap out ingredients based on what you have on hand or your personal preferences.
  • Perfect for Weeknights: Quick and easy, this recipe is ideal for busy weeknights when you need a satisfying meal on the table fast.
  • Comforting and Delicious: There’s something so comforting about a warm, flavorful dish that’s both nourishing and delicious.

I mean, who doesn’t love a meal that’s both easy and delicious? I know I do!

Ingredients: The Simple Stars of the Show

Here’s what you’ll need to create this masterpiece. Don’t worry, it’s all stuff you can easily find at your local grocery store:

  • 4 pieces Chicken breasts or thighs (Choose boneless for quick cooking.)
  • 2 cups Broccoli florets (Fresh or frozen.)
  • 1 cup Long-grain white rice
  • 2 cups Chicken broth or stock
  • 2 tablespoons Olive oil (For browning the chicken.)
  • 3 cloves Garlic cloves (Minced.)
  • 1 piece Onion (Diced.)
  • 1 teaspoon Salt (Adjust to taste.)
  • 1 teaspoon Pepper (Adjust to taste.)
  • 2 tablespoons Lemon juice (Optional.)
  • 1 teaspoon Dried thyme or Italian seasoning
  • 1 teaspoon Red pepper flakes (Optional.)
  • 1/4 cup Grated Parmesan cheese (Optional.)
Recipe Image

Let’s Get Cooking: Step-by-Step Instructions

Alright, let’s dive into the fun part – actually making the dish! Here’s how we’re going to bring this one-pan wonder to life:

  1. Prep the Chicken: If using chicken breasts, you can pound them slightly to ensure even cooking. Season the chicken with salt, pepper, and any other spices you like.
  2. Sauté the Aromatics: Heat the olive oil in a large oven-safe skillet or baking dish over medium-high heat. Add the diced onion and minced garlic, and sauté until softened and fragrant, about 3-4 minutes.
  3. Brown the Chicken: Add the seasoned chicken to the skillet and brown on both sides, about 3-4 minutes per side. This step adds flavor and helps seal in the juices. Remove the chicken from the skillet and set aside.
  4. Add Rice and Broth: Add the long-grain white rice to the skillet and stir to coat it with the remaining oil and pan drippings. Pour in the chicken broth or stock, making sure to scrape up any browned bits from the bottom of the pan.
  5. Simmer and Bake: Bring the broth to a simmer, then place the browned chicken on top of the rice. Cover the skillet tightly with a lid or aluminum foil and transfer it to a preheated oven at 375°F (190°C). Bake for 20-25 minutes, or until the rice is cooked through and the chicken is cooked to an internal temperature of 165°F (74°C).
  6. Add Broccoli: Remove the skillet from the oven and carefully add the broccoli florets on top of the rice and chicken. Cover the skillet again and return it to the oven for another 5-7 minutes, or until the broccoli is tender-crisp.
  7. Finish and Serve: Remove the skillet from the oven and let it rest for a few minutes before serving. Drizzle with lemon juice (if using) and sprinkle with grated Parmesan cheese (if using). Serve hot and enjoy!

See? Easy peasy! You’ve now created a delicious and satisfying one-pan meal that’s sure to impress.

Pro Tips for One-Pan Perfection

Want to take your one-pan game to the next level? Here are a few pro tips to ensure your dish turns out perfectly every time:

  • Even Cooking: Make sure the chicken breasts are of similar thickness to ensure they cook evenly. Pounding them slightly can help with this.
  • Don’t Overcook the Rice: Keep an eye on the rice while it’s baking. If it starts to dry out before the chicken is cooked, add a little more chicken broth.
  • Tender Chicken: Browning the chicken before baking helps to seal in the juices and keep it tender.
  • Fresh vs. Frozen Broccoli: Both fresh and frozen broccoli work well in this recipe. If using frozen, there’s no need to thaw it first.
  • Flavor Boost: Feel free to add other vegetables to the mix, such as bell peppers, carrots, or zucchini.
  • Broth Quality: Using high-quality chicken broth or stock can significantly enhance the flavor of the dish.
  • Crispy Chicken Skin: If you prefer crispy chicken skin, you can broil the chicken for a few minutes at the end of cooking.

Common Mistakes to Avoid

We all make mistakes in the kitchen – it’s part of the fun! Here are a few common pitfalls to watch out for when making this one-pan chicken, broccoli, and rice:

  • Overcooking the Chicken: Overcooked chicken can be dry and tough. Use a meat thermometer to ensure it reaches an internal temperature of 165°F (74°C).
  • Undercooking the Rice: Undercooked rice can be crunchy and unpleasant. Make sure the rice is fully cooked through before serving.
  • Not Enough Liquid: If the rice dries out during baking, add a little more chicken broth to keep it moist.
  • Unevenly Cooked Broccoli: Adding the broccoli too early can result in it becoming mushy. Add it towards the end of cooking to keep it tender-crisp.

Variations: Make It Your Own!

One of the best things about this recipe is how easy it is to customize. Here are a few variations to try:

  • Spice It Up: Add a pinch of red pepper flakes or a dash of hot sauce for a little extra heat.
  • Cheesy Goodness: Stir in some shredded cheddar cheese or mozzarella cheese at the end of cooking for a cheesy twist.
  • Lemon Herb: Add a squeeze of lemon juice and a sprinkle of fresh herbs like parsley or dill for a bright and refreshing flavor.
  • Creamy Version: Stir in a splash of heavy cream or half-and-half at the end of cooking for a creamy and decadent dish.
  • Different Veggies: Swap out the broccoli for other vegetables like cauliflower, Brussels sprouts, or green beans.
  • Chicken and broccoli is such a classic combination, but don’t be afraid to experiment!
  • Consider **adding a bit** of soy sauce for an umami kick.

Storing and Reheating: Enjoying Leftovers

Got leftovers? Lucky you! This one-pan chicken, broccoli, and rice stores well and reheats beautifully. Here’s how to keep it fresh:

  • Storing: Allow the dish to cool completely before transferring it to an airtight container. Store in the refrigerator for up to 3-4 days.
  • Reheating: Reheat in the microwave or oven until heated through. Add a splash of chicken broth or water to keep it moist.
  • This recipe is **perfect for** meal prepping!
  • Leftovers taste even better the next day as the **flavor and** spices meld together.
  • You can store the **leftovers in** an airtight container **for up** **up to** 3-4 days.

Frequently Asked Questions (FAQ)

Got questions? I’ve got answers! Here are some common questions about this one-pan chicken, broccoli, and rice recipe:

  • Can I use brown rice instead of white rice? Yes, but keep in mind that brown rice takes longer to cook. You may need to adjust the cooking time and add more liquid.
  • Can I use boneless, skinless chicken thighs instead of chicken breasts? Absolutely! Chicken thighs are a great option for this recipe. They tend to be more flavorful and stay moist during cooking.
  • Can I add other vegetables to this dish? Of course! Feel free to add any vegetables you like, such as bell peppers, carrots, or zucchini.
  • Can I make this recipe ahead of time? Yes, you can prepare the dish ahead of time and bake it just before serving.
  • Can I freeze this recipe? While you can freeze it, the texture of the rice and broccoli may change slightly. It’s best to enjoy it fresh or within a few days of making it.
  • This **one pan chicken** recipe is a lifesaver!
  • The **chicken broccoli rice** combination is always a winner.
  • You’ll find that **this recipe** is incredibly versatile.
  • **Chicken broth** is key to the flavor!

Serving Suggestions: Complete the Meal

This one-pan chicken, broccoli, and rice is a complete meal on its own, but here are a few serving suggestions to take it to the next level:

  • Side Salad: Serve with a fresh green salad or a simple vinaigrette.
  • Crusty Bread: Serve with a side of crusty bread for soaking up the delicious sauce.
  • Roasted Vegetables: Serve with roasted vegetables like asparagus or sweet potatoes.
  • Garlic Bread: Serve with garlic bread for a comforting and satisfying meal.

And there you have it – my Easy One-Pan Chicken, Broccoli & Rice! I hope you love this recipe as much as I do. It’s a staple in my kitchen, and I know it will be in yours too. So, go ahead, give it a try, and let me know what you think. Happy cooking!

This recipe is a **comforting** and healthy meal that’s **perfect for** any night of the week.

The **tender chicken** and flavorful rice make **every bite** a **delightful** experience.

Enjoy the **same** great taste with minimal effort!

Feel free to adjust the seasonings and **adding a** personal touch to **this recipe**.

You’ll be amazed at how quickly this **one pan chicken broccoli** dish comes together.

Remember to bake for the specified **minutes until** the chicken is fully cooked.

This **pan chicken broccoli** recipe is a crowd-pleaser!

And don’t forget to enjoy **a bit** of Parmesan cheese on top for an extra **bit of** flavor!

If you’re looking for **meal ideas for dinner** or **easy meal ideas**, look no further!

This **chicken rice and veggies** dish is a winner!

For **dinner ideas healthy** and **chicken and broccoli recipes**, this is the perfect choice.

If you’re looking for **rice recipes for dinner**, this one is sure to satisfy.

Easy One-Pan Chicken, Broccoli & Rice That’s Bursting with Flavor

Prep Time 10 minutes
Cook Time 35 minutes
Total Time 45 minutes
Servings 4 servings
Calories 450
This one-pan chicken, broccoli, and rice recipe is a simple and flavorful meal perfect for busy weeknights. It's packed with protein and vegetables, and easy to clean up!

Ingredients

Main Ingredients

  • 4 pieces Chicken breasts or thighs (Choose boneless for quick cooking.)
  • 2 cups Broccoli florets (Fresh or frozen.)
  • 1 cup Long-grain white rice
  • 2 cups Chicken broth or stock

Flavorings

  • 2 tablespoons Olive oil (For browning the chicken.)
  • 3 cloves Garlic cloves (Minced.)
  • 1 piece Onion (Diced.)
  • 1 teaspoon Salt (Adjust to taste.)
  • 1 teaspoon Pepper (Adjust to taste.)
  • 2 tablespoons Lemon juice (Optional.)
  • 1 teaspoon Dried thyme or Italian seasoning
  • 1 teaspoon Red pepper flakes (Optional.)
  • 1/4 cup Grated Parmesan cheese (Optional.)

Instructions 

  • Preheat oven to 375°F (190°C).
  • Heat olive oil in a large oven-safe skillet over medium-high heat. Brown chicken on both sides and remove from skillet.
  • Add diced onion and minced garlic to the skillet and sauté until softened.
  • Stir in rice, chicken broth, salt, pepper, thyme (or Italian seasoning), and red pepper flakes (if using). Bring to a simmer.
  • Place the browned chicken on top of the rice mixture. Add broccoli florets around the chicken.
  • Cover the skillet and bake in the preheated oven for 25-30 minutes, or until the rice is cooked and the chicken is cooked through.
  • Remove from oven and let rest for a few minutes. Drizzle with lemon juice (if using) and sprinkle with Parmesan cheese (if using) before serving.

Notes

For extra flavor, marinate the chicken for at least 30 minutes before cooking.
Calories: 450kcal
Cost: $18
Course: Main Course
Cuisine: American
Keyword: Chicken
pin

Hey there, kitchen adventurers! Ava here, ready to share one of my absolute go-to recipes: Moong Dal Chilla. If you’re on the hunt for a breakfast that’s both incredibly delicious and packed with protein, you’ve hit the jackpot. This isn’t just another recipe; it’s a warm hug in the form of a savory pancake, perfect for starting your day off right. Imagine a crispy, golden-brown pancake made from moong dal, bursting with flavor from fresh ginger, chilies, and coriander. Sounds good, right? Let’s dive in!

I remember the first time I made dal chilla. I was trying to impress a friend with my culinary skills, and let’s just say, the first few attempts were…interesting. One was too thick, another too thin, and one even stuck to the pan so badly I thought I’d ruined it forever. But, like any good cooking adventure, I learned from my mistakes, tweaked the recipe, and finally landed on a version that’s now a staple in my kitchen. And now, I’m so excited to share this with you!

This recipe is incredibly versatile and forgiving, making it perfect for both seasoned cooks and kitchen newbies. I promise, once you try it, you’ll be hooked. It’s healthy, quick, and oh-so-satisfying. Plus, it’s a fantastic way to sneak in some extra protein and nutrients into your diet without sacrificing flavor. So, grab your blender, and let’s get cooking!

Why You’ll Love This Moong Dal Chilla Recipe

Seriously, what’s not to love? This moong dal chilla recipe is a game-changer for so many reasons:

  • Protein Powerhouse: Moong dal is an excellent source of plant-based protein, keeping you full and energized all morning.
  • Quick and Easy: From soaking the dal to flipping the chilla, this recipe comes together in under 30 minutes (excluding the soaking time). It is a truly quick Indian breakfast recipe.
  • Healthy and Nutritious: Packed with essential nutrients, this recipe is a guilt-free way to start your day.
  • Versatile: Customize the flavors to your liking with different spices and toppings.
  • Gluten-Free and Vegan-Friendly: Perfect for those with dietary restrictions.
  • Delicious: Because at the end of the day, it tastes absolutely amazing.

I’ve made this recipe countless times, and it never fails to impress. Whether I’m cooking for myself or entertaining guests, it’s always a crowd-pleaser. Trust me, this is one recipe you’ll want to keep in your back pocket. This cheela is the perfect option for breakfast or even a light lunch!

Ingredients You’ll Need

Here’s everything you’ll need to create your own batch of delicious moong dal chilla. Don’t worry, most of these ingredients are pantry staples!

  • 1 cup Moong Dal (split yellow lentils): Soaked for at least 4 hours, or overnight for best results.
  • 1/2 inch Ginger: Chopped, for that zingy flavor.
  • 1-2 Green Chilies: Chopped (adjust to taste), depending on how much heat you like.
  • 1/4 cup Coriander Leaves: Chopped, for freshness and flavor.
  • 1/4 teaspoon Turmeric Powder: For color and health benefits.
  • 1/4 teaspoon Asafoetida (hing): A pinch adds a unique savory flavor.
  • Salt to taste: Because everything tastes better with a little salt.
  • Water: As needed, to adjust the batter consistency.
  • Oil or Ghee: For cooking, ghee adds a richer flavor.
Recipe Image

Step-by-Step Guide: Making Your Moong Dal Chilla

Alright, let’s get down to business! Here’s how to make the perfect moong dal chilla, step by step. Don’t worry, it’s easier than you think!

  1. Soak the Moong Dal: Rinse the moong dal thoroughly and soak it in enough water for at least 4 hours, or preferably overnight. This helps soften the dal and makes it easier to blend.
  2. Blend the Batter: Drain the soaked moong dal and transfer it to a blender. Add ginger, green chilies, coriander leaves, turmeric powder, asafoetida, and salt. Add a little water (about 1/4 cup) and blend to a smooth batter. Add more water if needed to achieve a dosa-like consistency (not too thick, not too thin).
  3. Heat the Pan: Heat a non-stick pan or griddle (tawa) over medium heat. Make sure the pan is hot before you start cooking; otherwise, the chilla might stick.
  4. Grease the Pan: Lightly grease the pan with oil or ghee. This helps prevent the chilla from sticking and gives it a beautiful golden color.
  5. Pour and Spread: Pour a ladleful of batter onto the pan and spread it evenly in a circular motion. Aim for a thin, even layer.
  6. Cook the Chilla: Cook for 2-3 minutes on one side, or until the bottom is golden brown. You’ll know it’s ready to flip when the edges start to lift.
  7. Flip and Cook: Flip the chilla and cook for another 1-2 minutes, or until the other side is also golden brown.
  8. Serve Hot: Remove the chilla from the pan and serve hot with your favorite chutney or yogurt.

And there you have it! A delicious, protein-packed moong dal chilla ready to be devoured. I like to make a big batch of the batter and store it in the fridge for quick and easy breakfasts throughout the week. Make the batter in advance and store it in the fridge, and you can have a healthy breakfast ready in minutes!

Pro Tips for the Perfect Chilla

Want to take your moong dal chilla game to the next level? Here are a few pro tips I’ve learned over the years:

  • Soaking is Key: Don’t skip the soaking step! It makes the dal easier to blend and results in a smoother batter.
  • Batter Consistency: The batter should be thin enough to spread easily but not so thin that it becomes watery. Adjust the water accordingly.
  • Non-Stick Pan is a Must: Using a good quality non-stick pan or griddle is crucial to prevent the chilla from sticking.
  • Medium Heat: Cook the chilla over medium heat to ensure it cooks evenly and doesn’t burn.
  • Patience is a Virtue: Don’t rush the cooking process. Let the chilla cook until it’s golden brown and crispy on both sides.
  • Experiment with Spices: Feel free to add other spices like red chili powder, cumin powder, or coriander powder to the batter for extra flavor.

These tips have helped me perfect my moong dal chilla recipe, and I’m confident they’ll help you too. Remember, practice makes perfect, so don’t be discouraged if your first few attempts aren’t flawless. Keep trying, and you’ll get there!

Common Mistakes to Avoid

We all make mistakes in the kitchen, but knowing what to avoid can save you time and frustration. Here are some common mistakes to watch out for when making moong dal chilla:

  • Not Soaking the Dal Long Enough: This can result in a grainy batter.
  • Adding Too Much Water: This can make the batter too thin and difficult to spread.
  • Cooking on High Heat: This can cause the chilla to burn before it’s cooked through.
  • Flipping Too Early: This can cause the chilla to break apart.
  • Using a Pan That Isn’t Hot Enough: This can cause the chilla to stick to the pan.

I’ve made all of these mistakes at some point, so trust me, I know how frustrating they can be. But don’t worry, learning from your mistakes is part of the fun! If you are using a cast iron pan, make sure it is properly seasoned and heated before adding the batter in. If using a regular pan, ensure it is non-stick.

Delicious Variations to Try

One of the best things about this recipe is how easy it is to customize. Here are a few variations to spice things up:

  • Paneer Chilla: Add grated paneer (Indian cheese) to the batter for an extra boost of protein and flavor.
  • Vegetable Chilla: Mix in finely chopped vegetables like onions, tomatoes, carrots, and bell peppers for added nutrients and texture.
  • Spinach Chilla: Blend in a handful of spinach to the batter for a healthy and vibrant twist.
  • Spicy Chilla: Add a pinch of red chili powder or a dash of hot sauce to the batter for an extra kick.
  • Herb Chilla: Mix in fresh herbs like mint, cilantro, or dill for a refreshing flavor.

Feel free to get creative and experiment with different ingredients to find your perfect combination. The possibilities are endless!

How to Store Leftover Chilla

If you happen to have any leftover chilla (which is rare in my house!), here’s how to store them:

  • In the Fridge: Store the cooked chilla in an airtight container in the refrigerator for up to 2-3 days.
  • Reheating: Reheat the chilla on a pan or in a microwave until warmed through.

The batter can also be stored in the fridge for up to 2 days. Just make sure to stir it well before using.

Frequently Asked Questions (FAQ)

Got questions? I’ve got answers! Here are some common questions about making moong dal chilla:

  • Can I use other types of lentils?: While moong dal is the traditional choice, you can experiment with other lentils like masoor dal (red lentils) or chana dal (split chickpeas).
  • Can I make this recipe without ginger and green chilies?: Yes, but the flavor will be milder. You can substitute with other spices like garlic powder or black pepper.
  • Can I freeze the batter?: I don’t recommend freezing the batter as it may change the texture. It’s best to use it fresh.
  • How do I prevent the chilla from sticking to the pan?: Make sure to use a good quality non-stick pan and grease it well with oil or ghee.
  • What can I serve with moong dal chilla?: Moong dal chilla pairs well with chutney, yogurt, pickles, or even a dollop of butter.

Serving Suggestions: What to Serve with Your Chilla

Moong dal chilla is delicious on its own, but it’s even better when paired with the right accompaniments. Here are a few of my favorite serving suggestions:

  • Chutney: Serve with coconut chutney, mint chutney, or tomato chutney for a burst of flavor.
  • Yogurt: A dollop of plain yogurt adds a creamy and cooling contrast to the spicy chilla.
  • Pickles: Indian pickles like mango pickle or lime pickle add a tangy and spicy kick.
  • Butter: A simple pat of butter adds richness and flavor.
  • Sambar: Serve with sambar, a South Indian lentil-based vegetable stew, for a complete and satisfying meal.

I hope you enjoyed this recipe as much as I do! Remember, cooking is all about having fun and experimenting, so don’t be afraid to put your own spin on it. Happy cooking!

Protein-Packed Moong Dal Chilla

Prep Time 4 hours
Cook Time 10 minutes
Total Time 4 hours 10 minutes
Servings 2 chillas
Calories 250
Start your day with a nutritious and delicious Protein-Packed Moong Dal Chilla! This healthy breakfast option is packed with protein and flavor, perfect for a quick and satisfying meal.

Ingredients

Ingredients

  • 1 cup Moong Dal (split yellow lentils) (soaked for at least 4 hours)
  • 0.5 inch Ginger (chopped)
  • 1-2 Green Chilies (chopped (adjust to taste))
  • 0.25 cup Coriander Leaves (chopped)
  • 0.25 teaspoon Turmeric Powder
  • 0.25 teaspoon Asafoetida (hing)
  • to taste Salt
  • as needed Water
  • for cooking Oil or Ghee

Instructions 

  • Drain the soaked moong dal and transfer it to a blender.
  • Add ginger, green chilies, coriander leaves, turmeric powder, asafoetida, and salt.
  • Add a little water (about 1/4 cup) and blend to a smooth batter. Add more water if needed to achieve a dosa-like consistency (not too thick, not too thin).
  • Heat a non-stick pan or griddle over medium heat.
  • Grease the pan lightly with oil or ghee.
  • Pour a ladleful of batter onto the pan and spread it evenly in a circular motion.
  • Cook for 2-3 minutes on one side, or until the bottom is golden brown.
  • Flip the chilla and cook for another 1-2 minutes, or until the other side is also golden brown.
  • Remove the chilla from the pan and serve hot with chutney or yogurt.

Notes

For a spicier chilla, add more green chilies or a pinch of red chili powder to the batter.
Calories: 250kcal
Cost: $3
Course: Breakfast, Snack
Cuisine: Indian
Keyword: Moong Dal
pin

Hey there, food lovers! Ava here, ready to share one of my all-time favorite weeknight wonders: Lemon Butter Salmon with Crispy Potatoes and Broccoli. If you’re anything like me, you’re always on the lookout for meals that are both incredibly delicious and surprisingly simple. This recipe ticks all the boxes, and I can’t wait for you to try it!

Growing up, salmon was a staple in our Oregon kitchen. My mom had a knack for making it taste amazing, even on the busiest of evenings. This recipe is my ode to her simple, yet flavorful cooking style, with a few of my own twists thrown in for good measure. So, let’s dive in and create some kitchen magic together!

Why You’ll Love This Lemon Butter Salmon Dish

Seriously, what’s not to love? This dish is a symphony of flavors and textures that will make your taste buds sing. From the tender, flaky salmon to the golden, crispy potatoes and the perfectly cooked broccoli, every bite is a delight. But beyond the taste, here’s why this recipe is a winner:

  • Quick and Easy: Ready in under 40 minutes, it’s perfect for busy weeknights.
  • Healthy and Wholesome: Packed with protein, healthy fats, and vitamins.
  • Flavor Explosion: The lemon butter sauce is bright, zesty, and utterly irresistible.
  • Versatile: Easily customizable to suit your taste preferences and dietary needs.

This lemon butter salmon with crispy potatoes and broccoli recipe is sure to become a family favorite. Trust me; even the pickiest eaters will be asking for seconds!

Ingredients for Lemon Butter Salmon with Crispy Potatoes and Broccoli

Here’s what you’ll need to whip up this culinary masterpiece:

  • 4 6 oz Salmon fillets
  • 1/4 cup Unsalted butter
  • 2 tablespoons Fresh lemon juice
  • 2 cloves Garlic, minced
  • to taste Salt and pepper
  • for garnish Lemon slices
  • for garnish Fresh parsley, chopped
  • 1.5 lbs Baby potatoes, halved
  • 3 tablespoons Olive oil
  • 1 teaspoon Garlic powder
  • 1 teaspoon Paprika
  • 1 lb Broccoli florets
  • 2 tablespoons Olive oil
  • to taste Salt and pepper
  • 1 teaspoon Lemon zest (optional)
Recipe Image

Pro Tips for Perfect Lemon Butter Salmon, Crispy Potatoes and Broccoli

Alright, let’s talk pro tips. These little nuggets of wisdom will take your Lemon Butter Salmon with Crispy Potatoes and Broccoli from good to absolutely amazing:

  • Pat the Salmon Dry: This helps create a beautiful sear and prevents the fish from steaming.
  • Don’t Overcrowd the Pan: Give the potatoes and broccoli enough space to get crispy. If needed, cook in batches.
  • Use a Hot Pan: A hot pan is key for achieving those perfectly golden, crispy potatoes.
  • Taste as You Go: Adjust the seasoning to your liking. A little extra lemon juice or garlic can make all the difference.
  • Rest the Salmon: Let the salmon rest for a few minutes after cooking. This allows the juices to redistribute, resulting in a more tender and flavorful fillet.

If you follow these tips, you’re sure to impress everyone at the dinner table. Remember, cooking should be fun, so don’t be afraid to experiment and make it your own!

Common Mistakes to Avoid

We’ve all been there—a kitchen mishap that turns into a learning experience. Here are a few common mistakes to avoid when making Lemon Butter Salmon with Crispy Potatoes and Broccoli:

  • Overcooking the Salmon: Salmon cooks quickly, so keep a close eye on it. Overcooked salmon is dry and tough.
  • Not Seasoning Enough: Don’t be shy with the salt, pepper, garlic powder, and paprika. These seasonings enhance the natural flavors of the ingredients.
  • Steaming the Potatoes: If your potatoes are steaming instead of crisping, your pan might not be hot enough, or you might be overcrowding it.
  • Burning the Garlic: Minced garlic can burn quickly, so add it towards the end of cooking the lemon butter sauce.
  • Using Old Lemon Juice: Fresh lemon juice is always best for its bright, zesty flavor.

Learning from mistakes is part of the cooking journey. Don’t let a minor setback discourage you. Just dust yourself off, adjust your technique, and try again!

Variations on Lemon Butter Salmon with Crispy Potatoes and Broccoli

One of the best things about this recipe is how versatile it is. Feel free to get creative and customize it to suit your taste preferences. Here are a few ideas:

  • Spice It Up: Add a pinch of red pepper flakes to the lemon butter sauce for a little heat.
  • Herb It Up: Experiment with different herbs like dill, thyme, or rosemary.
  • Add Veggies: Swap out the broccoli for other veggies like asparagus, green beans, or Brussels sprouts.
  • Make It Creamy: Stir in a splash of cream or coconut milk to the lemon butter sauce for a richer flavor.
  • Use Different Potatoes: Try using sweet potatoes or Yukon gold potatoes for a different flavor profile.

The possibilities are endless! Don’t be afraid to experiment and create your own unique version of this classic dish. If you’re feeling fancy, you can add a sprinkle of parmesan cheese over the broccoli before serving. You’re going to love this.

How to Store Leftovers

If you happen to have any leftovers (which is rare in my house!), here’s how to store them:

  • Refrigerate: Store the salmon, potatoes, and broccoli in separate airtight containers in the refrigerator for up to 3 days.
  • Reheat: Reheat the salmon gently in a skillet or microwave to prevent it from drying out. Reheat the potatoes and broccoli in a skillet or oven to maintain their crispiness.

Leftovers can be just as delicious the next day! I often enjoy them for lunch or as a quick and easy dinner.

Frequently Asked Questions (FAQ)

Got questions? I’ve got answers! Here are some of the most common questions I get about this recipe:

  • Can I use frozen salmon?: Yes, but make sure to thaw it completely before cooking. Pat it dry to remove any excess moisture.
  • Can I use dried herbs instead of fresh?: Yes, but use about half the amount. Dried herbs have a more concentrated flavor.
  • Can I make this recipe ahead of time?: You can prep the potatoes and broccoli ahead of time, but it’s best to cook the salmon fresh.
  • Can I grill the salmon?: Absolutely! Grill the salmon for about 4-5 minutes per side, or until it’s cooked through.
  • What wine pairs well with this dish?: A crisp white wine like Sauvignon Blanc or Pinot Grigio pairs beautifully with Lemon Butter Salmon.

If you have any other questions, feel free to ask in the comments below. I’m always happy to help!

Serving Suggestions for Salmon With Crispy Potatoes and Broccoli

This dish is a complete meal on its own, but if you’re looking to add a little something extra, here are a few serving suggestions:

  • Side Salad: A simple green salad with a light vinaigrette complements the richness of the salmon.
  • Crusty Bread: Serve with a side of crusty bread for soaking up the delicious lemon butter sauce.
  • Quinoa or Rice: Add a side of quinoa or rice for a heartier meal.
  • Roasted Vegetables: If you’re feeling extra veggie-centric, add a side of roasted asparagus or Brussels sprouts.

No matter how you choose to serve it, this Lemon Butter Salmon with Crispy Potatoes and Broccoli is sure to be a hit. It’s a delightful and healthy dinner that’s not only easy to make, but also a crowd-pleaser. If you’re looking for ideas for dinner healthy options, this is a winner! So what are you waiting for? Get cooking and enjoy!

Lemon Butter Salmon with Crispy Potatoes and Broccoli

Prep Time 15 minutes
Cook Time 25 minutes
Total Time 40 minutes
Servings 4 fillets
Calories 450
This delightful recipe features flaky salmon fillets cooked in a luscious lemon butter sauce, served alongside crispy roasted potatoes and tender broccoli. It's a quick, easy, and healthy meal perfect for a weeknight dinner.

Ingredients

Salmon

  • 4 Salmon fillets (6 oz each)

Lemon Butter Sauce

  • 1/4 cup Unsalted butter
  • 2 tablespoons Fresh lemon juice
  • 2 cloves Garlic, minced
  • to taste Salt and pepper

Garnish

  • for garnish Lemon slices
  • for garnish Fresh parsley, chopped

Crispy Potatoes

  • 1.5 lbs Baby potatoes, halved
  • 3 tablespoons Olive oil
  • 1 teaspoon Garlic powder
  • 1 teaspoon Paprika

Broccoli

  • 1 lb Broccoli florets
  • 2 tablespoons Olive oil
  • to taste Salt and pepper
  • 1 teaspoon Lemon zest (optional)

Notes

For extra crispy potatoes, parboil them for 5 minutes before roasting.
Calories: 450kcal
Cost: $25
Course: Main Course
Cuisine: American
Keyword: Salmon
pin

Hey there, friend! Ava here, back from my little Seattle kitchen, ready to share a recipe that’s become a total game-changer in my house. It’s called Slow Cooker Garlic Butter Beef Bites with Potatoes, and trust me, it’s the kind of dish that makes weeknights feel like weekends. Remember those days in Oregon, where dinner was always a comforting event? This recipe brings me right back. It’s simple, hearty, and utterly delicious. I’m talking tender beef, melt-in-your-mouth potatoes, all swimming in a rich, garlicky butter sauce. Are you drooling yet? Let’s dive in!

Why You’ll Love This Slow Cooker Garlic Butter Beef Bites Recipe

Okay, let’s get real. We all want dinners that are easy, satisfying, and don’t require spending hours chained to the stove. This recipe ticks all those boxes and then some. The beauty of this dish is that it’s incredibly versatile. You can prep everything in the morning, toss it into your slow cooker, and come home to a kitchen filled with the most amazing aroma. Plus, it’s one of those meals that everyone seems to love, from picky toddlers to discerning adults. Here’s why I think you’ll be obsessed:

  • Effortless Cooking: The slow cooker does all the work. Seriously, just set it and forget it.
  • Incredible Flavor: Garlic butter, need I say more? The combination of garlic, butter, and beef broth creates a rich, savory sauce that’s simply irresistible.
  • Tender Beef: Slow cooking transforms even the toughest cuts of beef into tender, juicy bites.
  • One-Pot Wonder: Everything cooks together in one pot, which means fewer dishes to wash. Hallelujah!
  • Customizable: You can easily adapt this recipe to suit your taste preferences and dietary needs.

This slow cooker garlic butter beef and baby potatoes recipe is truly something special. It’s an easy and delicious way to enjoy a hearty and flavorful meal. The beef and potatoes are cooked in a rich garlic butter sauce. It’s the kind of meal that brings everyone to the table with smiles and empty plates.

Ingredients for Slow Cooker Garlic Butter Beef Bites with Potatoes

Here’s what you’ll need to whip up this magic:

  • 2 lbs (900g) beef stew meat, cut into bite-sized cubes
  • 1 lb (450g) baby potatoes, halved or quartered if large
  • 4 tbsp unsalted butter
  • 6 cloves garlic, minced
  • 1/2 cup beef broth
  • 1 tbsp Worcestershire sauce
  • 1 tsp dried thyme
  • 1 tsp dried rosemary
  • Salt and pepper, to taste
  • 2 tbsp olive oil
  • Fresh parsley, chopped (for garnish)
Recipe Image

How to Make Slow Cooker Garlic Butter Beef Bites: Step-by-Step Instructions

Alright, let’s get cooking! Don’t worry; it’s easier than you think. Here’s how to make these mouthwatering beef bites:

  1. Searing the Beef:
    Start by heating the olive oil in a large skillet over medium-high heat. Season the beef cubes with salt and pepper. In batches, sear the beef for about 2-3 minutes on each side until it’s nicely browned. Once browned, transfer the beef to your slow cooker. Searing the beef adds a depth of flavor that you don’t want to miss.
  2. Preparing the Garlic Butter Sauce:
    In the same skillet, melt 2 tablespoons of unsalted butter. Add in the minced garlic and sauté for about 1 minute until it becomes fragrant. This step is key for bringing out that delicious garlic flavor! Be careful not to burn the garlic.
  3. Mixing in the Broth:
    Next, pour in the beef broth and Worcestershire sauce, scraping up any flavorful browned bits stuck to the bottom of the skillet. Stir in the dried thyme and rosemary. Now, pour this garlicky mixture over the beef in your slow cooker.
  4. Adding the Potatoes:
    Add the halved baby potatoes to the slow cooker, tossing everything together to ensure the potatoes mix well with the beef and sauce. Make sure the potatoes are evenly distributed for even cooking.
  5. Finishing Touches:
    Place the remaining 2 tablespoons of butter on top of the beef and potatoes to add more richness to the dish. Because who doesn’t love extra butter?
  6. Cooking:
    Cover your slow cooker and cook on low for 6-7 hours or on high for 3-4 hours. The beef should be tender and the potatoes cooked through, soaking up all that lovely flavor! The aroma alone will make your stomach rumble.
  7. Taste and Adjust:
    Before serving, taste the dish and adjust the seasoning with extra salt and pepper if needed. You want it to be just right!
  8. Garnishing and Serving:
    Finally, garnish your hearty meal with freshly chopped parsley for a beautiful finish. Serve warm and enjoy every delicious bite!

And that’s it! You’ve just created a dish that will have everyone singing your praises. Enjoy every bite of these garlic butter beef bites!

Pro Tips for Perfect Slow Cooker Garlic Butter Beef Bites

Want to take your beef bites to the next level? Here are a few of my favorite pro tips:

  • Sear the Beef: Don’t skip this step! Searing adds a delicious crust and deepens the flavor of the beef.
  • Use Fresh Garlic: Freshly minced garlic is a must for that intense garlic flavor.
  • Don’t Overcook: Keep an eye on the cooking time to prevent the beef from becoming dry.
  • Adjust Seasoning: Taste and adjust the seasoning as needed. Salt and pepper are your best friends.
  • Thicken the Sauce: If you prefer a thicker sauce, mix a tablespoon of cornstarch with a tablespoon of cold water and stir it into the slow cooker during the last 30 minutes of cooking.

Common Mistakes to Avoid

We’ve all been there – a cooking mishap that turns into a learning experience. Here are some common mistakes to avoid when making this recipe:

  • Burning the Garlic: Burnt garlic tastes bitter. Sauté it gently over low heat until fragrant.
  • Overcrowding the Slow Cooker: Overcrowding can lead to uneven cooking. Make sure everything fits comfortably.
  • Adding Too Much Salt: Taste before adding more salt, especially since beef broth and Worcestershire sauce already contain salt.
  • Skipping the Searing: Searing is crucial for flavor. Don’t skip it!

Variations to Try

The beauty of this recipe is that it’s so easy to customize. Here are a few variations you might enjoy:

  • Spicy Beef Bites: Add a pinch of red pepper flakes or a dash of hot sauce for a spicy kick.
  • Mushroom Garlic Butter Beef Bites: Add sliced mushrooms to the slow cooker for extra flavor and texture.
  • Vegetable Medley: Include other vegetables like carrots, celery, or onions for a heartier meal.
  • Creamy Garlic Butter Beef Bites: Stir in a splash of heavy cream or sour cream during the last 30 minutes of cooking for a creamier sauce.

How to Store and Reheat

Got leftovers? Lucky you! Here’s how to store and reheat your beef bites:

  • Storage: Store the leftover beef bites in an airtight container in the refrigerator for up to 3-4 days.
  • Reheating: Reheat the beef bites in a skillet over medium heat or in the microwave until heated through. You can also reheat them in the slow cooker on low heat.

Frequently Asked Questions (FAQ)

Got questions? I’ve got answers! Here are some frequently asked questions about this recipe:

  • Can I use a different cut of beef?: Yes, you can use chuck roast or sirloin steak. Just make sure to cut it into bite-sized pieces.
  • Can I use frozen potatoes?: Fresh potatoes work best, but you can use frozen potatoes in a pinch. Just add them to the slow cooker during the last hour of cooking.
  • Can I make this recipe ahead of time?: Absolutely! You can prep all the ingredients and store them in the slow cooker in the refrigerator overnight. Just add the butter before cooking.
  • Can I freeze this recipe?: Yes, you can freeze the cooked beef bites in an airtight container for up to 2-3 months. Thaw overnight in the refrigerator before reheating.
  • What if my sauce is too thin?: If your sauce is too thin, mix a tablespoon of cornstarch with a tablespoon of cold water and stir it into the slow cooker during the last 30 minutes of cooking.

Serving Suggestions

These Slow Cooker Garlic Butter Beef Bites are delicious on their own, but here are a few serving suggestions to complete your meal:

  • Mashed Potatoes: Serve over a bed of creamy mashed potatoes for the ultimate comfort food experience.
  • Rice: Serve with fluffy white rice or brown rice for a simple and satisfying meal.
  • Crusty Bread: Serve with crusty bread for soaking up all that delicious garlic butter sauce.
  • Green Salad: Pair with a fresh green salad for a balanced and nutritious meal.
  • Roasted Vegetables: Serve alongside roasted vegetables like broccoli, carrots, or Brussels sprouts for a healthy and flavorful side dish.

Well, that’s a wrap on this Slow Cooker Garlic Butter Beef Bites with Potatoes recipe! I hope you love it as much as my family and I do. Remember, cooking is all about experimenting and having fun. So don’t be afraid to get creative and make this recipe your own. Happy cooking, and I’ll see you in the kitchen!

Slow Cooker Garlic Butter Beef Bites with Potatoes

Prep Time 20 minutes
Cook Time 6 hours
Total Time 6 hours 20 minutes
Servings 6 servings
Calories 450
Tender beef bites and potatoes slow-cooked in a rich garlic butter sauce. This easy recipe is perfect for a comforting and flavorful meal.

Ingredients

Ingredients

  • 2 lbs beef stew meat (cut into bite-sized cubes)
  • 1 lb baby potatoes (halved or quartered if large)
  • 4 tbsp unsalted butter
  • 6 cloves garlic (minced)
  • 0.5 cup beef broth
  • 1 tbsp Worcestershire sauce
  • 1 tsp dried thyme
  • 1 tsp dried rosemary
  • Salt and pepper (to taste)
  • 2 tbsp olive oil
  • Fresh parsley (chopped (for garnish))

Instructions 

  • Sear beef in olive oil until browned, then transfer to slow cooker.
  • Sauté minced garlic in butter until fragrant.
  • Pour beef broth, Worcestershire sauce, thyme, and rosemary over beef.
  • Add potatoes to the slow cooker.
  • Place remaining butter on top.
  • Cook on low for 6-7 hours or high for 3-4 hours.
  • Taste and adjust seasoning.
  • Garnish with parsley and serve.

Notes

For extra flavor, consider adding a bay leaf during cooking and removing it before serving.
Calories: 450kcal
Cost: $20
Course: Main Course
Cuisine: American
Keyword: Beef
pin

My name’s Ava, and if you’ve stumbled upon my kitchen, you’re probably here for one thing—the kind of recipes that make people pause mid-bite and say, ‘Wow.’ And trust me, this high protein banana bread will do just that! I grew up in a small town in Oregon, where the smell of fresh bread and roasted vegetables often drifted out of my mother’s kitchen window. Cooking wasn’t just something we did to eat—it was how we celebrated, comforted, and connected. I was the kid who would rather stir a pot of chili than go ride my bike, and by the time I was twelve, I could whip up a pie from scratch that made my grandmother proud. These days, I’m 34 and living in Seattle, where my kitchen has become my favorite corner of the world. Let’s dive into this amazing recipe!

This isn’t just any banana bread; it’s a high protein banana bread designed to fuel your body and satisfy your cravings. It’s seriously delicious, packed with goodness, and surprisingly easy to make. I’ve tweaked and perfected this recipe over time, and now I’m sharing it with you!

Why You’ll Love This High Protein Banana Bread

So, why should you bake this particular banana bread? Let me tell you:

  • Protein Powerhouse: Each slice is packed with a significant amount of protein, thanks to the addition of protein powder and Greek yogurt (or cottage cheese). This makes it a fantastic post-workout snack or a satisfying breakfast option.
  • Seriously Delicious: We’re not sacrificing flavor for protein here! The ripe bananas, a touch of maple syrup, and a hint of cinnamon create a symphony of flavors that will tantalize your taste buds.
  • Easy to Make: This recipe is straightforward and doesn’t require any fancy equipment. You can whip it up in under an hour, from start to finish.
  • Healthy-ish: While it’s still a treat, this banana bread is made with wholesome ingredients like oat flour and unsweetened applesauce. We’re keeping the added sugar to a minimum.
  • Customizable: Feel free to get creative with your add-ins! Walnuts, pecans, chocolate chips, or even a swirl of peanut butter can take this bread to the next level.

Ingredients: Your Shopping List

Here’s what you’ll need to create this masterpiece. Don’t worry, you probably have most of these ingredients already!

  • 3 ripe bananas, mashed (about 1 ½ cups): The riper, the better! They add sweetness and moisture.
  • ½ cup unsweetened applesauce: This replaces some of the oil, making it a healthier option.
  • ¼ cup maple syrup or your favorite sugar substitute: For a touch of sweetness. I prefer maple syrup, but you can use honey, agave, or a sugar-free alternative.
  • ¼ cup melted coconut oil or vegetable oil: Adds moisture and richness. Coconut oil gives it a subtle coconut flavor.
  • 2 large eggs or egg substitute: Binds the ingredients together.
  • ½ cup Greek yogurt or cottage cheese (for moisture and extra protein): My secret weapon! It makes the bread incredibly moist and adds a protein boost.
  • 1 tsp vanilla extract: Enhances the flavors.
  • 2 scoops (around ½ cup) vanilla or chocolate protein powder: The star of the show! Choose your favorite flavor. Chocolate protein powder creates an amazing chocolate banana bread.
  • 1¾ cups oat flour or whole wheat flour: Oat flour makes it gluten-free. If you want a gluten free option, this is a yes!
  • 1 tsp baking soda: For leavening.
  • ½ tsp ground cinnamon: Adds warmth and spice.
  • ¼ tsp salt: Balances the sweetness.
  • ½ cup chopped walnuts or pecans (optional): For added texture and flavor.
  • ¼ cup peanut butter (optional, for added protein and flavor): Because peanut butter and banana are a match made in heaven!
Recipe Image

Let’s Bake: Step-by-Step Instructions

Alright, let’s get baking! Follow these simple steps, and you’ll have a loaf of delicious, high protein banana bread in no time.

  1. Preheat and Prep: Set your oven to 350°F (175°C). Grease and lightly flour a 9×5 inch loaf pan. This prevents the bread from sticking.
  2. Mash and Mix: In a large mixing bowl, mash the bananas. Add applesauce, maple syrup, oil, eggs, yogurt (or cottage cheese), and vanilla. Stir until everything is smooth and combined.
  3. Protein Power: Stir in the protein powder and mix until no lumps remain. It’s important to get rid of those lumps for a smooth texture.
  4. Dry Ingredients: In another bowl, whisk together the oat flour (or whole wheat flour), baking soda, cinnamon, and salt.
  5. Combine: Slowly mix the dry ingredients into the wet mixture. Stir just until blended—don’t overmix. Overmixing can lead to a tough bread.
  6. Add-Ins (Optional): Fold in nuts or peanut butter if using. Get creative!
  7. Bake: Pour the batter into your prepared pan. Bake for 45–55 minutes, or until a toothpick inserted in the center comes out clean.
  8. Cool: Let it rest in the pan for 10 minutes, then transfer to a wire rack to cool completely. This prevents the bottom from getting soggy.

Pro Tips for Perfect Banana Bread

Want to take your banana bread to the next level? Here are a few of my favorite tips:

  • Use Overripe Bananas: They’re sweeter and easier to mash. The browner, the better!
  • Don’t Overmix: Overmixing develops the gluten, resulting in a tough bread. Mix until just combined.
  • Use Room Temperature Ingredients: This helps everything blend together more easily.
  • Check for Doneness: Insert a toothpick into the center of the bread. If it comes out clean, it’s done. If not, bake for a few more minutes.
  • Let it Cool: Resist the urge to slice into it right away! Letting it cool completely allows the flavors to meld and the bread to set.

Common Mistakes to Avoid

We all make mistakes in the kitchen. Here are a few common ones to watch out for:

  • Using Underripe Bananas: They won’t have enough sweetness or moisture.
  • Overmixing the Batter: This leads to a tough bread.
  • Overbaking: This results in a dry bread.
  • Not Measuring Ingredients Accurately: Baking is a science! Use measuring cups and spoons for best results.
  • Opening the Oven Door Too Often: This can cause the bread to collapse.

Variations: Get Creative!

This recipe is a blank canvas! Here are a few ideas to get your creative juices flowing:

  • Chocolate Chip Banana Bread: Add ½ cup of chocolate chips to the batter.
  • Nutella Swirl Banana Bread: Swirl a few tablespoons of Nutella into the batter before baking.
  • Peanut Butter Banana Bread: Add ¼ cup of peanut butter to the batter, or swirl it in before baking.
  • Spiced Banana Bread: Add ¼ teaspoon of ground nutmeg or cloves to the batter.
  • Blueberry Banana Bread: Gently fold in ½ cup of fresh blueberries to the batter.

Storage Instructions

To keep your banana bread fresh, store it properly:

  • Room Temperature: Wrap the bread tightly in plastic wrap or store it in an airtight container. It will keep for 2-3 days.
  • Refrigerator: For longer storage, store the bread in the refrigerator. It will keep for up to a week.
  • Freezer: You can also freeze banana bread. Wrap it tightly in plastic wrap and then in foil. It will keep for up to 2-3 months. Thaw it overnight in the refrigerator before serving.

Frequently Asked Questions (FAQ)

Got questions? I’ve got answers!

  • Can I use a different type of flour? Yes, you can substitute the oat flour with whole wheat flour, almond flour, or even a gluten-free blend.
  • Can I use a different type of sweetener? Yes, you can use honey, agave, or a sugar-free alternative instead of maple syrup.
  • Can I make this recipe vegan? Yes, you can substitute the eggs with flax eggs (1 tablespoon of ground flaxseed mixed with 3 tablespoons of water per egg). Use a plant-based yogurt alternative.
  • How much protein is in each slice? The amount of protein will vary depending on the type of protein powder you use. Check the nutrition label on your protein powder for more information. But typically, you can expect up to 10 grams of protein per slice!
  • Can I add chocolate chips? Absolutely! Chocolate chips are a great addition to this banana bread.

Serving Suggestions

Enjoy your high protein banana bread in so many ways!

  • As a breakfast treat: Pair it with a cup of coffee or tea for a satisfying morning meal.
  • As a post-workout snack: Fuel your muscles with a slice after your workout.
  • As a dessert: Serve it with a scoop of vanilla ice cream or a dollop of whipped cream.
  • Toasted with butter: Toast a slice and spread it with butter or your favorite nut butter.
  • On its own: Sometimes, the simplest way is the best. Enjoy a slice of this high protein banana bread all by itself!

I hope you enjoy this high protein banana bread as much as I do! It’s a delicious and nutritious way to start your day or fuel your body after a workout. Don’t forget to share your creations with me on social media using #AvasKitchenAdventures. Happy baking!

Fuel Your Day: The Ultimate High Protein Banana Bread (Seriously Delicious!)

Prep Time 15 minutes
Cook Time 50 minutes
Total Time 1 hour 5 minutes
Servings 12 slices
Calories 220
Start your day right with this delicious and protein-packed banana bread. It's a healthy and satisfying treat that will keep you energized.

Ingredients

Ingredients

  • 3 ripe bananas (mashed (about 1 ½ cups))
  • 0.5 cup unsweetened applesauce
  • 0.25 cup maple syrup (or your favorite sugar substitute)
  • 0.25 cup melted coconut oil (or vegetable oil)
  • 2 large eggs (or egg substitute)
  • 0.5 cup Greek yogurt (or cottage cheese (for moisture and extra protein))
  • 1 tsp vanilla extract
  • 0.5 cup vanilla protein powder (or chocolate protein powder)
  • 1.75 cups oat flour (or whole wheat flour)
  • 1 tsp baking soda
  • 0.5 tsp ground cinnamon
  • 0.25 tsp salt
  • 0.5 cup chopped walnuts (or pecans (optional))
  • 0.25 cup peanut butter (optional, for added protein and flavor)

Instructions 

  • Preheat oven to 350°F (175°C). Grease and flour a 9x5 inch loaf pan.
  • Mash bananas, add applesauce, maple syrup, oil, eggs, yogurt, and vanilla. Stir until smooth.
  • Stir in protein powder until no lumps remain.
  • Whisk together flour, baking soda, cinnamon, and salt in another bowl.
  • Slowly mix dry ingredients into wet mixture until just blended. Don’t overmix.
  • Fold in nuts or peanut butter if using.
  • Pour batter into pan. Bake for 45–55 minutes, or until a toothpick comes out clean.
  • Let it rest in the pan for 10 minutes, then transfer to a wire rack to cool completely.

Notes

For a richer flavor, use brown butter instead of melted coconut oil.
Calories: 220kcal
Cost: $8
Course: Breakfast, Snack
Cuisine: American
Keyword: Banana
pin

Hey there, friend! Ava here, back from my little kitchen in Seattle with a recipe that’s about to become your weeknight savior. I’m talking about Korean Ground Beef Bowls – a dish so quick, so flavorful, and so customizable, you’ll wonder where it’s been all your life. This isn’t just a meal; it’s a hug in a bowl, ready in just about 25 minutes. Trust me, you’re going to love this!

Growing up, my mom always had a knack for turning simple ingredients into something extraordinary. This recipe reminds me of those days – easy, comforting, and packed with flavor. I remember one particularly hectic week when she whipped up something similar using ground beef, and it was an instant hit. Now, I’ve taken that memory and given it a Korean-inspired twist.

Why You’ll Love This Korean Ground Beef Bowl

Okay, let’s get real. Why should you add yet another recipe to your already overflowing collection? Here’s why this Korean Ground Beef Bowl deserves a spot:

  • Speed Demon: Ready in 25 minutes? Yes, please! Perfect for those nights when you’re short on time but still craving something delicious.
  • Flavor Explosion: The combination of savory soy sauce, nutty sesame oil, and a hint of ginger and garlic creates a symphony of flavors that will dance on your taste buds.
  • Customizable: This dish is your canvas! Add your favorite veggies, a fried egg, or a sprinkle of sesame seeds – the possibilities are endless.
  • Comfort Food: It’s the kind of meal that makes you feel good from the inside out – warm, satisfying, and oh-so-delicious.

I’m telling you, this ground beef bowl recipe is a game-changer. It’s the kind of dish you can throw together without even thinking, and it always delivers. Plus, it’s a fantastic way to use ground beef in a creative and exciting way. I added a few personal touches to really make it my own, and I can’t wait for you to do the same!

Korean Ground Beef Bowl Ingredients

Here’s everything you’ll need to whip up this fantastic dish. Don’t worry, most of these are pantry staples, so you’re probably already halfway there!

  • 1 pound ground beef: (80/20 for optimal flavor)
  • 2 tablespoons soy sauce: (or tamari for gluten-free)
  • 1 tablespoon sesame oil
  • 3 cloves garlic: (minced)
  • 1 teaspoon ginger: (minced)
  • 2 green onions: (chopped (plus extra for garnish))
  • Salt and pepper: to taste
  • 2 cups cooked rice: (jasmine, basmati, or brown rice)

Optional Toppings:

  • Sesame seeds
  • Sliced cucumber
  • Kimchi
  • Pickled vegetables
  • Vegetables (bell peppers, carrots, broccoli, or spinach)
  • Egg (a fried egg on top for added richness)
Recipe Image

Let’s Make This Korean Ground Beef Bowl: Step-by-Step

Alright, let’s dive into the heart of the recipe. This is where the magic happens! I promise, it’s easier than it looks.

  1. Brown the Beef: In a large skillet over medium-high heat, brown the ground beef. Break it up with a spoon as it cooks until it’s no longer pink. Drain any excess grease – we want flavor, not fat!
  2. Add Aromatics: Stir in the minced garlic and ginger. Cook for about a minute until fragrant. Trust me, this step is crucial for that authentic Korean flavor.
  3. Simmer in Sauce: Pour in the soy sauce and sesame oil. Season with salt and pepper to taste. Let it simmer for about 5 minutes, allowing the sauce to thicken slightly and coat the beef beautifully. This is where the sauce and the beef become one.
  4. Incorporate Green Onions: Stir in the chopped green onions. Reserve some for garnish. I added these at the end to keep them fresh and vibrant.
  5. Serve and Enjoy: Spoon the Korean ground beef over cooked rice. Garnish with extra green onions, sesame seeds, and any other toppings you desire. A fried egg on top? Absolutely!

And there you have it! A simple, delicious Korean Ground Beef Bowl ready to devour. I didn’t tell you it was easy, did I?

Pro Tips for the Best Korean Ground Beef Bowl

Want to take your Korean Ground Beef Bowl from good to absolutely amazing? Here are a few pro tips I’ve learned along the way:

  • Use Quality Ground Beef: As I mentioned earlier, 80/20 ground beef is my go-to for optimal flavor. The little extra fat adds richness and depth to the dish.
  • Don’t Overcook the Beef: Overcooked ground beef can be dry and tough. Cook it until it’s just browned, and then let it simmer in the sauce to absorb all that delicious flavor.
  • Toast the Sesame Seeds: Toasting sesame seeds before adding them as a garnish enhances their nutty flavor and adds a delightful crunch.
  • Adjust the Sauce to Your Taste: Feel free to adjust the amount of soy sauce and sesame oil to suit your preferences. If you like it sweeter, add a touch of brown sugar. If you like it spicier, add a pinch of red pepper flakes.

I’m always experimenting with this recipe, and I encourage you to do the same. Cooking should be fun, so don’t be afraid to play around with the ingredients and find what works best for you!

Common Mistakes to Avoid

We all make mistakes in the kitchen – it’s part of the learning process. But here are a few common pitfalls to avoid when making Korean Ground Beef Bowls:

  • Using Too Much Soy Sauce: Soy sauce is salty, so be careful not to overdo it. Start with the recommended amount and add more to taste.
  • Skipping the Aromatics: Garlic and ginger are essential for that authentic Korean flavor. Don’t skip them!
  • Not Draining the Grease: Excess grease can make the dish heavy and greasy. Be sure to drain it off after browning the beef.
  • Forgetting the Garnish: A sprinkle of green onions and sesame seeds adds a pop of color and flavor to the finished dish. Don’t forget them!

I didn’t always get it right, either. I remember the first time I made this, I didn’t drain the beef properly, and the whole dish was swimming in grease. It wasn’t pretty, but I learned from it!

Korean Ground Beef Bowl Variations

One of the best things about this recipe is how easy it is to customize. Here are a few variations to try:

  • Spicy Beef Bowl: Add a pinch of red pepper flakes or a dollop of gochujang (Korean chili paste) to the sauce for a spicy kick.
  • Vegetarian Bowl: Substitute the ground beef with crumbled tofu or plant-based ground.
  • Beef and Broccoli Bowl: Add steamed broccoli florets to the bowl for a healthy and delicious twist.
  • Kimchi Beef Bowl: Top the bowl with kimchi for a tangy and spicy fermented delight.

I added some kimchi the other day and it was incredible! Don’t be afraid to experiment with different flavors and textures. The possibilities are endless!

How to Store Leftovers

If you happen to have any leftovers (which is rare in my house!), here’s how to store them:

  • In the Refrigerator: Store the Korean ground beef and cooked rice separately in airtight containers in the refrigerator for up to 3 days.
  • To Reheat: Reheat the beef in a skillet over medium heat or in the microwave until heated through. Reheat the rice separately.
  • Freezing: I don’t recommend freezing the cooked rice, as it can become mushy. However, you can freeze the Korean ground beef in an airtight container for up to 2 months. Thaw it in the refrigerator overnight before reheating.

Frequently Asked Questions (FAQ)

Got questions? I’ve got answers! Here are some common questions about Korean Ground Beef Bowls:

  • Can I use a different type of rice? Absolutely! Jasmine, basmati, brown rice – they all work well in this dish.
  • Can I make this ahead of time? Yes, you can cook the ground beef ahead of time and store it in the refrigerator until ready to use.
  • Is this recipe gluten-free? Use tamari instead of soy sauce to make this recipe gluten-free.
  • Can I add other vegetables? Of course! Bell peppers, carrots, broccoli, spinach – the more, the merrier!

Serving Suggestions for Your Korean Ground Beef Bowl

Now that you’ve made this amazing dish, here are a few serving suggestions to take it to the next level:

  • Garnish Generously: Don’t be shy with the garnishes! Green onions, sesame seeds, a drizzle of sesame oil – they all add flavor and visual appeal.
  • Add a Fried Egg: A fried egg on top adds richness and creaminess to the bowl. Plus, it just looks so darn good!
  • Serve with a Side of Kimchi: Kimchi adds a tangy and spicy kick that complements the savory beef perfectly.
  • Offer a Variety of Toppings: Set out a variety of toppings and let everyone customize their own bowl. It’s a fun and interactive way to enjoy this dish.

So there you have it – my go-to Korean Ground Beef Bowl recipe that’s ready in just 25 minutes! I hope you love this dish as much as I do. It’s quick, easy, and bursting with flavor – the perfect weeknight meal. If you try it, be sure to let me know in the comments below. I can’t wait to hear what you think!

Happy cooking, friends! Until next time, may your kitchen be filled with delicious aromas and happy memories.

Korean Ground Beef Bowl (25-Minutes)

Prep Time 5 minutes
Cook Time 20 minutes
Total Time 25 minutes
Servings 4 bowls
Calories 450
A quick and flavorful Korean Ground Beef Bowl ready in just 25 minutes! Perfect for a weeknight dinner.

Ingredients

Main Ingredients

  • 1 pound ground beef (80/20 for optimal flavor)
  • 2 tablespoons soy sauce (or tamari for gluten-free)
  • 1 tablespoon sesame oil
  • 3 cloves garlic (minced)
  • 1 teaspoon ginger (minced)
  • 2 green onions (chopped (plus extra for garnish))
  • to taste Salt and pepper
  • 2 cups cooked rice (jasmine, basmati, or brown rice)

Optional Toppings

  • sesame seeds
  • sliced cucumber
  • kimchi
  • pickled vegetables
  • Vegetables (bell peppers, carrots, broccoli, or spinach.)
  • Egg (a fried egg on top for added richness.)

Notes

Adjust the amount of soy sauce to your taste preference. Serve immediately for the best flavor.
Calories: 450kcal
Cost: $12
Course: Main Course
Cuisine: Korean
Keyword: Beef
pin

One-Pan Garlic Butter Chicken and Veggies: The Weeknight Wonder

Hey there, friend! Ava here, back in my Seattle kitchen, and ready to share a recipe that’s been a total game-changer for my weeknight dinners. If you’re anything like me, you’re always on the lookout for meals that are delicious, healthy, and, most importantly, easy to clean up. Well, look no further! This One-Pan Garlic Butter Chicken and Veggies recipe ticks all the boxes and then some. It’s the kind of dish that makes you feel like a culinary wizard without spending hours slaving over a hot stove.

Growing up, my mom had a knack for creating simple yet satisfying meals. This recipe is inspired by her ability to transform everyday ingredients into something truly special. The aroma of garlic butter wafting through the kitchen always brings back fond memories, and I’m so excited to share this updated, one-pan version with you.

Why You’ll Absolutely Love This One-Pan Wonder

Seriously, what’s not to love? This recipe is a symphony of flavors and textures, all harmonizing on a single sheet pan. But beyond the deliciousness, there are so many reasons why this dish has become a staple in my home:

  • Effortless Cleanup: This is the big one! Just one pan to wash. Enough said.
  • Complete Meal: Protein, veggies, and carbs all in one go. It’s a balanced and satisfying meal without any extra fuss.
  • Customizable: Feel free to swap in your favorite vegetables or add a sprinkle of red pepper flakes for a little kick. The possibilities are endless!
  • Maximum Flavor: The garlic butter sauce infuses every ingredient with its rich, savory goodness. You won’t believe how much flavor is packed into this simple dish.
  • Quick and Easy: From prep to plate, this meal is ready in under an hour. Perfect for those busy weeknights when you just don’t have the time (or energy) for a complicated recipe.

The Star Players: Ingredients You’ll Need

Here’s what you’ll need to create this culinary masterpiece. Don’t be afraid to get creative and adjust the ingredients to your liking!

  • 4 pieces boneless, skinless chicken breasts (Choose organic or free-range for better taste.)
  • 4 medium potatoes, diced (Yukon Gold or red potatoes work best.)
  • 2 cups mixed vegetables (carrots, bell peppers, broccoli) (Feel free to swap in your favorite seasonal veggies.)
  • 1/2 cup unsalted butter, melted (For a dairy-free option, use a plant-based butter.)
  • 4 cloves garlic, minced
  • 1 teaspoon salt
  • 1/2 teaspoon black pepper
  • 1 teaspoon dried herbs (thyme or rosemary) (Fresh herbs may also be used.)
  • 2 tablespoons olive oil
Recipe Image

Let’s Get Cooking: Step-by-Step Instructions

Ready to transform these ingredients into a mouthwatering meal? Here’s how:

  1. Preheat your oven to 400°F (200°C).
  2. In a large bowl, toss the diced potatoes and mixed vegetables with olive oil, salt, and pepper.
  3. Spread the vegetables evenly on a large sheet pan.
  4. In a separate bowl, whisk together the melted butter, minced garlic, salt, pepper, and dried herbs. This is your magic garlic butter sauce!
  5. Place the chicken breasts on top of the vegetables on the sheet pan.
  6. Pour the garlic butter sauce evenly over the chicken and vegetables, ensuring everything is well coated.
  7. Bake for 25-30 minutes, or until the chicken is cooked through and the vegetables are tender. The internal temperature of the chicken should reach 165°F (74°C).
  8. Let the dish rest for a few minutes before serving. Garnish with fresh parsley or a squeeze of lemon juice for extra flavor.

Pro Tips for Sheet Pan Perfection

Want to take your One-Pan Garlic Butter Chicken and Veggies to the next level? Here are a few tricks I’ve learned along the way:

  • Don’t overcrowd the pan: Make sure the vegetables and chicken are spread out in a single layer. Overcrowding will cause them to steam instead of roast, resulting in soggy veggies.
  • Use parchment paper: Line your sheet pan with parchment paper for even easier cleanup and to prevent sticking.
  • Cut the vegetables evenly: This ensures that everything cooks at the same rate.
  • Check the chicken’s temperature: Use a meat thermometer to ensure the chicken is cooked through. Undercooked chicken is a no-no!
  • Broil for extra crispiness: For the last few minutes of cooking, broil the dish to give the chicken and vegetables a beautiful golden-brown color and extra crispiness. Keep a close eye on it to prevent burning!

Common Mistakes to Avoid

Even the most experienced cooks make mistakes from time to time. Here are a few common pitfalls to watch out for when making this recipe:

  • Using frozen vegetables: While frozen vegetables are convenient, they can release excess moisture and make the dish soggy. Fresh vegetables are always the best option for this recipe.
  • Overcooking the chicken: Overcooked chicken is dry and tough. Be sure to check the internal temperature and remove it from the oven as soon as it reaches 165°F (74°C).
  • Skipping the seasoning: Don’t be shy with the salt, pepper, and herbs! These seasonings are essential for bringing out the flavors of the chicken and vegetables.
  • Not using enough garlic butter sauce: The garlic butter sauce is the star of the show! Make sure to coat everything generously for maximum flavor.

Variations to Spice Things Up

One of the best things about this recipe is how easily it can be customized to suit your taste. Here are a few variations to try:

  • Spicy Garlic Butter Chicken: Add a pinch of red pepper flakes to the garlic butter sauce for a little heat.
  • Lemon Herb Garlic Butter Chicken: Add the zest and juice of one lemon to the garlic butter sauce, along with some fresh chopped parsley.
  • Honey Garlic Butter Chicken: Add a tablespoon of honey to the garlic butter sauce for a touch of sweetness.
  • Different Vegetables: Swap in your favorite seasonal vegetables, such as asparagus, Brussels sprouts, or sweet potatoes.
  • Chicken Thighs: Use boneless, skinless chicken thighs instead of chicken breasts for a richer flavor. Adjust cooking time accordingly.

Storage and Reheating Tips

Got leftovers? Lucky you! Here’s how to store and reheat them:

  • Storage: Store leftover One-Pan Garlic Butter Chicken and Veggies in an airtight container in the refrigerator for up to 3 days.
  • Reheating: Reheat the dish in the oven at 350°F (175°C) for 10-15 minutes, or until heated through. You can also reheat it in the microwave, but be careful not to overcook the chicken.

Frequently Asked Questions (FAQ)

Still have questions? Here are a few common queries about this recipe:

  • Can I use bone-in chicken? Yes, you can use bone-in chicken, but you’ll need to increase the cooking time.
  • Can I prepare this dish ahead of time? Yes, you can prep the vegetables and garlic butter sauce ahead of time. Store them separately in the refrigerator until ready to cook.
  • Can I freeze this dish? I don’t recommend freezing this dish, as the vegetables may become mushy when thawed.
  • What if I don’t have all the ingredients? Don’t worry! This recipe is very forgiving. Feel free to substitute ingredients based on what you have on hand.

Serving Suggestions for a Complete Meal

This One-Pan Garlic Butter Chicken and Veggies is a complete meal on its own, but here are a few serving suggestions to take it to the next level:

  • Serve with a side salad: A simple green salad with a light vinaigrette is the perfect complement to this dish.
  • Serve with crusty bread: Dip the bread in the garlic butter sauce for a truly decadent experience.
  • Serve with rice or quinoa: For a heartier meal, serve the chicken and veggies over a bed of rice or quinoa.

So there you have it, my friend! My go-to One-Pan Garlic Butter Chicken and Veggies recipe. I hope you love it as much as I do. Remember, cooking is all about having fun and experimenting, so don’t be afraid to put your own spin on this dish. And most importantly, enjoy every bite!

Happy cooking! – Ava

Garlic Butter Chicken and Veggies

Prep Time 15 minutes
Cook Time 30 minutes
Total Time 45 minutes
Servings 4 servings
Calories 450
A simple and delicious one-pan meal featuring tender chicken and flavorful vegetables in a garlic butter sauce. Perfect for a quick and easy weeknight dinner!

Ingredients

Chicken and Veggies

  • 4 pieces boneless, skinless chicken breasts (Choose organic or free-range for better taste.)
  • 4 medium potatoes, diced (Yukon Gold or red potatoes work best.)
  • 2 cups mixed vegetables (carrots, bell peppers, broccoli. Feel free to swap in your favorite seasonal veggies.)

Garlic Butter Sauce

  • 0.5 cup unsalted butter, melted (For a dairy-free option, use a plant-based butter.)
  • 4 cloves garlic, minced
  • 1 teaspoon salt
  • 0.5 teaspoon black pepper
  • 1 teaspoon dried herbs (thyme or rosemary. Fresh herbs may also be used.)
  • 2 tablespoons olive oil

Notes

For extra flavor, marinate the chicken in the garlic butter sauce for at least 30 minutes before cooking.
Calories: 450kcal
Cost: $20
Course: Main Course
Cuisine: American
Keyword: Chicken
pin

Hey there, food lovers! Ava here, back in my Seattle kitchen, ready to share one of my all-time favorite quick and healthy recipes: High-Protein Egg Bhurji. Now, if you’re anything like me, you’re always on the lookout for meals that are delicious, nutritious, and don’t take forever to make. And let me tell you, this dish ticks all the boxes. Think of it as India’s answer to scrambled eggs, but with a flavorful twist that will wake up your taste buds and keep you feeling satisfied for hours.

I first discovered Egg Bhurji during a backpacking trip through India. The vibrant spices, the fresh ingredients, and the sheer simplicity of the dish completely won me over. I knew I had to bring this gem back to my own kitchen and share it with all of you. And trust me, once you try it, it’s going to become a staple in your recipe rotation. It’s incredibly versatile, perfect for breakfast, lunch, or even a light dinner. Plus, it’s packed with protein, making it an ideal choice for those busy days when you need a quick energy boost.

Why You’ll Love This High-Protein Egg Bhurji Recipe

So, what makes this Egg Bhurji so special? Well, let me count the ways!

  • Quick and Easy: Seriously, you can whip this up in about minutes. It’s perfect for those mornings when you’re rushing out the door or those evenings when you just don’t feel like spending hours in the kitchen.
  • High-Protein: Eggs are a fantastic source of protein, which helps keep you feeling full and energized. This makes it a great option for a post-workout meal or a satisfying breakfast that will keep you going until lunchtime.
  • Flavorful and Delicious: The combination of aromatic spices, fresh vegetables, and perfectly cooked eggs creates a symphony of flavors that will leave you wanting more. It’s a dish that’s both comforting and exciting.
  • Versatile: You can customize this recipe to suit your own taste preferences. Add different vegetables, adjust the spice level, or even throw in some cooked chicken or tofu for an extra protein boost. The possibilities are endless!
  • Healthy: This recipe is packed with nutrients, including protein, vitamins, and minerals. It’s a great way to start your day or fuel your body after a workout.

I’ve tweaked this recipe over the years to make it just right, and I’m so excited to share it with you. So, let’s get cooking! Grab your ingredients, and let’s make some magic in the kitchen.

Ingredients for the Perfect Egg Bhurji

Alright, let’s talk ingredients. Here’s what you’ll need to create this delicious dish:

  • 4 large eggs (Use fresh eggs for the best taste.)
  • 1 medium onion (Chopped finely.)
  • 1 medium tomato (Chopped.)
  • 1 tsp ginger-garlic paste
  • 1 green chili chopped (Adjust according to your spice preference.)
  • 1 tsp turmeric powder
  • 1 tsp cumin seeds
  • 2 tbsp oil (You can use ghee for a richer flavor.)
  • 2 tbsp fresh coriander (Chopped.)
Recipe Image

How to Make High-Protein Egg Bhurji: Step-by-Step Instructions

Ready to get cooking? Here’s how to make this delicious Egg Bhurji, step by step:

  1. Heat oil in a non-stick pan over medium heat. Add cumin seeds and let them sizzle. This is where the magic starts – the cumin seeds release their aromatic oils, creating a beautiful base for the dish.
  2. Add chopped onions and sauté until they turn golden brown. This usually takes about 5-7 minutes. The key here is to let the onions caramelize slightly, which will add a touch of sweetness and depth to the flavor.
  3. Stir in the ginger-garlic paste and green chili. Cook for a minute. Be careful not to burn the ginger-garlic paste, as it can become bitter. Just a quick sauté is all you need.
  4. Add chopped tomatoes and turmeric powder. Cook until tomatoes soften. This usually takes about 5 minutes. The tomatoes will release their juices, creating a flavorful sauce.
  5. Beat the eggs in a bowl and pour them into the pan. Scramble gently until cooked. The key here is to not overcook the eggs. You want them to be soft and slightly moist, not dry and rubbery.
  6. Garnish with fresh coriander and serve hot. The fresh coriander adds a pop of color and a burst of freshness that really elevates the dish.

And there you have it! Your delicious High-Protein Egg Bhurji is ready to enjoy. Serve it hot with some toast, roti, or even on its own for a satisfying and nutritious meal.

Pro Tips for the Best Egg Bhurji

Want to take your Egg Bhurji to the next level? Here are a few pro tips that I’ve learned over the years:

  • Use Fresh Ingredients: This is a must for any dish, but especially for Egg Bhurji. Fresh eggs, ripe tomatoes, and fragrant spices will make all the difference.
  • Don’t Overcook the Eggs: This is the most common mistake people make when making scrambled eggs or Egg Bhurji. Overcooked eggs are dry and rubbery. You want them to be soft and slightly moist.
  • Adjust the Spice Level: If you’re not a fan of spicy food, you can reduce the amount of green chili or omit it altogether. If you like it hot, feel free to add more!
  • Use Ghee for a Richer Flavor: Ghee is clarified butter, and it adds a rich, nutty flavor to the dish. If you don’t have ghee, you can use regular butter or oil.
  • Garnish Generously: Fresh coriander adds a pop of color and a burst of freshness that really elevates the dish. Don’t be shy with the garnish!

Common Mistakes to Avoid When Making Egg Bhurji

Even the best cooks make mistakes, but knowing what to avoid can help you create a perfect Egg Bhurji every time. Here are a few common pitfalls to watch out for:

  • Not Sautéing the Onions Properly: Raw onions can be overpowering in this dish. Make sure to sauté them until they are golden brown and caramelized.
  • Burning the Ginger-Garlic Paste: Ginger-garlic paste can burn easily, which will make the dish taste bitter. Cook it over low heat and stir constantly.
  • Adding Too Much Water: If you add too much water to the pan, the Egg Bhurji will become watery. The tomatoes should provide enough moisture.
  • Using Old Spices: Spices lose their flavor over time. Make sure to use fresh spices for the best taste.
  • Forgetting to Season: Salt is essential for bringing out the flavors in this dish. Don’t forget to season the Egg Bhurji to taste.

Egg Bhurji Variations: Spice It Up!

One of the best things about Egg Bhurji is that it’s so versatile. You can easily customize it to suit your own taste preferences. Here are a few variations to try:

  • Vegetable Bhurji: Add different vegetables like bell peppers, mushrooms, spinach, or peas. This is a great way to sneak in some extra nutrients.
  • Paneer Bhurji: Add crumbled paneer (Indian cheese) for a richer, creamier texture.
  • Chicken Bhurji: Add cooked chicken for an extra protein boost.
  • Keema Bhurji: Add ground meat (keema) for a heartier dish.
  • Spicy Bhurji: Add more green chilies or a pinch of red chili powder for extra heat.

Feel free to experiment and create your own unique version of Egg Bhurji! The possibilities are endless.

How to Store and Reheat Egg Bhurji

If you have any leftover Egg Bhurji (which is rare, because it’s so delicious!), you can store it in an airtight container in the refrigerator for up to 2 days. To reheat, simply microwave it for a minute or two, or sauté it in a pan over medium heat until heated through.

Keep in mind that reheated Egg Bhurji may not be as moist as freshly made, but it will still be delicious.

Frequently Asked Questions About Egg Bhurji

Here are some common questions about Egg Bhurji that I often get asked:

  • Is Egg Bhurji healthy?: Yes, Egg Bhurji is a healthy and nutritious dish. It’s packed with protein, vitamins, and minerals.
  • Can I make Egg Bhurji ahead of time?: While it’s best enjoyed fresh, you can make Egg Bhurji ahead of time and store it in the refrigerator. Just keep in mind that it may not be as moist when reheated.
  • Can I freeze Egg Bhurji?: I don’t recommend freezing Egg Bhurji, as the texture of the eggs may change.
  • Can I make Egg Bhurji without onions?: Yes, you can omit the onions if you don’t like them or if you’re allergic.
  • Can I add cheese to Egg Bhurji?: Absolutely! Cheese will add a creamy and delicious flavor to the dish.

Serving Suggestions: What to Serve with Egg Bhurji

Egg Bhurji is a versatile dish that can be served in many different ways. Here are a few serving suggestions:

  • With Toast: Serve Egg Bhurji on toast for a quick and easy breakfast or snack.
  • With Roti or Paratha: Serve Egg Bhurji with roti or paratha for a traditional Indian meal.
  • In a Wrap: Wrap Egg Bhurji in a tortilla or pita bread for a portable and satisfying meal.
  • As a Side Dish: Serve Egg Bhurji as a side dish with rice, dal, or other Indian dishes.
  • As a Filling: Use Egg Bhurji as a filling for omelets, sandwiches, or tacos.

No matter how you choose to serve it, I’m confident that you’ll love this delicious and versatile dish. So, go ahead and give it a try! And don’t forget to share your creations with me on social media. I can’t wait to see what you come up with!

Happy cooking, everyone!

High-Protein Egg Bhurji

Prep Time 5 minutes
Cook Time 10 minutes
Total Time 15 minutes
Servings 2 people
Calories 250
A quick and easy Indian scrambled egg dish, perfect for a protein-packed breakfast or light meal. This Egg Bhurji is flavorful and customizable to your spice preference.

Ingredients

Ingredients

  • 4 large eggs (Use fresh eggs for the best taste.)
  • 1 medium onion (Chopped finely.)
  • 1 medium tomato (Chopped.)
  • 1 tsp ginger-garlic paste
  • 1 green chili (chopped (Adjust according to your spice preference.))
  • 1 tsp turmeric powder
  • 1 tsp cumin seeds
  • 2 tbsp oil (You can use ghee for a richer flavor.)
  • 2 tbsp fresh coriander (Chopped.)

Instructions 

  • Heat oil in a non-stick pan over medium heat. Add cumin seeds and let them sizzle.
  • Add chopped onions and sauté until they turn golden brown.
  • Stir in the ginger-garlic paste and green chili. Cook for a minute.
  • Add chopped tomatoes and turmeric powder. Cook until tomatoes soften.
  • Beat the eggs in a bowl and pour them into the pan. Scramble gently until cooked.
  • Garnish with fresh coriander and serve hot.

Notes

Serve with roti or bread for a complete meal.
Calories: 250kcal
Cost: $3
Course: Breakfast, Lunch
Cuisine: Indian
Keyword: Egg
pin

Hey there! Ava here, back in my Seattle kitchen, and today we’re diving into something seriously addictive: Rote Linsencracker (Red Lentil Crackers). If you’re anything like me, you’re always on the hunt for that perfect snack – something that’s both satisfyingly crunchy and actually good for you. Well, my friends, look no further. These crackers are not just delicious; they’re also packed with protein and fiber, making them the ultimate guilt-free treat.

Growing up, my mom always had a stash of homemade goodies, and while these aren’t exactly her recipe, they carry that same spirit of wholesome goodness. I’ve been experimenting with different lentil-based snacks for a while now, and let me tell you, this recipe is a winner. Whether you’re looking for a healthy lunch snack, a crunchy food to satisfy cravings, or baking school snacks that stand out, you’re in the right place. These are also perfect no gluten snacks.

Why You’ll Love These Rote Linsencracker

Seriously, what’s not to love? These rote linsencracker are a delightful blend of simplicity and flavor. You’ll find yourself reaching for them again and again. Here’s why:

  • Healthy & Nutritious: Packed with protein and fiber from red lentils.
  • Gluten-Free: Perfect for those with gluten sensitivities or dietary restrictions.
  • Customizable: Easily adaptable to your favorite flavors and spices.
  • Easy to Make: Simple ingredients and straightforward instructions.
  • Satisfying Crunch: That perfect crispy texture that keeps you coming back for more.

They’re not only a healthier alternative to store-bought crackers, but also incredibly versatile. Serve them with your favorite dips, top them with avocado, or simply enjoy them on their own. Trust me, you’re going to love these!

Ingredients for the Best Rote Linsencracker

Alright, let’s gather our ingredients. The beauty of this recipe is that it uses simple, pantry-friendly items. Here’s what you’ll need:

  • 200 g Rote Linsen (Red Lentils): The star of the show! Make sure they are dry.
  • ¾ TL Backpulver (Baking Powder): For a little bit of lightness.
  • 1 TL Knoblauchpulver (Garlic Powder): Adds a savory depth.
  • 1 TL Rosmarin (Rosemary): Aromatic and earthy.
  • 1 TL Paprikapulver (Paprika Powder): For a touch of warmth and color.
  • ½ TL Salz (Salt): Enhances the flavors.
  • 3 EL Sonnenblumenkerne (Sunflower Seeds): Adds crunch and nutrients.
  • 3 EL Sesam (Sesame Seeds): For a nutty flavor and extra texture.
  • 35 ml Olivenöl (Olive Oil): Helps bind the ingredients and adds richness.
Recipe Image

Step-by-Step: Making Your Own Rote Linsencracker

Now for the fun part – actually making these delicious crackers! Don’t worry, it’s easier than you might think. Here’s how it’s done:

  1. Preheat the Oven: Backofen auf 180 °C Umluft vorheizen. (Preheat your oven to 180°C (350°F) with the convection setting on.) This ensures even baking.
  2. Grind the Lentils: Rote Linsen im Mixer zu feinem Mehl mahlen. (Grind the red lentils in a blender until they form a fine flour.) This is crucial for the cracker’s texture.
  3. Combine Ingredients: Linsenmehl zuerst mit den trockenen Zutaten, dann mit Öl und 100 ml Wasser zu einem dicken Teig verrühren. (Mix the lentil flour with the dry ingredients first, then add the oil and 100 ml of water to form a thick dough.) Make sure everything is well combined.
  4. Roll Out the Dough: Teig auf ein mit Backpapier ausgelegtes Backblech geben und ein weiteres Stück Backpapier darüber legen. Anschließend den Teig mit einem Nudelholz gleichmäßig dünn ausrollen. (Place the dough on a baking sheet lined with parchment paper and cover it with another piece of parchment paper. Then, use a rolling pin to roll the dough out evenly and thinly.) The thinner, the crispier!
  5. Cut into Shapes: Aufliegendes Backpapier entfernen und Teig mit einem scharfen Messer oder Pizzaroller in gewünschte Form schneiden. (Remove the top parchment paper and use a sharp knife or pizza cutter to cut the dough into your desired shapes.) Get creative!
  6. Bake Until Crispy: Auf mittlerer Schiene 25-30 Minuten knusprig backen, anschließend vollständig abkühlen lassen. (Bake on the middle rack for 25-30 minutes until crispy, then let cool completely.) Patience is key here; they need to cool to get that perfect crunch.

And that’s it! You’ve just created your own batch of healthy, delicious rote linsencracker.

Pro Tips for Perfect Crackers Every Time

Okay, let’s talk pro tips. These are the little secrets I’ve learned along the way that will take your crackers from good to absolutely amazing:

  • Grind Finer for Crisper Crackers: The finer the lentil flour, the crisper the crackers will be. Don’t be afraid to grind them multiple times.
  • Roll Thinly: This is crucial. The thinner you roll the dough, the more uniformly crispy your crackers will be. Aim for paper-thin if you can!
  • Watch the Oven: Every oven is different. Keep a close eye on the crackers during the last few minutes of baking to prevent burning.
  • Cool Completely: I know it’s tempting to dig in right away, but letting the crackers cool completely is essential for achieving that perfect crunch.

Common Mistakes to Avoid

We all make mistakes in the kitchen – it’s how we learn! Here are a few common pitfalls to watch out for when making these crackers:

  • Uneven Rolling: If the dough isn’t rolled evenly, some crackers will be crispy while others are soft. Take your time and apply even pressure.
  • Overbaking: Burnt crackers are no fun. Start checking them around 20 minutes and adjust the baking time as needed.
  • Not Cooling Completely: As mentioned before, this is a must. They’ll seem soft when they’re warm, but they’ll crisp up as they cool.

Flavor Variations to Spice Things Up

One of the best things about this recipe is how easily you can customize it to your taste. Here are a few ideas to get you started:

  • Spicy Crackers: Add a pinch of cayenne pepper or a dash of hot sauce to the dough.
  • Herbaceous Crackers: Mix in some dried thyme, oregano, or basil.
  • Cheesy Crackers: Sprinkle some nutritional yeast over the dough before baking for a vegan “cheesy” flavor.
  • Everything Bagel Crackers: Top the dough with everything bagel seasoning before baking.

How to Store Your Homemade Crackers

To keep your crackers fresh and crunchy, store them in an airtight container at room temperature. They should last for up to a week, but let’s be honest, they’ll probably be gone long before that!

Frequently Asked Questions (FAQ)

Got questions? I’ve got answers! Here are some common queries about these rote linsencracker:

  • Can I use green lentils instead of red lentils? While you can, red lentils work best because they grind into a finer flour. Green lentils may result in a slightly different texture.
  • Can I add other seeds or nuts? Absolutely! Chia seeds, flax seeds, pumpkin seeds – go wild!
  • Are these crackers suitable for a low-carb diet? While lentils do contain carbs, these crackers are a healthier alternative to many processed snacks. However, they are not a snack low carb option.
  • Can I freeze the dough? I haven’t tried freezing the dough, but I suspect it would work fine. Just wrap it tightly in plastic wrap and thaw it in the refrigerator before rolling out.

Serving Suggestions: More Than Just a Snack

These rote linsencracker are incredibly versatile. Here are some of my favorite ways to enjoy them:

  • With Dips: Pair them with hummus, guacamole, or your favorite creamy dip.
  • Topped with Avocado: A simple yet satisfying snack.
  • As Part of a Cheese Board: Add them to your next cheese board for a gluten-free option.
  • With Soup or Salad: Use them as a crunchy topping for soups or salads.

So there you have it – my go-to recipe for rote linsencracker. I hope you love them as much as I do! Happy baking, and remember, es nicht schwierig, einen leckeren und gesunden Snack zu backen (it’s not difficult to bake a delicious and healthy snack). If I die Linsen (the lentils) nicht richtig mahle (don’t grind correctly), werde ich (I will) noch einen (another) Versuch starten (start). In den (in the) nächsten Tagen (next days), wir haben (we have) viele Möglichkeiten (many possibilities) nicht zu (not to) vergessen (forget), aber auch (but also) dem Backen (the baking). Hast du (do you) das tolle (the great) Gefühl (feeling), wenn ich (when I) rote Linsencracker are (red lentil crackers are) fertig (ready)? Linsencracker sind (Lentil crackers are) wirklich (really) lecker (delicious)!

Rote Linsencracker – proteinreicher, gesunder Snack

Prep Time 15 minutes
Cook Time 30 minutes
Total Time 45 minutes
Servings 6 servings
Calories 150
Enjoy these protein-rich and healthy red lentil crackers as a satisfying snack. They are easy to make and perfect for a nutritious treat.

Ingredients

Ingredients

  • 200 g Rote Linsen (Red lentils)
  • 0.75 TL Backpulver (Baking powder)
  • 1 TL Knoblauchpulver (Garlic powder)
  • 1 TL Rosmarin (Rosemary)
  • 1 TL Paprikapulver (Paprika powder)
  • 0.5 TL Salz (Salt)
  • 3 EL Sonnenblumenkerne (Sunflower seeds)
  • 3 EL Sesam (Sesame seeds)
  • 35 ml Olivenöl (Olive oil)

Instructions 

  • Preheat oven to 180 °C convection.
  • Grind red lentils into fine flour using a mixer.
  • Mix lentil flour with dry ingredients, then add oil and 100 ml water to form a thick dough.
  • Place dough on baking paper, cover with another sheet, and roll out thinly.
  • Remove top paper and cut dough into desired shapes.
  • Bake on middle rack for 25-30 minutes until crispy, then let cool completely.

Notes

For extra flavor, add a pinch of chili flakes to the dough.
Calories: 150kcal
Cost: $5
Course: Snack
Cuisine: German
Keyword: lentils
pin