Author

Ava

Browsing

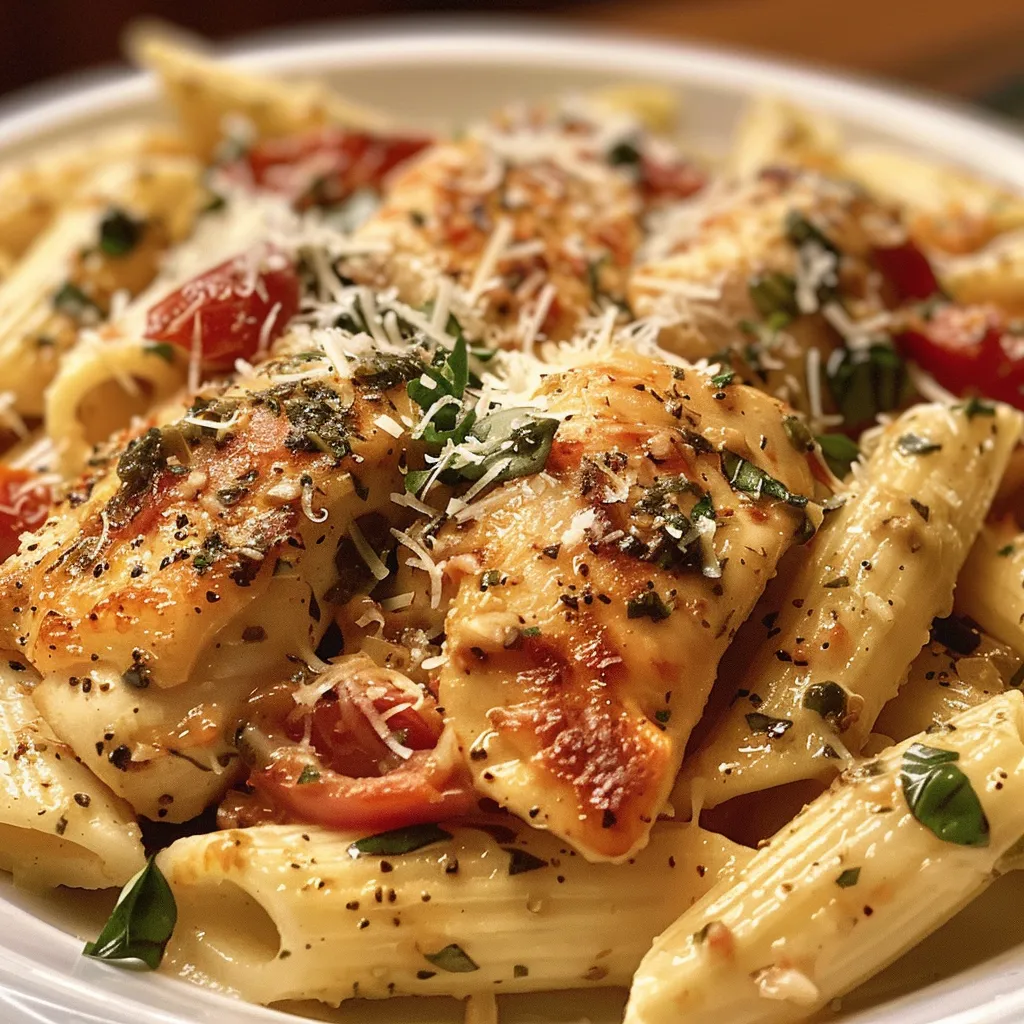
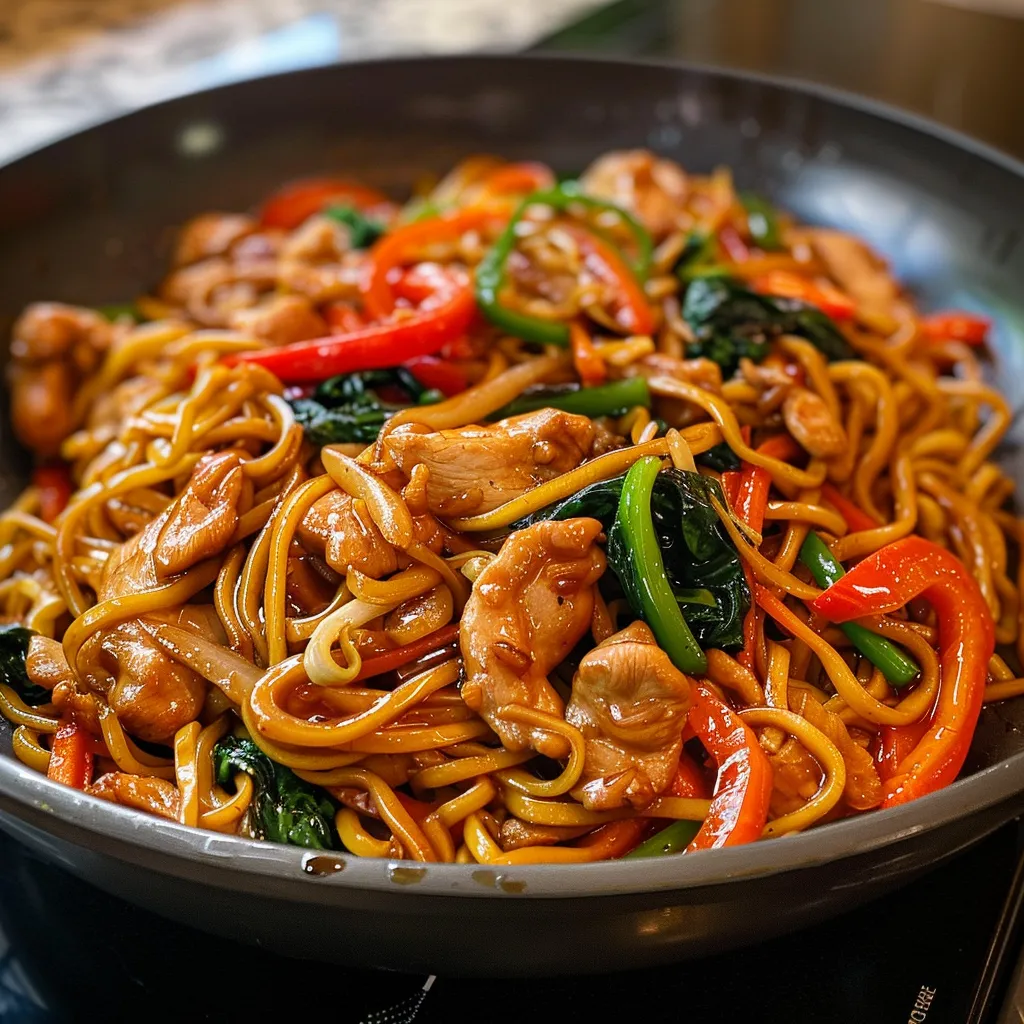
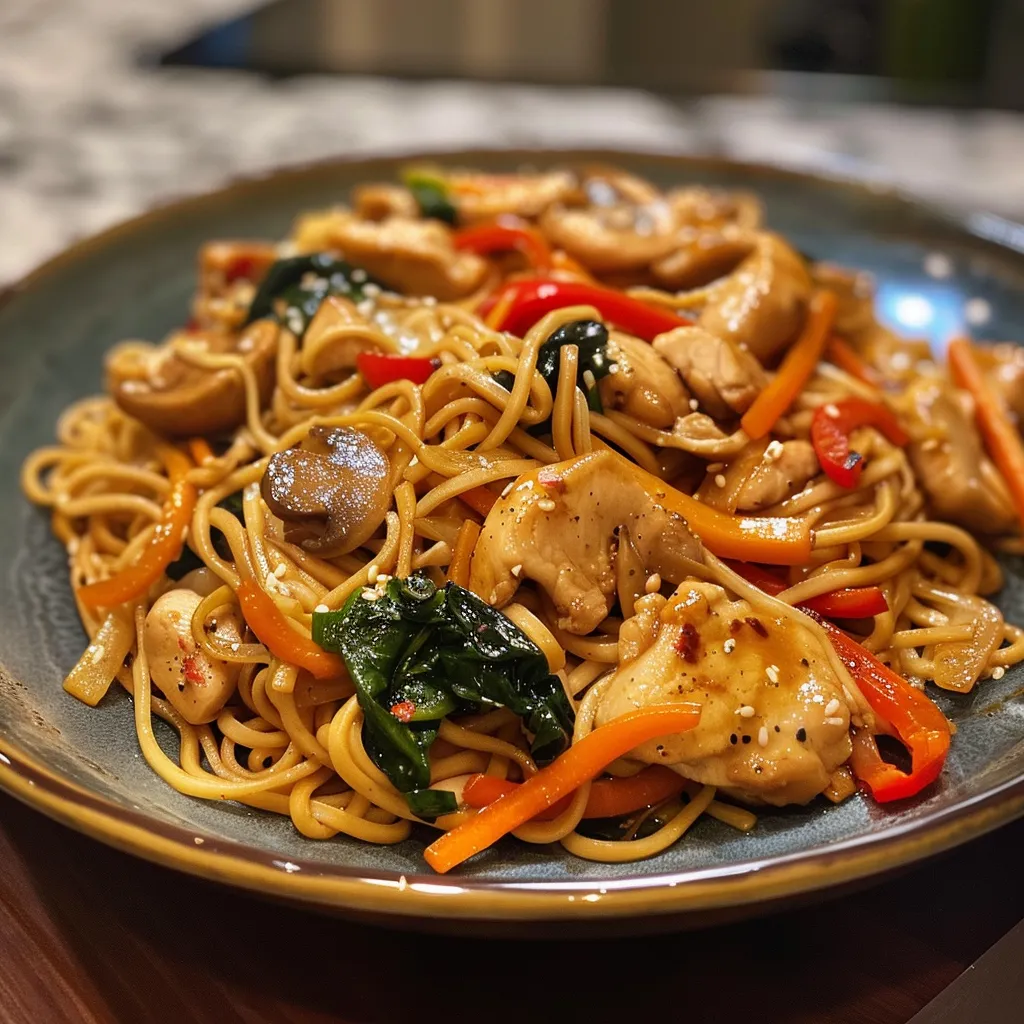
Welcome back to my kitchen, dear friends! Today, I’m inviting you to join me on a sweet and savory adventure with a dish that has become a staple in my home: Easy Honey Sesame Chicken. This recipe has a delightful balance of flavors that will make your taste buds do a happy dance. Picture this: tender chicken pieces glazed in a luscious honey sesame sauce, served over a bed of fluffy rice or alongside your favorite stir-fried veggies. It’s the kind of meal that brings everyone to the table, and I promise, it’s as easy as pie — or should I say chicken?

Growing up in Oregon, my family often gathered around the dinner table, sharing stories and laughter over home-cooked meals. My mom had this magical ability to transform simple ingredients into unforgettable dishes. Inspired by those memories, I’ve always believed that cooking should be approachable and fun, and this Easy Honey Sesame Chicken perfectly embodies that spirit. Let’s dive in!

Why You’ll Absolutely Love This Easy Honey Sesame Chicken

This dish isn’t just about taste; it’s a celebration of flavors and a way to bring people together. Here’s why you’ll absolutely love it:

  • It’s incredibly quick to prepare, perfect for busy weeknights.
  • The sweet and savory balance will have everyone asking for seconds.
  • It’s versatile — serve it over rice, noodles, or even in wraps.
  • You can easily customize it by adding your favorite veggies or spices.

Ingredients You’ll Need

Let’s talk about the star players in this dish! The ingredients for Easy Honey Sesame Chicken are simple yet impactful. You’ll need:

  • 1 pound boneless, skinless chicken breasts – I love using chicken breasts for their tenderness and quick cooking time. Cut them into bite-sized pieces for the perfect bite.
  • 1/4 cup honey – This adds the sweet touch that pairs beautifully with the savory elements.
  • 1/4 cup soy sauce – A classic ingredient that brings depth and umami to the dish.
  • 2 tablespoons sesame oil – This adds a lovely nuttiness that elevates the flavor profile.
  • 2 tablespoons cornstarch – A little secret to getting that crispy coating on the chicken.
  • 1 tablespoon vegetable oil – For cooking the chicken to golden perfection.
  • 1 teaspoon minced garlic and 1 teaspoon minced ginger – These fresh aromatics are essential for that punch of flavor.
  • Sesame seeds and chopped green onions – For garnish and a final touch of elegance!

You’ll find the full ingredient list with measurements in the recipe card below!

How to Make This Easy Honey Sesame Chicken, Step-by-Step

Now, let’s get cooking! Follow these steps to create your own delicious Easy Honey Sesame Chicken:

  1. In a bowl, combine the honey, soy sauce, sesame oil, minced garlic, and minced ginger. Mix well until the ingredients are thoroughly blended.
  2. Add the chicken pieces to the marinade, ensuring they are well-coated. Let it sit for at least 30 minutes; this will allow the flavors to penetrate the chicken. If you have more time, let it marinate longer for even better results!
  3. After marinating, sprinkle cornstarch over the chicken and toss to coat evenly. This step is crucial for achieving that lovely crispy texture.
  4. Heat the vegetable oil in a large skillet over medium-high heat. Once the oil is hot, add the chicken to the skillet, cooking until golden brown and cooked through, about 5-7 minutes. You’ll know it’s ready when your kitchen smells heavenly!
  5. Pour the remaining marinade into the skillet and cook for an additional 2-3 minutes until the sauce thickens. This is where the magic happens, and trust me, you’ll want to soak every bit of that sauce up!
  6. Serve the chicken hot, garnished with sesame seeds and chopped green onions. Voilà! A beautiful dish that’s bursting with flavor!
Easy Honey Sesame Chicken

Pro Tips for the Best Results

To help you create the most delicious Easy Honey Sesame Chicken, here are a few pro tips:

  • Make sure your skillet is hot enough before adding the chicken. This helps achieve that nice golden crust and prevents sticking.
  • Don’t skip the marinating step! Letting the chicken sit in the marinade will enhance the flavor and tenderness.
  • Feel free to add veggies! Bell peppers, broccoli, or snap peas make excellent additions. Just toss them in during the last few minutes of cooking.

Serving Suggestions

Now that your Easy Honey Sesame Chicken is ready, let’s talk about how to serve it. This dish shines on a bed of fluffy white rice or quinoa, allowing the sauce to soak in. You could also serve it with steamed vegetables for a well-rounded meal. If you’re feeling adventurous, try wrapping the chicken in lettuce leaves for a fresh, crunchy twist. And don’t forget to drizzle a bit of extra sesame oil before serving for that added depth of flavor!

Storage and Make-Ahead Tips

This dish is perfect for meal prep! You can store any leftovers in an airtight container in the fridge for up to 3 days. When reheating, add a splash of water or chicken broth to keep the chicken moist. If you’re looking to make it ahead of time, marinate the chicken the night before and store it in the fridge. Just remember to coat it with cornstarch before cooking for that crispy texture!

There you have it, friends! Easy Honey Sesame Chicken is not only a breeze to make but also a dish that will leave your family and friends raving. I hope you enjoy this recipe as much as I do, and may your kitchen always be filled with love and laughter. Happy cooking!

Easy Honey Sesame Chicken

Prep Time 10 minutes
Cook Time 10 minutes
Total Time 20 minutes
Servings 4 servings
Calories 350
A quick and flavorful dish combining tender chicken with a sweet and savory honey sesame sauce.

Ingredients

Protein

  • 1 pound boneless, skinless chicken breasts, cut into bite-sized pieces
  • 1/4 cup honey
  • 1/4 cup soy sauce
  • 2 tablespoons sesame oil
  • 2 tablespoons cornstarch
  • 1 tablespoon vegetable oil
  • 1 teaspoon minced garlic
  • 1 teaspoon minced ginger

Garnish

  • sesame seeds for garnish
  • chopped green onions for garnish

Instructions 

  • Mix honey, soy sauce, sesame oil, garlic, and ginger in a bowl.
  • Add chicken to marinade and let sit for 30 minutes.
  • Toss chicken with cornstarch to coat evenly.
  • Cook chicken in oil until golden, 5-7 minutes.
  • Add marinade to skillet, cook 2-3 minutes until thickened. Garnish and serve.

Notes

Serve with steamed rice for a complete meal.
Calories: 350kcal
Cost: $15
Course: Main Course
Cuisine: Asian
Keyword: Chicken

Loved this recipe? Save it to your favorite Pinterest board so you can easily find it later! It’s the perfect way to keep all your sweet ideas in one place. ✨

Easy Honey Sesame Chicken

Welcome to my kitchen, friends! I’m Ava, and today I’m excited to share a recipe that’s not only super simple but also packed with flavors that’ll have your loved ones asking for seconds. Growing up in Oregon, my mom often cooked up hearty meals that made our house smell like a cozy restaurant. One of my favorites was beef and broccoli—simple, satisfying, and oh-so-comforting. I can still picture the steam rising as she’d ladle it over fluffy rice, and I’d dive in with a smile that could light up the whole room.

Fast forward to my Seattle life, where I’ve made it my mission to recreate those beloved childhood dishes with a little twist. This Easy Beef and Broccoli Recipe is a nod to my roots, but trust me, it’s even better than your favorite takeout! With tender beef, vibrant broccoli, and a savory sauce, this dish is sure to become a staple in your home as it has in mine.

Why You’ll Absolutely Love This Easy Beef and Broccoli Recipe (Better than takeout!)

Let me tell you why this dish is a must-try:

  • It’s quick and easy—perfect for busy weeknights when you want something homemade without spending hours in the kitchen.
  • The flavors are incredible! The combination of soy sauce, oyster sauce, and sesame oil creates a depth that’s both comforting and exciting.
  • It’s a healthy choice! Packed with fresh broccoli and lean beef, this dish is as nutritious as it is delicious.
  • You can customize it! Feel free to throw in other veggies or adjust the sauce to suit your taste—cooking is all about making it your own!

Ingredients You’ll Need

Let’s talk ingredients! For this recipe, I’ve chosen some key players that come together beautifully. The flank steak is my go-to for its tenderness and flavor—it cooks quickly and absorbs the sauce perfectly. Fresh broccoli adds that lovely crunch and vibrant color, making the dish as pleasing to the eyes as it is to the palate.

We’ll also need soy sauce and oyster sauce for that umami kick, along with a hint of ginger and garlic to elevate the flavors. And of course, a drizzle of sesame oil at the end pulls everything together in the most delicious way.

You’ll find the full ingredient list with measurements in the recipe card below!

How to Make This Easy Beef and Broccoli Recipe (Better than takeout!), Step-by-Step

Ready to get cooking? Let’s dive into the steps!

  1. Start by marinating the sliced flank steak. In a bowl, combine the beef with 1 tablespoon of soy sauce and the cornstarch. Mix it well, and let it sit for about 15 minutes to absorb all those flavors.
  2. While the beef is marinating, prep your broccoli florets and get your rice cooking. I love using jasmine rice for its fragrant aroma, but any rice will do!
  3. In a large skillet or wok, heat the vegetable oil over medium-high heat. Once it’s hot, add the marinated beef, cooking until browned, about 3-4 minutes. Remove the beef from the skillet and set it aside—don’t worry, we’ll come back to it!
  4. In the same skillet, toss in the minced garlic and ginger, sautéing for about 30 seconds until fragrant. This is where the magic starts!
  5. Add the broccoli to the skillet, stir-frying for about 2-3 minutes until it’s bright green and tender-crisp. We want it to retain that beautiful crunch!
  6. Return the beef to the skillet, and then add the remaining soy sauce, oyster sauce, beef broth, and sesame oil. Stir well to combine everything.
  7. Let it cook for an additional 2-3 minutes, allowing the sauce to thicken slightly. The aroma will be irresistible!
  8. Serve hot over your cooked rice, and watch your family’s eyes light up!
Easy Beef and Broccoli Recipe (Better than takeout!)

Pro Tips for the Best Results

Here are a few pro tips to make this dish even better:

  • Don’t skip the marinating step! It really helps to tenderize the beef and infuse it with flavor.
  • If you want to add some variety, feel free to toss in other veggies like bell peppers or snap peas. Just adjust the cooking time accordingly!
  • For a little extra heat, add a pinch of red pepper flakes or a dash of sriracha to the sauce—balance is key!

Serving Suggestions

This Easy Beef and Broccoli is fantastic on its own, but you can jazz it up in a few ways:

  • Serve it with a side of crispy spring rolls or homemade dumplings to create a mini Asian feast!
  • Top it off with sesame seeds and sliced green onions for a pop of color and flavor.
  • Pair it with a light cucumber salad or some pickled vegetables for a refreshing contrast.

Storage and Make-Ahead Tips

If you’re lucky enough to have leftovers (which I rarely do!), you can store them in an airtight container in the fridge for up to 3 days. Just reheat on the stove over low heat, adding a splash of water or broth to loosen the sauce if needed.

This dish also makes a great make-ahead meal. You can marinate the beef and chop the veggies the night before, then whip it all together when you’re ready to eat!

Easy Beef and Broccoli Recipe (Better than takeout!)

Prep Time 15 minutes
Cook Time 10 minutes
Total Time 25 minutes
Servings 4 servings
Calories 350
This quick and flavorful beef and broccoli stir-fry is a perfect weeknight dinner that rivals takeout.

Ingredients

Meat

  • 1 lb flank steak, sliced thinly against the grain

Vegetables

  • 2 cups broccoli florets

Sauces & Oils

  • 3 tablespoons soy sauce
  • 2 tablespoons oyster sauce
  • 1 tablespoon cornstarch
  • 1 tablespoon vegetable oil
  • 2 cloves garlic, minced
  • 1 teaspoon ginger, minced
  • 1/2 cup beef broth
  • 1 tablespoon sesame oil

For Serving

  • cooked rice for serving

Instructions 

  • Marinate beef with 1 tbsp soy sauce and cornstarch for 15 minutes.
  • Cook beef in hot oil until browned, then remove and set aside.
  • Sauté garlic and ginger until fragrant.
  • Add broccoli and stir-fry 2-3 minutes.
  • Return beef, add remaining soy sauce, oyster sauce, beef broth, and sesame oil. Cook 2-3 minutes until sauce thickens.
  • Serve hot over cooked rice.

Notes

Use thinly sliced beef for quick cooking and tender results.
Calories: 350kcal
Cost: $15
Course: Main Course
Cuisine: Asian
Keyword: Beef, Broccoli, stir fry

Loved this recipe? Save it to your favorite Pinterest board so you can easily find it later! It’s the perfect way to keep all your sweet ideas in one place. ✨

Easy Beef and Broccoli Recipe (Better than takeout!)

Welcome to my cozy kitchen! I’m Ava, and today I’m excited to share a recipe that truly embodies the spirit of home cooking—my One Pan Chicken and Potatoes. This dish is a staple in my household, a classic that brings comfort and warmth, reminiscent of those beautiful evenings back in my small town in Oregon. You know those days when the sky is gray, and all you want is something hearty and satisfying? That’s when this recipe shines. It’s simple, it’s delicious, and best of all, it requires minimal cleanup. What’s not to love?

Imagine walking into your kitchen, the aroma of roasted chicken and tender potatoes filling the air, making you feel like you’re wrapped in a warm blanket. This dish is perfect for busy weeknights when you need something easy but still want to impress your loved ones. Each bite feels like a hug from the inside, and trust me, it’s one of those meals that will have everyone asking for seconds. So, grab your apron, and let’s dive into this culinary adventure together!

Why You’ll Absolutely Love This One Pan Chicken and Potatoes

This recipe is not just about cooking; it’s about creating memories around the dinner table. Here’s why I think you’re going to adore it:

  • It’s a breeze to make—perfect for those busy weeknights.
  • Minimal cleanup with just one pan needed—yes, please!
  • Versatile and customizable—add your favorite veggies or herbs!
  • It’s packed with flavor and comfort, making it a family favorite.

Ingredients You’ll Need

Let’s talk about the star players in this dish. You’ll need:

  • 4 bone-in, skin-on chicken thighs
  • 1 pound baby potatoes, halved
  • 3 tablespoons olive oil
  • 1 teaspoon garlic powder
  • 1 teaspoon onion powder
  • 1 teaspoon paprika
  • Salt and pepper to taste
  • Fresh rosemary or thyme (optional)

I love using bone-in, skin-on chicken thighs for this recipe because they stay juicy and flavorful, even when baked. The baby potatoes are not only adorable but also tender and delicious, soaking up all the lovely spices and chicken juices. Olive oil is my go-to for drizzling; it adds richness without overwhelming the dish. And those seasonings? They bring everything to life, creating a delightful aroma that will have your family flocking to the kitchen!

You’ll find the full ingredient list with measurements in the recipe card below!

How to Make This One Pan Chicken and Potatoes, Step-by-Step

Ready to cook? Here’s how to bring this dish to life, step by step:

  1. Preheat your oven to 400°F (200°C). This ensures everything cooks evenly and the skin gets that beautiful crispy texture.
  2. In a large bowl, combine the olive oil, garlic powder, onion powder, paprika, salt, and pepper. This will be your magic seasoning blend—feel free to adjust it to your taste!
  3. Add the chicken thighs to the bowl and coat them well with the seasoning mixture. Get in there with your hands; it’s the best way to make sure every inch is covered!
  4. Now, toss the halved baby potatoes in the same bowl to coat them with the remaining oil and seasonings. No potato left behind!
  5. Spread the chicken and potatoes evenly on a large baking sheet. Make sure they’re not crowded—this helps them roast instead of steam.
  6. If you’re feeling fancy, sprinkle some fresh rosemary or thyme over the top. It adds a lovely herbal note!
  7. Bake in the preheated oven for 35-40 minutes, or until the chicken is cooked through and the potatoes are tender. The skin should be golden and crispy—just how we like it!
  8. Remove from the oven and let it rest for 5 minutes before serving. This helps the juices redistribute, ensuring juicy chicken every time.
One Pan Chicken and Potatoes

Pro Tips for the Best Results

Here are a few of my tried-and-true tips to ensure your One Pan Chicken and Potatoes turns out perfectly:

  • Use a meat thermometer to check the chicken’s doneness. It should reach an internal temperature of 165°F (75°C) for safety.
  • For extra crispy skin, broil the chicken for the last 2-3 minutes of cooking, but keep a close eye on it!
  • Feel free to add seasonal vegetables like carrots or green beans to the pan for a more colorful and nutritious meal.

Serving Suggestions

When it comes to serving this dish, the sky’s the limit! Here are some ideas to elevate your meal:

  • Pair it with a simple green salad dressed with lemon vinaigrette for a refreshing contrast.
  • Serve with crusty bread to soak up the delicious juices.
  • A glass of white wine or a light beer complements the flavors beautifully.
  • For a cozy twist, serve it with a side of creamy mashed potatoes or a warm bowl of polenta.

Storage and Make-Ahead Tips

If you find yourself with leftovers (which is rare, but it happens!), here’s how to store them:

  • Store in an airtight container in the fridge for up to 3 days. Reheat in the oven or microwave until warmed through.
  • You can freeze the cooked chicken and potatoes for up to 3 months. Just make sure to let them cool completely before sealing them in freezer bags.
  • To make ahead, you can season the chicken and potatoes the night before and let them marinate in the fridge. Just pop them in the oven when you’re ready to cook!

And there you have it! A one-pan wonder that’s not just a meal but an experience, bringing warmth and joy to your kitchen. I hope you enjoy making and sharing this dish as much as I do. Happy cooking, my friends!

One Pan Chicken and Potatoes

Prep Time 10 minutes
Cook Time 40 minutes
Total Time 50 minutes
Servings 4 servings
Calories 600
A simple and flavorful one-pan meal featuring tender chicken thighs and crispy potatoes, perfect for a quick dinner.

Ingredients

Protein

  • 4 pieces bone-in, skin-on chicken thighs
  • 1 pound baby potatoes, halved
  • 3 tablespoons olive oil
  • 1 teaspoon garlic powder
  • 1 teaspoon onion powder
  • 1 teaspoon paprika
  • to taste salt and pepper
  • optional fresh rosemary or thyme (for garnish)

Instructions 

  • Preheat oven to 400°F (200°C).
  • Mix olive oil, garlic powder, onion powder, paprika, salt, and pepper.
  • Coat chicken and potatoes with the seasoning mixture.
  • Arrange on a baking sheet, sprinkle herbs if using.
  • Bake for 35-40 minutes, then rest for 5 minutes before serving.

Notes

Ensure chicken is cooked through and potatoes are tender before serving.
Calories: 600kcal
Cost: $15
Course: Main Course
Cuisine: American
Keyword: Chicken, potatoes

Loved this recipe? Save it to your favorite Pinterest board so you can easily find it later! It’s the perfect way to keep all your sweet ideas in one place. ✨

One Pan Chicken and Potatoes

Welcome to my kitchen, friends! Today, I want to share a dish that has become a staple in my home: Easy Garlic Parmesan Chicken Pasta. This recipe is a reminder of my childhood, where the aroma of garlic sizzling in olive oil would bring everyone together at the dinner table. Growing up in a small town in Oregon, I learned that cooking is more than just a necessity; it’s a way to connect with those we love. Fast forward to today, and I still find myself stirring pots and creating magic, especially when life gets busy. This pasta dish is quick to whip up, yet it feels like a warm hug on a plate. The combination of tender chicken, vibrant vegetables, and a creamy garlic-parmesan sauce is enough to brighten any day.

Why You’ll Absolutely Love This Easy Garlic Parmesan Chicken Pasta Recipe for a Healthy Dinner

This recipe is not just delicious; it’s also practical for those of us who juggle busy schedules but still want to enjoy a home-cooked meal. Here’s why you’ll absolutely love it:

  • It’s quick to prepare—perfect for busy weeknights when you need a tasty meal in a hurry.
  • Packed with wholesome ingredients, it’s a healthy option that doesn’t skimp on flavor.
  • It’s versatile—feel free to swap in your favorite veggies or add extra spices to suit your taste.
  • This dish is a crowd pleaser! Whether you’re cooking for family or friends, it’s sure to bring smiles around the table.

Ingredients You’ll Need

Let’s talk about the star ingredients for this delightful dish. You’ll need:

  • Whole Wheat Pasta: I love using whole wheat pasta for its nutty flavor and added fiber. It helps keep me feeling full longer!
  • Boneless, Skinless Chicken Breasts: A lean protein source that cooks quickly and pairs perfectly with the sauce.
  • Garlic: The more, the merrier! Fresh garlic adds a bold and aromatic flavor that’s hard to beat.
  • Cherry Tomatoes: These little gems bring sweetness and a pop of color to the dish.
  • Spinach: A nutritional powerhouse that wilts beautifully, adding vibrant green to your plate.
  • Parmesan Cheese: Because who doesn’t love a creamy, cheesy finish? It ties all the flavors together.

You’ll find the full ingredient list with measurements in the recipe card below!

How to Make This Easy Garlic Parmesan Chicken Pasta Recipe for a Healthy Dinner, Step-by-Step

Now, let’s get cooking! Trust me, you’ll have this dish on the table in no time. Follow these simple steps:

  1. Start by cooking the whole wheat pasta according to package instructions. Drain it and set it aside while you prepare the rest.
  2. While the pasta is cooking, season your chicken breasts with salt and pepper. This is where the flavor begins!
  3. In a large skillet, heat the olive oil over medium heat. Once hot, add the chicken breasts and cook for about 6-7 minutes on each side, until they’re golden brown and cooked through. Once done, remove them from the skillet and let them rest before slicing.
  4. In the same skillet, add the minced garlic and sauté for about 1 minute until fragrant. The aroma will have you dreaming of Italy!
  5. Add the halved cherry tomatoes and spinach to the skillet. Cook until the spinach wilts and the tomatoes soften, about 3-4 minutes. Your kitchen will smell heavenly!
  6. Slice the cooked chicken and return it to the skillet along with the drained pasta.
  7. Sprinkle the grated Parmesan cheese over the mixture and toss everything to combine. Adjust seasoning with salt and pepper to taste.
  8. Serve warm, garnished with fresh basil if desired. Enjoy every bite!
Easy Garlic Parmesan Chicken Pasta Recipe for a Healthy Dinner

Pro Tips for the Best Results

Here are a few pro tips to elevate your Garlic Parmesan Chicken Pasta:

  • Don’t overcook the chicken: Perfectly cooked chicken should be juicy and tender, so keep an eye on it while it cooks!
  • Customize your veggies: Feel free to add bell peppers, zucchini, or whatever seasonal vegetables you have on hand. It’s a great way to clean out the fridge!
  • Use freshly grated Parmesan: While pre-grated cheese is convenient, fresh Parmesan melts beautifully and enhances the flavor tenfold.

Serving Suggestions

This pasta dish is delightful on its own, but you can elevate your meal even further with these serving suggestions:

  • Serve it alongside a crisp green salad drizzled with balsamic vinaigrette for a refreshing contrast.
  • Pair it with garlic bread or a warm baguette to soak up all that delicious sauce.
  • Top with additional fresh herbs, like parsley or basil, for an extra burst of freshness.

Storage and Make-Ahead Tips

If you’re planning to make this dish ahead of time, I’ve got you covered. Here are some handy storage tips:

  • This pasta keeps well in an airtight container in the fridge for up to 3 days. Just reheat it gently on the stove or in the microwave.
  • If you want to freeze it, I recommend undercooking the pasta slightly. This way, when you reheat, it won’t turn mushy. It can be frozen for up to 2 months.
  • When reheating, add a splash of water or broth to bring back some moisture!

So there you have it! A simple, comforting, and absolutely delicious Garlic Parmesan Chicken Pasta recipe that’s perfect for busy weeknights or any occasion that calls for a little culinary magic. I hope you give this dish a try and find as much joy in it as I do. Happy cooking!

Easy Garlic Parmesan Chicken Pasta Recipe for a Healthy Dinner

Prep Time 10 minutes
Cook Time 20 minutes
Total Time 30 minutes
Servings 4 servings
Calories 550
A quick and healthy pasta dish featuring tender chicken, fresh vegetables, and a flavorful garlic Parmesan sauce.

Ingredients

Pasta

  • 8 oz whole wheat pasta

Protein

  • 2 pieces boneless, skinless chicken breasts

Oils and Aromatics

  • 2 tablespoons olive oil
  • 4 cloves garlic, minced

Vegetables

  • 1 cup cherry tomatoes, halved
  • 1 cup spinach

Cheese

  • 1/2 cup grated parmesan cheese

Seasonings

  • to taste salt and pepper

Garnish

  • optional fresh basil (for garnish)

Instructions 

  • Cook pasta according to package; drain.
  • Season chicken with salt and pepper; cook in skillet with olive oil until done. Rest and slice.
  • Sauté garlic in same skillet, add tomatoes and spinach; cook until wilted.
  • Add chicken and pasta to skillet, sprinkle Parmesan, toss to combine.
  • Garnish with basil if desired; serve warm.

Notes

Use fresh basil for best flavor and adjust seasoning as needed.
Calories: 550kcal
Cost: $15
Course: Main Course
Cuisine: Italian
Keyword: Chicken, healthy, pasta

Loved this recipe? Save it to your favorite Pinterest board so you can easily find it later! It’s the perfect way to keep all your sweet ideas in one place. ✨

Easy Garlic Parmesan Chicken Pasta Recipe for a Healthy Dinner

Hey there, friends! It’s Ava here, and today I’m so excited to share a recipe that’s become a staple in my kitchen—Easy Cowboy Butter Chicken Linguine. Picture this: it’s a busy weeknight, the kids are clamoring for dinner, and you just realized you forgot to plan ahead. Sound familiar? Don’t worry; this dish is here to save the day! It’s comforting, flavorful, and best of all, it comes together in just about 30 minutes. Trust me, you’ll have everyone at the table asking for seconds!

Growing up in Oregon, I learned that the best meals are often the simplest. My mother had a knack for turning fresh, wholesome ingredients into something magical. This Cowboy Butter Chicken Linguine is a tribute to those home-cooked meals that warm your soul. With its buttery sauce, tender chicken, and a hint of smokiness from the paprika, it’s the kind of dish that makes you feel right at home—no matter where you are.

Why You’ll Absolutely Love This Easy Cowboy Butter Chicken Linguine for Busy Evenings

Let me tell you why this recipe deserves a spot in your weekly rotation:

  • It’s quick and easy—perfect for those hectic nights when you need dinner on the table fast.
  • The flavors are a harmonious blend of buttery goodness and fresh ingredients that will have your taste buds dancing.
  • This dish is versatile! You can swap in different veggies or proteins based on what you have on hand.
  • It’s a crowd-pleaser! Whether you’re cooking for your family or hosting a casual dinner, everyone will love it.

Ingredients You’ll Need

Let’s talk about the stars of this dish! Here’s what you’ll need:

  • 8 oz linguine pasta: A perfect base that holds onto the sauce beautifully.
  • 2 tablespoons butter: Because everything is better with butter!
  • 1 pound boneless, skinless chicken breasts, diced: Lean protein that cooks quickly and soaks up all those delicious flavors.
  • 1 teaspoon garlic powder: For that aromatic flavor boost.
  • 1 teaspoon smoked paprika: Adds a lovely smokiness that elevates the dish.
  • 1/2 teaspoon salt and 1/4 teaspoon black pepper: Essential seasonings to bring everything together.
  • 1/4 cup chopped fresh parsley: A pop of color and freshness!
  • 1/4 cup grated parmesan cheese: Because cheese makes everything better.
  • 1/2 cup cherry tomatoes, halved: Sweet and juicy, they add a nice burst of flavor.

You’ll find the full ingredient list with measurements in the recipe card below!

How to Make This Easy Cowboy Butter Chicken Linguine for Busy Evenings, Step-by-Step

Let’s dive into the cooking process! Follow these simple steps, and you’ll have a delicious meal in no time:

  1. Start by cooking the linguine according to the package instructions until al dente. Drain and set aside.
  2. In a large skillet, melt the butter over medium heat. The moment that butter starts to sizzle, you know you’re in for something good!
  3. Add the diced chicken to the skillet and season with garlic powder, smoked paprika, salt, and black pepper. Cook the chicken for about 5-7 minutes, stirring occasionally, until it’s cooked through and no longer pink. This is where your kitchen will start to smell heavenly!
  4. Next, toss in the halved cherry tomatoes and cook for an additional 2 minutes. The tomatoes will soften and release their juices, creating a lovely sauce.
  5. Now, it’s time to bring it all together! Toss the cooked linguine into the skillet with the chicken and tomatoes, mixing well to combine.
  6. Remove from heat and stir in the chopped parsley and grated Parmesan cheese. The cheese will melt slightly, coating the pasta and making it irresistibly creamy.
  7. Serve immediately and enjoy your Easy Cowboy Butter Chicken Linguine!
Easy Cowboy Butter Chicken Linguine for Busy Evenings

Pro Tips for the Best Results

Here are a few tips I’ve picked up along the way to ensure your Cowboy Butter Chicken Linguine turns out perfectly:

  • Don’t overcook your chicken! Keep an eye on it and remove it from the heat as soon as it’s no longer pink.
  • Feel free to customize the dish! Add in your favorite veggies like spinach or bell peppers for extra nutrition.
  • For a little extra zing, try squeezing some fresh lemon juice over the top just before serving. It brightens the flavors wonderfully!

Serving Suggestions

When it comes to serving this dish, the options are endless! Here are a few ideas:

  • Pair it with a simple green salad dressed with a light vinaigrette for a refreshing contrast.
  • Serve it with crusty bread to soak up any leftover sauce—trust me, you won’t want to waste a drop!
  • For a hearty meal, add a side of roasted vegetables or garlic bread to round out your dinner.

Storage and Make-Ahead Tips

If you happen to have leftovers (which is rare in my house), here’s how to store them:

  • Store any leftover Cowboy Butter Chicken Linguine in an airtight container in the refrigerator for up to 3 days.
  • To reheat, simply warm it in a skillet over medium heat, adding a splash of water or chicken broth to loosen it up.
  • You can also make this dish ahead of time! Just prepare everything up to the point of combining the pasta and chicken, then store it in the fridge until you’re ready to cook.

There you have it! A quick, comforting, and utterly delicious meal that’s perfect for those busy evenings. I hope you enjoy making this Easy Cowboy Butter Chicken Linguine as much as I do. It’s one of those recipes that not only fills your belly but warms your heart too. Happy cooking, friends!

Easy Cowboy Butter Chicken Linguine for Busy Evenings

Prep Time 10 minutes
Cook Time 15 minutes
Total Time 25 minutes
Servings 4 servings
Calories 650
A quick and flavorful pasta dish featuring tender chicken, cherry tomatoes, and a buttery herb sauce, perfect for busy nights.

Ingredients

Pasta

  • 8 oz linguine pasta
  • 2 tablespoons butter
  • 1 pound boneless, skinless chicken breasts, diced
  • 1 teaspoon garlic powder
  • 1 teaspoon smoked paprika
  • 1/2 teaspoon salt
  • 1/4 teaspoon black pepper
  • 1/4 cup chopped fresh parsley
  • 1/4 cup grated parmesan cheese
  • 1/2 cup cherry tomatoes, halved

Instructions 

  • Cook linguine until al dente, then drain.
  • Melt butter in a skillet and cook diced chicken with seasonings until cooked through.
  • Add cherry tomatoes and cook for 2 minutes.
  • Mix in cooked linguine, parsley, and Parmesan cheese. Serve immediately.

Notes

For extra flavor, add a squeeze of lemon before serving.
Calories: 650kcal
Cost: $15
Course: Main Course
Cuisine: American
Keyword: Chicken, pasta, quick

Loved this recipe? Save it to your favorite Pinterest board so you can easily find it later! It’s the perfect way to keep all your sweet ideas in one place. ✨

Easy Cowboy Butter Chicken Linguine for Busy Evenings

Welcome to my cozy corner of the internet! I’m Ava, and if you’ve stumbled upon my kitchen, you’re probably here for one thing—the kind of recipes that make people pause mid-bite and say, ‘Wow.’ Growing up in a small Oregon town, my mother’s kitchen was the heart of our home, filled with the intoxicating aromas of freshly baked bread and roasted vegetables. Cooking wasn’t just about sustenance; it was a way to celebrate, comfort, and connect. I was the kid who would rather stir a pot of chili than go ride my bike, and by the time I was twelve, I could whip up a pie from scratch that made my grandmother proud.

Fast forward to today, and I’m living in vibrant Seattle, where my kitchen has become my favorite sanctuary. I believe the best recipes are the ones that feel like a warm hug, the ones you make over and over because they just work. Today, I’m excited to share my Easy Chicken Lo Mein Recipe—a dish that’s not only comforting but also incredibly straightforward to whip up on busy nights. Let’s dive in and make something magical together!

Why You’ll Absolutely Love This Easy Chicken Lo Mein Recipe

This Easy Chicken Lo Mein is a dish that brings joy to your table for so many reasons. It’s all about simple ingredients coming together to create a symphony of flavor. Here’s why you’ll absolutely love it:

  • It’s quick and easy—perfect for those hectic weeknights when you need dinner on the table fast.
  • Loaded with colorful vegetables and protein, it’s a balanced meal that doesn’t skimp on taste.
  • You can customize it to your heart’s content—swap in your favorite veggies or add some spice if you’re feeling adventurous!
  • It’s a crowd-pleaser! Whether you’re cooking for family or friends, this dish has everyone going back for seconds.

Ingredients You’ll Need

For this Easy Chicken Lo Mein, we’re going to keep it simple yet delicious. Here’s what you’ll need:

  • 8 oz lo mein noodles
  • 1 lb boneless, skinless chicken breast, sliced
  • 2 tablespoons vegetable oil
  • 2 cloves garlic, minced
  • 1 cup bell peppers, sliced
  • 1 cup broccoli florets
  • 2 green onions, chopped
  • 3 tablespoons soy sauce
  • 1 tablespoon oyster sauce
  • 1 tablespoon sesame oil
  • Salt and pepper to taste

You’ll find the full ingredient list with measurements in the recipe card below!

How to Make This Easy Chicken Lo Mein Recipe, Step-by-Step

Let’s get cooking! Follow these simple steps, and you’ll have a delicious meal ready in no time:

  1. Start by cooking the lo mein noodles according to the package instructions. Once done, drain them and set aside. This is the base of your dish, so make sure they’re cooked just right!
  2. In a large skillet or wok, heat the vegetable oil over medium-high heat. This is where the magic begins!
  3. Add the sliced chicken to the pan and cook until it’s browned and cooked through, about 5-7 minutes. The sizzling sound will have you dreaming of all the deliciousness to come.
  4. Next, toss in the minced garlic, bell peppers, and broccoli. Stir-fry for about 3-4 minutes until the veggies are just tender but still vibrant. The colors are going to pop, and your kitchen will smell heavenly!
  5. Now, stir in the cooked noodles, soy sauce, oyster sauce, and sesame oil, mixing everything well. You want every noodle to be coated in that savory goodness.
  6. Cook for an additional 2-3 minutes, allowing the flavors to meld beautifully. Season with salt and pepper to taste. This is where you can adjust to your liking!
  7. Finally, garnish with the chopped green onions and serve hot. Take a moment to admire your creation—dinner is served!
Easy Chicken Lo Mein Recipe

Pro Tips for the Best Results

Here are a few of my favorite tips to elevate your Chicken Lo Mein:

  • For an extra layer of flavor, marinate the chicken in a bit of soy sauce, garlic, and ginger before cooking. It adds a delightful depth!
  • Feel free to switch up the vegetables based on what you have on hand. Snap peas, carrots, or even bok choy work beautifully in this dish.
  • If you like a bit of heat, drizzle in some chili oil or add red pepper flakes for a spicy kick!

Serving Suggestions

When it comes to serving your Easy Chicken Lo Mein, think outside the box! Here are a few creative ideas:

  • Pair it with spring rolls or dumplings for a delightful Asian-inspired feast.
  • Serve it alongside a light cucumber salad dressed in rice vinegar for a refreshing contrast.
  • Top with sesame seeds or crushed peanuts for added crunch and flavor.

Storage and Make-Ahead Tips

If you find yourself with leftovers (which is rare, but it happens!), here’s how to store them:

  • Store in an airtight container in the refrigerator for up to 3 days. Just reheat it gently in a skillet to bring back that fresh flavor.
  • If you want to make it ahead of time, you can prepare the chicken and vegetables in advance. Just toss everything together with the noodles when you’re ready to eat.
  • This dish does not freeze well due to the texture of the noodles, so I recommend enjoying it fresh!

There you have it! My Easy Chicken Lo Mein Recipe that’s sure to bring joy to your table. I hope you give it a try and experience the warm embrace of this comforting dish. Happy cooking!

Easy Chicken Lo Mein Recipe

Prep Time 10 minutes
Cook Time 15 minutes
Total Time 25 minutes
Servings 4 servings
Calories 550
A quick and flavorful Chinese-inspired dish featuring tender chicken, fresh vegetables, and savory noodles.

Ingredients

Noodles

  • 8 oz lo mein noodles

Protein

  • 1 lb boneless, skinless chicken breast, sliced

Vegetables

  • 1 cup bell peppers, sliced
  • 1 cup broccoli florets

Aromatics & Oils

  • 2 cloves garlic, minced
  • 2 tablespoons vegetable oil

Sauces & Seasonings

  • 3 tablespoons soy sauce
  • 1 tablespoon oyster sauce
  • 1 tablespoon sesame oil
  • to taste salt and pepper

Garnish

  • 2 green onions green onions, chopped

Instructions 

  • Cook noodles as per package, drain, and set aside.
  • Heat oil in a skillet, cook chicken until browned, then add garlic and vegetables, stir-fry until tender.
  • Add noodles, soy sauce, oyster sauce, and sesame oil; toss to combine.
  • Cook for 2-3 minutes to meld flavors, season with salt and pepper.
  • Garnish with chopped green onions and serve hot.

Notes

Feel free to add other vegetables or adjust seasonings to taste.
Calories: 550kcal
Cost: $15
Course: Main Course
Cuisine: Chinese
Keyword: Chicken, Noodles

Loved this recipe? Save it to your favorite Pinterest board so you can easily find it later! It’s the perfect way to keep all your sweet ideas in one place. ✨

Easy Chicken Lo Mein Recipe

Welcome back to my cozy corner of the kitchen! If you’re anything like me, you know that some meals have a way of wrapping you in warmth and comfort, much like a favorite blanket on a chilly evening. Today, I’m excited to share a recipe that embodies that very essence: Cheesy Garlic Chicken Wraps. These delightful wraps are not only packed with flavor, but they also come together in a flash, making them perfect for busy weeknights or laid-back weekends.

Growing up, I cherished the moments spent in my mother’s kitchen, where the aroma of garlic would dance in the air, mingling with the sounds of laughter and chatter. These wraps remind me of those carefree days, where simple ingredients transformed into something magical. So, let’s dive into this recipe that’s sure to make your taste buds sing and your loved ones smile!

Why You’ll Absolutely Love This Cheesy Garlic Chicken Wraps – The Ultimate Flavor Explosion!

These Cheesy Garlic Chicken Wraps are not just another meal; they’re a celebration of flavor and comfort! Here’s why you’re going to adore them:

  • They are incredibly easy to make, requiring minimal prep time and just a handful of ingredients.
  • The combination of creamy cheeses and savory garlic creates a flavor explosion that’s impossible to resist.
  • These wraps are versatile—perfect for lunch, dinner, or even a snack, and they can be customized to suit your taste!
  • They’re budget-friendly, making them an excellent choice for meals under $5 without sacrificing taste.

Ingredients You’ll Need

Let’s talk about the stars of our show! The beauty of this recipe lies in its simplicity. Here’s what you’ll need to create these scrumptious wraps:

  • 2 cups cooked chicken, shredded
  • 1 cup shredded cheese (cheddar or mozzarella)
  • 4 large tortillas
  • 4 cloves garlic, minced
  • 1/2 cup cream cheese, softened
  • 1/4 cup sour cream
  • 1 tablespoon olive oil
  • 1 teaspoon paprika
  • Salt and pepper to taste
  • Fresh parsley, chopped (for garnish)

These ingredients not only come together beautifully but also create a comforting dish that feels like home. I chose shredded chicken because it’s quick, but you can easily swap it for leftover turkey or even a vegetarian option with sautéed veggies!

You’ll find the full ingredient list with measurements in the recipe card below!

How to Make This Cheesy Garlic Chicken Wraps – The Ultimate Flavor Explosion!, Step-by-Step

Now, let’s get cooking! Follow these simple steps to whip up your Cheesy Garlic Chicken Wraps:

  1. In a large bowl, combine the shredded chicken, minced garlic, cream cheese, sour cream, paprika, salt, and pepper. Mix until everything is well combined and creamy.
  2. Heat the olive oil in a skillet over medium heat. Add the chicken mixture and cook for about 5-7 minutes until heated through, stirring occasionally. Your kitchen will start to smell heavenly!
  3. Remove the skillet from heat and stir in the shredded cheese until it melts and blends into the mixture.
  4. Lay out a tortilla on a flat surface. Spoon a generous portion of the cheesy garlic chicken mixture onto the center of the tortilla.
  5. Fold the sides of the tortilla over the filling and then roll it tightly from the bottom up to create a wrap.
  6. Repeat with the remaining tortillas and filling.
  7. Optional: For an extra crispy finish, grill the wraps on a pan or sandwich press for 2-3 minutes on each side until golden brown.
  8. Slice in half, garnish with fresh parsley, and serve warm.
Cheesy Garlic Chicken Wraps – The Ultimate Flavor Explosion!

Pro Tips for the Best Results

Here are a few tips to ensure your Cheesy Garlic Chicken Wraps turn out perfectly every time:

  • Don’t rush the melting process! Allow the cheese to melt fully into the chicken mixture—this will give you that creamy, dreamy texture.
  • Feel free to experiment with different cheeses! A mix of mozzarella and cheddar adds a delightful complexity, but you could also try pepper jack for a spicy kick.
  • If you have time, consider marinating your chicken in garlic and spices beforehand for an extra depth of flavor.

Serving Suggestions

These wraps are fantastic on their own, but they can also be paired with so many sides! Here are a few serving suggestions to elevate your meal:

  • Serve with a side of crispy sweet potato fries or a fresh garden salad for a balanced meal.
  • Top with a dollop of guacamole or salsa for an added burst of flavor.
  • Pair with a light dipping sauce, like ranch or a spicy mayo, for a fun twist.

Storage and Make-Ahead Tips

If you find yourself with leftovers (which is rare, but it happens!), here’s how to store them:

  • Store any leftover wraps in an airtight container in the refrigerator for up to 3 days.
  • To reheat, pop them in the oven or air fryer to maintain that crispy texture.
  • You can also prepare the chicken mixture ahead of time, store it in the fridge, and assemble the wraps when you’re ready to eat for a quick meal solution.

There you have it! Cheesy Garlic Chicken Wraps that are sure to become a staple in your kitchen. Whether you’re cooking for family, friends, or just yourself, these wraps are bound to impress and satisfy. So grab your ingredients, roll up your sleeves, and let’s make some magic happen in the kitchen!

Cheesy Garlic Chicken Wraps – The Ultimate Flavor Explosion!

Prep Time 10 minutes
Cook Time 10 minutes
Total Time 20 minutes
Servings 4 servings
Calories 450
Enjoy these flavorful cheesy garlic chicken wraps that combine tender shredded chicken with melted cheese and aromatic garlic, all wrapped in soft tortillas for a satisfying meal.

Ingredients

Protein

  • 2 cups cooked chicken, shredded
  • 1 cup shredded cheese (cheddar or mozzarella)
  • 4 large tortillas
  • 4 cloves garlic, minced
  • 0.5 cup cream cheese, softened
  • 0.25 cup sour cream
  • 1 tablespoon olive oil
  • 1 teaspoon paprika
  • to taste salt and pepper

Garnish

  • fresh parsley, chopped for garnish

Instructions 

  • Mix shredded chicken, garlic, cream cheese, sour cream, paprika, salt, and pepper until combined.
  • Heat olive oil in a skillet and cook the chicken mixture for 5-7 minutes.
  • Remove from heat and stir in shredded cheese until melted.
  • Spread filling onto tortillas, fold sides, and roll tightly.
  • Optional: Grill wraps for 2-3 minutes per side until golden. Slice, garnish with parsley, and serve.

Notes

For extra flavor, add a dash of hot sauce or serve with a side salad.
Calories: 450kcal
Cost: $15
Course: Main Course
Cuisine: American
Keyword: Chicken

Loved this recipe? Save it to your favorite Pinterest board so you can easily find it later! It’s the perfect way to keep all your sweet ideas in one place. ✨

Cheesy Garlic Chicken Wraps – The Ultimate Flavor Explosion!