Author

Ava

Browsing

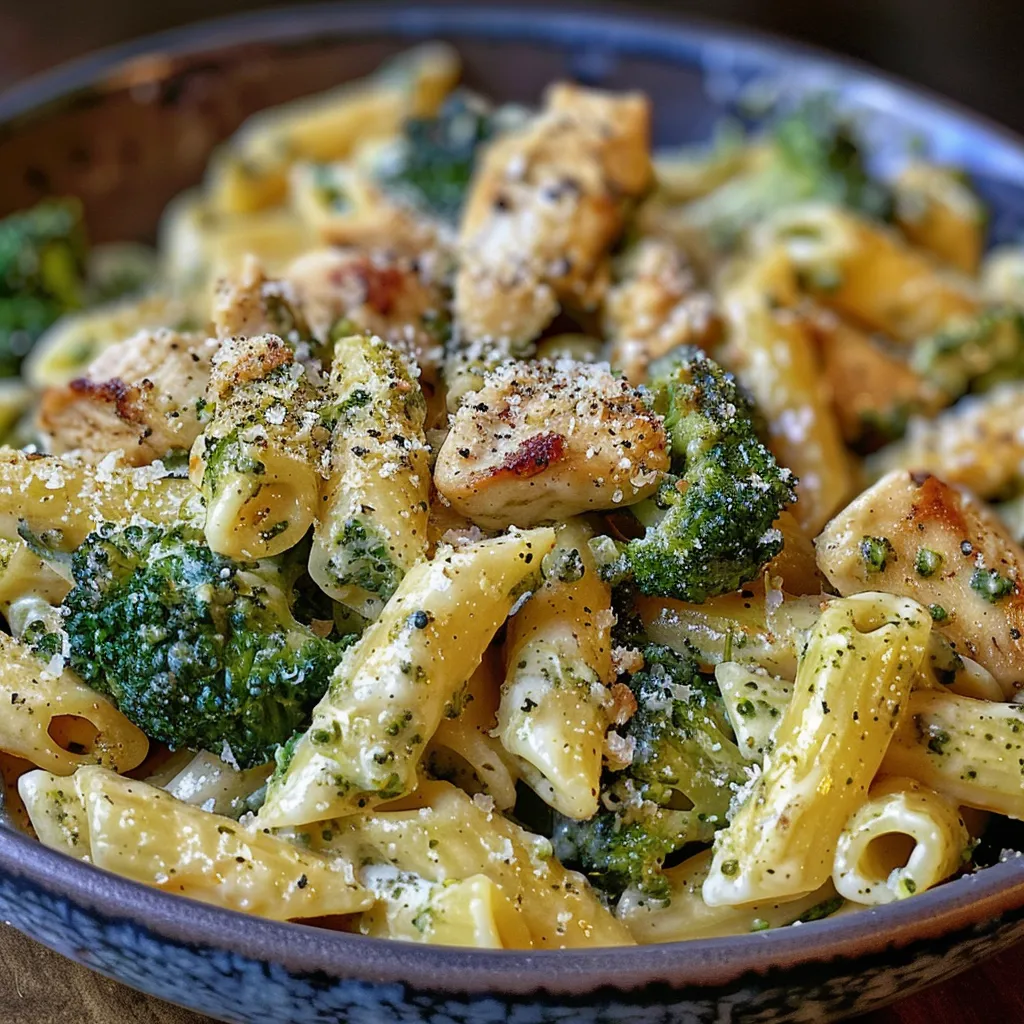
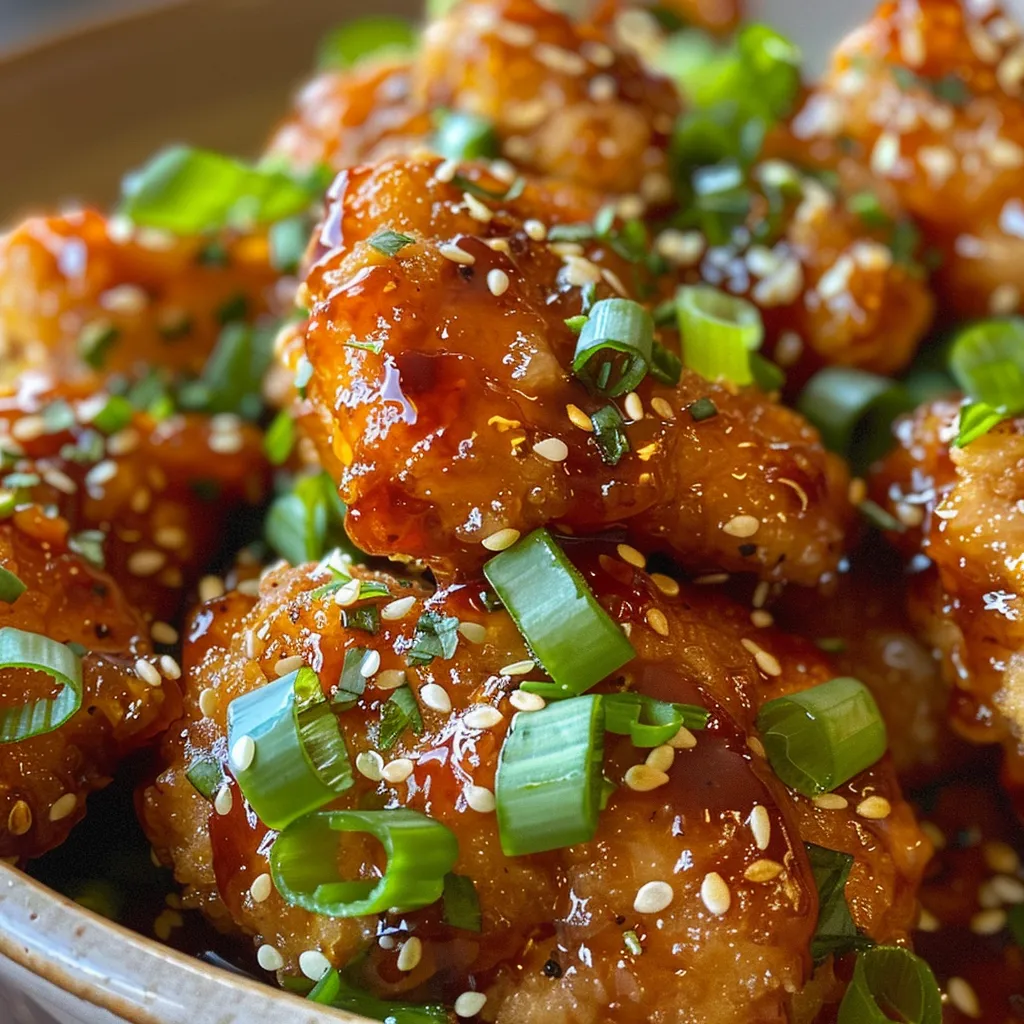
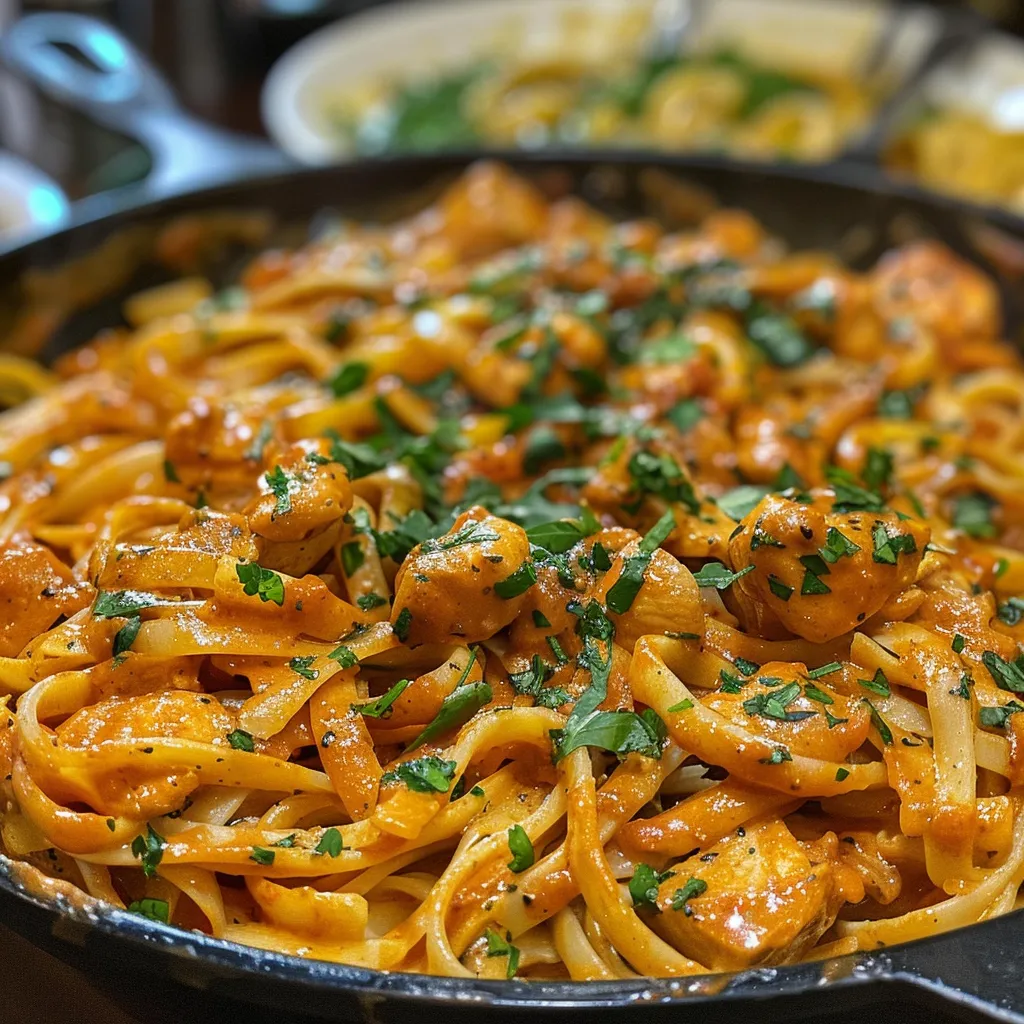
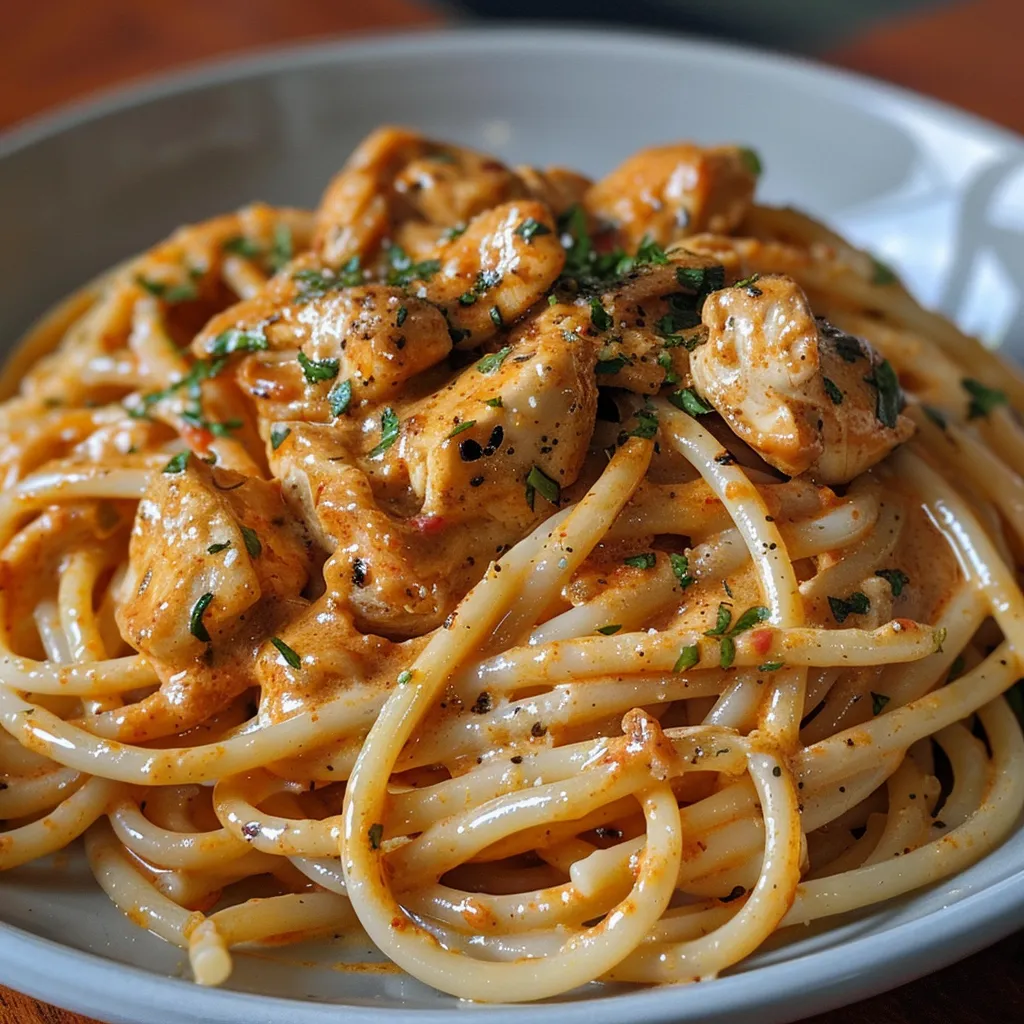
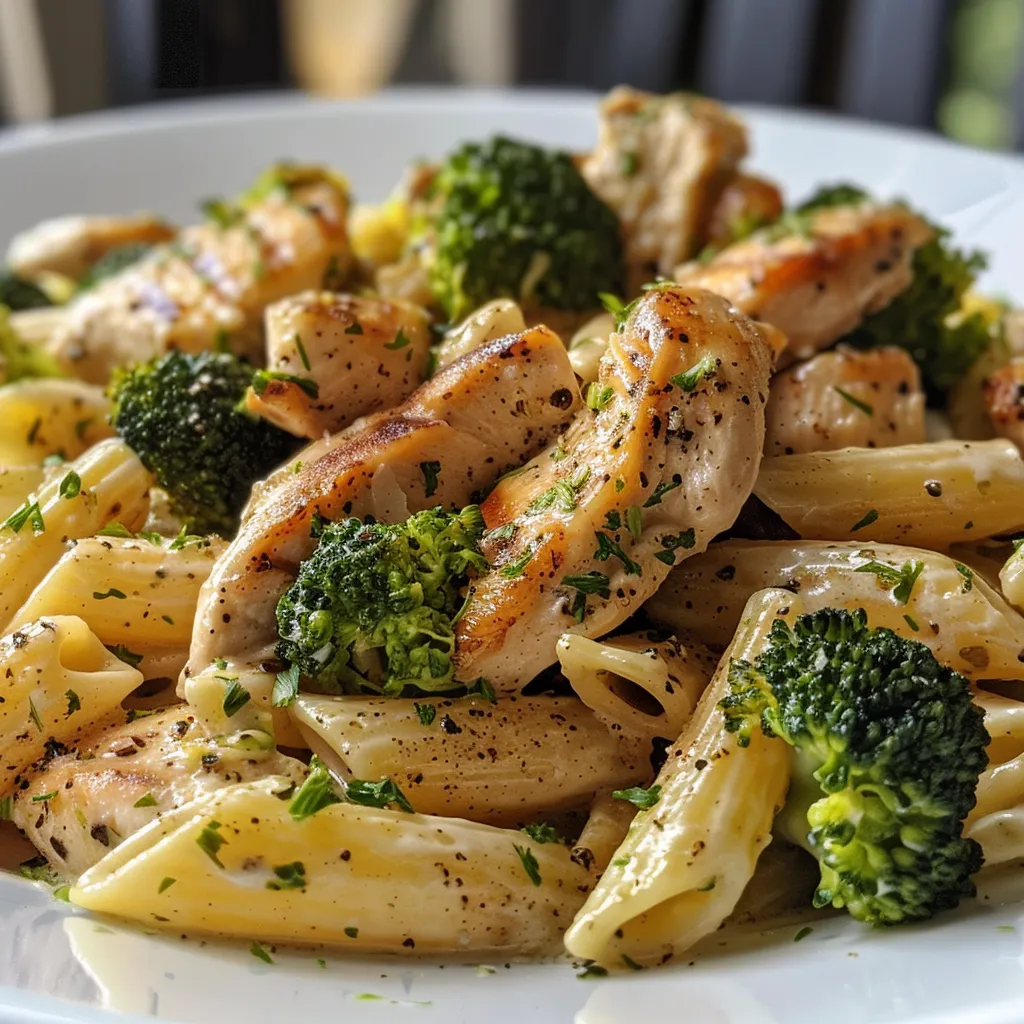
Welcome to my kitchen, dear friends! Today, I’m excited to share a recipe that embodies everything I love about cooking—simplicity, heartiness, and that warm, comforting feeling that makes you want to gather around the dinner table. This Heerlijke Kip Pasta Broccoli is not just a dish; it’s an experience that transports me back to my childhood in Oregon, where every meal was a celebration of flavors and family. You know, the kind of meal that makes you pause mid-bite and say, ‘Wow.’ And trust me, this one does just that!

Picture this: a busy weeknight, the hustle and bustle of life pulling you in every direction, and you’re craving something that feels like home. This pasta dish is here to save the day! With tender chicken, vibrant broccoli, and creamy parmesan sauce, it’s the perfect balance of flavors and textures that will leave everyone at the table asking for seconds. So, let’s dive in!

Why You’ll Absolutely Love This Heerlijke Kip Pasta Broccoli: Een Makkelijk Recept voor Elke Dag!

This recipe isn’t just any chicken pasta; it’s a delightful combination of ingredients that will warm your heart and fill your belly. Here’s why you’ll absolutely adore it:

  • It’s quick and easy to make—perfect for those busy weeknights!
  • Packed with protein and veggies, it’s a nutritious choice for the whole family.
  • The creamy sauce is a deliciously indulgent touch without being overly heavy.
  • It’s versatile! Feel free to swap ingredients based on what you have on hand.

Ingredients You’ll Need

Now, let’s talk about the star players in this dish. I love using fresh ingredients that bring out the best flavors, and this recipe is no exception. Here’s what you’ll need:

  • 300g pasta (bijvoorbeeld penne of fusilli)
  • 250g kipfilet, in blokjes
  • 200g broccoli, in roosjes
  • 2 teentjes knoflook, fijngehakt
  • 200ml room
  • 50g geraspte parmezaanse kaas
  • olijfolie
  • zout en peper naar smaak
  • verse peterselie, voor garnering

You’ll find the full ingredient list with measurements in the recipe card below!

How to Make This Heerlijke Kip Pasta Broccoli: Een Makkelijk Recept voor Elke Dag!, Step-by-Step

Alright, let’s get cooking! Follow these simple steps to create a meal that’s sure to impress:

  1. Kook de pasta volgens de aanwijzingen op de verpakking in gezouten water.
  2. Voeg de broccoli toe aan de pasta in de laatste 3 minuten van de kooktijd. This way, the broccoli stays bright and vibrant!
  3. Verhit een beetje olijfolie in een grote pan op middelhoog vuur.
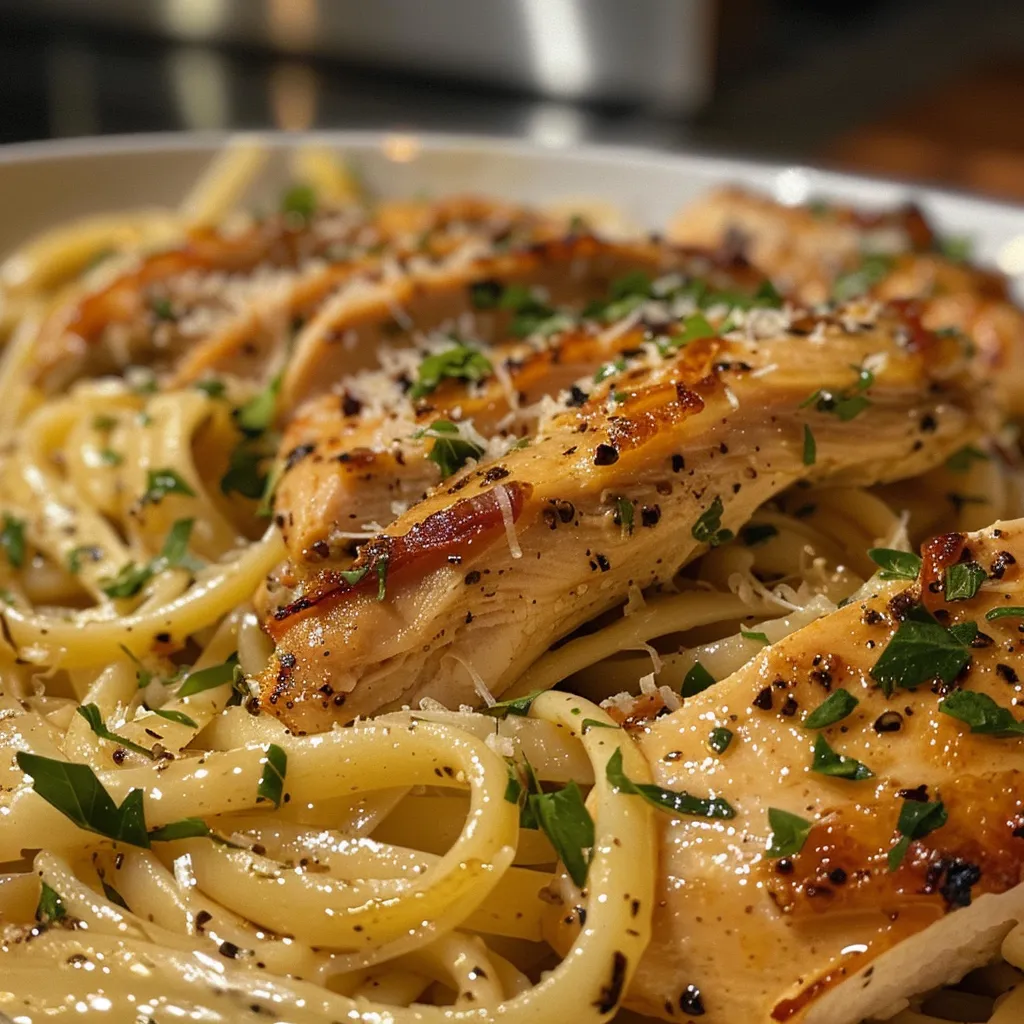
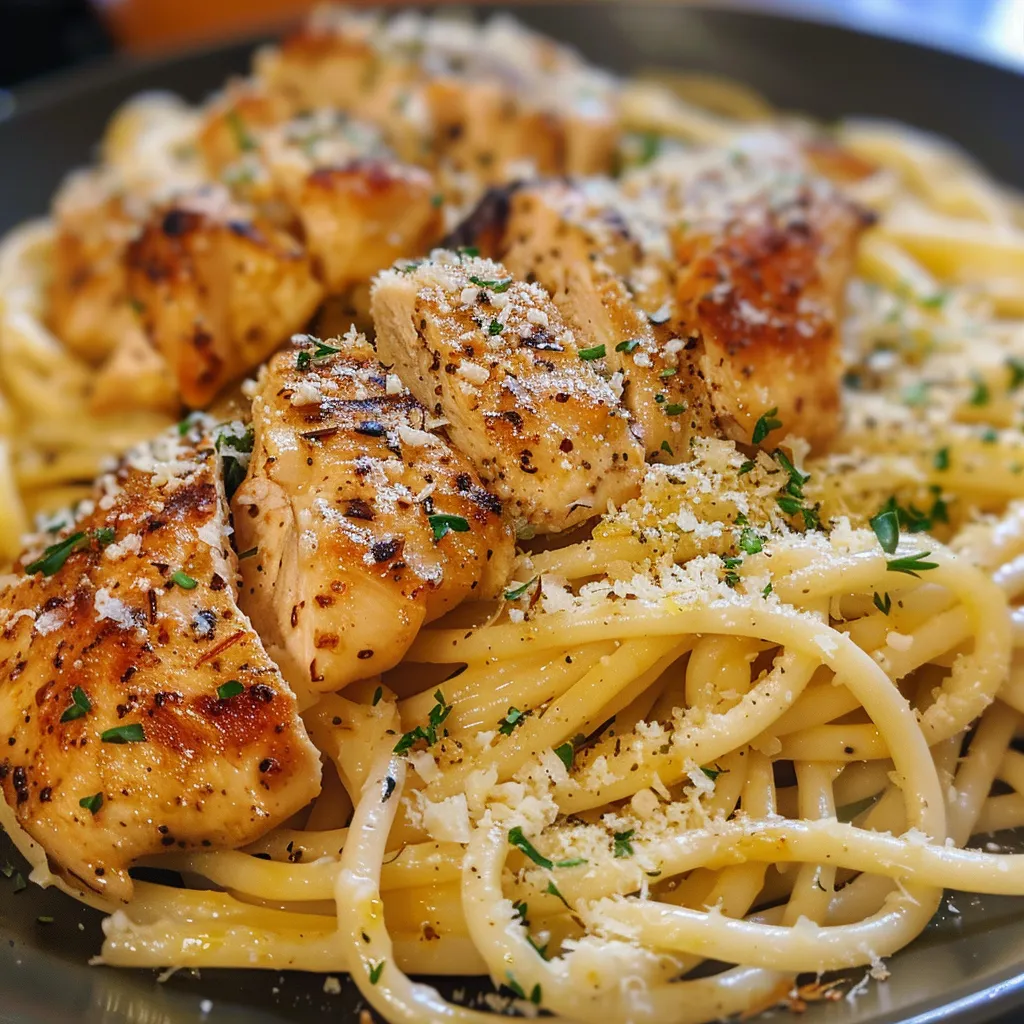
  4. Voeg de kipblokjes toe en bak ze goudbruin en gaar, ongeveer 5-7 minuten. The key here is to let them get a nice sear for extra flavor!
  5. Voeg de fijngehakte knoflook toe en bak nog een minuut mee. Oh, the aroma!
  6. Giet de pasta en broccoli af en voeg deze toe aan de pan met kip.
  7. Voeg de room en geraspte Parmezaanse kaas toe en roer goed door. Let that creamy goodness envelop the pasta!
  8. Breng op smaak met zout en peper. Taste as you go—cooking is all about trusting your palate!
  9. Serveer de pasta in borden en garneer met verse peterselie. A little sprinkle of green goes a long way!
Heerlijke Kip Pasta Broccoli: Een Makkelijk Recept voor Elke Dag!

Pro Tips for the Best Results

To ensure your Heerlijke Kip Pasta Broccoli turns out perfectly, here are a few insider tips:

  • Don’t overcook the broccoli! You want it tender but still with a bit of crunch to maintain its vibrant color and nutrients.
  • Feel free to add your favorite herbs or spices for an extra flavor kick. A pinch of red pepper flakes can add a delightful heat!
  • If you want a lighter version, you can substitute the cream with Greek yogurt or a plant-based cream alternative.

Serving Suggestions

This dish is versatile and can be enjoyed in many ways! Here are some creative serving ideas:

  • Pair it with a simple side salad dressed with lemon vinaigrette for a refreshing contrast.
  • Serve it with garlic bread to soak up that creamy sauce—yum!
  • Top with extra parmesan and some crushed nuts for added texture and flavor.

Storage and Make-Ahead Tips

Leftovers? No problem! This Heerlijke Kip Pasta Broccoli stores beautifully. Here’s how to handle it:

  • Store any leftovers in an airtight container in the fridge for up to 3 days.
  • You can also freeze it! Just make sure to separate it into portions for easy reheating.
  • When ready to eat, simply reheat in the microwave or on the stovetop, adding a splash of cream or broth to help loosen it up.

This recipe is not just about filling your stomach; it’s about creating memories, sharing love, and enjoying the simple pleasures of life. I hope you make this Heerlijke Kip Pasta Broccoli and find it becomes a beloved staple in your home. Happy cooking, friends!

Heerlijke Kip Pasta Broccoli: Een Makkelijk Recept voor Elke Dag!

Prep Time 10 minutes
Cook Time 15 minutes
Total Time 25 minutes
Servings 4 porties
Calories 650
Een smakelijk en eenvoudig gerecht dat snel klaar is, perfect voor elke dag.

Ingredients

Pasta

  • 300 g pasta (bijvoorbeeld penne of fusilli)

Kipfilet

  • 250 g kipfilet, in blokjes

Broccoli

  • 200 g broccoli, in roosjes

Knoflook

  • 2 teentjes knoflook, fijngehakt

Room

  • 200 ml room

Geraspte Parmezaanse kaas

  • 50 g geraspte parmezaanse kaas

Olijfolie

  • olijfolie

Zout en peper

  • zout en peper naar smaak

Verse peterselie

  • verse peterselie, voor garnering

Instructions 

  • Kook de pasta volgens de aanwijzingen op de verpakking in gezouten water.
  • Voeg de broccoli toe aan de pasta in de laatste 3 minuten en giet af.
  • Verhit olijfolie en bak de kip goudbruin, 5-7 min.
  • Voeg knoflook toe en bak 1 min. Meng pasta, broccoli, kip, room en kaas.
  • Breng op smaak met zout en peper, garneer met peterselie en serveer.

Notes

Gebruik verse peterselie voor een frisse smaak.
Calories: 650kcal
Cost: $15
Course: Hoofdgerecht
Cuisine: Internationaal
Keyword: Broccoli, Kip, pasta

Loved this recipe? Save it to your favorite Pinterest board so you can easily find it later! It’s the perfect way to keep all your sweet ideas in one place. ✨

Heerlijke Kip Pasta Broccoli: Een Makkelijk Recept voor Elke Dag!

Welcome to my kitchen! I’m Ava, and I’m so excited to share a recipe that feels like a warm hug on a plate. Growing up in Oregon, the kitchen was always filled with the comforting aromas of my mother’s cooking—especially her garlic-infused dishes that would make anyone feel at home. Fast forward to today, and I’ve created my own version of that comfort food: Easy Garlic Parmesan Chicken Pasta. This dish has become a staple in my Seattle kitchen, perfect for those bustling weeknights when you need something simple yet satisfying. It’s not just a meal; it’s a way to gather around the table, share stories, and create lasting memories.

Imagine this: tender chicken breasts cooked to golden perfection, mingling with whole wheat pasta, fresh spinach, and juicy cherry tomatoes, all tossed in a luscious garlic Parmesan sauce. Trust me, it’s the kind of dish that makes people pause mid-bite and say, ‘Wow.’ And the best part? It’s healthy too! So not only will you be treating your taste buds, but you’ll also be nourishing your body. Let’s dive into why you’ll absolutely love this recipe!

Why You’ll Absolutely Love This Easy Garlic Parmesan Chicken Pasta Recipe for a Healthy Dinner

This recipe has so much going for it—let me tell you why it’s become a beloved go-to in my home.

  • It’s incredibly easy to make—perfect for busy weeknights!
  • Whole wheat pasta and fresh veggies make it a healthy option without sacrificing flavor.
  • The combination of garlic and Parmesan creates a rich, comforting sauce that’s simply irresistible.
  • It’s versatile! Feel free to swap out ingredients based on what you have on hand or your dietary preferences.

Ingredients You’ll Need

Now, let’s talk about the star players in this dish. Each ingredient is chosen not just for taste but also for the health benefits they bring to the table. We’re using whole wheat pasta for a hearty base that’s packed with fiber, boneless, skinless chicken breasts for lean protein, and fresh spinach to sneak in some greens. The cherry tomatoes add a burst of sweetness, while minced garlic and grated Parmesan cheese bring that comforting flavor profile we all love. A drizzle of olive oil ties everything together beautifully.

You’ll find the full ingredient list with measurements in the recipe card below!

How to Make This Easy Garlic Parmesan Chicken Pasta Recipe for a Healthy Dinner, Step-by-Step

Ready to make some magic in your kitchen? Here’s how to whip up this delightful dish step-by-step:

  1. Cook the whole wheat pasta according to package instructions. Drain and set aside. It’s important not to overcook it; you want it al dente!
  2. While the pasta is cooking, season the chicken breasts with salt and pepper. Simple seasoning is key to letting the chicken shine.
  3. In a large skillet, heat olive oil over medium heat. Once hot, add the seasoned chicken breasts and cook for about 6-7 minutes on each side until cooked through. Remove from skillet and let rest.
  4. In the same skillet, add the minced garlic and sauté for 1-2 minutes until fragrant—this is where the magic begins!
  5. Add the cherry tomatoes and spinach to the skillet. Cook until the spinach wilts and the tomatoes soften, about 3-4 minutes.
  6. Slice the cooked chicken and add it back to the skillet along with the cooked pasta.
  7. Sprinkle grated Parmesan cheese over the mixture and toss until everything is well combined. The cheese will melt slightly, creating a creamy coating.
  8. Serve warm, garnished with fresh parsley for a pop of color and freshness.
Easy Garlic Parmesan Chicken Pasta Recipe for a Healthy Dinner

Pro Tips for the Best Results

To elevate your dish even further, here are a few pro tips:

  • Make sure your skillet is hot before adding the chicken. This helps achieve that lovely golden crust.
  • Don’t skip the resting step for the chicken! This allows the juices to redistribute, ensuring it’s tender and juicy.
  • Feel free to add other veggies like bell peppers or zucchini based on what’s in season or what you love!

Serving Suggestions

This Garlic Parmesan Chicken Pasta is delightful on its own, but if you want to take it up a notch, consider these serving ideas:

  • Pair it with a simple green salad drizzled with balsamic vinaigrette for a refreshing contrast.
  • Serve with a side of cheesy garlic bread to soak up all that delicious sauce.
  • Top with a sprinkle of red pepper flakes for a little heat, or add some toasted pine nuts for crunch!

Storage and Make-Ahead Tips

If you’re like me and love to meal prep, this recipe is perfect for that! Here are some storage tips:

  • Store leftovers in an airtight container in the fridge for up to 3 days. Reheat gently on the stove or in the microwave.
  • This dish can also be frozen! Just make sure it’s in a freezer-safe container. When ready to eat, thaw overnight in the fridge and reheat.
  • For meal prep, consider making a double batch and portioning it out for quick lunches or dinners throughout the week.

There you have it! A cozy, satisfying recipe that’s sure to become a favorite in your home. I hope you enjoy making this Easy Garlic Parmesan Chicken Pasta as much as I do. Remember, cooking is all about joy, so don’t forget to taste as you go and let your creativity shine. Happy cooking!

Easy Garlic Parmesan Chicken Pasta Recipe for a Healthy Dinner

Prep Time 10 minutes
Cook Time 20 minutes
Total Time 30 minutes
Servings 4 servings
Calories 550
A quick and healthy pasta dish featuring tender chicken, fresh vegetables, and Parmesan cheese, perfect for a wholesome dinner.

Ingredients

Pasta

  • 8 oz whole wheat pasta

Protein

  • 2 pieces boneless, skinless chicken breasts

Oil

  • 2 tablespoons olive oil

Garlic

  • 4 cloves garlic, minced

Vegetables

  • 1 cup cherry tomatoes, halved
  • 1 cup spinach

Cheese

  • 1/2 cup grated parmesan cheese

Seasonings

  • to taste salt and pepper

Garnish

  • for garnish fresh parsley

Instructions 

  • Cook pasta according to package instructions. Drain and set aside.
  • Season chicken with salt and pepper. Cook in a skillet with olive oil for 6-7 minutes per side. Rest and slice.
  • Sauté garlic in the same skillet for 1-2 minutes. Add cherry tomatoes and spinach; cook until wilted.
  • Return sliced chicken and pasta to skillet. Add Parmesan cheese and toss to combine. Garnish with parsley.

Notes

Use fresh ingredients for best flavor. Adjust seasoning to taste.
Calories: 550kcal
Cost: $15
Course: Main Course
Cuisine: American
Keyword: Chicken, healthy, pasta

Loved this recipe? Save it to your favorite Pinterest board so you can easily find it later! It’s the perfect way to keep all your sweet ideas in one place. ✨

Easy Garlic Parmesan Chicken Pasta Recipe for a Healthy Dinner

Welcome to my kitchen, friends! Today, I’m excited to share a recipe that takes me back to those cozy dinners at home, where the aromas of savory beef and vibrant broccoli would waft through the air, making it impossible not to smile. Growing up in Oregon, my family often gathered around the table to savor comforting meals, and this Easy Beef and Broccoli recipe is one that truly feels like home. Imagine tender slices of beef coated in a flavorful sauce, paired with crisp-tender broccoli, all served over a bed of fluffy rice. Trust me, this dish is better than takeout!

\n

Now, I know life can get busy, and sometimes we just want a quick, satisfying meal that doesn’t require a culinary degree to pull off. This recipe is perfect for those weeknight dinners when you want something delicious and wholesome without spending hours in the kitchen. Ready to dive in? Let’s get cooking!

\n

Why You’ll Absolutely Love This Easy Beef and Broccoli Recipe (Better than takeout!)

\n

This dish is not just any ordinary stir-fry; it’s a delightful combination of flavors and textures that will make your taste buds dance! Here’s why I know you’ll fall in love with it:

\n

  • It’s quick and easy—ready in about 30 minutes!
  • Better than takeout—made with fresh ingredients and no mystery sauces.
  • Customizable—add your favorite veggies or adjust the sauce to your liking.
  • Perfect for meal prep—make a big batch and enjoy it all week!

\n

Ingredients You’ll Need

\n

Let’s talk about the ingredients that bring this dish to life! Each one plays a crucial role in creating that comforting, savory flavor that we all crave. Here’s what you’ll need:

\n

  • 1 pound beef sirloin, thinly sliced
  • 2 cups broccoli florets
  • 3 tablespoons soy sauce
  • 2 tablespoons oyster sauce
  • 1 tablespoon cornstarch
  • 2 tablespoons vegetable oil
  • 3 cloves garlic, minced
  • 1 teaspoon ginger, minced
  • 1/2 cup beef broth
  • Salt and pepper to taste
  • Cooked rice, for serving

\n

Each ingredient is chosen with care: the sirloin is tender and flavorful, while the broccoli adds a lovely crunch and a pop of color. And the combination of soy and oyster sauce creates a savory depth that’s simply irresistible. Strong flavors, simple ingredients—that’s my motto!

\n

You’ll find the full ingredient list with measurements in the recipe card below!

\n

How to Make This Easy Beef and Broccoli Recipe (Better than takeout!), Step-by-Step

\n

Now for the fun part! Making this Easy Beef and Broccoli is as simple as it gets. Follow these steps, and you’ll have dinner on the table in no time:

\n

  1. In a bowl, combine the sliced beef with 1 tablespoon of soy sauce, 1 tablespoon of cornstarch, and a pinch of salt and pepper. Mix well and let it marinate for 15 minutes. This step is crucial for tenderizing the beef and infusing it with flavor.
  2. In a large skillet or wok, heat 1 tablespoon of vegetable oil over medium-high heat. Add the marinated beef and stir-fry until browned, about 2-3 minutes. Remove the beef from the skillet and set aside.
  3. In the same skillet, add the remaining tablespoon of vegetable oil. Add the minced garlic and ginger, and stir-fry for about 30 seconds until fragrant. This is where your kitchen starts to smell heavenly!
  4. Now, add the broccoli florets to the skillet and stir-fry for 2-3 minutes until they are bright green and tender-crisp. We want them to retain that lovely crunch!
  5. Return the cooked beef to the skillet. Add the remaining soy sauce, oyster sauce, and beef broth. Stir well and cook for another 2-3 minutes until the sauce thickens slightly. This is when the magic happens!
  6. Serve the beef and broccoli over cooked rice. Enjoy the warm, comforting flavors!

\n

Easy Beef and Broccoli Recipe (Better than takeout!)

\n

Pro Tips for the Best Results

\n

Want to take your Easy Beef and Broccoli to the next level? Here are a few pro tips from my kitchen to yours:

\n

  • For even more flavor, let the beef marinate for up to an hour if you have the time. The longer, the better!
  • Try adding a splash of sesame oil at the end for a nutty aroma that elevates the dish.
  • If you like it spicy, toss in some red pepper flakes or a drizzle of sriracha for a kick!

\n

Serving Suggestions

\n

Now that your Easy Beef and Broccoli is ready, let’s talk about how to serve it! This dish shines as a main course, but you can also:

\n

  • Pair it with steamed dumplings or egg rolls for a delightful Asian-inspired feast.
  • Serve it alongside a fresh cucumber salad dressed in rice vinegar for a refreshing contrast.
  • Add a sprinkle of sesame seeds and chopped green onions on top for an extra pop of color and flavor!

\n

Storage and Make-Ahead Tips

\n

If you’re like me and love to meal prep, you’ll be happy to know that this Easy Beef and Broccoli stores beautifully! Here’s what you need to know:

\n

  • Store any leftovers in an airtight container in the refrigerator for up to 3 days.
  • This dish also freezes well—just make sure to let it cool completely before transferring it to a freezer-safe container. It can last up to 3 months in the freezer!
  • When reheating, add a splash of beef broth or water to keep the sauce from thickening too much.

\n

There you have it, my friends! A wholesome Beef and Broccoli dish that feels like home and tastes even better than takeout. I can’t wait for you to try it and make it your own. Happy cooking, and remember, every meal is a new opportunity to create something magical in your kitchen!

Easy Beef and Broccoli Recipe (Better than takeout!)

Prep Time 15 minutes
Cook Time 10 minutes
Total Time 25 minutes
Servings 4 servings
Calories 450
A quick and delicious stir-fry that combines tender beef with crisp broccoli in a savory sauce, perfect for a satisfying meal.

Ingredients

Meat

  • 1 pound beef sirloin, thinly sliced

Vegetables

  • 2 cups broccoli florets

Sauces & Condiments

  • 3 tablespoons soy sauce
  • 2 tablespoons oyster sauce
  • 1 tablespoon cornstarch
  • 1/2 cup beef broth

Other

  • 2 tablespoons vegetable oil
  • 3 cloves garlic, minced
  • 1 teaspoon ginger, minced
  • salt and pepper to taste salt and pepper
  • cooked rice, for serving cooked rice (for serving)

Instructions 

  • Marinate beef with 1 tbsp soy sauce, 1 tbsp cornstarch, salt, and pepper for 15 minutes.
  • Heat 1 tbsp vegetable oil in a skillet, cook beef until browned (2-3 min), then set aside.
  • Add remaining oil, garlic, and ginger; stir-fry 30 seconds.
  • Add broccoli; stir-fry 2-3 minutes until tender-crisp.
  • Return beef to skillet, add soy sauce, oyster sauce, and beef broth; cook 2-3 minutes until sauce thickens.
  • Serve over cooked rice.

Notes

For extra flavor, add a splash of sesame oil or sprinkle with sesame seeds before serving.
Calories: 450kcal
Cost: $15
Course: Main Course
Cuisine: Asian
Keyword: Beef, Broccoli

Loved this recipe? Save it to your favorite Pinterest board so you can easily find it later! It’s the perfect way to keep all your sweet ideas in one place. ✨

Easy Beef and Broccoli Recipe (Better than takeout!)

Welcome to my cozy corner of the internet! I’m Ava, and today, I’m excited to share a dish that’s practically bursting with flavor and warmth—my Easy Honey Sesame Chicken. Picture this: it’s a busy weeknight, the kids are winding down from a long day, and you’re staring into the fridge wondering what on earth to whip up. This recipe will not only save the day but also bring smiles to the dinner table. I grew up in a household where meals were a celebration, and I believe this dish perfectly embodies that spirit. It’s sweet, savory, and oh-so-simple to make—just like the comforting meals my mother used to prepare.

As I’ve navigated my culinary adventures here in Seattle, I’ve learned that the best recipes are the ones that feel like a warm hug. This Honey Sesame Chicken does just that. With its delightful glaze and tender chicken, it’s a dish that will make your loved ones stop mid-bite and say, ‘Wow!’ So, let’s roll up our sleeves, grab our spatulas, and dive into this delightful recipe that’s destined to become a family favorite!

Why You’ll Absolutely Love This Easy Honey Sesame Chicken

There’s something magical about the way sweet and savory flavors dance together in this dish. Here’s why you’ll absolutely adore it:

  • It’s quick and easy—ready in about 30 minutes, perfect for those busy evenings!
  • The ingredients are simple and wholesome, making it a guilt-free indulgence.
  • This recipe allows for customization; you can easily add your favorite veggies or adjust the sweetness to your liking.
  • It’s a crowd-pleaser and perfect for family dinners or impressing friends at your next gathering.

Ingredients You’ll Need

Now, let’s talk about the star players in this recipe! Each ingredient is chosen with care to bring out the best in this dish. Here’s what you’ll need:

  • 1 pound boneless, skinless chicken breasts, cubed
  • 1/4 cup honey
  • 1/4 cup soy sauce
  • 2 tablespoons sesame oil
  • 2 cloves garlic, minced
  • 1 tablespoon cornstarch
  • 1 tablespoon water
  • 1 tablespoon sesame seeds
  • 2 green onions, chopped
  • Salt and pepper to taste

You’ll find the full ingredient list with measurements in the recipe card below!

How to Make This Easy Honey Sesame Chicken, Step-by-Step

Ready to get cooking? Let’s make some magic happen in the kitchen! Follow these simple steps:

  1. In a bowl, mix together honey, soy sauce, sesame oil, and minced garlic. This mixture is going to become your delicious glaze, so give it a good whisk to combine all those flavors.
  2. In a separate bowl, combine cornstarch and water to create a slurry. This will help thicken your sauce later on, adding that perfect glossy finish.
  3. Heat a large skillet over medium heat and add the cubed chicken. Season it with salt and pepper. Let it sizzle for about 5-7 minutes, stirring occasionally until browned and cooked through.
  4. Pour the honey mixture over the chicken and stir to coat every piece. Your kitchen will start to smell amazing!
  5. Add the cornstarch slurry to the skillet and stir until the sauce thickens, which should take about 2-3 minutes. Keep an eye on it; you want that luscious texture.
  6. Sprinkle sesame seeds over the chicken and stir well to combine. The sesame seeds add a lovely crunch and nutty flavor.
  7. Garnish with chopped green onions before serving. This adds a pop of color and freshness!
Easy Honey Sesame Chicken

Pro Tips for the Best Results

Here are a few tips I’ve learned along the way to ensure your Honey Sesame Chicken turns out perfectly:

  • For an extra layer of flavor, marinate the chicken in the honey-soy mixture for 30 minutes before cooking. It makes a world of difference!
  • If you like a bit of heat, consider adding a pinch of red pepper flakes to the sauce for a spicy kick.
  • Don’t be afraid to play with your veggies! Bell peppers, snap peas, or broccoli make great additions to this dish, adding both color and nutrition.

Serving Suggestions

This Honey Sesame Chicken is incredibly versatile! Here are a few creative ideas on how to serve it:

  • Serve it over a bed of fluffy jasmine rice or quinoa for a complete meal.
  • Add a side of steamed broccoli or stir-fried vegetables to round out the plate.
  • For a fun twist, try serving it in lettuce wraps for a fresh, crunchy bite.

Storage and Make-Ahead Tips

Got leftovers? No problem! Here’s how to handle storage:

  • This dish stores well in an airtight container in the refrigerator for up to 3 days. Just reheat it gently over medium heat.
  • If you want to make it ahead of time, you can prepare the chicken and sauce separately and combine them just before serving.
  • While I don’t recommend freezing this dish, it can be frozen before cooking. Just thaw in the fridge overnight before cooking.

So there you have it! My Easy Honey Sesame Chicken is a delightful blend of flavors and textures that’s sure to become a staple in your home. I hope you enjoy making it as much as I do. Happy cooking, and remember, the kitchen is your canvas—paint it with love!

Easy Honey Sesame Chicken

Prep Time 10 minutes
Cook Time 10 minutes
Total Time 20 minutes
Servings 4 servings
Calories 350
A quick and flavorful dish featuring tender chicken coated in a sweet honey sesame sauce, perfect for a weeknight dinner.

Ingredients

Chicken

  • 1 pound boneless, skinless chicken breasts, cubed
  • 1/4 cup honey
  • 1/4 cup soy sauce
  • 2 tablespoons sesame oil
  • 2 cloves garlic, minced
  • 1 tablespoon cornstarch
  • 1 tablespoon water
  • 1 tablespoon sesame seeds
  • 2 green onions chopped
  • to taste salt and pepper

Instructions 

  • Mix honey, soy sauce, sesame oil, and garlic.
  • Combine cornstarch and water to make a slurry.
  • Cook chicken in a skillet until browned, about 5-7 minutes.
  • Add honey mixture, then stir in slurry until thickened.
  • Sprinkle sesame seeds and green onions before serving.

Notes

Serve with rice or vegetables for a complete meal.
Calories: 350kcal
Cost: $15
Course: Main Course
Cuisine: Asian
Keyword: Chicken

Loved this recipe? Save it to your favorite Pinterest board so you can easily find it later! It’s the perfect way to keep all your sweet ideas in one place. ✨

Easy Honey Sesame Chicken

Hey there, friends! If you’ve ever craved a comforting bowl of noodles that wraps you in warmth and flavor, then you’re in for a treat today. Let me take you back to my childhood in Oregon, where the kitchen was always filled with the most delightful scents. My mom had a way of turning simple ingredients into meals that felt like a hug. One of my favorite dishes was her Chicken Lo Mein—quick, easy, and oh-so-satisfying. Fast forward to today, and I’ve put my own spin on this classic to share with you. So, pull up a chair, and let’s create some magic in the kitchen together!

Why You’ll Absolutely Love This Easy Chicken Lo Mein Recipe

This Easy Chicken Lo Mein recipe is not just about nourishment; it’s about bringing joy and flavor to your table. Here’s why it’s going to become your new go-to dish:

  • It’s incredibly quick to whip up—perfect for those busy weeknights when you need a delicious meal on the table in no time.
  • The combination of tender chicken, vibrant vegetables, and savory noodles creates a delightful medley of flavors and textures that will keep everyone coming back for seconds.
  • With just a few simple ingredients, this dish offers endless possibilities for customization—add your favorite veggies or switch up the protein!
  • It’s a one-pan wonder, meaning less cleanup and more time enjoying your meal with loved ones.

Ingredients You’ll Need

Now, let’s talk about the heart of this recipe: the ingredients. I’ve chosen fresh, vibrant veggies and lean chicken that not only taste amazing together but also create a beautiful dish. Here’s what you’ll need:

  • 8 oz egg noodles or lo mein noodles
  • 1 lb boneless, skinless chicken breast, sliced thin
  • 2 tablespoons soy sauce
  • 1 tablespoon oyster sauce
  • 1 tablespoon vegetable oil
  • 2 cloves garlic, minced
  • 1 cup bell peppers, sliced
  • 1 cup snow peas
  • 2 green onions, chopped
  • Salt and pepper to taste

You’ll find the full ingredient list with measurements in the recipe card below!

How to Make This Easy Chicken Lo Mein Recipe, Step-by-Step

Alright, let’s dive into the cooking process! I promise it’s as easy as pie (or should I say noodles?). Here’s how to make this delicious Chicken Lo Mein:

  1. Start by cooking the noodles according to the package instructions. Once they’re al dente, drain them and set aside. This is a great time to dance around your kitchen a little—trust me, it helps!
  2. In a bowl, combine the sliced chicken with soy sauce and oyster sauce. Let it marinate for about 15 minutes. This step is crucial for infusing flavor into the chicken!
  3. Heat vegetable oil in a large skillet or wok over medium-high heat. You want it hot enough to get a nice sizzle going.
  4. Add the minced garlic to the skillet and sauté for about 30 seconds until fragrant. This is where the magic begins—your kitchen will smell divine!
  5. Next, toss in the marinated chicken. Cook it until browned and cooked through, about 5-7 minutes. Make sure to stir occasionally so it doesn’t stick.
  6. Once the chicken is looking good, add the bell peppers and snow peas. Stir-fry for an additional 3-4 minutes until the vegetables are tender-crisp. You want them to retain that lovely crunch!
  7. Now, it’s time to add the cooked noodles to the skillet. Toss everything together to combine well. This is where you can add a splash more soy sauce if you like it extra flavorful.
  8. Season with salt and pepper to taste, then garnish with chopped green onions before serving. Voilà! You’ve just created a masterpiece!
Easy Chicken Lo Mein Recipe

Pro Tips for the Best Results

To ensure your Chicken Lo Mein turns out perfectly every time, here are a few pro tips from my kitchen to yours:

  • Don’t overcrowd the skillet! If you’re making a larger batch, consider cooking in batches to ensure a nice sear on the chicken and veggies.
  • Feel free to experiment with different vegetables! Broccoli, carrots, or snap peas can add an exciting twist to your dish.
  • If you’re feeling adventurous, add a sprinkle of sesame seeds or a drizzle of sesame oil at the end for an extra layer of flavor.

Serving Suggestions

This Chicken Lo Mein is delicious on its own, but you can elevate your meal even further with these serving suggestions:

  • Pair it with a side of crispy spring rolls or dumplings for a complete Asian-inspired feast.
  • Serve it alongside a fresh cucumber salad tossed with rice vinegar for a refreshing contrast.
  • For a cozy night in, enjoy it with a steaming cup of miso soup or egg drop soup.

Storage and Make-Ahead Tips

If you’re planning to make this dish ahead of time or have leftovers, here’s how to store it:

  • Store any leftovers in an airtight container in the refrigerator for up to 3 days. Reheat gently on the stove or in the microwave.
  • You can also freeze the Chicken Lo Mein for up to 2 months. Just make sure to cool it completely before transferring it to a freezer-safe container.
  • When you’re ready to enjoy it again, thaw it overnight in the refrigerator and reheat as mentioned above.

Easy Chicken Lo Mein Recipe

Prep Time 10 minutes
Cook Time 15 minutes
Total Time 25 minutes
Servings 4 servings
Calories 550
A quick and flavorful Chinese-inspired dish featuring tender chicken, colorful vegetables, and savory noodles.

Ingredients

Noodles

  • 8 oz egg noodles or lo mein noodles

Chicken

  • 1 lb boneless, skinless chicken breast, sliced thin

Sauces and Oil

  • 2 tablespoons soy sauce
  • 1 tablespoon oyster sauce
  • 1 tablespoon vegetable oil

Vegetables

  • 1 cup bell peppers, sliced
  • 1 cup snow peas

Garnish

  • 2 green onions green onions, chopped

Other

  • to taste salt and pepper

Instructions 

  • Cook noodles as per package, drain and set aside.
  • Marinate chicken with soy and oyster sauces for 15 minutes.
  • Heat oil, sauté garlic, then cook chicken until browned, 5-7 mins.
  • Add bell peppers and snow peas, stir-fry 3-4 mins.
  • Mix in noodles, season, garnish with green onions, and serve.

Notes

Feel free to add more vegetables or adjust seasonings to taste.
Calories: 550kcal
Cost: $15
Course: Main Course
Cuisine: Chinese
Keyword: Chicken, Noodles

Loved this recipe? Save it to your favorite Pinterest board so you can easily find it later! It’s the perfect way to keep all your sweet ideas in one place. ✨

Easy Chicken Lo Mein Recipe

Welcome, dear friends! If you’ve wandered into my little corner of the internet today, you’re in for a treat. Let me take you back to my childhood in Oregon, where the aroma of freshly baked bread mingled with the earthy scent of roasted vegetables wafting through my mother’s kitchen. Cooking was more than just a necessity; it was a way to connect, celebrate, and comfort ourselves and others. I was that kid who would much rather stir a pot of chili than ride my bike down the street. Fast forward to today, and my kitchen in Seattle remains my sanctuary, where I continue to create dishes that evoke that same warmth and nostalgia.

Today, we’re diving into a recipe that’s not just about the ingredients but about the experience of cooking and sharing something truly delicious. I’m excited to introduce you to my Cheesy Garlic Chicken Wraps – a delightfully gooey and flavorful dish that wraps your taste buds in a cozy embrace. If you’re looking for a meal that’s quick, satisfying, and full of cheesy goodness, you’ve come to the right place!

Why You’ll Absolutely Love This Cheesy Garlic Chicken Wraps – The Ultimate Flavor Explosion!

These wraps are not just any ordinary meal; they’re a flavor adventure waiting to happen! Here’s why you’ll absolutely adore them:

  • Comforting and Satisfying: Each bite is like a warm hug, filled with tender chicken and gooey cheese that will make your heart sing.
  • Quick and Easy: Perfect for busy weeknights or when you want a delicious meal without spending hours in the kitchen.
  • Customizable: You can easily swap ingredients based on what you have on hand or your personal preferences. Want to add some veggies? Go for it!
  • Perfect for Any Occasion: Whether it’s a casual lunch, a quick dinner, or even a picnic, these wraps fit right in.

Ingredients You’ll Need

Let’s talk about the star players in this recipe. I love using fresh, high-quality ingredients that not only taste amazing but also offer a little magic to the dish. Here’s what you’ll need:

  • 2 cups cooked chicken, shredded
  • 1 cup shredded cheese (cheddar or mozzarella)
  • 2 tablespoons garlic, minced
  • 1/4 cup cream cheese, softened
  • 1 tablespoon olive oil
  • 1 teaspoon paprika
  • Salt and pepper to taste
  • 4 large tortillas or wraps
  • 1 cup lettuce, shredded
  • 1/2 cup tomatoes, diced
  • 1/4 cup ranch dressing (optional)

You’ll find the full ingredient list with measurements in the recipe card below!

How to Make This Cheesy Garlic Chicken Wraps – The Ultimate Flavor Explosion!, Step-by-Step

Now, let’s get cooking! Making these wraps is as easy as pie (or should I say, easy as a cheesy wrap?). Here’s how to do it:

  1. In a large bowl, combine the shredded chicken, minced garlic, cream cheese, olive oil, paprika, salt, and pepper. Mix well until everything is fully combined. This is where the magic begins, so don’t rush it!
  2. Lay out the tortillas on a flat surface. It’s like setting the stage for your culinary masterpiece!
  3. Evenly distribute the chicken mixture onto each tortilla, leaving space at the edges. This is your canvas, so spread that goodness generously.
  4. Sprinkle shredded cheese over the chicken mixture for extra flavor. Because let’s be real—more cheese is always a good idea!
  5. Top with shredded lettuce and diced tomatoes. These add a nice crunch and freshness that balances the creamy filling.
  6. Roll up each tortilla tightly, tucking in the sides as you go to create a wrap. Think of it as a cozy burrito hug!
  7. Slice the wraps in half and serve with ranch dressing on the side, if desired. And there you have it—your Cheesy Garlic Chicken Wraps are ready to be devoured!
Cheesy Garlic Chicken Wraps – The Ultimate Flavor Explosion!

Pro Tips for the Best Results

Here are a few of my best tips for making these wraps truly unforgettable:

  • Feel Free to Experiment: Don’t hesitate to add your favorite ingredients. Spinach, bell peppers, or even a spicy jalapeño kick can elevate your wraps!
  • Use Leftover Chicken: This is a fantastic way to repurpose leftover chicken from a previous meal. It saves time and reduces waste—double win!
  • Toast the Wraps: If you want an extra layer of flavor, consider toasting the wraps in a skillet for a minute or two on each side after rolling them up. It adds a delightful crunch!

Serving Suggestions

Now that your wraps are ready, let’s talk about how to serve them. They’re fabulous on their own, but here are a few creative ideas to elevate your dining experience:

  • Serve with a side of crispy sweet potato fries for a satisfying meal.
  • Pair with a fresh salad drizzled with a zesty vinaigrette to balance the richness of the wraps.
  • For a fun twist, cut them into smaller pieces and serve as appetizers at your next gathering!

Storage and Make-Ahead Tips

If you’re planning to make these wraps ahead of time, here’s what you need to know:

  • Storage: Store any leftovers in an airtight container in the refrigerator for up to 3 days. Just reheat in the microwave when you’re ready to enjoy them again!
  • Freezing: You can freeze the unwrapped chicken mixture in a freezer-safe container for up to 2 months. Just thaw it overnight in the fridge before wrapping!
  • Make Ahead: You can prepare the filling a day in advance and store it in the fridge. When you’re ready to eat, just assemble your wraps and enjoy!

There you have it! Cheesy Garlic Chicken Wraps that are sure to become a favorite in your household. I can’t wait for you to try them and experience the warm hug of flavor that they bring. Happy cooking, friends!

Cheesy Garlic Chicken Wraps – The Ultimate Flavor Explosion!

Prep Time 10 minutes
Cook Time 10 minutes
Total Time 20 minutes
Servings 4 servings
Calories 450
Enjoy these flavorful wraps filled with tender chicken, melted cheese, and aromatic garlic, perfect for a quick and satisfying meal.

Ingredients

Protein

  • 2 cups cooked chicken, shredded
  • 1 cup shredded cheese (cheddar or mozzarella)
  • 2 tablespoons garlic, minced
  • 1/4 cup cream cheese, softened
  • 1 tablespoon olive oil
  • 1 teaspoon paprika
  • to taste salt and pepper

Wraps

  • 4 large tortillas or wraps
  • 1 cup lettuce, shredded
  • 1/2 cup tomatoes, diced
  • 1/4 cup ranch dressing (optional)

Instructions 

  • Mix shredded chicken, garlic, cream cheese, olive oil, paprika, salt, and pepper.
  • Lay out tortillas and evenly distribute the chicken mixture.
  • Add shredded cheese, lettuce, and tomatoes, then roll up.
  • Slice wraps in half and serve with ranch dressing if desired.

Notes

For extra flavor, toast the wraps lightly before serving.
Calories: 450kcal
Cost: $15
Course: Main Course
Cuisine: American
Keyword: Chicken

Loved this recipe? Save it to your favorite Pinterest board so you can easily find it later! It’s the perfect way to keep all your sweet ideas in one place. ✨

Cheesy Garlic Chicken Wraps – The Ultimate Flavor Explosion!

There’s something utterly enchanting about weeknight dinners, isn’t there? As a child in my small Oregon town, the kitchen was always filled with the comforting aroma of roasted veggies and fresh bread, often mingling with laughter and chatter. Fast forward to my life in Seattle, and I find myself recreating those cherished moments, striving to bring a sprinkle of magic to busy evenings. Enter my Easy Cowboy Butter Chicken Linguine—a dish that’s not only quick to whip up but also delivers a cozy hug in every bite. Whether it’s a rainy Seattle evening or a sunny day, this pasta will have your loved ones pausing mid-bite to exclaim, “Wow!”

Imagine this: a buttery, creamy sauce enveloping tender chicken and perfectly cooked linguine, all while being ready in under 30 minutes. It’s like a culinary warm embrace after a long day. Trust me, this recipe is going to become your go-to for those nights when you want to impress but don’t have the time (or energy) to spend hours in the kitchen. So, let’s dive into why you’ll absolutely adore this dish!

Why You’ll Absolutely Love This Easy Cowboy Butter Chicken Linguine for Busy Evenings

This recipe is a winner, and here’s why:

  • Quick and Simple: Ready in about 30 minutes, making it perfect for busy weeknights.
  • Comforting Flavors: The combination of butter, cream, and chicken creates a rich, satisfying dish that everyone will love.
  • Versatile Ingredients: Easy to adapt with whatever veggies or proteins you have on hand!
  • Impressive Presentation: Looks as good as it tastes, making it perfect for family dinners or impressing guests.

Ingredients You’ll Need

Let’s talk ingredients! This recipe calls for simple, yet flavorful components that you might already have in your pantry. The star here is the chicken, which is tender and juicy, and when paired with the buttery sauce, it’s simply irresistible. I love using linguine because it holds onto the creamy sauce beautifully, but feel free to swap it for your favorite pasta if you’re in the mood for something different.

Here’s what you’ll need:

  • 8 oz linguine pasta
  • 2 tablespoons butter
  • 1 pound chicken breast, cut into bite-sized pieces
  • 2 cloves garlic, minced
  • 1 teaspoon smoked paprika
  • 1 teaspoon garlic powder
  • 1 teaspoon onion powder
  • Salt and pepper to taste
  • 1/2 cup chicken broth
  • 1/4 cup heavy cream
  • 1/4 cup grated parmesan cheese
  • Chopped parsley for garnish

You’ll find the full ingredient list with measurements in the recipe card below!

How to Make This Easy Cowboy Butter Chicken Linguine for Busy Evenings, Step-by-Step

Ready to bring this dish to life? Let’s get cooking! Here’s how to make your Easy Cowboy Butter Chicken Linguine:

  1. Cook the linguine pasta according to package instructions; drain and set aside.
  2. In a large skillet, melt the butter over medium heat.
  3. Add the chicken pieces to the skillet and season with smoked paprika, garlic powder, onion powder, salt, and pepper.
  4. Cook the chicken until browned and cooked through, about 5-7 minutes.
  5. Stir in the minced garlic and cook for an additional minute.
  6. Pour in the chicken broth and bring to a simmer, allowing it to reduce slightly for about 3 minutes.
  7. Add the heavy cream and Parmesan cheese, stirring until well combined and heated through.
  8. Toss the cooked linguine in the skillet with the chicken and sauce until evenly coated.
  9. Serve hot, garnished with chopped parsley.
Easy Cowboy Butter Chicken Linguine for Busy Evenings

Pro Tips for the Best Results

Here are a few of my favorite tips to ensure your Cowboy Butter Chicken Linguine turns out perfectly every time:

  • Don’t overcook the chicken! Keep an eye on it to ensure it stays juicy and tender.
  • If you want to add some veggies, throw in some spinach or cherry tomatoes for a pop of color and nutrition.
  • For an extra kick, consider adding a dash of cayenne pepper or some red pepper flakes!

Serving Suggestions

This dish is delightful on its own, but why not elevate the experience? Here are a few serving suggestions:

  • Pair it with a crisp side salad dressed in a light vinaigrette.
  • Serve with crusty garlic bread for soaking up that creamy sauce.
  • Top with additional Parmesan and a sprinkle of fresh herbs for a restaurant-worthy presentation.

Storage and Make-Ahead Tips

Got leftovers? No problem! This pasta can be stored in an airtight container in the fridge for up to 3 days. Just reheat gently on the stove, adding a splash of chicken broth or cream to loosen it up. If you’re looking to make it ahead of time, you can prepare the chicken and sauce in advance, and simply combine with the pasta right before serving for the freshest taste. It’s the perfect solution for meal prep!

So there you have it—the Easy Cowboy Butter Chicken Linguine that promises to be a staple in your weeknight dinner rotation. I can’t wait for you to try it and hear how your loved ones react. Happy cooking!

Want to explore more recipes? Check out my Cheesy Garlic Chicken Magic or try my Easy Chicken Lo Mein for even more delightful meals!

Easy Cowboy Butter Chicken Linguine for Busy Evenings

Prep Time 10 minutes
Cook Time 15 minutes
Total Time 25 minutes
Servings 4 servings
Calories 650
A quick and flavorful pasta dish featuring tender chicken in a creamy butter sauce, perfect for busy weeknights.

Ingredients

Pasta

  • 8 oz linguine pasta

Dairy

  • 2 tablespoons butter
  • 1 pound chicken breast, cut into bite-sized pieces
  • 1/4 cup heavy cream
  • 1/4 cup grated parmesan cheese

Seasonings

  • 1 teaspoon smoked paprika
  • 1 teaspoon garlic powder
  • 1 teaspoon onion powder
  • to taste salt and pepper

Liquids

  • 1/2 cup chicken broth

Garnish

  • chopped parsley chopped parsley for garnish

Instructions 

  • Cook linguine according to package; drain.
  • Melt butter in a skillet over medium heat.
  • Add chicken and season with paprika, garlic powder, onion powder, salt, and pepper; cook until browned, 5-7 mins.
  • Stir in garlic, cook 1 min, then add broth; simmer 3 mins.
  • Stir in cream and Parmesan, then toss with cooked pasta; garnish with parsley.

Notes

For extra flavor, sprinkle with additional parsley or grated cheese before serving.
Calories: 650kcal
Cost: $15
Course: Main Course
Cuisine: American
Keyword: Chicken, creamy, pasta

Loved this recipe? Save it to your favorite Pinterest board so you can easily find it later! It’s the perfect way to keep all your sweet ideas in one place. ✨

Easy Cowboy Butter Chicken Linguine for Busy Evenings

Hey there, friends! If you’ve ever found yourself in the kitchen, stirring the pot and daydreaming about the perfect comfort food, then you’re in for a treat today. Let me take you back to my childhood in Oregon, where the scent of freshly baked bread and roasted veggies wafted through our home like a warm hug. Cooking was more than just dinner—it was a way of expressing love, crafting memories, and, let’s be honest, sometimes it was just about making sure we didn’t starve! Now, as I stand in my cozy Seattle kitchen, I find myself reaching for the same kind of recipes that made my heart sing back then. Today, I’m excited to share with you my Melt-in-Your-Mouth Cheesy Chicken Crescent Roll Recipe! This dish is everything—easy, comforting, and oh-so-delicious—and I promise it will steal your heart just like it did mine.

Picture this: fluffy crescent rolls enveloping a creamy, cheesy chicken filling that practically melts in your mouth. It’s the kind of dish that makes you pause mid-bite and sigh in satisfaction. Whether you’re whipping it up for a cozy family dinner, impressing friends at a game night, or simply treating yourself to something special, this recipe is sure to become a staple in your kitchen. So, grab your apron, and let’s dive into the magic of cheesy chicken goodness!

Why You’ll Absolutely Love This Melt-in-Your-Mouth Cheesy Chicken Crescent Roll Recipe!

This recipe is not just about the ingredients; it’s about the joy it brings to the table. Here’s why you’re going to fall head over heels for it:

  • It’s incredibly easy to make—perfect for busy weeknights or last-minute gatherings.
  • Each bite is a delightful balance of creamy, cheesy, and savory flavors that will have everyone asking for seconds.
  • Versatile enough to customize—add your favorite veggies or spices for a personal twist!
  • It’s a crowd-pleaser that even picky eaters will adore—trust me, kids will love this one!

Ingredients You’ll Need

Let’s talk ingredients! This recipe calls for some pantry staples that you might already have on hand, which makes it even more appealing. Here’s what you’ll need:

  • 1 can (8 oz) refrigerated crescent roll dough: The star of the show! Flaky and buttery, these rolls form the perfect little pockets for our delicious filling.
  • 1 cup cooked chicken, shredded: You can use leftover rotisserie chicken or poach some fresh chicken—whatever you have works!
  • 1 cup cream cheese, softened: This adds that creamy, dreamy texture that makes each bite irresistible.
  • 1 cup shredded cheddar cheese: Because let’s be real—cheddar makes everything better!
  • 1/2 teaspoon garlic powder and 1/2 teaspoon onion powder: These spices elevate the flavor profile and bring everything together beautifully.
  • Salt and pepper to taste: Simple but essential for balancing the flavors.
  • 1 tablespoon fresh parsley, chopped: For a pop of color and freshness right before serving.

You’ll find the full ingredient list with measurements in the recipe card below!

How to Make This Melt-in-Your-Mouth Cheesy Chicken Crescent Roll Recipe!, Step-by-Step

Ready to get cooking? Let’s turn those ingredients into a dish that will make your heart sing!

  1. Preheat your oven to 375°F (190°C). This ensures a nice golden brown finish on your rolls.
  2. In a mixing bowl, combine the shredded chicken, cream cheese, cheddar cheese, garlic powder, onion powder, salt, and pepper. Mix until well combined. You want it to be creamy and cheesy—like a little hug in a bowl!
  3. Unroll the crescent roll dough and separate it into triangles. This part always makes me feel like a kid again!
  4. Place a spoonful of the chicken mixture at the wide end of each triangle. Don’t be shy—go for a generous scoop!
  5. Roll up the dough from the wide end to the pointed end, enclosing the filling. Pinch the seams to ensure none of that cheesy goodness escapes.
  6. Place the rolled crescent rolls on a baking sheet lined with parchment paper. This makes cleanup a breeze!
  7. Bake in the preheated oven for 12-15 minutes, or until golden brown. Your kitchen will smell heavenly!
  8. Remove from the oven and let cool for a few minutes. Garnish with fresh parsley before serving. Trust me, a little green adds a lovely touch!
Melt-in-Your-Mouth Cheesy Chicken Crescent Roll Recipe!

Pro Tips for the Best Results

Want to make this dish even better? Here are a few of my pro tips:

  • For extra flavor, consider adding finely chopped green onions or spinach into the chicken mixture.
  • If you’re feeling adventurous, try substituting the cheddar cheese with pepper jack for a little kick!
  • Make sure to pinch the seams of the crescent rolls well to avoid any leaks during baking.

Serving Suggestions

Now that you’ve created these delightful crescent rolls, how do you serve them? Here are a few ideas:

  • Pair them with a fresh garden salad for a light and satisfying meal.
  • Serve with a side of marinara or ranch dressing for dipping—because who doesn’t love a good dip?
  • These rolls also make a fantastic appetizer for game nights or parties. Just keep them warm in the oven until it’s time to serve!

Storage and Make-Ahead Tips

If you find yourself with leftovers (though I doubt it!), here’s how to store them:

  • Store any leftover crescent rolls in an airtight container in the fridge for up to 3 days.
  • You can also freeze the unbaked rolls! Just assemble them, place them on a baking sheet, and freeze until solid. Then transfer to a freezer-safe bag. When you’re ready to bake, just pop them in the oven straight from the freezer, adding a few extra minutes to the cooking time.
  • Reheat any leftovers in the oven at 350°F (175°C) for about 10 minutes to regain that crispy texture.

There you have it, my friends! A recipe that’s not only simple but also bursting with flavor, perfect for any occasion. I hope you find as much joy in making these Melt-in-Your-Mouth Cheesy Chicken Crescent Rolls as I do. Happy cooking, and may your kitchen always be filled with love and laughter!

Melt-in-Your-Mouth Cheesy Chicken Crescent Roll Recipe!

Prep Time 10 minutes
Cook Time 15 minutes
Total Time 25 minutes
Servings 8 pieces
Calories 350
Enjoy these cheesy, tender chicken crescent rolls that are quick to make and perfect for any meal.

Ingredients

Dough

  • 1 can refrigerated crescent roll dough

Filling

  • 1 cup cooked chicken, shredded
  • 1 cup cream cheese, softened
  • 1 cup shredded cheddar cheese
  • 1/2 teaspoon garlic powder
  • 1/2 teaspoon onion powder
  • to taste salt and pepper
  • 1 tablespoon fresh parsley, chopped (for garnish)

Instructions 

  • Preheat oven to 375°F (190°C).
  • Mix chicken, cream cheese, cheddar, garlic, onion, salt, and pepper.
  • Unroll dough and cut into triangles. Place filling on each.
  • Roll up triangles and place on baking sheet.
  • Bake for 12-15 minutes until golden. Garnish with parsley.

Notes

For extra flavor, add a pinch of paprika or hot sauce to the filling.
Calories: 350kcal
Cost: $15
Course: Appetizer
Cuisine: American
Keyword: cheese, Chicken, crescent rolls

Loved this recipe? Save it to your favorite Pinterest board so you can easily find it later! It’s the perfect way to keep all your sweet ideas in one place. ✨

Melt-in-Your-Mouth Cheesy Chicken Crescent Roll Recipe!

Welcome to my kitchen, friends! Today, I’m thrilled to share a recipe that feels like a warm hug on a chilly night—my Garlic Parmesan Crockpot Chicken and Potatoes. Picture this: you’ve had a long day, and the last thing you want to do is fuss over dinner. You want something that’s not only easy to prepare but also bursting with flavor. This dish is just that! It’s my go-to when I need to nourish my family without spending hours in the kitchen. The best part? It cooks itself while you go about your day, filling your home with the irresistible aroma of garlic and parmesan. Trust me; it’s as comforting as it sounds!

Growing up in Oregon, my love for cooking was ignited in my mother’s kitchen, where the scents of roasted vegetables and freshly baked bread danced around us. I learned early on that food is more than sustenance; it’s how we connect and celebrate life’s moments. Now, living in Seattle, I carry that tradition into my own kitchen, where I whip up dishes that bring people together. This Garlic Parmesan Chicken and Potatoes recipe is one of those dishes that creates lasting memories around the dinner table. Let’s dive into the heartwarming magic of this simple yet delicious meal!

Why You’ll Absolutely Love This Garlic Parmesan Crockpot Chicken and Potatoes

This dish is a true crowd-pleaser, and here’s why I know you’ll love it:

  • Effortless Preparation: With just a few simple steps, you can set it and forget it! Perfect for busy weeknights.
  • Flavor-Packed: The combination of garlic and parmesan creates a rich, savory experience that will have everyone asking for seconds.
  • Comfort Food at Its Best: This meal is like a cozy blanket on a plate, ideal for those moments when you need a little extra comfort.
  • Family-Friendly: Kids love it! The tender chicken and buttery potatoes are a hit with even the pickiest eaters.

Ingredients You’ll Need

Let’s talk about the ingredients that will come together to create this culinary delight. For this recipe, I chose simple, wholesome ingredients that work beautifully together. The star of the show is, of course, the chicken breasts, which become incredibly tender after hours in the crockpot. The baby potatoes are the perfect vehicle for soaking up the savory garlic and parmesan flavors, and they add a delightful texture to the dish. The melted butter and chicken broth not only keep everything moist but also infuse the dish with rich, comforting flavor. And let’s not forget the garlic and Italian seasoning that elevate the whole experience!

You’ll find the full ingredient list with measurements in the recipe card below!

How to Make This Garlic Parmesan Crockpot Chicken and Potatoes, Step-by-Step

Ready to get cooking? Here’s how to whip up this delicious meal:

  1. Begin by placing the halved baby potatoes in the bottom of your crockpot. This will create a lovely bed for the chicken to rest on.
  2. In a separate bowl, mix together the melted butter, minced garlic, chicken broth, Italian seasoning, salt, and pepper. This is your magical garlic butter mixture.
  3. Lay the chicken breasts on top of the potatoes in the crockpot, ensuring they’re nestled in there nicely.
  4. Pour the garlic butter mixture over the chicken and potatoes, making sure everything is well coated.
  5. Sprinkle the grated Parmesan cheese over everything—don’t skimp! This is where the flavor really shines.
  6. Cover the crockpot and cook on low for 6-8 hours or on high for 3-4 hours, until the chicken is cooked through and tender.
  7. Once done, garnish with chopped parsley before serving to add a pop of color and freshness.
Garlic Parmesan Crockpot Chicken and Potatoes

Pro Tips for the Best Results

Here are a few of my favorite tips to ensure your dish turns out perfectly:

  • Don’t Rush the Cooking: Allow the chicken to cook low and slow for maximum tenderness. Trust me; it’s worth the wait!
  • Customize Your Seasonings: Feel free to add your favorite herbs or spices to the garlic butter mixture. A pinch of red pepper flakes can add a delightful kick!
  • Check for Doneness: If you’re unsure about the chicken being done, use a meat thermometer. The internal temperature should reach 165°F.

Serving Suggestions

This dish is fantastic on its own, but if you want to take it up a notch, consider serving it with a side salad or some crusty bread to soak up the delicious juices. A light, refreshing green salad with a tangy vinaigrette complements the richness of the chicken and potatoes beautifully. Or, if you’re feeling indulgent, serve it with a side of garlic bread for the ultimate comfort meal! You can also sprinkle some extra parmesan on top before serving for that extra cheesy goodness.

Storage and Make-Ahead Tips

Leftovers? No problem! This Garlic Parmesan Chicken and Potatoes stores beautifully. Allow it to cool completely before transferring it to an airtight container. It can be stored in the refrigerator for up to 3-4 days. You can also freeze it for up to 3 months! Just make sure to thaw it in the refrigerator overnight before reheating. To reheat, simply pop it in the microwave or warm it gently on the stove, adding a splash of chicken broth to keep it moist.

And there you have it! A recipe that brings the heart of my kitchen into yours. I can’t wait for you to try this Garlic Parmesan Crockpot Chicken and Potatoes. It’s a dish that’s sure to become a favorite in your home, just as it has in mine. Happy cooking, friends!

Garlic Parmesan Crockpot Chicken and Potatoes

Prep Time 10 minutes
Cook Time 4 hours
Total Time 4 hours 10 minutes
Servings 4 servings
Calories 550
A flavorful and easy crockpot dish combining tender chicken, baby potatoes, and a cheesy garlic sauce for a satisfying meal.

Ingredients

Main

  • 4 pieces boneless, skinless chicken breasts
  • 1 lb baby potatoes, halved
  • 1 cup grated parmesan cheese
  • 1/2 cup chicken broth
  • 1/4 cup butter, melted
  • 4 cloves garlic, minced
  • 1 teaspoon italian seasoning
  • to taste salt and pepper
  • chopped parsley for garnish

Instructions 

  • Place the halved baby potatoes in the bottom of the crockpot.
  • Mix melted butter, garlic, chicken broth, Italian seasoning, salt, and pepper.
  • Lay chicken breasts on top of potatoes and pour the garlic butter mixture over everything.
  • Sprinkle Parmesan cheese over the top and cook on low for 6-8 hours.
  • Garnish with chopped parsley before serving.

Notes

For extra flavor, add a squeeze of lemon before serving.
Calories: 550kcal
Cost: $15
Course: Main Course
Cuisine: American
Keyword: Chicken, garlic, potatoes

Loved this recipe? Save it to your favorite Pinterest board so you can easily find it later! It’s the perfect way to keep all your sweet ideas in one place. ✨

Garlic Parmesan Crockpot Chicken and Potatoes

Ah, the humble grilled cheese! It’s a classic comfort food that takes many of us back to our childhood—those blissful days of gooey cheese melted between two crispy slices of bread. Now, let me take you on a little culinary adventure where we blend this nostalgic favorite with the delightful heartiness of a burrito. Welcome to my kitchen, where today we’re whipping up the Easy Grilled Cheese Burrito, a cozy fusion dish that will steal your heart and become a staple in your home.

Growing up in a small town in Oregon, my mom’s kitchen was always filled with the warm, inviting aromas of freshly baked bread and roasted veggies. It was a place where we gathered, shared stories, and celebrated simple joys. Even as a kid, I found solace in cooking—swapping bike rides for stirring pots and rolling out dough. Now, as I live in vibrant Seattle, my kitchen remains my sanctuary, where I create recipes that feel like hugs in food form. And trust me, this Easy Grilled Cheese Burrito is one of those recipes that will make you pause mid-bite and say, ‘Wow!’

Why You’ll Absolutely Love This Easy Grilled Cheese Burrito Copycat Recipe

This recipe is more than just a meal; it’s a delightful experience that brings comfort and joy. Here’s why you’ll fall head over heels for it:

  • It combines the best of both worlds: the crispy, cheesy goodness of grilled cheese with the hearty filling of a burrito.
  • Perfect for late-night cravings or a quick and easy lunch, it’s a recipe you can whip up in no time.
  • Customization galore! You can add your favorite fillings or switch up the cheeses for a unique twist every time.
  • Kid-approved and family-friendly, making it a go-to for busy weeknights or fun weekend lunches.

Ingredients You’ll Need

Let’s talk ingredients! For this Easy Grilled Cheese Burrito, I’ve chosen a combination that’s not only delicious but also easy to find. You’ll need:

  • 4 large flour tortillas
  • 2 cups shredded cheddar cheese
  • 1 cup shredded mozzarella cheese
  • 1 cup cooked and seasoned ground beef (optional)
  • 1/2 cup sour cream
  • 1/4 cup diced tomatoes
  • 1/4 cup diced onions
  • 1 tablespoon butter

These ingredients come together to create a flavor explosion! The combination of cheddar and mozzarella gives you that perfect melty texture, while the optional ground beef adds a savory depth. And of course, the fresh veggies brighten everything up. You’ll find the full ingredient list with measurements in the recipe card below!

How to Make This Easy Grilled Cheese Burrito Copycat Recipe, Step-by-Step

Ready to bring this cozy creation to life? Let’s dive into the step-by-step process:

  1. In a skillet over medium heat, melt 1 tablespoon of butter. This will give your burrito that golden, crispy exterior we all love.
  2. Place one tortilla in the skillet and sprinkle a generous amount of cheddar and mozzarella cheese on one half of the tortilla. Go heavy on the cheese; it’s the star of the show!
  3. If you’re using ground beef, add a layer of it now, followed by dollops of sour cream, diced tomatoes, and onions. This is where the magic happens!
  4. Fold the tortilla over the filling and cook until the bottom is golden brown and the cheese starts to melt, about 2-3 minutes. Flip with confidence!
  5. Carefully flip the burrito and cook for an additional 2-3 minutes until the other side is golden brown and the cheese is fully melted.
  6. Remove from the skillet and let it cool for a minute before slicing in half—trust me, it’ll be worth the wait!
  7. Repeat with the remaining tortillas and ingredients.
  8. Serve warm and enjoy your Easy Grilled Cheese Burrito!
Easy Grilled Cheese Burrito Copycat Recipe

Pro Tips for the Best Results

Here are a few tips to ensure your burrito turns out perfectly every time:

  • Don’t rush the melting process! If you find that the outside is browning too quickly, lower the heat to allow the cheese to melt thoroughly.
  • Experiment with different cheeses! Pepper jack for a kick, or a blend of your favorites can elevate this dish.
  • If you’re feeling adventurous, add some fresh herbs or a dash of hot sauce for an extra layer of flavor.

Serving Suggestions

When it comes to serving your Easy Grilled Cheese Burrito, the possibilities are endless! Pair it with a side of:

  • Fresh guacamole and tortilla chips for a fiesta feel.
  • A simple green salad drizzled with a zesty vinaigrette for a refreshing contrast.
  • Pickled jalapeños or a spicy salsa for those who love a kick!

This dish is also fantastic for gatherings—slice it into smaller portions for a fun appetizer that everyone will rave about!

Storage and Make-Ahead Tips

Got leftovers? You lucky duck! Here’s how to store and enjoy them later:

  • Store any cooked burritos in an airtight container in the refrigerator for up to 3 days. Reheat in a skillet or microwave until warm.
  • If you want to make ahead, prepare the filling and store it separately from the tortillas. Assemble and cook when you’re ready to eat.
  • For longer storage, you can freeze uncooked burritos! Wrap them tightly in foil or plastic wrap and freeze for up to 2 months. Just cook them straight from the freezer—add a few extra minutes to the cooking time.

So there you have it—your new cozy favorite, the Easy Grilled Cheese Burrito! I can’t wait for you to try it and share the joy it brings to your table. Whether it’s a quick lunch, a satisfying dinner, or a late-night snack, this recipe will surely become a cherished part of your culinary repertoire. Happy cooking, my friends!

Easy Grilled Cheese Burrito Copycat Recipe

Prep Time 10 minutes
Cook Time 10 minutes
Total Time 20 minutes
Servings 4 servings
Calories 650
A quick and delicious twist on classic grilled cheese, wrapped into a hearty burrito with melted cheeses and optional beef.

Ingredients

Tortillas

  • 4 pieces large flour tortillas
  • 2 cups shredded cheddar cheese
  • 1 cup shredded mozzarella cheese
  • 1 cup cooked and seasoned ground beef (optional)
  • 1/2 cup sour cream
  • 1/4 cup diced tomatoes
  • 1/4 cup diced onions
  • 1 tablespoon butter

Instructions 

  • Melt butter in a skillet over medium heat.
  • Place a tortilla in the skillet, add cheese on half, then add beef, sour cream, tomatoes, and onions if desired. Fold and cook until golden, 2-3 mins each side.
  • Remove, cool slightly, then slice. Repeat with remaining ingredients.

Notes

Feel free to add more vegetables or adjust cheese types for variation.
Calories: 650kcal
Cost: $10
Course: Main Course
Cuisine: American
Keyword: Burrito, cheese, Grilled Cheese

Loved this recipe? Save it to your favorite Pinterest board so you can easily find it later! It’s the perfect way to keep all your sweet ideas in one place. ✨

Easy Grilled Cheese Burrito Copycat Recipe