Author

Ava

Browsing

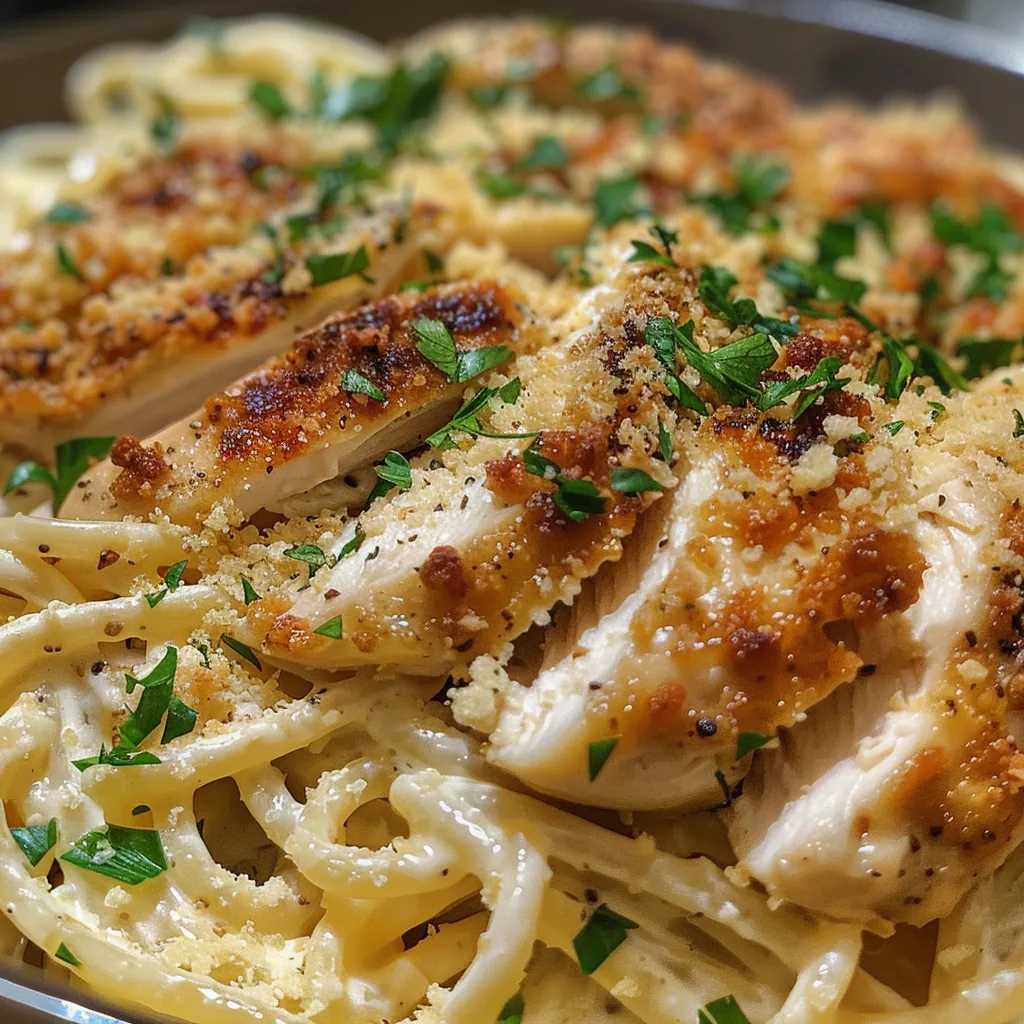
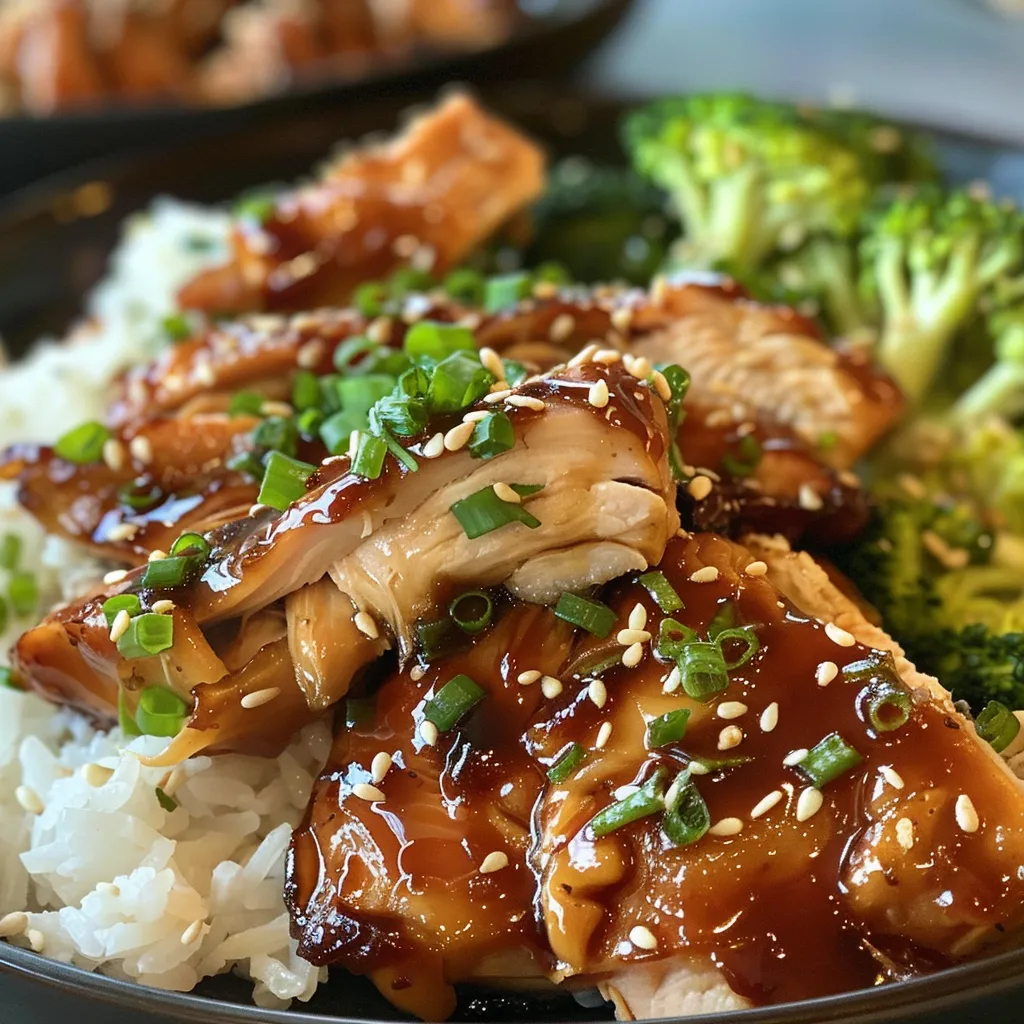
Welcome to my cozy corner of the internet! My name’s Ava, and if you’ve stumbled upon my kitchen, you’re probably here for one thing—the kind of recipes that make people pause mid-bite and say, ‘Wow.’ Today, I’m thrilled to share something that’s become a staple in my home: the Creamy Cajun Chicken & Rice Bowls. Growing up in a small town in Oregon, cooking was our way of connecting, and this dish embodies that warmth and comfort I cherish so much.

Imagine coming home after a long day, the air crisp with the promise of autumn. You walk into the kitchen, and the enticing aroma of Cajun spices fills the air, wrapping you in a cozy embrace. This dish is not just about the flavors; it’s about that feeling of home, of togetherness, and of a meal that nourishes both body and soul. Trust me, once you dig into these Creamy Cajun Chicken & Rice Bowls, you’ll find yourself asking for seconds—and maybe even thirds!

Why You’ll Absolutely Love This Creamy Cajun Chicken & Rice Bowls | High Protein Meal Prep

Let’s dive into why this dish is not just another meal prep recipe. It has all the elements that make it a winner in my kitchen—and I’m sure it will become one in yours too!

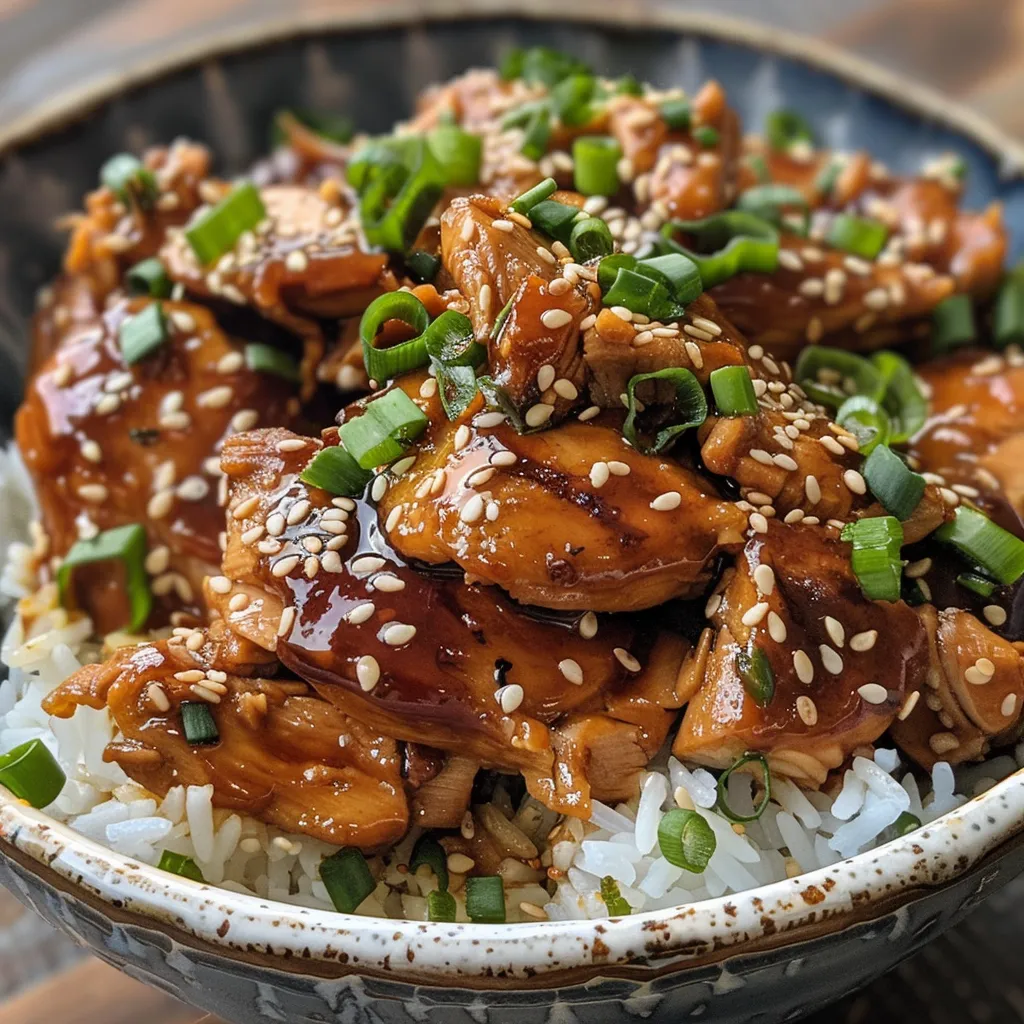
  • Comfort in a Bowl: With creamy textures and bold flavors, this dish is the ultimate comfort food that feels like a warm hug on a chilly evening.
  • High Protein Powerhouse: Packed with chicken and wholesome ingredients, it’s a satisfying meal that keeps you energized throughout the day.
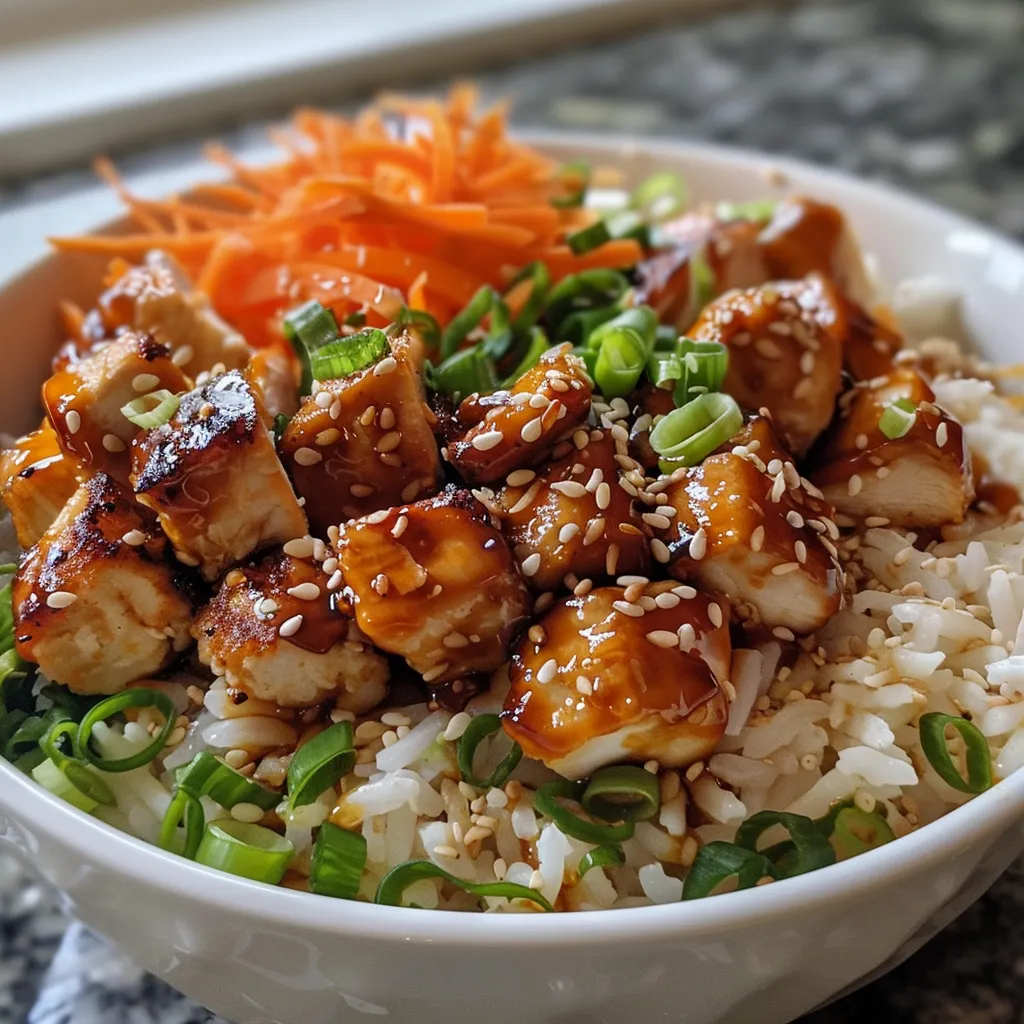
  • Meal Prep Friendly: Perfect for busy weeknights, you can make a big batch and enjoy it all week long. Just heat and eat!
  • Customizable Delight: Feel free to add your favorite veggies or adjust the spice level to suit your taste, making it truly your own.

Ingredients You’ll Need

Let’s talk about the ingredients that come together to create this magic. You’ll need just a handful of simple, yet flavorful components:

  • 1 lb chicken breast, diced
  • 1 cup long-grain rice
  • 2 cups chicken broth
  • 1 cup heavy cream
  • 2 tablespoons Cajun seasoning
  • 1 tablespoon olive oil
  • 1 bell pepper, diced
  • 1 onion, diced
  • 2 cloves garlic, minced
  • Salt and pepper to taste
  • Chopped green onions for garnish

These ingredients are not just staples; they’re the building blocks of a dish that sings with flavor. The Cajun seasoning adds that signature kick, while the heavy cream brings a luscious richness that ties everything together. You’ll find the full ingredient list with measurements in the recipe card below!

How to Make This Creamy Cajun Chicken & Rice Bowls | High Protein Meal Prep, Step-by-Step

Now that we’ve gathered our ingredients, let’s get cooking! Follow along with these simple steps to create your own bowl of comfort:

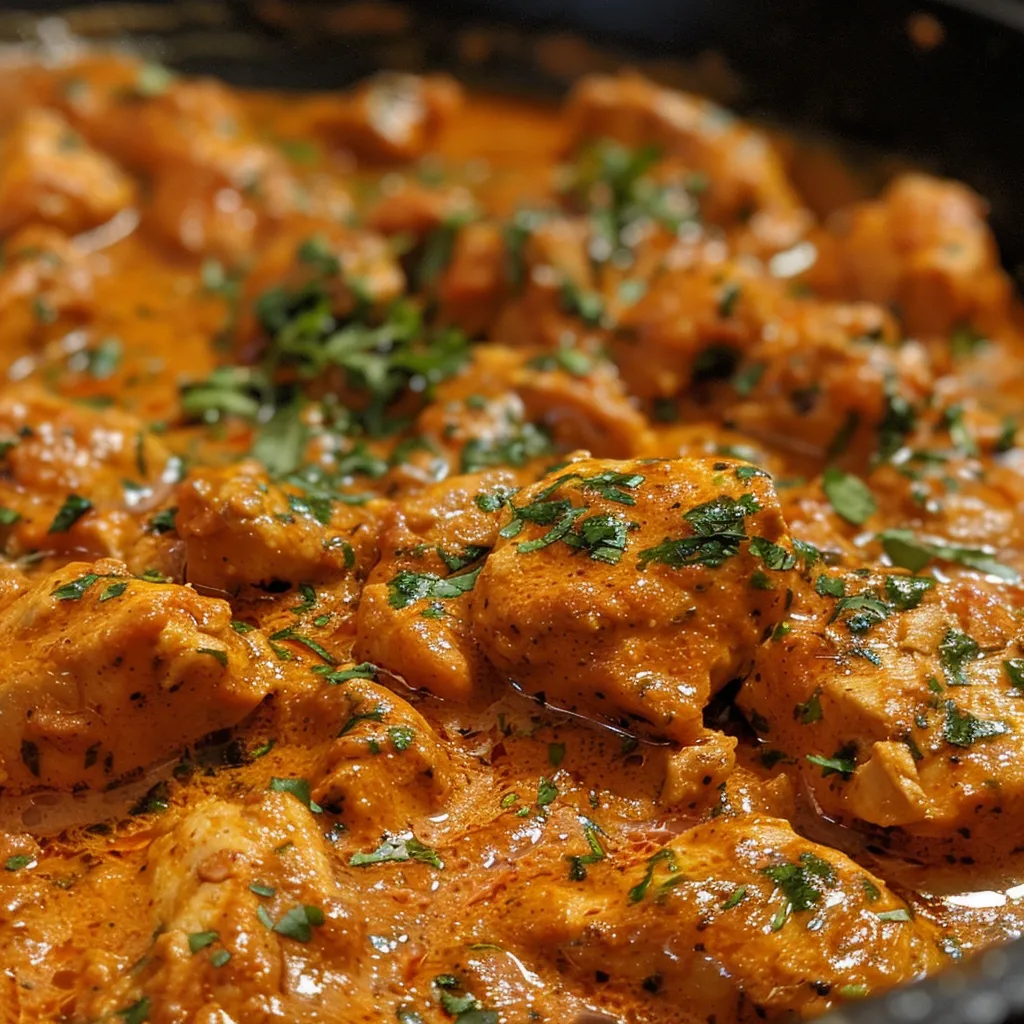
  1. In a large skillet, heat the olive oil over medium heat. Add the diced chicken, seasoning it with salt, pepper, and Cajun seasoning. Cook until the chicken is browned and cooked through, about 5-7 minutes. The aroma will already start to make your mouth water!
  2. Remove the chicken from the skillet and set it aside. In that same skillet, add the diced onion, bell pepper, and garlic. Sauté until softened, about 3-4 minutes. This step allows the veggies to soak up all those delicious flavors.
  3. Stir in the rice and chicken broth, bringing it to a boil. Reduce the heat to low, cover, and let it simmer for 15 minutes or until the rice is cooked. The rice will absorb all that savory broth, making it a perfect base for our dish.
  4. Add the heavy cream to the skillet and stir to combine. Return the cooked chicken to the skillet and mix everything well. Allow it to heat through for another 2-3 minutes. This is where the magic happens—the creamy goodness starts to envelop everything!
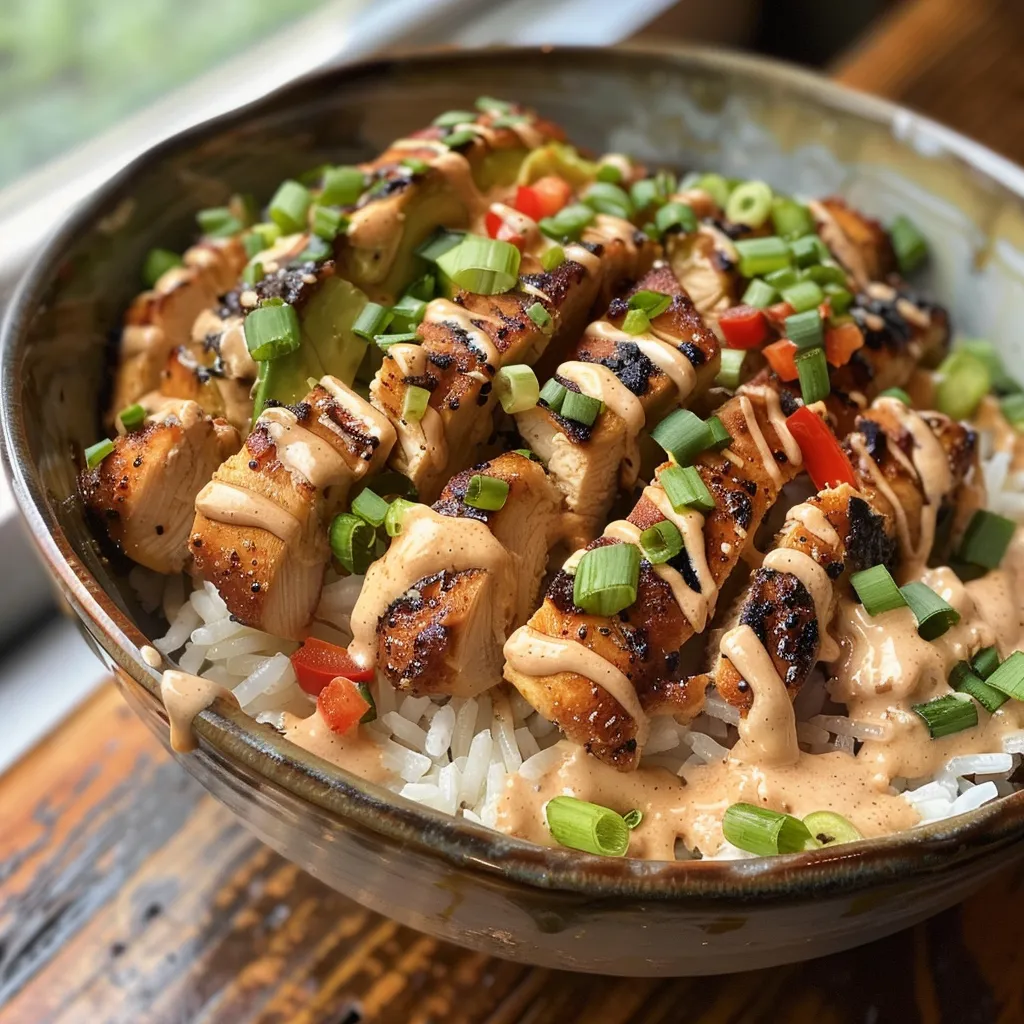
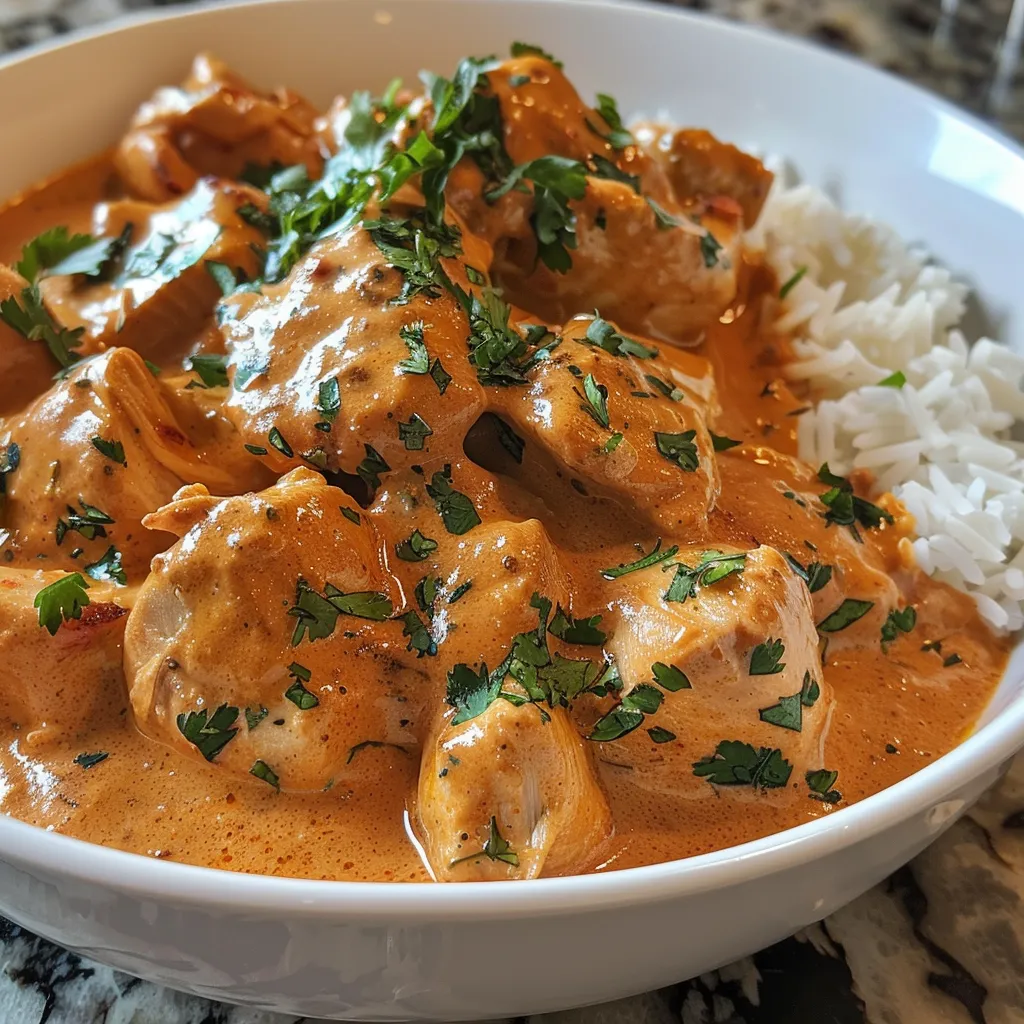
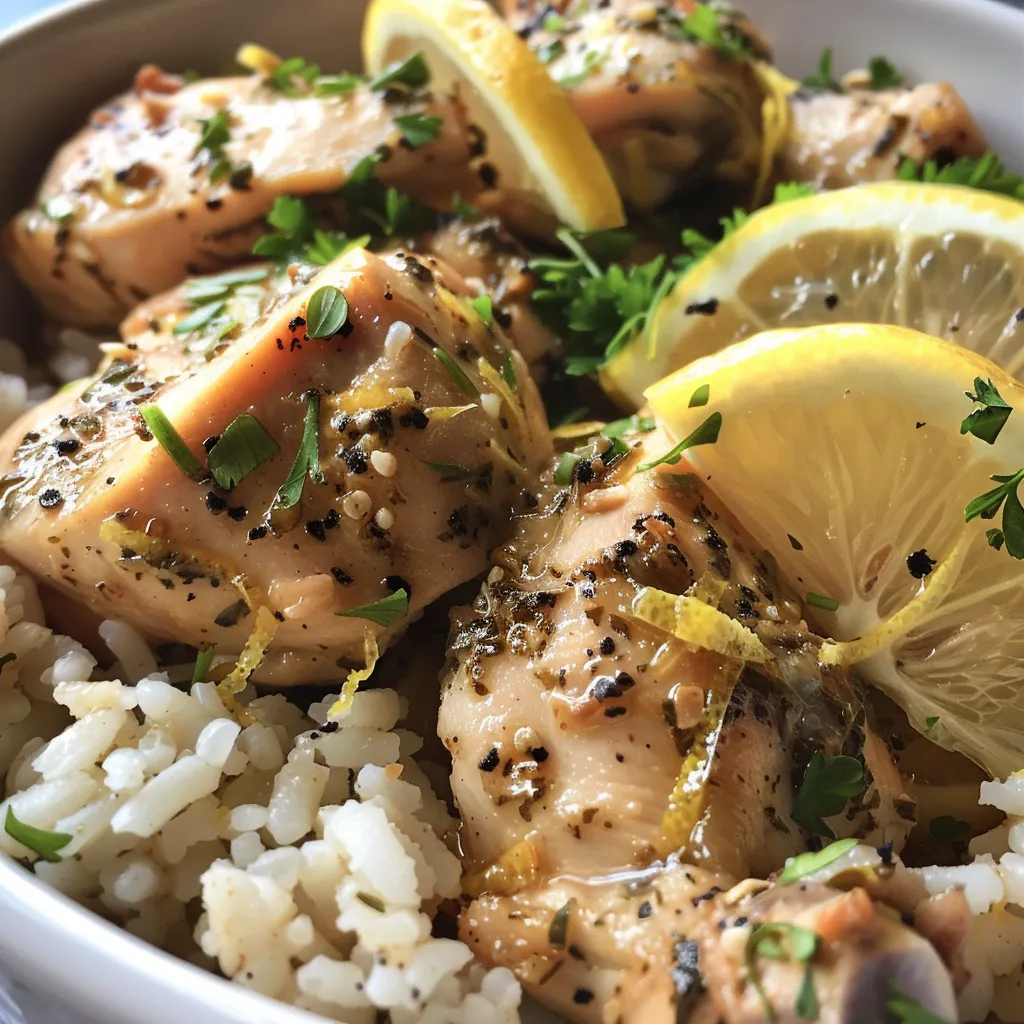
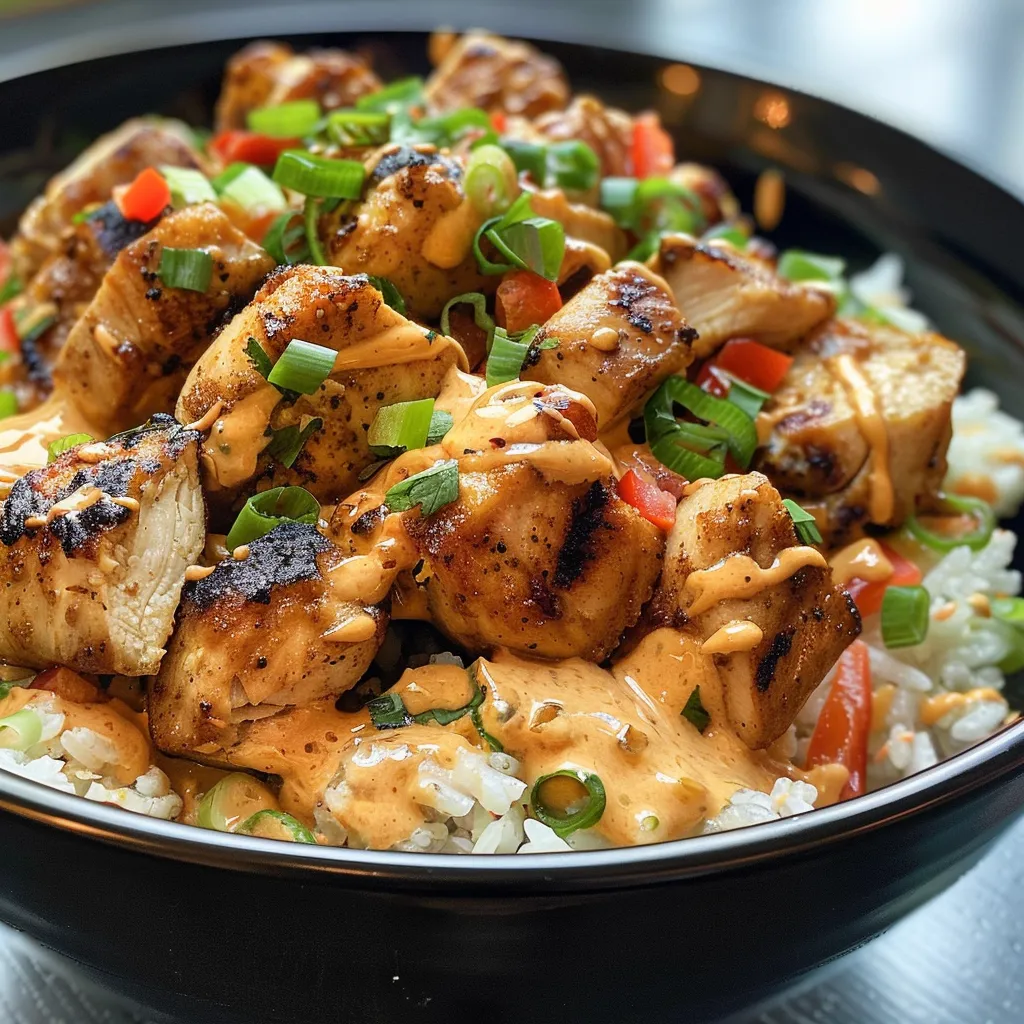
  5. Taste and adjust the seasoning if needed. Serve in bowls and garnish with chopped green onions for a fresh touch.
Creamy Cajun Chicken & Rice Bowls | High Protein Meal Prep

Pro Tips for the Best Results

Here are a few tips to elevate your dish:

  • Let the Chicken Rest: After cooking, let the chicken rest for a few minutes before slicing. This helps retain its juices, keeping it tender and flavorful.
  • Customize the Spice: If you prefer a milder dish, start with a lesser amount of Cajun seasoning and add more to taste. You can always sprinkle some extra on top for those who like it spicy!
  • Use Fresh Herbs: Fresh chives or parsley can add a burst of freshness and color to your bowls. Don’t be shy with the garnishes!

Serving Suggestions

While this dish is delicious on its own, there are several creative ways to serve it. Consider pairing it with:

  • A side of roasted vegetables for added nutrition and flavor.
  • A fresh garden salad drizzled with a light vinaigrette to balance the richness of the dish.
  • Some crusty bread to soak up all that delicious creamy sauce.

Storage and Make-Ahead Tips

This Creamy Cajun Chicken & Rice Bowl is perfect for meal prep! Here are some tips to ensure it stays fresh and delicious:

  • Refrigerate: Store leftovers in an airtight container in the fridge for up to 4 days. Just reheat and enjoy!
  • Freeze: You can freeze the dish for up to 3 months. To reheat, thaw overnight in the fridge and warm it gently on the stove.
  • Make Ahead: You can prep the chicken and veggies in advance and store them separately. When you’re ready to eat, just combine everything and cook!

So there you have it! A delightful recipe that’s not only comforting and creamy but also packed with protein and flavor. Whether you’re cooking for family, friends, or just yourself, I hope this Creamy Cajun Chicken & Rice Bowl brings as much joy to your table as it does to mine. Happy cooking!

Creamy Cajun Chicken & Rice Bowls | High Protein Meal Prep

Prep Time 10 minutes
Cook Time 25 minutes
Total Time 35 minutes
Servings 4 bowls
Calories 650
A flavorful and protein-packed meal perfect for meal prep, combining tender Cajun-spiced chicken with creamy rice and vegetables.

Ingredients

Protein

  • 1 lb chicken breast, diced

Grains

  • 1 cup long-grain rice

Broth & Cream

  • 2 cups chicken broth
  • 1 cup heavy cream

Seasonings & Oils

  • 2 tablespoons cajun seasoning
  • 1 tablespoon olive oil

Vegetables

  • 1 diced bell pepper
  • 1 diced onion
  • 2 cloves garlic, minced

Seasoning & Garnish

  • to taste salt and pepper
  • for garnish chopped green onions

Instructions 

  • Heat olive oil in a skillet, cook seasoned chicken until browned, about 5-7 minutes.
  • Remove chicken, sauté diced onion, bell pepper, and garlic until softened, 3-4 minutes.
  • Add rice and chicken broth, bring to a boil, then simmer covered for 15 minutes.
  • Stir in heavy cream, return chicken, heat through for 2-3 minutes, then serve garnished with green onions.

Notes

Adjust seasoning to taste and serve immediately for best flavor.
Calories: 650kcal
Cost: $15
Course: Main Course
Cuisine: American
Keyword: Cajun, Chicken, Rice

Loved this recipe? Save it to your favorite Pinterest board so you can easily find it later! It’s the perfect way to keep all your sweet ideas in one place. ✨

Creamy Cajun Chicken & Rice Bowls | High Protein Meal Prep

There’s something incredibly comforting about a warm plate of pasta at the end of a long day, isn’t there? I still remember those chilly evenings in Oregon when my mother would whip up her famous pasta dish, filling our home with the aroma of garlic and cheese. It was never just about the food; it was about gathering around the table, sharing stories, and feeling that cozy embrace of love and warmth. Fast forward to my bustling Seattle kitchen, and I find myself recreating those memories with my own twist on a classic: Easy Parmesan Chicken Pasta. This recipe is a celebration of all things comforting and delicious, and trust me, it’s about to become your new go-to meal!

This dish is like a warm hug on a plate. The creamy sauce envelops tender pieces of chicken and perfectly cooked pasta, creating a symphony of flavors that will have your loved ones pausing mid-bite to say, ‘Wow!’ Whether you’re cooking for a busy weeknight or a cozy weekend gathering, this recipe is as simple as it is satisfying. So, grab your apron and let’s dive into the magic of Easy Parmesan Chicken Pasta!

Why You’ll Absolutely Love This Easy Parmesan Chicken Pasta

Let me tell you why this dish is going to steal your heart (and your taste buds):

  • It’s quick and easy to make—perfect for busy weeknights when you want something comforting without spending hours in the kitchen.
  • The creamy, cheesy sauce is rich and indulgent, yet balanced enough that it won’t weigh you down.
  • It’s a crowd-pleaser! Even the pickiest of eaters will be asking for seconds.
  • It’s versatile! You can easily customize it with your favorite veggies or herbs to suit your taste.

Ingredients You’ll Need

Now, let’s talk about the ingredients that make this dish sing. You don’t need anything fancy; just some good-quality staples that you might already have in your kitchen. Here’s what you’ll need:

  • 8 oz pasta (linguine or fettuccine): The base of our dish! I love linguine for its ability to hold onto sauce, but fettuccine works wonders too.
  • 2 chicken breasts, boneless and skinless: Tender and juicy, they’ll soak up all that delicious sauce.
  • 1 cup grated parmesan cheese: The star of the show! It adds richness and that signature cheesy flavor.
  • 2 tablespoons olive oil: For sautéing the chicken and adding a touch of flavor.
  • 2 cloves garlic, minced: Because who doesn’t love garlic? It brings an irresistible aroma and depth to the dish.
  • 1 cup heavy cream: The secret to that luscious, creamy sauce.
  • Salt and pepper to taste: Essential for seasoning and elevating all the flavors.
  • Fresh parsley, chopped (for garnish): A pop of color and freshness to finish off the dish.

You’ll find the full ingredient list with measurements in the recipe card below!

How to Make This Easy Parmesan Chicken Pasta, Step-by-Step

Ready to turn your kitchen into a cozy bistro? Here’s how to whip up this delightful dish:

  1. Cook the pasta according to package instructions until al dente; drain and set aside. (Tip: Reserve a bit of the pasta water to help loosen the sauce later if needed!)
  2. Season the chicken breasts generously with salt and pepper. This step is crucial for flavor!
  3. In a large skillet, heat olive oil over medium heat. Add the chicken breasts and cook for 6-7 minutes on each side, or until fully cooked. Remove from the skillet and slice into strips.
  4. In the same skillet, add minced garlic and sauté for about 1 minute until fragrant. Your kitchen will start to smell heavenly!
  5. Pour in the heavy cream and bring to a simmer. Stir in the grated Parmesan cheese until melted and smooth. (Make sure to taste and adjust seasoning as you go!)
  6. Add the cooked pasta and sliced chicken to the skillet. Toss to combine and coat evenly with the sauce. If it seems too thick, add a splash of the reserved pasta water.
  7. Serve hot, garnished with fresh parsley. Don’t forget to snap a picture before diving in!
Easy Parmesan Chicken Pasta

Pro Tips for the Best Results

Here are a few tips that I’ve learned along the way to ensure your Easy Parmesan Chicken Pasta turns out perfectly every time:

  • Don’t overcook the chicken! It should be juicy and tender, not dry. Use a meat thermometer to check for doneness (165°F is your target).
  • Feel free to mix in some veggies! Spinach, broccoli, or cherry tomatoes can add a pop of color and nutrition.
  • For an extra flavor boost, try adding a pinch of red pepper flakes for some heat or a squeeze of lemon juice for brightness.

Serving Suggestions

This dish is perfect on its own, but if you want to elevate your dinner experience, here are a few serving suggestions:

  • Pair it with a simple side salad drizzled with balsamic vinaigrette for a refreshing contrast.
  • Serve with garlic bread or a warm baguette to soak up that creamy sauce.
  • Top with a sprinkle of extra Parmesan and a few fresh basil leaves for an elegant touch.

Storage and Make-Ahead Tips

If you’re like me and love to meal prep, this dish can be made ahead of time! Here’s how to store and reheat:

  • Store leftovers in an airtight container in the refrigerator for up to 3 days.
  • To reheat, simply warm it on the stovetop over low heat, adding a splash of milk or cream to loosen the sauce.
  • While I don’t recommend freezing this dish due to the cream sauce, it’s perfect for enjoying fresh!

So there you have it! A cozy, creamy, and utterly delicious Easy Parmesan Chicken Pasta that’s sure to become a staple in your kitchen. I can’t wait for you to try it and share it with the people you love. Happy cooking!

Easy Parmesan Chicken Pasta

Prep Time 10 minutes
Cook Time 20 minutes
Total Time 30 minutes
Servings 4 servings
Calories 650
A quick and creamy pasta dish featuring tender chicken and Parmesan cheese, perfect for a satisfying weeknight dinner.

Ingredients

Pasta

  • 8 oz pasta (linguine or fettuccine)

Chicken breasts

  • 2 pieces boneless, skinless chicken breasts

Parmesan cheese

  • 1 cup grated Parmesan cheese

Olive oil

  • 2 tablespoons olive oil

Garlic

  • 2 cloves minced garlic

Heavy cream

  • 1 cup heavy cream

Salt and pepper

  • to taste salt and pepper

Fresh parsley

  • for garnish chopped fresh parsley

Instructions 

  • Cook pasta until al dente, then drain.
  • Season chicken with salt and pepper, then cook in a skillet with olive oil until done. Slice into strips.
  • Sauté garlic in the same skillet for 1 minute.
  • Add heavy cream and Parmesan, simmer until smooth.
  • Mix in pasta and chicken, toss to coat. Garnish with parsley and serve.

Notes

For a lighter version, use half-and-half instead of heavy cream.
Calories: 650kcal
Cost: $15
Course: Main Course
Cuisine: Italian
Keyword: Chicken, parmesan, pasta

Loved this recipe? Save it to your favorite Pinterest board so you can easily find it later! It’s the perfect way to keep all your sweet ideas in one place. ✨

Easy Parmesan Chicken Pasta

Ah, the beauty of one-pan meals! They’re like a hug in a dish, and I can’t think of a better example than my Easy Cheesy Sausage Skillet Pasta. Picture this: it’s a busy weeknight, and you’re longing for a comforting, home-cooked meal that doesn’t require an army of pots and pans to make. Enter this delightful skillet pasta that combines savory sausage, gooey cheese, and tender pasta, all in one glorious pan. It’s quick, it’s easy, and it’ll have your family asking for seconds!

This recipe is close to my heart because it encapsulates everything I love about cooking: simplicity, flavor, and a touch of nostalgia. Growing up, my mom had a knack for whipping up meals that brought us together, and this dish does just that. It’s perfect for those nights when you want to savor every bite without spending hours in the kitchen. Trust me, once you take that first forkful, you’ll understand why this dish is destined to become a staple in your home.

Why You’ll Absolutely Love This Easy Cheesy Sausage Skillet Pasta: Your Go-To 30-Minute One-Pan Dinner!

Let me tell you, this dish is not just another pasta recipe; it’s a celebration of flavors and ease. Here’s why you’ll absolutely adore it:

  • It’s a one-pan wonder—less mess means more time to enjoy your meal!
  • Ready in just 30 minutes, making it perfect for busy weeknights.
  • The combination of savory sausage and melted cheese is a match made in heaven.
  • It’s versatile—feel free to throw in your favorite veggies for added nutrition and color!

Ingredients You’ll Need

Let’s talk about the star players in this delightful dish. You’ll find that each ingredient adds its own charm to the skillet:

  • 8 oz pasta (penne or rotini): These shapes are perfect for holding onto the sauce and cheese.
  • 1 lb Italian sausage: Choose between mild or spicy, depending on your taste preference.
  • 1 medium onion, diced: Adds sweetness and depth of flavor.
  • 2 cloves garlic, minced: Because everything is better with garlic!
  • 1 can (14.5 oz) diced tomatoes, undrained: This brings juiciness and a hint of acidity.
  • 2 cups chicken broth: For a rich, savory base.
  • 1 cup shredded mozzarella cheese: The gooey goodness we all love.
  • 1 cup spinach (fresh or frozen): A great way to sneak in some greens.
  • 1 tsp Italian seasoning: A blend of herbs that brings everything together.
  • Salt and pepper to taste: Essential for balancing flavors.
  • Olive oil (for cooking): A drizzle to start the sautéing process.

You’ll find the full ingredient list with measurements in the recipe card below!

How to Make This Easy Cheesy Sausage Skillet Pasta: Your Go-To 30-Minute One-Pan Dinner!, Step-by-Step

Now, let’s dive into the cooking process! It’s a breeze, and I promise you’ll feel like a kitchen rockstar:

  1. In a large skillet, heat a drizzle of olive oil over medium heat.
  2. Add the diced onion and sauté until translucent, about 3-4 minutes. The aroma will start to fill your kitchen, and trust me, it’s heavenly!
  3. Add the sausage to the skillet, breaking it up with a spoon, and cook until browned, about 5-7 minutes. This is where the magic begins!
  4. Stir in the minced garlic and Italian seasoning, cooking for an additional 1 minute until fragrant. Just wait until the garlic hits your nose—it’s pure bliss!
  5. Add the diced tomatoes (with juices), chicken broth, and pasta to the skillet. Stir to combine everything.
  6. Bring to a boil, then reduce heat to a simmer. Cover and cook for 10-12 minutes, or until pasta is al dente, stirring occasionally. This is when you can take a moment to sip some wine or enjoy a little dance break in the kitchen.
  7. Once the pasta is cooked, stir in the spinach and half of the mozzarella cheese. Cook until the spinach wilts and the cheese is melted. It’s starting to look like a cheesy dream!
  8. Season with salt and pepper to taste, and top with the remaining mozzarella cheese.
  9. Cover the skillet for a few minutes until the cheese is bubbly and melted. This is the moment you’ve been waiting for—don’t rush it!
  10. Serve warm and enjoy your Easy Cheesy Sausage Skillet Pasta!
Easy Cheesy Sausage Skillet Pasta: Your Go-To 30-Minute One-Pan Dinner!

Pro Tips for the Best Results

Here are a few of my tried-and-true tips to ensure your skillet pasta turns out perfectly every time:

  • Don’t skip the browning: Browning the sausage adds depth of flavor, so take that extra time to let it develop!
  • Experiment with cheese: While mozzarella is fantastic, feel free to mix in some Parmesan or cheddar for a different flavor profile.
  • Veggie boost: Toss in any leftover veggies you have on hand. Bell peppers, zucchini, or even broccoli can work beautifully!

Serving Suggestions

Now that you’ve created this cheesy masterpiece, how can you elevate the meal even more? Here are a few serving suggestions:

  • Pair it with a crisp garden salad dressed with a simple vinaigrette.
  • Serve with cheesy garlic bread for a truly indulgent experience.
  • Top with fresh basil or parsley for a burst of color and freshness.

Storage and Make-Ahead Tips

If you’re lucky enough to have leftovers (which is rare in my house), here’s how to store them:

  • Store in an airtight container in the refrigerator for up to 3 days.
  • To reheat, simply warm it in a skillet with a splash of chicken broth to loosen it up.
  • If you want to make it ahead, you can prepare the sausage and onion mixture, then add the rest of the ingredients when you’re ready to cook.

Easy Cheesy Sausage Skillet Pasta: Your Go-To 30-Minute One-Pan Dinner!

Prep Time 10 minutes
Cook Time 20 minutes
Total Time 30 minutes
Servings 4 servings
Calories 650
This quick and hearty skillet pasta combines sausage, cheese, and vegetables for a delicious 30-minute meal perfect for busy weeknights.

Ingredients

pasta

  • 8 oz pasta (penne or rotini)

meat

  • 1 lb italian sausage (mild or spicy, removed from casings)

vegetables

  • 1 medium onion, diced
  • 2 cloves garlic, minced

canned goods

  • 1 can (14.5 oz) diced tomatoes, undrained
  • 2 cups chicken broth

cheese

  • 1 cup shredded mozzarella cheese

greens

  • 1 cup spinach (fresh or frozen)

seasonings

  • 1 tsp italian seasoning

others

  • to taste salt and pepper
  • olive oil for cooking olive oil

Instructions 

  • Heat olive oil in a large skillet over medium heat. Sauté diced onion until translucent, then add sausage and cook until browned.
  • Stir in garlic and Italian seasoning; cook for 1 minute. Add diced tomatoes, chicken broth, and pasta. Bring to a boil.
  • Reduce heat, cover, and simmer for 10-12 minutes until pasta is al dente, stirring occasionally.
  • Stir in spinach and half of the mozzarella; cook until spinach wilts and cheese melts. Season with salt and pepper.
  • Top with remaining mozzarella, cover, and cook until cheese is bubbly. Serve warm.

Notes

For extra flavor, sprinkle with fresh herbs or red pepper flakes before serving.
Calories: 650kcal
Cost: $15
Course: Main Course
Cuisine: American
Keyword: pasta

Loved this recipe? Save it to your favorite Pinterest board so you can easily find it later! It’s the perfect way to keep all your sweet ideas in one place. ✨

Easy Cheesy Sausage Skillet Pasta: Your Go-To 30-Minute One-Pan Dinner!

Ah, Butter Chicken. Just the name conjures up memories of cozy evenings spent with family and friends, plates piled high with fragrant, creamy goodness. I remember the first time I tasted this classic dish—my taste buds danced with joy as the rich spices and tender chicken enveloped my senses. It was a game-changer, and I knew I had to recreate that magic in my own kitchen. Fast forward a few years, and here I am, sharing my beloved recipe for Quick & Easy Homemade Butter Chicken, perfect for any weeknight dinner or a cozy gathering.

Living in Seattle has its perks—especially when it comes to fresh ingredients. But even if you’re far from the Pacific Northwest, you can whip up this dish with just a few pantry staples and some love. This recipe is not only delicious but also incredibly easy to prepare, making it a go-to for those busy nights when you want something comforting without spending hours in the kitchen. Grab your apron, and let’s dive into this whirlwind of spices!

Why You’ll Absolutely Love This Quick & Easy Homemade Butter Chicken

This Butter Chicken recipe is a surefire way to bring warmth and joy to your dinner table. Here’s why you’ll absolutely love it:

  • It’s quick and easy—ready in about 30 minutes!
  • Rich, creamy sauce that perfectly balances spices and comfort.
  • Versatile—great with rice, naan, or even as a filling for wraps.
  • Impressively delicious enough to serve at dinner parties or family gatherings.

Ingredients You’ll Need

Let’s talk about the ingredients. The beauty of this Butter Chicken lies in its simplicity. You’ll need:

  • 1 lb chicken breast, cut into bite-sized pieces
  • 2 tablespoons butter
  • 1 onion, finely chopped
  • 2 cloves garlic, minced
  • 1 inch ginger, grated
  • 1 tablespoon garam masala
  • 1 teaspoon ground cumin
  • 1 teaspoon ground coriander
  • 1/2 teaspoon turmeric
  • 1 can (14 oz) tomato puree
  • 1 cup heavy cream
  • Salt to taste
  • Fresh cilantro for garnish
  • Cooked rice or naan for serving

You’ll find the full ingredient list with measurements in the recipe card below!

How to Make This Quick & Easy Homemade Butter Chicken, Step-by-Step

Now that we have our ingredients ready, let’s get cooking! Follow these simple steps:

  1. In a large skillet, melt the butter over medium heat. This is where the magic begins!
  2. Add the chopped onion and sauté until translucent, about 5 minutes. It’s amazing how this small step can elevate the flavor of the dish.
  3. Stir in the garlic and ginger, cooking for another minute until fragrant. You’ll want to pause and take a deep breath here—those aromas are heavenly!
  4. Add the chicken pieces to the skillet and cook until they are no longer pink. This shouldn’t take long, just about 5-7 minutes.
  5. Sprinkle in the garam masala, cumin, coriander, and turmeric, stirring well to coat the chicken. This is where your dish starts to come alive with color and flavor!
  6. Pour in the tomato puree and bring to a simmer. Cook for 10 minutes, allowing the flavors to meld beautifully.
  7. Reduce the heat and stir in the heavy cream. Cook for an additional 5 minutes until the sauce thickens. Oh, that velvety texture is to die for!
  8. Season with salt to taste and garnish with fresh cilantro. This little touch adds a vibrant pop of color and freshness.
  9. Serve hot with cooked rice or naan, and prepare for the compliments!
Quick & Easy Homemade Butter Chicken

Pro Tips for the Best Results

Here are a few tips I’ve learned along the way to ensure your Butter Chicken turns out perfect every time:

  • Don’t skimp on the spices! They’re what make this dish shine. Fresh spices can elevate the flavor significantly.
  • If you want a little heat, feel free to add a pinch of cayenne pepper or some chopped green chilies. Spice is always nice!
  • For an even creamier sauce, you can substitute half of the heavy cream with coconut milk—it adds a lovely twist!

Serving Suggestions

Now that your Butter Chicken is ready, let’s talk about how to serve it! This dish shines when paired with a few simple sides:

  • Fluffy basmati rice or aromatic jasmine rice are classic choices that soak up the sauce beautifully.
  • Warm naan bread is perfect for scooping up that creamy goodness—trust me, you’ll want to make sure there’s enough!
  • Add a side of roasted or sautéed vegetables for a colorful, healthful balance.
  • For a refreshing touch, serve it alongside a cucumber raita or a simple green salad.

Storage and Make-Ahead Tips

If you’re planning ahead, this Butter Chicken can be made in advance! Here are some storage tips:

  • Store any leftovers in an airtight container in the refrigerator for up to 3 days.
  • This dish freezes beautifully! Just let it cool completely before transferring it to a freezer-safe container. It can be frozen for up to 3 months.
  • To reheat, thaw overnight in the fridge, then gently warm on the stove over low heat, stirring occasionally.

So there you have it—my Quick & Easy Homemade Butter Chicken recipe that’s sure to become a staple in your kitchen. Whether you’re cooking for family, friends, or just treating yourself, this dish is all about warmth, comfort, and love. Happy cooking, and may your kitchen always be filled with delicious aromas!

Quick & Easy Homemade Butter Chicken

Prep Time 10 minutes
Cook Time 20 minutes
Total Time 30 minutes
Servings 4 servings
Calories 450
A flavorful and creamy butter chicken recipe that's quick to prepare and perfect for a satisfying meal.

Ingredients

Protein

  • 1 lb chicken breast, cut into bite-sized pieces

Dairy & Oils

  • 2 tablespoons butter

Vegetables & Aromatics

  • 1 onion onion, finely chopped
  • 2 cloves garlic, minced
  • 1 inch ginger, grated

Spices & Sauces

  • 1 tablespoon garam masala
  • 1 teaspoon ground cumin
  • 1 teaspoon ground coriander
  • 0.5 teaspoon turmeric
  • 14 oz tomato puree

Dairy & Sauces

  • 1 cup heavy cream

Seasonings

  • to taste salt

Garnish & Serve

  • fresh cilantro for garnish
  • cooked rice or naan for serving

Instructions 

  • Melt butter in a skillet over medium heat.
  • Sauté onion until translucent, then add garlic and ginger; cook 1 minute.
  • Add chicken and cook until no longer pink.
  • Stir in spices, then add tomato puree and simmer 10 minutes.
  • Stir in heavy cream, cook 5 minutes, season with salt, garnish, and serve.

Notes

For a richer flavor, let the sauce simmer longer before adding cream.
Calories: 450kcal
Cost: $12
Course: Main Course
Cuisine: Indian
Keyword: Butter Chicken

Loved this recipe? Save it to your favorite Pinterest board so you can easily find it later! It’s the perfect way to keep all your sweet ideas in one place. ✨

Quick & Easy Homemade Butter Chicken

Welcome to my kitchen, dear friends! Today, I’m thrilled to whisk you away into a world of comforting flavors with my Cheesy Hamburger Rice Casserole. Picture this: it’s a chilly Seattle evening, the kind that makes you want to curl up with a warm blanket and a bowl of something that feels like home. That’s exactly what this casserole delivers—a hug in a dish that’s perfect for busy weeknights or cozy family gatherings. Growing up in Oregon, my meals were often filled with simple yet hearty ingredients, and this recipe encapsulates that spirit beautifully.

Now, I know what you might be thinking: casseroles can sometimes feel like a last-minute dinner decision. But let me tell you, this Cheesy Hamburger Rice Casserole is anything but ordinary! It’s the kind of dish that makes people pause mid-bite and say, ‘Wow, this is delicious!’ Not only does it come together with minimal effort, but it’s also packed with flavors that are sure to delight everyone at your table.

Why You’ll Absolutely Love This Cheesy Hamburger Rice Casserole

This casserole is a delightful blend of savory ingredients that come together to create a dish that warms the heart. Here are just a few reasons why you’ll absolutely love it:

  • It’s a one-dish wonder—easy to make and even easier to clean up!
  • Rich, cheesy goodness that appeals to both kids and adults alike.
  • Flexible ingredients allow you to customize it based on what you have on hand.
  • Perfect for meal prepping or making ahead for busy nights.

Ingredients You’ll Need

Let’s talk about the star players in this delightful casserole! Each ingredient was chosen with love and care, ensuring that every bite is bursting with flavor. Here’s what you’ll need:

  • 1 pound ground beef – the heart of the dish, providing a savory base.
  • 1 cup uncooked rice – for that perfect comforting texture.
  • 2 cups beef broth – to infuse the rice with rich flavors.
  • 1 can (10.5 oz) cream of mushroom soup – adds creaminess and depth.
  • 1 cup shredded cheddar cheese – because cheese makes everything better!
  • 1 small onion, chopped – for that aromatic foundation.
  • 2 cloves garlic, minced – a must-have for flavor!
  • 1 teaspoon salt – to enhance all the flavors.
  • 1/2 teaspoon black pepper – for just the right amount of spice.
  • 1 teaspoon paprika – to add a subtle warmth.
  • 1 cup frozen mixed vegetables (optional) – for a pop of color and nutrition.

You’ll find the full ingredient list with measurements in the recipe card below!

How to Make This Cheesy Hamburger Rice Casserole, Step-by-Step

Ready to dive into this deliciousness? Let’s get cooking! Follow these simple steps to create your very own Cheesy Hamburger Rice Casserole:

  1. Preheat your oven to 350°F (175°C). This is the perfect temperature for bubbling cheese goodness!
  2. In a large skillet, brown the ground beef over medium heat. Make sure to drain any excess fat to keep it from becoming greasy.
  3. Add the chopped onion and minced garlic to the skillet, sautéing until the onion becomes translucent. This step adds such a lovely aroma to your kitchen!
  4. Stir in the uncooked rice, beef broth, cream of mushroom soup, salt, pepper, and paprika. Mix everything well until combined.
  5. If you’re feeling a bit adventurous, toss in those frozen mixed vegetables for some extra color and nutrition. Stir to combine!
  6. Transfer the mixture to a greased 9×13 inch baking dish, spreading it out evenly.
  7. Cover the dish with aluminum foil and bake for 30 minutes. This allows the rice to cook and soak up all those flavors.
  8. Remove the foil, sprinkle the shredded cheddar cheese on top, and bake for an additional 10-15 minutes, or until the cheese is bubbly and golden. This is the moment when your kitchen will smell absolutely divine!
  9. Let it cool for a few minutes before serving. Trust me, you’ll want to give it a moment to set!
Cheesy Hamburger Rice Casserole

Pro Tips for the Best Results

Here are a few tips I’ve learned along the way to ensure your casserole turns out perfectly:

  • For added flavor, consider browning the ground beef with some Worcestershire sauce or a dash of soy sauce.
  • If you prefer a creamier texture, feel free to substitute the beef broth with a combination of broth and half-and-half.
  • To make this dish a bit healthier, swap out the white rice for brown rice or quinoa!

Serving Suggestions

This Cheesy Hamburger Rice Casserole is fantastic on its own, but if you’re looking to elevate your meal even further, consider these serving suggestions:

  • Pair it with a fresh green salad drizzled with a light vinaigrette for a refreshing balance.
  • Serve with a side of my Cheesy Garlic Bread for an indulgent touch.
  • Top each serving with a dollop of sour cream or Greek yogurt for an extra layer of creaminess.

Storage and Make-Ahead Tips

Now, let’s talk about leftovers! This casserole is perfect for meal prep and can easily be stored:

  • Refrigerate any leftovers in an airtight container for up to 3-4 days.
  • You can also freeze the casserole before baking. Just cover it tightly and it’ll last for up to 2 months. When you’re ready to enjoy it, just thaw it in the refrigerator overnight and bake as directed.
  • Reheat individual portions in the microwave, or pop it back in the oven until heated through.

There you have it, my dear friends! A Cheesy Hamburger Rice Casserole that’s sure to become a staple in your kitchen. I hope it brings as much joy to your table as it has to mine. Happy cooking, and remember—there’s always room for a little magic in every meal!

Cheesy Hamburger Rice Casserole

Prep Time 10 minutes
Cook Time 40 minutes
Total Time 50 minutes
Servings 6 servings
Calories 650
A hearty and cheesy casserole combining ground beef, rice, and vegetables for a satisfying meal.

Ingredients

Meat and grains

  • 1 pound ground beef
  • 1 cup uncooked rice
  • 2 cups beef broth
  • 1 can (10.5 oz) cream of mushroom soup
  • 1 cup shredded cheddar cheese
  • 1 small onion, chopped
  • 2 cloves garlic, minced
  • 1 teaspoon salt
  • 1/2 teaspoon black pepper
  • 1 teaspoon paprika
  • 1 cup frozen mixed vegetables (optional)

Instructions 

  • Preheat oven to 350°F (175°C). Brown beef, then sauté onion and garlic.
  • Mix beef, rice, broth, soup, salt, pepper, paprika, and vegetables. Transfer to a greased dish.
  • Cover with foil and bake for 30 minutes. Remove foil, add cheese, and bake 10-15 minutes until bubbly.
  • Let cool briefly before serving.

Notes

For a creamier texture, use additional cheese or a splash of milk.
Calories: 650kcal
Cost: $15
Course: Main Course
Cuisine: American
Keyword: Beef, cheese, Rice

Loved this recipe? Save it to your favorite Pinterest board so you can easily find it later! It’s the perfect way to keep all your sweet ideas in one place. ✨

Cheesy Hamburger Rice Casserole

Welcome to my cozy kitchen! Today, I’m excited to share a recipe that has become a staple in my home: Easy Garlic Parmesan Chicken Pasta. This dish combines creamy richness with wholesome ingredients, and it’s one of those meals that will have your family pausing mid-bite to say, ‘Wow!’ I still remember the first time I made it—my husband took a bite and declared it, ‘a keeper.’ It’s perfect for busy nights when you want something delicious without spending hours in the kitchen.

Growing up in Oregon, my mom always said that food brings people together. I’ve carried that philosophy with me into my adult life, and this pasta dish embodies that spirit. It’s simple yet satisfying, and I love knowing that I can whip it up quickly while still using wholesome, nutritious ingredients. So, grab your apron, and let’s dive into this delightful recipe!

Why You’ll Absolutely Love This Easy Garlic Parmesan Chicken Pasta Recipe for a Healthy Dinner

This recipe isn’t just about filling your belly; it’s about creating a meal that feels like a warm hug. Here are a few reasons why you’re going to adore it:

  • It’s quick and easy—perfect for those hectic weeknights!
  • Packed with protein and veggies, it’s a balanced meal that doesn’t skimp on flavor.
  • The creamy garlic Parmesan sauce is a crowd-pleaser that elevates simple ingredients.
  • It’s versatile—swap in your favorite veggies or pasta type to make it your own!

Ingredients You’ll Need

Now, let’s talk about the ingredients. I’m all about using fresh, wholesome components that not only taste great but also make you feel good. In this recipe, we’ll be using:

  • 8 oz whole grain pasta – for that hearty base that’s also nutritious.
  • 2 boneless, skinless chicken breasts – lean protein that keeps you satisfied.
  • 2 tablespoons olive oil – a heart-healthy fat that adds flavor.
  • 4 cloves garlic, minced – because garlic makes everything better!
  • 1 cup broccoli florets – bright, crunchy, and full of vitamins.
  • 1 cup cherry tomatoes, halved – sweet bursts of flavor and color.
  • 1/2 cup grated parmesan cheese – the star ingredient for that creamy goodness.
  • 1 teaspoon salt and 1/2 teaspoon black pepper – for seasoning.
  • 1/2 teaspoon red pepper flakes (optional) – for a little kick if you’re feeling adventurous.
  • 2 tablespoons fresh parsley, chopped (for garnish) – because we eat with our eyes first!

You’ll find the full ingredient list with measurements in the recipe card below!

How to Make This Easy Garlic Parmesan Chicken Pasta Recipe for a Healthy Dinner, Step-by-Step

Ready to bring this delicious dish to life? Let’s go through the steps together:

  1. Start by cooking the whole grain pasta according to package instructions. Once it’s al dente, drain it and set it aside.
  2. While the pasta is cooking, heat the olive oil in a large skillet over medium heat. This is where the magic begins!
  3. Season the chicken breasts with salt and pepper, then add them to the skillet. Cook for about 5-7 minutes on each side until they’re golden brown and cooked through. Once done, remove them from the skillet and let them rest for a few minutes.
  4. In that same skillet (don’t you dare wash it yet!), add the minced garlic. Sauté for about a minute until it’s fragrant—your kitchen will smell divine!
  5. Next, toss in the broccoli florets and cherry tomatoes. Cook for another 3-4 minutes until the broccoli is tender and the tomatoes are slightly softened.
  6. Slice the cooked chicken and return it to the skillet. Add the drained pasta, grated Parmesan cheese, and red pepper flakes (if you’re using them). Toss everything together until well combined and the cheese starts to melt.
  7. Serve hot, garnished with fresh parsley for that pop of color and flavor. Enjoy every bite!
Easy Garlic Parmesan Chicken Pasta Recipe for a Healthy Dinner

Pro Tips for the Best Results

To make sure your Garlic Parmesan Chicken Pasta turns out perfectly, here are a few pro tips:

  • Don’t overcook the pasta! It should be al dente, as it will continue to cook a little when you toss it in the skillet.
  • Feel free to experiment with the veggies! Zucchini, bell peppers, or spinach are great additions.
  • If you want a creamier sauce, you can add a splash of heavy cream or a dollop of cream cheese when mixing everything together.

Serving Suggestions

This dish is delightful on its own, but if you’re looking to elevate your meal even more, consider these serving suggestions:

  • Pair it with a simple side salad dressed in lemon vinaigrette for a refreshing contrast.
  • Serve it with garlic bread to soak up any leftover sauce—trust me, you won’t want to waste a drop!
  • For a bit of crunch, sprinkle some toasted pine nuts or walnuts on top before serving.

Storage and Make-Ahead Tips

If you find yourself with leftovers (which I highly doubt!), here’s how to store and reheat your pasta:

  • Store in an airtight container in the refrigerator for up to 3 days. Just be sure it cools completely before sealing.
  • To reheat, add a splash of water or broth in a skillet over medium heat to help loosen up the pasta.
  • You can also freeze this dish! Just make sure to use a freezer-safe container. It should keep well for up to 2 months. Thaw overnight in the fridge before reheating.

And there you have it! A wholesome bowl of comfort that’s easy to make and impossible to resist. I hope this Easy Garlic Parmesan Chicken Pasta becomes a favorite in your home as it has in mine. Happy cooking, my friends! Until next time, keep stirring up that magic in your kitchen!

Easy Garlic Parmesan Chicken Pasta Recipe for a Healthy Dinner

Prep Time 10 minutes
Cook Time 20 minutes
Total Time 30 minutes
Servings 4 servings
Calories 550
A quick and nutritious pasta dish featuring tender chicken, fresh vegetables, and a flavorful garlic Parmesan sauce, perfect for a healthy dinner.

Ingredients

Pasta

  • 8 oz whole grain pasta
  • 2 pieces boneless, skinless chicken breasts
  • 2 tablespoons olive oil
  • 4 cloves garlic, minced
  • 1 cup broccoli florets
  • 1 cup cherry tomatoes, halved
  • 1/2 cup grated parmesan cheese
  • 1 teaspoon salt
  • 1/2 teaspoon black pepper
  • 1/2 teaspoon red pepper flakes (optional)
  • 2 tablespoons fresh parsley, chopped (for garnish)

Instructions 

  • Cook pasta according to package; drain and set aside.
  • Heat olive oil in a skillet; cook seasoned chicken 5-7 mins per side, then rest.
  • Sauté garlic in the same skillet 1 min, add broccoli and tomatoes; cook 3-4 mins.
  • Slice chicken, add to skillet with pasta, Parmesan, and red pepper flakes; toss to combine.
  • Serve hot, garnished with parsley.

Notes

For extra flavor, add a squeeze of lemon before serving.
Calories: 550kcal
Cost: $15
Course: Main Course
Cuisine: American
Keyword: Chicken, healthy, pasta

Loved this recipe? Save it to your favorite Pinterest board so you can easily find it later! It’s the perfect way to keep all your sweet ideas in one place. ✨

Easy Garlic Parmesan Chicken Pasta Recipe for a Healthy Dinner

Welcome to my cozy corner of the internet! I’m Ava, and if you’ve found yourself here, you’re in for a treat. Today, I’m excited to share a recipe that has become a beloved staple in my kitchen: Slow Cooker Lemon Herb Chicken and Rice. This dish is like a warm hug on a plate, perfect for those busy days when you still want to serve up something delicious and comforting. Growing up in Oregon, my mom always had a way of turning simple ingredients into magic, and this recipe is a reflection of that tradition. With the zesty brightness of lemon and the heartiness of chicken and rice, it’s truly a bowl of sunshine.

Imagine coming home after a long day, opening the door to the inviting aroma of garlic and herbs wafting through your house. That’s the kind of magic this slow cooker meal brings. It’s not just a meal; it’s a moment to pause, to savor, and to connect with loved ones around the dinner table. So, grab your favorite bowl and let’s dive into this delightful recipe!

Why You’ll Absolutely Love This Slow Cooker Lemon Herb Chicken and Rice

There’s something truly special about a dish that makes you feel good, and this one does just that. Here’s why I think you’ll love it:

  • It’s a one-pot wonder that makes cleanup a breeze—no need to dirty multiple dishes!
  • The slow cooker does all the heavy lifting, allowing you to focus on what really matters—spending time with family or catching up on your favorite show.
  • The combination of lemon and herbs brings a fresh, vibrant flavor that’s perfect for any season.
  • It’s easily customizable! Feel free to add your favorite veggies or spices to make it your own.

Ingredients You’ll Need

Let’s talk about the ingredients that bring this dish to life. Each one plays a crucial role in creating that delightful harmony of flavors. Here’s what you’ll need:

  • 4 boneless, skinless chicken breasts
  • 1 cup long-grain white rice
  • 2 cups chicken broth
  • 1 lemon (zested and juiced)
  • 2 cloves garlic (minced)
  • 1 teaspoon dried thyme
  • 1 teaspoon dried rosemary
  • 1 teaspoon salt
  • 1/2 teaspoon black pepper
  • 1 cup frozen peas
  • 2 tablespoons olive oil
  • Fresh parsley (for garnish)

You’ll find the full ingredient list with measurements in the recipe card below!

How to Make This Slow Cooker Lemon Herb Chicken and Rice, Step-by-Step

Ready to whip up this cozy dish? Let’s break it down step-by-step. Trust me, it’s as easy as pie (or should I say chicken and rice?).

1. Start by adding the olive oil to your slow cooker. This will help keep everything moist and flavorful. Then, place the chicken breasts right on top of the oil. Don’t worry about them being perfect; they’ll get all cozy in the cooker!

2. In a separate bowl, mix together the lemon juice, lemon zest, minced garlic, thyme, rosemary, salt, and pepper. This zesty mixture is going to infuse the chicken with incredible flavor, so don’t skip this step! Pour it over the chicken, making sure each piece gets a good coating.

3. Now, it’s time for the rice and chicken broth. Add the rice to the slow cooker, followed by the broth. Give it a gentle stir to combine everything without disturbing the chicken too much.

4. Cover the slow cooker and set it to cook on low for 6-7 hours or on high for 3-4 hours. This is the magic part—while you go about your day, the slow cooker will work its wonders.

5. About 30 minutes before serving, add the frozen peas. This will give them just enough time to warm up and maintain their vibrant color.

6. Once the cooking time is up, take two forks and shred the chicken right in the slow cooker. Mix everything together, allowing the rice to soak up all that delicious lemony goodness.

7. Serve hot, garnished with fresh parsley for that lovely pop of color. Enjoy every bite!

Slow Cooker Lemon Herb Chicken and Rice

Pro Tips for the Best Results

Here are a few of my favorite tips to ensure your Slow Cooker Lemon Herb Chicken and Rice turns out perfectly:

  • For extra flavor, consider marinating the chicken in the lemon herb mixture for a few hours (or overnight) before cooking.
  • If you prefer a creamier texture, stir in a splash of heavy cream or a dollop of sour cream just before serving.
  • Feel free to swap out the chicken for thighs if you love a bit more richness or use a mix of vegetables for added nutrition.

Serving Suggestions

This dish is delicious on its own, but here are a few creative ideas to elevate your meal:

  • Serve with a simple green salad dressed in a light vinaigrette to balance the richness of the chicken.
  • Pair it with crusty bread to soak up the savory broth—trust me, it’s heavenly!
  • A sprinkle of feta cheese or a dollop of Greek yogurt can add a delightful tang that complements the lemon beautifully.

Storage and Make-Ahead Tips

If you’re planning to make this ahead of time or have leftovers (which is a win!), here’s how to store it:

  • Store any leftovers in an airtight container in the fridge for up to 3-4 days.
  • This dish can also be frozen! Just make sure to cool it completely before transferring to freezer-safe containers. It should keep well for up to 3 months.
  • When ready to enjoy, simply thaw overnight in the fridge and reheat in the microwave or on the stovetop until warmed through.

And there you have it! A cozy bowl of sunshine that brings warmth and joy to your table. I hope you enjoy making this recipe as much as I do. Remember, cooking is all about love and experimentation, so don’t hesitate to make it your own. Happy cooking!

Slow Cooker Lemon Herb Chicken and Rice

Prep Time 10 minutes
Cook Time 4 hours
Total Time 4 hours 10 minutes
Servings 4 servings
Calories 450
A flavorful and easy-to-make slow cooker dish combining tender chicken, fragrant herbs, and rice, perfect for a comforting meal.

Ingredients

Protein

  • 4 pieces boneless, skinless chicken breasts

Grains

  • 1 cup long-grain white rice

Broth & Liquids

  • 2 cups chicken broth
  • 1 piece lemon (zested and juiced)

Aromatics & Herbs

  • 2 cloves garlic (minced)
  • 1 teaspoon dried thyme
  • 1 teaspoon dried rosemary
  • 1 teaspoon salt
  • 0.5 teaspoon black pepper

Vegetables

  • 1 cup frozen peas

Fats & Oils

  • 2 tablespoons olive oil

Garnish

  • to taste fresh parsley (for garnish)

Instructions 

  • Add olive oil to slow cooker, then place chicken on top.
  • Mix lemon juice, zest, garlic, thyme, rosemary, salt, and pepper; pour over chicken.
  • Add rice and chicken broth; stir gently.
  • Cook on low 6-7 hours or high 3-4 hours.
  • 30 minutes before serving, add peas; shred chicken and mix.
  • Serve hot, garnished with parsley.

Notes

For extra flavor, add a squeeze of fresh lemon before serving.
Calories: 450kcal
Cost: $15
Course: Main Course
Cuisine: American
Keyword: Chicken, lemon, Rice

Loved this recipe? Save it to your favorite Pinterest board so you can easily find it later! It’s the perfect way to keep all your sweet ideas in one place. ✨

Slow Cooker Lemon Herb Chicken and Rice

Hi there, fellow food lovers! My name’s Ava, and if you’ve stumbled upon my kitchen, you’re probably here for one thing—the kind of recipes that make people pause mid-bite and say, ‘Wow.’ Growing up in a small town in Oregon, the smell of fresh bread and roasted vegetables often drifted out of my mother’s kitchen window. Cooking was more than just a necessity; it was an art form, a way to express love, and a means of connection. I can still remember the thrill of stirring a pot of chili while my friends rode their bikes outside. It wasn’t just about the food; it was about the joy it brought to the table.

Now, as I navigate my 30s in the vibrant city of Seattle, my kitchen has become my sanctuary. I’ve learned that the best recipes are not necessarily the fancier ones—they’re the ones that feel like a warm hug, the ones you make repeatedly because they just work. Today, I’m excited to share a recipe that perfectly encapsulates that spirit: Cheesy Garlic Chicken Wraps. Trust me, these wraps are not just a meal; they’re a flavor-packed adventure that will wrap your taste buds in a cozy embrace!

Why You’ll Absolutely Love This Cheesy Garlic Chicken Wraps – The Ultimate Flavor Explosion!

Let me tell you, these Cheesy Garlic Chicken Wraps are everything you want in a meal—quick, delicious, and oh-so-satisfying. Here’s why they’ll become your new go-to:

  • They’re incredibly easy to prepare, making them perfect for a fast weeknight dinner.
  • Loaded with cheesy goodness and garlic flavor, they’re a crowd-pleaser that will impress your family and friends.
  • Versatile and customizable, you can mix and match ingredients based on what you have on hand.
  • They’re budget-friendly, allowing you to create a delightful meal without breaking the bank!

Ingredients You’ll Need

Now, let’s talk about the star players in this recipe. The ingredients are simple yet packed with flavor! You’ll need:

  • 2 cups cooked chicken, shredded – I love using leftover rotisserie chicken for convenience, but any cooked chicken works great!
  • 1 cup shredded mozzarella cheese – Because who doesn’t love melty cheese? It adds that gooey texture we crave.
  • 1/2 cup cream cheese, softened – This gives the wraps a creamy richness that balances the flavors beautifully.
  • 3 cloves garlic, minced – Fresh garlic is a must; it brings an aromatic punch that fills your kitchen with irresistible smells!
  • 1 teaspoon garlic powder – A little extra garlic never hurt anyone!
  • 1 teaspoon Italian seasoning – This adds a hint of herby goodness.
  • Salt and pepper to taste – Essential for enhancing all the flavors.
  • 4 large tortillas – Flour or whole wheat, whichever you prefer.
  • 1 cup spinach leaves – For a pop of color and healthiness!
  • 1/2 cup diced tomatoes – Freshness in every bite!
  • 1/4 cup chopped fresh parsley – This brightens up the wraps and adds a lovely finishing touch.

You’ll find the full ingredient list with measurements in the recipe card below!

How to Make This Cheesy Garlic Chicken Wraps – The Ultimate Flavor Explosion!, Step-by-Step

Ready to get cooking? Let’s bring these wraps to life!

  1. In a large bowl, combine the shredded chicken, mozzarella cheese, cream cheese, minced garlic, garlic powder, Italian seasoning, salt, and pepper. Mix until well combined—don’t be afraid to get your hands in there!
  2. Lay out the tortillas on a clean surface. Spread a generous amount of the cheesy chicken mixture evenly over each tortilla. Don’t skimp; this is where the magic happens!
  3. Top each tortilla with a handful of spinach leaves, diced tomatoes, and chopped parsley. These fresh ingredients not only add flavor but also a beautiful contrast to the creamy filling.
  4. Carefully roll up each tortilla tightly to form wraps. If you like, slice them in half for easier handling.
  5. Heat a skillet over medium heat and place the wraps seam side down. Cook for 2-3 minutes on each side until golden and crispy. You want that delicious crunch!
  6. Remove from the skillet and let cool for a minute before serving. Enjoy your cheesy garlic chicken wraps!
Cheesy Garlic Chicken Wraps – The Ultimate Flavor Explosion!

Pro Tips for the Best Results

Here are a few tips I’ve picked up along the way to ensure your wraps turn out perfectly:

  • For extra flavor, consider marinating your chicken in garlic and herbs before cooking. It makes a world of difference!
  • If you prefer a little heat, add some crushed red pepper flakes to the cheesy mixture.
  • Don’t rush the cooking process! A medium heat allows the wraps to crisp up nicely without burning.

Serving Suggestions

These wraps are versatile and can be enjoyed in various ways! Here are a few ideas:

  • Serve them with a side of homemade ranch or garlic dipping sauce for an extra layer of flavor.
  • Pair with a fresh side salad or some roasted veggies for a complete meal.
  • For a fun twist, cut them into bite-sized pieces and serve them as appetizers at your next gathering!

Storage and Make-Ahead Tips

If you find yourself with leftovers (which is rare, but it happens!), here’s how to store them:

  • Wrap any uneaten wraps tightly in plastic wrap or aluminum foil and store them in the refrigerator for up to 3 days.
  • You can also freeze them! Just wrap them individually and place them in a freezer-safe bag. They’ll keep for up to 2 months. To reheat, simply thaw overnight in the fridge and heat in a skillet until warmed through.

So there you have it, my friends! A simple yet delightful recipe that brings joy and flavor to your table. I hope you enjoy making these Cheesy Garlic Chicken Wraps as much as I do. Remember, cooking is all about having fun and experimenting, so don’t hesitate to add your own twists. Happy cooking!

Cheesy Garlic Chicken Wraps – The Ultimate Flavor Explosion!

Prep Time 10 minutes
Cook Time 10 minutes
Total Time 20 minutes
Servings 4 servings
Calories 550
Enjoy these flavorful cheesy garlic chicken wraps, packed with savory ingredients and crispy texture for a satisfying meal.

Ingredients

Protein

  • 2 cups cooked chicken, shredded
  • 1 cup shredded mozzarella cheese
  • 1/2 cup cream cheese, softened
  • 3 cloves garlic, minced
  • 1 teaspoon garlic powder
  • 1 teaspoon italian seasoning
  • to taste salt and pepper

Wraps

  • 4 large tortillas large tortillas
  • 1 cup spinach leaves
  • 1/2 cup diced tomatoes
  • 1/4 cup chopped fresh parsley

Instructions 

  • Mix shredded chicken, mozzarella, cream cheese, garlic, garlic powder, Italian seasoning, salt, and pepper.
  • Spread mixture on tortillas, then top with spinach, tomatoes, and parsley.
  • Roll up tortillas tightly, then cook seam side down in a skillet for 2-3 minutes per side until golden.
  • Remove from skillet, let cool briefly, then serve.

Notes

For extra flavor, add a dash of hot sauce or your favorite herbs.
Calories: 550kcal
Cost: $15
Course: Main Course
Cuisine: American
Keyword: Chicken

Loved this recipe? Save it to your favorite Pinterest board so you can easily find it later! It’s the perfect way to keep all your sweet ideas in one place. ✨

Cheesy Garlic Chicken Wraps – The Ultimate Flavor Explosion!

Welcome to my cozy corner of the kitchen, where the aroma of delicious meals dances in the air and every recipe tells a story. If you’re anything like me, you know that life can get a bit hectic—between work, family, and all those little things that seem to pop up out of nowhere. That’s why I’m thrilled to share my Dump and Go Crockpot Teriyaki Chicken with you. This dish has become my go-to for busy weeknights when I want something comforting yet ridiculously easy to whip up. I can almost hear the collective sigh of relief from my family as this delightful meal fills the house with its sweet and savory scent.

Growing up in Oregon, I learned to appreciate the beauty of simple, hearty meals that bring everyone to the table. Now, living in Seattle, I’ve made it my mission to create recipes that not only taste incredible but also invite a little magic into our everyday lives. This crockpot recipe embodies that spirit perfectly. It’s all about throwing a few ingredients into the pot, letting time work its magic, and serving a meal that makes everyone pause mid-bite and say, ‘Wow.’

Why You’ll Absolutely Love This Dump and Go Crockpot Teriyaki Chicken

This recipe has quickly become a staple in our home, and I think it will in yours too! Here’s why:

  • Effortless Preparation: Just dump the ingredients in, set the timer, and forget about it. It’s that easy!
  • Flavor Explosion: The combination of teriyaki sauce, honey, and ginger creates a sweet and savory glaze that’s simply irresistible.
  • Kid-Friendly: This dish is a hit with kids and adults alike—perfect for those picky eaters!
  • Versatile: Serve it over rice, in a wrap, or even with a side of steamed veggies. The options are endless!

Ingredients You’ll Need

Let’s talk about the star players in this delightful dish. The ingredients are simple, yet they come together to create a meal that feels anything but ordinary. You’ll need:

  • 2 lbs boneless, skinless chicken thighs
  • 1 cup teriyaki sauce
  • 1/2 cup honey
  • 1/4 cup soy sauce
  • 1 tablespoon minced garlic
  • 1 tablespoon minced ginger
  • 1 cup chopped bell peppers (optional)
  • 1 cup chopped broccoli (optional)
  • Cooked rice for serving
  • Sesame seeds for garnish (optional)
  • Green onions for garnish (optional)

Each ingredient plays a role in creating that rich, comforting flavor I’m always after. The chicken thighs are juicy and tender, while the teriyaki sauce and honey give it that sweet glaze that’s just to die for. And don’t even get me started on the optional veggies—they add a lovely crunch and a pop of color!

You’ll find the full ingredient list with measurements in the recipe card below!

How to Make This Dump and Go Crockpot Teriyaki Chicken, Step-by-Step

Now, let’s get to the fun part—making this dish! It’s as easy as 1-2-3:

  1. Place the chicken thighs in the crockpot. Don’t worry about trimming; they’ll cook down beautifully.
  2. In a bowl, mix together the teriyaki sauce, honey, soy sauce, minced garlic, and minced ginger. This sauce is where the magic happens!
  3. Pour the sauce mixture over the chicken in the crockpot, making sure each piece is generously coated.
  4. If you’re feeling adventurous, add in the chopped bell peppers and broccoli for an extra veggie boost.
  5. Cover and cook on low for 6-7 hours or high for 3-4 hours. The smell alone will have you dreaming of dinner!
  6. Once cooked, shred the chicken with two forks and stir it back into the sauce. This is when the flavors meld together beautifully.
  7. Serve over cooked rice and garnish with sesame seeds and green onions if desired. Voila!
Dump and Go Crockpot Teriyaki Chicken

Pro Tips for the Best Results

To ensure your crockpot teriyaki chicken turns out perfectly, here are a few tips from my kitchen to yours:

  • Use Chicken Thighs: They stay juicy and tender, unlike chicken breasts that can dry out in the crockpot.
  • Customize Your Veggies: Feel free to swap in your favorite vegetables. Snap peas, carrots, or even zucchini would work wonderfully!
  • Extra Sauce: If you love a saucy dish, consider doubling the sauce ingredients. You can use the extra for dipping or drizzling over your rice.

Serving Suggestions

Now that your teriyaki chicken is ready, it’s time to think about how to serve it. Here are a few ideas to elevate your meal:

  • Serve it over fluffy white or brown rice for a classic pairing.
  • Wrap it in lettuce leaves for a low-carb option, perfect for a fresh and crunchy bite!
  • Pair it with a side of steamed edamame or a simple cucumber salad for a refreshing contrast.
  • Top with extra sesame seeds and sliced green onions for that gourmet touch.

Storage and Make-Ahead Tips

One of the best things about this recipe is that it’s great for meal prep! Here’s how to store and reheat:

  • Storage: Once cooled, store the chicken in an airtight container in the fridge for up to 4 days.
  • Freezing: You can freeze the cooked chicken for up to 3 months. Just make sure to let it cool completely before transferring to freezer-safe containers.
  • Reheating: Reheat in the microwave or stovetop with a splash of water or extra sauce to keep it moist.

And there you have it! My Dump and Go Crockpot Teriyaki Chicken is not just a meal; it’s an experience that brings warmth and joy to the table. Whether you’re cooking for your family, hosting friends, or just treating yourself, I hope this dish becomes a beloved addition to your kitchen. Happy cooking, and may your kitchen always be filled with love and laughter!

Dump and Go Crockpot Teriyaki Chicken

Prep Time 10 minutes
Cook Time 4 hours
Total Time 4 hours 10 minutes
Servings 4 servings
Calories 350
This easy crockpot recipe delivers tender, flavorful teriyaki chicken with minimal effort, perfect for a quick weeknight dinner.

Ingredients

Protein

  • 2 lbs boneless, skinless chicken thighs

Sauce

  • 1 cup teriyaki sauce
  • 0.5 cup honey
  • 0.25 cup soy sauce
  • 1 tablespoon minced garlic
  • 1 tablespoon minced ginger

Vegetables (optional)

  • 1 cup chopped bell peppers (optional)
  • 1 cup chopped broccoli (optional)

For serving

  • as needed cooked rice (for serving)
  • for garnish sesame seeds, green onions (optional)

Instructions 

  • Place chicken in crockpot.
  • Mix teriyaki sauce, honey, soy sauce, garlic, and ginger; pour over chicken.
  • Add vegetables if using; cook on low 6-7 hours.
  • Shred chicken and stir to coat with sauce.
  • Serve over rice, garnish with sesame seeds and green onions if desired.

Notes

For extra flavor, marinate the chicken in the sauce overnight.
Calories: 350kcal
Cost: $15
Course: Main Course
Cuisine: Asian
Keyword: Chicken

Loved this recipe? Save it to your favorite Pinterest board so you can easily find it later! It’s the perfect way to keep all your sweet ideas in one place. ✨

Dump and Go Crockpot Teriyaki Chicken

Welcome to my kitchen, friends! Today, I’m thrilled to share with you a recipe that has quickly become a staple in my home: the Bang Bang Chicken Bowl. Picture this: tender chicken, vibrant veggies, and a creamy, spicy sauce all nestled atop a bed of fluffy rice. It’s the kind of dish that brings joy with every bite, making you pause and say, ‘Wow!’ just like those cherished meals from my childhood. Growing up in Oregon, my family had a knack for turning simple ingredients into something magical, and this bowl is no exception.

Whether you’re cooking for a cozy dinner with loved ones or whipping up something quick for a weeknight meal, this dish fits the bill perfectly. It’s colorful, satisfying, and bursting with flavor. Plus, it takes less than 30 minutes to pull together! So grab your spatula, and let’s dive into this delightful fusion of spicy, sweet, and savory flavors that will make your taste buds dance.

Why You’ll Absolutely Love This Bang Bang Chicken Bowl

This dish isn’t just a meal; it’s an experience! Here’s why you’ll fall head over heels for it:

  • Quick and Easy: Perfect for busy weeknights, this bowl comes together in a flash without sacrificing flavor.
  • Flavor Explosion: The combination of creamy mayo, sweet chili sauce, and a hint of sriracha creates a sauce that you’ll want to drizzle on everything.
  • Customizable: Feel free to swap in your favorite veggies or protein to make it your own. It’s versatile and adaptable!
  • One Bowl Wonder: Who doesn’t love a meal that’s as easy to serve as it is to eat? Everything you need is in one bowl!

Ingredients You’ll Need

Let’s talk ingredients! For this Bang Bang Chicken Bowl, I’ve chosen a few simple yet flavorful components that come together beautifully. The star of the show is the chicken, which I prefer to use fresh breast meat for its tenderness. The veggies—broccoli and carrots—add both color and crunch, while the rice serves as a comforting base. And of course, the Bang Bang sauce is what really ties everything together, bringing that addictive sweet and spicy kick.

You’ll find the full ingredient list with measurements in the recipe card below!

How to Make This Bang Bang Chicken Bowl, Step-by-Step

Ready to create some magic in your kitchen? Here’s how to make this Bang Bang Chicken Bowl, step by step:

  1. Start by mixing up the Bang Bang sauce. In a bowl, combine 1/2 cup mayonnaise, 1/4 cup sweet chili sauce, and if you’re feeling adventurous, 1 tablespoon sriracha for an extra kick. Give it a good stir and set it aside.
  2. Heat a drizzle of olive oil in a skillet over medium heat. Add 1 lb of diced chicken breast, seasoning it with salt and pepper. Cook until the chicken is golden brown and cooked through, about 5-7 minutes.
  3. In the same skillet, toss in 1 cup broccoli florets and 1/2 cup sliced carrots. Stir-fry for another 3-4 minutes until the veggies are tender but still vibrant.
  4. Now it’s time to assemble your bowl! In a serving dish, layer 1 cup cooked rice, followed by the sautéed chicken and veggies.
  5. Drizzle your homemade Bang Bang sauce generously over the top and finish with a sprinkle of 1/4 cup chopped green onions for that fresh touch.
  6. Serve immediately and watch everyone dive in with smiles on their faces!
Bang Bang Chicken Bowl

Pro Tips for the Best Results

Here are a few tips I’ve gathered along the way to ensure your Bang Bang Chicken Bowl turns out perfectly:

  • Don’t Overcrowd the Pan: When cooking the chicken, make sure not to overcrowd the skillet. This allows for a nice sear and keeps it juicy!
  • Customize Your Veggies: Feel free to swap out the broccoli and carrots for whatever you have on hand—snap peas, bell peppers, or even zucchini work beautifully!
  • Make It Ahead: If you’re meal prepping, keep the sauce separate until you’re ready to eat to maintain the freshness of the ingredients.

Serving Suggestions

While this Bang Bang Chicken Bowl is fantastic on its own, you can elevate it even further with a few creative serving ideas:

  • Top with Sesame Seeds: A sprinkle of sesame seeds adds a lovely crunch and a touch of elegance.
  • Fresh Herbs: Garnish with cilantro or basil for an extra burst of flavor and color.
  • Serve with Lime Wedges: A squeeze of fresh lime juice just before eating brightens up the flavors beautifully!

Storage and Make-Ahead Tips

Got leftovers? No problem! Here’s how to store and reheat your Bang Bang Chicken Bowl:

  • Refrigeration: Store any leftovers in an airtight container in the fridge for up to 3 days. The flavors will continue to meld together.
  • Freezing: While I recommend enjoying it fresh, you can freeze the chicken and veggies separately from the rice and sauce for up to a month. Just reheat and assemble when you’re ready!
  • Reheating: To reheat, warm in a skillet over low heat, adding a splash of water to keep it moist, or microwave until heated through.

Bang Bang Chicken Bowl

Prep Time 10 minutes
Cook Time 15 minutes
Total Time 25 minutes
Servings 4 servings
Calories 550
A flavorful and easy-to-make chicken bowl featuring a spicy, creamy sauce and fresh vegetables.

Ingredients

Protein

  • 1 lb chicken breast, diced

Carbohydrates

  • 1 cup cooked rice

Vegetables

  • 1 cup broccoli florets
  • 1/2 cup carrots, sliced

Dairy & Sauces

  • 1/4 cup mayonnaise
  • 1/4 cup sweet chili sauce
  • 1 tablespoon sriracha (optional)

Seasonings

  • to taste salt and pepper

Cooking Oil

  • for cooking olive oil

Instructions 

  • Mix mayonnaise, sweet chili sauce, and sriracha to make the sauce.
  • Cook diced chicken in olive oil until golden and cooked through, about 5-7 minutes.
  • Add broccoli and carrots; stir-fry for 3-4 minutes until tender.
  • Layer rice, chicken, and vegetables in a bowl. Drizzle with sauce and garnish with green onions.

Notes

Feel free to add more sriracha for extra spice.
Calories: 550kcal
Cost: $15
Course: Main Course
Cuisine: Asian Fusion
Keyword: Chicken, Rice, vegetables

Loved this recipe? Save it to your favorite Pinterest board so you can easily find it later! It’s the perfect way to keep all your sweet ideas in one place. ✨

Bang Bang Chicken Bowl