Hey there, friend! Ava here, back in my Seattle kitchen, and ready to share a recipe that’s become a weeknight staple: Venison Fajitas. Now, I know what you might be thinking: venison can be tricky. But trust me, with the right marinade and a few simple tricks, you can transform even the toughest cut into something incredibly tender and flavorful. I grew up eating venison, my dad was an avid hunter in Oregon, and this recipe has been a family favorite for years. It’s quick, easy, and guaranteed to impress!
I remember one particular hunting season, my dad brought home a particularly large deer. My mom, ever resourceful, experimented with different ways to prepare it. Some were fantastic, others… well, let’s just say the dogs enjoyed them more than we did. But this fajita recipe? This was a winner from the start. Even my picky little brother devoured it. It’s a testament to the power of a good marinade and the magic that happens when you combine simple, fresh ingredients.
Why You’ll Love This Venison Fajitas Recipe
Seriously, what’s not to love? These venison fajitas are:
Quick and Easy: Ready in under an hour, perfect for busy weeknights.
Flavor-Packed: The marinade tenderizes the venison and infuses it with incredible flavor.
Versatile: Customize with your favorite toppings and sides.
Healthy: A lean and protein-rich meal.
Impressive: Guests will think you spent hours on this dish!
Honestly, the best part is seeing everyone’s faces light up when they take that first bite. It’s a dish that brings people together, a dish that feels like a celebration. And that’s what cooking is all about, right?
The Ingredients You’ll Need
Here’s what you’ll need to whip up these amazing venison fajitas:
1 Lb Venison Steak, thinly sliced
1/3 Cup Lime Juice
2 tablespoon Worcestershire Sauce
2 tablespoon Red grape juice Vinegar
5 tablespoon Olive Oil, divided
1 tablespoon Minced Garlic
1 teaspoon EACH Cumin, Chili Powder, and Salt
1/2 teaspoon Paprika
1/4 teaspoon EACH Black Pepper and Red Pepper Flakes
2 Medium Onions, sliced
1 Large Chili Pepper, sliced (ribs and seeds removed)
2-3 Bell Peppers (any color), sliced and seeds removed
Flour Tortillas, warmed
How to Make the BEST Venison Fajitas
Ready to get cooking? Here’s how to make these delicious fajitas:
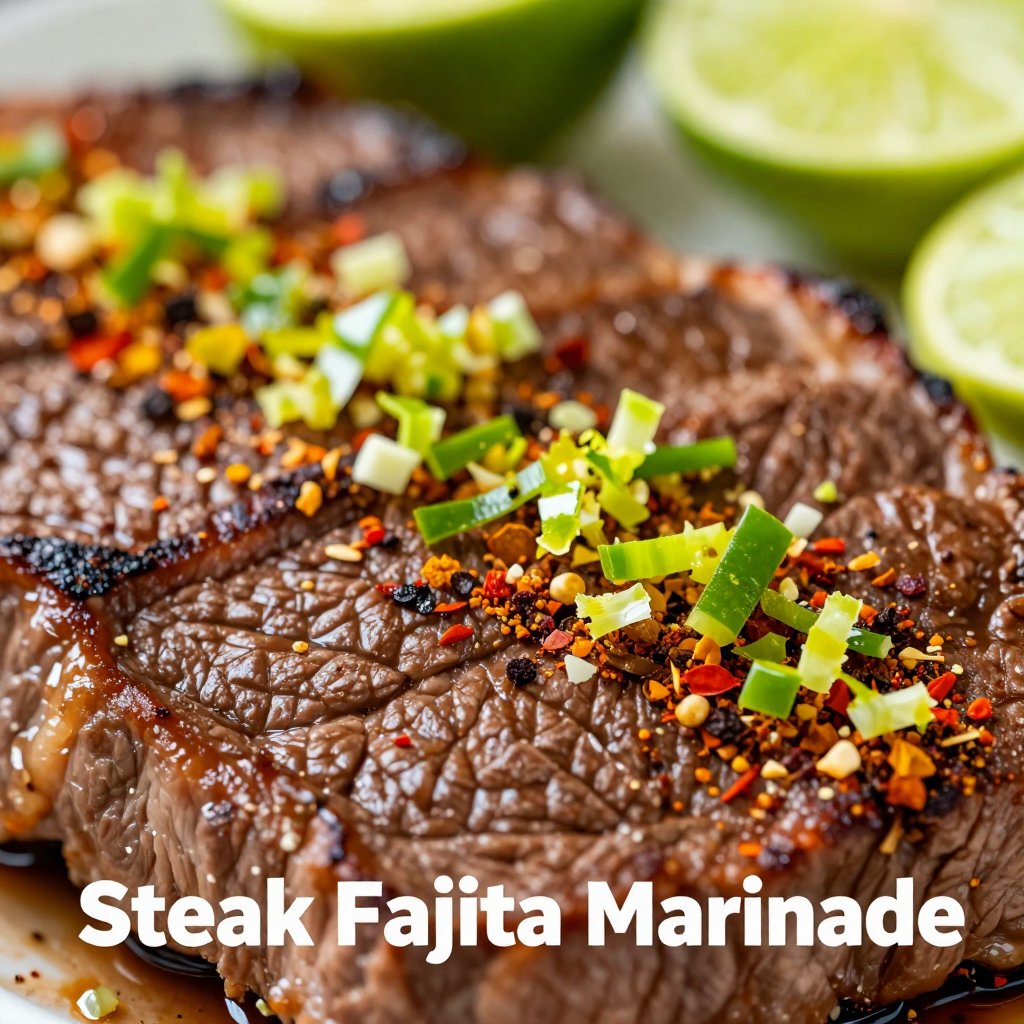
Slice venison thinly. In a large bowl combine lime juice, Worcestershire sauce, red grape juice vinegar, 3 tablespoons olive oil, minced garlic, cumin, chili powder, salt, paprika, black pepper, and red pepper flakes. Place the sliced venison steak in the marinade, cover the bowl with a lid, and refrigerate for at least 1 hour, or up to overnight. Remove from the refrigerator 30 minutes prior to cooking. The marinade is key to tenderizing the venison and infusing it with flavor.
Slice the vegetables while the meat and marinade come to room temperature.
In a large cast iron skillet, heat 1 tablespoon of olive oil over high heat. Discard marinade and working in batches, cook venison steak on each side for 1-2 minutes until it reaches the desired doneness and there is a nice char on the outside. Remove the steak from the pan and rest on a plate with tented aluminum foil. Remember you can always cook the meat longer, but you can’t uncook it!
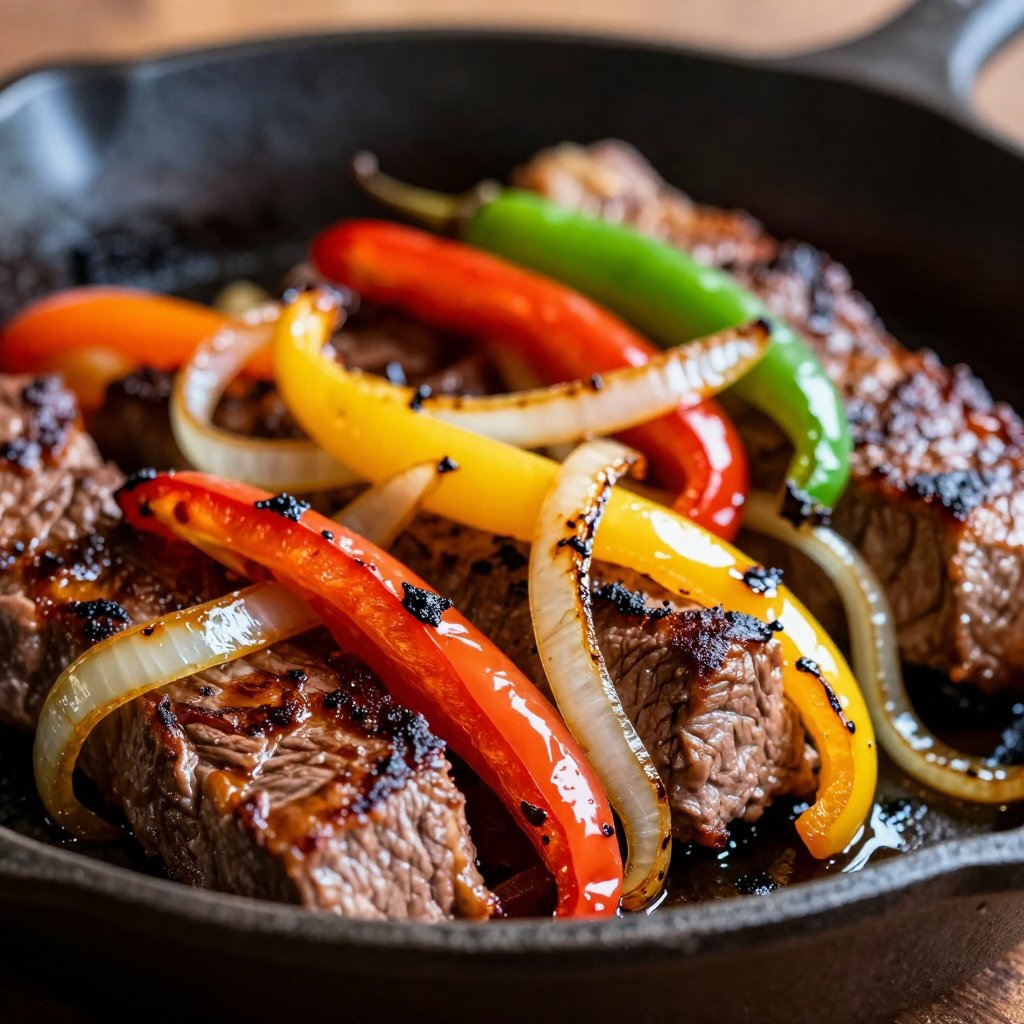
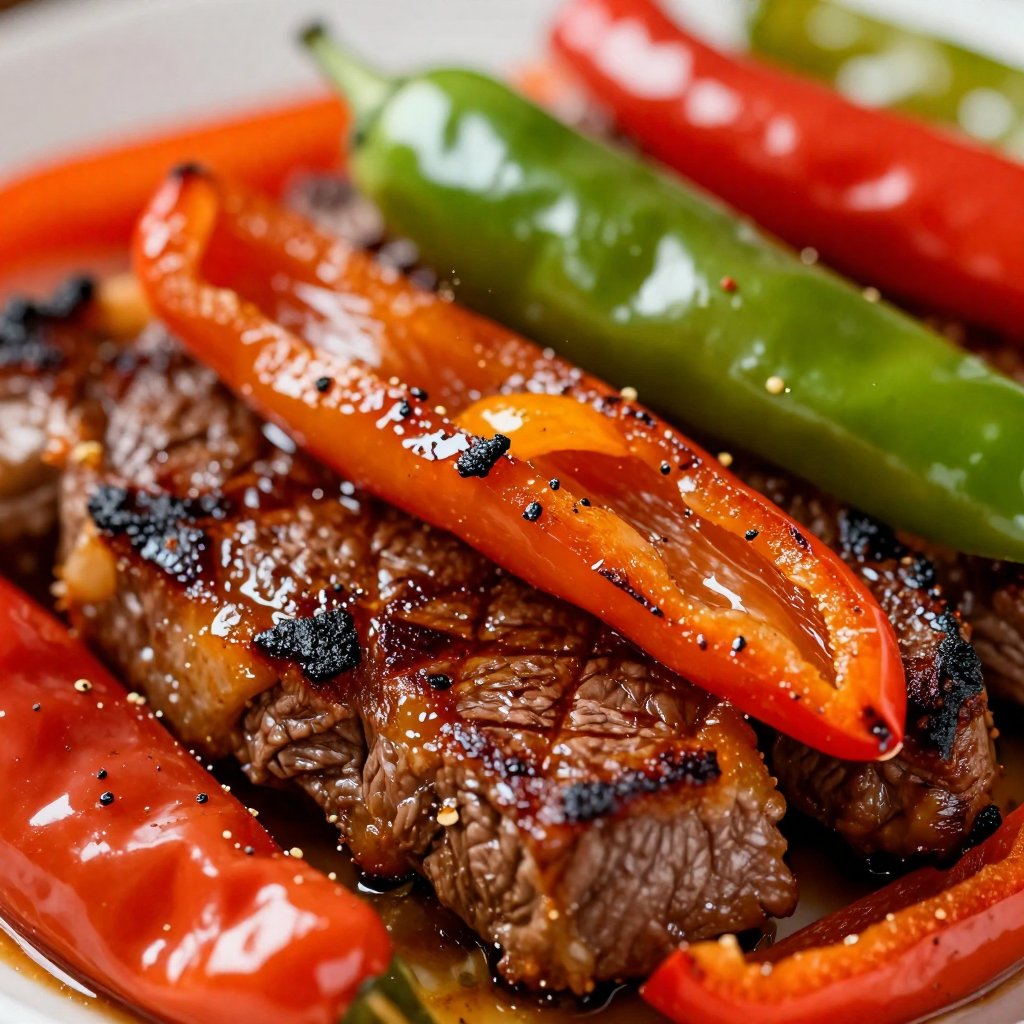
In the hot skillet, heat the remaining 1 tablespoon of olive oil and add in peppers and onions. Season them with a bit of salt and black pepper and cook for 2-3 minutes for crisp-tender, or longer if you want them softer. The peppers and onions add a delicious sweetness and texture to the fajitas.
Add the steak slices back into the pan with the vegetables and stir to combine.
Serve hot over hot tortillas. Top with your favorite toppings.
Pro Tips for Perfect Venison Fajitas
Want to take your venison fajitas to the next level? Here are a few of my favorite pro tips:
Slice the Venison Thinly: This is crucial for tender fajitas. Slicing against the grain will also help.
Don’t Overcook the Venison: Venison is best served medium-rare to medium. Overcooking will result in tough, dry meat.
Use a Hot Skillet: A hot skillet will give the venison a nice sear and prevent it from steaming.
Rest the Venison: Resting the venison after cooking allows the juices to redistribute, resulting in more tender and juicy meat.
Warm Your Tortillas: Warm tortillas are softer and more pliable, making them easier to roll and enjoy. You can warm them in a dry skillet, in the microwave, or even over an open flame (carefully!).
The goal is tender juicy venison and perfectly cooked vegetables, all wrapped up in a warm tortilla. It’s a symphony of flavors and textures!
Common Mistakes to Avoid
Even the best cooks make mistakes! Here are a few common pitfalls to watch out for when making venison fajitas:
Not Marinating Long Enough: The marinade is essential for tenderizing the venison. Don’t skimp on the marinating time!
Overcrowding the Skillet: Overcrowding the skillet will lower the temperature and prevent the venison from searing properly. Cook in batches for best results.
Using the Wrong Cut of Venison: Flank steak or rump steak are ideal for fajitas. Avoid tougher cuts that require longer cooking times.
Forgetting to Season: Don’t be afraid to season generously with salt, pepper, and other spices.
Learning from your mistakes is part of the fun! Don’t be discouraged if your first attempt isn’t perfect. Keep practicing, and you’ll be a venison fajita pro in no time.
Venison Fajitas Variations
Want to mix things up? Here are a few fun variations to try:
Spicy Fajitas: Add more red pepper flakes or a pinch of cayenne pepper to the marinade for extra heat.
Smoked Paprika: Use smoked paprika instead of regular paprika for a smoky flavor.
Mushroom Fajitas: Add sliced mushrooms to the skillet along with the peppers and onions.
Pineapple Fajitas: Add diced pineapple to the skillet for a sweet and tangy twist.
Different Marinades: Experiment with different marinades, such as a red wine marinade or a citrus marinade.
Don’t be afraid to get creative and experiment with different flavors and ingredients. The possibilities are endless!
How to Store Leftover Venison Fajitas
If you happen to have any leftovers (which is rare in my house!), here’s how to store them:
Refrigerate: Store leftover venison fajitas in an airtight container in the refrigerator for up to 3-4 days.
Reheat: Reheat in a skillet over medium heat or in the microwave.
Leftover venison fajitas are great for lunch the next day. You can use them in tacos, salads, or even omelets!
Frequently Asked Questions (FAQ)
Here are some frequently asked questions about venison fajitas:
What’s the best cut of venison for fajitas? Flank steak or rump steak are ideal.
How long should I marinate the venison? At least 1 hour, or up to overnight.
Can I use a different type of vinegar? Yes, you can use red wine vinegar or apple cider vinegar.
Can I use a different type of oil? Yes, you can use avocado oil or canola oil.
What are some good toppings for venison fajitas? Sour cream, guacamole, salsa, cheese, and cilantro are all great options.
If you have any other questions, feel free to ask in the comments below!
Serving Suggestions
Venison fajitas are delicious on their own, but here are a few serving suggestions to make it a complete meal:
Sides: Serve with rice, beans, or a side salad.
Toppings: Offer a variety of toppings, such as sour cream, guacamole, salsa, cheese, and cilantro.
Drinks: Pair with a cold beer, margarita, or sparkling water.
The most important thing is to enjoy your meal with friends and family. That’s what cooking is all about!
These venison fajitas are a fantastic way to use deer meat, offering a healthy and delicious deer dinner recipe that the whole family will love. Whether you’re looking for deer steak dinner ideas or simply exploring deer dinner recipes, this dish is sure to impress. For those focused on healthy options, these venison fajitas fit the bill perfectly as deer meat recipes healthy. And if you’re specifically seeking deer flank steak recipes or deer round steak recipes, remember that the key is in the preparation and the marinade to tenderize the meat effectively. So, next time you’re wondering about deer meat dinner ideas, remember these venison fajitas – they’re a guaranteed hit!
So there you have it – my go-to venison fajitas recipe! I hope you enjoy it as much as my family does. Happy cooking!
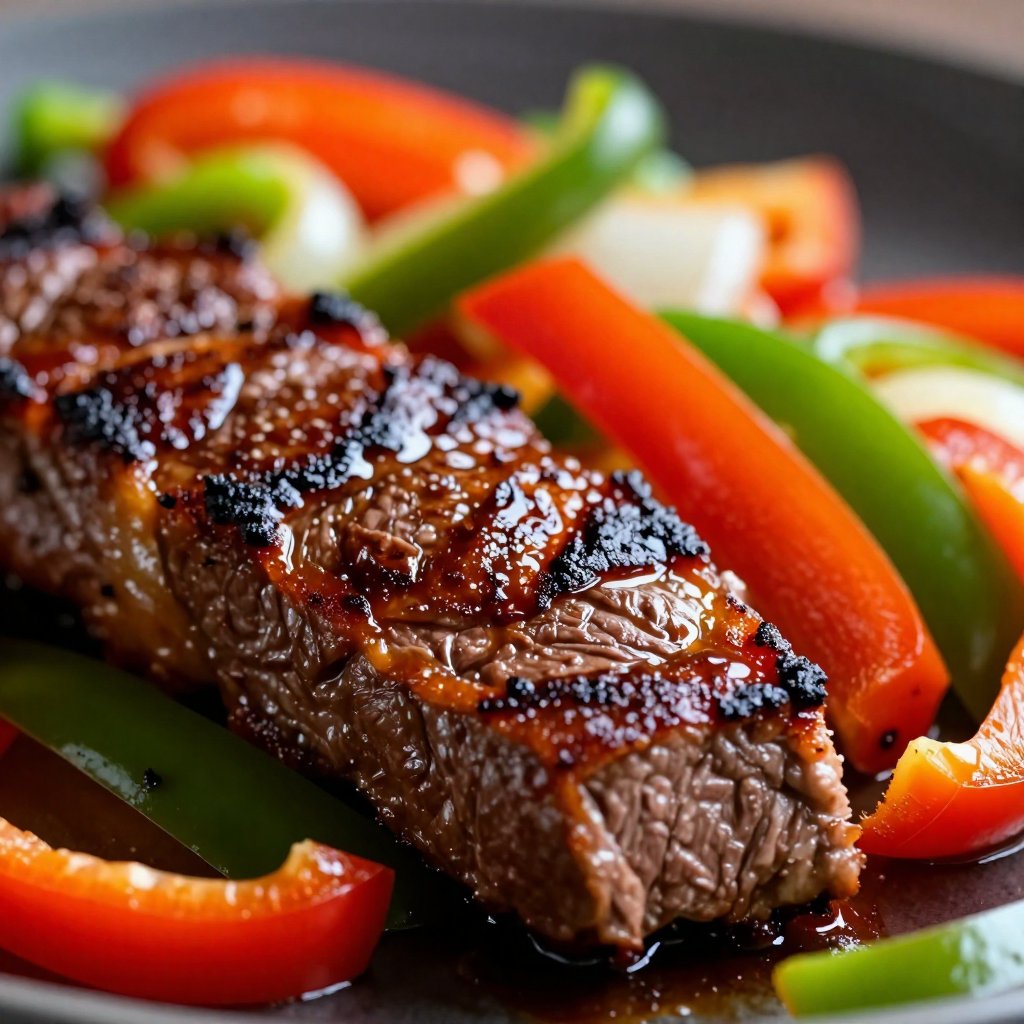
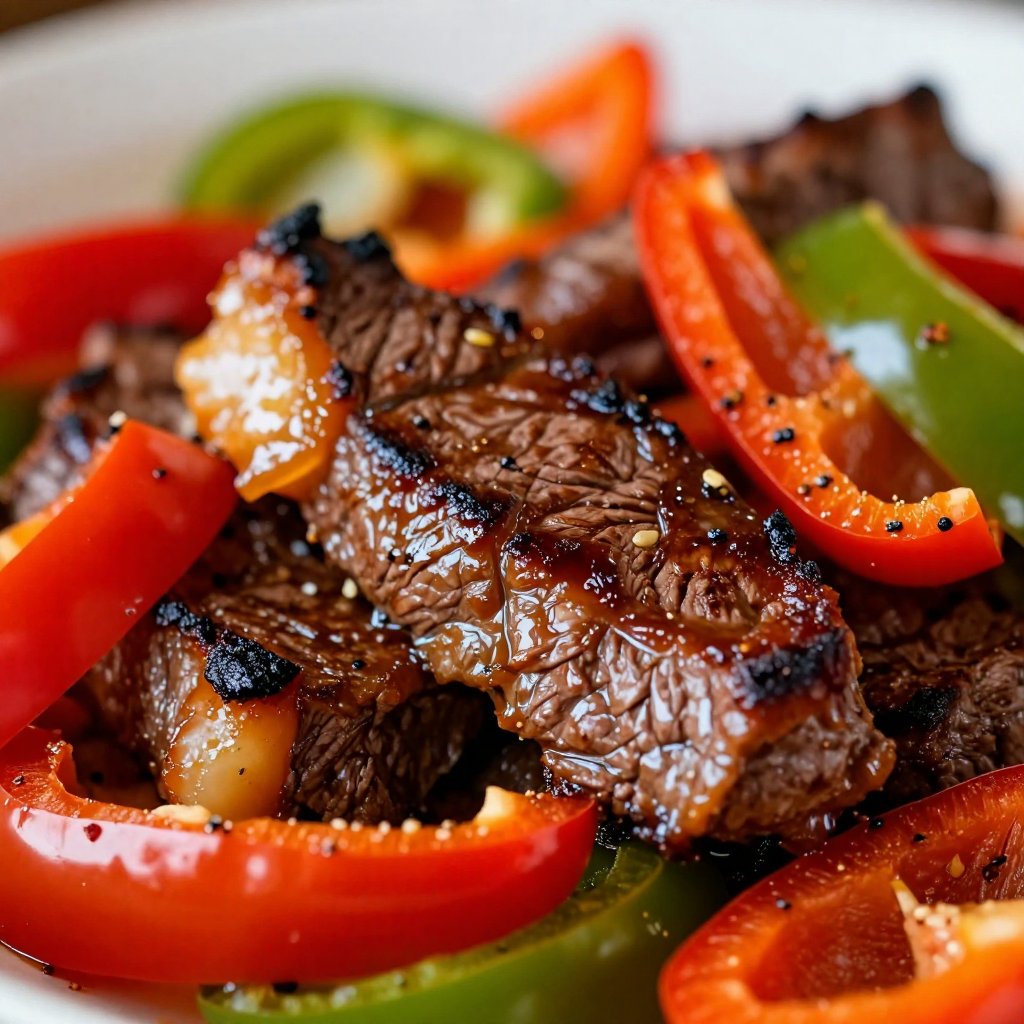
Hey there, friend! Ava here, back from my Seattle kitchen with a recipe that’s going to become a weeknight staple: Sizzling Steak Fajitas. If you’re anything like me, you crave those restaurant-style fajitas but cringe at the thought of the prep work. Well, those days are over! This recipe brings all the flavor and sizzle right to your kitchen, and it’s surprisingly easy, especially if you’re using an Instant Pot. Trust me; this will quickly become a family favorite. I remember the first time I made these for my friends. The aroma filled my apartment, and everyone gathered around the kitchen island, eagerly awaiting the first bite. The sound of ‘mmm’ and ‘wow’ filled the air. It was a total hit!
This recipe is perfect for busy weeknights when you want a delicious, satisfying meal without spending hours in the kitchen. And let me tell you, the Instant Pot makes this process ridiculously simple. No more standing over a hot stove, constantly stirring. Just set it, forget it, and let the magic happen. You’re going to love the juicy, tender steak and the perfectly cooked veggies. This is a great way to get dinner on the table quickly and efficiently. It’s a total game-changer.
Why You’ll Love This Recipe
Okay, let’s get real. Why should you spend your precious time making these fajitas? Here’s why:
Quick and Easy: From prep to plate in under 30 minutes. Yes, really!
Flavor Explosion: The marinade is a perfect blend of smoky, spicy, and savory.
Tender Steak: The Instant Pot makes the steak incredibly tender and juicy.
Versatile: Customize it with your favorite toppings and sides.
Crowd-Pleaser: Perfect for family dinners, casual get-togethers, or even a solo treat.
Minimal Cleanup: The Instant Pot reduces the number of dishes you have to wash.
I’ve always believed that the best recipes are the ones that are both delicious and easy to make. This one definitely fits the bill. You’re going to love how simple it is to throw together, and the flavor will blow you away. I promise!
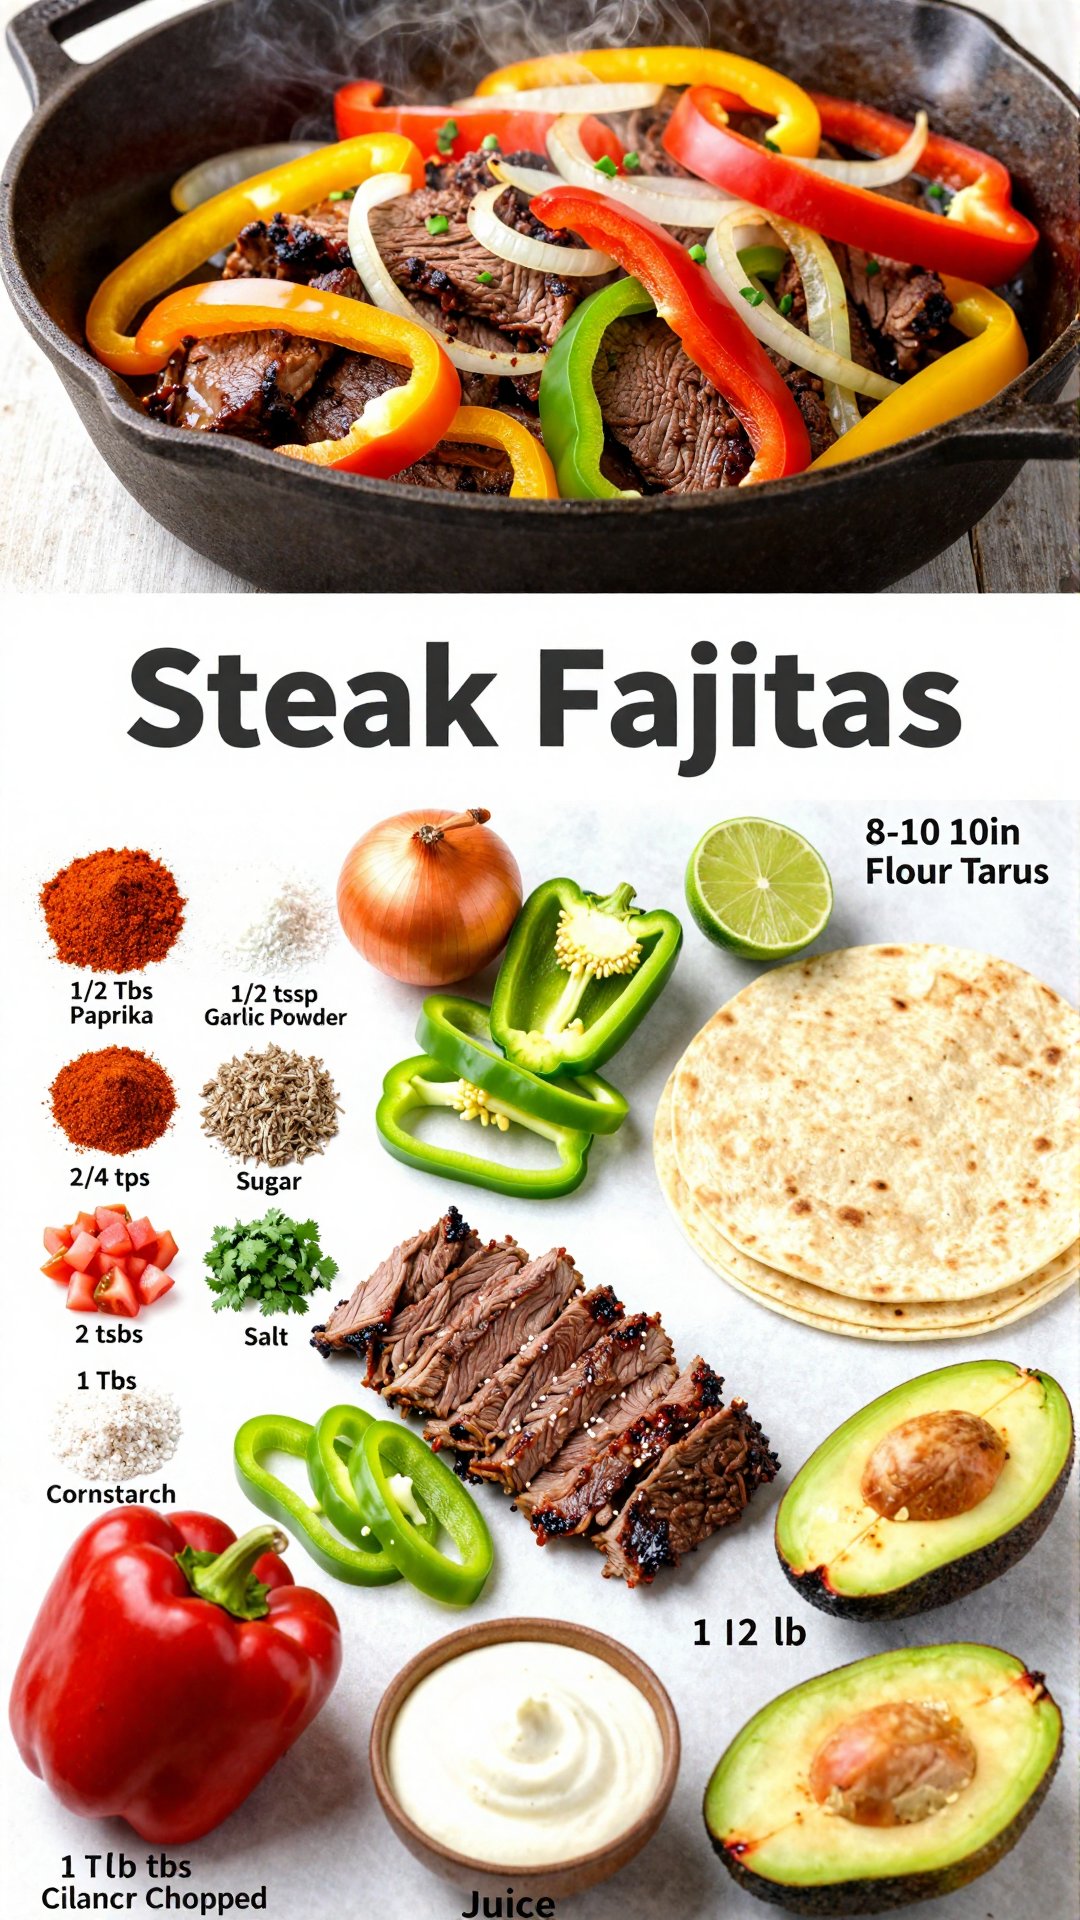
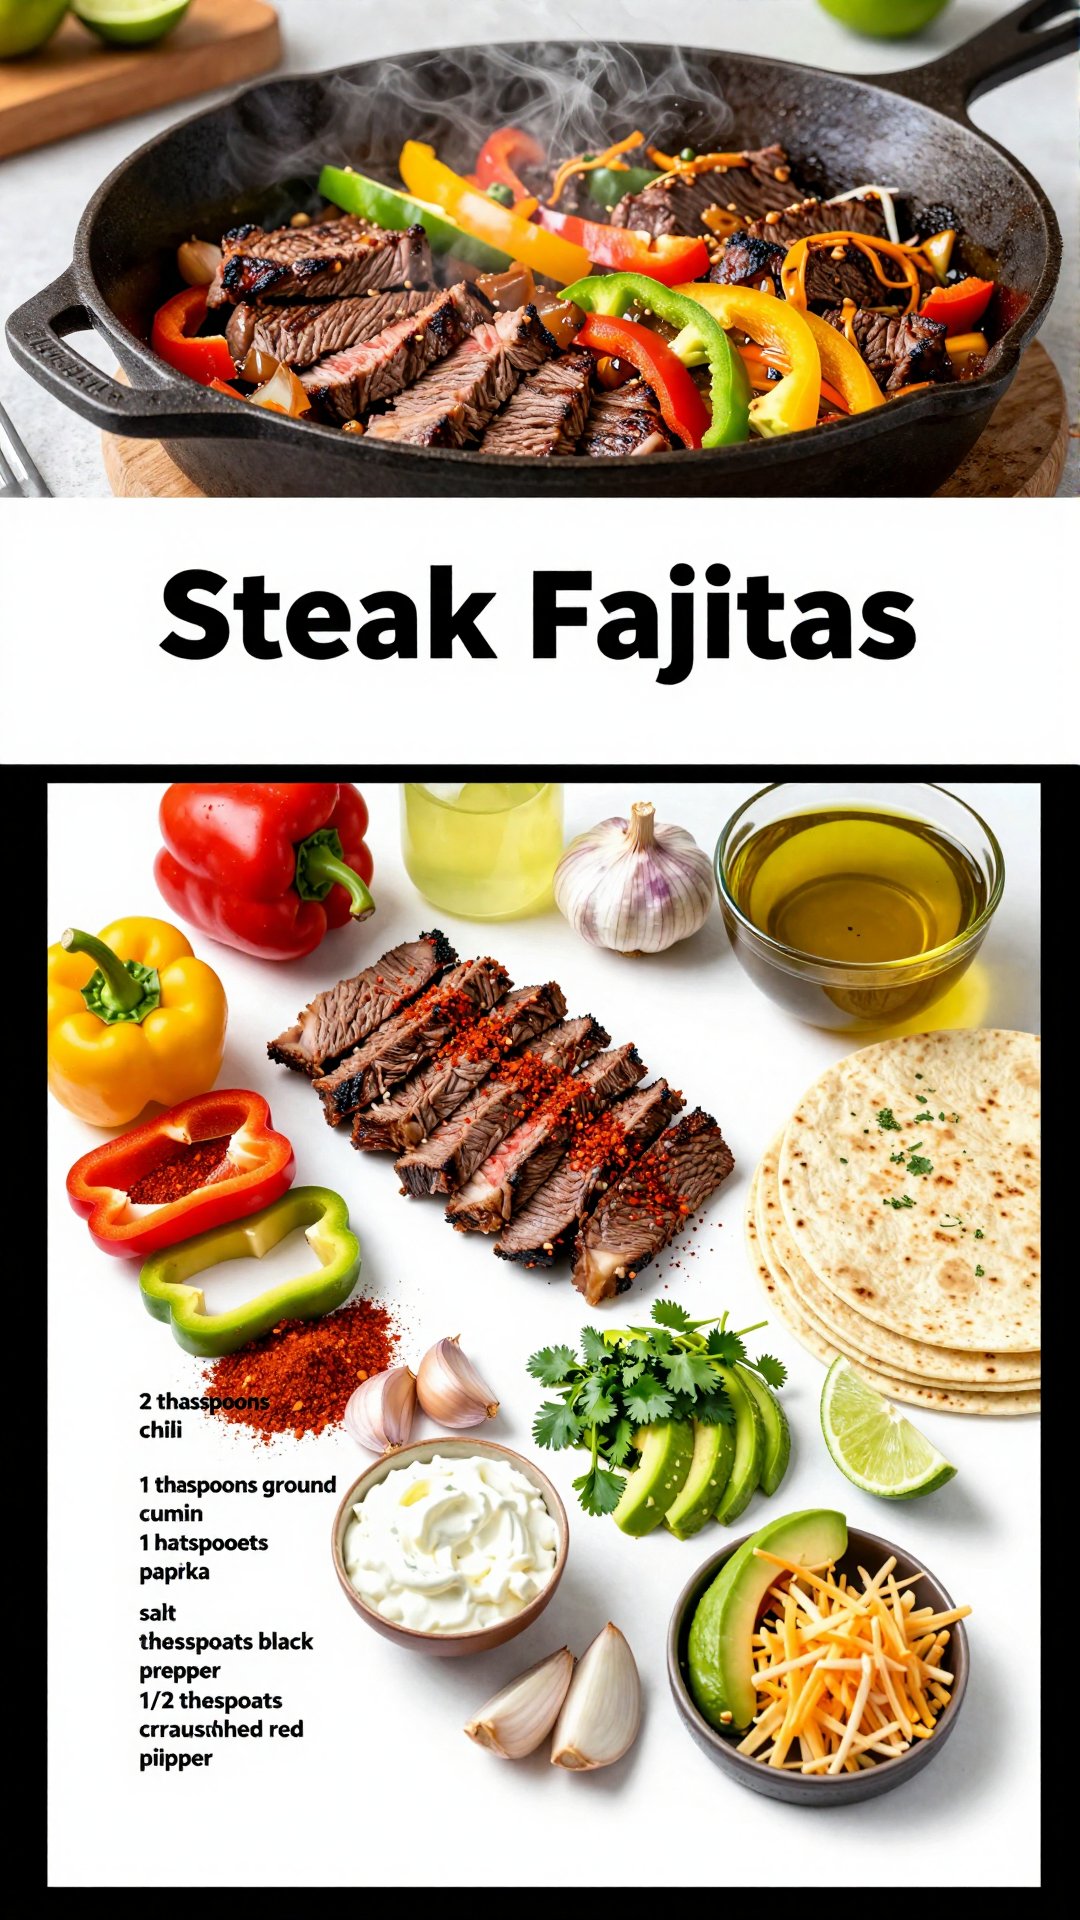
Ingredients You’ll Need
Here’s what you’ll need to create these amazing steak fajitas:
2 Tbs Chili Powder
1/2 Tbs Paprika
1 tsp Garlic Powder
1/2 tsp Onion Powder
2 tsp Cumin
1/4 tsp Cayenne (optional)
2 tsp Sugar
1 tsp Salt
1 Tbs Cornstarch
1 Med Yellow Onion (Sliced thin)
1 Green Bell Pepper (Sliced Thin)
1 Red Bell Pepper (Sliced Thin)
1 Yellow Bell Pepper (Sliced Thin)
1 1/2 lb Flank Steak (Sliced Thin and cut into bite size pieces)
1 Lime (Juiced or about 1-1 1/2 Tbs Lime Juice)
8-10 10in Flour Tortillas
1 Tomato (Diced)
2 Tbs Cilantro Chopped
Sour Cream
Avocado
1 Cup Cheddar Cheese
How to Make Sizzling Steak Fajitas: Step-by-Step
Alright, let’s get cooking! Here’s how to make these mouthwatering steak fajitas:
Prepare the Seasoning: Mix all of the seasoning ingredients in a small bowl and set aside.
Slice the Steak: Slice your flank steak in very thin rounds.
Cut into Bite-Size Pieces: Slice each round into 4-5 bite size pieces. Set Aside
Prep the Veggies: Slice your onion and bell peppers, set them aside.
Season Everything: Divide the seasoning mixture in half and sprinkle half over the veggies and half over the meat. Toss to coat. This is a great way to ensure everything is evenly seasoned.
Instant Pot Prep: Place a cup of water into your instant pot. Add trivet to bottom with a layer of foil. Place the flank steak on top of the foil.
Pressure Cook the Steak: Set it to manual pressure cook on high for 7 minutes and allow a 3-minute natural release (NR). Then do a quick release to release the remaining pressure.
Add the Veggies: Place your sliced veggies on top of the steak and quickly close the lid.
Pressure Cook the Veggies: Set to manual pressure cook on high for 1 minute and do a quick release.
Remove and Finish: Open the lid and remove the beef fajitas and veggies.
Lime Juice: Squeeze the juice from one lime over the fajitas and serve on warm tortillas.
Garnish and Serve: Garnish with cheese, sour cream, salsa, cilantro or your other preferred toppings.
And there you have it! Sizzling steak fajitas ready to devour. I always love seeing the smiles on people’s faces when they take that first bite. It’s the best feeling!
Pro Tips for Perfect Fajitas
Want to take your fajitas to the next level? Here are some pro tips I’ve learned over the years:
Use Quality Steak: Flank steak is ideal, but skirt steak or even sirloin will work. The key is to slice it thinly against the grain.
Don’t Overcook the Steak: The Instant Pot can make it tough if you overcook it. Follow the timing in the recipe for perfectly tender steak.
Warm the Tortillas: Warm tortillas are essential for a great fajita experience. You can warm them in a dry skillet, in the microwave, or even over an open flame.
Customize Your Toppings: Don’t be afraid to get creative with your toppings. Guacamole, pico de gallo, shredded lettuce, and pickled onions are all great options.
Marinate the Steak: If you have time, marinate the steak for at least 30 minutes (or even overnight) for extra flavor and tenderness.
Use a Hot Skillet for Serving: For that extra sizzle, serve the fajitas on a hot cast-iron skillet.
These little tips can make a big difference in the final result. Trust me; it’s worth the extra effort!
Common Mistakes to Avoid
Even with a simple recipe like this, there are a few common mistakes to watch out for:
Overcooking the Veggies: Nobody likes mushy veggies. The Instant Pot cooks them quickly, so be sure to follow the timing in the recipe.
Not Slicing the Steak Thinly Enough: Thinly sliced steak is key for tenderness and easy eating.
Using Too Much Liquid: Too much liquid in the Instant Pot can dilute the flavors. Stick to the recommended amount.
Skipping the Natural Release: The natural release helps the steak retain its moisture and tenderness.
I’ve made all of these mistakes at one point or another (yes, even me!), so don’t feel bad if you slip up. Just learn from it and try again!
Fajita Variations to Try
One of the best things about fajitas is how versatile they are. Here are a few variations to spice things up:
Chicken Fajitas: Substitute chicken breasts or thighs for the steak.
Shrimp Fajitas: Use shrimp instead of steak for a lighter option.
Vegetarian Fajitas: Load up on veggies like mushrooms, zucchini, and corn.
Spicy Fajitas: Add more cayenne pepper or a pinch of chili flakes to the seasoning.
Sweet and Savory Fajitas: Add a touch of honey or maple syrup to the marinade for a hint of sweetness.
Don’t be afraid to experiment and create your own unique fajita masterpiece! The possibilities are endless.
How to Store Leftovers
If you happen to have leftovers (which is rare in my house!), here’s how to store them properly:
Refrigerate: Store the steak and veggies in an airtight container in the refrigerator for up to 3 days.
Freeze: For longer storage, freeze the steak and veggies in a freezer-safe bag or container for up to 2 months.
Reheat: Reheat the steak and veggies in a skillet over medium heat or in the microwave until warmed through.
Leftovers are great for lunch the next day or for another quick and easy dinner. You can even use them to make fajita bowls or salads.
Frequently Asked Questions (FAQ)
Here are some common questions I get asked about making fajitas:
Can I make this without an Instant Pot? Yes, you can cook the steak in a skillet over medium-high heat until cooked through.
What kind of tortillas should I use? Flour tortillas are traditional, but corn tortillas are a great gluten-free option.
Can I make this ahead of time? Yes, you can prep the steak and veggies ahead of time and store them in the refrigerator until ready to cook.
What if I don’t have all the spices? Don’t worry! Use what you have on hand and adjust the amounts to your liking.
Can I add other veggies? Absolutely! Feel free to add any veggies you like, such as poblano peppers, jalapeños, or even pineapple.
If you have any other questions, feel free to leave a comment below, and I’ll do my best to answer them!
Serving Suggestions
Now that you’ve made these amazing steak fajitas, here are some serving suggestions to complete the meal:
Classic Toppings: Sour cream, guacamole, salsa, shredded cheese, and cilantro.
Side Dishes: Mexican rice, refried beans, or a simple salad.
Drinks: Margaritas, iced tea, or your favorite Mexican beer.
Dessert: Churros, flan, or a slice of tres leches cake.
I love serving these fajitas with a big bowl of guacamole and a side of Mexican rice. It’s the perfect combination!
So, there you have it! My quick and easy recipe for Sizzling Steak Fajitas. I hope you love it as much as my family and friends do. Remember, cooking is all about having fun and experimenting, so don’t be afraid to put your own spin on this recipe. And if you make it, be sure to tag me on social media – I’d love to see your creations! Happy cooking, friends!
This recipe is a definite crowd-pleaser, and the best part is how simple it is to make. You don’t have to be a professional chef to whip up these delicious fajitas. If you want to impress your friends and family, this is the perfect recipe. It’s a great way to enjoy a restaurant-quality meal in the comfort of your own home. And let’s be honest, who doesn’t love a good fajita? It’s one of those meals that everyone can agree on. The meat is tender and flavorful, and the veggies are perfectly cooked. There’s something about the combination of flavors and textures that just makes your taste buds sing.
Making them in the Instant Pot is a game-changer. It cuts down on the cooking time significantly, and it ensures that the steak is always tender and juicy. Plus, it’s so easy to clean up afterward. No more scrubbing pots and pans for hours! If you don’t have an Instant Pot, you can still make these fajitas in a skillet, but I highly recommend investing in an Instant Pot if you’re looking for a convenient and efficient way to cook. It’s one of my favorite kitchen gadgets, and I use it all the time.
If you’re looking for a gluten-free option, you can substitute the flour tortillas with corn tortillas. They’re just as delicious, and they’re a great way to accommodate dietary restrictions. You can also make these fajitas keto-friendly by skipping the tortillas altogether and serving them as a fajita bowl. Just load up on the steak, veggies, and your favorite toppings, and you’ve got a healthy and satisfying meal. It’s a great way to enjoy all the flavors of fajitas without the extra carbs.
This recipe is all about balance: sweet with savory, creamy with crunchy, familiar with unexpected. And I believe that cooking is less about following rules and more about trusting your senses. If it smells amazing and makes you smile, you’re probably on the right track. So go ahead, give this recipe a try, and let me know what you think! I can’t wait to hear about your fajita adventures!
Fajitas are a staple in many households, and for good reason. They’re easy to customize, they’re packed with flavor, and they’re always a hit. Whether you’re cooking for a crowd or just for yourself, this recipe is sure to impress. So grab your ingredients, fire up your Instant Pot, and get ready to enjoy some sizzling steak fajitas! You’re going to love it!
I hope you enjoy this recipe as much as I do. It’s one of my go-to meals for busy weeknights, and I’m always excited to share it with others. So go ahead, give it a try, and let me know what you think! I can’t wait to hear about your fajita adventures!
Easy One-Pot Steak Fajitas Recipe: A Flavor Fiesta in Minutes!
Hey there, fellow food lovers! Ava here, back from my Seattle kitchen with a recipe that’s going to revolutionize your weeknight dinners. Forget complicated meals with a mountain of dishes – we’re diving headfirst into the world of One-Pot Steak Fajitas! This isn’t just a recipe; it’s a culinary hug, a flavor explosion, and a ridiculously easy way to get dinner on the table. Think sizzling steak, vibrant bell peppers, and zesty spices, all mingling together in one glorious pot. Ready to unleash your inner fajita fanatic? Let’s get cooking!
Growing up, fajitas were a special occasion dish. My mom would spend hours marinating the steak, chopping vegetables, and prepping all the fixings. While I loved the end result, the process felt a bit… daunting. That’s why I set out to create a recipe that captures all the deliciousness of traditional steak fajitas, but with a fraction of the effort. And let me tell you, this one-pot wonder delivers! It’s perfect for busy weeknights, impromptu gatherings, or any time you’re craving a taste of Tex-Mex goodness without the fuss.
Why You’ll Absolutely Love This One-Pot Steak Fajitas Recipe
Seriously, where do I even begin? This recipe is packed with reasons to love it, beyond just the incredible taste. Here’s a sneak peek at why this will become your new go-to fajita recipe:
Unbelievably Easy: One pot means minimal cleanup. Enough said!
Bursting with Flavor: The combination of tender steak, sweet bell peppers, and zesty fajita seasoning is simply irresistible.
Customizable: Add your favorite toppings – sour cream, guacamole, salsa, cheese – the possibilities are endless!
Quick & Convenient: From prep to plate in under 30 minutes? Yes, please!
Crowd-Pleasing: This recipe is always a hit with family and friends.
Versatile: Serve as classic fajitas, in bowls, or even as a topping for nachos.
This recipe truly simplifies the process of making delicious steak fajitas. The best part? You get all the flavor without spending hours in the kitchen. It’s a win-win situation!
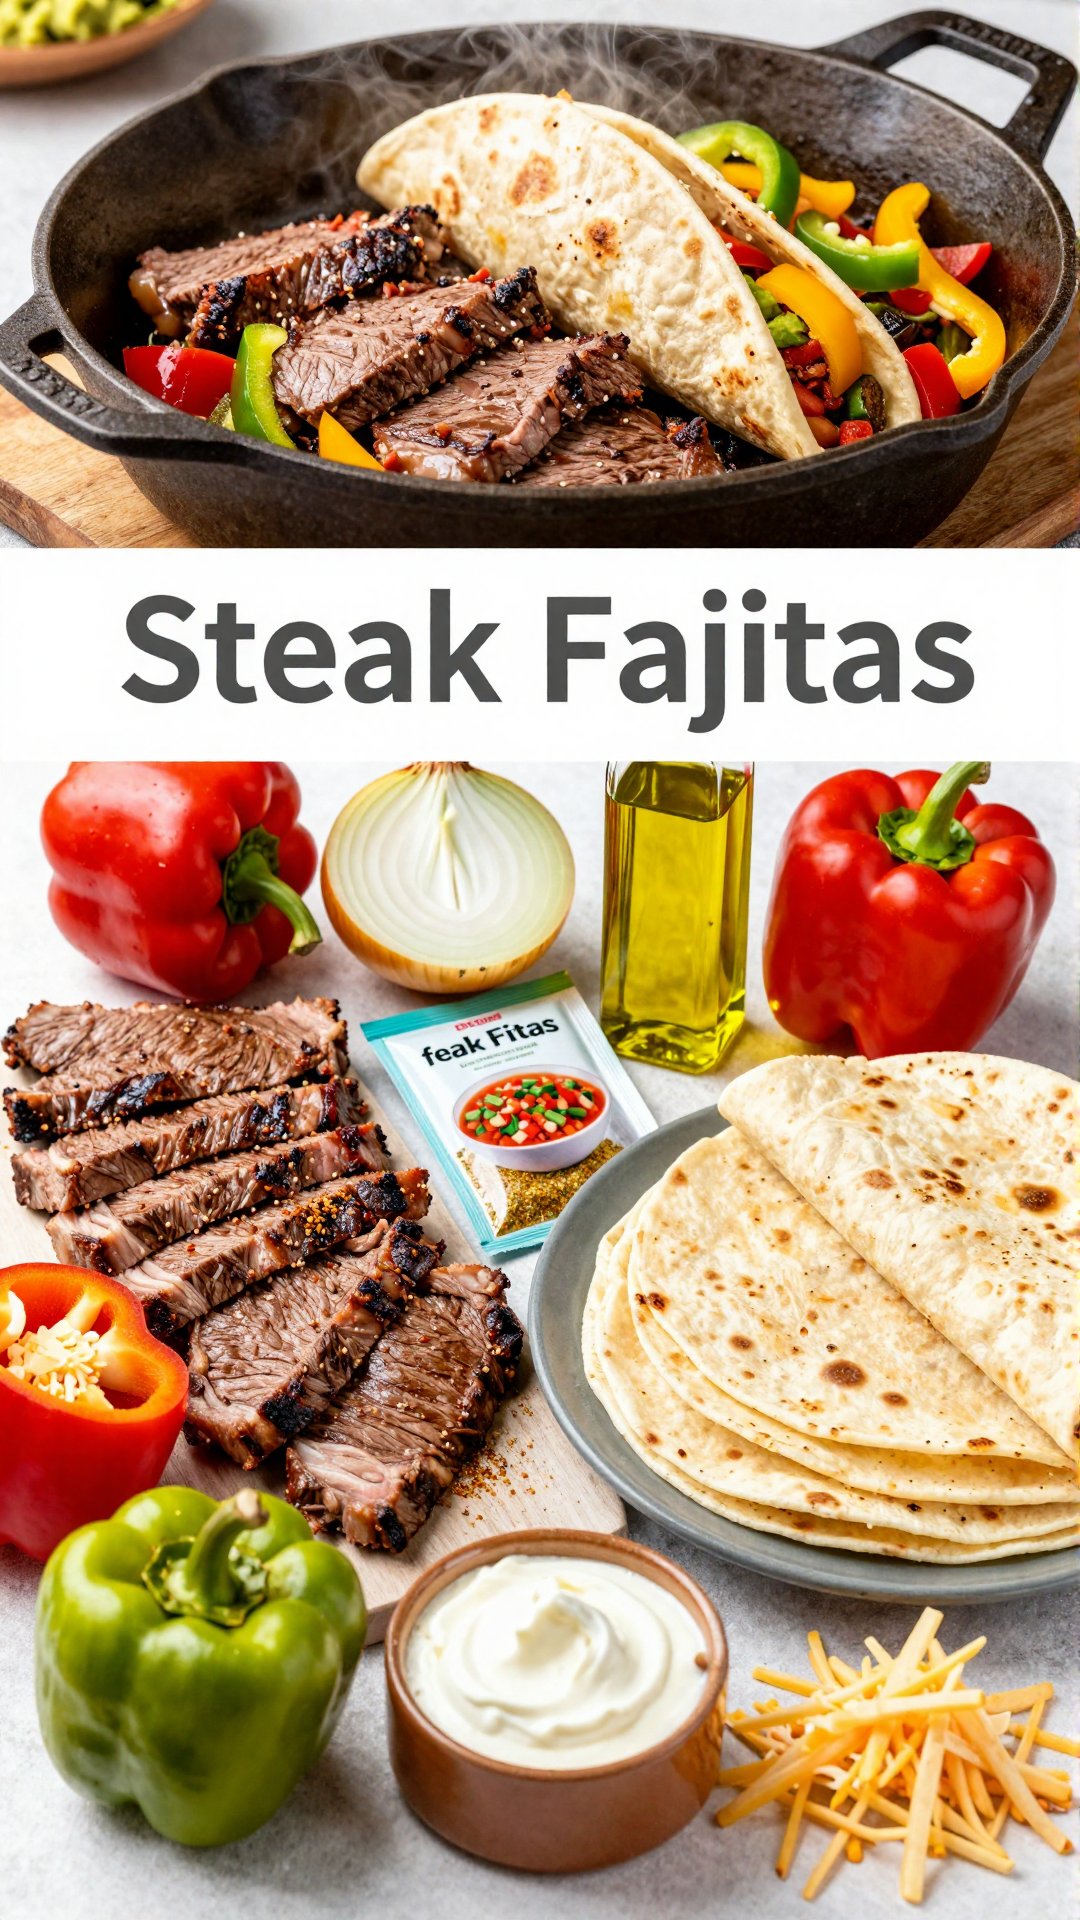
The Secret to Amazing One-Pot Steak Fajitas: Choosing Your Ingredients
Let’s talk ingredients! While the method is simple, the quality of your ingredients will significantly impact the final result. Here’s a breakdown of what you’ll need and why each ingredient is important:
1 lb skirt steak, thinly sliced: Skirt steak is my go-to for fajitas because it’s flavorful and cooks quickly. Look for a well-marbled piece of steak for the best flavor and tenderness. You can also use flank steak, but be sure to slice it thinly against the grain.
1 large onion, sliced: I prefer yellow onions for their mild sweetness, but white or red onions will also work.
2 bell peppers (various colors), sliced: A mix of colors (red, yellow, orange, green) not only looks beautiful but also adds different flavor notes. Red and yellow peppers are sweeter, while green peppers have a slightly more bitter taste.
1 packet fajita seasoning: You can use store-bought fajita seasoning or make your own (see my variation below!).
2 tablespoons olive oil: Olive oil helps to brown the steak and vegetables and adds a touch of richness.
1/2 cup beef broth (or water): Beef broth adds depth of flavor, but water works just fine in a pinch.
Flour tortillas, warmed: Warm tortillas are essential for the perfect fajita experience. You can warm them in a skillet, microwave, or oven.
Optional toppings: sour cream, guacamole, salsa, shredded cheese: The sky’s the limit when it comes to toppings! Choose your favorites and let everyone customize their own fajitas.
The key here is freshness. Using high-quality ingredients will elevate your fajitas from good to extraordinary. Don’t be afraid to experiment with different types of peppers or add other vegetables like mushrooms or zucchini.
Step-by-Step Guide: Mastering Your One-Pot Steak Fajitas
Alright, let’s get down to business! Here’s a detailed guide to making the most amazing one-pot steak fajitas you’ve ever tasted:
Heat the Oil: Place your large skillet or pot over medium-high heat. Add the olive oil and let it heat up until it shimmers. This is crucial for getting a good sear on the steak.
Sear the Steak: Add the sliced steak to the hot skillet. Make sure not to overcrowd the pan; work in batches if necessary. Cook the steak until browned on all sides, about 3-5 minutes per batch. Remove the steak from the skillet and set aside.
Sauté the Vegetables: Add the sliced onions and bell peppers to the skillet. Cook until they are softened and slightly caramelized, about 5-7 minutes. Stir occasionally to prevent burning.
Season and Simmer: Return the steak to the skillet with the vegetables. Sprinkle the fajita seasoning over the steak and vegetables. Stir well to combine, ensuring everything is evenly coated with the seasoning.
Add Broth and Cook: Pour in the beef broth (or water) and bring to a simmer. Reduce the heat to low, cover the skillet, and cook until the vegetables are tender and the sauce has slightly thickened, about 5-7 minutes.
Warm the Tortillas: While the fajitas are simmering, warm your flour tortillas according to your preference. You can use a skillet, microwave, or oven.
Serve and Enjoy: Serve the steak fajitas immediately in warmed flour tortillas with your favorite toppings.
See? Easy peasy! The key is to have everything prepped and ready to go before you start cooking. This will make the process even smoother and faster.
Pro Tips for Perfect One-Pot Steak Fajitas Every Time
Want to take your one-pot steak fajitas to the next level? Here are some of my tried-and-true pro tips:
Slice the Steak Properly: Always slice the steak thinly against the grain. This will ensure that it’s tender and easy to chew.
Don’t Overcrowd the Pan: Overcrowding the pan will lower the temperature and prevent the steak from browning properly. Cook in batches if necessary.
Use a Hot Skillet: A hot skillet is essential for getting a good sear on the steak. Make sure the oil is shimmering before adding the steak to the pan.
Don’t Overcook the Vegetables: You want the vegetables to be tender-crisp, not mushy. Cook them until they are softened but still have a bit of bite.
Taste and Adjust Seasoning: After adding the fajita seasoning, taste the mixture and adjust the seasoning as needed. You may want to add more seasoning or a pinch of salt and pepper.
Warm Your Tortillas: Warm tortillas are a must! They are more pliable and taste better than cold tortillas.
Let it Rest: After cooking, let the fajitas rest for a few minutes before serving. This allows the flavors to meld together and the steak to retain its juices.
Follow these tips, and you’ll be well on your way to fajita perfection!
Common Mistakes to Avoid When Making Steak Fajitas
Even with a simple recipe like this, there are a few common mistakes that can derail your fajita dreams. Here’s what to watch out for:
Using Tough Steak: Choosing the wrong cut of steak can result in tough, chewy fajitas. Stick to skirt steak or flank steak for the best results.
Not Slicing Against the Grain: Slicing the steak with the grain will make it tough and difficult to chew. Always slice against the grain.
Overcooking the Steak: Overcooked steak is dry and flavorless. Cook the steak until it’s browned but still slightly pink in the center.
Using Bland Fajita Seasoning: A bland fajita seasoning will result in bland fajitas. Use a high-quality fajita seasoning or make your own.
Not Using Enough Oil: Using too little oil will prevent the steak and vegetables from browning properly. Make sure to use enough oil to coat the bottom of the skillet.
Forgetting the Toppings: Toppings are what make fajitas fun and flavorful! Don’t forget to offer a variety of toppings for your guests to choose from.
By avoiding these common mistakes, you’ll be able to create delicious, restaurant-quality steak fajitas at home.
Variations to Spice Up Your One-Pot Steak Fajitas
Want to get creative with your one-pot steak fajitas? Here are a few fun and delicious variations to try:
Spicy Fajitas: Add a pinch of cayenne pepper or a chopped jalapeño to the skillet for a spicy kick.
Chicken Fajitas: Substitute the steak with chicken breast or chicken thighs.
Shrimp Fajitas: Use shrimp instead of steak for a lighter option.
Vegetarian Fajitas: Omit the steak and add more vegetables like mushrooms, zucchini, or corn.
Homemade Fajita Seasoning: Mix together chili powder, cumin, paprika, garlic powder, onion powder, oregano, salt, and pepper.
Marinated Steak Fajitas: Marinate the steak in a mixture of lime juice, soy sauce, garlic, and spices for extra flavor.
Low Carb Fajitas: Serve the fajitas in lettuce wraps instead of tortillas.
The possibilities are endless! Feel free to experiment with different ingredients and flavors to create your own signature fajita recipe.
Serving Suggestions: What To Have With Steak Fajitas
Fajitas are fantastic on their own, but the right side dishes can elevate your meal to a whole new level. Here are some of my favorite serving suggestions:
For a complete meal, I often serve my one-pot steak fajitas with a side of cilantro-lime rice and black beans. It’s a simple yet satisfying combination that everyone loves.
Storing and Reheating Your Leftover Steak Fajitas
Got leftovers? No problem! Here’s how to store and reheat your one-pot steak fajitas:
Storing: Let the fajitas cool completely before transferring them to an airtight container. Store in the refrigerator for up to 3-4 days.
Reheating: Reheat the fajitas in a skillet over medium heat, stirring occasionally, until heated through. You can also reheat them in the microwave, but be careful not to overcook them.
Leftover steak fajitas are also great in omelets, salads, or as a topping for nachos. Get creative and use them in whatever way you like!
Frequently Asked Questions About Steak Fajitas
Still have questions? Here are some frequently asked questions about steak fajitas:
What’s the best cut of steak for fajitas? Skirt steak and flank steak are the best choices for fajitas.
How do I slice the steak for fajitas? Always slice the steak thinly against the grain.
Can I use chicken or shrimp instead of steak? Yes, you can easily substitute chicken or shrimp for steak in this recipe.
Can I make this recipe in a crock pot? Yes, you can adapt this recipe for a crock pot. See the variation below.
Can I make this recipe ahead of time? Yes, you can make the fajita mixture ahead of time and store it in the refrigerator until you’re ready to cook it.
How do I warm the tortillas? You can warm the tortillas in a skillet, microwave, or oven.
Steak Fajitas Crockpot Easy: A Slow Cooker Variation
Want to set it and forget it? Here’s how to adapt this recipe for your crock pot:
Place the sliced onions and bell peppers in the bottom of the crock pot.
Top with the sliced steak.
Sprinkle the fajita seasoning over the steak and vegetables.
Pour in the beef broth (or water).
Cover and cook on low for 6-8 hours or on high for 3-4 hours.
Shred the steak with two forks.
Serve in warmed flour tortillas with your favorite toppings.
This method is perfect for busy days when you don’t have time to stand over the stove. You’ll come home to a delicious, ready-to-eat meal!
Recipes With Steak Fajita Meat: Beyond the Tortilla
Don’t limit yourself to just tortillas! Steak fajita meat is incredibly versatile. Here are some other ways to enjoy it:
Fajita Bowls: Serve the steak and vegetables over rice or quinoa with your favorite toppings.
Fajita Salads: Top a bed of lettuce with the steak and vegetables, then add your favorite salad dressings and toppings.
Fajita Nachos: Spread tortilla chips on a baking sheet, top with the steak and vegetables, shredded cheese, and other toppings, then bake until the cheese is melted and bubbly.
Fajita Omelets: Add the steak and vegetables to a fluffy omelet for a hearty breakfast or brunch.
Fajita Quesadillas: Fill tortillas with the steak and vegetables, cheese, and other fillings, then grill until golden brown and the cheese is melted.
Fire Station Lunch Ideas: A Quick and Easy Meal
Looking for a meal that’s quick, easy, and satisfying? These one-pot steak fajitas are perfect for a fire station lunch! They’re packed with protein and flavor, and they can be made in a large batch to feed a crowd. Plus, the one-pot cleanup is a huge bonus when you’re short on time.
Quick Steak Fajitas: Ready in Minutes!
As the name suggests, these fajitas are incredibly quick to make. From start to finish, you can have a delicious meal on the table in under 30 minutes. This makes them perfect for busy weeknights or any time you’re craving a flavorful and satisfying meal without the fuss.
One Pot Fajitas: Minimal Cleanup, Maximum Flavor
The best part about this recipe is the minimal cleanup. Everything cooks in one pot, which means fewer dishes to wash. This is a huge win for busy cooks who don’t want to spend hours cleaning up after dinner.
What To Have With Steak Fajitas: Completing the Meal
As mentioned earlier, the possibilities are endless when it comes to side dishes and toppings. But if you’re looking for some inspiration, here are a few more ideas:
Elote (Mexican Street Corn): A creamy, flavorful corn on the cob that’s grilled and topped with cheese, chili powder, and lime juice.
Guacamole: A classic Mexican dip made with avocados, onions, tomatoes, cilantro, and lime juice.
Pico de Gallo: A fresh salsa made with tomatoes, onions, jalapeños, cilantro, and lime juice.
Mexican Rice: A flavorful rice dish that’s cooked with tomatoes, onions, and spices.
Black Beans: A simple and healthy side dish that’s packed with protein and fiber.
Easy Beef Fajitas Dinner: A Weeknight Winner
This recipe is a true weeknight winner. It’s quick, easy, and satisfying, and it’s sure to please even the pickiest eaters. Plus, it’s a great way to use up leftover vegetables in your fridge.
Steak Fajita Recipe Crockpot: A Hands-Off Approach
As we discussed earlier, the crock pot version of this recipe is perfect for busy days when you don’t have time to cook. Simply throw everything in the crock pot in the morning, and you’ll come home to a delicious and ready-to-eat meal.
Stew Meat Fajitas: An Economical Option
While skirt steak and flank steak are the traditional choices for fajitas, you can also use stew meat as a more economical option. Simply cut the stew meat into thin strips and cook it according to the recipe instructions. Just be sure to cook it until it’s tender and easily shredded.
Final Thoughts: Enjoy the Fajita Fiesta!
So there you have it – my easy one-pot steak fajitas recipe! I hope you love it as much as I do. Remember, cooking should be fun and stress-free, so don’t be afraid to experiment and make this recipe your own. And most importantly, enjoy the fajita fiesta!
From my kitchen to yours, happy cooking! And as always, feel free to share your creations with me on social media – I love seeing what you’re whipping up!
Until next time, keep those pots simmering and those flavors popping!
Easy Crock-Pot Steak Fajita Recipe: A Flavor Fiesta in Your Slow Cooker
Hey there, flavor fanatics! Ava here, back from my Seattle kitchen with a recipe that’s going to revolutionize your weeknight dinners. If you’re anything like me, you love the vibrant flavors of fajitas but don’t always have the time (or energy) for all the chopping and sizzling. That’s where this Easy Crock-Pot Steak Fajita Recipe comes in. It’s a game-changer, a lifesaver, and seriously delicious. Imagine tender, juicy steak infused with smoky spices, nestled amongst sweet bell peppers and onions, all cooked to perfection in your trusty slow cooker. Sounds amazing, right? Well, trust me, it is! This recipe is one of my go-to solutions when I want a hearty, flavorful meal without spending hours in the kitchen. So, pull out your Crock-Pot, and let’s get cooking!
Why You’ll Love This Crock-Pot Steak Fajita Recipe
Okay, let’s get real. We all have those days when the thought of cooking a complicated meal is just…exhausting. That’s why I’m so passionate about this recipe. It’s simple, it’s satisfying, and it requires minimal effort. Here’s why you’ll absolutely adore it:
Effortless Cooking: You literally dump everything into the Crock-Pot and let it do its magic. No babysitting required!
Flavor Explosion: The slow cooking process allows the spices to meld together beautifully, creating a depth of flavor that’s simply irresistible.
Tender Steak: Say goodbye to tough, chewy steak. The slow cooker transforms even the most budget-friendly cuts into melt-in-your-mouth goodness.
Customizable: Add your favorite toppings, swap out veggies, or adjust the spice level to your liking. This recipe is incredibly versatile.
Crowd-Pleaser: Whether you’re feeding your family or hosting a party, these fajitas are always a hit.
I remember one particularly hectic week when I was juggling a work deadline, a leaky faucet, and a surprise visit from my in-laws. I needed a dinner solution, and I needed it fast. That’s when I turned to this Crock-Pot steak fajita recipe. It saved the day! My in-laws raved about the flavor, and I actually got to relax and enjoy their company. That’s the power of a good slow cooker recipe, my friends.
Ingredients for the Best Crock-Pot Steak Fajitas
Alright, let’s gather our ingredients. Don’t worry, the list is short and sweet. You probably have most of these items in your pantry already.
‘1 ½ pounds flank steak or skirt steak, thinly sliced’
‘3 bell peppers (red, green, yellow), sliced into strips’
‘1 large onion, sliced into strips’
‘3 cloves garlic, minced’
‘1/4 cup lime juice (about 2 limes)’
‘2 teaspoons chili powder’
‘1 teaspoon ground cumin’
‘1 teaspoon paprika’
‘1/2 teaspoon oregano’
‘1/2 teaspoon salt (adjust to taste)’
‘1/2 teaspoon black pepper’
‘1/4 teaspoon crushed red pepper flakes (optional for heat)’
Now for the fun part! Let’s walk through the steps of making these delicious fajitas. Trust me, it’s easier than ordering takeout.
Prepare the Spice Mix: In a small bowl, combine the chili powder, cumin, paprika, oregano, salt, black pepper, and crushed red pepper flakes if you want some heat. Give it a good mix. This is where the magic happens. You can also adjust the amounts to suit your taste. If you’re not a fan of spice, skip the red pepper flakes. If you like things extra smoky, add a pinch of smoked paprika.
Season the Steak: Take the sliced steak and place it in a large mixing bowl. Sprinkle the spice mix over the steak and toss until all the pieces are well-coated. Make sure every piece of the meat gets a good rubdown with those flavorful spices. The more evenly coated the steak is, the better the flavor will be.
Layer the Veggies: In your Crock-Pot, drop in the sliced bell peppers, onion, and minced garlic. Spread them out so they form a colorful base. The veggies not only add flavor but also help to keep the steak from sticking to the bottom of the pot.
Add the Steak: Now, layer the seasoned steak on top of the veggies in the Crock-Pot. Try to spread it out evenly so that it cooks uniformly.
Add Liquids: Drizzle the lime juice and olive oil over everything, then pour in the beef broth or water. This will help create a flavorful steam as it cooks. The lime juice adds a bright, tangy flavor that complements the spices perfectly.
Cook It Up: Cover the Crock-Pot and cook on low for 6 to 8 hours or on high for 3 to 4 hours. You’ll know it’s ready when the steak is tender and the veggies are soft! The cooking time will vary depending on your slow cooker, so keep an eye on it.
Stir and Serve: After cooking, give everything a good stir to combine the juices and flavors. Serve hot with warm tortillas and let everyone add their favorite toppings like avocado, sour cream, shredded cheese, fresh cilantro, and lime wedges.
Pro Tips for Perfect Crock-Pot Steak Fajitas
Want to take your fajitas to the next level? Here are a few of my tried-and-true tips:
Choose the Right Cut of Steak: While flank steak and skirt steak are classic choices, you can also use sirloin or even round steak. Just make sure to slice it thinly against the grain for maximum tenderness. The skirt steak is known for its rich flavor and ability to absorb marinades well, making it a fantastic choice for fajitas.
Don’t Skip the Searing (Optional): If you have a few extra minutes, sear the steak in a hot skillet before adding it to the Crock-Pot. This will give it a beautiful crust and enhance the flavor. I often skip this step when I am short on time, but it does add an extra layer of deliciousness.
Layer Your Ingredients Strategically: Placing the veggies at the bottom of the Crock-Pot helps to prevent the steak from sticking and ensures that everything cooks evenly. It also allows the veggies to release their natural moisture, which helps to create a flavorful steam.
Don’t Overcook the Steak: Overcooked steak can become dry and tough. Keep an eye on it and adjust the cooking time as needed. You want the steak to be tender and juicy, not leathery.
Warm Your Tortillas: Warm tortillas are a must! You can heat them in a dry skillet, in the microwave, or even over an open flame for a slightly charred flavor. I prefer to warm mine in a dry skillet, as it gives them a nice, slightly crispy texture.
Get Creative with Toppings: Don’t be afraid to experiment with different toppings. Sliced avocado, sour cream, shredded cheese, fresh cilantro, lime wedges, salsa, guacamole, and pickled onions are all great options. I like to set out a variety of toppings so that everyone can customize their fajitas to their liking.
Common Mistakes to Avoid
We all make mistakes in the kitchen, but with a little knowledge, you can avoid these common pitfalls:
Using Too Much Liquid: The Crock-Pot creates a lot of moisture, so you don’t need to add a ton of liquid. Too much liquid can result in watery fajitas. A quarter cup of beef broth or water is usually sufficient.
Not Seasoning Properly: Seasoning is key to flavorful fajitas. Don’t be afraid to be generous with the spices. Taste and adjust as needed. I always recommend starting with the amounts listed in the recipe and then adding more to taste.
Overcooking the Veggies: Overcooked veggies can become mushy and unappetizing. Keep an eye on them and adjust the cooking time as needed. You want the veggies to be tender but still have a little bit of bite.
Using the Wrong Cut of Steak: Tough cuts of steak can become even tougher in the Crock-Pot. Choose a tender cut like flank steak, skirt steak, or sirloin.
Forgetting the Lime Juice: The lime juice adds a crucial element of brightness and acidity to the fajitas. Don’t skip it! It helps to balance the richness of the steak and spices.
Delicious Variations to Try
Want to mix things up? Here are a few variations to keep your taste buds happy:
Chicken Fajitas: Swap out the steak for chicken breasts or thighs. Adjust the cooking time as needed.
Shrimp Fajitas: Add shrimp during the last hour of cooking.
Vegetarian Fajitas: Use portobello mushrooms or tofu in place of the steak.
Spicy Fajitas: Add more crushed red pepper flakes or a pinch of cayenne pepper to the spice mix.
Pineapple Fajitas: Add chunks of pineapple to the Crock-Pot for a sweet and tangy twist.
How to Store and Reheat Leftovers
Got leftovers? Lucky you! Here’s how to store and reheat them:
Storage: Store the fajitas in an airtight container in the refrigerator for up to 3 days.
Reheating: Reheat the fajitas in a skillet over medium heat, in the microwave, or in the oven. Add a splash of beef broth or water to keep them from drying out.
Freezing: Freeze the fajitas in an airtight container for up to 2 months. Thaw overnight in the refrigerator before reheating.
Frequently Asked Questions (FAQ)
Got questions? I’ve got answers!
Can I use frozen steak? I don’t recommend using frozen steak, as it can release a lot of water and make the fajitas watery. If you must use frozen steak, thaw it completely before cooking.
Can I make this recipe in an Instant Pot? Yes! Use the slow cooker setting and follow the same instructions. You can also use the pressure cooker setting for a faster cooking time.
Can I add other vegetables? Absolutely! Feel free to add other vegetables like zucchini, squash, or mushrooms.
Can I make this recipe ahead of time? Yes! You can prepare the spice mix and slice the vegetables ahead of time. Store them in separate containers in the refrigerator.
What kind of tortillas should I use? You can use flour or corn tortillas, depending on your preference. I prefer flour tortillas, as they are softer and more pliable.
Serving Suggestions: Completing Your Fajita Fiesta
These fajitas are delicious on their own, but here are a few serving suggestions to complete your meal:
Classic Fajitas: Serve the fajitas in warm tortillas with your favorite toppings.
Fajita Bowls: Serve the fajitas over rice with black beans, corn, and your favorite toppings.
Fajita Salad: Serve the fajitas over a bed of lettuce with your favorite toppings.
Fajita Nachos: Top tortilla chips with the fajitas, cheese, and your favorite toppings.
Fajita Quesadillas: Fill tortillas with the fajitas, cheese, and your favorite toppings, then grill until golden brown.
So there you have it, my friends! My Easy Crock-Pot Steak Fajita Recipe is a guaranteed crowd-pleaser. It’s perfect for busy weeknights, potlucks, or any time you’re craving a flavorful and satisfying meal. I hope you love it as much as I do! Happy cooking!
This recipe is more than just a set of instructions; it’s an invitation to create memories, to share laughter, and to nourish those you love. The beauty of this dish lies in its simplicity. You can use flank steak, skirt steak, or even round steak, depending on your budget and preference. What truly matters is the love and care you put into preparing it.
The slow cooker is your best friend here, transforming even the humblest cut of meat into a tender, flavorful delight. The cooking time, whether you opt for 6 to 8 hours on low or 3 to 4 hours on high, allows the spices to meld together, creating a symphony of flavors that will dance on your taste buds. If you’re short on time, the high setting is your go-to, but if you have the luxury of a longer cooking time, the low setting will yield even more tender results.
Don’t be afraid to experiment with the spice mix. If you’re a fan of heat, add a pinch of cayenne pepper or an extra dose of crushed red pepper flakes. If you prefer a milder flavor, reduce the amount of chili powder. The key is to find a balance that suits your personal taste.
The vegetables are just as important as the steak. Bell peppers, onions, and garlic are the classic choices, but you can also add other veggies like zucchini, squash, or mushrooms. The important thing is to slice them into strips so that they cook evenly.
And let’s not forget the toppings! Sliced avocado, sour cream, shredded cheese, fresh cilantro, and lime wedges are all essential for creating the perfect fajita experience. I also like to add a dollop of guacamole and a sprinkle of pickled onions for an extra burst of flavor.
So, gather your ingredients, fire up your Crock-Pot, and get ready to create a meal that will transport you to a sunny Mexican cantina. This Easy Crock-Pot Steak Fajita Recipe is more than just a recipe; it’s an adventure in flavor, a celebration of simplicity, and a reminder that the best meals are often the ones shared with loved ones.
Remember that triple-layer cake I mentioned earlier? Well, it taught me a valuable lesson: sometimes, the simplest things are the most satisfying. And these Crock-Pot steak fajitas are a testament to that. They’re easy to make, incredibly flavorful, and always a hit. So, go ahead and give them a try. I promise you won’t be disappointed.
You’ll find that the aroma alone is enough to make your mouth water. The combination of smoky spices, sweet bell peppers, and savory steak is simply irresistible. And when you take that first bite, you’ll be transported to a world of flavor. The tender steak, the perfectly cooked vegetables, and the zesty toppings all come together to create a culinary masterpiece.
If you’re looking for a way to simplify your weeknight dinners, this recipe is your answer. It’s quick, easy, and requires minimal cleanup. Plus, it’s a great way to use up any leftover vegetables you have in your fridge. So, don’t hesitate to give it a try. I guarantee it will become a staple in your household.
And remember, cooking is all about having fun. Don’t be afraid to experiment, to try new things, and to make mistakes. Because even the biggest culinary disasters can lead to delicious discoveries. So, grab your spatula, put on some music, and let’s get cooking! You’re going to love these Crock-Pot steak fajitas. They’re the perfect way to add a little spice to your life.
The crock pot is your secret weapon for creating tender steak fajitas with minimal effort. It’s the ideal way to infuse the meat with flavor and ensure it’s perfectly cooked every time. The steak, nestled amongst the bell peppers and onions, slowly absorbs the spices, creating a symphony of tastes that will tantalize your taste buds. If you’re looking for a simple yet satisfying meal, look no further than this crock pot fajita recipe.
You can also customize the recipe to your liking. Add a splash of hot sauce for extra heat, or a dollop of guacamole for creamy richness. The possibilities are endless! The key is to experiment and find what works best for you. And remember, cooking should be enjoyable, so don’t be afraid to let your creativity shine.
The meat should be tender and juicy, the vegetables should be soft and flavorful, and the tortillas should be warm and pliable. It’s a culinary experience that will leave you feeling satisfied and content. And the best part is, it’s so easy to make! With just a few simple ingredients and a little bit of time, you can create a meal that’s worthy of a five-star restaurant.
You’ll want to make these steak fajitas again and again. They’re perfect for family dinners, potlucks, or even a casual get-together with friends. So, go ahead and add this recipe to your collection. It’s a keeper!
These fajitas are a delicious and convenient option for any busy weeknight. If you’re looking for a way to simplify your meal planning, this recipe is your answer. It’s easy to prepare, requires minimal cleanup, and is always a hit with everyone. So, give it a try and see for yourself! You won’t be disappointed.
I love how versatile this recipe is. You can easily adapt it to suit your personal preferences. If you’re not a fan of steak, you can use chicken, shrimp, or even tofu. And if you’re watching your carbs, you can serve the fajitas over a bed of lettuce instead of tortillas. The possibilities are endless!
You can use warm tortillas to wrap the tender steak and flavorful vegetables, creating a satisfying and delicious meal. The warm tortillas add a touch of comfort and make the fajitas even more enjoyable. So, don’t forget to warm them up before serving! It makes all the difference.
The crock pot is truly a magical appliance. It can transform even the simplest ingredients into a culinary masterpiece. And these steak fajitas are a perfect example of that. They’re easy to make, incredibly flavorful, and always a crowd-pleaser. So, if you’re looking for a way to impress your friends and family, look no further than this crock pot fajita recipe.
If you’re anything like me, you’re always on the lookout for new and exciting recipes. And these steak fajitas are definitely worth adding to your repertoire. They’re easy to make, incredibly flavorful, and always a hit. So, go ahead and give them a try. I promise you won’t be disappointed!
This dish is all about creating a harmonious blend of flavors and textures. The tender steak, the perfectly cooked vegetables, and the zesty toppings all come together to create a culinary masterpiece. And the best part is, it’s so easy to make! With just a few simple ingredients and a little bit of time, you can create a meal that’s worthy of a five-star restaurant.
The flavors of these steak fajitas will transport you to a sunny Mexican cantina. The combination of smoky spices, sweet bell peppers, and savory steak is simply irresistible. And when you take that first bite, you’ll be transported to a world of culinary delight. So, go ahead and give them a try. You deserve it!
These crock pot steak fajitas are a true testament to the power of simple ingredients. With just a few basic items, you can create a meal that’s both satisfying and delicious. And the best part is, it’s so easy to make! So, if you’re looking for a way to impress your friends and family, look no further than this recipe.
If you’re on the hunt for a recipe that’s both delicious and easy to make, look no further than these crock pot steak fajitas. They’re perfect for busy weeknights, potlucks, or even a casual get-together with friends. So, go ahead and give them a try. I promise you’ll love them!
The secret to these amazing fajitas lies in the slow cooking process. The crock pot allows the flavors to meld together, creating a depth of taste that’s simply irresistible. And the best part is, it requires minimal effort on your part. So, sit back, relax, and let the crock pot do its magic!
You’ll find that these steak fajitas are incredibly versatile. You can serve them in warm tortillas, over rice, or even on top of a salad. The possibilities are endless! So, get creative and experiment with different toppings and sides. The key is to have fun and enjoy the process!
If you’re looking for a way to add a little excitement to your weeknight dinners, these crock pot steak fajitas are the perfect solution. They’re easy to make, incredibly flavorful, and always a crowd-pleaser. So, go ahead and give them a try. You won’t be disappointed!
The aroma that fills your kitchen as these fajitas cook is simply intoxicating. The combination of smoky spices, sweet bell peppers, and savory steak is enough to make anyone’s mouth water. And when you finally take that first bite, you’ll be in culinary heaven!
You can also add a variety of toppings to customize your fajitas to your liking. Sliced avocado, sour cream, shredded cheese, fresh cilantro, and lime wedges are all great options. And if you’re feeling adventurous, you can even add a dollop of guacamole or a sprinkle of pickled onions. The possibilities are endless!
This recipe is a true winner in my book. It’s easy to make, incredibly flavorful, and always a hit with everyone. So, if you’re looking for a way to impress your friends and family, look no further than these crock pot steak fajitas. They’re guaranteed to be a crowd-pleaser!
If you’re anything like me, you’re always on the lookout for new and exciting recipes. And these crock pot steak fajitas are definitely worth adding to your collection. They’re easy to make, incredibly flavorful, and always a hit. So, go ahead and give them a try. I promise you’ll love them!
You can also use this recipe as a base for other dishes. Add the cooked steak and vegetables to tacos, quesadillas, or even a salad. The possibilities are endless! So, get creative and experiment with different ways to use these delicious fajitas.
If you’re looking for a way to simplify your weeknight dinners, these crock pot steak fajitas are the perfect solution. They’re easy to make, require minimal cleanup, and are always a hit with everyone. So, give them a try and see for yourself! You won’t be disappointed.
I love how these fajitas are so customizable. You can easily adjust the spice level to suit your personal preferences. If you’re not a fan of heat, simply reduce the amount of chili powder or crushed red pepper flakes. And if you like things extra spicy, add a pinch of cayenne pepper or an extra dose of hot sauce.
You can use the crock pot to create a truly memorable meal. And these steak fajitas are a perfect example of that. They’re easy to make, incredibly flavorful, and always a crowd-pleaser. So, if you’re looking for a way to impress your friends and family, look no further than this recipe.
If you’re on the hunt for a recipe that’s both delicious and easy to make, look no further than these crock pot steak fajitas. They’re perfect for busy weeknights, potlucks, or even a casual get-together with friends. So, go ahead and give them a try. I promise you’ll love them!
You’ll find that these steak fajitas are a true crowd-pleaser. They’re perfect for parties, potlucks, or even a casual weeknight dinner. And the best part is, they’re so easy to make! So, go ahead and give them a try. I promise you won’t be disappointed.
If you’re looking for a way to add a little spice to your life, these crock pot steak fajitas are the perfect solution. They’re easy to make, incredibly flavorful, and always a hit. So, go ahead and give them a try. You won’t be disappointed!
You can also use this recipe to meal prep for the week. Simply cook the steak and vegetables in the crock pot, then divide them into individual containers. This makes it easy to grab a healthy and delicious lunch or dinner on the go.
If you’re looking for a way to simplify your life, these crock pot steak fajitas are the perfect solution. They’re easy to make, require minimal cleanup, and are always a hit. So, give them a try and see for yourself! You won’t be disappointed.
I hope you enjoy this Easy Crock-Pot Steak Fajita recipe as much as I do. It’s a simple, flavorful, and satisfying meal that’s perfect for any occasion. Happy cooking!
Enjoy delicious and tender steak fajitas with minimal effort using your Crock-Pot. This recipe combines flavorful steak, vibrant bell peppers, and onions for a satisfying meal.
Ingredients
Ingredients
1.5poundsflank steak or skirt steak(thinly sliced)
3bell peppers(red, green, yellow, sliced into strips)
1largeonion(sliced into strips)
3clovesgarlic(minced)
0.25cuplime juice(about 2 limes)
2teaspoonschili powder
1teaspoonground cumin
1teaspoonpaprika
0.5teaspoonoregano
0.5teaspoonsalt(adjust to taste)
0.5teaspoonblack pepper
0.25teaspooncrushed red pepper flakes(optional for heat)
Juicy Steakhouse Burgers Recipe: The Ultimate Guide to Burger Bliss
Hey there, burger aficionados! Ava here, back from my Seattle kitchen with a recipe that’s been a total game-changer in our household: Juicy Steakhouse Burgers. If you’re dreaming of that restaurant-quality burger experience right in your own backyard (or kitchen!), you’ve landed in the right place. Forget dry, bland patties – we’re talking about burgers so juicy, so flavorful, they’ll have everyone asking for your secret. And guess what? I’m sharing it all!
Growing up, burgers were a staple at our family barbecues, but let’s be honest, they were often…underwhelming. Dry, overcooked, and lacking that certain *oomph*. It wasn’t until I started experimenting with different techniques and ingredients that I unlocked the secret to the perfect steakhouse burger. Now, these burgers are so good, they rival anything you’d find on the best burger menu. So, grab your apron, and let’s dive into the juicy details!
Why You’ll Absolutely Love This Steakhouse Burger Recipe
Seriously, what’s not to love? This isn’t just another burger recipe; it’s an experience. Here’s why you’ll be making these again and again:
Unbeatable Juiciness: The secret? A specific blend of ground beef and a cooking technique that locks in all those delicious juices.
Restaurant-Quality Flavor: We’re talking that rich, savory taste you’d expect from a top-notch steakhouse.
Customizable: From the cheese to the toppings, you can tailor these burgers to your exact preferences. Need some burger ideas toppings? I’ve got you covered!
Surprisingly Easy: Despite the gourmet taste, these burgers are simple to make, even on a busy weeknight.
I remember the first time I made these for my friends. The silence that fell as they took their first bites was deafening. Then came the murmurs of appreciation, the wide eyes, and the inevitable request for the recipe. That’s when I knew I had something special. And now, I’m sharing it with you!
The Star Players: Ingredients You’ll Need
Alright, let’s talk ingredients. Quality is key here, so choose the best you can find. Here’s what you’ll need to make these incredible steakhouse burgers:
1.5 lbs Ground Beef (80/20 blend recommended): This ratio gives you the perfect balance of flavor and juiciness.
1 tbsp Olive Oil: For caramelizing those delicious onions.
1 large Onion, thinly sliced: Sweet onions work best for caramelizing.
4 slices Provolone Cheese: Adds a creamy, slightly tangy flavor that complements the beef perfectly.
4 Burger Buns: Choose your favorite – brioche, potato, or even pretzel buns work well.
4 tbsp Steak Sauce: This is our secret weapon for that signature steakhouse flavor.
Salt and Pepper to taste: Don’t skimp on the seasoning!
Optional Toppings: Lettuce, Tomato, Pickles: The possibilities are endless! Get creative and add your favorites.
Let’s Get Cooking: Step-by-Step Instructions
Now for the fun part! Follow these simple steps, and you’ll be sinking your teeth into a juicy steakhouse burger in no time.
Caramelize the Onions: Heat olive oil in a skillet over medium heat. Add sliced onions and cook until caramelized, about 15-20 minutes, stirring occasionally. Season with salt and pepper. Patience is key here – don’t rush the caramelization process!
Prepare the Patties: While onions are cooking, gently form ground beef into 4 patties. Season generously with salt and pepper. Avoid overworking the meat, as this can make the burgers tough.
Grill or Pan-Fry the Burgers: Preheat grill or skillet to medium-high heat. Cook burgers for 4-5 minutes per side for medium-rare, or longer depending on desired doneness.
Melt the Cheese: In the last minute of cooking, place a slice of provolone cheese on top of each patty and allow it to melt. The melty cheese is a must-have!
Assemble the Burgers: Spread steak sauce on both halves of each burger bun. Place cheesy burger patties on the bottom bun, top with caramelized onions, and any optional toppings.
Serve and Enjoy: Cover with the top bun and serve immediately. Get ready for burger bliss!
Ava’s Pro Tips for Burger Perfection
Over the years, I’ve learned a few tricks that take these burgers from good to *amazing*. Here are my top tips:
Don’t Overmix the Meat: Overworking the ground beef will result in tough burgers. Gently form the patties and avoid squeezing them too much.
Use a Meat Thermometer: The best way to ensure your burgers are cooked to perfection is to use a meat thermometer. Aim for an internal temperature of 130-135°F for medium-rare, 140-145°F for medium, and 150-155°F for medium-well.
Let the Burgers Rest: After cooking, let the burgers rest for a few minutes before serving. This allows the juices to redistribute, resulting in a juicier burger.
Toast the Buns: Toasting the buns adds a nice texture and prevents them from getting soggy.
Common Burger Mistakes (and How to Avoid Them)
We’ve all been there – dry, overcooked, or flavorless burgers. Here’s how to avoid these common mistakes:
Mistake: Overcooking the Burgers. Solution: Use a meat thermometer and cook to the desired internal temperature.
Mistake: Not Seasoning Enough. Solution: Be generous with the salt and pepper! Seasoning is key to flavorful burgers.
Mistake: Pressing Down on the Patties While Cooking. Solution: Avoid pressing down on the patties, as this squeezes out the juices and results in a dry burger.
Mistake: Using Lean Ground Beef. Solution: Opt for an 80/20 blend of ground beef for the perfect balance of flavor and juiciness.
Burger Variations to Spice Things Up
One of the best things about burgers is how versatile they are. Here are a few variations to try:
Spicy Jalapeño Burger: Add diced jalapeños to the ground beef mixture and top with pepper jack cheese.
Mushroom and Swiss Burger: Sauté sliced mushrooms and top with Swiss cheese.
BBQ Bacon Burger: Top with crispy bacon, BBQ sauce, and cheddar cheese.
Avocado Ranch Burger: Top with sliced avocado, ranch dressing, and lettuce.
Need some burger ideas restaurant style? Think about what flavors complement each other and go wild!
Storing Leftover Burgers (If There Are Any!)
If you happen to have any leftover burgers (which is rare in my house!), here’s how to store them:
In the Refrigerator: Store cooked burgers in an airtight container in the refrigerator for up to 3-4 days.
Reheating: Reheat burgers in the microwave, oven, or skillet until heated through.
Frequently Asked Questions (Burger Edition)
Got questions? I’ve got answers! Here are some of the most common questions I get about making steakhouse burgers:
Q: Can I use a different type of cheese?. A: Absolutely! Feel free to experiment with different cheeses like cheddar, Swiss, or pepper jack.
Q: Can I use ground turkey or chicken instead of ground beef?. A: Yes, but keep in mind that ground turkey and chicken tend to be drier than ground beef. You may need to add a bit of olive oil or breadcrumbs to the mixture to keep the burgers moist.
Q: Can I freeze cooked burgers?. A: Yes, you can freeze cooked burgers. Wrap them individually in plastic wrap and store them in a freezer bag for up to 2-3 months.
Q: What’s the best way to cook burgers indoors?. A: A cast-iron skillet or grill pan works best for cooking burgers indoors.
Serving Suggestions: Complete the Burger Experience
These steakhouse burgers are fantastic on their own, but here are a few serving suggestions to take them to the next level:
Classic Sides: French fries, onion rings, coleslaw, or potato salad are always a hit.
Healthy Options: Serve with a side salad or grilled vegetables.
Drink Pairings: A cold beer, iced tea, or lemonade pairs perfectly with these burgers. Thinking lunch ideas for restaurant? A burger and a beer is always a winner!
And there you have it! My ultimate guide to making juicy steakhouse burgers that will impress your friends, delight your family, and make you feel like a burger boss. So fire up that grill, gather your ingredients, and get ready for a burger experience you won’t soon forget. Happy cooking!
Juicy steakhouse-style burgers with caramelized onions and melted provolone cheese. A delicious and satisfying meal perfect for any occasion.
Ingredients
Burger Ingredients
1.5lbsGround Beef(80/20 blend recommended)
1tbspOlive Oil
1largeOnion(thinly sliced)
4slicesProvolone Cheese
4Burger Buns
4tbspSteak Sauce
Salt and Pepper(to taste)
Lettuce, Tomato, Pickles(Optional Toppings)
Instructions
Heat olive oil in a skillet over medium heat. Add sliced onions and cook until caramelized, about 15-20 minutes, stirring occasionally. Season with salt and pepper.
While onions are cooking, gently form ground beef into 4 patties. Season generously with salt and pepper.
Preheat grill or skillet to medium-high heat.
Cook burgers for 4-5 minutes per side for medium-rare, or longer depending on desired doneness.
In the last minute of cooking, place a slice of provolone cheese on top of each patty and allow it to melt.
Spread steak sauce on both halves of each burger bun.
Place cheesy burger patties on the bottom bun, top with caramelized onions, and any optional toppings.
Cover with the top bun and serve immediately.
Notes
For best results, use a meat thermometer to ensure burgers are cooked to your desired doneness.
Hey there, burger aficionados! Ava here, and let me tell you, I’ve spent a significant portion of my life on a quest. A quest for the perfect burger. Not just any burger, but the kind that makes you close your eyes and savor every single bite. The kind that brings back memories of summer barbecues and happy times. And guess what? I think I’ve finally cracked the code. This isn’t just a recipe; it’s a journey to burger bliss. I grew up thinking that the best burgers came from restaurants, but I’ve discovered that with a few simple tricks, you can create burger perfection right in your own kitchen.
This journey started when I was a little girl, watching my dad meticulously craft burgers on our old charcoal grill. He always had a secret blend of spices that he never revealed, and the aroma alone was enough to make my mouth water. Over the years, I’ve experimented with countless combinations, learning from my successes (and, let’s be honest, a few epic failures). And now, I’m ready to share my ultimate burger recipe with you. Get ready to impress your friends and family with burgers that are juicy, flavorful, and downright irresistible.
Why You’ll Love This Burger Recipe
Why will you absolutely fall head-over-heels for this burger recipe? Let me count the ways! This isn’t just about slapping some ground beef on a bun; it’s about creating an experience. It’s about the joy of biting into a burger that’s perfectly seasoned, cooked to juicy perfection, and piled high with your favorite toppings. It’s a guaranteed crowd-pleaser, whether you’re hosting a summer barbecue, a casual weeknight dinner, or just craving a little comfort food. This recipe is incredibly versatile. Feel free to customize it with your favorite cheeses, sauces, and veggies. The possibilities are endless!
**Juiciness**: This recipe guarantees a juicy burger every time. We’re talking about burgers that practically melt in your mouth.
**Flavor**: The blend of spices is what sets this burger apart. Each bite is an explosion of savory goodness.
**Ease**: Despite the incredible flavor, this recipe is surprisingly easy to follow. Even a beginner cook can nail it.
**Customizable**: This burger recipe is a blank canvas. Add your favorite toppings and sauces to create your dream burger.
**Crowd-Pleaser**: Prepare to receive rave reviews. These burgers are always a hit, no matter the occasion.
One of the things that I love most about this recipe is how it brings people together. There’s something special about sharing a delicious burger with friends and family. It’s a simple pleasure that can create lasting memories. So, gather your loved ones, fire up the grill (or heat up your skillet), and get ready to make some burger magic. You will not be disappointed! Thank you for joining me on this culinary adventure!
The Best Burger Recipe
Here’s what you’ll need to create burger perfection. I’ve carefully selected each ingredient to ensure maximum flavor and juiciness. Don’t skimp on the quality of the ground beef – it makes a huge difference!
Homemade Burger Ingredients
1.5 lbs ground beef (80/20 blend)
1 tbsp Worcestershire sauce
1 tsp garlic powder
1 tsp onion powder
1/2 tsp smoked paprika
1/4 tsp black pepper
1/2 tsp salt
4 burger buns
Your favorite burger toppings (lettuce, tomato, cheese, etc.)
Easy Burger Recipe Steps
Now, let’s get cooking! Follow these simple steps to create the juiciest, most flavorful burgers you’ve ever tasted.
In a large bowl, gently combine the ground beef, Worcestershire sauce, garlic powder, onion powder, smoked paprika, black pepper, and salt. Be careful not to overmix.
Divide the mixture into 4 equal portions and form into patties, about 3/4 inch thick. Make a slight indentation in the center of each patty to prevent them from bulging during cooking.
Preheat your grill or cast iron skillet to medium-high heat.
Cook the patties for 4-5 minutes per side for medium-rare, or longer depending on your desired doneness.
During the last minute of cooking, add cheese to the patties if desired.
Toast the burger buns lightly.
Assemble the burgers with your favorite toppings and enjoy!
Pro Tips for the Perfect Burger
Want to take your burgers from good to *amazing*? Here are a few of my secret weapon tips:
**Don’t Overmix:** Overmixing the meat develops the gluten, resulting in a tough burger. Gently combine the ingredients until just mixed.
**Make an Indentation:** Press a slight indentation into the center of each patty. This prevents the burgers from bulging in the middle as they cook, ensuring even cooking.
**Chill the Patties:** Place the formed patties in the refrigerator for about 30 minutes before cooking. This helps them hold their shape and prevents them from falling apart on the grill.
**Use a Meat Thermometer:** The best way to ensure your burgers are cooked to perfection is to use a meat thermometer. Insert it into the side of the patty to get an accurate reading.
**Let it Rest:** After cooking, let the burgers rest for a few minutes before serving. This allows the juices to redistribute, resulting in a juicier burger.
These key tips are here to help you achieve burger perfection. Remember, the key is to be gentle with the meat and not overcook it. If you follow these tips, you’ll be well on your way to making the best burgers of your life. Let’s move on to some common mistakes to avoid.
Common Mistakes to Avoid When Making Burgers
Even the most seasoned cooks can make mistakes. Here are a few common pitfalls to avoid when making burgers:
**Using Lean Ground Beef:** While lean ground beef might seem healthier, it lacks the fat needed for a juicy burger. Opt for an 80/20 blend for the best results.
**Skipping the Seasoning:** Don’t be afraid to season your burger generously. Salt, pepper, garlic powder, and onion powder are all essential for a flavorful burger.
**Pressing Down on the Patties:** Resist the urge to press down on the patties as they cook. This squeezes out the juices, resulting in a dry burger.
**Flipping Too Often:** Flip the burgers only once during cooking. This allows them to develop a nice crust on each side.
**Overcooking:** Overcooked burgers are dry and tough. Use a meat thermometer to ensure they’re cooked to your desired doneness.
Avoiding these mistakes will drastically improve the quality of your burgers. Remember, practice makes perfect! Don’t be discouraged if your first attempt isn’t flawless. Just keep experimenting and learning, and you’ll eventually master the art of burger-making. Next, let’s talk about some fun ways to change up the recipe.
Burger Variations: Spice It Up!
One of the best things about burgers is how versatile they are. Here are a few fun variations to try:
**Spicy Burger:** Add a pinch of cayenne pepper or a dash of hot sauce to the meat mixture for a spicy kick.
**Mushroom and Swiss Burger:** Top the burger with sautéed mushrooms and melted Swiss cheese.
**Bacon Cheeseburger:** Add crispy bacon and your favorite cheese for a classic bacon cheeseburger.
**BBQ Burger:** Brush the burger with BBQ sauce during the last minute of cooking and top with coleslaw.
**Greek Burger:** Mix crumbled feta cheese and chopped Kalamata olives into the meat mixture and top with tzatziki sauce.
These are just a few ideas to get you started. Feel free to get creative and experiment with different flavors and toppings. The possibilities are endless! Burger but with a little twist, can be fun. Now, let’s discuss how to store any leftover burgers (if you have any!).
How to Store Leftover Burgers
If you happen to have any leftover burgers, here’s how to store them properly:
**Refrigerate:** Allow the burgers to cool completely before storing them in an airtight container in the refrigerator. They’ll keep for up to 3-4 days.
**Freeze:** For longer storage, wrap the burgers individually in plastic wrap and then place them in a freezer bag. They’ll keep for up to 2-3 months.
**Reheating:** To reheat, thaw the burgers in the refrigerator overnight. Then, heat them in a skillet, microwave, or oven until heated through.
Proper storage is key to maintaining the quality and flavor of your burgers. Make sure to cool them completely before storing to prevent the growth of bacteria. Now, let’s answer some frequently asked questions about making burgers.
Frequently Asked Questions About Making Burgers
Here are some common questions I get asked about making burgers:
**What’s the best type of ground beef to use?** I recommend using an 80/20 blend of ground beef for the juiciest burgers.
**How do I prevent the burgers from shrinking?** Don’t overmix the meat and make a slight indentation in the center of each patty.
**How do I know when the burgers are done?** Use a meat thermometer to check the internal temperature. For medium-rare, cook to 130-135°F; for medium, cook to 140-145°F; and for well-done, cook to 160°F.
**Can I make these burgers ahead of time?** Yes, you can form the patties ahead of time and store them in the refrigerator until you’re ready to cook them.
**Can I grill or pan-fry the burgers?** Absolutely! You can cook the burgers on a grill, in a cast iron skillet, or even under the broiler.
If you have any other questions, feel free to leave them in the comments below. I’m always happy to help! One of the ways to make sure you get the burger right is by getting all your questions answered. It also helps to know what to serve with your burger.
Serving Suggestions: Complete the Meal
What’s a burger without some delicious sides? Here are a few of my favorite serving suggestions:
**French Fries:** A classic pairing. Crispy, salty fries are the perfect complement to a juicy burger.
**Onion Rings:** Another classic choice. Sweet and savory onion rings add a satisfying crunch.
**Coleslaw:** A creamy, tangy coleslaw adds a refreshing element to the meal.
**Potato Salad:** A classic side dish that’s perfect for summer barbecues.
**Corn on the Cob:** Sweet and juicy corn on the cob is a simple and delicious side.
These are just a few ideas to get you started. Feel free to get creative and add your own favorite sides. A good side dish can really elevate the burger experience. Let’s talk about how this recipe allows you to make the easiest burgers.
The Easiest Home Burgers Recipe
This Home Burgers Recipe is designed to be as straightforward and simple as possible, ensuring that anyone, regardless of their cooking experience, can create a delicious and satisfying burger at home. The beauty of this recipe lies in its simplicity; it requires minimal ingredients and equipment, and the steps are easy to follow. By using common pantry staples and straightforward cooking techniques, this recipe eliminates the intimidation factor often associated with homemade meals. The goal is to provide a no-fuss approach to burger making, making it a go-to option for quick weeknight dinners or casual weekend gatherings. The emphasis is on achieving maximum flavor with minimal effort, proving that you don’t need to be a culinary expert to enjoy a restaurant-quality burger in the comfort of your own kitchen. This allows you to whip up a burger quickly.
Easy Homemade Burger Guide
This Easy Homemade Burger Guide offers step-by-step instructions, starting with selecting the right ingredients and ending with assembling your perfect burger. It provides clear and concise directions, along with helpful tips and tricks to ensure a successful outcome every time. The guide emphasizes the importance of not overmixing the meat, forming the patties correctly, and cooking them to your desired level of doneness. It also includes suggestions for toppings and variations, allowing you to customize your burger to your personal preferences. Whether you’re a beginner cook or an experienced home chef, this guide provides all the information you need to create juicy, flavorful burgers that will impress your family and friends. This allows you to easily follow the recipe.
Easy Burger Recipe Ingredients
The Easy Burger Recipe Ingredients list is carefully curated to include only essential items that are readily available in most grocery stores. The focus is on simplicity and accessibility, ensuring that you can easily gather everything you need without having to search for obscure or hard-to-find items. The list includes ground beef, Worcestershire sauce, garlic powder, onion powder, smoked paprika, black pepper, salt, burger buns, and your favorite toppings. Each ingredient plays a crucial role in creating a flavorful and satisfying burger. The combination of spices enhances the natural taste of the beef, while the toppings add texture and freshness. By using these simple ingredients, you can create a delicious burger that rivals those found in restaurants, all without breaking the bank or spending hours in the kitchen. These ingredients and their proportions are key to the flavor.
Homemade Burger Cooking Tips
These Homemade Burger Cooking Tips are designed to help you achieve burger perfection by providing insider knowledge and techniques that elevate your cooking skills. These tips cover a range of topics, from selecting the right type of ground beef to preventing the burgers from shrinking while cooking. You’ll learn the importance of not overmixing the meat, making an indentation in the center of each patty, and chilling the patties before grilling or pan-frying. The tips also include advice on using a meat thermometer to ensure your burgers are cooked to your desired level of doneness and letting them rest for a few minutes after cooking to allow the juices to redistribute. By following these tips, you can avoid common mistakes and create juicy, flavorful burgers that will impress even the most discerning palates. I hope you get the way to cook perfect burgers.
Homemade Hamburgers Recipe
This Homemade Hamburgers Recipe is more than just a list of ingredients and instructions; it’s a comprehensive guide to creating the ultimate burger experience at home. It combines tried-and-true techniques with creative flavor combinations to deliver a burger that is both familiar and exciting. The recipe emphasizes the importance of using high-quality ingredients, such as fresh ground beef and flavorful spices, and provides detailed instructions on how to prepare and cook the burgers to perfection. It also includes suggestions for toppings and variations, allowing you to customize your burger to your personal preferences. Whether you’re grilling outdoors or pan-frying indoors, this recipe provides all the information you need to create juicy, flavorful hamburgers that will become a family favorite. This recipe, to make it perfect, requires patience.
How To Make In-n-out Burgers
While this recipe focuses on creating a classic homemade burger, you can easily adapt it to create a burger inspired by In-N-Out, the iconic California burger chain. To achieve that In-N-Out flavor, start by using fresh, high-quality ground beef and forming thin patties. Cook the patties on a flat-top grill or in a cast iron skillet until they are nicely browned and slightly crispy around the edges. For the sauce, mix together mayonnaise, ketchup, and sweet pickle relish. Toast the burger buns and spread the sauce on both halves. Add a slice of American cheese to the patty during the last minute of cooking, and top with lettuce, tomato, and thinly sliced onions. For an extra touch, add grilled onions that have been caramelized to perfection. Assemble the burger and enjoy a taste of California in your own home. This is the way to make restaurant-quality burgers.
And there you have it! My ultimate burger recipe, complete with tips, tricks, and variations. I hope you enjoy making these burgers as much as I do. Happy cooking!
Hey there, flavor fanatics! Ava here, back in my Seattle kitchen, ready to share a little secret that’s been transforming my steak fajitas from ‘meh’ to ‘WHOA’ for years. If you’re anything like me, you believe that the heart of any great dish lies in the marinade. And let me tell you, this Steak Fajita Marinade Recipe is not just good; it’s a game-changer. Forget those bland, store-bought packets – we’re about to embark on a culinary adventure that will have your taste buds singing and your family begging for seconds. Prepare to unlock the secret to mouthwatering steak fajitas with this easy and flavorful marinade recipe. Get ready for authentic Mexican taste right in your own home!
Growing up in Oregon, my mom always said, ‘Ava, the best meals start with love and a killer marinade.’ Okay, maybe she didn’t say it *exactly* like that, but the sentiment was there. She taught me that a good marinade isn’t just about soaking meat; it’s about infusing it with layers of flavor that dance on your palate. And trust me, this marinade is a masterpiece of flavor layering. It’s the best steak fajita marinade you’ll ever try!
Why You’ll Love This Steak Fajita Marinade
So, what makes this marinade so special? Why should you ditch your old recipe and give this one a whirl? Let me count the ways:
Unbelievable Flavor: This isn’t your run-of-the-mill marinade. The combination of lime juice, garlic, chili powder, and cumin creates a symphony of flavors that perfectly complements the richness of the steak. It’s so much great than anything you can buy in a store!
Quick and Easy: Seriously, you can whip this up in under 5 minutes. No fancy techniques or hard-to-find ingredients required. Just simple, straightforward goodness.
Versatile: While it’s designed for steak fajitas, this marinade works wonders on chicken, shrimp, or even tofu. Talk about a multi-tasker!
Customizable: Want to kick up the heat? Add a pinch of cayenne pepper. Prefer a sweeter note? A drizzle of honey will do the trick. The possibilities are endless.
Makes the Toughest Cuts Tender: This marinade contains lime juice, which helps to break down the fibers in the meat, resulting in a super tender and juicy steak. Even if you’re using a less expensive cut like flank steak, this marinade will transform it into something special. This is all the magic you need!
I remember one time, I was hosting a last-minute barbecue, and all I had was a tough cut of steak. I quickly whipped up this marinade, let it sit for a few hours, and grilled it to perfection. My friends couldn’t stop raving about how tender and flavorful the steak was. That’s the power of a good marinade, folks!
Ingredients for the Best Steak Fajita Marinade
Alright, let’s get down to business. Here’s what you’ll need to create this magical elixir:
1/4 cup olive oil
1/3 cup fresh lime juice (approx. 2 limes)
zest of 2 limes
1/2 teaspoon chili powder
1/2 teaspoon ground cumin
1 tablespoon garlic (minced)
1 tablespoon soy sauce
1/4 teaspoon kosher salt
1-2 tablespoons cilantro (chopped (optional))
How to Make Steak Fajita Marinade: Step-by-Step
Ready to transform your steak fajitas? Here’s the super simple process:
Combine: In a small mixing bowl, add the olive oil, lime juice, lime zest, chili powder, cumin, minced garlic, soy sauce, salt, and cilantro (if using).
Whisk: Whisk all the ingredients together until they are well combined. Make sure there are no clumps of spices. The marinade should be a uniform color and consistency.
Marinate: Place the steak in a reusable silicone bag or a glass container. Pour the marinade over the steak, making sure it’s fully coated. Seal the bag or cover the container tightly.
Refrigerate: Place the steak in the refrigerator and marinate for at least 30 minutes, or even better, for several hours. For the best results, marinate overnight.
Cook: Cook your steak however you like! Whether you prefer grilling, pan-searing, or broiling, this marinade will ensure a flavorful and tender result.
That’s it! See? I told you it was easy. Now, let’s dive into some pro tips to take your fajitas to the next level.
Pro Tips for the Perfect Marinade
Okay, friends, let’s elevate this marinade from great to extraordinary with a few of my tried-and-true pro tips:
Fresh is Best: Always use fresh lime juice. The bottled stuff just doesn’t have the same zing. Trust me on this one. You can really taste the difference.
Don’t Over-Marinate: While marinating is essential, don’t go overboard. Marinating for too long can make the steak mushy, especially with the lime juice. I recommend a minimum of 30 minutes and a maximum of 24 hours.
Pat it Dry: Before cooking, pat the steak dry with paper towels. This will help it get a nice sear and prevent it from steaming.
Get it Hot: Make sure your grill or pan is screaming hot before you add the steak. This will create a beautiful crust and lock in the juices.
Rest is Key: After cooking, let the steak rest for at least 5-10 minutes before slicing. This allows the juices to redistribute, resulting in a more tender and flavorful steak.
Use a Meat Thermometer: For perfectly cooked steak, use a meat thermometer. Insert it into the thickest part of the steak to gauge the internal temperature.
Common Mistakes to Avoid
We’ve all been there – cooking mishaps happen! Here are a few common mistakes to avoid when making this marinade:
Using Bottled Lime Juice: As I mentioned earlier, fresh lime juice is crucial for the best flavor. Bottled lime juice often contains preservatives and lacks the bright, zesty flavor of fresh limes.
Over-Marinating: Marinating for too long can break down the proteins in the steak, resulting in a mushy texture. Stick to the recommended marinating time for the best results.
Skipping the Zest: The lime zest adds a ton of flavor and aroma to the marinade. Don’t skip it!
Not Adjusting Seasoning: Taste the marinade before adding the steak and adjust the seasoning as needed. If it’s too tart, add a pinch of sugar. If it needs more depth, add a dash of smoked paprika.
Crowding the Pan: When searing the steak, avoid crowding the pan. This will lower the temperature and prevent the steak from browning properly. Cook the steak in batches if necessary.
Steak Fajita Marinade Variations
One of the things I love most about cooking is the ability to get creative and customize recipes to suit your taste. Here are a few variations on this marinade to spark your imagination:
Spicy Fajita Marinade: Add 1-2 finely chopped jalapeños or a pinch of cayenne pepper to the marinade for a spicy kick.
Sweet and Tangy Fajita Marinade: Add 1-2 tablespoons of honey or maple syrup to the marinade for a touch of sweetness. You can also add a splash of pineapple juice for extra tanginess.
Smoky Fajita Marinade: Add 1 teaspoon of smoked paprika or a splash of liquid smoke to the marinade for a smoky flavor.
Herbaceous Fajita Marinade: Add a mix of fresh herbs like oregano, thyme, and rosemary to the marinade for an herbaceous twist.
Citrus Blast Fajita Marinade: Use a combination of lime, orange, and grapefruit juice for a complex citrus flavor.
Feel free to experiment with different flavors and ingredients to create your own signature fajita marinade!
How to Store Leftover Marinade
If you have leftover marinade after marinating the steak, don’t throw it away! You can store it in an airtight container in the refrigerator for up to 3 days. However, it’s important to note that you should *never* use leftover marinade that has been in contact with raw meat as a sauce, unless you boil it first to kill any bacteria. A better use for the marinade and, the steak, would be to use it for veggies. It adds so much great flavor to them!
Frequently Asked Questions (FAQ)
Got questions? I’ve got answers! Here are some frequently asked questions about this steak fajita marinade:
Can I use this marinade on other types of meat? Absolutely! This marinade is delicious on chicken, pork, shrimp, and even tofu. Just adjust the marinating time accordingly.
How long should I marinate the steak? I recommend marinating the steak for at least 30 minutes, but for the best results, marinate overnight. Don’t marinate for more than 24 hours, as the lime juice can make the steak mushy.
Can I freeze the marinade? Yes, you can freeze the marinade for up to 3 months. Store it in an airtight container or freezer bag. Thaw it in the refrigerator before using.
Can I use dried herbs instead of fresh? While fresh herbs are always preferable, you can use dried herbs in a pinch. Use about 1 teaspoon of dried herbs for every tablespoon of fresh herbs.
What’s the best cut of steak for fajitas? Flank steak is a popular choice for fajitas because it’s relatively inexpensive and has a great flavor. Skirt steak is another good option, as it’s very tender.
Serving Suggestions
Now that you’ve got your perfectly marinated steak, it’s time to assemble those fajitas! Here are some of my favorite serving suggestions:
Classic Fajitas: Serve the sliced steak in warm flour or corn tortillas with your favorite toppings, such as sautéed bell peppers and onions, guacamole, sour cream, salsa, and shredded cheese.
Fajita Bowls: Create a healthy and delicious fajita bowl by serving the steak over a bed of rice or quinoa with black beans, corn, avocado, and a drizzle of lime crema.
Fajita Salad: Toss the sliced steak with mixed greens, black beans, corn, tomatoes, avocado, and a cilantro-lime dressing for a refreshing fajita salad.
Fajita Nachos: Load tortilla chips with the steak, cheese, beans, and your favorite toppings, then bake until the cheese is melted and bubbly for a crowd-pleasing appetizer.
Fajita Quesadillas: Layer the steak with cheese and sautéed vegetables between two tortillas, then grill until golden brown and the cheese is melted for a quick and easy meal.
No matter how you choose to serve it, this Steak Fajita Marinade is guaranteed to take your fajitas to the next level. So go ahead, fire up the grill, gather your friends and family, and get ready for a fiesta of flavor!
I truly believe that this is the best steak fajita marinade out there, and I can’t wait for you to try it. Thanks for stopping by my kitchen, and happy cooking!
If you liked this recipe, be sure to check out some of my other favorites. You can find them all on my website. Thank you again for visiting!
This steak fajita marinade infuses your steak with zesty lime and savory spices, creating a delicious and tender base for your fajitas. It's quick to prepare and elevates your steak to the next level!
Ingredients
Marinade Ingredients
1/4cupolive oil
1/3cupfresh lime juice(approx. 2 limes)
2limes(zest of)
1/2teaspoonchili powder
1/2teaspoonground cumin
1tablespoongarlic(minced)
1tablespoonsoy sauce
1/4teaspoonkosher salt
1-2tablespoonscilantro(chopped (optional))
Instructions
Add ingredients to a small mixing bowl.
Whisk until well combined.
Place steak in a reusable silicone bag or glass container.
Pour the marinade over the steak, ensuring it is fully coated.
Seal and place in the refrigerator for 30 minutes or more.
Cook your steak however you want!
Notes
For best results, marinate the steak for at least 2 hours, or even overnight, to allow the flavors to fully penetrate the meat.
Hey there, friend! Ava here, back in my little Seattle kitchen, and today we’re firing up the grill (or the skillet, if the Seattle weather is being its usual self) for something truly special: Grilled Flank Steak Fajitas. Trust me, these aren’t just any fajitas. They’re bursting with flavor, incredibly easy to make, and perfect for a weeknight dinner or a weekend fiesta. I remember the first time I made these for my friends; the smell alone had everyone crowding around the grill, practically drooling. Let’s bring that same magic to your kitchen!
Growing up, fajitas were always a family favorite. My mom had her own version, of course, but I’ve put my own spin on it over the years, tweaking the marinade until it’s just right. And let me tell you, the marinade is key. It transforms a simple flank steak into a tender, flavorful masterpiece. Are you ready to dive in?
Why You’ll Love This Grilled Flank Steak Fajitas Recipe
Okay, let’s be real. There are a million fajita recipes out there. So, why should you try this one? Well, let me tell you:
Flavor Explosion: The marinade is a symphony of savory, tangy, and slightly sweet notes that perfectly complement the rich flavor of the flank steak.
Quick & Easy: From prep to plate, these fajitas come together in under an hour. Perfect for those busy weeknights when you need a delicious meal without spending hours in the kitchen.
Customizable: Want to add some heat? Throw in a pinch of cayenne pepper. Prefer a different veggie? Swap out the bell peppers for your favorite. This recipe is a blank canvas for your culinary creativity.
Crowd-Pleaser: Whether you’re cooking for your family or hosting a gathering, these fajitas are guaranteed to be a hit. I’ve never seen a plate of these disappear so fast!
Seriously, friends, this recipe checks all the boxes. Let’s get cooking!
Ingredients for the Best Flank Steak Fajitas
Alright, let’s gather our ingredients. Here’s what you’ll need to create these amazing fajitas:
2 lb flank steak
Marinade:
¼ cup olive oil
¼ cup soy sauce
¼ cup fresh lime juice
2 tbsp brown sugar
1 tsp ground cumin
1 tsp chili powder
½ tsp kosher salt
½ tsp freshly ground black pepper
1 red bell pepper, sliced
1 yellow pepper, sliced
1 green pepper, sliced
1 medium yellow onion, halved and sliced
12-14 (6-inch) flour or corn tortillas, warmed
Garnish:
1 ripe avocado, sliced, for garnish
Salsa, for garnish
Fresh flat-leaf parsley, chopped, for garnish
How To Make Grilled Flank Steak Fajitas: Step-by-Step
Okay, let’s get down to the nitty-gritty. Here’s how we turn these ingredients into a fajita feast:
Marinate the Steak: Place the flank steak in a large resealable plastic bag. For the marinade, in a small bowl whisk olive oil, soy sauce, lime juice, brown sugar, cumin, chili powder, salt and pepper. Reserve ¼ cup marinade and pour remaining marinade over flank steak, seal bag and refrigerate at least 2 hours or overnight. The longer it marinates, the more flavorful it becomes!
Prep the Veggies: While the flank steak marinates, combine sliced peppers and onions with remaining ¼ cup marinade. Refrigerate until ready to cook. This allows the veggies to soak up some of that delicious marinade flavor.
Grill the Steak: Allow flank steak come to room temperature before cooking. When ready to cook, preheat grill to medium-high heat and lightly oil grill grates. Remove meat from marinade and place on grill. Grill 6 minutes, flip and cook 5 minutes more until cooked through. For medium-rare, you’ll want to cook until it reaches an internal temperature of 130-135°F.
Rest the Steak: Transfer meat to a cutting board and let rest 10 minutes. This is crucial! Resting allows the juices to redistribute, resulting in a more tender and flavorful steak.
Cook the Veggies: Heat a large skillet over high heat and add pepper and onion mixture. Cook 5 minutes, until peppers and onions are slightly charred. Remove from skillet and set aside. The char adds a lovely smoky flavor.
Assemble the Fajitas: When ready to assemble, thinly slice flank steak against the grain. Place steak down the centre of each tortilla, top with pepper and onion mixture followed by sliced avocado, salsa and parsley. Roll tortilla and serve immediately.
And there you have it! Easy peasy, right? Now, let’s talk about some pro tips to take these fajitas to the next level.
Pro Tips for Perfect Grilled Flank Steak Fajitas
Alright, friend, let’s elevate these fajitas from good to *amazing* with a few insider tips:
Marinate, Marinate, Marinate: Seriously, don’t skimp on the marinating time. The longer the flank steak sits in that flavorful concoction, the more tender and delicious it will be. Overnight is ideal, but at least 2 hours will do in a pinch.
Room Temperature is Key: Before grilling, let the flank steak sit at room temperature for about 30 minutes. This helps it cook more evenly.
Hot Grill is a Must: Make sure your grill is nice and hot before you throw the steak on. This will give you a beautiful sear and lock in those juices.
Don’t Overcook: Flank steak is best served medium-rare to medium. Overcooking will result in a tough, chewy steak. Use a meat thermometer to ensure it’s cooked to perfection.
Slice Against the Grain: This is crucial for tender fajitas. Look for the direction of the muscle fibers and slice perpendicular to them.
Warm Your Tortillas: Nobody wants a cold, stiff tortilla. Warm them up in a dry skillet or microwave for a few seconds before serving.
Get Creative with Toppings: Don’t be afraid to experiment with different toppings! Sour cream, guacamole, cheese, pickled onions, and jalapeños are all great options.
Remember, cooking is all about experimenting and having fun. Don’t be afraid to put your own spin on things!
Common Mistakes to Avoid When Making Flank Steak Fajitas
We all make mistakes in the kitchen, it’s part of the learning process. But here are a few common pitfalls to watch out for when making flank steak fajitas:
Not Marinating Long Enough: This is the biggest mistake! The marinade is what gives the flank steak its flavor and tenderness. Don’t rush it.
Overcooking the Steak: Flank steak is a lean cut of meat, so it can easily become tough if overcooked. Use a meat thermometer and aim for medium-rare to medium.
Not Resting the Steak: Resting allows the juices to redistribute, resulting in a more tender and flavorful steak. Don’t skip this step!
Slicing with the Grain: This will result in tough, chewy fajitas. Always slice against the grain.
Using Cold Tortillas: Warm tortillas are essential for a good fajita experience.
Learn from these mistakes, and you’ll be well on your way to fajita perfection!
Flavor Variations for Your Flank Steak Fajitas
One of the best things about fajitas is how versatile they are. Here are a few fun variations to try:
Spicy Fajitas: Add a pinch of cayenne pepper to the marinade or top with sliced jalapeños for some extra heat.
Citrusy Fajitas: Add the zest of one lime and one orange to the marinade for a bright, citrusy flavor.
Smoky Fajitas: Use smoked paprika in the marinade for a smoky flavor. Grill the peppers and onions over wood chips for an even smokier flavor.
Mushroom Fajitas: Add sliced mushrooms to the pepper and onion mixture for a vegetarian option.
Pineapple Fajitas: Grill some pineapple slices and add them to the fajitas for a sweet and tangy twist.
The possibilities are endless! Don’t be afraid to get creative and experiment with different flavors and ingredients.
How to Store Leftover Flank Steak Fajitas
If you happen to have any leftovers (which is rare in my house!), here’s how to store them:
Steak: Store the sliced flank steak in an airtight container in the refrigerator for up to 3 days.
Veggies: Store the cooked peppers and onions in an airtight container in the refrigerator for up to 3 days.
Tortillas: Store the tortillas in a resealable plastic bag at room temperature for up to 5 days.
To reheat, simply warm the steak and veggies in a skillet over medium heat until heated through. Warm the tortillas in a dry skillet or microwave before serving.
Frequently Asked Questions About Flank Steak Fajitas
Got questions? I’ve got answers! Here are some common questions about making flank steak fajitas:
Can I use a different cut of steak? While flank steak is the traditional choice for fajitas, you can also use skirt steak or hanger steak.
Can I make this recipe in the oven? Yes! Preheat your oven to 400°F. Place the marinated flank steak on a baking sheet and bake for 12-15 minutes, or until cooked to your desired doneness. Cook the peppers and onions in a skillet on the stovetop.
Can I freeze the flank steak? Yes! Marinate the flank steak and then freeze it in a resealable plastic bag for up to 3 months. Thaw in the refrigerator overnight before cooking.
What if I don’t have a grill? No problem! You can cook the flank steak in a skillet on the stovetop. Heat a large skillet over medium-high heat and cook the steak for 5-7 minutes per side, or until cooked to your desired doneness.
Can I make this recipe ahead of time? Yes! You can marinate the flank steak and prep the veggies ahead of time. Store them separately in the refrigerator until ready to cook.
Serving Suggestions for Your Grilled Flank Steak Fajitas
These fajitas are delicious on their own, but here are a few serving suggestions to make them even more special:
Sides: Serve with a side of rice and beans for a complete meal.
Toppings: Offer a variety of toppings, such as sour cream, guacamole, cheese, salsa, pickled onions, and jalapeños.
Drinks: Pair with a refreshing margarita or a cold beer.
Dessert: Finish off the meal with some churros or a slice of key lime pie.
There you have it, friend! My foolproof recipe for Grilled Flank Steak Fajitas. I hope you love them as much as I do. Now, go fire up that grill and get cooking! And don’t forget to share your creations with me on social media – I can’t wait to see what you come up with. Happy cooking!
Remember, you can cook until the steak reaches your desired level of doneness. The marinade, featuring soy sauce and a squeeze of lime, tenderizes the flank steak beautifully. Don’t forget some chopped onions and cilantro and a bit of fresh salsa for the perfect finishing touch. The ground ancho chile powder adds a depth of flavor that’s simply irresistible. Place flank steak in the marinade for at least two hours, or even better, cover and refrigerate overnight. Grill each side of steak, allowing about minutes for medium-rare. Serve with a squeeze of lime some chopped onions, and cilantro and a bit of fresh salsa made of steak. Enjoy!
Enjoy tender grilled flank steak fajitas with colorful peppers and onions, all wrapped in warm tortillas. A quick and flavorful meal perfect for any night of the week!
Ingredients
Ingredients
2lbflank steak
Marinade
¼cupolive oil
¼cupsoy sauce
¼cupfresh lime juice
2tbspbrown sugar
1tspground cumin
1tspchili powder
½tspkosher salt
½tspfreshly ground black pepper
1red bell pepper, sliced
1yellow pepper, sliced
1green pepper, sliced
1mediumyellow onion, halved and sliced
12-14(6-inch)flour or corn tortillas, warmed
1ripeavocado, sliced, for garnish
Salsa, for garnish
Fresh flat-leaf parsley, chopped, for garnish
Instructions
Marinate steak in a mixture of olive oil, soy sauce, lime juice, brown sugar, cumin, chili powder, salt, and pepper for at least 2 hours. Reserve some marinade for the peppers and onions.
Grill steak over medium-high heat for 6 minutes per side, then let rest for 10 minutes.
Cook peppers and onions in a skillet until slightly charred.
Slice steak against the grain and assemble fajitas with steak, peppers, onions, avocado, salsa, and parsley.
Notes
For extra flavor, add a squeeze of lime juice to the cooked peppers and onions.
Easy & Delicious Steak Fajitas Recipe: A Taste of Seattle Sunshine
Hey there, friend! Ava here, back in my Seattle kitchen, where the coffee’s always brewing and something delicious is always cooking. Today, we’re ditching the drizzle for a little fiesta, bringing some sunshine indoors with a recipe that’s close to my heart: Easy & Delicious Steak Fajitas. This isn’t just any fajita recipe; it’s the kind of meal that turns an ordinary weeknight into a mini-celebration. It’s quick, it’s easy, and it’s guaranteed to make you the hero of dinner. So, grab your apron, and let’s get sizzling!
I remember the first time I made steak fajitas. It was a total experiment, fueled by a craving for something vibrant and flavorful. I had some leftover skirt steak from a barbecue, a bell pepper that was begging to be used, and a serious need for a culinary adventure. The result? A dish that my family now requests at least once a month. And trust me, that’s saying something!
This recipe is all about simplicity without sacrificing flavor. We’re talking tender, juicy steak, perfectly softened bell peppers and onions, and a marinade that’s so good, you’ll want to bottle it up. Whether you’re a seasoned cook or just starting out, this recipe is designed to be foolproof. I’m confident that you’ll be able to make this recipe and have the best steak fajitas you’ve ever tasted!Why You’ll Absolutely Love This Steak Fajitas Recipe
What’s not to love about steak fajitas? They’re customizable, crowd-pleasing, and seriously delicious. But here are a few more reasons why this recipe deserves a spot in your regular rotation:
Quick and Easy: From prep to plate, these fajitas come together in under 30 minutes. Perfect for busy weeknights when you need a satisfying meal, fast.
Bursting with Flavor: The marinade is the star of the show, infusing the steak with a zesty, savory goodness that will make your taste buds sing.
Versatile: Feel free to swap in your favorite veggies, add a little spice, or load up on toppings. The possibilities are endless!
Crowd-Pleasing: Whether you’re feeding a family of four or hosting a dinner party, these fajitas are always a hit. Everyone loves building their own perfect bite.
Budget-Friendly: Using skirt steak keeps the cost down without compromising on flavor or tenderness.
The Secret’s in the Marinade: Ingredients for the Best Steak Fajitas
Alright, let’s talk ingredients. I’ve experimented with a lot of different marinades over the years, but this one is my go-to. It’s the perfect balance of tangy, savory, and just a hint of spice. Here’s what you’ll need:
1 lb skirt steak, thinly sliced: Skirt steak is ideal for fajitas because it’s flavorful and cooks quickly.
1 large bell pepper (any color), sliced: I usually go for a mix of red and yellow for a pop of color, but any bell pepper will work.
1 large onion, sliced: Yellow or white onions are great choices.
2 tbsp olive oil: For sautéing the veggies and steak.
2 tbsp fajita seasoning: You can use store-bought or make your own (see below for my homemade recipe).
1 tbsp lime juice: Adds a bright, tangy flavor to the marinade.
8 flour tortillas: Warm them up for the perfect fajita base.
I’ve found that quality ingredients really make a difference here. Freshly squeezed lime juice, vibrant bell peppers, and good-quality steak will elevate your fajitas to the next level. I used to skimp on the lime juice, but now I always make sure to have fresh limes on hand. Trust me, you’ll taste the difference!
If you’re feeling adventurous, try making your own fajita seasoning! It’s surprisingly easy, and you can customize it to your liking. Here’s my go-to recipe:
1 tablespoon chili powder
1 teaspoon cumin
1 teaspoon smoked paprika
1/2 teaspoon garlic powder
1/2 teaspoon onion powder
1/4 teaspoon cayenne pepper (optional, for heat)
1/4 teaspoon oregano
Salt and pepper to taste
Combine all the ingredients in a small bowl and store in an airtight container. This homemade fajita seasoning is so much better than store-bought, and it’s perfect for adding a little extra flavor to your steak fajitas.
Step-by-Step: How to Make the Best Steak Fajitas
Alright, let’s get cooking! Here’s a step-by-step guide to making the most amazing steak fajitas you’ve ever tasted. I’ve included a few of my favorite tips and tricks along the way, so pay attention!
Marinate the Steak: In a bowl, combine the sliced steak with fajita seasoning and lime juice. Marinate for at least 15 minutes, or up to a few hours in the refrigerator. The longer you marinate, the more flavorful the steak will be. I like to marinate the steak for at least an hour, or even overnight for maximum flavor. If you’re short on time, even 15 minutes will make a difference.
Sauté the Veggies: Heat olive oil in a large skillet or cast iron pan over medium-high heat. Add the sliced bell pepper and onion to the skillet and cook until softened, about 5-7 minutes. You want the veggies to be tender-crisp, not mushy. I like to add a pinch of salt and pepper to the veggies while they’re cooking to bring out their natural sweetness.
Cook the Steak: Add the marinated steak to the skillet and cook until browned and cooked through, about 5-7 minutes. Be careful not to overcrowd the pan, or the steak will steam instead of sear. If necessary, cook the steak in batches. I like to cook the steak to medium-rare for the best flavor and tenderness.
Warm the Tortillas: Warm the flour tortillas according to package instructions. You can warm them in the microwave, in a dry skillet, or even over an open flame for a slightly charred flavor. I prefer to warm them in a dry skillet for a few seconds on each side.
Assemble and Serve: Serve the steak and vegetable mixture in the warm tortillas with your favorite toppings. Sour cream, guacamole, salsa, and shredded cheese are all great options. I also like to add a squeeze of lime juice and a sprinkle of fresh cilantro for extra flavor.
This recipe is so simple, but the results are truly amazing. The steak is tender and flavorful, the veggies are perfectly cooked, and the toppings add a burst of freshness. I’m telling you, this is a recipe that you’ll make over and over again!
Pro Tips for Perfect Steak Fajitas Every Time
Want to take your steak fajitas to the next level? Here are a few of my favorite pro tips:
Choose the Right Cut of Steak: Skirt steak is my go-to for fajitas, but flank steak or even sirloin steak will also work. Just make sure to slice the steak thinly against the grain for maximum tenderness.
Don’t Overcook the Steak: Overcooked steak is tough and dry. Cook the steak to medium-rare for the best flavor and tenderness. Use a meat thermometer to ensure that the steak is cooked to the perfect temperature.
Marinate the Steak for at Least 30 Minutes: The longer you marinate the steak, the more flavorful it will be. I like to marinate the steak for at least 30 minutes, or even overnight for maximum flavor.
Use a Hot Skillet: A hot skillet is essential for searing the steak and vegetables. Make sure the skillet is hot before adding the steak and vegetables, or they will steam instead of sear.
Don’t Overcrowd the Pan: Overcrowding the pan will lower the temperature and cause the steak and vegetables to steam instead of sear. Cook the steak and vegetables in batches if necessary.
Warm the Tortillas Properly: Warm tortillas are essential for a good fajita. Warm the tortillas in a dry skillet, in the microwave, or over an open flame for the best results.
Use Fresh Toppings: Fresh toppings add a burst of flavor and freshness to your fajitas. Use fresh salsa, guacamole, sour cream, and cilantro for the best results.
These tips are all about maximizing flavor and texture. I’ve learned them through years of experimenting in the kitchen, and they really do make a difference. I like to think that my steak fajitas are more than just a meal; they’re an experience!
Common Mistakes to Avoid When Making Steak Fajitas
Even the simplest recipes can have their pitfalls. Here are a few common mistakes to avoid when making steak fajitas:
Not Marinating the Steak Long Enough: The marinade is key to tender, flavorful steak. Don’t skimp on the marinating time!
Overcooking the Steak: This is the biggest mistake people make. Overcooked steak is tough and dry. Use a meat thermometer and cook the steak to medium-rare.
Using a Dull Knife: A dull knife makes it difficult to slice the steak thinly against the grain. Use a sharp knife for the best results.
Overcrowding the Pan: Overcrowding the pan will lower the temperature and cause the steak and vegetables to steam instead of sear. Cook the steak and vegetables in batches if necessary.
Using Cold Tortillas: Cold tortillas are stiff and difficult to roll. Warm the tortillas before serving.
Not Using Enough Toppings: Toppings are what make fajitas fun! Don’t be shy, load ’em up!
I’ve made all of these mistakes at one point or another. The good news is that they’re easy to avoid! Just remember to take your time, pay attention to the details, and don’t be afraid to experiment.
Steak Fajitas Variations: Spice It Up!
One of the best things about steak fajitas is how easy they are to customize. Here are a few fun variations to try:
Spicy Fajitas: Add a pinch of cayenne pepper to the marinade or use a spicier fajita seasoning. You can also add a few slices of jalapeño to the skillet while cooking the vegetables.
Chicken Fajitas: Swap the steak for chicken breast or chicken thighs. Marinate the chicken for at least 30 minutes, or up to a few hours in the refrigerator.
Shrimp Fajitas: Use large shrimp instead of steak. Marinate the shrimp for 15-20 minutes before cooking. Shrimp cooks quickly, so be careful not to overcook it.
Vegetarian Fajitas: Use a mix of vegetables like mushrooms, zucchini, and corn instead of steak. You can also add black beans or pinto beans for extra protein.
Steak Fajita Bowls: Serve the steak and vegetable mixture over rice or quinoa instead of in tortillas. Top with your favorite toppings.
I love experimenting with different variations of this recipe. It’s a great way to use up whatever vegetables I have on hand, and it keeps things interesting. I’ve even tried adding pineapple to my fajitas for a sweet and savory twist!
Storing and Reheating Your Steak Fajitas
Got leftovers? No problem! Here’s how to store and reheat your steak fajitas:
Storing: Store the steak and vegetable mixture in an airtight container in the refrigerator for up to 3 days. Store the tortillas separately.
Reheating: Reheat the steak and vegetable mixture in a skillet over medium heat until heated through. You can also reheat it in the microwave, but it may not be as crispy. Warm the tortillas in a dry skillet or in the microwave.
I often make a big batch of steak fajitas on Sunday night and then enjoy the leftovers for lunch during the week. It’s a healthy and delicious way to fuel my busy days.
Frequently Asked Questions About Steak Fajitas
Got questions? I’ve got answers! Here are a few frequently asked questions about steak fajitas:
What is the best cut of steak for fajitas? Skirt steak is my top choice, but flank steak or sirloin steak will also work.
Can I make fajitas ahead of time? Yes, you can marinate the steak and slice the vegetables ahead of time. Store them separately in the refrigerator.
How do I keep the tortillas warm? Wrap the warm tortillas in a clean kitchen towel or place them in a tortilla warmer.
Can I freeze steak fajitas? Yes, you can freeze the steak and vegetable mixture. Store it in an airtight container in the freezer for up to 2 months. Thaw overnight in the refrigerator before reheating.
What are some good toppings for fajitas? Sour cream, guacamole, salsa, shredded cheese, cilantro, and lime wedges are all great options.
If you have any other questions, feel free to leave a comment below! I’m always happy to help.
Serving Suggestions: Complete Your Fajita Feast
Steak fajitas are delicious on their own, but here are a few serving suggestions to make your meal even more special:
Rice and Beans: Serve your fajitas with a side of Mexican rice and refried beans.
Guacamole and Salsa: Homemade guacamole and salsa are the perfect accompaniments to steak fajitas.
Mexican Street Corn: Grilled corn on the cob, slathered in mayonnaise, cotija cheese, and chili powder.
Margaritas: No fiesta is complete without margaritas!
I love to set up a fajita bar with all the fixings. It’s a fun and interactive way to get everyone involved in the meal. I usually include a variety of toppings, sauces, and sides, so everyone can customize their fajitas to their liking.
So there you have it – my Easy & Delicious Steak Fajitas recipe. I hope you love it as much as my family does. Remember, cooking is all about having fun and experimenting. Don’t be afraid to put your own spin on this recipe and make it your own. And most importantly, enjoy the process! Until next time, happy cooking!
I am so glad I was able to share this recipe with you. I’ve used this steak fajitas recipe for years, and I’m so glad to be able to pass it on. This recipe is perfect for a quick and easy dinner, and it’s always a hit with my family. The marinade is what really makes this recipe special. I like to marinate the steak overnight for the best flavor. I’ve found the night before is the best time to marinate the steak. This recipe is so easy, and it’s a great way to get your family involved in the cooking process. The steak is so tender and juicy, and the vegetables are perfectly cooked. The tortillas and toppings add a burst of freshness, and the whole meal is just so satisfying. I’m telling you, this is a recipe that you’ll make over and over again! This recipe is a quick and easy way to make steak fajitas at home. The marinade is the key to tender, flavorful steak, and the vegetables add a burst of freshness. Serve with warm tortillas and your favorite toppings for a complete meal. The steak is cooked to perfection, and the vegetables are tender and flavorful. The tortillas are warm and soft, and the toppings add a burst of freshness. The whole meal is just so satisfying. This steak fajitas recipe is a must-try! It’s a quick, easy, and delicious meal that’s perfect for any occasion. I hope you enjoy it as much as I do!
Hey there, food lovers! Ava here, ready to share one of my absolute favorite recipes: Steak Fajita Power Bowls. If you’re looking for a meal that’s packed with flavor, incredibly easy to make, and genuinely good for you, you’ve come to the right place. These bowls are a vibrant explosion of textures and tastes, combining tender steak, colorful veggies, and wholesome grains. Trust me; this is one recipe you’ll want to make again and again.
I remember the first time I made something similar to thesesteak fajita power bowls. It was a busy week, and I needed a quick and nutritious meal that wouldn’t sacrifice flavor. I threw together some leftover steak, rice, black beans, and whatever veggies I had on hand. The result? A delicious, satisfying bowl that kept me energized for hours. From that moment on, I was hooked on the power bowl concept, and these Steak Fajita Power Bowls are my ultimate version.
Why You’ll Love This Steak Fajita Power Bowl Recipe
So, what makes these Steak Fajita Power Bowls so special? Let me break it down for you:
Flavor Explosion: The combination of marinated steak, sautéed peppers and onions, and fresh toppings creates a symphony of flavors that will tantalize your taste buds.
Nutrient-Packed: These bowls are loaded with protein, fiber, vitamins, and antioxidants, making them a powerhouse of nutrition.
Easy to Customize: Feel free to swap out ingredients based on your preferences or what you have on hand. Chicken, shrimp, or tofu would work great instead of steak.
Quick and Convenient: From start to finish, this meal comes together in under an hour, making it perfect for busy weeknights.
Meal Prep Friendly: These bowls are ideal for meal prepping. You can prepare the ingredients ahead of time and assemble them when you’re ready to eat.
Honestly, what’s not to love? It’s the kind of meal that makes you feel good from the inside out. Plus, it’s a surefire way to impress your friends and family with minimal effort. The steak fajita element really elevates it!
Ingredients for Your Steak Fajita Power Bowls
Here’s what you’ll need to create thesesteak fajita power bowls:
For the Steak:
1 lb flank steak (or sirloin): Tender and flavorful cuts are perfect for fajitas.
2 tablespoons olive oil: For marinating and cooking the steak.
2 tablespoons lime juice: Adds a zesty flavor.
1 teaspoon chili powder: For a hint of spice.
1 teaspoon cumin: Adds warmth and depth.
1 teaspoon garlic powder: For a savory kick.
Salt and pepper: To taste.
For the Fajita Vegetables:
1 bell pepper (any color), sliced: Adds sweetness and crunch.
1 medium onion, sliced: Provides flavor and texture.
1 tablespoon olive oil: For sautéing the vegetables.
Salt and pepper: To taste.
For the Bowls:
2 cups cooked brown rice (or quinoa): The base of the power bowls.
1 can (15 oz) black beans, drained and rinsed: Adds protein and fiber.
1 cup corn (fresh, frozen, or canned): For sweetness and texture.
Substitutions: You can use chicken or shrimp instead of steak, and feel free to add other toppings like salsa, cheese, or Greek yogurt.
Step-by-Step Instructions: Making Your Power Bowls
Alright, let’s get cooking! Here’s how to bring these amazing Steak Fajita Power Bowls to life:
Prepare the marinade: In a small bowl, whisk together the olive oil, lime juice, chili powder, cumin, garlic powder, salt, and pepper.
Marinate the steak: Place the flank steak in a resealable plastic bag or shallow dish and pour the marinade over it. Seal the bag or cover the dish and refrigerate for at least 30 minutes (or up to 2 hours for more flavor).
Preheat the grill or skillet: Heat a grill or large skillet over medium-high heat.
Cook the steak: Remove the steak from the marinade and discard the marinade. Grill or sear the steak for about 5-7 minutes per side, or until it reaches your desired level of doneness. Let it rest for a few minutes before slicing it thinly against the grain. The steak is the star of this fajita power bowl.
Cook the fajita veggies: In the same skillet, add 1 tablespoon of olive oil and heat over medium heat. Add the sliced bell pepper and onion, seasoning with salt and pepper. Sauté for about 5-7 minutes until the vegetables are tender and slightly caramelized.
Layer the ingredients: In each bowl, start with a base of cooked brown rice or quinoa. Top with sliced steak, sautéed vegetables, black beans, corn, and avocado slices.
Garnish and serve: Sprinkle with fresh cilantro and serve with lime wedges on the side for squeezing over the top.
And there you have it! A vibrant, flavorful, and nutritious meal that’s ready to be devoured. This steak and fajita power bowlsare a great way to get a balanced meal. It’s easy to see why this is a perfect meal that everyone loves!
Pro Tips for Perfect Power Bowls
Want to take your Steak Fajita Power Bowls to the next level? Here are a few of my favorite pro tips:
Marinate the Steak Longer: If you have the time, marinating the steak for a few hours (or even overnight) will result in even more flavorful and tender meat.
Use a Meat Thermometer: To ensure your steak is cooked to perfection, use a meat thermometer. Aim for 130-135°F for medium-rare, 135-140°F for medium, and 140-145°F for medium-well.
Don’t Overcook the Veggies: Sauté the bell peppers and onions until they’re tender-crisp, not mushy. You want them to retain some of their texture and flavor.
Warm the Black Beans and Corn: For a more comforting bowl, warm the black beans and corn before adding them. You can do this in a saucepan or microwave.
Add a Sauce: A drizzle of your favorite sauce can add an extra layer of flavor. Try a creamy cilantro-lime dressing, a spicy chipotle sauce, or a tangy avocado crema.
These little tweaks can make a big difference in the overall taste and texture of your Steak Fajita Power Bowls. So, don’t be afraid to experiment and find what works best for you.
Common Mistakes to Avoid
Even the best cooks make mistakes! Here are a few common pitfalls to watch out for when making these bowls:
Overcooking the Steak: Dry, tough steak is a major bummer. Use a meat thermometer and don’t be afraid to pull it off the grill or skillet when it’s slightly underdone. It will continue to cook as it rests.
Using Bland Rice or Quinoa: The base of your bowl should be flavorful too! Cook the rice or quinoa in broth instead of water, or add a pinch of salt and a bay leaf while cooking.
Skipping the Marinade: The marinade is what gives the steak its signature fajita flavor. Don’t skip this step!
Adding Too Many Toppings: While it’s tempting to load up your bowl with every topping imaginable, too many ingredients can overwhelm the flavors. Stick to a few key toppings that complement each other.
Not Seasoning Properly: Season every component of the bowl – the steak, the veggies, the rice, and even the toppings. Salt and pepper are your friends!
By avoiding these common mistakes, you can ensure that your Steak Fajita Power Bowls turn out perfectly every time. Remember, cooking is all about learning and improving, so don’t get discouraged if you make a mistake. Just try again!
Variations: Make It Your Own
One of the best things about these Steak Fajita Power Bowls is how easy they are to customize. Here are a few variations to inspire you:
Chicken Fajita Power Bowls: Substitute the steak with grilled or sautéed chicken breast.
Shrimp Fajita Power Bowls: Use grilled or sautéed shrimp instead of steak.
Vegetarian Fajita Power Bowls: Omit the steak and add more veggies, such as mushrooms, zucchini, or sweet potatoes.
Spicy Fajita Power Bowls: Add a pinch of cayenne pepper to the steak marinade or a drizzle of hot sauce to the finished bowls.
Mediterranean Fajita Power Bowls: Use quinoa as the base and add Mediterranean toppings like feta cheese, Kalamata olives, and hummus.
The possibilities are endless! Feel free to get creative and experiment with different proteins, veggies, grains, and toppings to create your own signature power bowl.
Storage Tips
These Steak Fajita Power Bowls are perfect for meal prepping, but it’s important to store them properly to maintain their freshness and flavor. Here are a few tips:
Store Components Separately: If you’re meal prepping, store the steak, veggies, rice, and toppings in separate containers. This will prevent the ingredients from getting soggy and ensure that everything stays fresh.
Use Airtight Containers: Store the ingredients in airtight containers to prevent them from drying out or absorbing odors from the refrigerator.
Refrigerate Promptly: Refrigerate the bowls (or the individual components) within two hours of cooking to prevent bacterial growth.
Consume Within 3-4 Days: For the best quality, consume the Steak Fajita Power Bowls within 3-4 days.
Reheat Properly: Reheat the steak and veggies in a skillet or microwave until heated through. Add the cold toppings (like avocado and cilantro) just before serving.
With proper storage, you can enjoy these delicious power bowls throughout the week without sacrificing flavor or quality.
Frequently Asked Questions (FAQ)
Got questions? I’ve got answers! Here are some frequently asked questions about Steak Fajita Power Bowls:
Can I use a different cut of steak?: Yes, you can use other cuts of steak, such as sirloin, skirt steak, or even ribeye. Just adjust the cooking time accordingly.
Can I make these bowls ahead of time?: Absolutely! These bowls are perfect for meal prepping. Just store the ingredients separately and assemble them when you’re ready to eat.
Can I freeze these bowls?: While you can freeze the cooked steak and rice, I don’t recommend freezing the veggies or toppings, as they will become mushy when thawed.
Are these bowls gluten-free?: Yes, these bowls are naturally gluten-free, as long as you use gluten-free ingredients (like brown rice or quinoa).
Can I make these bowls vegan?: Yes, you can easily make these bowls vegan by substituting the steak with tofu or tempeh and omitting any dairy-based toppings.
If you have any other questions, feel free to leave a comment below. I’m always happy to help!
Serving Suggestions
These Steak Fajita Power Bowls are a complete meal on their own, but here are a few serving suggestions to elevate your dining experience:
Serve with a Side of Tortilla Chips and Salsa: For a more festive meal, serve the bowls with a side of tortilla chips and your favorite salsa.
Pair with a Refreshing Drink: A cold glass of limeade, iced tea, or a Mexican beer would be the perfect accompaniment to these bowls.
Offer a Variety of Toppings: Set out a variety of toppings, such as sour cream, guacamole, shredded cheese, and pickled onions, so everyone can customize their bowls to their liking.
Make It a Taco Bar: Instead of serving the ingredients in bowls, set them out as a taco bar and let everyone make their own fajita tacos.
Serve with a Side Salad: A simple green salad with a light vinaigrette would be a refreshing contrast to the rich and flavorful bowls.
No matter how you choose to serve them, these Steak Fajita Power Bowls are sure to be a hit. They’re a delicious, healthy, and customizable meal that’s perfect for any occasion. So, gather your ingredients, fire up the grill, and get ready to enjoy a flavor-packed adventure! And remember, you re in control of how you create your fajita power bowl. It s easy to make the perfect fajita power bowl, and nutritious too!
Steak Fajita Power Bowls: A Flavorful and Nutritious Meal
Prep Time 15 minutesminutes
Cook Time 20 minutesminutes
Total Time 35 minutesminutes
Servings 4bowls
Calories 550
Enjoy a delicious and healthy Steak Fajita Power Bowl packed with protein, fiber, and flavor. This recipe is easy to customize with your favorite toppings and substitutions.
Ingredients
For the Steak:
1lbflank steak (or sirloin)(Tender and flavorful cuts are perfect for fajitas.)
2tablespoonsolive oil(For marinating and cooking the steak.)
2tablespoonslime juice(Adds a zesty flavor.)
1teaspoonchili powder(For a hint of spice.)
1teaspooncumin(Adds warmth and depth.)
1teaspoongarlic powder(For a savory kick.)
Salt and pepper(To taste.)
For the Fajita Vegetables:
1bell pepper (any color)(Sliced. Adds sweetness and crunch.)
1mediumonion(Sliced. Provides flavor and texture.)
1tablespoonolive oil(For sautéing the vegetables.)
Salt and pepper(To taste.)
For the Bowls:
2cupscooked brown rice (or quinoa)(The base of the power bowls.)
15ozblack beans(Drained and rinsed. Adds protein and fiber.)
1cupcorn (fresh, frozen, or canned)(For sweetness and texture.)