Best Steak Fajita Marinade Recipe: A Flavor Fiesta in Your Kitchen!
Hey there, flavor enthusiasts! Ava here, back in my Seattle kitchen, where the magic (and delicious smells) happen. Today, we’re diving headfirst into the vibrant world of fajitas, and trust me, it all starts with the perfect marinade. I’m about to share my absolute favorite, the one that transforms ordinary steak into a tender, juicy, flavor-packed sensation. Get ready for the best steak fajita marinade you’ve ever tasted!
Growing up, fajitas were a staple at our family gatherings. But it wasn’t until I started experimenting with different marinades that I truly understood the power of a good soak. This recipe? It’s the culmination of years of tweaking, tasting, and perfecting. It’s the secret weapon to making incredible steak fajitas.
Why You’ll Love This Easy Steak Fajita Marinade
Why is this marinade my go-to? Let me count the ways! This easy steak fajita marinade is more than just a recipe; it’s a flavor adventure. It’s the difference between a good fajita and a *wow* fajita. Here’s why you’ll be hooked:
- Flavor Explosion: This isn’t your bland, run-of-the-mill marinade. We’re talking a symphony of flavors – zesty lime, savory soy sauce, smoky paprika, and a hint of chili spice.
- Tenderizes Like a Dream: The acid in the lime juice works its magic, breaking down the muscle fibers and turning even tougher cuts of steak into melt-in-your-mouth perfection.
- Quick & Easy: Seriously, you can whip this up in about 5 minutes. That’s less time than it takes to preheat your grill!
- Versatile: While it’s designed for steak, this marinade works wonders on chicken, shrimp, or even tofu for a vegetarian option.
- Crowd-Pleaser: I’ve made this for countless parties and potlucks, and it’s always a hit. Guaranteed to impress your friends and family!
This is the recipe for steak fajita marinade you’ve been searching for. It’s simple, effective, and utterly delicious. I promise, once you try it, you’ll never go back to store-bought marinades again.
The Star Players: Ingredients for the Best Steak Fajita Marinade
Let’s talk ingredients! Here’s what you’ll need to create this flavor masterpiece. Don’t worry, nothing too fancy – just simple, everyday ingredients that come together to create something truly special.
- 1/4 cup olive oil
- 1/4 cup lime juice
- 2 tablespoons soy sauce
- 2 cloves garlic, minced
- 1 tablespoon chili powder
- 1 teaspoon cumin
- 1/2 teaspoon smoked paprika
- 1/4 teaspoon cayenne pepper (optional)
- Salt and pepper to taste
How To Make Steak Fajita Marinade: Step-by-Step Instructions
Alright, let’s get cooking! Here’s how to make steak fajita marinade, step by simple step. Trust me, it’s so easy, you’ll be making this on repeat. The beauty of this marinade is in its simplicity. You don’t need any fancy equipment or culinary skills – just a bowl, a whisk, and a little bit of love.
- Combine the Ingredients: In a bowl, whisk together olive oil, lime juice, soy sauce, minced garlic, chili powder, cumin, smoked paprika, and cayenne pepper (if using).
- Season: Season with salt and pepper to taste. Don’t be shy – salt is your friend! It helps to bring out all the other flavors.
- Marinate: Place steak in a resealable bag or container. Pour the marinade over the steak, ensuring it is well coated. Give it a little massage to make sure every nook and cranny is covered.
- Refrigerate: Marinate in the refrigerator for at least 30 minutes, or up to 4 hours for maximum flavor. The longer you marinate, the more flavorful and tender the steak will be. I often prep this in the morning and let it sit all day.
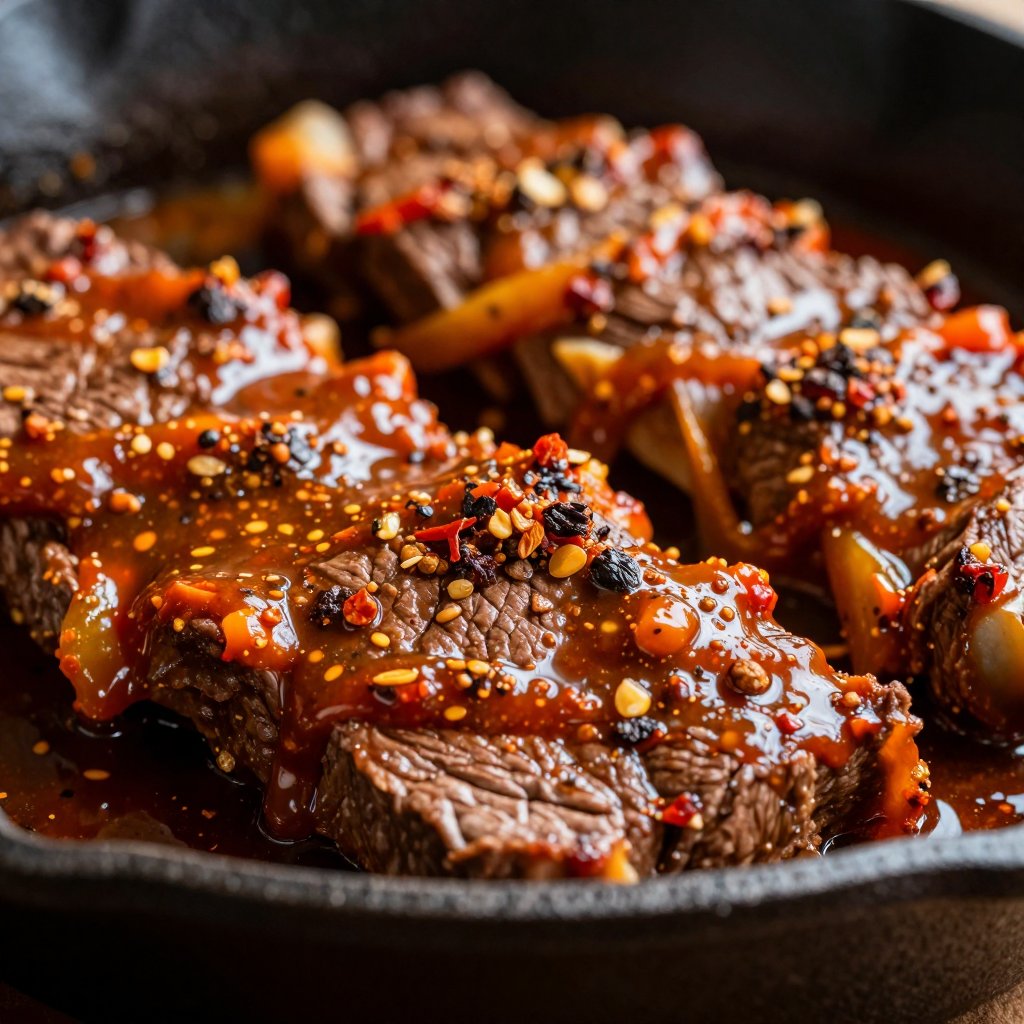
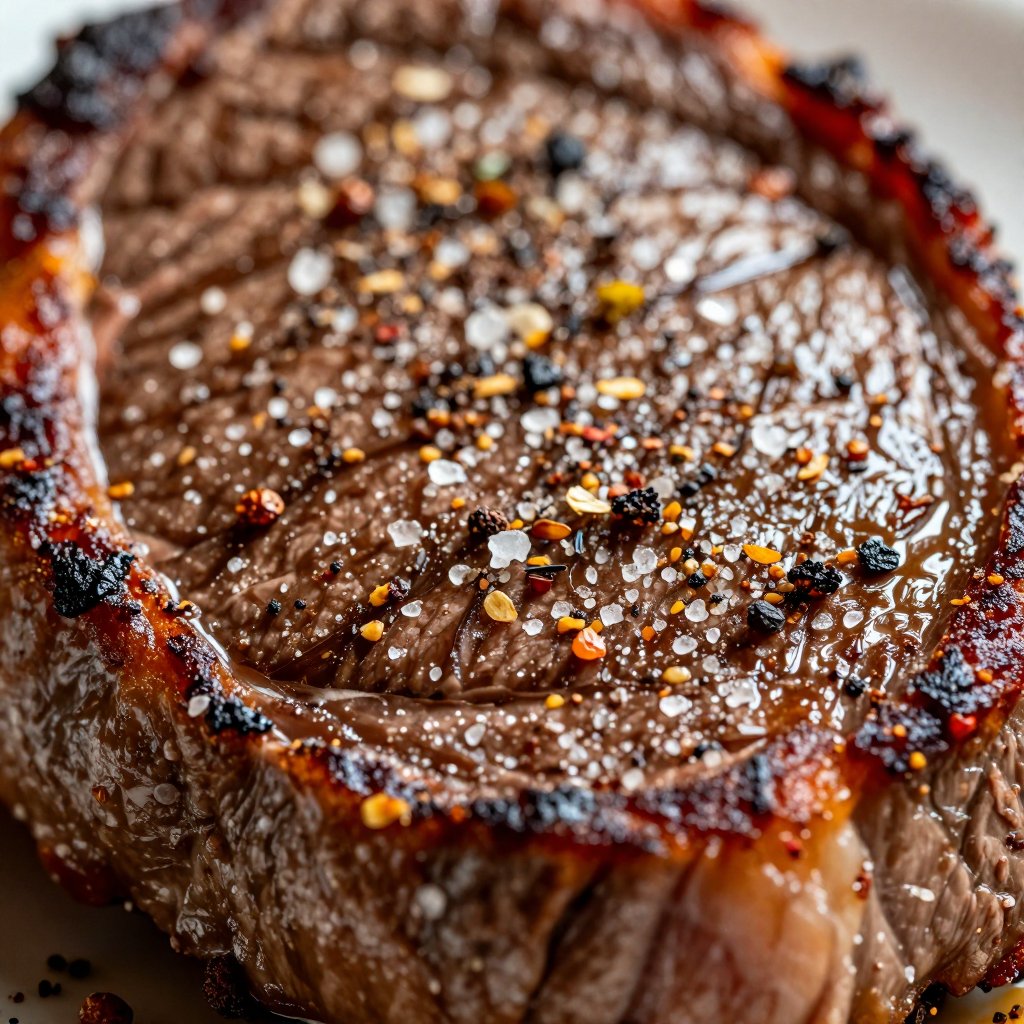
- Cook: Remove steak from marinade and discard the marinade. Cook steak to your desired level of doneness. Whether you’re grilling, pan-searing, or broiling, make sure to get a nice sear on the outside.
See? Told you it was easy! Now, let’s dive into some pro tips to really elevate your fajita game.
Ava’s Pro Tips for the Best Steak Fajitas Ever
Okay, friends, listen up! These pro tips are the secret sauce (or should I say, secret marinade?) that will take your steak fajitas from good to absolutely unforgettable. These tips are what I’ve learned over the years of making steak fajitas.
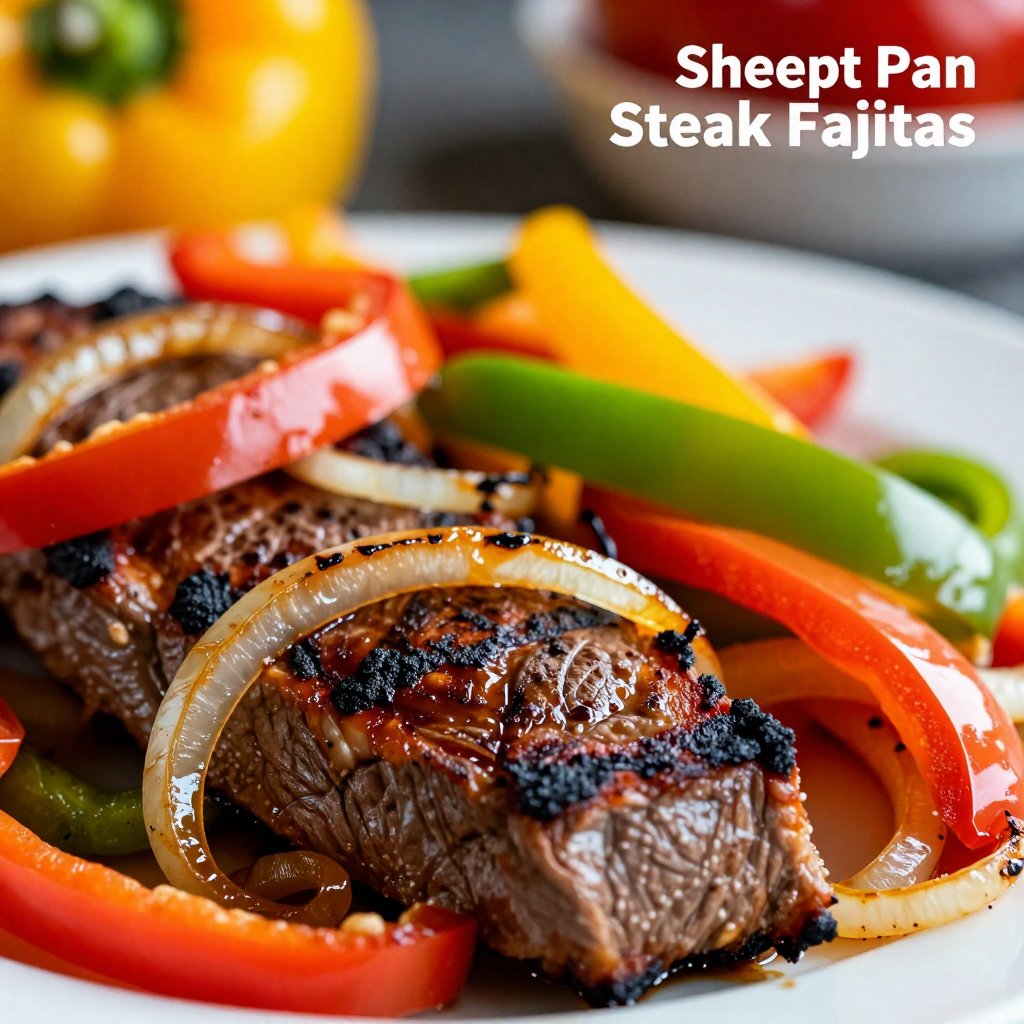
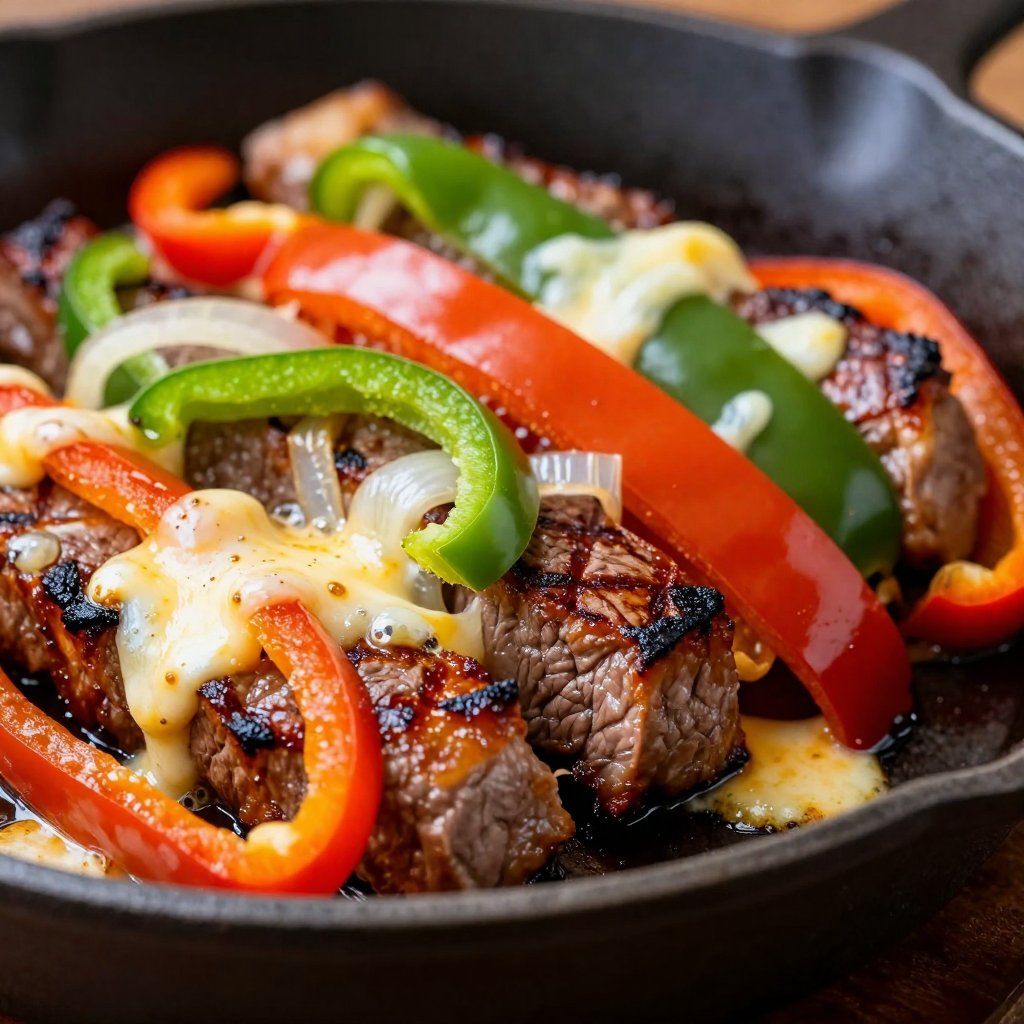
- Choose the Right Cut of Meat: Flank steak or skirt steak are the classic choices for fajitas. They’re relatively thin and take well to marinating. Look for good marbling for extra flavor and tenderness. This steak is perfect for this recipe.
- Don’t Over-Marinate: While marinating is crucial, don’t go overboard. Over-marinating can make the steak mushy. To hours is really the maximum; 30 minutes and 4 hours is the sweet spot.
- Pat the Steak Dry: Before cooking, pat the steak dry with paper towels. This helps to get a nice sear on the outside. Excess moisture will steam the steak instead of searing it.
- Get Your Pan Screaming Hot: Whether you’re using a grill or a cast-iron skillet, make sure it’s hot, hot, hot! A high temperature is essential for creating that beautiful, flavorful crust.
- Let it Rest: After cooking, let the steak rest for at least 5-10 minutes before slicing. This allows the juices to redistribute, resulting in a more tender and flavorful steak.
- Slice Against the Grain: This is crucial for tender fajitas! Look for the direction of the muscle fibers and slice perpendicular to them.
And there you have it! My top tips for fajita perfection. Now, let’s talk about some common mistakes to avoid.
Common Mistakes to Avoid When Making Steak Fajitas
We’ve all been there – a cooking mishap that leaves us scratching our heads. Here are a few common mistakes to watch out for when making steak fajitas, so you can avoid them and enjoy fajita success every time. Let’s ensure you don’t fall into these traps!
- Using the Wrong Cut of Steak: As mentioned earlier, flank steak and skirt steak are your best bets. Avoid thicker cuts like sirloin or ribeye, as they won’t cook as quickly or absorb the marinade as effectively.
- Overcooking the Steak: Overcooked steak is tough and dry. Aim for medium-rare to medium for the most tender and juicy results. Use a meat thermometer to ensure accuracy.
- Skipping the Resting Period: I know it’s tempting to dig in right away, but trust me, that resting period is essential. It allows the juices to redistribute, resulting in a more tender and flavorful steak.
- Crowding the Pan: If you’re pan-searing the steak, don’t overcrowd the pan. This will lower the temperature and cause the steak to steam instead of sear. Cook the steak in batches if necessary.
- Forgetting to Season: Don’t rely solely on the marinade for flavor. Season the steak with salt and pepper before cooking to enhance the natural flavors of the meat.
By avoiding these common mistakes, you’ll be well on your way to fajita mastery! Now, let’s spice things up with some fun variations.
Steak Fajita Marinade Variations: Spice It Up!
One of the things I love most about cooking is the freedom to experiment and make a recipe your own. This steak fajita marinade is a fantastic base, but feel free to tweak it to suit your taste preferences. Here are a few fun variations to try:
- Spicy Kick: Add a pinch of red pepper flakes or a diced jalapeño to the marinade for an extra kick of heat.
- Citrus Burst: Swap out some of the lime juice for orange juice for a sweeter, more citrusy flavor. The orange juice really adds a new dimension.
- Herby Goodness: Add a tablespoon of chopped cilantro or oregano to the marinade for a fresh, herbaceous flavor.
- Smoky Chipotle: Add a teaspoon of chipotle powder to the marinade for a smoky, earthy flavor.
- Sweet & Savory: Add a tablespoon of honey or maple syrup to the marinade for a touch of sweetness that complements the savory flavors.
Get creative and have fun with it! The possibilities are endless. Now, let’s talk about storing any leftover marinade or cooked fajitas.
Storage Tips: Keeping Your Fajitas Fresh
Got leftovers? No problem! Here’s how to store your steak fajita marinade and cooked fajitas to keep them fresh and delicious.
- Marinade: Leftover marinade can be stored in an airtight container in the refrigerator for up to 3 days. However, it’s best to discard any marinade that has been in contact with raw meat.
- Cooked Fajitas: Cooked steak fajitas can be stored in an airtight container in the refrigerator for up to 3-4 days. Reheat them in a skillet or microwave until heated through.
- Freezing: Cooked steak fajitas can also be frozen for longer storage. Wrap them tightly in plastic wrap and then place them in a freezer bag. They can be stored in the freezer for up to 2-3 months.
Proper storage is key to enjoying your fajitas to the fullest. Now, let’s answer some frequently asked questions.
Frequently Asked Questions (FAQ) About Steak Fajita Marinade
Got questions? I’ve got answers! Here are some of the most common questions I get asked about steak fajita marinade.
- Can I use this marinade on other types of meat?: Absolutely! This marinade is delicious on chicken, shrimp, pork, and even tofu. Just adjust the marinating time accordingly.
- Can I marinate the steak overnight?: I don’t recommend marinating the steak overnight, as the acid in the lime juice can start to break down the meat too much, resulting in a mushy texture. Stick to the recommended marinating time of 30 minutes to 4 hours.
- Can I grill the steak instead of pan-searing it?: Yes, you can definitely grill the steak! Just make sure to preheat your grill to high heat and cook the steak to your desired level of doneness.
- What if I don’t have lime juice?: You can substitute lemon juice for lime juice, but the flavor will be slightly different.
- Can I use dried garlic instead of fresh garlic?: Fresh juice garlic is always best for flavor, but if you’re in a pinch, you can use 1 teaspoon of garlic powder in place of the fresh garlic.
I hope these FAQs have been helpful! Now, let’s talk about serving suggestions.
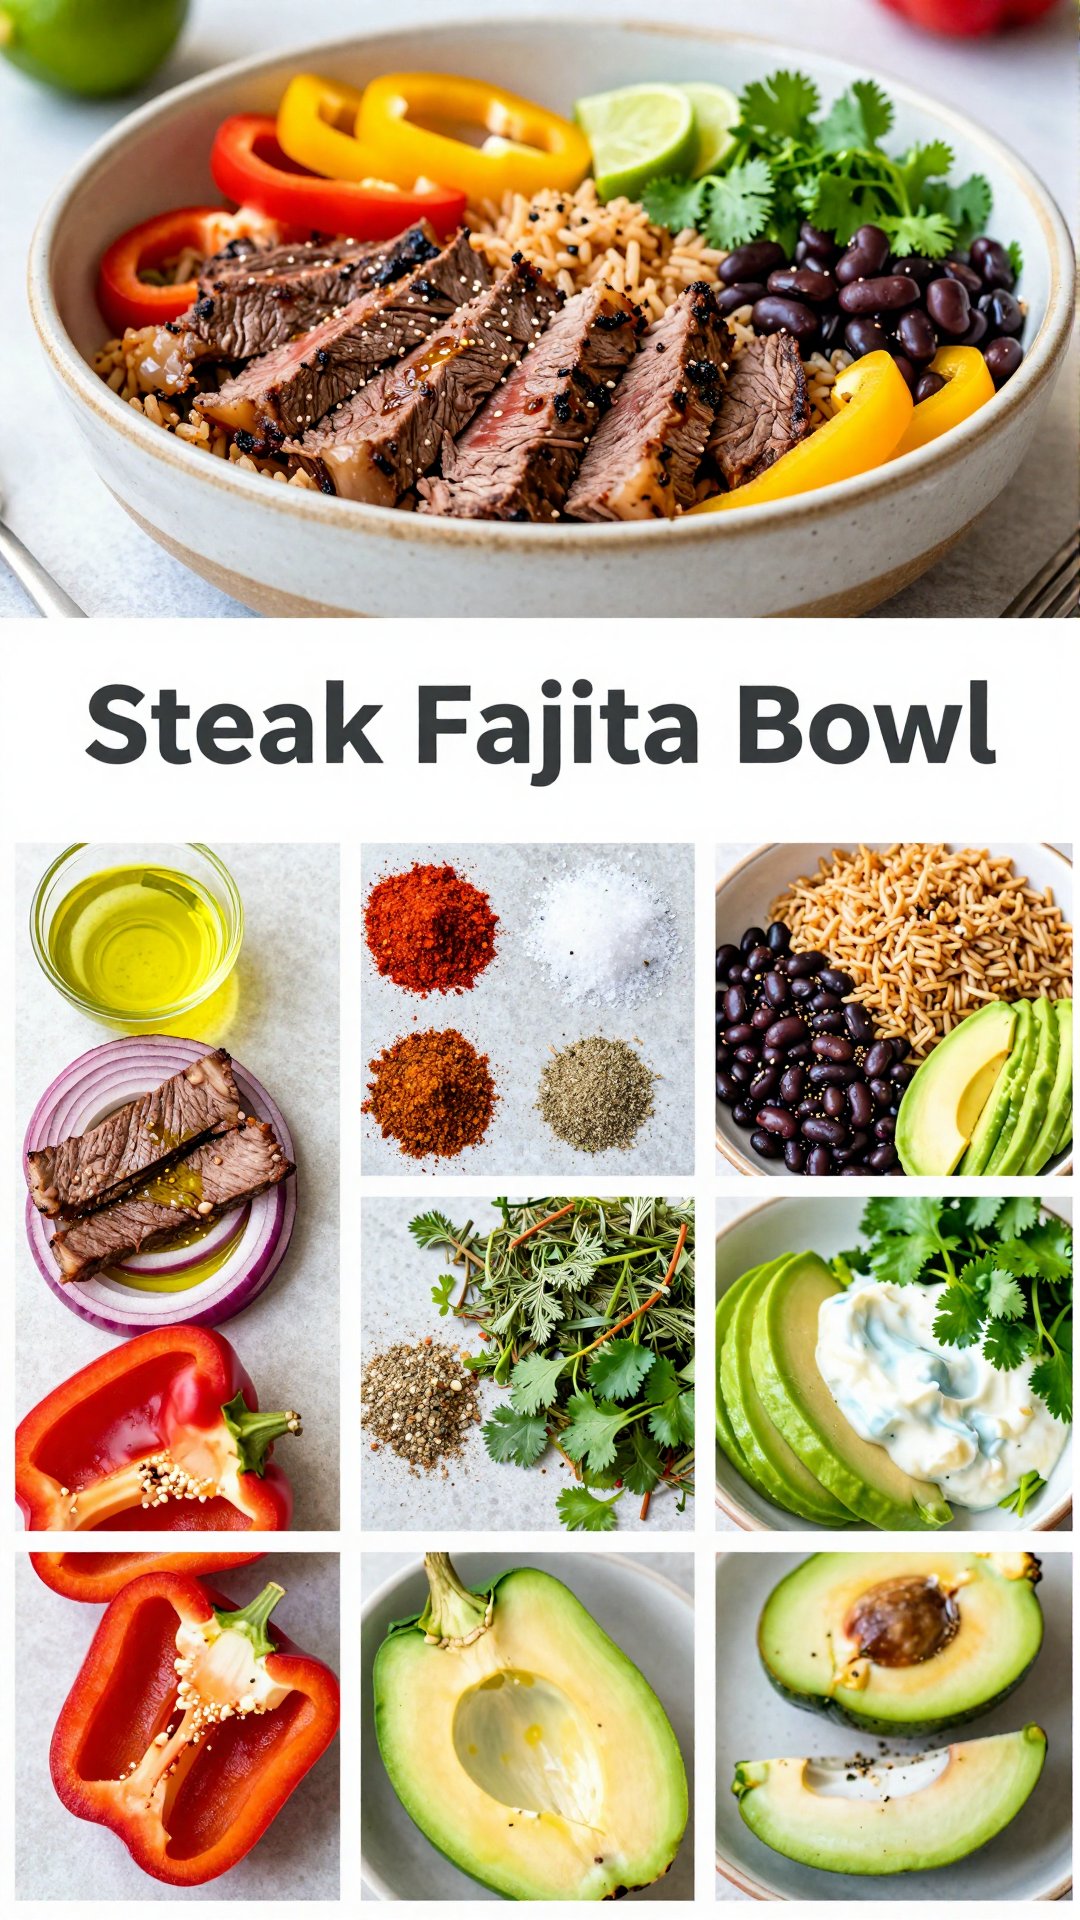
Serving Suggestions: Complete Your Fajita Fiesta!
Now that you’ve got the perfect steak fajita marinade and perfectly cooked steak, it’s time to assemble your fajitas and enjoy! Here are some delicious serving suggestions to complete your fajita fiesta:
- Warm Tortillas: Warm tortillas are a must for fajitas! You can warm them in a skillet, microwave, or oven.
- Toppings Galore: Offer a variety of toppings, such as:
- Sautéed bell peppers and onions
- Shredded lettuce
- Diced tomatoes
- Sour cream or Greek yogurt
- Guacamole
- Salsa
- Shredded cheese
- Cilantro
- Lime wedges
- Sides: Consider serving your fajitas with sides like:
- Mexican rice
- Black beans
- Corn on the cob
- Chips and salsa
- Guacamole
Get creative and have fun with your toppings and sides! Fajitas are all about customization and creating a meal that everyone will love. I highly recommend trying different combinations to find your favorite. Thank you for following along, and you’re welcome for this amazing recipe!
Remember, the key to amazing fajitas is all in the marinade! This steak fajita marinade will make all the difference. It’s a way to make your steak and vegetables taste amazing. It will make the meat flavorful. This steak fajita recipe is the best. Once you try it, you can experiment with some of the variations. If you have any questions, feel free to ask! I hope you enjoy this recipe as much as I do! I tried to make it as simple as possible. I want your steak fajitas and experience to be amazing. Toss it all together and enjoy!
Steak Fajita Marinade
Ingredients
Marinade
- 1/4 cup olive oil
- 1/4 cup lime juice
- 2 tablespoons soy sauce
- 2 cloves garlic, minced
- 1 tablespoon chili powder
- 1 teaspoon cumin
- 1/2 teaspoon smoked paprika
- 1/4 teaspoon cayenne pepper (optional) (optional)
- to taste Salt and pepper
Instructions
- In a bowl, whisk together olive oil, lime juice, soy sauce, minced garlic, chili powder, cumin, smoked paprika, and cayenne pepper (if using).
- Season with salt and pepper to taste.
- Place steak in a resealable bag or container.
- Pour marinade over steak, ensuring it is well coated.
- Marinate in the refrigerator for at least 30 minutes, or up to 4 hours for maximum flavor.
- Remove steak from marinade and discard marinade.
- Cook steak to your desired level of doneness.
Notes


")