Author

Ava

Browsing

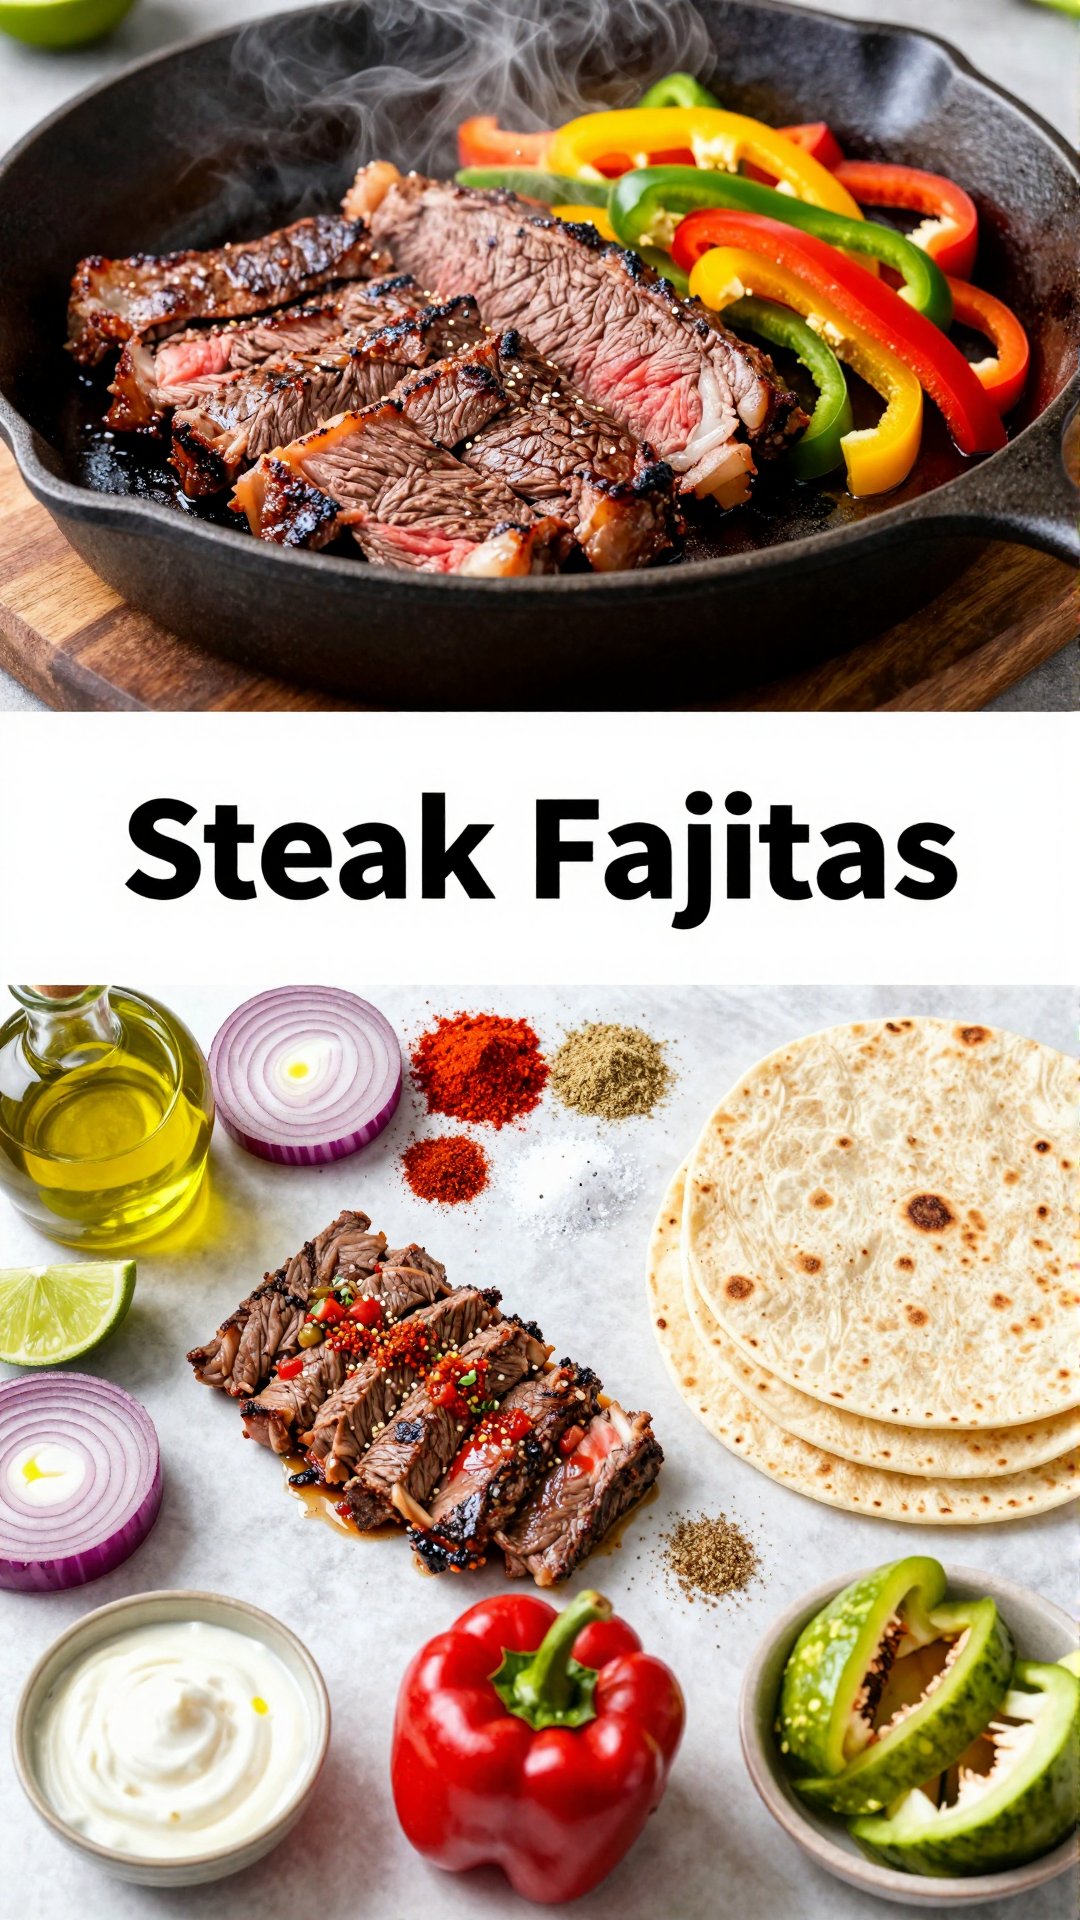
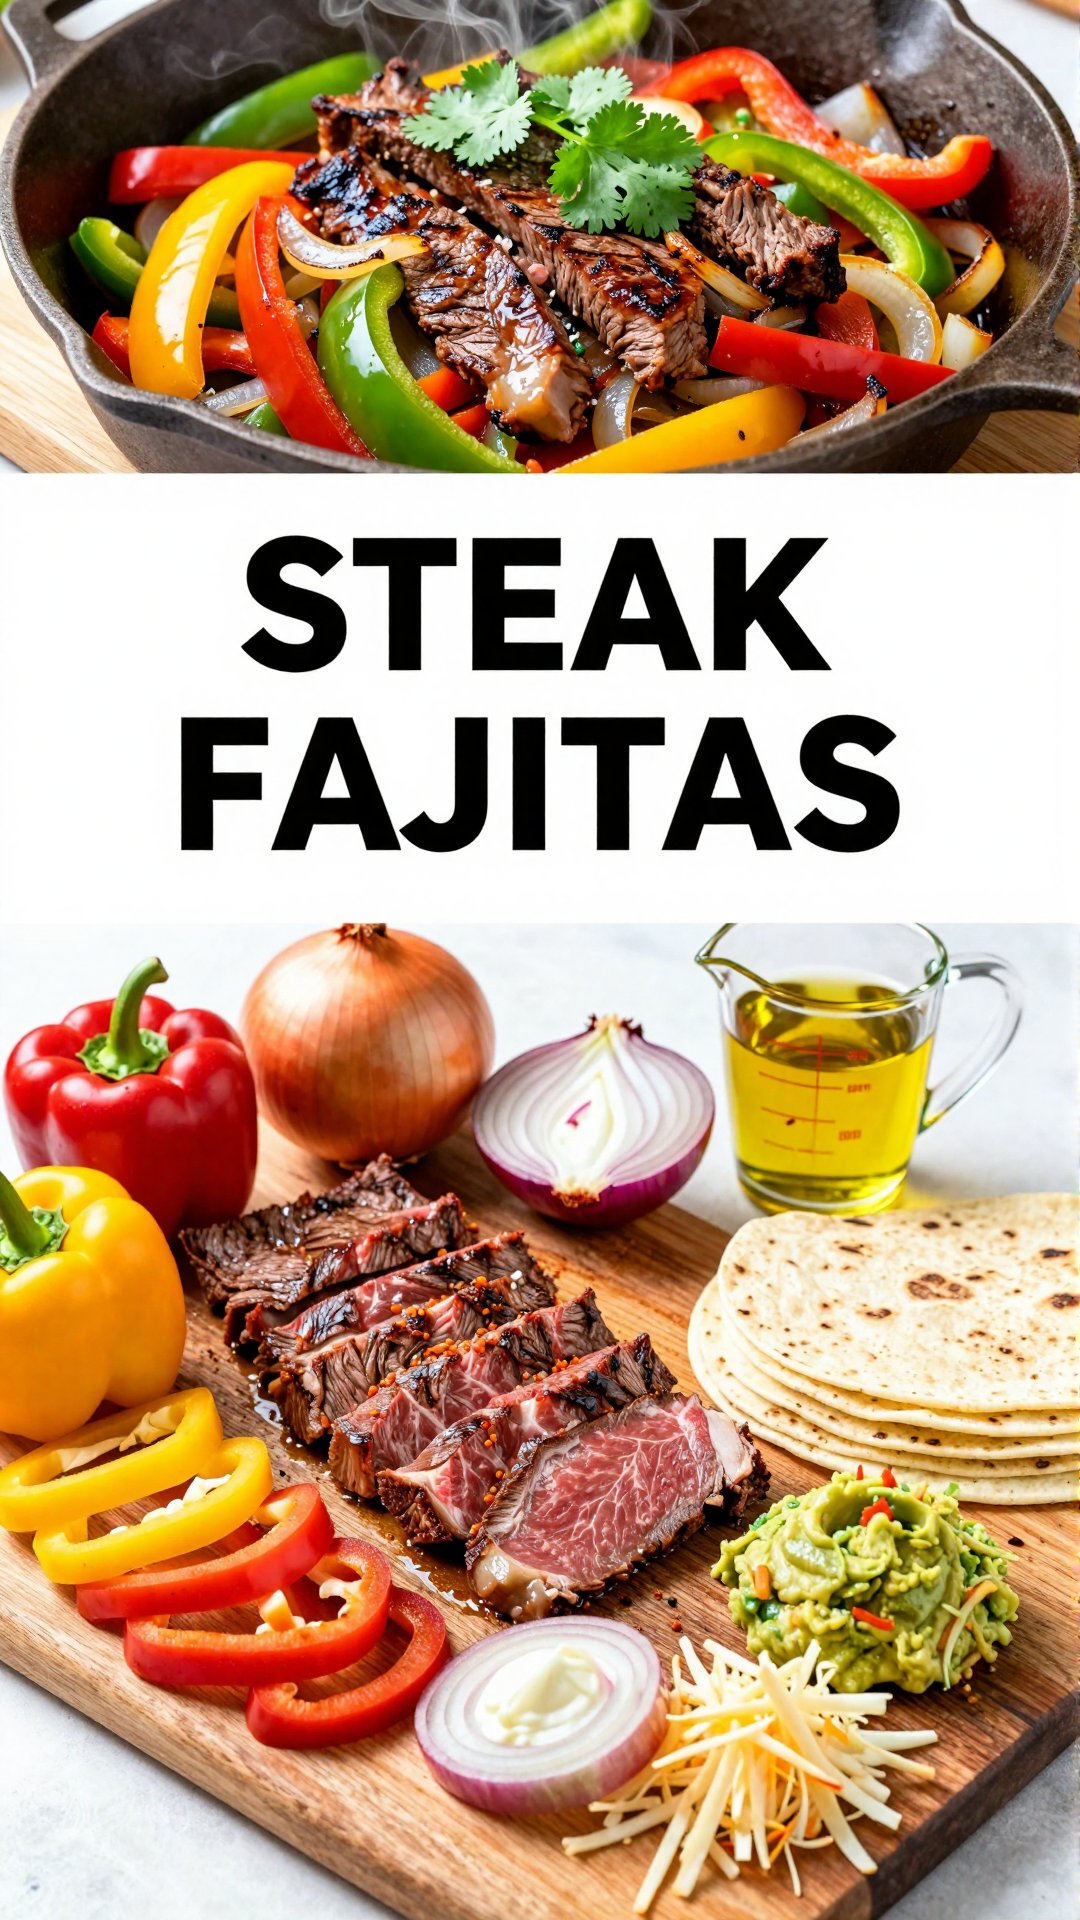
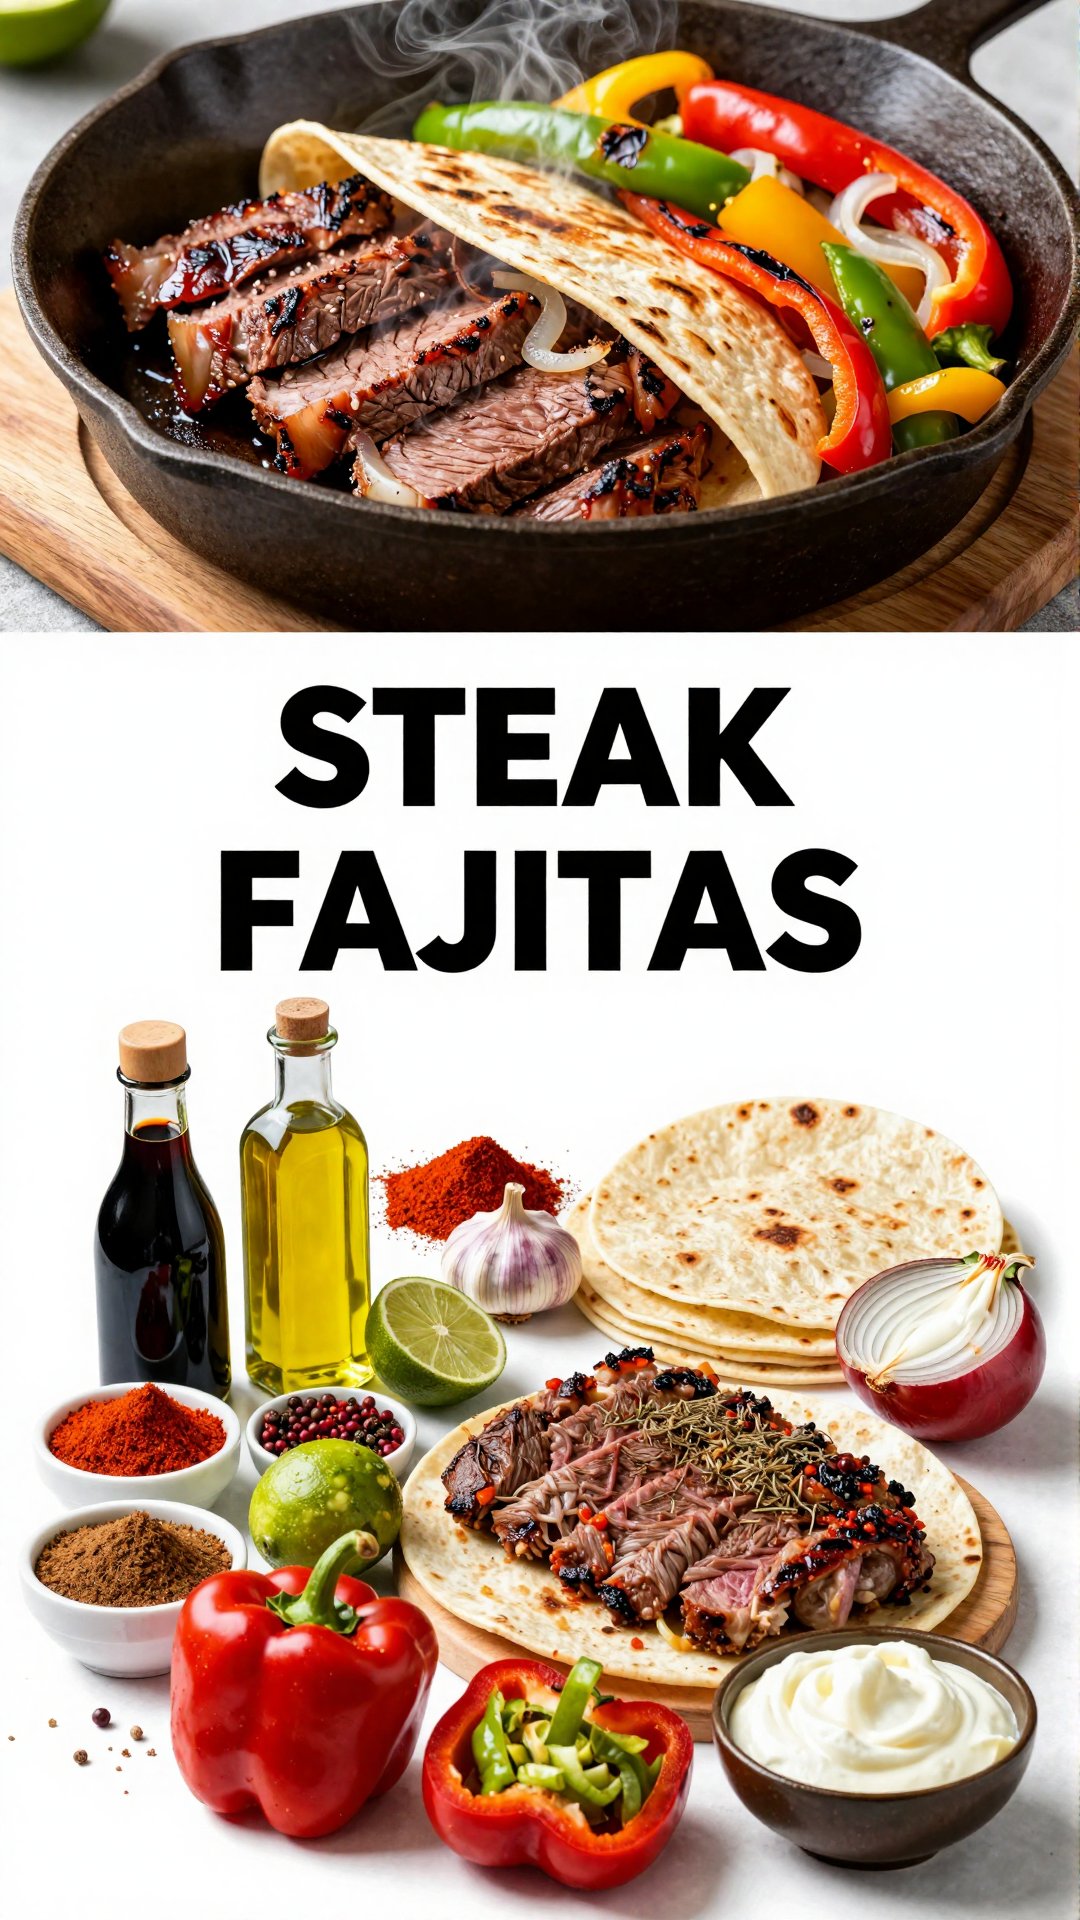
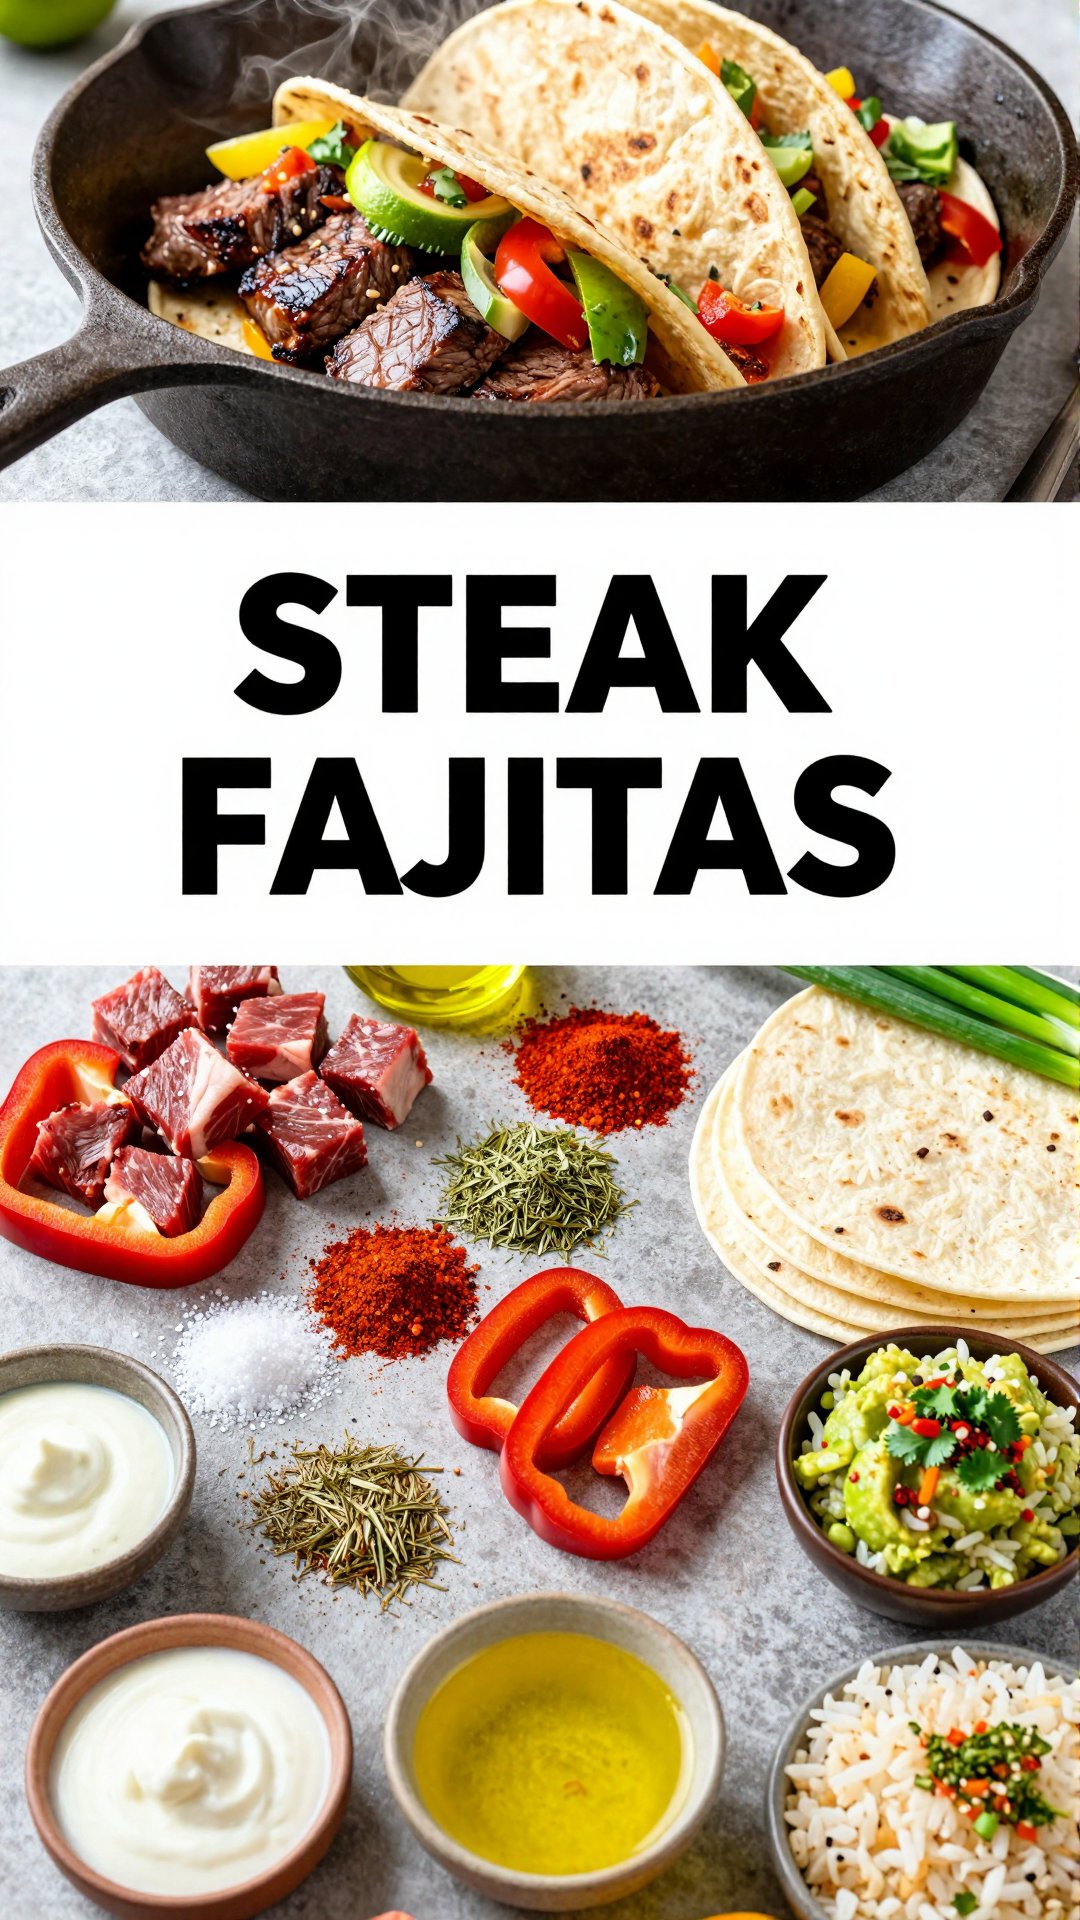
Hey there, friends! Ava here, ready to whisk you away to a land of sizzling flavors and happy bellies. If you’re anything like me, weeknights can be a whirlwind of activity, leaving little time for elaborate dinners. That’s where these Astonishing 30-Minute Skillet Seared Steak Fajitas come to the rescue. Imagine tender, juicy steak seared to perfection, mingling with vibrant peppers and onions, all wrapped up in a warm, comforting tortilla. Sounds good, right? This isn’t just a meal; it’s an experience – a mini fiesta right at your table!

I remember when I first started experimenting with fajitas. I was in college, missing my mom’s cooking like crazy, and craving something that felt both familiar and exciting. After a few (okay, maybe more than a few) attempts, I finally nailed a recipe that hit all the right notes. It was quick, easy, and bursting with flavor. Over the years, I’ve tweaked and perfected it, and now I’m thrilled to share it with you. So, grab your skillet, crank up the heat, and let’s get cooking!

Why You’ll Love This Steak Fajitas Recipe

Seriously, what’s not to love? This skillet seared steak fajitas recipe is a winner on so many levels. But let me break it down for you:

  • Quick and Easy: From prep to plate, you’re looking at about 30 minutes. Perfect for those crazy weeknights. This recipe is so quick, it’s a lifesaver.
  • Flavor Explosion: The combination of spices, seared steak, and caramelized veggies is simply irresistible.
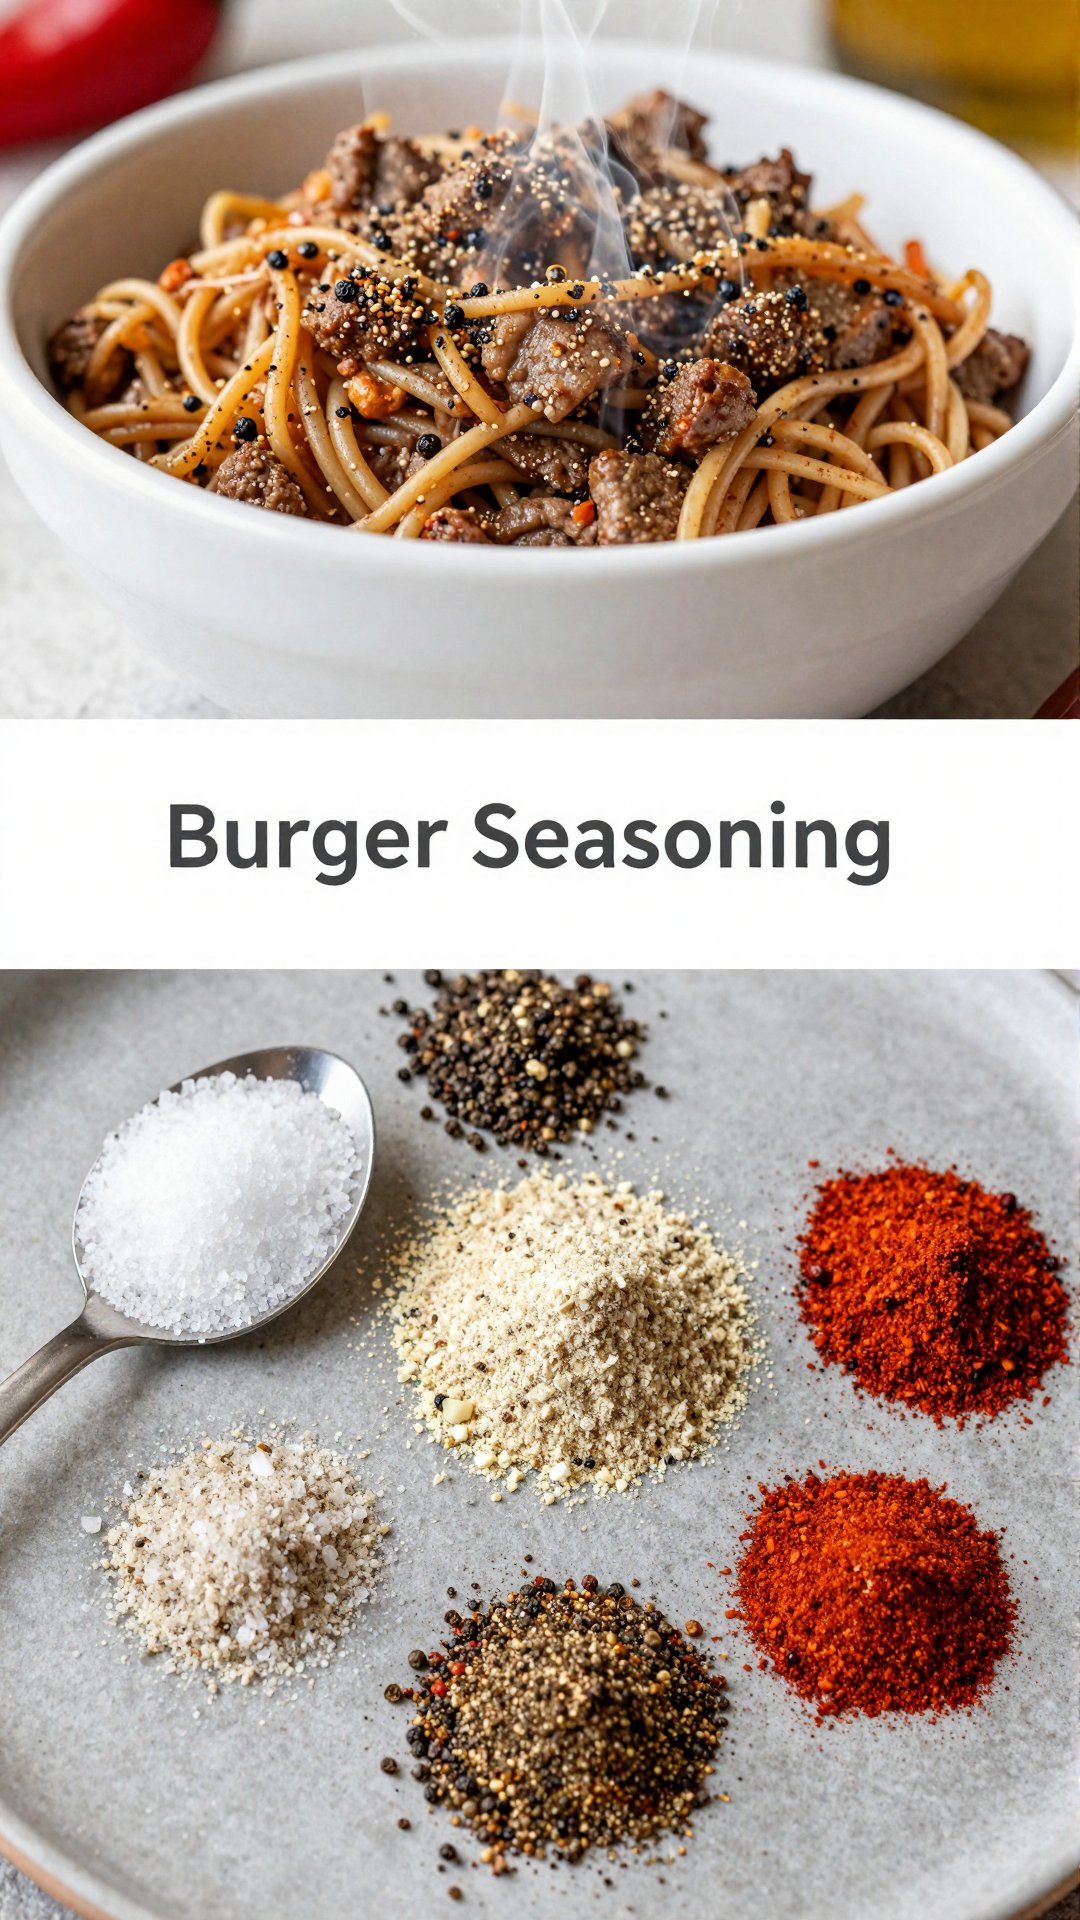
  • Customizable: You can easily adapt this recipe to your liking. Use different veggies, add a spicy kick, or swap out the steak for chicken or shrimp.
  • Crowd-Pleaser: Everyone loves fajitas! They’re perfect for family dinners, casual gatherings, or even a fun date night.
  • Minimal Cleanup: One skillet wonder! Need I say more?

This dish is a surefire way to bring smiles to your table. Trust me; it’s a recipe you’ll make again and again. The steak and vegetables are cooked to perfection, creating a symphony of flavors that will tantalize your taste buds.

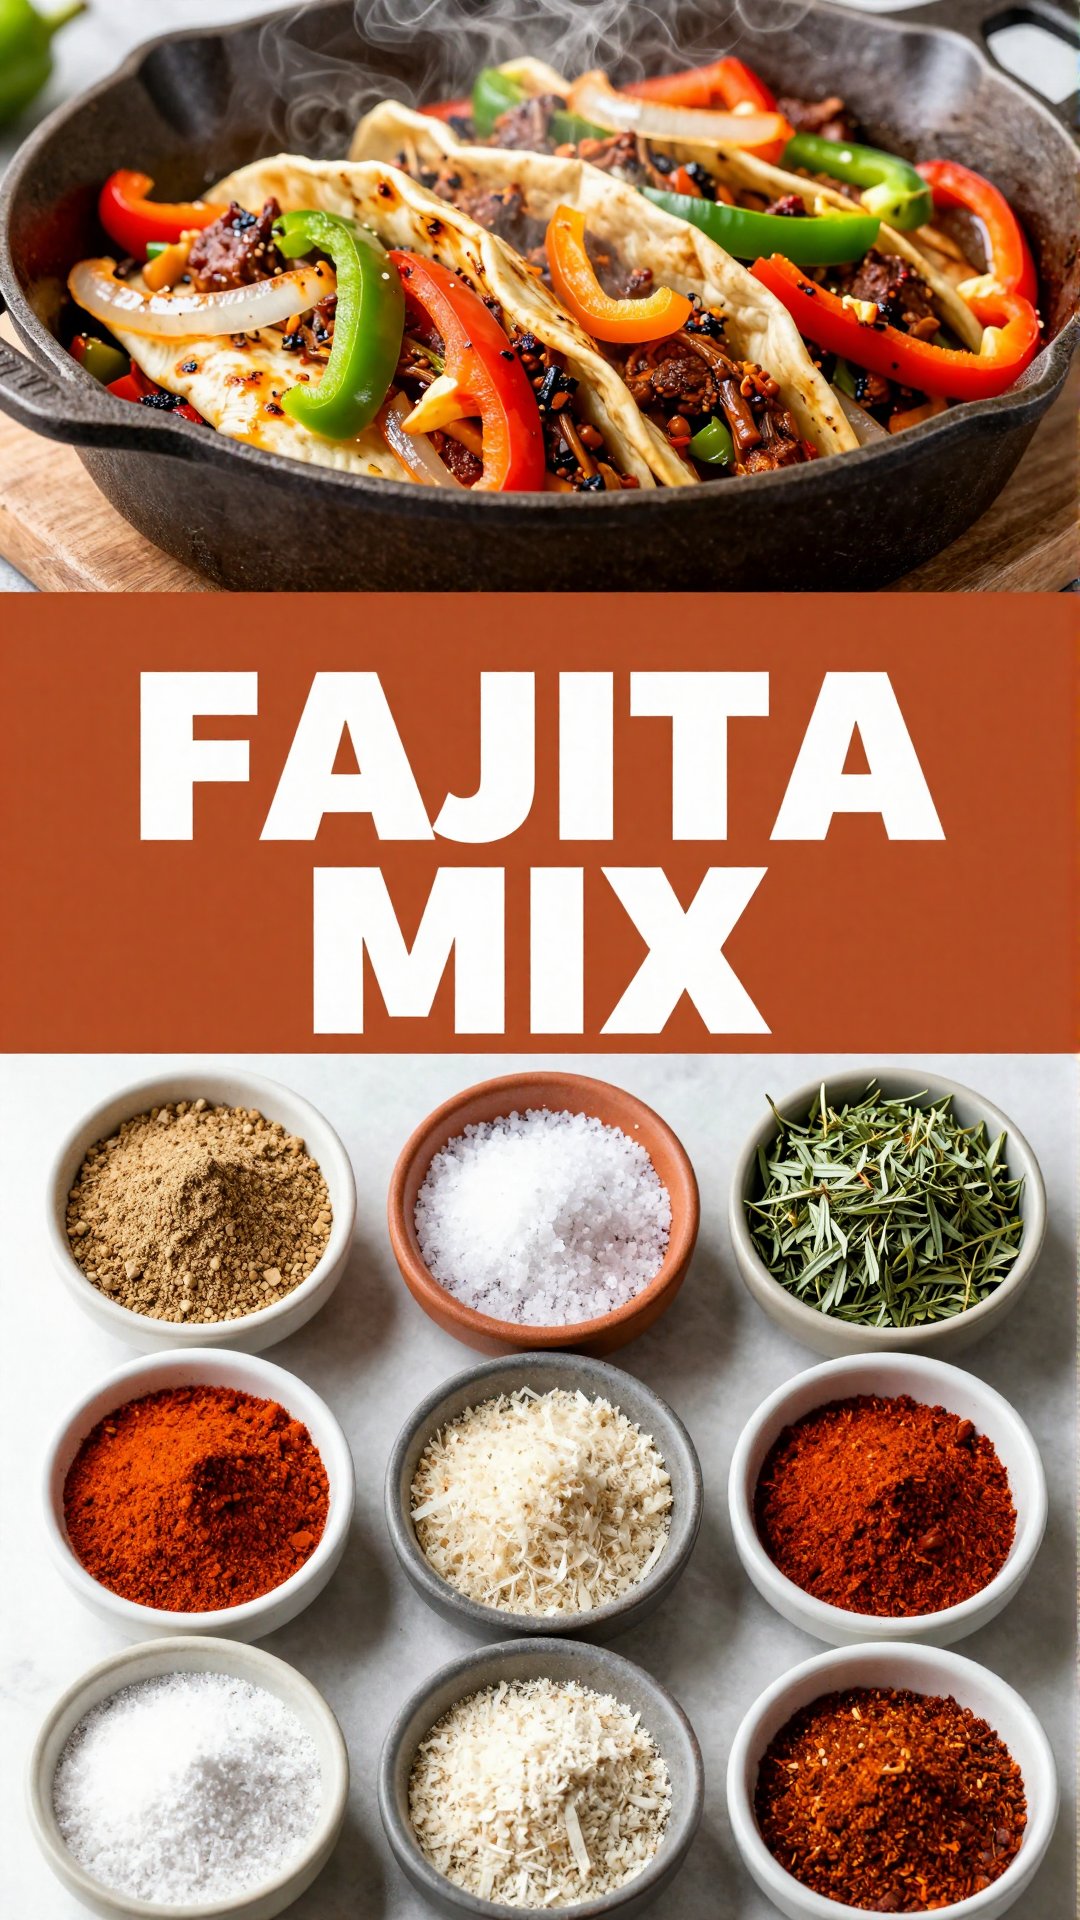
Ingredients for Skillet Seared Steak Fajitas

Here’s what you’ll need to create this masterpiece. Don’t worry; most of these ingredients are pantry staples.

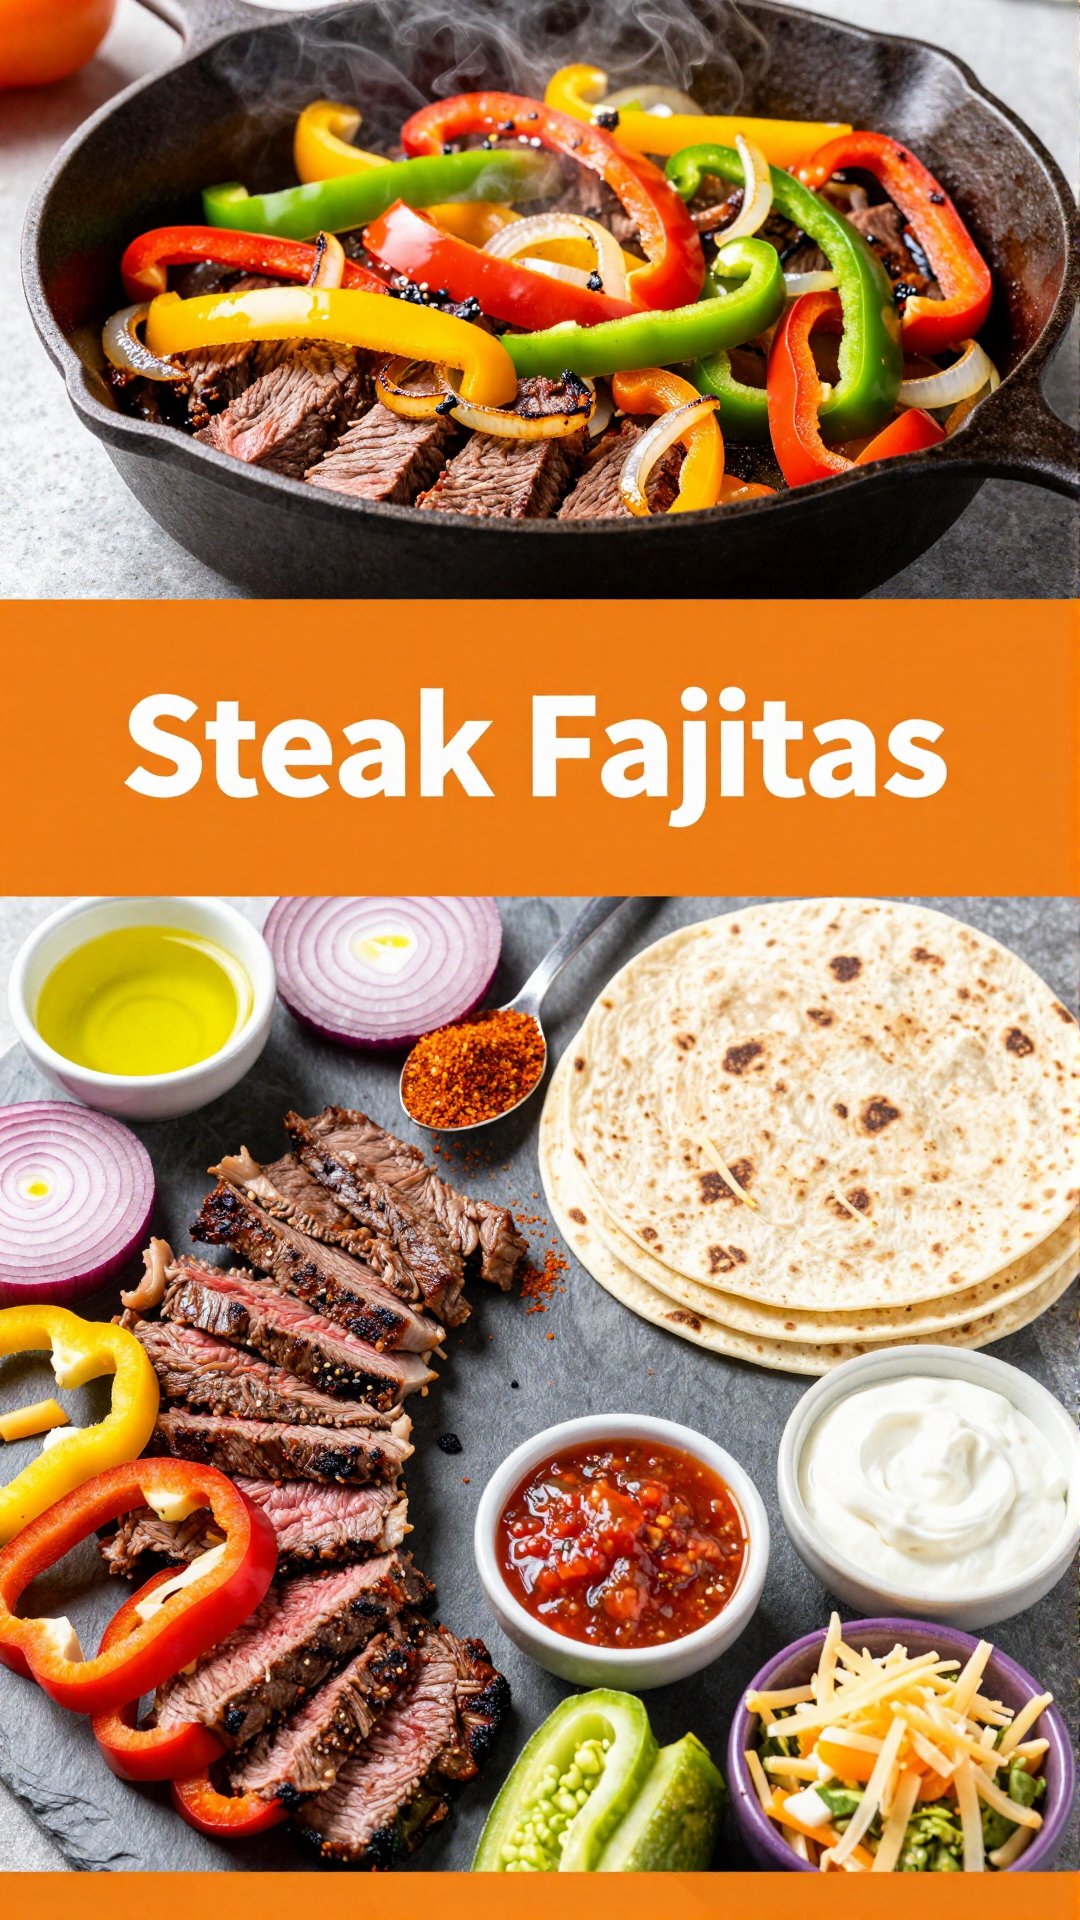
  • ‘1 pound skirt or flank steak, thinly sliced against the grain’
  • ‘1 tablespoon olive oil’
  • ‘1 large onion, cut into strips’
  • ‘2 bell peppers (any color), cut into strips’
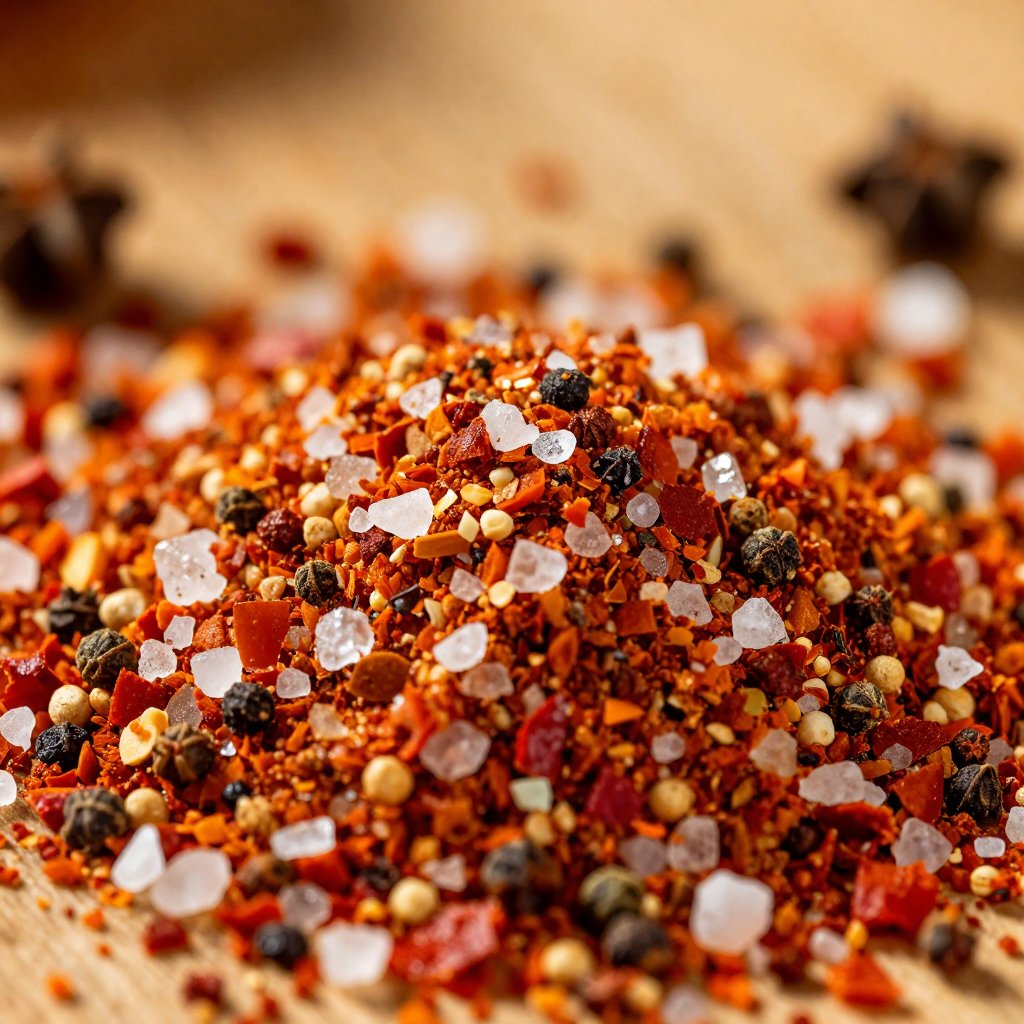
  • ‘1 teaspoon chili powder’
  • ‘1 teaspoon ground cumin’
  • ‘1/2 teaspoon smoked paprika’
  • ‘1/4 teaspoon garlic powder’
  • ‘Salt and black pepper to taste’
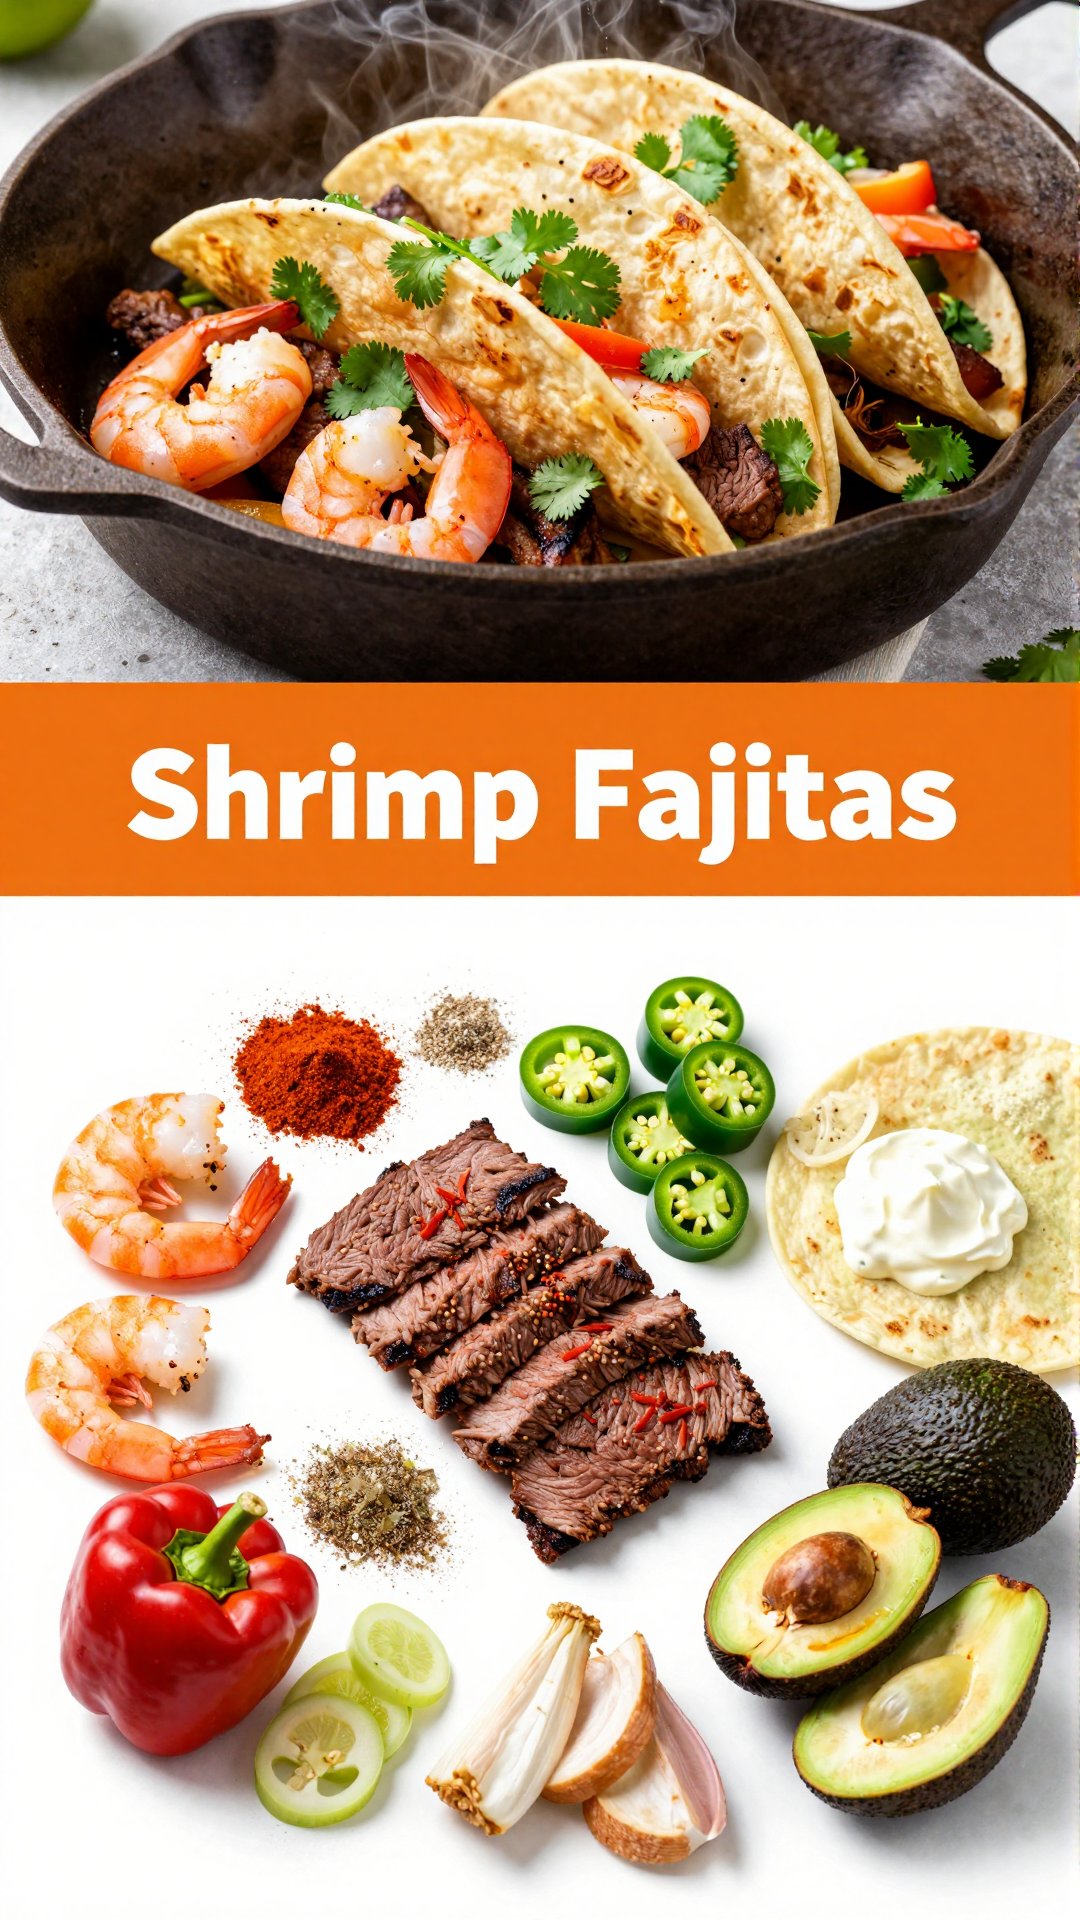
  • ‘8 small flour tortillas’
  • ‘Optional toppings: salsa, sour cream, guacamole, lime wedges’
Recipe Image

How to Make Astonishing Skillet Seared Steak Fajitas: Step-by-Step

Alright, let’s get down to business! Follow these simple steps, and you’ll be enjoying delicious steak fajitas in no time.

  1. Season the Steak: In a bowl, toss the sliced steak with chili powder, cumin, smoked paprika, garlic powder, salt, and pepper. Make sure the steak is evenly coated with all those yummy spices. This keeps the steak flavorful and delicious.
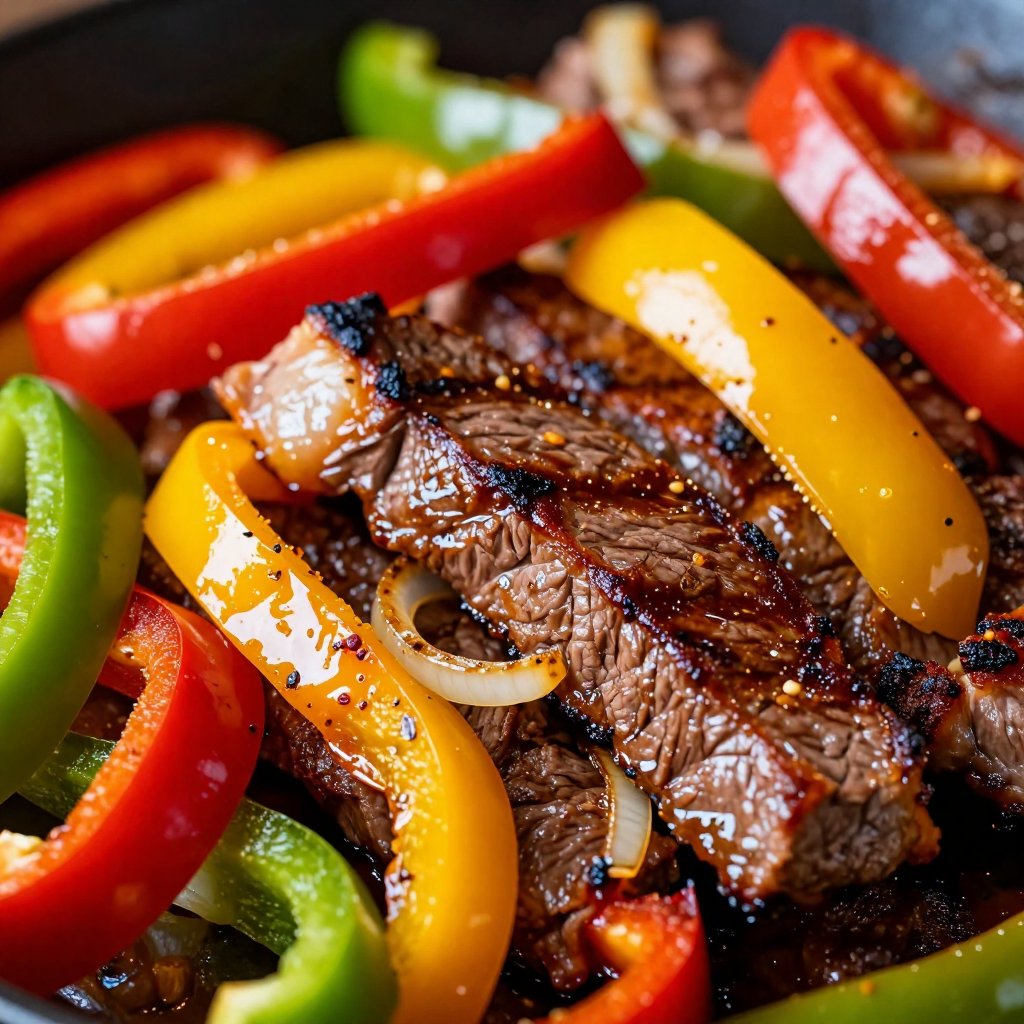
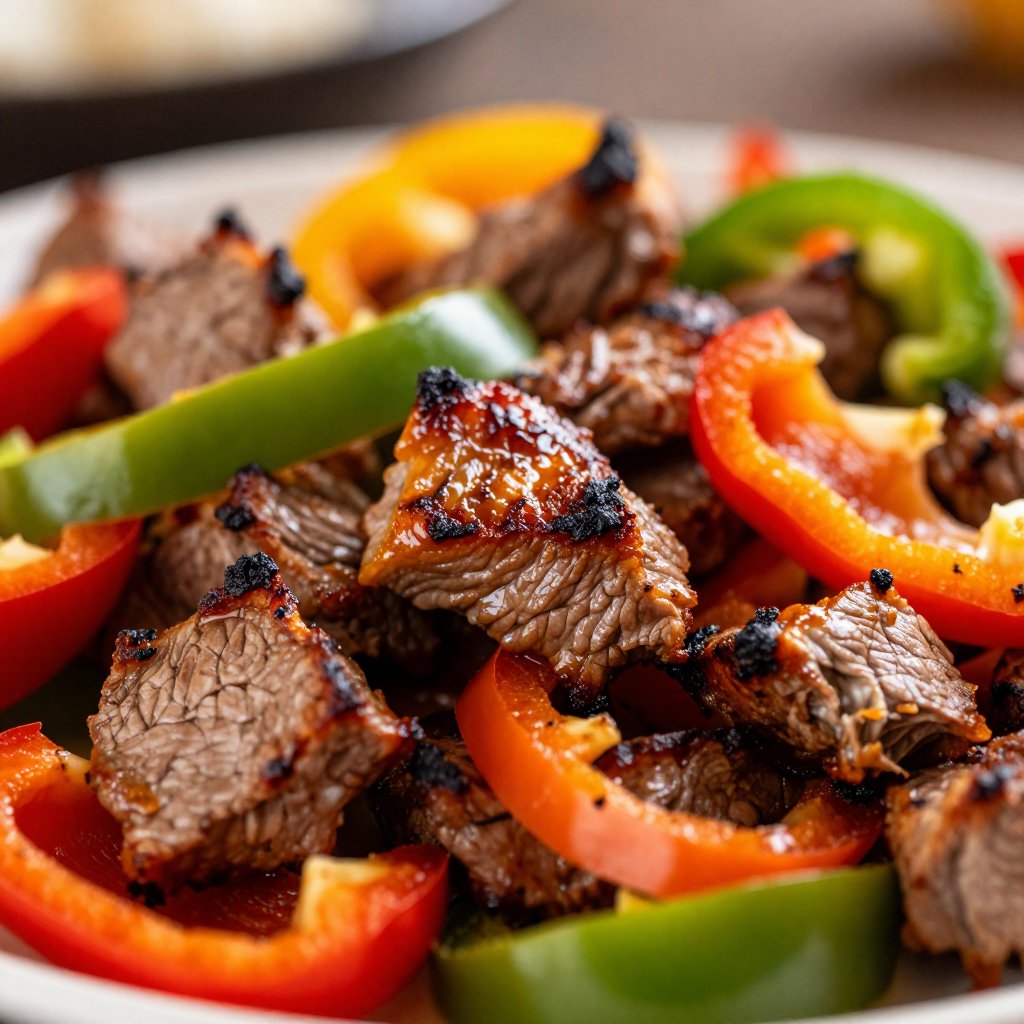
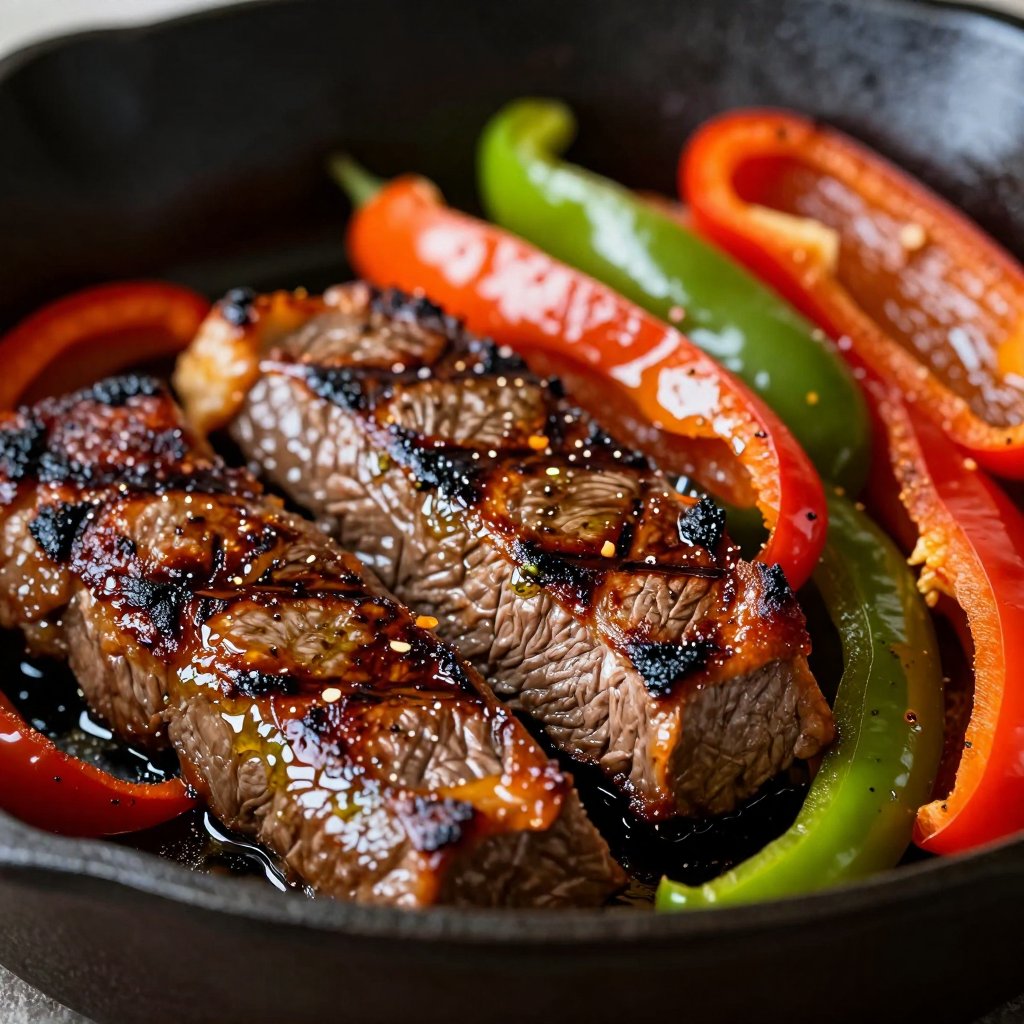
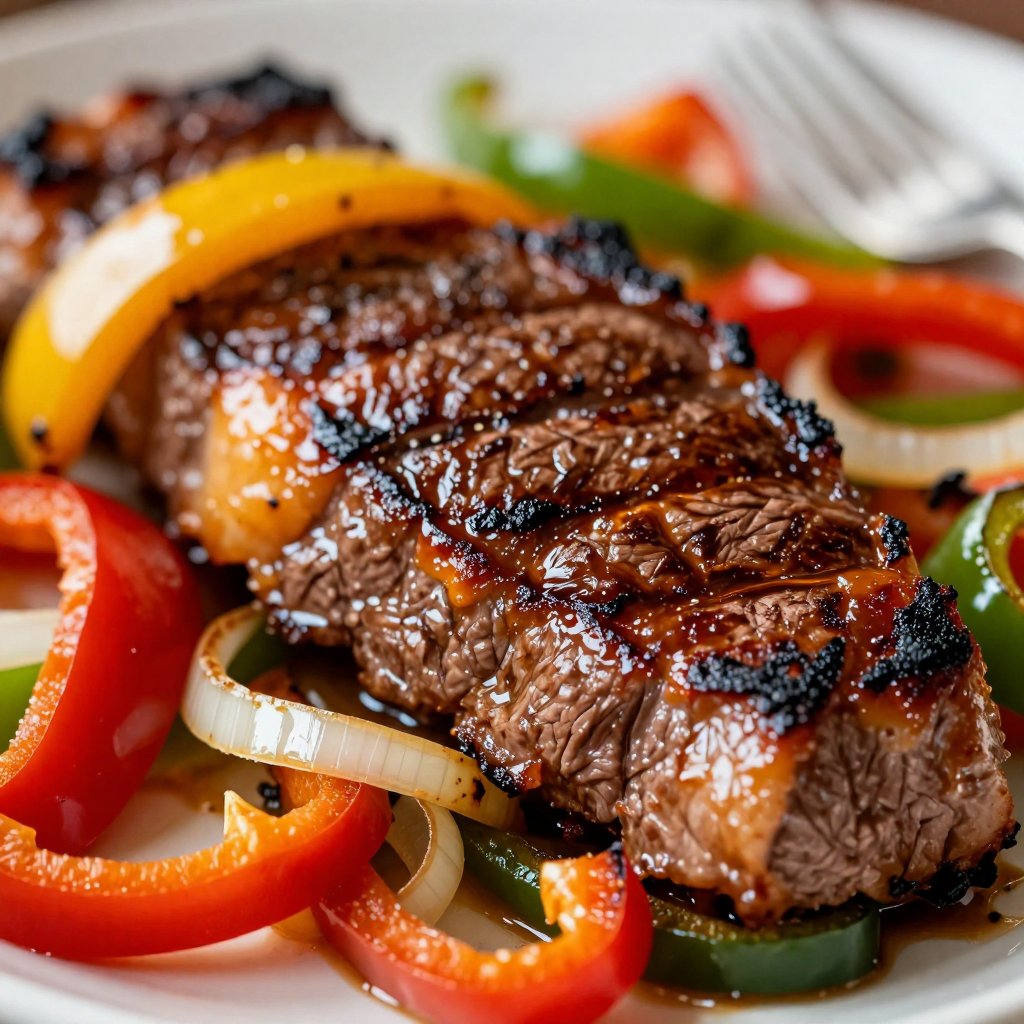
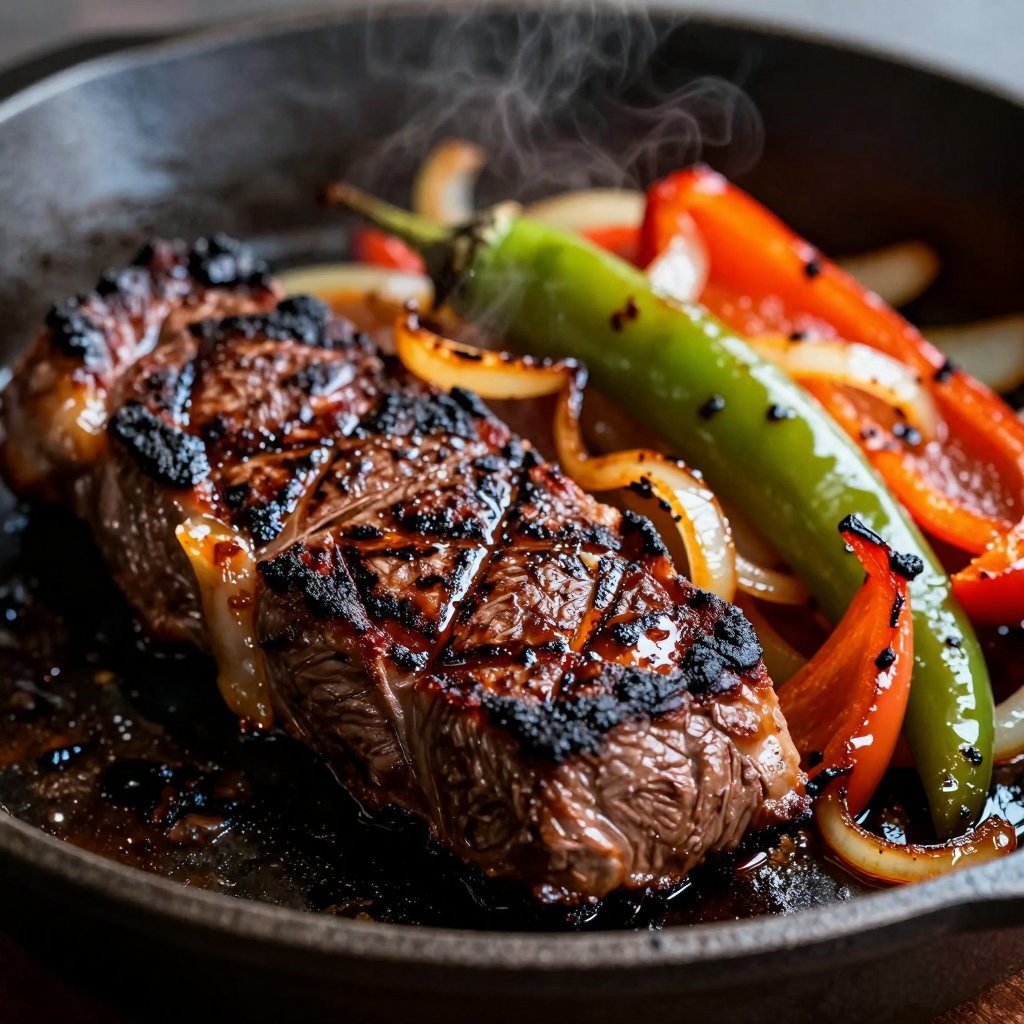
  2. Sear the Steak: Heat the olive oil in a large skillet over medium-high heat until shimmering. Add the seasoned steak to the hot pan in a single layer. Sear for 2-3 minutes per side until browned. You may need to work in batches to avoid overcrowding the pan. Remove the meat and set it aside. This is where that beautiful seared steak magic happens!
  3. Cook the Veggies: Add the onion and bell pepper strips to the same skillet. Cook, stirring occasionally, for 5-7 minutes until they soften and start to char slightly. Those slightly charred veggies add a fantastic depth of flavor.
  4. Combine Everything: Return the steak to the skillet with the vegetables. Toss everything together for 1 minute to heat through. This allows the flavors to meld together beautifully.
  5. Warm the Tortillas: Warm the tortillas according to package directions (you can warm them directly on a dry skillet). Warm tortillas are essential for the perfect fajita experience.
  6. Serve and Enjoy: Serve the steak and vegetable mixture immediately in the warm tortillas. Offer your favorite toppings on the side. Get creative with your toppings!

And there you have it! Astonishing 30-Minute Skillet Seared Steak Fajitas, ready to be devoured. The recipe is simple, but the results are extraordinary.

Pro Tips for the Best Skillet Seared Steak Fajitas

Want to take your fajitas to the next level? Here are a few of my go-to pro tips:

  • Use the Right Cut of Steak: Skirt steak or flank steak are the best choices for fajitas. They’re tender, flavorful, and cook quickly. Make sure to slice the steak thinly against the grain for maximum tenderness.
  • Don’t Overcrowd the Pan: When searing the steak, work in batches to avoid overcrowding the pan. Overcrowding will lower the temperature of the pan and result in steamed, rather than seared, steak. You want a nice, crispy sear on the steak.
  • Get the Pan Hot: Make sure your skillet is nice and hot before adding the steak. This will ensure a beautiful sear and prevent the steak from sticking. High heat is key to getting that delicious crust.
  • Season Generously: Don’t be shy with the spices! Season the steak and vegetables generously for the best flavor.
  • Rest the Steak: After searing the steak, let it rest for a few minutes before slicing. This allows the juices to redistribute, resulting in a more tender and flavorful steak.

These tips will help you achieve fajita perfection every time. Trust me; they make a difference!

Common Mistakes to Avoid When Making Steak Fajitas

Even the most seasoned cooks make mistakes. Here are a few common pitfalls to watch out for:

  • Overcooking the Steak: Overcooked steak is tough and dry. Be sure to sear the steak quickly over high heat and don’t overcook it.
  • Not Slicing Against the Grain: Slicing the steak with the grain will result in tough, chewy fajitas. Always slice against the grain for maximum tenderness.
  • Using Dull Knives: A sharp knife is essential for thinly slicing the steak and vegetables. Dull knives make the job more difficult and can be dangerous.
  • Skipping the Resting Period: Resting the steak allows the juices to redistribute, resulting in a more tender and flavorful steak. Don’t skip this step!
  • Using Cold Tortillas: Warm tortillas are essential for the perfect fajita experience. Cold tortillas are stiff and difficult to roll.

Avoid these mistakes, and you’ll be well on your way to fajita success. Remember, cooking is all about learning and experimenting.

Delicious Variations on This Steak Fajitas Recipe

Want to mix things up? Here are a few fun and delicious variations on this steak fajitas recipe:

  • Chicken Fajitas: Swap out the steak for chicken breast or thighs. Marinate the chicken in the same spices as the steak for extra flavor.
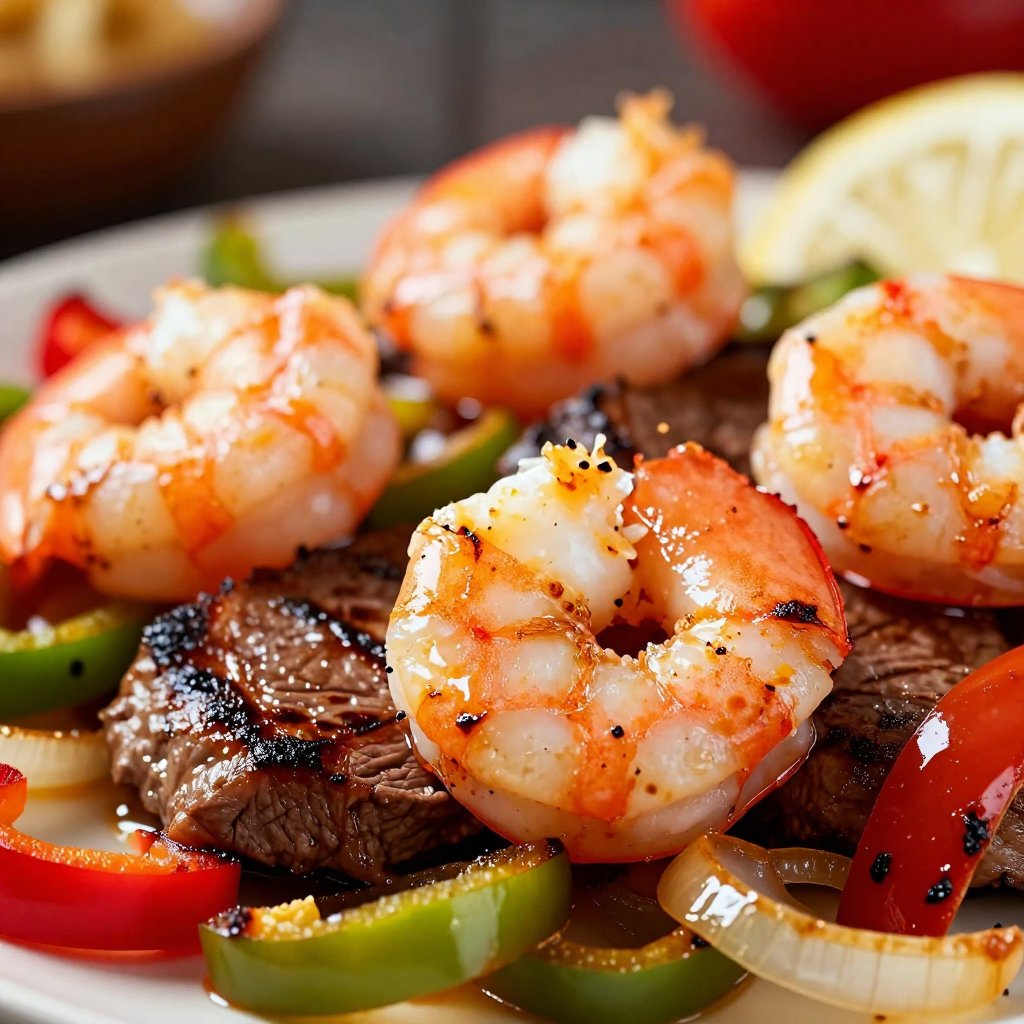
  • Shrimp Fajitas: Use shrimp instead of steak or chicken. Shrimp cooks quickly, so be careful not to overcook it.
  • Vegetarian Fajitas: Omit the meat and add more vegetables, such as mushrooms, zucchini, or corn. You can also add black beans or pinto beans for extra protein.
  • Spicy Fajitas: Add a pinch of cayenne pepper or a few chopped jalapeños to the spice mixture for a spicy kick.
  • Fajita Bowls: Serve the steak and vegetables over rice or quinoa instead of tortillas. Top with your favorite fajita toppings.

Get creative and experiment with different variations to find your favorite. The possibilities are endless!

How to Store and Reheat Leftover Steak Fajitas

Got leftovers? Lucky you! Here’s how to store and reheat them:

  • Storage: Store the steak and vegetables in an airtight container in the refrigerator for up to 3 days. Store the tortillas separately to prevent them from getting soggy.
  • Reheating: Reheat the steak and vegetables in a skillet over medium heat until heated through. You can also microwave them, but they may not be as flavorful. Warm the tortillas in a dry skillet or microwave before serving.

Leftover fajitas are great for lunch the next day. You can even use them to make fajita salads or quesadillas.

Frequently Asked Questions About Steak Fajitas

Got questions? I’ve got answers! Here are a few frequently asked questions about steak fajitas:

  • What is the best cut of steak for fajitas? Skirt steak and flank steak are the best choices. They’re tender, flavorful, and cook quickly.
  • How do I slice the steak for fajitas? Always slice the steak thinly against the grain for maximum tenderness.
  • Can I make fajitas ahead of time? Yes, you can prepare the steak and vegetables ahead of time and store them in the refrigerator. Reheat them just before serving.
  • What toppings go well with fajitas? Some popular fajita toppings include salsa, sour cream, guacamole, cheese, and lime wedges.
  • Can I use a different type of oil? Yes, you can use any type of cooking oil with a high smoke point, such as canola oil or avocado oil.

If you have any other questions, feel free to ask in the comments below. I’m always happy to help!

Serving Suggestions for Skillet Seared Steak Fajitas

Now that you’ve made these amazing steak fajitas, it’s time to serve them up! Here are a few serving suggestions to make your meal even more special:

  • Classic Fajita Platter: Arrange the steak and vegetables on a platter with warm tortillas and your favorite toppings. Let everyone assemble their own fajitas.
  • Fajita Bar: Create a fajita bar with a variety of toppings, such as different types of salsa, sour cream, guacamole, cheese, and pickled onions.
  • Side Dishes: Serve your fajitas with a side of Mexican rice, black beans, or a fresh salad.
  • Drinks: Pair your fajitas with a refreshing margarita, a cold beer, or a glass of iced tea.
  • Presentation: Garnish your fajitas with fresh cilantro and lime wedges for a pop of color and flavor.

These serving suggestions will help you create a memorable fajita experience for your family and friends. Enjoy!

So there you have it – my Astonishing 30-Minute Skillet Seared Steak Fajitas Recipe! I hope you love it as much as I do. It’s a quick, easy, and delicious way to bring a little bit of Tex-Mex magic to your kitchen. Remember, cooking is all about having fun and experimenting. Don’t be afraid to get creative and make this recipe your own. And most importantly, enjoy the process and savor every bite!

Happy cooking, friends! And don’t forget to share your fajita creations with me on social media. I can’t wait to see what you come up with! Until next time, keep stirring, keep smiling, and keep making magic in the kitchen. The meat needs to be seared to perfection, so don’t be shy with the heat! You don’t want a bland steak, so make sure to season it generously. This recipe is a guaranteed crowd-pleaser, and I can’t wait for you to try it. This dish is perfect for any occasion, from weeknight dinners to weekend gatherings. This keeps everyone happy and full. It’s a simple recipe but the best steak fajita recipe around. The pan needs to be screaming hot. It’s a great way to bring a little bit of Tex-Mex flavor to your table. How I love to cook this for friends and family. It s a simple way to make something delicious. You need to try this recipe today!

Astonishing 30-Minute Skillet Seared Steak Fajitas

Prep Time 10 minutes
Cook Time 20 minutes
Total Time 30 minutes
Servings 4 people
Calories 450
Quick and easy steak fajitas ready in just 30 minutes! Perfect for a flavorful weeknight meal.

Ingredients

Fajita Ingredients

  • 1 pound skirt or flank steak (thinly sliced against the grain)
  • 1 tablespoon olive oil
  • 1 large onion (cut into strips)
  • 2 bell peppers (any color, cut into strips)
  • 1 teaspoon chili powder
  • 1 teaspoon ground cumin
  • 0.5 teaspoon smoked paprika
  • 0.25 teaspoon garlic powder
  • to taste Salt and black pepper
  • 8 small flour tortillas

Optional Toppings

  • salsa (Optional)
  • sour cream (Optional)
  • guacamole (Optional)
  • lime wedges (Optional)

Instructions 

  • Toss steak with chili powder, cumin, paprika, garlic powder, salt, and pepper.
  • Heat olive oil in a large skillet over medium-high heat.
  • Sear steak in a single layer for 2-3 minutes per side. Remove and set aside.
  • Cook onion and bell pepper strips for 5-7 minutes until softened.
  • Return steak to skillet with vegetables and toss for 1 minute.
  • Warm tortillas according to package directions.
  • Serve steak and vegetable mixture in warm tortillas with toppings.

Notes

For extra flavor, marinate the steak for at least 30 minutes before cooking.
Calories: 450kcal
Cost: $20
Course: Main Course
Cuisine: Mexican
Keyword: Steak
pin

Quick & Easy Instant Pot Steak Fajitas: A Weeknight Fiesta!

Hey there, friend! Ava here, back from my little Seattle kitchen with a recipe that’s going to revolutionize your weeknight dinners. Picture this: juicy, tender steak, vibrant bell peppers, and savory onions, all swimming in a smoky, flavorful sauce. Now, imagine achieving that level of deliciousness in a fraction of the time, thanks to the magic of the Instant Pot. Yes, we’re talking about Instant Pot Steak Fajitas, and trust me, it’s a game-changer.

I remember the first time I made fajitas. I spent hours marinating the meat, prepping the veggies, and firing up the grill. The result was delicious, but the cleanup? Not so much. That’s when I started experimenting with the Instant Pot, and let me tell you, it’s like having a personal chef who’s also a wizard. This recipe is so easy, even my slightly-culinarily-challenged brother could nail it (and he did!).

These steak fajitas aren’t just about convenience; they’re about flavor. The Instant Pot locks in all the delicious juices, creating a depth of flavor you wouldn’t believe. Plus, the natural pressure release helps tenderize the meat, resulting in a melt-in-your-mouth texture that’s simply irresistible. So, ditch the takeout menu and get ready to fiesta!

Why You’ll Absolutely Love This Instant Pot Fajitas Recipe

Okay, so why should you trust me, a girl from Oregon who’s obsessed with her Instant Pot? Well, besides my impeccable taste (humble brag!), there are a few very good reasons why this Instant Pot Steak Fajitas recipe is about to become your new go-to:

  • Speed Demon: Say goodbye to hours of marinating and grilling. This recipe is ready in under 30 minutes, making it perfect for busy weeknights.
  • Flavor Explosion: The Instant Pot infuses the steak and veggies with a rich, smoky flavor that’s simply divine.
  • Tender Perfection: The pressure cooking process tenderizes the steak like you wouldn’t believe.
  • Minimal Cleanup: One pot. That’s it. Need I say more?
  • Customizable: Want to add some heat? Throw in a jalapeño. Prefer chicken? Go for it! This recipe is incredibly versatile.

This recipe is truly a winner. I’ve tested it countless times, tweaking the ingredients and adjusting the cooking time until it’s absolutely perfect. It’s a crowd-pleaser, a time-saver, and a guaranteed way to impress your family and friends. I’ve even made it for potlucks, and it’s always the first dish to disappear.

And honestly, the best part is how simple it is. Even if you’re a beginner cook, you can absolutely nail this recipe. I’ve broken down the steps into easy-to-follow instructions, and I’ve included plenty of tips and tricks to ensure success. So, grab your Instant Pot and let’s get cooking!

The Star Ingredients: What You’ll Need

Alright, let’s talk ingredients. The beauty of this recipe is that it uses simple, readily available ingredients that you probably already have in your pantry. Here’s the lineup:

  • 1.5 lbs Flank steak, skirt steak, or sirloin steak, cut into strips: The meat is the star of the show, so choose a good quality cut.
  • 1 large onion, sliced: Adds sweetness and depth of flavor.
  • 2 bell peppers (various colors), sliced: Adds color, sweetness, and a satisfying crunch.
  • 1 packet fajita seasoning (or homemade equivalent): This is where the magic happens! Use your favorite store-bought brand or whip up your own homemade blend.
  • 1 cup beef broth: Adds moisture and helps to deglaze the Instant Pot.
  • 2 tbsp olive oil: For searing the steak and sautéing the veggies.
  • Optional toppings: tortillas, sour cream, guacamole, salsa, shredded cheese: The possibilities are endless! Get creative and customize your fajitas to your liking.

Now, a little note about the fajita seasoning. I’m a big fan of making my own, because I can control the ingredients and adjust the spice level to my liking. But if you’re short on time, a store-bought packet works just fine. Just be sure to check the ingredients list and avoid any brands with excessive sodium or artificial flavors.

And as for the steak, feel free to experiment with different cuts. Flank steak is my personal favorite, because it’s relatively inexpensive and cooks up beautifully in the Instant Pot. But skirt steak and sirloin steak also work well. Just be sure to cut the steak into thin strips, against the grain, for maximum tenderness.

Recipe Image

Step-by-Step: Making Your Instant Pot Steak Fajitas

Okay, let’s get down to business! Here’s how to make these amazing Instant Pot Fajitas, step-by-step:

  1. Sear the Steak: Add olive oil to the Instant Pot and turn on the saute function. Add the sliced steak and brown on all sides. This may need to be done in batches to avoid overcrowding. Searing the steak adds a delicious depth of flavor.
  2. Sauté the Veggies: Remove the steak from the Instant Pot and set aside. Add the sliced onions and bell peppers to the Instant Pot and saute until softened, about 5 minutes. This helps to release their natural sweetness.
  3. Add Seasoning and Broth: Add the fajita seasoning and beef broth to the Instant Pot. Stir to combine, scraping up any browned bits from the bottom. This is crucial for preventing the burn notice!
  4. Pressure Cook: Return the steak to the Instant Pot. Secure the lid and set the Instant Pot to manual/pressure cook on high for 8 minutes.
  5. Natural Pressure Release: Allow for a natural pressure release for 10 minutes, then quick release any remaining pressure. This helps to tenderize the steak even further.
  6. Reduce the Sauce (If Necessary): Open the Instant Pot carefully. If there is excess of liquid, you can use the saute function to reduce it down.
  7. Serve and Enjoy!: Serve the steak fajitas immediately with your favorite toppings and warm tortillas.

See? I told you it was easy! The key is to not overcrowd the Instant Pot when searing the steak. If you try to cram too much in at once, the steak will steam instead of sear, and you won’t get that beautiful brown crust. And don’t forget to scrape up those browned bits from the bottom of the pot! That’s where all the flavor is.

Ava’s Pro Tips for Perfect Instant Pot Fajitas

Okay, my friends, let’s dive into some pro tips that will elevate your Instant Pot Steak Fajitas from good to absolutely amazing:

  • Marinate the Meat: If you have the time, marinating the steak for at least 30 minutes (or even overnight) will add even more flavor and tenderness. A simple marinade of lime juice, garlic, and olive oil works wonders.
  • Don’t Overcook the Steak: The Instant Pot can be a bit finicky, so it’s important to not overcook the steak. 8 minutes is usually perfect for medium-rare to medium. If you prefer your steak well-done, you may need to add a minute or two.
  • Use High-Quality Ingredients: The better the ingredients, the better the final product. Invest in good quality steak, fresh veggies, and flavorful fajita seasoning.
  • Warm Your Tortillas: Warm tortillas are a must! You can warm them in a dry skillet, in the microwave, or even directly over a gas flame (my personal favorite!).
  • Get Creative with Toppings: Don’t be afraid to experiment with different toppings! I love adding grilled corn, pickled onions, or even a dollop of mango salsa.

So, there you have it! My top tips for making the perfect Instant Pot Steak Fajitas. Remember, cooking is all about experimenting and having fun. Don’t be afraid to try new things and put your own spin on this recipe.

Common Mistakes to Avoid (and How to Fix Them!)

Alright, let’s talk about some common mistakes that people make when making Instant Pot Fajitas, and how to avoid them:

  • Getting the Burn Notice: This is the most common problem with Instant Pot cooking. To avoid the burn notice, make sure to scrape up all the browned bits from the bottom of the pot after sautéing the veggies. Also, make sure there’s enough liquid in the pot.
  • Overcooking the Steak: As I mentioned earlier, it’s important to not overcook the steak. If you’re worried about overcooking, you can always use a meat thermometer to check the internal temperature.
  • Using Too Much Liquid: The Instant Pot doesn’t evaporate liquid like a stovetop pot, so you don’t need to use as much liquid. One cup of beef broth is usually enough.
  • Not Searing the Steak: Searing the steak adds a crucial layer of flavor. Don’t skip this step!
  • Forgetting to Natural Pressure Release: The natural pressure release helps to tenderize the steak. Don’t rush the process!

If you do happen to make a mistake, don’t panic! Cooking is all about learning and growing. Just take a deep breath, assess the situation, and try again. And remember, even if your fajitas aren’t perfect, they’ll still be delicious!

Delicious Variations: Spice It Up!

The beauty of this Instant Pot Steak Fajitas recipe is that it’s incredibly versatile. Here are a few variations to try:

  • Spicy Fajitas: Add a diced jalapeño or a pinch of cayenne pepper to the Instant Pot for a spicy kick.
  • Chicken Fajitas: Substitute the steak with chicken breasts or thighs. Adjust the cooking time accordingly (usually 6-7 minutes).
  • Vegetarian Fajitas: Omit the steak and add more veggies, such as mushrooms, zucchini, or corn.
  • Shrimp Fajitas: Add shrimp to the Instant Pot during the last minute of cooking for a quick and easy seafood twist.
  • Pineapple Fajitas: Add chunks of pineapple to the Instant Pot for a sweet and tangy flavor.

These are just a few ideas to get you started. Feel free to experiment and create your own unique fajita variations! I’m always looking for new and exciting flavor combinations.

Storing and Reheating Your Leftovers

If you’re lucky enough to have leftovers (which is rare in my house!), here’s how to store and reheat them:

  • Storage: Store the leftover steak and veggies in an airtight container in the refrigerator for up to 3 days.
  • Reheating: Reheat the fajitas in a skillet over medium heat, or in the microwave. You can also reheat them in the Instant Pot using the saute function.
  • Freezing: You can freeze the leftover steak and veggies, but the texture may change slightly. Store in an airtight container in the freezer for up to 2 months.

I personally love using leftover fajitas in quesadillas, salads, or even breakfast burritos! The possibilities are endless.

Frequently Asked Questions (FAQ)

Got questions? I’ve got answers! Here are some frequently asked questions about Instant Pot Steak Fajitas:

  • Can I use frozen steak? While it’s best to use fresh steak, you can use frozen steak if you’re in a pinch. Just be sure to thaw it completely before cooking.
  • Can I make this recipe without an Instant Pot? Yes, you can make this recipe in a skillet on the stovetop. Just sear the steak and sauté the veggies as directed, then simmer in the fajita seasoning and beef broth until the steak is cooked through.
  • Can I use a different type of broth? Yes, you can use chicken broth or vegetable broth instead of beef broth.
  • Can I make this recipe ahead of time? Yes, you can make this recipe ahead of time and store it in the refrigerator for up to 2 days.
  • My fajitas are too salty! What do I do? If your fajitas are too salty, try adding a squeeze of lime juice or a pinch of sugar to balance out the flavors.

If you have any other questions, feel free to leave a comment below! I’m always happy to help.

Serving Suggestions: Complete Your Fiesta!

Okay, the steak fajitas are ready, but what about the sides? Here are some of my favorite serving suggestions to complete your fiesta:

  • Warm Tortillas: As I mentioned earlier, warm tortillas are a must! Corn or flour tortillas both work well.
  • Sour Cream: A dollop of sour cream adds a creamy, tangy element.
  • Guacamole: Creamy, rich guacamole is the perfect complement to the savory fajitas.
  • Salsa: Choose your favorite salsa, whether it’s mild, medium, or hot.
  • Shredded Cheese: Cheddar, Monterey Jack, or queso fresco all work well.
  • Rice and Beans: A side of rice and beans makes for a hearty and satisfying meal.

Don’t forget the drinks! Margaritas, Mexican beer, or even just a refreshing glass of iced tea are all great choices.

And that’s it, my friends! You’ve officially mastered the art of Instant Pot Steak Fajitas. I hope you enjoyed this recipe as much as I do. Now go forth and create some unforgettable memories in your kitchen!

Thank you so much for joining me on this culinary adventure! I love sharing my recipes with you, and I hope they bring a little bit of joy to your life. You’ll find this steak recipe is so easy to make, that the steak will be perfect every time. Whether you are using the instant pot, or a skillet, the recipe will be perfect every time. Don’t forget the fajita seasoning! I hope you enjoyed this recipe and that you will make it often. Thank you so much for reading!

Instant Pot Steak Fajitas

Prep Time 15 minutes
Cook Time 20 minutes
Total Time 35 minutes
Servings 6 servings
Calories 350
Quick and easy steak fajitas made in the Instant Pot! Tender steak and flavorful vegetables cooked to perfection in minutes.

Ingredients

Ingredients

  • 1.5 lbs Flank steak, skirt steak, or sirloin steak (cut into strips)
  • 1 large onion (sliced)
  • 2 bell peppers ((various colors), sliced)
  • 1 packet fajita seasoning (or homemade equivalent)
  • 1 cup beef broth
  • 2 tbsp olive oil

Optional Toppings

  • tortillas
  • sour cream
  • guacamole
  • salsa
  • shredded cheese

Instructions 

  • Add olive oil to the Instant Pot and turn on the saute function.
  • Add the sliced steak and brown on all sides. This may need to be done in batches.
  • Remove the steak from the Instant Pot and set aside.
  • Add the sliced onions and bell peppers to the Instant Pot and saute until softened, about 5 minutes.
  • Add the fajita seasoning and beef broth to the Instant Pot. Stir to combine.
  • Return the steak to the Instant Pot.
  • Secure the lid and set the Instant Pot to manual/pressure cook on high for 8 minutes.
  • Allow for a natural pressure release for 10 minutes, then quick release any remaining pressure.
  • Open the Instant Pot carefully. If there is excess liquid, you can use the saute function to reduce it down.
  • Serve the steak fajitas immediately with your favorite toppings and warm tortillas.

Notes

For extra flavor, marinate the steak for at least 30 minutes before cooking.
Calories: 350kcal
Cost: $20
Course: Main Course
Cuisine: Mexican
Keyword: Steak
pin

Hey there, burger aficionados! Ava here, back in my Seattle kitchen, and today we’re diving headfirst into a topic near and dear to my heart (and stomach): burger seasoning. I’m not talking about the stuff you grab off the shelf at the grocery store. Oh no, we’re going gourmet… homemade gourmet! Get ready to discover the best burger seasoning recipe that will transform your ordinary patties into extraordinary culinary creations. This isn’t just about throwing some spices together; it’s about crafting a symphony of flavors that will make your taste buds sing. And trust me, once you’ve tried this, you’ll never go back to pre-made blends again.

Growing up, my mom always had a knack for making the simplest meals taste incredible. Her secret? Fresh ingredients and a whole lot of love. But she also had a secret weapon: her own homemade seasoning blends. I remember watching her meticulously measure out spices, the aromas filling the kitchen and making my mouth water in anticipation. That’s where my love for creating custom spice blends began. And now, I’m sharing one of my all-time favorites with you.

Why You’ll Love This Burger Seasoning

So, why should you bother making your own burger seasoning when you can just buy it? Let me tell you, the difference is night and day. Here’s why you’ll absolutely adore this recipe:

  • Unmatched Flavor: This isn’t your average seasoning. The blend of spices creates a complex, savory flavor profile that store-bought versions just can’t match.
  • Customizable: Want it spicier? Add more cayenne! Prefer a smokier flavor? Throw in some smoked paprika. You can tweak the recipe to perfectly suit your taste.
  • Freshness: Nothing beats the taste of freshly ground spices. You control the quality and ensure that every burger is bursting with flavor.
  • No Mystery Ingredients: You know exactly what’s going into your seasoning. No weird additives or preservatives, just pure, delicious spices.
  • It’s Easy: Seriously, it takes less than 5 minutes to make. And once you have it on hand, you’re ready to whip up amazing burgers anytime.

Plus, making your own burger seasoning is incredibly satisfying. There’s something special about knowing you created something delicious from scratch. It’s like adding a little bit of your own magic to every meal.

Burger Seasoning Ingredients

Alright, let’s get down to the nitty-gritty. Here’s what you’ll need to create this amazing burger seasoning:

  • 1 tablespoon salt
  • 1 tablespoon black pepper
  • 1 tablespoon garlic powder
  • 1 tablespoon onion powder
  • 1 teaspoon paprika
  • 1/2 teaspoon cayenne pepper (optional)
Recipe Image

How to Make the Best Burger Seasoning: Step-by-Step

Making this seasoning blend is ridiculously simple. Here’s how you do it:

  1. Combine: In a small bowl, add all the ingredients.
  2. Mix: Stir well to ensure all the spices are evenly distributed.
  3. Store: Transfer the seasoning to an airtight container.

And that’s it! Seriously, that’s all there is to it. You now have your very own homemade burger seasoning, ready to elevate your burgers to the next level.

Pro Tips for the Perfect Burger Seasoning

Want to take your burger seasoning game to the next level? Here are a few pro tips to keep in mind:

  • Use High-Quality Spices: The better the quality of your spices, the better your seasoning will taste. I recommend using organic spices whenever possible.
  • Toast Your Spices: For an even deeper flavor, lightly toast your spices in a dry skillet over medium heat for a few minutes before grinding. Just be careful not to burn them!
  • Grind Your Own Spices: If you really want to go all out, grind your own spices using a spice grinder or mortar and pestle. The flavor will be incredibly fresh and vibrant.
  • Taste as You Go: Don’t be afraid to taste the seasoning as you mix it and adjust the ingredients to your liking. After all, it’s your seasoning blend!
  • Let it Sit: After mixing, let the seasoning sit for at least 30 minutes before using it. This allows the flavors to meld together and deepen.

Common Mistakes to Avoid

Even though this recipe is super simple, there are a few common mistakes you’ll want to avoid:

  • Using Stale Spices: Spices lose their flavor over time, so make sure yours are fresh. If they don’t have a strong aroma, it’s time to replace them.
  • Over-Seasoning: It’s easy to get carried away, but remember that a little goes a long way. Start with a small amount of seasoning and add more to taste.
  • Not Mixing Thoroughly: Make sure all the spices are evenly distributed, or you might end up with some bites that are too salty or too spicy.
  • Storing Improperly: Always store your seasoning in an airtight container to prevent it from losing its flavor and aroma.

Burger Seasoning Variations

One of the best things about making your own burger seasoning is that you can customize it to your heart’s content. Here are a few variations to try:

  • Spicy: Add more cayenne pepper or a pinch of red pepper flakes for extra heat.
  • Smoky: Use smoked paprika instead of regular paprika for a smoky flavor.
  • Sweet: Add a teaspoon of brown sugar for a touch of sweetness.
  • Herby: Mix in some dried herbs like oregano, thyme, or rosemary.
  • Mediterranean: Add a pinch of dried oregano, basil, and a squeeze of lemon zest.

Don’t be afraid to experiment and create your own unique blend! The possibilities are endless.

How to Store Your Burger Seasoning

Proper storage is key to keeping your burger seasoning fresh and flavorful. Here’s how to do it:

  • Airtight Container: Store the seasoning in an airtight container to prevent moisture and air from getting in.
  • Cool, Dark Place: Keep the container in a cool, dark place away from direct sunlight and heat.
  • Shelf Life: When stored properly, your burger seasoning will last for up to 6 months.

Frequently Asked Questions (FAQ)

Got questions about burger seasoning? I’ve got answers!

  • Can I use this seasoning on other meats? Absolutely! This seasoning is delicious on chicken, pork, and even fish.
  • How much seasoning should I use per pound of meat? I recommend using about 1-2 tablespoons of seasoning per pound of meat.
  • Can I make a big batch of this seasoning and store it? Yes, you can definitely make a big batch and store it for later use. Just make sure to store it properly.
  • What if I don’t have all the ingredients? Don’t worry, you can substitute ingredients as needed. For example, if you don’t have onion powder, you can use granulated onion.
  • Can I add salt to the burger meat even if the seasoning has salt? Be careful when adding extra salt. Taste the meat after you’ve added the seasoning and then decide if more salt is needed.

Serving Suggestions: Beyond Burgers!

While this seasoning is fantastic on burgers, don’t limit yourself! Here are a few other ways to use it:

  • Grilled Chicken: Sprinkle it on chicken breasts before grilling for a flavorful and juicy meal.
  • Roasted Vegetables: Toss your favorite veggies with olive oil and this seasoning before roasting for a delicious side dish.
  • Steak: Use it as a dry rub for steak before grilling or pan-searing.
  • French Fries: Sprinkle it on freshly cooked french fries for a gourmet twist.
  • Popcorn: Add a pinch to your popcorn for a savory snack.

This burger seasoning is more than just a spice blend; it’s a flavor enhancer that can transform all sorts of dishes. Feel free to experiment and discover your own favorite ways to use it!

So there you have it – my ultimate burger seasoning recipe! I hope you love it as much as I do. Remember, cooking should be fun and creative, so don’t be afraid to experiment and make this recipe your own. Happy grilling!

Now go forth and create the best burgers you’ve ever tasted! And don’t forget to share your creations with me – I love seeing what you come up with. Until next time, happy cooking!

If you’ve ever wondered how to make your burgers taste better, this is it! **You can** easily transform **your burger** from bland to bold with **this seasoning**. **Burger seasoning** is the secret weapon that **you’ve** been missing. **It’s** so simple, **if you** have **just a handful** of spices, you’re good to go! Be sure **to your** taste, **don’t** be afraid to **tweak the spice** blend. For **homemade burgers**, **this recipe** is a game changer. **This seasoning** is perfect with **garlic powder**, **kosher salt**, **black pepper**. Store it in **an airtight** container so **you can make** **burgers with** this amazing **seasoning blend**. I think **you’ve** found the **best** seasoning that **you’ve ever** tried. **In my** opinion, **just a handful of** ingredients will do the trick. Make sure **to your liking**, **store the** seasoning. **Just a handful** and you’ll be on your way to the best burgers.

Burger Seasoning

Prep Time 5 minutes
Total Time 5 minutes
Servings 24 servings
Calories 5
This homemade burger seasoning is the perfect blend of spices to elevate your burgers. It's easy to make and store, ensuring delicious burgers every time.

Ingredients

Seasoning

  • 1 tablespoon salt
  • 1 tablespoon black pepper
  • 1 tablespoon garlic powder
  • 1 tablespoon onion powder
  • 1 teaspoon paprika
  • 0.5 teaspoon cayenne pepper (optional)

Instructions 

  • Combine all ingredients in a small bowl.
  • Mix well to ensure all ingredients are evenly distributed.
  • Store in an airtight container.

Notes

Adjust the amount of cayenne pepper to your preferred level of spice.
Calories: 5kcal
Cost: $3
Course: Condiment
Cuisine: American
Keyword: Beef
pin

Shrimp and Steak Fajitas: A Beginner’s Guide to a Flavorful, Quick, and Easy Meal

Hey there, friend! Ava here, back from my Seattle kitchen with a recipe that’s been a total game-changer in my house: Shrimp and Steak Fajitas. If you’re looking for a meal that’s bursting with flavor, quick to make, and sure to impress, you’ve come to the right place. Forget complicated recipes and hours in the kitchen – this is about enjoying good food, good company, and maybe even a little bit of that ‘wow’ factor we all crave.

I remember the first time I tried fajitas. I was at a little Mexican restaurant, and the sizzling platter that came out of the kitchen was mesmerizing. The vibrant colors of the charred peppers and onions, the aroma of spices, it was all so inviting. Since then, I’ve been on a mission to recreate that experience at home, and let me tell you, these Shrimp and Steak Fajitas are as close as it gets. So, pull up a chair, and let’s dive into this recipe together.

Why You’ll Love This Shrimp and Steak Fajitas Recipe

So, what makes these fajitas so special? Well, for starters, they’re incredibly versatile. Whether you’re a seasoned cook or just starting out, this recipe is designed to be foolproof. But beyond that, there are so many reasons to fall in love with this dish. This dish is a symphony of flavors that dance on your tongue!

  • Quick and Easy: Ready in under 30 minutes, perfect for busy weeknights.
  • Flavor Explosion: The combination of shrimp and steak, seasoned with a blend of spices, is simply irresistible.
  • Customizable: Adjust the spice level, add your favorite toppings, and make it your own.
  • Crowd-Pleaser: Whether you’re cooking for your family or entertaining friends, these fajitas are always a hit.
  • Healthy-ish: Packed with protein and veggies, you can feel good about what you’re eating.

Ingredients You’ll Need

Here’s what you’ll need to create this culinary masterpiece. Don’t worry, most of these ingredients are pantry staples!

  • 1 lb Shrimp (peeled and deveined)
  • 1 lb Sliced Sirloin (or substitute with boneless, skinless chicken breast sliced into strips)
  • 1 tbsp Chili Powder
  • 1 tsp Cayenne Pepper (adjust to taste for spice level)
  • 1 tsp Onion Powder
  • 1 tsp Garlic Powder
  • 1 tsp Cumin
  • 2 tsp Smoked Paprika
  • 2 Bell Peppers (sliced, any color)
  • 3 Jalapeños (sliced, adjust based on spice preference)
  • 1 Onion (sliced)
  • 1 tbsp Soy Sauce
  • Olive Oil (for cooking)
  • Flour or Corn Tortillas (for serving)
  • 1 Avocado
  • ½ cup Sour Cream (or Greek yogurt for a healthier option)
  • 2 cloves Garlic
  • ¼ cup Cilantro (fresh)
  • Salt to taste
  • 1 tbsp Lime Juice
Recipe Image

How to Make Shrimp and Steak Fajitas: Step-by-Step

Alright, let’s get cooking! Here’s how to bring these Shrimp and Steak Fajitas to life. Remember, cooking should be fun, so don’t stress about perfection. Just follow along, and you’ll be amazed at what you can create.

  1. Pat the shrimp and steak dry with a paper towel. This helps them sear properly and prevents steaming in the pan.
  2. Divide the shrimp and steak into separate bowls. If using chicken instead of steak, follow the same process.
  3. In a small bowl, mix together chili powder, cayenne pepper, onion powder, garlic powder, cumin, and smoked paprika. This is where the magic happens – these spices will give your fajitas that authentic flavor.
  4. Sprinkle half of the spice mixture over the steak (or chicken) and the other half over the shrimp. Make sure everything is evenly coated.
  5. Add a tablespoon of soy sauce to the steak (or chicken) for extra flavor and moisture.
  6. Heat a large skillet or cast-iron pan over medium-high heat. Add a drizzle of olive oil.
  7. Once the pan is hot, add the sliced onions and bell peppers. Cook until they are tender and slightly charred, about 5-7 minutes. Remove from the pan and set aside.
  8. Add another drizzle of olive oil to the pan. Add the steak (or chicken) and cook until browned and cooked through, about 3-5 minutes per side, depending on the thickness. Remove from the pan and set aside.
  9. Add the shrimp to the pan and cook until pink and opaque, about 2-3 minutes per side. Be careful not to overcook them, or they will become rubbery.
  10. Return the cooked vegetables and steak (or chicken) to the pan with the shrimp. Toss everything together to combine.
  11. Warm the tortillas according to package instructions. I like to lightly char them on a dry skillet for extra flavor.
  12. To make the avocado crema, combine avocado, sour cream (or Greek yogurt), garlic, cilantro, lime juice, and salt in a food processor or blender. Blend until smooth and creamy.
  13. Assemble your fajitas! Fill each tortilla with the shrimp and steak mixture, top with avocado crema, and any other toppings you like.

Pro Tips for the Best Shrimp and Steak Fajitas

Want to take your fajitas to the next level? Here are a few pro tips I’ve learned over the years.

  • High Heat is Key: Make sure your skillet is screaming hot before adding the steak and shrimp. This will give you that beautiful sear and lock in the flavors.
  • Don’t Overcrowd the Pan: Cook the steak and shrimp in batches to avoid steaming. Overcrowding the pan will lower the temperature and result in less-than-perfectly seared ingredients.
  • Marinate for Extra Flavor: If you have time, marinate the steak and shrimp for at least 30 minutes before cooking. This will infuse them with even more flavor.
  • Fresh is Best: Use fresh ingredients whenever possible. The flavor will be so much better!
  • Spice it Up: Don’t be afraid to adjust the spice level to your liking. Add more cayenne pepper or jalapeños for extra heat.

Common Mistakes to Avoid

We all make mistakes in the kitchen, but here are a few common ones to watch out for when making fajitas.

  • Overcooking the Shrimp: Shrimp cooks quickly, so keep a close eye on it. Overcooked shrimp is rubbery and not very enjoyable.
  • Not Drying the Meat: Patting the steak and shrimp dry before cooking is crucial for achieving a good sear.
  • Using Dull Knives: Make sure your knives are sharp for slicing the vegetables and meat. This will make the prep work much easier and safer.
  • Skipping the Avocado Crema: Trust me, this is a game-changer. The creamy, cool avocado crema perfectly complements the spicy fajitas.

Shrimp and Steak Fajitas Variations

One of the best things about fajitas is how versatile they are. Here are a few variations to try.

  • Chicken Fajitas: Substitute the steak with boneless, skinless chicken breast.
  • Vegetarian Fajitas: Add more vegetables like mushrooms, zucchini, and corn.
  • Spicy Fajitas: Add more jalapeños or a dash of hot sauce to the spice mixture.
  • Blackstone Griddle Fajitas: Cook everything on a Blackstone griddle for that authentic restaurant flavor.
  • Steak or Chicken: If you’re not a fan of seafood, simply double the amount of steak or chicken.

How to Store and Reheat Leftovers

Got leftovers? Here’s how to store and reheat them.

  • Storage: Store the cooked shrimp and steak mixture in an airtight container in the refrigerator for up to 3 days. Store the tortillas separately to prevent them from getting soggy.
  • Reheating: Reheat the shrimp and steak mixture in a skillet over medium heat until warmed through. You can also microwave it, but be careful not to overcook the shrimp.
  • Freezing: While you can freeze the cooked shrimp and steak mixture, the texture may change slightly. If you do freeze it, use it within 1-2 months.

Frequently Asked Questions (FAQ)

Here are some common questions about making Shrimp and Steak Fajitas.

  • Can I use frozen shrimp?: Yes, but make sure to thaw it completely and pat it dry before cooking.
  • Can I make this ahead of time?: You can prep the vegetables and spice mixture ahead of time, but it’s best to cook the shrimp and steak right before serving.
  • What kind of steak should I use?: Sirloin is a great option, but you can also use flank steak or skirt steak.
  • Can I use corn tortillas instead of flour tortillas?: Absolutely! Use whichever you prefer.
  • What other toppings can I add?: The possibilities are endless! Try adding shredded cheese, salsa, guacamole, or pickled onions.

Serving Suggestions

These Shrimp and Steak Fajitas are fantastic on their own, but here are a few serving suggestions to make it a complete meal.

  • Sides: Serve with a side of Mexican rice, black beans, or a simple salad.
  • Drinks: Pair with a refreshing margarita, iced tea, or your favorite Mexican beer.
  • Dessert: Finish off the meal with some churros or a scoop of vanilla ice cream.

And there you have it! My go-to recipe for Shrimp and Steak Fajitas. I hope you love making these as much as I do. Remember, cooking is about having fun and creating memories. So, gather your ingredients, put on some music, and get ready to enjoy a delicious meal with the people you love. Happy cooking!

These fajitas are one of my favorite weeknight meals, because there’s something special about the vibrant colors and bold flavors all coming together in a warm tortilla. I hope this dish is a hit with you and your family! Getting the steak and shrimp just right is key, so don’t skip the step of patting them dry. This dish is so versatile; you can adjust the spice level to your liking, and feel free to experiment with different toppings. Whether you choose steak or chicken, the key is to have fun and make it your own. Shrimp and steak, or steak and shrimp, it’s all delicious!

Shrimp and Steak Fajitas: A Beginner’s Guide to a Flavorful, Quick, and Easy Meal

Prep Time 15 minutes
Cook Time 20 minutes
Total Time 35 minutes
Servings 4 people
Calories 450
Enjoy a quick and easy meal with these flavorful shrimp and steak fajitas. Perfect for a weeknight dinner, this recipe is customizable to your spice preference.

Ingredients

Protein

  • 1 lb Shrimp (peeled and deveined)
  • 1 lb Sliced Sirloin (or substitute with boneless, skinless chicken breast sliced into strips)

Spice Mix

  • 1 tbsp Chili Powder
  • 1 tsp Cayenne Pepper (adjust to taste for spice level)
  • 1 tsp Onion Powder
  • 1 tsp Garlic Powder
  • 1 tsp Cumin
  • 2 tsp Smoked Paprika

Vegetables

  • 2 Bell Peppers (sliced, any color)
  • 3 Jalapeños (sliced, adjust based on spice preference)
  • 1 Onion (sliced)

Sauces & Condiments

  • 1 tbsp Soy Sauce

Other

  • Olive Oil (for cooking)
  • Flour or Corn Tortillas (for serving)
  • 1 Avocado
  • 0.5 cup Sour Cream (or Greek yogurt for a healthier option)
  • 2 cloves Garlic
  • 0.25 cup Cilantro (fresh)
  • to taste Salt
  • 1 tbsp Lime Juice

Instructions 

  • Pat the shrimp and steak dry with a paper towel. This helps them sear properly and prevents steaming in the pan.
  • Divide the shrimp and steak into separate bowls. If using chicken instead of steak, follow the same process.

Notes

Adjust the amount of cayenne pepper and jalapeños to control the spice level. Serve with your favorite toppings like guacamole, salsa, and cheese.
Calories: 450kcal
Cost: $25
Course: dinner
Cuisine: Mexican
Keyword: shrimp, Steak
pin

Hey there, spice enthusiasts! Ava here, welcoming you back to my little corner of the internet. Today, we’re diving headfirst into a flavor adventure that’s close to my heart: homemade fajita seasoning. Forget those store-bought packets filled with who-knows-what – we’re about to create a vibrant, customizable blend that will elevate your fajitas to a whole new level. I promise, once you taste the difference, you’ll never go back!

Remember those summer evenings in Oregon, the sizzle of peppers and onions on the grill, the aroma of perfectly seasoned meat wafting through the air? Fajitas were a staple in our family, and while my mom always had a knack for making them taste incredible, she never quite shared her secret ingredient. It wasn’t until I started experimenting in my own kitchen that I realized the magic wasn’t in some exotic spice, but in the freshness and balance of the homemade seasoning itself.

So, grab your measuring spoons and let’s get started! This recipe is ridiculously easy, takes just minutes to whip up, and will transform your next fajita night into a fiesta of flavor.

Why You’ll Love This Homemade Fajita Seasoning

Seriously, what’s not to love? But let me break it down for you:

  • Unbeatable Flavor: The blend of spices creates a complex, savory, and slightly smoky flavor that store-bought versions simply can’t match.
  • Customizable Heat: Control the spice level to your liking by adjusting the amount of cayenne pepper.
  • Budget-Friendly: Making your own fajita seasoning is significantly cheaper than buying pre-made packets.
  • No Mystery Ingredients: You know exactly what’s going into your seasoning – no artificial flavors, preservatives, or fillers.
  • Quick & Easy: It takes less than 5 minutes to mix up a batch.
  • Versatile: This seasoning isn’t just for fajitas! Use it on chicken, steak, shrimp, veggies, or even popcorn!

This homemade fajita seasoning adds a depth and complexity of flavor that enhances the overall taste of your fajitas. It’s made from dried spices that you probably already have in your pantry, making it a convenient and delicious alternative to store-bought mixes.

Fajita Seasoning Recipe

Here’s what you’ll need to create your own amazing fajita seasoning mix:

Ingredients

  • 1 Tablespoon Ground Cumin
  • 1 Tablespoon Chili Powder
  • 1 Tablespoon Paprika
  • 1 Tablespoon Sea Salt
  • 1 Tablespoon Dried Oregano
  • 1 Teaspoon Garlic Powder
  • 1 Teaspoon Onion Powder
  • 1 Teaspoon Cayenne Pepper
Recipe Image

Steps

  1. In a small bowl or mason jar, combine all the spices.
  2. Until you’re ready to use it, keep it in an airtight container.

Pro Tips for the Best Homemade Fajita Seasoning

Want to take your fajita seasoning to the next level? Here are a few of my favorite tips:

  • Use Fresh Spices: The fresher your spices, the more potent and flavorful your seasoning will be. Check the expiration dates on your spice jars and replace any that are past their prime.
  • Toast Your Spices: For an even deeper, more complex flavor, toast the cumin, chili powder, and paprika in a dry skillet over medium heat for a few minutes before grinding. Be careful not to burn them!
  • Adjust the Salt: Salt is a crucial ingredient in fajita seasoning, but the amount you need will depend on your personal preference and the type of salt you use. Start with the recommended amount and adjust to taste.
  • Don’t Be Afraid to Experiment: This recipe is just a starting point. Feel free to adjust the ratios of the spices to create a blend that’s perfect for you.
  • Grind Your Own Spices: If you really want to take your fajita seasoning to the next level, grind your own spices from whole seeds and pods. The flavor will be incredibly fresh and vibrant.

Remember, the beauty of homemade fajita seasoning is that you can tailor it to your own taste. If you like a little more heat, add more cayenne pepper. If you prefer a smokier flavor, use smoked paprika. The possibilities are endless!

Common Mistakes to Avoid

Even though this recipe is super simple, here are a few common mistakes to watch out for:

  • Using Stale Spices: As I mentioned earlier, fresh spices are key to a flavorful seasoning. Don’t use spices that have been sitting in your pantry for years.
  • Burning the Spices: If you decide to toast your spices, be careful not to burn them. Burnt spices will have a bitter taste that will ruin your seasoning.
  • Over-Salting: It’s easy to over-salt a seasoning blend. Start with a smaller amount of salt and add more to taste.
  • Not Storing Properly: To keep your fajita seasoning fresh and flavorful, store it in an airtight container in a cool, dark place.

Fajita Seasoning Variations

Want to mix things up a bit? Here are a few fun variations to try:

  • Smoked Paprika Fajita Seasoning: Substitute smoked paprika for regular paprika for a smoky flavor.
  • Chipotle Fajita Seasoning: Add 1-2 teaspoons of chipotle powder for a smoky and spicy kick.
  • Lime Fajita Seasoning: Add 1 tablespoon of lime zest for a bright, citrusy flavor.
  • Sweet Fajita Seasoning: Add 1 tablespoon of brown sugar for a touch of sweetness.

The overall goal is enhancing the flavor profile to match your tastebuds. Adding a touch of lime or sweetness can really elevate the dish!

How to Store Homemade Fajita Seasoning

Proper storage is essential for keeping your homemade fajita seasoning fresh and flavorful. Here’s what you need to know:

  • Airtight Container: Store your seasoning in an airtight container to prevent moisture and air from getting in. Mason jars, spice jars with tight-fitting lids, or resealable plastic bags are all good options.
  • Cool, Dark Place: Store the container in a cool, dark place, such as a pantry or spice cabinet. Avoid storing it near heat sources or in direct sunlight, as this can cause the spices to lose their flavor.
  • Shelf Life: When stored properly, homemade fajita seasoning will last for about 6-12 months. After that, the spices may start to lose their potency.

Frequently Asked Questions (FAQ)

Got questions? I’ve got answers!

  • Can I use this seasoning for other dishes besides fajitas? Absolutely! This seasoning is delicious on chicken, steak, shrimp, veggies, tacos, and more.
  • Can I make a larger batch of this seasoning? Of course! Simply multiply the ingredient amounts by the desired number of batches.
  • Is this seasoning gluten-free? Yes, this seasoning is naturally gluten-free. However, always check the labels of your individual spices to ensure they haven’t been processed in a facility that also handles gluten.
  • Is this seasoning vegan? Yes, this seasoning is vegan.
  • Can I use fresh herbs instead of dried? While fresh herbs can add a lot of flavor, they’re not ideal for seasoning blends because they contain moisture that can cause the seasoning to clump and spoil. Stick to dried herbs for the best results.

Serving Suggestions

Now that you’ve got your amazing homemade fajita seasoning, it’s time to put it to use! Here are a few serving suggestions to get you started:

  • Classic Fajitas: Toss sliced bell peppers, onions, and your choice of protein (chicken, steak, shrimp, or tofu) with the fajita seasoning and cook in a skillet until tender. Serve with warm tortillas, salsa, guacamole, sour cream, and your favorite toppings.
  • Fajita Bowls: Create a healthy and delicious fajita bowl by layering rice, black beans, grilled fajita veggies, and your choice of protein in a bowl. Top with salsa, guacamole, and a dollop of Greek yogurt.
  • Fajita Salad: Turn your fajitas into a salad by topping a bed of lettuce with grilled fajita veggies, your choice of protein, and your favorite toppings. Add a drizzle of cilantro-lime dressing for extra flavor.
  • Fajita Quesadillas: Spread fajita seasoning on tortillas, add cheese, grilled fajita veggies, and your choice of protein. Fold in half and cook in a skillet until the cheese is melted and the tortilla is golden brown.

If you are looking for a steak fajita recipe or veggie fajitas, this seasoning works wonders! You can even use it as a fajita rub recipe.

So there you have it – my quick and easy homemade fajita seasoning recipe! I hope you love it as much as I do. Remember, cooking is all about having fun and experimenting, so don’t be afraid to put your own spin on this recipe and make it your own. Happy cooking!

Fajita Seasoning Recipe

Prep Time 5 minutes
Total Time 5 minutes
Servings 24 servings
Calories 15
This homemade fajita seasoning is a perfect blend of spices to add a zesty kick to your favorite dishes. It's easy to make and store for future use!

Ingredients

Spices

  • 1 Tablespoon Ground Cumin
  • 1 Tablespoon Chili Powder
  • 1 Tablespoon Paprika
  • 1 Tablespoon Sea Salt
  • 1 Tablespoon Dried Oregano
  • 1 Teaspoon Garlic Powder
  • 1 Teaspoon Onion Powder
  • 1 Teaspoon Cayenne Pepper

Instructions 

  • In a small bowl or mason jar, combine all the spices
  • Until you're ready to use it, keep it in an airtight container

Notes

Adjust the amount of cayenne pepper to control the spice level.
Calories: 15kcal
Cost: $3
Course: Spice Blend
Cuisine: Mexican
Keyword: spices
pin

Easy Sheet Pan Steak Fajitas Recipe: A Weeknight Fiesta!

Hey there, kitchen adventurers! Ava here, ready to whisk you away on a flavor-packed journey to…Sheet Pan Steak Fajita Land! If you’re anything like me, weeknights can feel like a culinary tightrope walk. Between work, errands, and maybe a little Netflix bingeing (guilty!), the last thing you want is a complicated dinner routine. That’s where this easy sheet pan steak fajitas recipe comes in. It’s quick, it’s flavorful, and it only dirties one pan. Yes, you heard that right – minimal cleanup!

Growing up, fajitas were a staple. My mom would whip them up with whatever veggies were in season, and the sizzle of the steak always brought us to the table, pronto. Now, I’ve put my own spin on this classic, making it even simpler and more weeknight-friendly. Trust me, your family will thank you for this one.

Why You’ll Love This Sheet Pan Steak Fajitas Recipe

Seriously, what’s not to love? This recipe is a game-changer for busy weeknights. Let’s break down why this will become a staple in your household:

  • Quick and Easy: From prep to plate in under 30 minutes. Say goodbye to long hours in the kitchen!
  • Minimal Cleanup: One sheet pan means less scrubbing. More time for Netflix… or maybe a quick nap.
  • Customizable: Add the veggies your family loves. Bell peppers, onions, mushrooms, even zucchini – the possibilities are endless.
  • Flavor Explosion: The combination of tender steak, vibrant veggies, and zesty fajita seasoning is simply irresistible.
  • Perfect for Meal Prep: Make a big batch on Sunday and enjoy delicious fajitas all week long.

Ingredients for the Best Sheet Pan Steak Fajitas

Here’s what you’ll need to create this masterpiece. Don’t worry, it’s a short and sweet list!

  • 1.5 lbs skirt steak, thinly sliced
  • 1 large bell pepper (any color), sliced
  • 1 large onion, sliced
  • 2 tablespoons olive oil
  • 2 tablespoons fajita seasoning (store-bought or homemade)
  • Salt and pepper to taste
  • Optional toppings: tortillas, salsa, sour cream, guacamole, cheese
Recipe Image

How to Make Sheet Pan Steak Fajitas: Step-by-Step

Ready to get cooking? Follow these simple steps and you’ll have a sizzling plate of steak fajitas in no time!

  1. Preheat: Crank up your oven to 400°F (200°C). This is crucial for getting the steak and veggies perfectly cooked.
  2. Toss: In a large bowl, combine the thinly sliced skirt steak, sliced bell pepper, and sliced onion. Drizzle with olive oil, then sprinkle with fajita seasoning, salt, and pepper. Toss everything together until well coated. This ensures every bite is bursting with flavor.
  3. Spread: Spread the mixture evenly on a large baking sheet. Make sure the steak and veggies are in a single layer so they cook evenly.
  4. Bake: Bake for 15-20 minutes, or until the steak is cooked to your desired doneness and the vegetables are tender-crisp. Keep an eye on it – you don’t want to overcook the steak!
  5. Serve: Serve immediately with warm tortillas and your favorite toppings. Salsa, sour cream, guacamole, cheese – the more, the merrier!

Pro Tips for Perfect Sheet Pan Steak Fajitas

Want to take your sheet pan steak fajitas to the next level? Here are a few of my favorite tips and tricks:

  • Choose the Right Cut of Steak: Skirt steak is my go-to for fajitas because it’s thin, flavorful, and cooks quickly. Flank steak also works well.
  • Slice Against the Grain: This makes the steak more tender and easier to chew. Trust me, it makes a big difference!
  • Don’t Overcrowd the Pan: If your baking sheet is too crowded, the veggies will steam instead of roast. Use two sheet pans if necessary.
  • Preheat the Pan: For extra sizzle, preheat the baking sheet in the oven for a few minutes before adding the steak and veggies.
  • Use a Meat Thermometer: To ensure the steak is cooked to your desired doneness, use a meat thermometer. Medium-rare is around 130-135°F, medium is 135-145°F, and medium-well is 145-155°F.

Common Mistakes to Avoid When Making Sheet Pan Steak Fajitas

We all make mistakes in the kitchen (remember my collapsing cake?). Here are a few common pitfalls to avoid when making sheet pan steak fajitas:

  • Overcooking the Steak: This is the biggest mistake! Skirt steak cooks quickly, so keep a close eye on it.
  • Using Dull Knives: A sharp knife makes slicing the steak and veggies much easier and safer.
  • Skipping the Fajita Seasoning: This is what gives the fajitas their signature flavor. Don’t skimp on it!
  • Not Allowing the Steak to Rest: Let the steak rest for a few minutes after cooking to allow the juices to redistribute. This will result in a more tender and flavorful steak.

Sheet Pan Steak Fajitas Variations: Spice It Up!

The best part about this recipe is how easy it is to customize. Here are a few variations to try:

  • Spicy Fajitas: Add a pinch of cayenne pepper or a diced jalapeño to the fajita seasoning for a kick.
  • Mushroom Fajitas: Add sliced mushrooms to the veggies for an earthy flavor.
  • Bell Pepper Bonanza: Use a mix of different colored bell peppers for a vibrant and flavorful fajita.
  • Pineapple Fajitas: Add chunks of pineapple for a sweet and tangy twist.
  • Chicken Fajitas: Swap the skirt steak for chicken breast or thighs.

How to Store and Reheat Sheet Pan Steak Fajitas

Got leftovers? Lucky you! Here’s how to store and reheat your sheet pan steak fajitas:

  • Storage: Store the cooked steak and veggies in an airtight container in the refrigerator for up to 3-4 days.
  • Reheating: Reheat in a skillet over medium heat until warmed through. You can also reheat in the microwave, but the steak may become a bit tougher.

Frequently Asked Questions About Sheet Pan Steak Fajitas

Got questions? I’ve got answers! Here are a few frequently asked questions about this recipe:

  • Can I use a different cut of steak? Yes, flank steak or sirloin steak also work well.
  • Can I use frozen veggies? Yes, but they may release more water, so you may need to cook them for a bit longer.
  • Can I make this recipe ahead of time? Yes, you can prep the steak and veggies ahead of time and store them in the refrigerator until ready to cook.
  • Can I grill the steak instead of baking it? Absolutely! Grill the steak to your desired doneness, then slice and serve with the grilled veggies.
  • What kind of tortillas should I use? Flour tortillas are the most common, but corn tortillas also work well.

Serving Suggestions for Sheet Pan Steak Fajitas

Now that you’ve got your delicious sheet pan steak fajitas, here are a few serving suggestions to make it a complete meal:

  • Classic Fajitas: Serve with warm tortillas, salsa, sour cream, guacamole, and cheese.
  • Fajita Bowls: Serve over rice with black beans, corn, and your favorite toppings.
  • Fajita Salad: Serve over a bed of lettuce with tomatoes, avocado, and a lime vinaigrette.
  • Fajita Quesadillas: Stuff the steak and veggies into tortillas with cheese and grill until golden brown.

So there you have it, my friends! An easy, delicious, and customizable sheet pan steak fajitas recipe that will become a staple in your kitchen. Thank you so much for joining me on this culinary adventure. Now go forth and make some magic!

Remember, cooking is all about having fun and experimenting. Don’t be afraid to try new things and put your own spin on this recipe. And most importantly, enjoy the process! I am sure your family s going to love this steak fajita recipe!

Thanks for stopping by, and happy cooking!

Easy Sheet Pan Steak Fajitas

Prep Time 10 minutes
Cook Time 20 minutes
Total Time 30 minutes
Servings 4 servings
Calories 450
These sheet pan steak fajitas are a quick and easy weeknight meal. Simply toss everything on a sheet pan and bake for a delicious and customizable dinner.

Ingredients

Ingredients

  • 1.5 lbs skirt steak (thinly sliced)
  • 1 large bell pepper (any color, sliced)
  • 1 large onion (sliced)
  • 2 tablespoons olive oil
  • 2 tablespoons fajita seasoning
  • to taste Salt and pepper

Optional Toppings

  • tortillas
  • salsa
  • sour cream
  • guacamole
  • cheese

Instructions 

  • Preheat oven to 400°F (200°C).
  • Toss steak, bell pepper, and onion with olive oil, fajita seasoning, salt, and pepper.
  • Spread the mixture evenly on a large baking sheet.
  • Bake for 15-20 minutes, or until steak is cooked and vegetables are tender.
  • Serve immediately with warm tortillas and your favorite toppings.

Notes

For extra flavor, marinate the steak for at least 30 minutes before cooking.
Calories: 450kcal
Cost: $20
Course: dinner
Cuisine: Mexican
Keyword: Steak
pin

Hey there, burger aficionados! Ava here, welcoming you back to my little corner of the culinary world. If you’re anything like me, you believe a truly great burger isn’t just about the patty—it’s about the symphony of flavors that dance on your tongue with every single bite. And that, my friends, all starts with the perfect burger seasoning. I remember one summer when my family hosted a huge barbecue, and my burgers were a total flop because I skimped on the seasoning. I vowed never to let that happen again! So, if you’re ready to elevate your grilling game and create burgers that will have everyone begging for more, you’ve come to the right place. This guide will walk you through crafting the best homemade hamburger seasoning imaginable, with tips, tricks, and even a few secret variations to keep things exciting.

Why You’ll Love This Burger Seasoning

I’m genuinely excited to share this recipe with you because, honestly, it’s a game-changer. Forget those pre-made packets filled with who-knows-what – we’re talking about fresh, vibrant flavors tailored precisely to your taste. Here’s why I love this burger seasoning, and why I think you will too:

  • Control Over Ingredients: You know exactly what’s going into your burger seasoning, no mystery additives or preservatives.
  • Customizable Flavor: Adjust the spices to suit your personal preferences. Want more heat? Add more cayenne! Craving a smoky flavor? Bump up the paprika.
  • Cost-Effective: Making your own burger seasoning is significantly cheaper than buying pre-made blends.
  • Superior Taste: Freshly ground spices deliver a more potent and vibrant flavor than anything you can buy off the shelf. This recipe is truly the best!
  • It’s Simple!: With simple ingredients and simple steps, you can have this ready in no time at all!

Burger Seasoning Recipe

Alright, let’s dive into the heart of the matter—the recipe itself! This is my go-to blend, the one I reach for time and time again when I want a burger that’s bursting with flavor. It’s incredibly versatile and works wonders on everything from classic beef burgers to turkey and veggie patties. You can easily find all of these ingredients in your pantry.

Ingredients:

  • 2 tablespoons paprika
  • 2 tablespoons brown sugar
  • 1 tablespoon onion powder
  • 2 teaspoons table salt
  • 2 teaspoons black pepper
  • 2 teaspoons garlic powder
  • 2 teaspoons cumin
  • 1/2 teaspoon cayenne pepper
Recipe Image

How to Make the Best Hamburger Seasoning: Step-by-Step

Now, for the fun part! Making this burger seasoning is so easy, it barely qualifies as cooking. But trust me, the results are anything but basic.

  1. Combine Ingredients: Mix all of the ingredients together in a small bowl. The recipe will make 9 tablespoons total, or enough for 9 pounds of hamburger meat.
  2. Prepare Patties: To make hamburgers, divide one pound of 80/20 ground beef into four equal patties, indenting the middle for easier cooking.
  3. Season Generously: Use one tablespoon of the hamburger seasoning and gently rub it into both sides of each hamburger patty. In other words, you will use a total of 1 tablespoon of the seasoning to season both sides of four burger patties made from 1 pound of ground beef. (Alternatively, you could mix 1 tablespoon into one pound of hamburger meat.)
  4. Grill to Perfection: Grill the patties over medium heat for 3 1/2 minutes on each side for medium doneness.
  5. Store for Later: Store the rest of the mixture in an airtight container for up to six months.

Pro Tips for the Perfect Burger Seasoning

Okay, now that you’ve got the basics down, let’s talk about some pro tips that will take your burger seasoning from good to absolutely unforgettable. These are the little secrets I’ve learned over the years that make all the difference.

  • Use Fresh Spices: This is non-negotiable. Freshly ground spices have a much more vibrant flavor than older ones that have been sitting in your pantry for ages.
  • Toast Your Spices: For an even deeper, more complex flavor, lightly toast your spices in a dry skillet over medium heat for a few minutes before grinding. Just be careful not to burn them!
  • Grind Your Own: If you’re feeling ambitious, grind your own spices using a spice grinder or mortar and pestle. The flavor will be even more intense.
  • Don’t Overmix: When mixing the seasoning into your ground beef, be gentle. Overmixing can result in tough burgers.
  • Let it Rest: After seasoning your patties, let them rest in the refrigerator for at least 30 minutes before grilling. This allows the flavors to meld and penetrate the meat.

Common Mistakes to Avoid

We all make mistakes in the kitchen, it’s part of the learning process. But here are a few common pitfalls to avoid when making and using burger seasoning:

  • Using Too Much Salt: Salt is essential for flavor, but too much can ruin your burgers. Start with the recommended amount and adjust to taste.
  • Forgetting the Sugar: A little bit of brown sugar adds a subtle sweetness that balances the savory flavors and helps create a beautiful crust on your burgers.
  • Overcooking Your Burgers: Nobody wants a dry, hockey-puck burger. Use a meat thermometer to ensure your burgers are cooked to the perfect internal temperature.
  • Not Letting the Grill Get Hot Enough: A hot grill is essential for searing the outside of your burgers and locking in the juices.
  • Pressing Down on the Patties: Resist the urge to press down on your burger patties with a spatula while they’re grilling. This squeezes out all the flavorful juices.

Burger Seasoning Variations

One of the best things about making your own burger seasoning is the ability to customize it to your liking. Here are a few variations to get you started:

  • Spicy Burger Seasoning: Add more cayenne pepper or a pinch of red pepper flakes for an extra kick.
  • Smoky Burger Seasoning: Substitute smoked paprika for regular paprika and add a dash of liquid smoke.
  • Herby Burger Seasoning: Add dried herbs like thyme, rosemary, or oregano for a more complex flavor.
  • Garlic Lover’s Burger Seasoning: Double the amount of garlic powder or add some minced fresh garlic to the mix.
  • Sweet and Savory Burger Seasoning: Increase the amount of brown sugar and add a pinch of cinnamon for a touch of sweetness.

How to Store Your Homemade Burger Seasoning

Proper storage is key to keeping your burger seasoning fresh and flavorful. Here’s what you need to know:

  • Airtight Container: Store your burger seasoning in an airtight container to prevent moisture and air from degrading the spices. I m partial to mason jars or spice containers.
  • Cool, Dark Place: Keep your seasoning in a cool, dark place away from direct sunlight and heat. Your pantry is the perfect spot!
  • Shelf Life: When stored properly, your homemade burger seasoning will last for up to six months. Be sure to label the container with the date you made it.

Frequently Asked Questions (FAQ)

Got questions? I’ve got answers! Here are some of the most common questions I get asked about burger seasoning:

  • Can I use this seasoning on other meats? Absolutely! This seasoning is fantastic on chicken, pork, and even fish.
  • Can I make this seasoning without brown sugar? Yes, you can. Just omit the brown sugar or substitute it with an equal amount of honey or maple syrup.
  • Can I use fresh herbs instead of dried? While fresh herbs add great flavor, they can also introduce moisture to the seasoning, which can shorten its shelf life. If you use fresh herbs, use the seasoning within a week or two.
  • How much seasoning should I use per pound of meat? I recommend using 1 tablespoon of seasoning per pound of meat, but you can adjust to taste.
  • Can I freeze this seasoning? While you can freeze the seasoning, it’s not necessary. It will last for up to six months when stored properly in an airtight container.

Serving Suggestions: Complete Your Burger Experience

Now that you’ve got the perfect burger seasoning, it’s time to think about how you’re going to serve your amazing burgers. Here are a few of my favorite serving suggestions:

  • Classic Burger: Serve your seasoned burgers on toasted buns with your favorite toppings like lettuce, tomato, onion, cheese, and pickles.
  • Gourmet Burger: Get fancy with toppings like caramelized onions, sautéed mushrooms, bacon, and a gourmet cheese like Gruyere or Brie.
  • BBQ Burger: Top your burgers with BBQ sauce, coleslaw, and crispy fried onions for a taste of summer.
  • Southwestern Burger: Add a dollop of guacamole, salsa, and a sprinkle of cotija cheese for a zesty twist.
  • Veggie Burger: Use this seasoning on your favorite veggie burgers for an extra boost of flavor.

So there you have it, my friends! The ultimate guide to burger seasoning. I hope this recipe inspires you to get creative in the kitchen and create burgers that are truly unforgettable. Remember, cooking is all about experimenting and having fun, so don’t be afraid to try new things and put your own spin on this recipe. Happy grilling!

Burger Seasoning

Prep Time 5 minutes
Total Time 5 minutes
Servings 9 tablespoons
Calories 25
This homemade burger seasoning is the perfect blend of spices to elevate your burgers. It's easy to make and store, ensuring delicious burgers every time.

Ingredients

Seasoning Ingredients

  • 2 tablespoons paprika
  • 2 tablespoons brown sugar
  • 1 tablespoon onion powder
  • 2 teaspoons table salt
  • 2 teaspoons black pepper
  • 2 teaspoons garlic powder
  • 2 teaspoons cumin
  • 0.5 teaspoon cayenne pepper

Instructions 

  • Mix all ingredients in a small bowl.
  • Divide 1 lb ground beef into four patties, indenting the middle.
  • Rub 1 tablespoon of seasoning into both sides of each patty.
  • Grill patties over medium heat for 3 1/2 minutes per side for medium doneness.
  • Store the remaining seasoning in an airtight container for up to six months.

Notes

Adjust the amount of cayenne pepper to your preferred level of spiciness.
Calories: 25kcal
Cost: $3
Course: Condiment
Cuisine: American
Keyword: Beef
pin

Hey there, fellow food adventurers! Ava here, popping in from my Seattle kitchen to share something I’m truly passionate about: creating the perfect burger. And what’s the secret to the best burger? It all starts with the seasoning. Forget those pre-made packets filled with who-knows-what. We’re going homemade today, and trust me, you’ll never go back. This homemade hamburger seasoning recipe is easy to make with simple ingredients and adds amazing flavor to your burgers!

Growing up, my mom always said the key to a great meal was layering flavors. And that’s exactly what we’re doing here. We’re building a symphony of savory, smoky, and slightly sweet notes that will transform your ground beef into burger bliss. Get ready to grill up the best burgers of your life!

Why You’ll Love This Burger Seasoning Recipe

Okay, let’s get real. There are a million burger seasoning recipes out there. So why should you try this one? Well, let me tell you:

  • Unbelievably Flavorful: This isn’t just salt and pepper, folks. We’re talking a carefully crafted blend that enhances the natural flavor of the beef without overpowering it.
  • Customizable: Want it spicier? Add a pinch of cayenne. Prefer a sweeter profile? A touch more brown sugar does the trick. This recipe is your blank canvas.
  • Simple Ingredients: No fancy, hard-to-find spices here. Everything you need is probably already in your pantry.
  • Quick to Make: Seriously, it takes less than 5 minutes to whip up a batch of this best burger seasoning.
  • Makes Burgers Taste Amazing: Thanks to this recipe, my hamburgers have never tasted better. You’ll have so many compliments on your hamburgers when you use this seasoning.

I love how this recipe takes ordinary ground beef and elevates it to something extraordinary. This recipe will help you make the best homemade burgers ever.

Ingredients for the Best Burger Seasoning

Alright, let’s gather our ingredients. Here’s what you’ll need for this amazing burger seasoning recipe:

  • 2 teaspoons Kosher salt
  • 2 teaspoons paprika
  • 1 teaspoon light brown sugar
  • 3/4 teaspoon ground black pepper
  • 3/4 teaspoon garlic powder
  • 3/4 teaspoon onion powder
  • 1/2 teaspoon dried basil
Recipe Image

How to Make Burger Seasoning: Step-by-Step

Making this spice mix for burgers is so easy, it barely qualifies as a recipe. But hey, sometimes the simplest things are the best, right?

  1. Combine: In a small bowl, combine all the seasonings: salt, paprika, brown sugar, black pepper, garlic powder, onion powder, and basil.
  2. Mix: Stir everything together until well combined. Make sure there are no clumps of brown sugar. You can easily double or triple this recipe, if you’d like to store more for later.
  3. Store: Place the burger seasoning in a small jar or airtight container until ready to use.
  4. Season: When ready to use, mix in 2-3 teaspoons of the seasoning per 1 pound of ground beef. I usually add about 2 1/2 teaspoons for the perfect balance. Then add in 1 Tablespoon of BBQ sauce for optimal flavor.
  5. Shape: Gently shape the seasoned ground beef into patties. Be careful not to overwork the meat, as this can make the burgers tough.
  6. Cook: Cook the patties according to your preference—grilled, pan-fried, or baked.

Pro Tips for Perfect Burgers

Want to take your burger game to the next level? Here are a few of my favorite pro tips:

  • Don’t Overmix: Overmixing the ground beef can result in tough burgers. Mix the seasoning in gently until just combined.
  • Thumbprint Trick: Press a small indentation in the center of each patty. This helps prevent the burgers from bulging in the middle as they cook.
  • Chill Out: Let the seasoned patties chill in the refrigerator for at least 30 minutes before cooking. This helps the flavors meld and the burgers hold their shape.
  • Hot Grill: Make sure your grill or pan is nice and hot before adding the burgers. This will give them a beautiful sear and lock in the juices.
  • Don’t Press: Resist the urge to press down on the burgers as they cook. This squeezes out the flavorful juices.
  • Use a Thermometer: The best way to ensure your burgers are cooked to perfection is to use a meat thermometer. The USDA recommends an internal temperature of 160°F for ground beef.

Common Mistakes to Avoid

Even with a simple recipe like this, it’s easy to make a few common mistakes. Here’s what to watch out for:

  • Over-Seasoning: Start with less seasoning than you think you need, and then add more to taste. Remember, you can always add more, but you can’t take it away.
  • Dry Burgers: Adding the BBQ sauce to your ground beef mixture adds moisture, which prevents the patties from being dry.
  • Uneven Cooking: Make sure your grill or pan is evenly heated to prevent some burgers from cooking faster than others.
  • Ignoring Carryover Cooking: Remember that burgers will continue to cook slightly after you remove them from the heat. Take them off the grill a few degrees before they reach your desired internal temperature.

Burger Seasoning Variations

The beauty of this recipe is how easily you can customize it to your liking. Here are a few fun variations to try:

  • Spicy Burger Seasoning: Add 1/4 teaspoon of cayenne pepper or red pepper flakes for a kick.
  • Smoked Paprika Burger Seasoning: Substitute smoked paprika for regular paprika for a smoky flavor.
  • Italian Burger Seasoning: Add 1/2 teaspoon of dried oregano and 1/4 teaspoon of dried rosemary.
  • Mexican Burger Seasoning: Add 1/2 teaspoon of chili powder and 1/4 teaspoon of cumin.

Feel free to experiment and create your own signature burger seasoning blend! I love to try new variations of this burger seasoning.

How to Store Homemade Burger Seasoning

This burger seasoning is best stored in an airtight container in a cool, dark place. It will keep for up to 6 months. Just make sure to check it every now and then to make sure the seasoning is still fragrant.

Burger Seasoning FAQs

Got questions? I’ve got answers!

  • Can I use this seasoning on other meats? Absolutely! This seasoning is delicious on pork, chicken, and even fish. It makes a great pork burger seasoning.
  • Can I make this recipe ahead of time? Yes! In fact, I recommend making a big batch and keeping it on hand for whenever burger cravings strike.
  • Can I use fresh herbs instead of dried? You can, but you’ll need to use about three times as much fresh herbs as dried herbs. Also, keep in mind that fresh herbs will shorten the shelf life of the seasoning.
  • How can I adjust the salt level? If you’re sensitive to salt, start with half the amount of salt called for in the recipe and then add more to taste.

Serving Suggestions

Of course, the main event is the burger itself. But here are a few of my favorite ways to serve it:

  • Classic Burger: Top your burger with lettuce, tomato, onion, pickles, and your favorite condiments.
  • Cheese Please: Add a slice of cheddar, Swiss, or pepper jack cheese for extra flavor.
  • Bacon Bliss: Crispy bacon takes any burger to the next level.
  • Avocado Dream: Sliced avocado adds a creamy, healthy touch.
  • Gourmet Burger: Get fancy with caramelized onions, sautéed mushrooms, and a drizzle of balsamic glaze.

And don’t forget the sides! Here are a few of my go-to burger accompaniments:

  • French Fries: A classic for a reason.
  • Sweet Potato Fries: A healthier and equally delicious alternative.
  • Coleslaw: A refreshing and tangy side that cuts through the richness of the burger.
  • Potato Salad: A summertime staple.
  • Corn on the Cob: Grilled corn on the cob is the perfect complement to a burger.

So there you have it—my ultimate guide to making the best homemade burger seasoning. This recipe is amazing, and I know you’ll love it. I used to buy store-bought seasoning, but now I make this. Use this seasoning to take your burgers to the next level. Thanks for visiting my kitchen, and happy grilling!

Hamburger Seasoning Recipe

Prep Time 5 minutes
Total Time 5 minutes
Servings 12 servings
Calories 5
This homemade hamburger seasoning blend is the perfect way to add flavor to your burgers. It's easy to make and tastes so much better than store-bought versions!

Ingredients

Seasoning

  • 2 teaspoons Kosher salt
  • 2 teaspoons paprika
  • 1 teaspoon light brown sugar
  • 0.75 teaspoon ground black pepper
  • 0.75 teaspoon garlic powder
  • 0.75 teaspoon onion powder
  • 0.5 teaspoon dried basil

Instructions 

  • Combine all seasonings in a small bowl and mix well.
  • Store in a jar. Use 2-3 teaspoons per pound of meat, plus 1 Tablespoon of BBQ sauce.
  • Shape into patties and cook according to preference.

Notes

Adjust the amount of seasoning to your taste preference.
Calories: 5kcal
Cost: $3
Course: Condiment
Cuisine: American
Keyword: Beef
pin

Best Steak Fajita Marinade Recipe: A Flavor Fiesta in Your Kitchen

My name’s Ava, and if you’ve stumbled upon my kitchen, you’re probably here for one thing—the kind of recipes that make people pause mid-bite and say, ‘Wow.’ I grew up in a small town in Oregon, where the smell of fresh bread and roasted vegetables often drifted out of my mother’s kitchen window. Cooking wasn’t just something we did to eat—it was how we celebrated, comforted, and connected. I was the kid who would rather stir a pot of chili than go ride my bike, and by the time I was twelve, I could whip up a pie from scratch that made my grandmother proud.

These days, I’m 34 and living in Seattle, where my kitchen has become my favorite corner of the world. I believe the best recipes aren’t always the fanciest—they’re the ones that feel like a warm hug, the ones you make over and over because they just work. Sure, I’ve had my share of flops (ask me about the infamous triple-layer cake that collapsed right before a dinner party), but I’ve learned that every ‘oops’ moment is just an invitation to try again—this time with a little more patience and maybe a pinch more salt.

What I love most is taking a recipe and finding ways to make it even better—whether it’s swapping in a secret ingredient, adjusting the texture, or adding a touch of spice to wake up the flavors. I’m a bit obsessed with balance: sweet with savory, creamy with crunchy, familiar with unexpected. And I believe that cooking is less about following rules and more about trusting your senses. If it smells amazing and makes you smile, you’re probably on the right track.

When I’m not stirring a pot or baking something golden, you’ll find me wandering local farmers’ markets, chatting with growers about their produce, or experimenting late at night when inspiration strikes. My recipes are a blend of comfort food classics, modern twists, and just enough adventure to keep things exciting. I share them because I want you to have a little magic in your kitchen too—meals that bring people together, that become your ‘go-to,’ that make someone you love ask for seconds.

So whether you’re cooking for your family, impressing friends, or just treating yourself, I’m here to help you find your next favorite dish. Pull up a chair, grab a spatula, and let’s make something unforgettable together. And today? We’re diving headfirst into the vibrant world of fajitas with my absolute **best steak fajita marinade recipe**! Get ready for a flavor explosion!

Why You’ll Love This Steak Fajita Marinade

Okay, friends, let’s talk fajitas. They’re quick, they’re customizable, and they’re always a crowd-pleaser. But the secret to truly amazing fajitas? It’s all in the marinade. And I’m not just saying that. This **steak fajita marinade** recipe is a game-changer.

Here’s why you’ll fall head-over-heels for it:

  • **Flavor Bomb**: This isn’t your run-of-the-mill marinade. We’re talking layers of flavor – savory, tangy, smoky, and just a hint of spice.
  • **Tenderizes Like a Dream**: The marinade not only infuses the steak with flavor but also helps to break down the fibers, resulting in incredibly tender and juicy steak.
  • **Versatile**: This **fajita marinade** isn’t just for steak! Use it on chicken, shrimp, or even tofu for a vegetarian option.
  • **Easy Peasy**: Seriously, this recipe is so simple, even a beginner cook can nail it. Just whisk, marinate, and cook!
  • **Customizable**: Want more heat? Add more cayenne. Prefer a sweeter flavor? A touch of honey or brown sugar will do the trick.

I’ve spent years perfecting this recipe, tweaking it here and there until it reached absolute fajita perfection. And now, I’m sharing it with you! So, let’s get started, shall we?

Steak Fajita Marinade Ingredients: The Magic Makers

Alright, let’s gather our ingredients. Don’t worry, you probably already have most of these in your pantry. Here’s what you’ll need to create **the best** **marinade for steak fajitas**:

  • **Soy Sauce**: The base of our marinade, adding a salty and umami-rich foundation.
  • **Lime Juice**: Freshly squeezed is **the best**, adding a tangy brightness that cuts through the richness of the steak.
  • **Olive Oil**: Helps to carry the flavors and keeps the steak moist during cooking.
  • **Garlic**: Because everything is better with garlic! Minced finely for maximum flavor.
  • **Chili Powder**: Adds warmth and a touch of earthy flavor.
  • **Cumin**: A quintessential fajita spice, adding a smoky and slightly bitter note.
  • **Smoked Paprika**: This is my secret weapon! It adds a lovely depth of smoky flavor that elevates the marinade to the next level.
  • **Cayenne Pepper (optional, but I love the kick!)**: For those who like a little heat, a pinch of cayenne pepper adds a fiery kick.
  • **Skirt or Flank Steak**: My go-to choices for fajitas, as they are flavorful and cook quickly.
  • **Bell Pepper (any color works!)**: Adds sweetness and vibrant color to your fajitas.
  • **Onion**: Adds a savory and slightly sweet element.
  • **Tortillas, Salsa, Guacamole, Sour cream and more!**: For serving, of course!

Remember, **it’s** all about using fresh, high-quality ingredients. It really does make a difference in the final flavor!

Recipe Image

How to Make Steak Fajita Marinade: Step-by-Step Guide

Okay, **let’s** get down to business! Follow these simple steps, and you’ll have mouthwatering fajitas on the table in no time.

  1. **Mix the Marinade**: First things first, let’s get that *Steak Fajita Marinade* mixed up. In a bowl, grab your soy sauce, fresh lime juice (trust me, bottled stuff just isn’t the same!), olive oil, and some minced garlic – get those good smells going! Then, in with the chili powder, cumin, smoked paprika (this adds such a lovely depth of flavor!), and a pinch of cayenne pepper **if you** like a little heat. Whisk it all together until it’s friends with each other.
  2. **Marinate the Steak**: Next up, it’s all about **the steak**. I like to use skirt or flank steak; they’re perfect for fajitas! Slice it up, put it in a zip-top bag (or a container **if you** are fancy), and pour in that delicious marinade. Make sure every single piece of steak gets a good coating – it’s like a marinade party in there! Now, here’s the key part: let it marinate in the fridge. Give it at least 30 minutes, but honestly, **the longer**, **the better**. Up to 4 hours is fantastic. Let the flavors mingle!
  3. **Cook the Fajitas**: Alright, time to get those fajitas cooked! You can use a grill or a cast-iron skillet (my fave!). Crank up the heat to medium-high. While it’s heating up, slice some bell peppers and onions. Toss the steak, onions, and peppers directly to the grill or pan. You want those veggies to get a little char, adds amazing flavor.
  4. **Cook to Perfection**: Now, watch **the steak** carefully. For medium, aim for about 3-5 minutes per side. For the vegetables, you want them tender-crisp – not totally mushy! Be careful, it splatters! Use tongs to flip **the steak** and move the vegetables around. Once everything is cooked to your liking, take it off the heat and let **the steak** rest for a few minutes before you slice it. This helps keep it nice and juicy; trust me, **it’s** worth the wait.
  5. **Assemble and Enjoy**: Now for **the best** part – eating! Warm up some tortillas (corn or flour, your choice), and get ready to assemble. Pile that juicy, flavorful steak and those slightly charred veggies into the tortillas. Then, go wild with the toppings!
  6. **Top it Off**: **I’m** talking salsa, guacamole (homemade is **the best**, but store-bought is fine in a pinch!), a dollop of sour cream or Greek yogurt (for a healthier option), and maybe some shredded cheese or some lime wedges. Roll up those beauties, take a giant bite, and enjoy! This *Steak Fajita Marinade* recipe is a guaranteed hit, every single time!

See? I told you it was easy! Now, let’s move on to some pro tips to ensure your fajitas are absolutely unforgettable.

Pro Tips for the Best Steak Fajitas Ever

Okay, **okay friends**, **let’s** elevate your fajita game even further with these insider tips:

  • **Use Fresh Lime Juice**: Bottled lime juice just doesn’t have the same zing. Freshly squeezed lime juice adds a brightness that really makes the flavors pop.
  • **Don’t Over-Marinate**: While marinating is crucial, don’t overdo it! Marinating for too long can actually make the steak tough. Stick to the recommended time frame (30 minutes to 4 hours).
  • **Get Your Pan Screaming Hot**: A hot pan or grill is essential for getting that beautiful sear on the steak and veggies. This also helps to lock in the juices and prevent the steak from drying out.
  • **Don’t Overcrowd the Pan**: Cook the steak and veggies in batches to avoid overcrowding the pan. Overcrowding lowers the temperature and results in steamed, rather than seared, ingredients.
  • **Let the Steak Rest**: This is a crucial step! Letting the steak rest for a few minutes before slicing allows the juices to redistribute, resulting in a more tender and flavorful steak.
  • **Warm Your Tortillas**: Warm tortillas are softer and more pliable, making them easier to roll and enjoy. You can warm them in a dry skillet, in the microwave, or over an open flame (my personal favorite!).

These tips might seem small, but they can make a huge difference in the overall outcome. Trust me, **I’ve** learned these lessons the hard way!

Common Mistakes to Avoid When Making Steak Fajitas

We all make mistakes in the kitchen, but knowing what to avoid can save you from a fajita fail. Here are some common pitfalls to watch out for:

  • **Using the Wrong Cut of Steak**: Not all steaks are created equal. Tougher cuts like round steak won’t work well for fajitas. Stick to skirt or flank steak for the best results.
  • **Skipping the Marinade**: Seriously, don’t even think about it! The marinade is what infuses the steak with flavor and tenderizes it.
  • **Overcooking the Steak**: Overcooked steak is dry and tough. Use a meat thermometer to ensure you cook the steak to your desired level of doneness. For medium, aim for an internal temperature of 130-135°F.
  • **Not Slicing Against the Grain**: This is crucial for tender fajitas. Slicing against the grain shortens the muscle fibers, making the steak easier to chew.
  • **Forgetting the Toppings**: The toppings are what take fajitas from good to great! Don’t skimp on the salsa, guacamole, sour cream, and other delicious additions.

**Don’t** worry, even if you make a mistake, you can still salvage your fajitas! Just learn from it and try again next time. Cooking is all about experimentation, after all.

Steak Fajita Marinade Variations: Spice It Up!

**If you**’re feeling adventurous, why not try some variations on this **steak fajita marinade** recipe? Here are a few ideas to get you started:

  • **Spicy Fajitas**: Add more cayenne pepper or a chopped jalapeño to the marinade for an extra kick.
  • **Citrusy Fajitas**: Add the zest of one orange or grapefruit to the marinade for a bright and zesty flavor.
  • **Sweet and Savory Fajitas**: Add a tablespoon of honey or brown sugar to the marinade for a touch of sweetness.
  • **Herby Fajitas**: Add a handful of chopped cilantro or oregano to the marinade for a fresh and herbaceous flavor.
  • **Smoky Chipotle Fajitas**: Add a tablespoon of chipotle powder or a chopped chipotle pepper in adobo sauce to the marinade for a smoky and spicy flavor.

**You can** also experiment with different types of vinegar, such as apple cider vinegar or balsamic vinegar, for a unique twist. The possibilities are endless! I love to experiment and **make some** variations.

How to Store Leftover Steak Fajitas (If There Are Any!)

If you happen to have any leftover steak fajitas (which is a rare occurrence in my house!), here’s how to store them properly:

  • **Store the Steak and Veggies Separately**: This will prevent the tortillas from getting soggy.
  • **Refrigerate Promptly**: Store the cooked steak and veggies in airtight containers in the refrigerator within two hours of cooking.
  • **Use Within 3-4 Days**: Leftover steak fajitas are best consumed within 3-4 days.
  • **Reheat Gently**: Reheat the steak and veggies in a skillet over medium heat or in the microwave. Avoid overcooking, as this can dry out the steak.

You can also use leftover steak fajitas to make other delicious dishes, such as quesadillas, tacos, or even a steak fajita salad!

Frequently Asked Questions About Steak Fajita Marinade

Got questions? I’ve got answers! Here are some frequently asked questions about **steak fajita marinade**:

  • **Can I use this marinade on other types of meat?**: Absolutely! This marinade is delicious on chicken, shrimp, pork, or even tofu.
  • **How long should I marinate the steak?**: I recommend marinating the steak for at least 30 minutes, but no more than 4 hours.
  • **Can I freeze the marinade?**: Yes, you can freeze the marinade for up to 3 months. Thaw it in the refrigerator overnight before using.
  • **What’s the best way to cook the fajitas?**: You can cook the fajitas on a grill, in a cast-iron skillet, or even in the oven.
  • **Can I make this marinade ahead of time?**: Yes, you can make the marinade up to 3 days in advance. Store it in an airtight container in the refrigerator.

If you have any other questions, feel free to ask in the comments below! **I’m** always happy to help.

Serving Suggestions: Complete Your Fajita Fiesta!

Now that you’ve mastered the **steak fajita**, **let’s** talk about serving suggestions! Here are some ideas to complete your fajita fiesta:

  • **Classic Toppings**: Salsa, guacamole, sour cream, shredded cheese, chopped cilantro, and lime wedges are all must-have toppings.
  • **Rice and Beans**: Serve your fajitas with a side of Mexican rice and refried beans for a complete meal.
  • **Grilled Corn on the Cob**: Grilled corn on the cob is a delicious and festive side dish.
  • **Mexican Street Corn Salad**: This creamy and flavorful salad is a perfect complement to fajitas.
  • **Margaritas**: No fajita fiesta is complete without margaritas! Serve your favorite flavor, or try a batch of my classic lime margaritas.

Don’t forget the chips and salsa! And most importantly, don’t forget to have fun! Fajitas are all about sharing good food and good times with the people you love.

The Secret Ingredient: Love

Okay, **okay friends**, I know it sounds cheesy, but the real secret ingredient to **the best** **steak fajita** recipe is love. When you cook with love and passion, it shines through in the final dish. So, put on some music, pour yourself a glass of wine, and enjoy the process of creating something delicious. **I’ve got** no doubt **you’re** going to create a masterpiece!

So there you have it! My ultimate **steak fajita marinade recipe**, complete with pro tips, variations, and serving suggestions. I hope you enjoy it as much as **I** do! Now, go forth and make some **amazing fajitas**!

Remember, cooking is an adventure, so don’t be afraid to experiment and have fun. And **if you** ever need a little inspiration, you know where to find me. Happy cooking!

This **steak fajita marinade recipe is** truly **the best**, and I **ve got** many more recipes **to make**, so don’t forget to check **all the** other recipes too!

I hope **you can** enjoy **some seriously** good food!

This **marinade recipe is** perfect for **marinade for steak fajitas**, **marinade for fajita steak**, **chicken and steak fajitas marinade**, **easy steak fajitas skillet**, **grilled steak fajitas marinade**, **how to make steak fajitas marinade**, **mexican steak fajitas marinade**, **steak fajita marinade**, **steak fajita marinade recipe**, **steak and** more!

If you’re looking for **a little** magic in your kitchen, this **marinade recipe** will surely do the trick.

Steak Fajita Marinade

Prep Time 15 minutes
Cook Time 15 minutes
Total Time 45 minutes
Servings 4 servings
Calories 450
This Steak Fajita Marinade recipe delivers juicy, flavorful steak and charred veggies in warm tortillas. Top with your favorite fixings for a guaranteed hit!

Ingredients

Marinade

  • Soy Sauce
  • Lime Juice (Fresh is best!)
  • Olive Oil
  • Garlic (Minced)
  • Chili Powder
  • Cumin
  • Smoked Paprika
  • Cayenne Pepper (Optional)

Fajitas

  • Skirt or Flank Steak (Sliced)
  • Bell Pepper (Any color)
  • Onion (Sliced)
  • Tortillas, Salsa, Guacamole, Sour cream and more! (For serving)

Instructions 

  • Mix soy sauce, lime juice, olive oil, minced garlic, chili powder, cumin, smoked paprika, and cayenne pepper (optional) in a bowl.
  • Slice steak, marinate in the fridge for at least 30 minutes (up to 4 hours).
  • Slice bell peppers and onions. Grill or pan-fry steak, onions, and peppers until charred.
  • Cook steak to medium (3-5 minutes per side). Cook vegetables until tender-crisp. Let steak rest before slicing.
  • Warm tortillas and assemble fajitas with steak and veggies.
  • Add toppings like salsa, guacamole, sour cream, and cheese. Enjoy!

Notes

Marinating the steak longer enhances the flavor. Don't skip the resting period for the steak!
Calories: 450kcal
Cost: $20
Course: Main Course
Cuisine: Mexican
Keyword: Steak
pin

Easy Sheet Pan Skirt Steak Fajitas: A Weeknight Fiesta!

Hey there, friend! Ava here, back in my Seattle kitchen, and tonight we’re ditching the dinner-time stress for something vibrant, flavorful, and oh-so-easy: Sheet Pan Skirt Steak Fajitas! If you’re anything like me, you love a meal that’s both exciting to eat and a breeze to clean up. Well, grab your apron, because this recipe checks all the boxes. Think tender, juicy skirt steak, colorful bell peppers, zesty spices, all roasted to perfection on a single sheet pan. It’s a fiesta in a pan, ready in under an hour!

I remember the first time I made fajitas at home. It was a disaster! I tried to juggle multiple pans on the stovetop, the kitchen filled with smoke, and the steak ended up tough as shoe leather. But hey, we learn from our mistakes, right? That’s why I’m sharing this foolproof sheet pan method with you. It’s simple, it’s delicious, and it’s guaranteed to put a smile on your face.

Why You’ll Love This Sheet Pan Skirt Steak Fajitas Recipe

Seriously, what’s not to love? This recipe is all about maximum flavor with minimal effort. Here’s why it’s about to become your new go-to weeknight meal:

  • **Quick and Easy**: From prep to plate in under an hour. Perfect for busy weeknights.
  • **Minimal Cleanup**: Everything cooks on one sheet pan. Say goodbye to mountains of dishes!
  • **Flavor Explosion**: The combination of spices and lime juice creates a truly unforgettable taste.
  • **Customizable**: Add your favorite toppings and sides to create your perfect fajita feast.
  • **Healthy**: Packed with protein and colorful vegetables. A nutritious and satisfying meal.

Plus, it’s just plain fun to eat! There’s something about assembling your own fajitas that makes dinner feel like a celebration. So, let’s get cooking!

The Star Ingredients: What You’ll Need

Let’s gather our ingredients. Don’t worry, you probably have most of these in your pantry already. If not, a quick trip to the grocery store is all you need.

  • ‘2 pounds skirt or flank steak (cut into 1-inch cubes)’
  • ‘1 large red bell pepper (thinly sliced, around 1/4 inch thick)’
  • ‘1 small yellow onion (peeled and thinly sliced, around 1/4 inch thick)’
  • ‘4 1/2 teaspoons chili powder’
  • ‘1 1/2 teaspoons ground cumin’
  • ‘1 1/2 teaspoons smoked paprika’
  • ‘1 teaspoon dried oregano’
  • ‘3/4 teaspoon garlic powder’
  • ‘1/2 teaspoon onion powder’
  • ‘1/4 teaspoon cayenne pepper’
  • ‘1 tablespoon kosher salt’
  • ‘2 tablespoons extra virgin olive oil’
  • ‘2 tablespoons fresh lime juice’
  • ‘3 tablespoons finely chopped green onions’
  • ‘Flour or corn tortillas (to serve)’
  • ‘Sour cream (to serve)’
  • ‘Guacamole (to serve)’
  • ‘Salsa (to serve)’
  • ‘Rice with cilantro and lime (to serve)’
Recipe Image

Step-by-Step: Making the Best Sheet Pan Fajitas

Alright, let’s get down to business! Here’s how to make these incredible sheet pan fajitas.

  1. **Prep the Steak**: In a large bowl, combine the cubed skirt steak with chili powder, cumin, smoked paprika, oregano, garlic powder, onion powder, cayenne pepper, and kosher salt. Make sure the meat is evenly coated. Drizzle with olive oil and lime juice, and toss again. Let the steak marinate at room temperature for about 20-30 minutes. This allows the flavors to meld together beautifully.
  2. **Prep the Vegetables**: While the steak is marinating, slice the bell pepper and onion into thin strips. The key is to keep them roughly the same size so they cook evenly.
  3. **Assemble the Fajitas**: Preheat your oven to 400°F (200°C). Spread the sliced bell pepper and onion evenly on a large sheet pan. Top with the marinated skirt steak, spreading it out in a single layer.
  4. **Bake to Perfection**: Bake for 12-15 minutes, or until the steak is cooked to your desired doneness. For medium-rare, aim for an internal temperature of 130-135°F (54-57°C).
  5. **Rest and Serve**: Remove the sheet pan from the oven and let the fajitas rest for a few minutes before serving. This allows the juices to redistribute, resulting in more tender and flavorful meat. Garnish with green onions and serve immediately with warm tortillas and your favorite toppings.

That’s it! See? Easy peasy. Now, let’s talk about some pro tips to take your fajitas to the next level.

Pro Tips for Perfect Sheet Pan Skirt Steak Fajitas

Want to make your fajitas truly exceptional? Here are a few insider tips from my kitchen to yours:

  • **Choose the Right Cut of Meat**: Skirt steak is the classic choice for fajitas because it’s thin, flavorful, and cooks quickly. Flank steak also works well, but you may need to adjust the cooking time.
  • **Marinate, Marinate, Marinate**: Don’t skip the marinade! It’s the key to tender, flavorful steak. Even a short 20-30 minute marinade will make a big difference.
  • **Don’t Overcrowd the Pan**: Make sure the steak and vegetables are spread out in a single layer on the sheet pan. Overcrowding will cause them to steam instead of roast, resulting in less flavorful fajitas. If needed, use two sheet pans.
  • **Use a Hot Oven**: A high oven temperature is essential for achieving that beautiful sear on the steak and vegetables.
  • **Let it Rest**: Allowing the fajitas to rest for a few minutes after baking is crucial for juicy, tender meat.
  • **Warm Your Tortillas**: Warm tortillas are a must for serving fajitas. You can warm them in the microwave, on a dry skillet, or in the oven.

Common Mistakes to Avoid

We all make mistakes in the kitchen, but here are a few common pitfalls to avoid when making sheet pan fajitas:

  • **Overcooking the Steak**: Skirt steak is best served medium-rare to medium. Overcooking will result in tough, dry meat. Use a meat thermometer to ensure perfect doneness.
  • **Not Using Enough Seasoning**: Don’t be shy with the spices! Fajitas are all about bold flavors.
  • **Skipping the Lime Juice**: The lime juice not only adds flavor but also helps to tenderize the meat.
  • **Using Dull Knives**: Sharp knives make slicing the steak and vegetables much easier and safer.

Flavor Variations: Spice Up Your Fajitas

Want to get creative? Here are a few fun variations to try:

  • **Add Some Heat**: Increase the amount of cayenne pepper for a spicier kick. You can also add a pinch of chili flakes.
  • **Make it Smoky**: Use smoked salt or add a few drops of liquid smoke to the marinade for a smoky flavor.
  • **Add More Vegetables**: Bell peppers and onions are the classic choices, but you can also add other vegetables like zucchini, mushrooms, or corn.
  • **Citrus Burst**: Add orange juice to the marinade.

Storage and Reheating Instructions

Got leftovers? Lucky you! Here’s how to store and reheat your sheet pan fajitas:

  • **Storage**: Store leftover fajitas in an airtight container in the refrigerator for up to 3 days.
  • **Reheating**: Reheat the fajitas in a skillet over medium heat, or in the microwave. Add a splash of water or broth to prevent them from drying out.

Frequently Asked Questions (FAQ)

Got questions? I’ve got answers! Here are some of the most common questions I get about sheet pan fajitas:

  • **Can I use a different cut of steak?**: Yes, you can use flank steak, sirloin steak, or even chicken. Just adjust the cooking time accordingly.
  • **Can I make this ahead of time?**: You can marinate the steak and slice the vegetables ahead of time, but it’s best to cook the fajitas fresh.
  • **Can I freeze leftovers?**: Yes, you can freeze cooked fajitas for up to 2 months. Thaw overnight in the refrigerator before reheating.
  • **What toppings go well with fajitas?**: The possibilities are endless! Some popular toppings include sour cream, guacamole, salsa, shredded cheese, pico de gallo, and pickled onions.

Serving Suggestions: Complete Your Fajita Feast

Fajitas are delicious on their own, but here are a few serving suggestions to create a complete meal:

  • **Sides**: Serve with rice and beans, Mexican street corn, or a simple salad.
  • **Drinks**: Margaritas, Mexican beer, or even just a refreshing glass of limeade pair perfectly with fajitas.
  • **Dessert**: Finish off your meal with churros, flan, or a scoop of ice cream.

And there you have it! My foolproof recipe for Easy Sheet Pan Skirt Steak Fajitas. I hope you enjoy making (and eating!) them as much as I do. Remember, cooking is all about having fun and experimenting. So, don’t be afraid to put your own spin on this recipe and make it your own. Happy cooking!

Remember the meat, especially the skirt steak, is the star. But you can’t forget and vegetables like bell peppers and onions to complete the experience! The steak is best when marinated, and the marinade should include lime juice for that authentic fajita flavor. When cooking, a cast iron skillet can be used if you prefer a stovetop method, but the sheet pan method is so easy. The meat and vegetables together create a delicious dish. These fajitas are a crowd-pleaser, and if you’re looking for an easy weeknight meal, be sure to try this recipe! Toppings like sour cream and guacamole elevate the dish even further. The steak and vegetables, when combined with your favorite toppings, are sure to be a hit. Remember to let the meat marinate at room temperature for about 20-30 minutes for the best flavor. The meat and vegetables should be cooked until the steak is done to your liking. And be sure to warm up those tortillas!

Easy Sheet Pan Skirt Steak Fajitas

Prep Time 15 minutes
Cook Time 20 minutes
Total Time 35 minutes
Servings 6 servings
Calories 450
Quick and easy skirt steak fajitas cooked on a sheet pan for a delicious weeknight meal. Serve with your favorite toppings for a customizable dinner.

Ingredients

Fajita Ingredients

  • 2 pounds skirt or flank steak (cut into 1-inch cubes)
  • 1 large red bell pepper (thinly sliced, around 1/4 inch thick)
  • 1 small yellow onion (peeled and thinly sliced, around 1/4 inch thick)

Spice Blend

  • 4.5 teaspoons chili powder
  • 1.5 teaspoons ground cumin
  • 1.5 teaspoons smoked paprika
  • 1 teaspoon dried oregano
  • 0.75 teaspoon garlic powder
  • 0.5 teaspoon onion powder
  • 0.25 teaspoon cayenne pepper
  • 1 tablespoon kosher salt
  • 2 tablespoons extra virgin olive oil
  • 2 tablespoons fresh lime juice
  • 3 tablespoons finely chopped green onions

To Serve

  • Flour or corn tortillas (to serve)
  • Sour cream (to serve)
  • Guacamole (to serve)
  • Salsa (to serve)
  • Rice with cilantro and lime (to serve)

Notes

For extra flavor, marinate the steak for at least 30 minutes before cooking.
Calories: 450kcal
Cost: $25
Course: dinner
Cuisine: Mexican
Keyword: Steak
pin