Author

Ava

Browsing

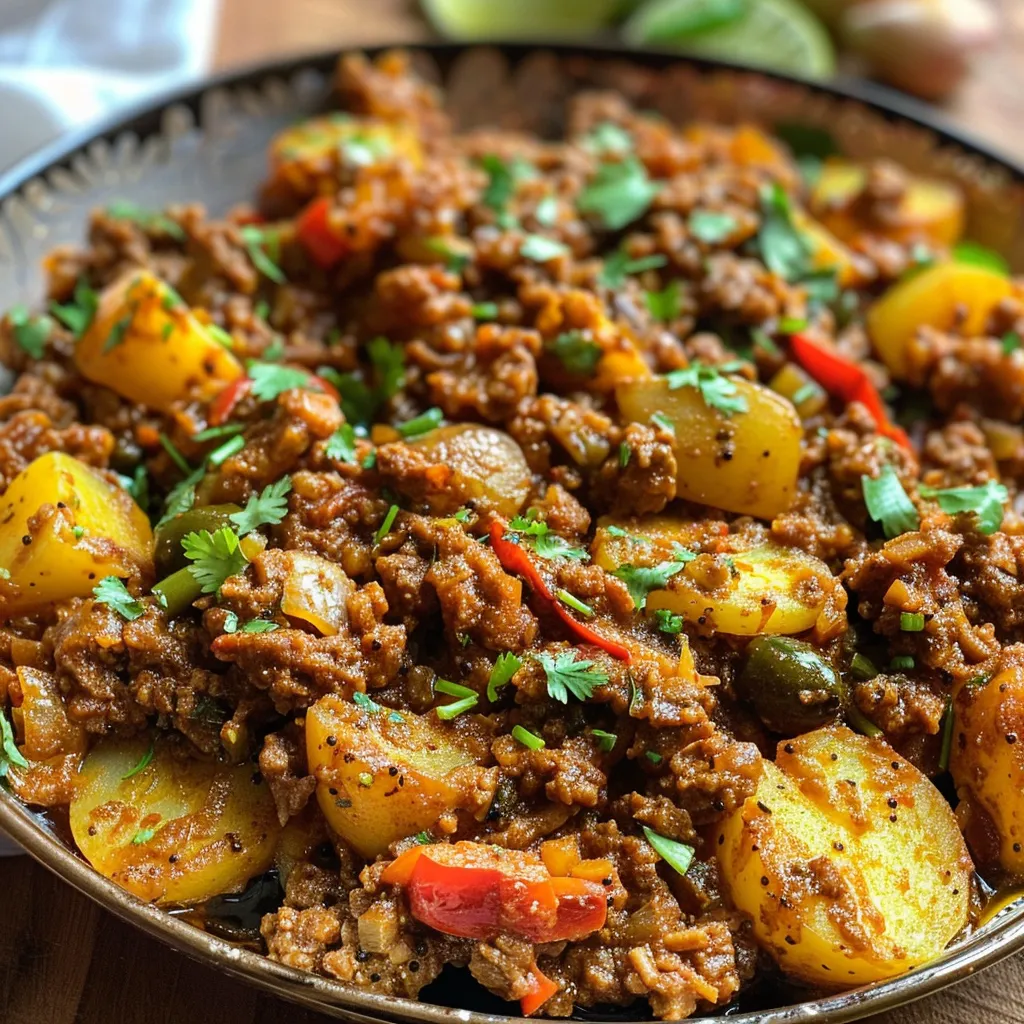
Welcome to Your New Favorite Comfort Dish

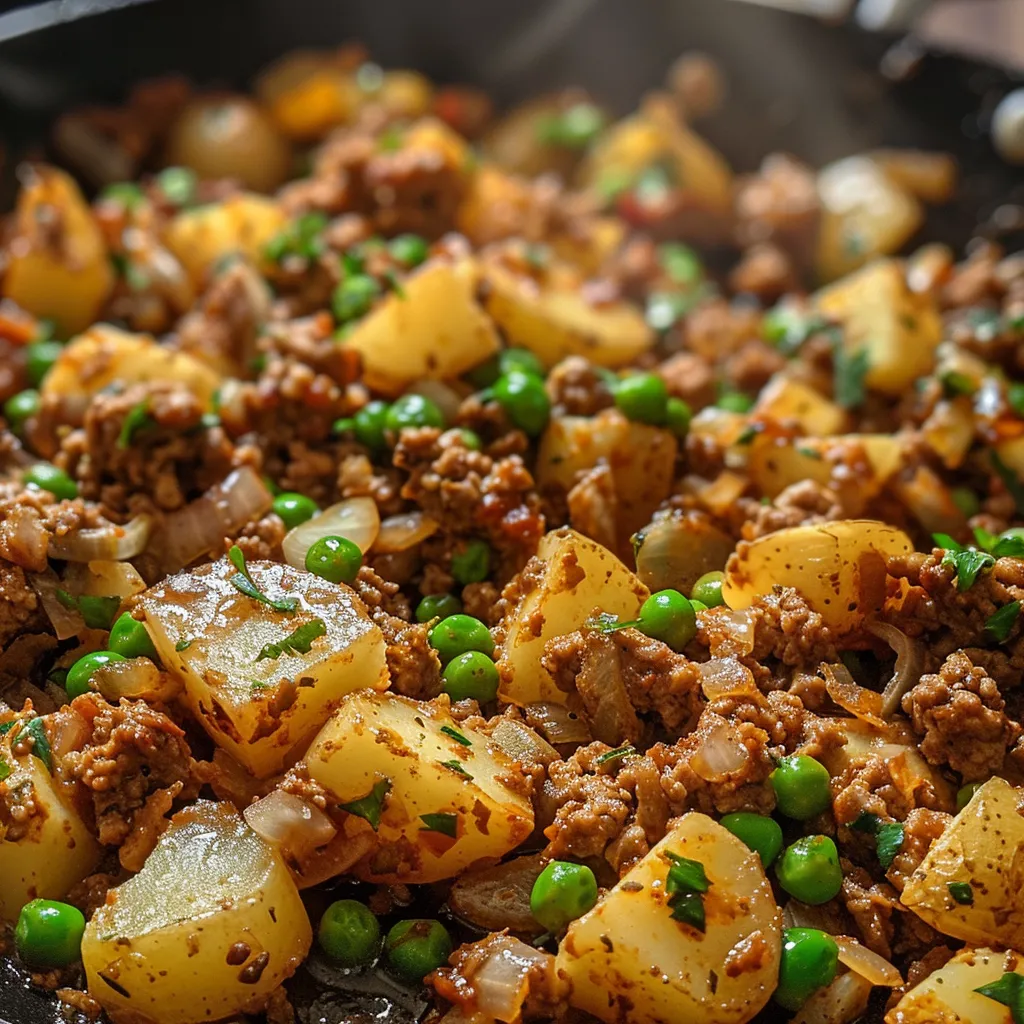
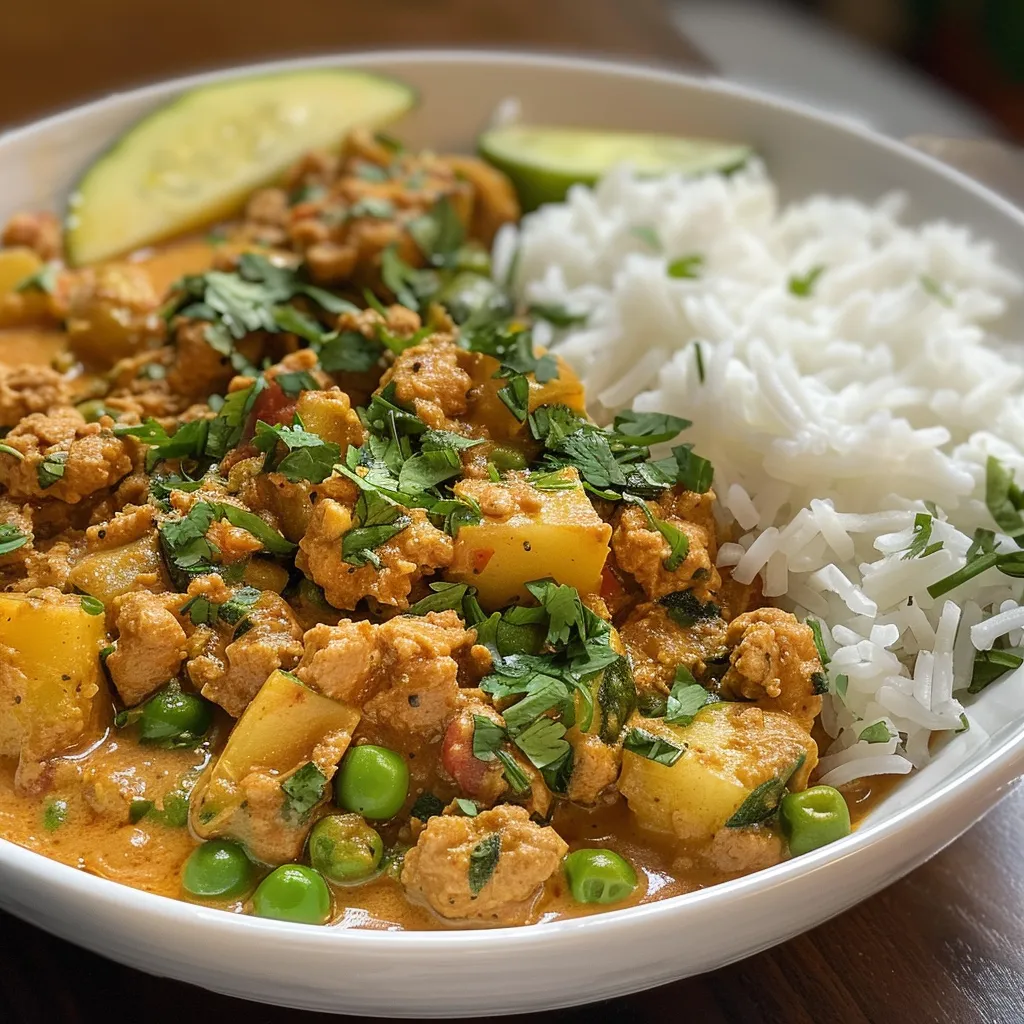
Hello, fellow food lovers! If you’re here, you’re likely searching for a recipe that not only fills your belly but also warms your heart. Let me introduce you to my Creamy Coconut Ground Turkey Potato Curry—a delightful dish that combines rich flavors and wholesome ingredients, creating a meal that’s perfect for any night of the week. In just a few simple steps, you’ll have a bowl of magic that makes everyone pause mid-bite and say, ‘Wow!’ Are you ready to make some culinary magic? Let’s dive in!

Why You’ll Love This Recipe

This isn’t just any curry; it’s a dish that brings together comfort and nutrition. Here are five reasons why this creamy delight will become a staple in your kitchen:

  • Quick and Easy: You can whip this up in under 30 minutes, making it an ideal weeknight dinner.
  • Nutritious Ingredients: Packed with lean ground turkey, wholesome potatoes, and vibrant veggies, this dish is as healthy as it is delicious.
  • Customizable: Feel free to swap in your favorite proteins or vegetables, ensuring every bowl is uniquely yours!
  • Rich and Creamy: The addition of coconut milk creates a velvety sauce that’s simply irresistible.
  • Meal Prep Friendly: Perfect for batch cooking—make it over the weekend and enjoy leftovers all week long!

Ingredient Breakdown

Let’s talk about what goes into this amazing dish. Here’s what you’ll need, along with some handy substitutions:

  • Ground Turkey: You can use extra lean ground turkey or substitute with ground chicken or beef. For a vegetarian version, try chickpeas or lentils!
  • Potatoes: Waxy varieties like Yukon Gold or red potatoes work best, but you can also use sweet potatoes for a twist.
  • Onion: A finely diced onion adds sweetness. You can use shallots or green onions if you prefer.
  • Garlic and Ginger: Freshly crushed garlic and grated ginger bring a fragrant depth. Dried spices can work in a pinch, but fresh is always better!
  • Curry Powder: Medium curry powder is perfect here, but feel free to adjust the heat by choosing a different blend.
  • Coconut Milk: Full-fat coconut milk is preferable for creaminess. If you want a lighter version, use light coconut milk or even almond milk.
  • Frozen Peas: These add a pop of color and sweetness. You can replace them with green beans or spinach.
  • Courgette (Zucchini): This veggie adds a lovely texture. You can substitute with bell peppers or carrots.

How to Make Creamy Coconut Ground Turkey Potato Curry

Juicy ground turkey curry featuring potatoes, peas, and zucchini in a creamy coconut sauce.

Ready to cook? Follow these simple steps for a dish that’s sure to impress:

  1. Heat a frying pan over medium-high heat. Once hot, add the ground turkey and cook until browned. Remove and set aside.
  2. In the same pan, spray some cooking oil and add the diced onion. Fry until golden and softened.
  3. Add in the crushed garlic and grated ginger, frying for an additional minute until fragrant.
  4. Stir in the curry powder and tomato paste, adding a splash of chicken stock to create a paste-like consistency.
  5. Return the ground turkey to the pan along with the cubed potatoes, mixing well to coat.
  6. Pour in the remaining chicken stock and bring to a boil. Reduce the heat to medium, cover, and let simmer for 15 minutes.
  7. Stir in the coconut milk, courgette, and peas, continuing to simmer until the sauce thickens and the courgette is tender.
  8. Season with salt and black pepper to taste, and finish with fresh coriander if desired. Enjoy!

Pro Tips for Recipe Success

Want to make this dish even better? Here are some expert insights:

  • Don’t Rush the Browning: Take your time browning the turkey for deeper flavor.
  • Adjust Consistency: If the curry is too thick, add a splash more chicken stock or coconut milk.
  • Season Gradually: Taste as you go! Adjust seasoning at different stages for the best flavor.
  • Leftover Love: This curry tastes even better the next day, so make extra!
  • Garnish for Greatness: Serve with fresh cilantro, lime wedges, or a dollop of yogurt for extra freshness.
  • Meal Prep Magic: Portion out leftovers and freeze for easy meals later.
  • Experiment with Spice: Add chili flakes or fresh chilies if you like it hot!
  • Perfect Pairings: Serve with rice, naan, or a side salad for a complete meal.

Common Mistakes and Troubleshooting

Even the best chefs have their off days! Here’s how to avoid common pitfalls:

  • Too Dry? If your curry lacks moisture, add more coconut milk or stock.
  • Too Spicy? Add a bit of sugar or more coconut milk to balance the heat.
  • Sticking to the Pan? Ensure you’re using enough oil and stirring frequently.
  • Flavorless? Always season at multiple stages and taste as you go!

Delicious Variations

Feeling adventurous? Here are some fun variations to try:

  • Sweet Potato Delight: Swap out the potatoes for sweet potatoes for a hint of sweetness.
  • Vegetarian Version: Replace turkey with chickpeas or tofu for a plant-based option.
  • Spicy Kick: Add diced jalapeños or a spoonful of chili paste for heat.
  • Herb Infusion: Mix in fresh herbs like basil or mint for a fresh twist.

Storage and Make-Ahead Instructions

This curry is perfect for meal prep! Here’s how to store it:

  • Refrigeration: Store in an airtight container in the fridge for up to 3 days.
  • Freezing: Freeze in individual portions for up to 3 months. Thaw in the fridge overnight before reheating.
  • Reheating: Gently reheat on the stove or in the microwave, adding a splash of stock if needed.

Frequently Asked Questions

Got questions? I’ve got answers!

  • Can I use a different type of meat? Absolutely! Ground chicken, beef, or plant-based alternatives work great!
  • Is this dish gluten-free? Yes, as long as you use gluten-free stock and tomato paste.
  • How can I make this dish spicier? Add more curry powder or include fresh chilies.
  • Can I make this curry in advance? Yes! It stores well in the fridge or freezer.
  • What can I serve with this curry? Rice, naan, or a fresh salad complement it perfectly!
  • Is coconut milk necessary? For the creamy texture, yes! But you can substitute with cashew cream if you prefer.
  • How do I ensure the curry doesn’t burn? Stir frequently and keep an eye on the heat level.
  • Can I add more vegetables? Definitely! Feel free to include your favorites like bell peppers or spinach.

Nutritional Tips and Dietary Adaptations

This creamy curry can be adapted to fit various dietary needs:

  • Low-carb option: Skip the potatoes and add more non-starchy vegetables!
  • Dairy-free: This recipe is naturally dairy-free thanks to coconut milk.
  • High-protein: Add legumes like lentils or beans for an extra protein boost.

Equipment Recommendations

To make this recipe, you’ll need:

  • Large Skillet: A good-quality non-stick skillet is essential for even cooking.
  • Sharp Knife: A sharp chef’s knife makes chopping vegetables a breeze.
  • Measuring Cups and Spoons: Accurate measurements ensure consistent flavor.

Serving Suggestions

To elevate your dish, consider these serving ideas:

  • Fresh Herbs: A sprinkle of fresh cilantro or mint adds brightness.
  • Lime Wedges: A squeeze of lime enhances the flavors beautifully.
  • Side Dishes: Serve with fluffy white rice or warm naan to soak up the sauce.

Conclusion

And there you have it! A quick, easy, and utterly delightful Creamy Coconut Ground Turkey Potato Curry that’s sure to become a household favorite. Remember, cooking is all about making it your own, so feel free to tweak this recipe to your heart’s content. I can’t wait for you to try it and hear how it turns out. Happy cooking, and may your kitchen be filled with warmth and laughter!

Creamy Coconut Ground Turkey Potato Curry

Prep Time 10 minutes
Cook Time 30 minutes
Total Time 40 minutes
Servings 4 servings
Calories 450
A flavorful and creamy curry combining ground turkey, potatoes, and vegetables in a rich coconut sauce, perfect for a comforting meal.

Ingredients

Protein

  • 455 g extra lean ground turkey (or ground chicken, beef etc)

Vegetables

  • 350 g potatoes, peeled and cubed (waxy variety)
  • 1 unit onion, finely diced
  • 1 clove garlic, crushed
  • 0.5 tablespoon fresh grated ginger root
  • 2 tablespoons medium curry powder
  • 3 tablespoons tomato paste (puree)
  • 480 ml chicken stock
  • 120 ml coconut milk
  • 80 g frozen peas
  • 1 unit courgette (zucchini), quartered and sliced

Cooking Oil

  • as needed cooking oil spray

Instructions 

  • Cook the ground turkey in a hot pan until browned, then set aside.
  • Sauté the onion in oil spray until golden, then add garlic and ginger, cooking for 1 minute.
  • Add curry powder, tomato paste, and a splash of stock to form a paste, then return turkey and add potatoes, mixing well.
  • Pour in remaining stock, bring to boil, cover, and simmer for 15 minutes.
  • Stir in coconut milk, add courgette and peas, and simmer until tender and sauce is velvety.

Notes

For softer courgette, add earlier during simmering.
Calories: 450kcal
Cost: $15
Course: Main Course
Cuisine: international
Keyword: Curry, ground turkey, potatoes

Why Potatoes Are the Ultimate Comfort Food

Welcome to my cozy corner of the internet! If you’ve found your way here, chances are you’re just as enamored with potatoes as I am. These humble tubers have a magical ability to transform into a myriad of comforting dishes—each one a warm hug on a plate. Today, we’re diving into the wonderful world of potato recipes that are not only delicious but also healthy. Let’s celebrate the versatility of potatoes and explore different ways to enjoy them, from hearty casseroles to zesty salads, and everything in between!

Why You’ll Love These Healthy Potato Recipes

Potatoes are more than just a side dish; they can be the star of your meal! Here’s why you’ll fall in love with these healthy potato recipes:

  • Versatility: Potatoes can be transformed into anything from creamy mashed goodness to crispy fries, making them perfect for any meal of the day.
  • Nutrient-Rich: Loaded with vitamins C and B6, potassium, and fiber, potatoes are not just filling; they’re also nourishing!
  • Budget-Friendly: Potatoes are an economical choice, allowing you to create satisfying meals without breaking the bank.
  • Comforting and Satisfying: Whether baked, roasted, or mashed, potatoes bring a sense of comfort to every bite, making them ideal for family dinners.
  • Easy to Customize: You can easily adapt potato recipes to suit your taste preferences, dietary needs, or even what you have on hand in your pantry.

Ingredient Breakdown: What You’ll Need

Before we get into the recipes, let’s break down the ingredients you’ll typically need when cooking with potatoes:

  • Potatoes: Russets, Yukon Golds, or sweet potatoes work beautifully, depending on the dish.
  • Protein: Ground beef, chicken, or plant-based alternatives can be added for a hearty touch.
  • Cheese: A sprinkle of cheese can elevate any potato dish—think cheddar, mozzarella, or even feta for a Mediterranean twist.
  • Herbs and Spices: Fresh herbs like rosemary or thyme, along with spices like paprika or garlic salt, can enhance flavor profiles dramatically.
  • Broth or Cream: Use beef or vegetable broth for savory dishes, or cream for rich, comforting textures.

Pro Tips for Perfect Potato Dishes

Side angle of a delicious ground beef and potato casserole, topped with melted cheese.

Ready to become a potato pro? Here are some tips to ensure your potato dishes turn out perfectly every time:

  • Choose the Right Potato: Different recipes call for different types of potatoes. For mashing, opt for starchy potatoes like Russets. For roasting, waxy potatoes like Yukon Gold are best.
  • Don’t Skimp on Salt: When boiling or steaming, salt the water generously. It enhances the flavor of the potatoes!
  • Let Them Rest: After cooking, let your potato dishes sit for a few minutes before serving. This allows flavors to meld beautifully.
  • Experiment with Toppings: Don’t be afraid to get creative! Top your casseroles with breadcrumbs, fresh herbs, or a drizzle of olive oil for an extra layer of flavor.
  • Use a Mandoline: For uniform slices or shreds, a mandoline can save time and ensure even cooking.
  • Embrace Leftovers: Leftover mashed potatoes can be transformed into potato pancakes or added to soups for extra creaminess!
  • Mind the Cooking Time: Different potato types and sizes will cook at different rates. Check for doneness by poking with a fork.
  • Taste as You Go: Always taste your dishes while cooking to adjust seasoning and make sure you’re on the right track.

Common Mistakes and Troubleshooting

Even the best cooks can have off days! Here are some common pitfalls and how to avoid them:

  • Overcooking: This leads to mushy potatoes. Keep an eye on them and check for tenderness with a fork.
  • Not Enough Flavor: If your dish tastes bland, try adding more salt, herbs, or spices to boost flavor.
  • Too Much Cream: If your mashed potatoes are too runny, add more potatoes or let them sit uncovered to thicken up.
  • Uneven Cooking: Cut potatoes into uniform sizes to ensure even cooking and avoid some pieces being undercooked while others are mushy.

Recipe: Cozy Up with This Ground Beef and Potatoes Casserole

Let’s get to the good stuff! Here’s a recipe that feels just like home.

Ingredients

  • 1 pound ground beef
  • 4 medium russet potatoes, peeled and diced
  • 1 medium yellow onion, chopped
  • 2 garlic cloves, minced
  • 1 cup shredded cheddar cheese, divided
  • 1 cup sour cream
  • 1/2 cup beef broth
  • 1 tablespoon olive oil
  • 1 teaspoon salt
  • 1/2 teaspoon black pepper
  • 1 teaspoon dried thyme
  • 1/2 teaspoon paprika

Instructions

  1. Preheat the oven to 375°F (190°C).
  2. Peel and dice the potatoes into small, even cubes. Chop the onion and mince the garlic cloves.
  3. Heat the olive oil in a large skillet over medium heat. Add the chopped onion and minced garlic; sauté until fragrant and softened.
  4. Add the ground beef to the skillet. Season with salt, black pepper, thyme, and paprika. Cook, breaking up the meat, until browned and fully cooked.
  5. Pour in beef broth and stir well, letting the mixture simmer for a few minutes to meld flavors. Remove the skillet from heat.
  6. In a large mixing bowl, combine the diced potatoes with the beef mixture. Fold in sour cream and half of the shredded cheddar cheese until well incorporated.
  7. Transfer the beef and potato mixture into a baking dish, spreading it in an even layer. Sprinkle the remaining cheddar cheese on top.
  8. Cover the dish tightly with foil and bake in the preheated oven for 30 minutes.
  9. Remove the foil and continue baking for 10 to 15 minutes, or until the cheese topping is melted and bubbling.
  10. Once baked, allow the casserole to rest for 10 minutes before serving for the best texture.

Variations to Try

Feeling adventurous? Here are some delicious variations to keep your potato game exciting:

  • Cheesy Broccoli Potato Bake: Add steamed broccoli to the casserole for a nutritious twist.
  • Spicy Mexican Beef and Potatoes: Incorporate taco seasoning and black beans for a zesty flavor profile.
  • Herbed Chicken and Potato Casserole: Swap ground beef for shredded rotisserie chicken and add fresh herbs like basil and parsley.
  • Vegetarian Delight: Replace beef with lentils or chickpeas and add a medley of your favorite vegetables for a hearty vegetarian dish.

Storage and Make-Ahead Instructions

Want to prepare this dish in advance? Here’s how to store it:

  • Refrigerate: Store leftovers in an airtight container in the fridge for up to 4 days.
  • Freezing: This casserole freezes well! Just cool completely, wrap tightly in foil, and freeze for up to 3 months.
  • Reheating: To reheat, thaw overnight in the fridge and bake in the oven at 350°F (175°C) until warmed through, about 30 minutes.

FAQs About Cooking with Potatoes

Got questions? I’ve got answers! Here are some common queries:

  • Can I use sweet potatoes instead of regular potatoes? Absolutely! Sweet potatoes provide a deliciously sweet twist and are packed with nutrients.
  • Are potatoes gluten-free? Yes, potatoes are naturally gluten-free, making them an excellent option for those with gluten sensitivities.
  • What’s the best way to store potatoes? Keep them in a cool, dark place and never in the fridge, as cold temperatures can affect their flavor.
  • How can I tell if potatoes are bad? Watch for sprouting, wrinkling, or any signs of mold—those potatoes should be discarded.
  • Can I cook potatoes in an Instant Pot? Yes! Potatoes cook beautifully in an Instant Pot. Just add a cup of water and set it on high pressure for about 10-12 minutes.
  • What’s the secret to creamy mashed potatoes? Use starchy potatoes, and don’t forget to warm your milk or cream before adding it to prevent them from getting gummy!
  • Can I leave the skin on my potatoes? Definitely! Potato skins are nutritious and add a lovely texture to your dishes.
  • How do I keep mashed potatoes from turning brown? Add a splash of lemon juice or vinegar to keep them looking fresh and appetizing.

Nutrition Tips and Dietary Adaptations

Looking for ways to make your potato dishes even healthier? Here are some tips:

  • Use Greek Yogurt: Substitute sour cream with Greek yogurt for a tangy twist and added protein.
  • Load Up on Veggies: Incorporate more vegetables into your potato dishes for extra fiber and nutrients.
  • Watch Your Portions: While potatoes are delicious, be mindful of portion sizes to maintain balance in your meals.

Equipment Recommendations

Here are some kitchen essentials that will make your potato cooking experience even better:

  • Sharp Chef’s Knife: A good knife will make cutting potatoes a breeze.
  • Cutting Board: Opt for a large, sturdy cutting board for easy chopping.
  • Oven-Safe Baking Dish: Perfect for casseroles and baked potato dishes.
  • Instant Pot: A versatile tool for quick potato cooking and steaming.
  • Mandoline Slicer: For uniform slices and perfect presentation.

Serving Suggestions

How can you make your potato dishes even more delightful? Here are a few serving ideas:

  • Pair with a Fresh Salad: A crisp salad balances the richness of potato dishes beautifully.
  • Add a Splash of Hot Sauce: For those who like a kick, drizzle some hot sauce over your potatoes for added flavor.
  • Serve with a Side of Dipping Sauce: Think garlic aioli or ranch dressing for a fun twist!

Conclusion

In conclusion, potatoes are a versatile, budget-friendly, and nutritious choice that can shine in a variety of dishes. Whether you’re whipping up a comforting casserole or a light salad, there’s a potato recipe for every occasion. So roll up your sleeves, grab those potatoes, and let’s make some culinary magic happen in your kitchen! Remember, cooking is all about joy and experimentation. Here’s to creating memorable meals that bring your loved ones together around the table. Happy cooking!

Ground Beef and Potatoes Casserole

Prep Time 15 minutes
Cook Time 40 minutes
Total Time 55 minutes
Servings 4 servings
Calories 650
A hearty and comforting casserole combining seasoned ground beef, tender potatoes, and melted cheese, perfect for a family dinner.

Ingredients

Meat and Potatoes

  • 1 pound ground beef
  • 4 medium russet potatoes, peeled and diced
  • 1 medium yellow onion, chopped
  • 2 cloves garlic, minced
  • 1 cup shredded cheddar cheese, divided
  • 1 cup sour cream
  • 0.5 cup beef broth
  • 1 tablespoon olive oil
  • 1 teaspoon salt
  • 0.5 teaspoon black pepper
  • 1 teaspoon dried thyme
  • 0.5 teaspoon paprika

Instructions 

  • Preheat oven to 375°F (190°C).
  • Cook onion and garlic in olive oil until fragrant. Add beef with seasonings; cook until browned. Stir in broth and simmer.
  • Mix cooked beef with diced potatoes, sour cream, and half the cheese. Transfer to baking dish, top with remaining cheese.
  • Bake covered for 30 minutes, then uncovered for 10-15 minutes until bubbly and golden.
  • Let rest for 10 minutes before serving.

Notes

For a creamier texture, add a splash of milk or more sour cream before baking.
Calories: 650kcal
Cost: $15
Course: Main Course
Cuisine: American
Keyword: Beef, potatoes

Discover the Heartwarming Magic of Potato Casserole

Ah, the potato casserole! If you’ve ever walked into a cozy kitchen and been greeted by the warm, inviting aroma of roasted potatoes and savory spices, you know exactly what I mean. This potato bake recipe is not just a dish; it’s a comforting hug in meal form, perfect for gatherings or a quiet night in. Imagine layers of tender potatoes mingling with onions and garlic, baked until golden and bubbly. Are you ready to make something that’ll leave your loved ones saying, ‘Wow’? Let’s dive in!

Why You’ll Love This Recipe

  • Quick and Easy: With just a handful of ingredients, this potato casserole comes together in no time, making it perfect for busy weeknights.
  • Customizable: Feel free to experiment! Swap in your favorite herbs, cheeses, or even add a protein to make it uniquely yours.
  • Comfort Food: There’s something inherently soothing about baked potatoes and creamy layers that brings out the nostalgia in every bite.
  • Feeding a Crowd: This recipe scales beautifully, so whether you’re hosting a family dinner or a potluck, you can easily adjust the quantities.
  • Make-Ahead Friendly: Prepare it in advance and bake it just before serving, allowing you to enjoy more time with your guests.

Ingredient Breakdown

To make the perfect potato casserole, you’ll need:

  • 3-4 large potatoes: Choose starchy varieties like Russets for the best texture.
  • 1 large onion: Sweet onions caramelize beautifully, adding depth to the flavor.
  • 3 cloves of garlic: Freshly minced for that aromatic touch.
  • 2 tbsp olive oil: A drizzle to sauté the onions and garlic to perfection.
  • Salt and pepper to taste: Essential for enhancing all the flavors.
  • Optional: herbs and spices: Consider thyme, rosemary, or a pinch of nutmeg to elevate the dish.

Pro Tips for the Perfect Potato Bake

A side view of a potato casserole featuring layered potatoes and herbs, displayed in a glass baking dish.
  • Layer Smartly: Alternate layers of potatoes and the onion-garlic mixture to ensure an even distribution of flavor.
  • Don’t Rush the Sauté: Taking the time to caramelize the onions and garlic will deepen the overall taste of your casserole.
  • Test for Tenderness: Use a fork to check if the potatoes are tender before removing them from the oven.
  • Rest Before Serving: Allow the casserole to sit for about 10 minutes after baking. This helps the layers set and makes serving easier.
  • Cover for Moisture: Cover the casserole with aluminum foil while baking to keep it moist, then remove the foil for the last few minutes to crisp the top.
  • Experiment with Cheeses: Add your favorite melting cheese, like Gruyère or Cheddar, for extra creaminess and flavor.
  • Use Fresh Ingredients: Fresh herbs and high-quality olive oil can significantly enhance the taste of your dish.
  • Don’t Overcrowd the Dish: If you’re making a larger batch, consider using two baking dishes rather than one to ensure even cooking.

Avoiding Common Mistakes

Even the best of us can stumble while cooking. Here are some common pitfalls to watch out for:

  • Not Preheating the Oven: Always preheat your oven to 375°F (190°C) to ensure even cooking.
  • Cutting Potatoes Unevenly: Aim for uniform slices to ensure they cook at the same rate.
  • Skipping the Resting Period: Allowing the casserole to rest helps the flavors meld and makes it easier to serve.

Delicious Variations to Try

  • Cheesy Spinach Potato Bake: Add a layer of fresh spinach and a generous sprinkle of cheese for a nutritious twist.
  • Bacon and Cheese Layered Bake: Incorporate crispy bacon bits for a savory crunch and extra flavor.
  • Herbed Potato Casserole: Mix in fresh herbs like dill or parsley for a bright, fresh taste.
  • Spicy Southwest Variation: Add diced jalapeños and a blend of pepper jack cheese for a spicy kick.

Storage and Make-Ahead Instructions

This casserole is perfect for meal prep. Here’s how to store and reheat it:

  • Refrigeration: Store leftovers in an airtight container in the fridge for up to 3-4 days.
  • Freezing: You can freeze the unbaked casserole for up to 2 months. Just thaw in the fridge overnight before baking.
  • Reheating: To reheat, cover with foil and bake at 350°F (175°C) until warmed through, about 20-25 minutes.

Frequently Asked Questions

  • Can I use different types of potatoes? Absolutely! Yukon Golds or fingerlings work well too. Just remember that different types may have varying cooking times.
  • What can I serve with potato casserole? This dish pairs beautifully with roasted meats, salads, or steamed vegetables.
  • Can I make this dish vegan? Yes! Substitute olive oil for butter and use a dairy-free cheese alternative.
  • How can I make it gluten-free? This recipe is naturally gluten-free as long as you ensure any added ingredients are certified gluten-free.
  • What’s the best way to slice the potatoes? Aim for about 1/8-inch thickness for even cooking.
  • Can I add meat to the casserole? Definitely! Cooked chicken, ham, or sausage would be delicious additions.
  • Is it necessary to peel the potatoes? While peeling is traditional, you can leave the skins on for added texture and nutrients.
  • How do I know when it’s done? The casserole is done when the potatoes are tender and the top is golden brown.

Nutritional Tips and Dietary Adaptations

This potato casserole can be a part of a balanced diet. Here are some tips to make it even healthier:

  • Go Light on the Oil: Use just enough to sauté the onions and garlic without overdoing it.
  • Increase Veggies: Add layers of vegetables like zucchini or bell peppers to boost nutrition.
  • Choose Low-Fat Dairy: If using cheese, opt for lower-fat options to reduce calories.

Essential Equipment for Potato Casserole

To whip up this delicious dish, you’ll need:

  • Sharp Knife: For slicing the potatoes and onions evenly.
  • Cutting Board: A sturdy surface to work from.
  • Large Baking Dish: A medium-sized oven-safe dish works best.
  • Aluminum Foil: To cover the casserole during baking.

Serving Suggestions

Now that your potato casserole is ready, here are a few ideas for serving:

  • Fresh Herbs: Garnish with chopped parsley or chives for a pop of color and flavor.
  • Side Salads: Pair with a crisp green salad to balance the richness of the casserole.
  • Homemade Bread: Serve with a slice of crusty bread for a hearty meal.

Conclusion

There you have it! A potato casserole recipe that’s not only easy to make but also comforting and delicious. Whether you’re feeding a crowd or enjoying a quiet night in, this dish is sure to bring warmth and joy to your table. So, gather your ingredients, roll up your sleeves, and let’s create some culinary magic together! Remember, every meal is an opportunity to connect, celebrate, and savor life’s little moments. Happy cooking!

Baked Potatoes and Onion Casserole

Prep Time 15 minutes
Cook Time 50 minutes
Total Time 1 hour 5 minutes
Servings 4 servings
Calories 250
A hearty and comforting dish featuring layered potatoes and caramelized onions, baked to perfection.

Ingredients

Vegetables

  • 3-4 large potatoes
  • 1 large onion
  • 3 cloves garlic (minced)
  • 2 tbsp olive oil
  • to taste Salt and pepper (as desired)
  • optional herbs and spices (of your choice)

Instructions 

  • Preheat oven to 375°F (190°C).
  • Peel and slice potatoes and onion; mince garlic.
  • Sauté onions and garlic in olive oil until caramelized.
  • Boil sliced potatoes in salted water until slightly tender, then drain.
  • Layer potatoes, onion mixture, and herbs in a casserole; finish with a potato layer.
  • Bake covered for 30 minutes, then uncovered for 20-25 minutes until golden and cooked.

Notes

For extra flavor, add your favorite herbs and spices before baking.
Calories: 250kcal
Cost: $15
Course: Main Course
Cuisine: homestyle
Keyword: potatoes

Welcome to the Ultimate Veggie-Packed Baked Ziti Experience

Ah, baked ziti! Just the name conjures up images of bubbling cheese, hearty pasta, and a cozy evening with loved ones. This veggie-packed baked ziti is not just a dish; it’s a celebration of flavors, textures, and memories. Growing up in my mother’s kitchen, baked ziti was a staple that brought everyone together, and now, I’m thrilled to share my twist on this classic comfort food. In just 50 minutes, you can create a meal that’s as satisfying as it is delicious, perfect for family dinners or a quiet night in. Let’s dive deep into why this recipe will steal your heart and become a regular in your kitchen!

Why You’ll Love This Recipe

  • Quick and Easy: With just 50 minutes from start to finish, this baked ziti is perfect for busy weeknights or last-minute gatherings.
  • Veggie Delight: Packed with colorful vegetables, this dish makes eating your greens enjoyable—no one will complain!
  • Cheesy Goodness: Layers of gooey mozzarella and creamy ricotta create a rich flavor that will have everyone coming back for seconds.
  • Make-Ahead Friendly: Prep it the night before and refrigerate; just pop it in the oven for an effortless meal.
  • Customizable: Easily swap in your favorite veggies or proteins to make this recipe your own.

Ingredient Breakdown

Before we get cooking, let’s take a closer look at what you’ll need. Here’s the list of ingredients for our veggie-packed baked ziti along with some wonderful substitutions.

  • 1 pound ziti pasta: You can substitute with penne or rigatoni if you prefer.
  • 1 tablespoon olive oil: Use avocado oil for a different flavor.
  • 1 medium onion, chopped: Shallots or leeks can work in a pinch.
  • 2 cloves garlic, minced: Feel free to use garlic powder if fresh isn’t available.
  • 1 red bell pepper, chopped: Yellow or green bell peppers are great alternatives.
  • 1 zucchini, chopped: Try using eggplant for a different texture.
  • 1 cup chopped broccoli florets: Spinach or kale could also be used for a nutrient boost.
  • 1 (28 ounce) can crushed tomatoes: Fresh tomatoes can be used, just increase the seasoning.
  • 1 (15 ounce) can tomato sauce: Substitute with homemade sauce if you have it.
  • 1 teaspoon dried oregano: Fresh oregano can add a delightful punch.
  • 1 teaspoon dried basil: Same goes for fresh basil, which brings vibrant flavor.
  • 1/2 teaspoon salt: Adjust to taste; you can use low-sodium salt if preferred.
  • 1/4 teaspoon black pepper: Freshly ground black pepper elevates the taste.
  • 15 ounces ricotta cheese: Cottage cheese or cream cheese can be a lighter alternative.
  • 1 large egg, beaten: This helps bind the cheese mixture, but you can leave it out for a vegan option.
  • 1/4 cup grated Parmesan cheese: Nutritional yeast works well for a dairy-free twist.
  • 2 cups shredded mozzarella cheese: Feel free to mix in cheddar or a dairy-free cheese alternative.

Let’s Get Cooking: Step-by-Step Instructions

Side view of a hearty baked ziti, featuring colorful vegetables and gooey mozzarella.

Ready to create some magic in your kitchen? Follow these simple steps to whip up your veggie-packed baked ziti!

  1. Preheat your oven: Set it to 375 degrees F (190 degrees C) and let that warmth fill your space.
  2. Cook the pasta: Boil the ziti according to package instructions. Drain and set aside, but don’t forget to save a little pasta water!
  3. Sauté the veggies: Heat olive oil in a large skillet over medium heat. Add chopped onion and sauté until softened, about 5 minutes.
  4. Add garlic and bell peppers: Toss in the minced garlic, red bell pepper, zucchini, and broccoli. Cook until tender-crisp, around 7-10 minutes.
  5. Mix in the sauce: Stir in the crushed tomatoes, tomato sauce, oregano, basil, salt, and pepper. Let it simmer for 5 minutes, allowing those flavors to meld.
  6. Combine cheeses: In a medium bowl, mix ricotta cheese, beaten egg, and Parmesan cheese until well combined.
  7. Combine everything: In a large bowl, mix the cooked ziti, veggie sauce, and ricotta mixture until everything is coated.
  8. Layer it up: Spread half of the ziti mixture into a 9×13 inch baking dish. Sprinkle with half of the mozzarella cheese. Repeat the layers with the remaining ziti mixture and mozzarella cheese on top.
  9. Bake: Place in the oven and bake for 25-30 minutes, or until bubbly and the cheese is melted and golden.
  10. Rest before serving: Let it stand for 5-10 minutes before serving to allow the flavors to settle.

Pro Tips for Perfecting Your Baked Ziti

  • Don’t overcook the pasta: Cook it al dente since it will continue to cook in the oven.
  • Mix cheese thoroughly: For an even distribution of cheesy goodness, ensure the ricotta is mixed well with the pasta.
  • Use fresh herbs: If available, fresh basil and oregano enhance flavor significantly.
  • Save some pasta water: Adding a splash can help loosen the sauce if it seems too thick.
  • Experiment with spices: A pinch of red pepper flakes can add a nice kick!
  • Cover with foil: If the cheese browns too quickly, cover the dish with foil for the last few minutes of baking.
  • Layer cheese: Don’t be shy with the cheese! More layers mean more gooey goodness.
  • Let it cool: Allow the dish to cool slightly before serving; it will set up beautifully.
  • Enjoy leftovers: This dish tastes even better the next day, as the flavors have more time to develop!

Common Mistakes and Troubleshooting

  • Overcooked pasta: Always cook just shy of al dente as it will soften further in the oven.
  • Too dry: If your ziti turns out dry, next time try adding more sauce or a splash of pasta water.
  • Uneven layers: Make sure to distribute ingredients evenly for consistent flavor throughout.
  • Cheese burning: If the top burns before the dish is heated through, cover it with foil.

Variations to Spice Things Up

Feel free to mix and match! Here are some fun variations you can try:

  • Meat Lover’s Ziti: Add cooked ground beef or sausage for a heartier dish.
  • Mexican-Style Ziti: Incorporate black beans, corn, and taco seasoning for a zesty twist.
  • Italian Sausage Ziti: Sauté Italian sausage with the veggies for extra flavor.
  • Pesto Ziti: Mix in some pesto for a fresh and vibrant taste.

Storage and Make-Ahead Instructions

Planning ahead? Here’s how to store and prepare your baked ziti:

  • Refrigerator: Store leftovers in an airtight container for up to 4 days.
  • Freezer: Freeze in portions for up to 3 months. Thaw overnight in the fridge before baking.
  • Make-Ahead: Assemble the ziti a day in advance, cover, and refrigerate. Just bake it straight from the fridge, adding a few extra minutes to the cooking time.

Comprehensive FAQ

  • Can I use jarred pasta sauce instead of making my own? Absolutely! A good quality jarred sauce will work just fine.
  • How can I make this dish vegan? Substitute ricotta with tofu or a vegan cheese alternative, and skip the egg.
  • What’s the best way to reheat leftovers? Reheat in the oven at 350°F until warmed through for the best texture.
  • Can I add more vegetables? Yes! Feel free to add any of your favorite veggies to the mix.
  • How do I know when the ziti is done baking? The cheese should be melted and bubbly, and the edges should be slightly golden.
  • Can I double the recipe? Absolutely! Just use a larger baking dish and adjust cooking times as needed.
  • What can I serve with baked ziti? A simple green salad and garlic bread make excellent accompaniments.
  • What’s the nutritional info for this dish? Check the nutrition label on the ingredients you use to get the best estimates.

Nutrition Tips and Dietary Adaptations

To make this recipe healthier without sacrificing flavor, consider the following:

  • Whole Wheat Pasta: Swap regular ziti for whole wheat for added fiber.
  • Less Cheese: Reduce the amount of cheese or opt for low-fat versions.
  • Increase Veggies: Add more vegetables to boost nutrients and flavor.

Equipment Recommendations

To make the process even easier, here’s a quick list of must-have tools:

  • Large Pot: For boiling pasta; a 4-quart pot works well.
  • Skillet: A large skillet for sautéing vegetables.
  • Baking Dish: A 9×13 inch baking dish is ideal for layering.
  • Mixing Bowls: Use medium and large bowls for mixing ingredients.
  • Wooden Spoon: Great for stirring and combining ingredients.

Serving Suggestions

Now that your ziti is ready to serve, consider these delicious pairings:

  • Garlic Bread: Slice up a loaf of garlic bread for a crunchy side.
  • Green Salad: A simple arugula or mixed greens salad with balsamic vinaigrette is refreshing.
  • Wine Pairing: A light-bodied red wine like Chianti complements the dish beautifully.

Conclusion

There you have it—the ultimate veggie-packed baked ziti that’s sure to become a beloved addition to your family meals! Whether you’re cooking for a crowd or just yourself, this recipe is flexible, forgiving, and utterly delicious. Remember, cooking is all about joy and exploration, so feel free to make this dish your own. I can’t wait to hear how it turns out for you—don’t forget to share your own twists and stories with me! Happy cooking, friends!

Veggie-Packed Baked Ziti: 50 Min Meal

Prep Time 15 minutes
Cook Time 35 minutes
Total Time 50 minutes
Servings 6 servings
Calories 650
A hearty and nutritious baked ziti loaded with colorful vegetables and cheesy goodness, perfect for a satisfying family dinner.

Ingredients

Pasta

  • 1 pound ziti pasta
  • 1 tablespoon olive oil
  • 1 medium onion, chopped
  • 2 cloves garlic, minced
  • 1 red bell pepper chopped
  • 1 zucchini chopped
  • 1 cup chopped broccoli florets
  • 1 28 ounce can crushed tomatoes
  • 1 15 ounce can tomato sauce
  • 1 teaspoon dried oregano
  • 1 teaspoon dried basil
  • 0.5 teaspoon salt
  • 0.25 teaspoon black pepper
  • 15 ounces ricotta cheese
  • 1 large egg, beaten
  • 0.25 cup grated Parmesan cheese
  • 2 cups shredded mozzarella cheese

Instructions 

  • Preheat oven to 375°F (190°C). Cook pasta, then drain.
  • Sauté onion and garlic in olive oil until softened. Add vegetables and cook until tender.
  • Mix in crushed tomatoes, tomato sauce, herbs, salt, and pepper; simmer for 5 minutes.
  • Combine cooked pasta, vegetable sauce, and ricotta mixture. Layer in baking dish with cheese, then bake for 25-30 minutes.
  • Let stand 5-10 minutes before serving. Enjoy!

Notes

For extra flavor, sprinkle fresh basil on top before serving.
Calories: 650kcal
Cost: $15
Course: Main Course
Cuisine: Italian-American
Keyword: baked, pasta, vegetables

The Secret to a Cozy One-Dish Chicken Casserole

Welcome to my kitchen, where the aroma of fresh ingredients and the warmth of home-cooked meals come together! If you’ve ever felt overwhelmed by busy weeknights, I’ve got the perfect solution for you: a delightful chicken casserole that turns chaotic evenings into cozy gatherings. This **Easy One-Dish Chicken Casserole** is not just a meal; it’s a warm hug served on a plate. It’s packed with flavor and simplicity, making it the ultimate comfort food for you and your loved ones.

Why You’ll Love This Recipe

Let’s talk about why this **delightful chicken casserole** is destined to become a family favorite:

  • Quick Preparation: With just a few ingredients and minimal prep time, you can whip this up even on your busiest days.
  • One-Dish Wonder: Fewer dishes mean less cleanup, leaving you more time to enjoy dinner with your family.
  • Customizable Ingredients: Feel free to adapt the recipe with whatever veggies or proteins you have on hand.
  • Freezer-Friendly: Make a double batch to enjoy later, perfect for unexpected guests or meal prepping.
  • Kid-Approved: The creamy goodness and cheesy topping make this a hit with children and adults alike!

Ingredients Breakdown

An appetizing one-dish chicken casserole in a baking dish, showcasing layers of chicken, rice, and melted cheese.

Here’s what you’ll need to create this cozy dish:

  • 2 cups cooked chicken: Shredded rotisserie chicken works wonders here!
  • 1 can (10.5 oz) cream of chicken soup: This adds creaminess and flavor.
  • 1 cup sour cream: For that rich, velvety texture.
  • 1 cup frozen mixed vegetables: You can use fresh vegetables as well, just sauté them first.
  • 1 cup cooked rice: Brown rice or white rice—whatever you prefer!
  • 1 cup shredded cheddar cheese: Because everything is better with cheese!
  • 1 teaspoon garlic powder: A must-have for flavor.
  • 1 teaspoon onion powder: Enhances the overall taste.
  • Salt and pepper to taste: Always season to your liking!
  • 1 cup crushed cornflakes (optional): For a crispy topping, but feel free to skip it if you’re not a fan.

Pro Tips for the Best Results

Before you start cooking, here are some expert tips to ensure your **chicken casserole** turns out perfectly:

  • Prep Ahead: You can mix the casserole ingredients the night before and store them in the fridge. Just pop it in the oven when you’re ready to bake.
  • Use Leftovers: This recipe is a fantastic way to use up leftover chicken and veggies.
  • Check Your Oven: Ovens can vary, so keep an eye on your casserole during the last few minutes of baking.
  • Don’t Skip the Cheese: A generous layer of cheese on top makes all the difference—go for it!
  • Mix it Up: Feel free to substitute cream of chicken soup with any creamy soup you like, such as cream of mushroom.
  • Season Generously: Don’t be afraid to adjust the spices and seasoning to match your taste.
  • Let it Rest: Allow the casserole to cool for a few minutes before serving to help it set.
  • Garnish for Flavor: A sprinkle of fresh herbs like parsley or chives can elevate your dish.

Common Mistakes and Troubleshooting

Even the best cooks have their off days. Here are some tips to avoid common mistakes:

  • Too Dry: If the casserole seems dry, add more sour cream or broth next time.
  • Overcooked Veggies: If using fresh vegetables, sauté them just until tender prior to adding them to the casserole.
  • Cheese Not Melting: Ensure your oven is preheated before baking for even melting.
  • Flavor Lacking: Always taste and adjust seasonings before baking.

Delicious Variations to Try

Want to switch things up? Here are some tasty variations:

  • Mexican Fiesta: Add a can of black beans, corn, and taco seasoning for a Tex-Mex twist!
  • Italian Delight: Incorporate Italian seasoning, diced tomatoes, and mozzarella cheese.
  • Buffalo Style: Mix in buffalo sauce for a spicy kick and top with blue cheese.
  • Vegetarian Version: Swap the chicken for chickpeas and double the veggies for a vegetarian delight!

Storage and Make-Ahead Instructions

This **chicken casserole** is perfect for meal prep:

  • Fridge Storage: Store leftovers in an airtight container in the fridge for up to 3 days.
  • Freezing: Freeze before baking for up to 2 months. Thaw in the fridge overnight before baking.
  • Reheating: Reheat in the oven at 350°F (175°C) until heated through, about 20-30 minutes.

Frequently Asked Questions

Here are some questions I often hear about this delightful dish:

  • Can I use fresh chicken? Yes! Just cook and shred it before adding it to the casserole.
  • What can I substitute for cream of chicken soup? You can use cream of mushroom or a homemade cream sauce if you prefer.
  • Is this casserole gluten-free? You can make it gluten-free by using gluten-free soup and cornflakes.
  • Can I add pasta to this recipe? Absolutely! Cooked pasta can be a delicious addition.
  • How can I make this dish spicier? Add jalapeños or a dash of cayenne pepper for some heat!
  • Is it suitable for kids? Yes! Kids love the creamy taste and cheesy topping.
  • What can I serve with this casserole? A simple green salad or garlic bread pairs perfectly!
  • Can I make this in advance? Yes! You can prepare it the night before and bake it when you’re ready.

Nutrition Tips and Dietary Adaptations

For those watching their dietary intake:

  • Lower Fat: Use low-fat sour cream and cheese to reduce calories.
  • Whole Grains: Opt for brown rice for added fiber.
  • Vegetarian Option: Replace chicken with beans or lentils.
  • Low Sodium: Use low-sodium soup and seasonings to control salt intake.

Equipment Recommendations

To make your cooking experience smooth:

  • 9×13 Inch Baking Dish: Perfect size for casseroles.
  • Mixing Bowls: Essential for combining ingredients.
  • Spatula: A good spatula helps in mixing and serving.
  • Oven Mitts: Safety first—never forget your oven mitts!

Serving Suggestions

To elevate your serving experience:

  • Fresh Herbs: Top with fresh parsley or cilantro for a pop of color.
  • Side Salad: A crisp garden salad complements the richness of the casserole.
  • Crusty Bread: Serve with warm, crusty bread for a complete meal.
  • Wine Pairing: A light white wine can enhance the flavors beautifully.

In conclusion, this **Easy One-Dish Chicken Casserole** is more than just a recipe; it’s an invitation to gather around the table and enjoy the magic of home-cooked meals. So grab your ingredients, preheat that oven, and let’s create some culinary memories together. Whether you’re cooking for family or just treating yourself, this dish is bound to bring joy and comfort to your kitchen. Happy cooking!

Easy One-Dish Chicken Casserole for Busy Nights

Prep Time 10 minutes
Cook Time 35 minutes
Total Time 45 minutes
Servings 6 servings
Calories 550
A quick and hearty casserole combining chicken, rice, vegetables, and cheese, perfect for busy weeknights.

Ingredients

Main ingredients

  • 2 cups cooked chicken, shredded
  • 1 can (10.5 oz) cream of chicken soup
  • 1 cup sour cream
  • 1 cup frozen mixed vegetables
  • 1 cup cooked rice
  • 1 cup shredded cheddar cheese
  • 1 teaspoon garlic powder
  • 1 teaspoon onion powder
  • to taste salt and pepper salt and pepper
  • 1 cup crushed cornflakes (optional for topping)

Instructions 

  • Preheat oven to 350°F (175°C).
  • Mix chicken, soup, sour cream, vegetables, rice, garlic, onion, salt, and pepper.
  • Transfer to a greased baking dish, top with cheese, and sprinkle cornflakes if desired.
  • Bake covered for 25-30 minutes, then uncover and bake 10 more minutes until bubbly.
  • Let cool briefly before serving.

Notes

You can add extra vegetables or cheese for more flavor.
Calories: 550kcal
Cost: $15
Course: Main Course
Cuisine: American
Keyword: Chicken

Loved this recipe? Save it to your favorite Pinterest board so you can easily find it later! It’s the perfect way to keep all your sweet ideas in one place. ✨

A steaming chicken casserole garnished with shredded cheese and a crispy cornflake topping, set on a wooden table.

Welcome to the World of Aloo Keema

If you’re searching for a recipe that feels like a warm hug on a chilly day, look no further than Aloo Keema. This comforting Pakistani curry combines the rich flavors of ground beef and tender potatoes, creating a dish that’s not just a meal, but a heartfelt experience. As you dive into this recipe, you’ll discover that it’s perfect for cozy family dinners, meal prep, or impressing guests. Let’s bring a little magic into your kitchen!

Why You’ll Love This Recipe

  • Comforting flavors: Aloo keema is a classic dish that brings a sense of nostalgia and warmth, perfect for sharing with family and friends.
  • One-pot wonder: This recipe is a one-pot meal, making cleanup a breeze while allowing the flavors to meld beautifully.
  • Customizable: You can easily adapt the recipe to suit your taste preferences, whether you like it spicy or mild.
  • Quick to prepare: Ready in about 45 minutes, this dish fits seamlessly into busy weeknight schedules.
  • Perfect for leftovers: Aloo keema tastes even better the next day, making it an excellent option for meal prep.

Ingredient Breakdown

This recipe uses simple yet flavorful ingredients. Here’s what you’ll need:

  • 500 g ground beef: You can use either lean or full-fat ground beef depending on your preference.
  • 1 onion: Finely diced; this adds a base of flavor.
  • 3 tomatoes: Sliced; they’ll break down into a rich sauce.
  • ¼ cup cooking oil: For sautéing; feel free to use olive oil or ghee for a richer taste.
  • 1 tsp ginger: Freshly minced adds warmth.
  • 1 tsp garlic: Freshly minced enhances the dish’s aroma.
  • Spices: Black cardamom, black peppercorns, cloves, red chili powder, salt, coriander powder, cumin powder, turmeric powder.
  • 2 small potatoes: Cut into 2 cm (1 inch) cubes; these will absorb the curry’s flavors.
  • 1 tsp garam masala: A final touch for a fragrant finish.
  • 2 green chilies: Sliced; adjust based on your heat preference.
  • 2 tbsp fresh coriander: Chopped for garnish.
  • 1 tbsp ginger: Sliced, for an added layer of flavor.

Pro Tips for Making Aloo Keema

Side view of flavorful Aloo Keema with tender potatoes and aromatic spices, served in a bowl.
  • Brown the onions: Take your time to sauté the onions until they are light golden, as this will enhance the dish’s depth of flavor.
  • Layer your spices: Add spices at different stages of cooking to build a complex flavor profile.
  • Adjust the moisture: If you prefer a drier keema, reduce the water added during cooking.
  • Use fresh ingredients: Fresh spices and herbs make a noticeable difference in flavor.
  • Cook low and slow: Allowing the dish to simmer helps meld the flavors beautifully.
  • Consider adding more vegetables: Peas or bell peppers can be great additions to enhance nutrition and flavor.
  • Taste and adjust: Always taste as you go, adjusting salt and spice levels to your preference.
  • Let it rest: Allow the dish to sit for a few minutes after cooking; this helps the flavors develop further.
  • Garnish generously: Fresh coriander and ginger slices add a lovely touch of brightness to the dish.

Common Mistakes and Troubleshooting

Even the best cooks can face challenges. Here are some common mistakes to avoid:

  • Overcooking the potatoes: Keep an eye on them to ensure they remain tender but not mushy.
  • Skipping the browning step: Don’t rush; browning the onions and spices is crucial for flavor.
  • Using too much water: Add water gradually to control the curry’s consistency.
  • Not tasting as you go: Always check the seasoning and spice levels during cooking.

Variations of Aloo Keema

Feel free to mix things up! Here are some delightful variations:

  • Vegetarian Version: Swap ground beef for lentils or a mix of your favorite vegetables.
  • Spicy Twist: Add more green chilies or a dash of hot sauce for extra heat!
  • Keema Matar: Include peas for a pop of color and sweetness.
  • Add Nuts: Chopped cashews or almonds can add a delightful crunch and richness.

Storage and Make-Ahead Instructions

Planning ahead? Here’s how to store and prepare Aloo Keema:

  • Refrigerate: Store leftovers in an airtight container in the fridge for up to 3 days.
  • Freeze: This dish can be frozen for up to 3 months. Just thaw and reheat before serving.
  • Make ahead: You can prepare the keema a day in advance; the flavors will deepen overnight!

Frequently Asked Questions

Got questions? Here are some answers to common inquiries about Aloo Keema:

  • Can I use chicken instead of beef? Absolutely! Ground chicken or turkey works wonderfully in this recipe.
  • Is it spicy? The heat level can be adjusted by controlling the amount of red chili powder and green chilies used.
  • What should I serve with Aloo Keema? It pairs beautifully with warm roti, paratha, or fragrant basmati rice.
  • Can I make it vegan? Yes, replace the ground beef with a meat substitute such as lentils or a plant-based mince.
  • How long does it take to cook? The entire process takes about 45 minutes from start to finish.
  • Can I add more vegetables? Definitely! Carrots, peas, or bell peppers make excellent additions.
  • What’s the best way to reheat leftovers? Reheat gently on the stovetop with a splash of water to keep it moist.
  • Can I add yogurt? Yes, a dollop of yogurt can add creaminess and balance the spices.

Nutritional Tips and Dietary Adaptations

Aloo Keema can be tailored to fit various dietary needs:

  • Low-carb option: Substitute potatoes with cauliflower for a lower carbohydrate version.
  • Protein-packed: This dish is already rich in protein from the ground beef, making it filling and satisfying.
  • Gluten-free: This recipe is naturally gluten-free, making it suitable for those with gluten sensitivities.

Essential Kitchen Equipment

To make this recipe, you’ll need:

  • Heavy-bottomed pan: Ideal for even cooking and preventing burning.
  • Sharp knife: For chopping onions, tomatoes, and potatoes with ease.
  • Wooden spoon: Great for stirring and breaking up ground beef.
  • Measuring cups and spoons: Essential for accurate ingredient measurements.

Serving Suggestions

Serving Aloo Keema is just as important as making it! Here are some ideas:

  • With Indian bread: Serve hot with warm roti or naan to soak up the delicious curry.
  • Garnish: Top with chopped fresh coriander and a squeeze of lemon for brightness.
  • Pair with sides: A simple cucumber raita or a fresh salad complements the richness of the curry.

Thank you for joining me on this culinary adventure! I hope this recipe for Aloo Keema becomes a beloved staple in your home, just as it has in mine. Cooking is all about sharing joy and creating memories, so gather your loved ones around the table, serve this delicious dish, and watch as it brings smiles all around. Happy cooking, and may your kitchen always be filled with warmth and love!

Aloo Keema (Pakistani Ground Beef and Potato Curry)

Prep Time 10 minutes
Cook Time 30 minutes
Total Time 40 minutes
Servings 4 servings
Calories 350
A flavorful Pakistani curry combining ground beef and potatoes, seasoned with aromatic spices and herbs.

Ingredients

Meat and Vegetables

  • 500 g ground beef (lean or full-fat)
  • 1 piece onion (finely diced)
  • 3 pieces tomatoes (sliced)
  • 2 small potatoes (cut in 2 cm cubes)

Instructions 

  • Heat oil in a pan, sauté onions until light golden, then add water to prevent browning.
  • Add spices (black cardamom, cloves, peppercorns), then tomatoes, ginger, garlic, salt, chili, turmeric, cumin, and coriander. Cover and cook until tomatoes break down.
  • Add ground beef, cook until browned, then pour water, cover, and simmer for 15 minutes until fully cooked.
  • Uncover, fry on high heat to dry excess moisture, then add potatoes and water. Cover and cook until potatoes are tender.
  • Add garam masala, green chilies, coriander, and sliced ginger. Cover briefly, then turn off heat and serve with bread or rice.

Notes

For a drier curry, cook longer to reduce moisture; for a moist curry, add extra water.
Calories: 350kcal
Cost: $12
Course: Main Course
Cuisine: Pakistani
Keyword: ground beef, potato, Spicy

Welcome to Your New Favorite Comfort Food!

Ah, the chicken and vegetable casserole—the ultimate dish that wraps you in warmth and nostalgia, just like a hug from your favorite aunt. If you’re like me, you remember those chilly evenings when a bubbling casserole would emerge from the oven, filling the house with the comforting aromas of home-cooked goodness. This vegetable casserole is not just a meal; it’s a memory maker, a conversation starter, and a delightful way to bring everyone to the table.

In this guide, we will not only dive into the details of the perfect chicken and vegetable casserole recipe but also explore the many reasons why this dish deserves a spot in your weekly meal rotation. So, grab your apron and let’s get cooking!

Why You’ll Love This Recipe

  • Quick and Easy Preparation: With just a few simple steps, you can create a comforting dish that’s perfect for weeknight dinners.
  • Customizable Ingredients: Use whatever vegetables you have on hand or whatever your family loves—this recipe is flexible!
  • Perfect for Leftovers: This casserole tastes even better the next day, making it a great make-ahead option for busy schedules.
  • Kid-Friendly: The creamy texture and cheesy topping are sure to please even the pickiest eaters.
  • Healthy and Wholesome: Packed with vegetables and lean protein, it’s a nourishing meal that brings balance to your table.

Ingredients for Your Cozy Casserole

A warm Chicken and Vegetable Casserole with visible broccoli, carrots, and a creamy sauce, captured in natural light.

Here’s what you’ll need to whip up this delicious chicken and vegetable casserole:

  • 2 cups cooked chicken: Shredded or cubed, this is the protein that makes the dish hearty.
  • 1 cup broccoli florets: Adds a nice crunch and vibrant color.
  • 1 cup carrots, sliced: Sweet and nutritious, they bring a pop of orange.
  • 1 cup bell peppers, diced: Choose your favorite color for visual appeal.
  • 1 can (10.5 oz) cream of mushroom soup: This is your creamy base—feel free to use a low-fat version!
  • 1 cup milk: For added creaminess, you can substitute with almond milk if desired.
  • 1 cup shredded cheddar cheese: The ooey-gooey topping that makes it irresistible.
  • 1 teaspoon garlic powder: Essential for flavor.
  • 1 teaspoon onion powder: Complements the garlic beautifully.
  • Salt and pepper to taste: Always season to your liking.
  • 1 cup cooked rice or pasta: This is optional but adds a nice texture and helps to bulk up the casserole.
  • 1 tablespoon olive oil: Just a drizzle for that extra touch of richness.

Instructions: How to Create Your Casserole Masterpiece

Ready to bring this dish to life? Follow these simple steps:

  1. Preheat your oven to 350°F (175°C).
  2. In a large mixing bowl, combine the cooked chicken, broccoli, carrots, bell peppers, cooked rice or pasta, cream of mushroom soup, milk, garlic powder, onion powder, salt, and pepper. Mix well until everything is evenly coated.
  3. Transfer the mixture into a greased 9×13 inch casserole dish.
  4. Sprinkle the shredded cheddar cheese evenly on top, and drizzle the olive oil over the cheese.
  5. Cover the casserole with aluminum foil and bake for 25 minutes.
  6. Remove the foil and bake for an additional 10-15 minutes, or until the cheese is bubbly and golden.
  7. Let it cool for a few minutes before serving. Enjoy!

Pro Tips for the Perfect Casserole

  • Use Fresh Vegetables: Fresh produce not only enhances the flavor but also boosts the nutritional value of your dish.
  • Mix It Up: Experiment with different vegetables like zucchini, spinach, or peas. The more variety, the better!
  • Cheese Choices: While cheddar is a classic, feel free to mix in mozzarella or gouda for a different flavor profile.
  • Make It Ahead: Prepare your casserole a day in advance and store it in the fridge. Just pop it in the oven when you’re ready to eat!
  • Check for Doneness: Make sure your casserole is heated through and the cheese is melted and bubbly for the best result.
  • Garnish Before Serving: A sprinkle of fresh herbs like parsley or thyme can elevate the dish visually and flavor-wise.
  • Mind the Salt: If using canned soup, be cautious with extra salt, as it can be quite salty already.
  • Use a Meat Thermometer: If you’re unsure about the chicken’s doneness, a meat thermometer should read 165°F (74°C).

Common Mistakes and Troubleshooting

Even the best cooks can have off days. Here are some common pitfalls and how to avoid them:

  • Dry Casserole: Ensure you have enough moisture. If it seems dry, add a splash more milk or broth.
  • Overcooked Vegetables: If you prefer your veggies to have a bit of crunch, add them halfway through the baking process.
  • Cheese Not Melting: Make sure to cover your casserole for the first part of baking to help the cheese melt properly.
  • Flavorless Dish: Always taste before baking and adjust your seasoning accordingly!

Delicious Variations to Try

Feeling adventurous? Here are some variations to make this casserole your own:

  • Mexican Twist: Add black beans, corn, and replace the cheese with pepper jack for a spicy kick.
  • Italian Style: Incorporate diced tomatoes and Italian herbs, and swap the cheddar for mozzarella.
  • Vegetarian Delight: Omit the chicken and double up on the veggies for a hearty vegetarian version. You can use chickpeas for protein.
  • Creamy Ranch Version: Mix in ranch seasoning for a zesty twist that will have everyone asking for the recipe!

Storage and Make-Ahead Instructions

This casserole is perfect for meal prep! Here’s how to store it:

  • Refrigeration: Store leftovers in an airtight container in the fridge for up to 4 days.
  • Freezing: You can freeze the casserole before baking. Just cover tightly and keep for up to 3 months. When ready, thaw overnight in the fridge and bake as directed.
  • Reheating: To reheat, cover the casserole with foil and bake at 350°F (175°C) until heated through, about 20-25 minutes.

Frequently Asked Questions

Got questions? I’ve got answers!

  • Can I use frozen vegetables? Absolutely! Just make sure to thaw and drain them to avoid excess moisture.
  • Is this casserole gluten-free? Yes, as long as you use gluten-free soup and pasta.
  • Can I make it dairy-free? Yes! Substitute with dairy-free cheese and plant-based milk.
  • How can I make it spicier? Add diced jalapeños or red pepper flakes!
  • Can I double this recipe? Of course! Just use a larger baking dish and adjust the baking time accordingly.
  • What can I serve with this casserole? A fresh salad, crusty bread, or steamed vegetables make great sides.
  • How long does it take to bake? It typically takes about 35-40 minutes total.
  • Can I use leftover rotisserie chicken? Yes! It’s a great way to use up leftovers.

Nutrition Tips and Dietary Adaptations

This chicken and vegetable casserole can be a healthy choice with a few tweaks:

  • Lean Protein: Use skinless chicken breast for a lower-fat option.
  • Veggie Power: Load up on colorful vegetables for added vitamins and minerals.
  • Whole Grains: Switch to brown rice or whole wheat pasta for extra fiber.
  • Low-Fat Options: Opt for low-fat cheese and cream of mushroom soup to lighten it up.

Equipment Recommendations

Here’s what you need to get started:

  • Mixing Bowl: A large bowl to combine your ingredients.
  • Casserole Dish: A 9×13 inch dish is perfect for this recipe.
  • Measuring Cups and Spoons: For precise ingredient measurements.
  • Wooden Spoon or Spatula: For mixing everything together.
  • Aluminum Foil: To cover your casserole while baking.

Serving Suggestions

This casserole is a meal in itself, but here are some ideas to round out your dinner:

  • Fresh Salad: A simple green salad with vinaigrette pairs beautifully.
  • Crusty Bread: Serve with warm, crusty bread for dipping.
  • Steamed Vegetables: Add a side of seasonal veggies for extra nutrition.
  • Fruit Salad: A light fruit salad can be a refreshing end to the meal.

Conclusion

Your journey into the world of chicken and vegetable casserole has just begun! I hope this recipe inspires you to create something truly special in your kitchen. Remember, cooking is about exploration and joy, so don’t be afraid to make it your own. Whether you’re feeding a family or enjoying a cozy night in, this casserole is sure to bring a smile to your face. Now, go ahead, grab those ingredients, and let the magic happen!

Chicken and Vegetable Casserole

Prep Time 10 minutes
Cook Time 35 minutes
Total Time 45 minutes
Servings 4 servings
Calories 550
A hearty and cheesy casserole combining tender chicken, fresh vegetables, and rice, baked to perfection.

Ingredients

Protein

  • 2 cups cooked chicken, shredded
  • 1 cup broccoli florets
  • 1 cup carrots, sliced
  • 1 cup bell peppers, diced

Canned Goods

  • 1 can cream of mushroom soup (10.5 oz)
  • 1 cup milk
  • 1 cup shredded cheddar cheese

Spices and Oils

  • 1 teaspoon garlic powder
  • 1 teaspoon onion powder
  • to taste salt and pepper
  • 1 cup cooked rice or pasta
  • 1 tablespoon olive oil

Instructions 

  • Preheat oven to 350°F (175°C).
  • Mix all ingredients except cheese and olive oil in a bowl.
  • Transfer to a greased casserole dish, top with cheese, and drizzle with olive oil.
  • Bake covered for 25 minutes, then uncover and bake 10-15 minutes until bubbly and golden.
  • Let cool briefly before serving.

Notes

You can substitute cooked turkey or add other vegetables for variety.
Calories: 550kcal
Cost: $15
Course: Main Course
Cuisine: American
Keyword: Casserole, Chicken, vegetables

Loved this recipe? Save it to your favorite Pinterest board so you can easily find it later! It’s the perfect way to keep all your sweet ideas in one place. ✨

Eye-level shot of a hearty Chicken and Vegetable Casserole featuring a crunchy cheese topping and vibrant vegetables.

Unleash the Magic of Your Slow Cooker with This Cheesy Broccoli Casserole

Welcome to the ultimate comfort food experience! If you’ve ever found yourself daydreaming about a dish that’s creamy, cheesy, and packed with nutrition, then you’re in the right place. This Crockpot Broccoli Cheese Casserole isn’t just a recipe; it’s a warm hug on a plate. Perfect for busy weeknights or cozy gatherings, this dish transforms humble broccoli into something irresistibly delicious. Get ready to impress your family and friends with minimal effort!

Why You’ll Love This Recipe

Here are five reasons why this Crockpot Broccoli Cheese Casserole should be on your menu:

  • Effortless Preparation: With just a few simple steps, you can have a hearty meal cooking away while you tackle other tasks.
  • Health Meets Indulgence: Broccoli is a powerhouse of nutrients, and when paired with creamy, melted cheese, it becomes a dish everyone will crave.
  • Versatile Ingredients: Customize the recipe to suit your taste by swapping ingredients or adding extra veggies.
  • Perfect for Leftovers: This casserole is just as good, if not better, the next day, making it ideal for meal prep.
  • Kid-Friendly: Even the pickiest eaters will love this cheesy delight, making mealtime a breeze.

Ingredient Breakdown

Let’s dive into what you’ll need to create this delectable dish:

  • 1 can of condensed cream of celery soup (10.75 oz): This creamy base adds flavor and moisture.
  • 2 1/2 cups sharp cheddar cheese (grated and divided): Cheese is the star here, providing that gooey, melty goodness.
  • ½ tsp salt: A pinch to enhance the flavors.
  • ½ tsp pepper: For a touch of warmth and spice.
  • 40 oz. frozen broccoli (about 12 cups, thawed): The hero ingredient that brings nutrition to this dish.
  • 1 ½ cups Ritz crackers (crushed): These add a delightful crunch on top.

Pro Tips for Perfecting Your Casserole

Side view of a delicious broccoli cheese casserole, featuring a golden crust and visible green broccoli.

To ensure your Crockpot Broccoli Cheese Casserole turns out amazing every time, keep these expert tips in mind:

  • Thaw the Broccoli: Make sure your broccoli is thawed and drained well to prevent a watery casserole.
  • Mix Well: Ensure all ingredients are combined thoroughly for an even distribution of flavors.
  • Layering Technique: Consider layering the cheese and crackers to create a more textured topping.
  • Adjust Cooking Time: Depending on your slow cooker, cooking times may vary. Keep an eye on it!
  • Experiment with Cheeses: Try different cheeses like Gruyere or Monterey Jack for a unique twist.
  • Add Protein: Mix in cooked chicken or ham for a heartier meal.
  • Spice It Up: A dash of cayenne or red pepper flakes can elevate the flavor profile.
  • Garnish: Fresh herbs like parsley or chives can add a pop of color and freshness.

Avoiding Common Mistakes

Even the best cooks can make mistakes. Here’s how to avoid some common pitfalls:

  • Overcooking: Keep an eye on your casserole; overcooking can lead to mushy broccoli.
  • Too Much Liquid: Ensure the broccoli is well-drained to avoid a soupy texture.
  • Skipping the Cheese: Don’t skimp on the cheese! It’s essential for that rich flavor.
  • Ignoring Variations: Feel free to experiment! Sticking strictly to the recipe may limit your culinary creativity.

Variations to Spice Up Your Casserole

Feel like getting adventurous? Here are some delicious variations to try:

  • Broccoli and Cauliflower Medley: Replace half of the broccoli with cauliflower for a different texture.
  • Mexican Twist: Stir in black beans, corn, and a sprinkle of taco seasoning for a fiesta in your slow cooker.
  • Herb Infusion: Add fresh herbs like thyme or rosemary for an aromatic touch.
  • Buffalo Broccoli Casserole: Mix in buffalo sauce for a spicy kick that pairs wonderfully with the cheese.

Storage and Make-Ahead Instructions

This casserole is perfect for meal prep or entertaining:

  • Make Ahead: You can prepare the casserole a day in advance. Simply assemble it in the slow cooker, cover, and refrigerate. When ready to cook, just pop it in the slow cooker.
  • Storage: Store leftovers in an airtight container in the fridge for up to 3 days. Reheat in the microwave or oven until warmed through.

Frequently Asked Questions

Here are some common questions about this Crockpot Broccoli Cheese Casserole:

  • Can I use fresh broccoli instead of frozen? Yes, just blanch it first to ensure it cooks evenly.
  • How can I make this dish gluten-free? Substitute Ritz crackers with gluten-free breadcrumbs or crushed gluten-free crackers.
  • Is there a vegan version? Absolutely! Use vegan cheese and a plant-based cream soup to make it dairy-free.
  • How long does it take to cook? Cook on LOW for 5 hours or HIGH for 2 1/2 hours.
  • Can I freeze the casserole? Yes, but it’s best to freeze before cooking. Thaw and then cook as directed.
  • What can I serve with this casserole? Pair it with a simple green salad or roasted chicken for a complete meal.
  • How do I know when it’s done? The casserole should be bubbly and the cheese melted. A fork should easily pierce through the broccoli.
  • Can I double the recipe? Yes, just ensure your slow cooker is large enough to accommodate the increased volume.

Nutritional Tips and Dietary Adaptations

Making this casserole healthier is easier than you think:

  • Low-Fat Cheese: Use low-fat cheese to reduce calories without sacrificing flavor.
  • More Veggies: Add in other vegetables like carrots or bell peppers for added nutrients.
  • Protein Boost: Incorporate beans or chicken to enhance the protein content.
  • Whole Grain Crackers: Use whole grain or seed-based crackers for extra fiber.

Essential Equipment for Success

Here’s what you’ll need to whip up this delicious casserole:

  • Slow Cooker: A reliable slow cooker is essential for this dish. Choose one with a non-stick interior for easy cleanup.
  • Mixing Bowl: Use a large bowl for mixing the ingredients thoroughly.
  • Measuring Cups and Spoons: Precision is key to achieving the perfect balance of flavors.
  • Spatula: A sturdy spatula will help you mix and transfer the ingredients smoothly.

Serving Suggestions

Ready to serve your masterpiece? Here are some ideas to elevate your dining experience:

  • Family Style: Serve directly from the slow cooker for a rustic, family-style meal.
  • Garnish: Sprinkle with fresh herbs or a drizzle of olive oil for an appealing finish.
  • Pair with Proteins: Serve alongside grilled chicken, fish, or a hearty salad for a balanced plate.

Cooking can be a little magical, and this Crockpot Broccoli Cheese Casserole embodies that spirit perfectly. It’s the kind of dish that will make your kitchen feel like home. So grab your slow cooker, gather your ingredients, and let’s create something unforgettable together! You’re just a few steps away from a cheesy delight that will have everyone asking for seconds. Happy cooking!

Crockpot Broccoli Cheese Casserole

Prep Time 10 minutes
Cook Time 5 hours
Total Time 5 hours 10 minutes
Servings 8 servings
Calories 350
A creamy, cheesy broccoli casserole cooked effortlessly in the crockpot, perfect for a comforting family meal.

Ingredients

Condensed Cream of Celery Soup

  • 2.5 cups sharp cheddar cheese (grated and divided)
  • 0.5 tsp salt
  • 0.5 tsp pepper
  • 40 oz frozen broccoli (about 12 cups, thawed)
  • 1.5 cups Ritz crackers (crushed)

Instructions 

  • Mix soup, 2 cups cheese, salt, and pepper in a large bowl.
  • Add broccoli and stir to coat evenly.
  • Transfer mixture to slow cooker.
  • Top with crushed crackers and remaining cheese.
  • Cook on LOW for 5 hours or HIGH for 2.5 hours.

Notes

For a crunchier topping, broil the casserole for a few minutes before serving.
Calories: 350kcal
Cost: $15
Course: Side Dish
Cuisine: American
Keyword: Broccoli, cheese

Welcome to Your New Favorite Recipe: Ground Turkey with Potatoes

Ah, the comforting embrace of a one-pan meal! If you’re on the hunt for a recipe that is not just easy but also deliciously satisfying, you’ve landed in the right place. This Ground Turkey with Potatoes dish is a straightforward yet heartwarming combination of flavors that will have your loved ones asking for seconds and thirds. It’s a fantastic way to incorporate ground turkey into your dinner rotation, and the best part? It all comes together in one skillet, making cleanup a breeze. Grab your apron, and let’s dive into this culinary adventure!

Why You’ll Love This Recipe

This dish is more than just another weeknight meal; it’s a delightful experience! Here are five reasons you’ll adore it:

  • One-Pan Wonder: All the ingredients cook together beautifully, which means you’ll spend less time scrubbing pots and more time enjoying your meal.
  • Family-Friendly: Even picky eaters will be delighted by the savory turkey flavors combined with tender potatoes.
  • Budget-Conscious: Utilizing pantry staples like potatoes and spices, this meal is easy on the wallet while still being filling.
  • Quick and Easy: With a cooking time of just about 30 minutes, it’s perfect for those busy weeknights when you want something warm and comforting.
  • Customizable: Feel free to add any veggies you have on hand—this dish is as flexible as your imagination allows!

Ingredients You’ll Need

Let’s gather our ingredients! Here’s what you’ll need to whip up this scrumptious meal:

  • 1 lb (450g) ground turkey: A lean protein that’s not only versatile but also healthy.
  • 2 tbsp olive oil: This adds richness and helps to sauté the aromatics perfectly.
  • 1 medium onion, finely chopped: A must for that foundational flavor.
  • 2 cloves garlic, minced: Because garlic makes everything better.
  • 2 cups diced potatoes: They soak up all the delicious juices and provide that hearty texture.
  • 1 cup frozen peas: A pop of color and nutrition that complements the dish.
  • 1 tsp ground cumin: For a warm and earthy flavor.
  • 1/2 tsp paprika: Adds a subtle smokiness.
  • Salt and pepper, to taste: Essential for seasoning.
  • 1/4 cup chopped fresh cilantro (optional): A fresh herb garnish that lifts the dish.

How to Make Ground Turkey with Potatoes

Juicy ground turkey mixed with golden potatoes and green peas in a skillet, viewed from the side.

Ready to cook? Let’s walk through the steps to create this delicious meal!

Step 1: Sauté the Aromatics

Heat the olive oil in a large skillet over medium heat. As the oil shimmers, toss in the chopped onion. Stir occasionally until it softens and turns translucent—about 5 minutes. The smell of onions cooking always reminds me of cozy kitchens and family conversations. Add the minced garlic, stirring just until it releases its aroma, about 1 minute.

Step 2: Brown the Turkey

Crumble the ground turkey into the skillet. With your spatula, break it up as it cooks. You’ll notice it go from pink to golden-brown within 7 to 10 minutes. This is where the dish starts to build its heartiness. Sprinkle in the cumin, paprika, salt, and pepper, stirring well so every bit of turkey is kissed by the spices.

Step 3: Add the Potatoes

Stir in the diced potatoes, making sure they’re evenly distributed. Cover the skillet and let it cook, stirring every few minutes, until the potatoes are tender—about 15 minutes. The potatoes soak up the flavorful juices from the turkey, transforming into little golden gems.

Step 4: Toss in the Peas

Add the frozen peas to the skillet, stirring them in gently. Let everything cook for another 5 minutes, just until the peas are warmed through. Their pop of green color adds brightness and freshness.

Step 5: Garnish and Serve

If you love fresh herbs like I do, sprinkle chopped cilantro over the top right before serving. Spoon the savory turkey and potatoes into bowls and serve warm—maybe with a slice of crusty bread or over fluffy rice if you’re feeling extra cozy.

Pro Tips for Perfecting Your Dish

Before you start cooking, here are some expert insights to ensure your ground turkey with potatoes turns out perfectly:

  • Uniform potato sizes: Cut your potatoes into similar-sized pieces for even cooking.
  • Don’t rush the browning: Allow the turkey to brown well for deeper flavor; it’s worth the wait!
  • Feel free to swap: If you don’t have peas, try green beans or corn for a different twist.
  • Spice it up: Add a pinch of red pepper flakes if you like a little heat in your meals!
  • Make it creamy: Stir in a splash of cream or sour cream at the end for a richer texture.
  • Fresh herbs: Besides cilantro, try parsley or green onions for additional flavor.
  • Meal prep friendly: Make a double batch and store leftovers in the fridge for easy lunches.
  • Freezer-friendly: Portion out servings and freeze for quick dinners later on.

Common Mistakes and Troubleshooting

Even the best of us can encounter a few hiccups in the kitchen. Here are some common pitfalls and how to avoid them:

  • Turkey not browning: If your turkey isn’t browning, it might be overcrowded in the pan. Cook in batches if needed.
  • Potatoes not tender: If the potatoes are still hard after cooking, cover the skillet and give them a bit more time.
  • Too dry: If the dish seems dry, add a splash of broth or water during cooking to keep it moist.
  • Too bland: Always taste as you go! Adjust seasonings according to your preference.

Variations to Try

This dish is so flexible! Here are a few variations you might enjoy:

  • Mexican Style: Swap out spices for taco seasoning and add black beans and corn.
  • Italian Twist: Add diced tomatoes, Italian herbs, and finish with mozzarella cheese.
  • Breakfast Hash: Stir in some scrambled eggs and serve with avocado on top.
  • Vegetarian Version: Substitute ground turkey with lentils or crumbled tofu for a meatless option.

Storage and Make-Ahead Instructions

This dish holds up beautifully, making it perfect for meal prep!

  • Refrigeration: Store leftovers in an airtight container in the fridge for up to 4 days.
  • Freezing: Portion into freezer-safe containers for up to 3 months. Thaw overnight in the fridge before reheating.
  • Reheating: Warm in a skillet over medium heat, adding a splash of broth or water to prevent drying out.

Comprehensive FAQ

Got questions about this dish? Here are some answers to common queries:

  • Can I use ground beef instead of turkey? Absolutely! Ground beef will work just as well, though it may be a bit richer.
  • What can I serve with this dish? This meal pairs wonderfully with a side salad or some crusty bread.
  • Is this a Whole30-compliant dish? Yes, if you omit the peas and use compliant seasoning.
  • Can I add more vegetables? Yes! Feel free to toss in your favorites like bell peppers or zucchini.
  • How do I know when the turkey is fully cooked? The turkey should be browned throughout with no pink remaining.
  • Can I make this dish in advance? Yes, it’s great for meal prep and can be stored in the fridge or freezer.
  • What if I don’t have cumin? You can substitute with chili powder or just leave it out for a lighter flavor.
  • How spicy is this dish? It’s mild, but you can easily adjust the spice level by adding chili flakes or hot sauce.

Nutrition Tips and Dietary Adaptations

This dish is naturally nutritious, but here are some tips to make it even healthier:

  • Protein boost: Add a can of beans for extra protein and fiber.
  • Low-carb option: Substitute potatoes with cauliflower or sweet potatoes for a lower-carb meal.
  • Gluten-free: This recipe is naturally gluten-free, just be sure to check your spices.
  • Dairy-free: Simply omit any cheese or dairy products for a dairy-free meal.

Equipment Recommendations

To make your cooking experience even smoother, here’s what I recommend having on hand:

  • A large skillet: Opt for a non-stick or cast-iron skillet for even cooking.
  • Spatula: A sturdy spatula will help you break up the turkey and stir everything together.
  • Chopping board and knife: Essential for prepping your ingredients with ease.

Serving Suggestions

When it comes to serving this hearty meal, here are some delicious ideas:

  • With Crusty Bread: A slice of warm, crusty bread is perfect for soaking up all that flavor.
  • Over Rice: Serve it over fluffy rice or quinoa for a complete meal.
  • With a Side Salad: A fresh garden salad balances the heartiness of the dish.
  • Garnished with Avocado: Slices of creamy avocado on top add a delightful richness.

So there you have it! A comprehensive look at creating a meal that warms the soul and fills the belly. Cooking should be a joyful experience, so I encourage you to make this recipe your own by adding your personal touches. If you’ve made it this far, thank you for joining me in this culinary journey. Now, it’s time to gather your loved ones, serve this delightful dish, and create some wonderful memories around the dinner table!

Ground Turkey with Potatoes: A Hearty Skillet Classic

Prep Time 10 minutes
Cook Time 30 minutes
Total Time 40 minutes
Servings 4 servings
Calories 350
A comforting and flavorful skillet dish combining ground turkey, potatoes, and peas, perfect for a quick and satisfying meal.

Ingredients

Meat

  • 1 lb ground turkey
  • 2 tbsp olive oil
  • 1 medium onion, finely chopped
  • 2 cloves garlic, minced
  • 2 cups diced potatoes
  • 1 cup frozen peas
  • 1 tsp ground cumin
  • 1/2 tsp paprika
  • to taste Salt and pepper
  • 1/4 cup chopped fresh cilantro (optional)

Instructions 

  • Sauté the onion and garlic in olive oil until translucent, about 5 minutes.
  • Add ground turkey, cook until browned, then stir in cumin, paprika, salt, and pepper.
  • Mix in diced potatoes, cover, and cook until tender, about 15 minutes.
  • Stir in frozen peas and cook for another 5 minutes until warmed through.
  • Garnish with cilantro if desired, then serve warm.

Notes

For extra flavor, add a squeeze of lemon or a dash of hot sauce before serving.
Calories: 350kcal
Cost: $12
Course: Main Course
Cuisine: American
Keyword: ground turkey

Welcome to My Kitchen: The Heart of Comfort Food

Ah, the comforting embrace of a warm, creamy casserole! If you’re searching for a dish that wraps you in a blanket of flavor, look no further than my Creamy Italian Sausage Casserole. This hearty meal not only fills your belly but also warms your heart, making it perfect for gatherings, weeknight dinners, or even a cozy night in. With savory Italian sausage, rich cream, and a cheesy topping, this casserole is sure to become a staple in your home.

As we dive into this recipe, I’ll share all my secrets and tips, ensuring that your casserole turns out as delightful as mine. Ready your spatula and let’s make magic happen in your kitchen!

Why You’ll Love This Recipe

  • Comfort in Every Bite: The combination of creamy sauce and savory sausage creates a dish that feels like a warm hug on a chilly night.
  • Quick and Easy: This casserole comes together in under an hour, making it a go-to for busy weeknights.
  • One-Pan Wonder: Minimal cleanup is required since everything cooks in one baking dish. Less time washing up means more time enjoying your meal!
  • Versatile Ingredients: You can easily swap in your favorite veggies or cheeses, making it adaptable for different tastes and dietary needs.
  • Feeds a Crowd: This dish is perfect for potlucks and family gatherings, ensuring everyone leaves the table happy and satisfied.

Ingredients Breakdown

Let’s gather our ingredients! Here’s what you’ll need:

  • 1 pound Italian sausage (casings removed): Use spicy or mild based on your preference.
  • 12 oz short pasta (penne or rigatoni, cooked and drained): This dish works best with pasta that holds sauce well.
  • 1 onion (chopped): Adds sweetness and depth to the dish.
  • 3 cloves garlic (minced): Garlic is a must for that aromatic flavor.
  • 1 can crushed tomatoes (28 oz): Provides a robust base for the sauce.
  • 1/2 cup heavy cream: This is where the creaminess comes from!
  • 1 cup shredded mozzarella: For that gooey, cheesy topping.
  • 1/2 cup grated Parmesan: Adds a savory, nutty flavor.
  • 1 tablespoon olive oil: For cooking the sausage and veggies.
  • 1 teaspoon Italian seasoning: A blend of herbs that brings the flavors together.
  • 1/4 teaspoon red pepper flakes (optional): If you like a little heat!
  • Salt and pepper (to taste): Essential for enhancing all the flavors.

Pro Tips for Casserole Mastery

A delicious freshly baked creamy Italian sausage casserole displaying layers of pasta and sausage.

Here are my tried-and-true tips to elevate your casserole game:

  • Don’t Overcook the Pasta: It should be al dente since it will continue to cook in the oven.
  • Use Fresh Ingredients: The fresher your ingredients, the more vibrant your dish will be.
  • Layer Wisely: Mix half the cheese into the pasta and sauce, then top with the rest for a beautiful presentation.
  • Broil for a Crispy Top: Broiling the casserole for the last 2 minutes gives it that delightful golden finish.
  • Garnish with Fresh Herbs: A sprinkle of parsley or basil right before serving brightens the dish.
  • Make it Ahead: Assemble the casserole a day in advance and bake it before serving for an easy meal.
  • Customize Your Cheese: Try adding different cheeses like provolone or gouda for a unique twist.
  • Don’t Skip the Resting Time: Allow the casserole to sit for a few minutes after baking. This helps it set and makes serving easier.

Avoid These Common Mistakes

Even the best chefs make mistakes! Here’s how to avoid common pitfalls:

  • Overcrowding the Pan: If your baking dish is too small, the casserole won’t cook evenly. Use a larger dish if necessary.
  • Skipping the Seasoning: Always taste your sauce as you go. Don’t be afraid to adjust the seasoning!
  • Ignoring Texture: A perfect casserole should have a creamy sauce but also a bit of texture from the sausage and pasta.
  • Not Enough Sauce: Ensure there’s enough sauce to coat the pasta well; otherwise, it may dry out in the oven.

Delicious Variations to Try

Feel free to experiment! Here are some tasty variations:

  • Vegetarian Option: Substitute the sausage with sautéed mushrooms and spinach for a hearty vegetarian casserole.
  • Mexican Twist: Add black beans, corn, and taco seasoning for a zesty Mexican version.
  • Cheesy Broccoli Addition: Stir in cooked broccoli florets before baking for a nutritious boost.
  • Gluten-Free Adaptation: Use gluten-free pasta and check labels on your sausage and cream.

Storage and Make-Ahead Instructions

Planning ahead? Here’s how to store and reheat:

  • Refrigerator Storage: Store leftover casserole in an airtight container for up to 3 days.
  • Freezing: Assemble the casserole but don’t bake it. Wrap tightly in foil and freeze for up to 3 months. Bake directly from the freezer, adding 10-15 minutes to the cooking time.
  • Reheating: Cover with foil and reheat in a 350°F oven until warmed through, about 20-30 minutes.

Frequently Asked Questions

Got questions? I’ve got answers! Here are some FAQs:

  • Can I use spicy sausage? Absolutely! Adjust the seasoning based on your heat preference.
  • Does it work without cream? Yes, you can substitute with Greek yogurt or a non-dairy cream for a lighter option.
  • What if I don’t have mozzarella? Feel free to swap in any melty cheese you have on hand!
  • Can I add more vegetables? Definitely! Bell peppers, zucchini, or kale are excellent additions.
  • How do I make this dairy-free? Use plant-based sausage and a dairy-free cream alternative.
  • Is this recipe kid-friendly? Yes! The cheesy goodness is usually a hit with kids.
  • Can I prepare this casserole ahead of time? Yes, you can assemble it and refrigerate it for up to a day before baking.
  • How do I know when it’s done? Look for a bubbly, golden top and ensure the internal temperature reaches 165°F.

Nutritional Tips and Dietary Adaptations

Whether you’re watching your diet or accommodating special needs, here are some tips:

  • Low-Carb Version: Swap pasta for zucchini noodles or cauliflower rice to cut carbs.
  • High-Protein Option: Add cooked lentils or chickpeas for an extra protein boost.
  • Low-Fat Adaptation: Use lean turkey sausage and replace heavy cream with low-fat milk.

Essential Equipment Recommendations

Before we wrap up, let’s talk tools! Here’s what you need:

  • 9×13 Baking Dish: A must-have for casseroles—choose a glass or ceramic for even cooking.
  • Large Skillet: For browning the sausage and sautéing the vegetables.
  • Measuring Cups and Spoons: Precision is key for the best results.
  • Spatula: For mixing and serving the casserole with ease.

Serving Suggestions

Now that your casserole is ready, here are some delicious sides to serve:

  • Garlic Bread: Perfect for scooping up all that creamy goodness.
  • Fresh Salad: A crisp green salad balances the richness of the casserole.
  • Roasted Vegetables: A side of seasonal veggies adds nutrition and flavor.

Conclusion: A Dish to Cherish

There you have it—a cozy embrace in a dish! My Creamy Italian Sausage Casserole is not just a meal; it’s a celebration of flavors that brings loved ones together. I hope this recipe fills your home with warmth and joy. Remember, cooking is all about experimenting and making it your own, so feel free to adjust ingredients to suit your taste. Happy cooking, and may your kitchen always be filled with love and laughter!

Creamy Italian Sausage Casserole

Prep Time 15 minutes
Cook Time 30 minutes
Total Time 45 minutes
Servings 6 servings
Calories 650
A hearty and creamy baked pasta dish featuring savory Italian sausage and melted cheeses, perfect for a comforting family dinner.

Ingredients

Meat

  • 1 pound Italian sausage (casings removed)
  • 12 oz short pasta (penne or rigatoni, cooked and drained)
  • 1 whole onion (chopped)
  • 3 cloves garlic (minced)
  • 1 can crushed tomatoes (28 oz)
  • 1/2 cup heavy cream
  • 1 cup shredded mozzarella
  • 1/2 cup grated Parmesan
  • 1 tablespoon olive oil
  • 1 teaspoon Italian seasoning
  • 1/4 teaspoon red pepper flakes (optional)
  • to taste salt and pepper

Instructions 

  • Preheat oven to 375°F (190°C). Grease a 9x13 inch baking dish.
  • Cook pasta until just under al dente, then drain.
  • In a skillet, heat olive oil. Add sausage, onions, and garlic; cook until browned.
  • Stir in crushed tomatoes, cream, Italian seasoning, red pepper flakes, salt, and pepper; simmer 5 minutes.
  • Mix cooked pasta with sauce, half of mozzarella, and Parmesan. Transfer to baking dish, top with remaining mozzarella, and bake 20–25 minutes until bubbly.

Notes

For extra flavor, garnish with fresh parsley before serving.
Calories: 650kcal
Cost: $15
Course: Main Course
Cuisine: Italian
Keyword: cheese, pasta, sausage