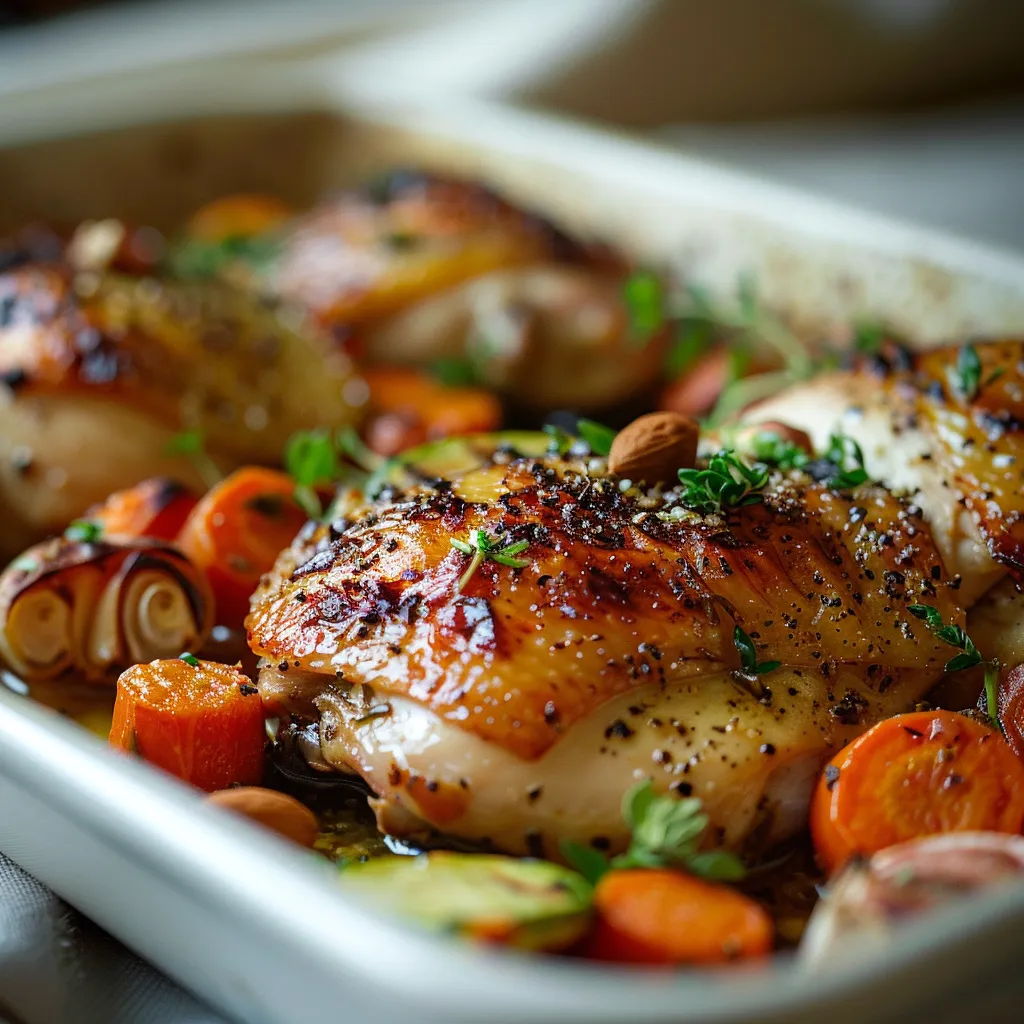
Author

Ava

Browsing

Welcome to Your Next Kitchen Adventure!

Hey there! I’m Ava, and I’m thrilled you’ve joined me on this culinary journey. Today, we’re diving into a dish that’s a cozy hug on a plate: my Quick Ground Turkey Orzo Recipe. This delightful blend of tender orzo, flavorful ground turkey, and vibrant broccoli is not just a meal—it’s a celebration of flavors that feels like home. Perfect for those busy weeknights, this dish is going to impress not just your taste buds, but also anyone lucky enough to share it with you.

Let’s get into why this turkey orzo is exactly what your dinner table needs. As we whip up this comforting and hearty meal, I’ll guide you through every step, share my favorite tips, and even sprinkle in a bit of kitchen wisdom along the way. So, pull up a chair, grab your spatula, and let’s make some magic happen!

Why You’ll Love This Recipe

  • Quick & Easy: Ready in under 30 minutes, this one-pan meal is perfect for busy evenings when you want something homemade but don’t have hours to spend in the kitchen.
  • Nutritious & Wholesome: Packed with extra lean ground turkey and fresh broccoli, this dish delivers a hearty dose of protein and veggies, making it a balanced meal.
  • One-Pan Convenience: Everything cooks in the same pan, which means less cleanup and more time to enjoy your evening. Who doesn’t love that?
  • Kid-Friendly: The creamy texture and mild flavors make this dish a hit with the little ones (and the not-so-little ones!). Plus, it’s a sneaky way to get them to eat their veggies.
  • Versatile Substitutions: Easily customize this recipe with your favorite ingredients or pantry staples. Have some leftover veggies? Toss them in!

Ingredient Breakdown

Getting to know your ingredients is key to creating a dish that makes you say “Wow!” Here’s what you’ll need for this ground turkey orzo:

  • 12 ounces of broccoli: Fresh or frozen, this adds a nice crunch and color. You can substitute with green beans or spinach if you prefer.
  • 1 tablespoon olive oil: For sautéing. Feel free to use avocado oil for a different flavor profile.
  • 1 pound extra lean ground turkey: Lean protein that cooks up tender and flavorful. Ground chicken or beef works too!
  • 1 and 1/3 cups orzo: This pasta adds a delightful texture. If you’re avoiding gluten, try a gluten-free orzo.
  • 2 tablespoons lemon pepper seasoning: Brightens up the dish. You can swap this for Italian seasoning or a pinch of salt and pepper.
  • 2 tablespoons dijon mustard: Adds a tangy depth. Feel free to omit if you’re not a fan.
  • 1/4 cup lemon juice: Freshly squeezed is best! It adds a zesty kick.
  • 2 and 1/2 cups chicken broth: Use homemade if you have it! Vegetable broth can be a great substitute.
  • 2 tablespoons butter: For richness. You can use olive oil for a lighter option.
  • 1 cup milk: Adds creaminess; dairy-free milk works too!
  • 2 ounces shredded parmesan: For that cheesy finish. Nutritional yeast is a tasty dairy-free alternative.
  • Red pepper flakes: To serve, for those who enjoy a little heat!

Pro Tips for Success

Juicy ground turkey orzo dish garnished with shredded parmesan and red pepper flakes.
  • Prep Ahead: Chop your veggies and measure out your ingredients before you start cooking to make the process smoother.
  • Don’t Overcook the Orzo: Follow package instructions for al dente orzo; it will continue to cook in the skillet.
  • Adjust Seasoning: Always taste your dish as you go! Feel free to add more lemon juice or seasoning to suit your taste.
  • Let It Rest: After cooking, let the dish sit for a few minutes before serving. This helps the flavors meld together beautifully.
  • Experiment with Proteins: Ground turkey is fantastic, but don’t hesitate to try ground chicken or even crumbled tofu for a vegetarian twist.
  • Garnish Generously: Fresh herbs like parsley or basil add a lovely touch. Plus, they make your dish look extra fancy!
  • Save Some Broth: Keep a little extra chicken broth on hand to adjust the consistency if needed before serving.
  • Make it Cheesy: Stir in more cheese right before serving for a creamy, indulgent finish.

Avoiding Common Mistakes

Even seasoned cooks can run into hiccups in the kitchen. Here are some common pitfalls and how to avoid them:

  • Overcrowding the Pan: If your skillet is too crowded, your turkey won’t brown properly. Cook it in batches if necessary.
  • Forgetting to Season: Don’t skip the seasoning! It’s vital for elevating the flavors of your dish.
  • Rushing the Cooking Process: Take your time with each step, especially sautéing the aromatics. This develops the base of flavor for your dish.
  • Neglecting Texture: Keep an eye on the orzo; you want it tender but not mushy. Timing is everything!

Delicious Variations

Feeling adventurous? Try one of these fun variations to mix things up:

  • Spicy Turkey Orzo: Add diced jalapeños or more red pepper flakes for a spicy kick.
  • Vegetable Medley: Toss in bell peppers, zucchini, or carrots for a colorful veggie boost.
  • Herbed Turkey Orzo: Stir in fresh herbs like dill or thyme for an aromatic twist.
  • Creamy Mushroom Orzo: Sauté some mushrooms with the turkey for an earthy flavor.

Storage & Make-Ahead Instructions

This dish is perfect for meal prep! Here’s how to store it:

  • Refrigeration: Store in an airtight container in the fridge for up to 3-4 days. The flavors will deepen as it sits!
  • Freezing: You can freeze leftovers for up to 3 months. Just be sure to cool it completely before transferring it to a freezer-safe container.
  • Reheating: When reheating, add a splash of chicken broth or milk to loosen it up. Microwave or heat on the stove until warmed through.

Comprehensive FAQ

  • Can I make this recipe dairy-free? Absolutely! Substitute the milk and butter with plant-based alternatives, and skip the cheese.
  • How can I make this dish vegetarian? Swap the ground turkey for crumbled tofu or lentils, and use vegetable broth instead.
  • What can I use instead of orzo? Try rice, quinoa, or any small pasta if orzo isn’t available.
  • Can I add more protein? Yes! Feel free to mix in beans or chickpeas for an extra protein boost.
  • How long does this dish take to make? From start to finish, you’re looking at about 30 minutes!
  • Can I make this in advance? Definitely! Prepare it ahead and store it in the fridge or freezer for later.
  • What’s the best way to serve this dish? Garnish with fresh herbs, a sprinkle of cheese, and a wedge of lemon for an extra pop of flavor.
  • Are there any gluten-free options? Use gluten-free orzo or substitute with quinoa or rice for a gluten-free version.

Nutritional Tips & Dietary Adaptations

Balancing flavor and nutrition is key. Here are a few tips:

  • Increase Fiber: Add beans or legumes to boost fiber content.
  • Lower Sodium: Use low-sodium chicken broth and season to taste to control sodium levels.
  • Healthy Fats: Opt for olive oil instead of butter for a heart-healthy choice.
  • Whole Grains: If you want to make the dish even healthier, look for whole-grain orzo options.

Equipment Recommendations

Having the right tools makes cooking a breeze. Here’s what you’ll need:

  • Large Skillet: A good quality skillet is essential for even cooking.
  • Wooden Spoon: Perfect for stirring without scratching your pan.
  • Measuring Cups and Spoons: Accuracy is key in cooking—especially with seasonings!
  • Sharp Knife: For chopping veggies quickly and safely.

Serving Suggestions

This ground turkey orzo is a fantastic standalone dish, but here are some ideas to elevate your meal:

  • Pair with a Salad: A simple green salad with lemon vinaigrette complements the richness of the orzo beautifully.
  • Serve with Crusty Bread: A slice of crusty bread is perfect for soaking up any leftover sauce.
  • Wine Pairing: A crisp white wine or a light red pairs well with the flavors of this dish.

Conclusion

And there you have it, my friend! A Quick Ground Turkey Orzo Recipe that’s as easy to make as it is delightful to eat. I hope you find as much joy in cooking and sharing this dish as I do. Remember, cooking is all about exploration and enjoying the process. So, don’t be afraid to make it your own! Pull out those extra veggies, try a new spice, or share it with someone special. Happy cooking, and may your kitchen always be filled with love and laughter!

Quick Ground Turkey Orzo Recipe

Prep Time 10 minutes
Cook Time 15 minutes
Total Time 25 minutes
Servings 4 servings
Calories 650
A flavorful and quick-to-make dish combining lean ground turkey, orzo pasta, and fresh lemon for a satisfying meal.

Ingredients

Vegetables

  • 12 ounces broccoli
  • 1 tablespoon olive oil
  • 1/2 tablespoon olive oil (additional for cooking)

Meat and Pasta

  • 1 pound extra lean ground turkey
  • 1 1/3 cups orzo (220 grams)
  • 2 tablespoons lemon pepper seasoning
  • 2 tablespoons dijon mustard
  • 1/4 cup lemon juice (about 1 large lemon)
  • 1 cup chicken broth
  • 1 1/2 cups chicken broth (for a total of 2 1/2 cups)
  • 2 tablespoons butter
  • 1 cup milk
  • 2 ounces shredded parmesan

Red pepper flakes

  • to serve Red pepper flakes

Instructions 

  • Cook broccoli until tender, then set aside.
  • In a large skillet, heat olive oil and cook ground turkey until browned.
  • Add orzo, lemon pepper, dijon mustard, lemon juice, and broth; simmer until orzo is cooked.
  • Stir in butter, milk, and parmesan; cook until creamy.
  • Mix in cooked broccoli, season with red pepper flakes, and serve.

Notes

For extra flavor, add fresh herbs or a squeeze of lemon before serving.
Calories: 650kcal
Cost: $15
Course: Main Course
Cuisine: American
Keyword: ground turkey

Why This Chicken and Green Beans Recipe Will Be Your New Go-To

If you’re anything like me, you know that some meals have the power to transport you back to cozy kitchens, family gatherings, and laughter-filled dinners. This Quick Chicken Breast and Green Beans Recipe is one of those meals—a delightful combination of simplicity and flavor that’s perfect for busy weeknights. In just 30 minutes, you can whip up a dish that’s both nourishing and satisfying, making it the hero of your dinner table.

Let’s dive into why this recipe is not just another chicken dish but a flavor bomb that will make your taste buds dance!

Why You’ll Love This Recipe

  • Quick and Easy: Ready in just 30 minutes, this dish is perfect for those hectic evenings when time is of the essence.
  • One-Pan Wonder: Everything cooks in one skillet, which means less cleanup and more time to relax after dinner.
  • Healthy and Nutritious: Packed with lean protein from chicken breasts and fiber-rich green beans, this recipe is a wholesome choice for your family.
  • Customizable: From adding spices to swapping out veggies, you can easily adapt this dish to fit your taste preferences.
  • Impressive Flavor: The combination of garlic, olive oil, and a squeeze of lemon elevates this dish from simple to sensational!

Ingredient Breakdown

Deliciously cooked chicken breast next to vibrant green beans, softly illuminated.

Here’s what you’ll need to gather for this amazing chicken and green beans dish:

  • 2 boneless, skinless chicken breasts: Look for chicken that is fresh and firm. If you prefer, you can use thighs for a juicier option.
  • 2 cups fresh green beans: Trimmed and ready to go! If you’re in a pinch, frozen green beans work just as well—just make sure to thaw and drain them first.
  • 2 tablespoons olive oil: A good quality olive oil enhances the flavor. You can also substitute with avocado oil for a different twist.
  • 2 garlic cloves, minced: Fresh garlic adds a punch of flavor. If you’re in a hurry, garlic powder can be a quick alternative.
  • Salt and pepper to taste: Simple seasonings that elevate the dish.
  • 1 teaspoon lemon juice (optional): A splash of acidity brightens up the flavors. Feel free to omit if you prefer a more straightforward taste.

Step-by-Step Cooking Instructions

Ready to get cooking? Here’s how to make your chicken and green beans shine:

  1. Heat 1 tablespoon of olive oil in a large skillet over medium heat.
  2. Season the chicken breasts with salt and pepper, and add them to the skillet. Cook for about 6-7 minutes on each side, until golden brown and cooked through.
  3. Remove the chicken from the skillet and set aside to rest.
  4. In the same skillet, add the remaining tablespoon of olive oil and minced garlic. Sauté for about 30 seconds until fragrant—don’t let it burn!
  5. Add the green beans to the skillet and sauté for 5-6 minutes until tender but still crisp.
  6. Season the green beans with salt, pepper, and lemon juice if using.
  7. Slice the chicken and serve it alongside the sautéed green beans. Enjoy!

Expert Tips for Success

  • Perfectly Cooked Chicken: Use a meat thermometer to ensure your chicken reaches an internal temperature of 165°F for safety.
  • Keep It Crisp: Avoid overcooking the green beans—aim for that perfect crisp-tender texture for maximum flavor.
  • Versatile Sauce: Want a saucier dish? Add a splash of soy sauce or broth to the pan after cooking the green beans for a quick sauce.
  • Meal Prep Friendly: Cook an extra batch and store for quick meals throughout the week. Just reheat and enjoy!
  • Seasoning Variations: Experiment with spices like paprika, cumin, or Italian herbs to switch up the flavor profile.
  • Garnish for Presentation: A sprinkle of sesame seeds or freshly chopped parsley can add a lovely touch to your dish.

Common Mistakes and Troubleshooting

We all have our cooking mishaps, and this recipe is no different! Here are some common issues and how to avoid them:

  • Overcooked Chicken: If your chicken is dry, it’s likely been overcooked. Keep an eye on the cooking time and use a thermometer.
  • Soggy Green Beans: If your green beans become mushy, try sautéing them on higher heat and ensure they are not overcrowded in the pan.
  • Flavor Lacking: If the dish tastes bland, don’t hesitate to adjust seasoning—add salt, pepper, or a bit more garlic to amp up the flavors.

Variations to Try

If you’re feeling adventurous, here are some exciting variations you can try:

  • Asian Twist: Add soy sauce and sesame oil for a delicious Asian-inspired dish. Top with sesame seeds and sliced green onions.
  • Spicy Kick: Incorporate red pepper flakes or sliced jalapeños for a spicy version that will wake up your taste buds.
  • Herbaceous Addition: Toss in fresh herbs like thyme, rosemary, or basil for a fresh, fragrant twist.
  • Different Veggies: Substitute green beans with broccoli, asparagus, or bell peppers for a colorful and nutritious variety.

Storage and Make-Ahead Instructions

This chicken and green beans dish is also great for meal prep. Here’s how to store it:

  • Refrigeration: Store in an airtight container in the fridge for up to 3-4 days.
  • Freezing: You can freeze the cooked chicken and green beans in a freezer-safe container for up to 3 months. Thaw in the fridge before reheating.
  • Make-Ahead: Prep the chicken and green beans in advance. Store them separately until you’re ready to cook.

Comprehensive FAQ

Got questions? I’ve got answers! Here are some frequently asked questions about this recipe:

  • Can I use frozen chicken breasts? Yes! Just ensure they are fully thawed before cooking.
  • How do I know when the chicken is done? Use a meat thermometer to check for an internal temperature of 165°F.
  • What can I serve with chicken and green beans? This dish pairs beautifully with rice, quinoa, or a simple salad.
  • Can I make this dish vegetarian? Absolutely! Substitute chicken with firm tofu or chickpeas.
  • How do I get the best flavor? Fresh, high-quality ingredients make all the difference, so opt for the best you can find.
  • Is this recipe gluten-free? Yes, it is naturally gluten-free! Just be cautious with sauces and seasonings.
  • Can I add more vegetables? Definitely! Feel free to toss in whatever veggies you have on hand.
  • How should I store leftovers? Place them in an airtight container in the fridge for 3-4 days or freeze them for later use.

Nutrition Tips and Dietary Adaptations

To make this dish even healthier, consider the following tips:

  • Lean Proteins: Opt for skinless chicken breasts to keep the dish low in fat.
  • More Veggies: Load up on green beans or add in other colorful vegetables for extra nutrients.
  • Healthy Fats: Use olive oil sparingly, or substitute with non-stick cooking spray for fewer calories.

Essential Equipment Recommendations

Having the right tools makes cooking a breeze. Here’s what you’ll need:

  • Large Skillet: A non-stick or cast-iron skillet works best for even cooking.
  • Meat Thermometer: Ensures your chicken is perfectly cooked every time.
  • Sharp Knife: Essential for slicing your chicken and prepping vegetables.

Serving Suggestions

Make your meal feel special with these serving ideas:

  • Plate Presentation: Serve the chicken sliced atop a bed of green beans for a beautiful display.
  • Add a Starch: Pair with fluffy rice or buttery mashed potatoes for a complete meal.
  • Garnish: Finish with a sprinkle of fresh herbs or lemon zest to brighten up the dish.

Conclusion

This Flashy Chicken and Green Beans Recipe is more than just a meal; it’s a celebration of flavors that are both comforting and exciting. With its quick preparation and impressive taste, it’s bound to become a staple in your home. So grab your apron, invite your loved ones to the table, and enjoy the magic of cooking together. Happy eating!

Quick Chicken Breast and Green Beans Recipe

Prep Time 10 minutes
Cook Time 15 minutes
Total Time 25 minutes
Servings 2 servings
Calories 350
A quick and healthy dish featuring tender chicken breasts and crisp green beans, perfect for a nutritious weeknight dinner.

Ingredients

Protein

  • 2 pieces boneless, skinless chicken breasts

Vegetables

  • 2 cups fresh green beans, trimmed

Fats & Oils

  • 2 tablespoons olive oil

Aromatics

  • 2 cloves garlic, minced

Seasonings

  • to taste salt and pepper
  • 1 teaspoon lemon juice (optional)

Instructions 

  • Heat 1 tablespoon of olive oil in a skillet over medium heat.
  • Season chicken with salt and pepper, cook 6-7 minutes per side until golden and cooked through.
  • Remove chicken, set aside. In the same skillet, add remaining oil and garlic; sauté 30 seconds.
  • Add green beans, sauté 5-6 minutes until tender but crisp. Season with salt, pepper, and lemon juice if using.
  • Slice chicken and serve alongside green beans.

Notes

For extra flavor, add herbs like thyme or parsley.
Calories: 350kcal
Cost: $15
Course: Main Course
Cuisine: American
Keyword: Chicken, green beans, healthy

Loved this recipe? Save it to your favorite Pinterest board so you can easily find it later! It’s the perfect way to keep all your sweet ideas in one place. ✨

Tasty chicken and green beans on a white plate, shot in warm, natural light.

Welcome to Your New Favorite Comfort Food

When the chill of the evening sets in and the aroma of something hearty fills the air, there’s a certain magic that happens in the home. Today, we’re diving into the world of a classic dish that embodies warmth and satisfaction: Hearty Beef Stew. This isn’t just any stew; it’s the kind of recipe that wraps you in nostalgia, echoing the comforting meals of childhood while bringing a touch of modern flair. So, roll up your sleeves, and let’s make something unforgettable together!

Why You’ll Love This Recipe

There are countless reasons to fall in love with this Hearty Beef Stew, but here are just a few:

  • Rich Flavors: The combination of tender beef, fresh vegetables, and aromatic herbs creates a symphony of tastes that dance on your palate.
  • Easy Preparation: With simple ingredients and straightforward steps, this stew is perfect for both novice cooks and seasoned chefs.
  • One-Pot Wonder: Minimal cleanup is required since all the magic happens in one pot, leaving you more time to relax.
  • Versatile Ingredients: This recipe allows for plenty of substitutions, making it easy to tailor to your preferences or to use up what’s in your pantry.
  • Perfect for Meal Prep: This stew keeps well in the fridge or freezer, making it an ideal choice for meal planning.

Ingredient Breakdown

Let’s take a closer look at the ingredients that make this stew so special, along with some easy substitutions if you’re in a pinch:

  • 1.5 kg of beef: Use a cut suitable for stewing, like chuck or brisket. If you’re feeling adventurous, try using lamb for a different flavor.
  • Flour: This helps to thicken the stew. If gluten-free, substitute with cornstarch or a gluten-free flour blend.
  • Olive oil: For sautéing. Feel free to use canola or vegetable oil if that’s what you have on hand.
  • Vegetables: The classic duo of carrots and potatoes is a must, but don’t hesitate to add parsnips, turnips, or even sweet potatoes for a twist!
  • Herbs: The bouquet garni includes thyme, bay leaf, and parsley. Fresh herbs are a lovely touch, but dried herbs work just fine too.

Cooking Steps

A side view of a delicious beef stew filled with carrots, potatoes, and green peas in a rich sauce.

Now, let’s get cooking! Follow these simple steps to create a delicious beef stew that will have everyone asking for seconds:

  1. Start by cutting the beef into medium-sized pieces. Season them with salt and pepper, then coat lightly with flour.
  2. In a large pot, heat the olive oil over medium heat. Brown the beef on all sides, then remove and set it aside.
  3. Add the chopped onions and minced garlic to the pot. Sauté until softened and golden.
  4. Return the beef to the pot. Pour in the red wine and let it reduce for a few minutes, scraping any brown bits off the bottom for extra flavor.
  5. Stir in the tomato paste, beef broth, bouquet garni, carrots, potatoes, and celery. Bring to a boil, then reduce the heat to low.
  6. Cover and let it simmer for about 2 hours, or until the beef is tender.
  7. To thicken the stew, mix a small amount of cooking liquid with flour in a bowl, then stir it back into the pot.
  8. Add the peas and cook for an additional 10-15 minutes until heated through.
  9. Adjust seasoning to taste, remove the bouquet garni, and serve hot!

Pro Tips for the Perfect Stew

Want to elevate your stew game? Here are some expert insights to ensure your dish is a showstopper!

  • Let it rest: After cooking, allow the stew to sit for a bit. This resting period helps the flavors meld beautifully.
  • Use quality beef: The better the beef, the richer the flavor. Look for well-marbled cuts for the best results.
  • Don’t rush the browning: Take your time when browning the meat. This step adds depth and complexity to the overall flavor.
  • Add acidity: A splash of vinegar or a squeeze of lemon juice at the end brightens the flavors and balances the richness.
  • Keep it low and slow: Cook your stew on low heat for a more tender and flavorful outcome.
  • Experiment with spices: Feel free to add spices like paprika or a dash of cayenne for a little kick.
  • Go seasonal: Use seasonal vegetables to keep things fresh and exciting throughout the year.
  • Make it a day ahead: Stews often taste even better the next day, so consider making it in advance!

Common Mistakes and Troubleshooting

Even the best of us make mistakes in the kitchen! Here are some common pitfalls and how to avoid them:

  • Dry beef: If your beef turns out dry, it may have been overcooked. Always check for tenderness after the suggested cooking time.
  • Thin sauce: If your stew is too watery, make sure to thicken it properly using the flour slurry method mentioned above.
  • Overcooked vegetables: Add hearty vegetables like carrots and potatoes early, but save delicate ones like peas for the end to maintain their texture.
  • Bland flavor: If your stew lacks flavor, try adding more seasoning or a splash of Worcestershire sauce for depth.

Delicious Variations

Feeling adventurous? Here are some delightful variations you can try:

  • Herb-Roasted Beef Stew: Add fresh rosemary and thyme during the last 30 minutes of cooking for an aromatic twist.
  • Spicy Chipotle Beef Stew: Incorporate chipotle peppers in adobo sauce for a smoky heat.
  • Vegetable-Loaded Stew: Swap out half the meat for additional vegetables like zucchini, bell peppers, and green beans.
  • Beer-Braised Stew: Replace the red wine with a rich stout for an earthy flavor.

Storage and Make-Ahead Instructions

This stew is perfect for making ahead of time! Here’s how to store it:

  • Refrigeration: Store in an airtight container in the fridge for up to 3 days.
  • Freezing: Allow the stew to cool completely before transferring to a freezer-safe container. It will keep for up to 3 months.
  • Reheating: Reheat gently on the stovetop or in the microwave, adding a splash of broth if needed to loosen it up.

Frequently Asked Questions

Got questions? Here are some common queries about making the perfect beef stew:

  • Can I use frozen beef? Yes! Just ensure to thaw completely before cooking for even results.
  • How can I make this stew gluten-free? Substitute regular flour with cornstarch or a gluten-free flour blend.
  • What’s the best way to thicken stew? A flour slurry or cornstarch mix added towards the end works beautifully.
  • Can I cook this stew in a slow cooker? Absolutely! Follow the same steps and cook on low for 6-8 hours.
  • What sides go well with beef stew? Serve with crusty bread, a fresh salad, or over creamy mashed potatoes.
  • Is it necessary to brown the beef? Yes! Browning adds incredible flavor to your stew.
  • Can I add beans to this stew? Yes! White beans or kidney beans are a great addition for extra protein and fiber.
  • How do I know when the beef is done? The beef is cooked when it is fork-tender and easily shreds apart.

Nutritional Tips and Dietary Adaptations

This Hearty Beef Stew can be adapted to fit various dietary needs:

  • Lower calories: Use lean cuts of beef and reduce the amount of oil used.
  • Vegetarian option: Replace the beef with mushrooms or lentils and use vegetable broth instead.
  • Low-carb option: Swap potatoes for cauliflower or turnips for a lighter version.
  • High-protein: Add beans or lentils to boost the protein content without relying solely on meat.

Essential Equipment for Your Stew

To make this delightful dish, you’ll need:

  • Heavy-bottomed pot: A Dutch oven or sturdy stockpot is perfect for even cooking.
  • Wooden spoon: Ideal for stirring and scraping the bottom of the pot.
  • Measuring cups and spoons: Accurate measurements ensure consistency and flavor.
  • Sharp knife: For chopping your ingredients with ease.

Serving Suggestions

Ready to serve up your masterpiece? Here are some ideas to elevate your meal:

  • Garnish: Fresh parsley or thyme sprinkled on top adds a vibrant touch.
  • Accompaniments: Pair with a side of crusty bread for dipping or a refreshing side salad.
  • Wine Pairing: A glass of red wine, like Merlot or Cabernet Sauvignon, complements the rich flavors beautifully.

In Conclusion

As you close this chapter on the Hearty Beef Stew that warms your soul, remember that cooking is about connection. It’s about gathering around the table, sharing stories, and enjoying the simple pleasures of life. So, whether you’re making it for family, friends, or just for yourself, know that this stew carries a piece of my kitchen magic into yours. Happy cooking, and may your kitchen always be filled with love and delicious aromas!

Ragoût de Bœuf Copieux

Prep Time 30 minutes
Cook Time 2 hours
Total Time 2 hours 30 minutes
Servings 6 servings
Calories 650
A hearty French beef stew slow-cooked with vegetables and red wine, perfect for a comforting meal.

Ingredients

Meat

  • 1.5 kg bœuf (paleron, joue, ou tout autre morceau adapté pour mijoter)
  • 3 tablespoons farine (for coating and thickening)
  • 4 tablespoons huile d'olive
  • 2 units oignons, hachés
  • 3 cloves gousses d'ail, émincées
  • 4 carottes carottes, coupées en rondelles épaisses
  • 3 potatoes pommes de terre, pelées et coupées en cubes
  • 2 stalks céleri, coupés en tronçons
  • 1 cup petits pois (frais ou surgelés)

Herbes et assaisonnements

  • 1 bouquet garni (thym, laurier, persil)
  • to taste Sel et poivre
  • 750 ml bouillon de bœuf
  • 1 cup vin rouge
  • 2 tablespoons concentré de tomate
  • 2 tablespoons farine (pour épaissir la sauce)

Instructions 

  • Découpez le bœuf en morceaux, assaisonnez et enrobez de farine.
  • Faites dorer la viande dans l'huile, puis réservez.
  • Revenez les oignons et l'ail, puis déglacez avec le vin rouge.
  • Ajoutez le concentré, le bouillon, les légumes et le bouquet, puis mijotez 2 heures.
  • Préparez un mélange de farine pour épaissir, puis incorporez-le. Ajoutez les petits pois et terminez la cuisson.

Notes

Pour une sauce plus épaisse, utilisez un peu plus de farine ou réduisez le liquide en fin de cuisson.
Calories: 650kcal
Cost: $15
Course: Main Course
Cuisine: French
Keyword: Beef

Welcome to the Flavor Frontier: An Invitation to One-Pan Cowboy Garlic Chicken & Potatoes

Gather ’round, my fellow food adventurers! If you’re on the hunt for a recipe that combines tender chicken, crispy potatoes, and a garlic twist—all made in just one pan—then you’ve hit the jackpot! Today, I’m thrilled to share my beloved One-Pan Cowboy Garlic Chicken & Potatoes Dinner. This dish isn’t just about filling your belly; it’s about bringing warmth and joy to your table, just like the dinners I cherished growing up in my mother’s cozy kitchen in Oregon.

So, saddle up for flavor! Whether you’re cooking for a busy weeknight or hosting a cozy gathering, this recipe is your trusty companion. Let’s dive in and explore why this dish will soon be your go-to!

Why You’ll Love This Recipe

  • Easy Clean-Up: One pan means less time washing dishes and more time enjoying dinner!
  • Quick to Prepare: This meal comes together in just about 30 minutes—perfect for hectic evenings.
  • Flavor Explosion: The combination of garlic, smoked paprika, and fresh herbs makes every bite a taste sensation.
  • Customizable: Add your favorite veggies or swap in different proteins for a unique twist.
  • Hearty and Satisfying: With tender chicken and crispy potatoes, it’s a meal that will leave everyone feeling full and happy.

Ingredients

Delicious Cowboy Garlic Chicken and Potatoes arranged in a rustic setting, illuminated by warm natural light.

Let’s gather our ingredients! Here’s what you’ll need to whip up this delicious dish:

  • 4 boneless, skinless chicken breasts
  • 1 pound baby potatoes, halved
  • 4 tablespoons olive oil
  • 4 cloves garlic, minced
  • 1 teaspoon smoked paprika
  • 1 teaspoon dried thyme
  • 1 teaspoon dried oregano
  • Salt and pepper to taste
  • Chopped fresh parsley for garnish

Substitutions:

  • Chicken thighs: For a juicier option, use skinless chicken thighs instead of breasts.
  • Sweet potatoes: Swap halved baby potatoes for sweet potatoes for a sweeter, more nutritious option.
  • Herb variations: Feel free to use fresh herbs if you have them on hand—thyme and oregano are particularly lovely!
  • Dairy-free: Use a vegan butter substitute if you want to keep this dish dairy-free.

How to Make It

Ready to get cookin’? Here’s your step-by-step guide:

  1. Preheat the oven to 400°F (200°C).
  2. Mix the marinade: In a large bowl, combine the olive oil, minced garlic, smoked paprika, thyme, oregano, salt, and pepper.
  3. Toss it up: Add the chicken breasts and halved baby potatoes to the bowl, tossing until everything is well coated in that garlicky goodness.
  4. Spread it out: Transfer the chicken and potatoes to a large baking sheet in a single layer, ensuring they have room to roast.
  5. Bake away: Place the sheet in the preheated oven and bake for 25-30 minutes, or until the chicken is cooked through and the potatoes are tender.
  6. Garnish and serve: Remove from the oven, let it rest for a few minutes, then garnish with chopped fresh parsley before serving.

Pro Tips for Perfecting Your Dish

  • Don’t overcrowd the pan: Give your chicken and potatoes space to roast beautifully and develop a golden crust.
  • Check doneness: Use a meat thermometer to ensure your chicken has reached an internal temperature of 165°F (74°C).
  • For extra crispy potatoes: Broil for the last 2-3 minutes of cooking to achieve that perfect golden exterior.
  • Let it rest: Allow your chicken to rest for a few minutes before slicing; this helps retain moisture.
  • Experiment with flavors: Feel free to add in your favorite spices or sauces for a personalized touch.
  • Make it a full meal: Pair with a fresh green salad or some roasted veggies for a complete dinner.
  • Use high-quality ingredients: Fresh garlic and good olive oil can elevate the flavors significantly.
  • Store leftovers properly: Keep any leftover chicken and potatoes in an airtight container in the fridge for up to 3 days.

Common Mistakes and Troubleshooting

Even the best cooks can have off days! Here are some common pitfalls and how to avoid them:

  • Chicken is dry: This can happen if you overcook the chicken. Use a meat thermometer to check for doneness.
  • Potatoes are mushy: Ensure you don’t overcrowd the pan and that you roast them long enough to achieve that crispy texture.
  • Flavor is lacking: Don’t be shy with the seasoning—taste as you go and adjust accordingly!

Variations to Try

Feeling adventurous? Here are some fun variations on this classic dish:

  • Cajun twist: Add Cajun seasoning for a spicy kick!
  • Italian style: Toss in some cherry tomatoes and fresh basil for a Mediterranean flair.
  • Vegetarian version: Replace chicken with hearty mushrooms or tofu for a plant-based alternative.
  • Herb butter finish: Drizzle melted herb butter over the chicken and potatoes just before serving for a rich finish.

Storing and Make-Ahead Instructions

Planning ahead? Here’s how to store and prepare this dish in advance:

  • Make-ahead: You can marinate the chicken and potatoes a few hours in advance and keep them in the fridge until you’re ready to bake.
  • Storing leftovers: Cool any remaining portions and transfer to an airtight container. They’ll keep well in the refrigerator for up to 3 days.
  • Reheating: To reheat, simply pop it back in the oven at 350°F (175°C) until warmed through, or use the microwave if you’re in a hurry.

Comprehensive FAQ

  • Can I use chicken thighs instead of breasts? Yes! Chicken thighs are juicier and can add even more flavor to the dish.
  • What if I don’t have fresh garlic? You can use garlic powder in a pinch, but fresh garlic is always best for flavor.
  • Can I add vegetables? Absolutely! Feel free to toss in your favorite vegetables like bell peppers or green beans.
  • What can I serve with this dish? A fresh salad, steamed broccoli, or crusty bread make great accompaniments.
  • Is this dish gluten-free? Yes, all ingredients listed are gluten-free! Just double-check your spices.
  • Can I freeze leftovers? Yes! Freeze in an airtight container for up to 3 months. Thaw in the fridge before reheating.
  • How do I know when the chicken is done? Use a meat thermometer to check that it has reached an internal temperature of 165°F (74°C).
  • Can I make this dish in advance? Yes! You can marinate the chicken and potatoes in advance and bake them when you’re ready.

Nutritional Tips and Dietary Adaptations

This dish can be a wholesome part of your meal plan! Here are some tips to make it even healthier:

  • Lean protein: Using skinless chicken helps keep the dish low in fat while providing beneficial protein.
  • Whole foods: Incorporating more veggies can increase fiber and nutrient content.
  • Low-sodium options: Use low-sodium broth or spices to reduce salt intake while maintaining flavor.

Equipment Recommendations

Here’s what you’ll need to make this recipe a success:

  • Large mixing bowl: For combining the chicken and marinade.
  • Baking sheet: A large, rimmed baking sheet is ideal for even cooking.
  • Meat thermometer: To ensure your chicken is cooked to the perfect temperature.

Serving Suggestions

Wondering how to present this delightful dish? Try these ideas:

  • Garnish: A sprinkle of fresh parsley adds a pop of color and freshness.
  • Serve with sides: Pair with a crisp salad or roasted seasonal vegetables for a balanced meal.
  • Enjoy with bread: Serve with fresh crusty bread to soak up all that delicious garlic sauce!

Conclusion: Your New Favorite Go-To Recipe Awaits

And there you have it, my dear friends! This One-Pan Cowboy Garlic Chicken & Potatoes is everything you could want in a meal: easy, flavorful, and comforting. I invite you to bring this recipe into your kitchen and experience the magic for yourself. It’s the kind of dish that will make your loved ones pause mid-bite and say, ‘Wow!’ So, let’s gather our loved ones, share this meal, and create memories that will last a lifetime. Happy cooking!

Easy One-Pan Cowboy Garlic Chicken & Potatoes Dinner

Prep Time 10 minutes
Cook Time 30 minutes
Total Time 40 minutes
Servings 4 servings
Calories 450
A flavorful and easy-to-make one-pan dinner featuring tender chicken breasts and roasted baby potatoes seasoned with smoky spices and fresh herbs.

Ingredients

Main

  • 4 pieces boneless, skinless chicken breasts
  • 1 pound baby potatoes, halved
  • 4 tablespoons olive oil
  • 4 cloves garlic, minced
  • 1 teaspoon smoked paprika
  • 1 teaspoon dried thyme
  • 1 teaspoon dried oregano
  • to taste salt and pepper
  • chopped fresh parsley for garnish

Instructions 

  • Preheat oven to 400°F (200°C).
  • Mix olive oil, garlic, paprika, thyme, oregano, salt, and pepper.
  • Toss chicken and potatoes in the mixture, then spread on a baking sheet.
  • Bake for 25-30 minutes until cooked and tender.
  • Rest briefly, then garnish with parsley before serving.

Notes

Ensure chicken is cooked through for safety.
Calories: 450kcal
Cost: $15
Course: dinner
Cuisine: American
Keyword: Chicken, garlic, potatoes

Loved this recipe? Save it to your favorite Pinterest board so you can easily find it later! It’s the perfect way to keep all your sweet ideas in one place. ✨

Close-up of a savory One Pan Chicken and Potatoes dish, showcasing garlic and herb flavors with a blurred background.

Welcome to the ultimate comfort food experience! Ground Beef Stroganoff is not just a meal; it’s a warm embrace, a nostalgic reminder of family dinners, and a dish that brings smiles to faces. If you’re ready to whip up a bowl of happiness that your loved ones will crave, you’ve come to the right place. Let’s dive into the heartwarming flavors of this classic recipe that’s as satisfying to make as it is to eat.

With rich beef broth, creamy sauces, and tender egg noodles, this dish is perfect for family dinners or cozy nights in. Plus, it’s incredibly easy to prepare—making it a weeknight winner! Join me in creating a meal that’s sure to impress and nourish.

Why You’ll Love This Recipe

This isn’t just any ground beef stroganoff; it’s a recipe filled with love and warmth. Here are five reasons why this dish will become a staple in your kitchen:

  • Comforting flavors: The combination of savory beef, creamy sauce, and tender noodles is the epitome of comfort food.
  • Quick and easy: Ready in under 30 minutes, it’s perfect for those busy weeknights when you want something delicious without spending hours in the kitchen.
  • One-pot wonder: Less mess means more time enjoying your meal. This recipe is cooked in one pot, making cleanup a breeze!
  • Customizable: With a variety of ingredients and variations, you can make it your own. Add mushrooms, swap in different proteins, or spice things up according to your taste.
  • Family favorite: This dish is sure to become a go-to for family dinners, bringing everyone together around the table.

Ingredients Breakdown

Let’s gather our ingredients! Here’s what you’ll need:

  • 12 oz Egg Noodles: The base of this dish, egg noodles soak up the rich sauce beautifully. Feel free to swap with gluten-free pasta or your favorite noodle type!
  • 1 pound Ground Beef: For the best flavor, use lean ground beef. However, you can also substitute with ground turkey or chicken for a lighter option.
  • 4 cloves Garlic, minced: Fresh garlic adds a fragrant kick to the dish. If you’re short on time, garlic powder works in a pinch too.
  • 3 tbs Worcestershire Sauce: This sauce adds depth and umami. If you’re out, soy sauce is a great alternative.
  • 1/2 stick Butter: For sautéing and adding richness. You can use olive oil if you prefer.
  • 1/4 cup Flour: This helps thicken the sauce. For a gluten-free option, cornstarch is a good substitute.
  • 3 cups Beef Broth: It’s the heart of the stroganoff sauce. Use homemade or store-bought for convenience.
  • 1 tbs Kitchen Bouquet: This gives the sauce a beautiful color and depth. If you don’t have it, a splash of soy sauce can work.
  • 1/2 cup Heavy Cream: For a luxurious, creamy texture. You can use half-and-half for a lighter version.
  • 1/2 cup Sour Cream: This adds tanginess and creaminess. Greek yogurt is a wonderful substitute if you’re looking for a healthier option.
  • 1 tbs Garlic Powder: For an extra layer of garlic flavor.
  • Salt and Pepper to taste: Essential for seasoning and enhancing flavors.
  • Fresh Parsley for garnish (optional): A sprinkle of parsley adds freshness and a pop of color!

Step-by-Step Instructions

Ready to get cooking? Here’s how to make your Ground Beef Stroganoff:

  1. In a large skillet or pot, brown the ground beef over medium-high heat, breaking it into pieces as it cooks. Drain excess fat, then season with salt, pepper, and garlic powder.
  2. Add in the minced garlic and Worcestershire sauce. Cook for about 2 minutes until fragrant.
  3. Stir in the butter until melted, then sprinkle in the flour. Cook for 2 minutes, stirring constantly to create a roux.
  4. Pour in the beef broth and Kitchen Bouquet, stirring to combine.
  5. Add the egg noodles and ensure they’re mostly submerged in the sauce. Add more broth if necessary.
  6. Cover with the lid and let the noodles gently boil in the sauce for about 10 minutes, stirring occasionally.
  7. Once the noodles are tender, remove the lid and stir in the heavy cream. Taste and adjust seasoning with additional salt and pepper.
  8. Turn off the heat and gently fold in the sour cream until well combined.
  9. Let the stroganoff cool slightly, then garnish with freshly chopped parsley before serving.

Pro Tips for Perfect Stroganoff

Side view of Ground Beef Stroganoff showcasing its rich sauce and tender beef.
  • Don’t overcook the noodles: They should be tender but not mushy. Keep an eye on them while they cook.
  • Use quality beef broth: The flavor of the broth will greatly affect the final dish, so choose a rich, flavorful broth.
  • Let it simmer: Allow the flavors to meld together by letting the stroganoff simmer for a few minutes after adding the cream.
  • Adjust for thickness: If your sauce is too thick, stir in more beef broth or water until you reach your desired consistency.
  • Taste as you go: Don’t be shy about tasting! Adjust seasonings to suit your preferences.
  • Experiment with spices: Feel free to add paprika, cayenne, or herbs for extra flavor.
  • Make it lighter: Use low-fat cream and yogurt for a healthier twist.
  • Serve immediately: Stroganoff is best enjoyed fresh, but it can be reheated.

Common Mistakes and Troubleshooting

Even the best cooks make mistakes. Here’s how to troubleshoot common issues:

  • Sauce is too thin: If your sauce isn’t thickening, you can create a slurry with a bit of flour and water, then stir it into the sauce.
  • Noodles are mushy: This can happen if overcooked. Next time, check the noodles a minute or two earlier.
  • Too salty: If your stroganoff is too salty, add a splash of vinegar or lemon juice to balance it out.
  • Not enough flavor: Boost it with extra Worcestershire sauce, garlic powder, or a sprinkle of fresh herbs.

Variations to Try

Make this recipe your own with these fun variations:

  • Mushroom Stroganoff: Add sautéed mushrooms for an earthy flavor. Use a mix of cremini and button mushrooms for depth.
  • Vegetarian Stroganoff: Substitute ground beef with lentils or mushrooms for a hearty vegetarian version.
  • Spicy Stroganoff: Add a kick with red pepper flakes or a dash of hot sauce.
  • Herbed Stroganoff: Stir in fresh herbs like thyme or dill for a burst of freshness.

Storage and Make-Ahead Instructions

Got leftovers? Here’s how to store and reheat:

  • Refrigerate: Allow the stroganoff to cool completely before transferring to an airtight container. It will keep in the fridge for up to 3 days.
  • Freeze: This dish doesn’t freeze well due to the cream, but you can freeze the beef mixture before adding the cream and noodles.
  • Reheat gently: When reheating, do it on low heat to prevent the sauce from separating. Add a splash of broth to loosen it up.

Comprehensive FAQ

  • Can I make this stroganoff ahead of time? Yes! You can prepare the beef mixture a day in advance and add the noodles and cream just before serving.
  • What can I serve with stroganoff? Serve it with a side salad, garlic bread, or steamed vegetables for a complete meal.
  • Can I use other types of meat? Absolutely! Feel free to substitute ground turkey, pork, or even chicken.
  • Is there a gluten-free option? Yes! Use gluten-free pasta and substitute flour with cornstarch to thicken the sauce.
  • Can I use sour cream substitutes? Greek yogurt is a great alternative for a tangy flavor and lower calories.
  • How do I make it spicier? Add red pepper flakes or a splash of hot sauce during cooking for heat.
  • What herbs work well in stroganoff? Fresh thyme, parsley, or dill can enhance the flavor beautifully.
  • Can I add vegetables? Yes! Feel free to add peas or spinach for added nutrition and color.

Nutrition Tips and Dietary Adaptations

This recipe can easily be adapted to fit various dietary needs:

  • Low-carb version: Swap egg noodles for zucchini noodles or cauliflower rice.
  • Low-fat option: Use lean ground beef and substitute heavy cream with low-fat alternatives.
  • Dairy-free version: Use coconut milk or cashew cream instead of heavy cream and sour cream.

Equipment Recommendations

To make your cooking experience smoother, here’s what I recommend having on hand:

  • Large skillet or pot: A deep skillet or large pot is essential for cooking everything in one place.
  • Wooden spoon: Perfect for stirring and preventing scratches on your cookware.
  • Measuring cups and spoons: Accurate measurements ensure the best flavor.
  • Cutting board and knife: For chopping garlic and prepping your ingredients.

Serving Suggestions

When it comes to serving your Ground Beef Stroganoff, presentation is key! Here are a few ideas:

  • Garnish: Finish with fresh parsley or chives for a pop of color.
  • Side dishes: Pair with a crisp green salad or buttery garlic bread to soak up that creamy sauce.
  • Wine pairing: A glass of red wine, like Merlot or Pinot Noir, complements the dish beautifully.

Conclusion

And there you have it! A delicious, comforting bowl of Ground Beef Stroganoff that’s sure to win over hearts and stomachs alike. This dish is more than just a meal; it’s a way to connect with those you love and create memories around the table. So, gather your ingredients, roll up your sleeves, and let’s make something unforgettable together. Happy cooking!

Ground Beef Stroganoff

Prep Time 10 minutes
Cook Time 20 minutes
Total Time 30 minutes
Servings 4 servings
Calories 650
A hearty and creamy classic dish featuring tender ground beef and egg noodles in a savory sauce, perfect for a comforting meal.

Ingredients

Pasta

  • 12 oz Egg Noodles

Meat

  • 1 pound Ground Beef

Aromatics and Sauces

  • 4 cloves Garlic, minced
  • 3 tbs Worcestershire Sauce
  • 1/2 stick Butter
  • 1/4 cup Flour
  • 3 cups Beef Broth (add more if needed)
  • 1 tbs Kitchen Bouquet
  • 1/2 cup Heavy Cream
  • 1/2 cup Sour Cream
  • 1 tbs Garlic Powder

To taste

  • Salt and Pepper

Garnish

  • Fresh Parsley for garnish (optional)

Instructions 

  • Brown the ground beef in a skillet, drain fat, and season with salt, pepper, and garlic powder.
  • Add minced garlic and Worcestershire sauce; cook for 2 minutes.
  • Melt butter, stir in flour, and cook for 2 minutes over medium-high heat.
  • Pour in beef broth and kitchen bouquet, then add egg noodles and cook covered for 10 minutes.
  • Stir in heavy cream, season if needed, then remove from heat and mix in sour cream. Garnish with parsley and serve.

Notes

Use fresh parsley for best flavor and adjust seasoning to taste.
Calories: 650kcal
Cost: $15
Course: Main Course
Cuisine: American
Keyword: Beef, Noodles

Welcome to the World of One Dish Chicken Bake

Ah, the humble one dish chicken bake. If you’re anything like me, you know the joy of a meal that warms not just your stomach but also your soul. Growing up in Oregon, the aromas wafting from my mom’s kitchen were the backdrop to many cherished family moments. Today, I’m excited to share my favorite One Dish Chicken Bake Recipe—a cozy meal that’s not only simple to prepare but also perfect for family gatherings. Trust me, this dish combines tender chicken, vibrant vegetables, and a touch of magic that guarantees smiles all around the dinner table!

Why You’ll Love This Recipe

  • Effortless Preparation: With just a few simple steps, you can have a delightful meal ready to bake. No complicated techniques here—just pure, delicious cooking!
  • One-Pan Cleanup: Say goodbye to a mountain of dishes! This recipe is baked all in one dish, making cleanup a breeze.
  • Customizable Ingredients: Feel free to swap in your favorite vegetables or chicken cuts. This dish is as versatile as it is tasty!
  • Family-Friendly Flavors: The harmonious blend of spices and veggies makes this dish appealing to both kids and adults alike.
  • Perfect for Meal Prep: Make a double batch, and you’ll have wholesome leftovers ready for lunch or dinner later in the week.

Ingredient Breakdown

An appetizing one-dish chicken bake featuring tender chicken, halved baby potatoes, sliced carrots, and broccoli, illuminated by natural light.

Let’s talk about the ingredients that make this dish shine. Here’s what you’ll need:

  • 4 bone-in, skin-on chicken thighs: These are perfect for achieving that juicy flavor and crispy skin. You can substitute with chicken breasts for a leaner option.
  • 2 cups baby potatoes, halved: I love using baby potatoes for their tender texture. But feel free to swap them for sweet potatoes if you prefer a sweeter touch!
  • 1 cup carrots, sliced: Carrots add a wonderful sweetness. You can also use parsnips or even bell peppers for a different crunch.
  • 1 cup broccoli florets: Broccoli not only adds color but also packs a nutritious punch. You could also use green beans or asparagus if you’d like.
  • 3 tablespoons olive oil: This is essential for roasting the veggies. Don’t have olive oil? Avocado oil works beautifully too!
  • Spices: You’ll need 1 teaspoon each of garlic powder, onion powder, and paprika. These spices create a lovely depth of flavor.
  • Salt and pepper to taste: Seasoning is key! Adjust according to your preference.
  • Fresh parsley for garnish (optional): A sprinkle of fresh herbs brightens up the dish and makes it look even more inviting.

Pro Tips for the Perfect One Dish Chicken Bake

  • Preheat your oven properly: Ensure your oven is at 400°F (200°C) before placing your dish inside. This helps everything cook evenly!
  • Don’t overcrowd the dish: Give your chicken and veggies space to roast properly for that lovely caramelization.
  • Use a meat thermometer: For perfectly cooked chicken, aim for an internal temperature of 165°F (75°C).
  • Rest before serving: Let your chicken rest for a few minutes after baking. This allows the juices to redistribute, making every bite tender and juicy.
  • Experiment with spices: Feel free to add herbs like thyme or rosemary for a fragrant twist!
  • Choose seasonal vegetables: As seasons change, so do available veggies—embrace what’s fresh for the best flavors.
  • Make it cheesy: For a creamy touch, sprinkle some shredded cheese over the top in the last 10 minutes of baking.
  • Garnish with love: A touch of fresh parsley or even a squeeze of lemon can elevate the dish beautifully!

Avoiding Common Mistakes

Common Mistakes and Troubleshooting

  • Chicken too dry? Make sure to not overbake your chicken. Keep an eye on the cooking time and use a meat thermometer.
  • Veggies not tender? If they’re still crunchy, they likely need a bit more time. Just give them a few extra minutes in the oven.
  • Flavor lacking? Don’t shy away from seasoning! Taste your dish before serving and adjust accordingly.

Variations to Try

One of the best things about a one dish chicken bake is its adaptability! Here are some variations you might love:

  • Italian Style: Add Italian seasoning, diced tomatoes, and mozzarella cheese for a Mediterranean twist.
  • Southwestern Flair: Toss in corn, black beans, and a bit of taco seasoning for a fun kick!
  • Herbaceous Delight: Experiment with fresh herbs like basil or dill for an aromatic boost.
  • Comforting Creamy Bake: Mix in a can of cream of mushroom soup for a rich, creamy texture.

Storage and Make-Ahead Instructions

This recipe is fantastic for meal prep! Here’s how to store and make it ahead of time:

  • Refrigerating: Store leftovers in an airtight container in the fridge for up to 3 days.
  • Freezing: If you want to freeze it, let it cool completely before transferring to a freezer-safe container. It can last up to 3 months!
  • Reheating: To reheat, simply place in the oven at 350°F (175°C) until heated through.

Frequently Asked Questions

Let’s address some common questions to make your cooking experience even smoother:

  • Can I use boneless chicken? Absolutely! Boneless chicken will cook faster, so adjust the baking time accordingly.
  • What vegetables work best? Feel free to use any veggies you love! Just keep in mind that denser vegetables may need longer to cook.
  • Can I make this dish dairy-free? Yes! Just skip any cheese and use dairy-free substitutes where needed.
  • How do I know when the chicken is done? Use a meat thermometer—the internal temperature should reach 165°F (75°C).
  • Can I prepare this ahead of time? Yes! You can assemble it the night before and bake it the next day.
  • What sides pair well with this dish? A simple green salad or crusty bread works perfectly to soak up the delicious juices.
  • Is it okay to add more spices? Definitely! Customize the spices to your liking. Just remember to taste as you go!
  • Can I make it in a slow cooker? Yes! Just adjust the cooking time and enjoy a set-it-and-forget-it option.

Nutrition Tips and Dietary Adaptations

This One Dish Chicken Bake can be made to fit various dietary needs:

  • Low-Carb Option: Swap out potatoes for cauliflower for a lower-carb alternative.
  • Gluten-Free: Ensure any seasoning blends you use are gluten-free.
  • High-Protein Version: Add chickpeas or lentils for an extra protein boost.

Equipment Recommendations

For best results, here’s what I recommend:

  • Large Baking Dish: A sturdy glass or ceramic dish works best for even cooking.
  • Meat Thermometer: Essential for checking that chicken is cooked through without losing moisture.
  • Sharp Knife: A good knife makes chopping veggies a breeze!

Serving Suggestions

When it comes to serving this dish, keep it simple:

  • Serve warm: This dish is best enjoyed fresh from the oven, steaming and fragrant.
  • Garnish generously: A sprinkle of fresh parsley or even grated cheese adds a lovely finishing touch.
  • Pair with a drink: A crisp white wine or a refreshing iced tea complements the flavors beautifully.

Conclusion

There you have it! My One Dish Chicken Bake—a meal that brings comfort, warmth, and just the right amount of magic into your kitchen. I hope this recipe finds a special place in your home, just like it has in mine. Cooking is about sharing love and creating memories, and I can’t wait to hear how your own One Dish Chicken Bake turns out. So grab your apron, put on your favorite tunes, and let’s make something unforgettable together!

One Dish Chicken Bake Recipe

Prep Time 10 minutes
Cook Time 45 minutes
Total Time 55 minutes
Servings 4 servings
Calories 550
A delicious and easy one-pan chicken bake featuring tender chicken thighs and roasted vegetables, perfect for a wholesome meal.

Ingredients

Meat

  • 4 pieces bone-in, skin-on chicken thighs
  • 2 cups baby potatoes, halved
  • 1 cup carrots, sliced
  • 1 cup broccoli florets
  • 3 tablespoons olive oil
  • 1 teaspoon garlic powder
  • 1 teaspoon onion powder
  • 1 teaspoon paprika
  • to taste salt and pepper
  • for garnish fresh parsley (optional)

Instructions 

  • Preheat oven to 400°F (200°C).
  • Combine vegetables with olive oil and seasonings, toss to coat.
  • Place chicken thighs on top and season with salt and pepper.
  • Bake for 40-45 minutes until cooked through.
  • Rest briefly, garnish with parsley, and serve.

Notes

Ensure chicken reaches an internal temperature of 165°F (75°C) before serving.
Calories: 550kcal
Cost: $15
Course: Main Course
Keyword: bake, Chicken, roasted vegetables

Loved this recipe? Save it to your favorite Pinterest board so you can easily find it later! It’s the perfect way to keep all your sweet ideas in one place. ✨

A beautifully arranged plate of chicken bake, showcasing crispy chicken skin and a medley of vibrant vegetables in a cozy setting.

Welcome to Your New Favorite Comfort Meal

Ah, the magic of a cozy meal made in one skillet! If you’re anything like me, you cherish those moments when you can whip up a delicious dish without creating a mountain of dishes to wash afterward. Today, we’re diving into the heartwarming world of One-Skillet Cheesy Ground Chicken Pasta. This recipe marries the savory flavors of ground chicken with the creamy goodness of cheese and pasta, creating a meal that feels like home. In under 30 minutes, you can serve up a comforting bowl that’s sure to get everyone at the table singing your praises. Let’s get cooking!

Why You’ll Love This Recipe

This isn’t just another pasta dish; it’s a celebration of flavors and comfort. Here are five reasons why this recipe will quickly become a staple in your kitchen:

  • Quick and Easy: With a total cooking time of less than 30 minutes, this recipe is perfect for busy weeknights.
  • One-Skillet Wonder: Minimal cleanup means more time to enjoy your meal and less time scrubbing pots and pans.
  • Kid-Friendly: The cheesy goodness and pasta make it appealing for picky eaters, ensuring everyone gets a hearty meal.
  • Customizable: You can easily swap out ingredients to suit your taste or dietary needs, making it versatile for any occasion.
  • Hearty and Satisfying: The combination of ground chicken and pasta creates a filling dish that will keep you satisfied.

Diving into the Ingredients

Let’s talk about what you need to create this culinary delight. Here’s a detailed breakdown of the ingredients, along with some handy substitutions:

  • 1 pound ground chicken: You can substitute with ground turkey or beef for a different flavor profile.
  • 8 ounces pasta: Penne or fusilli are great choices, but feel free to use whole wheat or gluten-free pasta if needed.
  • 2 cups chicken broth: Vegetable broth works well too, especially for a vegetarian version.
  • 1 cup milk: Use any milk you have on hand—dairy or plant-based alternatives work perfectly.
  • 1 cup shredded cheese: Cheddar or mozzarella are classic choices, but feel free to mix it up with pepper jack for a spicy kick!
  • 1 tablespoon olive oil: For sautéing; can be replaced with butter for a richer flavor.
  • 1 onion, diced: Yellow or white onions add sweetness, but shallots can be a delightful alternative.
  • 3 cloves garlic, minced: Fresh garlic is best; garlic powder can work in a pinch!
  • 1 teaspoon Italian seasoning: A mix of dried herbs that you probably already have in your pantry.
  • Salt and pepper to taste: Don’t skimp on seasoning for the best flavor.
  • Fresh parsley for garnish: Optional, but it adds a lovely pop of color and freshness.

How to Make One-Skillet Cheesy Ground Chicken Pasta

Side view of a steaming skillet of One-Skillet Cheesy Ground Chicken Pasta with melted cheese visible on top.

Now that we’ve gathered our ingredients, let’s dive into the cooking process. Follow these simple steps to create your delicious meal:

  1. Cook the Ground Chicken: In a large skillet, heat the olive oil over medium heat. Add the ground chicken and cook until browned, about 5-7 minutes.
  2. Add Aromatics: Stir in the diced onion and minced garlic. Sauté until the onion is translucent, around 2-3 minutes.
  3. Mix the Pasta: Pour in the uncooked pasta, chicken broth, and milk. Stir to combine all ingredients.
  4. Season: Add the Italian seasoning, salt, and pepper. Bring the mixture to a boil, then reduce the heat to a simmer.
  5. Cook the Pasta: Cover the skillet and let the pasta cook for about 10-12 minutes, or until al dente, stirring occasionally to prevent sticking.
  6. Add Cheese: Once the pasta is cooked, stir in the shredded cheese until it melts and creates a creamy sauce.
  7. Adjust Seasoning: Taste and adjust the seasoning if necessary, adding more salt or pepper according to your preference.
  8. Garnish: Remove from heat and garnish with fresh parsley if desired.
  9. Serve: Serve hot and enjoy the creamy, cheesy goodness!

Pro Tips for Perfecting Your Dish

Want to ensure your One-Skillet Cheesy Ground Chicken Pasta turns out perfectly every time? Here are some expert tips:

  • Don’t Overcrowd the Pan: If you’re making a larger batch, consider cooking the chicken in two batches to ensure it browns nicely.
  • Stir Frequently: Stirring occasionally while the pasta cooks helps prevent it from sticking and ensures even cooking.
  • Experiment with Cheese: Mixing different types of cheese can elevate the dish; try adding some cream cheese for extra creaminess!
  • Adjust the Liquid: Depending on your pasta choice, you might need to adjust the amount of chicken broth or milk.
  • Add Veggies: For a healthier twist, toss in some spinach, bell peppers, or mushrooms towards the end of cooking.
  • Spice it Up: If you like a little heat, consider adding red pepper flakes or a dash of hot sauce to the mix.
  • Let it Rest: Allowing the dish to rest for a few minutes after cooking helps the flavors meld together beautifully.
  • Garnish Generously: A sprinkle of fresh herbs not only looks appealing but also enhances the flavors.

Common Mistakes and Troubleshooting

Even the best cooks make mistakes, but here’s how to avoid them:

  • Dry Pasta: If your pasta turns out dry, add a splash of chicken broth or milk to loosen it up.
  • Overcooked Chicken: To keep your ground chicken tender, cook until just browned; don’t overcook.
  • Cheese Clumping: If your cheese clumps instead of melting smoothly, remove the skillet from heat before adding cheese and stir well.
  • Flavorless Dish: Always taste and season as you go; don’t be afraid to add more salt and pepper!

Delicious Variations to Try

Feeling adventurous? Here are some fun variations to keep things fresh:

  • Mexican Style: Add taco seasoning instead of Italian and top with avocado and cilantro.
  • Italian Sausage: Swap the ground chicken for Italian sausage for a heartier flavor.
  • Vegetarian Version: Use lentils or chickpeas instead of ground chicken and add more veggies.
  • Cheesy Spinach: Stir in fresh spinach before serving for added nutrition and color.

Storage and Make-Ahead Instructions

Want to enjoy this delicious meal later? Here’s how to store it correctly:

  • Refrigerate: Store leftovers in an airtight container in the fridge for up to 3 days.
  • Freeze: This dish freezes well! Portion it into freezer-safe containers for up to 3 months.
  • Reheat: To reheat, add a bit of milk or broth to loosen it up, then warm it in the microwave or on the stovetop.

Comprehensive FAQ

Got questions? Here are some common queries about this recipe:

  • Can I use different pasta shapes? Absolutely! Just adjust the cooking time based on the pasta you choose.
  • Is this recipe gluten-free? Yes, simply use gluten-free pasta and ensure your broth is also gluten-free.
  • Can I make this vegetarian? Yes, substitute the ground chicken with your favorite plant-based protein.
  • What can I serve with this dish? Garlic bread, a fresh salad, or steamed veggies make great sides!
  • How can I make it spicier? Add red pepper flakes or diced jalapeños for a kick!
  • Can I add more vegetables? Definitely! Broccoli, zucchini, or bell peppers work great.
  • How long does it take to cook? This dish comes together in about 30 minutes from start to finish.
  • What’s the best way to store leftovers? Keep them in an airtight container in the fridge for up to 3 days.

Nutritional Tips and Dietary Adaptations

Looking to make this dish a bit healthier? Here are some ideas:

  • Whole Wheat Pasta: Opt for whole wheat or legume-based pasta for added fiber.
  • Low-Fat Milk: Use skim or almond milk to reduce calories.
  • Extra Veggies: Add a variety of vegetables to boost nutrients without adding many calories.

Essential Equipment You’ll Need

Before you start cooking, gather these essential tools:

  • Large Skillet: A deep skillet is key for cooking all the ingredients together.
  • Wooden Spoon: For stirring and mixing everything together.
  • Measuring Cups and Spoons: Accurate measurements ensure your dish turns out perfectly!

Serving Suggestions

How you present your dish can elevate the whole experience. Serve your One-Skillet Cheesy Ground Chicken Pasta in a large bowl or individual plates for a family-style dinner. Pair it with:

  • Garlic Bread: Perfect for soaking up any creamy sauce left on your plate.
  • Caesar Salad: A crisp salad provides a nice contrast and freshness.
  • Steamed Vegetables: Bright green broccoli or green beans add color and nutrition.

Conclusion: Your New Go-To Recipe

There you have it—your comprehensive guide to making the ultimate One-Skillet Cheesy Ground Chicken Pasta. This dish is not just a meal; it’s an experience, a way to bring warmth and joy into your home. I hope you enjoy every comforting bite and share it with those you love. So, grab your skillet and get cooking; your taste buds will thank you!

One-Skillet Cheesy Ground Chicken Pasta: An Amazing Ultimate Recipe

Prep Time 10 minutes
Cook Time 20 minutes
Total Time 30 minutes
Servings 4 servings
Calories 550
A quick and delicious one-skillet meal combining ground chicken, pasta, and cheese for a satisfying dinner in under 30 minutes.

Ingredients

Protein

  • 1 pound ground chicken

Pasta

  • 8 ounces pasta (penne, fusilli, or your choice)

Broth & Dairy

  • 2 cups chicken broth
  • 1 cup milk

Cheese

  • 1 cup shredded cheese (cheddar or mozzarella)

Vegetables & Oils

  • 1 tablespoon olive oil
  • 1 diced onion
  • 3 cloves garlic, minced

Seasonings

  • 1 teaspoon Italian seasoning
  • to taste Salt and pepper

Garnish

  • optional Fresh parsley (for garnishing)

Instructions 

  • Cook the ground chicken in olive oil until browned, about 5-7 minutes.
  • Add diced onion and minced garlic; sauté until translucent, 2-3 minutes.
  • Pour in pasta, chicken broth, and milk; stir to combine.
  • Add Italian seasoning, salt, and pepper; bring to a boil, then simmer.
  • Cover and cook for 10-12 minutes until pasta is al dente, stirring occasionally.
  • Stir in shredded cheese until melted and creamy. Garnish with parsley if desired. Serve hot.

Notes

This one-skillet meal is quick to prepare and perfect for a comforting dinner.
Calories: 550kcal
Cost: $15
Course: Main Course
Keyword: cheesy, Chicken, pasta

Why This One-Pot Wonder Will Become Your New Favorite

Welcome to your new weeknight hero: the One-Pot Creamy Beef and Garlic Butter Pasta. This dish is not just a meal; it’s an experience, a nostalgic hug from your childhood, and a time-saver all rolled into one. If you’ve ever been in a rush but still wanted something hearty and comforting, this recipe is for you. It combines the rich flavors of ground beef with the aromatic allure of garlic butter, all while being incredibly simple and quick to prepare. Plus, who doesn’t love a dish that only dirties one pot? Let’s dive in!

Why You’ll Love This Recipe

  • Quick and Easy: This meal comes together in under 30 minutes, making it perfect for busy weeknights.
  • One-Pot Cooking: With everything cooked in a single pot, cleanup is a breeze. More time for you to relax!
  • Rich and Creamy: The combination of heavy cream, Parmesan, and mozzarella creates a luscious sauce that clings perfectly to the pasta.
  • Versatile Ingredients: Use pantry staples like ground beef and pasta, with optional add-ins to customize the dish to your taste.
  • Comfort Food at Its Best: This dish feels like a warm hug, bringing together beloved flavors that both kids and adults will adore.

Ingredients Breakdown & Substitutions

Let’s gather our ingredients! This recipe calls for a few straightforward items, and I’ll also share some handy substitutions to make it work for you.

  • 1 lb Ground Beef: You can swap this with ground turkey or chicken for a leaner option.
  • 8 oz Short Pasta: Use penne, rotini, or even gluten-free pasta if you prefer.
  • 4 cups Beef Broth: If you don’t have beef broth, chicken broth or vegetable broth will work just fine.
  • 1 tbsp Olive Oil: Any cooking oil like canola or avocado oil can be used.
  • 3 tbsp Butter: You can substitute with margarine or a plant-based butter for a dairy-free version.
  • 4 Garlic Cloves: Fresh garlic is best, but you can use 1 tsp of garlic powder in a pinch.
  • 1 tsp Italian Seasoning: A mix of dried basil, oregano, and thyme will suffice.
  • 1/2 tsp Red Pepper Flakes: Adjust based on your heat preference or omit entirely.
  • 1/2 tsp Smoked Paprika: This adds depth; if you don’t have any, regular paprika works too.
  • Salt & Black Pepper: Season to taste.
  • 1/2 cup Grated Parmesan Cheese: Nutritional yeast can be an excellent dairy-free substitute.
  • 1/2 cup Heavy Cream: Use coconut cream for a dairy-free alternative.
  • 1/2 cup Shredded Mozzarella: Feel free to use any melty cheese you love.
  • 2 tbsp Fresh Parsley: Fresh herbs brighten the dish, but dried herbs can work in a pinch.

Step-by-Step Cooking Instructions

Juicy One-Pot Creamy Beef Pasta in a bowl, garnished with parsley.

Now that we have our ingredients prepped, let’s get cooking! Follow these simple steps for a delicious dinner.

  • Step 1: Brown the Ground Beef (8 minutes) – Heat olive oil in a large deep skillet or Dutch oven over medium-high heat. Add the ground beef, breaking it up into small crumbles as it cooks until browned, about 6-8 minutes.
  • Step 2: Create the Garlic Butter Base (3 minutes) – Add butter to the pan with the cooked beef. Once melted, stir in minced garlic, Italian seasoning, red pepper flakes, smoked paprika, salt, and black pepper. Cook for 1-2 minutes until fragrant.
  • Step 3: Add Pasta & Broth (15 minutes) – Pour in beef broth and add uncooked pasta. Stir to ensure pasta is submerged. Bring to a boil, then reduce heat to medium-low and cover. Simmer for 12-15 minutes, stirring occasionally.
  • Step 4: Make It Ridiculously Creamy (3 minutes) – Once the pasta is tender, reduce heat to low. Stir in heavy cream, grated Parmesan, and shredded mozzarella until melted and creamy.
  • Step 5: Rest & Thicken (5 minutes) – Turn off heat and let the pasta sit uncovered for 5 minutes to thicken.
  • Step 6: The Finishing Touches – Sprinkle fresh chopped parsley over the top before serving. Enjoy your meal!

Pro Tips for Perfecting Your Pasta

  • Don’t Overcook the Pasta: Keep an eye on the pasta; it should be al dente, as it will continue to cook while resting.
  • Use Fresh Garlic: Fresh garlic gives the best flavor, so skip the pre-minced stuff if you can.
  • Adjust the Creaminess: If you prefer a lighter dish, reduce the amount of heavy cream or substitute with milk.
  • Experiment with Seasoning: Taste and adjust the seasonings as you go. Every palate is different!
  • Save Some Pasta Water: If the sauce is too thick, add a splash of reserved pasta water for a creamy consistency.
  • Mix in Veggies: For a nutritious boost, add spinach, peas, or bell peppers in the last few minutes of cooking.
  • Garnish Generously: Fresh herbs not only add flavor but also make the dish visually appealing.
  • Make It Ahead: This dish can be made ahead of time and reheated, making it a great meal prep option.

Common Mistakes & Troubleshooting

Even the best of us have kitchen flops, so here are some common pitfalls and how to avoid them:

  • Too Much Liquid: If your pasta is swimming in broth, you may have added too much. Ensure you measure accurately and let it simmer long enough to absorb.
  • Dry Meat: If your ground beef turns out dry, it might be overcooked. Keep an eye on it and remove it from heat once it’s browned.
  • Flavorless Sauce: Always taste as you go! If the dish seems bland, a little more salt or seasoning can elevate it significantly.
  • Sticky Pasta: Stirring occasionally during cooking helps prevent the pasta from sticking together.

Delicious Variations to Try

Want to mix things up? Here are some variations to keep your dinners exciting:

  • Spicy Garlic Butter: Add more red pepper flakes or even a splash of hot sauce for a kick.
  • Mushroom Medley: Incorporate sautéed mushrooms for an earthy flavor.
  • Cheesy Spinach: Stir in fresh spinach and extra cheese for a creamy, veggie-packed dish.
  • Pesto Twist: Add a few tablespoons of pesto for a vibrant twist on the classic.

Storage & Make-Ahead Instructions

This dish stores well in the fridge for up to 3 days. To reheat, simply add a splash of broth or water to bring back the creamy texture. You can also make it ahead of time—just follow the recipe and store it in an airtight container until you’re ready to enjoy it!

Nutrition Tips & Dietary Adaptations

For those looking to maintain a balanced diet, here are some tips:

  • Swap for Whole Grains: Use whole grain or legume-based pasta for added fiber.
  • Lean Proteins: Choose lean ground turkey or chicken to reduce fat content.
  • Load on Vegetables: Add a variety of vegetables for more nutrients and flavor.
  • Control Portions: Serve with a side salad to balance your meal and control portion sizes.

Equipment Recommendations

No special equipment is needed for this recipe, but here are some helpful tools:

  • Large Deep Skillet or Dutch Oven: Ideal for browning meat and cooking pasta.
  • Wooden Spoon: Perfect for stirring and breaking up ground beef.
  • Measuring Cups and Spoons: Essential for accurate ingredient measurements.

Serving Suggestions

Serve this dish with a side of garlic bread and a fresh garden salad for a complete meal. And don’t forget to top it off with a sprinkle of extra Parmesan and parsley for that gourmet touch!

Frequently Asked Questions

  • Can I use different types of meat? Absolutely! Ground turkey or chicken work great as alternatives.
  • How do I make this dish vegetarian? Substitute ground beef with lentils or mushrooms and use vegetable broth.
  • What pasta types can I use? Any short pasta works well, including penne, rotini, or farfalle.
  • Can I prepare this dish in advance? Yes! You can make it ahead of time and reheat when ready to serve.
  • How do I store leftovers? Store in an airtight container in the fridge for up to 3 days.
  • What if I don’t have heavy cream? You can use half-and-half or coconut cream as alternatives.
  • Can I freeze this dish? Yes, but it may affect the texture of the cream. Reheat gently when ready to eat.
  • Is this recipe suitable for kids? Definitely! The flavors are mild and comforting, perfect for little palates.

Now that you have everything you need to make this incredible One-Pot Creamy Beef and Garlic Butter Pasta, get ready to impress your family and friends. Cooking should be fun and rewarding, so embrace your inner chef and enjoy the process. Happy cooking, and may your kitchen always be filled with love and laughter!

One-Pot Creamy Beef and Garlic Butter Pasta

Prep Time 10 minutes
Cook Time 20 minutes
Total Time 30 minutes
Servings 4 servings
Calories 650
A quick and hearty one-pot pasta dish combining savory beef, garlic butter, and creamy cheese for a satisfying meal.

Ingredients

Meat and Pasta

  • 1 lb Ground Beef
  • 8 oz Short Pasta (Penne, rotini, rigatoni, or farfalle)
  • 4 cups Beef Broth
  • 1 tbsp Olive Oil
  • 3 tbsp Butter
  • 4 cloves Garlic Cloves
  • 1 tsp Italian Seasoning
  • 1/2 tsp Red Pepper Flakes
  • 1/2 tsp Smoked Paprika
  • to taste Salt & Black Pepper Salt & Black Pepper
  • 1/2 cup Grated Parmesan Cheese
  • 1/2 cup Heavy Cream
  • 1/2 cup Shredded Mozzarella
  • 2 tbsp Fresh Parsley

Instructions 

  • Heat olive oil and brown ground beef for 6-8 minutes until browned.
  • Add butter and garlic, cook for 1-2 minutes with seasonings until fragrant.
  • Pour in beef broth, add pasta, bring to boil, then simmer covered for 12-15 minutes.
  • Stir in heavy cream, Parmesan, and mozzarella until creamy, cook 3 minutes.
  • Turn off heat, let sit uncovered for 5 minutes to thicken, then garnish with parsley.

Notes

For extra flavor, sprinkle additional Parmesan or fresh herbs before serving.
Calories: 650kcal
Cost: $15
Course: Main Course
Cuisine: American
Keyword: pasta

Welcome to Your New Favorite Comfort Dish!

When the weather turns chilly and you’re craving something warm and hearty, nothing beats a cozy bowl of One-Pot Sausage and Rice. This recipe is not just about the ingredients; it’s about the memories it creates and the comfort it brings to your table. Imagine the aroma of sautéing sausage mingling with the sweetness of bell peppers, all enveloped in creamy, cheesy goodness. It’s the kind of dish that whispers, “Everything will be alright,” as you gather around the table with your loved ones.

In this article, we’re diving deep into everything you need to know to master this dish, from the essential ingredients to the perfect technique. So, pull up a chair, grab your spatula, and let’s get cooking!

Why You’ll Love This Recipe

This One-Pot Sausage and Rice dish is more than just a meal; it’s a celebration of flavors and convenience. Here are five reasons why you’ll want to make it a regular in your kitchen:

  • Quick and Easy: Ready in under 30 minutes, making it perfect for busy weeknights.
  • One-Pot Wonder: All ingredients cook together, saving you time on cleanup.
  • Flavor Packed: Juicy sausage, creamy cheese, and vibrant peppers create a taste explosion.
  • Customizable: Easily swap out ingredients to suit your taste or what you have on hand.
  • Great for Leftovers: This dish reheats beautifully, making it perfect for meal prep.

Ingredients Breakdown

Here’s what you’ll need for this One-Pot Sausage and Rice recipe:

  • 3 Tablespoons olive oil: For sautéing and flavor.
  • 11 oz. sausage: Smoked sausage works best, but feel free to use chicken or turkey sausage for a lighter option.
  • 2 Tablespoons butter: Adds richness and depth.
  • ½ cup yellow onion (diced): For sweetness and aroma.
  • 2 cloves garlic (minced): A must for that savory kick.
  • 2 ½ cups chicken broth: The cooking liquid that infuses flavor into the rice.
  • 1 ¼ cups white long grain rice (uncooked): The base of the dish.
  • 1 small red bell pepper (sliced): Adds color and crunch.
  • 1 small green bell pepper (sliced): For a fresh flavor contrast.
  • 10.75 oz. cream of chicken soup: Adds creaminess and a hint of nostalgia.
  • ½ cup sour cream: For tang and creaminess.
  • ¾ cup milk: To adjust the consistency.
  • 1 cup cheddar cheese (shredded): Because cheese makes everything better!
  • 1 pinch red pepper flakes (optional): For a touch of heat if desired.

**Substitutions:** If you’re looking to mix it up, here are some great alternatives:

  • Rice: Quinoa or brown rice can be used, but be sure to adjust the cooking time.
  • Sausage: Swap for vegetarian sausage or even canned beans for a meatless option.
  • Broth: Vegetable broth works well for a lighter flavor.
  • Vegetables: Feel free to add in broccoli, peas, or corn for more color and nutrients.

Cooking Steps: Your Guide to Perfection

Side view of delicious sausage and rice with colorful bell peppers.

This recipe is designed for simplicity, allowing you to prepare everything in one pot. Here’s how to make it:

  • Step 1: Heat 2 tablespoons of olive oil in a large pot over medium heat. Slice and brown your sausage until golden.
  • Step 2: Add the diced onion and sauté until translucent, about 3-4 minutes. Then, stir in the minced garlic for an additional minute until fragrant.
  • Step 3: Toss in the sliced bell peppers and cook for 2-3 minutes until they begin to soften.
  • Step 4: Add the rice to the pot, stirring to coat it in the oil and flavors.
  • Step 5: Pour in the chicken broth, cream of chicken soup, sour cream, and milk. Stir well to combine.
  • Step 6: Bring the mixture to a boil, then reduce to a simmer. Cover and cook for 18-20 minutes until the rice is tender and has absorbed the liquid.
  • Step 7: Remove from heat, fluff with a fork, and stir in the shredded cheddar cheese until melted.
  • Step 8: Serve warm, garnished with a sprinkle of red pepper flakes if desired.

Pro Tips for a Flawless Dish

Want to ensure your One-Pot Sausage and Rice turns out perfectly? Here are some expert insights:

  • Don’t Rush the Browning: Take your time browning the sausage; it adds depth of flavor.
  • Rice Rinsing: Rinse the rice before cooking to remove excess starch and prevent stickiness.
  • Liquid Adjustments: Always check the rice package for liquid ratios; you may need to adjust based on the type of rice.
  • Cheese Variations: Experiment with different cheeses like pepper jack or gouda for a unique twist.
  • Herbs and Spices: Fresh herbs like parsley or thyme can elevate the dish even more.
  • Leftover Magic: This dish makes excellent leftovers; just reheat with a splash of broth to bring back the creaminess.
  • Meal Prep Friendly: Make a double batch for easy lunches throughout the week!
  • Don’t Forget the Garnish: A sprinkle of fresh herbs or a dollop of sour cream adds the finishing touch.

Common Mistakes and Troubleshooting

Even the best chefs have off days. Here are some common pitfalls to avoid:

  • Overcooking the Rice: Make sure to follow the cooking time; overcooked rice can become mushy.
  • Not Enough Liquid: If your rice isn’t cooking properly, it might need a splash more broth.
  • Skipping the Cheese: Don’t skip the cheese; it’s what makes this dish so creamy and comforting!

Delicious Variations to Try

Feel free to mix and match! Here are some fun variations of this recipe you can experiment with:

  • Spicy Sausage and Rice: Use spicy Italian sausage and add jalapeños for a kick.
  • Vegetarian Delight: Replace sausage with black beans and add extra veggies like zucchini and carrots.
  • Mexican Twist: Add taco seasoning and swap the cheddar for a Mexican blend cheese.
  • Asian-Inspired: Use soy sauce, ginger, and sesame oil for a delicious Asian flavor profile.

Storage and Make-Ahead Instructions

This dish is perfect for meal prep! Here’s how to store and reheat:

  • Refrigerate: Store leftovers in an airtight container for up to 4 days.
  • Freeze: This dish can be frozen for up to 3 months. Thaw in the refrigerator overnight before reheating.
  • Reheat: Add a splash of broth or water when reheating to bring back the creamy texture.

FAQs About One-Pot Sausage and Rice

Here are some frequently asked questions to help you navigate this recipe:

  • Can I use brown rice instead of white? Yes, but brown rice requires more liquid and a longer cooking time.
  • What’s the best sausage to use? Smoked sausage adds great flavor, but feel free to use any your family loves!
  • Can I make this in a slow cooker? Absolutely! Just follow the same steps, but adjust cooking times to 4-6 hours on low.
  • How do I make this dairy-free? Substitute dairy ingredients with coconut milk and omit cheese.
  • Can I add other vegetables? Yes! Peas, carrots, or spinach can be great additions.
  • Is this dish gluten-free? Yes, as long as you use gluten-free sausage and check the broth.
  • How do I make it spicier? Add more red pepper flakes or use a spicy sausage for heat.
  • Can I double the recipe? Yes! Just be sure to use a larger pot to accommodate the increased volume.

Nutritional Tips and Dietary Adaptations

This dish can be adapted to meet various dietary needs:

  • Low-Carb Option: Substitute rice with cauliflower rice for a low-carb alternative.
  • Dairy-Free: Use non-dairy cream and cheese alternatives.
  • High-Protein: Add beans or lentils to increase protein content.

Essential Equipment You’ll Need

To make this recipe, you’ll need:

  • Large Pot or Dutch Oven: Ideal for one-pot cooking.
  • Wooden Spoon: Perfect for stirring ingredients without scratching your pot.
  • Measuring Cups and Spoons: For accurate ingredient measurements.
  • Knife and Cutting Board: To prep your veggies and sausage.

Serving Suggestions

This One-Pot Sausage and Rice dish is delightful on its own, but here are a few ideas to elevate your meal:

  • Fresh Salad: Pair with a bright, crisp salad for a refreshing contrast.
  • Garlic Bread: Serve with warm garlic bread to soak up all the creamy goodness.
  • Wine Pairing: A chilled white wine complements the dish beautifully.

Conclusion: Let’s Cook Together!

Now that you have all the tools to create this delicious One-Pot Sausage and Rice dish, it’s time to put on your apron and make some magic in the kitchen! This recipe is about more than just filling bellies; it’s about creating moments and memories with every bite. So gather your loved ones, share a laugh, and enjoy the process. Happy cooking, friends!

Sausage and Rice - One Pot!

Prep Time 10 minutes
Cook Time 30 minutes
Total Time 40 minutes
Servings 4 servings
Calories 650
A flavorful one-pot meal combining sausage, rice, and colorful peppers for a satisfying dinner.

Ingredients

Oil and fats

  • 3 tablespoons olive oil (separated)
  • 2 tablespoons butter

Meat and protein

  • 11 oz. sausage (see notes)

Vegetables

  • ½ cup yellow onion (diced)
  • 2 cloves garlic (minced)
  • 1 small red bell pepper (sliced)
  • 1 small green bell pepper (sliced)

Canned and processed foods

  • 10.75 oz. cream of chicken soup
  • ½ cup sour cream
  • ¾ cup milk
  • 1 cup cheddar cheese (shredded)
  • 1 pinch optional red pepper flakes

Instructions 

  • Cook sausage and vegetables in one pot, then add broth, rice, and seasonings.
  • Simmer until rice is cooked and flavors meld.
  • Stir in cream of chicken, sour cream, milk, and cheese; cook until heated through.

Notes

You can cook the rice separately if preferred to save time.
Calories: 650kcal
Cost: $15
Course: Main Course
Cuisine: American
Keyword: one-pot, Rice, sausage

Why This Creamy Salmon Pasta Will Be Your New Favorite

Welcome to the world of culinary hugs, where every bite feels like a warm embrace! If you’re looking for a dish that’s quick, comforting, and absolutely delicious, you’ve landed in the right spot. This 15-minute creamy salmon pasta is not just a meal; it’s an experience of flavors that dance together in perfect harmony. Whether you’re a busy parent or a culinary novice, this dish is designed to deliver happiness on a plate.

Let’s dive into why this recipe will quickly become a staple in your kitchen:

  • Quick Preparation: With just 15 minutes from start to finish, this meal is perfect for those hectic weeknights when time is of the essence.
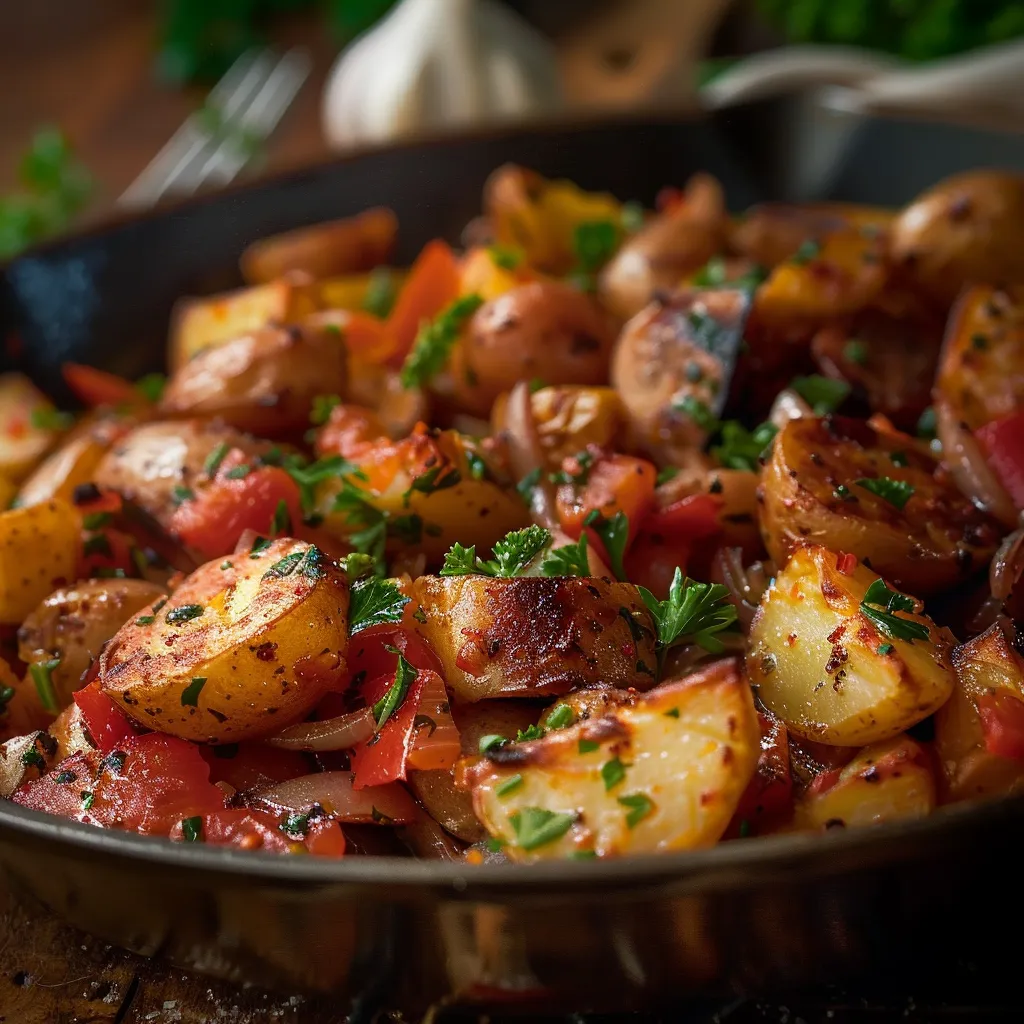
  • Flavor Explosion: The combination of smoky salmon, creamy sauce, and fresh herbs creates a scrumptious flavor profile that will leave everyone asking for seconds.
  • Versatile Ingredients: Using easily accessible ingredients means you can whip this up any day of the week without a trip to the specialty store.
  • Comforting and Satisfying: This dish is not just about filling your stomach; it’s about warming your soul with every luscious bite.
  • Impressive Presentation: The vibrant colors of the dish make it visually appealing, making it perfect for a dinner party or festive gathering.

Ingredient Breakdown

Let’s take a closer look at what you’ll need to create this creamy salmon delight:

  • Pasta: 200g of your choice (fettuccine, penne, or spaghetti work wonderfully). Feel free to use whole grain or gluten-free options for dietary preferences.
  • Smoked Salmon: 150g, chopped into tender pieces. If you prefer, you can substitute with cooked salmon or even canned salmon for convenience.
  • Heavy Cream: 200ml for that rich, creamy sauce. You can substitute with half-and-half or coconut cream for a lighter or dairy-free version.
  • Olive Oil: 1 tablespoon for sautéing; this adds a layer of flavor. Avocado oil can also be a great alternative.
  • Garlic: 2 cloves, minced. Garlic powder can be used in a pinch—just a teaspoon will do.
  • Lemon Juice: 1 tablespoon for a zesty kick; you can swap this for white wine for a different flavor profile.
  • Seasoning: Salt and pepper to taste enhance the flavors. Don’t forget a sprinkle of fresh dill or parsley for garnish!

Let’s Make It Together

A detailed shot of pasta coated in a creamy sauce, featuring pieces of salmon and garlic.

Ready to create this beautiful dish? Let’s break it down step-by-step:

  1. Cook the Pasta: Begin by boiling your pasta according to package instructions until it’s al dente. Drain and set aside, reserving a cup of pasta water.
  2. Sauté the Garlic: In a large pan, heat olive oil over medium heat. Add the minced garlic and sauté until fragrant, about 1 minute.
  3. Create the Creamy Sauce: Pour in the heavy cream and bring to a gentle simmer. This is where the magic happens!
  4. Add the Salmon: Stir in the chopped smoked salmon and lemon juice. Cook for 2-3 minutes until everything is heated through and beautifully combined.
  5. Combine: Toss the cooked pasta into the sauce, mixing well to coat every piece. If the sauce is too thick, add a splash of reserved pasta water.
  6. Serve It Up: Plate your creamy salmon pasta and garnish with fresh dill or parsley. Enjoy immediately!

Pro Tips for Perfection

To elevate your dish even further, consider these expert insights:

  • Don’t Overcook the Salmon: If using raw salmon, ensure it’s cooked just until tender; overcooking can lead to dry pieces.
  • Reserve Pasta Water: This starchy water is a secret weapon for achieving the perfect sauce consistency.
  • Experiment with Herbs: Fresh basil or chives can add a wonderful twist to the flavor profile.
  • Make it Spicy: A pinch of red pepper flakes can introduce a delightful kick if you’re feeling adventurous!
  • Balance the Flavors: Taste as you go! Adjust salt, pepper, and lemon juice for a balanced flavor.
  • Meal Prep: This dish can be made ahead and reheats beautifully—just add a splash of cream when reheating to maintain texture.
  • Garnish Generously: A sprinkle of fresh herbs not only adds flavor but makes your dish pop visually.
  • Pair with Wine: A glass of chilled white wine complements the richness beautifully—think Sauvignon Blanc or Chardonnay.

Common Mistakes and Troubleshooting

Even the best of us can make a few blunders in the kitchen! Here are some tips to avoid common pitfalls:

  • Overcooking Pasta: Always follow package instructions for the best results—al dente is key!
  • Skipping the Seasoning: Don’t forget to season your sauce; it’s essential for flavor depth.
  • Using Low-Quality Salmon: Invest in good-quality smoked salmon; it makes a noticeable difference in flavor.
  • Forgetting the Garnish: A little fresh herb goes a long way in making your dish look and taste gourmet.

Delicious Variations to Try

Want to mix things up? Here are a few variations that can keep this recipe exciting:

  • Veggie Lovers: Add fresh spinach or kale for a nutrient boost!
  • Seafood Extravaganza: Incorporate shrimp or scallops for a seafood medley.
  • Pasta Primavera: Toss in seasonal vegetables like bell peppers, zucchini, or asparagus for a colorful addition.
  • Spicy Cajun Style: Add Cajun seasoning for a flavorful, zesty twist!

Storage and Make-Ahead Instructions

This creamy salmon pasta is not only quick to prepare but also easy to store:

  • Refrigeration: Store any leftovers in an airtight container for up to 3 days. Reheat gently on the stove, adding a splash of cream or pasta water.
  • Make Ahead: You can prepare the sauce a day in advance; just reheat and toss with freshly cooked pasta before serving.

FAQ about Creamy Salmon Pasta

Still have questions? Let’s address some common queries:

  • Can I use frozen salmon? Yes, just ensure it’s fully thawed and cooked properly before adding it to the sauce.
  • What type of pasta works best? Fettuccine and penne are popular choices, but feel free to use your favorite type!
  • Can I make this dish dairy-free? Absolutely! Substitute heavy cream with coconut cream or a cashew cream alternative.
  • How can I enhance the flavor? Consider adding capers or a splash of white wine for added depth.
  • Can I freeze this dish? While it’s best fresh, you can freeze the sauce separately; just add freshly cooked pasta when ready to eat.
  • What sides pair well? A fresh green salad or garlic bread complements this dish beautifully.
  • Is this dish kid-friendly? Yes! The creamy sauce and tender salmon are generally a hit with kids.
  • How do I keep the sauce from curdling? Maintain a gentle heat and avoid boiling the cream to keep it smooth.

Nutritional Tips and Dietary Adaptations

For those keeping an eye on nutrition, here are a few adjustments you can make:

  • Protein Boost: Add additional salmon or a side of grilled chicken for extra protein.
  • Whole Grain Pasta: Opt for whole grain or legume-based pasta for added fiber and nutrients.
  • Low-Calorie Cream: Use low-fat cream or Greek yogurt to reduce calorie intake while maintaining creaminess.
  • Herb Infusion: Fresh herbs are low in calories and can be added generously without worry!

Essential Equipment for Success

To make this creamy salmon pasta, you’ll need a few basic kitchen tools:

  • Large Pot: For boiling the pasta; a pot with a lid will help speed up the boiling process.
  • Skillet: A large skillet for sautéing and combining the sauce.
  • Measuring Cups and Spoons: Precision makes a difference, especially with liquids.
  • Cooking Spoon: A sturdy spoon for stirring the sauce and pasta together.

Serving Suggestions

This dish is perfect for any occasion. Serve it with:

  • Garlic Bread: A crispy side that complements the creamy sauce.
  • Mixed Green Salad: A light salad with a vinaigrette dressing brightens the meal.
  • Wine Pairing: A chilled glass of white wine enhances the flavors beautifully.

So, whether you’re cooking for family, friends, or just treating yourself after a long day, this 15-minute creamy salmon pasta is bound to bring joy and happiness to your table. It’s not just a meal; it’s a quick escape into comfort with every bite. Bon appétit!

15-Minute Creamy Salmon Pasta

Prep Time 5 minutes
Cook Time 10 minutes
Total Time 15 minutes
Servings 2 servings
Calories 550
A quick and delicious pasta dish featuring smoked salmon in a creamy sauce, perfect for a fast weeknight dinner.

Ingredients

pasta

  • 200 g pasta of choice
  • 150 g smoked salmon, chopped
  • 200 ml heavy cream
  • 1 tablespoon olive oil
  • 2 cloves garlic, minced
  • 1 tablespoon lemon juice
  • to taste salt and pepper
  • optional fresh dill or parsley for garnish

Instructions 

  • Cook pasta until al dente, then drain.
  • Heat olive oil and sauté garlic until fragrant.
  • Add cream and simmer gently.
  • Stir in salmon and lemon juice; cook 2-3 minutes.
  • Season with salt and pepper, then toss with pasta.
  • Serve garnished with herbs if desired.

Notes

Use fresh herbs for best flavor and adjust seasoning to taste.
Calories: 550kcal
Cost: $15
Course: Main Course
Cuisine: Italian
Keyword: Salmon

Loved this recipe? Save it to your favorite Pinterest board so you can easily find it later! It’s the perfect way to keep all your sweet ideas in one place. ✨

A beautifully styled bowl of creamy salmon pasta with soft shadows and a blurred background.