Hey there, burger aficionados! Ava here, back from my Seattle kitchen with a recipe that’s about to revolutionize your grilling game. Forget dry, flavorless turkey burgers – we’re diving headfirst into a world of juicy, mouthwatering goodness. I’m talking about the kind of turkey burgers that even beef purists will secretly crave. So, fire up the grill, because we’re making the best turkey burgers ever!
I remember the first time I tried grilling turkey burgers. Let’s just say it wasn’t pretty. They were dry, crumbly, and tasted suspiciously like cardboard. It was a culinary disaster of epic proportions. But, being the stubborn cook I am, I refused to give up. I experimented with different ingredients, techniques, and seasonings until I finally cracked the code. And now, I’m sharing all my secrets with you!
Why You’ll Love This Turkey Burger Recipe
Why should you trust me with your precious grilling time? Because this recipe is a game-changer. If you‘ve been disappointed by turkey burgers in the past, prepare to be amazed. Here’s why you’ll be obsessed:
Juiciness Overload: We’re talking seriously succulent burgers that burst with flavor in every bite. No more dry, sad patties!
Flavor Explosion: Forget bland! We’re packing these burgers with herbs, spices, and a secret ingredient (more on that later) that will make your taste buds sing.
Easy Peasy: This recipe is ridiculously simple to make. Even if you’re a grilling newbie, you’ll nail it on the first try.
Healthy-ish: Turkey burgers are a lighter alternative to beef, so you can indulge without the guilt.
Customizable: Want to add cheese? Spice it up with jalapenos? The possibilities are endless! You can tailor this recipe to your exact preferences.
Ingredients for the Ultimate Turkey Burger
Here’s what you’ll need to create these delicious turkey burgers:
1.5 lbs ground turkey
1/4 cup breadcrumbs
1/4 cup finely chopped onion
1 clove garlic, minced
1 tablespoon Worcestershire sauce
1 teaspoon Dijon mustard
1/2 teaspoon dried thyme
1/4 teaspoon salt
1/4 teaspoon black pepper
4 hamburger buns
Toppings of your choice (lettuce, tomato, cheese, etc.)
How to Make Juicy Grilled Turkey Burgers: Step-by-Step
Alright, let’s get down to business! Here’s how to transform simple ingredients into burger perfection:
Combine the Ingredients: In a large bowl, gently combine the ground turkey, breadcrumbs, onion, garlic, Worcestershire sauce, Dijon mustard, thyme, salt, and pepper. Remember, the key word here is “gently.” Overmixing can lead to tough burger patties.
Form the Patties: Divide the mixture into 4 equal portions and form them into patties about 3/4 inch thick. Make a slight indentation in the center of each patty to prevent them from puffing up too much on the grill.
Preheat the Grill: Preheat your grill to medium heat. Be sure it’s not too hot, or the outside of the burgers will burn before the inside is cooked through.
Oil the Grates: Lightly oil the grates to prevent the turkey burgers from sticking. You can use cooking spray or brush them with a little olive oil.
Grill the Burgers: Place the turkey burger patties on the grill and cook for 6-8 minutes per side, or until the internal temperature reaches 165°F (74°C). Use a meat thermometer to ensure they’re cooked through.
Add Cheese (Optional): During the last minute of cooking, add cheese to the burgersif you desire. Cheddar, Monterey Jack, or even a little crumbled feta would be delicious.
Rest and Serve: Remove the burgers from the grill and let them rest for a few minutes before serving. This allows the juices to redistribute, resulting in a juicier burger. Serve on hamburger buns with your favorite toppings.
Pro Tips for Perfect Turkey Burgers
Want to take your turkey burgers from good to great? Here are a few of my top tips:
Don’t Overmix: I can’t stress this enough! Overmixing the turkey mixture will result in tough, dry burgers. Mix just until the ingredients are combined.
Use Breadcrumbs: Breadcrumbs help to bind the ingredients together and keep the burgers moist. I prefer panko breadcrumbs for their light and airy texture.
Add Moisture: Ground turkey can be lean, so it’s important to add moisture to the mixture. Worcestershire sauce and Dijon mustard not only add flavor but also help to keep the burgers juicy.
Don’t Press Down: Resist the urge to press down on the burgers while they’re grilling. This will squeeze out the juices and result in a dry burger.
Use a Meat Thermometer: Be sure to cook the turkey burgers to an internal temperature of 165°F (74°C) to ensure they’re safe to eat.
Common Mistakes to Avoid
Even with the best turkey burger recipe, mistakes can happen. Here’s what to watch out for:
Using Extra-Lean Ground Turkey: While it might seem healthier, extra-lean ground turkey tends to dry out easily. Opt for a blend with a little more fat content (around 93% lean) for juicier burgers.
Overcooking the Burgers: Turkey burgers can quickly become dry if overcooked. Use a meat thermometer and remove them from the grill as soon as they reach 165°F (74°C).
Forgetting to Oil the Grates: This is a surefire way to end up with stuck, mangled burgers. Lightly oil the grates before placing the patties on the grill.
Adding Too Many Ingredients: While it’s tempting to load up the mixture with all sorts of goodies, too many ingredients can make the burgers fall apart. Keep it simple and focus on quality flavors.
Turkey Burger Variations: Spice It Up!
Want to get creative? Here are a few fun variations to try with this recipe:
Spicy Turkey Burgers: Add a pinch of cayenne pepper, some chopped jalapenos, or a dash of hot sauce to the mixture for a fiery kick.
Mediterranean Turkey Burgers: Mix in some crumbled feta cheese, Kalamata olives, and sun-dried tomatoes for a taste of the Mediterranean.
BBQ Turkey Burgers: Brush the burgers with your favorite BBQ sauce during the last few minutes of grilling.
Mushroom and Swiss Turkey Burgers: Top the burgers with sautéed mushrooms and melted Swiss cheese.
Avocado Turkey Burgers: Add slices of creamy avocado and a dollop of sriracha mayo for a West Coast-inspired burger.
Storage Instructions
Got leftovers? Lucky you! Here’s how to store your turkey burgers:
Refrigerator: Cooked turkey burgers can be stored in an airtight container in the refrigerator for up to 3-4 days.
Freezer: For longer storage, wrap the cooked burger patties individually in plastic wrap and then place them in a freezer bag. They can be frozen for up to 2-3 months.
To reheat, simply microwave the burgers until heated through, or warm them up in a skillet over medium heat.
Frequently Asked Questions (FAQ)
Got questions? I’ve got answers!
Can I use ground chicken instead of ground turkey? Absolutely! You can substitute ground chicken for ground turkey in this recipe. The cooking time will be the same.
Can I make these burgers on the stovetop? Yes! If you don’t have a grill, you can cook the burgers in a skillet over medium heat. Cook for about 5-7 minutes per side, or until the internal temperature reaches 165°F (74°C). Turkey Burger Recipes Stove Top are great when you can’t get outdoors.
Can I make the patties ahead of time? Absolutely! You can prepare the burger patties ahead of time and store them in the refrigerator for up to 24 hours.
What’s the best way to prevent the burgers from sticking to the grill? Make sure the grates are clean and well-oiled. Be sure to preheat the grill to medium heat before placing the patties on.
Can I add an egg to the mixture? While some people add an egg to their turkey burgermixture to help bind the ingredients together, I find that the breadcrumbs and Worcestershire sauce do a good enough job. Adding an egg can sometimes make the burgers a little too dense. Turkey Burger Recipes No Egg are perfectly fine!
Serving Suggestions: Complete the Meal
Turkey burgers are incredibly versatile and pair well with a variety of sides. Here are a few of my favorite serving suggestions:
Classic Burger Night: Serve the burgers on toasted buns with lettuce, tomato, onion, cheese, and your favorite condiments.
Sweet Potato Fries: Crispy sweet potato fries are the perfect complement to juicy turkey burgers.
Coleslaw: A creamy coleslaw adds a refreshing crunch to the meal.
Corn on the Cob: Grilled corn on the cob is a summertime staple that pairs perfectly with turkey burgers.
Salad: A light and refreshing salad is a great way to balance out the richness of the burgers.
And there you have it – my ultimate turkey burger recipe! I’m sure to hear from you once you try it. I’m so happy to share this recipe with you, and I hope it becomes a staple in your kitchen. If you give it a try, be sure to let me know in the comments below! I’d love to hear what you think and what variations you come up with. Enjoy, and happy grilling!
I’ve really enjoyed sharing this recipe with you all. It’s always a pleasure to know that something I created in my kitchen can bring joy to yours. Until next time, happy cooking! Thank you for stopping by!
I’ve spent countless hours perfecting this recipe, and I’ve poured all my heart and soul into ensuring that you’ll have the best possible experience making these turkey burgers. Don’t hesitate to reach out if you have any questions or need any assistance along the way. I’m here to help you every step of the way.
Juicy and flavorful grilled turkey burgers are a healthy and delicious alternative to beef. These burgers are easy to make and perfect for a summer barbecue.
Ingredients
Burger Ingredients
1.5lbsground turkey
1/4cupbreadcrumbs
1/4cupfinely chopped onion
1clovegarlic, minced
1tablespoonWorcestershire sauce
1teaspoonDijon mustard
1/2teaspoondried thyme
1/4teaspoonsalt
1/4teaspoonblack pepper
Serving
4hamburger buns
Toppings of your choice (lettuce, tomato, cheese, etc.)
Instructions
Combine turkey, breadcrumbs, onion, garlic, Worcestershire, mustard, thyme, salt, and pepper in a bowl.
Gently mix until just combined; do not overmix.
Divide into 4 patties, about 3/4 inch thick.
Preheat grill to medium heat.
Lightly oil the grill grates.
Grill burgers for 6-8 minutes per side, until 165°F (74°C).
Add cheese during the last minute, if desired.
Remove from grill and let rest for a few minutes.
Serve on buns with your favorite toppings.
Notes
For extra flavor, try adding a dash of hot sauce or a pinch of red pepper flakes to the turkey mixture.
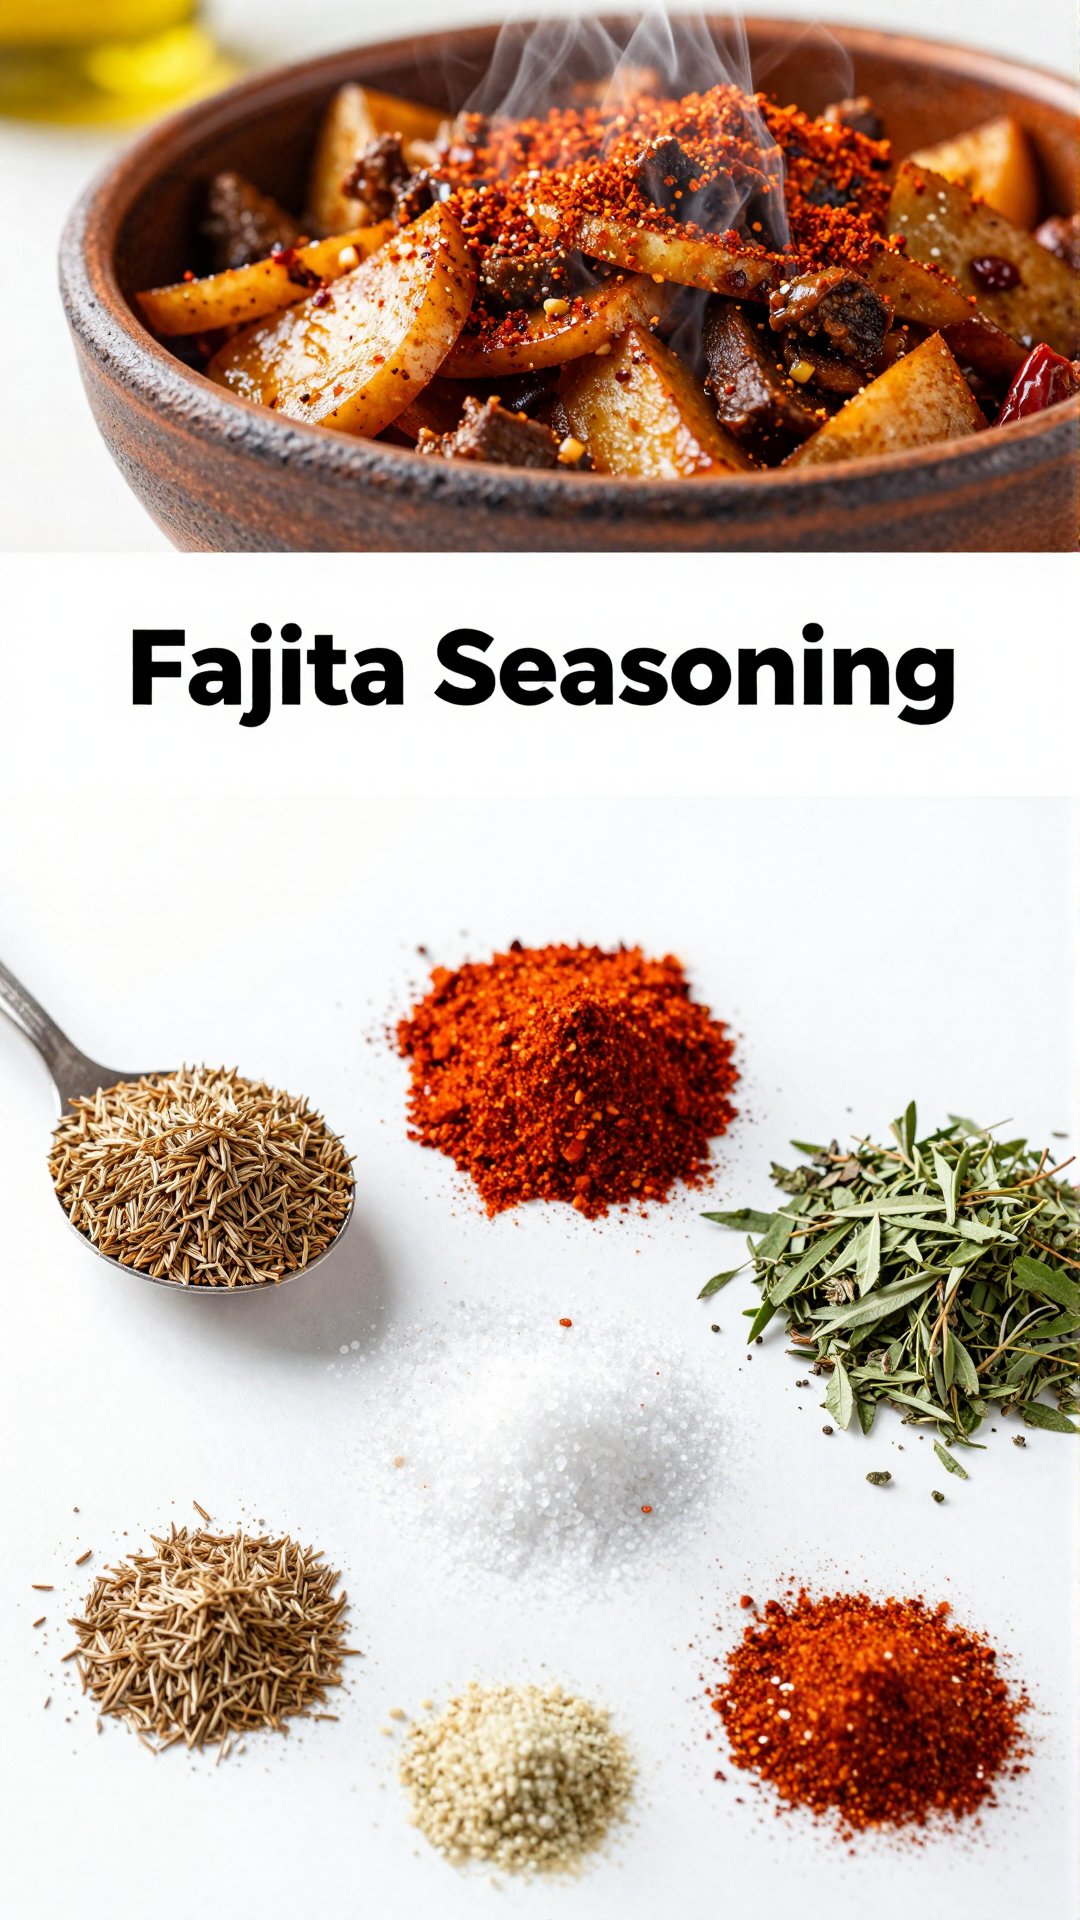
Hey there, spice enthusiasts! Ava here, back in my Seattle kitchen, and today we’re diving into something that’s ridiculously easy, endlessly customizable, and guaranteed to elevate your Tex-Mex game: homemade fajita seasoning. Forget those pre-packaged packets – we’re about to create a spice blend that’s bursting with flavor and perfectly tailored to your taste. If you’ve ever wondered what makes fajitas so irresistible, it all starts with the seasoning.
I remember the first time I made my own fajita seasoning. I had invited friends over for a fajita night, only to discover I was out of the store-bought stuff. Panic almost ensued! But then I thought, ‘Wait a minute, I have all the spices I need right here.’ A quick online search, a little experimentation, and voilà! The best fajitas of my life were born. And that’s how this recipe came to be, born from a moment of near-disaster that turned into a culinary triumph.
This recipe is more than just a list of ingredients; it’s an invitation to play in your kitchen. It’s a chance to become a spice master, adjusting flavors until they sing your song. So, grab your spice jars, and let’s get started!
Why You’ll Love This Homemade Fajita Seasoning
Seriously, why settle for store-bought when you can create something so much better at home? Here’s why this homemade fajita seasoning will become your new go-to:
Control the Ingredients: You know exactly what’s going into your spice blend. No weird additives or preservatives. Just pure, unadulterated flavor.
Customize to Your Taste: Love a little heat? Add more cayenne pepper! Prefer a smoky flavor? Up the smoked paprika! This recipe is your canvas.
Budget-Friendly: Making your own spice blends is significantly cheaper than buying pre-made packets.
Freshness Matters: Homemade seasoning is fresher and more flavorful than anything you’ll find on the grocery store shelf.
It’s Ridiculously Easy: Seriously, it takes about 5 minutes to make.
Plus, there’s something incredibly satisfying about creating your own spice blends. It makes you feel like a culinary wizard, and who doesn’t want that?
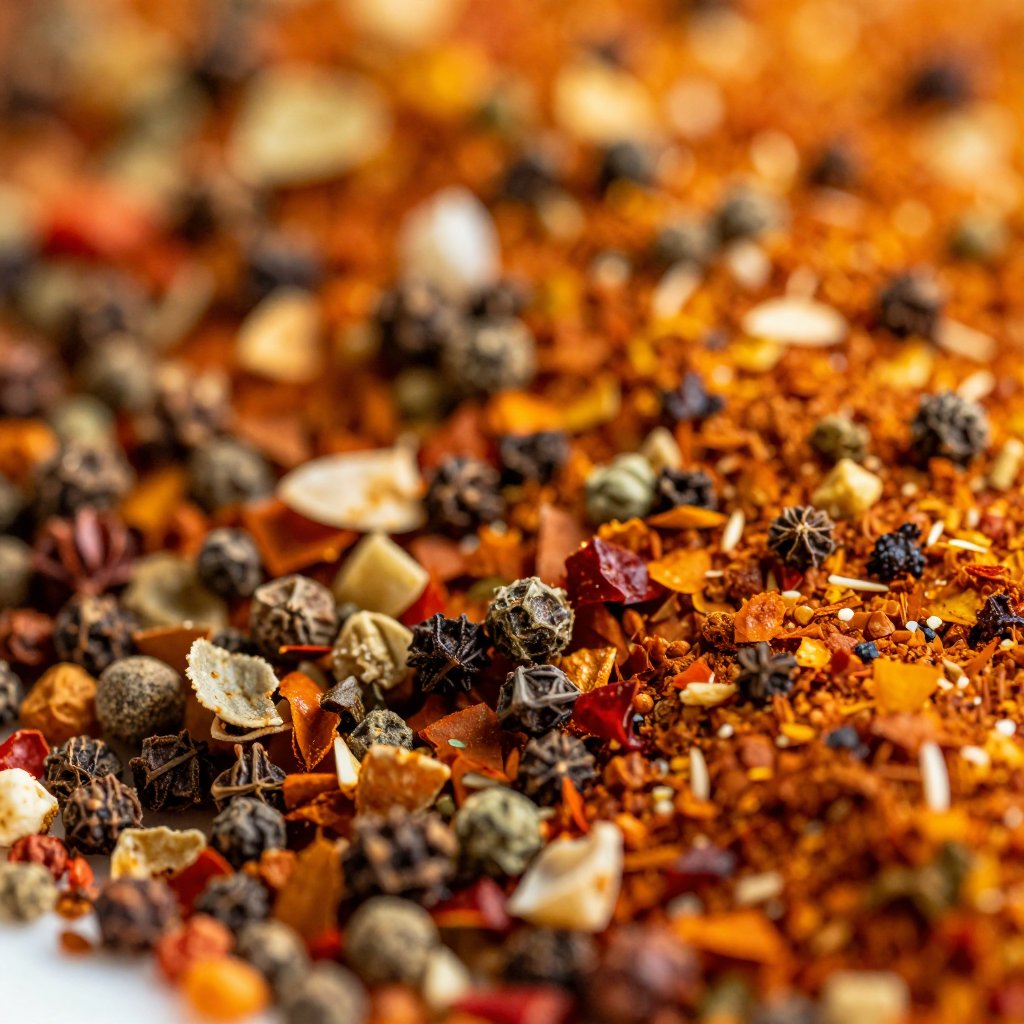
Ingredients for the Perfect Fajita Spice Blend
Here’s what you’ll need to create this magical spice blend. Don’t worry, you probably already have most of these in your pantry!
2 tablespoons chili powder: The base of our flavor profile. Choose a good quality chili powder for the best results.
1 tablespoon ground cumin: Adds warmth and earthiness.
1 tablespoon smoked paprika: This is my secret weapon! It adds a smoky depth that’s simply irresistible.
1 tablespoon garlic powder: Because everything’s better with garlic, right?
1 tablespoon onion powder: Adds a subtle sweetness and complexity.
1 teaspoon dried oregano: Provides a hint of herbaceousness.
1 teaspoon salt: Enhances all the other flavors. Adjust to your liking.
1/2 teaspoon black pepper: Adds a touch of spice and balances the flavors.
1/2 teaspoon cayenne pepper (optional): For a kick! If you like your fajitas with a little heat, don’t skip this. Adjust to your spice preference; a little goes a long way.
How to Make Homemade Fajita Seasoning: Step-by-Step
Ready to whip up this amazing spice blend? It’s so easy, you’ll wonder why you haven’t been doing this all along!
Combine the Spices: In a small bowl, combine the chili powder, ground cumin, smoked paprika, garlic powder, onion powder, dried oregano, salt, black pepper, and cayenne pepper (if using).
Whisk Thoroughly: Whisk all the spices together thoroughly until well combined and there are no clumps. This ensures that the flavors are evenly distributed.
Store Properly: Transfer the homemade fajita seasoning to an airtight container or spice jar. Store in a cool, dark place for up to 6 months.
That’s it! You’re ready to transform ordinary ingredients into a fajita fiesta. You can use this blend on beef or chicken, or even vegetables. If you’re looking to have fun, try it on tofu or portobello mushrooms for a vegetarian option. And don’t be afraid to experiment with different combinations of spices to find what you like best.
Pro Tips for the Best Fajita Seasoning
Want to take your fajita seasoning to the next level? Here are a few tips and tricks I’ve learned over the years:
Use Fresh Spices: The fresher your spices, the more flavorful your seasoning will be.
Toast the Spices: For an even deeper flavor, lightly toast the spices in a dry skillet over medium heat for a few minutes before combining them. Be careful not to burn them!
Adjust to Taste: This is your seasoning, so make it your own! Adjust the amount of each spice to suit your preferences. If you like it spicier, add more cayenne pepper. If you prefer a smoky flavor, add more smoked paprika.
Grind Whole Spices: If you really want to go the extra mile, grind your own spices from whole. The flavor will be unparalleled.
Don’t Be Afraid to Experiment: Try adding a pinch of sugar for a touch of sweetness, or a dash of coriander for a citrusy note.
Common Mistakes to Avoid
Even though this recipe is super simple, here are a few common mistakes to watch out for:
Using Stale Spices: Check the expiration dates on your spices before using them. Stale spices will have a muted flavor.
Burning the Spices: If you choose to toast the spices, keep a close eye on them to prevent burning. Burnt spices will taste bitter.
Not Combining Thoroughly: Make sure all the spices are well combined so that the flavors are evenly distributed.
Storing Improperly: Store your fajita seasoning in an airtight container in a cool, dark place to prevent it from losing its flavor.
Adding Too Much Salt: Start with the recommended amount of salt and then adjust to taste. It’s always easier to add more than to take away.
Fajita Seasoning Variations
Want to mix things up a bit? Here are a few fun variations to try:
Spicy Fajita Seasoning: Add more cayenne pepper or a pinch of red pepper flakes.
Smoky Fajita Seasoning: Increase the amount of smoked paprika.
Citrusy Fajita Seasoning: Add a teaspoon of lime zest or orange zest.
Herby Fajita Seasoning: Add a teaspoon of dried cilantro or parsley.
Sweet Fajita Seasoning: Add a teaspoon of brown sugar or maple sugar.
The possibilities are endless! Feel free to get creative and experiment with different flavors.
How to Store Your Homemade Seasoning
Proper storage is key to keeping your fajita seasoning fresh and flavorful. Here’s what you need to know:
Airtight Container: Store your seasoning in an airtight container to prevent it from losing its flavor and aroma.
Cool, Dark Place: Keep the container in a cool, dark place, away from direct sunlight and heat.
Shelf Life: Homemade fajita seasoning will last for up to 6 months when stored properly.
I like to use small glass jars with tight-fitting lids. They look pretty and keep the seasoning fresh. You can even make homemade fajita seasoning packets for easy use or to give as gifts.
Frequently Asked Questions (FAQ)
Got questions? I’ve got answers!
What spices are in fajita seasoning? The main spices are chili powder, cumin, smoked paprika, garlic powder, onion powder, oregano, salt, and pepper.
Can I adjust the amount of cayenne pepper? Absolutely! Adjust the amount of cayenne pepper to your liking. If you don’t like spice, you can omit it altogether.
How much seasoning do I use per pound of meat? I recommend using about 2-3 tablespoons of fajita seasoning per pound of meat or vegetables.
Can I use this seasoning for anything else? Of course! It’s great on chicken, steak, shrimp, tofu, vegetables, or even sprinkled on roasted potatoes.
Is this gluten-free? Yes, this recipe is naturally gluten-free.
Serving Suggestions
Now that you’ve made your amazing homemade fajita seasoning, it’s time to put it to good use! Here are a few serving suggestions:
Classic Fajitas: Marinate sliced chicken, steak, or shrimp in the fajita seasoning, then grill or sauté until cooked through. Serve with warm tortillas, sautéed peppers and onions, salsa, guacamole, and sour cream.
Fajita Bowls: Create a delicious and healthy fajita bowl with rice, black beans, grilled vegetables, and your choice of protein. Top with a dollop of Greek yogurt or a drizzle of cilantro-lime dressing.
Fajita Salad: Toss grilled chicken or steak with mixed greens, black beans, corn, avocado, and a zesty vinaigrette.
Fajita Quesadillas: Fill tortillas with cheese, grilled vegetables, and your choice of protein. Grill or pan-fry until the cheese is melted and the tortillas are golden brown.
Fajita Nachos: Load tortilla chips with cheese, black beans, grilled vegetables, and your choice of protein. Bake until the cheese is melted and bubbly. Top with your favorite nacho toppings.
No matter how you choose to serve it, this homemade fajita seasoning is sure to be a hit. It’s the perfect way to add a burst of flavor to any meal. It’s ready to go whenever you are!
So there you have it! My go-to, never-fail, absolutely-delicious homemade fajita seasoning recipe. I hope you love it as much as I do. Now, go forth and create some culinary magic! Remember, cooking isn’t about perfection; it’s about having fun and creating something delicious. Until next time, happy cooking!
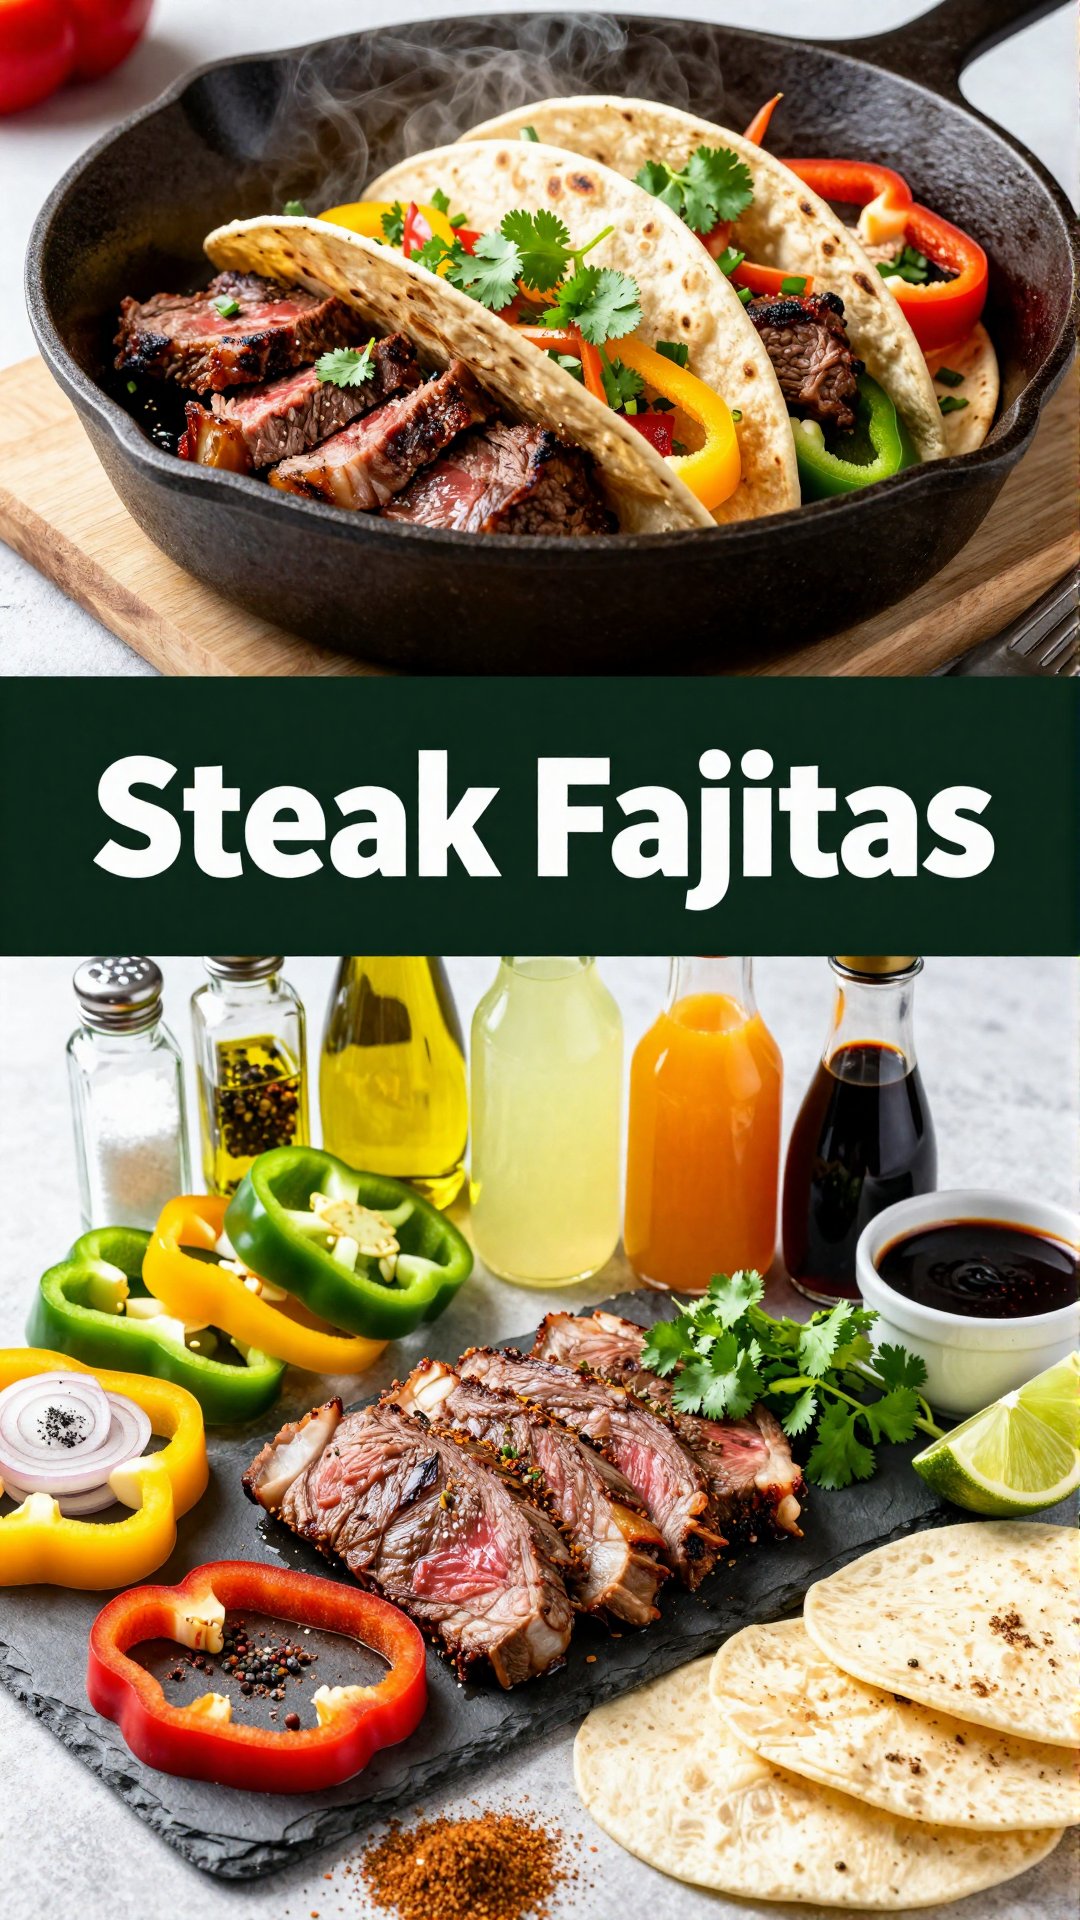
My name’s Ava, and if you’ve stumbled upon my kitchen, you’re probably here for one thing—the kind of recipes that make people pause mid-bite and say, ‘Wow.’ And trust me, these skillet steak fajitas will do just that! I grew up in a small town in Oregon, where the smell of fresh bread and roasted vegetables often drifted out of my mother’s kitchen window. Cooking wasn’t just something we did to eat—it was how we celebrated, comforted, and connected. I was the kid who would rather stir a pot of chili than go ride my bike, and by the time I was twelve, I could whip up a pie from scratch that made my grandmother proud.
These days, I’m 34 and living in Seattle, where my kitchen has become my favorite corner of the world. I believe the best recipes aren’t always the fanciest—they’re the ones that feel like a warm hug, the ones you make over and over because they just work. Sure, I’ve had my share of flops (ask me about the infamous triple-layer cake that collapsed right before a dinner party), but I’ve learned that every ‘oops’ moment is just an invitation to try again—this time with a little more patience and maybe a pinch more salt. And that’s exactly what happened when I was trying to nail down the perfect steak fajita recipe. It took several tries, but I finally got it!
What I love most is taking a recipe and finding ways to make it even better—whether it’s swapping in a secret ingredient, adjusting the texture, or adding a touch of spice to wake up the flavors. I’m a bit obsessed with balance: sweet with savory, creamy with crunchy, familiar with unexpected. And I believe that cooking is less about following rules and more about trusting your senses. If it smells amazing and makes you smile, you’re probably on the right track. These restaurant-style skillet steak fajitas are all about that—trusting your senses and creating something incredible.
When I’m not stirring a pot or baking something golden, you’ll find me wandering local farmers’ markets, chatting with growers about their produce, or experimenting late at night when inspiration strikes. My recipes are a blend of comfort food classics, modern twists, and just enough adventure to keep things exciting. I share them because I want you to have a little magic in your kitchen too—meals that bring people together, that become your ‘go-to,’ that make someone you love ask for seconds.
So whether you’re cooking for your family, impressing friends, or just treating yourself, I’m here to help you find your next favorite dish. Pull up a chair, grab a spatula, and let’s make something unforgettable together. Let’s start with these incredible skillet steak fajitas. You won’t regret it!
Why You’ll Love This Recipe
Okay, let’s get real. Why should you spend your precious time making these skillet steak fajitas? Because they’re ridiculously good, that’s why! But let’s break it down a bit more:
Restaurant-Quality at Home: Get that sizzling, flavorful fajita experience without leaving your kitchen.
Quick & Easy: Ready in just 30 minutes, perfect for busy weeknights. If you want a fast and delicious meal, look no further.
Customizable: Easily adjust the spice level and toppings to suit your taste.
Crowd-Pleaser: Everyone loves fajitas! They’re perfect for family dinners or casual gatherings.
Healthy-ish: Packed with protein and veggies, these fajitas are a relatively healthy and satisfying meal.
I mean, who doesn’t love fajitas? The sizzle, the smell, the vibrant colors – it’s a feast for the senses. And the best part? You don’t have to wait for a special occasion to enjoy them. This recipe brings the restaurant experience right to your dining table.
The secret to the best skillet steak fajitas is all in the marinade and the cooking technique. We’re talking tender, juicy steak, perfectly charred veggies, and a flavor explosion that will have everyone reaching for seconds. So, are you ready to ditch the takeout and make some magic in your kitchen? Let’s do this!
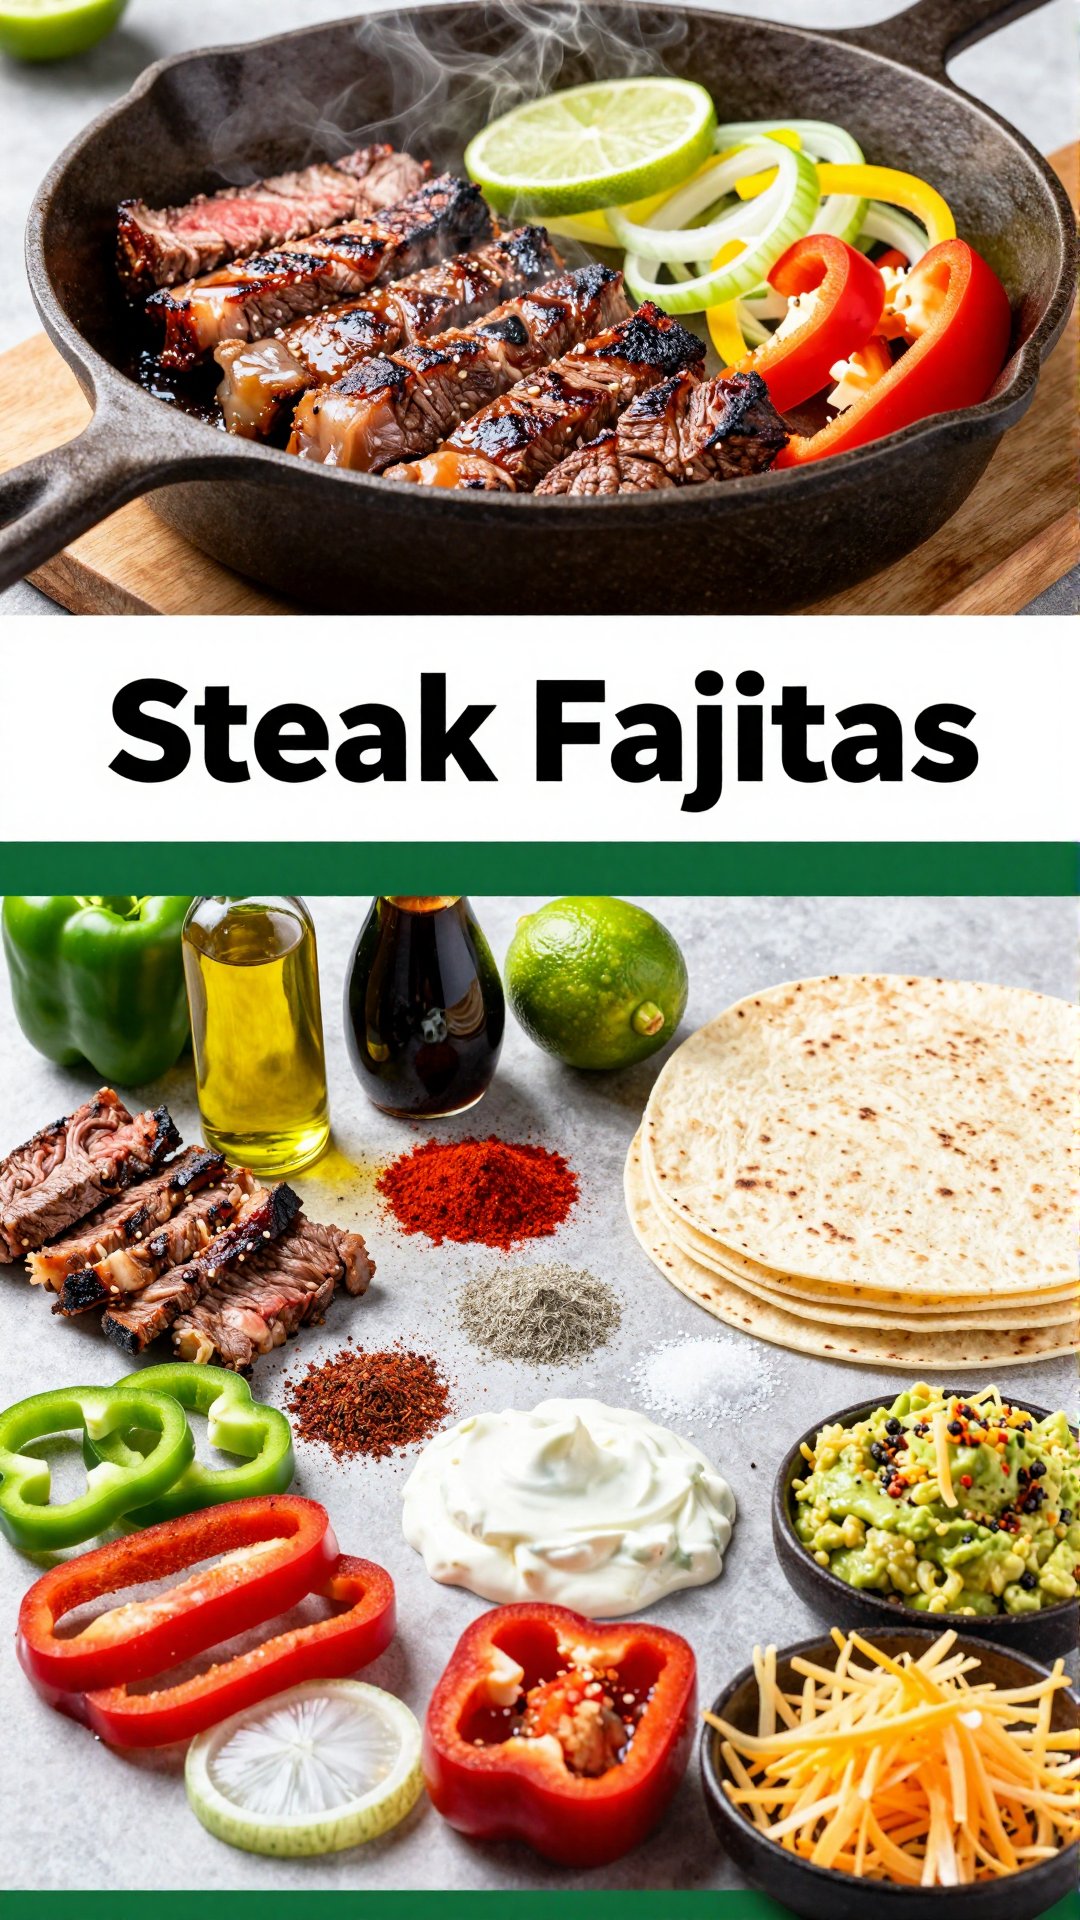
Ingredients for the Best Skillet Steak Fajitas
Alright, let’s gather our ingredients. Here’s what you’ll need to create these restaurant-style skillet steak fajitas:
1. 5 lbs skirt steak or flank steak, sliced against the grain into thin strips
How to Make Restaurant-Style Skillet Steak Fajitas: Step-by-Step
Okay, here’s how to bring it all together. Follow these simple steps, and you’ll be enjoying the best skillet steak fajitas in no time!
Marinate the Steak: Combine the steak strips with lime juice, 1 tablespoon of olive oil, Worcestershire sauce, chili powder, cumin, smoked paprika, garlic powder, onion powder, salt, and pepper in a bowl. Mix well to coat. Cover and marinate in the refrigerator for at least 20 minutes, or up to 4 hours. The longer you marinate, the more flavorful the steak will be.
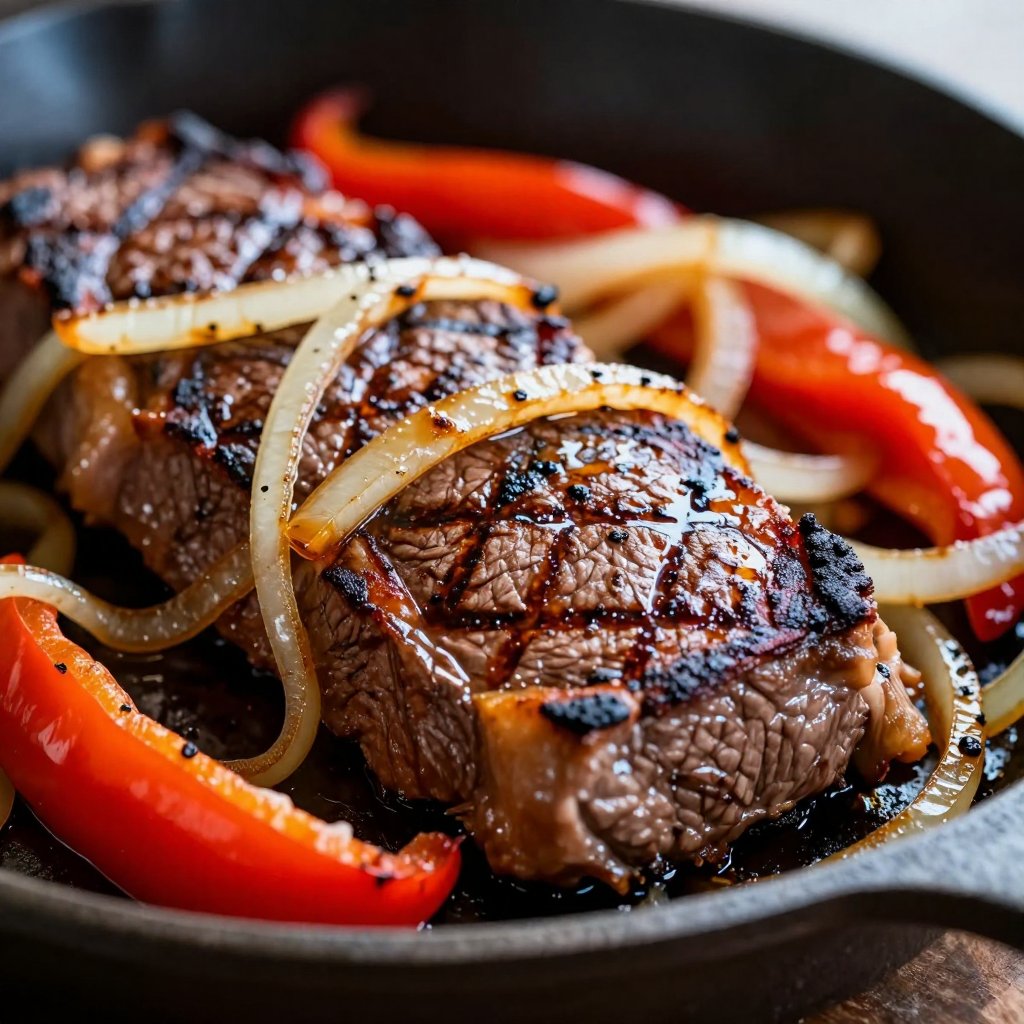
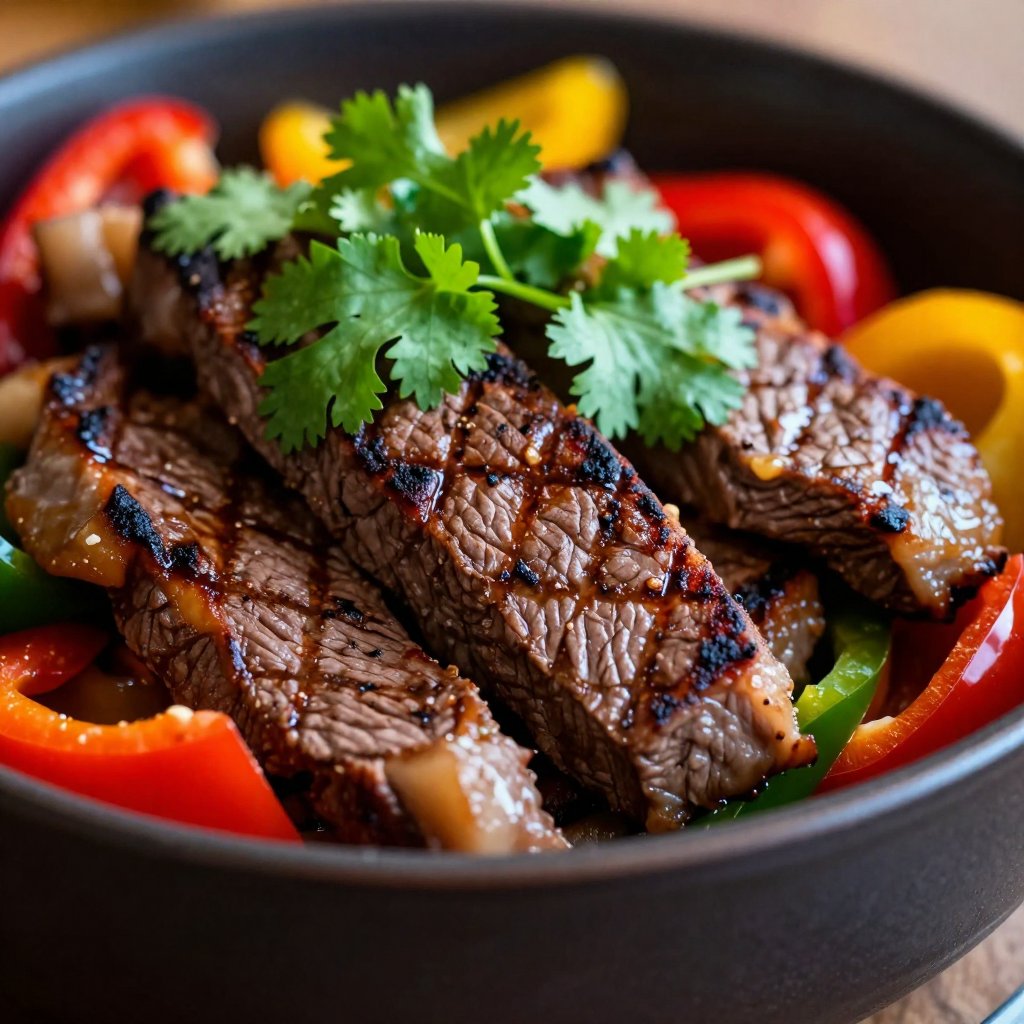
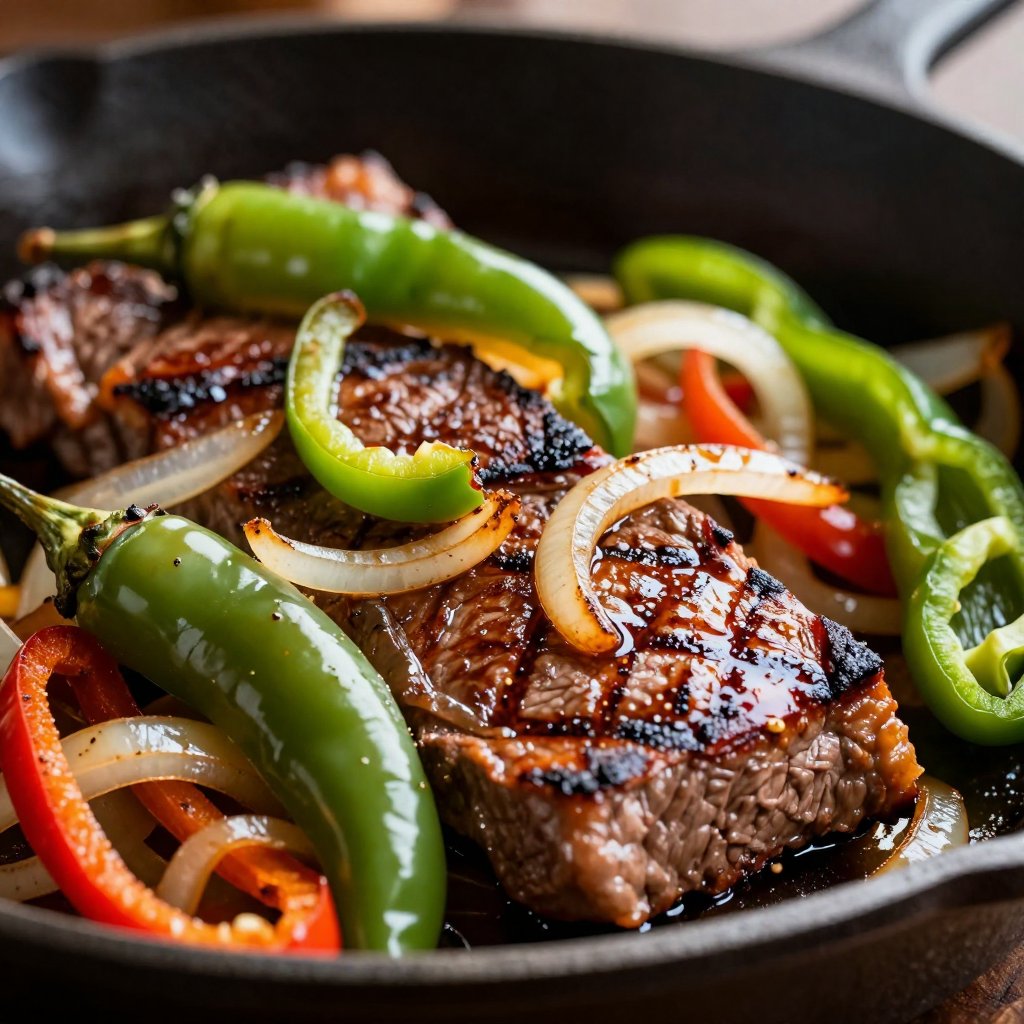
Sear the Steak: Heat 1 tablespoon of olive oil in a large cast iron skillet or heavy-bottomed pan over medium-high heat until shimmering. This high heat helps achieve the restaurant sizzle. Remove the steak from the marinade, letting excess drip off. Add half of the steak to the hot skillet in a single layer. Cook for 2 to 3 minutes per side until nicely browned and cooked to your preferred doneness. Remove the steak from the skillet and set aside.
Cook in Batches: Add the remaining steak to the skillet and cook in batches if necessary to avoid overcrowding the pan. Remove and set aside with the first batch. Overcrowding the pan will steam the steak instead of searing it.
Sauté the Veggies: Add the sliced bell peppers and onions to the same skillet. Cook, stirring occasionally, for 5 to 7 minutes until the vegetables are tender-crisp and slightly charred.
Combine and Reheat: Return all the cooked steak to the skillet with the vegetables. Toss everything together for 1 minute to reheat.
Serve and Enjoy: Serve the sizzling steak fajitas immediately with warm tortillas and your choice of toppings. For easy meal planning, consider this a great alternative to some meal delivery companies.
See? It’s not rocket science! The key is to get that skillet screaming hot and to cook the steak in batches. That’s how you get that perfect sear and juicy, tender steak. And don’t skimp on the toppings! That’s where the fun really begins.
Pro Tips for Perfect Skillet Steak Fajitas
Want to take your skillet steak fajitas to the next level? Here are a few pro tips that will make all the difference:
Use a Cast Iron Skillet: A cast iron skillet is your best friend for this recipe. It gets incredibly hot and distributes heat evenly, which is essential for searing the steak and charring the vegetables. If you don’t have one, a heavy-bottomed pan will work, but the cast iron really elevates the dish.
High Heat is Key: Don’t be afraid to crank up the heat! You want that skillet to be smoking hot before you add the steak. This is what creates that beautiful sear and locks in the juices.
Don’t Overcrowd the Pan: Cooking the steak in batches is crucial. Overcrowding the pan will lower the temperature and cause the steak to steam instead of sear.
Let the Steak Rest: After cooking the steak, let it rest for a few minutes before slicing. This allows the juices to redistribute, resulting in a more tender and flavorful steak.
Warm Your Tortillas: Warm tortillas are a must! You can warm them in a dry skillet, in the microwave, or even over an open flame for a slightly charred flavor.
These tips are simple, but they make a huge difference in the final product. Trust me, a little extra effort goes a long way when it comes to skillet steak fajitas.
Common Mistakes to Avoid
We all make mistakes in the kitchen, but here are a few common pitfalls to avoid when making skillet steak fajitas:
Not Marinating the Steak: The marinade is essential for tenderizing the steak and infusing it with flavor. Don’t skip this step!
Using the Wrong Cut of Steak: Skirt steak or flank steak are the best choices for fajitas. They’re relatively inexpensive and have a great flavor. Avoid tougher cuts of steak that require longer cooking times.
Overcooking the Steak: Overcooked steak is tough and dry. Aim for medium-rare to medium for the best results.
Not Slicing Against the Grain: Slicing the steak against the grain is crucial for tenderness. Look for the lines in the steak and slice perpendicular to them.
Using Dull Knives: Using a dull knife to slice the steak makes it difficult to slice thinly and evenly. Make sure your knives are sharp!
Learning from your mistakes is part of the fun of cooking. But hopefully, these tips will help you avoid some of the most common pitfalls and create perfect skillet steak fajitas every time.
Variations to Try
Want to mix things up a bit? Here are a few variations to try with your skillet steak fajitas:
Chicken Fajitas: Substitute the steak with chicken breasts or thighs. Marinate the chicken in the same marinade as the steak.
Shrimp Fajitas: Use large shrimp instead of steak. Reduce the cooking time to avoid overcooking the shrimp.
Vegetarian Fajitas: Omit the meat and add more vegetables, such as mushrooms, zucchini, and corn.
Spicy Fajitas: Add a pinch of cayenne pepper or a chopped jalapeño to the marinade for a spicy kick.
Different Toppings: Get creative with your toppings! Try adding pico de gallo, cotija cheese, pickled onions, or a drizzle of hot sauce.
The possibilities are endless! Feel free to experiment and create your own signature version of skillet steak fajitas. That’s what cooking is all about!
How to Store and Reheat Leftovers
If you happen to have leftovers (which is rare!), here’s how to store and reheat them:
Storage: Store the cooked steak and vegetables in an airtight container in the refrigerator for up to 3 days.
Reheating: Reheat the steak and vegetables in a skillet over medium heat until warmed through. You can also reheat them in the microwave, but the texture may not be as good.
Tortillas: Store the tortillas separately in a sealed bag or container to prevent them from drying out.
Leftover fajitas are great for lunch the next day! You can use them to make fajita bowls, salads, or even quesadillas. Get creative and enjoy!
Frequently Asked Questions (FAQ)
Got questions? I’ve got answers! Here are some frequently asked questions about skillet steak fajitas:
What’s the best cut of steak for fajitas? Skirt steak and flank steak are the best choices. They’re relatively inexpensive and have a great flavor.
Can I use a different type of oil? Yes, you can use any high-heat oil, such as avocado oil or grapeseed oil.
Can I make these ahead of time? Yes, you can marinate the steak ahead of time and store it in the refrigerator for up to 24 hours. You can also slice the vegetables ahead of time and store them in a separate container.
Can I freeze the leftovers? Yes, you can freeze the cooked steak and vegetables in an airtight container for up to 2 months. Thaw overnight in the refrigerator before reheating.
What goes well with steak fajitas? Rice, beans, and a simple salad are great side dishes for steak fajitas.
If you have any other questions, feel free to ask in the comments below! I’m always happy to help.
Serving Suggestions: Complete Your Fajita Feast!
Alright, you’ve got your sizzling skillet steak fajitas ready to go. Now, let’s talk about how to serve them and create a complete fajita feast!
Warm Tortillas: As I mentioned earlier, warm tortillas are a must! Serve them in a tortilla warmer or wrap them in a clean kitchen towel to keep them warm.
Toppings Galore: Set out a variety of toppings for your guests to choose from. Some popular options include:
Sour cream
Salsa
Guacamole
Shredded cheese
Pico de gallo
Pickled onions
Chopped cilantro
Lime wedges
Side Dishes: Round out your meal with some delicious side dishes:
Mexican rice
Refried beans or black beans
Corn on the cob
A simple green salad with a lime vinaigrette
Elote (Mexican street corn)
Drinks: Don’t forget the drinks! Margaritas, Mexican beer, or even just some refreshing agua fresca are perfect complements to steak fajitas.
Creating a complete fajita experience is all about the details. From the warm tortillas to the variety of toppings and side dishes, every element contributes to the overall enjoyment of the meal.
And there you have it! The ultimate restaurant-style skillet steak fajitas recipe, ready in just 30 minutes. I hope you love this recipe as much as I do. It’s a guaranteed crowd-pleaser and a great way to bring a little bit of magic to your kitchen.
So, what are you waiting for? Grab your skillet, gather your ingredients, and let’s get cooking! And don’t forget to share your creations with me on social media. I can’t wait to see what you come up with!
Happy cooking, friends! And remember, the best meals are the ones made with love. Enjoy!
If you want to check out some other recipes, you can browse the site! I always try to get new recipes up as fast as possible.
If you want to get the best sear on the steak, you need to make sure that it’s dry before it hits the pan. Pat it dry with paper towels to remove any excess moisture. This will help the steak to brown properly and develop a delicious crust. If you re looking for the best steak and fajitas you can make, this is the recipe to follow. It’s easy, quick, and packed with flavor. You don t need to be a professional chef to make this dish. All you need is a little patience and a willingness to experiment.
The best thing about fajitas is that you can customize them to your liking. If you want to add more spice, feel free to add some jalapeños or cayenne pepper. If you want to make them healthier, you can use whole wheat tortillas and load up on the vegetables. The possibilities are endless! If you want to impress your friends and family, this is the recipe to make. It’s a guaranteed crowd-pleaser and a great way to show off your cooking skills. You re going to love this recipe. It’s easy, delicious, and perfect for any occasion.
The key to making the best steak fajitas is to use high-quality ingredients. Start with a good cut of steak, such as skirt steak or flank steak. Make sure the vegetables are fresh and vibrant. And don t forget the toppings! The toppings are what really make the fajitas special. If you re looking for a quick and easy weeknight meal, these skillet steak fajitas are the perfect choice. They re ready in just 30 minutes and require minimal cleanup. You need to try this recipe! It’s so good, you’ll want to make it every week.
The flavor of the steak is amazing, thanks to the marinade. The lime juice tenderizes the steak and adds a zesty flavor. The chili powder, cumin, and smoked paprika give it a smoky and spicy kick. And the Worcestershire sauce adds a savory depth. If you want to make your fajitas even more flavorful, you can add a splash of tequila to the marinade. It sounds crazy, but it really does make a difference! You get a subtle hint of tequila that complements the other flavors perfectly.
If you re not a fan of steak, you can easily substitute it with chicken or shrimp. Just adjust the cooking time accordingly. Chicken will take a little longer to cook than steak, while shrimp will cook very quickly. If you re making chicken fajitas, you can use chicken breasts or chicken thighs. Chicken thighs are more flavorful and tend to stay more moist than chicken breasts. If you re making shrimp fajitas, make sure to use large shrimp. Small shrimp will overcook and become rubbery.
If you want to make your fajitas even more authentic, you can make your own tortillas. It’s not as difficult as it sounds! All you need is flour, water, salt, and a little bit of shortening or lard. There are tons of recipes online that you can follow. Making your own tortillas is a fun and rewarding experience. Plus, they taste so much better than store-bought tortillas! You re going to love the way they taste and the satisfaction of knowing that you made them yourself.
If you re looking for a healthy meal option, these skillet steak fajitas are a great choice. They re packed with protein and vegetables. Plus, you can control the amount of fat and sodium that you add. If you re trying to lose weight, you can skip the sour cream and cheese and load up on the salsa and guacamole. Guacamole is a healthy source of fat and adds a creamy texture to the fajitas. If you want to make your fajitas even healthier, you can use lettuce wraps instead of tortillas. It s a great way to cut down on carbs and calories.
If you re cooking for a crowd, these skillet steak fajitas are a perfect choice. They re easy to make and can be customized to suit everyone’s tastes. You can set up a fajita bar with all the different toppings and let everyone build their own fajitas. It’s a fun and interactive way to serve dinner. Plus, it takes the pressure off of you to make everything perfect. All you have to do is cook the steak and vegetables and let everyone else do the rest! You want to make sure that you have enough tortillas for everyone. It s always better to have too many than not enough.
If you re looking for a way to spice up your weeknight dinners, these skillet steak fajitas are the perfect solution. They re quick, easy, and packed with flavor. Plus, they re a great way to use up any leftover vegetables that you have in the fridge. You can add any type of vegetable that you like, such as mushrooms, zucchini, or bell peppers. The more vegetables, the better! You want to make sure that the vegetables are cooked until they’re tender-crisp. You don t want them to be mushy. If you re using frozen vegetables, make sure to thaw them completely before cooking.
If you want to make these fajitas even easier, you can use a pre-made fajita seasoning mix. There are tons of different brands available at most grocery stores. Just make sure to check the ingredients list to make sure that there aren’t any added sugars or artificial flavors. You can also make your own fajita seasoning mix by combining chili powder, cumin, smoked paprika, garlic powder, onion powder, salt, and pepper. It s easy to make and you can control the amount of each ingredient. You want to make sure that you store your fajita seasoning mix in an airtight container in a cool, dry place. It will last for several months.
If you re looking for a way to impress your date, these skillet steak fajitas are a great choice. They re romantic, delicious, and easy to make. You can even make them together! It’s a fun and interactive way to spend an evening. Plus, you’ll get to enjoy a delicious meal together. You want to make sure that you set the mood. Light some candles, put on some music, and pour some wine. It s the perfect way to create a romantic atmosphere. If you want to make it even more special, you can surprise your date with a bouquet of flowers.
If you re looking for a way to celebrate a special occasion, these skillet steak fajitas are a perfect choice. They re festive, delicious, and easy to make. You can serve them at a birthday party, a graduation party, or even a Cinco de Mayo celebration. They re always a hit! You want to make sure that you have plenty of decorations. Hang some streamers, put up some balloons, and play some festive music. It s the perfect way to create a celebratory atmosphere. If you want to make it even more special, you can hire a mariachi band.
If you re looking for a way to make your family happy, these skillet steak fajitas are a perfect choice. They re kid-friendly, delicious, and easy to make. Plus, they re a great way to get your kids to eat their vegetables. You can let them help you make the fajitas. They can slice the vegetables, mix the marinade, or even build their own fajitas. It’s a fun and educational way to spend time together. You want to make sure that you have plenty of kid-friendly toppings. Some popular options include shredded cheese, sour cream, salsa, and guacamole. If you want to make it even more special, you can let them decorate their own tortillas with edible markers.
The Ultimate Restaurant-Style Skillet Steak Fajitas
Prep Time 20 minutesminutes
Cook Time 10 minutesminutes
Total Time 30 minutesminutes
Servings 4people
Calories 450
Enjoy restaurant-quality steak fajitas made easily in a skillet in just 30 minutes! This recipe delivers sizzling flavor and tender steak with perfectly charred vegetables.
Ingredients
Steak & Marinade
1.5lbsskirt steak or flank steak(sliced against the grain into thin strips)
Hey there, friends! Ava here, back in my Seattle kitchen, ready to share something that’s become a serious staple in our household: the Grilled Chicken Bacon Sandwich. This isn’t just any sandwich; it’s a symphony of flavors and textures that dance on your taste buds. Think juicy, perfectly grilled chicken, crispy bacon, fresh veggies, and a tangy sauce, all nestled between toasted buns. Are you hungry yet? Because I sure am!
I remember the first time I made this sandwich. It was a busy weeknight, and I needed something quick, satisfying, and, let’s be honest, impressive enough to make my partner forget about the pile of laundry in the corner. I threw together some grilled chicken, crisped up some bacon, and layered everything onto a bun with whatever veggies I had on hand. The result? Pure magic. It’s been a family favorite ever since, and I’m so excited to share it with you.
Why You’ll Love This Grilled Chicken Bacon Sandwich
This sandwich is more than just a quick meal; it’s an experience. Here’s why I think you’ll fall head-over-heels for it:
Flavor Explosion: The combination of smoky grilled chicken, salty bacon, and fresh veggies creates a flavor profile that’s simply irresistible.
Quick and Easy: From start to finish, this sandwich comes together in about 30 minutes, making it perfect for busy weeknights.
Customizable: Feel free to swap out ingredients and adjust the recipe to your liking. Want to add avocado? Go for it! Prefer a different type of cheese? The possibilities are endless.
Crowd-Pleaser: Whether you’re cooking for your family, hosting a barbecue, or just treating yourself, this sandwich is guaranteed to be a hit.
Healthy(ish): Using grilled chicken and turkey bacon makes this sandwich a slightly healthier option than your average fast-food burger.
Ingredients for the Ultimate Grilled Chicken Bacon Sandwich
Here’s what you’ll need to make this amazing sandwich:
How to Make the Best Grilled Chicken Bacon Sandwich: Step-by-Step
Alright, let’s get cooking! Here’s how to make this mouthwatering sandwich:
Prep the Chicken: Season the chicken breasts with salt and pepper. If you want to elevate the flavor even more, consider marinating the chicken in a mixture of olive oil, lemon juice, garlic, and herbs for at least 30 minutes. This will ensure that the chicken is juicy and flavorful.
Grill the Chicken: Preheat your grill to medium heat. Grill the chicken breasts for 6-8 minutes per side, or until cooked through (internal temperature reaches 165°F). Make sure to let the chicken rest for a few minutes after grilling to allow the juices to redistribute, resulting in a more tender and flavorful sandwich. Grilled chicken is the star of this show, so don’t skip this step!
Cook the Bacon: While the chicken is grilling, cook the turkey bacon in a skillet until crispy. I prefer using turkey bacon because it’s a bit healthier, but feel free to use regular bacon if that’s what you prefer. The key is to get it nice and crispy!
Make the Sauce: In a small bowl, mix mayonnaise and Dijon mustard. This simple sauce adds a tangy kick to the sandwich. If you’re feeling adventurous, you can add a pinch of garlic powder or a dash of hot sauce for extra flavor.
Toast the Buns: Toast the hamburger buns. This will prevent them from getting soggy when you add the toppings. You can toast them in a toaster, in a skillet, or on the grill.
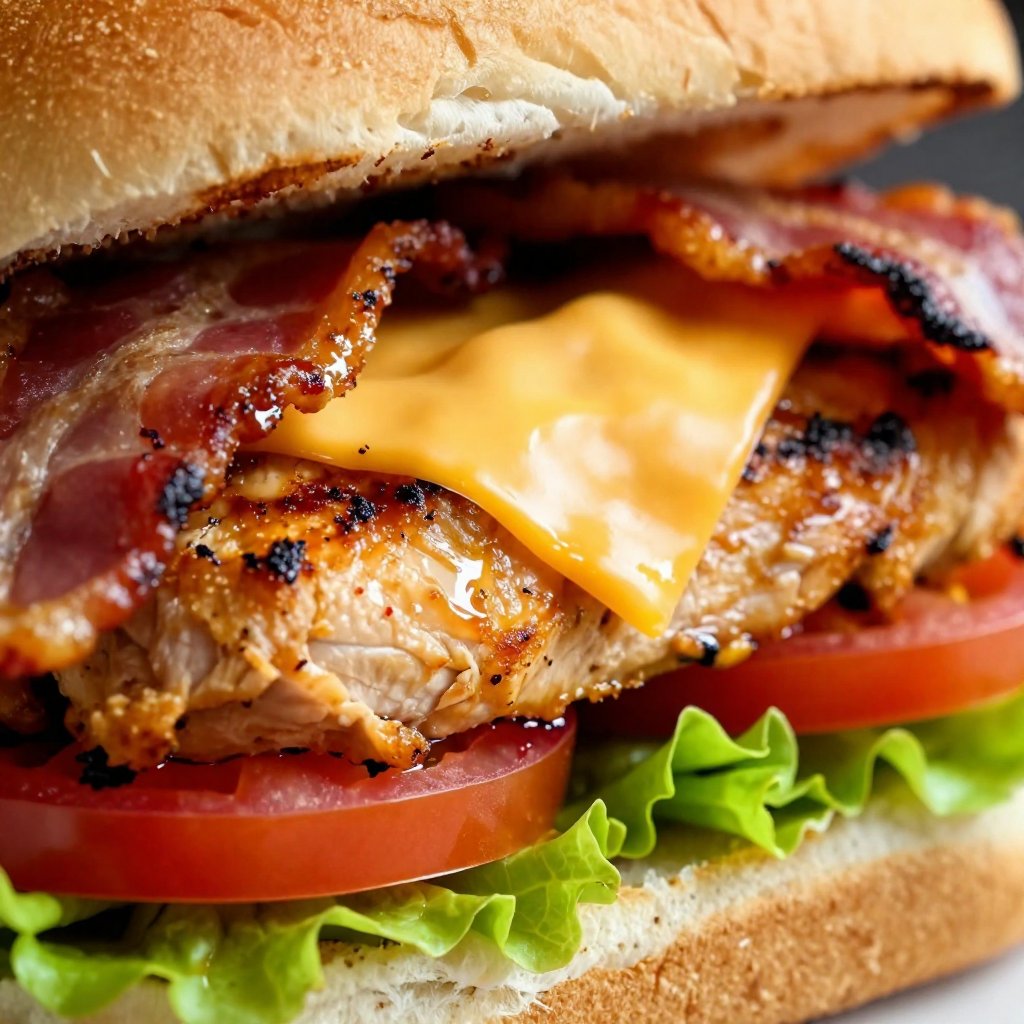
Assemble the Sandwich: Spread the mayonnaise mixture on both halves of the toasted buns. Place lettuce and tomato slices on the bottom bun. Add the grilled chicken breast. Top with cooked turkey bacon. Optional: Add cheese slices on top of the turkey bacon. Place the top bun on the sandwich and serve immediately.
And there you have it! A delicious, homemade chicken sandwich that’s perfect for lunch or dinner.
Pro Tips for the Perfect Grilled Chicken Sandwich
Want to take your sandwich to the next level? Here are a few of my favorite pro tips:
Marinate the Chicken: As I mentioned earlier, marinating the chicken is a great way to add extra flavor and ensure that it stays juicy while grilling. My go-to marinade includes olive oil, lemon juice, garlic, herbs, and a pinch of salt and pepper.
Use a Meat Thermometer: To ensure that the chicken is cooked through, use a meat thermometer to check the internal temperature. It should reach 165°F. Overcooked chicken is dry and tough, so it’s important to get it just right.
Don’t Overcook the Bacon: Crispy bacon is essential, but burnt bacon is a no-no. Keep a close eye on it while it’s cooking and remove it from the skillet as soon as it’s crispy.
Toast the Buns Properly: A properly toasted bun should be golden brown and slightly crispy. This will prevent it from getting soggy and add a nice textural contrast to the sandwich.
Don’t Be Afraid to Experiment: This recipe is just a starting point. Feel free to experiment with different ingredients and flavors to create your own signature sandwich.
Common Mistakes to Avoid When Making Grilled Chicken Sandwiches
We all make mistakes in the kitchen, but here are a few common ones to avoid when making grilled chicken sandwiches:
Overcooking the Chicken: This is the most common mistake. Overcooked chicken is dry and tough, so make sure to use a meat thermometer and cook it to an internal temperature of 165°F.
Not Marinating the Chicken: Marinating the chicken adds flavor and helps it stay juicy while grilling. Don’t skip this step!
Using Soggy Buns: Soggy buns can ruin a perfectly good sandwich. Make sure to toast them properly to prevent them from getting soggy.
Adding Too Much Sauce: Too much sauce can make the sandwich messy and overpower the other flavors. Use just enough to add a tangy kick.
Not Letting the Chicken Rest: Letting the chicken rest for a few minutes after grilling allows the juices to redistribute, resulting in a more tender and flavorful sandwich.
Grilled Chicken Sandwich Variations: Make It Your Own!
One of the best things about this recipe is that it’s so versatile. Here are a few variations to try:
Spicy Chicken Sandwich: Add a pinch of cayenne pepper to the chicken marinade and use a spicy mayonnaise instead of regular mayonnaise.
BBQ Chicken Sandwich: Brush the chicken with your favorite BBQ sauce while grilling and add coleslaw to the sandwich.
Mediterranean Chicken Sandwich: Marinate the chicken in a mixture of olive oil, lemon juice, garlic, and oregano. Add feta cheese, cucumbers, and olives to the sandwich.
Hawaiian Chicken Sandwich: Marinate the chicken in a mixture of pineapple juice, soy sauce, and ginger. Add grilled pineapple slices and teriyaki sauce to the sandwich.
Pesto Chicken Sandwich: Spread pesto on the buns instead of mayonnaise and add roasted red peppers to the sandwich.
How to Store Leftover Grilled Chicken Sandwich Ingredients
If you have any leftover ingredients, here’s how to store them:
Grilled Chicken: Store the grilled chicken in an airtight container in the refrigerator for up to 3-4 days.
Cooked Bacon: Store the cooked bacon in an airtight container in the refrigerator for up to 3-4 days.
Lettuce and Tomato: Store the lettuce and tomato in separate airtight containers in the refrigerator.
Mayonnaise Mixture: Store the mayonnaise mixture in an airtight container in the refrigerator for up to 1 week.
Buns: Store the buns in a breadbox or airtight container at room temperature.
Frequently Asked Questions About Grilled Chicken Sandwiches
Here are some common questions about chicken sandwich recipes, especially when grilled:
Can I use frozen chicken breasts?: Yes, but make sure to thaw them completely before grilling.
Can I use a different type of bacon?: Absolutely! Feel free to use regular bacon, Canadian bacon, or even prosciutto.
Can I add other toppings?: Of course! Some other great toppings include avocado, onions, pickles, and sprouts.
Can I make this sandwich ahead of time?: While you can cook the chicken and bacon ahead of time, I recommend assembling the sandwich right before serving to prevent the buns from getting soggy.
What should I serve with this sandwich?: This sandwich pairs well with fries, salad, coleslaw, or potato chips.
Serving Suggestions for Your Delicious Grilled Chicken Sandwich
This chicken sandwich is fantastic on its own, but here are a few ideas to make it a complete meal:
Fries: Serve with a side of crispy fries for a classic pairing.
Salad: A fresh green salad or a tangy coleslaw complements the richness of the sandwich.
Sweet Potato Fries: For a healthier option, serve with sweet potato fries.
Soup: A warm bowl of tomato soup or chicken noodle soup is perfect for a cozy meal.
Fruit Salad: A light and refreshing fruit salad adds a touch of sweetness to the meal.
And there you have it! My go-to Grilled Chicken Bacon Sandwich recipe. I hope you love it as much as we do. Remember, cooking is all about having fun and experimenting. Don’t be afraid to get creative and make this recipe your own. Happy cooking!
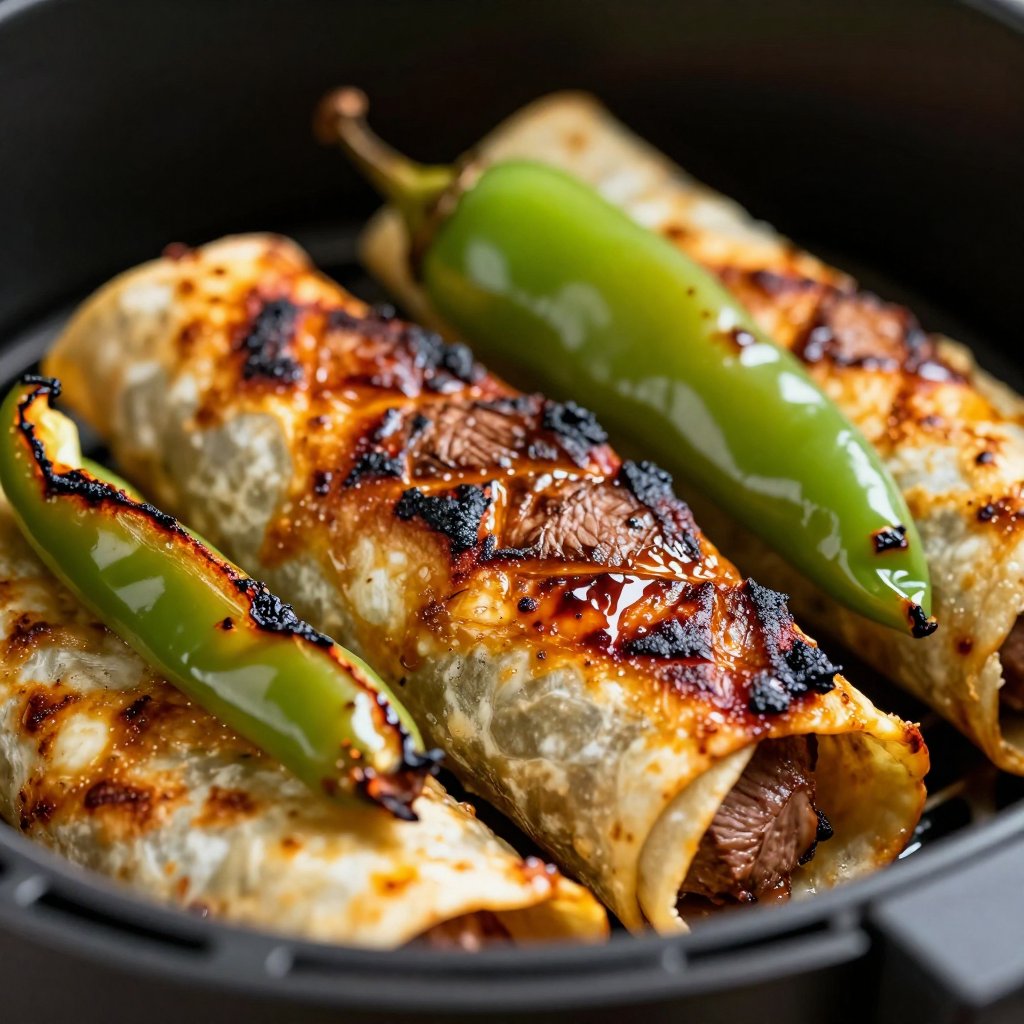
Hey friends, Ava here! If you’re anything like me, weeknights are a whirlwind of activity, and the last thing you want to do is spend hours in the kitchen. That’s why I’m absolutely obsessed with this Easy Sheet Pan Steak Fajitas recipe. It’s quick, it’s easy, and it’s bursting with flavor. Think juicy, tender steak, vibrant bell peppers, and sweet onions, all cooked together on one glorious sheet pan. Ready to ditch the takeout and whip up something amazing? Let’s get started!
I remember the first time I made these fajitas. I was rushing to get dinner on the table after a long day, and I needed something fast and satisfying. I threw some steak and veggies on a sheet pan, tossed them with a simple marinade, and hoped for the best. The result? A flavor explosion that had everyone asking for seconds. This recipe has become a staple in my kitchen ever since, and I can’t wait to share it with you.
Why You’ll Love This Sheet Pan Steak Fajitas Recipe
Seriously, where do I even begin? This recipe is a game-changer for so many reasons:
Quick and Easy: From prep to plate, this meal comes together in under an hour. Perfect for busy weeknights.
Minimal Cleanup: One sheet pan means less dishes. Hallelujah!
Customizable: Swap out the veggies, adjust the spices, and load up on your favorite toppings. The possibilities are endless.
Incredible Flavor: The combination of the tangy marinade and the sizzling steak and veggies is simply irresistible.
Family-Friendly: Even the pickiest eaters will love this dish. Trust me, I’ve tested it on my own family!
This recipe is so simple to make, and the result is a restaurant-quality meal that you can enjoy in the comfort of your own home. So grab your sheet pan, and let’s get cooking!
Ingredients for the Best Sheet Pan Steak Fajitas
Here’s what you’ll need to create these amazing fajitas:
2 lb (900 g) sirloin steak or flank steak, (thinly sliced against the grain – see notes)
1 medium red pepper, (sliced)
1 medium green pepper, (sliced)
1 medium yellow pepper, (sliced)
1 large onion, (sliced)
1 tablespoon olive oil
Salt and black pepper to taste
Freshly chopped cilantro leaves to garnish ((optional))
1/4 cup (60 ml) fresh lime juice
½ cup (120 ml) orange juice
2 tablespoons Worcestershire sauce
2 tablespoons soy sauce
3 tablespoons vegetable or canola oil
3 teaspoons garlic powder
3 teaspoons onion powder
2 teaspoons chili powder
2 teaspoons cumin
1 teaspoon paprika
1 teaspoon salt
½ teaspoon black pepper
8 – 10 flour or corn tortillas
Any other toppings of your liking
Lime wedges ((optional))
How to Make Sheet Pan Steak Fajitas: Step-by-Step
Alright, let’s get down to business! Here’s how to make these mouthwatering sheet pan steak fajitas:
Marinate the Steak: Whisk together all marinade ingredients in a plastic bag or bowl. Add the sliced beef, cover or seal and refrigerate for 30 minutes to 24 hours (whatever time permits). Remove the beef from the fridge and allow it to sit at room temperature for 10 – 15 minutes before baking. Marinating the beef will help to tenderize the steak and infuse it with flavor.
Prep the Oven: Place racks in the top and lower thirds of the oven; preheat the broiler. Coat a large-rimmed baking sheet with cooking spray. For easier cleanup, you can also line with foil before spraying cooking spray.
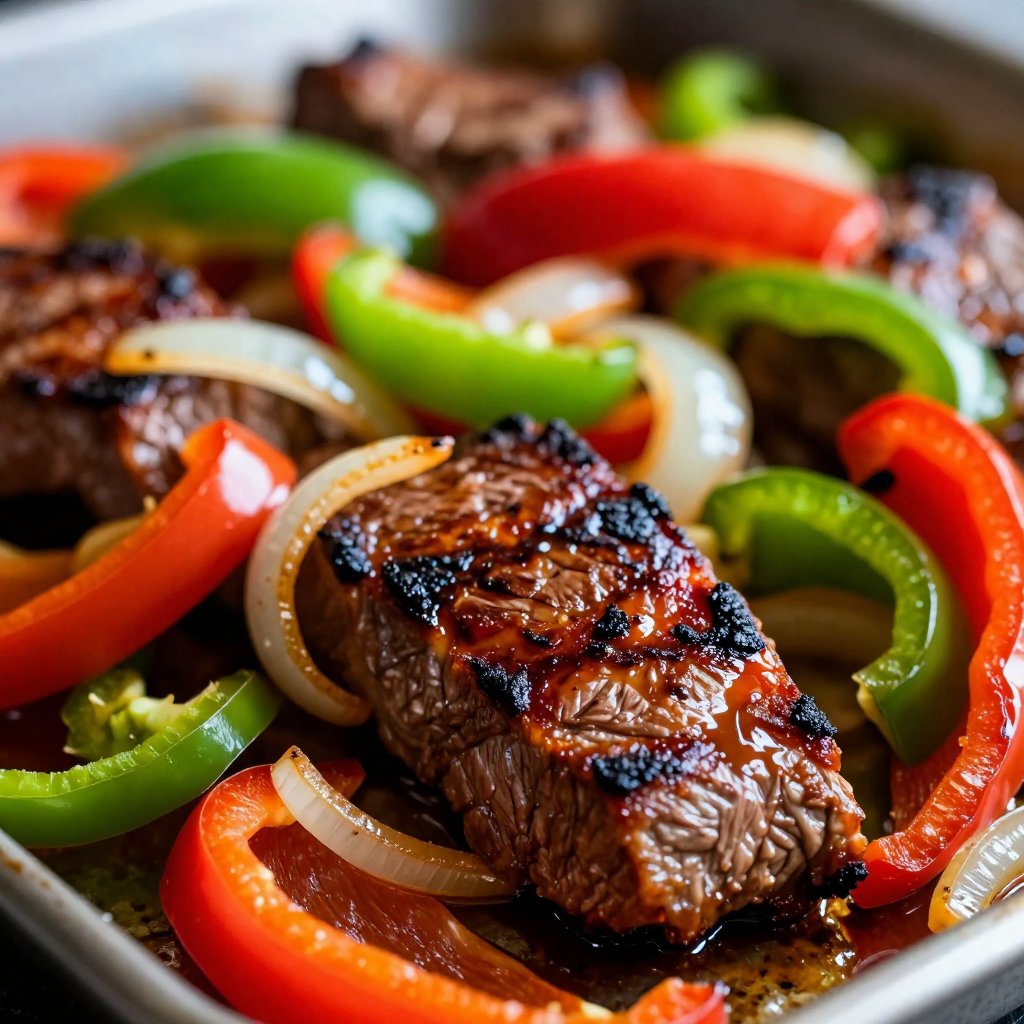
Roast the Veggies: Add peppers and onion to a large bowl; add olive oil, salt, and black pepper to taste; toss to combine. Spread the vegetables in an even layer on the prepared sheet pan. Bake in a preheated oven for 5 minutes (depending on how you like your vegetables) or until the peppers are slightly tender.
Broil the Steak: Carefully remove the hot pan from the oven. Push vegetable mixture to one side of the pan. Arrange beef in an even layer on the remaining side. Broil until the steak is slightly charred and cooked to your liking. I broiled mine for about 5 minutes. I recommend keeping a close eye on the steak to ensure it doesn’t overcook.
Serve and Enjoy: Squeeze lime wedges over the steak and vegetables. Garnish with chopped cilantro and serve immediately with warmed tortillas, avocado sauce, salsa, or desired toppings.
And there you have it! Easy, delicious, and perfect for any night of the week. If you’re looking for a quick and satisfying meal, this recipe is a winner.
Pro Tips for Perfect Sheet Pan Steak Fajitas
Want to take your sheet pan fajitas to the next level? Here are a few of my favorite tips:
Choose the Right Cut of Steak: Flank steak or sirloin steak are both excellent choices for fajitas. They’re relatively inexpensive and cook quickly. The steak should be thinly sliced against the grain to ensure tenderness.
Don’t Skip the Marinade: The marinade is key to infusing the steak with flavor and keeping it tender. Even a short 30-minute marinade will make a big difference.
Preheat the Sheet Pan: Placing the sheet pan in the oven while it preheats will help the steak and veggies to sizzle and caramelize beautifully.
Don’t Overcrowd the Pan: Overcrowding the sheet pan will cause the steak and veggies to steam instead of roast. If necessary, use two sheet pans to ensure everything cooks evenly.
Broil for the Perfect Char: Broiling the steak at the end gives it a beautiful char and locks in the juices. Just be sure to keep a close eye on it to prevent burning.
These tips will help you to create the most delicious and authentic sheet pan steak fajitas possible. I’m confident that you’ll love the results!
Common Mistakes to Avoid
Even the best cooks make mistakes! Here are a few common pitfalls to avoid when making sheet pan steak fajitas:
Overcooking the Steak: Steak can go from perfectly cooked to tough and dry in a matter of minutes. Use a meat thermometer to ensure it’s cooked to your desired level of doneness. I recommend cooking the steak to medium for the best results.
Not Slicing Against the Grain: Slicing the steak with the grain will result in tough, chewy fajitas. Always slice against the grain to ensure tenderness. You can easily identify the grain by looking at the muscle fibers in the steak.
Using Dull Knives: Sharp knives are essential for slicing the steak and veggies thinly and evenly. Dull knives can be dangerous and make the prep work much more difficult.
Forgetting to Season: Don’t be afraid to season generously with salt, pepper, and your favorite spices. The seasoning will help to bring out the natural flavors of the steak and veggies.
Not Warming the Tortillas: Warm tortillas are essential for a truly authentic fajita experience. You can warm them in a dry skillet, in the microwave, or wrapped in foil in the oven.
By avoiding these common mistakes, you’ll be well on your way to creating perfect sheet pan steak fajitas every time.
Variations on the Classic Recipe
Want to mix things up a bit? Here are a few fun variations on the classic sheet pan steak fajitas recipe:
Chicken Fajitas: Substitute chicken breast or thighs for the steak. Adjust the cooking time as needed to ensure the chicken is cooked through.
Shrimp Fajitas: Use large shrimp instead of steak. Shrimp cooks very quickly, so broil it for just a few minutes until it’s pink and opaque.
Vegetarian Fajitas: Omit the meat altogether and load up on extra veggies like mushrooms, zucchini, and bell peppers.
Spicy Fajitas: Add a pinch of cayenne pepper or a diced jalapeño to the marinade for a spicy kick.
Sweet and Tangy Fajitas: Add a tablespoon of brown sugar and a splash of apple cider vinegar to the marinade for a sweet and tangy flavor.
These variations are a great way to customize the recipe to your liking and keep things interesting. Don’t be afraid to experiment and find your own favorite combinations!
How to Store and Reheat Leftovers
If you happen to have any leftovers (which is unlikely!), here’s how to store and reheat them:
Storage: Store the steak and veggies in an airtight container in the refrigerator for up to 3 days.
Reheating: Reheat the fajitas in a skillet over medium heat or in the microwave. Add a splash of water or broth to prevent them from drying out.
Freezing: While you can freeze the cooked steak and veggies, the texture may change slightly upon thawing. If you do freeze them, store them in an airtight container for up to 2 months.
Leftover fajitas are great for lunch the next day or as a filling for tacos or burritos. The possibilities are endless!
Frequently Asked Questions (FAQ)
Here are a few common questions about sheet pan steak fajitas:
What kind of steak is best for fajitas? Flank steak or sirloin steak are both excellent choices.
Can I use frozen vegetables? Yes, but fresh vegetables will give you the best flavor and texture. If using frozen vegetables, thaw them completely before cooking.
How do I prevent the steak from drying out? Don’t overcook it! Use a meat thermometer to ensure it’s cooked to your desired level of doneness. The recipe card at the end of the post will help to guide you.
Can I make this recipe ahead of time? Yes, you can marinate the steak and slice the vegetables ahead of time. Store them separately in the refrigerator until you’re ready to cook.
What toppings go well with fajitas? The possibilities are endless! Some popular toppings include guacamole, sour cream, salsa, shredded cheese, and pickled onions.
I hope these FAQs have answered all of your questions. If you have any other questions, feel free to leave a comment below!
Serving Suggestions for Sheet Pan Steak Fajitas
These sheet pan steak fajitas are delicious on their own, but here are a few serving suggestions to make them even more special:
Classic Fajitas: Serve the steak and veggies in warm tortillas with your favorite toppings.
Fajita Bowls: Create a healthy and delicious fajita bowl by serving the steak and veggies over rice or quinoa. Top with avocado, black beans, and a dollop of sour cream.
Fajita Salads: Toss the steak and veggies with mixed greens, avocado, and a lime vinaigrette for a light and refreshing salad.
Fajita Nachos: Layer tortilla chips with the steak and veggies, cheese, and your favorite nacho toppings. Bake until the cheese is melted and bubbly.
No matter how you choose to serve them, these sheet pan steak fajitas are sure to be a hit! I’m so excited for you to try this recipe and experience the joy of cooking a delicious and easy meal. Remember, cooking should be fun and stress-free. So put on some music, pour yourself a glass of wine, and enjoy the process. And most importantly, don’t be afraid to experiment and make the recipe your own. Happy cooking, friends! I’m so glad you’re here in my little corner of the internet. If you make this recipe, be sure to tag me on social media – I can’t wait to see your creations! I’m always here to help if you need me; you’re never alone in the kitchen when you’re cooking with Ava!
High-Protein Steak Fajita Bowl Recipe: A Flavor Fiesta in a Bowl!
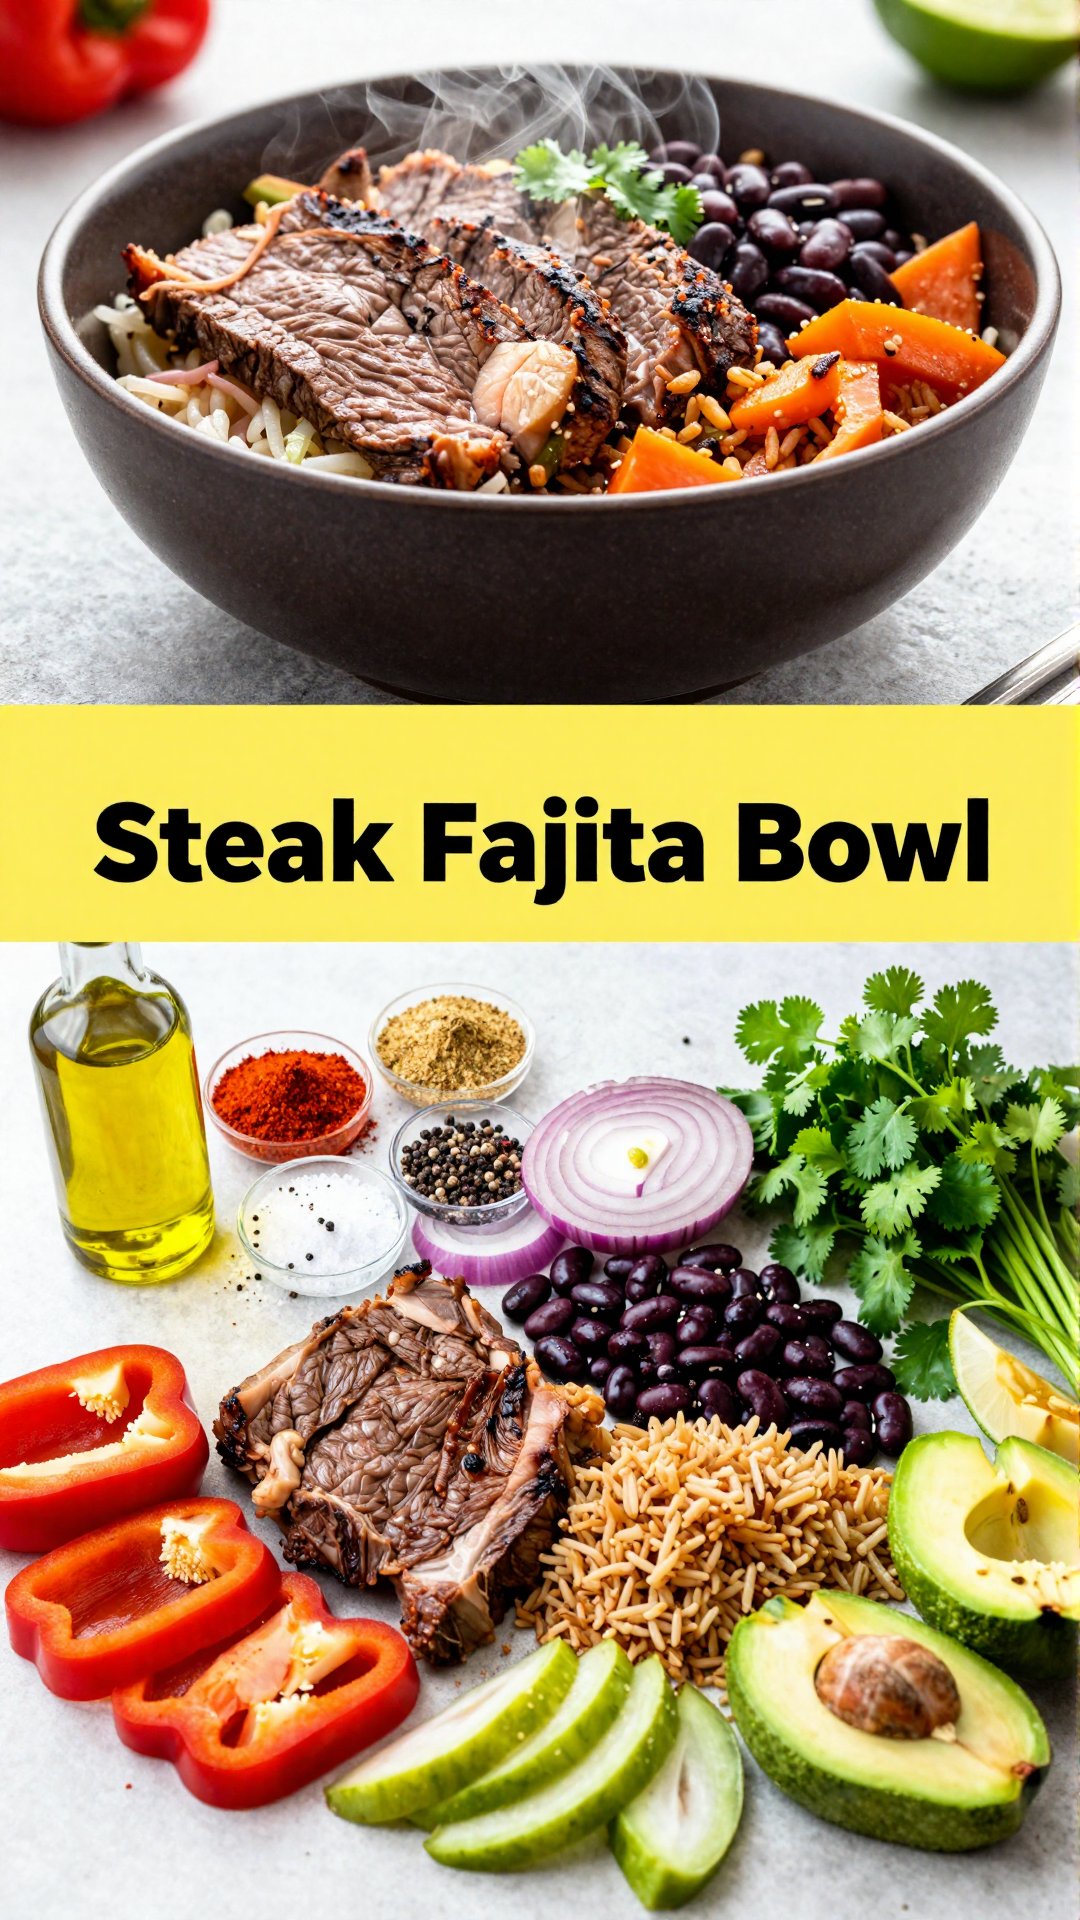
Hey there, fellow food lovers! Ava here, back from my Seattle kitchen with a recipe that’s been on repeat for weeks. Seriously, I can’t get enough of this High-Protein Steak Fajita Bowl. It’s quick, it’s easy, it’s packed with flavor, and it’s the perfect way to fuel your body with goodness. Think sizzling steak, vibrant veggies, and all your favorite fajita fixings, all nestled in one satisfying bowl. It’s like a fiesta in your mouth, and trust me, you’re invited!
This isn’t just another recipe; it’s a glimpse into my quest for meals that are both delicious and nutritious. I’m all about finding that sweet spot where healthy eating doesn’t feel like a chore, and this steak fajita bowl hits the mark perfectly. So, grab your apron, and let’s get cooking!
Why You’ll Love This Steak Fajita Bowl
Okay, let me count the ways you’re going to fall head-over-heels for this recipe. First off, it’s incredibly versatile. You can customize it to your heart’s content, swapping out ingredients based on what you have on hand or what your taste buds are craving. Need a low-carb option? Simply swap the brown rice for cauliflower rice. Want to add some extra heat? Throw in a pinch of cayenne pepper or a few slices of jalapeño. The possibilities are endless!
But beyond its adaptability, this steak fajita bowl is just plain delicious. The combination of tender, flavorful steak, crisp-tender bell peppers and onions, and creamy avocado is a match made in culinary heaven. And did I mention it’s packed with protein? This bowl will keep you feeling full and energized for hours, making it perfect for a post-workout meal or a satisfying lunch.
Quick and Easy: Ready in under 30 minutes – perfect for busy weeknights.
Customizable: Swap ingredients to suit your taste and dietary needs.
High-Protein: Packed with protein to keep you feeling full and energized.
Flavorful: A delicious blend of savory steak, vibrant veggies, and creamy avocado.
Healthy: A nutritious and balanced meal that’s good for you.
Plus, cleanup is a breeze! One pan for the steak and veggies, and you’re good to go. No mountains of dishes to wash – that’s a win in my book!
High-Protein Steak Fajita Bowl Ingredients
Here’s what you’ll need to whip up this amazing dish. Don’t be intimidated by the list; most of these are pantry staples!
1 pound flank steak, sliced into thin strips
1 tablespoon olive oil
1 teaspoon chili powder
1 teaspoon ground cumin
1 teaspoon garlic powder
1 teaspoon onion powder
1/2 teaspoon salt
1/4 teaspoon black pepper
1 bell pepper, sliced
1 onion , sliced
1 cup cooked brown rice
1 cup black beans, drained and rinsed
1 avocado , diced
Fresh cilantro, for garnish
Fresh lime wedges, for serving
Step-by-Step Instructions: Making Your Steak Fajita Bowl
Alright, let’s get down to business. Here’s how to create your own delicious steak fajita bowl:
Prep the Pan: Heat a non-stick pan over medium-high heat. Add 1 tablespoon olive oil and allow it to heat for about 1 minute.
Sauté the Steak: Add the sliced flank steak to the pan and sprinkle with chili powder, cumin, garlic powder, onion powder, salt, and black pepper. Sauté the steak until browned, about 5-7 minutes, stirring occasionally. The key here is not to overcrowd the pan; if needed, cook the steak in batches to ensure it browns evenly.
Cook the Veggies: In the same pan, add the sliced bell pepper and onion. Cook for an additional 3-4 minutes, or until the vegetables are tender and slightly caramelized. You want them to have a little bit of a bite, so don’t overcook them.
Assemble the Bowls: In serving bowls, layer the cooked brown rice, black beans, the sautéed steak, and vegetables.
Garnish and Serve: Top each bowl with diced avocado and garnish with fresh cilantro. Serve with lime wedges on the side. A squeeze of fresh lime juice really brings all the flavors together!
And that’s it! You’ve just created a restaurant-worthy meal in your own kitchen. Take a moment to admire your creation, then dig in and enjoy!
Pro Tips for the Perfect Steak Fajita
Want to take your steak fajita bowl to the next level? Here are a few of my favorite pro tips:
Marinate Your Steak: For even more flavor, marinate your steak for at least 30 minutes (or up to overnight) before cooking. A simple marinade of olive oil, lime juice, garlic, and your favorite spices will do the trick.
Don’t Overcook the Steak: The key to tender, juicy steak is not to overcook it. Aim for medium-rare to medium, and be sure to let the steak rest for a few minutes before slicing.
Use High Heat: To get that nice sear on the steak, make sure your pan is nice and hot before adding the steak. You want to hear that sizzle!
Prep Your Ingredients: Before you start cooking, chop all your veggies and measure out your spices. This will make the cooking process much smoother and more efficient.
Warm Your Tortillas (Optional): If you’re feeling extra fancy, warm your tortillas in a dry skillet or over an open flame before serving. This will make them more pliable and flavorful.
These tips are like little secrets that can elevate your steak fajita game from good to amazing. Trust me, they’re worth the extra effort!
Common Mistakes to Avoid When Making Steak Fajitas
We’ve all been there – those kitchen moments when things don’t go quite as planned. Here are a few common mistakes to watch out for when making steak fajitas:
Overcrowding the Pan: This is a big one! Overcrowding the pan will cause the steak to steam instead of sear, resulting in a less flavorful dish. Cook the steak in batches if necessary.
Using Dull Knives: A sharp knife is essential for slicing the steak and veggies evenly. Dull knives can be dangerous and make the prep work much more difficult.
Not Seasoning Properly: Don’t be shy with the spices! Generously season the steak and veggies to bring out their natural flavors.
Overcooking the Veggies: Soggy, overcooked veggies are no fun. Cook them until they’re tender-crisp, with just a little bit of bite.
Learning from your mistakes is part of the fun of cooking! Don’t be discouraged if things don’t turn out perfectly the first time. Just keep practicing, and you’ll be a steak fajita pro in no time.
Delicious Variations to Try
One of the best things about this recipe is how easy it is to customize. Here are a few variations to get your creative juices flowing:
Chicken Fajita Bowl: Swap the steak for chicken breast or thighs. Season the chicken with the same spices as the steak.
Shrimp Fajita Bowl: Use shrimp instead of steak for a lighter option. Cook the shrimp until pink and opaque.
Vegetarian Fajita Bowl: Skip the meat altogether and load up on extra veggies like mushrooms, zucchini, and squash.
Spicy Fajita Bowl: Add a pinch of cayenne pepper or a few slices of jalapeño to the steak and veggies for an extra kick.
Sweet Potato Fajita Bowl: Add roasted sweet potatoes for a touch of sweetness and extra nutrients.
Don’t be afraid to experiment and come up with your own unique variations. Cooking is all about having fun and creating something that you love!
How to Store Leftovers
If you happen to have any leftovers (which is rare in my house!), here’s how to store them properly:
Refrigerate: Store the steak, veggies, rice, and black beans separately in airtight containers in the refrigerator for up to 3-4 days.
Reheat: Reheat the steak and veggies in a skillet or microwave until warmed through. Reheat the rice and black beans separately.
Assemble: Assemble the bowls just before serving, adding fresh avocado and cilantro.
I don’t recommend freezing the avocado, as it can become mushy when thawed. It’s best to add fresh avocado just before serving.
Frequently Asked Questions (FAQ)
Got questions? I’ve got answers! Here are some of the most common questions I get about this recipe:
Can I make this ahead of time?: Absolutely! You can cook the steak, veggies, rice, and black beans ahead of time and store them separately in the refrigerator. Then, simply assemble the bowls when you’re ready to eat.
Can I use a different type of steak?: Yes, you can use any type of steak you like. Skirt steak, sirloin steak, or even ground beef would work well.
Can I add cheese?: Of course! Shredded cheddar cheese, Monterey Jack cheese, or queso fresco would all be delicious additions.
Is this recipe gluten-free?: Yes, this recipe is naturally gluten-free. Just be sure to use gluten-free rice and black beans.
Can I make this in a slow cooker?: Yes, you can cook the steak and veggies in a slow cooker. Combine the steak, veggies, and spices in a slow cooker and cook on low for 6-8 hours or on high for 3-4 hours.
If you have any other questions, feel free to leave a comment below. I’m always happy to help!
Serving Suggestions: Complete Your Meal
While this steak fajita bowl is a complete meal on its own, here are a few serving suggestions to take it to the next level:
Tortilla Chips and Salsa: Serve with a side of tortilla chips and your favorite salsa for a crunchy, flavorful appetizer.
Guacamole: A dollop of homemade guacamole is the perfect complement to this dish.
Mexican Street Corn Salad: This vibrant and flavorful salad is a delicious side dish that will impress your guests.
Margaritas: No fiesta is complete without margaritas! Whip up a batch of classic margaritas or try a fun variation like strawberry or mango.
So there you have it – my go-to High-Protein Steak Fajita Bowl recipe! I hope you love it as much as I do. Give it a try, and let me know what you think in the comments below. Happy cooking!
Remember, cooking is about more than just following a recipe; it’s about creating something that you love and sharing it with the people you care about. So, gather your ingredients, put on some music, and get ready to make some magic in the kitchen!
This steak fajita bowl is perfect for a quick weeknight dinner, a healthy lunch, or even a fun weekend gathering. It’s a crowd-pleaser that’s sure to impress. The combination of flavors and textures is simply irresistible. From the tender, juicy steak to the crisp-tender bell peppers and onions, every bite is a delight. And with the addition of creamy avocado, flavorful black beans, and a squeeze of fresh lime juice, this bowl is bursting with deliciousness.
When you’re making your steak fajita, remember that the quality of your ingredients matters. Use fresh, high-quality steak and vegetables for the best flavor. And don’t be afraid to experiment with different spices and seasonings to create your own unique blend. That’s the beauty of cooking – it’s all about putting your own personal touch on a dish and making it your own.
The fajita bowl with steak and all the fixings is not only a delicious meal, but also a great way to get your daily dose of protein, fiber, and vitamins. It’s a balanced and nutritious meal that will keep you feeling full and energized for hours. And with so many variations to choose from, you can easily customize it to fit your dietary needs and preferences.
Whether you’re a seasoned chef or a beginner cook, this steak and fajita bowl recipe is sure to become a staple in your kitchen. It’s easy, versatile, and incredibly delicious. So what are you waiting for? Grab your ingredients and get cooking! I can’t wait to hear what you think.
Enjoy creating your own version of your fajita bowl! Remember to have fun and experiment with different flavors and ingredients. The possibilities are endless! And most importantly, don’t forget to share your creations with the people you love. Cooking is a way to show your love and appreciation, and there’s nothing better than sharing a delicious meal with friends and family.
The fajita bowl with steak, bell peppers and all the other tasty ingredients is something you’re really going to love. That’s a promise from my kitchen to yours!
Enjoy a delicious and healthy High-Protein Steak Fajita Bowl packed with flavor and nutrients. This easy-to-make bowl is perfect for a quick lunch or dinner.
Ingredients
Steak Fajita Bowl Ingredients
1poundflank steak(sliced into thin strips)
1tablespoonolive oil
1teaspoonchili powder
1teaspoonground cumin
1teaspoongarlic powder
1teaspoononion powder
1/2teaspoonsalt
1/4teaspoonblack pepper
1bell pepper(sliced)
1onion(sliced)
1cupcooked brown rice
1cupblack beans(drained and rinsed)
1avocado(diced)
Freshcilantro(for garnish)
Freshlime wedges(for serving)
Instructions
Heat pan with oil for 1 minute.
Add steak and spices. Sauté 5-7 minutes.
Add bell pepper and onion. Cook 3-4 minutes.
Layer rice, beans, steak, and vegetables in bowls.
Top with avocado and cilantro. Serve with lime.
Notes
Adjust spices to your preference for a customized flavor!
Sizzling Blackstone Steak Fajitas Recipe: A Flavor Fiesta on Your Griddle
Hey there, flavor fanatics! Ava here, back in my Seattle kitchen and ready to share a recipe that’s been setting my taste buds on fire – Sizzling Blackstone Steak Fajitas! If you’re anything like me, you crave those meals that are quick, easy, and bursting with flavor. And let me tell you, these fajitas deliver on all fronts. Growing up in Oregon, summer evenings always meant something sizzling on the grill, and these fajitas bring back those memories with a delicious twist. This isn’t just a recipe; it’s an invitation to a fiesta right in your backyard.
I remember the first time I made fajitas on a Blackstone. I was a little intimidated, to be honest. All that open flame! But once I got the hang of it, I realized it was the perfect way to get that restaurant-quality sear on the steak and those perfectly charred veggies. The secret? A screaming hot griddle and a little bit of patience. Trust me, the results are worth it. We’re talking tender, juicy steak, caramelized peppers and onions, and all the fixings you could dream of. So, grab your spatula, fire up your Blackstone, and let’s get cooking!
Why You’ll Love This Blackstone Steak Fajitas Recipe
Seriously, what’s not to love? These fajitas are a crowd-pleaser, a weeknight wonder, and a flavor explosion all rolled into one. But let me break it down for you:
Quick and Easy: From prep to plate, you’re looking at about 30 minutes. Perfect for those busy weeknights when you need a delicious meal fast.
Restaurant-Quality Flavor: The Blackstone griddle imparts an incredible sear and smoky flavor that you just can’t get with a regular pan.
Customizable: Load them up with your favorite toppings – salsa, guacamole, sour cream, cheese… the possibilities are endless!
Crowd-Pleasing: Whether you’re feeding a family of four or hosting a backyard barbecue, these fajitas are always a hit.
Versatile: You can easily adapt this recipe to use different types of steak, vegetables, or even shrimp or chicken.
I’ve made these fajitas countless times, and they always bring a smile to my face. There’s just something about the sizzle, the aroma, and the vibrant colors that makes me feel like I’m on vacation, even when I’m just standing in my own backyard. Plus, cleanup is a breeze with the Blackstone! So, if you’re looking for a recipe that’s guaranteed to impress, look no further. These Sizzling Blackstone Steak Fajitas are calling your name.
Ingredients for the Best Steak Fajitas
Alright, let’s talk ingredients. Here’s what you’ll need to create these mouthwatering fajitas:
500 g de carne de res (sirloin o falda): This translates to about 1.1 pounds of beef, and I recommend sirloin or skirt steak. These cuts are flavorful and cook quickly on the hot griddle. For those wondering about *la carne*, using a quality cut makes all the difference.
1 pimiento rojo, en tiras: One red bell pepper, sliced into strips. Adds sweetness and vibrant color.
1 pimiento verde, en tiras: One green bell pepper, sliced into strips. Provides a slightly bitter counterpoint to the red pepper.
1 cebolla, en tiras: One onion, sliced into strips. Caramelizes beautifully on the Blackstone, adding a savory sweetness.
2 cucharadas de aceite de oliva: Two tablespoons of olive oil. Helps to coat the steak and vegetables, preventing them from sticking to the griddle.
2 cucharadas de condimento para fajitas: Two tablespoons of fajita seasoning. You can use store-bought or make your own (recipe below!). The key is *los sabores* that this seasoning brings to *las fajitas*.
Tortillas de harina o maíz: Flour or corn tortillas. Warm them up on the Blackstone for extra flavor!
Limón, para servir: Lime wedges, for serving. A squeeze of lime juice brightens up all the flavors.
Salsa y guarniciones (opcional): Salsa and toppings (optional). Get creative with your favorite toppings! Guacamole, sour cream, cheese, pico de gallo… the sky’s the limit.
For the fajita seasoning, I like to make my own. It’s so much more flavorful than the store-bought stuff, and you can customize it to your liking. Here’s my go-to recipe:
1 tablespoon chili powder
1 teaspoon cumin
1 teaspoon smoked paprika
1/2 teaspoon garlic powder
1/2 teaspoon onion powder
1/4 teaspoon cayenne pepper (optional, for a little heat)
1 teaspoon salt
1/2 teaspoon black pepper
Simply mix all the ingredients together in a small bowl, and you’re good to go! This seasoning blend is perfect for *fajitas de steak* and so much more.
Step-by-Step Guide: Making Steak Fajitas on the Blackstone Plancha
Okay, now for the fun part! Let’s get these fajitas cooking. Here’s a step-by-step guide to help you create the perfect Sizzling Blackstone Steak Fajitas:
Precalienta la plancha Blackstone a temperatura media-alta: Preheat your Blackstone griddle to medium-high heat. You want it hot enough to sear the steak quickly, but not so hot that it burns the vegetables. A properly preheated *plancha blackstone* is key.
Corta la carne en tiras delgadas: Slice the steak into thin strips. This helps it cook quickly and evenly. Remember, we want tender steak, not tough leather.
En un tazón, mezcla la carne con el aceite de oliva y el condimento para fajitas: In a bowl, toss the steak with olive oil and fajita seasoning. Make sure the steak is evenly coated with the seasoning for maximum flavor. This is where *los ingredientes* really come together.
Añade la carne a la plancha caliente y cocina por 5-7 minutos hasta que esté dorada: Add the steak to the hot griddle and cook for 5-7 minutes, until browned and cooked to your desired doneness. I like mine medium-rare, but cook it to your preference. The key here is to get a good sear on *the steak* without overcooking it.
Agrega los pimientos y la cebolla y cocina por otros 5 minutos hasta que las verduras estén tiernas: Add the bell peppers and onions to the griddle and cook for another 5 minutes, until the vegetables are tender-crisp. You want them to be slightly charred but still have a little bite.
Sirve en tortillas calientes con limón y tus salsas favoritas: Serve in warm tortillas with lime wedges and your favorite toppings. Don’t forget the salsa, guacamole, and sour cream!
And that’s it! You’ve just created a restaurant-quality meal in your own backyard. Now, gather your friends and family, and enjoy the fiesta!
Pro Tips for Perfect Blackstone Steak Fajitas
Want to take your fajitas to the next level? Here are a few pro tips that I’ve learned over the years:
Use a Meat Thermometer: To ensure your steak is cooked to perfection, use a meat thermometer. Medium-rare is around 130-135°F.
Don’t Overcrowd the Griddle: Cook the steak and vegetables in batches if necessary to avoid overcrowding the griddle. Overcrowding will lower the temperature and prevent the steak from searing properly.
Let the Steak Rest: After cooking, let the steak rest for 5-10 minutes before slicing it. This allows the juices to redistribute, resulting in a more tender and flavorful steak.
Warm the Tortillas: Warm the tortillas on the Blackstone for a few seconds per side to make them more pliable and flavorful. You can even char them slightly for a smoky taste.
Use High-Quality Ingredients: The better the ingredients, the better the fajitas. Invest in good-quality steak, fresh vegetables, and flavorful tortillas.
I always say, *it s* the little things that make a big difference in cooking. These tips will help you elevate your fajitas from good to great. And remember, cooking should be fun! Don’t be afraid to experiment and try new things.
Common Mistakes to Avoid When Making Steak Fajitas
We all make mistakes in the kitchen, but here are a few common ones to avoid when making steak fajitas:
Not Preheating the Griddle: A hot griddle is essential for searing the steak and vegetables properly. Make sure to preheat it to medium-high heat before adding any ingredients.
Overcooking the Steak: Overcooked steak is tough and dry. Use a meat thermometer to ensure it’s cooked to your desired doneness.
Using Too Much Oil: Too much oil can make the fajitas greasy. Use just enough to coat the steak and vegetables.
Not Seasoning Properly: Seasoning is key to flavorful fajitas. Don’t be afraid to use plenty of fajita seasoning.
Letting the Tortillas Get Stale: Keep the tortillas warm and covered until serving to prevent them from drying out.
I’ve made all of these mistakes myself at one point or another, so don’t feel bad if you do too! The important thing is to learn from them and keep practicing. And remember, even if your fajitas aren’t perfect, they’ll still be delicious!
Delicious Variations on Blackstone Steak Fajitas
One of the best things about fajitas is that they’re so versatile. Here are a few delicious variations to try:
Chicken Fajitas: Substitute the steak with chicken breast or thighs. Marinate the chicken in fajita seasoning for at least 30 minutes before cooking.
Shrimp Fajitas: Use shrimp instead of steak or chicken. Shrimp cooks quickly, so be careful not to overcook it.
Vegetarian Fajitas: Omit the meat altogether and load up on vegetables. Bell peppers, onions, mushrooms, zucchini, and corn are all great options.
Spicy Fajitas: Add a pinch of cayenne pepper to the fajita seasoning or use a spicy salsa to kick up the heat.
Sweet and Savory Fajitas: Add a touch of sweetness with a drizzle of honey or maple syrup.
Don’t be afraid to get creative and experiment with different flavors and ingredients. The possibilities are endless!
How to Store and Reheat Leftover Steak Fajitas
If you have any leftover steak fajitas (which is rare in my house!), here’s how to store and reheat them:
Storage: Store the steak and vegetables separately in airtight containers in the refrigerator for up to 3 days.
Reheating: Reheat the steak and vegetables on the Blackstone griddle or in a skillet over medium heat until warmed through. You can also microwave them, but they may not be as flavorful.
Tortillas: Store the tortillas in an airtight container at room temperature. Reheat them on the Blackstone or in a microwave before serving.
Leftover fajitas are great for lunch the next day. You can even use them to make a fajita salad or a fajita burrito.
Frequently Asked Questions About Steak Fajitas
Got questions about steak fajitas? I’ve got answers!
What’s the best cut of steak for fajitas? I recommend sirloin or skirt steak. These cuts are flavorful and cook quickly on the hot griddle.
Can I use frozen vegetables? Yes, you can use frozen vegetables, but fresh vegetables are always better. If using frozen vegetables, thaw them completely before cooking.
How do I prevent the steak from sticking to the griddle? Make sure the griddle is properly preheated and use enough oil to coat the steak.
Can I make fajitas ahead of time? Yes, you can prepare the steak and vegetables ahead of time and store them in the refrigerator. Just reheat them on the Blackstone before serving.
What toppings go well with fajitas? The possibilities are endless! Some popular toppings include salsa, guacamole, sour cream, cheese, pico de gallo, and jalapeños.
If you have any other questions, feel free to ask in the comments below!
Serving Suggestions for Blackstone Steak Fajitas
Now that you’ve made these amazing fajitas, it’s time to serve them up! Here are a few serving suggestions:
Classic Fajitas: Serve the steak and vegetables in warm tortillas with your favorite toppings.
Fajita Bowls: Create a fajita bowl by layering rice, beans, steak, vegetables, and toppings in a bowl.
Fajita Salads: Top a bed of lettuce with steak, vegetables, and your favorite salad dressing for a lighter option.
Fajita Nachos: Load tortilla chips with steak, vegetables, cheese, and your favorite nacho toppings.
Fajita Quesadillas: Fill tortillas with steak, vegetables, and cheese, and grill them until the cheese is melted and bubbly.
No matter how you choose to serve them, these Sizzling Blackstone Steak Fajitas are sure to be a hit! So, gather your friends and family, and enjoy the fiesta! Remember that *que la* comida siempre sea un motivo para celebrar. These *steak fajitas* are great, but *no solo* about the food, it’s about the people you share them with.
Remember to always ensure that *la carne* is cooked properly and that *las tortillas* are warm. The key to great *fajitas de steak* is using *ingredientes frescos* and enjoying the process. Before you begin, make sure your *plancha blackstone* is clean and ready for action. It’s important to *mantener la* plancha in good condition for the best results. Keep in mind that *de res* is a great option, but chicken or shrimp work well too.
Hey, friends! Ava here, back in my Seattle kitchen, where the spice rack is overflowing and the air often smells like a fiesta. Today, we’re ditching those store-bought packets and diving into the wonderful world of homemade fajita seasoning. Trust me, once you taste the difference, you’ll never go back. This recipe is all about creating that restaurant-style fajita magic right in your own kitchen, and it’s surprisingly simple. It’s the perfect blend of smoky, spicy, and savory – everything you want in a fajita seasoning mix.
I remember the first time I made my own fajita seasoning. I was attempting to recreate my favorite dish from a local Mexican restaurant. After a few (ahem, several) attempts, I finally nailed it. The secret? Fresh spices and a little bit of love. This recipe is my perfected version, and I’m so excited to share it with you!
Why You’ll Love This Homemade Fajita Seasoning
So, why should you bother making your own fajita seasoning? Well, let me tell you:
Control the Ingredients: Ever look at the back of a store-bought seasoning packet? The ingredient list can be a mile long, filled with preservatives and things you can’t pronounce. When you make it yourself, you know exactly what’s going in.
Adjust the Spice Level: Love a little heat? Add more cayenne pepper! Prefer a milder flavor? Reduce the chili powder. You have complete control over the spice blend.
Superior Flavor: Freshly ground spices have a vibrancy that pre-packaged blends simply can’t match. The flavor is richer, more complex, and oh-so-delicious.
Cost-Effective: Buying individual spices in bulk is often cheaper than constantly repurchasing those little packets.
It’s Incredibly Versatile: While it’s perfect for fajitas, this seasoning mix can also be used on chicken, steak, vegetables, or even sprinkled on popcorn for a spicy kick.
Fajita Seasoning Recipe
Ready to get started? Here’s what you’ll need:
Ingredients:
1 tablespoon ground cumin
1 tablespoon chili powder
1 tablespoon paprika
1 tablespoon sea salt
1 tablespoon dried oregano
1 teaspoon garlic powder (or granulated garlic)
1 teaspoon onion powder (or granulated onion)
1 teaspoon cayenne pepper
How to Make Fajita Seasoning: Step-by-Step
Making your own fajita seasoning is ridiculously easy. Here’s how to do it:
Combine: In a small bowl or mason jar, combine all of the spices together.
Mix: Stir well until everything is evenly distributed.
Store: Transfer the fajita spices recipe to an airtight container. A mason jar works great! Store in a cool, dark place until ready to use.
Pro Tips for the Best Fajita Seasoning
Want to take your fajita seasoning to the next level? Here are a few of my favorite tips:
Use Fresh Spices: Check the expiration dates on your spices. Older spices lose their potency and won’t deliver the same flavor punch.
Toast Your Spices: For an even deeper flavor, lightly toast the cumin and chili powder in a dry skillet over medium heat for a few minutes before combining with the other spices. Keep a close eye on them so they don’t burn!
Adjust the Salt: The amount of salt is a matter of personal preference. Start with the recommended amount and adjust to taste.
Granulated vs. Powder: I personally prefer granulated garlic and onion for a bit of texture, but powder works just as well.
Common Mistakes to Avoid
Even though this recipe is simple, there are a few pitfalls to watch out for:
Burning the Spices: If you decide to toast your spices, don’t walk away from the stove! They can burn quickly and ruin the flavor.
Using Too Much Salt: It’s always easier to add more salt than to take it away. Start with less and taste as you go.
Not Storing Properly: Moisture is the enemy of spices. Make sure your container is airtight to prevent clumping and loss of flavor.
Fajita Seasoning Variations
One of the best things about making your own seasoning is that you can customize it to your liking. Here are a few variations to try:
Smoked Paprika: Substitute regular paprika with smoked paprika for a smoky flavor.
Chipotle Powder: Add a teaspoon of chipotle powder for a smoky, spicy kick.
Lime Zest: Add the zest of one lime for a bright, citrusy flavor.
Brown Sugar: A teaspoon of brown sugar adds a touch of sweetness and helps to balance the spices.
Add Heat: If you want to add more heat, you can add more cayenne pepper, or a pinch of red pepper flakes.
How to Store Homemade Fajita Seasoning
Proper storage is key to keeping your fajita seasoning fresh and flavorful. Here’s what you need to know:
Airtight Container: Store the seasoning in an airtight container, such as a mason jar or spice jar.
Cool, Dark Place: Keep the container in a cool, dark place away from direct sunlight and heat. A pantry or spice cabinet is ideal.
Shelf Life: When stored properly, homemade fajita seasoning will last for up to 6-12 months.
FAQ: Your Fajita Seasoning Questions Answered
Got questions? I’ve got answers!
Can I use this seasoning for chicken fajitas? Absolutely! This seasoning is fantastic on chicken. You can also use it for steak or shrimp.
How much seasoning should I use per pound of meat? I recommend using about 2-3 tablespoons of seasoning per pound of meat. Adjust to taste.
Can I make a big batch and store it? Yes! This recipe can easily be doubled or tripled. Just make sure to store it properly.
Is this seasoning gluten-free? Yes, as long as you use gluten-free spices. Always check the labels to be sure.
What if I don’t have all the spices? While the recipe is best with all the listed spices, you can make substitutions. For example, if you don’t have onion powder, you can use a little bit of granulated onion.
Serving Suggestions: Beyond Fajitas
While this seasoning is amazing for fajitas, don’t limit yourself! Here are a few other ways to use it:
Grilled Vegetables: Toss bell peppers, onions, and zucchini with olive oil and fajita seasoning before grilling.
Tacos: Use it to season ground beef or turkey for tacos.
Roasted Potatoes: Sprinkle it on roasted potatoes for a spicy kick.
Chicken Wings: Toss cooked chicken wings with fajita seasoning for a flavorful appetizer.
Black Beans: Add some seasoning to black beans to give them a fajita flavor.
Okay, friends, that’s it! I hope you enjoy this homemade fajita seasoning recipe as much as I do. Remember, cooking is all about experimenting and having fun. So, don’t be afraid to get creative and make this recipe your own. And if you cook for minutes and end up with something amazing, be sure to let me know! You can cook for minutes per side for steak or chicken. This seasoning mix will add so much flavor to your dish. You can use all of the spices, or adjust the amount you want. If you want to make fajitas, you’ll need about tablespoons or teaspoons of seasoning. You can also add a tablespoon olive oil, bell peppers and onions to your dish. Remember, it’s all about creating your own perfect spice blend.
A flavorful blend of spices perfect for fajitas and other Tex-Mex dishes. This homemade seasoning is easy to make and tastes better than store-bought versions.
Ingredients
Spices
1tablespoonground cumin
1tablespoonchili powder
1tablespoonpaprika
1tablespoonsea salt
1tablespoondried oregano
1teaspoongarlic powder (or granulated garlic)
1teaspoononion powder (or granulated onion)
1teaspooncayenne pepper
Instructions
Combine all spices in a bowl or jar.
Store in an airtight container.
Notes
Adjust the amount of cayenne pepper to control the spice level.
Hey there, friend! Ava here, back in my Seattle kitchen, and today we’re making something that’s been on repeat lately: Air Fryer Steak Fajitas. If you’re like me, you crave those sizzling, flavorful fajitas but don’t always have the time (or energy!) for a full-blown production. That’s where the air fryer swoops in to save the day. This recipe is all about speed, simplicity, and, most importantly, incredible flavor. Forget takeout; these fajitas are ready faster than you can say ‘guacamole’!
I remember the first time I made fajitas from scratch. It was a disaster! The steak was tough, the peppers were soggy, and the whole thing took hours. But I was determined to master the art of the fajita, and after many trials (and a few errors), I finally cracked the code. And now, with the help of my trusty air fryer, it’s easier than ever. Trust me, even if you’re a beginner cook, you can nail this recipe.
Why You’ll Love This Air Fryer Steak Fajita Recipe
Okay, let’s get real. There are a million fajita recipes out there. So why should you try this one? Here’s the deal:
Speed Demon: This recipe is lightning-fast. Seriously, from prep to plate, you’re looking at about 20 minutes. Perfect for those hectic weeknights.
Flavor Explosion: The air fryer works its magic, caramelizing the peppers and onions while keeping the steak juicy and tender. We’re talking serious flavor.
Easy Cleanup: One bowl, one air fryer basket. That’s it. Say goodbye to mountains of dishes.
Customizable: Don’t like red onions? Swap them for yellow. Prefer chicken over steak? Go for it! This recipe is a blank canvas for your culinary creativity.
Healthy-ish: Compared to traditional pan-fried fajitas, this recipe uses less oil, making it a slightly healthier option. We’re always looking for ways to lighten things up, right?
So, if you’re looking for a quick, easy, and delicious way to satisfy your fajita cravings, you’ve come to the right place. Let’s get cooking!
Ingredients You’ll Need
Here’s what you’ll need to make these incredible air fryer steak fajitas. Don’t worry, it’s a pretty straightforward list!
½ pound steak (flank, sirloin, or skirt, sliced into thin strips)
½ red onion (sliced)
½ red bell pepper (sliced)
½ green bell pepper (sliced)
½ yellow bell pepper (sliced)
1 Tablespoon olive oil
1 Tablespoon fajita seasoning
3 cloves garlic (minced)
How to Make Air Fryer Steak Fajitas: Step-by-Step
Ready to turn these ingredients into a mouthwatering meal? Follow these simple steps, and you’ll be enjoying your air fryer steak fajitas in no time!
Preheat Air Fryer: Set to 400°F for 3-5 minutes. This ensures even cooking and helps the steak and veggies caramelize beautifully.
Prepare Ingredients: Slice the steak and vegetables into thin strips. Uniform size is key for even cooking.
Season & Coat: In a bowl, toss steak and veggies with olive oil, fajita seasoning, and minced garlic until well coated. Make sure everything is evenly seasoned for maximum flavor.
Air Fry: Place the steak and vegetable mixture in the air fryer basket in a single layer. Depending on the size of your air fryer, you may need to cook in batches.
Cook: Air fry for 8-10 minutes, flipping halfway through, until the steak is cooked to your desired doneness and the vegetables are tender-crisp. If you want your steak more well-done, cook for a few extra minutes.
Serve: Serve immediately with your favorite toppings, such as tortillas, salsa, sour cream, guacamole, and cheese.
Pro Tips for Perfect Air Fryer Steak Fajitas
Want to take your fajitas to the next level? Here are a few pro tips that I’ve learned along the way:
Don’t Overcrowd the Basket: This is crucial for even cooking. If the basket is too crowded, the steak and veggies will steam instead of caramelizing. Cook in batches if necessary.
Use a Meat Thermometer: For perfectly cooked steak, use a meat thermometer to check the internal temperature. For medium-rare, aim for 130-135°F; for medium, 135-145°F; and for medium-well, 145-155°F.
Marinate the Steak: For extra flavor and tenderness, marinate the steak for at least 30 minutes before cooking. A simple marinade of lime juice, soy sauce, and garlic works wonders.
Preheat is Key: Always preheat your air fryer before adding the steak and veggies. This helps to ensure even cooking and a crispy exterior.
Don’t Be Afraid to Experiment: Add other vegetables like mushrooms, zucchini, or jalapeños to your fajitas. The possibilities are endless!
Remember, cooking is all about having fun and experimenting with flavors. Don’t be afraid to try new things and put your own spin on this recipe!
Common Mistakes to Avoid
Even with a simple recipe like this, it’s easy to make a few common mistakes. Here’s what to watch out for:
Overcooking the Steak: This is the biggest culprit. Overcooked steak is tough and dry. Use a meat thermometer and cook to your desired doneness.
Using the Wrong Cut of Steak: Flank, sirloin, or skirt steak are the best choices for fajitas. Avoid tougher cuts like chuck steak.
Not Seasoning Enough: Fajitas are all about flavor, so don’t be shy with the seasoning. Use a generous amount of fajita seasoning, and don’t forget the garlic!
Not Slicing the Steak Thinly Enough: Thinly sliced steak cooks quickly and evenly. Make sure to slice against the grain for maximum tenderness.
Forgetting to Flip: Flipping the steak and veggies halfway through cooking ensures even browning and prevents sticking.
By avoiding these common mistakes, you’ll be well on your way to making perfect air fryer steak fajitas every time.
Delicious Variations to Try
Want to mix things up? Here are a few delicious variations to try:
Chicken Fajitas: Substitute steak with chicken breast or thighs. Adjust the cooking time as needed.
Shrimp Fajitas: Use shrimp instead of steak. Shrimp cooks very quickly in the air fryer, so keep a close eye on it.
Vegetarian Fajitas: Omit the steak and add extra vegetables like mushrooms, zucchini, and corn.
Spicy Fajitas: Add a pinch of cayenne pepper or a few chopped jalapeños to the seasoning mixture for a spicy kick.
Citrus Fajitas: Marinate the steak in lime or orange juice for a bright and tangy flavor.
Don’t be afraid to get creative and experiment with different flavors and ingredients. The possibilities are endless!
How to Store and Reheat Leftovers
If you happen to have any leftovers (which is rare in my house!), here’s how to store and reheat them:
Storage: Store leftover steak and vegetables in an airtight container in the refrigerator for up to 3 days.
Reheating: Reheat in the air fryer at 350°F for 3-5 minutes, or until heated through. You can also reheat in a skillet over medium heat.
Freezing: While you can freeze leftover fajitas, the texture may change slightly. If freezing, store in an airtight container for up to 2 months. Thaw overnight in the refrigerator before reheating.
Leftover fajitas are great for lunch the next day or as a topping for salads or nachos.
Frequently Asked Questions (FAQ)
Got questions? I’ve got answers! Here are some frequently asked questions about air fryer steak fajitas:
Can I use frozen steak? Yes, but make sure to thaw it completely before cooking.
Can I use pre-cut fajita vegetables? Absolutely! This is a great time-saver.
What kind of fajita seasoning should I use? You can use store-bought or make your own. There are tons of recipes online.
Can I add beans to my fajitas? Sure! Black beans or pinto beans are a great addition.
What’s the best way to warm tortillas? You can warm tortillas in a dry skillet, in the microwave, or in the oven.
If you have any other questions, feel free to leave a comment below. I’m always happy to help!
Serving Suggestions and What to Serve with Air Fryer Steak Fajitas
Okay, so you’ve got your sizzling air fryer steak fajitas ready to go. Now what? Here are a few serving suggestions and side dishes to complete the meal:
Tortillas: Warm flour or corn tortillas are a must.
Salsa: Choose your favorite salsa, from mild to spicy.
Guacamole: Creamy, homemade guacamole is always a winner.
Sour Cream: A dollop of sour cream adds a cool and tangy touch.
Cheese: Shredded cheddar, Monterey Jack, or queso fresco are all great choices.
Rice and Beans: Serve with a side of Mexican rice and refried beans for a complete meal.
Pico de Gallo: Fresh pico de gallo adds a burst of flavor and freshness.
Mexican Street Corn Salad: A fun and flavorful side dish.
And there you have it! Everything you need to make and serve the most amazing air fryer steak fajitas. I hope you enjoy this recipe as much as I do. Happy cooking!
This recipe, and others like it, are designed to bring people together in one. The air fryer ensures it’s a breeze. Meal prep or not, they’re so glad you found this recipe. Serve them up to your favorite people. They’re re so easy to make. If you want to up the flavor, try different marinades.
Hey there! Ava here, back in my Seattle kitchen, and today we’re diving headfirst into a recipe that’s a little bit… well, addictive. I call them Crack Burgers, and trust me, the name is no exaggeration. These aren’t your average, run-of-the-mill burgers. We’re talking next-level flavor, juicy perfection, and a ridiculously easy preparation that’ll have you wondering why you ever bothered with anything else. I first stumbled upon a version of this recipe years ago at a neighborhood BBQ, and after a few tweaks and a whole lot of taste-testing, I’ve landed on a version that I think is pretty darn close to burger nirvana. So, grab your apron, fire up the grill (or your trusty skillet), and let’s get cooking!
Why You’ll Love This Crack Burger Recipe
What makes these burgers so special? It’s the combination of simple ingredients that create an explosion of flavor in every bite. Here’s why you’ll be hooked:
Flavor Bomb: The sour cream and ranch dressing mix infuse the ground chuck with a tangy, savory goodness that’s simply irresistible.
Effortless Prep: Seriously, these burgers come together in minutes. Perfect for busy weeknights or impromptu gatherings.
Customizable: Feel free to get creative with your toppings and cheese. The possibilities are endless!
Crowd-Pleaser: I’ve never met anyone who didn’t fall in love with these burgers. They’re a guaranteed hit at any BBQ or party.
Perfectly Juicy: Using ground chuck with the right fat content ensures the patties are juicy and flavorful.
These Crack Burgers are more than just a meal; they’re an experience. They’re the kind of burgers that make you close your eyes and savor every single morsel. They’re the burgers you crave, the burgers you dream about, and the burgers you’ll want to share with everyone you know. You’re going to love it!
Crack Burger Ingredients
1.5 lb ground chuck: (Aim for 80/20 fat content for juiciness.)
3 Tbsp sour cream
2 Tbsp ranch dressing mix
⅓ cup cooked and crumbled turkey bacon
1 cup shredded cheddar cheese
Hamburger buns: (Toast for a crispier texture.)
Lettuce: (For crunch and flavor.)
Tomato: (Sliced.)
Mustard: (For extra taste.)
Mayo: (For topping.)
How to Make Crack Burgers: Step-by-Step
Alright, let’s get down to business. Here’s how to make these incredibly addictive Crack Burgers:
Prep the Meat: In a large bowl, gently combine the ground chuck, sour cream, and ranch dressing mix. Be careful not to overmix; you want to keep the meat tender.
Form the Patties: Divide the meat mixture into equal portions (about 4-6 patties, depending on your desired size). Gently form them into patties, making sure they’re not too thick. A slight indentation in the center can help prevent them from puffing up too much while cooking.
Add the Goodies: Sprinkle the cooked and crumbled turkey bacon and shredded cheddar cheese evenly over the top of each patty. Gently press them into the meat so they stay put.
Cook the Burgers: You can grill or pan-fry these burgers. For grilling, preheat your grill to medium-high heat. For pan-frying, heat a skillet over medium heat with a little oil or butter.
Grill ‘Em Up: Place the patties on the grill or in the skillet and cook for about 4-5 minutes per side for medium doneness, or until they reach your desired level of doneness. Remember, burgers cook to an internal temperature of 160°F (71°C) for medium. Use a meat thermometer to ensure accuracy.
Toast the Buns: While the burgers are cooking, toast your hamburger buns. This adds a nice crispy texture that complements the juicy patties.
Assemble and Serve: Place the cooked patties on the toasted buns. Add your favorite toppings, such as lettuce, tomato, mustard, and mayo. Serve immediately and enjoy!
Pro Tips for the Best Crack Burgers
Want to take your Crack Burgers to the next level? Here are a few of my favorite pro tips:
Don’t Overmix: Overmixing the meat can result in tough burgers. Gently combine the ingredients until just mixed.
Fat is Your Friend: Using ground chuck with a good fat content (80/20) is crucial for juicy, flavorful burgers. The fat renders during cooking, keeping the patties moist and delicious.
Temperature Matters: Make sure your grill or skillet is hot enough before adding the patties. This will help create a nice sear on the outside while keeping the inside juicy.
Cheese Placement: Pressing the cheese and bacon into the patties helps them stay in place during cooking.
Resting Time: Let the burgers rest for a few minutes after cooking. This allows the juices to redistribute, resulting in a more tender and flavorful burger.
For Medium: Remember, cook to 160°F for medium.
Common Mistakes to Avoid
Even with a simple recipe, it’s easy to make a few common mistakes. Here’s what to watch out for:
Overcooking the Burgers: Dry, overcooked burgers are a tragedy. Use a meat thermometer to ensure they’re cooked to your desired doneness.
Using Lean Ground Beef: While it might seem healthier, lean ground beef will result in dry, less flavorful burgers. Stick with 80/20 ground chuck for the best results.
Adding Too Much Seasoning: The ranch dressing mix already adds a lot of flavor, so be careful not to over-season the meat.
Pressing Down on the Patties: Avoid pressing down on the patties while they’re cooking. This squeezes out the juices and can result in dry burgers.
Not Toasting the Buns: Toasting the buns adds a crucial layer of texture and prevents them from getting soggy. Don’t skip this step!
Crack Burger Variations
Want to mix things up? Here are a few fun variations to try:
Spicy Crack Burgers: Add a pinch of cayenne pepper or a dash of hot sauce to the meat mixture for a little kick.
Garlic Herb Crack Burgers: Mix in some minced garlic and fresh herbs like parsley or thyme for a more aromatic burger.
Blue Cheese Crack Burgers: Swap the cheddar cheese for crumbled blue cheese for a tangy, pungent twist.
Mushroom Swiss Crack Burgers: Top the burgers with sautéed mushrooms and Swiss cheese for a classic combination.
Jalapeño Popper Crack Burgers: Add diced jalapeños and cream cheese to the meat mixture for a spicy, creamy burger.
How to Store Leftover Crack Burgers
If you happen to have any leftover Crack Burgers (which is unlikely, but hey, it could happen!), here’s how to store them:
Refrigerate: Store cooked burgers in an airtight container in the refrigerator for up to 3-4 days.
Reheat: Reheat the burgers in a skillet over medium heat, in the microwave, or in the oven until heated through.
Freezing: For longer storage, you can freeze the cooked burgers. Wrap them individually in plastic wrap and then place them in a freezer-safe bag or container. They can be stored in the freezer for up to 2-3 months.
Crack Burger FAQs
Got questions? I’ve got answers! Here are some frequently asked questions about Crack Burgers:
Can I use a different type of ground meat?: While ground chuck is my preferred choice for its flavor and fat content, you can use ground sirloin or a blend of ground beef and ground pork. Just be aware that leaner meats may result in drier burgers.
Can I make these burgers ahead of time?: You can prepare the meat mixture and form the patties ahead of time, but I recommend cooking them right before serving for the best flavor and texture.
Can I use regular bacon instead of turkey bacon?: Absolutely! Feel free to use regular bacon if you prefer.
Can I grill or pan-fry the burgers?: Yes, you can grill or pan-fry the burgers. Both methods work well.
What’s the best way to prevent the burgers from sticking to the grill?: Make sure your grill is clean and well-oiled before adding the patties.
Serving Suggestions for Crack Burgers
Crack Burgers are delicious on their own, but they’re even better when paired with the right sides. Here are a few of my favorite serving suggestions:
Classic Sides: Serve them with classic sides like French fries, onion rings, or coleslaw.
Salads: A fresh salad like a garden salad, Caesar salad, or potato salad is a great way to balance out the richness of the burgers.
Grilled Vegetables: Grilled corn on the cob, zucchini, or bell peppers are delicious and healthy accompaniments.
Sweet Potato Fries: Sweet potato fries add a touch of sweetness and a fun twist to the classic burger and fries combo.
Homemade Pickles: Add a tangy crunch with homemade pickles.
So there you have it—my recipe for Crack Burgers. I hope you love them as much as I do. Remember, cooking is all about having fun and experimenting, so don’t be afraid to put your own spin on this recipe. And if you do, be sure to let me know in the comments below. Happy cooking!
Beginner note: Make sure the meat is fresh! It’s important to the quality of your crack burger. You can grill or pan-fry the patties. Remember, burgers are a blank canvas. That’s why your crack burger can be unique and delicious. It’s all about experimenting with the patties to get the right taste. Remember, it’s best when shared. You’re going to want to make these crack burgers again and again. That’s the guarantee!
These Crack Burgers are incredibly flavorful and juicy, perfect for a satisfying meal. The combination of sour cream, ranch dressing mix, and turkey bacon creates an irresistible taste.
Ingredients
Burger Ingredients
1.5lbground chuck(Aim for 80/20 fat content for juiciness.)
3Tbspsour cream
2Tbspranch dressing mix
⅓cupcooked and crumbled turkey bacon
1cupshredded cheddar cheese
Toppings
Hamburger buns(Toast for a crispier texture.)
Lettuce(For crunch and flavor.)
Tomato(Sliced.)
Mustard(For extra taste.)
Mayo(For topping.)
Notes
For best results, don't overcook the burgers. A slightly pink center ensures they remain juicy and flavorful.


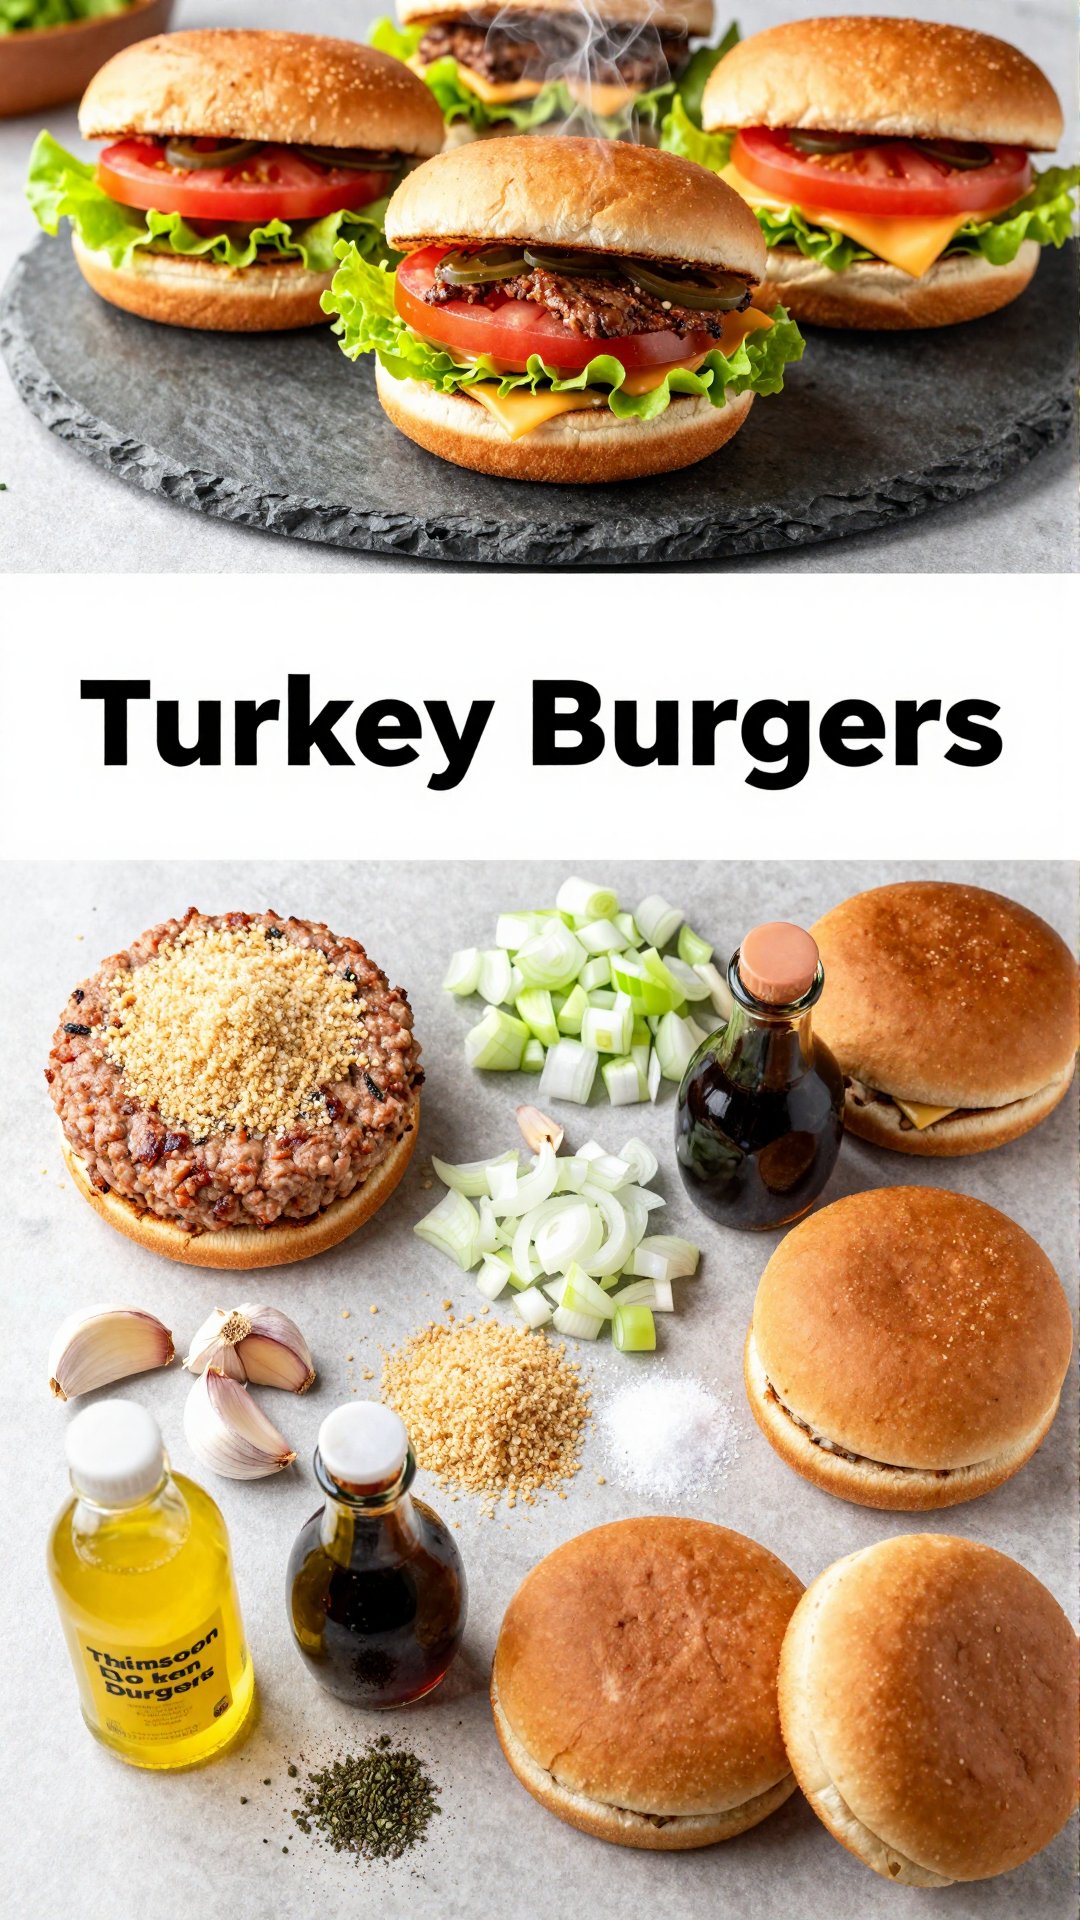

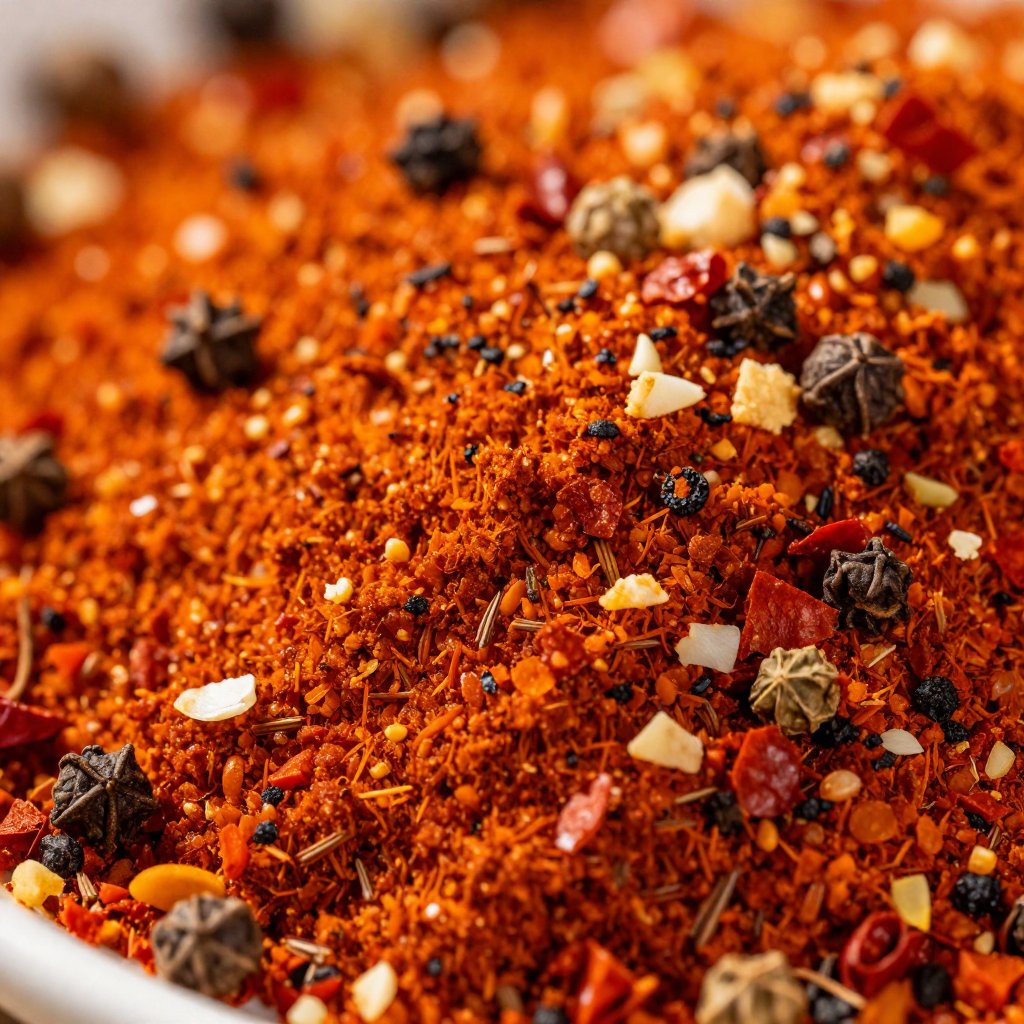

")