Author

Ava

Browsing

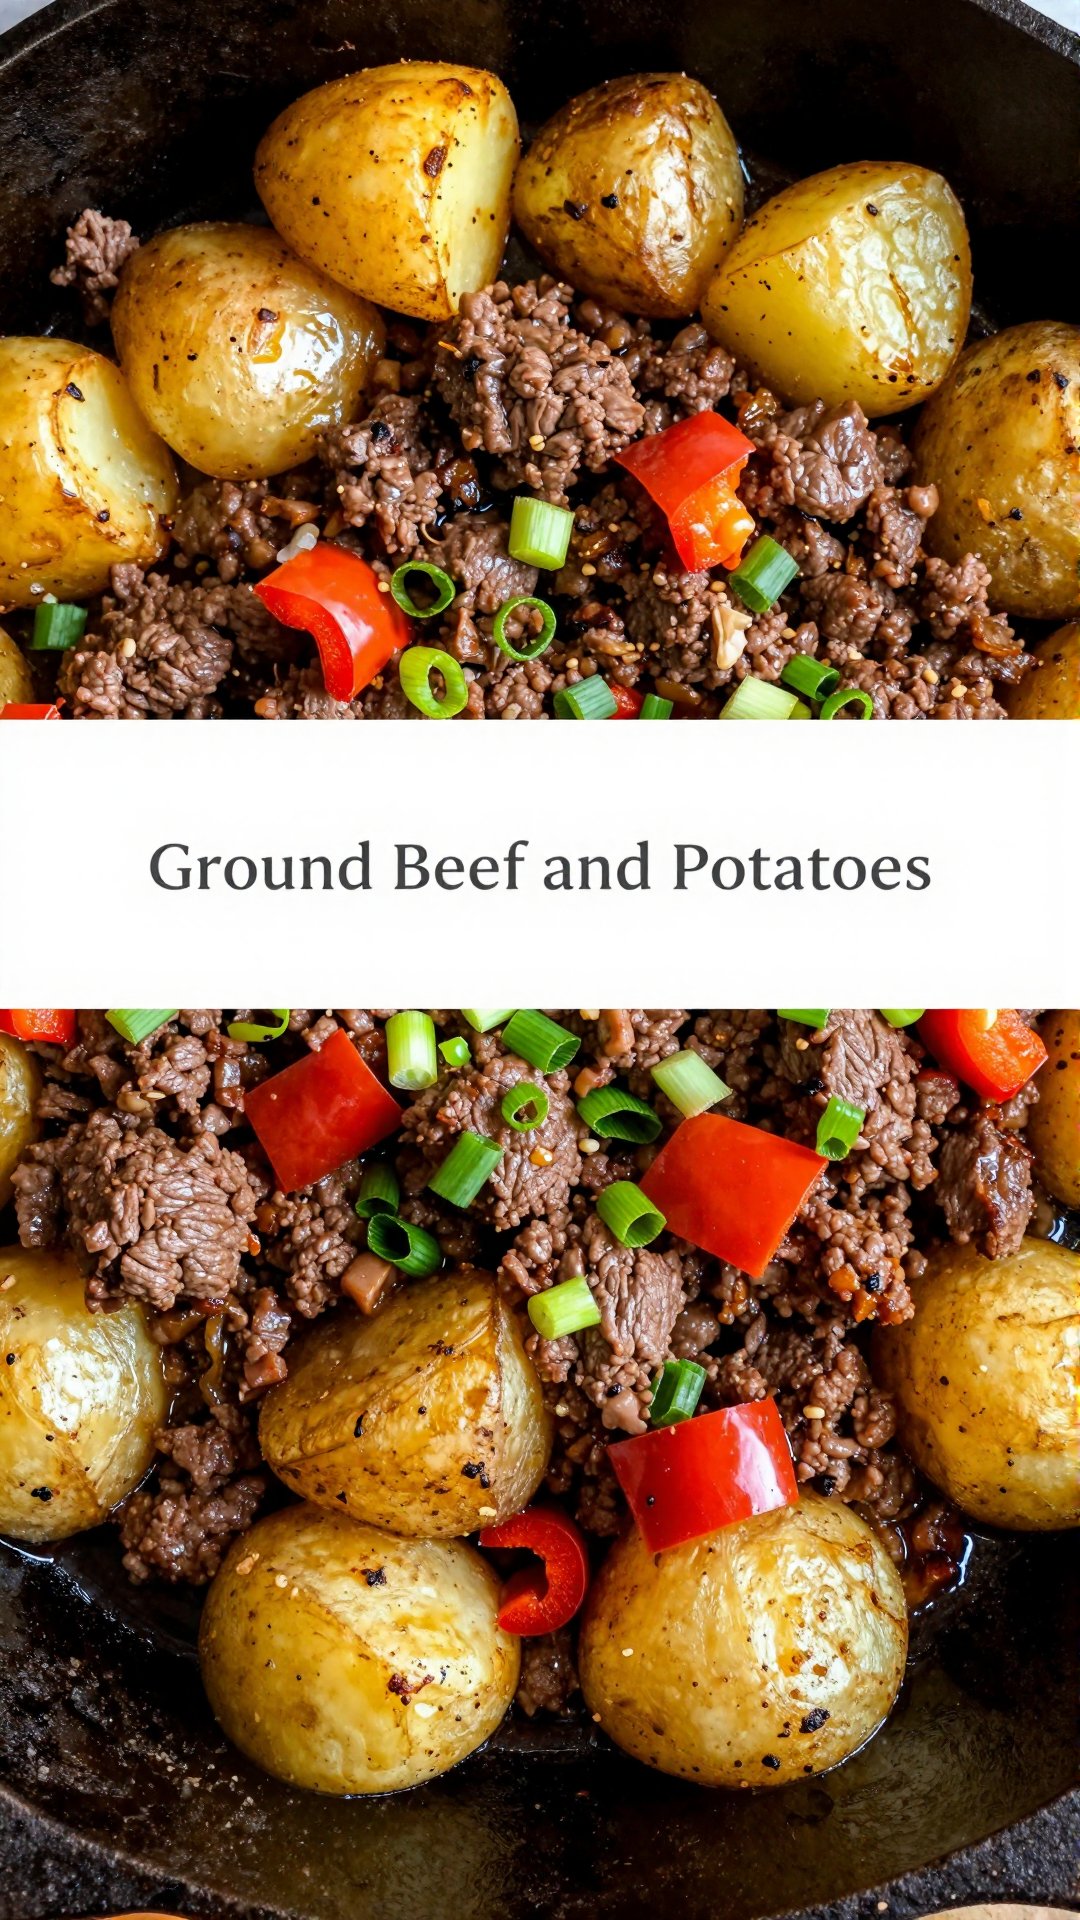
Easy Ground Beef and Potatoes Skillet Recipe: A Weeknight Winner

Hey there, friend! Ava here, back from my Seattle kitchen with a recipe that’s become a total staple: my Easy Ground Beef and Potatoes Skillet. If you’re anything like me, weeknights can be a whirlwind of activity. Between work, errands, and trying to maintain some semblance of a social life, cooking a gourmet meal is often the last thing on my mind. That’s where this recipe comes in – it’s quick, comforting, and uses ingredients you probably already have. Think of it as a warm hug in a skillet, ready in under 30 minutes.

Growing up, my mom had a knack for creating incredible meals out of simple ingredients. This dish reminds me of those cozy dinners around the kitchen table, where laughter and good food were always on the menu. I’ve tweaked her original recipe over the years, adding my own little twists, but the heart of it remains the same: simple, honest, and delicious.

Why You’ll Love This Ground Beef and Potatoes Skillet

Seriously, what’s not to love? This isn’t just another ground beef recipe; it’s a complete meal in one pan, which means fewer dishes to wash (hallelujah!). But beyond the convenience, here’s why this skillet meal with potatoes has won a permanent spot in my recipe rotation:

  • **Speed**: From start to finish, you’re looking at about 30 minutes. Perfect for those nights when you’re short on time but still want a home-cooked meal.
  • **Simplicity**: The ingredient list is short and sweet. No need to hunt down exotic spices or hard-to-find produce.
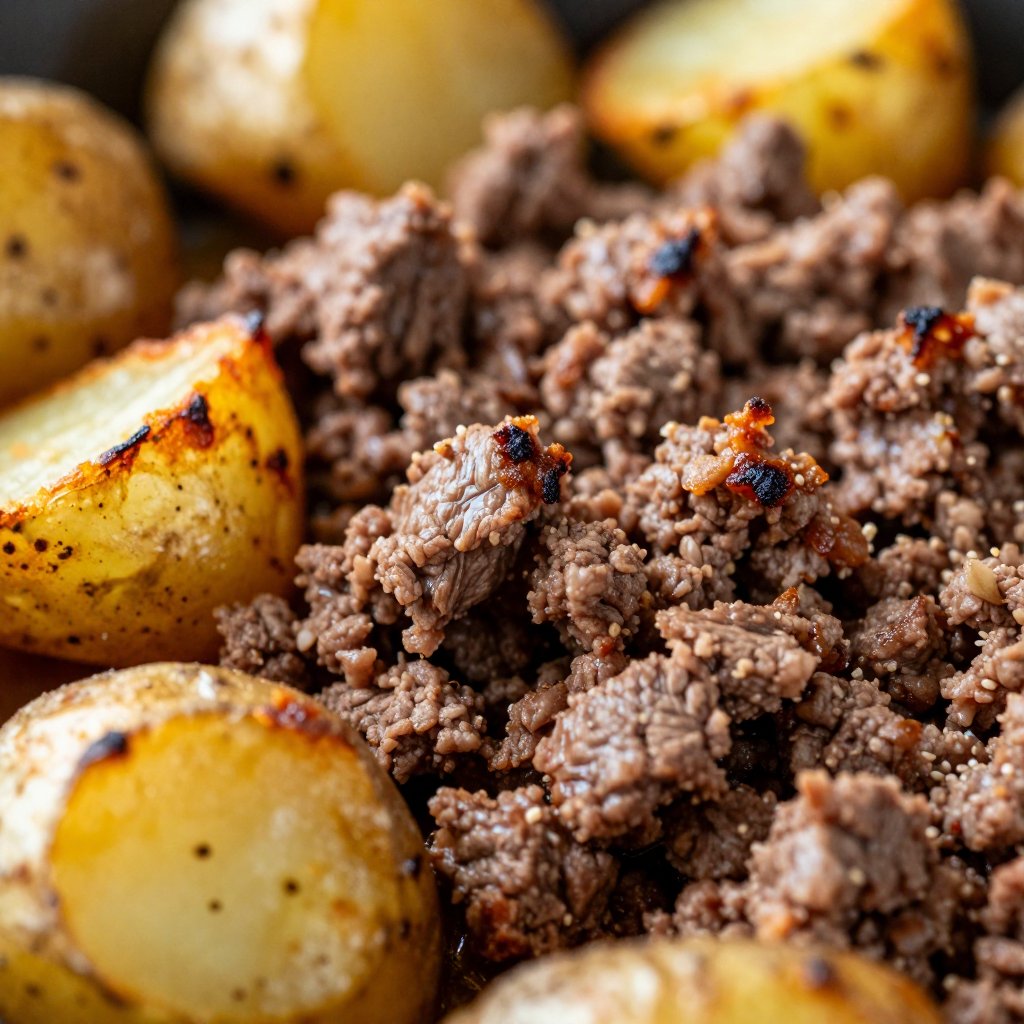
  • **Comfort Factor**: There’s something incredibly comforting about the combination of savory ground beef and tender potatoes. It’s the kind of dish that just makes you feel good.
  • **Versatility**: This recipe is incredibly adaptable. Feel free to swap out vegetables, add different spices, or even top it with cheese for an extra layer of flavor.
  • **Budget-Friendly**: Ground beef and potatoes are both relatively inexpensive, making this a great option for feeding a family on a budget.

I truly believe this is the best ground beef and potatoes recipe you’ll find. It’s the kind of dish that becomes a go-to, a reliable friend you can always count on. And let’s be honest, who doesn’t need a little comfort food in their life?

Ingredients for the Perfect Ground Beef and Potatoes

Here’s what you’ll need to whip up this fantastic dish. Don’t worry; it’s all pretty standard stuff!

  • ‘2 tablespoons olive oil’
  • ‘1 lb lean ground beef’
  • ‘1 medium yellow onion (diced)’
  • ‘1 red bell pepper (diced)’
  • ‘1.5 lbs Yukon gold potatoes (peeled and cubed)’
  • ‘1 cup beef stock or water’
  • ‘2 tablespoons Worcestershire sauce’
  • ‘1 teaspoon Dijon mustard’
  • ‘2 –3 green onions (chopped)’

Spices:

  • ‘1 tablespoon cumin (divided)’
  • ‘2 teaspoons paprika (divided)’
  • ‘2 teaspoons dried thyme (divided)’
  • ‘1 teaspoon garlic powder (divided)’
  • ‘1 teaspoon salt (divided)’
  • ‘½ teaspoon black pepper (divided)’
Recipe Image

How to Make Beef Potato Skillet: Step-by-Step

Alright, let’s get cooking! Here’s the easy step-by-step guide to creating this delicious ground beef and potatoes skillet. Trust me; it’s easier than it looks.

  1. Cook the Beef: Heat olive oil in a large skillet over medium heat. Add ground beef, season with half the spices, and cook until browned, breaking it apart as it cooks. Transfer to a plate and set aside.
  2. Cook the Potatoes: In the same skillet, add the cubed potatoes. Season with the remaining half of the spices. Pour in 1 cup of beef stock, cover, and cook for 8–10 minutes, stirring occasionally, until the potatoes are tender and most of the liquid has evaporated.
  3. Sauté Vegetables: Add the diced onion and red bell pepper to the skillet with the potatoes. Sauté until the vegetables are softened.
  4. Combine and Finish: Return the cooked ground beef to the skillet. Stir in Worcestershire sauce and Dijon mustard, mixing well. Taste and adjust seasoning as needed.
  5. Garnish and Serve: Sprinkle with chopped green onions and serve warm.

See? Told you it was simple! Now, let’s dive into some pro tips to make this dish even better.

Pro Tips for the Best Ground Beef and Potatoes

Okay, I’ve made this recipe more times than I can count, so I’ve picked up a few tricks along the way. Here are my top pro tips for ensuring your skillet is a total success:

  • **Choose the Right Potatoes**: Yukon gold potatoes are my go-to for this recipe because they have a creamy texture and hold their shape well. However, red potatoes also work great! Avoid russet potatoes, as they tend to fall apart more easily.
  • **Don’t Overcrowd the Pan**: When cooking the potatoes, make sure they’re in a single layer in the skillet. Overcrowding can cause them to steam instead of brown, which will affect the flavor and texture. If necessary, cook them in batches.
  • **Season Generously**: Don’t be shy with the spices! Seasoning is key to bringing out the flavors of the beef and potatoes. Taste as you go and adjust as needed.
  • **Deglaze the Pan**: After cooking the beef, there will be some browned bits stuck to the bottom of the skillet. These are full of flavor! When you add the beef stock, scrape up those bits to deglaze the pan and add extra depth to the dish.
  • **Use Quality Ground Beef**: Opt for lean ground beef (90/10) to avoid excess grease. This will also make the dish healthier without sacrificing flavor.

Common Mistakes to Avoid When Cooking Ground Beef and Potatoes

We’ve all been there – a recipe that looked foolproof turns into a bit of a disaster. Here are some common mistakes to avoid when making this skillet, so you can nail it every time:

  • **Not Browning the Beef**: Don’t skip the step of browning the ground beef! This adds a ton of flavor and creates those delicious crispy bits that make the dish so satisfying.
  • **Overcooking the Potatoes**: Keep an eye on the potatoes while they’re cooking. Overcooked potatoes will turn mushy and ruin the texture of the dish. Aim for tender but not falling apart.
  • **Adding Too Much Liquid**: Be careful not to add too much beef stock. You want just enough to help the potatoes cook through, but not so much that the dish becomes soupy.
  • **Skipping the Worcestershire Sauce and Dijon Mustard**: These ingredients add a subtle tang and depth of flavor that really elevates the dish. Don’t leave them out!
  • **Forgetting to Season**: I can’t stress this enough – season, season, season! Taste as you go and adjust the seasoning as needed.

Delicious Variations to Try

One of the things I love most about this recipe is how easy it is to customize. Here are a few variations to try if you’re feeling adventurous:

  • **Spicy Skillet**: Add a pinch of red pepper flakes or a diced jalapeño to the skillet for a little heat.
  • **Cheesy Goodness**: Sprinkle shredded cheddar cheese, Monterey Jack, or pepper jack cheese over the skillet during the last few minutes of cooking.
  • **Mediterranean Twist**: Add chopped Kalamata olives, feta cheese, and a squeeze of lemon juice for a Mediterranean-inspired version.
  • **Veggie Boost**: Add extra vegetables like mushrooms, zucchini, or spinach to the skillet.
  • **Creamy Delight**: Stir in a dollop of sour cream or Greek yogurt just before serving for a creamy, tangy twist.

These are just a few ideas to get you started. Feel free to experiment and create your own unique version of this skillet meal!

How to Store and Reheat Leftovers

If you happen to have leftovers (which is rare in my house!), here’s how to store and reheat them for the best results:

  • **Storage**: Allow the skillet to cool completely, then transfer it to an airtight container and store it in the refrigerator for up to 3-4 days.
  • **Reheating**: You can reheat the skillet in the microwave, on the stovetop, or in the oven. For the microwave, heat in 1-minute intervals, stirring in between, until heated through. For the stovetop, heat over medium heat, stirring occasionally, until heated through. For the oven, preheat to 350°F (175°C), spread the skillet in an oven-safe dish, and bake for 15-20 minutes, or until heated through.

Frequently Asked Questions (FAQ)

Got questions? I’ve got answers! Here are some of the most common questions I get about this ground beef and potatoes skillet:

  • **Can I use frozen potatoes?**: While fresh potatoes are best, you can use frozen cubed potatoes in a pinch. Just be sure to thaw them slightly before adding them to the skillet.
  • **Can I use ground turkey instead of ground beef?**: Absolutely! Ground turkey is a great substitute for ground beef. Just be sure to adjust the seasoning as needed.
  • **Can I make this recipe ahead of time?**: Yes, you can make this recipe ahead of time and store it in the refrigerator for up to 24 hours. Just reheat it before serving.
  • **Is this recipe gluten-free?**: Yes, this recipe is naturally gluten-free. Just be sure to check the labels of your Worcestershire sauce and Dijon mustard to ensure they are gluten-free as well.
  • **Can I add cheese to this recipe?**: Of course! Cheese is always a welcome addition. Sprinkle shredded cheese over the skillet during the last few minutes of cooking, or add a dollop of sour cream or Greek yogurt just before serving.

Serving Suggestions: Complete the Meal

While this ground beef and potatoes skillet is delicious on its own, here are a few serving suggestions to round out the meal:

  • **Side Salad**: A simple green salad with a vinaigrette dressing is a great way to add some freshness to the meal.
  • **Steamed Vegetables**: Steamed broccoli, green beans, or asparagus are all great options for a healthy side dish.
  • **Crusty Bread**: Serve the skillet with a side of crusty bread for dipping into the sauce.
  • **Corn on the Cob**: Corn on the cob is a classic summer side dish that pairs perfectly with this skillet.
  • **Coleslaw**: A creamy coleslaw is a refreshing and tangy addition to the meal.

I hope you enjoy this recipe as much as I do! It’s a simple, comforting, and delicious meal that’s perfect for any night of the week. And remember, cooking is all about having fun and experimenting, so don’t be afraid to put your own spin on this dish. Happy cooking!

This ground beef and potatoes dish is truly one of the best, and I can’t wait for you to try it! I want to hear how it turns out! Let’s make some unforgettable meals together!

Ground Beef and Potatoes

Prep Time 15 minutes
Cook Time 25 minutes
Total Time 40 minutes
Servings 4 people
Calories 450
A hearty and comforting dish featuring savory ground beef and tender potatoes, perfect for a satisfying meal.

Ingredients

Ingredients

  • 2 tablespoons olive oil
  • 1 lb lean ground beef
  • 1 medium yellow onion (diced)
  • 1 red bell pepper (diced)
  • 1.5 lbs Yukon gold potatoes (peeled and cubed)
  • 1 cup beef stock or water
  • 2 tablespoons Worcestershire sauce
  • 1 teaspoon Dijon mustard
  • 2 –3 green onions (chopped)

Spices

  • 1 tablespoon cumin (divided)
  • 2 teaspoons paprika (divided)
  • 2 teaspoons dried thyme (divided)
  • 1 teaspoon garlic powder (divided)
  • 1 teaspoon salt (divided)
  • 0.5 teaspoon black pepper (divided)

Instructions 

  • Cook the Beef: Heat olive oil, add ground beef, season with half the spices, and cook until browned. Transfer to a plate.
  • Cook the Potatoes: Add potatoes to the skillet, season with remaining spices, add beef stock, cover, and cook until tender.
  • Saute Vegetables: Add onion and bell pepper to the skillet and saute until softened.
  • Combine and Finish: Return beef to the skillet. Stir in Worcestershire sauce and Dijon mustard. Adjust seasoning.
  • Garnish and Serve: Sprinkle with green onions and serve warm.

Notes

For a richer flavor, use bone broth instead of beef stock.
Calories: 450kcal
Cost: $12
Course: Main Course
Cuisine: American
Keyword: Beef
pin

High Protein Chocolate Chia Seed Pudding: A Guilt-Free Indulgence

My name’s Ava, and welcome back to my little corner of the internet! Today, we’re diving headfirst into a recipe that’s become a staple in my kitchen: High Protein Chocolate Chia Seed Pudding. If you’ve been searching for a treat that’s both delicious and good for you, then you’re in the right place. I’m always on the lookout for ways to sneak in extra protein without sacrificing flavor, and this pudding is a game-changer. It’s the perfect breakfast, snack, or even dessert – and it’s so easy to make that even a kitchen newbie can nail it.

Growing up, my mom always emphasized the importance of starting the day with a good breakfast. For her, it was often oatmeal with fruit, but I craved something with a little more… pizzazz. Now, this *chocolate chia seed pudding* is my answer to that craving. I get my chocolate fix, a protein boost, and a healthy dose of fiber all in one delightful bowl. Plus, the variations are endless, so you’ll never get bored.

This recipe has become one of my go-to *chia pudding recipes* because it’s so versatile. Whether I’m rushing out the door in the morning or need a quick afternoon pick-me-up, *chia seed pudding* is always a winner. And let’s be honest, who can resist a *protein pudding* that tastes like dessert?

Why You’ll Love This High Protein Chocolate Chia Seed Pudding

Let’s face it, we all want to indulge without the guilt. This recipe allows you to do just that. Here’s why you’ll fall in love with this *high protein chocolate chia* creation:

  • Healthy Indulgence: Satisfies your sweet tooth without the sugar crash.
  • Quick and Easy: Ready in minutes, perfect for busy mornings or late-night cravings.
  • High in Protein: Keeps you full and energized, thanks to the *protein powder chia pudding*.
  • Versatile: Endless topping options to customize your flavor experience.
  • Nutrient-Packed: Loaded with fiber, omega-3s, and antioxidants.
  • Meal Prep Friendly: Make a batch on Sunday and enjoy it all week long!

I’ve tried countless *best low carb recipes*, and this one consistently comes out on top because it’s so satisfying and easy to adapt to my dietary needs. If you’re looking for *high protein desserts* that don’t taste like cardboard, trust me, this is it.

The Star Players: Ingredients You’ll Need

Here’s what you’ll need to whip up this magical *chocolate chia pudding*. Don’t worry, most of these are pantry staples!

  • ‘1/2 cup chia seeds’
  • ‘2 cups almond milk (or any plant-based milk)’
  • ‘1/4 cup chocolate protein powder’
  • ‘2 tablespoons maple syrup (optional)’
  • ‘1 teaspoon vanilla extract’
  • ‘Pinch of salt’
Recipe Image

Step-by-Step: Making Your Chocolate Chia Seed Pudding

Ready to get started? Here’s how to transform those simple ingredients into a *delicious and* nutritious treat:

  1. Combine Ingredients: In a mixing bowl, combine the *chia seeds*, almond milk, *chocolate protein powder*, maple syrup (if using), vanilla extract, and salt.
  2. Whisk Well: Whisk until well combined, ensuring that the *chia seeds* are evenly distributed. This is crucial to prevent clumping!
  3. Let it Sit: Let *it s*it for about 5 minutes to allow the *chia seeds* to soak up some liquid. *If you*skip this step, you might end up with a gritty texture.
  4. Whisk Again: After 5 minutes, whisk again to break up any clumps that might have formed. Trust me, you don’t want to skip this step!
  5. Refrigerate: Cover the bowl and refrigerate for at least 2 hours or, ideally, overnight to thicken. This is where the magic happens!
  6. Serve and Enjoy: Serve chilled and top with your favorite toppings like fresh fruit, nuts, or nut butter.

That’s *it s*! Seriously, *to make this chocolate chia seed pudding* is so easy. It’s the kind of recipe that makes you feel like a kitchen wizard, even if you’re just throwing a few ingredients together.

Pro Tips for the Perfect Pudding

Here are some of my tried-and-true tips to ensure your *chia seed pudding* is always a winner:

  • Chia Seed Ratio: The *chia seeds* to liquid ratio is crucial. Too many *chia seeds*, and the *pudding is* too thick; too little, and it’s too runny. Stick to the recipe for the best results.
  • Whisking is Key: Don’t skip the whisking! It helps prevent clumping and ensures a smooth, creamy texture.
  • Patience is a Virtue: Allow the *pudding is*to chill for at least 2 hours, or preferably overnight. This gives the *chia seeds* enough time to absorb the liquid and create that perfect *pudding* consistency.
  • Quality Protein Powder: Choose a *protein powder* that you enjoy the taste of. It will significantly impact the overall flavor of the *pudding*.
  • Sweetness Level: Adjust the maple syrup to your liking. *If you* prefer a sweeter *pudding*, add more; *if you re* watching your sugar intake, reduce or omit it altogether.

Common Mistakes and How to Avoid Them

Even the simplest recipes can have their pitfalls. Here’s what to watch out for when making *chia seed pudding*:

  • Clumpy Pudding: Not whisking thoroughly enough can lead to clumps. Make sure to whisk vigorously and break up any clumps that form.
  • Gritty Texture: Not allowing the *pudding is*to sit for a few minutes before refrigerating can result in a gritty texture. Let the *chia seeds* soak up some liquid before chilling.
  • Bland Flavor: Using a low-quality *protein powder* or not adding enough sweetener can result in a bland *pudding*. Choose a *protein powder* you love and adjust the sweetness to your liking.
  • Too Thick or Too Runny: Using the wrong *chia seeds* to liquid ratio can result in a *pudding* that’s too thick or too runny. Stick to the recipe for the best results.

Variations to Spice Things Up

One of the best things about *chia seed pudding* is how versatile it is. Here are some fun variations to try:

  • Peanut Butter Chocolate: Add a tablespoon of peanut butter *protein powder* for a *delicious and* nutty twist.
  • Coconut Dream: Use coconut milk instead of almond milk and add shredded coconut.
  • Berry Bliss: Blend in a handful of fresh or frozen berries for a fruity explosion.
  • Mocha Magic: Add a teaspoon of instant coffee for a caffeine kick.
  • Mint Chocolate Chip: Add a few drops of peppermint extract and some mini chocolate chips.

*You can* really get creative with this! *This chocolate chia seed* recipe is just a base – feel free to experiment with different flavors and toppings to find your perfect combination.

Storage Tips: Keeping Your Pudding Fresh

This *pudding is* best stored in an airtight container in the refrigerator. *It s*will keep for up to 5 days, making it a *perfect for* meal prep option.

  • Airtight Container: Use a container with a tight-fitting lid to prevent the *pudding* from drying out.
  • Refrigeration: Store in the refrigerator at all times.
  • Avoid Contamination: Use a clean spoon each time you scoop out a serving to prevent bacterial growth.

Frequently Asked Questions (FAQ)

Got questions? I’ve got answers! Here are some common questions about *chia seed pudding*:

  • Can I use regular milk instead of almond milk? Yes, *you can* use any type of milk you prefer. Dairy milk, soy milk, oat milk, or even cashew milk will work.
  • Can I use a different sweetener? Absolutely! Honey, agave, or even stevia are all great alternatives to maple syrup.
  • Can I make *this recipe* without *protein powder*? Yes, but you may want to add an extra tablespoon or two of *cocoa powder* to enhance the chocolate flavor.
  • How long does *chia seed pudding* last? *Chia seed pudding* will last for up to 5 days in the refrigerator.
  • Can I freeze *chia seed pudding*? While *you can* freeze *chia seed pudding*, the texture may change slightly upon thawing. *It s* best to enjoy it fresh.

Serving Suggestions: Elevate Your Pudding Experience

While this *pudding is* delicious on its own, here are some fun ways to elevate your serving experience:

  • Fresh Fruit: Top with berries, bananas, or sliced peaches for a burst of freshness.
  • Nuts and Seeds: Add a sprinkle of almonds, walnuts, or pumpkin seeds for a crunchy texture.
  • Nut Butter: Drizzle with peanut butter, almond butter, or cashew butter for extra flavor and healthy fats.
  • Chocolate Chips: Add a few mini chocolate chips for an extra dose of chocolatey goodness.
  • Whipped Cream: Top with a dollop of whipped cream for a decadent treat.

*This pudding is* a blank canvas – let your creativity run wild! I personally love adding a mix of fresh berries, a sprinkle of granola, and a drizzle of almond butter. It’s like a party in my mouth!

I *to hear* how *this chocolate chia seed pudding* turns out for you! Share your creations with me on social media – I can’t wait to see what delicious combinations you come up with. Happy pudding-making!

This *high protein chocolate chia seed pudding* is a *treat that* you can enjoy any time of the day! It’s *perfect for* those who are looking for a *high protein chocolate* fix and it’s easy *to create a* healthy and satisfying snack.

High Protein Chocolate Chia Seed Pudding

Prep Time 5 minutes
Cook Time 2 hours
Total Time 2 hours 5 minutes
Servings 2 servings
Calories 350
A delicious and healthy chocolate chia seed pudding packed with protein. Perfect for a quick breakfast or dessert!

Ingredients

Ingredients

  • 1/2 cup chia seeds
  • 2 cups almond milk (or any plant-based milk)
  • 1/4 cup chocolate protein powder
  • 2 tablespoons maple syrup (optional)
  • 1 teaspoon vanilla extract
  • 1 Pinch salt

Instructions 

  • Combine all ingredients in a mixing bowl.
  • Whisk until well combined.
  • Let sit for 5 minutes.
  • Whisk again to break up clumps.
  • Refrigerate for at least 2 hours or overnight.
  • Serve chilled with toppings.

Notes

For a thicker pudding, use less almond milk. Adjust sweetness to taste.
Calories: 350kcal
Cost: $8
Course: Breakfast, Dessert
Cuisine: Healthy
Keyword: Chia Seeds, chocolate
pin

Hey there, friend! Ava here, back in my Seattle kitchen, and today I’m sharing one of my absolute go-to recipes: the Spicy Chickpea and Avocado Wrap. If you’re anything like me, you’re always on the lookout for a lunch that’s quick, healthy, and, most importantly, bursting with flavor. This wrap ticks all those boxes and more! It’s the kind of recipe that makes you feel good from the inside out, and it’s so easy to customize that you’ll never get bored.

Growing up, my mom always had a knack for throwing together amazing meals with whatever was on hand. This wrap reminds me of those impromptu kitchen creations – simple, wholesome, and utterly delicious. So, pull up a chair, and let’s get wrapping!

Why You’ll Love This Spicy Chickpea and Avocado Wrap

Seriously, what’s not to love? But if you need convincing, here are a few reasons why this wrap will become a staple in your lunch rotation:

  • A quick and easy meal: Ready in minutes, perfect for busy weekdays.
  • Healthy and nutritious: Packed with protein, fiber, and healthy fats.
  • Vegetarian and vegan-friendly: A great option for plant-based eaters.
  • Customizable: Easily adaptable to your taste preferences and dietary needs.
  • Perfect for meal prep: Make the filling ahead of time for an even faster lunch.
  • Spicy chickpea and creamy avocado are a match made in heaven!

You can enjoy these wraps for up to 3 days after preparing them, making them perfect for meal prepping!

Ingredients for the Best Chickpea and Avocado Wrap

Here’s what you’ll need to whip up these amazing wraps:

  • 400g canned chickpeas, drained and rinsed
  • 2 medium ripe avocados
  • ½ medium red onion, finely diced
  • 1 medium bell pepper, finely diced (any color works!)
  • 1 small jalapeño, seeded and minced (optional, for extra heat)
  • 2 tbsp lime juice (freshly squeezed is best!)
  • 1 tsp chili powder
  • ½ tsp cumin
  • ¼ tsp smoked paprika
  • ¼ tsp garlic powder
  • Salt and pepper to taste
  • 4 large tortillas (I like whole wheat or spinach)
Recipe Image

How to Make the Ultimate Spicy Chickpea and Avocado Wrap: Step-by-Step

Alright, let’s get down to business. Here’s how to assemble these flavor-packed wraps:

  1. Prepare the filling: In a mixing bowl, mash the avocados until smooth (or leave them slightly chunky if you prefer).
  2. Combine ingredients: Stir in the chickpeas, diced red onion, bell pepper, jalapeño (if using), lime juice, chili powder, cumin, smoked paprika, garlic powder, salt, and pepper. Mix well until everything is evenly combined.
  3. Warm the tortillas: Warm tortillas in a skillet or microwave for easier handling and to prevent them from cracking when you fold them. A few seconds on each side in a dry skillet does the trick!
  4. Assemble the wraps: Divide the chickpea and avocado filling among the warmed tortillas.
  5. Add toppings (optional): Add any additional toppings you like, such as fresh cilantro, lettuce, spinach, or a dollop of Greek yogurt.
  6. Fold and roll: Fold in the sides of the tortilla and roll tightly to form wraps.
  7. Serve and enjoy: Cut in half if desired and serve immediately.

Pro Tips for the Perfect Wrap

Want to take your wraps to the next level? Here are a few of my favorite tricks:

  • Use ripe avocados: Ripe avocados are easier to mash and have the best flavor.
  • Don’t overfill the wraps: Overfilling can make them difficult to roll and prone to falling apart.
  • Warm the tortillas: Warming the tortillas makes them more pliable and less likely to tear.
  • Toast the wraps: For extra flavor and texture, try toasting the assembled wraps in a skillet or panini press for a few minutes until golden brown.
  • Spice it up: If you like things extra spicy, add a pinch of cayenne pepper or a dash of hot sauce to the chickpea mixture.

Common Mistakes to Avoid

Even the simplest recipes can have pitfalls. Here’s what to watch out for:

  • Using unripe avocados: Hard, unripe avocados will be difficult to mash and won’t have the creamy texture you’re looking for.
  • Skipping the lime juice: Lime juice not only adds flavor but also helps prevent the avocado from browning.
  • Overmixing the filling: Overmixing can make the chickpea mixture mushy. Mix just until everything is combined.
  • Using cold tortillas: Cold tortillas are stiff and prone to cracking. Always warm them before assembling the wraps.

If you are looking for a light lunch, this recipe will be perfect!

Delicious Variations to Try

The best part about this recipe is how easily you can customize it to your liking. Here are a few variations to get you started:

  • Mediterranean Wrap: Add crumbled feta cheese, chopped cucumber, and Kalamata olives to the chickpea mixture.
  • Mexican Wrap: Add black beans, corn, and salsa to the chickpea mixture. Top with a dollop of sour cream or Greek yogurt.
  • Asian-Inspired Wrap: Add shredded carrots, bean sprouts, and a drizzle of sesame oil to the chickpea mixture.
  • Spicy Chickpea and Avocado Salad: Serve the chickpea mixture over a bed of lettuce or spinach for a lighter option.

These wraps are a quick and easy lunch or dinner option, and are packed with nutrients!

How to Store Your Wraps

These wraps are best enjoyed fresh, but you can store them in the refrigerator for up to 24 hours. To prevent the tortillas from getting soggy, wrap them tightly in plastic wrap or foil. The chickpea mixture can be stored separately in an airtight container for up to 3 days.

Frequently Asked Questions (FAQ)

Got questions? I’ve got answers!

  • Can I make these wraps ahead of time? Yes, you can make the chickpea mixture ahead of time and store it in the refrigerator for up to 3 days. Assemble the wraps just before serving to prevent the tortillas from getting soggy.
  • Can I freeze these wraps? I don’t recommend freezing these wraps, as the avocado can become mushy and the tortillas can get soggy when thawed.
  • Are these wraps gluten-free? To make these wraps gluten-free, use gluten-free tortillas.
  • Can I use different types of beans? Yes, you can substitute other types of beans for chickpeas, such as black beans or cannellini beans.

Serving Suggestions

These wraps are delicious on their own, but here are a few serving suggestions to complete your meal:

  • Serve with a side of fresh fruit or vegetables.
  • Pair with a cup of soup or a small salad.
  • Pack them for a picnic or a road trip.

And there you have it – my go-to Spicy Chickpea and Avocado Wrap recipe! I hope you love it as much as I do. Remember, cooking is all about experimenting and having fun, so don’t be afraid to get creative and make this recipe your own. Happy wrapping!

Target Keywords Summary

  • Healthy But Tasty Lunch Ideas: This recipe perfectly embodies a lunch option that doesn’t compromise on flavor while being nutritious.
  • Veggie Wrap: A simple, descriptive term that accurately categorizes the recipe.
  • High Fiber Recipes: Chickpeas and whole wheat tortillas contribute to the high fiber content.
  • Simple Meals Vegetarian: Aligns with the ease of preparation and vegetarian nature of the dish.
  • Quick Whole Food Recipes: Emphasizes the use of minimally processed, whole ingredients and the speed of preparation.
  • Healthy Vegetarian Recipes: Highlights both the health benefits and vegetarian aspect.
  • Vegetarian Wrap Recipe: Direct and specific, catering to users searching for vegetarian wrap options.
  • High Protein Lunch Sides: Chickpeas provide a significant protein boost, making it a satisfying meal.
  • Vegetarian Fiber Meals: Reinforces the combination of vegetarianism and high fiber content in the recipe.

Spicy Chickpea and Avocado Wrap

Prep Time 15 minutes
Cook Time 5 minutes
Total Time 20 minutes
Servings 4 wraps
Calories 450
A flavorful and healthy wrap filled with creamy avocado and spicy chickpeas. Perfect for a quick lunch or light dinner!

Ingredients

Filling

  • 400 g canned chickpeas (drained and rinsed)
  • 2 medium ripe avocados
  • ½ medium red onion (diced)
  • 1 medium bell pepper (diced)
  • 1 small jalapeño (minced (optional))
  • 2 tbsp lime juice (freshly squeezed)

Wraps

  • 4 large tortillas

Instructions 

  • Mash avocados, stir in chickpeas, onion, bell pepper, jalapeño, lime juice, and spices.
  • Warm tortillas for easier handling.
  • Divide filling among tortillas, add optional toppings.
  • Fold sides and roll tightly.
  • Cut in half and serve immediately.

Notes

Adjust the amount of jalapeño to your spice preference. For a smoother filling, blend the chickpeas and avocado together.
Calories: 450kcal
Cost: $8
Course: dinner, Lunch
Cuisine: Mexican
Keyword: Avocado, chickpeas
pin

Hey there, friend! Ava here, welcoming you into my cozy Seattle kitchen where magic happens—one delicious dish at a time. Today, we’re diving headfirst into a recipe that’s become a staple in my household: Cowboy Butter Chicken Pasta. This isn’t just any chicken pasta; it’s a flavor explosion that’s both comforting and exciting, easy enough for a weeknight dinner, yet impressive enough for a weekend gathering. Think creamy, dreamy, and downright irresistible. Ready to lasso up some flavor? Let’s get cooking!

I remember the first time I made this dish. It was a chilly evening, and I was craving something that would warm me from the inside out. I had some chicken, some pasta, and a whole lot of inspiration. After a little experimenting (and a few taste tests, of course), Cowboy Butter Chicken Pasta was born. It was an instant hit, and I’ve been tweaking and perfecting it ever since. Now, I’m thrilled to share it with you!

Why You’ll Love This Cowboy Butter Chicken Pasta

Trust me, this isn’t just another chicken pasta recipe. It’s a culinary adventure that’ll have your taste buds doing a happy dance. Here’s why you’ll absolutely adore it:

  • Flavor Explosion: The combination of savory chicken, rich cowboy butter, and creamy sauce creates a symphony of flavors that’s simply divine.
  • Easy Peasy: This recipe is surprisingly simple to make, perfect for busy weeknights when you need a quick and satisfying meal.
  • Crowd-Pleaser: Whether you’re cooking for your family, friends, or just yourself, this dish is guaranteed to be a hit.
  • Versatile: Feel free to customize it with your favorite veggies, cheeses, or spices to make it your own.
  • Comfort Food: It’s like a warm hug in a bowl, perfect for those days when you need a little extra comfort.

It’s truly amazing how the simple ingredients come together to create something so special. I love how this dish can transform an ordinary evening into a memorable one. Plus, the aroma that fills your kitchen while it’s cooking is pure magic!

Ingredients for the Best Cowboy Butter Chicken Pasta

Alright, let’s gather our ingredients. Here’s what you’ll need to create this masterpiece:

  • Pasta of your choice (e.g., penne or fettuccine) – 12 ounces
  • Chicken breast – 1 pound, boneless and skinless, cut into bite-sized pieces
  • Butter – 4 tablespoons (unsalted is recommended for better flavor control)
  • Garlic – 4 cloves, minced
  • Onion – 1 medium, diced
  • Heavy cream – 1 cup (or substitute with coconut milk for a lighter option)
  • Chicken broth – 1 cup (low-sodium preferred)
  • Parmesan cheese – 1 cup, grated
  • Italian seasoning – 1 tablespoon
  • Red pepper flakes – 1 teaspoon (adjust to taste)
  • Salt and pepper – to taste
  • Fresh parsley – for garnish (optional)

Remember, quality ingredients make all the difference. I always try to use fresh, locally sourced ingredients whenever possible. It not only supports local farmers but also enhances the flavor of the dish. And don’t be afraid to experiment! If you have a favorite type of pasta or cheese, go ahead and use it.

Recipe Image

Step-by-Step: Making Your Cowboy Butter Chicken Pasta

Okay, let’s get down to business. Here’s how to make this incredible dish, step by easy step:

  1. 🔵 Cook the Pasta
    Bring a large pot of salted water to a rolling boil. Add the pasta and cook according to the package instructions until al dente (typically 8-10 minutes). Once cooked, reserve 1 cup of pasta water, drain it, and set it aside. This pasta water is liquid gold! It helps to create a creamy, luscious sauce.

  2. 🔵 Sauté Chicken
    In a large skillet, melt 2 tablespoons of butter over medium heat. Add the diced chicken pieces and season with salt and pepper. Cook for about 6-8 minutes until the chicken is golden brown and cooked through, stirring occasionally. Remove the chicken from the skillet and set aside. The chicken should be nicely browned but not dry. Remember, we want juicy, flavorful chicken!

  3. 🔵 Create the Sauce
    In the same skillet, add the remaining butter and sauté the minced garlic and diced onion until translucent (about 3-4 minutes). This step infuses the butter with flavor, making your sauce deliciously aromatic. Be careful not to burn the garlic – burnt garlic is bitter and can ruin the flavor of the sauce.

  4. 🔵 Add Cream and Broth
    Pour in the heavy cream and chicken broth, stirring to combine. Add the Italian seasoning and red pepper flakes. Let the sauce simmer gently for about 5 minutes until it thickens slightly. If it becomes too thick, use your reserved pasta water to adjust the consistency. The sauce should be creamy and smooth, like a warm blanket.

  5. 🔵 Combine Pasta and Chicken
    Return the cooked chicken and drained pasta to the skillet with the sauce. Adjust seasoning with additional salt and pepper if needed. Toss everything together to ensure the chicken and pasta are coated in the creamy sauce, and let it cook for another 2 minutes to meld the flavors. This is where the magic happens – the flavors come together to create something truly special.

  6. 🔵 Serve
    Finally, sprinkle grated Parmesan cheese over the top and let it melt into the dish. Garnish with fresh parsley before serving to add a pop of color. Enjoy your Cowboy Butter Chicken Pasta warm! The Parmesan cheese adds a salty, savory note that complements the creamy sauce perfectly. And the fresh parsley adds a touch of freshness and visual appeal.

And there you have it! A simple, yet incredibly flavorful Cowboy Butter Chicken Pasta that will become a family favorite. Every time I make this, it reminds me of those comforting meals from my childhood, but with a fun, modern twist.

Pro Tips for the Perfect Chicken Pasta

Want to take your Cowboy Butter Chicken Pasta to the next level? Here are some pro tips I’ve learned over the years:

  • Don’t Overcook the Pasta: Al dente pasta is key! It should be firm to the bite, not mushy.
  • Use Fresh Garlic: Freshly minced garlic adds so much more flavor than the pre-minced stuff.
  • Reserve Pasta Water: As I mentioned before, this is liquid gold. It helps to create a creamy, emulsified sauce.
  • Taste as You Go: Seasoning is crucial. Taste the sauce as it simmers and adjust the salt, pepper, and red pepper flakes to your liking.
  • Don’t Be Afraid to Experiment: This recipe is a great starting point. Feel free to add your own personal touch with different veggies, cheeses, or spices.

These little tweaks can make a big difference in the final result. Remember, cooking is all about experimenting and finding what works best for you.

Common Mistakes to Avoid

We all make mistakes in the kitchen, but here are a few common ones to watch out for when making this dish:

  • Burning the Garlic: Burnt garlic is bitter and can ruin the flavor of the sauce. Keep a close eye on it and sauté it over medium heat.
  • Overcooking the Chicken: Overcooked chicken is dry and tough. Cook it just until it’s golden brown and cooked through.
  • Not Seasoning Properly: Seasoning is essential for flavor. Make sure to season the chicken, the sauce, and the pasta water.
  • Using Too Much Cream: Too much cream can make the sauce heavy and greasy. Start with 1 cup and add more if needed.
  • Not Reserving Pasta Water: This is a crucial step. Don’t skip it! The pasta water helps to create a creamy, emulsified sauce.

Learning from our mistakes is part of the fun of cooking! Don’t be discouraged if your first attempt isn’t perfect. Just keep practicing, and you’ll get there.

Variations to Spice Things Up

Want to mix things up? Here are some fun variations to try:

  • Vegetarian Version: Substitute the chicken with sautéed mushrooms, bell peppers, or zucchini.
  • Spicy Version: Add more red pepper flakes or a dash of hot sauce for extra heat.
  • Cheesy Version: Add a blend of cheeses, such as mozzarella, provolone, and fontina.
  • Lemon Herb Version: Add a squeeze of lemon juice and some fresh herbs, such as basil, oregano, and thyme.
  • Smoked Paprika Version: Add a teaspoon of smoked paprika to the sauce for a smoky flavor.

The possibilities are endless! Let your creativity run wild and create your own unique version of this dish.

How to Store and Reheat

Got leftovers? Lucky you! Here’s how to store and reheat your Cowboy Butter Chicken Pasta:

  • Storage: Store the pasta in an airtight container in the refrigerator for up to 3 days.
  • Reheating: Reheat the pasta in the microwave or on the stovetop. If reheating on the stovetop, add a splash of chicken broth or water to prevent it from drying out.

Leftovers are great for lunch the next day or a quick and easy dinner. I often make a double batch just so I can have leftovers!

Frequently Asked Questions (FAQ)

Here are some common questions I get about this recipe:

  • Can I use a different type of pasta?
    Absolutely! Feel free to use your favorite type of pasta, such as penne, fettuccine, rigatoni, or even gluten-free pasta.
  • Can I use a different type of cream?
    Yes, you can substitute the heavy cream with half-and-half, light cream, or even coconut milk for a lighter option.
  • Can I make this dish ahead of time?
    Yes, you can make the sauce ahead of time and store it in the refrigerator for up to 2 days. When you’re ready to serve, cook the pasta and chicken and combine everything together.
  • Can I freeze this dish?
    I don’t recommend freezing this dish, as the sauce may separate when thawed.
  • How can I make this dish healthier?
    Use whole wheat pasta, light cream or coconut milk, and plenty of vegetables.

If you have any other questions, feel free to ask in the comments below. I’m always happy to help!

Serving Suggestions

Here are some ideas for serving your Cowboy Butter Chicken Pasta:

  • Side Salad: A simple green salad with a light vinaigrette is a great way to balance out the richness of the pasta.
  • Garlic Bread: Crusty garlic bread is perfect for soaking up the delicious sauce.
  • Roasted Vegetables: Roasted broccoli, asparagus, or Brussels sprouts are a healthy and flavorful side dish.
  • Wine Pairing: A crisp white wine, such as Pinot Grigio or Sauvignon Blanc, pairs well with this dish.

No matter how you choose to serve it, I’m sure you’ll enjoy this Cowboy Butter Chicken Pasta. It’s a dish that’s sure to impress!

Final Thoughts

So there you have it—my Cowboy Butter Chicken Pasta recipe, shared with love from my kitchen to yours. I hope you give it a try and that it brings as much joy to your table as it has to mine. Remember, cooking is about more than just following instructions; it’s about creating memories, sharing love, and having fun. So, grab your apron, turn up the music, and let’s make some magic together!

And if you do make this recipe, I’d love to see your creations! Tag me on social media using #AvasKitchenAdventures so I can admire your culinary masterpieces. Happy cooking, friends!

This recipe truly embodies what I love about cooking: taking simple ingredients and transforming them into something extraordinary. The creamy sauce, the tender chicken, and the perfectly cooked pasta all come together to create a dish that’s both comforting and exciting. Whether you’re cooking for a special occasion or just a weeknight dinner, this Cowboy Butter Chicken Pasta is sure to be a hit. So, go ahead and give it a try—I promise you won’t be disappointed!

Cowboy Butter Chicken Pasta

Prep Time 15 minutes
Cook Time 25 minutes
Total Time 40 minutes
Servings 6 servings
Calories 550
Enjoy this easy, creamy, and flavorful Cowboy Butter Chicken Pasta. It's a quick and delicious meal perfect for any night of the week!

Ingredients

Pasta

  • 12 ounces Pasta of your choice (e.g., penne or fettuccine)

Chicken

  • 1 pound Chicken breast (boneless and skinless, cut into bite-sized pieces)

Sauce

  • 4 tablespoons Butter (unsalted is recommended for better flavor control)
  • 4 cloves Garlic (minced)
  • 1 medium Onion (diced)
  • 1 cup Heavy cream (or substitute with coconut milk for a lighter option)
  • 1 cup Chicken broth (low-sodium preferred)
  • 1 cup Parmesan cheese (grated)
  • 1 tablespoon Italian seasoning
  • 1 teaspoon Red pepper flakes (adjust to taste)
  • to taste Salt and pepper
  • for garnish Fresh parsley (optional)

Instructions 

  • Cook pasta according to package instructions until al dente. Reserve 1 cup of pasta water, drain, and set aside.
  • Sauté chicken in 2 tablespoons of butter over medium heat, seasoned with salt and pepper, until golden brown and cooked through. Remove and set aside.
  • In the same skillet, sauté garlic and onion in remaining butter until translucent.
  • Pour in heavy cream and chicken broth, stirring to combine. Add Italian seasoning and red pepper flakes. Simmer until slightly thickened, adjusting consistency with reserved pasta water if needed.
  • Return chicken and pasta to the skillet with the sauce. Toss to coat, and cook for 2 minutes to meld flavors. Adjust seasoning if needed.
  • Sprinkle with Parmesan cheese and let it melt. Garnish with fresh parsley before serving.

Notes

For a richer flavor, use freshly grated Parmesan cheese.
Calories: 550kcal
Cost: $18
Course: Main Course
Cuisine: American
Keyword: Chicken
pin

Hey there! Ava here, welcoming you to my little corner of the internet where deliciousness meets simplicity. If you’re anything like me, you’re always on the hunt for recipes that are both wholesome and easy to whip up, especially when those ripe bananas are staring back at you from the fruit bowl. Well, look no further! These 4 Ingredient Banana Bars are a game-changer. They’re quick, they’re healthy-ish (we’re talking about dessert, after all!), and they’re the perfect way to use up those bananas before they turn into science experiments.

I remember one particularly chaotic morning when I was scrambling to pack lunches and get everyone out the door. I spotted a bunch of overripe bananas and thought, ‘There has to be something better than banana bread.’ That’s when the idea for these bars struck! A few simple ingredients later, and I had a batch of chewy, satisfying banana bars that were an instant hit. Now, they’re a staple in our house, and I’m so excited to share the recipe with you.

Why You’ll Love This Recipe

Seriously, what’s not to love? These banana bars are not only incredibly easy to make, but they’re also endlessly customizable. Plus, they’re a great way to sneak in some healthy ingredients without sacrificing flavor. Here’s why these 4 ingredient banana bars are about to become your new go-to:

  • Quick & Easy: This recipe requires minimal effort and time. Perfect for busy weeknights or when you need a quick treat.
  • Only 4 Ingredients: Yes, you read that right! Just four simple ingredients that you probably already have in your pantry.
  • Healthy-ish: Packed with the goodness of bananas and oats, these bars are a healthier alternative to traditional desserts.
  • Customizable: Feel free to add your favorite mix-ins like nuts, seeds, or dried fruit.
  • Perfect for Toddlers: These soft, naturally sweetened bars are a great snack for your toddler, and you’ll love them too!

These bars are truly an easy snack. The bars are so easy to make, even your little ones can help!

Ingredients for 4 Ingredient Banana Bars

  • 5 bananas (mashed): The riper, the better! Overripe bananas add sweetness and moisture to the bars.
  • 1 cup peanut butter (or other nut or seed butter): Provides healthy fats, protein, and a delicious nutty flavor. You can substitute with almond butter, sunflower seed butter, or any other nut or seed butter you prefer.
  • 4 cups rolled oats: Adds texture, fiber, and a subtle nutty flavor. Make sure to use rolled oats, not instant oats, for the best results.
  • 1/4 cup chocolate chips: Because everything is better with chocolate! Feel free to use dark, milk, or white chocolate chips, or even leave them out if you prefer.
Recipe Image

How to Make 4 Ingredient Banana Bars: Step-by-Step

Alright, let’s get baking! Here’s a simple step-by-step guide to making these delicious banana bars:

  1. Preheat & Prep: Preheat your oven to 350°F (175°C). Grease or line an 8×8 inch baking dish with parchment paper. This will prevent the bars from sticking and make them easy to remove.
  2. Combine Ingredients: In a large mixing bowl, combine the mashed bananas, peanut butter, rolled oats, and chocolate chips. Mix well until all ingredients are fully incorporated.
  3. Transfer to Dish: Once the ingredients are evenly mixed, transfer the mixture into the prepared baking dish. Use a spatula or the back of a spoon to spread the mixture evenly in the dish, smoothing out the top.
  4. Bake: Place the baking dish in the preheated oven and bake for 12-14 minutes, or until the edges are golden brown and the bars are set.
  5. Cool & Slice: Once baked, remove the banana bars from the oven and allow them to cool completely in the dish before slicing into bars. This will prevent them from crumbling.

Pro Tips for Perfect Banana Bars

Want to take your banana bars to the next level? Here are a few of my tried-and-true tips:

  • Use Ripe Bananas: The riper the bananas, the sweeter and more flavorful the bars will be. If you have bananas that are almost too ripe to eat, they’re perfect for this recipe!
  • Don’t Overmix: Overmixing can result in tough bars. Mix just until the ingredients are combined.
  • Press Firmly: When pressing the mixture into the baking dish, make sure to press firmly to ensure the bars hold together well.
  • Cool Completely: Allow the bars to cool completely before slicing. This will make them easier to cut and prevent them from crumbling.
  • Experiment with Mix-Ins: Get creative with your mix-ins! Try adding chopped nuts, seeds, dried fruit, or even a sprinkle of cinnamon.

Common Mistakes to Avoid

We all make mistakes in the kitchen, but here are a few common ones to watch out for when making these banana bars:

  • Using Underripe Bananas: Underripe bananas won’t provide enough sweetness or moisture, resulting in dry, bland bars.
  • Overbaking: Overbaking can make the bars dry and crumbly. Keep a close eye on them and remove them from the oven as soon as the edges are golden brown.
  • Not Pressing Firmly Enough: If you don’t press the mixture firmly enough into the baking dish, the bars may not hold together well.
  • Cutting Too Soon: Cutting the bars before they’ve cooled completely can cause them to crumble. Be patient and let them cool!

Variations to Try

One of the best things about this recipe is how versatile it is! Here are a few variations to try:

  • Peanut Butter Chocolate Chip Banana Bars: Use peanut butter and add extra chocolate chips for a classic combination.
  • Oat Bars: Add a streusel topping made from oats, flour, butter, and sugar for a more decadent treat.
  • Nut-Free Banana Bars: Substitute the peanut butter with sunflower seed butter or tahini for a nut-free option.
  • Chocolate Banana Bars: Add cocoa powder to the batter for a rich, chocolatey flavor.
  • Banana Cream Cheese Bars: Add a layer of cream cheese frosting over the cooled bars for a tangy and sweet twist.

How to Store Banana Bars

To keep your banana bars fresh and delicious, follow these storage tips:

  • At Room Temperature: Store the bars in an airtight container at room temperature for up to 3 days.
  • In the Refrigerator: For longer storage, keep the bars in the refrigerator for up to a week.
  • In the Freezer: Freeze the bars for up to 2 months. Wrap them individually in plastic wrap before placing them in a freezer-safe bag or container.

Frequently Asked Questions (FAQ)

Got questions? I’ve got answers! Here are some common questions about these banana bars:

  • Can I use frozen bananas?: Yes, you can! Just make sure to thaw them completely and drain any excess liquid before using them.
  • Can I use a different type of flour?: While this recipe doesn’t call for flour, you can add a few tablespoons of oat flour or almond flour if you want a denser texture.
  • Can I add spices?: Absolutely! Cinnamon, nutmeg, and ginger all pair well with bananas.
  • Are these bars suitable for toddlers?: Yes, these soft banana bars are great for toddlers! Just make sure to cut them into small, manageable pieces. They’re an easy and healthy snack for kids.
  • Can I make these vegan?: You can make these vegan by using dairy-free chocolate chips and ensuring your peanut butter is vegan-friendly.

Serving Suggestions

These banana bars are delicious on their own, but here are a few ways to take them to the next level:

  • As a Snack: Enjoy a bar with a glass of milk or a cup of coffee for a satisfying afternoon snack.
  • For Dessert: Serve the bars with a scoop of vanilla ice cream or a dollop of whipped cream for a simple yet elegant dessert.
  • In Lunchboxes: Pack a bar in your kid’s lunchbox for a healthy and delicious treat.
  • With Fruit: Pair the bars with fresh fruit like berries or sliced bananas for a complete and balanced snack.
  • With Yogurt: Crumble a bar over a bowl of yogurt for a quick and easy breakfast or snack.

So there you have it! My super easy, super delicious 4 Ingredient Banana Bars recipe. I hope you love them as much as we do. If you make them, be sure to tag me on social media—I can’t wait to see your creations! Happy baking!

4 Ingredient Banana Bars

Prep Time 10 minutes
Cook Time 14 minutes
Total Time 24 minutes
Servings 12 bars
Calories 180
These simple banana bars are made with just four ingredients and are perfect for a quick and healthy snack. They're easy to customize with your favorite toppings!

Ingredients

Ingredients

  • 5 bananas (mashed)
  • 1 cup peanut butter (or other nut or seed butter)
  • 4 cups rolled oats
  • 1/4 cup chocolate chips

Instructions 

  • Preheat oven to 350°F (175°C). Grease or line an 8x8 inch baking dish.
  • Combine mashed bananas, peanut butter, rolled oats, and chocolate chips in a large bowl. Mix well.
  • Transfer mixture to the prepared baking dish and spread evenly.
  • Bake for 12-14 minutes, or until edges are golden brown.
  • Cool completely before slicing into bars.

Notes

Add a sprinkle of sea salt on top before baking for a sweet and salty flavor!
Calories: 180kcal
Cost: $5
Course: Dessert, Snack
Cuisine: American
Keyword: Banana
pin

Error: AI failed to generate content structure.

Recipe Image

Steak Fajitas Recipe

Prep Time 30 minutes
Cook Time 15 minutes
Total Time 45 minutes
Servings 4 people
Calories 450
Enjoy flavorful steak fajitas with tender steak, colorful bell peppers, and onions, all wrapped in warm tortillas. This recipe is perfect for a quick and delicious weeknight meal.

Ingredients

Steak Fajitas

  • 1.5 lbs flank steak or skirt steak
  • 3 bell peppers (mixed colors, thinly sliced)
  • 1 large onion (thinly sliced)
  • 2 tbsp olive oil (divided)
  • 1 tsp salt
  • 0.5 tsp black pepper
  • 8 small flour tortillas (warmed)

Marinade

  • 3 tbsp olive oil
  • 3 tbsp lime juice (about 2 limes)
  • 3 cloves garlic (minced)
  • 1 tsp chili powder
  • 1 tsp smoked paprika
  • 1 tsp cumin
  • 0.5 tsp oregano
  • 0.5 tsp red pepper flakes (optional, for heat)
  • 0.5 tsp salt

Optional toppings

  • Sour cream
  • Salsa or pico de gallo
  • Guacamole
  • Shredded cheese
  • Fresh cilantro

Instructions 

  • Marinate steak: Whisk marinade ingredients, add steak, coat well, and refrigerate for at least 30 minutes (up to 4 hours).
  • Cook steak: Heat skillet/grill pan over medium-high. Remove steak, pat dry. Cook 4–5 minutes per side for medium-rare. Rest 5 minutes.
  • Cook veggies: Heat 1 tbsp olive oil in skillet. Add bell peppers and onions, season, and sauté until tender and charred (6–7 minutes).
  • Slice steak: Thinly slice steak against the grain into strips.
  • Assemble: Add steak and veggies to warm tortillas. Serve with toppings.

Notes

For extra flavor, grill the tortillas lightly before adding the filling.
Calories: 450kcal
Cost: $20
Course: Main Course
Cuisine: Mexican
Keyword: Steak
pin

Error: AI returned broken format. Expecting ‘,’ delimiter: line 2 column 3434 (char 3435)

Recipe Image

Savory Slow-Cooker Flank Steak Fajitas for Easy Family Dinners

Prep Time 15 minutes
Cook Time 4 hours
Total Time 4 hours 15 minutes
Servings 8 tortillas
Calories 450
Enjoy tender and flavorful flank steak fajitas made easily in your slow cooker. This recipe is perfect for a simple and delicious family dinner.

Ingredients

Main Ingredients

  • 2 pounds Beef Flank Steak (or skirt steak or sirloin for variety)
  • 1 medium Green Pepper (or any color bell pepper)
  • 1 medium Red Pepper (or extra green pepper if preferred)
  • 1 medium Onion (yellow or red onions)
  • 2 tablespoons Fajita Seasoning Mix (homemade or store-bought)
  • 1 cup non-alcoholic malt beverage or Reduced-Sodium Beef Broth (or substitute with chicken or vegetable broth)

Toppings

  • 8 small Flour Tortillas (try whole wheat or gluten-free tortillas)
  • 1 cup Pico de Gallo (or store-bought salsa)
  • 0.25 cup Chopped Fresh Cilantro (omit if not a fan)

Notes

For extra flavor, sear the flank steak before placing it in the slow cooker.
Calories: 450kcal
Cost: $25
Course: dinner
Cuisine: Mexican
Keyword: Beef
pin

Hey there! Ava here, welcoming you to my little corner of the internet where deliciousness and simplicity collide. If you’re anything like me, you crave those ‘wow’ moments around the dinner table without spending hours chained to the stove. And that’s precisely why I’m so excited to share this Easy Crock Pot Steak Fajitas recipe with you. Imagine coming home after a long day to the irresistible aroma of tender steak and flavorful peppers, all cooked to perfection in your slow cooker. Ready to dive in? Let’s get started!

I grew up in Oregon, where the best meals were the ones that brought everyone together. This recipe reminds me of those days—simple, comforting, and bursting with flavor. It’s the kind of dish that makes weeknight dinners feel special, and it’s so easy, even a novice cook can nail it. Plus, who doesn’t love a good fajita? The sizzling skillet, the customizable toppings, and the explosion of flavors – it’s a guaranteed crowd-pleaser.

Why You’ll Love This Crock Pot Steak Fajitas Recipe

Okay, let’s get real. Why should you try this recipe instead of the dozens of others out there? Well, here’s the deal:

  • Effortless Cooking: Dump everything in the slow cooker and let it do its thing. Seriously, it doesn’t get much easier than this.
  • Tender, Juicy Steak: The slow cooking process transforms even the toughest cuts of beef into melt-in-your-mouth perfection.
  • Customizable Flavors: Add your favorite toppings and adjust the spice level to suit your taste. Fajitas are all about personalization.
  • Minimal Cleanup: One pot means less dishes. Need I say more?
  • Perfect for Meal Prep: Make a big batch on Sunday and enjoy delicious fajitas all week long.

I mean, seriously, what’s not to love? This recipe is a win-win for busy weeknights and lazy weekends alike. You get all the flavor of traditional steak fajitas without all the fuss. So, if you’re looking for a simple, satisfying, and utterly delicious meal, look no further.

Ingredients for Crock Pot Steak Fajitas

  • 2 pounds (900 g) thinly sliced beef (flank steak or sirloin)
  • 1 red bell pepper, sliced
  • 1 green bell pepper, sliced
  • 1 yellow bell pepper, sliced
  • 1 large onion, thinly sliced
  • 1 can (14 oz / 400 g) diced tomatoes
  • 2 tablespoons olive oil
  • 2 teaspoons ground cumin
  • 2 teaspoons chili powder
  • 1 teaspoon garlic powder
  • 1 teaspoon paprika
  • ½ teaspoon salt
  • ¼ teaspoon black pepper
  • Juice of 1 lime (or green lemon)
  • ¼ cup (10 g) fresh cilantro, chopped, for garnish
  • ½ cup (120 ml) beef broth, optional, if you want extra juices
  • Crock Pot or slow cooker
  • Sharp knife and cutting board
  • Measuring spoons
  • Tongs or a spatula
Recipe Image

Ingredient Substitutions and Variations

Life happens, and sometimes you don’t have every single ingredient on hand. No worries! Here are some easy substitutions and variations to make this recipe work for you:

  • Beef: If you don’t have flank steak, go for top sirloin or chuck roast instead — or swap it out for sliced chicken if you want something leaner.
  • Bell peppers: Don’t worry if you’re missing a color — just use whatever you have on hand, it’ll still taste amazing.
  • Onion: You can use red onion or even 1 tablespoon (15 ml) of onion powder in a pinch.
  • Diced tomatoes: No problem if you don’t have them — use thick tomato sauce or 1 cup (240 ml) of red enchilada sauce instead.
  • Olive oil: Avocado or canola oil work just as well for this recipe.
  • Chili powder: If you’re out, mix 1 teaspoon paprika + ¼ teaspoon cayenne + ¼ teaspoon cumin — easy and flavorful.
  • Lime: You can replace it with a yellow lemon or 2 tablespoons (30 ml) of apple cider vinegar — just note the flavor will change a bit with vinegar.
  • Beef broth: Swap it for water mixed with ½ teaspoon of bouillon or even vegetable broth.
  • Cilantro: Flat-leaf parsley works great as a substitute with a similar herbal vibe.
  • Tortillas: If you don’t have any or prefer something lighter, serve your fajitas with rice, quinoa, or wrapped in crisp lettuce leaves.

Don’t be afraid to get creative and experiment with different flavors! That’s what cooking is all about.

Step-by-Step Instructions

Alright, let’s get cooking! Follow these simple steps for Crock Pot Steak Fajita perfection:

  1. Let’s get started! Prep all your ingredients first to make things flow easier. Slice the peppers into thin strips, remove the seeds, and clean the membranes. Then slice the onion thinly so it caramelizes nicely as it cooks. Place both in the bottom of your Crock Pot, forming an even layer — this will act as a flavorful bed that keeps the beef juicy and prevents sticking. Trust me, it works like a charm!
  2. Now grab your beef and slice it thinly against the grain — that’s the secret to tender fajitas. Lay the strips on top of the veggies, spreading them out evenly so everything cooks uniformly.
  3. In a small bowl, combine the diced tomatoes, olive oil, cumin, chili powder, garlic powder, paprika, salt, and black pepper. If you’re adding beef broth, now’s the time. Mix everything well until you get a rich, fragrant sauce — this helps all those spices blend perfectly before hitting the slow cooker.
  4. Next, pour the tomato and spice mixture over the meat and veggies in your Crock Pot. Use a spoon or spatula to spread it out so everything gets coated. No need to overmix — just make sure the sauce reaches all the way down to the bottom for full flavor.
  5. Time to let the magic happen! Cover with the lid and cook on low for about 6 hours. It’ll be totally worth it. Try not to open the lid too often — every time you do, you lose heat and moisture, and that can mess with your cook time. You’ll know it’s ready when the meat is super tender and you can pull it apart easily with a fork.
  6. Once it’s done, squeeze the juice of one fresh lime right over the hot beef. That bright citrus kick really wakes up all the flavors and gives it a fresh finish.
  7. And that’s it! Sprinkle chopped cilantro on top right before serving. You can wrap it in warm flour or corn tortillas, or serve it over white or brown rice — however you like it best. Either way, you’re in for some seriously delicious fajitas!

Pro Tips for the Best Steak Fajitas

Want to take your fajitas to the next level? Here are a few of my favorite pro tips:

  • Brown the meat: Give it a quick sear — about 2 to 3 minutes per side in a hot pan — before adding it to the Crock Pot for a deeper flavor.
  • Cut against the grain: Always slice your beef this way — it’s the secret to tender, melt-in-your-mouth strips.
  • Layering matters: Always place the peppers and onions at the bottom, then the beef on top. That way the juices soak into the veggies and everything cooks perfectly.
  • Spice mix: Combine your spices separately first. It helps you control the salt and heat better.
  • Finishing touch: Don’t skip this one — squeeze fresh lime juice right before serving. You’ll taste the difference!

Common Mistakes to Avoid

We’ve all been there – a recipe that looks so easy turns into a kitchen disaster. Here are some common mistakes to avoid when making Crock Pot Steak Fajitas:

  • Cooking on “High” for less than 3 hours: If you do, your beef will end up tough, dry, and honestly, pretty sad-looking.
  • Overfilling the pot: Super important — don’t fill it past ¾ full or it won’t cook evenly.
  • Cutting the meat too thick: Thicker strips take longer to soften and won’t shred properly.
  • Adding lime too early: Save it for the end! Adding it early kills the acidity and can actually toughen the meat.
  • Slicing the peppers too thin: If you cook them for 6 hours, they’ll completely fall apart.
  • Adding too much liquid: Doing this waters down the flavor and turns your fajitas into a steamed mess instead of a rich, flavorful dish.

Learn from my mistakes (and the mistakes of others!) and you’ll be well on your way to fajita success.

Serving Suggestions and Favorite Toppings

Okay, the fajitas are cooked, the kitchen smells amazing – now what? Here are some serving suggestions and topping ideas to make your fajita night unforgettable:

  • Tortillas: Warm flour or corn tortillas are a must.
  • Salsa: Choose your favorite – mild, medium, or hot.
  • Guacamole: Creamy, dreamy guacamole is always a hit.
  • Sour cream or Greek yogurt: Adds a cool, tangy contrast to the spicy fajitas.
  • Shredded cheese: Cheddar, Monterey Jack, or a Mexican blend.
  • Pico de gallo: Fresh, vibrant, and oh-so-delicious.
  • Pickled jalapeños: For those who like a little extra kick.
  • Rice and beans: A classic side dish that complements the fajitas perfectly.

Let everyone customize their own fajitas with their favorite toppings. It’s a fun and interactive way to enjoy a delicious meal.

Storage and Reheating Instructions

Got leftovers? Lucky you! Here’s how to store and reheat your Crock Pot Steak Fajitas:

  • Storage: Allow the fajitas to cool completely, then store them in an airtight container in the refrigerator for up to 3-4 days.
  • Reheating: You can reheat the fajitas in the microwave, in a skillet over medium heat, or back in the slow cooker on low. Add a splash of beef broth or water to keep them moist.

Leftovers are great for lunch the next day, or you can use them to make fajita bowls, salads, or quesadillas.

Frequently Asked Questions (FAQ)

Got questions? I’ve got answers! Here are some frequently asked questions about Crock Pot Steak Fajitas:

  • Can I use frozen beef?: I recommend using fresh beef for the best results, but you can use frozen beef if you thaw it completely first.
  • Can I make this recipe ahead of time?: Absolutely! You can prep all the ingredients and store them in the Crock Pot in the refrigerator overnight. Just add the sauce and cook as directed the next day.
  • Can I freeze the leftovers?: Yes, you can freeze the leftovers for up to 2-3 months. Thaw them completely before reheating.
  • How can I make this recipe spicier?: Add a pinch of cayenne pepper to the spice mixture, or use hot salsa as a topping.
  • Can I add other vegetables?: Sure! Feel free to add mushrooms, zucchini, or any other vegetables you like.

Final Thoughts

And there you have it – my Easy Crock Pot Steak Fajitas recipe! I hope you love it as much as my family does. Remember, cooking is all about having fun and experimenting with flavors. So don’t be afraid to put your own spin on this recipe and make it your own.

If you try this recipe, be sure to leave a comment below and let me know how it turned out. I love hearing from you! And if you’re looking for more delicious and easy recipes, be sure to check out my other posts. Happy cooking!

This recipe is perfect for a weeknight dinner. Tender steak and flavorful peppers cooked in your slow cooker. Enjoy delicious and easy Crock Pot Steak Fajitas!

Crock Pot Steak Fajitas

Prep Time 20 minutes
Cook Time 6 hours
Total Time 6 hours 20 minutes
Servings 6 servings
Calories 450
Enjoy tender and flavorful steak fajitas made easily in your crock pot. This recipe combines thinly sliced beef with colorful bell peppers and onions, slow-cooked to perfection in a rich, spiced tomato sauce.

Ingredients

Ingredients

  • 2 pounds thinly sliced beef (flank steak or sirloin) (If you don’t have flank steak, go for top sirloin or chuck roast instead — or swap it out for sliced chicken if you want something leaner.)
  • 1 red bell pepper, sliced (Don’t worry if you’re missing a color — just use whatever you have on hand, it’ll still taste amazing.)
  • 1 green bell pepper, sliced (Don’t worry if you’re missing a color — just use whatever you have on hand, it’ll still taste amazing.)
  • 1 yellow bell pepper, sliced (Don’t worry if you’re missing a color — just use whatever you have on hand, it’ll still taste amazing.)
  • 1 large onion, thinly sliced (You can use red onion or even 1 tablespoon (15 ml) of onion powder in a pinch.)
  • 1 can diced tomatoes (No problem if you don’t have them — use thick tomato sauce or 1 cup (240 ml) of red enchilada sauce instead.)
  • 2 tablespoons olive oil (Avocado or canola oil work just as well for this recipe.)
  • 2 teaspoons ground cumin
  • 2 teaspoons chili powder (If you’re out, mix 1 teaspoon paprika + ¼ teaspoon cayenne + ¼ teaspoon cumin — easy and flavorful.)
  • 1 teaspoon garlic powder
  • 1 teaspoon paprika
  • 0.5 teaspoon salt
  • 0.25 teaspoon black pepper
  • 1 lime (You can replace it with a yellow lemon or 2 tablespoons (30 ml) of apple cider vinegar — just note the flavor will change a bit with vinegar.)
  • 0.25 cup fresh cilantro, chopped, for garnish (Flat-leaf parsley works great as a substitute with a similar herbal vibe.)
  • 0.5 cup beef broth, optional, if you want extra juices (Swap it for water mixed with ½ teaspoon of bouillon or even vegetable broth.)

Instructions 

  • Prep ingredients: Slice peppers and onions, place in the bottom of the Crock Pot.
  • Slice beef thinly against the grain and lay on top of the veggies.
  • Combine diced tomatoes, olive oil, spices, and beef broth (if using) in a bowl.
  • Pour the tomato and spice mixture over the meat and veggies.
  • Cook on low for about 6 hours, covered.
  • Squeeze lime juice over the hot beef.
  • Sprinkle chopped cilantro on top and serve in tortillas or over rice.

Notes

Always slice your beef against the grain for the most tender results.
Calories: 450kcal
Cost: $20
Course: Main Course
Cuisine: Mexican
Keyword: Beef
pin

Easy Slow Cooker Steak Fajitas Recipe: A Taste of Seattle Sunshine in Every Bite

Hey there, friend! Ava here, back in my Seattle kitchen, where the coffee’s strong and the recipes are even stronger. Today, we’re ditching the drizzle for a fiesta of flavor with my Easy Slow Cooker Steak Fajitas. If you’re anything like me, you crave those weeknight meals that practically cook themselves, filling your home with aromas that make everyone rush to the table. Well, grab your sombrero because this is *it*.

Remember those days growing up in Oregon? My mom had this uncanny ability to make the simplest ingredients taste like a gourmet feast. These slow cooker steak fajitas are inspired by her magic touch, combined with my own Seattle twist. I’ve spent countless evenings tweaking this recipe, aiming for that perfect balance of tender steak, vibrant veggies, and a kick of spice that makes you want to shout, ‘Olé!’

This recipe isn’t just about convenience (though, let’s be honest, the slow cooker *is* a lifesaver). It’s about creating a meal that feels like a celebration. It’s about taking a humble flank steak and transforming it into something extraordinary. And trust me, even if you’re a kitchen newbie, you can nail this. I promise.

Why You’ll Love This Easy Slow Cooker Steak Fajitas Recipe

Okay, let’s get real. Why should you bother with *this* steak fajitas recipe when the internet is overflowing with them? Here’s why:

  • Effortless Flavor: The slow cooker does all the work! You just toss everything in, set it, and forget it. The low and slow cooking method ensures that **the steak** becomes incredibly **tender and** juicy.
  • Customizable Spice: Whether you like it mild or wild, you can adjust the heat to your liking. I’ve included a chipotle pepper option for those who crave a fiery kick.
  • Minimal Cleanup: Seriously, one pot! Say goodbye to mountains of dishes.
  • Perfect for Meal Prep: Make a big batch on Sunday and enjoy flavorful fajitas all week long.
  • Crowd-Pleaser: Everyone loves fajitas! This recipe is guaranteed to be a hit with family and friends. You **will love** how versatile **steak fajitas they** are.

Seriously, **you’ll** wonder where this **recipe if you** have been hiding all your life. It’s a game-changer. This **recipe if you** are looking for a simple way to make **steak fajitas they** are the way to go.

The Secret Ingredient for the Best Steak Fajitas

Before we dive into the ingredients, let me let you in on a little secret. The key to amazing steak fajitas isn’t just about the ingredients; it’s about the *love* you put into it. Okay, I know that sounds cheesy, but hear me out. When you cook with intention, when you savor the aromas and enjoy the process, the food just tastes better. Trust me on this one. But if you want the **exact ingredient** to take it to the next level, it’s the chipotle peppers in adobo sauce. They add a smoky depth that is unmatched.

Easy Slow Cooker Steak Fajitas: The Ingredients You’ll Need

Alright, let’s gather our ingredients. Don’t worry, you probably have most of these in your pantry already. If not, a quick trip to the store will do the trick.

  • 1 yellow onion (sliced)
  • 1 red bell pepper (sliced)
  • 1 yellow bell pepper (sliced)
  • 1 green bell pepper (sliced)
  • 1 ½ pounds flank steak
  • 1 teaspoon chili powder
  • 1 teaspoon cumin
  • 1 teaspoon paprika
  • ½ teaspoon salt
  • ½ teaspoon oregano
  • 1 teaspoon black pepper
  • 10.5 ounces diced tomatoes with green chillies (drained)
  • ¼ cup chipotle peppers in adobo sauce (chopped (Optional, leave out if you don’t like it spicy))
  • 3 teaspoons garlic (minced)
  • 2 limes (juiced)
Recipe Image

How to Make Easy Slow Cooker Steak Fajitas: The Recipe

Now for the fun part! Let’s get cooking. This is where **it’s** all going to come together and you will have delicious **steak fajitas**.

  1. Layer the Veggies: Add onions and bell peppers to the bottom of a 6-quart slow cooker. This creates a flavorful base for the steak.
  2. Season the Steak: Place the **flank steak** on the vegetables and season with chili powder, cumin, paprika, salt, oregano, and black pepper. Don’t be shy with the spices!
  3. Add the Flavor Boosters: Top with diced tomatoes with green chillies, chipotle peppers in adobo sauce, garlic, and lime juice. This is where the magic happens.
  4. Slow Cook to Perfection: Cover and cook on low for 7-8 hours or high for 3-4 hours. The longer it cooks, the more tender **the meat** becomes.
  5. Slice and Serve: Remove the steak and slice against the grain. Add it back into the **crock pot** and mix into juices and veggies.
  6. Enjoy! Serve on tortillas with your favorite toppings and enjoy!

Pro Tips for Perfect Slow Cooker Steak Fajitas

Want to take your fajitas from good to *amazing*? Here are a few of my go-to pro tips:

  • Sear the Steak (Optional): For an extra layer of flavor, sear the flank steak in a hot skillet before adding it to the slow cooker. This creates a beautiful crust and locks in the juices.
  • Don’t Overcook: Overcooked steak can become dry and tough. Keep an eye on it and adjust the cooking time as needed. You can also cook **the steak** **on the grill**.
  • Use Fresh Ingredients: Freshly sliced peppers and onions will give you the best flavor and texture.
  • Spice It Up: Add a pinch of cayenne pepper or a dash of hot sauce for an extra kick.
  • Let it Rest: After slicing the steak, let it rest for a few minutes before adding it back to the slow cooker. This allows the juices to redistribute, resulting in a more tender and flavorful bite.

Common Mistakes to Avoid When Making Slow Cooker Steak Fajitas

We all make mistakes in the kitchen, it’s part of the process! Here are a few common pitfalls to avoid when making slow cooker steak fajitas:

  • Using the Wrong Cut of Steak: Flank steak is ideal for fajitas because it’s relatively inexpensive and becomes incredibly tender in the slow cooker. Avoid using tougher cuts like round steak, as they may not break down properly.
  • Adding Too Much Liquid: The vegetables and tomatoes will release their own juices as they cook, so you don’t need to add any extra liquid. Adding too much liquid can result in watery fajitas.
  • Skipping the Lime Juice: The lime juice adds a bright, acidic note that balances the richness of the steak and vegetables. Don’t skip it!
  • Not Slicing Against the Grain: Slicing the steak against the grain is crucial for tender fajitas. This breaks up the muscle fibers, making it easier to chew.
  • Forgetting the Toppings: The toppings are what really make fajitas special! Don’t forget to offer a variety of toppings, such as sour cream, guacamole, salsa, and cheese. **There’s** **s no** excuse to skip the toppings.

Variations on Easy Slow Cooker Steak Fajitas

Want to mix things up? Here are a few fun variations on my classic slow cooker steak fajitas recipe:

  • Chicken Fajitas: Substitute flank steak with chicken breasts or thighs.
  • Vegetarian Fajitas: Omit the steak and add more vegetables, such as mushrooms, zucchini, or corn.
  • Shrimp Fajitas: Add shrimp during the last 30 minutes of cooking for a seafood twist.
  • Spicy Mango Fajitas: Add diced mango and a pinch of cayenne pepper for a sweet and spicy flavor combination.
  • Pineapple Fajitas: Grill pineapple and use it as a topping to add a sweet and tangy taste.

How to Store and Reheat Leftover Steak Fajitas

Got leftovers? Lucky you! Here’s how to store and reheat your steak fajitas:

  • Storage: Store leftover steak fajitas in an airtight container in the refrigerator for up to 3-4 days.
  • Reheating: Reheat in a skillet over medium heat until warmed through. You can also microwave them, but they may become a bit dry.
  • Freezing: For longer storage, freeze the steak fajitas in an airtight container for up to 2-3 months. Thaw overnight in the refrigerator before reheating.

I often use leftover steak fajitas in quesadillas, tacos, or even as a topping for salads. The possibilities are endless!

Frequently Asked Questions About Slow Cooker Steak Fajitas

Got questions? I’ve got answers! Here are a few frequently asked questions about slow cooker steak fajitas:

  • Can I use a different cut of steak? While flank steak is ideal, you can also use skirt steak or sirloin steak. Just be sure to adjust the cooking time accordingly.
  • Can I make this in an Instant Pot? Yes! Sear the steak using the saute function, then add the remaining ingredients and cook on high pressure for 20-25 minutes, followed by a natural pressure release.
  • Can I add beans to the slow cooker? Absolutely! Add a can of black beans or pinto beans during the last hour of cooking.
  • What kind of tortillas should I use? I prefer flour tortillas for fajitas, but corn tortillas also work well.
  • Can I prepare this ahead of time? Yes! You can assemble the fajitas in the slow cooker the night before and store it in the refrigerator. Just add the lime juice right before cooking.

Serving Suggestions for the Ultimate Fajita Fiesta

No fajita feast is complete without the perfect accompaniments. Here are a few of my favorite serving suggestions:

  • Toppings: Offer a variety of toppings, such as sour cream, guacamole, salsa, shredded cheese, chopped cilantro, and pickled onions.
  • Sides: Serve with rice and beans for a complete and satisfying meal.
  • Drinks: Wash it all down with a refreshing margarita or a cold Mexican beer.
  • Dessert: Finish the meal with a scoop of vanilla ice cream topped with cinnamon and sugar.

The best part about fajitas is that they’re so customizable. Let everyone build their own perfect fajita and enjoy the fiesta!

Why This Recipe Works: The Science Behind the Flavor

Let’s get a little nerdy for a second and talk about the science behind this recipe. The slow cooker works its magic by gently breaking down the tough fibers in the flank steak, resulting in a super tender and flavorful meat. The low and slow cooking method also allows the spices to meld together, creating a complex and aromatic flavor profile. The acidity of the lime juice helps to tenderize the steak and brighten the flavors. It’s all about balance and harmony!

The combination of chili powder, cumin, paprika, oregano, and black pepper creates a classic Tex-Mex flavor that is both comforting and exciting. The chipotle peppers in adobo sauce add a smoky depth that is simply irresistible. And the diced tomatoes with green chillies provide a touch of heat and sweetness that ties everything together.

This **steak fajitas** recipe **work and** the **crock** pot make it easy. Try **steak fajitas** with **the crock** pot and **you’ll** make it again.

From My Kitchen to Yours: A Final Word

So there you have it, my friend! My Easy Slow Cooker Steak Fajitas recipe, straight from my Seattle kitchen to yours. I hope you give it a try and share it with the people you love. Remember, cooking is all about having fun and experimenting. Don’t be afraid to get creative and put your own spin on this recipe.

Whether you’re cooking for your family, impressing friends, or just treating yourself, I hope this recipe brings a little sunshine into your kitchen. And if you happen to make a batch on a rainy Seattle day, just close your eyes, take a bite, and imagine you’re on a sunny beach in Mexico. Until next time, happy cooking!

I **love how** easy this slow cooker fajita recipe is, and I hope you do too! **Try these** slow cooker steak fajitas, and you **won’t** be disappointed! This **steak fajitas** recipe is the **exact ingredient** for a great weeknight meal.

Slow Cooker Steak Fajitas

Prep Time 15 minutes
Cook Time 7 hours
Total Time 7 hours 15 minutes
Servings 6 servings
Calories 350
Enjoy delicious and easy steak fajitas made in your slow cooker! This recipe is perfect for a flavorful and convenient meal.

Ingredients

Vegetables

  • 1 yellow onion (sliced)
  • 1 red bell pepper (sliced)
  • 1 yellow bell pepper (sliced)
  • 1 green bell pepper (sliced)

Meat & Seasoning

  • 1.5 pounds flank steak
  • 1 teaspoon chili powder
  • 1 teaspoon cumin
  • 1 teaspoon paprika
  • 0.5 teaspoon salt
  • 0.5 teaspoon oregano
  • 1 teaspoon black pepper

Toppings

  • 10.5 ounces diced tomatoes with green chillies (drained)
  • 0.25 cup chipotle peppers in adobo sauce (chopped (Optional, leave out if you don't like it spicy))
  • 3 teaspoons garlic (minced)
  • 2 limes (juiced)

Instructions 

  • Add onions and bell peppers to the bottom of a 6-quart slow cooker.
  • Place the flank steak on the vegetables and season with chili powder, cumin, paprika, salt, oregano and black pepper.
  • Top with diced tomatoes with green chillies, chipotle peppers in adobo sauce, garlic, and lime juice.
  • Cover and cook on low for 7-8 hours or high for 3-4 hours.
  • Remove the steak and slice against the grain. Add it back into the slow cooker and mix into juices and veggies.
  • Serve on tortillas with your favorite toppings and enjoy!

Notes

For a spicier dish, add more chipotle peppers or a pinch of cayenne pepper.
Calories: 350kcal
Cost: $20
Course: Main Course
Cuisine: Mexican
Keyword: Steak
pin

Hey there, burger aficionados! Ava here, straight from my Seattle kitchen, ready to share the secret to the juiciest, most flavorful hamburger patties you’ve ever tasted. I’m talking about the kind of burger that makes your eyes roll back in your head and your taste buds sing. Forget dry, crumbly patties – we’re diving into a world of burger bliss!

I grew up in Oregon, where summer meant one thing: grilling season. My dad was the grill master, and his burgers were legendary. Years of tweaking and perfecting have led me to this recipe, which I’m thrilled to share with you. Whether you’re firing up the grill, using a cast iron skillet, or even broiling indoors, this hamburger patty recipe will deliver every single time.

Why You’ll Love This Hamburger Patty Recipe

Trust me, this isn’t just another hamburger patty recipe. This is the hamburger patty recipe. Here’s why you’ll be making these patties that over and over again:

  • Juiciness Overload: The secret ingredient (ice water and cold butter!) locks in moisture, creating an unbelievably juicy burger.
  • Flavor Explosion: A blend of savory spices, Worcestershire sauce, and Dijon mustard creates a complex and irresistible flavor profile.
  • Versatile Cooking Methods: Grill, pan-fry, or broil – this recipe works beautifully with any cooking method.
  • Easy to Customize: Swap out spices, add cheese, or mix in your favorite ingredients to create your signature burger.
  • Crowd-Pleasing Guarantee: These burgers are always a hit, whether you’re feeding your family or hosting a backyard barbecue.

This hamburger patty recipe is so good. My neighbor, Emma and her kids, always ask when I’m making them again!

Hamburger Patty Recipe

Alright, let’s get down to business. Here’s what you’ll need to create burger magic:

Ingredients

  • 1 lb ≈454 g Ground chuck (80/20): Keep it cold! The fat content is key for flavor and juiciness.
  • 1¼ tsp Kosher salt: If using Morton use ~¾ tsp. Salt is crucial for seasoning and helps retain moisture.
  • 1 tsp Fresh cracked black pepper: Medium grind. Adds a touch of spice and depth.
  • ½ tsp Garlic powder: For that classic burger flavor.
  • ½ tsp Onion powder: Complements the garlic and adds a subtle sweetness.
  • 2 tsp Worcestershire sauce: This is my secret weapon! It adds a savory, umami punch.
  • 2 tsp Dijon mustard: Smooth. Adds a tangy kick and helps bind the ingredients.
  • 1 Tbsp Ice water: Very cold. This is essential for keeping the patties juicy.
  • 1 Tbsp 14 g Unsalted butter, diced: Pea-size pieces, cold. Adds richness and moisture.
  • ½ tsp Smoked paprika: For a hint of smoky flavor.
  • 1 tsp Fresh thyme minced: Adds a touch of freshness and herbaceousness.
  • 4 slices Aged cheddar: For topping (optional, but highly recommended!).
  • 2 Tbsp turkey bacon bits crisp: Fold in gently (optional).
  • 4 small chips (~5 g each) Ice: Nest in the center of each patty before cooking (optional, but adds a burst of moisture!).
Recipe Image

How to Make Juicy Hamburger Patties: Step-by-Step

Now for the fun part! Follow these simple steps to create the best burger patties you’ve ever had:

  1. Chill Out: Place your mixing bowl, ground chuck, and diced butter in the freezer for about thirty minutes. Keeping everything cold is vital for preventing the fat from melting, which leads to a juicy burger.
  2. Flavor Infusion: In a small bowl, whisk together the Worcestershire sauce, Dijon mustard, and ice water until you have a smooth paste. This mixture will add tons of flavor and moisture to the patties.
  3. Season and Fold: Gently combine the ground chuck, salt, pepper, garlic powder, onion powder, smoked paprika, and minced thyme in the chilled mixing bowl. Pour the Worcestershire mixture over the meat. Using your hands, gently fold the ingredients together until just combined. Be careful not to overmix, as this can result in tough patties. Gently fold in the turkey bacon bits, if using.
  4. Patty Perfection: Divide the meat mixture into four equal portions (about four ounces each). Gently form each portion into a patty, about ¾ inch thick. Make a small dimple in the center of each patty with your thumb. This helps prevent the patties from bulging in the center while cooking. If using, nestle a small ice chip into the center of each patty and gently press the meat around it to seal it in.
  5. Sear and Cook: Heat your grill, skillet, or broiler to medium-high heat. For grilling, lightly oil the grates. For pan-frying, add a tablespoon of oil to your skillet. Sear the patties for about four minutes per side, flipping only once. Cook to your desired level of doneness. I recommend using a meat thermometer to ensure accuracy. For medium-rare (130-135°F), cook for a total of 8-10 minutes. For medium (135-145°F), cook for 10-12 minutes.
  6. Rest and Serve: Once the patties are cooked to your liking, transfer them to a plate and let them rest for three minutes before serving. This allows the juices to redistribute, resulting in a more flavorful and juicy burger. Top with aged cheddar (if using) during the last minute of cooking or immediately after removing from the heat.

Pro Tips for the Best Hamburger Patties

Want to take your burger game to the next level? Here are a few extra tips from my kitchen to yours:

  • Don’t Overmix: Overmixing the meat will result in tough, dry patties. Mix just until the ingredients are combined.
  • Keep it Cold: Cold meat and butter are key for juicy burgers.
  • Don’t Press Down: Resist the urge to press down on the patties while they’re cooking. This squeezes out the juices and makes them dry.
  • Use a Meat Thermometer: A meat thermometer is the best way to ensure your burgers are cooked to your desired level of doneness.
  • Let it Rest: Resting the patties after cooking allows the juices to redistribute, resulting in a more flavorful and juicy burger.

Common Mistakes to Avoid

Even the best cooks make mistakes! Here are a few common pitfalls to avoid when making hamburger patties:

  • Using Lean Ground Beef: Lean ground beef will result in dry, crumbly patties. Opt for 80/20 ground chuck for the best flavor and juiciness.
  • Overmixing the Meat: As mentioned before, overmixing leads to tough patties.
  • Not Seasoning Properly: Don’t be shy with the seasoning! Salt and pepper are essential, but feel free to experiment with other spices and herbs.
  • Cooking at Too High of a Heat: Cooking at too high of a heat can cause the outside of the patties to burn before the inside is cooked through.
  • Not Letting the Patties Rest: Skipping the resting step can result in a less juicy burger.

Variations on This Hamburger Patty Recipe

The beauty of this recipe is that it’s incredibly versatile! Here are a few ideas for customizing your burger patties:

  • Beef And Pork Burgers: Mix equal parts ground beef and ground pork for a richer, more flavorful burger.
  • Spicy Burgers: Add a pinch of cayenne pepper or some chopped jalapeños to the meat mixture for a spicy kick.
  • Mushroom and Swiss Burgers: Sauté some sliced mushrooms and onions and top the burgers with Swiss cheese.
  • BBQ Burgers: Brush the patties with your favorite BBQ sauce during the last few minutes of cooking.
  • Healthy Hamburger Meat Recipes: Use ground turkey or chicken instead of ground beef for a leaner option.

Storage Instructions

Got leftovers? Here’s how to store your cooked hamburger patties:

  • Refrigerator: Store cooked patties in an airtight container in the refrigerator for up to 3-4 days.
  • Freezer: Wrap individual patties tightly in plastic wrap and then place them in a freezer bag. Freeze for up to 2-3 months. Thaw overnight in the refrigerator before reheating.

Frequently Asked Questions (FAQ)

Here are some common questions I get asked about making hamburger patties:

  • What is the best ground beef to use for hamburger patties?: I recommend using 80/20 ground chuck for the best flavor and juiciness.
  • How do I prevent my hamburger patties from shrinking?: Don’t overmix the meat and make a small dimple in the center of each patty before cooking.
  • How do I keep my hamburger patties from sticking to the grill?: Make sure your grill grates are clean and lightly oiled.
  • How long should I cook hamburger patties?: Cooking time will vary depending on the thickness of the patties and your desired level of doneness. Use a meat thermometer to ensure accuracy.

Serving Suggestions

Now that you’ve mastered the art of making juicy hamburger patties, it’s time to build your dream burger! Here are a few serving suggestions:

  • Classic Burger: Serve on a toasted bun with lettuce, tomato, onion, cheese, and your favorite condiments.
  • Gourmet Burger: Top with caramelized onions, sautéed mushrooms, Gruyere cheese, and a balsamic glaze.
  • Southwestern Burger: Add guacamole, salsa, and pepper jack cheese.
  • Sides: Serve with fries, onion rings, coleslaw, or a fresh salad.

There you have it – my definitive guide to making the juiciest, most flavorful hamburger patties at home. I hope this recipe becomes a staple in your kitchen, just like it is in mine. Happy grilling, and remember, cooking is all about having fun and experimenting! Enjoy!

Hamburger Patty Recipe

Prep Time 30 minutes
Cook Time 10 minutes
Total Time 40 minutes
Servings 4 patties
Calories 450
This hamburger patty recipe delivers juicy and flavorful burgers every time. With a blend of seasonings and a simple technique, you'll create restaurant-quality burgers at home.

Ingredients

Burger Ingredients

  • 1 lb Ground chuck (80/20) (Keep cold)
  • 1.25 tsp Kosher salt (If using Morton use ~¾ tsp)
  • 1 tsp Fresh cracked black pepper (Medium grind)
  • 0.5 tsp Garlic powder
  • 0.5 tsp Onion powder
  • 2 tsp Worcestershire sauce
  • 2 tsp Dijon mustard (Smooth)
  • 1 Tbsp Ice water (Very cold)
  • 1 Tbsp Unsalted butter, diced (Pea-size pieces, cold)
  • 0.5 tsp Smoked paprika
  • 1 tsp Fresh thyme minced
  • 4 slices Aged cheddar (For topping)
  • 2 Tbsp turkey bacon bits crisp (Fold in gently)
  • 4 small chips Ice (Nest in the center of each patty before cooking)

Instructions 

  • Chill bowl, meat, and butter for thirty minutes.
  • Whisk Worcestershire, Dijon, and ice water into smooth paste.
  • Season chuck; fold gently; form dimpled, even four-ounce patties.
  • Sear four minutes; flip once; cook to desired temperature.
  • Transfer burgers; rest three minutes; serve immediately with toppings.

Notes

For best results, don't overwork the meat when forming the patties.
Calories: 450kcal
Cost: $12
Course: Main Course
Cuisine: American
Keyword: Beef
pin