Author

Ava

Browsing

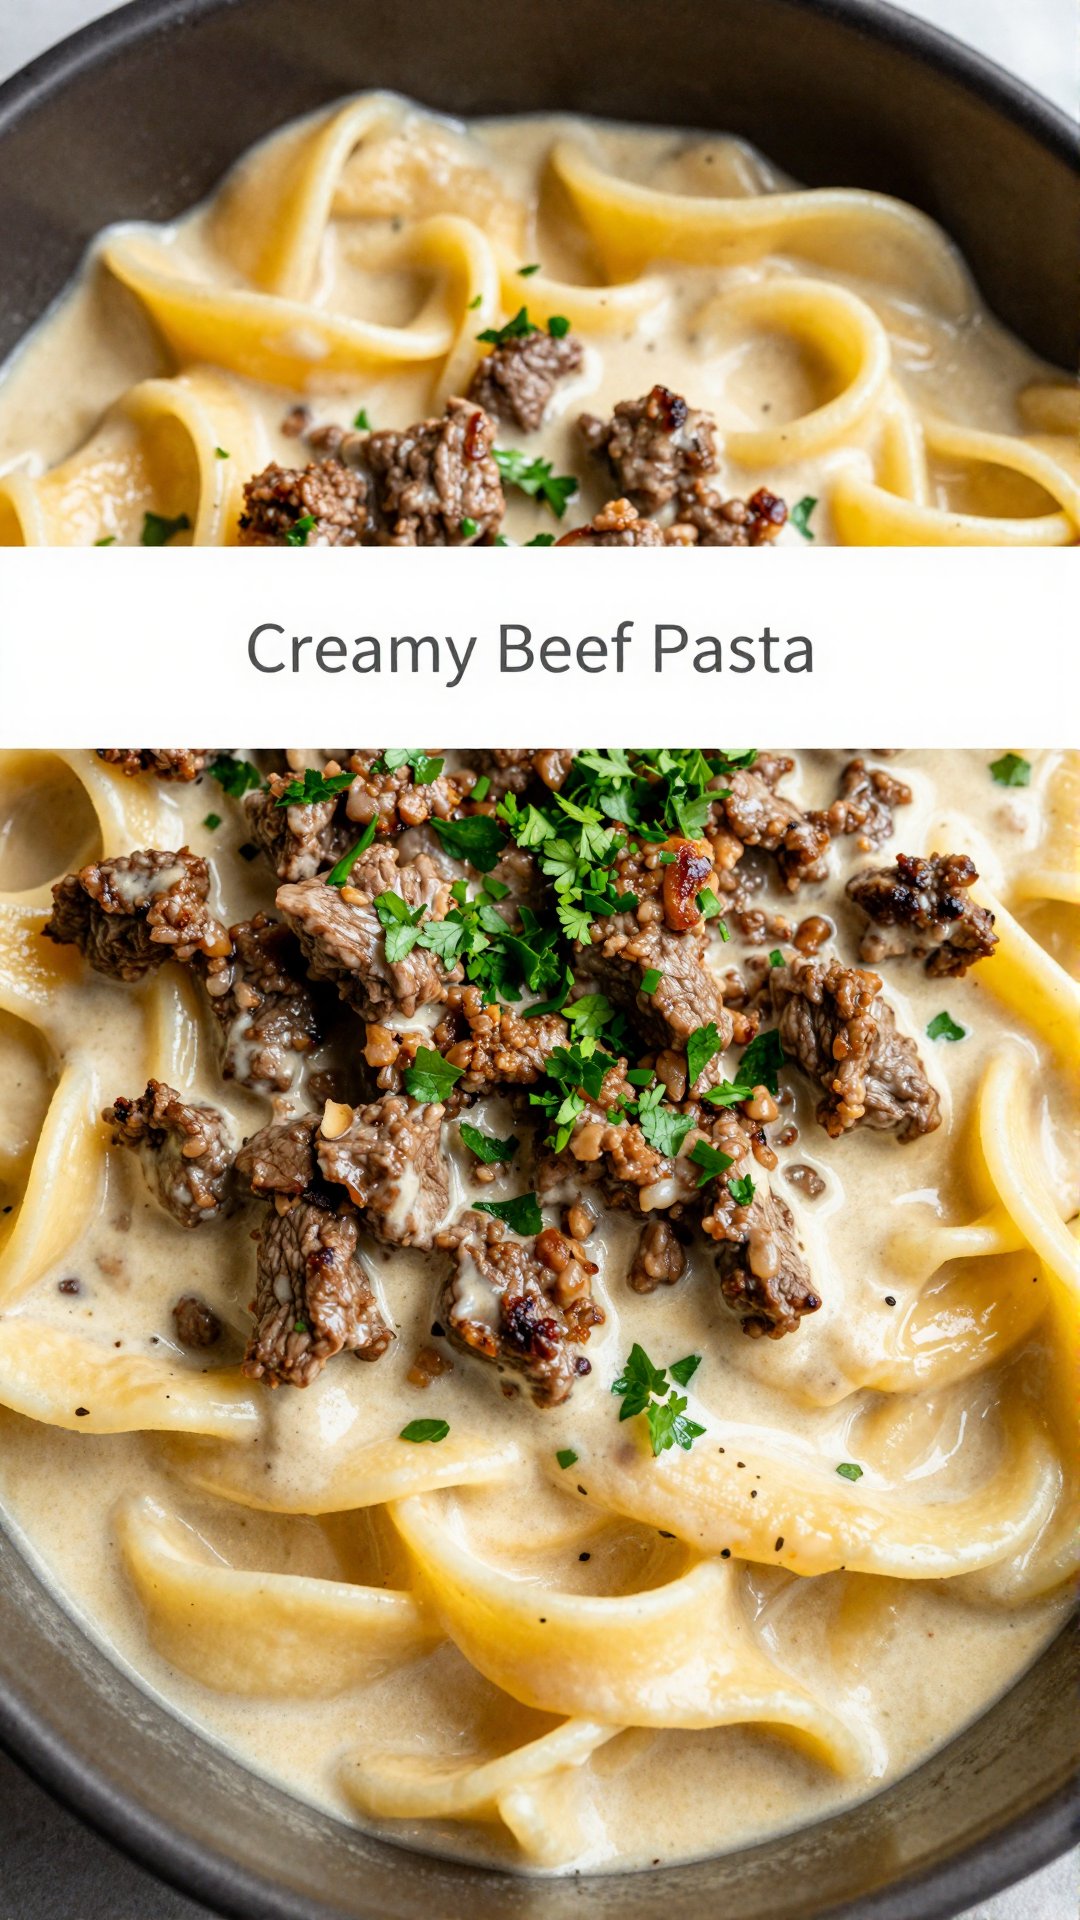
Easy Ground Beef and Potatoes Skillet Recipe: A Hearty Weeknight Delight

Hey there, kitchen adventurers! Ava here, ready to share one of my all-time favorite comfort food recipes: the Easy Ground Beef and Potatoes Skillet. If you’re anything like me, you’re always on the lookout for dishes that are both delicious and simple to make, especially on those hectic weeknights. This recipe ticks all the boxes – it’s hearty, flavorful, and comes together in just one pan, meaning fewer dishes to wash! Growing up, my mom would often make a variation of this, and the smell alone would draw everyone to the kitchen. Now, I’m sharing my version with you, perfected over years of tweaking and tasting. Trust me, this is one you’ll want to add to your regular rotation. It’s the perfect way to use ground beef and potatoes for a comforting meal.

This dish is more than just a recipe; it’s a warm hug on a plate. It reminds me of simpler times, of family dinners filled with laughter and second helpings. I hope it brings that same sense of comfort and joy to your table.

Why You’ll Love This Ground Beef and Potatoes Skillet

Seriously, what’s not to love? But here are a few specific reasons why this Ground Beef and Potatoes Skillet will become your new go-to:

  • Quick and Easy: Perfect for busy weeknights when you need a satisfying meal on the table in under an hour.
  • One-Pan Wonder: Less cleanup is always a win! Everything cooks together in one skillet.
  • Budget-Friendly: Uses simple, affordable ingredients that you probably already have in your pantry.
  • Customizable: Easily adaptable to your favorite flavors and dietary preferences.
  • Comfort Food at Its Best: Warm, hearty, and incredibly satisfying – the ultimate comfort food experience.

Ground Beef and Potatoes Skillet Ingredients

Here’s what you’ll need to whip up this delicious dish. Don’t worry, the list is short and sweet!

  • 1 tablespoon olive oil
  • 1 pound ground beef (sirloin, chuck, or round)
  • 1 small onion (finely diced)
  • 3-4 garlic cloves (minced)
  • 1 pound russet potatoes (peeled and cubed)
  • ½ cup beef broth
  • 1 tablespoon tomato paste
  • ½ tablespoon Worcestershire sauce
  • Salt and pepper to taste
Recipe Image

How to Make Ground Beef and Potatoes Skillet: Step-by-Step

Ready to get cooking? Follow these simple steps for a perfect Ground Beef and Potatoes Skillet every time.

  1. Brown the Beef: Heat olive oil in a large skillet over medium-high heat. Add ground beef, salt, and pepper; cook until browned for about 5 minutes, breaking it up with a spoon as it cooks.
  2. Sauté the Aromatics: Stir in diced onion and cook for another 3 minutes, until softened. Add minced garlic and tomato paste; stir well for 2 minutes, allowing the garlic to become fragrant.
  3. Simmer to Perfection: Mix in cubed potatoes, beef broth, and Worcestershire sauce; cover and simmer on medium-low for 20-25 minutes, or until potatoes are tender. Make sure to stir well to combine all the flavors.
  4. Season and Serve: Adjust seasoning as needed before serving. Taste and add more salt and pepper to your liking.

And that’s it! Your Ground Beef and Potatoes Skillet is ready to be devoured. Serve it hot and enjoy every delicious bite.

Pro Tips for the Best Potatoes Skillet

Want to take your Ground Beef and Potatoes Skillet to the next level? Here are a few of my favorite pro tips:

  • Choose the Right Beef: I prefer using ground sirloin or chuck for this recipe because they have a good balance of flavor and leanness.
  • Don’t Overcrowd the Pan: Make sure your skillet is large enough to accommodate all the ingredients without overcrowding. If necessary, cook the beef in batches.
  • Evenly Cubed Potatoes: Ensure that the potatoes are evenly cubed so they cook at the same rate. Aim for about ½-inch cubes.
  • Don’t Skip the Worcestershire Sauce: This adds a depth of flavor that you won’t want to miss.
  • Taste and Adjust: Always taste the dish before serving and adjust the seasoning as needed. A little extra salt, pepper, or even a pinch of red pepper flakes can make a big difference.

Common Mistakes to Avoid

We all make mistakes in the kitchen, but here are a few common ones to watch out for when making this Ground Beef and Potatoes Skillet:

  • Undercooked Potatoes: Make sure the potatoes are fully cooked and tender before serving. Nobody likes crunchy potatoes!
  • Bland Flavor: Don’t be shy with the seasoning. Salt, pepper, garlic, and Worcestershire sauce are your friends.
  • Dry Skillet: If the skillet becomes too dry during simmering, add a little more beef broth.
  • Burning the Garlic: Garlic burns easily, so make sure to stir it frequently and don’t let it cook for too long.

Variations to Try with Your Favorite Ground Beef and Potatoes Skillet

One of the best things about this recipe is how easily you can customize it to your liking. Here are a few variations to try:

  • Spicy Skillet: Add a pinch of red pepper flakes or a diced jalapeño for a spicy kick.
  • Cheesy Skillet: Sprinkle shredded cheddar or mozzarella cheese over the top during the last few minutes of cooking.
  • Veggie-Packed Skillet: Add other vegetables like carrots, peas, or bell peppers for extra nutrients and flavor.
  • Creamy Skillet: Stir in a dollop of sour cream or Greek yogurt before serving for a creamy texture.
  • Italian Skillet: Use Italian seasoning and diced tomatoes for an Italian-inspired twist.

Feel free to get creative and experiment with your favorite flavors! This recipe is a blank canvas just waiting for your personal touch.

How to Store and Reheat Ground Beef and Potatoes Skillet

Got leftovers? Lucky you! Here’s how to store and reheat your Ground Beef and Potatoes Skillet:

  • Storage: Store leftovers in an airtight container in the refrigerator for up to 3-4 days.
  • Reheating: Reheat in a skillet over medium heat, stirring occasionally, until heated through. You can also microwave individual portions for a quick and easy meal.

This dish tastes even better the next day, as the flavors have had time to meld together. It’s perfect for meal prepping!

Frequently Asked Questions (FAQ) About Ground Beef and Potatoes Skillet

Here are some common questions I get asked about this recipe:

  • Can I use sweet potatoes instead of russet potatoes? Absolutely! Sweet potatoes add a touch of sweetness and a different nutritional profile.
  • Can I use ground turkey or chicken instead of ground beef? Yes, you can substitute ground turkey or chicken for a leaner option.
  • Can I make this recipe in a slow cooker? Yes, you can! Brown the beef and onions in a skillet first, then transfer everything to a slow cooker and cook on low for 6-8 hours.
  • Can I freeze this dish? Yes, you can freeze it for up to 2-3 months. Thaw in the refrigerator overnight before reheating.
  • What kind of broth should I use? Beef broth is recommended for the best flavor, but chicken or vegetable broth can also be used.

Serving Suggestions for Ground Beef and Potatoes Skillet

This Ground Beef and Potatoes Skillet is a complete meal on its own, but here are a few serving suggestions to make it even better:

  • Side Salad: Serve with a fresh green salad for a balanced meal.
  • Crusty Bread: Serve with a side of crusty bread for soaking up the delicious sauce.
  • Toppings: Top with sour cream, shredded cheese, or chopped green onions for extra flavor and texture.

No matter how you serve it, this Ground Beef and Potatoes Skillet is sure to be a hit. Enjoy!

So there you have it – my Easy Ground Beef and Potatoes Skillet recipe, straight from my kitchen to yours. I hope you love it as much as I do! Remember, cooking is all about having fun and experimenting, so don’t be afraid to put your own spin on this dish. And as always, happy cooking!

Ground Beef and Potatoes Skillet

Prep Time 10 minutes
Cook Time 30 minutes
Total Time 40 minutes
Servings 4 servings
Calories 350
A hearty and comforting skillet dish featuring ground beef, potatoes, and savory seasonings. Perfect for a quick and satisfying weeknight meal.

Ingredients

Ingredients

  • 1 tablespoon olive oil
  • 1 pound ground beef (sirloin, chuck, or round)
  • 1 small onion (finely diced)
  • 3-4 cloves garlic (minced)
  • 1 pound russet potatoes (peeled and cubed)
  • 0.5 cup beef broth
  • 1 tablespoon tomato paste
  • 0.5 tablespoon Worcestershire sauce
  • to taste Salt and pepper

Instructions 

  • Heat olive oil in a large skillet over medium-high heat.
  • Add ground beef, salt, and pepper; cook until browned for about 5 minutes.
  • Stir in diced onion and cook for another 3 minutes.
  • Add minced garlic and tomato paste; stir well for 2 minutes.
  • Mix in cubed potatoes, beef broth, and Worcestershire sauce; cover and simmer on medium-low for 20-25 minutes until potatoes are tender.
  • Adjust seasoning as needed before serving.

Notes

For a richer flavor, consider adding a bay leaf while simmering.
Calories: 350kcal
Cost: $12
Course: Main Course
Cuisine: American
Keyword: Beef
pin

Creamy Pesto Chicken Pasta: A Quick & Easy Recipe That Will Wow Your Taste Buds

Hey there, friend! Ava here, ready to share a recipe that’s become a staple in my Seattle kitchen: Creamy Pesto Chicken Pasta. If you’re anything like me, you’re always on the lookout for meals that are both incredibly delicious and surprisingly easy to whip up, especially on those hectic weeknights. This dish is exactly that – a cozy, comforting bowl of goodness that brings together the bright flavors of basil pesto, tender chicken, and perfectly cooked pasta, all bathed in a luscious creamy sauce.

Growing up, pesto was a summertime staple, thanks to my mom’s overflowing herb garden. This recipe is a nod to those simple, flavorful meals, but with a grown-up twist that makes it perfect for any occasion. Get ready to impress your family (or yourself!) with this super easy dinner meal.

Why You’ll Absolutely Love This Creamy Pesto Chicken Pasta

Okay, let’s get real. There are a million pasta recipes out there, so why should you try this one? Here’s the lowdown:

  • Quick and Easy: From start to finish, this dish is ready in under 30 minutes. Perfect for those nights when you’re short on time but still want something homemade and satisfying.
  • Incredibly Flavorful: The combination of basil pesto, creamy sauce, and savory chicken is a match made in heaven. It’s a flavor explosion in every bite!
  • Versatile: You can easily customize this recipe to suit your tastes. Swap out the pasta, add your favorite veggies, or adjust the amount of pesto to your liking. It’s all about making it your own.
  • Comfort Food at Its Finest: There’s something incredibly comforting about a warm bowl of creamy pasta. This dish is like a warm hug on a plate, perfect for chilly evenings or when you just need a little pick-me-up.

This truly is one of those simple quick recipes for dinner that you’ll find yourself making again and again. Whether you need nightly dinner ideas or just want a reliable meal idea for a family of 4, this recipe has got you covered!

What You’ll Need: The Creamy Pesto Chicken Pasta Ingredients List

Alright, let’s gather our ingredients. Here’s what you’ll need to create this culinary masterpiece:

  • 10.5 ounces penne or rigatoni pasta
  • 2 medium boneless, skinless chicken breasts, diced (about 10.5 ounces total)
  • 1 tablespoon olive oil
  • Salt and freshly ground black pepper, to taste
  • 1 tablespoon unsalted butter
  • 2 cloves garlic, minced
  • 3/4 cup plus 2 tablespoons heavy cream
  • 1/2 cup whole milk
  • 1/2 cup basil pesto (store-bought or homemade)
  • 3/4 cup grated Parmesan cheese
  • 3.5 ounces baby spinach (optional, for extra nutrition)
  • 1 cup shredded mozzarella cheese
  • 1/4 cup grated Parmesan cheese
Recipe Image

Let’s Make Some Magic: Step-by-Step Instructions

Okay, apron on? Let’s get cooking! Follow these simple steps to create the most amazing Creamy Pesto Chicken Pasta you’ve ever tasted.

  1. Preheat and Prep: Preheat your oven to 400°F (200°C). Lightly grease a 9×13-inch baking dish. This will prevent the pasta from sticking and make cleanup a breeze.
  2. Cook the Pasta: In a large pot of boiling salted water, cook the pasta for 2 minutes less than the package directions, ensuring it is just under al dente. Drain and set aside. Remember, the pasta will continue to cook in the oven, so you want to make sure it doesn’t get too mushy.
  3. Sauté the Chicken: Heat olive oil in a large skillet over medium-high heat. Season the diced chicken pieces with salt and pepper to taste. Sauté the chicken until it’s cooked through and lightly golden, about 5–6 minutes. Remove the chicken from the skillet and set aside.
  4. Make the Creamy Pesto Sauce: In the same skillet, melt butter over medium heat. Add minced garlic and sauté for about 30 seconds until fragrant. Be careful not to burn the garlic – nobody likes bitter garlic! Stir in the heavy cream and whole milk, then bring to a gentle simmer for 2–3 minutes until the sauce has slightly thickened. Mix in the basil pesto and grated Parmesan cheese, stirring until everything is smooth and melted. This is where the magic happens, folks! The sauce is the heart of this recipe.
  5. Combine Everything: Return the cooked chicken, drained pasta, and spinach (if using) to the skillet with the creamy pesto sauce. Toss everything thoroughly until all the ingredients are evenly coated in that glorious sauce. The spinach will wilt slightly from the heat, adding a lovely touch of green and extra nutrients.
  6. Bake It Up: Transfer the coated mixture into the prepared baking dish. Evenly sprinkle shredded mozzarella and extra Parmesan cheese over the top. This cheese layer is what gives the dish that irresistible golden, bubbly crust.
  7. Bake to Perfection: Bake uncovered for 20–25 minutes, or until the cheese is melted, golden, and bubbly. Keep an eye on it to prevent the cheese from burning.
  8. Rest and Serve: Allow the dish to rest for 5 minutes before serving. This allows the sauce to thicken slightly and the flavors to meld together even more.

And there you have it! A delicious and easy Creamy Pesto Chicken Pasta that’s sure to become a new family favorite. It is also a great white chicken pasta bake. Serve it hot with a side of garlic bread or a simple salad for a complete and satisfying meal.

Ava’s Pro Tips for the Best Creamy Pesto Chicken Pasta

Alright, friend, let’s talk pro tips. These are the little secrets that will take your Creamy Pesto Chicken Pasta from good to absolutely unforgettable:

  • Don’t Overcook the Pasta: As mentioned earlier, make sure to cook the pasta just under al dente. It will continue to cook in the oven, and you don’t want it to become mushy.
  • Use High-Quality Pesto: The quality of your pesto will significantly impact the flavor of this dish. If possible, use homemade pesto for the best flavor. If you’re using store-bought, look for a brand that uses fresh basil and high-quality ingredients.
  • Don’t Skip the Resting Time: Allowing the dish to rest for a few minutes before serving is crucial. It gives the sauce time to thicken and the flavors to meld together.
  • Add a Touch of Lemon: For an extra burst of flavor, add a squeeze of fresh lemon juice to the sauce just before serving. The acidity will brighten up the dish and balance out the richness of the cream.

Common Mistakes to Avoid

We’ve all been there – a recipe that looks easy but ends up being a total disaster. Here are a few common mistakes to avoid when making Creamy Pesto Chicken Pasta:

  • Burning the Garlic: Burnt garlic can ruin the entire dish. Make sure to sauté it over medium heat and keep a close eye on it.
  • Overcooking the Chicken: Overcooked chicken can be dry and tough. Sauté it until it’s just cooked through and lightly golden.
  • Using Too Much Salt: Pesto and Parmesan cheese are both naturally salty, so be careful not to over-salt the dish. Taste as you go and adjust the seasoning accordingly.
  • Not Greasing the Baking Dish: Forgetting to grease the baking dish can result in the pasta sticking to the bottom, making it difficult to serve and clean up.

Variations to Spice Things Up

One of the best things about this recipe is how easy it is to customize. Here are a few variations to try:

  • Add Vegetables: Toss in some roasted vegetables like bell peppers, zucchini, or broccoli for extra nutrition and flavor.
  • Swap the Protein: Replace the chicken with shrimp, sausage, or even tofu for a vegetarian option.
  • Use Different Cheese: Experiment with different types of cheese, such as provolone, Gruyère, or fontina.
  • Add a Kick: Add a pinch of red pepper flakes to the sauce for a little heat.

Storing and Reheating Your Creamy Pesto Chicken Pasta

Got leftovers? Lucky you! Here’s how to store and reheat your Creamy Pesto Chicken Pasta:

  • Storing: Allow the pasta to cool completely before transferring it to an airtight container. Store it in the fridge for up to 3-4 days.
  • Reheating: Preheat your oven to 350°F (175°C). Place the pasta in an oven-safe dish, cover with foil, and bake for 15-20 minutes, or until heated through. You can also reheat it in the microwave, but be careful not to overcook it.

The creamy pesto chicken pasta is great to have in the fridge for a quick lunch or dinner.

Frequently Asked Questions (FAQ)

Got questions? I’ve got answers! Here are some of the most common questions I get about this recipe:

  • Can I use frozen chicken? Yes, but make sure to thaw it completely before cooking.
  • Can I make this recipe ahead of time? Yes, you can assemble the dish ahead of time and store it in the fridge until you’re ready to bake it. Just add a few extra minutes to the baking time.
  • Can I freeze this recipe? I don’t recommend freezing this recipe, as the cream sauce may separate upon thawing.
  • Can I use gluten-free pasta? Absolutely! Just make sure to cook it according to the package directions.

Serving Suggestions: Completing the Meal

This Creamy Pesto Chicken Pasta is delicious on its own, but here are a few serving suggestions to complete the meal:

  • Garlic Bread: Serve with warm garlic bread for dipping in the creamy sauce.
  • Side Salad: A simple green salad with a light vinaigrette is the perfect complement to the rich pasta.
  • Roasted Vegetables: Add some roasted vegetables like asparagus, bell peppers, or zucchini for extra nutrition and flavor.
  • Wine Pairing: Pair this dish with a crisp white wine like Sauvignon Blanc or Pinot Grigio.

So there you have it – my Creamy Pesto Chicken Pasta recipe that is an easy low prep dinner! I hope you enjoy making and eating it as much as I do. Remember, cooking is all about having fun and experimenting, so don’t be afraid to put your own spin on this recipe. Happy cooking, friends!

Creamy Pesto Chicken Pasta

Prep Time 15 minutes
Cook Time 30 minutes
Total Time 45 minutes
Servings 6 servings
Calories 650
Indulge in this comforting Creamy Pesto Chicken Pasta, featuring tender chicken and perfectly cooked pasta coated in a rich pesto cream sauce, topped with melted mozzarella and Parmesan cheese. A delightful and satisfying meal!

Ingredients

Pasta

  • 10.5 ounces penne or rigatoni pasta

Chicken

  • 2 medium boneless, skinless chicken breasts (diced (about 10.5 ounces total))

Other

  • 1 tablespoon olive oil
  • to taste Salt and freshly ground black pepper
  • 1 tablespoon unsalted butter
  • 2 cloves garlic (minced)
  • 0.75 cup heavy cream (plus 2 tablespoons)
  • 0.5 cup whole milk
  • 0.5 cup basil pesto (store-bought or homemade)
  • 0.75 cup grated Parmesan cheese
  • 3.5 ounces baby spinach (optional, for extra nutrition)
  • 1 cup shredded mozzarella cheese
  • 0.25 cup grated Parmesan cheese

Instructions 

  • Preheat oven to 400°F (200°C). Grease a 9x13-inch baking dish.
  • Cook pasta in boiling salted water for 2 minutes less than package directions. Drain and set aside.
  • Heat olive oil in a skillet over medium-high. Season chicken with salt and pepper, then sauté until cooked through, about 5–6 minutes. Remove from heat.
  • Melt butter in the same skillet over medium heat. Add garlic and sauté for 30 seconds. Stir in heavy cream and milk, then simmer for 2–3 minutes. Mix in pesto and Parmesan, stirring until smooth.
  • Return cooked chicken, drained pasta, and spinach (if using) to the sauce. Toss thoroughly.
  • Transfer mixture into the baking dish. Sprinkle mozzarella and Parmesan cheese over the top.
  • Bake uncovered for 20–25 minutes until cheese is golden and bubbly.
  • Allow dish to rest for 5 minutes before serving.

Notes

For a richer flavor, use homemade pesto. You can also add sun-dried tomatoes for extra taste.
Calories: 650kcal
Cost: $20
Course: Main Course
Cuisine: Italian
Keyword: Chicken
pin

My name’s Ava, and if you’ve stumbled upon my kitchen, you’re probably here for one thing—the kind of recipes that make people pause mid-bite and say, ‘Wow.’ Today, we’re diving into a breakfast game-changer: Protein-Packed Breakfast Burritos! These aren’t just any burritos; they’re your ticket to a stress-free, healthy, and delicious morning, even on the busiest of days. I’m talking about meal prep magic, freezer-friendly goodness, and a taste that’ll make you forget all about those drive-thru breakfast sandwiches.

I grew up in a small town in Oregon, where the smell of fresh bread and roasted vegetables often drifted out of my mother’s kitchen window. Cooking wasn’t just something we did to eat—it was how we celebrated, comforted, and connected. These burritos remind me of those mornings, filled with warmth and the promise of a great day ahead. Let’s get cooking!

Why You’ll Love This Recipe

Seriously, what’s not to love? These Protein Packed Breakfast Burritos are:

  • Meal Prep Friendly: Make a big batch on Sunday and enjoy them all week long.
  • Freezer-Friendly: Perfect for long-term storage. Just grab one from the freezer and reheat!
  • Customizable: Swap in your favorite veggies, cheeses, or sauces.
  • High in Protein: Keeps you full and energized until lunchtime. We’re talking serious staying power!
  • Delicious: A perfect balance of savory, cheesy, and slightly spicy flavors.

In essence, these burritos are a hug in a tortilla. The best part? They are incredibly easy to make. Even if you’re not a seasoned chef, you can nail this recipe. And trust me, once you taste these, you’ll be making them again and again.

Ingredients

  • 1 cup bell peppers (diced, any color)
  • 1 cup onions (diced, yellow or white)
  • 2 cups yellow potatoes (diced, Yukon Gold preferred)
  • 1 lb lean ground meat (turkey, chicken, or 93/7 beef, raw weight)
  • 6 large eggs
  • 4 large egg whites
  • 1/2 cup cottage cheese (full-fat for best texture)
  • 1 cup shredded cheddar cheese (sharp cheddar recommended)
  • 2 tablespoons olive oil
  • salt and pepper (to taste)
  • 1 teaspoon paprika
  • 1 teaspoon garlic powder
  • 1 teaspoon onion powder
  • 10 large burrito-sized tortillas (Grande size)
  • favorite sauce (salsa, hot sauce, or both)
  • 1/4 cup fresh cilantro (chopped)
Recipe Image

Let’s Make Some Burritos!

Here’s how we bring these Protein Packed Breakfast Burritos to life:

  1. Roast the Veggies: Preheat your oven to 400°F. Spread the diced bell peppers, onions, and yellow potatoes evenly on a large sheet pan. Drizzle with olive oil, season generously with salt and pepper, then toss everything until well coated. Roast for 20-25 minutes until the edges are golden brown and the potatoes are fork-tender. Roasting brings out the natural sweetness of the vegetables, adding a depth of flavor that’s hard to resist.
  2. Cook the Meat: Remove the pan from the oven and spread the lean ground meat over the roasted vegetables. Break it up into small crumbles with a spatula, then season with paprika, garlic powder, onion powder, salt, and pepper. Return to the oven and roast for 10-15 minutes until the meat is fully cooked through with no pink remaining. I recommend using lean ground turkey or chicken to keep these burritos healthy and packed with protein.
  3. Make the Egg Mixture: While the meat cooks, blend the eggs, egg whites, and cottage cheese in a blender or food processor until completely smooth about 30 seconds. If you don’t have a blender, whisk vigorously for 2-3 minutes until well combined. The cottage cheese adds a creamy texture and a protein boost that you won’t get with eggs alone.
  4. Bake the Eggs: Pour the egg mixture evenly over the cooked meat and vegetables, tilting the pan gently to distribute into all corners. Sprinkle the shredded cheddar cheese on top and bake for 12-15 minutes until the eggs are set in the center and the cheese is melted and bubbly. The aroma at this point is simply divine!
  5. Assemble the Burritos: Let the pan cool for 20-30 minutes until it’s comfortable to handle. Slice into 10 equal portions using a sharp knife or bench scraper. If desired, warm your tortillas for 15-20 seconds in the microwave to make them more pliable. Place each portion on a tortilla, add a drizzle of your favorite sauce and a sprinkle of fresh cilantro, then fold in the sides and roll tightly from bottom to top to form a burrito.
  6. Freeze (or Enjoy!): Wrap each burrito tightly in parchment paper or foil, label with the date, and freeze flat in a single layer on a baking sheet. Once frozen solid (about 2-3 hours), you can stack them in a freezer bag to save space. To reheat from frozen, unwrap completely and place on a microwave-safe plate. Microwave on high for 3-4 minutes, flipping halfway through for even heating.

Pro Tips for Perfect Burritos

  • Don’t Overcook the Eggs: The eggs should be set but still slightly moist. Overcooked eggs will become rubbery when reheated.
  • Warm the Tortillas: Warm tortillas are much easier to roll and less likely to tear.
  • Cool Completely Before Freezing: This prevents ice crystals from forming, which can affect the texture of the burritos.
  • Wrap Tightly: Proper wrapping is key to preventing freezer burn.
  • Use High-Quality Ingredients: The better the ingredients, the better the taste.

These little tweaks can take your burritos from good to absolutely amazing!

Common Mistakes to Avoid

  • Using Cold Ingredients: Make sure your roasted veggies and meat mixture have cooled down slightly before adding the egg mixture. This ensures even cooking.
  • Overfilling the Burritos: Too much filling will make them difficult to roll and prone to bursting.
  • Skipping the Cottage Cheese: Don’t skip the cottage cheese! It adds so much moisture and protein to the egg mixture.
  • Forgetting to Season: Season every layer of the burrito, from the veggies to the meat to the eggs.

Avoiding these mistakes will ensure your Protein Packed Breakfast Burritos are a success every time!

Variations to Spice Things Up

Want to get creative? Here are a few variations to try:

  • Sweet Potato Sunrise: Swap out the yellow potatoes for diced sweet potato for a touch of sweetness. Roasting the sweet potato brings out its natural sugars, creating a delightful contrast to the savory meat and cheese.
  • Spicy Fiesta: Add a pinch of cayenne pepper to the meat mixture or use pepper jack cheese for an extra kick. I love a little heat in the morning to wake me up!
  • Veggie Lovers’ Delight: Load up on the veggies! Add spinach, mushrooms, or zucchini to the roasting pan.
  • Mediterranean Magic: Use feta cheese, olives, and sun-dried tomatoes for a Mediterranean twist.
  • Sausage Sensation: Use breakfast sausage instead of ground meat for a classic breakfast flavor.

The possibilities are endless! Feel free to experiment and create your own signature burrito.

Storage Instructions

These Protein Packed Breakfast Burritos are designed for easy storage:

  • Freezing: Wrap each burrito individually in parchment paper or foil and store in a freezer bag for up to 3 months.
  • Refrigerating: If you plan to eat them within a few days, you can store them in the refrigerator for up to 4 days.

Frequently Asked Questions

Here are some common questions about these burritos:

  • Can I use frozen vegetables? Yes, but fresh vegetables will provide a better texture and flavor. If you use frozen, make sure to thaw and drain them before roasting.
  • Can I use different types of cheese? Absolutely! Monterey Jack, provolone, or even a spicy cheese blend would work well.
  • Can I make these vegetarian? Of course! Simply omit the meat or substitute with plant-based crumbles.
  • How do I prevent the tortillas from getting soggy? Make sure to cool the filling completely before assembling the burritos. Wrapping them tightly also helps.
  • How much protein is in each burrito? Each burrito contains approximately 30-35 grams of protein, depending on the type of meat and cheese you use. These protein packed breakfast burritos are great for you.

Serving Suggestions

These burritos are fantastic on their own, but here are a few serving suggestions to take them to the next level:

  • With Salsa or Hot Sauce: A classic pairing that adds a burst of flavor.
  • With Guacamole: Creamy guacamole adds richness and healthy fats.
  • With a Side of Fruit: A light and refreshing side to balance the savory burrito.
  • With a Dollop of Sour Cream: Adds a tangy and cool contrast to the warm burrito.

And there you have it—Protein-Packed Breakfast Burritos that are ready to freeze and reheat! These are perfect for those busy mornings when you need a quick, healthy, and delicious breakfast. They’re also a fantastic way to meal prep and ensure you always have a nutritious option on hand. Remember, cooking is about having fun and experimenting, so don’t be afraid to put your own spin on this recipe. Happy cooking!

Consider pairing these breakfast burritos with a turkey-burgers for lunch, a turkey-burger-recipe, or even the best-turkey-burger for a complete and protein-rich meal plan!

Protein-Packed Breakfast Burritos Ready to Freeze & Reheat

Prep Time 20 minutes
Cook Time 45 minutes
Total Time 1 hour 5 minutes
Servings 10 burritos
Calories 350
Start your day with these protein-packed breakfast burritos, perfect for meal prepping and freezing for a quick and easy breakfast. Loaded with veggies, meat, eggs, and cheese, they're a delicious and convenient way to fuel your morning.

Ingredients

Vegetables

  • 1 cup bell peppers (diced, any color)
  • 1 cup onions (diced, yellow or white)
  • 2 cups yellow potatoes (diced, Yukon Gold preferred)

Protein

  • 1 lb lean ground meat (turkey, chicken, or 93/7 beef, raw weight)
  • 6 large eggs
  • 4 large egg whites
  • 1/2 cup cottage cheese (full-fat for best texture)
  • 1 cup shredded cheddar cheese (sharp cheddar recommended)

Seasoning & Wraps

  • 2 tablespoons olive oil
  • to taste salt and pepper
  • 1 teaspoon paprika
  • 1 teaspoon garlic powder
  • 1 teaspoon onion powder
  • 10 large burrito-sized tortillas (Grande size)
  • favorite sauce (salsa, hot sauce, or both)
  • 1/4 cup fresh cilantro (chopped)

Instructions 

  • Roast vegetables at 400°F for 20-25 minutes.
  • Add ground meat to roasted vegetables, season, and roast for 10-15 minutes.
  • Blend eggs, egg whites, and cottage cheese until smooth.
  • Pour egg mixture over meat and vegetables, top with cheese, and bake for 12-15 minutes.
  • Cool, slice into portions, warm tortillas, add sauce and cilantro, and roll into burritos.
  • Wrap burritos, freeze, and reheat in the microwave for 3-4 minutes.

Notes

For best results, use high-quality tortillas that won't tear easily when rolling.
Calories: 350kcal
Cost: $20
Course: Breakfast
Cuisine: Mexican
Keyword: Eggs
pin

Easy Low Carb Cheesy Garlic Chicken Wraps Recipe: A Flavor Explosion in Every Bite!

Hey there, friend! Ava here, back in my Seattle kitchen, and today I’m beyond excited to share a recipe that’s become a total staple in my house: Easy Low Carb Cheesy Garlic Chicken Wraps. If you’re anything like me, you crave those comforting, flavor-packed meals that don’t leave you feeling sluggish. Well, look no further! These wraps are the answer to your weeknight dinner dreams – quick, satisfying, and oh-so-delicious.

I remember the first time I made these. It was a busy Tuesday, and I was staring into the fridge, willing inspiration to strike. Rotisserie chicken was the star of the show that night. I wanted something that would be flavorful, but also healthy. After some experimentation, the result was these cheesy garlic chicken wraps and they quickly became a family favorite.

Why You’ll Absolutely Love These Low Carb Cheesy Garlic Chicken Wraps

Seriously, get ready to fall head-over-heels for these wraps. Here’s why they’ve earned a permanent spot in my recipe rotation:

  • **Quick and Easy**: From prep to plate in under 30 minutes? Yes, please! Perfect for those hectic weeknights when you need a delicious meal without spending hours in the kitchen.
  • **Low Carb and Keto-Friendly**: Watching your carb intake? No problem! These wraps are designed to be low carb without sacrificing flavor.
  • **Cheesy Garlic Goodness**: That’s right – cheesy and garlicky! The combination of melted mozzarella, cheddar, and savory garlic is simply irresistible.
  • **Versatile**: Use rotisserie chicken for convenience, or cook your own chicken breast. Add your favorite veggies, spices, or sauces to customize these wraps to your liking.
  • **Satisfying**: Packed with protein and healthy fats, these wraps will keep you feeling full and satisfied for hours.

The Star Players: Ingredients You’ll Need

Let’s gather our ingredients! Here’s what you’ll need to make these incredible low carb cheesy garlic chicken wraps:

  • 2 cups cooked chicken breast (shredded, or use rotisserie chicken)
  • 1 cup shredded mozzarella cheese
  • 1/2 cup shredded cheddar cheese
  • 2 cloves garlic (minced)
  • 1/4 cup cream cheese (softened)
  • 1 tablespoon olive oil
  • 4 large low-carb tortillas or wraps
  • 1 tablespoon fresh parsley (chopped)
  • Salt and pepper (to taste)
  • 1 handful baby spinach (optional)
Recipe Image

Let’s Get Cooking: Step-by-Step Instructions

Alright, grab your apron, and let’s get started! Here’s how to make these mouthwatering wraps:

  1. Preheat a skillet or grill pan over medium heat and add olive oil. While heating, warm your tortillas for 10-15 seconds in the microwave covered with a damp paper towel to prevent cracking.
  2. In a mixing bowl, combine the shredded chicken, mozzarella cheese, cheddar cheese, softened cream cheese, minced garlic, parsley, salt, and pepper. If using spinach, add it at this stage. Mix thoroughly until the cream cheese coats everything evenly.
  3. Divide the chicken mixture evenly among the four low-carb tortillas, placing about 1/2 cup in the center of each. Roll each tortilla tightly, tucking in the sides as you go to form secure wraps.
  4. Place the wraps seam-side down in the preheated skillet. Cook for 2-3 minutes per side without moving them, until the wraps are golden brown and the cheese is melted and slightly oozing from the edges.
  5. Remove from skillet, slice each wrap in half diagonally, and serve hot. Garnish with extra parsley if desired.

Ava’s Pro Tips for Cheesy Garlic Chicken Wrap Perfection

Over the years, I’ve learned a few tricks to elevate these wraps from good to absolutely amazing. Here are my top pro tips:

  • **Don’t Overfill**: Resist the urge to stuff too much filling into the wraps. Overfilling makes them difficult to roll and can cause them to burst while cooking. About 1/2 cup of filling per wrap is just right.
  • **Warm the Tortillas**: This is crucial! Warming the tortillas makes them more pliable and prevents them from cracking when you roll them. A quick zap in the microwave with a damp paper towel does the trick.
  • **Get That Golden Brown Crust**: Patience is key! Let the wraps cook undisturbed in the skillet until they’re golden brown and the cheese is melted and oozing. That crispy, cheesy crust is what makes these wraps so irresistible.
  • **Use Good Quality Cheese**: The cheese is a star of the show, so don’t skimp! Opt for high-quality mozzarella and cheddar cheese for the best flavor and melt.
  • **Season Generously**: Don’t be afraid to season the chicken mixture generously with salt, pepper, and any other spices you love. A well-seasoned filling is what takes these wraps to the next level.

Common Mistakes to Avoid

We all make mistakes in the kitchen – it’s part of the learning process! Here are a few common pitfalls to watch out for when making these cheesy garlic chicken wraps:

  • **Using Cold Cream Cheese**: Make sure the cream cheese is softened before you mix it into the chicken mixture. Cold cream cheese won’t blend in properly and can leave you with clumps.
  • **Overcooking the Wraps**: Overcooking can make the tortillas dry and brittle. Keep a close eye on the wraps while they’re in the skillet and remove them as soon as they’re golden brown and the cheese is melted.
  • **Not Tucking in the Sides**: When rolling the wraps, make sure to tuck in the sides to create a secure seal. This will prevent the filling from spilling out while they cook.
  • **Forgetting to Preheat the Skillet**: A preheated skillet ensures that the wraps cook evenly and develop that beautiful golden-brown crust.
  • **Skipping the Garlic**: I know it sounds crazy, but some people might be tempted to skip the garlic. Don’t do it! The garlic adds a ton of flavor and is essential to the overall deliciousness of these wraps.

Variations to Spice Things Up

One of the best things about these wraps is how easy they are to customize. Here are a few variations to try:

  • **Spicy Chicken Wraps**: Add a pinch of red pepper flakes or a dash of hot sauce to the chicken mixture for a kick of heat.
  • **BBQ Chicken Wraps**: Toss the shredded chicken with your favorite BBQ sauce before adding it to the filling.
  • **Pesto Chicken Wraps**: Stir a tablespoon of pesto into the cream cheese mixture for a burst of fresh, herby flavor.
  • **Veggie-Packed Wraps**: Add your favorite veggies to the chicken mixture, such as diced bell peppers, onions, or mushrooms.
  • **Mediterranean Wraps**: Add crumbled feta cheese, chopped Kalamata olives, and sun-dried tomatoes to the filling for a Mediterranean twist.

Storage Tips for Leftovers

If you happen to have any leftovers (which is rare in my house!), here’s how to store them properly:

  • **Refrigerate**: Wrap the leftover wraps tightly in plastic wrap or store them in an airtight container in the refrigerator for up to 3 days.
  • **Reheat**: To reheat, warm the wraps in a skillet over medium heat until heated through and the cheese is melted. You can also microwave them, but they may become a bit soggy.

Frequently Asked Questions (FAQ)

Got questions? I’ve got answers! Here are some of the most common questions I get about these cheesy garlic chicken wraps:

  • **Can I use different types of cheese?**: Absolutely! Feel free to experiment with different cheeses, such as Monterey Jack, provolone, or pepper jack.
  • **Can I use ground chicken instead of shredded chicken?**: Yes, you can! Just make sure to cook the ground chicken thoroughly before adding it to the filling.
  • **Can I make these ahead of time?**: You can prepare the chicken mixture ahead of time and store it in the refrigerator for up to 24 hours. When you’re ready to make the wraps, simply assemble and cook as directed.
  • **Are these wraps gluten-free?**: To make these wraps gluten-free, use gluten-free tortillas.
  • **Can I freeze these wraps?**: I don’t recommend freezing these wraps, as the tortillas may become soggy when thawed.

Serving Suggestions: What to Pair with Your Wraps

These cheesy garlic chicken wraps are delicious on their own, but here are a few serving suggestions to round out your meal:

  • **Side Salad**: A simple side salad with a light vinaigrette is a perfect complement to these wraps.
  • **Coleslaw**: Creamy coleslaw adds a refreshing crunch.
  • **Roasted Vegetables**: Roasted broccoli, cauliflower, or Brussels sprouts are all great options.
  • **Soup**: A bowl of tomato soup or chicken noodle soup pairs perfectly with these wraps on a chilly day.
  • **Sweet Potato Fries**: For a more indulgent treat, serve these wraps with a side of sweet potato fries.

And there you have it! My Easy Low Carb Cheesy Garlic Chicken Wraps recipe. I hope you love these as much as my family and I do. They’re the perfect solution for a quick, easy, and delicious meal that everyone will enjoy. Remember, cooking is all about having fun and experimenting, so don’t be afraid to put your own spin on this recipe. Happy cooking, friends! The best part is that **you can** easily adjust the ingredients to your liking. **If you** like it spicy, add some jalapenos! **When you** are ready to eat, you’ll have a delicious and healthy meal. These **garlic chicken wraps** will not disappoint. **It’s** such a simple recipe, and **you’re** going to love it. **Don’t** be afraid to experiment with **the filling**. The **low carb** nature of **these wraps** makes them a great option for a healthy lifestyle. The **cheesy garlic** flavor is just an added bonus! This **garlic chicken** recipe is a guaranteed winner. You can even use **rotisserie chicken** for even faster prep! This **carb cheesy garlic chicken** recipe is a game changer. You can whip up **these cheesy garlic chicken** wraps in no time! You’ll love the **melty cheese** and the savory chicken. This recipe **doesn’t** require a lot of effort to produce a great result. The **cream cheese** really adds to the flavor. This **garlic chicken wraps** recipe is a must try!

Low Carb Cheesy Garlic Chicken Wraps

Prep Time 10 minutes
Cook Time 6 minutes
Total Time 16 minutes
Servings 4 wraps
Calories 450
Enjoy these delicious and easy-to-make Low Carb Cheesy Garlic Chicken Wraps for a quick lunch or dinner. Packed with flavor and protein, they're a satisfying and healthy option.

Ingredients

Ingredients

  • 2 cups cooked chicken breast (shredded, or use rotisserie chicken)
  • 1 cup shredded mozzarella cheese
  • 1/2 cup shredded cheddar cheese
  • 2 cloves garlic (minced)
  • 1/4 cup cream cheese (softened)
  • 1 tablespoon olive oil
  • 4 large low-carb tortillas or wraps
  • 1 tablespoon fresh parsley (chopped)
  • to taste Salt and pepper
  • 1 handful baby spinach (optional)

Instructions 

  • Preheat skillet with olive oil; warm tortillas in microwave.
  • Combine chicken, cheeses, cream cheese, garlic, parsley, salt, pepper, and spinach (if using).
  • Divide mixture among tortillas, roll tightly.
  • Cook wraps in skillet 2-3 minutes per side until golden brown and cheese is melted.
  • Slice and serve hot, garnish with parsley if desired.

Notes

Adjust the amount of garlic and seasoning to your preference. You can also add other vegetables like bell peppers or onions to the filling.
Calories: 450kcal
Cost: $12
Course: dinner, Lunch
Cuisine: American
Keyword: Chicken
pin

Hey there! Ava here, back in my Seattle kitchen, and today we’re whipping up something that’s become a staple in my house: Wholesome Protein Banana Bread Muffins! These aren’t your average muffins; they’re packed with goodness, flavor, and a whole lot of love. If you’re looking for a guilt-free treat that satisfies your sweet tooth while fueling your body, you’re in the right place. These protein banana bread muffins are the perfect solution!

I remember the first time I tried to make healthy muffins. Let’s just say they were…dense. Edible, but not exactly enjoyable. That’s why I’ve spent years perfecting this recipe, ensuring it’s both nutritious and delicious. We’re talking fluffy, moist, and bursting with banana flavor, all without any refined sugar. It’s the kind of recipe that makes you feel good from the inside out.

Why You’ll Love This Recipe

Honestly, what’s not to love? But let me break it down for you:

  • Healthy Indulgence: These muffins are naturally sweetened with honey or maple syrup and ripe bananas, meaning no refined sugar needed!
  • Protein-Packed: With added protein powder and Greek yogurt, these muffins keep you feeling full and satisfied. Perfect for a post-workout snack or a quick breakfast.
  • Easy to Make: This recipe is so simple, even a beginner baker can nail it. It’s a great way to use up those ripe bananas sitting on your counter.
  • Customizable: Feel free to get creative with add-ins! Nuts, chocolate chips, dried fruit—the possibilities are endless.
  • Perfect for Meal Prep: Make a batch on Sunday and enjoy them throughout the week. They store well and are great for on-the-go snacking.

These banana bread muffins are truly a game changer. Trust me, you’re going to want to add this recipe to your collection. You’ll find yourself making these again and again. They are a crowd-pleaser and a personal favorite.

Ingredients You’ll Need

Let’s gather our ingredients. I always find that having everything prepped and ready to go makes the baking process smoother and more enjoyable.

  • 3 ripe bananas, mashed
  • 2 large eggs, room temperature
  • ½ cup Greek yogurt (plain or vanilla)
  • ¼ cup natural nut butter (almond, peanut, or cashew)
  • ¼ cup honey or pure maple syrup
  • 1 ½ cups whole wheat flour
  • ½ cup vanilla or unflavored protein powder (whey or plant-based)
  • 1 teaspoon baking soda
  • 1 teaspoon baking powder
  • 1 teaspoon ground cinnamon
  • ½ teaspoon salt
  • 1 teaspoon pure vanilla extract
  • Optional: ½ cup chopped walnuts or dark chocolate chips
Recipe Image

Step-by-Step Instructions

Alright, let’s get baking! Follow these simple steps for muffin perfection:

  1. Preheat and Prep: Preheat your oven to 350°F (175°C). Lightly grease your muffin tin or line it with paper liners.
  2. Mash the Bananas: In a large bowl, mash the bananas with a fork or potato masher until mostly smooth with a few small lumps remaining.
  3. Combine Wet Ingredients: Whisk in the eggs, Greek yogurt, nut butter, honey (or maple syrup), and vanilla extract until creamy and well combined. It’s important to have the eggs at room temperature for the best results.
  4. Combine Dry Ingredients: In a separate bowl, combine the whole wheat flour, protein powder, baking soda, baking powder, cinnamon, and salt. Mix well.
  5. Combine Wet and Dry: Gently fold the dry ingredients into the wet ingredients using a spatula until just combined. Be careful not to overmix; a few streaks of flour are okay.
  6. Add Mix-Ins (Optional): If using add-ins like nuts or chocolate chips, fold them in carefully now.
  7. Fill Muffin Cups: Divide the batter evenly among the 12 muffin cups, filling each about ¾ full.
  8. Bake: Bake for 18-22 minutes, or until a toothpick inserted in the center comes out clean or with a few moist crumbs.
  9. Cool: Remove the muffins from the oven and let them cool in the tin for 5 minutes before transferring to a wire rack to cool completely.

Pro Tips for Perfect Muffins

Here are a few of my tried-and-true tips to ensure your muffins turn out perfectly every time:

  • Use Ripe Bananas: The riper the bananas, the sweeter and more flavorful your muffins will be. Those brown, spotty bananas are perfect for this recipe!
  • Don’t Overmix: Overmixing can lead to tough muffins. Mix until just combined, and don’t worry about a few lumps.
  • Room Temperature Ingredients: Using room temperature eggs and yogurt helps the batter come together more smoothly, resulting in a better texture.
  • Measure Accurately: Especially when baking, accurate measurements are key. Use measuring cups and spoons for best results.
  • Check for Doneness: Use a toothpick to check for doneness. If it comes out clean or with a few moist crumbs, your muffins are ready.

Common Mistakes to Avoid

We all make mistakes in the kitchen, but here are a few common ones to watch out for when making these muffins:

  • Overbaking: Overbaking can lead to dry muffins. Keep a close eye on them and check for doneness after 18 minutes.
  • Using Cold Ingredients: Cold ingredients can affect the texture of the batter, so make sure your eggs and yogurt are at room temperature.
  • Skipping the Nut Butter: The nut butter adds moisture and healthy fats to the muffins, so don’t skip it!
  • Not Greasing the Muffin Tin: Make sure to grease your muffin tin well, or use paper liners, to prevent the muffins from sticking.

Variations and Add-Ins

Want to switch things up? Here are a few fun variations to try:

  • Chocolate Chip: Add ½ cup of dark chocolate chips for a decadent treat.
  • Nutty Delight: Mix in ½ cup of chopped walnuts, pecans, or almonds for added crunch.
  • Berry Blast: Fold in ½ cup of fresh or frozen berries for a burst of flavor.
  • Spice It Up: Add a pinch of nutmeg or cardamom for a warm, cozy flavor.
  • Lemon Zest: Add the zest of one lemon for a bright, citrusy twist.

How to Store Your Muffins

These muffins are best stored in an airtight container at room temperature for up to 3 days. For longer storage, you can freeze them for up to 2 months. Just wrap them individually in plastic wrap and store them in a freezer bag.

Frequently Asked Questions (FAQ)

Got questions? I’ve got answers!

  • Can I use regular flour instead of whole wheat flour? Yes, you can substitute all-purpose flour for whole wheat flour. The texture might be slightly different, but they will still be delicious.
  • Can I use a different sweetener? Absolutely! You can use honey, maple syrup, agave nectar, or even a sugar-free sweetener like stevia.
  • Can I make these muffins vegan? Yes, you can! Substitute the eggs with flax eggs (1 tablespoon of flaxseed meal mixed with 3 tablespoons of water per egg) and use a plant-based protein powder.
  • Can I add more protein powder? I wouldn’t recommend adding much more, as it can make the muffins dry. Stick to the ½ cup in the recipe.
  • Why are my muffins dry? Overbaking or adding too much protein powder can cause dry muffins. Make sure to measure accurately and check for doneness after 18 minutes.

Serving Suggestions

These muffins are delicious on their own, but here are a few ways to elevate your muffin experience:

  • Warm with Butter: Serve warm with a pat of butter or a drizzle of honey.
  • Paired with Yogurt: Enjoy alongside a cup of Greek yogurt and some fresh fruit for a balanced breakfast.
  • Coffee Companion: Perfect with a cup of coffee or tea for a cozy afternoon treat.
  • Dessert: Serve with a scoop of vanilla ice cream for a simple yet satisfying dessert.

So there you have it—my Wholesome Protein Banana Bread Muffins recipe! I hope you love these muffins as much as I do. They’re a perfect example of how you can enjoy delicious, satisfying treats without sacrificing your health. Now go ahead, get baking, and fill your kitchen with the irresistible aroma of banana bread! And remember, every ‘oops’ moment is just an invitation to try again—this time with a little more patience and maybe a pinch more salt. Happy baking!

These muffins are packed with natural sweetness from the bananas and a touch of honey or maple syrup. It’s a healthy way to satisfy your sweet cravings without refined sugar. These bread muffins are perfect for breakfast or a snack.

If you want to make these muffins without refined sugar, this recipe is perfect for you. They are also packed with protein, making them a great option for a post-workout snack or a healthy breakfast. The greek yogurt and protein powder add a boost of protein to these banana bread muffins.

These protein banana bread muffins are easy to make and require only a few simple ingredients. It’s a great way to use up ripe bananas and enjoy a healthy treat. The natural nut butter adds healthy fats and enhances the flavor. Make sure your eggs are at room temperature for the best results.

Wholesome Protein Banana Bread Muffins Without Refined Sugar

Prep Time 15 minutes
Cook Time 22 minutes
Total Time 37 minutes
Servings 12 muffins
Calories 180
Enjoy these healthy and delicious banana bread muffins packed with protein and made without refined sugar. Perfect for a guilt-free breakfast or snack!

Ingredients

Ingredients

  • 3 ripe bananas, mashed
  • 2 large eggs (room temperature)
  • 0.5 cup Greek yogurt (plain or vanilla)
  • 0.25 cup natural nut butter (almond, peanut, or cashew)
  • 0.25 cup honey or pure maple syrup
  • 1.5 cups whole wheat flour
  • 0.5 cup vanilla or unflavored protein powder (whey or plant-based)
  • 1 teaspoon baking soda
  • 1 teaspoon baking powder
  • 1 teaspoon ground cinnamon
  • 0.5 teaspoon salt
  • 1 teaspoon pure vanilla extract
  • 0.5 cup chopped walnuts or dark chocolate chips (Optional)

Instructions 

  • Preheat oven to 350°F (175°C). Grease muffin tin or use liners.
  • Mash bananas in a large bowl until mostly smooth.
  • Whisk in eggs, yogurt, nut butter, honey (or maple syrup), and vanilla until creamy.
  • Combine flour, protein powder, baking soda, baking powder, cinnamon, and salt in a separate bowl.
  • Fold dry ingredients into wet ingredients until just combined.
  • Fold in nuts or chocolate chips, if using.
  • Divide batter evenly among 12 muffin cups, filling each ¾ full.
  • Bake for 18-22 minutes, until a toothpick comes out clean.
  • Cool in tin for 5 minutes, then transfer to a wire rack.

Notes

For extra moist muffins, let the batter rest for 10 minutes before baking.
Calories: 180kcal
Cost: $8
Course: Breakfast, Snack
Cuisine: American
Keyword: Banana
pin

Hey there, pasta lovers! Ava here, back in my Seattle kitchen, and today I’m sharing a recipe that’s been a staple in my family for years: Creamy Beef Pasta. If you’re anything like me, weeknights can be a whirlwind of activities, and the last thing you want is a complicated dinner. This recipe is quick, easy, and guaranteed to satisfy even the pickiest eaters. It’s the kind of dish that brings everyone to the table with smiles, and honestly, what’s better than that?

I remember the first time I made this. It was a rainy Tuesday night, and I was craving something comforting. I rummaged through my fridge and pantry and threw together what I had. The result? Pure magic. The creamy sauce, the savory beef, the perfectly cooked pasta – it was a symphony of flavors that just worked. Since then, this recipe has evolved, but the heart of it remains the same: simple ingredients, big flavor, and a whole lot of love.

Why You’ll Love This Creamy Beef Pasta

Seriously, what’s not to love? This Creamy Beef Pasta is a winner for so many reasons. Let me break it down for you:

  • Quick and Easy: From start to finish, this dish is ready in under 30 minutes. Perfect for those busy weeknights when time is of the essence.
  • Simple Ingredients: You probably already have most of these ingredients in your pantry and fridge. No need for a special trip to the grocery store!
  • Comfort Food at Its Best: This creamy beef pasta is the culinary equivalent of a warm hug. It’s rich, satisfying, and oh-so-delicious.
  • Versatile: You can easily customize this recipe to your liking. Add your favorite veggies, swap out the pasta, or adjust the seasoning to make it your own.
  • Kid-Friendly: Even the pickiest eaters will devour this dish. The creamy sauce and familiar flavors are a guaranteed hit with kids of all ages.

I truly believe that the best recipes are the ones that are both delicious and easy to make. This Creamy Beef Pasta checks all the boxes. It’s a comforting, crowd-pleasing meal that you’ll want to make again and again. It’s the perfect dish when you need something reliable that feels a little special.

Ingredients for Creamy Beef Pasta

Here’s what you’ll need to whip up this delectable dish. Don’t worry, it’s a simple list!

  • 8 oz penne pasta
  • 1 lb lean ground beef
  • 1 cup heavy cream
  • 3 cloves garlic, minced
  • 1 medium onion, diced
  • 1 cup grated Parmesan cheese
  • 2 tsp Italian seasoning
  • Salt and pepper to taste
  • 2 tsp olive oil for sautéing
Recipe Image

How to Make Creamy Beef Pasta: Step-by-Step

Alright, let’s get cooking! Here’s how to make this creamy beef pasta, step by step:

  1. Cook the Pasta: Cook the penne according to package instructions until al dente. Drain and reserve 1 cup of pasta water. The pasta should be cooked just right.
  2. Sauté the Aromatics: In a large skillet over medium heat, add olive oil. Sauté the diced onion and minced garlic until fragrant (about 5 minutes). This is where the magic starts!
  3. Brown the Beef: Add ground beef to the skillet, breaking it apart as it cooks until browned (about 7 minutes). Season with salt, pepper, and Italian seasoning. Make sure the beef is nicely browned for the best flavor.
  4. Create the Creamy Sauce: Lower heat and stir in heavy cream. Gradually add reserved pasta water until desired sauce consistency is reached. Mix in grated Parmesan until melted. The creamy sauce is the key to this dish.
  5. Combine and Serve: Combine cooked pasta with the sauce in the skillet, tossing gently to coat. Serve hot, garnished with additional Parmesan or fresh parsley if desired.

And there you have it! A simple, delicious, and comforting Creamy Beef Pasta that’s perfect for any night of the week. It’s a recipe that’s always a hit, and I hope you enjoy making it as much as I do.

Pro Tips for the Best Creamy Beef Pasta

Want to take your Creamy Beef Pasta to the next level? Here are a few pro tips from my kitchen to yours:

  • Don’t Overcook the Pasta: Al dente pasta is key to a great texture. Overcooked pasta will become mushy and won’t hold the sauce as well.
  • Reserve Pasta Water: This is liquid gold! The starchy water helps to create a creamy, emulsified sauce that clings to the pasta.
  • Use Freshly Grated Parmesan: Pre-grated Parmesan often contains cellulose, which can prevent it from melting smoothly. Freshly grated Parmesan will melt beautifully into the sauce.
  • Don’t Boil the Cream: Boiling the heavy cream can cause it to curdle. Keep the heat low and simmer gently.
  • Taste and Adjust: Seasoning is key! Taste the sauce and adjust the salt, pepper, and Italian seasoning to your liking.

These little tips can make a big difference in the final result. Trust me, it’s worth paying attention to the details to create a truly exceptional dish.

Common Mistakes to Avoid

Even with a simple recipe like this, it’s easy to make a few common mistakes. Here’s what to watch out for:

  • Not Draining the Beef Properly: Excess grease can make the sauce heavy and greasy. Drain the beef well after browning.
  • Overcooking the Garlic: Burnt garlic is bitter and can ruin the flavor of the dish. Sauté the garlic until fragrant, but don’t let it brown.
  • Adding Cold Cream: Adding cold heavy cream to a hot pan can cause it to seize up. Let the cream come to room temperature before adding it to the skillet.
  • Not Using Enough Salt: Salt is essential for bringing out the flavors of the dish. Don’t be afraid to season generously.
  • Rushing the Sauce: The sauce needs time to thicken and develop its flavor. Be patient and let it simmer gently.

By avoiding these common mistakes, you’ll be well on your way to creating a perfect Creamy Beef Pasta every time.

Variations and Add-Ins

One of the best things about this recipe is how versatile it is. Here are a few variations and add-ins to try:

  • Add Vegetables: Sauté some chopped bell peppers, mushrooms, or spinach along with the onion and garlic.
  • Spice It Up: Add a pinch of red pepper flakes to the sauce for a little heat.
  • Use Different Pasta: Feel free to swap out the penne for your favorite pasta shape, such as rigatoni, farfalle, or rotini.
  • Add Cheese: Experiment with different cheeses, such as mozzarella, provolone, or Gruyère.
  • Make it Lighter: Use half-and-half or milk instead of heavy cream for a lighter option. A lighter option can be just as delicious.

Don’t be afraid to get creative and experiment with different flavors and ingredients. This recipe is a blank canvas, so have fun with it!

How to Store and Reheat Creamy Beef Pasta

Got leftovers? Here’s how to store and reheat your Creamy Beef Pasta:

  • Storage: Store the pasta in an airtight container in the refrigerator for up to 3 days.
  • Reheating: Reheat the pasta in a skillet over medium heat, adding a splash of milk or water to loosen the sauce. You can also reheat it in the microwave, but be careful not to overcook it.

Leftovers are a great way to enjoy this dish again, and it’s just as delicious the next day!

Frequently Asked Questions (FAQ)

Got questions? I’ve got answers! Here are some frequently asked questions about Creamy Beef Pasta:

  • Can I use ground turkey instead of ground beef?: Yes, you can definitely use ground turkey for a leaner option.
  • Can I make this recipe ahead of time?: Yes, you can make the sauce ahead of time and store it in the refrigerator. Just cook the pasta when you’re ready to serve.
  • Can I freeze this recipe?: I don’t recommend freezing this recipe, as the sauce may separate when thawed.
  • What if I don’t have heavy cream?: You can use half-and-half or milk instead, but the sauce won’t be as rich and creamy.
  • Can I add vegetables to this recipe?: Absolutely! Feel free to add your favorite vegetables, such as bell peppers, mushrooms, or spinach.

If you have any other questions, feel free to leave a comment below. I’m always happy to help!

Serving Suggestions

Looking for some serving ideas? Here are a few suggestions to complete your meal:

  • Garlic Bread: Serve with a side of crusty garlic bread for dipping in the creamy sauce.
  • Salad: A simple green salad with a vinaigrette dressing is a refreshing contrast to the richness of the pasta.
  • Roasted Vegetables: Roasted broccoli, asparagus, or Brussels sprouts are a healthy and delicious side dish.
  • Wine Pairing: A light-bodied red wine, such as Pinot Noir or Beaujolais, pairs well with this dish.

Whether you’re cooking for a crowd or just for yourself, this Creamy Beef Pasta is a guaranteed crowd-pleaser. Enjoy!

I hope you love this recipe as much as I do! It’s a staple in my kitchen, and I know it will become one in yours too. Remember, cooking is all about having fun and experimenting, so don’t be afraid to put your own spin on it. Happy cooking!

This creamy beef pasta is the best way to make a quick and easy dinner. If you are looking for easy dinners for two ground beef, this is good to make with ground beef. This is also one of the easy cheap dinner meals and easy meal ground beef. Enjoy these creamy hamburger pasta recipes. This is an easy recipe ground beef and one of the easy pasta dishes for dinner. This recipe makes for super easy and quick dinner ideas.

Creamy Beef Pasta

Prep Time 10 minutes
Cook Time 20 minutes
Total Time 30 minutes
Servings 4 people
Calories 550
A comforting and delicious Creamy Beef Pasta recipe featuring tender ground beef in a rich, Parmesan-infused cream sauce. Perfect for a quick and satisfying weeknight meal.

Ingredients

Pasta

  • 8 oz penne pasta

Beef

  • 1 lb lean ground beef

Sauce

  • 1 cup heavy cream
  • 3 cloves garlic, minced
  • 1 medium onion, diced
  • 1 cup grated Parmesan cheese
  • 2 tsp Italian seasoning
  • to taste Salt and pepper
  • 2 tsp olive oil (for sautéing)

Instructions 

  • Cook penne until al dente, reserve 1 cup pasta water.
  • Sauté onion and garlic in olive oil until fragrant.
  • Brown ground beef, season with salt, pepper, and Italian seasoning.
  • Lower heat, stir in heavy cream and pasta water to desired consistency. Mix in Parmesan.
  • Combine cooked pasta with sauce.
  • Serve hot, garnish with Parmesan or parsley.

Notes

For a richer flavor, use freshly grated Parmesan cheese. Adjust the amount of pasta water to achieve your preferred sauce thickness.
Calories: 550kcal
Cost: $12
Course: Main Course
Cuisine: Italian
Keyword: Beef
pin

My name’s Ava, and if you’ve stumbled upon my kitchen, you’re probably here for one thing—the kind of recipes that make people pause mid-bite and say, ‘Wow.’ Today, we’re diving into a recipe that does just that: Strawberry Protein Muffins! These aren’t just any muffins; they’re a game-changer for anyone looking for a healthy, delicious, and satisfying treat. I grew up in a small town in Oregon, where the smell of fresh bread and roasted vegetables often drifted out of my mother’s kitchen window. Cooking wasn’t just something we did to eat—it was how we celebrated, comforted, and connected.

These muffins are especially great if you’re watching your carb intake, trying to boost your protein, or following a bariatric diet. But honestly, even if you’re not on any specific diet, you’ll love them! They’re packed with flavor, easy to make, and perfect for a quick breakfast, a post-workout snack, or a guilt-free dessert. I was the kid who would rather stir a pot of chili than go ride my bike, and by the time I was twelve, I could whip up a pie from scratch that made my grandmother proud.

These days, I’m 34 and living in Seattle, where my kitchen has become my favorite corner of the world. I believe the best recipes aren’t always the fanciest—they’re the ones that feel like a warm hug, the ones you make over and over because they just work. Sure, I’ve had my share of flops (ask me about the infamous triple-layer cake that collapsed right before a dinner party), but I’ve learned that every ‘oops’ moment is just an invitation to try again—this time with a little more patience and maybe a pinch more salt.

What I love most is taking a recipe and finding ways to make it even better—whether it’s swapping in a secret ingredient, adjusting the texture, or adding a touch of spice to wake up the flavors. I’m a bit obsessed with balance: sweet with savory, creamy with crunchy, familiar with unexpected. And I believe that cooking is less about following rules and more about trusting your senses. If it smells amazing and makes you smile, you’re probably on the right track.

When I’m not stirring a pot or baking something golden, you’ll find me wandering local farmers’ markets, chatting with growers about their produce, or experimenting late at night when inspiration strikes. My recipes are a blend of comfort food classics, modern twists, and just enough adventure to keep things exciting. I share them because I want you to have a little magic in your kitchen too—meals that bring people together, that become your ‘go-to,’ that make someone you love ask for seconds.

So whether you’re cooking for your family, impressing friends, or just treating yourself, I’m here to help you find your next favorite dish. Pull up a chair, grab a spatula, and let’s make something unforgettable together.

Why You’ll Love This Strawberry Protein Muffins Recipe

Seriously, what’s not to love? This recipe is a winner on so many levels. But let me break it down for you:

  • Low Carb: Perfect for those watching their carbohydrate intake.
  • High Protein: Keeps you feeling full and satisfied. A great way to start your day or refuel after a workout.
  • Bariatric Friendly: A fantastic option for those following a bariatric diet, providing essential nutrients in a convenient and tasty form.
  • Easy to Make: You don’t need to be a professional baker to whip up a batch of these.
  • Delicious: The combination of sweet strawberries and a hint of vanilla makes these muffins irresistible.

Plus, they’re incredibly versatile. You can customize them with different protein powders, sweeteners, or add-ins to suit your taste. Whether you’re a seasoned baker or a kitchen newbie, this recipe is sure to become a staple in your repertoire.

Strawberry Protein Muffins Ingredients

Here’s what you’ll need to make these delightful strawberry protein muffins. Don’t worry, you probably have most of these ingredients in your pantry already!

  • 1 cup almond flour
  • 1/2 cup protein powder (whey or plant-based)
  • 1/4 cup erythritol or sweetener of choice
  • 1 teaspoon baking powder
  • 1/4 teaspoon salt
  • 2 large eggs
  • 1/4 cup unsweetened almond milk
  • 1/4 cup melted coconut oil or butter
  • 1 teaspoon vanilla extract
  • 1/2 cup chopped fresh strawberries
Recipe Image

How to Make Strawberry Protein Muffins: Step-by-Step

Alright, let’s get baking! Here’s a simple, step-by-step guide to creating these amazing strawberry protein muffins:

  1. Preheat and Prep: Preheat your oven to 350°F (175°C) and line a muffin tin with paper liners. This prevents the muffins from sticking and makes cleanup a breeze.
  2. Combine Dry Ingredients: In a large bowl, whisk together the almond flour, protein powder, erythritol, baking powder, and salt. Make sure everything is well combined to avoid any clumps.
  3. Mix Wet Ingredients: In a separate bowl, whisk together the eggs, almond milk, melted coconut oil, and vanilla extract. The vanilla extract adds a lovely depth of flavor.
  4. Combine Wet and Dry: Pour the wet ingredients into the dry ingredients and mix until just combined. Be careful not to overmix; a few lumps are okay. Overmixing can result in tough muffins.
  5. Add Strawberries: Gently fold in the chopped fresh strawberries. Distribute them evenly throughout the batter.
  6. Fill Muffin Liners: Divide the batter evenly among the prepared muffin liners. I like to use an ice cream scoop to ensure each muffin is the same size.
  7. Bake: Bake for 20-25 minutes, or until a toothpick inserted into the center comes out clean. The muffins should be golden brown on top.
  8. Cool: Let the muffins cool in the tin for a few minutes before transferring them to a wire rack to cool completely. This prevents them from becoming soggy.

Pro Tips for Perfect Strawberry Protein Muffins

Want to take your muffins from good to great? Here are a few pro tips I’ve learned over the years:

  • Don’t Overmix: I can’t stress this enough! Overmixing develops the gluten in the almond flour, resulting in tough, dense muffins. Mix until just combined.
  • Use Room Temperature Ingredients: This helps the ingredients blend together more easily and creates a smoother batter.
  • Measure Accurately: Baking is a science, so accurate measurements are crucial. Use measuring cups and spoons, and level off the ingredients.
  • Fresh Strawberries are Best: While you can use frozen strawberries, fresh ones will give you the best flavor and texture.
  • Cool Completely: Resist the urge to eat them straight out of the oven. Letting them cool completely allows the flavors to develop and the texture to set.

Common Mistakes to Avoid

Even the most experienced bakers make mistakes sometimes. Here are a few common pitfalls to watch out for:

  • Using the Wrong Protein Powder: Not all protein powders are created equal. Whey protein tends to work best, but plant-based protein can also be used. Just be aware that it may affect the texture.
  • Overbaking: Overbaked muffins are dry and crumbly. Keep a close eye on them in the oven and test for doneness with a toothpick.
  • Not Using Enough Sweetener: If you have a sweet tooth, you may want to add a little extra erythritol or your sweetener of choice.
  • Skipping the Almond Flour: Almond flour is essential for creating a low-carb muffin. Don’t substitute it with regular flour.
  • Forgetting the Baking Powder: This is what gives the muffins their rise. Don’t leave it out!

If you do make a mistake, don’t worry! Every batch is a learning opportunity. That’s what I tell myself anyway!

Strawberry Protein Muffins Variations

One of the best things about this recipe is how easy it is to customize. Here are a few variations to try:

  • Blueberry Protein Muffins: Substitute the strawberries with fresh blueberries.
  • Chocolate Chip Protein Muffins: Add 1/4 cup of sugar-free chocolate chips to the batter.
  • Lemon Poppy Seed Protein Muffins: Add 1 tablespoon of poppy seeds and the zest of one lemon to the batter.
  • Cinnamon Swirl Protein Muffins: Swirl a mixture of cinnamon and erythritol into the batter before baking.
  • Strawberry Cheesecake Protein Muffins: Add a dollop of cream cheese filling to the center of each muffin before baking.

Get creative and experiment with different flavors and add-ins. The possibilities are endless!

How to Store Strawberry Protein Muffins

These muffins are great for meal prepping, but proper storage is key to keeping them fresh. Here’s how to store them:

  • Room Temperature: Store in an airtight container for up to 2 days.
  • Refrigerator: Store in an airtight container for up to 5 days.
  • Freezer: Wrap individually in plastic wrap and store in a freezer bag for up to 2 months. Thaw in the refrigerator or at room temperature before serving.

Frequently Asked Questions (FAQ)

Got questions? I’ve got answers! Here are some of the most common questions I get about this recipe:

  • Can I use a different type of flour?: While almond flour is ideal for low-carb baking, you can try using coconut flour. However, you may need to adjust the amount of liquid.
  • Can I use a different sweetener?: Yes, you can use any sweetener you prefer, such as stevia, monk fruit, or xylitol.
  • Can I make these muffins vegan?: Yes, you can substitute the eggs with flax eggs or a commercial egg replacer. Be sure to use a plant-based protein powder as well.
  • Can I add greek yogurt to the batter?: Yes, you can add 1/4 cup of greek yogurt to the batter for extra moisture and protein. Just be mindful of the added carbs.
  • Can I double the recipe?: Absolutely! Just make sure you have enough muffin liners.
  • How to make them in advance?: These muffins are perfect for meal prepping. Bake them on the weekend and enjoy them throughout the week.

Serving Suggestions

These muffins are delicious on their own, but here are a few serving suggestions to take them to the next level:

  • With a dollop of greek yogurt and fresh berries: This adds extra protein and flavor.
  • With a drizzle of sugar-free syrup: For a touch of sweetness.
  • As part of a balanced breakfast: Pair with a side of scrambled eggs or a protein smoothie.
  • As a post-workout snack: To refuel your muscles after exercise.
  • As a healthy dessert: Enjoy with a cup of herbal tea.

Whether you’re enjoying them for breakfast, snack, or dessert, these strawberry protein muffins are sure to satisfy your cravings without derailing your healthy eating goals. And remember, if you’re looking for easy sugar free recipes, complex carb recipes, high protein low sugar dessert options, low carb sweet breakfast ideas, protein snacks and meals, healthy strawberry muffin recipes, protein fat carb meals, high protein meals on the go, or low carb gf recipes, these muffins are a perfect fit! These strawberry protein muffins are a delightful and nutritious treat that fits perfectly into a healthy lifestyle. So go ahead, bake a batch and enjoy!

Strawberry Protein Muffins Low Carb High Protein Bariatric Friendly

Prep Time 15 minutes
Cook Time 25 minutes
Total Time 40 minutes
Servings 12 muffins
Calories 120
Enjoy these delicious and healthy strawberry protein muffins! They are low carb, high in protein, and bariatric friendly, making them a perfect guilt-free treat.

Ingredients

Muffin Ingredients

  • 1 cup almond flour
  • 1/2 cup protein powder (whey or plant-based)
  • 1/4 cup erythritol (or sweetener of choice)
  • 1 teaspoon baking powder
  • 1/4 teaspoon salt
  • 2 large eggs
  • 1/4 cup unsweetened almond milk
  • 1/4 cup melted coconut oil or butter
  • 1 teaspoon vanilla extract
  • 1/2 cup chopped fresh strawberries

Instructions 

  • Preheat oven to 350°F (175°C) and line a muffin tin with paper liners.
  • Whisk together almond flour, protein powder, erythritol, baking powder, and salt in a large bowl.
  • In a separate bowl, whisk together eggs, almond milk, melted coconut oil, and vanilla extract.
  • Pour the wet ingredients into the dry ingredients and mix until just combined. Do not overmix.
  • Gently fold in the chopped strawberries.
  • Divide the batter evenly among the prepared muffin liners.
  • Bake for 20-25 minutes, or until a toothpick inserted into the center comes out clean.
  • Let the muffins cool in the tin for a few minutes before transferring them to a wire rack to cool completely.

Notes

For a richer flavor, use melted butter instead of coconut oil.
Calories: 120kcal
Cost: $12
Course: Breakfast, Snack
Cuisine: American
Keyword: strawberry
pin

Hey there, pasta lovers! Ava here, and I’m about to let you in on a little secret: you can have your creamy, comforting pasta and still feel good about it. I’m talking about my High Protein Creamy Beef Pasta. If you’re anything like me, the words ‘creamy’ and ‘pasta’ probably conjure up images of decadent, calorie-laden dishes that are best reserved for special occasions. But what if I told you that you could enjoy a bowl of creamy, satisfying pasta any night of the week, without the guilt? That’s exactly what this recipe is all about.

Growing up, my mom always made sure we had a balanced meal, but sometimes, I just craved that rich, comforting taste. This recipe is my adult way of honoring that craving while sneaking in some extra protein and nutrients. It’s a dish that’s both indulgent and nourishing – the best of both worlds!

So, if you’re ready to dive into a bowl of creamy, protein-packed goodness, keep reading. I’m going to walk you through every step, share my favorite tips and tricks, and answer all your burning questions. Let’s get cooking!

Why You’ll Love This High Protein Beef Pasta

Okay, let’s be real. There are a million pasta recipes out there. So, why should you try this one? Let me tell you:

  • It’s Packed with Protein: Thanks to the lean ground beef and Greek yogurt, this pasta provides a serious boost of protein. We’re talking grams of protein that will keep you feeling full and satisfied for hours.
  • It’s Creamy Without the Guilt: The secret ingredient? Greek yogurt! It adds a luscious creaminess without all the extra fat and calories of traditional cream sauces.
  • It’s Quick and Easy: This recipe comes together in under 30 minutes, making it perfect for busy weeknights.
  • It’s Customizable: Want to add some veggies? Go for it! Feel like spicing things up? A pinch of red pepper flakes is all you need.
  • It’s Delicious: Seriously, this pasta is so good. The combination of savory beef, tangy tomatoes, and creamy sauce is simply irresistible.

Seriously, *this recipe* is a game-changer. It’s the kind of meal that even my picky eaters devour without complaint. And as a bonus, it’s a fantastic way to use up leftover ground beef!

High Protein Creamy Beef Pasta Ingredients

Here’s what you’ll need to whip up this amazing dish. Don’t worry, it’s all stuff you can easily find at your local grocery store:

  • 8 oz penne pasta
  • 1 lb lean ground beef (Excellent source of protein.)
  • 1 medium onion, chopped
  • 2 cloves garlic, minced (Adds flavor.)
  • 1 can (15 oz) diced tomatoes (with juices)
  • 1 cup low-sodium beef broth (Can substitute chicken or vegetable broth.)
  • 1/2 cup plain Greek yogurt (For creaminess without excess fat.)
  • 1/4 cup grated Parmesan cheese
  • 1 tbsp Italian seasoning
  • Salt and pepper to taste (Adjust for flavor.)
  • Fresh basil or parsley for garnish (Add for color and flavor.)
  • Olive oil (for cooking) (Used to sauté onions and garlic.)
Recipe Image

How to Make High Protein Creamy Beef Pasta: Step-by-Step

Alright, let’s get down to business. Here’s how to make this incredible beef pasta:

  1. Cook the Pasta: Bring a large pot of salted water to a boil. Add the penne pasta and cook according to package directions until al dente. Drain the pasta and set aside.
  2. Brown the Beef: While the pasta is cooking, heat olive oil in a large skillet over medium-high heat. Add the lean ground beef and cook, breaking it up with a spoon, until browned. Drain any excess fat. *The beef* should be nicely browned for the best flavor.
  3. Sauté Aromatics: Add the chopped onion to the skillet and cook until softened, about 3-5 minutes. Add the minced garlic and cook for another minute until fragrant.
  4. Simmer the Sauce: Stir in the diced tomatoes (with juices), beef broth, Italian seasoning, salt, and pepper. Bring the sauce to a simmer and cook for 10-15 minutes, allowing the flavors to meld together. *The sauce* will thicken slightly as it simmers.
  5. Make it Creamy: Remove the skillet from the heat and stir in the Greek yogurt and Parmesan cheese until smooth and creamy. Make sure *it’s* fully incorporated for the best texture.
  6. Combine and Serve: Add the cooked pasta to the skillet and toss to coat with the creamy beef sauce. Garnish with fresh basil or parsley, if desired.

And there you have it! A delicious, high-protein, creamy beef pasta that’s ready in under 30 minutes.

Pro Tips for the Best Beef Pasta

Want to take your beef pasta to the next level? Here are a few of my favorite pro tips:

  • Don’t Overcook the Pasta: Al dente pasta holds its shape better and has a more satisfying bite.
  • Brown the Beef Properly: Don’t overcrowd the skillet when browning the beef. Cook it in batches if necessary to ensure it gets a nice sear.
  • Use High-Quality Ingredients: The better the ingredients, the better the flavor. Opt for fresh herbs, good-quality Parmesan cheese, and lean ground beef.
  • Season Generously: Don’t be afraid to season your pasta with salt and pepper. Taste as you go and adjust accordingly.
  • Add a Splash of Pasta Water: If the sauce is too thick, add a splash of pasta water to loosen it up. The starch in the pasta water will also help the sauce cling to the pasta.

These little tricks make a HUGE difference. Trust me!

Common Mistakes to Avoid

Even the best cooks make mistakes sometimes. Here are a few common pitfalls to avoid when making beef pasta:

  • Overcooking the Pasta: Mushy pasta is a no-go. Cook it al dente!
  • Not Draining the Beef Properly: Excess fat can make the pasta greasy. Drain it well after browning.
  • Adding the Greek Yogurt While the Sauce is Too Hot: The Greek yogurt can curdle if the sauce is too hot. Remove the skillet from the heat before stirring it in.
  • Skipping the Parmesan Cheese: The Parmesan cheese adds a salty, nutty flavor that really elevates the dish. Don’t skip it!
  • Forgetting to Season: Under-seasoned pasta is bland and boring. Season generously with salt and pepper.

Learning from my own *oops* moments has made me a better cook. Hopefully, these tips will help you avoid some of the same mistakes!

Beef Pasta Variations

One of the best things about this recipe is how versatile it is. Here are a few fun variations to try:

  • Spicy Beef Pasta: *Add the* red pepper flakes to the sauce for a spicy kick.
  • Vegetarian Pasta: Substitute the ground beef with lentils or crumbled plant-based meat.
  • Cheesy Beef Pasta: Add extra cheese, such as mozzarella or cheddar, to the sauce.
  • Mushroom Beef Pasta: Sauté sliced mushrooms with the onions and garlic for an earthy flavor.
  • Spinach Beef Pasta: Stir in a few handfuls of fresh spinach at the end for added nutrients. *Like spinach*, it wilts quickly and adds a lovely green color.

Get creative and make this recipe your own! Don’t be afraid to experiment with different flavors and ingredients.

How to Store and Reheat Leftovers

If you have any leftovers (which is rare in my house!), here’s how to store and reheat them:

  • Storage: Store the leftover pasta in an airtight container in the refrigerator for up to 3-4 days.
  • Reheating: Reheat the pasta in the microwave or on the stovetop. If reheating on the stovetop, add a splash of beef broth or water to prevent it from drying out.

Leftovers are great for lunch the next day or a quick and easy dinner!

Frequently Asked Questions (FAQ)

Got questions? I’ve got answers!

  • Can I use a different type of pasta? Absolutely! Feel free to use any type of pasta you like. *Pasta is* so versatile.
  • Can I use ground turkey or chicken instead of beef? Yes, you can. Just adjust the cooking time accordingly.
  • Can I make this recipe ahead of time? Yes, you can make the sauce ahead of time and store it in the refrigerator for up to 2 days. When you’re ready to serve, cook the pasta and combine it with the sauce.
  • Is this recipe gluten-free? Not as written, but you can easily make it gluten-free by using gluten-free pasta.
  • Is this recipe dairy-free? Not as written, but you can substitute the Greek yogurt with a dairy-free alternative and omit the Parmesan cheese.

If you have any other questions, feel free to ask in the comments below!

Serving Suggestions

This beef pasta is delicious on its own, but here are a few serving suggestions to round out your meal:

  • Side Salad: Serve with a simple green salad or a Caesar salad.
  • Garlic Bread: Crusty garlic bread is always a welcome addition to any pasta dish.
  • Roasted Vegetables: Roast some broccoli, Brussels sprouts, or asparagus for a healthy and flavorful side.
  • Wine Pairing: A medium-bodied red wine, such as Chianti or Merlot, pairs well with this dish.

And there you have it! My High Protein Creamy Beef Pasta recipe. I hope you love it as much as I do. Happy cooking!

This *high protein creamy* *beef pasta* *is not* just a meal; it’s an experience. I pour my heart and soul into every recipe, and I hope that shines through in this one. *This recipe* *provides a* delicious and nutritious way to enjoy a classic comfort food. Remember, cooking should be fun and stress-free. So, grab your ingredients, put on some music, and let’s make some magic in the kitchen! *Beef pasta* *is* my go-to for a quick and satisfying weeknight dinner. And with *lean ground beef* and Greek yogurt, you can feel good about what you’re eating. Enjoy!

High Protein Creamy Beef Pasta

Prep Time 10 minutes
Cook Time 25 minutes
Total Time 35 minutes
Servings 4 servings
Calories 450
A delicious and protein-packed pasta dish featuring lean ground beef and a creamy Greek yogurt sauce. This recipe is a healthy and satisfying meal option.

Ingredients

Pasta

  • 8 oz penne pasta

Beef

  • 1 lb lean ground beef (Excellent source of protein.)

Vegetables

  • 1 medium onion, chopped
  • 2 cloves garlic, minced (Adds flavor.)
  • 15 oz diced tomatoes (with juices)
  • 1 cup low-sodium beef broth (Can substitute chicken or vegetable broth.)

Dairy & Seasoning

  • 0.5 cup plain Greek yogurt (For creaminess without excess fat.)
  • 0.25 cup grated Parmesan cheese
  • 1 tbsp Italian seasoning
  • to taste Salt and pepper (Adjust for flavor.)

Garnish & Cooking

  • Fresh basil or parsley (Add for color and flavor.)
  • Olive oil (Used to sauté onions and garlic.)

Notes

For a spicier dish, add a pinch of red pepper flakes.
Calories: 450kcal
Cost: $12
Course: Main Course
Cuisine: Italian
Keyword: Beef
pin

Hey there! Ava here, welcoming you back to my little corner of the internet where delicious meets nutritious. Today, we’re diving headfirst into a recipe that’s become a staple in my Seattle kitchen – Easy & Healthy Protein Banana Muffins. If you’re anything like me, you’re always on the lookout for snacks that are quick, satisfying, and won’t derail your healthy eating goals. And trust me, these muffins check all the boxes.

I’ve always loved baking, but sometimes the traditional recipes can feel a bit…indulgent. That’s where these protein banana muffins come in. They’re packed with goodness, naturally sweetened with ripe bananas, and give you that boost of protein to power through your day. Plus, they’re incredibly easy to make – even on those mornings when you’re running on fumes. I’m telling you, you need this recipe in your life.

Growing up, my mom always had a batch of banana bread or muffins on hand. It was her way of using up those overripe bananas that were starting to look a little sad on the counter. These protein banana muffins are my modern, healthier take on that classic comfort food. They’re perfect for a quick breakfast, a post-workout snack, or even a guilt-free dessert. And the best part? The kids absolutely love them, which is always a win in my book!

Why You’ll Love This Recipe

Okay, let’s get down to brass tacks. Why should you spend your precious time baking these muffins? Well, let me count the ways:

  • Quick & Easy: From start to finish, these muffins come together in under 30 minutes. Perfect for busy mornings or last-minute snack cravings.
  • Healthy & Nutritious: Packed with protein, fiber, and the natural sweetness of bananas, these muffins are a guilt-free treat.
  • Versatile: The base recipe is fantastic on its own, but you can easily customize it with your favorite add-ins like chocolate chips, nuts, or berries.
  • Kid-Friendly: Even the pickiest eaters will gobble these up. The natural sweetness of the bananas makes them a hit with kids of all ages.
  • Great for Meal Prep: These muffins store well, making them perfect for meal prepping. Bake a batch on Sunday and enjoy them all week long.

Honestly, what’s not to love? This recipe so yummy and satisfying that you’ll wonder why you didn’t try it sooner. You can even adapt this recipe up to your own dietary needs and preferences. I’ve tried so many variations, and they all turn out great!

Protein Banana Muffins Ingredients

Here’s what you’ll need to whip up a batch of these delightful muffins:

  • 2 ripe bananas, mashed
  • 2 scoops vanilla protein powder
  • 1/2 cup rolled oats
  • 1/4 cup milk (dairy or non-dairy)
  • 1 egg
  • 1 teaspoon baking powder
  • 1/2 teaspoon cinnamon
  • Optional: chocolate chips, nuts, or berries

You know, the beauty of this recipe is that you probably already have most of these ingredients in your pantry. And if not, they’re easy to find at any grocery store. Let’s talk a little more about why each of these ingredients is important:

  • Ripe Bananas: The riper, the better! Overripe bananas are sweeter and easier to mash, giving your muffins that perfect moist texture and natural sweetness.
  • Vanilla Protein Powder: This adds a boost of protein and a hint of vanilla flavor. You can use your favorite brand. Whey, casein, or plant-based protein powders all work well.
  • Rolled Oats: These add fiber and a slightly chewy texture to the muffins. They also help to bind the ingredients together.
  • Milk: Use dairy or non-dairy milk, depending on your preference. Almond milk, soy milk, or regular milk all work great.
  • Egg: This helps to bind the ingredients and adds moisture to the muffins.
  • Baking Powder: This is what makes the muffins rise and become light and fluffy.
  • Cinnamon: This adds a warm, comforting flavor that pairs perfectly with bananas.
  • Optional Add-Ins: Chocolate chips, nuts, or berries are all great additions to these muffins. Get creative and use your favorites!
Recipe Image

How to Make Protein Banana Muffins: Step-by-Step Instructions

Alright, let’s get baking! Here’s how to make these protein banana muffins:

  1. Preheat and Prep: Preheat oven to 375°F (190°C). Line a muffin tin with paper liners or grease well.
  2. Mash the Bananas: In a large bowl, mash the bananas until smooth. A few small chunks are okay.
  3. Combine Ingredients: Add protein powder, rolled oats, milk, egg, baking powder, and cinnamon to the bowl. Mix until well combined. Be careful not to overmix.
  4. Add Optional Ingredients: If desired, fold in chocolate chips, nuts, or berries.
  5. Fill the Muffin Tin: Spoon the batter into the prepared muffin tin, filling each cup about 2/3 full.
  6. Bake: Bake for 18-20 minutes, or until a toothpick inserted into the center comes out clean.
  7. Cool: Let cool in the muffin tin for a few minutes before transferring to a wire rack to cool completely.

And that’s it! You’ve just made a batch of delicious and healthy protein banana muffins. Now, let’s dive into some pro tips to make sure your muffins turn out perfectly every time.

Pro Tips for Perfect Protein Banana Muffins

Here are a few tricks I’ve learned along the way to ensure your muffins are always moist, fluffy, and delicious:

  • Use Ripe Bananas: Seriously, the riper the better. Those brown, spotty bananas are your best friend. They’re sweeter and easier to mash, which means more flavor and moisture in your muffins.
  • Don’t Overmix: Overmixing can lead to tough muffins. Mix the ingredients until just combined. A few lumps are okay.
  • Measure Carefully: Especially when it comes to the protein powder. Too much protein powder can make the muffins dry.
  • Use a Muffin Liner: This makes it easier to remove the muffins from the tin and prevents them from sticking.
  • Test for Doneness: Insert a toothpick into the center of a muffin. If it comes out clean, the muffins are done.

I’ve found that following these tips consistently leads to the best results. I’m always experimenting, but these guidelines are my go-to for foolproof muffins. The kids even help out now, it’s so easy!

Common Mistakes to Avoid

Even the most seasoned bakers make mistakes sometimes. Here are a few common pitfalls to watch out for when making these muffins:

  • Using Underripe Bananas: This will result in muffins that are less sweet and have a less pronounced banana flavor.
  • Overmixing the Batter: This can lead to tough, dense muffins. Mix until just combined.
  • Overbaking: This will result in dry muffins. Keep a close eye on the muffins while they’re baking and test for doneness with a toothpick.
  • Using Too Much Protein Powder: This can make the muffins dry and dense. Measure carefully.
  • Not Greasing the Muffin Tin: If you’re not using muffin liners, make sure to grease the muffin tin well to prevent the muffins from sticking.

I’ve made all of these mistakes at one point or another, so don’t feel bad if you do too! The important thing is to learn from them and keep baking.

Variations to Try

One of the things I love most about this recipe is how versatile it is. Here are a few variations to try:

  • Chocolate Chip Protein Banana Muffins: Fold in 1/2 cup of chocolate chips to the batter.
  • Nutty Protein Banana Muffins: Add 1/4 cup of chopped nuts, such as walnuts, pecans, or almonds.
  • Berry Protein Banana Muffins: Fold in 1/2 cup of fresh or frozen berries, such as blueberries, raspberries, or strawberries.
  • Peanut Butter Protein Banana Muffins: Add 2 tablespoons of peanut butter to the batter.
  • Almond Flour Protein Banana Muffins: Substitute 1/4 cup of the rolled oats with almond flour for a slightly different texture and flavor.

Feel free to get creative and experiment with your own variations! The possibilities are endless. You can even add a sprinkle of cinnamon sugar on top before baking for a little extra sweetness. It’s a simple touch that makes them feel extra special. The best banana muffin is one that you customize to your own tastes.

How to Store Protein Banana Muffins

These muffins store well, making them perfect for meal prep or a quick snack on the go:

  • Room Temperature: Store in an airtight container at room temperature for up to 3 days.
  • Refrigerator: Store in an airtight container in the refrigerator for up to 1 week.
  • Freezer: Wrap individually in plastic wrap and store in a freezer bag for up to 2 months. Thaw at room temperature before serving.

I often double or triple the batch and freeze some for later. It’s so convenient to have a healthy snack on hand whenever I need it.

Frequently Asked Questions (FAQ)

Here are some common questions about these protein banana muffins:

  • Can I use a different type of protein powder? Yes, you can use any type of protein powder you like. Just keep in mind that different protein powders may have different textures and flavors, so the muffins may turn out slightly different.
  • Can I make these muffins gluten-free? Yes, you can make these muffins gluten-free by using gluten-free rolled oats and almond flour.
  • Can I make these muffins vegan? Yes, you can make these muffins vegan by using a plant-based protein powder, non-dairy milk, and a flax egg (1 tablespoon of flaxseed meal mixed with 3 tablespoons of water).
  • Can I add sugar to these muffins? These muffins are naturally sweetened with bananas, but if you prefer a sweeter muffin, you can add a tablespoon or two of honey, maple syrup, or sugar to the batter.
  • Why are my muffins dry? This could be due to overbaking or using too much protein powder. Make sure to measure carefully and test for doneness with a toothpick.

If you have any other questions, feel free to leave a comment below! I’m always happy to help.

Serving Suggestions

These muffins are delicious on their own, but here are a few serving suggestions to take them to the next level:

  • With a dollop of Greek yogurt and a drizzle of honey.
  • With a smear of peanut butter or almond butter.
  • Alongside a cup of coffee or tea.
  • As a post-workout snack with a protein shake.
  • As a healthy dessert.

No matter how you choose to serve them, I hope you enjoy these Easy & Healthy Protein Banana Muffins as much as I do! They’re a staple in my kitchen for a reason – they’re easy to make, healthy, and incredibly delicious. So go ahead, give them a try and let me know what you think!

Protein Banana Muffins

Prep Time 10 minutes
Cook Time 20 minutes
Total Time 30 minutes
Servings 12 muffins
Calories 120
These protein banana muffins are a healthy and delicious way to start your day or enjoy as a post-workout snack. They're packed with protein and fiber, and naturally sweetened with ripe bananas.

Ingredients

Ingredients

  • 2 ripe bananas (mashed)
  • 2 scoops vanilla protein powder
  • 1/2 cup rolled oats
  • 1/4 cup milk (dairy or non-dairy)
  • 1 egg
  • 1 teaspoon baking powder
  • 1/2 teaspoon cinnamon
  • chocolate chips, nuts, or berries (Optional)

Instructions 

  • Preheat oven to 375°F (190°C). Line a muffin tin with paper liners or grease well.
  • In a large bowl, mash the bananas.
  • Add protein powder, rolled oats, milk, egg, baking powder, and cinnamon to the bowl. Mix until well combined.
  • If desired, fold in chocolate chips, nuts, or berries.
  • Spoon the batter into the prepared muffin tin, filling each cup about 2/3 full.
  • Bake for 18-20 minutes, or until a toothpick inserted into the center comes out clean.
  • Let cool in the muffin tin for a few minutes before transferring to a wire rack to cool completely.

Notes

For a richer flavor, use brown butter instead of regular butter.
Calories: 120kcal
Cost: $8
Course: Breakfast, Snack
Cuisine: American
Keyword: Banana
pin

Hey there! Ava here, welcoming you into my little corner of the internet where healthy meets absolutely delicious. If you’re anything like me, you’ve probably battled late-night cravings while trying to stick to a healthy lifestyle. That’s where this High Protein Cottage Cheese Dessert comes in. It’s creamy, dreamy, and packed with protein, making it the perfect guilt-free indulgence. I’ve been making variations of this for years, and it’s become my go-to for satisfying my sweet tooth without derailing my fitness goals. Trust me, this isn’t your grandma’s cottage cheese!

Growing up, cottage cheese was always a staple in our fridge, but not necessarily something I craved. It wasn’t until I started experimenting with healthier dessert options that I realized its incredible potential. Now, *it’s* the base for *my* favorite quick dessert. *If you* haven’t tried it this way, *you’re* in for a treat! I promise, *it doesn’t* taste like *cottage cheese* at all.

This recipe is perfect *if you’re* looking for a quick, easy, and healthy dessert option. *It’s* customizable, so *you can* tailor it to your specific tastes and dietary needs. Whether you’re a fitness enthusiast, a busy parent, or just someone who loves a good dessert, this recipe is for you. Plus, *it’s* so simple that even the most novice cook *can* whip it up in minutes. So, let’s dive in and discover how to transform humble *cottage cheese* into a decadent delight!

Why You’ll Love This High Protein Cottage Cheese Dessert

Okay, let’s get real. There are tons of dessert recipes out there, so why choose this one? Here’s why I think you’ll fall in love with it:

  • High Protein: Each serving is packed with protein, thanks to the cottage cheese, which helps keep you full and satisfied. This makes it a great option for curbing those late-night cravings.
  • Quick and Easy: From start to finish, this dessert takes less than 10 minutes to prepare. No baking required!
  • Customizable: You can easily adapt this recipe to suit your tastes and dietary needs. Add different flavorings, toppings, or sweeteners to create your perfect dessert.
  • Healthy: Unlike many desserts, this one is low in sugar and high in nutrients. It’s a guilt-free way to satisfy your sweet tooth.
  • Delicious: Let’s face it, the most important reason is that it tastes amazing! The creamy texture and delicious flavor will leave you wanting more. *That’s* the goal, right?

Ingredients You’ll Need

Here’s what you’ll need to make this magical dessert. Don’t worry, *it’s* all simple stuff!

  • Full-fat or low-fat cottage cheese (use what fits your goals)
  • Honey or maple syrup for sweetness
  • Vanilla extract for flavor depth
  • Cocoa powder or melted dark chocolate (optional but recommended)
  • Pinch of salt to balance everything
  • Fresh berries or banana slices for topping
  • Nut butter or crushed nuts for texture
  • Optional protein powder *if you want* an extra boost
Recipe Image

Step-by-Step Instructions: From Fridge to Fantastic

Ready to get started? Here’s how to make this amazing dessert:

  1. Step 1: Blend the Cottage Cheese Until Smooth

    Add the *cottage cheese* to a high-speed blender or food processor. Blend for at least 30–45 seconds until completely smooth with no visible curds left. This step matters more than anything else, so *don’t* rush *it*.

    *If the texture* looks grainy, keep going. *Cottage cheese* transforms slowly, and stopping too early is the number one reason people think they *don’t like* it in desserts. *The texture* is key here!

  2. Step 2: Add Sweetener and Flavor

    Once *the texture* looks creamy, add your sweetener and vanilla extract. Start small and taste as you go because it’s easier to add than fix over-sweetening.

    *If you’re* using cocoa powder or melted *chocolate mousse*, add it here and blend again until fully incorporated. The mixture should look glossy and thick, not runny or chalky. *It’s* totally fine to use *protein powder* at this step.

  3. Step 3: Adjust Texture and Taste

    At this point, check the consistency. *If it* feels too thick, add a splash of milk or almond milk and blend again. *If it’s* too thin, a spoon of Greek yogurt or *protein powder* thickens *it* right up.

    Taste again and adjust salt or sweetness. That tiny pinch of salt makes a noticeable difference, even in desserts. *That’s* my secret ingredient!

  4. Step 4: Chill or Serve Immediately

    *You can* eat *it* right away for a soft, *mousse-like texture*. *If you want* something more cheesecake-*like*, pop *it in the fridge* for 30–60 minutes.

    Chilling helps the flavors settle and gives *it* a firmer bite. Both ways work, so *it* really depends on your mood.

  5. Step 5: Add Toppings and Finish

    Top with berries, crushed nuts, chocolate shavings, or a drizzle of nut butter. Keep *it* simple or go all in, depending on what *you’re* craving.

    Serve *it* in a bowl, jar, or even layered *like a* parfait. *It’s* flexible enough to look fancy with almost no effort.

Pro Tips for the Perfect Cottage Cheese Dessert

Here are a few extra tips to ensure your dessert turns out perfectly every time:

  • Use High-Quality Cottage Cheese: The better the cottage cheese, the better the final product. Look for a brand with a creamy texture and a clean flavor.
  • Don’t Skip the Blending: This is the most important step! Make sure to blend the cottage cheese until it’s completely smooth to avoid any grainy texture.
  • Taste as You Go: Adjust the sweetness and flavorings to your liking. Don’t be afraid to experiment and find what works best for you.
  • Chill for Best Results: While you can eat it right away, chilling the dessert for at least 30 minutes allows the flavors to meld together and creates a firmer texture.
  • Get Creative with Toppings: The possibilities are endless! Use your favorite fruits, nuts, seeds, or even a sprinkle of chocolate chips to add extra flavor and texture.

Common Mistakes to Avoid

Even though this recipe is super simple, here are a few common mistakes to watch out for:

  • Not Blending Enough: This is the biggest culprit of grainy cottage cheese desserts. Make sure to blend until completely smooth.
  • Over-Sweetening: Start with a small amount of sweetener and add more as needed. It’s easier to add than to take away.
  • Using Old Cottage Cheese: Make sure your cottage cheese is fresh for the best flavor and texture.
  • Skipping the Salt: A pinch of salt helps to balance the sweetness and enhance the other flavors.
  • Not Chilling: While not essential, chilling the dessert allows the flavors to meld together and creates a better texture.

Delicious Variations to Try

The beauty of this recipe is that it’s so versatile! Here are a few variations to try:

  • Chocolate Peanut Butter: Add cocoa powder and peanut butter for a decadent treat.
  • Berry Blast: Mix in fresh or frozen berries for a fruity and refreshing dessert.
  • Lemon Cheesecake: Add lemon zest and a touch of lemon juice for a tangy twist.
  • Cinnamon Roll: Add cinnamon and a swirl of cream cheese frosting for a cozy dessert.
  • Coffee Craze: Add a shot of espresso or a teaspoon of instant coffee for a caffeinated treat.

How to Store Your Cottage Cheese Dessert

If you have leftovers (which is rare in my house!), here’s how to store them:

  • In the Fridge: Store the dessert in an airtight container in the fridge for up to 3 days.
  • Freezing: I don’t recommend freezing this dessert, as *the texture* may change. *It’s not* the same after thawing.

Frequently Asked Questions (FAQ)

Got questions? I’ve got answers!

  • Can I use fat-free cottage cheese?

    Yes, *you can*, but keep in mind that *the texture* may be slightly different. Full-fat cottage cheese will result in a creamier dessert.

  • Can I use a different sweetener?

    Absolutely! Maple syrup, agave, stevia, or any other sweetener will work. Just adjust the amount to your liking.

  • Can I add protein powder?

    Yes, *you can* add *protein powder* for an extra protein boost. I recommend using a vanilla or chocolate flavor. *It’s* a great way to sneak in extra nutrients!

  • Can I make this vegan?

    Yes, *you can* use vegan *cottage cheese* and a plant-based sweetener. *It’s* a delicious and healthy option for vegans.

  • Why is my dessert grainy?

    This usually happens when the *cottage cheese* isn’t blended enough. Make sure to blend until completely smooth.

Serving Suggestions: Elevate Your Dessert Game

Looking for ways to make this dessert even more special? Here are a few serving suggestions:

  • Parfait Style: Layer the dessert with granola and fresh berries for a beautiful and delicious parfait.
  • Chocolate Heaven: Drizzle with melted dark chocolate and sprinkle with sea salt for a decadent treat.
  • Nutty Delight: Top with crushed nuts and a drizzle of nut butter for added texture and flavor.
  • Tropical Twist: Add diced mango and coconut flakes for a tropical-inspired dessert.
  • Simple and Sweet: Just enjoy it as is! *It’s* delicious even without toppings.

So there you have it—my go-to High Protein Cottage Cheese Dessert Recipe. *It’s* a game-changer for satisfying your sweet tooth without the guilt. I hope *you’ll* give it a try and let me know what you think! Remember, cooking is all about experimenting and having fun, so don’t be afraid to get creative and make this recipe your own. Happy cooking!

High Protein Cottage Cheese Dessert Recipe

Prep Time 5 minutes
Total Time 5 minutes
Servings 2 servings
Calories 250
A delicious and healthy dessert option packed with protein. This recipe transforms cottage cheese into a creamy and satisfying treat.

Ingredients

Ingredients

  • Full-fat or low-fat cottage cheese (use what fits your goals)
  • Honey or maple syrup (for sweetness)
  • Vanilla extract (for flavor depth)
  • Cocoa powder or melted dark chocolate (optional but recommended)
  • Pinch of salt (to balance everything)
  • Fresh berries or banana slices (for topping)
  • Nut butter or crushed nuts (for texture)
  • Optional protein powder (if you want an extra boost)

Instructions 

  • Blend the Cottage Cheese Until Smooth
  • Add Sweetener and Flavor
  • Adjust Texture and Taste
  • Chill or Serve Immediately
  • Add Toppings and Finish

Notes

For a smoother texture, use a high-powered blender and blend for a longer time.
Calories: 250kcal
Cost: $8
Course: Dessert
Cuisine: American
Keyword: cottage cheese
pin