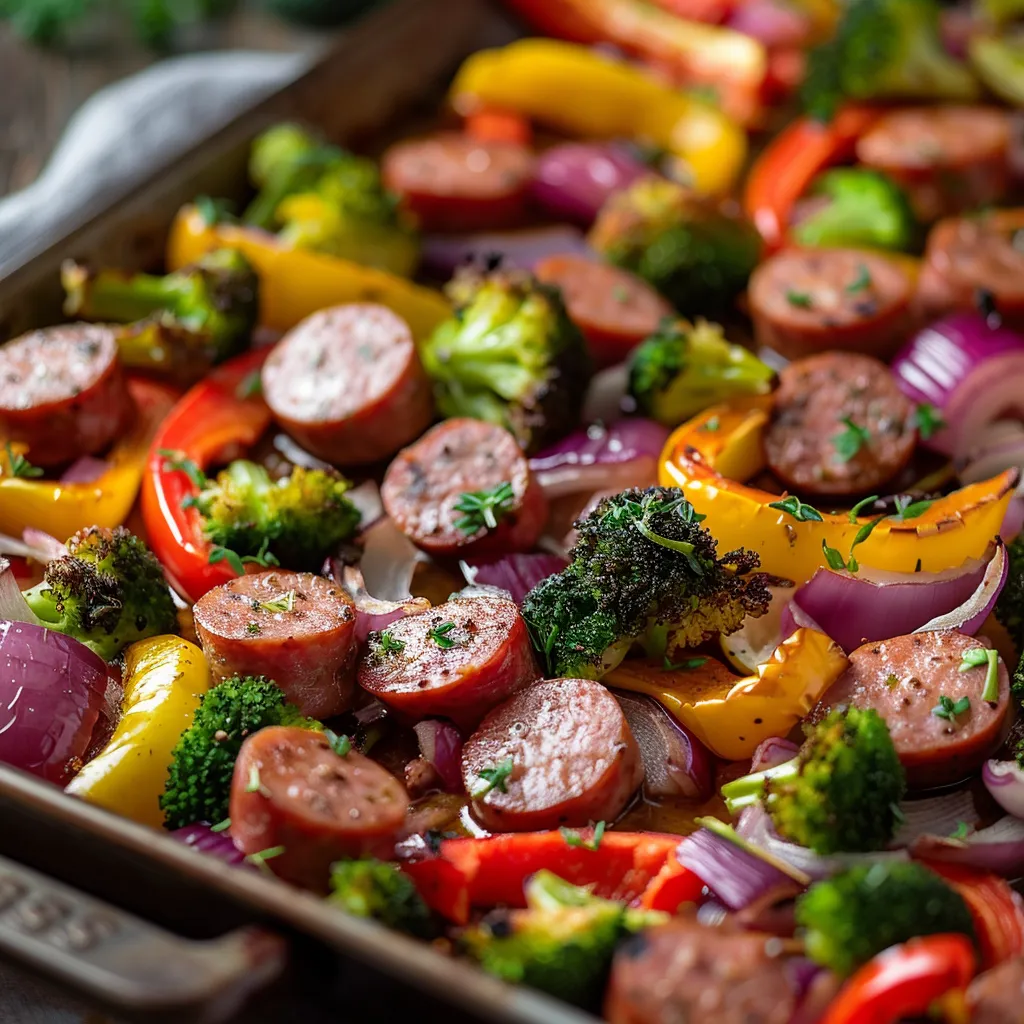
The One-Pan Dinner That Feels Like Home: Sheet-Pan Sausage & Veggies
Welcome to my kitchen! If you’re anything like me, you know that sometimes the best meals are the ones that don’t require a slew of pots and pans. Enter the Sheet-Pan Sausage & Veggies One-Pan Dinner. This dish is not only a delightful combination of flavors but also a celebration of simplicity—perfect for those busy weeknights when the last thing you want to do is spend hours in the kitchen.
As the aroma of roasted sausage mingling with vibrant veggies wafts through your home, you’ll find yourself transported to a place of comfort and warmth. This dish is my go-to for those evenings when I crave something hearty yet easy to prepare. Let’s dive into why this recipe is a must-try!
Why is Sheet-Pan Sausage & Veggies a Must-Try?
First and foremost, this dish is a true lifesaver. It’s the kind of recipe that practically cooks itself. You toss everything onto a single sheet pan, pop it in the oven, and let the magic happen. The best part? You’ll only have one pan to clean! Here are a few reasons why you’ll love this dish:
- Effortless preparation: With minimal chopping and no complicated techniques, this meal is incredibly straightforward.
- Flavor explosion: The combination of smoked sausage and fresh vegetables creates a symphony of flavors that dances on your palate.
- Healthy and hearty: Packed with protein and nutrients, it’s not just comforting but also nourishing.
- Perfect for meal prep: Make a big batch and have leftovers for lunch or dinner throughout the week!
Sheet Pan Sausage & Veggies Ingredients
To create this delightful dish, you’ll need the following ingredients:
- 1 pound smoked sausage, sliced
- 2 cups broccoli florets
- 2 cups bell peppers, sliced
- 1 cup red onion, sliced
- 2 tablespoons olive oil
- 1 teaspoon garlic powder
- 1 teaspoon Italian seasoning
- Salt and pepper to taste
These ingredients come together beautifully, creating a colorful and satisfying meal that will impress your family and friends.
Step-by-Step Instructions for Sheet Pan Sausage & Veggies
Ready to get cooking? Follow these simple steps:
Step 1: Preheat the Oven
Start by preheating your oven to 400°F (200°C). This step is crucial for achieving that perfectly roasted flavor and tender texture in your meal.
Step 2: Prepare the Ingredients
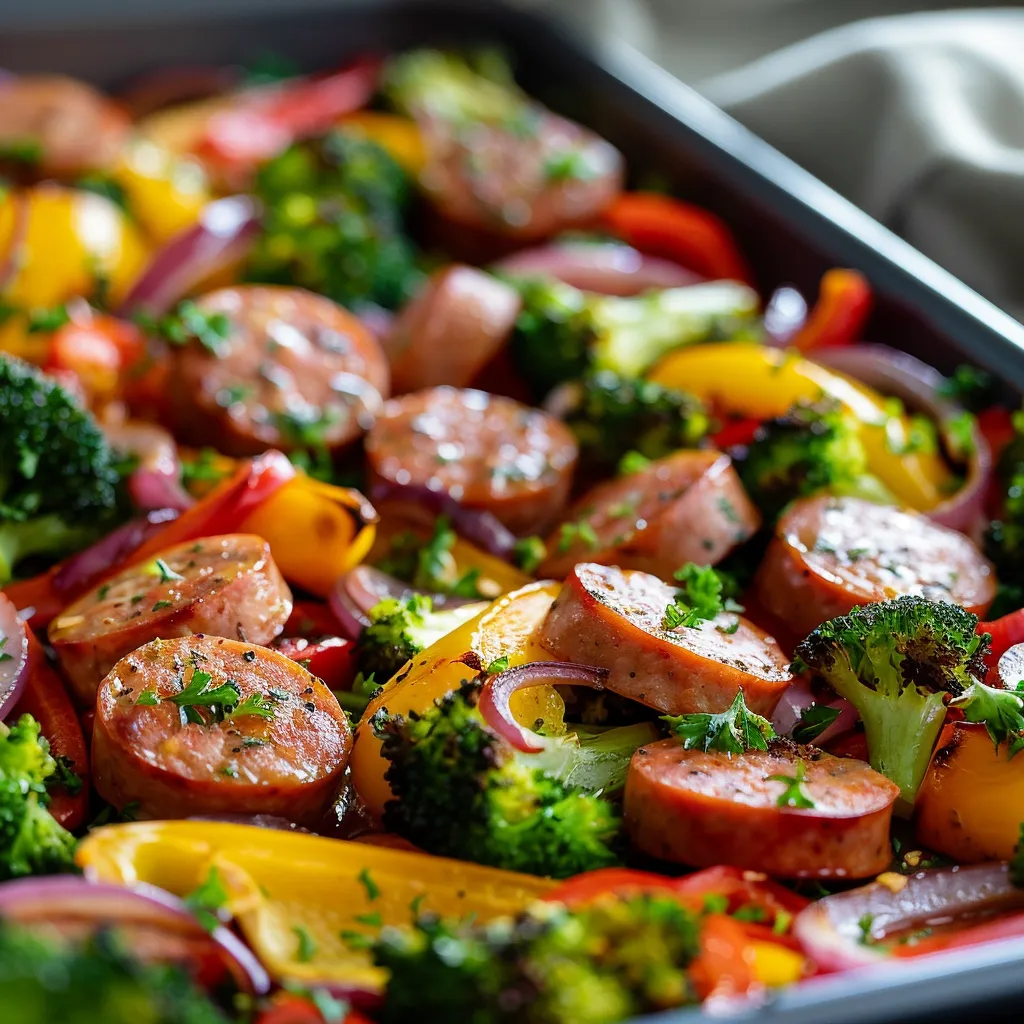
On a large sheet pan, combine the sliced sausage, broccoli florets, sliced bell peppers, and red onion. The vibrant colors alone will make you excited to eat!
Step 3: Season Generously
Drizzle the olive oil over the mixture and sprinkle with garlic powder, Italian seasoning, salt, and pepper. Don’t be shy with the seasoning; it’s what makes this dish sing!
Step 4: Toss and Coat
Using your hands or a spatula, toss everything together until well coated. You want every piece of sausage and veggie to get a good dose of that olive oil and seasoning.
Step 5: Spread Evenly
Spread the mixture in a single layer on the sheet pan. This is crucial for even cooking and caramelization, which adds depth to the flavors.
Step 6: Bake to Perfection
Place the sheet pan in the preheated oven and bake for 25-30 minutes. Be sure to stir halfway through to ensure everything cooks evenly. You’ll know it’s done when the veggies are tender and the sausage is heated through, with a lovely golden crust.
Step 7: Serve Warm
Remove from the oven and serve warm. This dish is delightful on its own, but feel free to pair it with some crusty bread or a fresh salad for an extra touch.
Expert Tips for Sheet Pan Sausage & Veggies
To ensure your dish turns out perfectly every time, keep these tips in mind:
- Don’t overcrowd the pan: Give your ingredients some space to roast; this promotes even cooking and caramelization.
- Cut vegetables uniformly: Chop your veggies into similar-sized pieces to guarantee they cook evenly.
- Experiment with seasonings: Feel free to add your favorite herbs or spices to elevate the flavors even further.
- Swap in seasonal vegetables: Asparagus, Brussels sprouts, or even sweet potatoes can add variety and excitement to this dish!
Make Ahead Options
Looking to save time? You can chop all your vegetables and slice the sausage up to 24 hours in advance. Store them in an airtight container in the refrigerator, and when you’re ready to cook, just toss them with olive oil and seasonings before baking. This makes weeknight dinners a breeze!
How to Store and Freeze Sheet Pan Sausage & Veggies
Leftover Sheet Pan Sausage & Veggies are a fantastic option for meal prep. Here’s how to store and freeze your delicious dish:
Storage
- Fridge: Store leftovers in an airtight container in the fridge for up to 3 days. Simply reheat in the oven or microwave when you’re ready to enjoy.
- Freezer: If you want to freeze your dish, place cooled leftovers in a freezer-safe container or zip-top bag. They can last for up to 3 months. When you’re ready to eat, thaw overnight in the fridge before reheating.
Reheating
To reheat, warm in the oven at 350°F (175°C) for about 15-20 minutes or until heated through. You can also microwave individual portions for a quick meal.
Sheet Pan Sausage & Veggies Variations
One of the best things about this recipe is its versatility! Here are some fun variations to try:
- Switch the sausage: Use turkey sausage or chicken sausage for a lighter option.
- Add different veggies: Carrots, zucchini, or even cherry tomatoes can add new flavors and textures.
- Spice it up: Add a pinch of red pepper flakes for a kick or some balsamic glaze before serving for a sweet tang.
What to Serve with Sheet Pan Sausage & Veggies
This dish is delicious on its own but pairs wonderfully with a variety of sides:
- Creamy Mashed Potatoes: Fluffy and buttery, they soak up the savory juices beautifully.
- Garlic Bread: Perfect for mopping up those delicious drippings!
- Mixed Green Salad: A fresh salad with a tangy vinaigrette balances the richness of the dish.
- Roasted Brussels Sprouts: A crispy side that complements the flavors of the sausage.
Sheet Pan Sausage & Veggies Recipe FAQs
Can I substitute different vegetables?
Absolutely! Feel free to swap in any seasonal vegetables you enjoy. Just keep in mind their cooking times to ensure everything cooks evenly.
What if my veggies are browning too quickly?
If you notice your veggies are browning too fast, try lowering the oven temperature to 375°F (190°C) and check them more frequently.
How do I choose ripe vegetables for this recipe?
Look for firm and vibrant bell peppers and zucchinis with shiny skins. For broccoli, choose florets that are bright green without any yellowing.
Savor Every Bite with Sheet Pan Sausage & Veggies Delight
There you have it! The Sheet-Pan Sausage & Veggies One-Pan Dinner is not just a meal; it’s an experience. The warmth of the dish, the delightful aroma filling your home, and the joy of sharing it with loved ones make this recipe truly special. So, gather your ingredients, preheat that oven, and let’s make something magical together!
Whether you’re cooking for family, impressing friends, or simply treating yourself, I hope this recipe brings a little extra warmth and comfort to your table. Happy cooking, my friend!
Sheet-Pan Sausage & Veggies One-Pan Dinner
Ingredients
Main
- 1 pound smoked sausage, sliced
- 2 cups broccoli florets
- 2 cups bell peppers, sliced
- 1 cup red onion, sliced
- 2 tablespoons olive oil
- 1 teaspoon garlic powder
- 1 teaspoon italian seasoning
- to taste salt and pepper salt and pepper
Instructions
- Preheat oven to 400°F (200°C).
- Combine sausage, broccoli, bell peppers, and red onion on a sheet pan.
- Drizzle with olive oil, sprinkle garlic powder, Italian seasoning, salt, and pepper, then toss to coat.
- Spread in a single layer and bake for 25-30 minutes, stirring halfway.
- Remove from oven and serve warm.
Notes
Loved this recipe? Save it to your favorite Pinterest board so you can easily find it later! It’s the perfect way to keep all your sweet ideas in one place. ✨