Author

Ava

Browsing

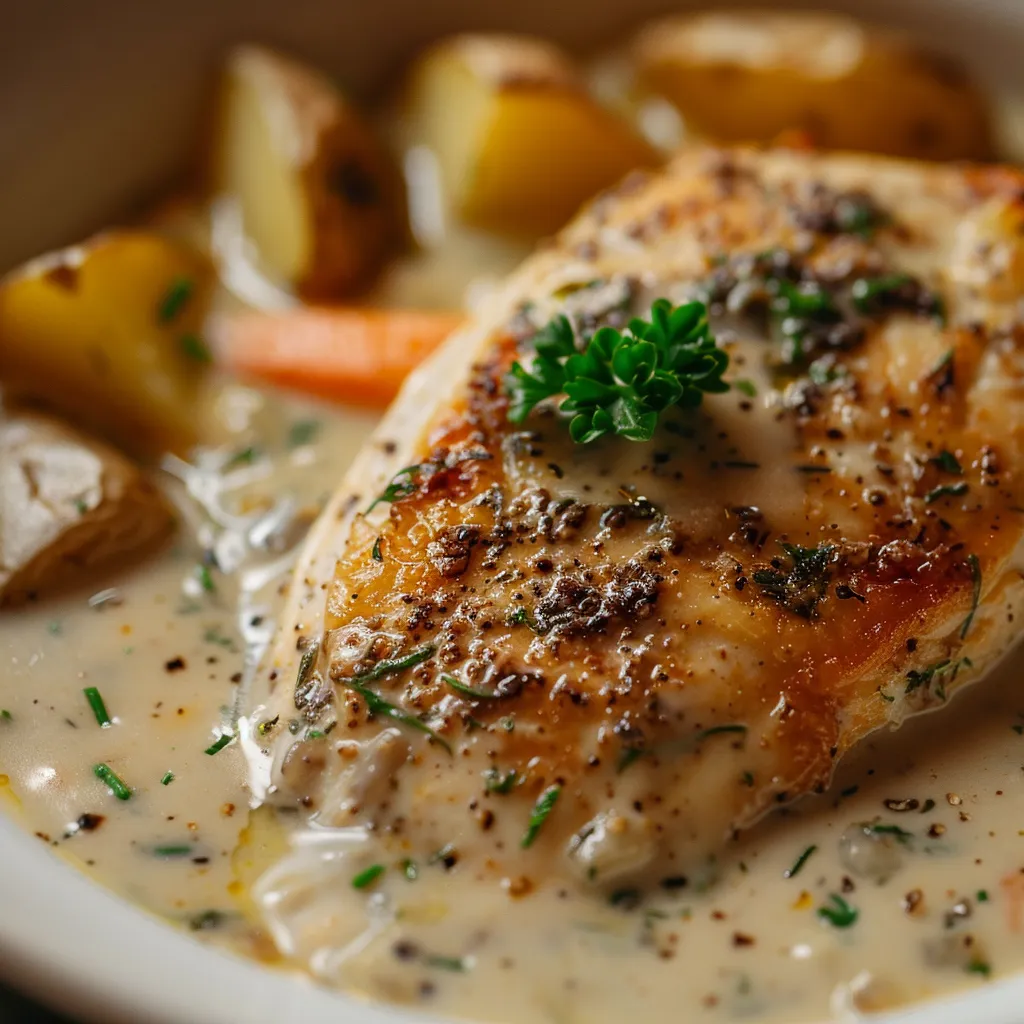
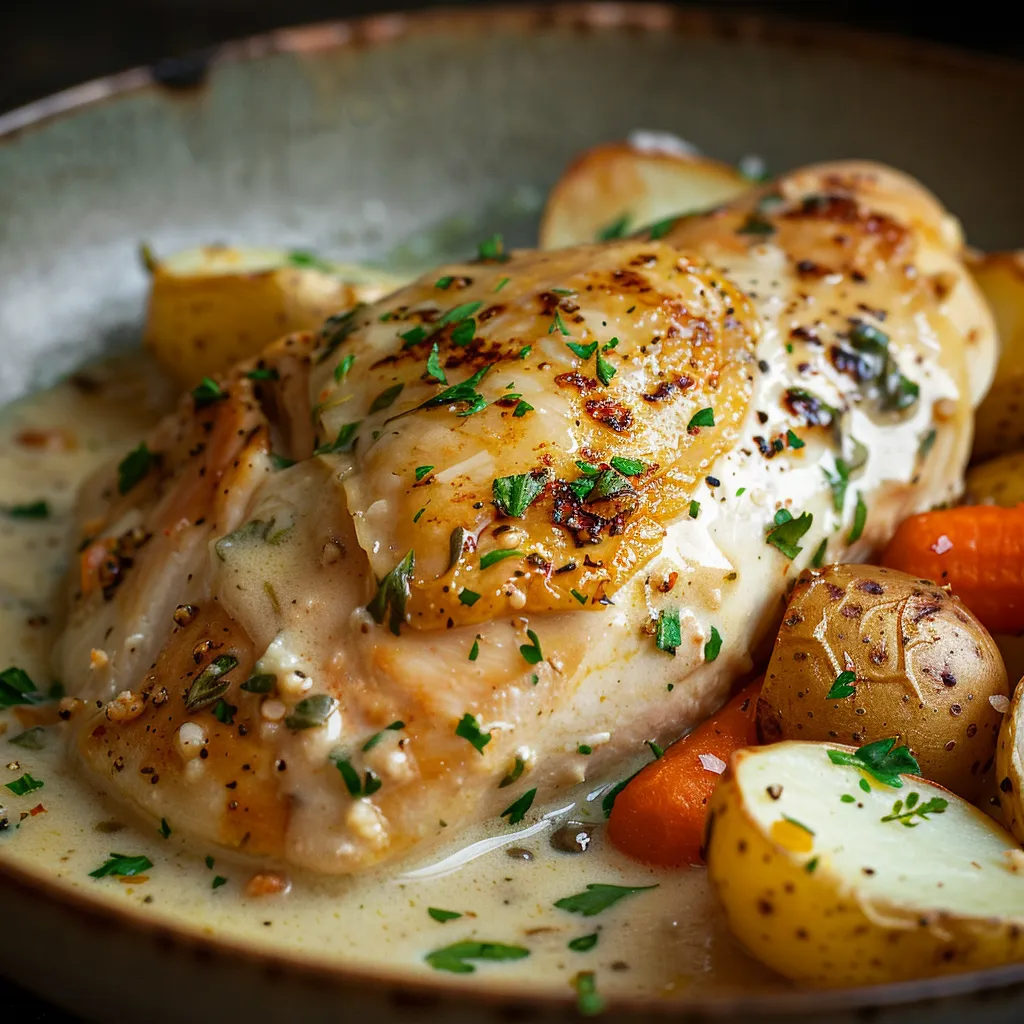
A Cozy Evening with Creamy Herb Chicken: The Dinner That Feels Like Home

There’s something magical about cooking a meal that feels like a warm hug. When I think of comfort food, my mind immediately drifts to Creamy Herb Chicken with Mashed Potatoes and Glazed Carrots. This dish has been a staple in my kitchen for years, a recipe that not only fills the belly but also nourishes the soul. It’s the kind of meal that you can whip up for a cozy night in or impress guests at a dinner party. Join me as we dive into this delightful recipe that brings family and friends together around the dinner table.

Why You’ll Love This Recipe

  • Complete Comfort Meal: This dish brings together protein, carbs, and veggies in one stunning plate.
  • Easy Yet Impressive: Perfect for weeknight dinners, yet elegant enough for special occasions.
  • Customizable: You can easily tweak the ingredients to suit your taste or dietary needs.
  • Flavors that Sing: The creamy herb sauce elevates the chicken, while buttery mashed potatoes and sweet glazed carrots create a delightful balance.

Ingredients You’ll Need

A delicious plate of creamy herb chicken, fluffy mashed potatoes, and vibrant glazed carrots, beautifully arranged.

For the Creamy Herb Chicken:

  • 4 boneless, skinless chicken breasts
  • 1 cup heavy cream
  • 1 cup chicken broth
  • 2 tablespoons olive oil
  • 2 cloves garlic, minced
  • 1 teaspoon dried thyme
  • 1 teaspoon dried rosemary
  • Salt and pepper to taste

For the Mashed Potatoes:

  • 4 large potatoes, peeled and quartered
  • 1/2 cup milk
  • 4 tablespoons butter
  • Salt and pepper to taste

For the Glazed Carrots:

  • 1 pound carrots, sliced
  • 2 tablespoons brown sugar
  • 1 tablespoon butter (for carrots)
  • Fresh parsley for garnish (optional)

How to Make the Dish

1. Start with the Mashed Potatoes

Begin by bringing a large pot of salted water to a boil. Carefully add the quartered potatoes and let them simmer until tender—this usually takes about 15-20 minutes. You’ll know they’re ready when a fork easily slides through them. Once cooked, drain the potatoes and return them to the pot.

Next, add the milk and butter. As you mash, the warm butter and milk will transform the potatoes into a creamy dream. Don’t rush this step! The secret to buttery mashed potatoes lies in the texture—smooth and velvety. Season with salt and pepper to taste. Cover to keep warm while you prepare the chicken and carrots.

2. Make the Glazed Carrots

In a separate pan, melt 1 tablespoon of butter over medium heat. Add the sliced carrots and sprinkle with brown sugar. Stir to coat the carrots in the buttery sweetness. Cook for about 5-7 minutes, stirring occasionally, until the carrots are tender and beautifully glazed. If you’re feeling adventurous, a pinch of cinnamon adds a delightful twist. Once ready, remove from heat and set aside.

3. Cook the Chicken

Now, let’s get to the star of the show: the chicken! Heat the olive oil in a large skillet over medium heat. Season the chicken breasts with salt and pepper before placing them in the skillet. Allow them to cook for about 6-7 minutes on each side until golden brown and cooked through. To check for doneness, the internal temperature should reach 165°F. Once cooked, remove the chicken from the skillet and set aside.

4. Make the Creamy Herb Sauce

In the same skillet, add the minced garlic and sauté for about a minute until fragrant—your kitchen will smell divine! Pour in the chicken broth and heavy cream, stirring to combine. Now, sprinkle in the dried thyme and rosemary. This is where the magic happens! Bring the mixture to a gentle simmer and let it thicken for about 5 minutes.

Return the chicken to the skillet, spooning the creamy sauce over the top. Allow it to simmer for an additional 5 minutes, letting the flavors meld together. If the sauce gets too thick, don’t fret! Just add a splash of chicken broth to reach your desired consistency.

Plating Your Dinner

Now comes the fun part—plating! Take a generous scoop of those dreamy mashed potatoes and place them on each plate. Next, lay a chicken breast beside or on top of the potatoes, generously ladling the creamy herb sauce over the chicken. Finally, add a portion of the glazed carrots on the side. For a touch of elegance, garnish with fresh parsley. Your dinner is not just a meal; it’s a masterpiece!

Serving Suggestions

While this dish is a complete meal on its own, consider serving it with:

  • Crusty Bread: Perfect for mopping up that delicious sauce.
  • A Glass of Chardonnay: The crispness of white wine pairs beautifully with the flavors.
  • Fresh Green Salad: A light salad with a vinaigrette can balance the richness of the dish.

Tips for Success

  • Don’t Overcook the Chicken: Use a meat thermometer for accuracy to ensure juicy chicken.
  • Use Fresh Herbs: Fresh herbs elevate the dish and add depth of flavor.
  • Sauté Garlic Gently: Burnt garlic can overpower your sauce, so keep an eye on it.
  • Rest the Chicken: Allowing the chicken to rest for a few minutes before slicing keeps it juicy.
  • Adjust Sauce Consistency: If the sauce thickens too much, thin it with a little broth or cream.

Variations to Try

Want to make this dish your own? Here are a few ideas:

  • Different Proteins: Swap chicken for turkey or even pork chops for a different flavor profile.
  • Vegetable Swaps: Try using green beans or Brussels sprouts instead of carrots.
  • Herbed Mashed Potatoes: Add roasted garlic or chives to the mashed potatoes for extra flavor.
  • Dairy-Free Option: Use coconut cream in place of heavy cream and vegan butter in the mashed potatoes.

Storage & Freezing Tips

To Make Ahead:

You can prepare the mashed potatoes and glazed carrots in advance. Just store them in the refrigerator and reheat gently before serving. The creamy herb chicken is best made fresh, but if you want to cook it ahead of time, refrigerate the chicken and reheat it in the sauce when ready to serve.

Storage:

Store any leftovers in an airtight container in the refrigerator for up to 3 days. Just remember that the sauce might thicken in the fridge; add a splash of broth or cream when reheating!

To Reheat:

  • Microwave: Reheat in 1-minute intervals until warmed through.
  • Stovetop: Reheat chicken and sauce together over medium-low heat, stirring occasionally.

FAQs

Can I substitute the chicken?

Absolutely! Feel free to use turkey cutlets or even bone-in chicken for more flavor.

What’s the best way to ensure my chicken is tender?

Using a meat thermometer is the best way to ensure your chicken is cooked perfectly. Aim for an internal temperature of 165°F.

How can I make this recipe gluten-free?

This recipe is naturally gluten-free! Just make sure your chicken broth is certified gluten-free if you’re using store-bought.

Why This Meal Deserves a Spot in Your Dinner Rotation

This recipe checks all the boxes: flavor-packed, comforting, and wholesome. The balance between the creamy herb sauce, savory chicken, buttery mashed potatoes, and sweet glazed carrots creates a beautiful harmony of textures and tastes. It’s a meal that invites conversation and laughter, where everyone at the table is too busy enjoying their food to worry about anything else.

Try It Tonight

Are you ready to bring this cozy classic to your table? You don’t need hours in the kitchen or fancy ingredients. Just a little time, some fresh herbs, and a few kitchen staples will lead you to one of the most satisfying plates you’ve ever served. I promise, once you try this Creamy Herb Chicken with Mashed Potatoes and Glazed Carrots, it will become a beloved addition to your dinner repertoire.

If you enjoyed this recipe, be sure to check out my other favorites like Cheesy Garlic Chicken or Creamy Garlic Tomato Pasta for more delicious ideas. Happy cooking, my friend! Let’s create some delicious memories together in the kitchen!

Creamy Herb Chicken with Mashed Potatoes & Glazed Carrots: A Complete Comfort Food Dinner

Prep Time 20 minutes
Cook Time 30 minutes
Total Time 50 minutes
Servings 4 servings
Calories 650
A hearty and comforting dinner featuring tender herb-seasoned chicken, creamy mashed potatoes, and sweet glazed carrots.

Ingredients

Protein

  • 4 pieces boneless, skinless chicken breasts
  • 1 cup heavy cream
  • 1 cup chicken broth

Cooking Oil

  • 2 tablespoons olive oil

Aromatics & Herbs

  • 2 cloves garlic, minced
  • 1 teaspoon dried thyme
  • 1 teaspoon dried rosemary

Vegetables & Sides

  • 4 large potatoes, peeled and quartered
  • 1/2 cup milk
  • 4 tablespoons butter
  • 1 pound carrots, sliced
  • 2 tablespoons brown sugar
  • 1 tablespoon butter (for carrots)

Garnish

  • to taste fresh parsley for garnish (optional)

Instructions 

  • Cook chicken in olive oil until golden and cooked through, then set aside.
  • Sauté garlic, add broth and cream, season with herbs, simmer, and return chicken to thicken sauce.
  • Boil potatoes until tender, then mash with milk and butter, season to taste.
  • Cook carrots with butter and brown sugar until glazed and tender.
  • Serve mashed potatoes topped with chicken and glazed carrots, garnished with parsley if desired.

Notes

For extra flavor, add fresh herbs or a squeeze of lemon before serving.
Calories: 650kcal
Cost: $15
Course: Main Course
Cuisine: American
Keyword: Chicken, comfort food, glazed carrots, mashed potatoes

Loved this recipe? Save it to your favorite Pinterest board so you can easily find it later! It’s the perfect way to keep all your sweet ideas in one place. ✨

A detailed view of creamy chicken with mashed potatoes and carrots, showcasing textures and colors.

Why My BBQ Chicken Quesadillas Are the Life of Every Gathering

Welcome to my kitchen, friend! If you’re looking for a crowd-pleaser that’s as comforting as it is delicious, you’ve come to the right place. My BBQ Chicken Quesadillas have become a staple in my home, and trust me, they’re not just any ordinary quesadilla. They embody everything I love about cooking—simplicity, flavor, and the ability to bring people together around the table.

Picture this: a warm tortilla cradling tender, shredded chicken coated in smoky BBQ sauce, crowned with gooey cheese, and finished with a sprinkle of fresh herbs. The aroma wafting through your kitchen is enough to make anyone’s mouth water. Ready to create some magic? Let’s dive in!

The Magic of BBQ Chicken Quesadillas

So, what makes BBQ Chicken Quesadillas such a beloved dish? Well, it’s not just the combination of flavors; it’s the memories and connections they foster. Whether it’s a casual weeknight dinner, a game day gathering, or a festive family get-together, these quesadillas have a way of making every occasion feel special. And let’s be honest, who doesn’t love a meal that’s both comforting and quick to whip up?

The Perfect Blend of Flavors

A golden-brown BBQ chicken quesadilla sliced and topped with cilantro.

One bite of these quesadillas, and you’ll understand why they’ve earned their place at the table. The sweetness of the BBQ sauce melds beautifully with the richness of melted cheese, while the crispy tortilla adds that satisfying crunch. And let’s not forget the fresh red onion and cilantro, which add a bright punch that takes this dish to another level.

Ingredients You’ll Need

Before we break down the steps to create these delicious BBQ Chicken Quesadillas, let’s gather our ingredients. Here’s what you’ll need:

  • 2 cups cooked chicken, shredded – This can be leftover rotisserie chicken or any cooked chicken you have on hand.
  • 1 cup BBQ sauce – Choose your favorite style; a smoky Kansas City blend works wonders!
  • 1 cup shredded cheddar cheese – Adds a delicious sharpness.
  • 1 cup shredded mozzarella cheese – For that stretchy, gooey texture.
  • 4 large flour tortillas – The perfect vessel for all that goodness.
  • 1 tablespoon olive oil – To achieve that crispy exterior.
  • 1/2 cup red onion, thinly sliced – For a touch of crunch and flavor.
  • 1/4 cup fresh cilantro, chopped (optional) – A burst of freshness, but feel free to skip if you’re not a fan!

Step-by-Step Instructions

How to Make BBQ Chicken Quesadillas

Let’s get cooking! Here’s how to bring these scrumptious quesadillas to life:

  1. In a mixing bowl, combine the shredded chicken with BBQ sauce until well coated. Make sure every piece of chicken gets a good slathering of sauce—it’s where the magic begins!
  2. Heat a large skillet over medium heat and add the olive oil, allowing it to warm up for a minute.
  3. Place one tortilla in the skillet and sprinkle half of the cheddar and mozzarella cheeses evenly on one half of the tortilla. Trust me, this cheese layer is crucial for that gooey texture!
  4. Add half of the BBQ chicken mixture and some red onion on top of the cheese. Feel free to sprinkle in a little cilantro here if you’re using it!
  5. Fold the tortilla in half and cook for 3-4 minutes until the bottom is golden brown and crispy. You want it to have that beautiful golden hue!
  6. Flip the quesadilla and cook for another 3-4 minutes until the other side is golden and the cheese is melted. Use a spatula to help with this—nobody likes a quesadilla that falls apart!
  7. Remove from the skillet and repeat with the remaining tortillas and filling until you’ve cooked up a delicious stack of quesadillas.
  8. Slice the quesadillas into wedges and garnish with fresh cilantro if desired. Serve hot with extra BBQ sauce on the side for dipping.

Tips for Perfect Quesadillas

Now that you know how to make BBQ Chicken Quesadillas, here are some tips to ensure your quesadillas turn out perfectly every time:

  • Don’t Overfill: It’s tempting to pile on the fillings, but overstuffing can lead to messy quesadillas. Stick to a moderate amount for even cooking!
  • Watch the Heat: Medium heat is key. If it’s too high, your tortillas will burn before the cheese melts. If it’s too low, you’ll miss out on that crispy exterior.
  • Experiment with Cheese: While cheddar and mozzarella are classic choices, don’t be afraid to mix it up! Pepper jack adds a spicy kick, or goat cheese brings a creamy tang.

Variations to Spice Things Up

If you’re feeling adventurous, consider trying these variations to keep your BBQ Chicken Quesadillas exciting:

Spicy BBQ Chicken Quesadillas

Add sliced jalapeños to the filling for an extra kick. You can also use a spicy BBQ sauce to crank up the heat.

BBQ Chicken Quesadillas with Roasted Veggies

Roast some bell peppers, zucchini, or mushrooms in the oven and toss them into the quesadilla for added flavor and texture.

Low-Carb or Gluten-Free Options

Swap traditional flour tortillas for low-carb or gluten-free wraps. Lettuce wraps also make for a light and refreshing alternative!

Mini BBQ Chicken Quesadilla Bites

Use smaller tortillas for bite-sized quesadillas—perfect for parties or gatherings where finger foods are a hit!

Pairings and Side Dishes

What’s a meal without some delicious side dishes? Here are some great pairings to elevate your BBQ Chicken Quesadilla experience:

Fresh Salsas and Dips

Serve with a vibrant salsa or guacamole for a refreshing contrast to the smoky flavors.

Simple Salads

A crisp green salad with a light vinaigrette can balance out the richness of the quesadillas beautifully.

Drink Pairings

Consider serving with a chilled iced tea or a light beer to complement the BBQ flavors.

Storing and Reheating BBQ Chicken Quesadillas

Have leftovers? Here’s how to store and reheat your quesadillas:

Best Practices for Storing Leftovers

Let the quesadillas cool completely before storing them in an airtight container. You can also wrap them in parchment paper to keep them from getting soggy.

How to Reheat Without Losing Crispiness

The best way to reheat quesadillas is in a skillet over medium heat. This helps maintain that crispy exterior while warming up the filling. You can also use an oven set to 350°F (175°C) for about 10-15 minutes.

Common Mistakes to Avoid When Making BBQ Chicken Quesadillas

Making quesadillas is relatively straightforward, but here are some common pitfalls to avoid:

Overfilling the Tortilla

As mentioned earlier, too much filling can lead to a messy outcome. It’s all about balance!

Using the Wrong Heat Level

Finding the right heat is crucial. Too high, and you’ll burn the tortillas; too low, and they’ll be soggy.

Skipping the Cheese Layer for Binding

Cheese isn’t just for flavor; it helps hold everything together. Layer it both under and over the chicken.

Healthier BBQ Chicken Quesadillas

If you’re looking to lighten up your quesadilla, here are some healthier options:

Using Whole Wheat or Gluten-Free Tortillas

Whole wheat or gluten-free tortillas can be a great substitute that adds fiber without sacrificing flavor.

Leaner Protein and Lighter Cheese Options

Consider using grilled chicken breast or turkey for a leaner protein choice, and opt for lower-fat cheese.

Frequently Asked Questions (FAQs)

Can I make BBQ Chicken Quesadillas ahead of time?

Yes! You can prepare the filling in advance and assemble the quesadillas when you’re ready to cook. Just store the filling in the fridge until you’re ready to use it.

What’s the best BBQ sauce to use?

It really depends on your flavor preference! A sweet Kansas City-style works great, or a vinegar-based sauce for tang. Choose one that excites your taste buds!

Can I freeze BBQ Chicken Quesadillas?

Absolutely! After cooking, allow them to cool completely, then wrap them tightly in foil or plastic wrap before freezing. They’ll keep for up to three months!

How do I make them crispier?

Ensure your skillet is hot enough before adding the quesadilla. You can also brush the tortillas lightly with olive oil before cooking for an extra crisp.

Can I make BBQ Chicken Quesadillas vegetarian?

Definitely! Swap out the chicken for grilled vegetables or black beans, and keep the BBQ sauce for flavor.

Conclusion: Bringing BBQ Chicken Quesadillas Into Your Kitchen

There you have it—my ultimate BBQ Chicken Quesadilla recipe that’s sure to become a beloved dish in your home. These quesadillas are not only easy to make, but they’re also a fantastic way to enjoy flavors that everyone loves. Whether you’re cooking for your family or hosting friends for a casual gathering, these BBQ Chicken Quesadillas will steal the show and leave everyone asking for seconds.

So, gather your ingredients, put on your favorite playlist, and let’s create some delicious memories together. Happy cooking, and may your kitchen be filled with warmth, laughter, and a little bit of magic!

BBQ Chicken Quesadillas

Prep Time 10 minutes
Cook Time 10 minutes
Total Time 20 minutes
Servings 4 servings
Calories 550
Delicious and cheesy quesadillas filled with smoky BBQ chicken and melted cheeses, perfect for a quick meal.

Ingredients

Protein

  • 2 cups cooked chicken, shredded
  • 1 cup bbq sauce

Cheese

  • 1 cup shredded cheddar cheese
  • 1 cup shredded mozzarella cheese

Other ingredients

  • 4 large flour tortillas
  • 1 tablespoon olive oil
  • 1/2 cup red onion, thinly sliced
  • 1/4 cup fresh cilantro, chopped (optional)

Instructions 

  • Mix shredded chicken with BBQ sauce.
  • Heat oil in a skillet over medium heat.
  • Place tortilla, add cheese, chicken mixture, and red onion, then fold.
  • Cook 3-4 minutes until golden, flip, and cook another 3-4 minutes.
  • Repeat with remaining tortillas, then slice and garnish with cilantro.

Notes

Use fresh cilantro for added flavor if desired.
Calories: 550kcal
Cost: $15
Course: Main Course
Cuisine: American
Keyword: Chicken

Loved this recipe? Save it to your favorite Pinterest board so you can easily find it later! It’s the perfect way to keep all your sweet ideas in one place. ✨

Delicious BBQ chicken quesadilla served with red onion and cheese, on a rustic background.

A Flavorful Adventure: Loaded Herb Grilled Chicken with Creamy Pesto Pasta & Roasted Potatoes

Welcome to my kitchen! Today, we’re embarking on a delightful culinary journey with a dish that is sure to become a staple in your meal rotation: Loaded Herb Grilled Chicken with Creamy Pesto Pasta & Roasted Potatoes. This dish is not just a meal; it’s an experience that combines the vibrant flavors of herb-marinated chicken, the rich creaminess of pesto pasta, and the irresistible crunch of roasted baby potatoes—all in one plate. Let’s dive in!

Why You’ll Love This Recipe

There are countless reasons to fall head over heels for this dish. Here are just a few:

  • Balanced Comfort: Each bite brings together the juicy essence of grilled chicken, the creamy goodness of pasta, and the crispy texture of roasted potatoes.
  • Simple Preparation: With minimal ingredients and straightforward techniques, you can whip up this meal without breaking a sweat.
  • Versatile Flavors: Feel free to tweak the ingredients to suit your taste or dietary needs. This recipe is as flexible as it is delicious!
  • One-Bowl Wonder: Who doesn’t love a meal that’s easy to serve and even easier to clean up?

Ingredients You’ll Need

Delicious loaded herb grilled chicken beside creamy pesto pasta and crispy roasted potatoes.

Here’s what you’ll need to bring this flavorful adventure to life:

  • For the Grilled Herb Chicken:
    • 4 chicken breasts
    • 2 tablespoons olive oil
    • 2 teaspoons garlic powder
    • 1 teaspoon dried oregano
    • 1 teaspoon dried basil
    • 1 teaspoon paprika
    • Salt and pepper to taste
  • For the Creamy Pesto Pasta:
    • 1 cup pasta (penne or fusilli)
    • 1/2 cup heavy cream
    • 1/2 cup pesto
    • 1/2 cup grated Parmesan cheese
  • For the Roasted Baby Potatoes:
    • 1 pound baby potatoes, halved
    • 1 tablespoon olive oil
    • Salt and pepper to taste
  • For Garnish:
    • 1 tablespoon fresh parsley, chopped

Equipment You’ll Need

Before we start cooking, gather the following kitchen tools:

  • Grill or grill pan
  • Pot for boiling pasta
  • Baking dish for roasting potatoes
  • Skillet for sauce
  • Mixing bowls
  • Chef’s knife and cutting board

Step-by-Step Instructions

Now, let’s get cooking! Follow these steps for a delicious meal that will impress anyone who sits at your table.

1. Preheat the Grill

Start by preheating your grill to medium-high heat. This ensures that your chicken gets those beautiful grill marks and that delicious smoky flavor.

2. Marinate the Chicken

In a mixing bowl, combine the olive oil, garlic powder, dried oregano, dried basil, paprika, salt, and pepper. This herb mixture is the key to infusing flavor into the chicken. Coat the chicken breasts with this mixture thoroughly and let them sit while you prepare the other components of the dish.

3. Cook the Pasta

Bring a pot of salted water to a boil. Once boiling, add your pasta (penne or fusilli works wonderfully here) and cook according to package instructions until al dente. Drain the pasta and set it aside. It’s okay if it’s not fully cooled; we’ll finish cooking it with the sauce later.

4. Roast the Potatoes

While the pasta cooks, take your halved baby potatoes and toss them in a baking dish with olive oil, salt, and pepper. Roast them in the oven at 400°F (200°C) for 25-30 minutes or until they are golden brown and tender, flipping them halfway for even cooking.

5. Grill the Chicken

Once the grill is hot, place the marinated chicken breasts on it. Grill for about 6-7 minutes on each side, or until the chicken is fully cooked and reaches an internal temperature of 165°F (74°C). Once done, remove from the grill and let them rest for a few minutes before slicing.

6. Prepare the Creamy Pesto Sauce

In a skillet over medium heat, combine the heavy cream and pesto. Stir until well blended and heated through, then add the cooked pasta and Parmesan cheese, tossing everything together to ensure the pasta is well coated in the creamy sauce.

7. Assemble and Serve

To serve, place a generous portion of creamy pesto pasta on a plate, add slices of grilled chicken on top, and round it off with a side of roasted baby potatoes. Garnish with fresh parsley to add a pop of color and flavor.

Tips & Variations

Now that you have the basics down, here are some tips and variations to elevate your dish even further:

  • Vegetable Add-Ins: Toss in some cherry tomatoes or sautéed spinach for a burst of color and flavor.
  • Spicy Flair: For those who enjoy a kick, sprinkle red chili flakes over the chicken or mix some hot sauce into the pesto sauce.
  • Flavor Swaps: Try using sun-dried tomato pesto instead of traditional basil pesto for a unique twist.
  • Dairy-Free Option: Substitute heavy cream with coconut milk or a plant-based cream, and use nutritional yeast in place of Parmesan for a vegan-friendly option.

Storage & Freezing Tips

Wondering how to store leftovers? Here’s the scoop:

  • Refrigeration: Store each component (chicken, pasta, and potatoes) in separate airtight containers for up to 3 days.
  • Freezing: You can freeze the grilled chicken and roasted potatoes for up to a month. However, creamy pasta does not freeze well due to changes in texture upon reheating.

Frequently Asked Questions (FAQs)

Can I use other cuts of chicken?

Absolutely! Chicken thighs or tenders would work beautifully. Just adjust the cooking time as needed.

What if I don’t have fresh herbs?

No problem! Dried herbs can be used in place of fresh; just remember to use about one-third the quantity.

Can I skip grilling and use a skillet?

Yes! A cast-iron or non-stick skillet works perfectly. Just heat some oil and sear the chicken for 6-7 minutes per side.

How do I store leftovers?

Keep each component separate in airtight containers. Reheat gently to maintain the texture of the pasta and chicken.

Why This Recipe Stands Out

This recipe stands out not just for its flavors, but also for its simplicity and versatility. It brings together a wonderful balance of textures and tastes that can easily be adjusted to suit any palate. Whether you’re cooking for a casual weeknight dinner or impressing guests at a gathering, this dish is sure to shine.

Elevating the Presentation

For a beautiful presentation, consider:

  • Garnishing with bright herbs like basil or microgreens.
  • Adding a sprinkle of extra Parmesan or a drizzle of olive oil for a touch of elegance.
  • Serving family-style for a cozy gathering or individual plates for a more formal occasion.

Conclusion

And there you have it! A delicious plate of Loaded Herb Grilled Chicken with Creamy Pesto Pasta & Roasted Potatoes that is sure to bring warmth and joy to your table. The next time you’re looking for a meal that is both comforting and full of flavor, remember this recipe. It’s perfect for sharing with loved ones or enjoying on a quiet evening at home. Grab your ingredients, gather your loved ones, and let’s create some culinary magic together! Happy cooking!

Loaded Herb Grilled Chicken with Creamy Pesto Pasta & Roasted Potatoes

Prep Time 15 minutes
Cook Time 40 minutes
Total Time 55 minutes
Servings 4 servings
Calories 850
A flavorful and hearty meal featuring herb-marinated grilled chicken, creamy pesto pasta, and crispy roasted potatoes.

Ingredients

Protein

  • 4 pieces chicken breasts
  • 2 tablespoons olive oil
  • 2 teaspoons garlic powder
  • 1 teaspoon dried oregano
  • 1 teaspoon dried basil
  • 1 teaspoon paprika
  • salt and pepper to taste salt and pepper

Pasta

  • 1 cup pasta (penne or fusilli)
  • 1/2 cup heavy cream
  • 1/2 cup pesto
  • 1/2 cup grated parmesan cheese

Potatoes

  • 1 pound baby potatoes, halved
  • 1 tablespoon fresh parsley, chopped (for garnish)

Instructions 

  • Preheat grill to medium-high. Mix olive oil, garlic powder, oregano, basil, paprika, salt, and pepper. Coat chicken and set aside.
  • Boil salted water and cook pasta until al dente. Drain and set aside.
  • Toss potatoes with olive oil, salt, and pepper. Roast at 400°F (200°C) for 25-30 minutes.
  • Grill chicken 6-7 minutes per side until cooked. Meanwhile, heat heavy cream and pesto, then toss with pasta and Parmesan.
  • Serve chicken with pesto pasta and roasted potatoes. Garnish with parsley.

Notes

Adjust seasoning to taste and ensure chicken is fully cooked before serving.
Calories: 850kcal
Cost: $15
Course: Main Course
Cuisine: American
Keyword: Chicken, pasta, potatoes

Loved this recipe? Save it to your favorite Pinterest board so you can easily find it later! It’s the perfect way to keep all your sweet ideas in one place. ✨

Succulent grilled chicken with pesto sauce, creamy pasta, and golden roasted baby potatoes displayed elegantly.

Wrap Your Taste Buds in Comfort: The Cheesy Garlic Chicken Delight You Need

Welcome, fellow food lovers! Today, we’re diving into a recipe that’s bound to become your new go-to comfort food: the Ooey-Gooey Cheesy Garlic Chicken Wraps. Picture this: tender, juicy chicken enveloped in a warm tortilla, slathered in creamy cheese, and infused with the bold essence of garlic. This dish isn’t just a meal; it’s a warm hug on a plate, perfect for any occasion. Whether you’re whipping up a quick weeknight dinner, hosting friends, or simply treating yourself, these wraps are sure to make your taste buds dance with joy!

Why You’ll Love These Cheesy Garlic Chicken Wraps

There’s something undeniably comforting about wraps. They’re portable, customizable, and best of all, they pack a delightful punch of flavor. As you take your first bite, the melty cheese oozes out, and the garlic’s aromatic charm greets you like an old friend. These wraps are not just about taste; they offer a delicious textural contrast: the crispness of the golden tortilla against the creamy, cheesy filling. Trust me, once you try these, you’ll want to make them again and again!

Ingredients Needed

Delicious Cheesy Garlic Chicken Wraps, golden brown and oozing cheese.
  • 2 cups cooked shredded chicken
  • 1 cup cream cheese, softened
  • 1 cup shredded mozzarella cheese
  • 1/2 cup grated parmesan cheese
  • 4 cloves garlic, minced
  • 1 tablespoon olive oil
  • 1 teaspoon Italian seasoning
  • 1/2 teaspoon salt
  • 1/4 teaspoon black pepper
  • 4 large flour tortillas
  • 1 cup fresh spinach leaves
  • 1/2 cup diced tomatoes
  • Cooking spray or additional olive oil for grilling

Step-by-Step Cooking Instructions

Now that we have our ingredients ready, let’s jump right into making these scrumptious wraps!

  1. Mix the Cheesy Filling: In a large bowl, combine the cooked shredded chicken, softened cream cheese, shredded mozzarella, grated parmesan, minced garlic, olive oil, Italian seasoning, salt, and black pepper. Mix until everything is well combined and creamy. You want this filling to be rich and flavorful!
  2. Prepare the Tortillas: Lay out a tortilla on a flat surface. Place a handful of fresh spinach leaves right in the center. This not only adds a pop of color but also a lovely crunch.
  3. Add the Filling: Spoon a generous amount of the cheesy chicken mixture on top of the spinach. Don’t be shy; you want every bite to be packed with flavor!
  4. Top It Off: Sprinkle some diced tomatoes on top of the chicken mixture. These juicy little gems add a refreshing burst of flavor.
  5. Roll It Up: Fold in the sides of the tortilla and then roll it up tightly from the bottom to the top, securing all that cheesy goodness inside.
  6. Cook the Wraps: Heat a skillet over medium heat and lightly grease it with cooking spray or a drizzle of olive oil. Place the wraps seam-side down in the skillet and cook for about 3-4 minutes on each side, or until golden brown and crispy. Keep an eye on them; you want that lovely golden crust without burning!
  7. Serve: Remove the wraps from the skillet, cut them in half, and serve warm. I recommend pairing them with your favorite dipping sauce for an extra touch of deliciousness!

Tips for Customizing the Recipe

One of the best things about these wraps is their versatility! Here are some ideas to tailor them to your taste:

  • Protein Swaps: Have leftover rotisserie chicken? Use that for a super quick option! You can also switch things up with ground chicken, turkey, or even cooked shrimp!
  • Cheese Variations: Feel free to experiment with different cheeses. Pepper jack adds a kick, while gouda gives a smoky richness. Mix and match to find your favorite combo!
  • Add Veggies: For a veggie-packed version, toss in sautéed mushrooms, bell peppers, or onions. You can even add in some roasted zucchini for extra flavor.
  • Make It Spicy: If you like heat, stir in some crushed red pepper flakes or jalapeños with the chicken mixture.
  • Gluten-Free Option: Want to make these wraps gluten-free? Just swap out the tortillas for certified gluten-free ones.

Nutritional Information

Each cheesy garlic chicken wrap is not only satisfying but also packed with protein and flavor. Here’s a rough estimate of the nutritional information per wrap (based on a recipe yielding four wraps):

  • Calories: 400
  • Protein: 30g
  • Carbohydrates: 30g
  • Fat: 20g
  • Saturated Fat: 10g
  • Fiber: 2g

Keep in mind that these values may vary depending on the exact ingredients and brands you use.

Serving Suggestions

These wraps are delightful on their own, but they also pair beautifully with a variety of sides. Here are some ideas:

  • Fresh Green Salad: A crisp salad with a tangy vinaigrette complements the richness of the wraps.
  • Potato Wedges: Seasoned potato wedges or fries offer a satisfying crunch alongside the creamy wraps.
  • Tomato Soup: Serve with a warm bowl of tomato soup for a classic, comforting combo.
  • Coleslaw: A tangy coleslaw provides a refreshing balance to the cheesy richness.
  • Roasted Vegetables: Roasted seasonal vegetables add color and nutrition to your plate.

Storage & Freezing

If you have leftovers (which I doubt will happen!), you can store them in an airtight container in the refrigerator for up to three days. To reheat, I recommend using a skillet or toaster oven instead of the microwave to keep that crispiness intact.

Want to make these wraps ahead of time? You can assemble them up to a day in advance. Just keep them wrapped in plastic wrap in the fridge. When ready to eat, grill them as directed.

For long-term storage, you can freeze the assembled wraps. Wrap each one tightly in plastic wrap and then place them in a freezer-safe bag. They can be frozen for up to three months. When you’re ready to enjoy, thaw in the fridge overnight and grill as instructed!

FAQs

Can I substitute the chicken? Absolutely! You can use any cooked protein you like, such as turkey, beef, or even tofu for a vegetarian option.

What’s the best way to keep the wraps crispy? To maintain that wonderful crisp, avoid reheating in the microwave. Instead, use a pan or toaster oven to bring back the crunch.

Can I make these wraps ahead of time? Yes! You can prep them in advance and store them in the refrigerator or freezer and simply reheat when ready to serve.

What if I don’t have Italian seasoning? No worries! You can create your own mix with dried oregano, basil, and thyme, or just use your favorite herbs.

Conclusion

There you have it, my friends! The Ooey-Gooey Cheesy Garlic Chicken Wraps are not just a meal; they are an experience. With their rich flavors, delightful textures, and endless customization options, they are sure to become a staple in your kitchen. So gather your ingredients, roll up your sleeves, and let’s create some magic in your kitchen. Don’t forget to share your creations with friends and family—they’ll be begging for this recipe, and who knows, it might just become their favorite too! Happy cooking!

Ooey-Gooey Cheesy Garlic Chicken Wraps You’ll Devour in 2025

Prep Time 10 minutes
Cook Time 10 minutes
Total Time 20 minutes
Servings 4 wraps
Calories 650
Delight in these cheesy, garlicky chicken wraps that are crispy on the outside and gooey on the inside, perfect for a quick and satisfying meal.

Ingredients

Protein

  • 2 cups cooked shredded chicken
  • 1 cup cream cheese, softened
  • 1 cup shredded mozzarella cheese
  • 1/2 cup grated parmesan cheese
  • 4 cloves garlic, minced
  • 1 tablespoon olive oil
  • 1 teaspoon italian seasoning
  • 1/2 teaspoon salt
  • 1/4 teaspoon black pepper

Wraps

  • 4 large flour tortillas
  • 1 cup fresh spinach leaves
  • 1/2 cup diced tomatoes

For Grilling

  • as needed cooking spray or additional olive oil

Instructions 

  • Mix chicken, cheeses, garlic, oil, and seasonings until combined.
  • Place spinach on a tortilla, add cheesy mixture, and top with tomatoes.
  • Fold and roll the tortilla tightly.
  • Cook wraps in a skillet with oil until golden, about 3-4 minutes per side.
  • Cut in half and serve warm.

Notes

For extra flavor, add a squeeze of lemon or your favorite dipping sauce.
Calories: 650kcal
Cost: $15
Course: Main Course
Cuisine: American
Keyword: cheese, Chicken, garlic

Loved this recipe? Save it to your favorite Pinterest board so you can easily find it later! It’s the perfect way to keep all your sweet ideas in one place. ✨

Gourmet shot of garlic chicken wraps filled with creamy cheese and fresh ingredients.

The Crispy Chilli Chicken Recipe That Brings the Heat and Heart

Ah, Crispy Chilli Chicken! It’s one of those comforting dishes that wraps you in warmth with just a single bite. Picture this: tender chicken pieces enveloped in a golden, crispy coating, all while being tossed in a sweet, spicy sauce that dances on your taste buds. If you’re like me, you might find yourself daydreaming about this dish after just one taste. Let’s embark on a culinary adventure together as we uncover the secrets of making this delectable dish right in your own kitchen!

Why You’ll Love This Homemade Chinese Stir-fry Recipe

This isn’t just any chicken dish; it’s a symphony of flavors and textures. The crunch of the chicken contrasts beautifully with the silky sauce, and the vibrant vegetables add a pop of color and freshness. What’s more, making Crispy Chilli Chicken at home means you can adjust the heat level to your liking. Whether you’re serving it up for family dinner or a casual gathering with friends, it’s bound to impress. And let’s not forget the delightful aroma that fills your kitchen—trust me, it’s hard to resist!

Ingredients for Crispy Chilli Chicken

Appetizing plate of Crispy Chilli Chicken featuring crispy coating and colorful vegetables.

Here’s what you’ll need to create this culinary masterpiece:

  • 500g boneless chicken, cut into bite-sized pieces
  • 1 cup all-purpose flour
  • 1/2 cup cornflour
  • 1 tsp salt
  • 1/2 tsp black pepper
  • 1/2 tsp paprika
  • 1/2 tsp garlic powder
  • 1/2 cup water
  • Oil for frying
  • 2 tbsp vegetable oil
  • 3-4 green chillies, chopped
  • 1 onion, sliced
  • 1 bell pepper, sliced
  • 2-3 cloves garlic, minced
  • 1 tbsp soy sauce
  • 1 tbsp vinegar
  • 1 tsp sugar
  • Spring onions for garnish

How to Make Crispy Chilli Chicken

Now, let’s dive into the step-by-step process of creating this dish:

Step 1: Prepare the Batter

Start by grabbing a mixing bowl. In it, combine the all-purpose flour, cornflour, salt, black pepper, paprika, and garlic powder. These ingredients are the foundation of that crispy coating we crave. Now, gradually add the water to form a smooth batter. It should be thick enough to cling to the chicken but not so thick that it overwhelms it.

Step 2: Coat the Chicken

Once your batter is ready, dip each piece of chicken into it, ensuring they are well coated. This is where the magic happens! The cornflour gives the chicken that irresistible crunch.

Step 3: Fry the Chicken

Heat oil in a pan over medium-high heat. You want it hot enough to sizzle when the chicken hits the oil. Fry the chicken pieces in batches until they’re golden and crispy, which usually takes about 4-5 minutes. Remove them and let them drain on paper towels to get rid of any excess oil.

Step 4: Prepare the Sauce

In another pan, heat 2 tablespoons of vegetable oil. Add the minced garlic, sliced onion, and bell pepper. Sauté until softened—your kitchen will smell divine! Once the veggies are tender, toss in the chopped green chillies, soy sauce, vinegar, and sugar. Stir it well and let it simmer for a minute or two.

Step 5: Combine Everything

Finally, add the crispy fried chicken to the pan with the sauce. Toss everything together until the chicken is well coated in that gorgeous, glossy sauce. Garnish with chopped spring onions, and voila! Your Crispy Chilli Chicken is ready to be served!

Tips for Perfect Crispy Chilli Chicken

Here are some of my top tips to ensure your dish turns out perfectly every time:

  • Double Frying: For that extra crunch, consider double frying the chicken. After the first fry, let it rest for a minute, then fry again until golden brown.
  • Hot Oil: Ensure your oil is hot enough before adding the chicken. If it’s not hot, the chicken will absorb excess oil, resulting in a greasy texture.
  • Marination: While not necessary, marinating the chicken in soy sauce for at least 30 minutes can enhance the flavor even more.
  • Variations: Feel free to add other veggies like broccoli or snap peas for added nutrition and color.

Storage & Freezing

If you happen to have leftovers (which is rare in my house!), store them in an airtight container in the fridge for up to 3 days. The chicken is best enjoyed fresh, as reheating may compromise the crispiness. If you want to freeze it, I recommend freezing the chicken and sauce separately. When you’re ready to eat, simply reheat in a hot pan until heated through. You can always add a splash of water to the pan to help revitalize the sauce.

Common Questions About Crispy Chilli Chicken

Can I substitute cornflour with something else?

If you’re looking for a gluten-free option, cornflour is perfect. However, if you’d like to use plain flour instead, you can, though it may not achieve the same level of crispiness.

What can I serve with this dish?

Crispy Chilli Chicken pairs beautifully with a side of fluffy rice or noodles. I personally love serving it with fried rice, making it a complete meal. You could also serve it alongside roasted vegetables for a more balanced dinner.

Can I make it less spicy?

Absolutely! Adjust the amount of green chillies to your preference. You can also remove the seeds if you want to tone down the heat.

Variations to Try

1. Sweet and Sour Twist: Add pineapple chunks to the sauce for a sweet and tangy flavor.
2. Vegetarian Version: Substitute chicken with tofu or cauliflower for a delicious plant-based alternative.
3. Extra Crunch: Incorporate crushed fried noodles at the end for added texture.

Conclusion

And there you have it—the ultimate Crispy Chilli Chicken recipe that’s sure to impress. Cooking this dish is not just about feeding your belly; it’s about the joy, the laughter, and the memories created around the dinner table. Whether it’s a weeknight family meal or a weekend gathering with friends, this recipe is your ticket to a magical dining experience. So, roll up your sleeves, gather your ingredients, and let’s get cooking! I can’t wait to hear how yours turns out! If you enjoyed this recipe, you might also love Cheesy Garlic Chicken Wraps or Garlic Parmesan Chicken Pasta.

Crispy Chilli Chicken Recipe

Prep Time 15 minutes
Cook Time 20 minutes
Total Time 35 minutes
Servings 4 servings
Calories 650
A flavorful and crispy chicken dish coated in a spicy chili sauce, perfect for a quick and delicious meal.

Ingredients

Main

  • 500 g boneless chicken, cut into bite-sized pieces
  • 1 cup all-purpose flour
  • 1/2 cup cornflour
  • 1 tsp salt
  • 1/2 tsp black pepper
  • 1/2 tsp paprika
  • 1/2 tsp garlic powder
  • 1 cup water
  • oil for frying oil for frying (Enough for deep frying)
  • 2 tbsp vegetable oil
  • 3-4 green chillies green chillies, chopped
  • 1 onion onion, sliced
  • 1 bell pepper bell pepper, sliced
  • 2-3 cloves garlic, minced
  • 1 tbsp soy sauce
  • 1 tbsp vinegar
  • 1 tsp sugar

Garnish

  • spring onions for garnish spring onions

Instructions 

  • Mix flour, cornflour, salt, black pepper, paprika, and garlic powder to make the batter.
  • Dip chicken pieces into batter and fry until golden and crispy. Drain on paper towels.
  • Sauté garlic, onion, and bell pepper in vegetable oil until softened.
  • Add chopped chillies, soy sauce, vinegar, and sugar. Mix well.
  • Add fried chicken to the pan and toss in the sauce. Garnish with spring onions and serve hot.

Notes

Ensure oil is hot enough before frying for crispy chicken.
Calories: 650kcal
Cost: $15
Course: Main Course
Cuisine: Asian
Keyword: Chicken

Loved this recipe? Save it to your favorite Pinterest board so you can easily find it later! It’s the perfect way to keep all your sweet ideas in one place. ✨

Delicious Crispy Chilli Chicken in a warm lighting setting, highlighting texture and ingredients.

Sizzle and Serve: The Sheet Pan Chicken Fajitas That Will Steal Your Heart

If you’ve ever walked into a kitchen and been greeted by the glorious aroma of sizzling fajitas, you know you’re in for a treat. Well, get ready to make that magic happen right in your own home with my Sheet Pan Chicken Fajitas. This one-pan wonder is not only bursting with flavor and color, but it’s also the perfect solution for those busy weeknights when you want to whip up something quick and delicious without the fuss. Trust me; these fajitas will have your family and friends buzzing with excitement!

Why This Recipe Works

Let’s talk about what makes this recipe a standout. First off, the beauty of sheet pan meals lies in their simplicity. You can toss all the ingredients onto a single pan, pop it in the oven, and let the magic happen. This recipe combines juicy chicken, vibrant bell peppers, and sweet onions, all seasoned to perfection. The high heat of the oven caramelizes the vegetables, enhancing their natural sweetness while keeping the chicken tender and juicy. Plus, cleanup is a breeze! Who doesn’t love a recipe that delivers both flavor and convenience?

Ingredient Deep Dive: Building Flavor from the Ground Up

Plate of chicken fajitas featuring sliced chicken, bell peppers, and onions, with tortillas on the side.

The Chicken: Your Protein Foundation

For this recipe, you’ll need 1 lb of chicken breast sliced into strips. Chicken breast is a lean protein that takes on flavors beautifully. If you’re looking for a more robust taste, feel free to swap it out for chicken thighs, which are slightly fattier and can add extra juiciness.

The Marinade: Your Flavor Powerhouse

The marinade is where the magic truly begins. You’ll need:

  • 2 tablespoons of olive oil
  • 2 teaspoons of chili powder
  • 1 teaspoon of cumin
  • 1 teaspoon of garlic powder
  • 1 teaspoon of onion powder
  • Salt and pepper to taste

This combination of spices not only adds layers of flavor but also helps to tenderize the chicken. The chili powder gives a subtle kick, while cumin adds warmth. The garlic and onion powders are like the dynamic duo of seasoning, enhancing every bite.

The Vegetables: Texture and Color

To bring this dish to life, we’ll use:

  • 1 red bell pepper, sliced
  • 1 green bell pepper, sliced
  • 1 yellow onion, sliced

These colorful veggies don’t just add visual appeal; they also contribute crunch and sweetness, making each bite a delight. Feel free to mix and match with other veggies like zucchini or mushrooms if you’re feeling adventurous!

The Step-by-Step Instructions

Preparation Phase

Now that we have our ingredients, let’s dive into the preparation:

  1. Preheat the oven to 400°F (200°C). This step is crucial for achieving that perfect char on your fajitas.
  2. In a large bowl, combine the chicken strips, sliced bell peppers, and onion.
  3. Drizzle with olive oil and sprinkle with chili powder, cumin, garlic powder, onion powder, salt, and pepper.
  4. Toss everything together until the chicken and vegetables are well-coated in the marinade.
  5. Spread the mixture evenly on a sheet pan in a single layer, ensuring everything has room to roast.

Cooking Phase

  1. Bake in the preheated oven for 20-25 minutes, or until the chicken is cooked through and the vegetables are tender.
  2. Remove from the oven and let cool for a few minutes before serving.

And there you have it! Serve the chicken and vegetables in 8 small flour or corn tortillas with your choice of optional toppings like sour cream, salsa, avocado, and fresh cilantro.

Expert Tips for Perfection

Mastering the Perfect Char

To achieve that restaurant-style char, it’s essential not to overcrowd the pan. If you’re making a larger batch, consider using two pans. Also, make sure your oven is fully preheated before adding the sheet pan.

Advanced Techniques

If you want to take it up a notch, try marinating your chicken overnight. This allows the flavors to penetrate deeper, resulting in even more scrumptious fajitas.

Tortilla Perfection

Warm your tortillas before serving! You can do this in a dry skillet over medium heat for about 30 seconds on each side or wrap them in aluminum foil and place them in the oven for a few minutes.

Variations & Customizations

Sheet Pan Chicken Fajitas

This is the classic version, but you can easily customize it to your liking.

Air Fryer Chicken Fajitas

If you have an air fryer, feel free to adapt this recipe! Just cook at 400°F for about 10-15 minutes, shaking halfway through to ensure even cooking.

Alternative Proteins

Want to switch things up? Try shrimp or even tofu for a vegetarian option. Just adjust the cooking time accordingly.

Dietary Adaptations

This recipe can easily be made gluten-free by opting for corn tortillas or serving it over rice instead.

Serving, Storing, and Reheating

Perfect Fajita Assembly

When it comes to assembling your fajitas, layer your toppings in this order for the best experience: start with the chicken and veggies, then add your desired toppings like creamy avocado and zesty salsa.

Storage Solutions

If you have leftovers (though I doubt it!), store them in an airtight container in the refrigerator for up to 3 days. For longer storage, you can freeze the cooked chicken and veggies for up to 3 months.

Reheating for Best Results

To reheat, simply place the fajitas in a skillet over medium heat for a few minutes until warmed through, adding a splash of water if needed to prevent drying out. You could also microwave them, but be careful not to overdo it!

Meal Prep Success

This recipe is fantastic for meal prep! You can marinate the chicken and chop the veggies in advance, then just throw everything on the sheet pan when you’re ready to cook.

The Ultimate Fajita FAQ

Can I substitute chicken with another protein?

Absolutely! You can use beef, shrimp, or a plant-based protein like tempeh or tofu. Just remember to adjust the cooking time accordingly.

How do I know when my chicken is cooked through?

The best way to check is with a meat thermometer; chicken should reach an internal temperature of 165°F (75°C). If you don’t have a thermometer, make a cut in the thickest part of the chicken—it should be opaque and the juices should run clear.

What should I serve with my fajitas?

Fajitas are great on their own, but you can also serve them with a side of Mexican rice, refried beans, or a fresh salad for a complete meal.

Conclusion

There you have it, my friends! A delightful recipe for Sheet Pan Chicken Fajitas that’s sure to become a staple in your home. With a blend of vibrant colors, tantalizing flavors, and the ease of one-pan cooking, this dish is perfect for any occasion—whether it’s a quick weeknight dinner or a fun gathering with friends. So gather your ingredients, let the aroma fill your kitchen, and watch as everyone falls in love with this simple yet magical meal. Happy cooking!

And for more delicious recipes, don’t forget to check out my other favorites like Cheesy Garlic Chicken Wraps or Chicken Fillet in Creamy Garlic Parmesan Sauce. Let’s keep the flavor adventures going!

Sheet Pan Chicken Fajitas – Easy One-Pan Dinner!

Prep Time 10 minutes
Cook Time 20 minutes
Total Time 30 minutes
Servings 4 servings
Calories 350
Enjoy a quick and flavorful dinner with these easy sheet pan chicken fajitas, perfect for busy weeknights.

Ingredients

Protein

  • 1 lb chicken breast, sliced into strips

Vegetables

  • 1 red bell pepper, sliced red bell pepper
  • 1 green bell pepper, sliced green bell pepper
  • 1 yellow onion, sliced yellow onion

Seasonings & Oil

  • 2 tablespoons olive oil
  • 2 teaspoons chili powder
  • 1 teaspoon cumin
  • 1 teaspoon garlic powder
  • 1 teaspoon onion powder
  • to taste salt and pepper salt and pepper

Tortillas & Toppings

  • 8 small flour or corn tortillas tortillas
  • optional sour cream, salsa, avocado, cilantro (optional toppings)

Instructions 

  • Preheat oven to 400°F (200°C).
  • Combine chicken, peppers, and onion; toss with oil and seasonings.
  • Spread mixture on a sheet pan and bake for 20-25 minutes.
  • Let cool slightly, then serve in tortillas with toppings.

Notes

Use fresh ingredients for best flavor. Adjust seasonings to taste.
Calories: 350kcal
Cost: $15
Course: Main Course
Cuisine: Mexican
Keyword: Chicken, easy, fajitas

Loved this recipe? Save it to your favorite Pinterest board so you can easily find it later! It’s the perfect way to keep all your sweet ideas in one place. ✨

Delicious Sheet Pan Chicken Fajitas arranged with vibrant toppings and garnishes.

One-Pan Wonder: Cashew Chicken That Brings Family Together

Welcome to my kitchen! Today, I’m thrilled to share a delightful recipe that has become a staple in my home—a dish that’s not only bursting with flavor but also makes cleanup a breeze. Yes, you guessed it! We’re diving into the world of Easy Sheet Pan Cashew Chicken, a recipe that transforms ordinary weeknight dinners into extraordinary family gatherings.

Growing up in a small town in Oregon, I learned early on that food is not just something you eat; it’s a way to connect, to celebrate, and sometimes, to heal. In my mother’s bustling kitchen, the aroma of roasted vegetables and sweet spices would dance through the air, inviting everyone to gather around the table. Fast forward to today, and I find joy in recreating those cherished moments through cooking, especially with recipes that are as simple and satisfying as this one.

Why This Recipe Works So Well

What sets this Sheet Pan Cashew Chicken apart is its incredible ability to meld flavors with minimal effort. The combination of tender chicken, vibrant vegetables, and crunchy cashews comes together harmoniously in one pan, allowing the oven to work its magic while you kick back and relax. The real beauty lies in how each ingredient contributes to the overall experience—sweet, savory, and nutty flavors that will make your taste buds dance.

Recipe Timing & Difficulty

Delicious Easy Sheet Pan Cashew Chicken served with vibrant bell peppers and broccoli.

Now, let’s talk about timing. This dish is a true friend for busy weeknights. With a total time of just 30 minutes, you can have a wholesome meal on the table without spending hours in the kitchen. Plus, the difficulty level is easy, making it perfect for both novice cooks and seasoned chefs alike. You’ll impress your family and friends without breaking a sweat!

Key Ingredients & Smart Substitutions

Here’s what you’ll need to create this culinary masterpiece:

  • 1 pound boneless, skinless chicken thighs, cut into bite-sized pieces
  • 1 cup raw cashews
  • 2 cups mixed bell peppers, sliced (feel free to use your favorite colors!)
  • 1 cup broccoli florets
  • 3 tablespoons soy sauce (or tamari for a gluten-free option)
  • 2 tablespoons honey (maple syrup works as a vegan alternative)
  • 1 tablespoon sesame oil
  • 2 cloves garlic, minced
  • 1 teaspoon ginger, minced
  • Salt and pepper to taste
  • Cooked rice or quinoa for serving
  • Chopped green onions for garnish

Feel free to get creative! If you’re not a fan of cashews, almonds or peanuts can make fantastic substitutes. And if you’re looking for a veggie twist, add snap peas or carrots for a colorful crunch.

Pro Tips for Perfect Results

Now that you have your ingredients ready, let’s dive into some pro tips to ensure your Sheet Pan Cashew Chicken turns out perfectly every time:

  • Preheat your oven: Make sure to preheat your oven to 400°F (200°C) before you start assembling your dish. A hot oven ensures that everything cooks evenly and gets that beautiful caramelization.
  • Don’t overcrowd the pan: Spread out your chicken and veggies on the sheet pan. Overcrowding can lead to steaming rather than roasting, which means less flavor and texture.
  • Marinate for maximum flavor: A minimum of 15 minutes in the marinade is ideal, but for the best results, let the chicken soak in those flavors for up to 4 hours in the fridge.
  • Keep an eye on the cashews: Add the cashews halfway through cooking to ensure they stay crunchy and don’t burn.

Detailed Recipe Instructions

Ingredients Table

Here’s a quick reference for your ingredients:

  • 1 pound boneless, skinless chicken thighs, cut into bite-sized pieces
  • 1 cup raw cashews
  • 2 cups mixed bell peppers, sliced
  • 1 cup broccoli florets
  • 3 tablespoons soy sauce
  • 2 tablespoons honey
  • 1 tablespoon sesame oil
  • 2 cloves garlic, minced
  • 1 teaspoon ginger, minced
  • Salt and pepper to taste
  • Cooked rice or quinoa for serving
  • Chopped green onions for garnish

Step-by-Step Instructions

Let’s get cooking! Follow these simple steps to create your Easy Sheet Pan Cashew Chicken:

  1. Preheat the oven: Set your oven to 400°F (200°C) and line a sheet pan with parchment paper for easy cleanup.
  2. Prepare the ingredients: In a large bowl, combine the chicken, bell peppers, broccoli, and cashews. The colors should be vibrant and inviting!
  3. Make the sauce: In a separate bowl, whisk together the soy sauce, honey, sesame oil, garlic, ginger, salt, and pepper until smooth.
  4. Toss it all together: Pour the sauce over the chicken and vegetables, tossing until everything is well coated. This is where the magic begins!
  5. Spread on the pan: Spread the mixture evenly on the prepared sheet pan, making sure everything has room to breathe.
  6. Time to bake: Bake for 25-30 minutes, or until the chicken is cooked through (165°F internally) and the veggies are tender.
  7. Serve and garnish: Serve over cooked rice or quinoa and garnish with chopped green onions. Enjoy the fragrant aroma wafting through your kitchen!

Ensuring Perfect Results Every Time

To ensure your Sheet Pan Cashew Chicken turns out beautifully every time, remember these key points:

  • Check the chicken’s internal temperature: Use a meat thermometer to ensure it reaches 165°F (74°C).
  • Vegetable tenderness: Your broccoli should be tender but still have a slight crunch, so keep an eye on it during baking.
  • Watch the cashews: If they’re browning too quickly, cover the pan with foil for the last few minutes of cooking.

Serving Suggestions & FAQ

Serving Suggestions

This dish shines on its own, but if you want to take it up a notch, consider serving it with:

  • Fluffy jasmine rice: The perfect base to soak up all those delicious juices!
  • Cauliflower rice: A low-carb alternative that pairs beautifully with the flavors.
  • A simple side salad: A fresh salad dressed with sesame dressing can add a nice crunch and balance to the meal.

Storage and Reheating

Let’s talk leftovers! This recipe is fantastic for meal prep. Here’s how to store and reheat:

  • Refrigeration: Store leftovers in an airtight container in the fridge for up to 3 days. The flavors actually improve overnight!
  • Reheating: For best results, reheat in a skillet over medium heat to maintain the cashews’ crunch. Avoid the microwave if possible, as it can make the cashews soggy.
  • Freezing: You can freeze portions for up to 3 months. Thaw overnight in the refrigerator before reheating, and add a splash of water or chicken broth to prevent drying out.

Meal Prep Tips

Want to streamline your week? Here are some meal prep tips:

  • Cook a double batch on Sunday and portion into containers for grab-and-go lunches.
  • Store chicken and veggies in one container and cashews in another to keep them crunchy.

Frequently Asked Questions

Can I use different nuts in this recipe?

Absolutely! Almonds, peanuts, or pecans can work well. Just remember to adjust the seasoning since different nuts have varying salt levels.

What if I don’t have rice vinegar?

White wine vinegar or apple cider vinegar can be used as substitutes. Just keep in mind that they may alter the flavor slightly.

Can I make this dish ahead of time?

Yes! You can marinate the chicken and prep the vegetables up to 24 hours in advance. Just store them separately in the refrigerator.

Is this recipe gluten-free?

Use tamari instead of soy sauce, and check that your other ingredients are gluten-free. Tamari provides the same umami flavor without the gluten.

How can I make this spicier?

Add red pepper flakes to the marinade or include sliced jalapeños with the vegetables. The honey in the marinade balances spice beautifully, so feel free to adjust to your taste!

Can I double this recipe?

Of course! Just use two sheet pans to avoid overcrowding, which can lead to steaming instead of roasting.

Final Thoughts

This Easy Sheet Pan Cashew Chicken recipe has become a go-to in my kitchen, and I’m confident it will be in yours too. It’s the epitome of comfort food—easy to prepare, loaded with flavor, and perfect for gathering loved ones around the dinner table. Whether you’re cooking for family, friends, or just treating yourself, this dish is sure to impress.

So, what are you waiting for? Grab your apron, gather those ingredients, and let’s create some kitchen magic together. Trust me; your taste buds will thank you!

Easy Sheet Pan Cashew Chicken Recipe

Prep Time 10 minutes
Cook Time 25 minutes
Total Time 35 minutes
Servings 4 servings
Calories 450
A quick and flavorful sheet pan meal featuring tender chicken, crunchy cashews, and colorful vegetables, perfect for a weeknight dinner.

Ingredients

Protein

  • 1 pound boneless, skinless chicken thighs, cut into bite-sized pieces

Nuts

  • 1 cup raw cashews

Vegetables

  • 2 cups mixed bell peppers, sliced
  • 1 cup broccoli florets

Sauce & Oils

  • 3 tablespoons soy sauce
  • 2 tablespoons honey
  • 1 tablespoon sesame oil
  • 2 cloves garlic, minced
  • 1 teaspoon ginger, minced
  • to taste salt and pepper

For Serving

  • as needed cooked rice or quinoa
  • for garnish chopped green onions

Instructions 

  • Preheat oven to 400°F (200°C) and line a sheet pan with parchment paper.
  • Combine chicken, bell peppers, broccoli, and cashews in a large bowl.
  • Whisk together soy sauce, honey, sesame oil, garlic, ginger, salt, and pepper; pour over the mixture and toss.
  • Spread evenly on the sheet pan and bake for 25-30 minutes.
  • Serve over rice or quinoa, garnished with green onions.

Notes

Feel free to customize with your favorite vegetables or adjust seasoning to taste.
Calories: 450kcal
Cost: $15
Course: Main Course
Cuisine: Asian
Keyword: cashew, Chicken, Sheet Pan

Loved this recipe? Save it to your favorite Pinterest board so you can easily find it later! It’s the perfect way to keep all your sweet ideas in one place. ✨

Savory dish of cashew chicken featuring bite-sized pieces and a medley of vegetables.

The Butter Chicken That Brings the Family Together on a Busy Weeknight

Picture this: the sun is setting, casting a warm glow through your kitchen window, and the enticing aroma of spices dances through the air. You’ve just finished a long day, and the last thing you want is to spend hours in the kitchen. Enter my Quick & Easy Homemade Butter Chicken—your new go-to comfort dish that wraps you in warmth and flavor, ensuring everyone at the table asks for seconds!

This recipe is not just about satisfying hunger; it’s about creating moments. Moments when your family gathers around the table, forks clinking against plates, laughter mingling with the sizzling sounds from the stove. Butter chicken is that magical dish that does just that. Creamy, spiced, and oh-so-comforting, it’s a delightful blend that brings everyone together, making weeknight dinners feel special.

Ingredients

Before we dive into the cooking magic, let’s gather our ingredients. Here’s what you’ll need:

  • 1 lb boneless chicken thighs, cut into chunks
  • 2 tablespoons butter
  • 1 onion, finely chopped
  • 3 cloves garlic, minced
  • 1 tablespoon ginger, grated
  • 1 can (14 oz) crushed tomatoes
  • 1 cup heavy cream
  • 2 teaspoons garam masala
  • 1 teaspoon ground cumin
  • 1 teaspoon paprika
  • Salt and pepper to taste
  • Fresh cilantro for garnish
  • Cooked rice or naan for serving

Instructions

Delicious homemade butter chicken featuring tender chicken pieces in a rich orange sauce, with a soft focus background.

Now that we have everything ready, let’s get cooking! Follow these simple steps to create a dish that will leave you—and your family—smiling:

  1. Melt the Butter: In a large skillet over medium heat, melt the butter. Let it sizzle and swirl around the pan, filling your kitchen with a delightful aroma.
  2. Sauté the Aromatics: Add the finely chopped onion and sauté until it becomes translucent, about 5 minutes. This step is key; the onions should be soft and sweet, creating a beautiful base for your dish.
  3. Add Garlic and Ginger: Stir in the minced garlic and grated ginger, cooking for an additional minute. Trust me, the smell will make your mouth water!
  4. Brown the Chicken: Toss in the chicken chunks, cooking until they are browned on all sides. This usually takes about 5-7 minutes. You want that golden color to develop, as it adds depth to the flavor.
  5. Mix in the Tomatoes and Spices: Pour in the crushed tomatoes, followed by the garam masala, cumin, paprika, salt, and pepper. Stir everything together, letting the spices bloom in the heat.
  6. Simmer: Reduce the heat and let your mixture simmer for 15-20 minutes, allowing the chicken to cook through and the flavors to meld beautifully.
  7. Add the Cream: Finally, pour in the heavy cream and stir until everything is well combined. Let it simmer for another 5 minutes. This is where it transforms from a simple chicken dish to a creamy, dreamy masterpiece!
  8. Garnish and Serve: Garnish with fresh cilantro and serve hot with rice or warm naan. Watch as your family digs in, and enjoy those happy faces!

Substitutions

Sometimes, creativity in the kitchen leads to the best discoveries! Here are a few substitutions you can consider:

  • Chicken: While I love using boneless chicken thighs for their juiciness, you can easily swap them for chicken breast if that’s what you have on hand. Just be mindful that breast meat may dry out more quickly, so adjust cooking time accordingly.
  • Heavy Cream: For a lighter option, try using coconut cream or full-fat yogurt. Just remember, this will alter the flavor slightly, but it can still be delicious!
  • Spices: If you don’t have garam masala, a mix of cumin, coriander, and a touch of cinnamon can mimic that warm, aromatic flavor profile. Spices are flexible friends in the kitchen!
  • Vegetarian Option: Swap the chicken for chickpeas or tofu for a delightful vegetarian twist. Simply follow the same cooking instructions, adjusting the cooking time as needed.

Equipment

To whip up this delightful butter chicken, you’ll need just a few basic kitchen tools:

  • A large skillet or frying pan for cooking
  • A wooden spoon or spatula for stirring
  • A sharp knife for chopping
  • A cutting board
  • A measuring cup and spoons

Storage and Freezing

Leftovers—if you’re lucky enough to have any—can be stored in an airtight container in the refrigerator for up to 3 days. Simply reheat gently on the stovetop over low heat, adding a splash of water or cream if the sauce thickens too much.

If you want to freeze this dish, it’s perfect for meal prep! Let it cool completely, then transfer it to a freezer-safe container. It can be frozen for up to 2 months. When you’re ready to enjoy, thaw it in the fridge overnight and reheat as mentioned above.

Top Tips for Perfect Butter Chicken

To ensure your butter chicken turns out perfectly every time, keep these tips in mind:

  • Don’t rush the sautéing: Taking your time to sauté the onions, garlic, and ginger will pay off in flavor.
  • Adjust the spices: If you love a bit of heat, feel free to add cayenne pepper or chili powder to the mix. Just a pinch can elevate the dish!
  • Taste as you go: This is your dish! Adjust seasonings to your liking; a little more salt or a sprinkle of sugar can make a world of difference.
  • Garnish generously: Fresh cilantro adds brightness and a pop of color, making your dish even more inviting.

FAQs

Can I make this butter chicken in advance?
Absolutely! It actually tastes even better the next day as the flavors continue to meld. Just store it in the fridge, and you’re good to go!

What can I serve with butter chicken?
Traditionally, butter chicken is served with rice or naan. You can also pair it with a simple salad or roasted vegetables for a complete meal.

Is this dish kid-friendly?
Yes! The creamy texture and mild spices make it appealing to kids. Plus, you can always adjust the spice level to suit their taste.

What if I don’t have garam masala?
No worries! You can use a combination of spices like cumin, coriander, turmeric, and a pinch of cinnamon to create a similar flavor profile.

Related Recipes You’ll Love

If you enjoyed this butter chicken, you might also love these delicious dishes:

Conclusion

Cooking is about connection, and my Quick & Easy Homemade Butter Chicken brings that connection to the dinner table in the most delicious way. It’s a dish that warms the heart and satisfies the soul, making it perfect for busy weeknights or special family gatherings. So, gather your loved ones, whip up this comforting meal, and enjoy the magic of togetherness around your table. Happy cooking from my kitchen to yours!

Quick & Easy Homemade Butter Chicken

Prep Time 10 minutes
Cook Time 25 minutes
Total Time 35 minutes
Servings 4 servings
Calories 450
A flavorful and creamy butter chicken recipe that comes together quickly for a satisfying meal.

Ingredients

Protein

  • 1 lb boneless chicken thighs, cut into chunks

Dairy

  • 2 tablespoons butter
  • 1 cup heavy cream

Vegetables & Aromatics

  • 1 onion onion, finely chopped
  • 3 cloves garlic, minced
  • 1 tablespoon ginger, grated

Spices

  • 2 teaspoons garam masala
  • 1 teaspoon ground cumin
  • 1 teaspoon paprika

Canned & Jarred Goods

  • 1 can crushed tomatoes (14 oz)

Seasonings

  • salt and pepper to taste salt and pepper

Garnish & Serve

  • fresh cilantro for garnish cilantro
  • cooked rice or naan for serving rice or naan

Instructions 

  • Melt butter in a skillet, sauté onions until translucent.
  • Add garlic and ginger, cook for 1 minute. Add chicken and brown.
  • Stir in crushed tomatoes and spices, simmer 15-20 minutes.
  • Pour in heavy cream, cook 5 minutes. Garnish with cilantro and serve.

Notes

Use fresh cilantro for the best flavor. Serve with rice or naan for a complete meal.
Calories: 450kcal
Cost: $15
Course: Main Course
Cuisine: Indian
Keyword: Butter Chicken

Loved this recipe? Save it to your favorite Pinterest board so you can easily find it later! It’s the perfect way to keep all your sweet ideas in one place. ✨

A vibrant plate of butter chicken showcasing its velvety texture and warmth, accented by herbs.

Sweet Heat and Simplicity: My Go-To Sheet Pan Hot Honey Chicken & Zucchini

Welcome to my cozy kitchen, where the air is always filled with delicious aromas and the promise of a comforting meal. If you’re anything like me, you know that after a long day, the last thing you want to do is spend hours slaving over a hot stove. That’s why I’m thrilled to share with you my favorite weeknight recipe: Easy Sheet Pan Hot Honey Chicken & Zucchini. This dish brings together the sweet, spicy, and savory flavors that make your taste buds dance while keeping your prep and cleanup time to a minimum. It’s perfect for those busy evenings when you crave something delightful without the fuss!

Why You’ll Love This Sheet Pan Hot Honey Chicken & Zucchini

This recipe is not just about convenience; it’s a culinary experience that brings warmth and joy to your dinner table. Here’s why you’ll adore it:

  • Simple Ingredients: With just a handful of ingredients, you can create a dish that feels like it took hours to prepare.
  • Flavor Explosion: The combination of hot honey and garlic creates a mouthwatering flavor profile that’s hard to resist.
  • One-Pan Wonder: Enjoy the ease of cooking everything on a single sheet pan, making cleanup a breeze.
  • Healthy and Wholesome: Packed with protein and veggies, this dish is a nutritious addition to your dinner repertoire.

Ingredients for Easy Sheet Pan Hot Honey Chicken & Zucchini

A vibrant dish of Easy Sheet Pan Hot Honey Chicken with zucchini, showcasing texture and color under warm lighting.

Let’s gather our ingredients and get started on this delicious journey:

  • 1.5 pounds boneless, skinless chicken thighs
  • 2 medium zucchinis, sliced
  • 3 tablespoons olive oil
  • 2 tablespoons hot honey
  • 1 teaspoon garlic powder
  • 1 teaspoon paprika
  • Salt and pepper, to taste
  • Fresh parsley, for garnish (optional)

How to Make Easy Sheet Pan Hot Honey Chicken & Zucchini

Ready to dive into the cooking process? Let’s go through each step together, ensuring you have all the tips and tricks you need to make this dish a hit!

Step 1: Preheat the Oven

Start by preheating your oven to 400°F (200°C). This step is crucial for even cooking and ensures that everything comes out perfectly tender and juicy.

Step 2: Prepare the Marinade

In a large mixing bowl, combine the chicken thighs, olive oil, hot honey, garlic powder, paprika, salt, and pepper. Toss everything together until the chicken is well coated. This marinade is where the magic happens! The hot honey adds a touch of sweetness while the garlic powder and paprika bring depth to the flavor.

Step 3: Marinate the Chicken

If you have a bit of time, let the chicken marinate for at least 15 minutes (or up to 2 hours in the refrigerator) to allow the flavors to meld beautifully. If you’re in a rush, don’t worry—this dish will still taste fantastic!

Step 4: Arrange on the Sheet Pan

Line a large sheet pan with parchment paper or foil for easy cleanup. Spread the marinated chicken thighs out in a single layer on one side of the pan. On the other side, add the sliced zucchini, drizzling them with a bit more olive oil and seasoning with salt and pepper. This setup ensures that everything cooks evenly while soaking up those delicious juices from the chicken.

Step 5: Bake to Perfection

Place the sheet pan in your preheated oven and bake for 25-30 minutes, or until the chicken reaches an internal temperature of 165°F (75°C). The zucchini should be tender yet retain a bit of crunch, adding a lovely texture to the dish.

Step 6: Broil for Extra Flavor

If you love that gorgeous caramelization (who doesn’t?), switch your oven to broil for the last 2-3 minutes. Keep a close eye on it, as broiling can go from beautifully browned to burnt in a flash!

Step 7: Garnish and Serve

Once your dish is out of the oven, let it rest for a few minutes. This step is essential as it allows the juices to redistribute, keeping the chicken succulent. Garnish with fresh parsley for a pop of color and serve hot. Enjoy the delightful combination of sweet and spicy flavors with each bite!

Tips for Success

  • Use Fresh Ingredients: The fresher your ingredients, the better your dish will taste. Try to use seasonal zucchinis for the best flavor.
  • Adjust the Heat: If you’re not a fan of too much heat, you can reduce the amount of hot honey or even use regular honey instead. Alternatively, add more red pepper flakes if you want to amp up the spice!
  • Make it a Meal: Serve this dish with a side of rice or a hearty grain like quinoa to make it a complete meal.

Variations

This recipe is incredibly versatile, and you can easily switch things up! Here are some fun variations:

  • Different Proteins: Swap out chicken thighs for chicken breasts, pork chops, or even tofu for a vegetarian option.
  • More Veggies: Feel free to add bell peppers, asparagus, or even sweet potatoes to the sheet pan for extra nutrition and flavor.
  • Seasoning Swaps: Experiment with different spices like cumin, chili powder, or Italian seasoning to create a unique flavor profile.

Equipment Needed

To whip up this delightful dish, you’ll need:

  • A large mixing bowl
  • A sheet pan (preferably lined with parchment paper)
  • A meat thermometer (for checking doneness)
  • A whisk or spoon for mixing

Storage & Freezing

If you find yourself with leftovers (which is rare, but it happens!), here’s how to store them:

  • Refrigerator: Store any leftovers in an airtight container in the fridge for up to 3 days.
  • Freezer: You can freeze the cooked chicken and zucchini in a freezer-safe container for up to 3 months. Just thaw in the fridge overnight before reheating.
  • Reheating: Reheat in the oven at 350°F (175°C) until warmed through, or use the microwave for a quick meal.

FAQs about Easy Sheet Pan Hot Honey Chicken & Zucchini

Can I use chicken breasts instead of thighs?

Absolutely! However, keep in mind that chicken breasts may dry out more quickly, so adjust the cooking time accordingly.

How can I make this dish spicier?

If you love a kick, feel free to add more red pepper flakes or a splash of sriracha to the marinade. You can also serve it with a spicy dipping sauce on the side.

Can I prepare this dish in advance?

Yes! You can marinate the chicken a day ahead and store it in the refrigerator. Just assemble and bake when you’re ready to eat.

What other vegetables can I use?

Besides zucchini, you can experiment with bell peppers, asparagus, or even broccoli. Each will bring a unique flavor and texture to the dish.

Is this recipe gluten-free?

It sure is! Just make sure to use gluten-free hot honey and soy sauce, and you’re good to go!

Final Thoughts

Cooking should be a joyful experience, and my Easy Sheet Pan Hot Honey Chicken & Zucchini embodies that spirit. It’s not just a meal; it’s a celebration of flavors and a way to bring loved ones together around the table. Whether it’s a busy weeknight or a casual gathering, this dish is sure to impress and satisfy. So roll up your sleeves, embrace the process, and enjoy the delightful moments that come from sharing good food with great company! Don’t forget to check out some of my other favorites, like Cheesy Garlic Chicken Wraps or Garlic Parmesan Chicken Pasta. Happy cooking!

Easy Sheet Pan Hot Honey Chicken & Zucchini

Prep Time 10 minutes
Cook Time 30 minutes
Total Time 40 minutes
Servings 4 servings
Calories 450
A quick and flavorful sheet pan dinner featuring tender chicken thighs and zucchini glazed with hot honey.

Ingredients

Protein

  • 1.5 pounds boneless, skinless chicken thighs

Vegetables

  • 2 medium zucchinis zucchinis, sliced

Oils & Condiments

  • 3 tablespoons olive oil
  • 2 tablespoons hot honey

Spices & Seasonings

  • 1 teaspoon garlic powder
  • 1 teaspoon paprika
  • to taste salt and pepper salt and pepper

Garnish

  • optional fresh parsley (for garnish)

Instructions 

  • Preheat oven to 400°F (200°C).
  • Toss chicken with olive oil, hot honey, garlic powder, paprika, salt, and pepper.
  • Spread chicken on a sheet pan and add zucchini slices.
  • Bake for 25-30 minutes until cooked through.
  • Optional: Broil for 2-3 minutes for caramelization. Garnish with parsley and serve.

Notes

Use a meat thermometer to ensure chicken reaches 165°F (75°C).
Calories: 450kcal
Cost: $15
Course: Main Course
Cuisine: American
Keyword: Chicken, hot honey, zucchini

Loved this recipe? Save it to your favorite Pinterest board so you can easily find it later! It’s the perfect way to keep all your sweet ideas in one place. ✨

Plated hot honey chicken and roasted zucchini with a soft-focus background, highlighting the ingredients' appeal.

A Flavorful Escape: Mediterranean Chicken Gyros That Transport You to the Sun-Kissed Coast

Welcome to my kitchen, where today we’re about to embark on a culinary journey that takes us straight to the sun-kissed coasts of the Mediterranean! If you’ve ever dreamt of biting into a warm, fluffy pita stuffed with juicy chicken, fresh veggies, and creamy tzatziki, then you’re in for a treat. I’m excited to share with you my recipe for Mediterranean Chicken Gyros: Quick & Healthy! Trust me, this dish is perfect for busy weeknights or a delightful weekend treat, and it brings a burst of vibrant flavors that will make your taste buds dance.

Growing up in Oregon, I often found comfort in the kitchen, where the aromas of spices and fresh ingredients would mingle, creating a symphony of scents. Chicken gyros were a favorite in our home, serving as a reminder of family gatherings and sunny picnics. As I’ve moved through life, living in bustling Seattle, I’ve learned to recreate those warm memories with my own twist, bringing a little Mediterranean magic into my kitchen. So, let’s roll up our sleeves and dive into this easy recipe that promises to be a hit with everyone!

Ingredients You’ll Need

To whip up these delicious gyros, you’ll need the following ingredients:

  • 1 lb boneless, skinless chicken breasts
  • 2 tablespoons olive oil
  • 2 teaspoons dried oregano
  • 1 teaspoon garlic powder
  • 1 teaspoon paprika
  • Salt and pepper to taste
  • 4 whole wheat pita breads
  • 1 cup cherry tomatoes, halved
  • 1 cucumber, diced
  • 1/2 red onion, thinly sliced
  • 1/2 cup plain Greek yogurt
  • 1 tablespoon lemon juice
  • Fresh parsley for garnish

With these ingredients, you’re not just making dinner; you’re crafting a meal that evokes the warmth of a Mediterranean sunset. The combination of spices is what brings this dish to life, so let’s get started!

How to Make Mediterranean Chicken Gyros

Side-lit professional photograph of a chicken gyros with vibrant toppings.

Let’s walk through the steps to create these mouthwatering gyros. Don’t worry; it’s simpler than it looks!

  1. Prepare the Marinade: In a medium bowl, combine the olive oil, dried oregano, garlic powder, paprika, salt, and pepper. This aromatic mixture is the heart of our gyros.
  2. Marinate the Chicken: Add the chicken breasts to the marinade, ensuring they are fully coated. Cover the bowl and let it marinate for at least 15 minutes. If you have a little extra time, let it sit for 30 minutes to deepen the flavors.
  3. Make the Tzatziki: While the chicken is marinating, let’s whip up the tzatziki! In a small bowl, mix the Greek yogurt, lemon juice, and a pinch of salt. This creamy sauce will add a refreshing touch to your gyros.
  4. Cook the Chicken: Heat a grill or skillet over medium heat. Cook the marinated chicken for about 6-7 minutes on each side or until it’s cooked through and has those beautiful grill marks. The sizzle of the chicken will make your mouth water!
  5. Slice the Chicken: Once cooked, remove the chicken from the heat and let it rest for a few minutes before slicing it into strips. This resting period allows the juices to redistribute, ensuring every bite is tender and juicy.
  6. Warm the Pita: While the chicken rests, warm the pita breads in a toaster or on the grill for about 1 minute until they are soft and pliable.
  7. Assemble the Gyros: Now comes the fun part! On each warm pita, layer the sliced chicken, halved cherry tomatoes, diced cucumber, and thinly sliced red onion. Top it all off with a generous dollop of tzatziki sauce.
  8. Garnish and Serve: Sprinkle fresh parsley on top for that pop of color and flavor. Serve your Mediterranean chicken gyros immediately, and watch as everyone gathers around for a taste of this delightful dish!

Tips for the Perfect Gyros

Here are some tips to ensure your gyros turn out perfectly:

  • Marination Time: The longer you marinate the chicken, the more flavor it will absorb. Try to marinate for at least 30 minutes or even overnight for an explosion of taste.
  • Grill Marks: If you’re using a skillet, consider adding a bit of cooking spray or extra olive oil to get those coveted grill marks.
  • Fresh Ingredients: Use the freshest vegetables you can find. A crisp cucumber and ripe tomatoes will elevate your gyros!

Variations to Try

Feeling adventurous? Here are some variations you can try with this recipe:

  • Add Spice: If you like a little heat, try adding some cayenne pepper to your marinade.
  • Vegetarian Option: Substitute the chicken with grilled halloumi or marinated tofu for a delicious vegetarian gyro.
  • Different Sauces: Experiment with different sauces like a spicy harissa or a tangy tahini sauce instead of tzatziki.

Substitutions You Can Make

Cooking is all about flexibility! Here are some substitutions if you don’t have certain ingredients on hand:

  • Chicken: You can use boneless, skinless thighs for a juicier alternative.
  • Pita Bread: If you don’t have whole wheat pita, any flatbread or even lettuce wraps can work.
  • Greek Yogurt: For a dairy-free option, try coconut yogurt or a cashew-based yogurt.

Equipment You’ll Need

To create these Mediterranean chicken gyros, you’ll need:

  • A grill or skillet for cooking the chicken
  • A mixing bowl for marinating the chicken and making the tzatziki
  • A sharp knife for slicing the chicken
  • A toaster or grill for warming the pita

Storage and Freezing Tips

If you have leftovers (which is rare, but just in case!), here’s how to store them:

  • Refrigerate: Store any leftover chicken and tzatziki in airtight containers in the fridge for up to 3 days.
  • Freezing: You can freeze the marinated chicken before cooking it for up to 2 months. Just be sure to thaw it in the fridge overnight before cooking.

FAQs

Can I make these gyros ahead of time?

Absolutely! You can marinate the chicken the night before and store the tzatziki in the fridge. Just assemble the gyros when you’re ready to eat.

What’s the best way to reheat gyros?

If you have leftover gyros, the best way to reheat them is in a skillet over medium heat. This will keep the pita warm and the chicken juicy.

Can I use other proteins?

Yes! Feel free to substitute chicken with beef, lamb, or even shrimp. Just adjust the cooking time accordingly.

Conclusion

There you have it—my take on Mediterranean Chicken Gyros that are not only quick and healthy but also bursting with flavor that will transport you to a sunny Mediterranean beach. These gyros are perfect for a weeknight dinner or a gathering with friends, and I promise they’ll leave everyone asking for seconds!

So, gather your ingredients, turn up your favorite tunes, and let’s create a meal that not only fills the belly but also warms the heart. And when you take that first bite, close your eyes and let the flavors whisk you away to a sun-soaked Mediterranean escape. Happy cooking, my friends!

Don’t forget to check out some of my other favorite recipes, like my Cheesy Garlic Chicken Wraps or Chicken Fillet in Creamy Garlic Parmesan Sauce. Let’s keep the flavor adventure going!

Mediterranean Chicken Gyros: Quick & Healthy!

Prep Time 15 minutes
Cook Time 14 minutes
Total Time 29 minutes
Servings 4 servings
Calories 450
Enjoy a flavorful and healthy Mediterranean-inspired chicken gyros, perfect for a quick weeknight dinner.

Ingredients

Meat

  • 1 lb boneless, skinless chicken breasts
  • 2 tablespoons olive oil
  • 2 teaspoons dried oregano
  • 1 teaspoon garlic powder
  • 1 teaspoon paprika
  • to taste salt and pepper salt and pepper

Bread

  • 4 whole wheat pita breads whole wheat pita breads

Vegetables

  • 1 cup cherry tomatoes, halved
  • 1 cucumber diced cucumber
  • 1/2 red onion red onion, thinly sliced

Sauce & Garnish

  • 1/2 cup plain Greek yogurt
  • 1 tablespoon lemon juice

Garnish

  • fresh parsley fresh parsley for garnish

Instructions 

  • Mix olive oil, oregano, garlic powder, paprika, salt, and pepper. Marinate chicken for 15 minutes.
  • Prepare tzatziki by mixing Greek yogurt, lemon juice, and salt.
  • Grill chicken 6-7 minutes per side, then rest and slice into strips.
  • Warm pita breads, then assemble gyros with chicken, vegetables, and tzatziki. Garnish with parsley.

Notes

Marinate the chicken for better flavor and ensure thorough cooking.
Calories: 450kcal
Cost: $15
Course: Main Course
Cuisine: Mediterranean
Keyword: Chicken

Loved this recipe? Save it to your favorite Pinterest board so you can easily find it later! It’s the perfect way to keep all your sweet ideas in one place. ✨

A detailed view of a Mediterranean Chicken Gyros, featuring grilled chicken and fresh garnishes.