Author

Ava

Browsing

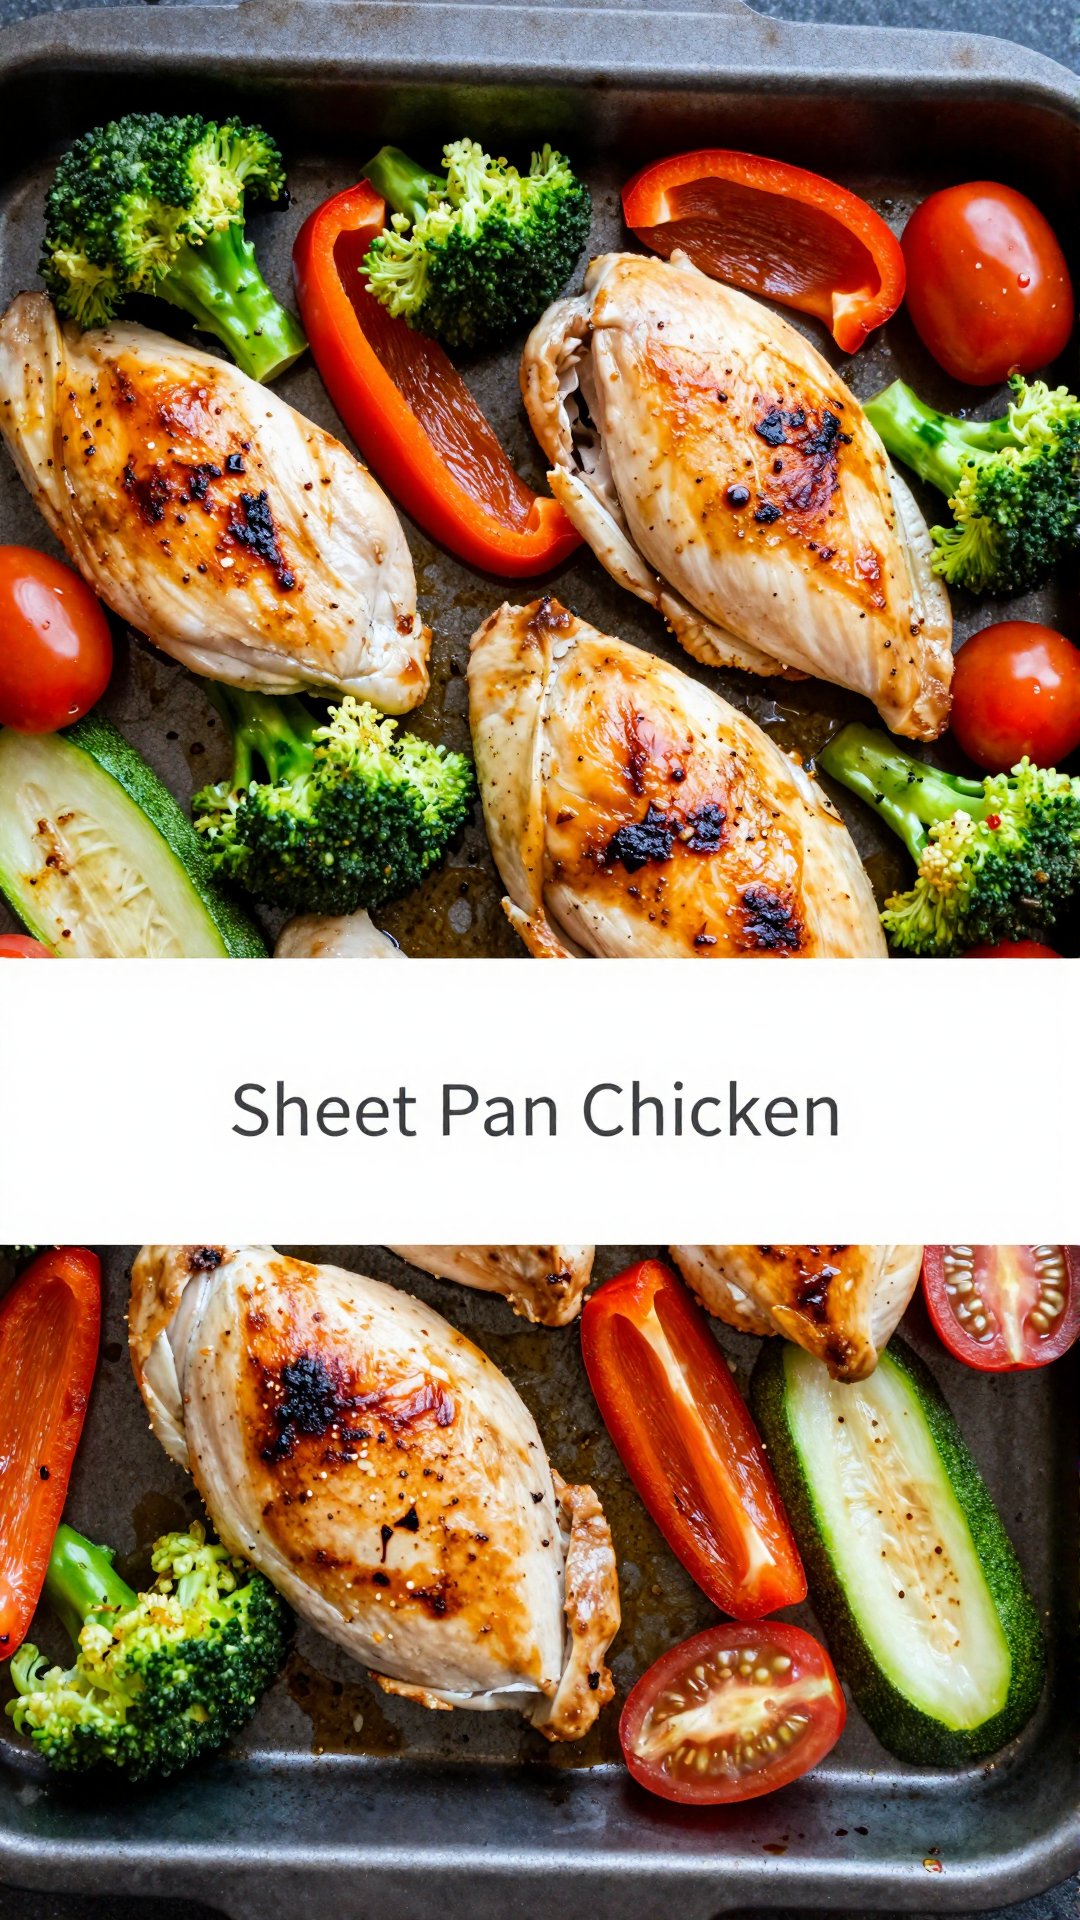
Hey there, friend! Ava here, welcoming you into my cozy Seattle kitchen. Today, we’re whipping up something that’s become a staple in my household: a Quick & Easy Sheet Pan Chicken and Vegetables Recipe. Seriously, if you’re looking for a dinner that’s both incredibly simple and bursting with flavor, you’ve hit the jackpot. This is one of those recipes that I find myself turning to again and again, especially on those hectic weeknights when time is of the essence. Think tender, juicy chicken nestled amongst a colorful medley of perfectly roasted veggies. Are you hungry yet?

This recipe isn’t just about convenience; it’s about creating a meal that’s both satisfying and nourishing. I’m all about finding that sweet spot where delicious meets nutritious, and this sheet pan wonder hits the mark every time. It’s the kind of dish that makes you feel good from the inside out, and that’s what cooking is all about, right?

Why You’ll Love This Sheet Pan Chicken and Vegetables Recipe

Okay, let’s dive into why this recipe is a total game-changer. Trust me, once you try it, you’ll be hooked. This recipe is a delightful mix of flavors, textures, and convenience. It’s not only delicious, but also incredibly versatile, allowing you to customize it to your liking. Here’s why you’ll fall in love:

  • Minimal Cleanup: Seriously, who loves doing dishes? With everything cooking on one sheet pan, cleanup is a breeze.
  • Customizable: Don’t like broccoli? Swap it out for Brussels sprouts. Prefer sweet potatoes over zucchini? Go for it! This recipe is your canvas.
  • Healthy and Nutritious: Packed with protein and a rainbow of vegetables, this meal is a nutritional powerhouse.
  • Quick and Easy: From prep to plate, this dish comes together in under an hour, making it perfect for busy weeknights.
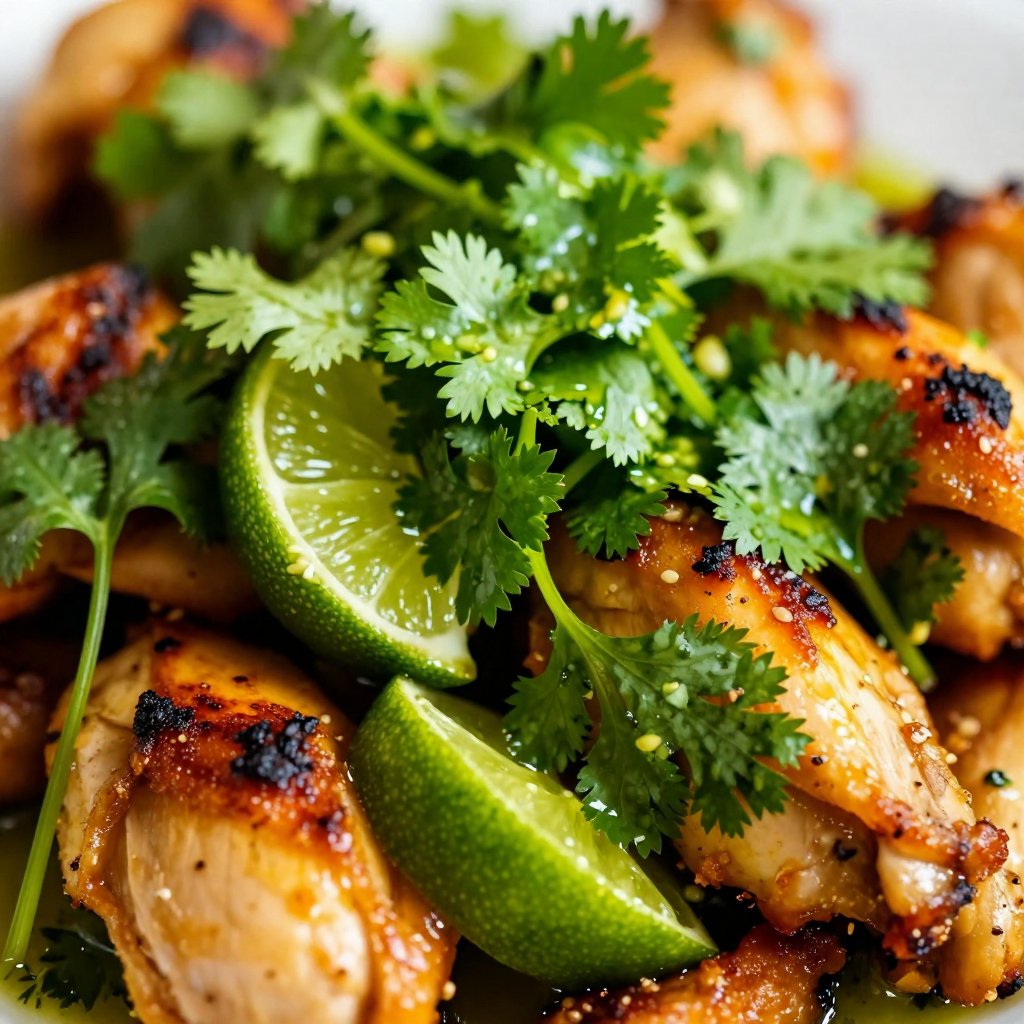
  • Delicious and Flavorful: The combination of savory chicken and perfectly roasted vegetables, seasoned with garlic, herbs, and a hint of lemon, is simply irresistible.

I mean, who doesn’t love a good sheet pan dinner? I find them especially useful when I’m short on time, but still want a home-cooked meal. My family absolutely loves this recipe, and I’m sure yours will too!

The Ingredients You’ll Need

Alright, let’s gather our ingredients! Here’s what you’ll need to create this masterpiece. Remember, the beauty of this recipe is its flexibility, so feel free to adjust the vegetables based on what you have on hand or what’s in season.

  • 4 Chicken breasts, boneless and skinless
  • 2 cups Broccoli florets
  • 2 Bell peppers, sliced
  • 1 cup Cherry tomatoes
  • 1 Zucchini, sliced
  • 3 tbsp Olive oil
  • 1 tsp Garlic powder
  • 1 tsp Italian seasoning
  • 1/2 tsp Paprika
  • 2 tbsp Lemon juice
  • Salt, to taste
  • Black pepper, to taste
  • Fresh parsley, chopped for garnish
Recipe Image

Step-by-Step Guide to Sheet Pan Chicken and Vegetables

Ready to get cooking? Here’s a simple, step-by-step guide to creating this delightful sheet pan chicken and vegetables recipe. Trust me, it’s easier than you think!

  1. Preheat and Prep: Preheat your oven to 400°F (200°C) and line a large sheet pan with parchment paper. This makes cleanup a breeze!
  2. Mix the Magic: In a small bowl, whisk together olive oil, garlic powder, Italian seasoning, paprika, lemon juice, salt, and black pepper. This is our flavor bomb!
  3. Arrange the Ingredients: Place the chicken breasts in the center of the sheet pan. Arrange broccoli, bell peppers, cherry tomatoes, and zucchini around the chicken.
  4. Drizzle and Coat: Drizzle the olive oil mixture over the chicken and vegetables, ensuring they are evenly coated. This is key to getting that delicious roasted flavor.
  5. Bake to Perfection: Bake in the preheated oven for 25-30 minutes until the chicken is cooked through and the vegetables are tender. Use a meat thermometer to ensure the chicken reaches an internal temperature of 165°F (74°C).
  6. Garnish and Serve: Garnish with fresh parsley before serving. A little pop of green makes everything look even more appetizing!

And there you have it! A complete, delicious, and healthy meal, all cooked on one sheet pan. It’s that easy!

Pro Tips for the Perfect Sheet Pan Chicken and Vegetables

Want to take your sheet pan game to the next level? Here are a few pro tips that I’ve learned over the years to ensure your dish is always a winner:

  • Don’t Overcrowd the Pan: Make sure the vegetables and chicken are spread out in a single layer. Overcrowding can lead to steaming instead of roasting, resulting in soggy vegetables.
  • Cut Vegetables Evenly: This ensures that everything cooks at the same rate. Nobody wants crunchy broccoli and mushy zucchini!
  • Use a Meat Thermometer: The best way to ensure your chicken is cooked through is to use a meat thermometer. Insert it into the thickest part of the breast; it should read 165°F (74°C).
  • Preheat the Pan: For extra crispy vegetables, preheat the sheet pan in the oven for a few minutes before adding the ingredients.
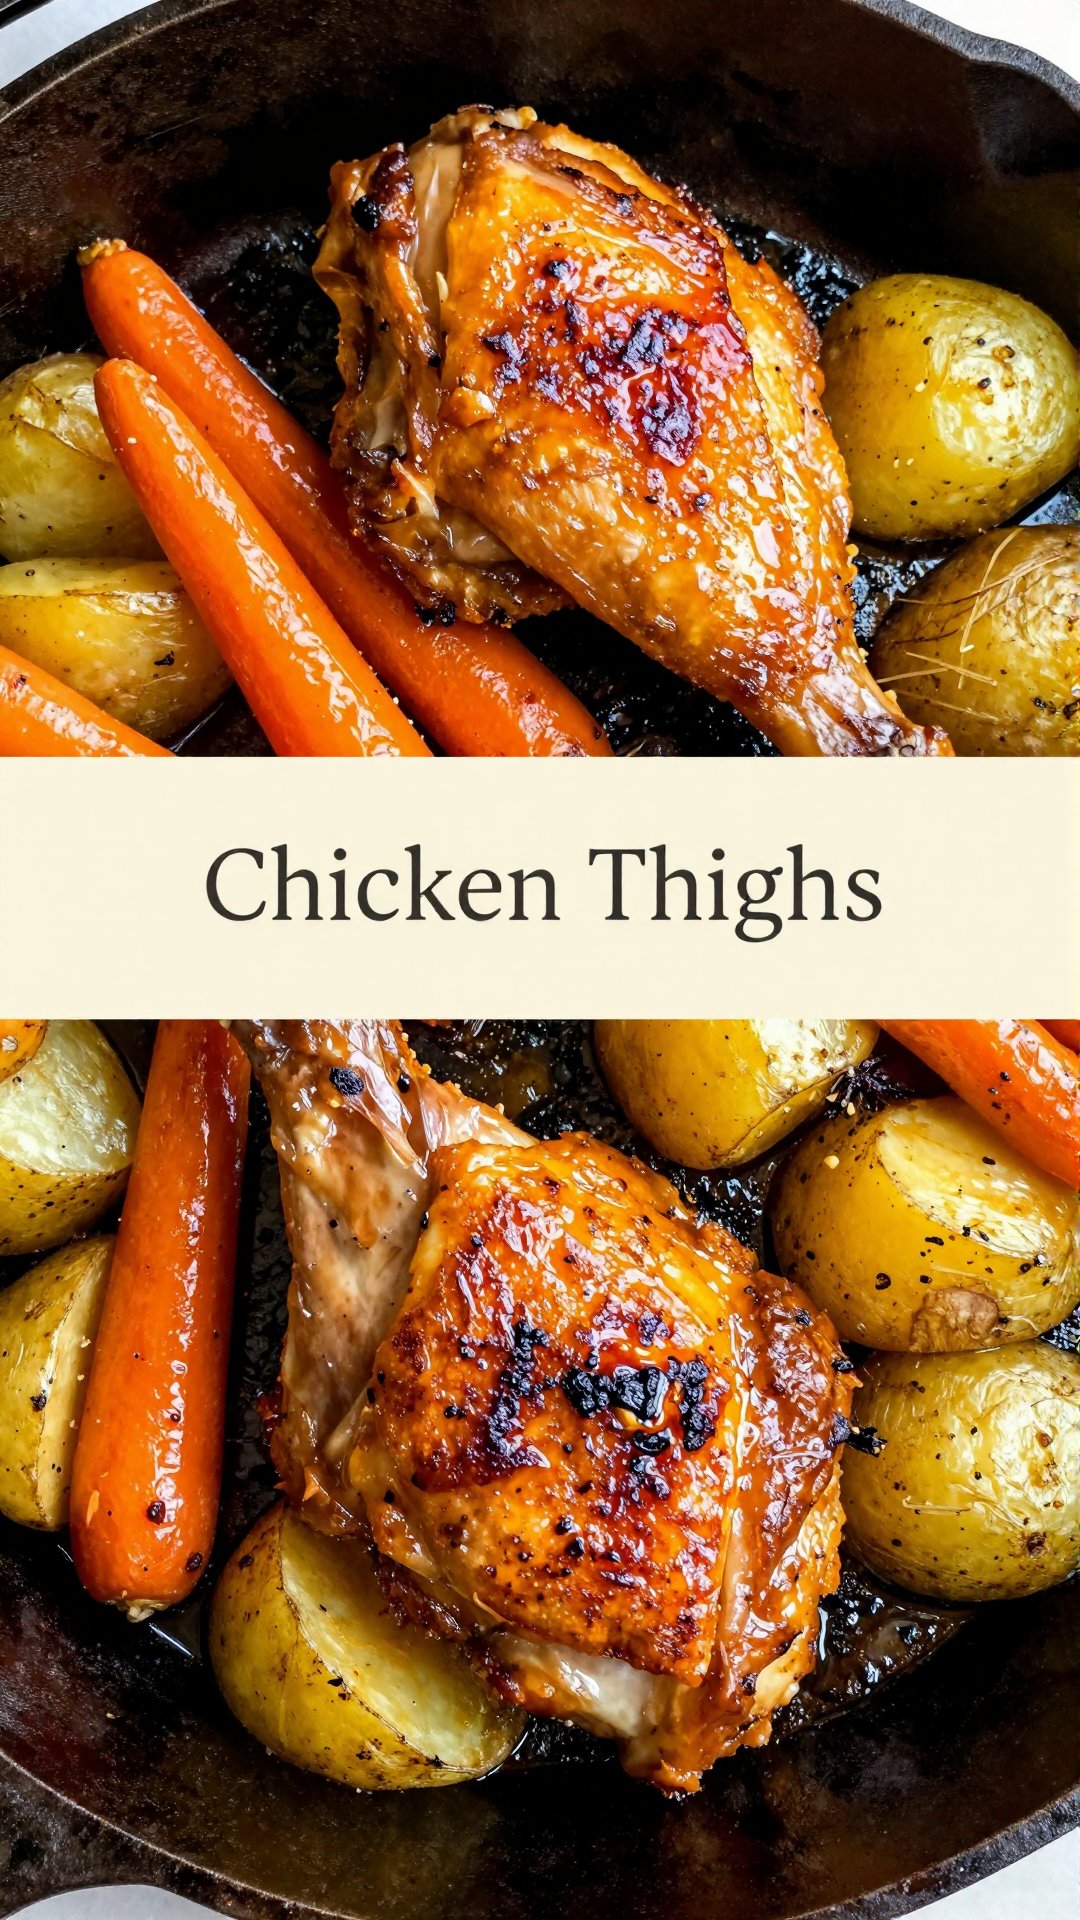
  • Add Heartier Vegetables First: If you’re using root vegetables like potatoes or carrots, add them to the pan a few minutes before the other vegetables, as they take longer to cook.

These tips will help you achieve perfectly cooked chicken and tender-crisp vegetables every time. Experiment with different seasonings and vegetable combinations to find your perfect sheet pan masterpiece!

Common Mistakes to Avoid

We all make mistakes in the kitchen, but knowing what to watch out for can help you avoid some common pitfalls. Here are a few mistakes to avoid when making sheet pan chicken and vegetables:

  • Not Using Enough Oil: Olive oil is essential for roasting vegetables properly. It helps them caramelize and develop that delicious roasted flavor. Don’t skimp!
  • Skipping the Parchment Paper: Parchment paper makes cleanup so much easier and prevents the vegetables from sticking to the pan.
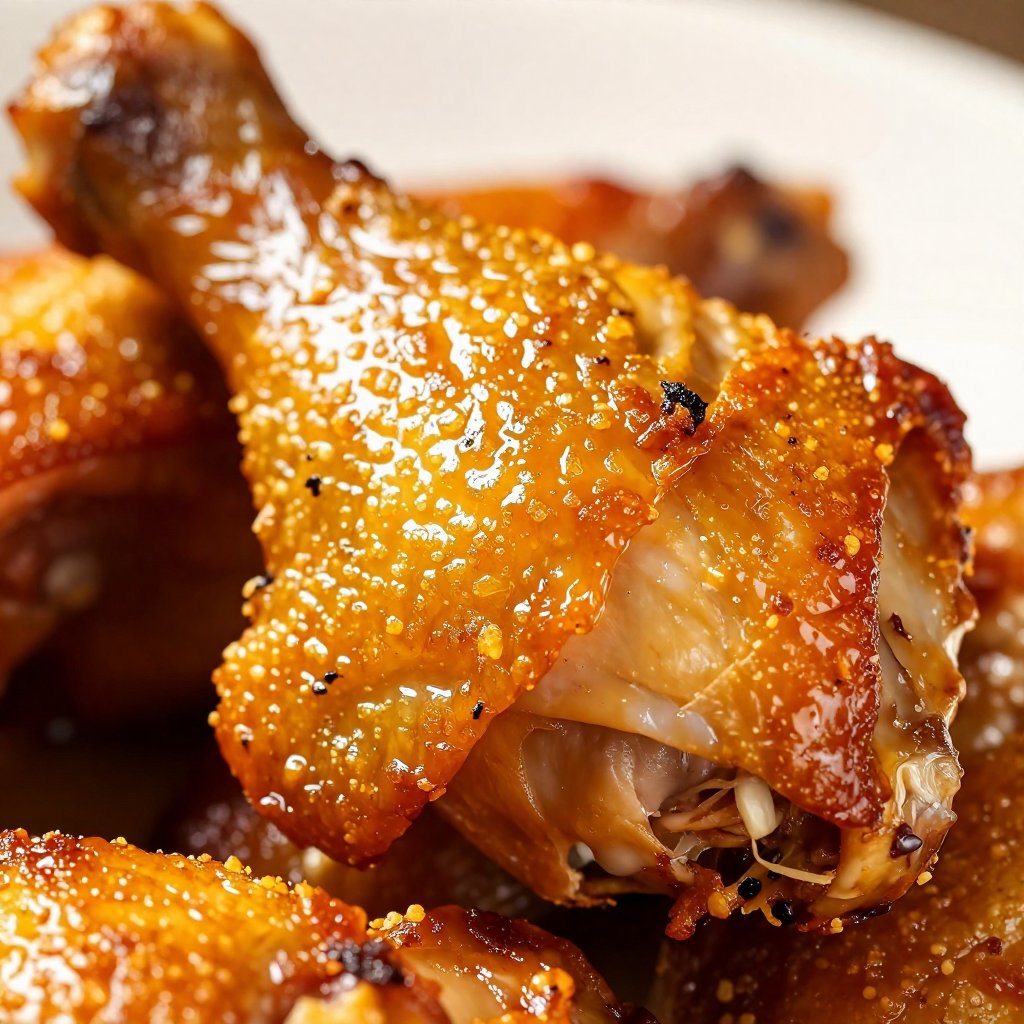
  • Overcooking the Chicken: Dry chicken is a sad chicken. Use a meat thermometer to ensure it’s cooked to perfection without drying out.
  • Not Seasoning Properly: Seasoning is key to bringing out the flavors of the chicken and vegetables. Don’t be afraid to experiment with different herbs and spices.
  • Adding Too Much Liquid: Adding too much liquid can cause the vegetables to steam instead of roast. If you’re using a marinade, make sure to drain off any excess before adding the ingredients to the pan.

Learning from your mistakes is part of the fun of cooking! Don’t be discouraged if your first attempt isn’t perfect. Keep practicing, and you’ll be a sheet pan pro in no time.

Delicious Variations to Try

One of the best things about this recipe is how versatile it is. Here are a few delicious variations to try:

  • Spicy Chicken and Veggies: Add a pinch of red pepper flakes to the olive oil mixture for a kick of heat.
  • Mediterranean Chicken and Veggies: Use Mediterranean vegetables like eggplant, zucchini, and bell peppers. Season with oregano, thyme, and a squeeze of lemon juice.
  • Asian-Inspired Chicken and Veggies: Use soy sauce, ginger, and garlic to season the chicken and vegetables. Add a drizzle of sesame oil for extra flavor.
  • Lemon Herb Chicken and Veggies: Use a combination of fresh herbs like rosemary, thyme, and parsley. Add extra lemon zest for a bright, citrusy flavor.
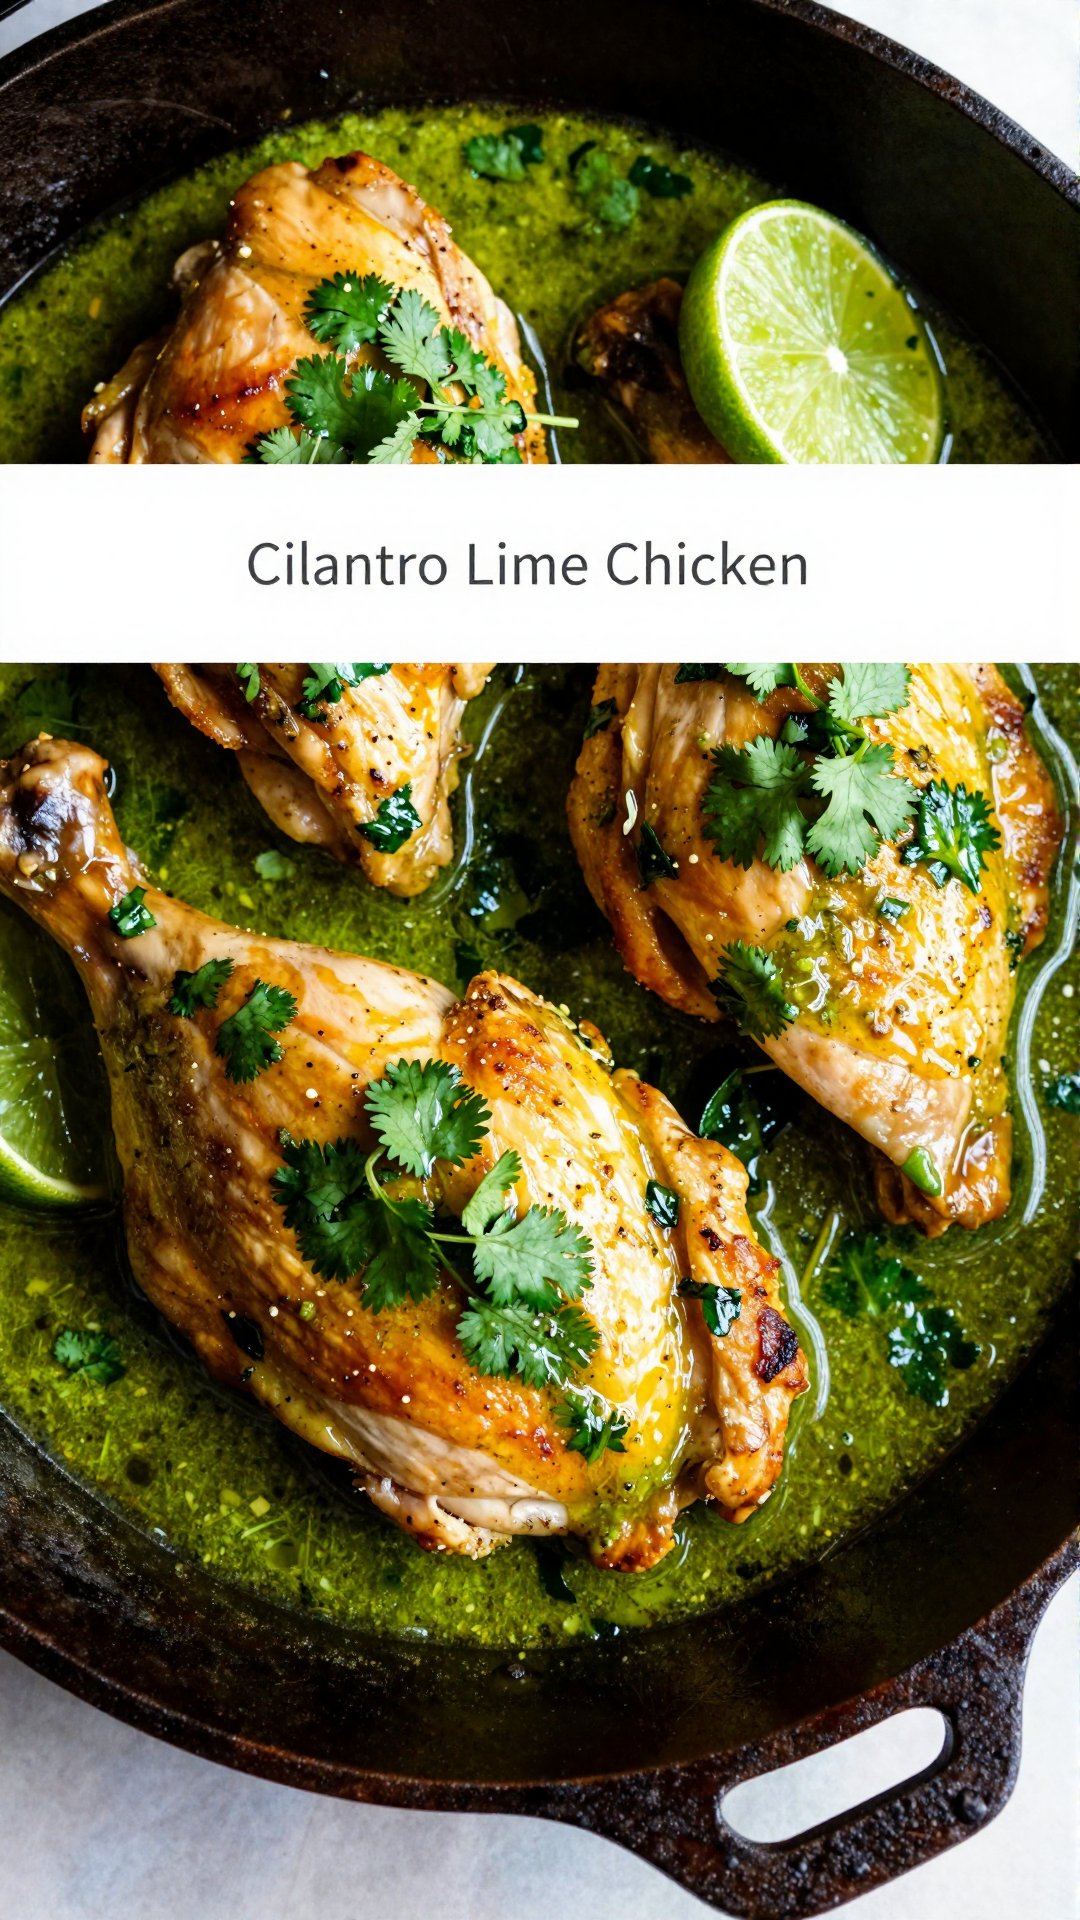
  • Chicken Thigh Sheet Pan Dinner: Swap out the chicken breasts for chicken thighs. Chicken thighs are more forgiving and stay moist during the roasting process.

The possibilities are endless! Get creative and experiment with different flavor combinations to find your perfect sheet pan creation. The use of sheet pan techniques allows for endless variations. For more inspiration, consider searching for more sheet pan chicken and vegetables recipe ideas.

How to Store and Reheat Leftovers

If you happen to have any leftovers (which is rare in my house!), here’s how to store and reheat them:

  • Storage: Allow the chicken and vegetables to cool completely before transferring them to an airtight container. Store in the refrigerator for up to 3-4 days.
  • Reheating: Preheat your oven to 350°F (175°C). Spread the chicken and vegetables on a sheet pan and reheat for 10-15 minutes, or until heated through. You can also reheat them in the microwave, but the vegetables may become a bit soggy.

Leftovers are great for lunch the next day or as a quick and easy dinner. You can even add them to salads or wraps for a healthy and flavorful meal.

Frequently Asked Questions (FAQ)

Got questions? I’ve got answers! Here are some frequently asked questions about sheet pan chicken and vegetables:

  • Can I use frozen vegetables?: Yes, you can use frozen vegetables, but keep in mind that they may release more water during cooking. Make sure to spread them out in a single layer and pat them dry before adding them to the pan.
  • Can I use bone-in chicken?: Yes, you can use bone-in chicken, but you may need to adjust the cooking time accordingly. Bone-in chicken takes longer to cook than boneless chicken.
  • Can I add potatoes or carrots?: Yes, you can add potatoes or carrots, but keep in mind that they take longer to cook than other vegetables. Add them to the pan a few minutes before the other vegetables.
  • How do I prevent the vegetables from burning?: Make sure to use enough olive oil and don’t overcrowd the pan. If the vegetables start to brown too quickly, you can lower the oven temperature or cover the pan with foil.
  • Can I marinate the chicken beforehand?: Absolutely! Marinating the chicken beforehand will add even more flavor and help keep it moist during cooking.

If you have any other questions, feel free to leave a comment below! I’m always happy to help.

Serving Suggestions

Looking for some ways to serve your delicious sheet pan chicken and vegetables? Here are a few ideas:

  • Serve it as is: This dish is a complete meal on its own, packed with protein and vegetables.
  • Serve it with a side of rice or quinoa: This will add some extra carbohydrates to the meal and make it even more filling.
  • Serve it with a side salad: A light and refreshing salad is the perfect complement to this hearty dish.
  • Serve it in a wrap or sandwich: Use the chicken and vegetables as a filling for wraps or sandwiches. Add some hummus or tzatziki sauce for extra flavor.
  • Top it with a sauce: A drizzle of balsamic glaze, pesto, or a creamy yogurt sauce can add a burst of flavor to this dish.

No matter how you choose to serve it, I’m sure you’ll love this quick and easy sheet pan chicken and vegetables recipe. It’s a simple, healthy, and delicious meal that’s perfect for any occasion. So, grab your sheet pan, gather your ingredients, and let’s get cooking! Enjoy this delightful dish and the explosion of flavor.

Happy cooking, friends! And remember, every ‘oops’ moment is just an invitation to try again—this time with a little more patience and maybe a pinch more salt. This sheet pan chicken and vegetables recipe is perfect for a hearty dinner, or even low salt recipes, just adjust the seasoning. It’s quick, easy, and totally customizable. Enjoy!

Quick Sheet Pan Chicken and Vegetables

Prep Time 15 minutes
Cook Time 30 minutes
Total Time 45 minutes
Servings 4 servings
Calories 350
This easy sheet pan chicken and vegetables recipe is perfect for a quick and healthy weeknight dinner. Simply toss everything on a pan and bake!

Ingredients

Ingredients

  • 4 Chicken breasts, boneless and skinless
  • 2 cups Broccoli florets
  • 2 Bell peppers, sliced
  • 1 cup Cherry tomatoes
  • 1 Zucchini, sliced
  • 3 tbsp Olive oil
  • 1 tsp Garlic powder
  • 1 tsp Italian seasoning
  • 0.5 tsp Paprika
  • 2 tbsp Lemon juice
  • to taste Salt
  • to taste Black pepper
  • Fresh parsley, chopped for garnish

Instructions 

  • Preheat oven to 400°F (200°C) and line a sheet pan with parchment paper.
  • Mix olive oil, garlic powder, Italian seasoning, paprika, lemon juice, salt, and pepper in a bowl.
  • Place chicken in the center of the pan. Arrange vegetables around the chicken.
  • Drizzle the olive oil mixture over the chicken and vegetables.
  • Bake for 25-30 minutes until chicken is cooked and vegetables are tender.
  • Garnish with fresh parsley before serving.

Notes

For extra flavor, marinate the chicken for 30 minutes before baking.
Calories: 350kcal
Cost: $20
Course: Main Course
Cuisine: American
Keyword: Chicken
pin

Hey there, friend! Ava here, back from my little Seattle kitchen with a recipe that’s about to become your new weeknight hero. Remember those nights when you’re staring into the fridge, wondering how to conjure up something healthy, delicious, and FAST? Well, this One-Pan Garlic Herb Salmon & Veggies is the answer to your prayers. Seriously, it’s so easy, it feels almost like cheating. But trust me, the flavor is anything but simple!

Growing up, my mom always had a knack for making magic happen with minimal effort. This recipe is inspired by her effortless style – simple ingredients, bold flavors, and minimal cleanup. This isn’t just a meal; it’s a warm hug on a plate, ready in under 30 minutes. Let’s dive in!

Why You’ll Love This One-Pan Salmon and Veggies

Okay, let’s get real. We all crave those meals that are both good for us and ridiculously tasty. This recipe hits all the right notes. Here’s what makes this recipe perfect for busy weeknights:

  • Minimal Cleanup: Everything cooks together on one sheet pan. Less dishes? Yes, please!
  • Healthy and Delicious: Packed with protein, healthy fats, and vibrant veggies, it’s a complete meal that nourishes your body and delights your taste buds.
  • Quick and Easy: From prep to plate in under 30 minutes. Perfect for those nights when time is of the essence.
  • Customizable: Swap out the veggies for your favorites. Broccoli, bell peppers, asparagus – the possibilities are endless!
  • Flavor Explosion: The garlic herb oil infuses every bite with savory, aromatic goodness. The lemon slices on the salmon add a burst of citrusy brightness.

Ingredients for Garlic Herb Salmon & Veggies

Here’s what you’ll need to whip up this masterpiece. Don’t worry, most of these are pantry staples!

  • 4 salmon fillets (about 6 oz each)
  • 1 lb baby potatoes, halved
  • 1 cup cherry tomatoes
  • 1/2 lb green beans, trimmed
  • 3 tbsp olive oil
  • 2 garlic cloves, minced
  • 1 tsp paprika
  • 1/2 tsp dried thyme
  • 1/2 tsp dried rosemary
  • Salt and freshly cracked black pepper, to taste
  • 1 lemon, sliced
  • Fresh parsley, chopped, for garnish
Recipe Image

How to Make One-Pan Garlic Herb Salmon & Veggies: Step-by-Step

Ready to get cooking? Follow these simple steps, and you’ll have a delicious dinner on the table in no time!

  1. Preheat the Oven and Prepare the Sheet Pan: Preheat your oven to 400°F (200°C). Line a large baking sheet with parchment paper or aluminum foil for easy cleanup. This ensures nothing sticks and makes washing up a breeze!
  2. Make the Garlic Herb Oil: In a small bowl, whisk together the olive oil, minced garlic, paprika, dried thyme, dried rosemary, salt, and black pepper. Set this garlic herb mixture aside. This garlic herb oil is the star of the show, infusing everything with incredible flavor.
  3. Roast the Baby Potatoes: Arrange the halved baby potatoes on the prepared sheet pan. Drizzle about one-third of the garlic herb oil over the potatoes and toss to coat. Spread them evenly in a single layer and roast in the preheated oven for 15 minutes. Roasting the potatoes first ensures they’re perfectly tender.
  4. Add the Salmon and Vegetables: After the potatoes have roasted for 15 minutes, remove the sheet pan from the oven. Push the potatoes to one side of the pan. Add the salmon fillets, skin-side down, and place the trimmed green beans and cherry tomatoes around the salmon and potatoes.
  5. Coat and Arrange the Salmon and Veggies: Drizzle the remaining garlic herb oil over the salmon fillets and veggies. Use tongs or a spoon to ensure everything is evenly coated. Place a slice of lemon on top of each salmon fillet for a burst of citrusy freshness. The lemon not only adds flavor but also helps keep the salmon moist.
  6. Roast to Perfection: Return the sheet pan to the oven and roast everything for an additional 12–15 minutes, or until the salmon easily flakes with a fork and the veggies are tender. Keep an eye on the salmon to prevent overcooking.
  7. Garnish and Serve: Once done, remove the sheet pan from the oven. Sprinkle fresh chopped parsley over the entire dish for a pop of color and extra flavor. Serve hot, and enjoy this simple, one-pan dinner!

Pro Tips for the Best One-Pan Salmon & Veggies

Want to take this recipe from good to amazing? Here are a few of my favorite tips:

  • Use Fresh Ingredients: Fresh herbs and veggies make a world of difference. If possible, hit up your local farmers’ market for the best produce.
  • Don’t Overcrowd the Pan: Overcrowding can lead to steaming instead of roasting. Make sure everything has enough space to get nicely browned and crispy.
  • Pat the Salmon Dry: Before adding the garlic herb oil, pat the salmon fillets dry with a paper towel. This helps them get a nice sear in the oven.
  • Adjust Cooking Time: Cooking times may vary depending on your oven and the thickness of your salmon fillets. Keep an eye on things and adjust as needed. The salmon is done when it flakes easily with a fork.
  • Season Generously: Don’t be shy with the salt and pepper. Proper seasoning is key to bringing out the flavors of the salmon and veggies.

Common Mistakes to Avoid

We all make mistakes in the kitchen – it’s part of the learning process! Here are a few common pitfalls to watch out for:

  • Overcooking the Salmon: Overcooked salmon is dry and tough. Aim for a slightly undercooked center, as it will continue to cook as it rests.
  • Not Roasting the Potatoes First: Potatoes take longer to cook than salmon and green beans. Roasting them first ensures they’re tender and perfectly cooked.
  • Skipping the Parchment Paper: Trust me, you’ll thank yourself later. Parchment paper makes cleanup so much easier.
  • Forgetting the Lemon: The lemon slices add a crucial burst of acidity that balances the richness of the salmon and garlic herb oil. Don’t skip them!
  • Not Preheating the Oven: A properly preheated oven ensures even cooking and prevents the salmon and veggies from steaming.

Variations to Try

One of the best things about this recipe is how easy it is to customize. Here are a few variations to get your creative juices flowing:

  • Spicy Salmon: Add a pinch of red pepper flakes to the garlic herb oil for a little kick.
  • Mediterranean Twist: Use Kalamata olives, feta cheese, and oregano for a Mediterranean-inspired flavor profile.
  • Asian-Inspired: Swap the garlic herb oil for a mixture of soy sauce, ginger, and sesame oil. Add some broccoli florets and sliced bell peppers.
  • Sweet and Savory: Drizzle a little honey over the salmon and veggies for a touch of sweetness.
  • Different Veggies: Feel free to use any veggies you like. Asparagus, bell peppers, zucchini, and Brussels sprouts all work well.

How to Store and Reheat Leftovers

Got leftovers? Lucky you! Here’s how to store and reheat them properly:

  • Storage: Store the leftover salmon and veggies in an airtight container in the refrigerator for up to 3 days.
  • Reheating: Reheat the salmon and veggies in the oven at 350°F (175°C) for about 10-15 minutes, or until heated through. You can also reheat them in a microwave, but the texture may not be as good.

Frequently Asked Questions (FAQ)

Got questions? I’ve got answers!

  • Can I use frozen salmon fillets? Yes, but make sure to thaw them completely before cooking. Pat them dry with a paper towel to remove any excess moisture.
  • Can I use different types of potatoes? Absolutely! Red potatoes, Yukon gold potatoes, or even sweet potatoes would work well in this recipe.
  • Can I make this recipe ahead of time? You can prepare the garlic herb oil and chop the veggies ahead of time, but it’s best to cook the salmon and veggies fresh for the best flavor and texture.
  • Is this recipe gluten-free? Yes, this recipe is naturally gluten-free.
  • Can I grill the salmon and veggies instead of roasting them? Yes, grilling is a great option! Grill the salmon and veggies over medium heat for about 10-12 minutes, or until the salmon is cooked through and the veggies are tender.

Serving Suggestions

This One-Pan Garlic Herb Salmon & Veggies is a complete meal on its own, but here are a few serving suggestions to take it to the next level:

  • Serve with a side of quinoa or rice: For a heartier meal, serve the salmon and veggies with a side of fluffy quinoa or brown rice.
  • Add a dollop of Greek yogurt or sour cream: A dollop of Greek yogurt or sour cream adds a creamy tang that complements the savory flavors of the dish.
  • Serve with a simple salad: A fresh green salad with a light vinaigrette is the perfect accompaniment to this dish.
  • Garnish with fresh herbs: A sprinkle of fresh herbs, such as dill, chives, or basil, adds a pop of color and flavor.
  • Serve with a crusty bread: For soaking up all those delicious juices from the pan.

So there you have it, my friend! A simple, delicious, and healthy One-Pan Garlic Herb Salmon & Veggies recipe that’s perfect for any weeknight. I hope you love it as much as I do! Happy cooking!

One-Pan Garlic Herb Salmon & Veggies

Prep Time 10 minutes
Cook Time 27 minutes
Total Time 37 minutes
Servings 4 servings
Calories 450
Enjoy a healthy and delicious one-pan meal with flaky salmon and tender vegetables, infused with garlic and herbs. This recipe is quick, easy, and perfect for a weeknight dinner.

Ingredients

Main Ingredients

  • 4 salmon fillets (about 6 oz each)
  • 1 lb baby potatoes (halved)
  • 1 cup cherry tomatoes
  • 0.5 lb green beans (trimmed)

Garlic Herb Oil

  • 3 tbsp olive oil
  • 2 cloves garlic (minced)
  • 1 tsp paprika
  • 0.5 tsp dried thyme
  • 0.5 tsp dried rosemary
  • to taste Salt and freshly cracked black pepper
  • 1 lemon (sliced)
  • chopped Fresh parsley (for garnish)

Instructions 

  • Preheat oven to 400°F (200°C). Line a baking sheet with parchment paper.
  • Whisk together olive oil, garlic, paprika, thyme, rosemary, salt, and pepper.
  • Arrange potatoes on the sheet pan. Drizzle with one-third of the garlic herb oil. Roast for 15 minutes.
  • Remove pan. Add salmon, green beans, and tomatoes around the salmon and potatoes.
  • Drizzle remaining garlic herb oil over salmon and veggies. Place lemon slices on salmon.
  • Roast for 12–15 minutes, until salmon flakes and veggies are tender.
  • Garnish with parsley. Serve hot.

Notes

For extra flavor, marinate the salmon in the garlic herb oil for 30 minutes before roasting.
Calories: 450kcal
Cost: $22
Course: Main Course
Cuisine: American
Keyword: Salmon
pin

Hey there, friend! Ava here, back in my cozy Seattle kitchen, where the magic (and delicious smells) happen. Today, we’re diving headfirst into a bowl of pure comfort: Cheesy One Pot Beef and Potatoes. If you’re anything like me, you crave those no-fuss, deeply satisfying meals that make everyone around the table happy. This, my friend, is that dish. It’s simple, it’s cheesy, it’s packed with flavor, and best of all, it all cooks in one pot! Let’s get started, shall we?

Growing up, my mom had a knack for turning simple ingredients into something extraordinary. This recipe reminds me of those cozy evenings around the dinner table, sharing stories and laughter. It’s a modern twist on a classic comfort food, and I think you’re going to love it as much as my family does.

Why You’ll Love This Cheesy One Pot Beef and Potatoes

Seriously, what’s not to love? But let me break it down for you:

  • Ease of Cleanup: One pot means minimal dishes. Hallelujah!
  • Simple Ingredients: Nothing fancy here. Just good, wholesome ingredients you probably already have on hand.
  • Kid-Friendly: Even the pickiest eaters will devour this cheesy goodness.
  • Customizable: Want to add some veggies? Go for it! This recipe is super adaptable.
  • A Hearty and Satisfying Meal: Perfect for those chilly evenings when you need a warm hug from the inside out. This is truly a hearty and satisfying dish that will leave you feeling content.

This dish is a lifesaver on busy weeknights. It’s the kind of recipe that becomes a family staple, passed down through generations. Trust me, once you try this, it’ll be on repeat in your house!

Ingredients for Your Cheesy One Pot Beef and Potatoes

  • 1 lb ground beef
  • 4 medium potatoes, peeled and diced
  • 1 medium onion, chopped
  • 2 cloves garlic, minced
  • 1 cup beef broth
  • 1 cup heavy cream
  • 2 cups shredded cheddar cheese
  • 1 tablespoon olive oil
  • 1 teaspoon dried thyme
  • 1 teaspoon paprika
  • Salt and pepper, to taste
  • Fresh parsley for garnish (optional)
Recipe Image

How to Make Cheesy One Pot Beef and Potatoes: Step-by-Step

Alright, let’s get cooking! Here’s how to bring this cheesy dream to life:

  1. Brown the Beef: In a large pot or Dutch oven, heat the olive oil over medium heat. Add the ground beef and cook, breaking it apart with a spoon, until browned and fully cooked. Drain excess fat if necessary.
  2. Sauté Aromatics: Add the chopped onion and minced garlic to the pot and cook for 2-3 minutes until softened and fragrant. This step is crucial for building flavor, so don’t rush it.
  3. Spice Things Up: Stir in the diced potatoes, dried thyme, paprika, salt, and pepper. Cook for 2-3 minutes, stirring occasionally, to coat the potatoes in the spices. The potatoes soak up all that goodness, setting the stage for a flavorful dish.
  4. Simmer and Dream: Pour in the beef broth and heavy cream. Stir everything together to combine. Bring the mixture to a simmer.
  5. Cook Until Tender: Cover the pot and let the potatoes cook for 20-25 minutes, stirring occasionally, until they are tender and the sauce has thickened slightly. The potatoes is the star of the show, so make sure they’re perfectly cooked.
  6. Cheese, Please!: Once the potatoes are tender, sprinkle the shredded cheddar cheese over the top of the mixture. Stir until the cheese is completely melted and the sauce becomes creamy. This is where the magic happens, folks. Yourcheesy one pot creation is almost complete!
  7. Taste and Adjust: Taste the dish and adjust the seasoning with more salt and pepper if needed. Don’t be afraid to add a pinch of something extra if your heart desires.
  8. Serve and Enjoy: Serve the cheesy beef and potatoes hot, garnished with fresh parsley for a pop of color and added flavor. Now, dig in and enjoy the fruits of your labor!

And there you have it! A simple, delicious, and utterly satisfying Cheesy One Pot Beef and Potatoes. I hope this recipe brings as much joy to your table as it does to mine.

Pro Tips for the Best One Pot Beef and Potatoes

Want to take this dish from good to great? Here are a few of my favorite pro tips:

  • Use Quality Beef: Opt for grass-fed ground beef for the best flavor and texture.
  • Don’t Overcook the Potatoes: Nobody likes mushy potatoes. Cook them until they’re just fork-tender.
  • Grate Your Own Cheese: Pre-shredded cheese often contains cellulose, which can prevent it from melting smoothly.
  • Add a Splash of Worcestershire Sauce: For an extra layer of umami flavor, add a tablespoon of Worcestershire sauce along with the beef broth.
  • Let it Rest: After the cheese is melted, let the dish rest for 5-10 minutes before serving. This allows the flavors to meld together even more.

These tips will help you elevate your one pot beef and potatoes to a whole new level. Remember, cooking is all about experimenting and having fun!

Common Mistakes to Avoid

We all make mistakes in the kitchen, but here are a few common pitfalls to watch out for:

  • Burning the Garlic: Burnt garlic is bitter and can ruin the flavor of the dish. Keep the heat on medium and stir frequently.
  • Using Too Much Liquid: If the sauce is too thin, remove the lid and let it simmer for a few more minutes to reduce.
  • Not Seasoning Properly: Salt and pepper are your best friends. Don’t be afraid to season generously.
  • Overcrowding the Pot: If you’re doubling the recipe, use a larger pot to ensure even cooking.

Learning from mistakes is part of the cooking journey. Don’t be discouraged if things don’t turn out perfectly the first time. Just keep practicing, and you’ll get there!

Variations to Spice Things Up

One of the best things about this recipe is how easy it is to customize. Here are a few variations to try:

  • Add Veggies: Mix in some diced carrots, celery, or bell peppers for added nutrients and flavor.
  • Spice It Up: Add a pinch of red pepper flakes for a little heat.
  • Use Different Cheese: Try using a blend of cheddar and Monterey Jack for a more complex flavor.
  • Make it Creamier: Add a dollop of sour cream or cream cheese along with the heavy cream for extra richness.
  • Add Bacon: Because everything is better with bacon! Cook some bacon and crumble it over the top of the dish before serving.

Feel free to get creative and experiment with different flavors and ingredients. The possibilities are endless!

How to Store and Reheat Leftovers

If you happen to have any leftovers (which is rare in my house!), here’s how to store and reheat them:

  • Storage: Store the cheesy beef and potatoes in an airtight container in the refrigerator for up to 3-4 days.
  • Reheating: Reheat in the microwave or on the stovetop over medium heat until heated through. Add a splash of beef broth or water if needed to prevent it from drying out.

Leftovers are great for lunch the next day or a quick and easy dinner. This recipe is a true time-saver!

Frequently Asked Questions (FAQ)

Got questions? I’ve got answers! Here are a few frequently asked questions about this recipe:

  • Can I use different types of potatoes? Absolutely! Russet, Yukon Gold, or red potatoes all work well in this recipe.
  • Can I use ground turkey instead of ground beef? Yes, ground turkey is a great substitute. Just make sure to season it well.
  • Can I make this recipe in a slow cooker? Yes, you can! Brown the beef and sauté the onions and garlic on the stovetop, then transfer everything to a slow cooker and cook on low for 6-8 hours. Add the cheese during the last 30 minutes of cooking.
  • Can I freeze this dish? While you can freeze it, the texture of the potatoes may change slightly. If you do freeze it, store it in an airtight container for up to 2-3 months. Thaw overnight in the refrigerator before reheating.

If you have any other questions, feel free to leave a comment below. I’m always happy to help!

Serving Suggestions: What to Serve with Cheesy One Pot Beef and Potatoes

This dish is hearty enough to stand on its own, but here are a few serving suggestions to complete the meal:

  • Side Salad: A simple green salad with a vinaigrette dressing adds a refreshing contrast to the richness of the dish.
  • Steamed Vegetables: Steamed broccoli, green beans, or asparagus are healthy and delicious sides.
  • Crusty Bread: Perfect for soaking up all that cheesy sauce.
  • Cornbread: A classic pairing with comfort food.

No matter what you choose to serve with it, this Cheesy One Pot Beef and Potatoes is sure to be a hit. Enjoy!

So, there you have it! Yourcheesy one pot beef and potatoes recipe, ready to bring smiles to faces. I hope you enjoy this recipe as much as I do. Happy cooking, friends! And remember, every ‘oops’ moment is just an invitation to try again—this time with a little more patience and maybe a pinch more salt. This recipe is a perfect blend of savory beef, tender potatoes, and melted cheese, all cooked in one pot the easy way! This recipe is a hearty and satisfying dish that will become a family favorite. Here are a few other recipes you might enjoy: hamburger-patty

Cheesy One Pot Beef and Potatoes

Prep Time 15 minutes
Cook Time 35 minutes
Total Time 50 minutes
Servings 6 servings
Calories 450
A hearty and comforting one-pot dish featuring ground beef, potatoes, and a creamy cheddar cheese sauce. Perfect for a quick and easy weeknight meal!

Ingredients

Ingredients

  • 1 lb ground beef
  • 4 medium potatoes (peeled and diced)
  • 1 medium onion (chopped)
  • 2 cloves garlic (minced)
  • 1 cup beef broth
  • 1 cup heavy cream
  • 2 cups shredded cheddar cheese
  • 1 tablespoon olive oil
  • 1 teaspoon dried thyme
  • 1 teaspoon paprika
  • to taste Salt and pepper
  • Fresh parsley (for garnish (optional))

Instructions 

  • Brown ground beef in olive oil, drain fat.
  • Add onion and garlic, cook until softened.
  • Stir in potatoes, thyme, paprika, salt, and pepper.
  • Pour in beef broth and heavy cream, simmer.
  • Cover and cook until potatoes are tender.
  • Stir in cheddar cheese until melted.
  • Adjust seasoning to taste.
  • Serve hot, garnish with parsley.

Notes

For a spicier kick, add a pinch of red pepper flakes along with the paprika.
Calories: 450kcal
Cost: $18
Course: Main Course
Cuisine: American
Keyword: Beef
pin

Cilantro and Lime Chicken: A Zesty Culinary Adventure

Hey there, flavor explorers! Ava here, back from my little kitchen in Seattle, and today we’re diving headfirst into a dish that’s become a staple in my household: Cilantro and Lime Chicken. If you’re anything like me, you’re always on the lookout for recipes that are both incredibly delicious and surprisingly easy to whip up. This one ticks all the boxes, and trust me, it’s about to become a regular in your dinner rotation too. The best part? It’s so versatile! Tacos, salads, bowls… the possibilities are endless.

I remember the first time I made this. It was a busy week, and I was craving something vibrant and fresh but didn’t want to spend hours in the kitchen. I threw together a quick marinade with lime juice, cilantro, and a few other goodies, tossed in some chicken, and hoped for the best. The result? Pure magic. The chicken was juicy, flavorful, and had that perfect zing that just makes you want to keep eating it. Since then, I’ve tweaked and perfected this recipe, and I’m so excited to share it with you.

Why You’ll Absolutely Love This Cilantro Lime Chicken Recipe

Okay, let’s get down to brass tacks. Why should you make this cilantro lime chicken? Well, besides the fact that it tastes absolutely amazing, here are a few reasons:

  • Quick and Easy: Seriously, this comes together in under 30 minutes. Perfect for those hectic weeknights when you need dinner on the table ASAP.
  • Bursting with Flavor: The combination of fresh cilantro, zesty lime, and warm spices creates a flavor explosion that will tantalize your taste buds.
  • Versatile: As I mentioned before, this chicken is incredibly versatile. Use it in tacos, salads, bowls, sandwiches, or enjoy it on its own with a side of rice and veggies.
  • Healthy: This recipe is packed with lean protein and fresh ingredients, making it a guilt-free meal option.
  • Crowd-Pleaser: Whether you’re cooking for your family or entertaining guests, this cilantro lime chicken is sure to be a hit.

The Magic Ingredients: What You’ll Need

Alright, let’s gather our ingredients. Here’s what you’ll need to make this amazing cilantro lime chicken:

  • 1.5 lbs boneless, skinless chicken breasts
  • 1/4 cup olive oil
  • 1/4 cup lime juice, freshly squeezed
  • 1/4 cup chopped cilantro, fresh
  • 2 cloves garlic, minced
  • 1 teaspoon chili powder
  • 1/2 teaspoon cumin
  • 1/4 teaspoon salt
  • 1/4 teaspoon black pepper
Recipe Image

Step-by-Step: Making Your Cilantro Lime Chicken

Now for the fun part! Here’s how to bring this cilantro lime chicken to life:

  1. The Marinade Magic: In a medium bowl, whisk together olive oil, lime juice, cilantro, garlic, chili powder, cumin, salt, and pepper. This is the flavor bomb that will transform your chicken.
  2. Marinate the Chicken: Place the chicken breasts in a resealable plastic bag or a shallow dish. Pour the marinade over the chicken, ensuring it is evenly coated. Marinate in the refrigerator for at least 30 minutes, or up to 4 hours. The longer it marinates, the more flavorful the chicken will be. If you’re short on time, 30 minutes will do, but letting it marinate for a few hours really makes a difference.
  3. Cook to Perfection: Preheat grill or skillet to medium-high heat. Remove chicken from marinade and discard the marinade (we don’t want to re-use that!). Cook chicken for 6-8 minutes per side, or until cooked through and the internal temperature reaches 165°F (74°C). You can also cook the chicken in the oven if you prefer. Just bake it at 375°F (190°C) for about 20-25 minutes, or until cooked through.
  4. Rest and Serve: Let the chicken rest for 5 minutes before slicing and serving. This allows the juices to redistribute, resulting in a more tender and flavorful chicken.

Pro Tips for Cilantro Lime Chicken Perfection

Want to take your cilantro lime chicken to the next level? Here are a few pro tips to keep in mind:

  • Fresh is Best: Use freshly squeezed lime juice and fresh cilantro for the best flavor. The pre-bottled lime juice just doesn’t have the same zing, and dried cilantro is no match for the fresh stuff.
  • Don’t Overcook: Overcooked chicken is dry and tough. Use a meat thermometer to ensure that the chicken is cooked to 165°F (74°C).
  • Marinate Smart: While you can marinate the chicken for up to 4 hours, avoid marinating it for longer than that, as the lime juice can start to break down the chicken and make it mushy.
  • Sear for Flavor: If you’re using a skillet, make sure it’s nice and hot before adding the chicken. This will create a beautiful sear and add extra flavor.

Common Mistakes to Avoid

Even the best cooks make mistakes sometimes. Here are a few common pitfalls to watch out for when making cilantro lime chicken:

  • Not Marinating Long Enough: The marinade is key to the flavor of this dish, so don’t skimp on the marinating time.
  • Overcooking the Chicken: As I mentioned before, overcooked chicken is dry and tough. Use a meat thermometer to ensure that it’s cooked to perfection.
  • Using Dull Knives: A sharp knife makes slicing the chicken much easier and prevents it from tearing.
  • Forgetting to Rest the Chicken: Resting the chicken allows the juices to redistribute, resulting in a more tender and flavorful dish.

Variations to Keep Things Exciting

One of the best things about this cilantro lime chicken recipe is that it’s so easy to customize. Here are a few variations to try:

  • Spicy Cilantro Lime Chicken: Add a pinch of cayenne pepper or a chopped jalapeño to the marinade for a spicy kick.
  • Honey Lime Chicken: Add a tablespoon of honey to the marinade for a touch of sweetness.
  • Cilantro Lime Chicken with Coconut Milk: Substitute some of the olive oil with coconut milk for a richer, creamier sauce.
  • Grilled Cilantro Lime Chicken Skewers: Cut the chicken into bite-sized pieces, thread them onto skewers, and grill them for a fun and flavorful appetizer.

Storing Your Cilantro Lime Chicken

Got leftovers? Lucky you! Here’s how to store your cilantro lime chicken:

  • In the Refrigerator: Store cooked chicken in an airtight container in the refrigerator for up to 3-4 days.
  • In the Freezer: For longer storage, freeze the cooked chicken in an airtight container for up to 2-3 months. Thaw overnight in the refrigerator before reheating.

Frequently Asked Questions (FAQ)

Got questions? I’ve got answers! Here are a few frequently asked questions about cilantro lime chicken:

  • Can I use frozen chicken breasts? Yes, you can use frozen chicken breasts, but make sure to thaw them completely before marinating.
  • Can I use chicken thighs instead of chicken breasts? Absolutely! Chicken thighs are a great alternative to chicken breasts. Just adjust the cooking time accordingly.
  • Can I make this recipe ahead of time? Yes, you can marinate the chicken ahead of time and store it in the refrigerator for up to 24 hours.
  • What can I serve with cilantro lime chicken? The possibilities are endless! Serve it with rice, beans, roasted vegetables, salad, tacos, or bowls.

Serving Suggestions: Complete the Meal

Now that you’ve got your delicious cilantro lime chicken, it’s time to think about what to serve with it. Here are a few of my favorite serving suggestions:

  • Cilantro Lime Rice: Cook rice according to package directions, then stir in fresh cilantro and lime juice.
  • Black Beans: Serve with a side of black beans for a healthy and flavorful meal.
  • Roasted Vegetables: Roast your favorite vegetables, such as bell peppers, onions, and zucchini, for a colorful and nutritious side dish.
  • Tacos: Use the cilantro lime chicken as a filling for tacos, topped with your favorite toppings, such as salsa, guacamole, and sour cream.
  • Salad: Add the cilantro lime chicken to a salad for a protein-packed and flavorful meal.

And there you have it! My go-to Cilantro and Lime Chicken recipe. I hope you enjoy making this as much as I do. Remember, cooking is all about experimenting and having fun, so don’t be afraid to put your own spin on this recipe. If you try it out, be sure to let me know how it turns out in the comments below. Happy cooking!

Thanks for stopping by my kitchen. I’m so happy to share this recipe with you, and I hope it brings a little bit of sunshine to your table. Until next time, happy cooking!

Cilantro and Lime Chicken

Prep Time 10 minutes
Cook Time 16 minutes
Total Time 26 minutes
Servings 4 servings
Calories 250
This Cilantro and Lime Chicken recipe delivers a flavorful and zesty dish perfect for a quick weeknight meal. The marinade infuses the chicken with bright citrus and herbaceous notes, resulting in a tender and delicious main course.

Ingredients

Ingredients

  • 1.5 lbs boneless, skinless chicken breasts
  • 1/4 cup olive oil
  • 1/4 cup lime juice, freshly squeezed
  • 1/4 cup chopped cilantro, fresh
  • 2 cloves garlic, minced
  • 1 teaspoon chili powder
  • 1/2 teaspoon cumin
  • 1/4 teaspoon salt
  • 1/4 teaspoon black pepper

Instructions 

  • Whisk together olive oil, lime juice, cilantro, garlic, chili powder, cumin, salt, and pepper.
  • Place chicken in a resealable bag or dish.
  • Pour marinade over chicken, ensuring it is coated.
  • Marinate in the refrigerator for at least 30 minutes, or up to 4 hours.
  • Preheat grill or skillet to medium-high heat.
  • Remove chicken from marinade and discard the marinade.
  • Cook chicken for 6-8 minutes per side, or until cooked through (165°F).
  • Let the chicken rest for 5 minutes before slicing and serving.

Notes

For best results, marinate the chicken for at least 2 hours to allow the flavors to fully penetrate.
Calories: 250kcal
Cost: $12
Course: Main Course
Cuisine: Mexican
Keyword: Chicken
pin

Hey there, kitchen adventurers! Ava here, ready to share a recipe that’s not just a meal but a hug in a pan. Remember those weeknights when dinner felt like a Herculean task? This one-pan wonder is about to become your new best friend. We’re talking juicy, flavorful chicken thighs roasted to perfection alongside tender carrots and potatoes. It’s simple, satisfying, and leaves you with minimal cleanup. Trust me, you can absolutely nail this, even if you’re just starting your cooking journey.

Why You’ll Love This Recipe

This isn’t just another dinner recipe; it’s a game-changer. It’s the kind of meal that makes you feel good from the inside out. Here’s why I think you’ll fall head over heels for these pan roasted chicken thighs:

  • Effortless Elegance: It’s fancy enough for company but easy enough for a Tuesday night.
  • One-Pan Wonder: Minimal dishes mean more time for you.
  • Flavor Explosion: The herbs and spices create a symphony of deliciousness.
  • Customizable: Swap veggies, add spice, make it your own!

I developed this recipe after one of those busy weeks where I barely had time to breathe. I needed something comforting, nourishing, and, most importantly, easy. After a few tweaks and taste tests (the best part!), this chicken potato bake was born. It’s now a staple in my kitchen, and I’m so excited to share it with you.

Ingredients: The Simple Stars of the Show

Let’s gather our cast of culinary characters. Don’t worry, they re all easy to find and even easier to love:

  • 4-6 bone-in, skin-on chicken thighs (6-8 oz each)
  • 1 tbsp olive oil
  • 1 tsp dried thyme
  • 1 tsp dried rosemary
  • ½ tsp kosher salt
  • ¼ tsp black pepper
  • 4 medium carrots, cut into 1-inch pieces
  • 4 medium Yukon Gold potatoes, cut into 1-inch cubes
  • 2 tbsp olive oil
  • 4 cloves garlic, minced
  • 1 tsp dried thyme
  • 1 tsp dried rosemary
  • ½ tsp kosher salt
  • ¼ tsp black pepper
Recipe Image

Step-by-Step: Let’s Get Cooking!

Alright, let’s get down to business. Don’t worry, to cook this dish is super simple, and I’ll walk you through every step.

  1. Prep the Chicken: Pat the chicken thighs dry with paper towels. In a small bowl, combine 1 tbsp olive oil, 1 tsp thyme, 1 tsp rosemary, ½ tsp salt, and ¼ tsp pepper. Rub this mixture all over the chicken.
  2. Prep the Veggies: In a large bowl, toss the carrots and potatoes with 2 tbsp olive oil, minced garlic, 1 tsp thyme, 1 tsp rosemary, ½ tsp salt, and ¼ tsp pepper. Make sure the vegetables are evenly coated.
  3. Arrange and Roast: Spread the vegetables in a single layer on a large baking sheet. Place the chicken thighs on top of the vegetables, skin side up.
  4. Bake: Roast in a preheated oven at 400°F (200°C) for 45-50 minutes, or until the chicken is cooked through and the vegetables are tender. The chicken is done when a meat thermometer inserted into the thickest part registers 165°F (74°C).
  5. Rest and Serve: Let the chicken rest for 5-10 minutes before serving. This helps the juices redistribute, resulting in even more flavorful and tender chicken thighs.

Pro Tips for Chicken Thigh Perfection

Want to take your oven roasted chicken thighs to the next level? Here are a few of my favorite tricks:

  • Dry Brine: Salt the chicken thighs a few hours before cooking (or even overnight). This helps them retain moisture and intensifies the flavor.
  • High Heat: Roasting at a high temperature ensures crispy skin and tender meat.
  • Don’t Crowd the Pan: Give the vegetables space to roast properly. Overcrowding can lead to steaming instead of roasting.
  • Check the Temperature: A meat thermometer is your best friend. Don’t rely on guesswork!

Common Mistakes (and How to Avoid Them)

We all make mistakes in the kitchen, but here are a few common pitfalls to watch out for:

  • Undercooking the Chicken: Always use a meat thermometer to ensure the chicken is cooked to a safe temperature.
  • Overcrowding the Pan: This leads to soggy vegetables. Use a larger pan or roast in batches.
  • Skipping the Rest: Letting the chicken rest is crucial for juicy, tender meat.
  • Not Seasoning Properly: Don’t be shy with the herbs and spices! They’re what make this dish sing.

I remember one time I tried to rush this recipe and didn’t let the chicken rest. The result? Dry, sad chicken. Learn from my mistakes, friends!

Variations: Let Your Creativity Shine

The beauty of this recipe is how easily you can also adapt it to your tastes. Here are a few ideas to get you started:

  • Spice it Up: Add a pinch of red pepper flakes or a dash of cayenne pepper to the spice rub for a little heat.
  • Herb Garden: Experiment with different herbs like oregano, sage, or marjoram. Fresh herbs also work great!
  • Veggies Galore: Try adding Brussels sprouts, sweet potatoes, or butternut squash to the mix.
  • Lemon Zing: Add a squeeze of lemon juice to the vegetables before roasting for a bright, citrusy flavor.

One of my favorite variations is adding a drizzle of honey to the vegetables during the last 10 minutes of roasting. It adds a touch of sweetness that complements the savory chicken perfectly.

Storage and Reheating: Making the Most of Your Leftovers

If you happen to have any leftovers (which is rare in my house!), here’s how to store and reheat them:

  • Storage: Store the chicken and vegetables in an airtight container in the refrigerator for up to 3 days.
  • Reheating: Reheat in the oven at 350°F (175°C) until warmed through, or microwave on medium power.

Leftover chicken and vegetables are also fantastic in salads, sandwiches, or even as a topping for pizza!

Frequently Asked Questions (FAQ)

Got questions? I’ve got answers! Here are a few common questions about this recipe:

  • Can I use boneless, skinless chicken thighs? Yes, you can, but the cook time will be shorter. Check for doneness after about 30 minutes. Instead of bone in it will need less time.
  • Can I use different vegetables? Absolutely! Feel free to use your favorite vegetables. Just keep in mind that some vegetables may require different cooking times.
  • Can I make this ahead of time? You can prep the vegetables and season the chicken ahead of time, but I recommend roasting it fresh for the best results.
  • What if I don’t have dried thyme and rosemary? You can also use Italian seasoning or a combination of other dried herbs.

If you have any other questions, feel free to leave them in the comments below!

Serving Suggestions: Completing the Meal

While this one-pan meal is delicious on its own, here are a few ideas to round out your dinner:

  • Side Salad: A simple green salad with a light vinaigrette.
  • Crusty Bread: Perfect for soaking up the delicious pan juices.
  • Steamed Green Beans: A quick and easy side dish.
  • Mashed Potatoes: For the ultimate comfort food experience.

I often serve this with a big loaf of crusty bread and a simple salad. It’s the perfect combination of comfort and freshness.

I hope you love this roast chicken thigh recipes as much as I do. It’s a simple, delicious, and comforting meal that’s perfect for any night of the week. So, gather your ingredients, preheat your oven, and let’s make some magic in the kitchen!

This recipe is inspired by the many amazing recipes I’ve seen and adapted over the years. I am merely a recipes contributor sharing my love of food with the world. Think of me as the simply recipes reader, taking inspiration and passing it on. I believe anyone can to make this healthy chicken thigh recipes, simply follow the instructions!

Happy cooking!

One-Pan Roasted Chicken Thighs with Carrots and Potatoes

Prep Time 15 minutes
Cook Time 45 minutes
Total Time 1 hour
Servings 4 people
Calories 450
This one-pan roasted chicken thighs recipe is a simple and delicious way to enjoy a complete meal with minimal cleanup. The chicken thighs are roasted with carrots and potatoes, creating a flavorful and satisfying dish.

Ingredients

Chicken

  • 4-6 bone-in, skin-on chicken thighs (6-8 oz each)

Chicken Seasoning

  • 1 tbsp olive oil
  • 1 tsp dried thyme
  • 1 tsp dried rosemary
  • 0.5 tsp kosher salt
  • 0.25 tsp black pepper

Vegetables

  • 4 medium carrots (cut into 1-inch pieces)
  • 4 medium Yukon Gold potatoes (cut into 1-inch cubes)

Vegetable Seasoning

  • 2 tbsp olive oil
  • 4 cloves garlic (minced)
  • 1 tsp dried thyme
  • 1 tsp dried rosemary
  • 0.5 tsp kosher salt
  • 0.25 tsp black pepper

Notes

For extra crispy skin, pat the chicken thighs dry with paper towels before seasoning.
Calories: 450kcal
Cost: $18
Course: Main Course
Cuisine: American
Keyword: Chicken
pin

Hey there, friend! Ava here, welcoming you into my little corner of the internet where deliciousness and simplicity collide. Today, we’re diving headfirst into one of my absolute go-to meals: the Ground Beef Power Bowl with Avocado & Cottage Cheese. Trust me, this isn’t just another recipe; it’s a flavor-packed adventure that’s quick, easy, and oh-so-satisfying.

Growing up, dinner was always a family affair. My mom had this uncanny ability to transform simple ingredients into meals that felt like a warm hug. This power bowl is my grown-up version of those comforting dinners, a celebration of fresh flavors and wholesome goodness. It’s perfect for busy weeknights, post-workout fuel, or when you just need a delicious pick-me-up.

So, grab your skillet and let’s get cooking! I promise, this recipe will become a staple in your kitchen, just like it is in mine.

Why You’ll Love This Ground Beef Power Bowl

Seriously, what’s not to love? This Ground Beef Power Bowl is a game-changer for so many reasons. It’s a symphony of flavors and textures that will make your taste buds sing. But beyond the deliciousness, here’s why you’ll keep coming back for more:

  • Quick and Easy: Ready in about 20 minutes, it’s perfect for those hectic weeknights.
  • Healthy and Nutritious: Packed with protein, healthy fats, and essential nutrients.
  • Customizable: Easily adaptable to your dietary needs and preferences.
  • Satisfying: Keeps you full and energized for hours.
  • Delicious: The combination of seasoned ground beef, creamy avocado, and tangy cottage cheese is simply irresistible.

I’ve been making these power bowls for years, tweaking and perfecting the recipe until it became the ultimate comfort food. And trust me, if you’re looking for a meal that’s both good for you and incredibly tasty, you’ve found it.

Ingredients You’ll Need

Here’s what you’ll need to create your own Ground Beef Power Bowl masterpiece. Don’t worry, these are all pantry-friendly ingredients that you probably already have on hand!

  • 1 lb Ground Beef
  • 1 tbsp Olive Oil
  • 1/2 tsp Salt
  • 1/4 tsp Black Pepper
  • 1 cup Cooked Rice (brown or white)
  • 1 Avocado, diced
  • 1 cup Cottage Cheese
  • 1/4 cup Salsa (optional)
  • 1/4 cup Shredded Cheddar Cheese (optional)
Recipe Image

How to Make Your Ground Beef Power Bowl: Step-by-Step

Alright, let’s get cooking! Follow these simple steps to create your own Ground Beef Power Bowl:

  1. Prep the Skillet: In a large skillet, heat olive oil over medium-high heat.
  2. Cook the Beef: Add the ground beef, salt, and pepper. Cook, breaking up the beef with a spoon, until browned. This usually takes about 7-10 minutes. Make sure the beef is cooked through and no longer pink.
  3. Drain the Grease: Drain off any excess grease from the skillet. Nobody wants a greasy power bowl!
  4. Assemble the Bowls: Divide the cooked rice into bowls. I like to use brown rice for extra fiber, but white rice works just as well.
  5. Top It Off: Top the rice with the cooked ground beef, diced avocado, and cottage cheese.
  6. Add Extras (Optional): Add salsa and shredded cheddar cheese, if desired. These are totally optional, but they add a burst of flavor and texture.
  7. Serve Immediately: Dig in and enjoy your delicious Ground Beef Power Bowl!

See? Easy peasy! This recipe is so straightforward, even a beginner cook can nail it. And the best part is, you can customize it to your heart’s content.

Pro Tips for the Perfect Power Bowl

Want to take your Ground Beef Power Bowl to the next level? Here are a few of my insider tips:

  • Seasoning is Key: Don’t be afraid to experiment with different seasonings. Chili powder, cumin, paprika, and garlic powder all work wonders with ground beef. A pinch of cayenne pepper can add a nice kick.
  • Quality Ingredients Matter: Use the best quality ground beef and avocado you can find. It makes a difference in the overall flavor.
  • Warm Rice: Make sure your rice is warm when you assemble the bowls. It helps to melt the cheese and bring all the flavors together.
  • Don’t Overcook the Beef: Overcooked ground beef can be dry and tough. Cook it until it’s just browned, and no longer pink.
  • Fresh Avocado: Use a perfectly ripe avocado for the best flavor and texture. It should be slightly soft to the touch.

These little tweaks can make a big difference in the final result. Trust me, it’s worth the extra effort!

Common Mistakes to Avoid

We all make mistakes in the kitchen, but here are a few common pitfalls to avoid when making your Ground Beef Power Bowl:

  • Not Seasoning Enough: Ground beef can be bland on its own. Be generous with your seasonings!
  • Overcooking the Beef: As I mentioned before, overcooked ground beef is a no-no.
  • Using Unripe Avocado: An unripe avocado will be hard and flavorless. Wait until it’s perfectly ripe before using it.
  • Skipping the Cheese: Okay, this might be a personal preference, but I think the cheese adds a lot of flavor and creaminess.
  • Forgetting the Salsa: The salsa adds a tangy kick that really elevates the dish. Don’t skip it!

Learn from my mistakes (and the mistakes of others!) and you’ll be well on your way to power bowl perfection.

Variations to Spice Things Up

One of the best things about this recipe is how versatile it is. Here are a few variations to keep things interesting:

  • Spicy Power Bowl: Add a pinch of cayenne pepper to the ground beef, or use a spicy salsa.
  • Mexican Power Bowl: Add black beans, corn, and a dollop of sour cream.
  • Mediterranean Power Bowl: Add chopped cucumber, tomatoes, and feta cheese.
  • Vegetarian Power Bowl: Substitute the ground beef with lentils or black beans.
  • Keto Power Bowl: Use cauliflower rice instead of regular rice, and add extra cheese and avocado.

Get creative and experiment with different flavors and ingredients. The possibilities are endless!

How to Store Leftovers

If you happen to have any leftovers (which is rare!), here’s how to store them:

  • Refrigerate: Store the cooked ground beef and rice separately in airtight containers in the refrigerator for up to 3 days.
  • Reheat: Reheat the ground beef and rice in the microwave or on the stovetop until heated through.
  • Assemble: Assemble the power bowls with fresh avocado and cottage cheese just before serving.

I don’t recommend freezing the avocado or cottage cheese, as they can become watery and lose their texture.

Frequently Asked Questions (FAQ)

Got questions? I’ve got answers! Here are a few frequently asked questions about the Ground Beef Power Bowl:

  • Can I use ground turkey instead of ground beef? Absolutely! Ground turkey is a great substitute for ground beef.
  • Can I use quinoa instead of rice? Yes, quinoa is a healthy and delicious alternative to rice.
  • Can I make this recipe ahead of time? Yes, you can cook the ground beef and rice ahead of time and store them in the refrigerator. Assemble the power bowls just before serving.
  • Is this recipe gluten-free? Yes, as long as you use gluten-free rice and salsa.
  • Can I add other vegetables? Of course! Feel free to add any vegetables you like, such as bell peppers, onions, or zucchini.

If you have any other questions, feel free to leave them in the comments below!

Serving Suggestions

This Ground Beef Power Bowl is a complete meal on its own, but here are a few serving suggestions to make it even better:

  • Side Salad: Serve with a simple side salad for a light and refreshing meal.
  • Tortilla Chips: Serve with tortilla chips for dipping.
  • Guacamole: Add a dollop of guacamole for extra flavor and creaminess.
  • Lime Wedges: Serve with lime wedges for a tangy twist.
  • Hot Sauce: Add a few dashes of your favorite hot sauce for a spicy kick.

And there you have it! A complete guide to making the ultimate Ground Beef Power Bowl with Avocado & Cottage Cheese. I hope you love this recipe as much as I do. It’s a simple, delicious, and healthy meal that’s perfect for any occasion. If you try it out, be sure to let me know in the comments below. I can’t wait to hear what you think!

Happy cooking, friends! – Ava

Internal Links

If you enjoyed this recipe, you might also like my delicious hamburger patty recipe!

So there you have it! A complete guide to making the ultimate Ground Beef Power Bowl with Avocado and Cottage Cheese. I hope you love this recipe as much as I do. It’s a simple, delicious, and healthy meal that’s perfect for any occasion. If you try it out, be sure to let me know in the comments below. I can’t wait to hear what you think! Remember, if you re ever looking for a quick and easy meal, you can always count on this power bowl. The seasoned beef, combined with the creamy avocado and cottage cheese, makes for a truly unforgettable dish. This power bowl is not just a meal; it’s an experience! The beef mixture combined with brown rice is a great source of energy. For minutes, you will enjoy every bite of this power bowl. And if you are feeling adventurous, add some beans and chili powder to the ground beef for an extra kick. A pinch of cumin and paprika to the beef will also add a wonderful depth of flavor. You’ll find that if you follow these tips, you’ll create a power bowl that’s both healthy and delicious. This power is truly amazing! When you need a quick and satisfying meal, look no further. It s the perfect blend of flavors and textures. And remember, you can always adjust the ingredients to suit your own tastes. Happy cooking!

Ground Beef Power Bowl with Avocado & Cottage Cheese

Prep Time 10 minutes
Cook Time 15 minutes
Total Time 25 minutes
Servings 4 bowls
Calories 450
A hearty and healthy power bowl featuring seasoned ground beef, creamy avocado, and protein-packed cottage cheese. Perfect for a quick and satisfying meal!

Ingredients

Ingredients

  • 1 lb Ground Beef
  • 1 tbsp Olive Oil
  • 1/2 tsp Salt
  • 1/4 tsp Black Pepper
  • 1 cup Cooked Rice (brown or white)
  • 1 Avocado, diced
  • 1 cup Cottage Cheese
  • 1/4 cup Salsa (optional) (optional)
  • 1/4 cup Shredded Cheddar Cheese (optional) (optional)

Instructions 

  • Heat olive oil in a large skillet over medium-high heat.
  • Add ground beef, salt, and pepper. Cook until browned, breaking up the beef.
  • Drain off any excess grease.
  • Divide cooked rice into bowls.
  • Top with cooked ground beef, diced avocado, and cottage cheese.
  • Add salsa and shredded cheddar cheese, if desired.
  • Serve immediately.

Notes

Feel free to customize your power bowl with other toppings like black beans, corn, or a drizzle of hot sauce.
Calories: 450kcal
Cost: $12
Course: Main Course
Cuisine: American
Keyword: ground beef
pin

Hey there! Ava here, back in my Seattle kitchen, and I’ve got a recipe that’s going to become your new weeknight hero. If you’re anything like me, you crave those meals that are both incredibly satisfying and ridiculously easy to clean up. And trust me, this One Pan Cheesy Meat & Potato Skillet checks all the boxes. It’s the kind of comfort food that warms you from the inside out, perfect for those evenings when all you want to do is curl up on the couch. This recipe brings back memories of my childhood in Oregon, where simple, hearty meals were a staple at our family table. It’s a modern twist on those classic flavors, packed with cheesy goodness and that undeniable home-cooked vibe.

The best part? It all comes together in, well, one pan! Minimal dishes, maximum flavor – that’s my motto. So, grab your skillet, and let’s dive into this easy, cheesy, and oh-so-delicious meal that will have everyone asking for seconds.

Why You’ll Love This One Pan Cheesy Meat & Potato Skillet

Seriously, where do I even begin? This isn’t just another recipe; it’s a weeknight game-changer. Here’s why I think you’ll fall head-over-heels for this one pan wonder:

  • Easy Cleanup: Let’s be honest, who loves doing dishes? Since it’s a one pan cheesy creation, cleanup is a breeze.
  • Comfort Food at Its Finest: This dish is pure comfort food. The combination of ground beef, potatoes, and cheese is like a warm hug on a plate.
  • Customizable: Feel free to swap out ingredients based on what you have on hand. Want to add some veggies? Go for it! More on variations later.
  • Quick and Easy: From start to finish, this meal comes together in under an hour. Perfect for those busy weeknights.
  • Kid-Friendly: Even the pickiest eaters will love this cheesy meat and potato skillet. It’s a guaranteed crowd-pleaser.
  • Affordable: Using simple and budget-friendly ingredients, this recipe is easy on the wallet without sacrificing flavor.

It’s the kind of recipe that you can adapt to your own tastes, and it always delivers. This one pan cheesy delight is proof that you don’t need fancy ingredients or complicated techniques to create something truly special. It’s the kind of dish that makes you feel good, both while you’re cooking it and while you’re eating it. And that, my friends, is what cooking is all about.

Ingredients for Your Cheesy Meat & Potato Skillet

  • 1 lb ground beef
  • 3 tbsp butter or olive oil
  • 1 medium onion (diced)
  • 3 cloves garlic (minced)
  • 4 medium potatoes (diced)
  • 1 tsp salt
  • 0.5 tsp black pepper
  • 0.5 tsp smoked paprika (optional)
  • 0.5 tsp garlic powder
  • 0.5 tsp onion powder
  • 0.25 cup heavy cream or milk
  • 1 cup cheddar cheese (shredded)
  • 2 tbsp parsley or green onions (chopped, for garnish)
Recipe Image

How to Make This One Pan Cheesy Meat & Potato Skillet: Step-by-Step Instructions

Alright, let’s get cooking! Follow these simple steps to create a skillet masterpiece:

  1. Brown the Ground Beef: In a large skillet, brown the ground beef over medium-high heat until it’s cooked through. Make sure to drain off any excess fat. Nobody wants a greasy skillet.
  2. Sauté the Aromatics: Add the diced onion and minced garlic to the skillet. Sauté until they’re softened and fragrant, about 3-5 minutes. This is where the magic starts!
  3. Add Potatoes and Seasonings: Add the diced potatoes, salt, pepper, smoked paprika (if using), garlic powder, and onion powder. Stir well to combine, ensuring the potatoes are coated in all those delicious spices.
  4. Cook Until Tender: Cover the skillet and cook for 15–20 minutes, or until the potatoes are tender. Stir occasionally to prevent sticking. If the potatoes start to brown too quickly, add a splash of water or broth.
  5. Stir in Cream and Cheese: Stir in the heavy cream (or milk) and half of the shredded cheddar cheese. Mix until the cheese is melted and everything is well combined. This creates that creamy, cheesy goodness we all crave.
  6. Top and Melt: Top with the remaining cheddar cheese. Cover the skillet again and cook until the cheese is melted and bubbly.
  7. Garnish and Serve: Garnish with chopped parsley or green onions. Serve immediately and enjoy this one pan cheesy delight!

Pro Tips for the Perfect Skillet

Want to take your One Pan Cheesy Meat & Potato Skillet to the next level? Here are a few pro tips to help you achieve skillet perfection:

  • Choose the Right Potatoes: Russet or Yukon Gold potatoes work best for this recipe. They hold their shape well and have a great texture.
  • Don’t Overcrowd the Skillet: Make sure the ingredients are spread out in a single layer. Overcrowding can lead to uneven cooking.
  • Use a Cast Iron Skillet: If you have one, a cast iron skillet is perfect for this recipe. It distributes heat evenly and creates a nice crust on the potatoes. Cast iron meals dinners are the best.
  • Season Generously: Don’t be shy with the seasonings! They’re what give this dish its flavor. Taste as you go and adjust accordingly.
  • Preheat the Skillet: Before adding the ground beef, make sure the skillet is properly preheated. This will help prevent sticking and ensure even browning.
  • Use Freshly Grated Cheese: Pre-shredded cheese often contains cellulose, which can prevent it from melting properly. Freshly grated cheese melts like a dream.

Common Mistakes to Avoid

We all make mistakes in the kitchen, but here are a few common ones to watch out for when making this skillet:

  • Undercooking the Potatoes: Make sure the potatoes are fully cooked before adding the cheese. Nobody wants crunchy potatoes.
  • Burning the Garlic: Garlic can burn easily, so keep a close eye on it while sautéing. If it starts to brown too quickly, reduce the heat.
  • Using Too Much Liquid: Be careful not to add too much water or broth, as this can make the skillet soggy.
  • Not Draining the Ground Beef: Excess fat can make the skillet greasy and affect the flavor. Always drain the ground beef after browning.
  • Forgetting to Season: Seasoning is key to a flavorful dish. Don’t forget to add salt, pepper, and any other spices you like.

Variations to Spice Things Up

Want to put your own spin on this One Pan Cheesy Meat & Potato Skillet? Here are a few variations to try:

  • Add Veggies: Mix in some diced bell peppers, onions, mushrooms, or spinach for added nutrients and flavor.
  • Use Different Meats: Substitute ground beef with ground turkey, sausage, or even shredded chicken.
  • Spice It Up: Add a pinch of red pepper flakes or a dash of hot sauce for a little heat.
  • Try Different Cheeses: Experiment with different types of cheese, such as Monterey Jack, pepper jack, or even a blend of cheeses.
  • Make It Vegetarian: Omit the ground beef and add lentils or black beans for a vegetarian-friendly version.
  • BBQ Cheeseburger Potato Skillet: Add BBQ sauce and top with pickles for a BBQ cheeseburger twist.

How to Store and Reheat Leftovers

If you happen to have any leftovers (which is rare!), here’s how to store and reheat them:

  • Storage: Store leftovers in an airtight container in the refrigerator for up to 3-4 days.
  • Reheating: Reheat in a skillet over medium heat, stirring occasionally, until heated through. You can also microwave it, but the texture might be a bit different.

Frequently Asked Questions (FAQ)

Got questions? I’ve got answers!

  • Can I use sweet potatoes instead of regular potatoes?: Absolutely! Sweet potatoes add a touch of sweetness and a different flavor profile.
  • Can I make this ahead of time?: Yes, you can assemble the skillet ahead of time and store it in the refrigerator until you’re ready to cook it. Just add a few extra minutes to the cooking time.
  • Can I freeze this skillet?: I don’t recommend freezing it, as the potatoes can become mushy when thawed.
  • What kind of skillet should I use?: A large skillet, preferably cast iron, works best for this recipe.
  • Can I use milk instead of heavy cream?: Yes, you can use milk, but the skillet won’t be as creamy.

Serving Suggestions

This One Pan Cheesy Meat & Potato Skillet is a complete meal on its own, but here are a few serving suggestions to round it out:

  • Side Salad: Serve with a simple green salad for a light and refreshing contrast.
  • Garlic Bread: Pair with a side of garlic bread for dipping into that cheesy goodness.
  • Steamed Vegetables: Add some steamed broccoli, green beans, or carrots for extra nutrients.
  • Corn on the Cob: Serve with corn on the cob for a classic summer meal.

There’s something about a skillet meal that just feels right, isn’t there? It’s the simplicity, the comforting flavors, and the ease of cleanup that make it a winner every time. This one pan cheesy meat & potato skillet is no exception. It’s a dish that’s sure to become a staple in your kitchen, a go-to for those busy weeknights when you need something quick, easy, and delicious. So go ahead, give it a try. I promise you won’t be disappointed. And who knows, maybe it’ll even become a cherished family favorite, just like it has in mine. Happy cooking!

One Pan Cheesy Meat & Potato Skillet

Prep Time 10 minutes
Cook Time 30 minutes
Total Time 40 minutes
Servings 6 servings
Calories 450
This hearty one-pan skillet is packed with ground beef, potatoes, and plenty of cheese. It's a comforting and easy meal perfect for a weeknight dinner.

Ingredients

Ingredients

  • 1 lb ground beef
  • 3 tbsp butter or olive oil
  • 1 medium onion (diced)
  • 3 cloves garlic (minced)
  • 4 medium potatoes (diced)
  • 1 tsp salt
  • 0.5 tsp black pepper
  • 0.5 tsp smoked paprika (optional)
  • 0.5 tsp garlic powder
  • 0.5 tsp onion powder
  • 0.25 cup heavy cream or milk
  • 1 cup cheddar cheese (shredded)
  • 2 tbsp parsley or green onions (chopped, for garnish)

Instructions 

  • Brown the ground beef in a large skillet until cooked through. Drain excess fat.
  • Add diced onion and garlic. Sauté until softened.
  • Add diced potatoes and seasonings. Stir well to combine.
  • Cover and cook 15–20 minutes until potatoes are tender.
  • Stir in cream and half of the cheese, mix until melted.
  • Top with remaining cheese and cover until melted. Garnish with parsley.

Notes

For a spicier kick, add a pinch of red pepper flakes along with the other seasonings.
Calories: 450kcal
Cost: $18
Course: Main Course
Cuisine: American
Keyword: Beef
pin

Hey there, friend! Ava here, back in my Seattle kitchen, ready to share one of my absolute go-to recipes: Easy Vegetarian Quesadillas. Seriously, if you’re looking for a quick, satisfying, and utterly delicious meal, you’ve landed in the right place. I’ve been making these for years, tweaking and perfecting them until they’ve become a staple in my house. And trust me, they’re about to become one in yours, too!

Remember those nights when you’re staring into the fridge, wondering what to whip up that’s both healthy and doesn’t require a ton of effort? That’s where these veggie quesadillas shine. They’re packed with flavor, customizable to your liking, and ready in under 30 minutes. Plus, they’re a fantastic way to sneak in extra veggies. My picky-eater nephew devours them every time!

Why You’ll Love This Vegetarian Quesadillas Recipe

Okay, let’s get real. There are a million quesadilla recipes out there. So, what makes these vegetarian quesadillas so special? Here’s why I think you’ll fall head-over-heels for this recipe:

  • Quick and Easy: From prep to plate, these quesadillas are ready in a flash. Perfect for busy weeknights.
  • Customizable: Don’t like sweet potatoes? Swap them out! Want extra spice? Add more jalapenos. This recipe is your canvas.
  • Healthy and Delicious: Packed with veggies and flavor, these quesadillas are a guilt-free indulgence.
  • Kid-Friendly: Even the pickiest eaters will love these quesadillas. Trust me, I’ve seen it happen!
  • Great for Leftovers: Make a big batch and enjoy them for lunch the next day. They taste just as good reheated.

I love that these vegetarian quesadillas are so versatile. You can easily adapt them to whatever you have on hand. It’s a great way to use up leftover veggies!

Ingredients for the Best Veggie Quesadillas

Alright, let’s gather our ingredients. Here’s what you’ll need to make these amazing vegetarian quesadillas:

  • 4 Medium Flour Tortillas: The foundation of our delicious creation. I prefer flour tortillas for their soft texture, but you can use corn tortillas if you prefer.
  • 1 Large Sweet Potato: Adds a touch of sweetness and a whole lot of nutrients.
  • 2 Ripe Avocados: Creamy, dreamy, and oh-so-good.
  • 1/2 Cup Black Beans (Rinsed and Drained): Adds protein and a hearty texture. Black beans sweet potatoes and avocado are a match made in heaven.
  • 1/4 Cup Corn (Rinsed and Drained): For a pop of sweetness and color.
  • 1 Mini Red Pepper & 1 Mini Orange Pepper: Because colorful veggies make everything better.
  • 1 Tsp Jalapeno (Diced-Optional): For a little kick! Add more or less depending on your spice preference.
  • 1 Tbsp Easy Homemade Taco Seasoning (Or Store Bought Mix Packet): Adds a burst of flavor.
  • 1 Cup Cheddar or Pepper Jack Cheese: Melty, cheesy goodness.
  • 1 Tbsp Butter (For Pan Frying): To get those tortillas perfectly golden brown.
  • 2 Tsp Olive Oil (Divided): For roasting the sweet potatoes.
  • Fresh Cilantro: For a fresh, vibrant garnish.
  • Lime Juice: A squeeze of lime brightens up all the flavors.
  • Your Favorite Salsa: For dipping, of course!
  • Sour Cream: Because everything is better with a dollop of sour cream.
Recipe Image

How to Make These Vegetarian Quesadillas: Step-by-Step

Now for the fun part! Here’s how to bring all these delicious ingredients together to create the perfect veggie quesadillas:

  1. Roast the Sweet Potato: Preheat your oven to 400°F (200°C). Dice the sweet potato into small cubes, toss with 1 teaspoon of olive oil, and spread on a baking sheet. Roast for 20-25 minutes, or until tender and slightly caramelized.
  2. Prepare the Other Veggies: While the sweet potato is roasting, dice the red and orange peppers, and jalapeno (if using). Rinse and drain the black beans and corn.
  3. Mash the Avocado: In a small bowl, mash the avocados with a fork. Add a squeeze of lime juice and a pinch of salt.
  4. Assemble the Quesadillas: Lay out the flour tortillas. Spread a layer of mashed avocado on one half of each tortilla. Sprinkle with taco seasoning.
  5. Add the Fillings: Top the avocado with the roasted sweet potato, black beans, corn, diced peppers, and jalapeno (if using). Sprinkle generously with cheddar or pepper jack cheese.
  6. Fold and Cook: Fold the tortillas in half. Melt the butter in a large skillet over medium heat. Place the quesadillas in the skillet and cook for 3-4 minutes per side, or until golden brown and the cheese is melted and gooey.
  7. Serve and Enjoy: Cut the quesadillas into wedges and serve immediately with your favorite salsa, sour cream, fresh cilantro, and an extra squeeze of lime juice.

Pro Tips for Perfect Quesadillas

Want to take your quesadilla game to the next level? Here are a few of my favorite pro tips:

  • Don’t Overfill: Resist the urge to stuff your quesadillas to the brim. Overfilling can make them difficult to fold and cook evenly.
  • Use a Good Cheese: Quality cheese makes all the difference. I love using a combination of cheddar and pepper jack for a little extra flavor.
  • Low and Slow: Cook the quesadillas over medium heat to ensure the cheese melts completely and the tortillas turn golden brown without burning.
  • Press Down: Use a spatula to gently press down on the quesadillas while they’re cooking. This helps them cook evenly and seals the edges.
  • Warm the Tortillas: Warming the tortillas slightly before assembling the quesadillas makes them more pliable and less likely to tear.

Common Mistakes to Avoid

We all make mistakes in the kitchen, but here are a few common pitfalls to avoid when making quesadillas:

  • Using Cold Tortillas: Cold tortillas are stiff and prone to cracking. Warm them up slightly before using.
  • Overcooking the Sweet Potato: Overcooked sweet potato can become mushy. Roast it until it’s tender but still holds its shape.
  • Not Draining the Beans and Corn: Excess moisture can make the quesadillas soggy. Be sure to drain the black beans and corn thoroughly.
  • Using Too Much Heat: Cooking the quesadillas over high heat can cause the tortillas to burn before the cheese melts.
  • Skipping the Avocado: Okay, this isn’t really a mistake, but trust me, the avocado adds so much creaminess and flavor!

Delicious Variations to Try

The beauty of this recipe is that it’s so easy to customize. Here are a few variations to try:

  • Spicy Quesadillas: Add a pinch of cayenne pepper to the taco seasoning, or use a spicier cheese like habanero jack.
  • Mediterranean Quesadillas: Add feta cheese, olives, and sun-dried tomatoes.
  • Breakfast Quesadillas: Add scrambled eggs and chorizo for a hearty breakfast.
  • Mushroom Quesadillas: Sauté sliced mushrooms with garlic and thyme and add them to the filling.
  • Spinach and Artichoke Quesadillas: Add chopped spinach and artichoke hearts for a delicious twist.

These veggie quesadillas are a great base for experimentation. You can add almost any vegetable you like!

How to Store Leftover Quesadillas

If you happen to have any leftover quesadillas (which is rare in my house!), here’s how to store them:

  • Refrigerate: Let the quesadillas cool completely, then wrap them tightly in plastic wrap or store them in an airtight container in the refrigerator for up to 3 days.
  • Reheat: Reheat the quesadillas in a skillet over medium heat until warmed through, or in the microwave for about 1 minute.

Frequently Asked Questions (FAQ)

Got questions? I’ve got answers!

  • Can I use corn tortillas?: Yes, you can use corn tortillas, but flour tortillas are generally more pliable and easier to work with.
  • Can I make these ahead of time?: You can prepare the filling ahead of time, but it’s best to assemble and cook the quesadillas just before serving.
  • Can I freeze these?: I don’t recommend freezing cooked quesadillas, as the texture can change when thawed. However, you can freeze the filling separately.
  • What kind of cheese should I use?: Cheddar, pepper jack, Monterey Jack, and Oaxaca cheese all work well in quesadillas.
  • Are these quesadillas vegetarian?: Yes, this recipe is vegetarian-friendly. Just be sure to use vegetarian-friendly cheese.

Serving Suggestions

These vegetarian quesadillas are delicious on their own, but here are a few serving suggestions to round out your meal:

  • Salsa and Sour Cream: The classic accompaniments.
  • Guacamole: Because you can never have too much avocado.
  • Mexican Rice: A simple side dish that pairs perfectly with quesadillas.
  • Black Bean Soup: A hearty and flavorful soup that complements the quesadillas.
  • Side Salad: A light and refreshing salad to balance out the richness of the quesadillas.

And there you have it! My go-to recipe for Easy Vegetarian Quesadillas. I hope you love them as much as I do. If you make this recipe, be sure to tag me on social media so I can see your creations! Happy cooking!

Vegetarian Quesadillas

Prep Time 20 minutes
Cook Time 15 minutes
Total Time 35 minutes
Servings 4 quesadillas
Calories 450
Delicious and easy vegetarian quesadillas packed with sweet potato, black beans, corn, and colorful peppers. Perfect for a quick lunch or dinner!

Ingredients

Quesadilla Ingredients

  • 4 Medium Flour Tortillas
  • 1 Large Sweet Potato
  • 2 Avocados
  • 1/2 Cup Black Beans (Rinsed and Drained)
  • 1/4 Cup Corn (Rinsed and Drained)
  • 1 Mini Red Pepper
  • 1 Mini Orange Pepper
  • 1 Tsp Jalapeno (Diced-Optional)
  • 1 Tbsp Easy Homemade Taco Seasoning (Or Store Bought Mix Packer)
  • 1 Cup Cheddar or Pepper Jack Cheese
  • 1 Tbsp Butter (For Pan Frying)
  • 2 Tsp Olive Oil (Divided)
  • Fresh Cilantro
  • Lime Juice
  • Your Favorite Salsa
  • Sour Cream

Instructions 

  • Dice sweet potato and roast with olive oil and taco seasoning until tender.
  • Mash avocado and combine with black beans, corn, diced peppers, and optional jalapeno.
  • Spread avocado mixture on tortillas, top with sweet potato and cheese.
  • Fold tortillas in half and pan-fry in butter until golden brown and cheese is melted.
  • Serve with cilantro, lime juice, salsa, and sour cream.

Notes

Add other vegetables like spinach or mushrooms for extra nutrients.
Calories: 450kcal
Cost: $12
Course: dinner, Lunch, Main Course
Cuisine: Mexican
Keyword: sweet potato
pin

Easy & Flavorful Mongolian Ground Beef Recipe: A Weeknight Wonder

Hey there, kitchen adventurers! Ava here, ready to share a recipe that’s become a staple in my Seattle kitchen – Easy Mongolian Ground Beef. If you’re anything like me, weeknights are a juggling act of work, errands, and trying to squeeze in a little ‘me’ time. That’s why I’m always on the lookout for recipes that are quick, easy, and, most importantly, bursting with flavor. And let me tell you, this Mongolian Ground Beef ticks all those boxes and then some!

I remember the first time I made this. It was a particularly hectic Tuesday, and I was staring into the fridge, wondering what on earth I could whip up with the ground beef I had on hand. I’d been craving something Asian-inspired, but didn’t want to spend hours in the kitchen. That’s when the idea hit me: Mongolian Beef, but make it FAST. And so, this recipe was born. It’s a total game-changer!

Why You’ll Absolutely Love This Mongolian Ground Beef Recipe

Trust me, this isn’t just another ground beef recipe. It’s a flavor explosion that’s ready in under 30 minutes. Here’s why you’ll keep coming back to it:

  • Quick & Easy: From fridge to table in less than 30 minutes. Perfect for those crazy weeknights.
  • Flavor Bomb: Sweet, savory, and a little bit spicy – this dish hits all the right notes.
  • Versatile: Serve it over rice, noodles, or even in lettuce wraps for a low-carb option.
  • Budget-Friendly: Ground beef is a wallet-friendly protein, making this a great option for feeding a crowd.
  • Crowd-Pleaser: Even picky eaters will devour this dish. It’s a guaranteed win!

If you are looking for a quick and easy meal that the whole family will love, then you can’t go wrong with this Mongolian ground beef.

The Star Ingredients

Let’s talk about what you’ll need to make this magic happen. Don’t worry, the ingredient list is short and sweet, and you probably already have most of these in your pantry:

  • 1 lb ground beef
  • 4 clove garlic (minced)
  • 2 tsp ginger (grated)
  • ¼ cup soy sauce
  • ¼ cup water
  • 2 tbsp hoisin sauce
  • 2 tbsp brown sugar
  • 2 tsp sesame oil
  • 1 tsp red pepper flakes
  • 2 tbsp cornstarch
  • ¼ cup water
  • ½ tsp salt
  • ½ tsp black pepper
  • green onion (for garnish)
  • white sesame seeds (for garnish)
Recipe Image

Let’s Get Cooking: Step-by-Step Instructions

Alright, apron on? Let’s do this! Here’s how to transform simple ground beef into a flavor-packed Mongolian masterpiece:

  1. Make the sauce: Combine soy sauce, water, hoisin sauce, brown sugar, and sesame oil in a small bowl. Whisk until well combined and set aside. The sauce is the key to the whole dish, so make sure it’s well mixed.
  2. Brown the beef: In a large skillet or pan, heat 1 tbsp of cooking oil. Add ground beef, ginger, and garlic. Cook until beef is browned and cooked through. Make sure to break up the beef into small pieces as it cooks.
  3. Add the sauce: Pour the prepared sauce over ground beef and stir well to coat. This is where the magic happens!
  4. Thicken it up: In a small bowl, mix cornstarch and water to make cornstarch slurry. Pour cornstarch slurry into the ground beef mixture and stir well. Let it simmer for a few minutes until the sauce thickens and becomes glossy.
  5. Season and spice: Season with red pepper flakes, salt, and pepper. Taste and adjust seasonings needed. If you like it spicier, add more red pepper flakes!
  6. Garnish and serve: Garnish with chopped green onion and sesame seeds. Serve the Mongolian beef over steamed rice and a side of veggie for a complete meal.

Make this dish and you’ll be amazed at how quickly it comes together. This recipe is a fantastic alternative to ordering takeout. Instead of spending money on restaurant food, you’ll have a healthy and delicious meal in no time. If you are looking for a quick and easy dinner, then you’ll definitely want to try this recipe!

Ava’s Pro Tips for Mongolian Ground Beef Perfection

Want to take this dish from good to AMAZING? Here are a few of my secret weapons:

  • Quality Beef Matters: Use lean ground beef (90/10) to avoid excess grease. Nobody wants a greasy dinner.
  • Don’t Overcook the Beef: Overcooked ground beef can be dry and tough. Cook it just until it’s browned and cooked through.
  • Fresh Ginger & Garlic: Trust me on this one. Freshly grated ginger and minced garlic make a world of difference in flavor.
  • Taste as You Go: Seasoning is key! Taste the sauce and adjust as needed. More soy sauce for saltiness, more brown sugar for sweetness, more red pepper flakes for heat.
  • Don’t Skip the Garnish: Green onions and sesame seeds add a pop of color, flavor, and texture. They’re not just for looks!

Common Mistakes to Avoid

We all have kitchen mishaps, but here are a few common pitfalls to watch out for when making Mongolian Ground Beef:

  • Too Much Cornstarch: Adding too much cornstarch can make the sauce gloppy. Start with less and add more as needed.
  • Burning the Garlic: Burnt garlic is bitter. Keep the heat medium and stir frequently.
  • Not Breaking Up the Beef: Make sure to break up the ground beef into small pieces as it cooks. Large chunks of beef won’t absorb the sauce as well.
  • Skipping the Simmer: Letting the sauce simmer for a few minutes is crucial for thickening and developing the flavors.
  • Over Salting: Soy sauce is already salty, so be careful not to over-salt the dish. Taste as you go and adjust accordingly.

Mongolian Ground Beef: Fun Variations to Try

Want to mix things up? Here are a few fun variations to try:

  • Spicy Mongolian Beef: Add more red pepper flakes or a dash of chili oil for extra heat.
  • Veggie-Packed Mongolian Beef: Add chopped broccoli, carrots, or bell peppers for extra nutrients and flavor.
  • Mongolian Ground Turkey or Chicken: Swap out the ground beef for ground turkey or chicken for a leaner option. Ground turkey or chicken works really well with this recipe.
  • Mongolian Beef Lettuce Wraps: Serve the Mongolian beef in lettuce cups for a low-carb and refreshing meal.
  • Mongolian Beef Noodles: Serve over your favorite noodles (ramen, udon, or even spaghetti) instead of rice.

Storing and Reheating Like a Pro

Got leftovers? Lucky you! Here’s how to store and reheat your Mongolian Ground Beef like a pro:

  • Storage: Store the cooked Mongolian beef in an airtight container in the refrigerator for up to 3-4 days.
  • Reheating: Reheat in a skillet over medium heat, stirring occasionally, until heated through. You can also microwave it, but the texture might be slightly different.
  • Freezing: For longer storage, freeze the cooked Mongolian beef in an airtight container for up to 2-3 months. Thaw overnight in the refrigerator before reheating.

Frequently Asked Questions (FAQ)

Got questions? I’ve got answers!

  • Can I use low-sodium soy sauce?: Absolutely! This is a great way to reduce the sodium content of the dish.
  • Can I make this ahead of time?: Yes! The Mongolian beef can be made ahead of time and stored in the refrigerator for up to 2 days. Reheat before serving.
  • Can I add other vegetables?: Of course! Feel free to add your favorite veggies, such as broccoli, carrots, or bell peppers.
  • What if I don’t have hoisin sauce?: If you don’t have hoisin sauce, you can substitute it with a mixture of soy sauce, brown sugar, and a touch of peanut butter.
  • Is this recipe gluten-free?: No, soy sauce typically contains gluten. To make it gluten-free, use tamari instead of soy sauce.

Serving Suggestions: Complete the Meal

Ready to serve up a feast? Here are a few of my favorite ways to enjoy Mongolian Ground Beef:

  • Over Rice: The classic choice! Serve over steamed white or brown rice.
  • With Veggies: Add a side of steamed broccoli, stir-fried vegetables, or a simple salad.
  • In Lettuce Wraps: For a low-carb option, serve in crisp lettuce cups with a sprinkle of sesame seeds and green onions.
  • With Noodles: Serve over your favorite noodles (ramen, udon, or even spaghetti).
  • As a Bowl: Create a bowl with rice, Mongolian beef, your favorite veggies, and a drizzle of sriracha mayo.

And there you have it! Easy Mongolian Ground Beef that’s sure to become a weeknight favorite. I hope this recipe brings a little magic to your kitchen and a lot of smiles to your table. Happy cooking, friends! And remember, even if you have a few ‘oops’ moments along the way, that’s just part of the fun. Embrace the journey, trust your senses, and most importantly, enjoy the process. After all, the best meals are the ones made with love (and maybe a pinch of extra red pepper flakes!). What to make with lean ground beef? This! It’s one of the easy high protein beef recipes that you can make in under 30 minutes. It is a healthy dinner with meat that the whole family will love. If you are looking for Mongolian beef healthy recipes, then this is it. This is also a great ground meat meal idea. This dish can also be considered one of the best ground beef and rice dinner ideas. You can also consider this one of the ground hamburger healthy recipes. This is a healthy dinner recipe that takes just 30 minutes. This is a ground beef fast dinner that you’ll want to add to your rotation.

Asian Mongolian Ground Beef Recipe with Few Ingredients

Prep Time 5 minutes
Cook Time 15 minutes
Total Time 20 minutes
Servings 4 people
Calories 350
Quick and easy Mongolian ground beef recipe with minimal ingredients. Perfect for a weeknight dinner served over rice.

Ingredients

Ingredients

  • 1 lb ground beef
  • 4 clove garlic (minced)
  • 2 tsp ginger (grated)
  • ¼ cup soy sauce
  • ¼ cup water
  • 2 tbsp hoisin sauce
  • 2 tbsp brown sugar
  • 2 tsp sesame oil
  • 1 tsp red pepper flakes
  • 2 tbsp cornstarch
  • ¼ cup water
  • ½ tsp salt
  • ½ tsp black pepper
  • green onion (for garnish)
  • white sesame seeds (for garnish)

Instructions 

  • Make the sauce by combining soy sauce, water, hoisin sauce, brown sugar, and sesame oil. Whisk and set aside.
  • Cook ground beef, ginger, and garlic until beef is browned.
  • Pour sauce over ground beef and stir well.
  • Mix cornstarch and water, then pour into the ground beef. Simmer until sauce thickens.
  • Season with red pepper flakes, salt, and pepper. Adjust seasonings.
  • Garnish with green onion and sesame seeds. Serve over rice.

Notes

Adjust the amount of red pepper flakes to your spice preference.
Calories: 350kcal
Cost: $12
Course: Main Course
Cuisine: Asian
Keyword: ground beef
pin

Hey there, friend! Ava here, back from my Seattle kitchen with a recipe that’s about to become your new weeknight hero. This 30-Minute One Pan Turkey Sausage Skillet is the kind of dish that makes you feel like you’ve actually got your life together, even when everything else is a little chaotic. It’s quick, it’s easy, and most importantly, it’s packed with flavor that’ll have everyone asking for seconds. I’m telling you, if you’re looking for something delicious that won’t keep you chained to the stove all evening, this is it.

I remember one particularly hectic week when I was juggling work, errands, and trying to keep up with my ever-growing collection of houseplants. I needed dinner, and I needed it fast. That’s when I threw together this skillet recipe, and it was an instant hit. Now, it’s a regular in my rotation, and I’m so excited to share it with you!

Why You’ll Love This One Pan Turkey Sausage Skillet

Let’s be real, we all have those nights where the thought of cooking feels like climbing a mountain. This recipe is designed for those moments. It’s all about maximum flavor with minimal effort and cleanup. Here’s why you’ll be obsessed:

  • Quick and Easy: From prep to plate in just 30 minutes. Seriously, it doesn’t get much easier than this.
  • One Pan Wonder: Fewer dishes mean more time for Netflix (or, you know, folding laundry… maybe).
  • Healthy and Delicious: Turkey sausage and loads of veggies make this a feel-good meal.
  • Customizable: Add your favorite toppings and make it your own!
  • Flavor Bomb: The combination of spices and fresh ingredients creates a taste that’s simply irresistible.

I think it’s the perfect blend of comfort and convenience, and I know you’re going to love it just as much as I do.

Ingredients You’ll Need

Before we dive in, let’s gather our ingredients. Don’t worry, you probably already have most of these in your pantry and fridge. If you don’t, a quick trip to the store will do the trick. Remember, the quality of your ingredients will shine through in the final dish, so choose the freshest produce and the best turkey sausage you can find.

  • 1 pound ground turkey beef sausage
  • 1 tablespoon olive oil
  • 1 onion, chopped
  • 1 bell pepper (any color), chopped
  • 2 cloves garlic, minced
  • 1 (14.5 ounce) can diced tomatoes, undrained
  • 1 (15 ounce) can black beans, rinsed and drained
  • 1 cup corn (fresh, frozen, or canned)
  • 1 teaspoon chili powder
  • 1/2 teaspoon cumin
  • 1/4 teaspoon smoked paprika
  • Salt and pepper to taste
  • Optional toppings: shredded cheese, sour cream, avocado, cilantro
Recipe Image

Let’s Get Cooking: Step-by-Step Instructions

Alright, let’s turn these ingredients into a delicious skillet masterpiece! Follow these simple steps, and you’ll have dinner on the table in no time. I’m telling you, it’s so easy, you’ll feel like a culinary wizard.

  1. Sauté the Sausage: Heat olive oil in a large skillet over medium-high heat. Add ground turkey beef sausage and cook, breaking it up with a spoon, until browned. Make sure it’s nice and crumbly; that’s what we want.
  2. Add Veggies: Add onion and bell pepper to the skillet and cook until softened, about 5 minutes. The skillet should be getting fragrant at this point.
  3. Garlic Time: Stir in garlic and cook for 1 minute more. Don’t let it burn; we just want that lovely garlic aroma.
  4. Combine Everything: Add diced tomatoes, black beans, corn, chili powder, cumin, and smoked paprika to the skillet. This is where the magic happens!
  5. Season and Simmer: Season with salt and pepper to taste. Bring to a simmer and cook for 10-15 minutes, or until the sauce has thickened slightly. You’ll notice the colors deepen and the flavors meld together beautifully.
  6. Serve and Enjoy: Serve hot, topped with your favorite toppings. I love mine with a dollop of sour cream and a sprinkle of cilantro.

Pro Tips for Skillet Perfection

Want to take your skillet game to the next level? Here are a few of my favorite tips and tricks that will help you achieve skillet perfection every time. Trust me; these little details make all the difference!

  • Choose Quality Sausage: The better the sausage, the better the flavor. Look for turkey sausage with minimal fillers and a good balance of spices.
  • Don’t Overcrowd the Pan: If you’re cooking for a crowd, work in batches to ensure the sausage browns properly. Overcrowding the pan will steam the sausage instead of browning it.
  • Taste as You Go: Seasoning is key! Taste the skillet mixture throughout the cooking process and adjust the salt, pepper, and spices as needed.
  • Get Creative with Toppings: Don’t be afraid to experiment with different toppings. Shredded cheese, avocado, sour cream, cilantro, green onions, and a squeeze of lime juice are all fantastic options.
  • Use a Good Skillet: A well-seasoned cast iron skillet or a good quality non-stick skillet will work best for this recipe.

Common Mistakes to Avoid

Even the best cooks make mistakes sometimes. Here are a few common pitfalls to watch out for when making this turkey sausage skillet, so you can avoid them and ensure a delicious outcome. I’ve definitely been there, done that, and learned from my mishaps!

  • Burning the Garlic: Garlic burns easily, so keep a close eye on it and stir it frequently. If it starts to brown too quickly, reduce the heat.
  • Under-Seasoning: Don’t be shy with the salt, pepper, and spices. Under-seasoning is a common mistake that can leave your skillet tasting bland.
  • Overcooking the Vegetables: Cook the vegetables until they’re tender-crisp, not mushy. No one likes a soggy bell pepper.
  • Forgetting to Drain the Black Beans: Draining the black beans is essential to prevent the skillet from becoming too watery.
  • Not Letting the Sauce Thicken: Allow the sauce to simmer and thicken slightly for the best flavor and texture.

Delicious Variations to Try

One of the best things about this recipe is how versatile it is. Feel free to experiment with different ingredients and flavors to create your own unique version. Here are a few variations to get you started:

  • Spicy Skillet: Add a pinch of red pepper flakes or a chopped jalapeño for a kick of heat.
  • Mediterranean Skillet: Use Italian sausage and add Kalamata olives, feta cheese, and a sprinkle of oregano.
  • Mexican Skillet: Add a can of Rotel tomatoes and green chilies, and top with guacamole and salsa.
  • Vegetarian Skillet: Omit the sausage and add more vegetables, such as zucchini, mushrooms, and spinach.
  • Sweet Potato Skillet: Add diced sweet potatoes for a touch of sweetness and extra nutrients.

How to Store and Reheat

This turkey sausage skillet is great for meal prepping or making ahead of time. Here’s how to store and reheat it:

  • Storage: Allow the skillet to cool completely, then transfer it to an airtight container and store it in the refrigerator for up to 3-4 days.
  • Reheating: Reheat the skillet in a skillet over medium heat, stirring occasionally, until heated through. You can also microwave it in individual portions.
  • Freezing: For longer storage, freeze the skillet in an airtight container for up to 2-3 months. Thaw it in the refrigerator overnight before reheating.

Frequently Asked Questions (FAQ)

Got questions? I’ve got answers! Here are some of the most common questions I get about this turkey sausage skillet:

  • Can I use a different type of sausage? Absolutely! Feel free to use chicken sausage, Italian sausage, or even chorizo.
  • Can I use fresh tomatoes instead of canned? Yes, you can. Use about 2 cups of chopped fresh tomatoes in place of the canned tomatoes.
  • Can I add rice or quinoa to the skillet? Yes, you can. Add about 1 cup of cooked rice or quinoa to the skillet during the last 5 minutes of cooking.
  • Can I make this skillet ahead of time? Yes, you can. Prepare the skillet as directed, then store it in the refrigerator for up to 24 hours before reheating.
  • Is this skillet gluten-free? Yes, this skillet is naturally gluten-free.

Serving Suggestions

This turkey sausage skillet is delicious on its own, but it’s even better when paired with the right sides and toppings. Here are a few of my favorite serving suggestions:

  • Toppings: Shredded cheese, sour cream, avocado, cilantro, green onions, salsa, hot sauce.
  • Sides: Tortilla chips, cornbread, a side salad, or steamed rice.
  • As a Filling: Use it as a filling for tacos, burritos, or omelets.

I hope you love this 30-Minute One Pan Turkey Sausage Skillet as much as I do! It’s a quick, easy, and delicious meal that’s perfect for busy weeknights. Give it a try and let me know what you think. And if you make any fun variations, be sure to share them with me in the comments below!

Happy cooking, friends! And remember, even if things get a little messy in the kitchen, it’s all part of the fun. Until next time!

You Might Also Like…

If you loved this recipe, here are a few other turkey recipes you might enjoy:

30-Minute One Pan Turkey Sausage Skillet!

Prep Time 5 minutes
Cook Time 25 minutes
Total Time 30 minutes
Servings 6 servings
Calories 350
This quick and easy turkey sausage skillet is a flavorful and healthy meal that's ready in just 30 minutes! Perfect for a weeknight dinner.

Ingredients

Ingredients

  • 1 pound ground turkey beef sausage
  • 1 tablespoon olive oil
  • 1 onion, chopped
  • 1 bell pepper (any color), chopped
  • 2 cloves garlic, minced
  • 14.5 ounce diced tomatoes, undrained
  • 15 ounce black beans, rinsed and drained
  • 1 cup corn (fresh, frozen, or canned)
  • 1 teaspoon chili powder
  • 0.5 teaspoon cumin
  • 0.25 teaspoon smoked paprika
  • to taste Salt and pepper
  • Optional toppings: shredded cheese, sour cream, avocado, cilantro

Instructions 

  • Heat olive oil in a large skillet over medium-high heat.
  • Add ground turkey beef sausage and cook, breaking it up with a spoon, until browned.
  • Add onion and bell pepper to the skillet and cook until softened, about 5 minutes.
  • Stir in garlic and cook for 1 minute more.
  • Add diced tomatoes, black beans, corn, chili powder, cumin, and smoked paprika to the skillet.
  • Season with salt and pepper to taste.
  • Bring to a simmer and cook for 10-15 minutes, or until the sauce has thickened slightly.
  • Serve hot, topped with your favorite toppings.

Notes

Adjust the amount of chili powder to your preferred level of spiciness.
Calories: 350kcal
Cost: $18
Course: Main Course
Cuisine: American
Keyword: Turkey Sausage
pin