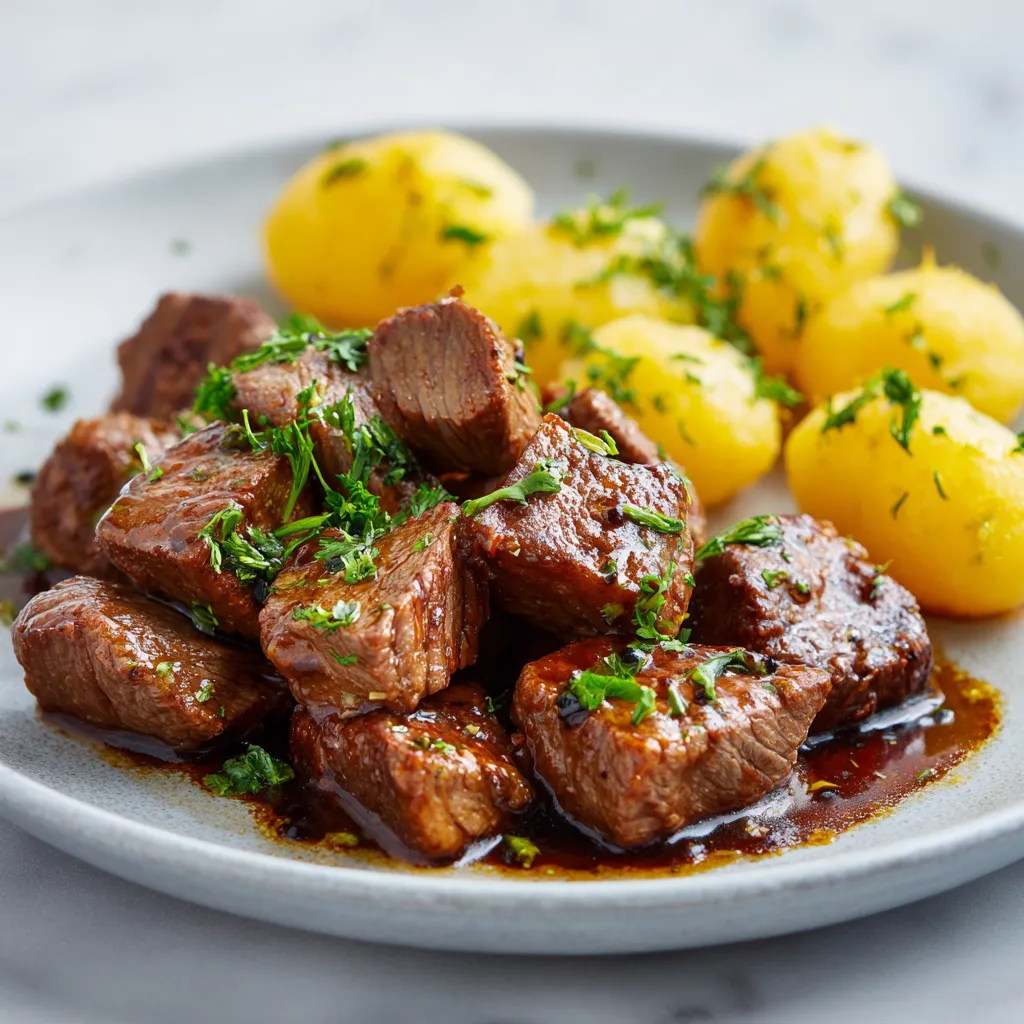
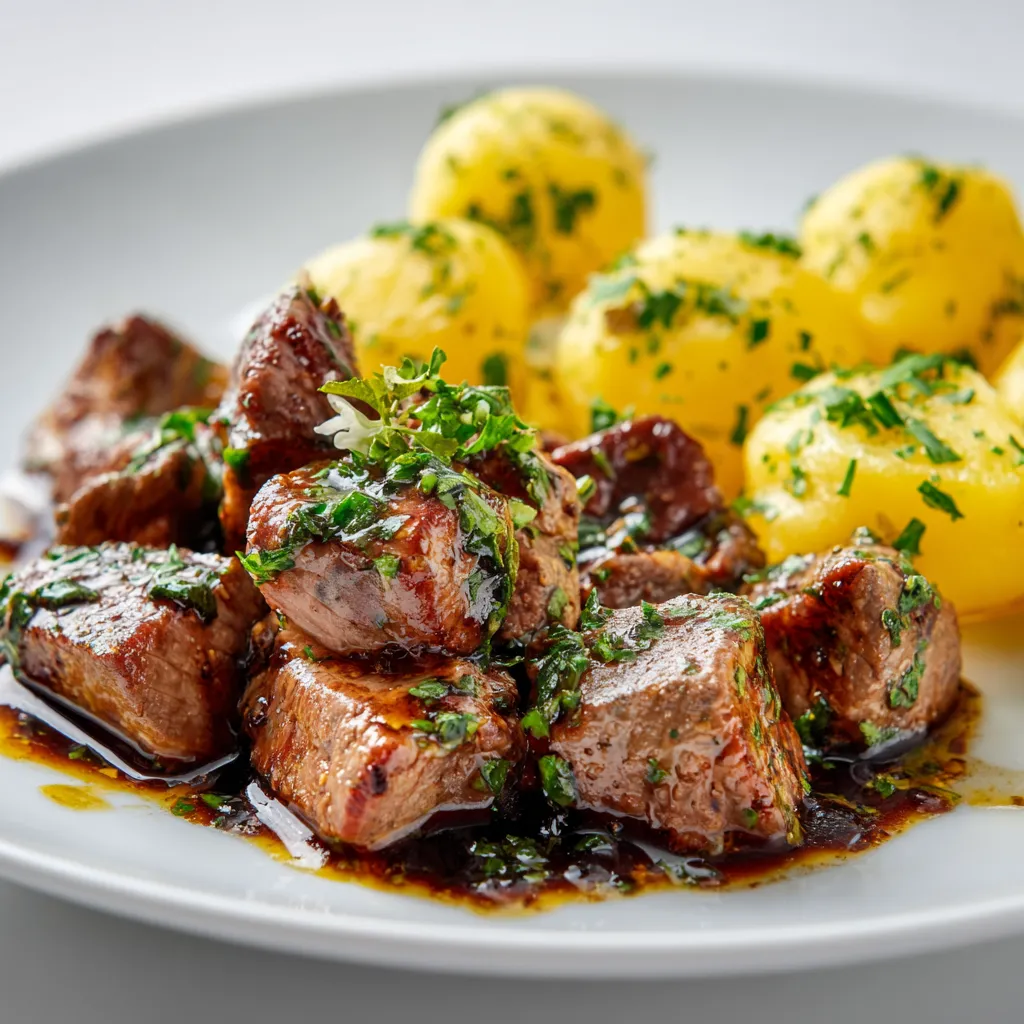
Author

Ava

Browsing

Why This Chicken Quesadilla Recipe Will Transform Your Family Dinners

If you’re looking for a way to elevate your family dinners into a fiesta of flavors, you’ve come to the right place! Our Family Favorite Chicken Quesadilla recipe is not just about the food; it’s about creating memories that linger long after the last bite. Here’s why you’ll absolutely love this recipe:

  • Quick and Easy: With simple ingredients and minimal prep time, you can whip up these quesadillas in under 30 minutes, making it perfect for busy weeknights.
  • Customizable: You can adjust the fillings to suit your family’s tastes—add more veggies, switch up the protein, or even make it vegetarian!
  • Kid-Friendly: This dish is a hit with my daughter and her friends; they love the fun of dipping into sour cream and salsa!
  • Perfect for Leftovers: If you have extra chicken or veggies, toss them into the mix for a delicious way to use up what’s in your fridge.
  • Comfort Food Classic: These quesadillas are crispy on the outside and gooey on the inside, delivering that warm hug from your kitchen that everyone craves.

What You’ll Need for the Ultimate Quesadilla

Gathering quality ingredients is key to making the best chicken quesadilla. Here’s a detailed list of what you’ll need, along with some substitutions to suit your pantry:

  • 2 cups cooked chicken, shredded: Use rotisserie chicken for convenience or leftover grilled chicken for added flavor.
  • 1 cup shredded cheese: Cheddar or Monterey Jack work wonderfully. For a twist, try pepper jack for some heat!
  • 1 cup bell peppers, sliced: Any color will do; mix red, yellow, and green for a vibrant presentation.
  • 1/2 cup onion, sliced: Red or yellow onions add sweetness; sauté them until they’re caramelized for extra flavor.
  • 4 large flour tortillas: Opt for whole wheat or corn tortillas for a healthier option.
  • 2 tablespoons olive oil: Use this for sautéing and frying; you can also try avocado oil for a different flavor.
  • 1 teaspoon cumin: This spice brings warmth and depth to the dish.
  • 1 teaspoon paprika: Adds a subtle smokiness that complements the chicken beautifully.
  • Salt and pepper to taste: Essential for enhancing all the flavors in the quesadilla.
  • Sour cream and salsa for serving: These are must-have condiments that elevate your quesadilla experience!

How to Make Your Chicken Quesadilla

Delicious golden-brown chicken quesadilla with melted cheese and colorful vegetables, garnished with sour cream.

Let’s dive into the step-by-step instructions that will lead you to quesadilla perfection. Follow these simple steps, and you’ll be serving up mouthwatering quesadillas in no time!

  1. Heat the skillet: In a skillet, heat 1 tablespoon of olive oil over medium heat.
  2. Sauté the veggies: Add sliced onions and bell peppers, sauté until softened, about 5 minutes.
  3. Mix the chicken: In a bowl, mix the shredded chicken with cumin, paprika, salt, and pepper.
  4. Combine ingredients: Add the sautéed onions and peppers to the chicken mixture and stir to combine.
  5. Prepare the tortillas: In the same skillet, add another tablespoon of olive oil and place one tortilla in the skillet.
  6. Layer the filling: On one half of the tortilla, layer 1/4 of the chicken mixture and sprinkle with 1/4 cup of cheese.
  7. Cook to golden perfection: Fold the tortilla over and cook for 2-3 minutes on each side, until golden brown and cheese is melted.
  8. Repeat: Continue with the remaining tortillas and filling.
  9. Serve: Cut into wedges and serve hot with sour cream and salsa.

Pro Tips for the Best Quesadilla

Want to take your quesadilla game to the next level? Here are some expert insights:

  • Don’t Overfill: While it’s tempting to pile on the filling, too much will make it hard to fold and cook properly.
  • Use a Non-Stick Skillet: This ensures easy flipping and prevents sticking.
  • Let it Rest: Allow your quesadilla to sit for a minute after cooking. This helps the cheese set, making it easier to cut.
  • Experiment with Flavors: Add spices like chili powder or red pepper flakes for extra heat!
  • Use Fresh Ingredients: Fresh veggies and quality cheese will make a noticeable difference in flavor.
  • Get Creative with Cheese: Try a blend of cheeses for complexity. A mix of mozzarella and cheddar is delightful!
  • Make it Ahead: You can prep the filling in advance and assemble your quesadillas when ready to cook.
  • Watch the Heat: Cook on medium heat to avoid burning the tortillas while ensuring the cheese melts perfectly.

Variations to Try

Once you’ve mastered the classic chicken quesadilla, try these fun variations to keep things exciting:

  • Veggie Quesadilla: Skip the chicken and load up on your favorite veggies like mushrooms, zucchini, and spinach.
  • Spicy Chicken Quesadilla: Add jalapeños to the filling for a spicy kick that makes your taste buds dance!
  • BBQ Chicken Quesadilla: Mix shredded BBQ chicken with cheese for a sweet and smoky flavor.
  • Mediterranean Quesadilla: Swap the chicken for feta cheese, olives, and sun-dried tomatoes for a Mediterranean twist.

Storage and Make-Ahead Instructions

If you have leftovers or want to prepare ahead of time, here’s how to store your quesadillas:

  • Refrigeration: Store cooled quesadillas in an airtight container in the fridge for up to 3 days.
  • Freezing: Freeze assembled but uncooked quesadillas separated by parchment paper in a freezer-safe bag for up to 2 months.
  • Reheating: Reheat in a skillet over medium heat until warmed through and crispy.
  • Make Ahead: Prepare the filling and store it in the fridge for up to 2 days. Assemble and cook when ready to eat!

Frequently Asked Questions

Got questions about making chicken quesadillas? Here are some FAQs:

  • Can I use corn tortillas instead of flour? Absolutely! Corn tortillas work well and are gluten-free.
  • What other cheeses can I use? Feel free to experiment with cheeses like gouda or feta for a different flavor profile.
  • Can I make these quesadillas vegetarian? Yes! Just omit the chicken and load up on veggies and cheese.
  • How do I know when the quesadillas are done? They should be golden brown and crispy, and the cheese should be melted.
  • What can I serve with quesadillas? Sour cream, salsa, guacamole, or a fresh salad make great accompaniments.
  • Can I add beans to the filling? Absolutely! Black beans or refried beans add protein and flavor.
  • How do I prevent soggy quesadillas? Make sure to sauté your vegetables well to remove excess moisture before adding them to the quesadilla.
  • Can I use leftover turkey or beef? Yes! This recipe is versatile and works with any cooked meat you have on hand.

Nutritional Tips and Dietary Adaptations

Looking to make this recipe fit your dietary needs? Here are some tips:

  • Low-Carb Version: Use lettuce wraps instead of tortillas for a low-carb alternative.
  • Dairy-Free Option: Substitute cheese with dairy-free cheese alternatives and use coconut yogurt instead of sour cream.
  • Gluten-Free Option: Opt for gluten-free tortillas to accommodate dietary restrictions.
  • Protein Boost: Add black beans or chickpeas for additional protein and fiber.

Essential Equipment for Quesadilla Making

Here are the tools that will make your quesadilla-making process easier:

  • Non-Stick Skillet: A must-have for cooking quesadillas without sticking.
  • Spatula: Use a spatula to flip the quesadillas easily.
  • Cutting Board and Knife: Essential for prepping all your ingredients.
  • Mixing Bowl: For combining the chicken and seasonings.

Serving Suggestions

When it comes to serving your quesadillas, presentation matters! Here are some ideas:

  • Plate with Style: Serve on a colorful platter with dips arranged in small bowls around the quesadillas.
  • Garnish: Sprinkle fresh cilantro or green onions on top for a pop of color and flavor.
  • Side Salads: Pair with a fresh green salad or a corn salad for a complete meal.

So there you have it, friends! This chicken quesadilla recipe is not just a meal; it’s an experience. Whether you’re cooking for your family or hosting friends, these quesadillas promise to bring joy to your table. Now, roll up those sleeves, grab your ingredients, and let’s make some magic happen in the kitchen!

Family Favorite Chicken Quesadilla Recipe

Prep Time 10 minutes
Cook Time 10 minutes
Total Time 20 minutes
Servings 4 servings
Calories 550
A quick and delicious chicken quesadilla perfect for family dinners or casual gatherings.

Ingredients

Chicken and Vegetables

  • 2 cups cooked chicken, shredded
  • 1 cup shredded cheese (cheddar or monterey jack)
  • 1 cup bell peppers, sliced
  • 0.5 cup onion, sliced
  • 4 large flour tortillas
  • 2 tablespoons olive oil
  • 1 teaspoon cumin
  • 1 teaspoon paprika
  • to taste salt and pepper
  • for serving sour cream
  • for serving salsa

Instructions 

  • Heat 1 tbsp olive oil in a skillet, sauté onions and peppers until softened.
  • Mix shredded chicken with cumin, paprika, salt, and pepper.
  • Add cooked vegetables to chicken, then assemble tortillas with filling and cheese.
  • Cook folded tortillas in skillet until golden and cheese melts, about 2-3 minutes per side.
  • Cut into wedges and serve with sour cream and salsa.

Notes

Use fresh ingredients for best flavor. Feel free to customize with additional toppings.
Calories: 550kcal
Cost: $15
Course: Main Course
Cuisine: Mexican
Keyword: Chicken

Loved this recipe? Save it to your favorite Pinterest board so you can easily find it later! It’s the perfect way to keep all your sweet ideas in one place. ✨

A beautifully shot chicken quesadilla showcasing its texture, with a cozy background and warm lighting.

Welcome to Your New Favorite Comfort Dish!

Hey there, fellow food lover! If you’re looking for a dish that wraps you in warmth and flavor, you’ve come to the right place. Today, I’m sharing my Quick & Easy Butter Chicken Recipe. It’s a cozy escape right in your kitchen, perfect for those nights when you want something delicious but don’t feel like spending hours slaving away. So, grab your apron and let’s dive into a recipe that will have everyone at the dinner table asking for seconds!

Why You’ll Love This Recipe

This butter chicken recipe is not just about the flavors; it’s about the experience! Here are five reasons why this dish will quickly become a staple in your home:

  • Quick Preparation: Ready in under 30 minutes, perfect for busy weeknights!
  • Comforting Flavors: The creamy tomato sauce combined with aromatic spices creates a dish that’s both satisfying and indulgent.
  • Versatile Dish: Enjoy it with rice, naan, or even as a part of a larger spread during gatherings.
  • Kid-Friendly: The mild flavors are generally a hit with kids, making it an easy dinner choice.
  • Customizable: Adjust the spice levels based on your preference—add more heat or keep it mild!

Ingredient Breakdown

Delicious butter chicken dish with creamy sauce and spices, presented on a rustic table.

Let’s talk about what goes into this delightful dish! Here’s what you’ll need:

  • 1 lb (450g) boneless chicken: Cut into bite-sized pieces. You can use thighs for juiciness or breasts for a leaner option.
  • 2 tablespoons butter: For that rich flavor—can substitute with olive oil for a lighter version.
  • 1 onion: Finely chopped. A yellow onion adds sweetness, but a red onion can provide a nice color.
  • 3 cloves garlic: Minced. Fresh garlic is key for depth of flavor.
  • 1 tablespoon ginger: Grated. Fresh ginger adds a zing that complements the creaminess.
  • 1 can (14 oz) diced tomatoes: The base of your sauce—feel free to use fresh tomatoes if they’re in season!
  • 1 cup heavy cream: For that luscious texture. Substitute with coconut milk for a dairy-free option.
  • 2 tablespoons garam masala: This spice blend is the heart of your butter chicken. It’s warm, aromatic, and essential.
  • 1 teaspoon chili powder: Adjust to your spice tolerance. Add cayenne pepper for an extra kick!
  • Salt to taste: Enhances all the flavors.
  • Fresh cilantro for garnish: It adds a fresh touch at the end.
  • Cooked rice or naan for serving: The perfect companions to soak up that delicious sauce!

Instructions: How to Make Butter Chicken

Now that we’ve got our ingredients ready, let’s get cooking!

  1. In a large skillet, melt the butter over medium heat.
  2. Add the chopped onion and sauté until translucent, about 5 minutes.
  3. Stir in the minced garlic and grated ginger, cooking for another 1-2 minutes until fragrant.
  4. Add the chicken pieces to the skillet and cook until browned on all sides.
  5. Stir in the diced tomatoes, garam masala, chili powder, and salt, cooking for 5 minutes.
  6. Reduce the heat and pour in the heavy cream, stirring to combine.
  7. Simmer for 10-15 minutes until the chicken is cooked through and the sauce thickens.
  8. Garnish with fresh cilantro and serve hot over rice or with naan.

Pro Tips for Perfect Butter Chicken

Want to elevate your butter chicken game? Here are some expert insights:

  • Marinate the Chicken: For deeper flavors, marinate the chicken in yogurt and spices for a few hours or overnight.
  • Use Fresh Spices: Freshly ground spices can significantly enhance the aroma and flavor of your dish.
  • Control the Heat: Adjust the amount of chili powder and cayenne pepper based on your preference for spice.
  • Thicken the Sauce: If your sauce is too thin, let it simmer uncovered for a few minutes to reduce.
  • Add Vegetables: For a nutritious boost, toss in some spinach or peas towards the end of cooking.
  • Experiment with Proteins: This recipe works well with shrimp, tofu, or even lentils for a vegetarian option.
  • Make it Ahead: Butter chicken tastes even better the next day; make it in advance for an easy meal!
  • Freeze for Later: Portion and freeze leftovers for an easy weeknight dinner.

Common Mistakes and Troubleshooting

Even the best cooks hit a snag sometimes! Here are a few common pitfalls and how to avoid them:

  • Overcooking the Chicken: Keep an eye on your chicken; overcooked chicken can become dry. Aim for tender, juicy pieces.
  • Too Spicy: If you accidentally add too much heat, balance it by stirring in extra cream or a spoonful of sugar.
  • Thin Sauce: If your sauce is too watery, simmer it longer without a lid to thicken it up.
  • Bland Flavor: Always taste and adjust seasoning as needed; every ingredient can vary in strength.

Variations to Try

Feeling adventurous? Here are some variations you can try:

  • Butter Chicken Bowls: Serve over quinoa or brown rice, topped with roasted veggies.
  • Butter Chicken Tacos: Use tortillas filled with butter chicken, slaw, and avocado for a fun twist.
  • Butter Chicken Pizza: Spread the sauce over pizza dough, top with cheese, and bake for a fusion delight.
  • Butter Chicken Casserole: Layer cooked rice, butter chicken, and cheese in a baking dish and bake until bubbly.

Storage and Make-Ahead Instructions

Planning to enjoy this dish later? Here’s how to store and reheat:

  • Refrigerate: Store in an airtight container in the fridge for up to 4 days.
  • Freeze: Freeze in individual portions for up to 3 months. Thaw in the fridge overnight before reheating.
  • Reheat: Warm on the stove over low heat, stirring occasionally, or microwave in short bursts until heated through.

Frequently Asked Questions

Got questions? Here are some common queries about my butter chicken recipe:

  • Can I use bone-in chicken? Yes, but it will require longer cooking time. Make sure to remove the bones before serving.
  • Is butter chicken spicy? This recipe is mild but can be adjusted to your preference with more or less chili powder.
  • Can I make this dish dairy-free? Absolutely! Substitute heavy cream with coconut milk and butter with olive oil.
  • What can I serve with butter chicken? It pairs beautifully with basmati rice, naan, or even a fresh salad.
  • Can I add vegetables? Yes! Spinach, peas, or bell peppers can be delicious additions.
  • How long does butter chicken last in the fridge? It’s best enjoyed within 4 days when stored properly.
  • Can I make this in a slow cooker? Yes, add all ingredients and cook on low for 6-8 hours for a hands-off approach.
  • What is garam masala? It’s a blend of spices commonly used in Indian cooking, offering warmth and depth to dishes.

Nutrition Tips and Dietary Adaptations

Want to make this dish healthier? Here are some tips:

  • Choose Lean Chicken: Opt for chicken breasts instead of thighs for a lower-fat option.
  • Increase Vegetables: Add more veggies to boost the nutritional content and fiber.
  • Lower Fat Options: Use light cream or yogurt to reduce calories while still keeping it creamy.

Equipment Recommendations

To make your butter chicken a breeze, here are a few kitchen tools you might need:

  • Skillet: A large, deep skillet is perfect for cooking the chicken and sauce.
  • Wooden Spoon: For stirring the sauce and preventing it from sticking.
  • Measuring Cups and Spoons: Accurate measurements help ensure your dish turns out just right.

Serving Suggestions

When it comes to serving butter chicken, the options are endless! Here are a few ideas:

  • Classic Pairing: Serve over fluffy basmati rice with a side of naan to soak up that delicious sauce.
  • Fresh Salad: A simple cucumber and tomato salad can provide a refreshing contrast to the rich flavors.
  • Yogurt Sauce: A dollop of raita or plain yogurt can help cool down the spice level.

Final Thoughts

And there you have it—my ultimate Quick & Easy Butter Chicken Recipe that’s sure to impress! Cooking doesn’t have to be complicated to be delicious. With simple ingredients and a few easy steps, you can create a dish that’s both comforting and satisfying. So, whether you’re cooking for family, friends, or just yourself, remember that every meal is an opportunity to create magic in the kitchen. Thank you for joining me today, and happy cooking!

Quick & Easy Homemade Butter Chicken

Prep Time 10 minutes
Cook Time 20 minutes
Total Time 30 minutes
Servings 4 servings
Calories 450
A flavorful and creamy butter chicken recipe that's quick to prepare and perfect for a satisfying meal.

Ingredients

Protein

  • 1 lb boneless chicken, cut into bite-sized pieces

Dairy

  • 2 tablespoons butter
  • 1 cup heavy cream

Vegetables & Aromatics

  • 1 onion onion, finely chopped
  • 3 cloves garlic, minced
  • 1 tablespoon ginger, grated

Canned Goods

  • 1 can diced tomatoes (14 oz)

Spices

  • 2 tablespoons garam masala
  • 1 teaspoon chili powder
  • salt to taste salt

Garnish & Serving

  • fresh cilantro for garnish cilantro
  • cooked rice or naan for serving rice or naan

Instructions 

  • Melt butter in a skillet over medium heat.
  • Sauté onion until translucent, then add garlic and ginger, cooking 1-2 minutes.
  • Add chicken and cook until browned.
  • Stir in tomatoes, spices, and salt; cook for 5 minutes.
  • Pour in heavy cream, simmer 10-15 minutes until thickened.
  • Garnish with cilantro and serve over rice or with naan.

Notes

For a milder flavor, reduce chili powder; for extra richness, add a dollop of yogurt.
Calories: 450kcal
Cost: $15
Course: Main Course
Cuisine: Indian
Keyword: Butter Chicken

Loved this recipe? Save it to your favorite Pinterest board so you can easily find it later! It’s the perfect way to keep all your sweet ideas in one place. ✨

A vibrant plate of butter chicken with rich gravy and warm naan in the background.

Welcome to the Cozy World of Sweet Potato Taco Bowls

Ah, the sweet potato taco bowl—where comfort meets vibrant flavors! If you’re here, you’re probably looking for a meal that not only fills your belly but also warms your heart. Imagine this: tender, roasted sweet potatoes nestled alongside zesty black beans and topped with creamy avocado, fresh tomatoes, and a sprinkle of cilantro. Sounds like a dream, right? Well, it’s about to become your reality.

In my kitchen, the sweet potato taco bowl is more than just a meal; it’s a celebration of flavors, colors, and textures. Whether you’re prepping for a busy weeknight dinner or a cozy weekend gathering, this recipe is your trusty sidekick. Ready to dive in? Let’s go!

Why You’ll Love This Recipe

This sweet potato taco bowl is not just another recipe but a delightful experience. Here’s why:

  • Quick & Easy: With a prep time of just 10 minutes and a total cook time of 30 minutes, you’ll have a hearty meal ready in no time.
  • Healthy & Nourishing: Roasted sweet potatoes are packed with fiber and vitamins A and C, while black beans provide a protein boost.
  • Customizable: Whether you’re a meat lover or a vegetarian, you can easily swap ingredients to suit your cravings.
  • Meal Prep Friendly: Perfect for batch cooking. Make a big batch and store it for quick lunches or dinners throughout the week.
  • Flavor Explosion: The combination of zesty taco seasoning and fresh toppings creates a flavor profile that will leave you wanting more.

Ingredient Breakdown & Substitutions

Close-up view of a colorful Sweet Potato Taco Bowl with fresh toppings and a sprinkle of cilantro, surrounded by soft shadows.

Let’s talk about what you’ll need for this delightful dish:

  • Sweet Potatoes: 2 medium, diced. These are your star ingredient, bringing sweetness and substance.
  • Black Beans: 1 can, rinsed and drained. A great source of protein; feel free to substitute with kidney beans or lentils.
  • Corn: 1 cup (fresh or frozen). Adds a sweet crunch—try using roasted corn for extra flavor!
  • Taco Seasoning: 1 teaspoon chili powder and 1 teaspoon cumin. Spice it up with your favorite taco blend or add a dash of cayenne for heat.
  • Olive Oil: 1 tablespoon. Essential for roasting; avocado oil works well too if you prefer.
  • Avocado: 1, diced. Creaminess that pairs perfectly with the other ingredients.
  • Cherry Tomatoes: 1 cup, halved. For color and freshness.
  • Red Onion: 1/4 cup, diced. Adds a nice bite; you can switch this with green onions for a milder flavor.
  • Cilantro: 1/4 cup, chopped. If cilantro isn’t your jam, parsley is a great substitute.
  • Lime Wedges: For serving. A squeeze of lime brightens everything up!
  • Tortilla Chips: Optional, for that extra crunch!

Step-by-Step Instructions for the Perfect Taco Bowl

Ready to bring this taco bowl to life? Follow these simple steps:

  1. Preheat your oven to 425°F (220°C).
  2. In a large bowl, toss the diced sweet potatoes with olive oil, chili powder, cumin, salt, and pepper until evenly coated.
  3. Spread the sweet potatoes on a baking sheet in a single layer. Roast for 25-30 minutes, or until they’re tender and slightly crispy.
  4. While the sweet potatoes are roasting, heat the black beans and corn in a separate pot over medium heat until warmed through.
  5. Once the sweet potatoes are done, it’s time to assemble your bowl! Start with a base of roasted sweet potatoes, then layer in the black beans, corn, diced avocado, halved cherry tomatoes, red onion, and cilantro.
  6. Serve with lime wedges and, if desired, some crunchy tortilla chips on the side.

Pro Tips for the Best Sweet Potato Taco Bowl

Want to elevate your taco bowl game? Here are some expert insights:

  • Don’t Overcrowd: When roasting sweet potatoes, make sure they’re spread out on the baking sheet. This guarantees even crispiness!
  • Experiment with Seasoning: Don’t be shy! Adding smoked paprika or oregano can give your bowl a unique twist.
  • Balance the Flavors: If you love heat, consider adding jalapeños or a drizzle of hot sauce to amp things up!
  • Texture Matters: For a crunchy contrast, top your bowl with crushed tortilla chips or pumpkin seeds.
  • Make It Ahead: Prep the ingredients and store them separately in the fridge, so when you’re ready, it’s just assembly time!
  • Fresh Herbs: Always go for fresh herbs over dried ones for the brightest flavors!
  • Don’t Skip the Lime: A squeeze of lime at the end ties all the flavors together beautifully.
  • Play with Toppings: Add sour cream, feta cheese, or even a zesty yogurt dressing for a creamy finish.

Common Mistakes & Troubleshooting

Even the best of us can make a mistake in the kitchen. Here are some common pitfalls and how to avoid them:

  • Underseasoning: Always taste and adjust seasoning as you go. Sweet potatoes can handle a good amount of flavor!
  • Overcooking: Keep an eye on the sweet potatoes to prevent them from becoming mushy. You want them crispy on the edges!
  • Ingredient Swaps: If you’re using a different type of bean or veggie, adjust cooking times accordingly.
  • Assembly Line: If your bowl looks a bit jumbled, consider layering ingredients instead of mixing them all together for presentation.

Delicious Variations to Try

Want to switch things up? Here are some tasty variations:

  • Chicken Taco Bowl: Add grilled chicken seasoned with taco spices for a protein boost.
  • Vegetarian Delight: Swap beans for quinoa or add roasted chickpeas for a hearty vegetarian option.
  • Breakfast Taco Bowl: Top with scrambled eggs or a fried egg for a breakfast twist!
  • Spicy Southwest Bowl: Incorporate roasted jalapeños and a drizzle of chipotle sauce for that extra kick.

Storage & Make-Ahead Instructions

This sweet potato taco bowl is great for meal prep! Here’s how to store it:

  • Refrigeration: Store in an airtight container in the fridge for up to 4 days.
  • Freezing: While the sweet potatoes can be frozen, it’s best to store the toppings separately to maintain freshness.
  • Make-Ahead: Roast the sweet potatoes in advance and store them in the fridge. Just reheat before serving!

Frequently Asked Questions

Got questions? I’ve got answers! Here are some common queries:

  • Can I make this bowl vegan? Absolutely! Just ensure your toppings are dairy-free.
  • What can I use instead of sweet potatoes? Butternut squash or regular potatoes can be great alternatives.
  • How can I add more protein? Consider adding grilled chicken, turkey, or more beans!
  • Can I eat this bowl cold? Yes! It makes a refreshing salad-like dish when served cold.
  • What if I don’t have taco seasoning? Mix equal parts chili powder, cumin, and garlic powder as a substitute.
  • How do I make this gluten-free? All ingredients are naturally gluten-free, just ensure your tortilla chips are as well.
  • Can I use a different type of bean? Of course! Feel free to use pinto beans, lentils, or even chickpeas.
  • What’s the best way to reheat leftovers? Reheat in the microwave or oven until warm. Add fresh toppings after reheating.

Nutritional Tips & Dietary Adaptations

This sweet potato taco bowl is packed with nutrition! Here are some tips to enhance it:

  • For a low-carb option: Substitute roasted cauliflower for sweet potatoes.
  • Need more fiber? Add chia seeds or flaxseeds to your toppings.
  • For a protein boost: Incorporate more beans or lean meats.

Equipment Recommendations

Here’s what you’ll need for this recipe:

  • Baking Sheet: A large, rimmed baking sheet for roasting sweet potatoes.
  • Mixing Bowl: For tossing your ingredients together.
  • Pot: A small pot for warming the beans and corn.
  • Knife & Cutting Board: For chopping all those fresh ingredients.

Serving Suggestions

This sweet potato taco bowl is delicious on its own, but here are some fun serving ideas:

  • Pair with a Side Salad: A light green salad with a citrus vinaigrette complements the bowl beautifully.
  • Serve with Tortilla Chips: For added crunch, serve with a side of your favorite chips.
  • Top with Salsa: Fresh pico de gallo or store-bought salsa adds a zesty touch!

So there you have it! Your ultimate guide to crafting the perfect sweet potato taco bowl. Remember, the kitchen is a place for creativity and joy, so don’t hesitate to make this recipe your own. I can’t wait for you to experience the magic of this cozy meal. Happy cooking!

Sweet Potato Taco Bowl

Prep Time 10 minutes
Cook Time 30 minutes
Total Time 40 minutes
Servings 4 servings
Calories 350
A vibrant and healthy vegetarian dish combining roasted sweet potatoes with fresh toppings for a flavorful meal.

Ingredients

Vegetables and Legumes

  • 2 medium sweet potatoes, diced
  • 1 can black beans, rinsed and drained
  • 1 cup corn (fresh or frozen)
  • 1 tablespoon olive oil
  • 1 avocado diced avocado
  • 1 cup cherry tomatoes, halved
  • 0.25 cup red onion, diced
  • 0.25 cup fresh cilantro, chopped
  • lime wedges for serving lime wedges
  • tortilla chips (optional) tortilla chips (optional)

Instructions 

  • Preheat oven to 425°F (220°C). Toss sweet potatoes with olive oil, chili powder, cumin, salt, and pepper.
  • Roast sweet potatoes for 25-30 minutes until tender and crispy. Heat black beans and corn until warmed.
  • Assemble the bowl with roasted sweet potatoes, black beans, corn, avocado, cherry tomatoes, red onion, and cilantro.
  • Serve with lime wedges and optional tortilla chips.

Notes

You can customize toppings or add hot sauce for extra flavor.
Calories: 350kcal
Cost: $15
Course: Main Course
Cuisine: Mexican
Keyword: sweet potato

Loved this recipe? Save it to your favorite Pinterest board so you can easily find it later! It’s the perfect way to keep all your sweet ideas in one place. ✨

Delicious Sweet Potato Taco Bowl showcasing diced ingredients like sweet potatoes, black beans, and avocado, illuminated by natural light.

Welcome to My Creamy Paprika Zucchini Chicken Adventure

Join me as we dive into the delightful world of Creamy Paprika Zucchini Chicken—a dish that’s not just a meal but a cozy experience, perfect for any occasion. It’s where vibrant flavors and comforting textures collide, creating a culinary hug that warms your heart and fills your belly. You’ll find that this recipe is simple enough to whip up on a weeknight yet impressive enough to serve at a gathering. Let’s embark on this flavorful journey together!

Why You’ll Love This Recipe

  • Quick and Easy: This recipe comes together in under 30 minutes, making it perfect for busy weeknights or last-minute dinner parties.
  • Flavorful Comfort: The creamy sauce, combined with paprika and fresh veggies, creates a comforting dish that everyone will love.
  • Healthy Ingredients: Packed with protein from the chicken and nutrients from zucchini and bell peppers, this meal is both satisfying and nourishing.
  • Versatile: Serve it with noodles, rice, or mashed potatoes, or enjoy it on its own for a low-carb option.
  • Customizable: You can easily adapt this recipe to your taste by swapping in your favorite vegetables or using different proteins.

Ingredient Breakdown

A delicious serving of creamy chicken with zucchini and red peppers.

Let’s get into the nitty-gritty of what makes this dish sing. Here’s what you’ll need:

  • 500g Chicken Breast: Boneless, skinless chicken breasts are ideal. For a juicier option, consider using chicken thighs.
  • 2 Zucchini: Fresh zucchini adds a lovely texture. You can substitute with yellow squash if desired.
  • 2 Red Bell Peppers: These contribute sweetness and color to the dish. Feel free to mix in green or yellow peppers for variety.
  • 1 Onion: Use a yellow or white onion for the best flavor.
  • 2 Garlic Cloves: Fresh garlic enhances the dish’s aroma and taste.
  • 200ml Heavy Cream: For richness, but you can substitute with half-and-half or coconut milk for a lighter version.
  • 2 tbsp Olive Oil: Essential for sautéing your ingredients.
  • 1 tsp Paprika: This is the star spice that ties everything together, giving it that signature flavor.
  • 1 tsp Dried Italian Herbs: Adds depth; you can use a mix of basil, oregano, and thyme.
  • Salt and Pepper: To taste, naturally.
  • Fresh Parsley: For garnish, adding a fresh touch to the finished dish.

Step-by-Step Instructions

Ready to bring this dish to life? Here’s how to do it:

  • Step 1: Cut the chicken breast into bite-sized cubes. Season with salt, pepper, and paprika, and set aside.
  • Step 2: Dice the onion and mince the garlic. Chop the zucchini and red bell peppers into similar-sized pieces for even cooking.
  • Step 3: In a large pan, heat olive oil over medium heat. Add the chicken cubes and sauté until they are golden brown, about 5-7 minutes. Remove from the pan and set aside.
  • Step 4: In the same pan, add the onions and garlic, cooking until the onion is translucent, about 3 minutes.
  • Step 5: Toss in the zucchini and bell peppers, cooking for an additional 5 minutes until they soften.
  • Step 6: Return the chicken to the pan and stir to combine.
  • Step 7: Pour in the heavy cream and sprinkle with dried Italian herbs. Stir to combine and let it simmer on low heat until the sauce thickens, about 5 minutes.
  • Step 8: Season with additional salt and pepper as needed. Garnish with fresh parsley before serving.

Pro Tips for Success

  • Use Fresh Ingredients: Fresh veggies and high-quality chicken will enhance the flavor of the dish.
  • Don’t Overcrowd the Pan: If you’re making a larger batch, consider cooking in batches to allow proper browning of the chicken.
  • Adjust the Creaminess: If you like a thicker sauce, let it simmer longer. For a lighter sauce, add a splash of chicken broth.
  • Incorporate Spices: Feel free to add a pinch of cayenne pepper for some heat or a sprinkle of smoked paprika for a deeper flavor.
  • Make Ahead: You can prepare the chicken and veggies ahead of time, then simply combine and finish the dish when ready to serve.
  • Pairing Options: This dish pairs wonderfully with a crisp salad or some crusty bread to soak up the sauce.
  • Leftovers: This recipe makes for excellent leftovers; the flavors only get better as they meld together.
  • Cook with Love: Remember, cooking is about enjoying the process. Don’t stress if things don’t go perfectly; just have fun!

Common Mistakes and Troubleshooting

Even the best of us have kitchen flops! Here are some common pitfalls and how to avoid them:

  • Overcooked Chicken: If your chicken is dry, it may have been cooked too long. Always cook until just done and remove it from the heat.
  • Sauce Too Thin: If your sauce doesn’t thicken, let it simmer longer or add a cornstarch slurry (1 tbsp cornstarch mixed with 1 tbsp water) to thicken it up.
  • Too Much Spice: If you’ve accidentally added too much paprika or spice, balance it out with a pinch of sugar or more cream.

Variations to Try

Feel like getting creative? Here are some fun twists on this classic recipe:

  • Mediterranean Twist: Replace the bell peppers with sun-dried tomatoes and add spinach for a Mediterranean vibe.
  • Cheesy Delight: Stir in some grated Parmesan or mozzarella for a cheesy version that’s irresistible.
  • Herbed Chicken: Use fresh herbs like thyme, rosemary, or basil for a fragrant touch.
  • Spicy Kick: Add sliced jalapeños or a dash of hot sauce to give it some heat.

Storage and Make-Ahead Instructions

This dish is perfect for meal prep! Here’s how to store and reheat:

  • Refrigeration: Store any leftovers in an airtight container in the fridge for up to 3 days.
  • Freezing: You can freeze the cooked chicken and sauce for up to 2 months. Thaw in the fridge overnight before reheating.
  • Reheating: Simply warm it in a pan over low heat or in the microwave, adding a splash of cream or broth if it seems dry.

Comprehensive FAQ

  • Can I use other vegetables? Yes! Feel free to experiment with broccoli, asparagus, or even carrots.
  • What can I serve with this dish? It pairs beautifully with rice, noodles, or a simple green salad.
  • Is it gluten-free? Yes, this recipe is gluten-free as long as your chicken and cream are gluten-free.
  • Can I make it dairy-free? Absolutely! Swap the cream for coconut milk or a dairy-free cream alternative.
  • How long does it take to cook? The total cook time is about 30 minutes.
  • Can I double the recipe? Yes! Just ensure your pan is large enough to accommodate all the ingredients.
  • What’s the best way to store leftovers? Store in an airtight container in the fridge for up to 3 days.
  • Can I use frozen chicken? It’s best to use thawed chicken for even cooking, but if using frozen, ensure it’s fully cooked before serving.

Nutrition Tips and Dietary Adaptations

This dish can easily fit into various dietary preferences. Here are some tips:

  • Low-Carb Option: Serve over zucchini noodles for a low-carb alternative.
  • Heart-Healthy: Opt for lean cuts of chicken and use low-fat cream.
  • Vegan Version: Substitute chicken with tofu or chickpeas and use coconut cream.

Equipment Recommendations

Here’s what you’ll need to prepare this delightful dish:

  • Large Skillet: A good-quality non-stick or cast-iron skillet works best for sautéing.
  • Sharp Knife: For easily chopping your ingredients.
  • Cutting Board: Keep your workspace organized and safe.
  • Measuring Cups and Spoons: Accurate measurements are key to delicious outcomes!

Serving Suggestions

When it comes to serving, the possibilities are endless! Here are some ideas:

  • With Noodles: Serve over egg noodles or spaghetti for a heartier meal.
  • On Rice: White or brown rice makes an excellent base to soak up the creamy sauce.
  • With Crusty Bread: A slice of crusty bread is perfect for mopping up every last bit of sauce.

Conclusion

So there you have it, my friends! A delicious journey to the heart of comfort food with this Creamy Paprika Zucchini Chicken recipe. Whether you’re cooking for your family, entertaining friends, or just treating yourself, this dish is bound to become a favorite. Remember, cooking is about love and creativity—embrace it and make it your own! Until next time, happy cooking!

Cremiges Paprika-Zucchini-Hähnchen – Sämig, Würzig

Prep Time 10 minutes
Cook Time 20 minutes
Total Time 30 minutes
Servings 4 portionen
Calories 450
Dieses cremige und würzige Gericht vereint zarte Hähnchenbrust mit frischem Gemüse in einer sämigen Sauce – perfekt für ein schnelles, leckeres Abendessen.

Ingredients

Protein

  • 500 g Hähnchenbrustfilets

Vegetables

  • 2 Stück Zucchini
  • 2 Stück rote Paprika

Aromatics

  • 1 Stück Zwiebel
  • 2 Zehen Knoblauchzehen

Sahne & Gewürze

  • 200 ml Sahne
  • 2 Esslöffel Olivenöl
  • 1 Teelöffel Paprikapulver
  • 1 Teelöffel getrocknete italienische Kräuter

Salz & Pfeffer

  • nach Geschmack Salz und Pfeffer

Garnitur

  • frische Petersilie frische Petersilie (zum Garnieren)

Instructions 

  • Hähnchen in Würfel schneiden, mit Salz, Pfeffer und Paprikapulver marinieren.
  • Zwiebel und Knoblauch hacken; Zucchini und Paprika würfeln.
  • Hähnchen anbraten, beiseite stellen; Zwiebel und Knoblauch im selben Öl anbraten.
  • Zucchini und Paprika hinzufügen, 5 Minuten braten, dann Hähnchen wieder zugeben.
  • Sahne und Kräuter hinzufügen, köcheln lassen, bis die Sauce sämig ist. Mit Petersilie garnieren und servieren.

Notes

Für extra Würze kannst du noch etwas Chili hinzufügen.
Calories: 450kcal
Cost: $15
Course: Hauptgericht
Cuisine: Deutsch
Keyword: Hähnchen, Paprika, zucchini

Loved this recipe? Save it to your favorite Pinterest board so you can easily find it later! It’s the perfect way to keep all your sweet ideas in one place. ✨

Plate of paprika-infused chicken with zucchini, garnished with parsley.

Discover the Magic of Roasted Tomato and Garlic Ricotta Pasta

Welcome to my kitchen, where we’re about to embark on a delightful culinary adventure with a dish that brings together simplicity and sophistication: Roasted Tomato and Garlic Ricotta Pasta. This comforting recipe combines the vibrant flavors of roasted tomatoes and garlic with creamy ricotta, creating a pasta dish that feels like a warm hug. Whether you’re cooking for a special occasion or just want to treat yourself to something delicious, this recipe is your ticket to flavor town!

With a cook time of just under an hour, this dish not only pleases the palate but also fills your kitchen with the comforting aroma of roasting garlic and tomatoes. The best part? It’s incredibly adaptable, so you can make it your own with just a few tweaks. Let’s dive in!

Why You’ll Love This Recipe

Here are five reasons why this Roasted Tomato and Garlic Ricotta Pasta will become a staple in your kitchen:

  • Quick and Easy: This dish comes together in about 30-40 minutes, perfect for busy weeknights.
  • Flavor Explosion: The roasting process intensifies the sweetness of the tomatoes and mellows the garlic, creating a rich sauce that’s bursting with flavor.
  • Comforting and Satisfying: The creamy ricotta adds a luxurious texture, making every bite feel indulgent.
  • Customizable: Swap in your favorite pasta or add vegetables for a personal touch.
  • Perfect for Any Occasion: Whether it’s a family dinner or a romantic date night, this pasta dish impresses.

Ingredients You’ll Need

Eye-level shot of a creamy pasta dish topped with roasted cherry tomatoes and garlic.

Let’s gather our ingredients! Here’s what you’ll need to create this delicious Roasted Tomato and Garlic Ricotta Pasta:

  • 2 cups cherry tomatoes: Their sweetness intensifies when roasted, providing a burst of flavor.
  • 4 cloves garlic, minced: Roasted garlic adds a subtle sweetness and depth to the sauce.
  • 2 tablespoons olive oil: A high-quality olive oil enhances the dish’s richness.
  • Salt and pepper to taste: Essential for bringing out the natural flavors.
  • 8 ounces pasta: Spaghetti is a classic choice, but feel free to use your favorite type.
  • 1 cup ricotta cheese: Creamy ricotta is the heart of this dish, adding both texture and flavor.
  • 1/4 cup grated parmesan cheese: For a savory finish that complements the ricotta.
  • Fresh basil leaves: A fragrant garnish that ties all the flavors together.

How to Make Roasted Tomato and Garlic Ricotta Pasta

Follow these simple steps to create your Roasted Tomato and Garlic Ricotta Pasta:

  1. Preheat the oven: Set your oven to 400°F (200°C) to get it nice and hot.
  2. Prepare the tomatoes and garlic: In a baking dish, combine the cherry tomatoes, minced garlic, olive oil, salt, and pepper. Toss to coat everything evenly.
  3. Roast: Place the dish in the preheated oven and roast for 20-25 minutes, or until the tomatoes are blistered and soft.
  4. Cook the pasta: While the tomatoes are roasting, cook the pasta according to package instructions until al dente. Drain and set aside.
  5. Combine: Once the tomatoes are done roasting, remove them from the oven and stir in the ricotta cheese until well combined.
  6. Add pasta: Toss the cooked pasta into the tomato and ricotta mixture, ensuring everything is well coated.
  7. Finish with cheese: Sprinkle with grated parmesan cheese and garnish with fresh basil leaves before serving.

Pro Tips for Perfect Roasted Tomato and Garlic Ricotta Pasta

To elevate this dish to the next level, consider the following tips:

  • Use high-quality ingredients: Fresh, ripe tomatoes and good olive oil make a difference in flavor.
  • Don’t overcrowd the baking dish: Give the tomatoes and garlic enough space to roast properly.
  • Experiment with pasta shapes: Different pasta shapes hold the sauce differently; try penne or fusilli for a fun twist.
  • Add a splash of pasta water: If the sauce feels too thick, add a little reserved pasta water to loosen it.
  • Incorporate veggies: Add spinach, zucchini, or bell peppers for added nutrition and flavor.
  • Top with fresh herbs: Besides basil, try parsley or oregano for a different flavor profile.
  • Spice it up: Add red pepper flakes for an extra kick.
  • Use whole-milk ricotta: For a creamier texture that enhances the dish.

Common Mistakes and Troubleshooting

Even the best of us make mistakes in the kitchen! Here’s how to avoid common pitfalls:

  • Overcooking the pasta: Always check for al dente; it should have a slight bite to it.
  • Not seasoning enough: Don’t skimp on salt; it’s crucial for flavor enhancement.
  • Skipping the roasting step: Roasting the tomatoes and garlic is essential for developing their flavors—don’t skip it!
  • Using low-quality cheese: Invest in good ricotta and parmesan for the best results.

Delicious Variations

Feel free to get creative! Here are some tasty variations you can try:

  • Lemon zest: Add a teaspoon of lemon zest for a bright, refreshing flavor that complements the richness of the ricotta.
  • Spinach and Ricotta: Incorporate fresh spinach into the mix for added nutrition and color.
  • Roasted Red Peppers: Toss in some roasted red peppers for a smoky flavor that pairs beautifully with the other ingredients.
  • Herbed Ricotta: Mix in fresh herbs like thyme or chives into the ricotta for an aromatic twist.

Storage and Make-Ahead Instructions

This dish is perfect for meal prep! Here’s how to store and reheat:

  • Storing leftovers: Keep any leftovers in an airtight container in the fridge for up to 3 days.
  • Reheating: Warm gently in a saucepan over low heat, adding a splash of water or broth to loosen the sauce.
  • Make-ahead: You can prepare the roasted tomatoes and garlic ahead of time, then combine with pasta when ready to serve.

Frequently Asked Questions

You’ve got questions, and I’ve got answers! Here are some FAQs about this Roasted Tomato and Garlic Ricotta Pasta:

  • Can I use cherry tomatoes instead of medium vine tomatoes? Absolutely! Cherry tomatoes are sweeter and perfect for roasting.
  • Can I make the sauce ahead of time? Yes, you can roast the tomatoes and garlic ahead of time; just combine with pasta when ready to eat.
  • Is there a substitute for ricotta cheese? You can use cottage cheese or cream cheese, but the texture will differ slightly.
  • How can I add protein to this dish? Grilled chicken or sautéed shrimp are great additions.
  • Can I freeze this pasta? While it’s best fresh, you can freeze the pasta without the ricotta and add it when reheating.
  • What herbs pair best with roasted tomato and garlic ricotta pasta? Fresh basil, oregano, and thyme complement the flavors beautifully.
  • Can I use whole wheat pasta? Yes, whole wheat pasta works well and adds more fiber.
  • How do I make this dish vegan? Substitute ricotta with a vegan alternative and use nutritional yeast for that cheesy flavor.

Nutritional Tips and Dietary Adaptations

This dish can easily fit into various dietary preferences:

  • Gluten-free: Use gluten-free pasta to make this dish accessible for those with gluten sensitivities.
  • Low-carb: Substitute pasta with spiralized zucchini or spaghetti squash for a low-carb option.
  • Dairy-free: Opt for a dairy-free ricotta alternative to keep it creamy without the dairy.

Essential Equipment for Success

Here’s what you’ll need to whip up this delicious pasta:

  • Baking dish: For roasting the tomatoes and garlic.
  • Large pot: To cook your pasta to perfection.
  • Mixing spoon: For combining all those wonderful ingredients.
  • Serving bowl: To present your masterpiece.

Serving Suggestions

To make your dining experience even more delightful, consider these serving suggestions:

  • Pair with a salad: A fresh green salad with a light vinaigrette complements the richness of the pasta.
  • Serve with garlic bread: A side of warm, buttery garlic bread is always a hit!
  • Wine pairing: A glass of white wine, like Pinot Grigio, enhances the meal beautifully.

Now that you have all the tips, tricks, and variations, it’s time to get cooking! I hope this Roasted Tomato and Garlic Ricotta Pasta becomes a beloved recipe in your kitchen, just as it has in mine. Remember, cooking is about joy and connection, so invite your friends or family to share in the magic. Happy cooking!

Roasted Tomato and Garlic Ricotta Pasta

Prep Time 10 minutes
Cook Time 25 minutes
Total Time 35 minutes
Servings 4 servings
Calories 550
A flavorful and easy pasta dish featuring roasted cherry tomatoes, garlic, and creamy ricotta cheese, perfect for a quick weeknight dinner.

Ingredients

Vegetables and Aromatics

  • 2 cups cherry tomatoes
  • 4 cloves garlic, minced
  • 2 tablespoons olive oil
  • salt and pepper to taste salt and pepper

Pasta and Dairy

  • 8 ounces pasta (spaghetti or your choice)
  • 1 cup ricotta cheese
  • 1/4 cup grated parmesan cheese

Garnish

  • fresh basil leaves for garnish fresh basil leaves

Instructions 

  • Preheat oven to 400°F (200°C). Toss cherry tomatoes, minced garlic, olive oil, salt, and pepper; roast for 20-25 minutes.
  • Cook pasta until al dente; drain and set aside.
  • Mix roasted tomatoes and garlic with ricotta cheese; combine with cooked pasta.
  • Sprinkle with grated Parmesan and garnish with basil before serving.

Notes

For extra flavor, add a drizzle of balsamic vinegar or red pepper flakes.
Calories: 550kcal
Cost: $15
Course: Main Course
Cuisine: Italian
Keyword: pasta

Loved this recipe? Save it to your favorite Pinterest board so you can easily find it later! It’s the perfect way to keep all your sweet ideas in one place. ✨

Delicious pasta with ricotta, garnished with basil and illuminated by soft natural light.

Discover the Magic of Maple-Glazed Chicken with Sweet Potatoes

Welcome to my cozy kitchen, where delicious aromas and heartfelt stories intertwine! Today, we’re diving into a recipe that embodies comfort and joy: Maple-Glazed Chicken with Sweet Potatoes. This dish is a delightful combination of sweet and savory flavors that will make your taste buds dance and your heart sing. Perfect for weeknight dinners or special occasions, this recipe is all about bringing people together around the table, much like the warm memories from my childhood in Oregon.

So, grab your apron and let’s embark on this culinary adventure! With maple syrup lending its sweet charm to juicy chicken breasts and tender sweet potatoes, this dish is as simple as it is satisfying. Let’s get started!

Why You’ll Love This Recipe

  • Comfort food classic: A timeless dish that combines familiar flavors for a warm, inviting meal.
  • One-pan wonder: Everything cooks together in a single baking dish, making cleanup a breeze.
  • Quick and easy: Ready in under an hour, perfect for busy weeknights!
  • Versatile: Great for meal prep or as a show-stopping centerpiece for gatherings.
  • Healthy and hearty: Packed with nutrients from sweet potatoes and lean chicken, it’s a balanced meal.

Ingredients You’ll Need

A vibrant dish of Maple Glazed Chicken alongside golden sweet potato cubes, beautifully lit.

Here’s what you need to create this delightful dish:

  • 4 boneless, skinless chicken breasts: The star of the dish—lean and tender.
  • 1/4 cup pure maple syrup: Adds a rich sweetness that balances the savory flavors.
  • 2 tablespoons soy sauce: For depth and umami.
  • 1 tablespoon Dijon mustard: A touch of tanginess to enhance the glaze.
  • 2 cloves garlic, minced: Infuses the dish with aromatic goodness.
  • 1 teaspoon salt: Essential for flavor enhancement.
  • 1/2 teaspoon black pepper: Adds a hint of spice.
  • 2 large sweet potatoes, peeled and cubed: The perfect companion to the chicken, providing sweetness and texture.
  • 2 tablespoons olive oil: Helps with roasting and adds healthy fats.
  • 1 teaspoon paprika: For a subtle smokiness.
  • Fresh parsley for garnish: Adds a pop of color and freshness.

Step-by-Step Instructions

Let’s make some magic in the kitchen! Follow these simple steps:

  1. Preheat your oven to 400°F (200°C) so it’s nice and hot when we’re ready to bake.
  2. Make the glaze: In a bowl, whisk together the maple syrup, soy sauce, Dijon mustard, minced garlic, salt, and pepper until well combined.
  3. Prepare the chicken: Place the chicken breasts in a baking dish and pour the maple glaze over them, ensuring each piece is well coated.
  4. Toss the sweet potatoes: In a separate bowl, toss the cubed sweet potatoes with olive oil, paprika, salt, and pepper until they’re evenly coated.
  5. Combine in the baking dish: Spread the sweet potatoes around the chicken in the same baking dish.
  6. Bake: Pop the dish into the oven and bake for 25-30 minutes, or until the chicken is cooked through and the sweet potatoes are tender.
  7. Let it rest: Remove from the oven and let it sit for a few minutes before serving.
  8. Garnish and serve: Sprinkle fresh parsley on top and serve warm. Enjoy!

Pro Tips for the Best Maple-Glazed Chicken

  • Marinate for flavor: If you have time, marinate the chicken in the glaze for up to an hour before cooking for deeper flavor.
  • Check for doneness: Use a meat thermometer to ensure the chicken reaches an internal temperature of 165°F (75°C).
  • Customize the seasoning: Feel free to add spices like cumin or chili powder for a different flavor profile.
  • Use fresh herbs: Fresh thyme or rosemary can elevate the dish with aromatic notes.
  • Balance the sweetness: If you prefer a less sweet dish, reduce the amount of maple syrup slightly.
  • Try it on the grill: This recipe works beautifully on the grill for a smoky flavor.
  • Serve with a side salad: Pair with a fresh green salad for a complete meal.
  • Leftovers are gold: This dish reheats wonderfully, making it perfect for meal prep.

Common Mistakes and Troubleshooting

Even the best chefs have their off days! Here are some common pitfalls and how to avoid them:

  • Overcooking the chicken: Keep an eye on the chicken to prevent it from drying out. Use a meat thermometer!
  • Undercooked sweet potatoes: If they’re not tender after the initial baking time, give them a few extra minutes.
  • Too sweet: Adjust the maple syrup to your taste. You can always add more, but it’s hard to take it away!
  • Skipping the resting step: Letting the chicken rest helps retain its juices, making it more tender.

Variations to Spice Things Up

Looking to change it up? Here are some delicious variations:

  • Maple-Mustard Glaze: Add extra Dijon mustard for a tangy twist.
  • Spicy Maple Chicken: Incorporate a teaspoon of cayenne pepper for some heat.
  • Veggie Medley: Toss in additional vegetables like bell peppers or Brussels sprouts for a colorful dish.
  • Slow Cooker Version: Cook on low for 6-8 hours for a set-it-and-forget-it option.

Storage and Make-Ahead Instructions

This dish is perfect for meal prep! Here’s how to store and make it ahead of time:

  • Refrigeration: Store leftovers in an airtight container in the fridge for up to 4 days.
  • Freezing: Freeze in individual portions for up to 3 months. Thaw in the fridge overnight before reheating.
  • Make-ahead option: Prepare the chicken and sweet potatoes in the baking dish a day ahead, cover, and refrigerate. Bake when ready to serve.

FAQs About Maple-Glazed Chicken with Sweet Potatoes

  • Can I use chicken thighs instead of breasts? Absolutely! Thighs will yield a juicier result; just adjust the cooking time.
  • What can I substitute for maple syrup? Honey or agave syrup works well, but the flavor will be slightly different.
  • Can I add vegetables to this dish? Yes! Feel free to toss in your favorite veggies.
  • Is this recipe gluten-free? Use gluten-free soy sauce to make this dish entirely gluten-free.
  • How do I know when the chicken is done? Use a meat thermometer; it should read 165°F (75°C).
  • Can I prepare this the night before? Yes, just keep it in the fridge and bake when you’re ready.
  • What should I serve with this dish? A fresh salad or steamed vegetables pair nicely!
  • Can I make this in a slow cooker? Yes! Cook on low for 6-8 hours for a tender meal.

Nutritional Tips and Dietary Adaptations

This recipe can be easily adapted to meet various dietary needs:

  • Low-carb option: Substitute sweet potatoes for cauliflower for a lower-carb version.
  • Paleo-friendly: Ensure your soy sauce is compliant, or use coconut aminos instead.
  • Whole30 compliant: Omit the soy sauce or use a compliant alternative.

Essential Equipment for This Recipe

Make sure you have these tools handy:

  • Baking dish: A 9×13-inch dish works perfectly for this recipe.
  • Meat thermometer: Essential for checking chicken doneness.
  • Mixing bowls: For preparing the glaze and tossing sweet potatoes.
  • Whisk: To mix the glaze ingredients smoothly.

Serving Suggestions

To elevate your meal experience, consider these serving ideas:

  • Pair with a side salad: A simple green salad dressed with a light vinaigrette complements the richness of the chicken.
  • Serve with crusty bread: Perfect for soaking up any leftover maple glaze!
  • Garnish with fresh herbs: Fresh thyme or parsley adds a lovely touch and enhances presentation.

Conclusion: A Recipe to Cherish

And there you have it! My beloved Maple-Glazed Chicken with Sweet Potatoes is a recipe that brings comfort and joy to your table. Whether you’re cooking for family, friends, or just treating yourself, this dish is sure to impress. Remember, cooking is about experimenting and having fun, so feel free to tweak the recipe to suit your taste! I can’t wait to hear how your version turns out. Until next time, happy cooking!

Maple-Glazed Chicken with Sweet Potatoes

Prep Time 10 minutes
Cook Time 30 minutes
Total Time 40 minutes
Servings 4 servings
Calories 450
A delicious and hearty dish featuring tender chicken glazed with pure maple syrup, paired with roasted sweet potatoes for a comforting meal.

Ingredients

Protein

  • 4 pieces boneless, skinless chicken breasts

Sauces & Condiments

  • 1/4 cup pure maple syrup
  • 2 tablespoons soy sauce
  • 1 tablespoon dijon mustard

Vegetables

  • 2 cloves garlic, minced
  • 2 large sweet potatoes, peeled and cubed

Oils & Spices

  • 2 tablespoons olive oil
  • 1 teaspoon salt
  • 1/2 teaspoon black pepper
  • 1 teaspoon paprika

Garnish

  • to taste fresh parsley for garnish

Instructions 

  • Preheat oven to 400°F (200°C).
  • Mix maple syrup, soy sauce, Dijon mustard, garlic, salt, and pepper.
  • Coat chicken with glaze and place in baking dish. Toss sweet potatoes with oil, paprika, salt, and pepper, then spread around chicken.
  • Bake for 25-30 minutes until cooked and tender. Rest briefly, then garnish with parsley and serve.

Notes

Ensure chicken is cooked through and sweet potatoes are tender before serving.
Calories: 450kcal
Cost: $15
Course: Main Course
Cuisine: American
Keyword: Chicken, maple syrup, Sweet Potatoes

Loved this recipe? Save it to your favorite Pinterest board so you can easily find it later! It’s the perfect way to keep all your sweet ideas in one place. ✨

Delicious Maple Glazed Chicken with sweet potatoes, captured in warm natural light.

Welcome to the delightful world of smashburger quesadillas, where crispy tortillas embrace juicy, flavorful burgers in a cozy twist that’s bound to make your taste buds dance. Whether you’re rushing through a busy week or planning a fun weekend gathering, these quesadillas are the perfect solution for a fast and satisfying meal. In this comprehensive guide, we’ll explore everything you need to know to make these culinary wonders—so grab your spatula and let’s dive in!

Why You’ll Love This Recipe

  • Quick and Easy: With just a handful of ingredients and minimal prep time, you can whip up these smashburger quesadillas in under 30 minutes!
  • Versatile Ingredients: Customize your quesadillas with your favorite toppings and fillings. The possibilities are endless!
  • Budget-Friendly: Using ground beef and pantry staples makes this a cheap dinner recipe that won’t break the bank.
  • Family-Friendly: Kids (and adults) love the combination of crispy tortillas and juicy burgers, making it a hit for the whole family.
  • Perfect for Leftovers: Make extra quesadillas to enjoy later! They also reheat beautifully, ensuring nothing goes to waste.

Ingredient Breakdown

Let’s gather our ingredients! For this smashburger quesadilla recipe, you’ll need:

  • 1 pound ground beef: Use an 80/20 fat ratio for the best flavor and juiciness. Feel free to substitute with turkey or chicken for a leaner option, or even black beans for a vegetarian twist.
  • 1 teaspoon salt: Essential for enhancing the flavor of the beef.
  • 1 teaspoon black pepper: A must-have for seasoning the beef.
  • 4 flour tortillas: Burrito-size tortillas work best for holding all the delicious fillings. If you’re gluten-free, try almond flour tortillas for a great alternative!
  • 1 cup shredded cheddar cheese: A blend of sharp cheddar and American cheese creates a gooey, melty goodness. For a dairy-free option, go for plant-based cheese.
  • 1/2 cup diced onions: Adds a nice crunch and flavor to the quesadilla.
  • 1/2 cup diced tomatoes: Brings freshness and juiciness.
  • 1/4 cup pickles (optional): A tangy surprise that elevates your quesadilla! Don’t skip this if you’re a pickle lover.
  • Cooking oil for frying: Any neutral oil will do, but I love using avocado oil for its high smoke point.
  • Optional toppings: Sour cream, salsa, or guacamole to customize your serving experience.

Let’s Get Cooking: Your Foolproof Roadmap

A delicious Smashburger Quesadilla arranged on a wooden surface, showcasing layers of melted cheese and fresh ingredients.

Ready to create some magic? Follow these steps for smashburger quesadilla perfection:

  • Step 1: Heat Things Up: In a skillet over medium-high heat, add a little cooking oil and let it heat up until shimmering.
  • Step 2: Build Your Burger Base: Divide the ground beef into four equal portions. Season each portion with salt and pepper for maximum flavor.
  • Step 3: Season Like You Mean It: Place one portion of beef in the skillet and smash it down with a spatula to form a thin patty. Cook for about 2-3 minutes until browned, then flip and cook for another 1-2 minutes.
  • Step 4: Sizzle & Flip: Once cooked, remove the patty from the skillet and set it aside. Repeat with the remaining beef portions until all are cooked to perfection.
  • Step 5: Cheese It & Fold: In the same skillet, lay one tortilla flat and sprinkle half of the shredded cheese on one half. Place a smashed burger patty on top, followed by diced onions, tomatoes, and pickles if using. Add a bit more cheese on top and fold the tortilla in half.
  • Step 6: Cook to Golden Perfection: Cook the quesadilla for 2-3 minutes on each side until golden brown and the cheese has melted. Remove from the skillet and repeat with the remaining tortillas and fillings.
  • Step 7: Slice and Serve: Slice into wedges and serve warm with your favorite toppings like sour cream, salsa, or guacamole.

Pro Tips for Ultimate Quesadilla Success

  • Press Down Firmly: For the crispiest quesadilla, press the beef firmly into the tortilla before cooking. This helps the flavors meld beautifully.
  • Don’t Overfill: It’s tempting to pile on the fillings, but too much can make it hard to cook evenly and flip. Keep it balanced!
  • Keep the Heat Moderate: If your skillet is too hot, the tortilla can burn before the cheese melts. Keep it on medium heat for the best results.
  • Experiment with Cheese: Mixing cheeses can elevate the flavor. Try adding pepper jack for some heat or mozzarella for a stretchier texture.
  • Let it Rest: Allow the quesadilla to sit for a minute before slicing, as this helps the cheese set a bit and prevents it from oozing out.
  • Use a Cast Iron Skillet: For the best heat retention and even cooking, a cast iron skillet is a fantastic choice.
  • Personal Touch: Don’t hesitate to add your favorite spices or sauces to the beef for a unique flavor profile!
  • Perfect Pairings: Serve with classic burger toppings like pickles, onions, or your favorite burger sauce for an extra flavor punch!

Common Mistakes and Troubleshooting

Even the best of us have kitchen mishaps! Here’s how to avoid common pitfalls:

  • Quesadillas Won’t Crisp: Ensure your skillet is preheated and use enough oil. A hot surface creates that golden crust!
  • Filling Leaks Out: If your quesadilla bursts, it’s likely overfilled. Stick to a modest amount of ingredients for easy flipping.
  • Meat Is Tough: If your beef turns out chewy, it may have been cooked too long. Aim for a nice sear, but don’t overdo it.
  • Cheese Isn’t Melting: If the cheese stays clumpy, it might be too cold. Let it come to room temperature before adding it to the quesadilla.

Delicious Variations to Try

Feeling adventurous? Here are some fun twists on the classic smashburger quesadilla:

  • BBQ Chicken Quesadilla: Swap ground beef for shredded BBQ chicken and add red onions and cilantro for a smoky flavor.
  • Breakfast Quesadilla: Use breakfast sausage or bacon with scrambled eggs and cheese for a hearty morning meal.
  • Veggie Quesadilla: Load it up with sautéed bell peppers, mushrooms, and spinach instead of meat for a delightful vegetarian option.
  • Spicy Buffalo Quesadilla: Mix ground beef with buffalo sauce and add blue cheese crumbles for a spicy kick!

Storage and Make-Ahead Instructions

Want to enjoy your smashburger quesadillas later? Here’s how to store and reheat them:

  • Refrigeration: Store cooked quesadillas in an airtight container in the fridge for up to 3 days.
  • Freezing: To freeze, wrap each quesadilla tightly in plastic wrap, then place them in a freezer bag. They can be frozen for up to 2 months.
  • Reheating: For best results, reheat quesadillas in a skillet over medium heat until heated through and crispy again. You can also pop them in the oven at 350°F for about 10-15 minutes.

Frequently Asked Questions (FAQ)

  • Can I use a different type of meat? Absolutely! Ground turkey or chicken work well, and for a vegetarian option, try black beans or lentils.
  • How can I make these quesadillas healthier? Opt for whole wheat tortillas and lean meats, and load up on fresh veggies!
  • What dipping sauces pair well? Sour cream, guacamole, or a tangy ranch dressing complement the flavors nicely.
  • Can I make these quesadillas spicy? Yes! Add jalapeños to the filling or use spicy salsa as a dipping sauce.
  • What is the best way to serve these? Serve warm with a side of salsa, guacamole, or your favorite burger sauce for dipping!
  • Can I make these quesadillas in advance? Yes! Cook them ahead of time and store them in the fridge. Just reheat before serving.
  • What kind of cheese is best? A mix of cheddar and American creates the perfect melt. Feel free to experiment with your favorites!
  • How do I prevent soggy quesadillas? Ensure your fillings aren’t too wet, and cook the quesadillas in a hot skillet to achieve that crispy texture.

Nutrition Tips and Dietary Adaptations

Want to keep things healthy while enjoying these smashburger quesadillas? Here are some tips:

  • Use Lean Cuts: Opt for lean ground beef or turkey to reduce fat content.
  • Load Up on Veggies: Add more vegetables like bell peppers and spinach to increase fiber and nutrients.
  • Choose Whole Grains: Whole wheat tortillas add extra fiber and nutrients compared to regular tortillas.
  • Portion Control: Enjoy a smaller serving alongside a fresh salad for a balanced meal.

Equipment Recommendations

For success in making these smashburger quesadillas, here are some handy tools to have:

  • Cast Iron Skillet: Ideal for even heat distribution and creating a perfect crispy crust.
  • Spatula: A sturdy spatula is crucial for smashing the patties and flipping the quesadillas.
  • Cutting Board: A large cutting board makes it easy to slice your quesadillas into wedges.
  • Sharp Knife: A sharp knife ensures clean cuts for perfect presentation.

Serving Suggestions

Pair your smashburger quesadillas with these delightful accompaniments:

  • Classic Sides: Serve with a fresh green salad or crunchy coleslaw for a refreshing contrast.
  • Make It a Meal: Add a side of seasoned fries or sweet potato wedges for a full meal experience.
  • Elevate with Dips: Offer a variety of dips like ranch, salsa, or even a spicy aioli to please everyone at the table.

So there you have it—everything you need to create the ultimate smashburger quesadillas that will steal your heart and satisfy your hunger. I hope you enjoy making these as much as I do! Pull up a chair, gather your loved ones, and let’s make some delicious memories together in the kitchen. Happy cooking!

Smashburger Quesadillas - Mini kitchen magic

Prep Time 10 minutes
Cook Time 15 minutes
Total Time 25 minutes
Servings 4 servings
Calories 650
Delicious mini quesadillas filled with smashed burger patties, cheese, and fresh toppings, perfect for a quick and satisfying meal.

Ingredients

Meat

  • 1 pound ground beef
  • 1 teaspoon salt
  • 1 teaspoon black pepper

Tortillas & Cheese

  • 4 pieces flour tortillas
  • 1 cup shredded cheddar cheese

Vegetables & Pickles

  • 1/2 cup diced onions
  • 1/2 cup diced tomatoes
  • 1/4 cup pickles (optional)

Other

  • as needed for frying cooking oil (for frying)
  • optional optional toppings: sour cream, salsa, or guacamole

Instructions 

  • Heat a skillet with a little cooking oil over medium-high heat.
  • Divide beef into four portions, season with salt and pepper, then smash and cook each for 2-3 minutes per side.
  • Place a tortilla in the skillet, sprinkle cheese, add a burger patty, vegetables, then top with more cheese and fold.
  • Cook each quesadilla 2-3 minutes per side until golden and cheese melts. Slice and serve with toppings.

Notes

Ensure to smash the beef patties thin for quick cooking and crispy edges.
Calories: 650kcal
Cost: $15
Course: Main Course
Cuisine: American
Keyword: Beef

Loved this recipe? Save it to your favorite Pinterest board so you can easily find it later! It’s the perfect way to keep all your sweet ideas in one place. ✨

Gourmet presentation of Smashburger Quesadillas, highlighting crispy tortillas and colorful fillings in a soft-focus setting.

Welcome to Your New Favorite Comfort Meal

Hey there, fellow food lover! If you’ve found your way to this recipe, you’re in for a delightful treat. Today, we’re diving into the world of Loaded Herb Grilled Chicken served with creamy pesto pasta and crispy roasted potatoes. This dish is not just a meal; it’s a warm embrace on a plate, perfect for any occasion. Whether you’re cooking for your family, hosting friends, or just indulging in a cozy night in, this recipe has your back!

Growing up, meals were the heart of our home. I remember the aroma of grilled chicken wafting through the air, mingling with the scent of fresh herbs and garlic. This dish captures that nostalgia while bringing a modern twist to the table. Let’s roll up our sleeves and create something magical together!

Why You’ll Love This Recipe

Here are just a few reasons why this Loaded Herb Grilled Chicken with Creamy Pesto Pasta & Roasted Potatoes will become a staple in your kitchen:

  • Flavor Explosion: The combination of grilled chicken marinated in fragrant herbs, rich creamy pesto, and perfectly roasted potatoes delivers a symphony of flavors that will make your taste buds dance.
  • Easy to Prepare: This recipe is straightforward, making it perfect for weeknight dinners or special occasions. With minimal prep and cooking time, you’ll have a delicious meal on the table in no time.
  • Customizable: Feel free to switch up the ingredients based on what you have on hand or your personal preferences—this dish is versatile and forgiving!
  • Healthful Ingredients: Packed with protein from the chicken, healthy fats from olive oil, and the goodness of veggies, this meal checks all the boxes for a wholesome dinner.
  • Leftover Friendly: If you happen to have any leftovers, they make for a fantastic lunch the next day, keeping well in the fridge and tasting even better!

Ingredients You’ll Need

A vibrant plate featuring Loaded Herb Grilled Chicken alongside creamy pesto pasta and golden roasted potatoes.

To whip up this delightful dish, gather the following ingredients:

  • 4 chicken breasts: The star of the show! Feel free to swap in thighs for an even juicier bite.
  • 2 tablespoons olive oil: This helps keep the chicken moist and adds a rich flavor.
  • 2 teaspoons dried oregano: A classic herb that enhances the Mediterranean vibes.
  • 2 teaspoons dried basil: Fresh or dried, it’s a must for that aromatic touch.
  • 2 teaspoons garlic powder: Because who doesn’t love garlic?
  • Salt and pepper to taste: Essential seasonings that make all the flavors pop.
  • 8 ounces pasta: Penne or fettuccine work beautifully. You could even use whole wheat for a healthier twist.
  • 1 cup heavy cream: Adds that luscious creaminess to the dish.
  • 1/2 cup prepared pesto: Store-bought or homemade, it’s your choice!
  • 1 cup cherry tomatoes: Halved for a burst of freshness.
  • 1/2 cup grated parmesan cheese: Because cheese is life.
  • 1 pound baby potatoes: These little gems roast up beautifully and complement the chicken perfectly.
  • Fresh basil for garnish: Adds a pop of color and a fragrant finish.

Equipment You’ll Need

Before we get cooking, let’s ensure you have the right tools:

  • Grill or grill pan: Essential for getting that delicious char on the chicken.
  • Baking sheet: For roasting those baby potatoes to perfection.
  • Large skillet: Ideal for combining the creamy pesto sauce with pasta.
  • Mixing bowls: For marinating the chicken and mixing ingredients.
  • Pot for boiling pasta: A must-have for cooking your pasta to al dente perfection.

Step-by-Step Instructions

Now that we’ve prepped everything, let’s dive into the cooking process:

  1. Preheat the oven: Get your oven ready by preheating it to 400°F (200°C).
  2. Marinate the chicken: In a bowl, mix olive oil, oregano, basil, garlic powder, salt, and pepper. Coat the chicken breasts in this mixture, making sure they’re well covered.
  3. Grill the chicken: Place the coated chicken on a grill or grill pan over medium-high heat. Cook for about 6-7 minutes on each side, until fully cooked and golden brown.
  4. Roast the potatoes: While the chicken grills, halve the baby potatoes and place them on a baking sheet. Drizzle with olive oil and season with salt and pepper. Roast in the oven for 25-30 minutes until golden and tender.
  5. Cook the pasta: In a pot of boiling salted water, cook the pasta according to package instructions. Drain and set aside.
  6. Prepare the creamy pesto sauce: In a large skillet over medium heat, combine heavy cream and pesto, stirring until heated through. Add the cooked pasta and toss to coat.
  7. Assemble the dish: Once the chicken is done, slice it and layer it on top of the creamy pesto pasta. Add halved cherry tomatoes and sprinkle with grated Parmesan cheese.
  8. Serve: Plate the loaded herb grilled chicken with the creamy pesto pasta and roasted potatoes on the side. Garnish with fresh basil for that perfect finishing touch.

Pro Tips for the Perfect Dish

Before you dive in, here are some expert tips to take your cooking game to the next level:

  • Let it rest: After grilling, allow the chicken to rest for a few minutes before slicing. This keeps the juices locked in.
  • Use fresh herbs: If you have access to fresh oregano and basil, they’ll elevate the flavor even more.
  • Don’t overcrowd the pan: When grilling the chicken, make sure not to crowd the pan to ensure even cooking.
  • Adjust the creaminess: If you prefer a lighter sauce, you can substitute part of the heavy cream with chicken broth.
  • Spice it up: Add a pinch of red pepper flakes to the creamy pesto for a little kick!
  • Experiment with veggies: Feel free to toss in sautéed spinach or bell peppers for added nutrition and color.
  • Make it ahead: You can marinate the chicken a day in advance for even deeper flavors.
  • Store leftovers properly: Keep any leftovers in an airtight container in the fridge for up to 3 days.

Common Mistakes and Troubleshooting

Even the best cooks have their off days. Here are some common pitfalls and how to avoid them:

  • Overcooked chicken: Keep an eye on your grill time. Chicken is done when it reaches an internal temperature of 165°F (75°C).
  • Too much salt: Always start with less salt; you can always add more later. Taste as you go!
  • Dry pasta: Make sure to cook the pasta until just al dente, as it will continue to cook when mixed with the sauce.
  • Sauce too thick: If your creamy pesto sauce is too thick, add a splash of pasta water or chicken broth to loosen it up.

Variations to Try

Feeling adventurous? Here are some fun variations to switch things up:

  • Grilled Vegetable Medley: Toss in some grilled zucchini, bell peppers, and asparagus for a colorful veggie boost.
  • Spicy Pesto: Substitute traditional pesto with a spicy variant or add diced jalapeños into the mix.
  • Cheesy Garlic Bread: Serve with a side of cheesy garlic bread for an indulgent, comforting meal.
  • Gluten-Free Option: Use gluten-free pasta and ensure your pesto is also gluten-free.

Storage and Make-Ahead Instructions

This dish is great for meal prep! Here’s how to store and reheat:

  • Refrigerator: Store leftovers in an airtight container for up to 3 days.
  • Freezer: You can freeze the grilled chicken and pesto pasta separately for up to 2 months. Just make sure to label them!
  • Reheating: When ready to enjoy, reheat in the microwave or over low heat on the stovetop, adding a splash of cream or broth to revive the sauce.

Loaded Herb Grilled Chicken with Creamy Pesto Pasta & Roasted Potatoes Recipe FAQs

Got questions? I’ve got answers! Here are some FAQs to help you out:

  • Can I use frozen chicken?: Yes! Just make sure it’s fully thawed before marinating and grilling.
  • What can I substitute for heavy cream?: You can use half-and-half or a non-dairy milk like coconut milk for a lighter version.
  • Is this dish good for meal prep?: Absolutely! It stores well and makes for perfect lunches throughout the week.
  • How can I make this dairy-free?: Use dairy-free pesto and substitute heavy cream with coconut cream or a dairy-free milk alternative.
  • What other herbs can I use?: Fresh thyme or rosemary can add a lovely twist to the chicken marinade.
  • Can I grill the potatoes?: Yes! You can parboil the potatoes and then grill them until crispy.
  • How spicy is the pesto?: Most store-bought pestos are mild. If you want heat, consider adding red pepper flakes.
  • What do I serve it with?: A simple side salad or steamed vegetables pair perfectly with this comforting dish.

Nutritional Tips and Dietary Adaptations

This dish can easily fit into various dietary needs:

  • Low-Carb Option: Substitute pasta with spiralized zucchini or cauliflower rice to keep it low-carb.
  • High-Protein Boost: Add more chicken or incorporate chickpeas for a vegetarian protein source.
  • Vegetarian Version: Swap chicken for grilled tofu or tempeh and use a plant-based creamy sauce.

Serving Suggestions

To elevate your meal, consider these serving suggestions:

  • Fresh herbs: Garnish with extra fresh basil or parsley for a vibrant pop of color.
  • Parmesan cheese: Offer additional grated Parmesan cheese on the side for those who want an extra cheesy experience.
  • Lemon wedges: A squeeze of fresh lemon juice over the dish adds brightness and balances the richness.

Conclusion

And there you have it—your guide to creating a truly unforgettable meal! This Loaded Herb Grilled Chicken with Creamy Pesto Pasta & Roasted Potatoes is perfect for any occasion, bringing warmth and comfort to your dining table. Remember, cooking is all about experimenting and having fun, so feel free to make it your own. I can’t wait for you to try this recipe and share it with your loved ones. Happy cooking, and may your kitchen be filled with laughter and love!

Loaded Herb Grilled Chicken with Creamy Pesto Pasta & Roasted Potatoes

Prep Time 15 minutes
Cook Time 40 minutes
Total Time 55 minutes
Servings 4 servings
Calories 850
A flavorful and hearty dish featuring herb-marinated grilled chicken, creamy pesto pasta, and roasted baby potatoes, perfect for a satisfying meal.

Ingredients

Protein

  • 4 pieces chicken breasts
  • 2 tablespoons olive oil
  • 2 teaspoons dried oregano
  • 2 teaspoons dried basil
  • 2 teaspoons garlic powder
  • salt and pepper to taste salt and pepper
  • 8 ounces pasta (penne or fettuccine)
  • 1 cup heavy cream
  • 1/2 cup prepared pesto
  • 1 cup cherry tomatoes, halved
  • 1/2 cup grated parmesan cheese
  • 1 pound baby potatoes, halved

Garnish

  • fresh basil for garnish fresh basil

Instructions 

  • Preheat oven to 400°F (200°C).
  • Mix olive oil, oregano, basil, garlic powder, salt, and pepper; coat chicken. Grill 6-7 mins per side.
  • Roast potatoes with olive oil, salt, and pepper for 25-30 mins.
  • Cook pasta; heat cream and pesto, toss with pasta.
  • Slice chicken, layer on pasta, add cherry tomatoes, sprinkle Parmesan, and garnish with basil.

Notes

Adjust seasoning to taste and serve immediately for best flavor.
Calories: 850kcal
Cost: $15
Course: Main Course
Cuisine: American
Keyword: Chicken, pasta, potatoes

Loved this recipe? Save it to your favorite Pinterest board so you can easily find it later! It’s the perfect way to keep all your sweet ideas in one place. ✨

Delicious herb-infused grilled chicken served with creamy pasta and perfectly roasted potatoes on a cozy table setting.

Unleashing the Magic of Crockpot Mac and Cheese

Ah, mac and cheese—the ultimate comfort food that warms the heart and fills the belly. If you’ve ever experienced that blissful moment when gooey cheese meets perfectly cooked pasta, you know it’s a dish that transcends generations. Today, we’re diving into a recipe that will not only satisfy those cheesy cravings but will also turn your kitchen into a dance floor of flavors—my Creamy Crockpot Mac and Cheese.

This isn’t just any mac and cheese; it’s a creamy, dreamy delight that marries nostalgia with a sprinkle of magic, perfect for gatherings or cozy nights in. So, grab your crockpot and let’s get started on this journey to cheesy perfection!

Why You’ll Love This Recipe

  • Hands-Free Cooking: Just toss your ingredients into the crockpot and let it do the work while you sip on a glass of wine or catch up on your favorite show.
  • Creamy Texture: With a combination of sharp cheddar, mozzarella, and cream cheese, this dish delivers an irresistibly creamy consistency that clings to every noodle.
  • Customizable: Feel free to add your favorite proteins or veggies—think crispy bacon, sautéed mushrooms, or even a handful of spinach for a pop of color.
  • Perfect for Meal Prep: Make a big batch and enjoy it throughout the week—it’s just as delicious reheated!
  • Crowd-Pleaser: Whether you’re hosting a party or just feeding the family, this dish will have everyone asking for seconds!

Ingredients You’ll Need

Close-up of crockpot mac and cheese with a golden, cheesy top and creamy texture.

Let’s gather our ingredients for this creamy concoction. Here’s what you’ll need:

  • 16 ounces elbow macaroni
  • 4 cups sharp cheddar cheese, shredded
  • 1 cup mozzarella cheese, shredded
  • 1 cup cream cheese, cubed
  • 4 cups milk
  • 1/2 cup butter, melted
  • 1 teaspoon garlic powder
  • 1 teaspoon onion powder
  • Salt and pepper to taste
  • 1/2 cup grated parmesan cheese

Feel free to swap out cheeses or pasta shapes based on what you have on hand. Just remember, the cheese is where the magic happens!

How To Make Creamy Crockpot Mac and Cheese

Now that we have our ingredients, let’s whip up this delicious dish:

  1. Prep Your Crockpot: Spray the inside of your crockpot with cooking spray for easy cleanup.
  2. Mix the Dry Ingredients: In a large bowl, combine the dry elbow macaroni, shredded cheddar cheese, mozzarella cheese, and cream cheese.
  3. Prepare the Liquid Mixture: In a separate bowl, whisk together the milk, melted butter, garlic powder, onion powder, salt, and pepper.
  4. Combine and Stir: Pour the milk mixture over the macaroni and cheese mixture in the crockpot. Stir everything together until well combined.
  5. Cook: Cover and cook on low for 2 to 3 hours, stirring occasionally, until the pasta is tender and the cheese is melted.
  6. Add Parmesan: Once cooked, stir in the grated Parmesan cheese until melted and creamy.
  7. Serve and Dance: Serve hot and enjoy the deliciousness while dancing in your kitchen!

Pro Tips for the Best Crockpot Mac and Cheese

  • Don’t Overcook: Keep an eye on your mac and cheese towards the end of the cooking time. Overcooked pasta can become mushy, so taste test as you go!
  • Use Freshly Shredded Cheese: Pre-shredded cheese often contains anti-caking agents that can affect the creaminess. Shred your own for the best texture.
  • Mix It Up: Experiment with different cheese combinations. Gouda, fontina, or pepper jack can add exciting flavors!
  • Add Flavor Boosters: A dash of hot sauce or a sprinkle of smoked paprika can elevate the dish to new heights.
  • Adjust Consistency: If you prefer a thicker mac and cheese, reduce the amount of milk slightly. For a creamier texture, add a bit more.
  • Don’t Skip the Stirring: Stirring occasionally helps to ensure even cooking and prevents the pasta from sticking together.
  • Let It Rest: Allow the mac and cheese to rest for a few minutes after cooking. This helps it thicken up a bit more.
  • Explore Add-Ins: Try adding cooked bacon, sautéed onions, or even broccoli for a complete meal.

Common Mistakes and Troubleshooting

Even the best chefs have their off days! Here are some common pitfalls and how to avoid them:

  • Mushy Pasta: If your pasta turns out mushy, try reducing the cooking time or the amount of liquid next time.
  • Too Thick: If your mac and cheese is too thick, stir in a little extra milk to loosen it up.
  • Not Enough Flavor: If it tastes bland, try adding more spices or cheese. A bit of salt can make a significant difference!

Delicious Variations to Try

Why not make this dish your own? Here are some variations to consider:

  • Buffalo Chicken Mac: Stir in shredded rotisserie chicken and a few tablespoons of buffalo sauce for a spicy twist!
  • Veggie Lover’s Delight: Add sautéed bell peppers, spinach, or mushrooms for a hearty veggie option.
  • Mac and Cheese Bake: After cooking, transfer to a baking dish, top with breadcrumbs and more cheese, and broil until golden and bubbly.
  • Truffle Mac and Cheese: Drizzle a bit of truffle oil over the top before serving for a touch of luxury.

Storage and Make-Ahead Instructions

This creamy crockpot mac and cheese is perfect for meal prep! Here’s how to store it:

  • Refrigeration: Store leftovers in an airtight container in the fridge for up to 4 days.
  • Freezing: You can freeze mac and cheese for up to 3 months. Just make sure to allow it to cool completely before transferring it to a freezer-safe container.
  • Reheating: Reheat in the microwave or on the stovetop, adding a splash of milk to restore creaminess.

Frequently Asked Questions

  • Can I use gluten-free pasta? Yes, feel free to swap in gluten-free pasta for a gluten-free version.
  • Is there a way to lighten this recipe? You can use low-fat cheese and milk for a lighter option, though it may affect the creaminess.
  • Can I make this in advance? Absolutely! You can prepare the ingredients ahead of time and store them in the fridge until you’re ready to cook.
  • What’s the best way to serve this dish? Serve hot as a main dish or as a side to grilled meats or salads.
  • Can I double this recipe? Yes, just make sure your crockpot is large enough to accommodate the increased quantity!
  • What can I add for protein? Cooked chicken, bacon, or ham are excellent options to enhance the dish.
  • What’s the best cheese for mac and cheese? A blend of sharp cheddar and mozzarella works best, but feel free to experiment with others!
  • How do I make it spicy? Add diced jalapeños or a few dashes of hot sauce for a spicy kick!

Nutritional Tips and Dietary Adaptations

This dish can be adjusted to fit various dietary needs:

  • Dairy-Free: Use dairy-free cheeses and nut milk for a dairy-free option.
  • Lower Carb: Substitute pasta with cauliflower florets for a lower-carb version.
  • Vegetarian: This recipe is already vegetarian, but feel free to add plant-based proteins for extra nutrition.

Essential Equipment for This Recipe

Before you start, make sure you have the following:

  • Crockpot: A 6-quart slow cooker is perfect for this recipe.
  • Mixing Bowls: For combining your ingredients.
  • Measuring Cups and Spoons: Precision is key when measuring ingredients!

Serving Suggestions

This mac and cheese is delicious on its own but pairs beautifully with:

  • Grilled Chicken: A simple grilled chicken breast complements the creaminess.
  • Garden Salad: A fresh side salad adds a crisp contrast to the rich dish.
  • Garlic Bread: Because who doesn’t love more carbs?

Conclusion

And there you have it—my Creamy Crockpot Mac and Cheese recipe that’s sure to become a staple in your kitchen. With its dreamy texture and customizable ingredients, you’ll find yourself making it again and again. So, whether you’re hosting a party, enjoying a cozy night in, or simply feeding the family, this dish is bound to impress. Now, get cooking, and don’t forget to dance a little while you’re at it! Happy cooking from my kitchen to yours!

Creamy Crockpot Mac and Cheese That Will Make You Dance in the Kitchen

Prep Time 10 minutes
Cook Time 2 hours 30 minutes
Total Time 2 hours 40 minutes
Servings 6 servings
Calories 650
A rich and creamy crockpot mac and cheese recipe that’s perfect for a cozy night and will have you dancing in the kitchen!

Ingredients

Dry Pasta

  • 16 ounces elbow macaroni

Cheese

  • 4 cups sharp cheddar cheese, shredded
  • 1 cup mozzarella cheese, shredded
  • 1 cup cream cheese, cubed

Liquids and Fats

  • 4 cups milk
  • 1/2 cup butter, melted

Spices and Seasonings

  • 1 teaspoon garlic powder
  • 1 teaspoon onion powder
  • to taste salt and pepper
  • 1/2 cup grated parmesan cheese

Instructions 

  • Spray crockpot, then combine pasta, cheeses, and seasonings.
  • Whisk milk, melted butter, garlic, onion, salt, and pepper; pour over mixture.
  • Stir to combine, then cook on low for 2-3 hours, stirring occasionally.
  • Stir in Parmesan cheese until creamy, then serve hot.

Notes

For extra flavor, add a pinch of paprika or cayenne pepper.
Calories: 650kcal
Cost: $15
Course: Main Course
Cuisine: American
Keyword: Mac and Cheese

Loved this recipe? Save it to your favorite Pinterest board so you can easily find it later! It’s the perfect way to keep all your sweet ideas in one place. ✨

A hearty serving of macaroni and cheese adorned with a rich, cheesy layer and soft pasta.

The Cozy Embrace of Baked Japanese Sweet Potatoes

Welcome to a delightful culinary journey where the charm of baked Japanese sweet potatoes, or yaki imo, transforms your kitchen into a haven of warmth and nostalgia. These sweet, creamy gems, with their vibrant hues and irresistible sweetness, are a staple in Japanese cuisine, known for their simplicity and incredible taste. Whether you’re preparing a comforting snack or a unique side dish, this recipe will not only satisfy your cravings but also bring a little magic to your mealtime. Trust me, your taste buds are in for a treat!

Why You’ll Love This Recipe

Let me share five reasons why this recipe for baked Japanese sweet potatoes will become a cherished addition to your culinary repertoire:

  • Nutritious Delight: Packed with vitamins, fiber, and antioxidants, these sweet potatoes are a healthy choice that can boost your wellness.
  • Simple Preparation: With just two ingredients—Japanese sweet potatoes and a sprinkle of sea salt—this recipe is incredibly easy to make.
  • Versatile Serving Options: Enjoy them as a standalone snack, a comforting side dish, or even as a base for creative toppings.
  • Family-Friendly: This recipe is sure to please both kids and adults, making it a perfect addition to family meals.
  • Comforting Aroma: The scent of sweet potatoes roasting in the oven will fill your home with a cozy vibe that invites everyone to gather around the table.

Ingredients You’ll Need

An appetizing platter of golden-brown yaki imo with a soft texture and natural shadows.

To create these heavenly baked Japanese sweet potatoes, gather the following ingredients:

  • 2 medium Japanese sweet potatoes (satsumaimo are the best choice for sweetness and texture)
  • Optional: Sea salt for sprinkling

Step-by-Step Instructions

Ready to bake some delicious yaki imo? Let’s dive into the simple steps:

  1. Preheat your oven to 400°F (200°C).
  2. Wash the Japanese sweet potatoes thoroughly to remove any dirt. Ensure they are clean, as the skin is edible and flavorful.
  3. Pat the sweet potatoes dry with a towel to ensure they roast perfectly.
  4. Place the sweet potatoes directly on the oven rack or on a baking sheet lined with parchment paper. This allows hot air to circulate evenly for a better bake.
  5. Bake for 45-60 minutes, or until the sweet potatoes are tender when pierced with a fork. The baking time may vary depending on the size of your sweet potatoes.
  6. Remove from the oven and let them cool slightly before serving.
  7. Optional: Sprinkle with a little sea salt before enjoying for an extra flavor boost.

Pro Tips for Perfect Baked Sweet Potatoes

Here are some expert insights to elevate your baking game:

  • Choose the right variety: Satsumaimo is preferred for its sweetness, but you can also experiment with Murasaki or Beni Haruka for different flavors.
  • Don’t skip the washing: Thoroughly wash your sweet potatoes to remove any residual dirt that might alter the flavor.
  • Check for doneness: Use a fork to test tenderness; it should glide in easily. If they’re still firm, give them a few more minutes in the oven.
  • Experiment with toppings: Try adding a dollop of butter, a drizzle of honey, or a sprinkle of cinnamon for added richness.
  • Be patient: Letting them rest for a few minutes after baking allows the flavors to meld beautifully.
  • Consider the skin: The skin of Japanese sweet potatoes is not only edible but also packed with nutrients, so don’t peel them!
  • Make ahead: These sweet potatoes can be baked in advance and reheated, making them perfect for busy weeknights.
  • Serve warm: They taste best when enjoyed warm from the oven, so plan to serve them right after baking.

Common Mistakes and Troubleshooting

Even seasoned cooks can run into hiccups. Here’s how to avoid common pitfalls:

  • Underbaking: If your sweet potatoes are hard when you check them, they need more time in the oven.
  • Not drying properly: Skipping the drying step can lead to soggy skins. Always pat them dry after washing.
  • Piling them up: Ensure the sweet potatoes are spaced out on the baking sheet or oven rack for even cooking.
  • Using the wrong oven temperature: Make sure your oven is preheated correctly; an inaccurate temperature can lead to inconsistent results.

Variations on the Classic Recipe

Feeling adventurous? Here are four fun twists on traditional yaki imo:

  • Honey Glazed: Drizzle honey over the baked sweet potatoes for a sweet finish that enhances their natural sugars.
  • Spiced Sweet Potatoes: Add a blend of cinnamon and nutmeg before baking for a warm, spiced flavor.
  • Savory Spin: Top with crumbled feta cheese and fresh herbs like parsley or thyme for a savory dish.
  • Stuffed Sweet Potatoes: After baking, halve the sweet potatoes and fill them with your favorite ingredients like black beans, avocado, and salsa.

Storage and Make-Ahead Instructions

If you want to prepare ahead, here’s how to store your baked Japanese sweet potatoes:

  • Refrigeration: Store uneaten baked sweet potatoes in an airtight container in the fridge for up to 4 days.
  • Reheating: Reheat in the oven at 350°F (175°C) until warmed through, about 10-15 minutes.
  • Freezing: You can freeze baked sweet potatoes for up to 3 months. Just let them cool completely before wrapping tightly in plastic wrap and placing them in a freezer bag.

Frequently Asked Questions

Got questions? Here are some answers to common inquiries:

  • Can I use other types of sweet potatoes? Yes, but Japanese sweet potatoes offer the best flavor and texture for this recipe.
  • Do I need to peel the sweet potatoes? No, the skin is edible and nutritious! Just be sure to wash them well.
  • What’s the best way to tell if they’re done? They should be tender when pierced with a fork. If there’s resistance, give them more time.
  • Can I bake them at a different temperature? Yes, but keep an eye on them as baking times will vary.
  • What can I serve with baked Japanese sweet potatoes? They pair wonderfully with proteins like grilled chicken or fish, or you can enjoy them as a snack on their own.
  • How can I enhance the flavor? Experiment with toppings like butter, sea salt, or spices to bring out the natural sweetness.
  • Can I microwave them instead? While you can microwave sweet potatoes, they won’t have the same caramelization and flavor as oven-baked ones.
  • What’s the nutritional value of Japanese sweet potatoes? They are rich in fiber, vitamins A and C, and antioxidants, making them a healthy choice!

Nutrition Tips and Dietary Adaptations

For a balanced meal, consider these nutritional tips:

  • Pair with protein: Add a source of protein like grilled chicken or legumes for a complete meal.
  • Go vegan: Enjoy your baked sweet potatoes with plant-based toppings like avocado or tahini for a vegan-friendly dish.
  • Low-carb option: Use smaller sweet potatoes for a lower-carb meal without sacrificing flavor.
  • Gluten-free: This recipe is naturally gluten-free, making it suitable for those with gluten sensitivities.

Equipment Recommendations

Here’s what you’ll need to make this recipe:

  • Oven: A reliable oven that can maintain a consistent temperature is essential for perfect baking.
  • Baking sheet: Use a baking sheet lined with parchment paper for easy cleanup.
  • Fork: For testing doneness and serving your sweet potatoes.

Serving Suggestions

How to enjoy your baked sweet potatoes:

  • As a snack: Perfect for a mid-afternoon pick-me-up or a late-night treat!
  • With toppings: Try them with Greek yogurt, honey, or nut butter for a delightful twist.
  • In salads: Add warm sweet potato chunks to salads for a comforting, filling addition.
  • As a side dish: Serve alongside roasted meats or fish for a wholesome meal.

Conclusion

There you have it—an inviting recipe for baked Japanese sweet potatoes that promises comfort, flavor, and simplicity all in one! I hope you find joy in making these delicious yaki imo, just as I do. With every bite, you’ll be reminded of home, warmth, and those cozy moments spent in the kitchen. So gather your sweet potatoes, preheat that oven, and let’s create some magic together!

Baked Japanese Sweet Potatoes (Authentic Yaki Imo) - Okonomi Kitchen

Prep Time 10 minutes
Cook Time 50 minutes
Total Time 1 hour
Servings 2 pieces
Calories 180
Enjoy tender, naturally sweet Japanese sweet potatoes baked to perfection for a simple and wholesome treat.

Ingredients

Main

  • 2 medium Japanese sweet potatoes (satsumaimo)
  • 1 pinch sea salt for sprinkling (optional)

Instructions 

  • Preheat oven to 400°F (200°C).
  • Wash and dry the sweet potatoes.
  • Place directly on oven rack or on a lined baking sheet.
  • Bake for 45-60 minutes until tender.
  • Remove and let cool slightly. Optional: sprinkle with sea salt.

Notes

For extra flavor, try adding a drizzle of honey or a sprinkle of cinnamon.
Calories: 180kcal
Cost: $10
Course: Side Dish
Cuisine: Japanese
Keyword: Sweet Potatoes

Loved this recipe? Save it to your favorite Pinterest board so you can easily find it later! It’s the perfect way to keep all your sweet ideas in one place. ✨

Delicious, roasted satsumaimo with a shiny skin, sprinkled with sea salt, displayed elegantly.