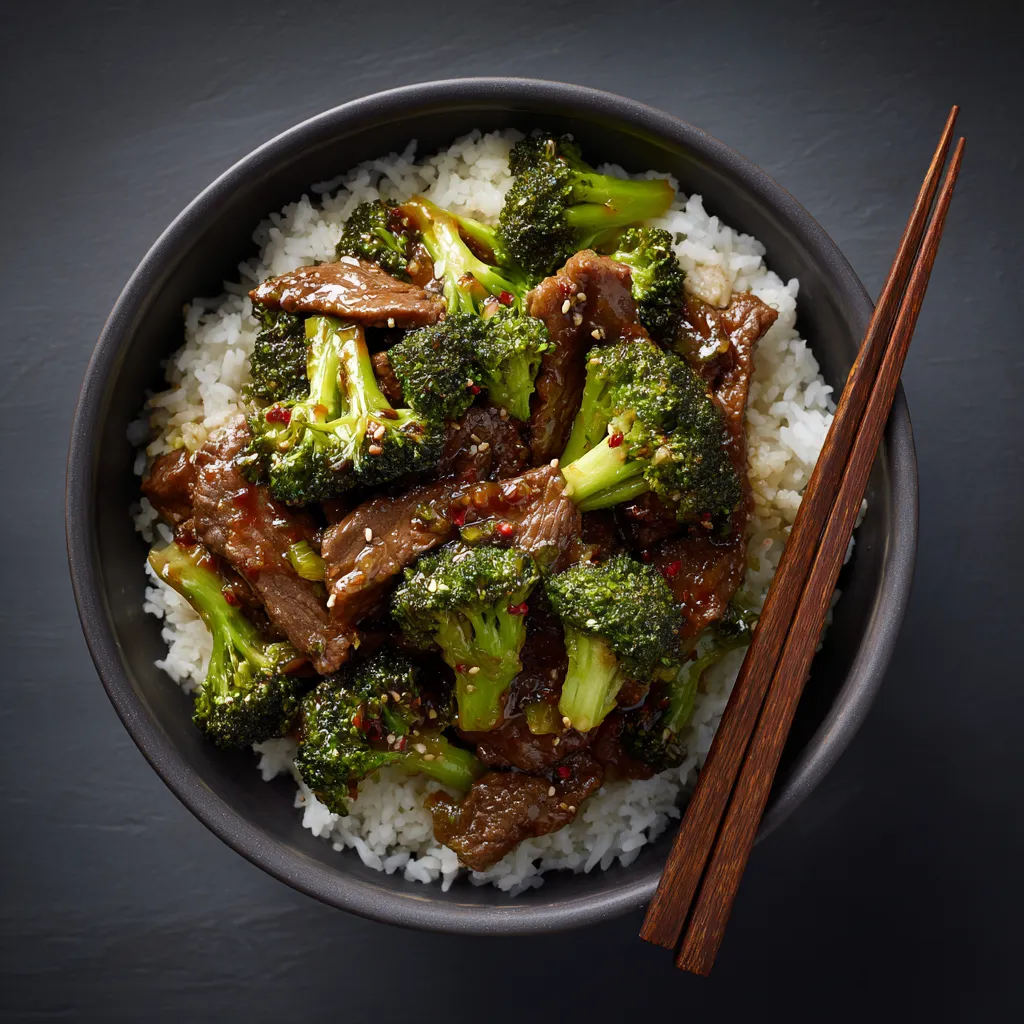
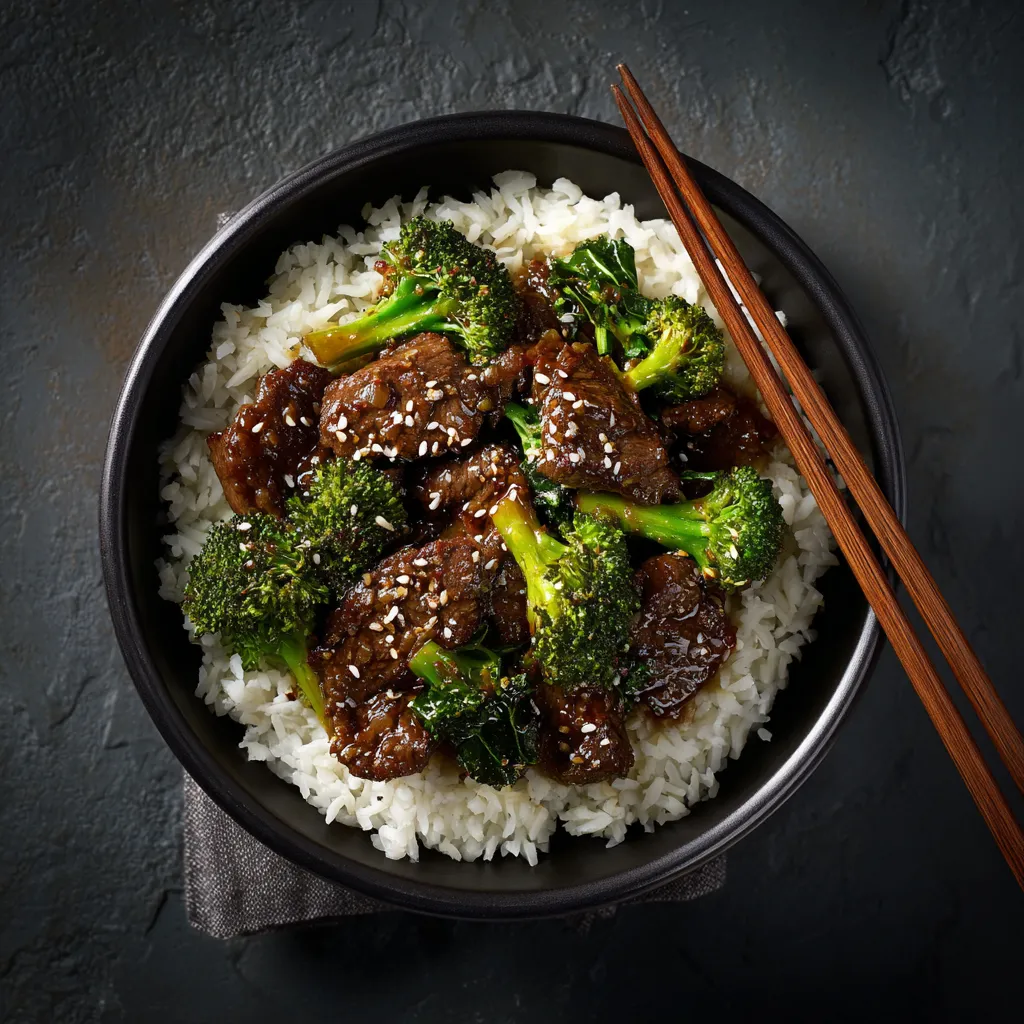
Author

Ava

Browsing

Why This Spinach Tomato Pasta Will Steal Your Heart

Ah, pasta—the universal comfort food that instantly transports us to cozy family dinners and warm evenings spent with loved ones. If you’re on the lookout for a dish that’s not just quick and easy but also bursting with flavor, you’ve come to the right place! This Spinach Tomato Pasta is a delightful blend of fresh spinach, juicy cherry tomatoes, and aromatic garlic, all brought together in a luscious sauce that hugs every strand of pasta.

Imagine a dish so comforting that it can turn an ordinary weeknight into a culinary celebration! This pasta isn’t just about filling your belly; it’s about nourishing your soul and creating memories around the dinner table. Ready to dive in? Let’s explore why this recipe deserves a spot in your kitchen rotation!

  • Quick and Easy: This pasta dish comes together in under 30 minutes, making it perfect for busy weeknights or when surprise guests drop by.
  • Nutritious Ingredients: Packed with fresh spinach and tomatoes, this meal is a great way to sneak in those essential nutrients without sacrificing flavor.
  • Customizable: Whether you’re gluten-free or vegan, you can easily swap ingredients to fit your dietary needs. Pasta is versatile like that!
  • Minimal Cleanup: With a one-pot cooking method, you’ll spend less time cleaning and more time enjoying your delicious creation.
  • Family-Friendly: Kids love pasta! This dish is sure to please even the pickiest of eaters, making it a great choice for family dinners.

Gathering Your Ingredients

Let’s talk about what you need to whip up this scrumptious dish. Here’s a detailed breakdown of the ingredients, along with some handy substitutions if you’re missing something in your pantry.

  • Pasta of Choice: 200g of your favorite pasta (spaghetti, penne, or fusilli work wonderfully). Don’t hesitate to try gluten-free options if needed!
  • Fresh Spinach: 2 cups of washed spinach. For a different twist, you can use kale or Swiss chard.
  • Cherry Tomatoes: 1 cup, halved. If you can’t find fresh ones, canned diced tomatoes will do in a pinch.
  • Garlic: 2 cloves, minced. You can substitute with garlic powder if you’re in a hurry.
  • Olive Oil: 2 tablespoons. Feel free to use avocado oil if that’s what you have on hand!
  • Salt and Pepper: To taste. Always adjust according to your preference.
  • Parmesan Cheese: Grated, for topping (optional but recommended). Nutritional yeast is a great vegan alternative!

Cooking Instructions: A Step-by-Step Guide

Plate of spinach tomato pasta garnished with fresh ingredients, captured at eye level.

Now that you’ve got your ingredients ready, let’s get cooking! Follow these simple steps to create your Spinach Tomato Pasta masterpiece.

  1. Cook the Pasta: Bring a large pot of salted water to a boil. Add the pasta and cook according to package instructions until al dente. Drain and set aside.
  2. Heat the Oil: In a large skillet over medium heat, add the olive oil. Allow it to warm up for a minute.
  3. Sauté the Garlic: Add the minced garlic to the skillet and sauté for about 1 minute until fragrant. Be careful not to burn it!
  4. Add the Tomatoes: Toss in the halved cherry tomatoes and cook for 3-4 minutes, until they begin to soften and release their juices.
  5. Incorporate the Spinach: Stir in the fresh spinach and cook until wilted, about 2 minutes. It will shrink down significantly, so don’t be alarmed!
  6. Combine Everything: Add the cooked pasta to the skillet with the spinach and tomato mixture. Season with salt and pepper, then toss everything together until well mixed.
  7. Serve and Enjoy: Serve hot, topped with grated Parmesan cheese if desired. Sit back, relax, and enjoy your creation!

Pro Tips for Perfect Pasta

Want to take your Spinach Tomato Pasta to the next level? Here are some expert insights to help you shine in the kitchen:

  • Perfect Pasta Texture: Always cook your pasta al dente. This ensures it holds up well when tossed with the sauce and doesn’t become mushy.
  • Flavor Boost: For an extra kick, add red pepper flakes when sautéing the garlic for a spicy twist!
  • Don’t Forget the Pasta Water: Reserve a cup of pasta cooking water before draining. Adding a splash to the sauce can help create a luscious, velvety texture.
  • Fresh Herbs: Sprinkle some fresh basil or parsley on top just before serving for a burst of color and flavor.
  • Meal Prep: This pasta dish holds up well in the fridge, making it a great option for meal prep. Just reheat and enjoy!
  • Experiment with Proteins: Add grilled chicken, shrimp, or chickpeas for a protein boost if you want to make it heartier.
  • Seasoning: Taste as you go! Adjust salt and pepper to your liking, and don’t hesitate to experiment with other spices like Italian seasoning.
  • Storage Tips: Store leftovers in an airtight container in the fridge for up to 3 days. Reheat gently on the stove with a splash of water or stock to revive the sauce.

Common Mistakes and Troubleshooting

Even the best chefs have their off days! Here are some common pitfalls to avoid when preparing your pasta dish:

  • Overcooking the Pasta: Keep a close eye on the cooking time and taste the pasta a minute or two before the package time is up.
  • Burning Garlic: Garlic can go from fragrant to burnt in seconds. Stir it constantly while sautéing.
  • Soggy Vegetables: Make sure you don’t overcook the spinach or tomatoes. You want them to retain some texture and freshness.
  • Too Much Salt: Start with a little and adjust as necessary. It’s easier to add than to take away!

Delicious Variations to Try

Feeling adventurous? Here are a few variations to keep your pasta nights exciting:

  • Pasta Primavera: Toss in seasonal vegetables like bell peppers, zucchini, or broccoli for a colorful and nutritious boost.
  • Creamy Spinach Tomato Pasta: Add a splash of cream or a dollop of ricotta for a rich, creamy sauce.
  • Pesto Spinach Pasta: Stir in a few tablespoons of basil pesto for an aromatic twist that elevates the flavors.
  • Nutty Addition: Sprinkle with toasted pine nuts or walnuts for added crunch and a nutty flavor.

Storage and Make-Ahead Instructions

This Spinach Tomato Pasta is fantastic for meal prep! Here’s how to handle leftovers effectively:

  • Refrigeration: Store any leftovers in an airtight container for up to 3 days.
  • Freezing: While not ideal for creamy sauces, this pasta can be frozen in a freezer-safe container for up to 2 months. Just remember to leave out the cheese until you reheat it.
  • Reheating: Reheat on low heat on the stove, adding a splash of water or chicken stock to revive the sauce.

Frequently Asked Questions

Got questions? I’ve got answers! Here are some common queries about this Spinach Tomato Pasta:

  • Can I use frozen spinach? Yes! Just thaw and drain excess water before adding it to the dish.
  • Is this recipe vegan? Absolutely! Just omit the cheese or use a vegan alternative.
  • What kind of pasta is best? This recipe works with any pasta shape you love. I recommend penne or fusilli for their sauce-hugging abilities.
  • Can I add protein? Yes! Grilled chicken, shrimp, or beans can all be delicious additions to make it a complete meal.
  • How do I make it gluten-free? Simply substitute regular pasta with gluten-free pasta. The cooking methods remain the same!
  • Can I meal prep this dish? For sure! It’s perfect for meal prepping. Just store in individual containers for easy lunches.
  • What can I serve with it? A simple side salad or crusty bread pairs beautifully with this pasta dish!
  • How spicy can I make it? If you’re a spice lover, feel free to add more red pepper flakes or even a dash of hot sauce!

Nutritional Tips and Dietary Adaptations

This Spinach Tomato Pasta is not only delicious but can also be nutritious! Here are some tips on how to adapt it to meet various dietary needs:

  • Low-Carb: Swap traditional pasta with zucchini noodles or spaghetti squash for a lighter option.
  • High-Protein: Incorporate chickpeas or lentils into the mix for a protein-packed meal.
  • Vegan-Friendly: Use nutritional yeast instead of cheese for a cheesy flavor without the dairy.
  • Low-Fat: You can reduce the olive oil and skip the cheese without sacrificing too much flavor.

Essential Kitchen Equipment

Before you dive into cooking, make sure you have the following tools on hand:

  • Large Pot: For boiling the pasta.
  • Skillet: A large skillet is essential for sautéing your veggies.
  • Colander: To drain your pasta efficiently.
  • Wooden Spoon: Perfect for stirring and combining ingredients.

Serving Suggestions to Elevate Your Meal

To make your dining experience even more special, consider these serving suggestions:

  • Garnish: Fresh basil, parsley, or even a sprinkle of chili flakes can add a lovely finishing touch.
  • Pair with Wine: A light white wine, like Sauvignon Blanc, complements the flavors beautifully.
  • Serve with Bread: A warm, crusty baguette or garlic bread makes for the perfect accompaniment to soak up any extra sauce.

Conclusion: Your New Favorite Pasta Dish Awaits!

And there you have it—your guide to creating a comforting and delicious Spinach Tomato Pasta that’s sure to impress! With its simple ingredients and quick preparation, this dish is not just a meal; it’s an experience. So, the next time you find yourself in the kitchen, remember that a little love and creativity can turn a regular dinner into something truly magical. Pull up a chair, share with your loved ones, and let the flavors transport you to a cozy evening filled with laughter and warmth. Happy cooking!

Delicious Spinach Tomato Pasta

Prep Time 10 minutes
Cook Time 15 minutes
Total Time 25 minutes
Servings 4 servings
Calories 450
A quick and flavorful pasta dish packed with fresh spinach and cherry tomatoes, perfect for a healthy meal.

Ingredients

pasta of choice

  • 200 g pasta of choice

fresh spinach

  • 2 cups fresh spinach (washed)

cherry tomatoes

  • 1 cup cherry tomatoes (halved)

garlic

  • 2 cloves garlic (minced)

olive oil

  • 2 tablespoons olive oil

salt

  • to taste salt

pepper

  • to taste pepper

parmesan cheese

  • grated (optional) parmesan cheese (optional)

Instructions 

  • Cook pasta until al dente, then drain.
  • Heat olive oil, sauté garlic for 1 minute.
  • Add cherry tomatoes and cook 3-4 minutes.
  • Stir in spinach until wilted, then combine with pasta.
  • Season with salt and pepper, toss, and serve with Parmesan if desired.

Notes

You can add a squeeze of lemon for extra freshness.
Calories: 450kcal
Cost: $12
Course: Main Course
Cuisine: Italian
Keyword: pasta

Loved this recipe? Save it to your favorite Pinterest board so you can easily find it later! It’s the perfect way to keep all your sweet ideas in one place. ✨

Delicious bowl of pasta with spinach and cherry tomatoes, softly lit.

Why You’re Going to Fall in Love with These Sticky Garlic Chicken Noodles

Hey there, fellow food lover! If you’re in search of a dinner that feels like a warm hug, look no further than these Sticky Garlic Chicken Noodles. This dish perfectly balances savory and sweet, making it a hit for any occasion. But hold on—don’t just take my word for it! Here’s why you’ll want to dive into this recipe:

  • Quick and Easy: Ready in just 30 minutes, these noodles are perfect for weeknight dinners when time is of the essence.
  • Flavor Explosion: The sticky garlic sauce envelops tender chicken and chewy noodles, creating a dish that’s impossible to resist.
  • Customizable: Feel free to swap in your favorite protein or add in seasonal vegetables for a personal touch.
  • Kid-Approved: This dish is a guaranteed winner with picky eaters, making meal times a breeze.
  • Leftover Magic: These noodles taste even better the next day, making them an excellent choice for meal prep!

Ingredients Breakdown: What You’ll Need

Let’s take a closer look at the essential ingredients that make this dish shine. Each component plays a crucial role, and I’ve included some handy substitutions if you’re missing something!

  • 400g Chicken Breast: Sliced thinly for quick cooking. You can substitute with tofu or shrimp for a different protein experience.
  • 200g Noodles: Choose rice noodles or egg noodles based on your preference. Gluten-free options are available for those with dietary restrictions.
  • 4 Cloves Garlic: Minced to infuse the dish with that irresistible aroma. Fresh garlic is best, but garlic powder can work in a pinch.
  • 3 Tablespoons Soy Sauce: The backbone of the sauce. You can use tamari for a gluten-free version.
  • 2 Tablespoons Honey: For that sweet contrast. Maple syrup is a great vegan substitute!
  • 1 Tablespoon Sesame Oil: Adds a nutty flavor. If you’re out, vegetable oil can be used instead.
  • 1 Tablespoon Vegetable Oil: For cooking the chicken. Any neutral oil will do.
  • 1 Teaspoon Ginger: Freshly grated ginger brings a zing. Ground ginger can be used if that’s all you have.
  • 2 Green Onions: Chopped for garnish and a fresh crunch. You can also use chives as an alternative.
  • Salt and Pepper: To taste, enhancing all the flavors.
  • Sesame Seeds: For garnishing, adding a nice crunch and visual appeal.

How to Make Sticky Garlic Chicken Noodles

A vibrant plate of sticky garlic chicken noodles with garlic, green onions, and sesame seeds on top.

Now that we have our ingredients ready, let’s get cooking! Follow these simple steps to create a deliciously sticky masterpiece:

  1. Cook the noodles according to package instructions, then drain and set aside.
  2. In a bowl, mix together soy sauce, honey, sesame oil, minced garlic, and grated ginger to create the sauce.
  3. In a large skillet or wok, heat vegetable oil over medium heat.
  4. Add the sliced chicken to the skillet and season with salt and pepper. Cook until browned and cooked through, about 5-7 minutes.
  5. Pour the sauce over the chicken and stir to coat, cooking for an additional 2-3 minutes until the sauce thickens and becomes sticky.
  6. Add the cooked noodles to the skillet and toss to combine with the chicken and sauce.
  7. Stir in chopped green onions and cook for another minute.
  8. Serve hot, garnished with sesame seeds and additional green onions if desired.

Expert Pro Tips for Perfect Sticky Garlic Chicken Noodles

Want to elevate your sticky garlic chicken noodles to the next level? Here are some tips from my kitchen to yours:

  • Marinate the Chicken: For an extra punch of flavor, marinate the chicken in the sauce for at least 30 minutes before cooking.
  • Adjust the Sweetness: If you prefer a sweeter dish, add more honey. If you like it spicy, increase the chili flakes.
  • Don’t Overcook the Noodles: Noodles should be cooked al dente since they will continue to cook slightly when combined with the hot chicken.
  • Use a Wok: If you have one, a wok is perfect for this recipe. It allows for quick cooking and even distribution of heat.
  • Fresh Ingredients: Always go for fresh garlic and ginger to get the most vibrant flavor.
  • Play with Textures: Add crunchy vegetables like bell peppers or snap peas for added texture and nutrients.
  • Garnish Generously: A sprinkle of sesame seeds and green onions not only adds flavor but makes your dish look more appealing.
  • Keep the Heat Up: When adding the sauce, make sure your skillet is hot to achieve that sticky consistency.

Common Mistakes and Troubleshooting

Even the best chefs make mistakes! Here’s how to avoid common pitfalls when preparing this dish:

  • Too Saucy: If your noodles are too saucy, let them cook longer on medium heat to allow the sauce to thicken.
  • Dry Chicken: If your chicken is dry, it may have been overcooked. Always check for doneness around the 5-minute mark.
  • Sticky Noodles: If your noodles stick together, rinse them under cold water after cooking to prevent clumping.
  • Flavorless Dish: Don’t forget to season your chicken well with salt and pepper before cooking for maximum flavor.

Delicious Variations to Try

Tired of the same old recipe? Switch things up with these variations:

  • Vegetable Delight: Add your favorite vegetables like bell peppers, broccoli, or carrots for a colorful twist.
  • Shrimp Version: Swap out the chicken for shrimp for a seafood delight. Just adjust the cooking time accordingly.
  • Spicy Kick: Toss in some red chili flakes or sriracha for a spicy version that packs a punch!
  • Peanut Sauce: For a nutty flavor, try using a peanut sauce instead of the soy sauce mixture.

Storing and Make-Ahead Instructions

This dish is perfect for meal prep and leftovers! Here’s how to store and reheat:

  • Storing: Keep leftovers in an airtight container in the fridge for up to 3 days.
  • Reheating: Gently reheat in a skillet over low heat, adding a splash of water or soy sauce to loosen the noodles.
  • Make-Ahead: You can prep the sauce and chop the chicken and vegetables a day in advance to save time.

FAQs About Sticky Garlic Chicken Noodles

Here are some frequently asked questions about this delightful dish:

  • Can I use frozen chicken? Yes, just ensure it’s fully thawed before cooking for even results.
  • What noodles work best? Both rice noodles and egg noodles are excellent choices, depending on your preference.
  • Is this recipe gluten-free? Absolutely! Just use gluten-free soy sauce and noodles.
  • How spicy is it? The spice level can be adjusted by controlling the amount of chili flakes you add.
  • Can I add more vegetables? Definitely! Feel free to incorporate any veggies you love or have on hand.
  • How long does it take to make? This dish can be prepared in about 30 minutes, perfect for a busy weeknight!
  • Can I double the recipe? Yes! Just ensure your skillet is large enough to accommodate the extra ingredients.
  • What can I serve with it? Serve it with a side of steamed vegetables or a fresh salad for a complete meal.

Nutritional Tips and Dietary Adaptations

Keeping health in mind? Here are some nutritional tips:

  • Protein Boost: Add edamame or chickpeas to increase the protein content of the dish.
  • Low-Carb Option: Substitute noodles with zucchini noodles or spaghetti squash for a low-carb version.
  • Reduce Sugar: Cut down on honey and use a sugar substitute if you’re watching your sugar intake.

Equipment Recommendations

Here’s what you’ll need to whip up these delicious noodles:

  • Large Skillet or Wok: Essential for even cooking and tossing ingredients together.
  • Measuring Cups and Spoons: For accurate ingredient measurements.
  • Cutting Board and Knife: To slice and dice ingredients efficiently.
  • Pasta Strainer: For easily draining your noodles after cooking.

Serving Suggestions: Making it a Meal

Now that your sticky garlic chicken noodles are ready, here are some ideas to elevate your meal:

  • Pair with a Fresh Salad: A light cucumber salad complements the richness of the noodles.
  • Serve with Steamed Veggies: Broccoli or snap peas add a colorful and nutritious side.
  • Top with Extra Green Onions: A sprinkle of fresh green onions adds a burst of freshness.

So, there you have it! A recipe that’s not just a meal, but a delightful experience that brings joy to every bite. I hope you find your kitchen filled with the comforting aroma of these Sticky Garlic Chicken Noodles. Happy cooking, my friend!

Sticky Garlic Chicken Noodles

Prep Time 10 minutes
Cook Time 15 minutes
Total Time 25 minutes
Servings 4 servings
Calories 550
A quick and flavorful Asian-inspired dish featuring tender chicken, garlic, and noodles coated in a savory, sticky sauce.

Ingredients

Protein

  • 400 g chicken breast, sliced

Carbohydrates

  • 200 g noodles (rice or egg noodles)

Flavorings & Oils

  • 4 cloves garlic, minced
  • 3 tablespoons soy sauce
  • 2 tablespoons honey
  • 1 tablespoon sesame oil
  • 1 tablespoon vegetable oil
  • 1 teaspoon ginger, grated
  • 2 green onions chopped green onions
  • to taste salt and pepper
  • for garnish sesame seeds

Instructions 

  • Cook noodles as per package, drain and set aside.
  • Mix soy sauce, honey, sesame oil, garlic, and ginger to make the sauce.
  • Cook chicken in oil until browned, then add sauce and cook until sticky.
  • Add noodles, toss to coat, then stir in green onions and serve garnished with sesame seeds.

Notes

Adjust seasoning to taste and serve immediately for best flavor.
Calories: 550kcal
Cost: $15
Course: Main Course
Cuisine: Asian
Keyword: Chicken, garlic, Noodles

Loved this recipe? Save it to your favorite Pinterest board so you can easily find it later! It’s the perfect way to keep all your sweet ideas in one place. ✨

An eye-level view of sticky garlic chicken noodles arranged beautifully with a soft, blurred background.

A Wholesome Dinner Journey Awaits

Welcome to my cozy kitchen, where I invite you to join me on a culinary adventure that’s all about comfort and flavor. Today, we’re making Creamy Herb Chicken served alongside buttery mashed potatoes and sweet glazed carrots. It’s the kind of meal that feels like a warm hug on a plate, perfect for any occasion—whether you’re feeding your family or impressing friends. This dish is not just about nourishment; it’s about creating memories around the dinner table, where laughter and stories are shared over every delightful bite.

Why You’ll Love This Recipe

This creamy herb chicken dish brings together flavors and textures that will make your taste buds dance. Here’s why it deserves a spot in your dinner rotation:

  • Comforting flavors: The rich, creamy herb sauce envelops the chicken, making every bite a delightful experience.
  • Family-friendly: Even picky eaters will gobble this up! The sweet glazed carrots and buttery mashed potatoes are crowd-pleasers.
  • Quick preparation: This meal can be on your table in under an hour, making it perfect for busy weeknights.
  • Flexible ingredients: You can easily swap ingredients based on what you have on hand or dietary preferences.
  • Impressive presentation: Serve it up beautifully, and it looks like you spent hours in the kitchen!

Ingredients You’ll Need

Appetizing plate featuring creamy herb chicken, smooth mashed potatoes, and vibrant glazed carrots, captured in natural light.

Let’s gather our ingredients for this delightful dinner. Here’s what you’ll need:

  • 4 boneless, skinless chicken breasts
  • 1 cup heavy cream (for a lighter option, use coconut cream)
  • 1 tablespoon olive oil
  • 2 cloves garlic, minced
  • 1 teaspoon dried thyme (or 1 tablespoon fresh thyme)
  • 1 teaspoon dried rosemary (or 1 tablespoon fresh rosemary)
  • Salt and pepper to taste
  • 2 pounds potatoes, peeled and quartered
  • 4 tablespoons butter
  • 1/2 cup milk (substitute with almond milk for a dairy-free version)
  • 1 pound carrots, peeled and sliced
  • 2 tablespoons brown sugar
  • 1 tablespoon butter (for glazing the carrots)

How to Make the Dish

Ready to get cooking? Here’s a step-by-step guide to make your creamy herb chicken with mashed potatoes and glazed carrots.

1. Start with the Mashed Potatoes

In a large pot, boil the quartered potatoes in salted water until tender, about 15-20 minutes. This is the base for your creamy mashed potatoes. Remember, the key to great mashed potatoes is to use hot milk and butter for that dreamy texture!

2. Make the Glazed Carrots

While the potatoes are cooking, melt 1 tablespoon of butter in a separate pan over medium heat. Add the sliced carrots, sprinkle with brown sugar, and stir to coat. Cook for about 5-7 minutes until the carrots are tender and beautifully glazed.

3. Cook the Chicken

In a large skillet, heat the olive oil over medium heat. Season your chicken breasts with salt and pepper, then add them to the skillet. Cook for 6-7 minutes on each side until golden brown and cooked through. Remove from the skillet and set aside.

4. Make the Creamy Herb Sauce

In the same skillet, add minced garlic and cook for 1 minute until fragrant. Stir in the heavy cream, dried thyme, and dried rosemary. Bring to a gentle simmer and return the chicken to the skillet. Let it simmer for about 5 minutes to thicken the sauce.

5. Mash the Potatoes

Drain the potatoes and return them to the pot. Add butter and milk, then mash until smooth. Season with salt to taste, and feel free to add a splash more milk if you like them creamier!

Plating Your Dinner

Now it’s time to plate this beautiful dish. Start with a generous scoop of mashed potatoes, add the chicken on top, and drizzle the creamy herb sauce over everything. Don’t forget to arrange the sweet glazed carrots on the side. A sprinkle of fresh herbs can add a lovely touch!

Pro Tips for Success

Here are some expert insights to ensure your dish turns out perfectly:

  • Use fresh herbs: Fresh herbs elevate the flavor profile and provide a vibrant touch to your dish.
  • Don’t overcook the chicken: Keep an eye on the chicken to avoid dryness; it should be juicy and tender.
  • Adjust the thickness: If the sauce is too thick, add a splash of chicken broth or water to reach your desired consistency.
  • Mashed potato secrets: For extra flavor, add roasted garlic to your potatoes.
  • Glazed carrots: Add a splash of orange juice for a citrusy twist!
  • Leftover magic: Transform any leftovers into a delicious casserole by layering them and baking with cheese.
  • Keep it warm: If you’re serving a crowd, keep the chicken in the oven at a low temperature until ready to serve.
  • Make it ahead: You can prepare the chicken and sauce a day in advance and just reheat before serving.

Variations to Try

Feel like experimenting? Here are some fun variations to make this dish your own:

  • Spicy Kick: Add a pinch of red pepper flakes to the sauce for some heat.
  • Herbaceous Delight: Swap out thyme and rosemary for fresh basil and parsley for a different flavor profile.
  • Cheesy Mashed Potatoes: Stir in shredded cheese for creamy, cheesy mashed potatoes.
  • Vegetarian Option: Replace the chicken with grilled portobello mushrooms for a hearty, meatless meal.

Storage and Make-Ahead Instructions

If you have leftovers (which is rare, but it happens!), here’s how to store them:

  • Refrigerate: Store in an airtight container for up to 3-4 days.
  • Freeze: The chicken and sauce can be frozen for up to 3 months. Just reheat gently on the stove or in the microwave.

Frequently Asked Questions

Here are some common questions to help you along your cooking journey:

  • Can I use frozen chicken? Yes, but make sure to thaw it completely before cooking.
  • What can I substitute for heavy cream? You can use half-and-half or coconut cream for a dairy-free option.
  • Can I make this dish gluten-free? Absolutely! Just ensure your broth and any added ingredients are gluten-free.
  • How do I know when the chicken is done? It should reach an internal temperature of 165°F (75°C).
  • Can I add other vegetables? Yes, feel free to add peas or green beans for extra color and nutrition!
  • What’s the best way to reheat leftovers? Reheat gently in a skillet over low heat to maintain tenderness.
  • Can I make this dish dairy-free? Yes, use coconut cream and dairy-free milk for the mashed potatoes.
  • How do I prevent the mashed potatoes from being lumpy? Ensure your potatoes are fully cooked and mash them while they’re hot.

Nutrition Tips and Dietary Adaptations

This dish can easily be adapted for different dietary needs:

  • Low-carb version: Substitute potatoes with cauliflower for a lighter option.
  • Low-calorie adaptation: Use skinless chicken thighs and reduce the amount of cream and butter in the recipe.
  • Vegetarian option: Use plant-based chicken substitutes and keep the creamy herb sauce as is.

Equipment Recommendations

For this recipe, having the right tools can make your cooking journey smoother:

  • Large pot: For boiling potatoes evenly.
  • Skillet: A non-stick skillet is ideal for cooking the chicken and sauce.
  • Potato masher: For perfectly smooth mashed potatoes.

Serving Suggestions

Want to elevate your meal even further? Here are some ideas:

  • Pair with a fresh salad: A crisp green salad balances the richness of the chicken.
  • Serve with crusty bread: Perfect for mopping up that creamy sauce!
  • Wine pairing: A nice Chardonnay complements the flavors beautifully.

Conclusion

And there you have it! A delicious journey into the world of creamy herb chicken with mashed potatoes and glazed carrots. I hope you feel inspired to create this dish in your own kitchen and share it with those you love. Remember, it’s all about the joy of cooking and the memories we create around the table. So pull up a chair, grab a spatula, and let’s make something unforgettable together!

Creamy Herb Chicken with Mashed Potatoes & Glazed Carrots: A Complete Comfort Food Dinner

Prep Time 20 minutes
Cook Time 30 minutes
Total Time 50 minutes
Servings 4 servings
Calories 650
A hearty and comforting dinner featuring tender herb-seasoned chicken, creamy mashed potatoes, and sweet glazed carrots.

Ingredients

Protein

  • 4 pieces boneless, skinless chicken breasts
  • 1 cup heavy cream
  • 1 tablespoon olive oil
  • 2 cloves garlic, minced
  • 1 teaspoon dried thyme
  • 1 teaspoon dried rosemary
  • to taste salt and pepper salt and pepper

Vegetables

  • 2 pounds potatoes, peeled and quartered
  • 4 tablespoons butter
  • 1/2 cup milk
  • 1 pound carrots, peeled and sliced
  • 2 tablespoons brown sugar
  • 1 tablespoon butter

Instructions 

  • Boil potatoes in salted water until tender, about 15-20 minutes.
  • Cook seasoned chicken breasts in olive oil for 6-7 minutes per side until golden and cooked through. Remove and set aside.
  • In the same skillet, cook garlic for 1 minute, then add heavy cream, thyme, and rosemary. Simmer and return chicken to thicken sauce for 5 minutes.
  • Drain potatoes, add butter and milk, then mash until smooth. Season with salt.
  • In a pan, melt butter, add carrots and brown sugar, cook until tender and glazed, about 5-7 minutes.
  • Serve chicken with mashed potatoes and glazed carrots.

Notes

For extra flavor, add fresh herbs or a squeeze of lemon before serving.
Calories: 650kcal
Cost: $15
Course: Main Course
Cuisine: American
Keyword: Chicken, comfort food, glazed carrots, mashed potatoes

Loved this recipe? Save it to your favorite Pinterest board so you can easily find it later! It’s the perfect way to keep all your sweet ideas in one place. ✨

Close-up of a comforting dinner plate with moist creamy herb chicken, buttery mashed potatoes, and sweet glazed carrots.

Welcome to Your New Favorite Comfort Dish!

Hey there, kitchen adventurer! Today, I’m thrilled to share with you a recipe that’s not just about getting dinner on the table—it’s about creating a moment of joy and warmth in your home. Picture this: a plate of Easy Healthy Broccoli Pasta, where tender broccoli florets meet perfectly cooked whole wheat pasta, all brought together with the rich, comforting embrace of olive oil and garlic. This dish is like a big hug on a plate, ready to make any weeknight feel special.

As someone who believes that cooking is a way to connect, both with ourselves and others, I can assure you that this recipe will not only satisfy your taste buds but will also become a staple in your kitchen. Let’s dive into the delightful world of broccoli pasta!

Why You’ll Love This Recipe

  • Quick and Easy: This dish comes together in about 30 minutes, making it perfect for busy weeknights when you need something delicious but don’t want to spend hours in the kitchen.
  • Nutritious and Filling: Packed with fiber and vitamins from the broccoli and whole wheat pasta, this meal is both satisfying and healthy.
  • Budget-Friendly: With simple ingredients that you probably already have in your pantry, this recipe won’t break the bank.
  • Versatile: Feel free to customize the dish with your favorite proteins or other veggies you have on hand—there’s no wrong way to enjoy it!
  • Comforting and Delicious: The combination of garlic, olive oil, and a sprinkle of parmesan cheese creates a flavor explosion that’s sure to impress.

Ingredient Breakdown

A vibrant bowl of broccoli pasta adorned with parmesan cheese, captured in natural light.

Let’s take a closer look at what you’ll need to whip up this fantastic dish:

  • Whole Wheat Pasta (8 oz): A healthier alternative to regular pasta, adding fiber and nutrients.
  • Broccoli Florets (2 cups): Fresh or frozen, these vibrant green gems are packed with vitamins and add a lovely crunch.
  • Olive Oil (2 tablespoons): A heart-healthy fat that enhances flavor and helps sauté the garlic and broccoli.
  • Garlic (3 cloves, minced): Adds aromatic depth and a savory kick to the dish.
  • Red Pepper Flakes (1/4 teaspoon): A pinch adds just the right amount of heat; adjust to your taste.
  • Salt and Pepper: Essential for seasoning; don’t skip this step to enhance the flavors!
  • Parmesan Cheese (1/4 cup, optional): A delicious finishing touch if you’re not dairy-free. It adds creaminess and depth.
  • Lemon Juice (1 tablespoon): Brightens the dish and balances the flavors beautifully.

Pro Tips for Perfect Broccoli Pasta

  • Don’t Overcook the Broccoli: Blanch it just until bright green and tender to maintain that lovely crunch.
  • Reserve Pasta Water: Save a cup of pasta water before draining—it can help adjust the sauce’s consistency if needed.
  • Adjust Seasoning: Taste as you go! Adjust the salt, pepper, and lemon juice to your liking for the best flavor.
  • Experiment with Cheese: If you want a vegan version, skip the cheese or try nutritional yeast for a cheesy flavor without dairy.
  • Mix in Protein: Add grilled chicken, shrimp, or chickpeas for a heartier meal.
  • Go Seasonal: Swap broccoli for seasonal veggies like asparagus or spinach for a fresh twist!
  • Make it Creamy: For a creamy version, stir in a splash of heavy cream or a dollop of ricotta at the end.
  • Chill Leftovers: This dish can be enjoyed cold as a pasta salad the next day—just add a little extra lemon juice!

Common Mistakes and Troubleshooting

Even the best of us have mishaps in the kitchen! Here are a few common pitfalls and how to avoid them:

  • Overcooked Pasta: Keep an eye on the cooking time and taste test a minute or two before the package instructions say it’s done.
  • Overcooked Broccoli: Follow the blanching instructions closely to keep it vibrant and crunchy.
  • Too Oily or Dry: If your dish feels too oily, add a splash of reserved pasta water. If it’s too dry, drizzle a bit more olive oil or lemon juice.
  • Flavorless Dish: Adjust seasoning at the end; a pinch of salt or a squeeze of lemon can elevate the flavor significantly.

Delicious Variations to Try

This recipe is a canvas, ready for your creativity! Here are some variations to inspire you:

  • Broccoli and Chicken: Add some grilled chicken or rotisserie chicken for a protein-packed meal.
  • Vegan Delight: Omit the cheese and add nutritional yeast for a cheesy flavor without dairy.
  • Spicy Shrimp: Toss in some shrimp sautéed in garlic and chili flakes for a seafood twist.
  • Lemon Garlic Spinach: Swap broccoli for spinach and add a splash of lemon for a refreshing change.

Storage and Make-Ahead Instructions

This dish is perfect for meal prep! Here’s how to store and reheat:

  • Storage: Keep leftovers in an airtight container in the fridge for up to 3 days.
  • Reheating: Gently reheat in a skillet over medium heat, adding a splash of water or olive oil to keep it moist.
  • Make-Ahead: You can cook the pasta and broccoli ahead of time; combine with the other ingredients when you’re ready to serve.

Frequently Asked Questions

Got questions? I’ve got answers! Here are some common queries about this recipe:

  • Can I use frozen broccoli? Absolutely! Just add it directly to the skillet, adjusting the cooking time slightly.
  • Is this dish gluten-free? Yes, you can swap whole wheat pasta with gluten-free pasta for a gluten-free version.
  • Can I add other vegetables? Yes! Feel free to mix in your favorites—zucchini, bell peppers, or even peas work well.
  • How can I make this dish spicy? Increase the amount of red pepper flakes or add fresh chopped chili for heat.
  • What should I serve with this dish? It pairs beautifully with a simple green salad or garlic bread.
  • Can I make this vegan? Yes! Omit the cheese and consider adding a plant-based protein for a satisfying meal.
  • How do I prevent the pasta from sticking? Make sure to stir the pasta during cooking and rinse with cold water after draining if not serving immediately.
  • Can I make this dish ahead of time? Yes! Prepare the pasta and broccoli in advance, then combine when ready to serve.

Nutrition Tips and Dietary Adaptations

This recipe is not only delicious but can also be adapted to meet various dietary needs:

  • Low-Carb Option: Substitute pasta with spiralized zucchini or cauliflower rice for a low-carb twist.
  • High-Protein: Add cooked lentils or chickpeas to boost the protein content.
  • Heart-Healthy: Use whole grain pasta and olive oil to promote heart health while keeping it delicious!

Recommended Equipment

Here’s what you’ll need to make this recipe a breeze:

  • Large Pot: For boiling pasta.
  • Skillet: A large skillet works best for sautéing the garlic and broccoli.
  • Colander: For draining the pasta.

Serving Suggestions

Serve this delightful broccoli pasta warm, topped with freshly grated parmesan cheese and a squeeze of lemon juice for extra zing. It makes a perfect main dish or a fantastic side to grilled meats or hearty salads. Enjoy with a glass of your favorite white wine or a refreshing sparkling water for a complete meal experience!

So there you have it—your ticket to a comforting, wholesome dinner that’s sure to become a staple in your home. Happy cooking, my friend! May your kitchen be filled with laughter, love, and delicious aromas!

Easy Healthy Broccoli Pasta

Prep Time 10 minutes
Cook Time 15 minutes
Total Time 25 minutes
Servings 4 servings
Calories 400
A quick and nutritious pasta dish featuring fresh broccoli and whole wheat pasta, perfect for a healthy meal.

Ingredients

Pasta

  • 8 oz whole wheat pasta
  • 2 cups broccoli florets
  • 2 tablespoons olive oil
  • 3 cloves garlic, minced
  • 1/4 teaspoon red pepper flakes
  • to taste salt and pepper
  • 1/4 cup grated parmesan cheese (optional)
  • 1 tablespoon lemon juice

Instructions 

  • Cook pasta until al dente, then drain.
  • Heat olive oil in a skillet and sauté garlic and red pepper flakes.
  • Add broccoli and cook until tender, about 5 minutes.
  • Combine pasta with broccoli, season with salt, pepper, and lemon juice.
  • Serve warm, topped with Parmesan if desired.

Notes

You can add more vegetables or protein for extra nutrition.
Calories: 400kcal
Cost: $12
Course: Main Course
Cuisine: Healthy
Keyword: Broccoli

Loved this recipe? Save it to your favorite Pinterest board so you can easily find it later! It’s the perfect way to keep all your sweet ideas in one place. ✨

Eye-level shot of healthy broccoli pasta, showcasing its texture and fresh ingredients.

A Flavorful Journey into the Heart of Easy Ground Beef Bulgogi

Welcome to my kitchen! Today, we’re diving into the world of Easy Ground Beef Bulgogi, a dish that wraps you in a cozy embrace of sweet and savory flavors, making every bite feel like home. This quick and delicious recipe is perfect for any night when you want to whip up something magical without spending hours in the kitchen. Let’s embark on this culinary adventure together!

Why You’ll Love This Recipe

This Easy Ground Beef Bulgogi isn’t just another recipe; it’s a celebration of flavor and convenience! Here are five reasons why this dish will quickly become a favorite in your household:

  • Quick Cooking Time: In just 20 minutes, you can have a delicious meal on the table, making it perfect for busy weeknights.
  • Versatile Serving Options: Serve it over rice, wrap it in lettuce leaves, or create a vibrant bowl with fresh veggies—there’s no wrong way to enjoy it!
  • Family-Friendly: The sweet and savory flavors appeal to both kids and adults, making it a hit at the dinner table.
  • Budget-Friendly: Made with ground beef, this recipe is a cost-effective way to enjoy a taste of Korean cuisine without breaking the bank.
  • Meal Prep Friendly: This dish stores well, making it a great candidate for meal prepping or freezing for later.

Ingredient Breakdown

Overhead view of a bowl of Easy Ground Beef Bulgogi served with cooked rice and lettuce leaves, showcasing vibrant colors and textures.

Let’s take a closer look at what goes into this delightful dish. Here’s what you’ll need to create the perfect Easy Ground Beef Bulgogi:

  • 1 pound ground beef: Choose a lean variety for the best flavor and texture.
  • 3 tablespoons soy sauce: This is the base of our bulgogi sauce, providing that essential umami flavor.
  • 2 tablespoons brown sugar: Adds a touch of sweetness to balance the savory notes.
  • 1 tablespoon sesame oil: Imparts a rich, nutty flavor that enhances the dish.
  • 2 cloves garlic, minced: For aromatic depth.
  • 1 teaspoon ginger, minced: Adds brightness and warmth to the sauce.
  • 1 tablespoon gochujang: This Korean red pepper paste introduces a subtle heat and rich flavor.
  • 1 green onion, chopped: For garnish and a fresh crunch.
  • 1 tablespoon sesame seeds: Adds a delightful crunch when sprinkled on top.
  • Cooked rice: The perfect base for your bulgogi.
  • Lettuce leaves (optional): Great for wrapping and adds a refreshing crunch.

Pro Tips for the Best Ground Beef Bulgogi

Ready to elevate your bulgogi game? Here are my top tips for making this dish a resounding success:

  • Use Fresh Ingredients: Fresh garlic and ginger make a world of difference in flavor.
  • Don’t Overcook the Beef: Aim for just browned to keep the meat tender and juicy.
  • Adjust the Spice Level: If you love heat, add more gochujang or a sprinkle of red pepper flakes.
  • Let it Marinate: For deeper flavor, let the beef marinate in the sauce for 30 minutes before cooking.
  • Experiment with Proteins: This recipe is versatile; try it with ground turkey or chicken for a lighter option.
  • Serve with Pickled Vegetables: They add a tangy contrast to the rich flavors of the bulgogi.
  • Make it a Meal: Add sautéed vegetables like bell peppers and carrots for a complete dish.

Common Mistakes & Troubleshooting

Even the best chefs have their off days! Here are some common pitfalls to avoid when making ground beef bulgogi:

  • Too Much Fat: If your ground beef is fatty, drain excess grease after browning to prevent a greasy dish.
  • Overseasoning: Taste the sauce before adding more soy sauce or salt; you can always adjust later!
  • Not Letting the Flavors Meld: Allow the dish to simmer for a few minutes after adding the sauce to enhance the overall flavor.
  • Skipping the Garnish: Don’t skip the green onions and sesame seeds—they add a necessary pop of freshness!

Variations to Try

Feeling adventurous? Here are some fun variations to try with your bulgogi:

  • Spicy Bulgogi: Add more gochujang or diced fresh chilies to kick up the heat.
  • Vegetarian Bulgogi: Substitute ground beef with mushrooms or lentils for a meatless option.
  • Bulgogi Tacos: Use taco shells instead of rice or lettuce wraps for a fun twist.
  • Stuffed Peppers: Use the bulgogi mix to stuff bell peppers and bake until tender.

Storage and Make-Ahead Instructions

Planning ahead? Here’s how to store and prep your bulgogi:

  • Refrigerator: Store leftovers in an airtight container for up to 3 days.
  • Freezer: Freeze bulgogi in a freezer-safe container for up to 3 months. Thaw in the refrigerator before reheating.
  • Meal Prep: Cook a double batch and portion it into containers for easy meals throughout the week.

Frequently Asked Questions

Got questions? I’ve got answers! Here are some common queries about Easy Ground Beef Bulgogi:

  • Can I use a different type of meat? Yes! Ground turkey, chicken, or even tofu work well.
  • What should I serve with bulgogi? Serve over rice, or with lettuce leaves, pickled veggies, and kimchi for a traditional touch.
  • Can I make this dish spicy? Absolutely! Adjust the amount of gochujang or add fresh chilies to your taste.
  • How long does the bulgogi sauce last? The sauce can be stored in the fridge for up to a week.
  • Is this recipe kid-friendly? Yes! The sweet flavors appeal to children, and you can adjust the spice level.
  • Can I marinate the beef overnight? Yes! Marinating overnight will deepen the flavors significantly.
  • What’s the best way to heat leftovers? Reheat in a skillet over medium heat, adding a splash of water to keep it moist.
  • Can I add vegetables to the bulgogi? Definitely! Add bell peppers, carrots, or broccoli to the mix while cooking.

Nutrition Tips and Dietary Adaptations

Looking for ways to make this recipe fit your dietary needs? Here are some ideas:

  • Low-Carb Option: Serve with cauliflower rice instead of regular rice for a lower-carb meal.
  • Gluten-Free: Use tamari instead of soy sauce for a gluten-free version.
  • High-Protein: Pair with additional protein-rich sides like edamame or a boiled egg.

Essential Equipment

To make this Easy Ground Beef Bulgogi, you don’t need fancy gadgets. Here’s a quick list of what you’ll need:

  • Large Skillet: For browning the ground beef and mixing in the sauce.
  • Mixing Bowl: To combine the bulgogi sauce ingredients.
  • Spatula: For breaking apart the beef as it cooks.
  • Measuring Spoons: To accurately measure your sauce ingredients.

Serving Suggestions

This Easy Ground Beef Bulgogi is incredibly versatile. Here are some serving ideas to make your meal even more special:

  • Rice Bowl: Serve over fluffy jasmine or brown rice, topped with fresh veggies.
  • Lettuce Wraps: Create a fun, interactive meal by wrapping bulgogi in lettuce leaves with toppings like cucumber and carrots.
  • Bulgogi Sliders: Serve on slider buns with a dollop of creamy coleslaw for a unique twist.
  • With Noodles: Toss the bulgogi with cooked noodles for a fusion-style dish.

As we wrap up this culinary journey, I hope you feel inspired to bring the warmth and comfort of Easy Ground Beef Bulgogi into your kitchen. Remember, cooking is all about experimenting and making it your own. So, grab your apron, gather your ingredients, and let’s make something unforgettable together!

EASY GROUND BEEF BULGOGI

Prep Time 10 minutes
Cook Time 10 minutes
Total Time 20 minutes
Servings 4 servings
Calories 350
A quick and flavorful Korean-inspired dish featuring seasoned ground beef served over rice and wrapped in lettuce leaves.

Ingredients

Main

  • 1 pound ground beef
  • 3 tablespoons soy sauce
  • 2 tablespoons brown sugar
  • 1 tablespoon sesame oil
  • 2 cloves garlic, minced
  • 1 teaspoon ginger, minced
  • 1 tablespoon gochujang (korean red pepper paste)
  • 1 green onion chopped
  • 1 tablespoon sesame seeds
  • cooked rice for serving
  • lettuce leaves for serving (optional)

Instructions 

  • Cook ground beef in a skillet until browned, then drain excess fat.
  • Mix soy sauce, brown sugar, sesame oil, garlic, ginger, and gochujang in a bowl.
  • Pour sauce over beef and cook for 3-5 minutes.
  • Stir in chopped green onions and sesame seeds, then serve over rice and lettuce if desired.

Notes

Use fresh ingredients for best flavor and adjust spice level with gochujang.
Calories: 350kcal
Cost: $10
Course: Main Course
Cuisine: Korean
Keyword: Beef

Loved this recipe? Save it to your favorite Pinterest board so you can easily find it later! It’s the perfect way to keep all your sweet ideas in one place. ✨

A plate of Easy Ground Beef Bulgogi with a savory glaze, fresh green onions, and sesame seeds, set against a cozy, blurred background.

Discover the Magic of Creamy Smoked Sausage Pasta

Welcome to a world where comfort food meets culinary delight! If you’re on a quest for a smoked sausage dish that feels like a warm hug on a plate, you’ve come to the right place. This creamy smoked sausage pasta recipe is a weeknight wonder that’s quick, easy, and packed with flavor. Picture this: tender pasta enveloped in a rich, creamy sauce, mingling with smoky sausage and vibrant spinach. It’s the kind of meal that makes you pause, savor, and maybe even go back for seconds. Let’s dive into the details of this recipe that is sure to become your new favorite!

Why You’ll Love This Recipe

  • Quick and Easy: This dish can be whipped up in under 30 minutes, making it perfect for those busy weeknights when you need something delicious in a flash.
  • Family-Friendly: With its creamy sauce and tender pasta, this recipe is a hit with both kids and adults alike—expect requests for seconds!
  • Versatile Ingredients: You can easily customize the recipe by swapping ingredients based on what you have on hand, making it a flexible addition to your meal rotation.
  • One-Pan Wonder: Less cleanup is always a win! Everything cooks in one skillet, so you can spend more time enjoying your meal and less time washing dishes.
  • Creamy and Flavorful: The combination of smoked sausage, cream, and seasonings creates a rich flavor profile that’s simply irresistible.

Ingredients Breakdown

Delicious bowl of creamy smoked sausage pasta garnished with parsley, showcasing the dish's rich texture.

Here’s what you’ll need to make this creamy smoked sausage pasta, along with some tasty substitutions:

  • 8 oz pasta: Use penne or rotini for the best texture. Gluten-free pasta works just as well!
  • 1 tablespoon olive oil: A touch of butter can enhance the flavor if you prefer.
  • 12 oz smoked sausage: Choose your favorite brand; feel free to swap in turkey sausage for a lighter option.
  • 1 small onion: Diced. Shallots are a lovely alternative for a sweeter taste.
  • 2 cloves garlic: Minced. Garlic powder can be used in a pinch, but fresh is best!
  • 1 cup heavy cream: Substitute with half-and-half for a lighter sauce or coconut cream for a dairy-free option.
  • 1 cup chicken broth: Vegetable broth is a great alternative for a vegetarian version.
  • 1 cup spinach: Fresh or frozen. Kale can be a hearty substitute.
  • 1 teaspoon Italian seasoning: A blend of dried herbs that adds depth; you can create your own with basil, oregano, and thyme.
  • Salt and pepper to taste: Essential for balancing flavors.
  • 1/2 cup grated parmesan cheese: Freshly grated cheese is recommended for the best flavor.
  • Fresh parsley: For garnish—totally optional but adds a lovely touch!

How to Make Creamy Smoked Sausage Pasta

Now let’s get cooking! Follow these simple steps to create your creamy masterpiece:

  1. Cook the pasta according to package instructions. Drain and set aside.
  2. In a large skillet, heat the olive oil over medium heat. Add the sliced smoked sausage and cook until browned, about 5-7 minutes.
  3. Add the diced onion and minced garlic to the skillet, cooking until the onion is translucent, about 3-4 minutes.
  4. Pour in the heavy cream and chicken broth, stirring to combine. Bring to a gentle simmer.
  5. Add the spinach and Italian seasoning, cooking until the spinach wilts (if using fresh) or is heated through (if using frozen).
  6. Season with salt and pepper to taste.
  7. Stir in the cooked pasta and grated Parmesan cheese until everything is well combined and creamy.
  8. Serve hot, garnished with fresh parsley if desired.

Pro Tips for Perfecting Your Pasta

  • Don’t Overcook the Pasta: Aim for al dente! It’ll continue to cook when mixed with the sauce.
  • Choose Quality Sausage: The better the sausage, the better the flavor. Look for high-quality smoked sausage for the best results.
  • Balance the Cream: If the sauce is too thick, add a splash more chicken broth to reach your desired consistency.
  • Experiment with Cheese: Try adding a blend of cheeses—mozzarella, cheddar, or even cream cheese for a richer sauce!
  • Season Gradually: Taste as you go! Adjust the salt and pepper according to your preference.
  • Garnish Wisely: A sprinkle of red pepper flakes can add a delightful kick if you’re feeling adventurous.
  • Stir Frequently: Stir the pasta while it cooks to prevent sticking and ensure even cooking.
  • Save Some Pasta Water: Reserve a cup of pasta cooking water before draining; you can add it to the sauce for extra creaminess.

Common Mistakes and Troubleshooting

Even the best cooks can run into a few hiccups in the kitchen! Here are some common mistakes and how to avoid them:

  • Overcooked Pasta: Keep an eye on the cooking time and taste a piece before draining.
  • Too Thick Sauce: If the sauce is too thick, add a splash of chicken broth or reserved pasta water to loosen it up.
  • Sauce Separation: Make sure to stir continuously and avoid cooking on too high heat to prevent the sauce from separating.
  • Lack of Flavor: Don’t skimp on seasoning! Taste and adjust as needed.

Creative Variations

Once you’ve mastered the classic recipe, why not mix it up? Here are some fun variations to try:

  • Add Veggies: Toss in bell peppers, mushrooms, or zucchini for extra nutrients and flavor.
  • Spicy Kick: Use spicy smoked sausage or add crushed red pepper flakes for a heat boost.
  • Herbaceous Flavor: Experiment with fresh herbs like basil or thyme for a fragrant twist.
  • Cheesy Delight: Swap out the Parmesan for a different cheese, like feta or goat cheese, for a unique taste.

Storage and Make-Ahead Instructions

This creamy smoked sausage pasta is perfect for meal prep! Here’s how to store it:

  • Refrigerator: Store in an airtight container for up to 3 days. Reheat gently on the stove or in the microwave.
  • Freezer: While pasta can be frozen, the texture may change. If freezing, consider storing the sauce separately and combining when ready to eat.
  • Make-Ahead: Prepare the sauce in advance and store it in the fridge for up to 2 days. Cook the pasta fresh when ready to serve.

FAQ: Your Burning Questions Answered

  • Can I use a different type of sausage? Absolutely! Turkey or chicken sausage works well for a lighter option.
  • Is this dish gluten-free? You can make it gluten-free by using gluten-free pasta and ensuring your sausage and broth are certified gluten-free.
  • What can I substitute for heavy cream? Half-and-half or coconut milk are great alternatives for a lighter or dairy-free option.
  • How can I make this dish vegetarian? Replace the sausage with roasted vegetables or a meat substitute and use vegetable broth.
  • Can I add seafood to this recipe? Yes! Shrimp or scallops would be delicious additions; just cook them separately and add them in at the end.
  • Can I prepare this dish in advance? Yes! Prepare the sauce ahead of time and store it in the fridge; cook the pasta fresh when ready to serve.
  • How do I store leftovers? Store in an airtight container in the fridge for up to 3 days.
  • Can I freeze this dish? It’s best to freeze the sauce separately from the pasta to maintain texture.

Nutritional Tips and Dietary Adaptations

This dish can be adjusted to fit various dietary needs:

  • Low-Calorie: Use whole grain or vegetable pasta and reduce the amount of cream.
  • High-Protein: Add beans or lentils for extra protein, or serve with a side of grilled chicken.
  • Dairy-Free: Substitute heavy cream with coconut cream and use dairy-free cheese options.

Essential Equipment

To make this creamy smoked sausage pasta, you’ll need:

  • Large Skillet: A good-quality non-stick skillet is ideal for cooking the sausage and making the sauce.
  • Pot for Pasta: A large pot for boiling the pasta.
  • Wooden Spoon: Perfect for stirring and mixing ingredients.
  • Measuring Cups and Spoons: For precise measurements, especially when it comes to seasonings.

Serving Suggestions

To elevate your meal, consider pairing this dish with:

  • Crusty Bread: A side of warm, crusty bread is perfect for soaking up the creamy sauce.
  • Side Salad: A fresh garden salad with a light vinaigrette balances the richness of the dish.
  • Wine Pairing: A glass of white wine, like Chardonnay, complements the creamy flavors beautifully.

Conclusion

And there you have it! A creamy smoked sausage pasta recipe that not only satisfies your cravings but also brings a little magic into your weeknight dinners. Whether you’re cooking for family or just treating yourself, this dish is sure to impress. So grab your ingredients, gather around the table, and enjoy the comforting flavors that this recipe has to offer. Happy cooking, my friends!

Creamy Smoked Sausage Pasta Recipe – Easy & Delicious Weeknight Dinner

Prep Time 10 minutes
Cook Time 15 minutes
Total Time 25 minutes
Servings 4 servings
Calories 650
This creamy smoked sausage pasta is a quick and flavorful weeknight dinner, combining savory sausage with a rich, cheesy sauce.

Ingredients

Pasta

  • 8 oz pasta (penne or rotini)

Olive Oil

  • 1 tablespoon olive oil

Smoked Sausage

  • 12 oz smoked sausage, sliced

Onion

  • 1 small small onion, diced

Garlic

  • 2 cloves garlic, minced

Heavy Cream

  • 1 cup heavy cream

Chicken Broth

  • 1 cup chicken broth

Spinach

  • 1 cup spinach (fresh or frozen)

Italian Seasoning

  • 1 teaspoon italian seasoning

Salt and Pepper

  • to taste salt and pepper

Parmesan Cheese

  • 1/2 cup grated parmesan cheese

Fresh Parsley

  • for garnish fresh parsley (optional)

Instructions 

  • Cook pasta according to package instructions. Drain and set aside.
  • Heat olive oil in a skillet. Cook sausage until browned, then add onion and garlic; cook until translucent.
  • Pour in heavy cream and chicken broth; simmer. Add spinach and Italian seasoning; cook until spinach wilts.
  • Season with salt and pepper. Stir in cooked pasta and Parmesan cheese until creamy. Garnish with parsley if desired.

Notes

Use fresh parsley for best flavor, and adjust seasoning to taste.
Calories: 650kcal
Cost: $15
Course: Main Course
Cuisine: American
Keyword: creamy, pasta, sausage

Loved this recipe? Save it to your favorite Pinterest board so you can easily find it later! It’s the perfect way to keep all your sweet ideas in one place. ✨

Close-up of pasta with sliced smoked sausage, creamy sauce, and fresh spinach, highlighted by soft shadows.

Delight in Every Bite: The Magic of Garlic Parmesan Cheeseburger Bombs

Welcome to the world of Garlic Parmesan Cheeseburger Bombs—a recipe that’s not just a meal but an experience! If you’re looking for a way to impress friends or simply want a cozy night in with a delightful snack, these bite-sized wonders will have everyone asking for seconds. The marriage of savory ground beef, gooey cheese, and garlic butter wrapped in flaky biscuit dough creates a flavor explosion that’s hard to resist. Let’s dive into this culinary adventure together, shall we?

Why You’ll Love This Recipe

Here are just a few reasons why this recipe deserves a spot in your kitchen:

  • Quick and Easy: Perfect for weeknight dinners or last-minute gatherings, these cheeseburger bombs come together in under 30 minutes.
  • Great for Sharing: Ideal for parties or game nights, they’re easy to grab and enjoy without any fuss.
  • Customizable: Feel free to swap in your favorite ingredients—add jalapeños for a kick or substitute turkey for a lighter version.
  • Mess-Free: Each bomb is neatly sealed, ensuring no mess on your hands or table—every bite is pure joy!
  • Kid-Approved: With flavors that appeal to kids and adults alike, these bombs are a surefire hit for the whole family.

Gather Your Ingredients

Deliciously baked Garlic Parmesan Cheeseburger Bombs, showcasing a crispy exterior and rich filling, set against a softly blurred background.

Let’s get our hands on the essentials for these delicious Garlic Parmesan Cheeseburger Bombs:

  • 1 lb ground beef: Choose a blend with some fat for juiciness—80/20 is a great option.
  • 1 cup shredded cheddar cheese: Sharp cheddar adds a delightful tang; feel free to mix in other cheeses like Monterey Jack.
  • 1/2 cup grated parmesan cheese: The real star for that umami richness.
  • 1 clove garlic, minced: Fresh garlic enhances the flavor immensely.
  • 1 tsp onion powder: A great addition for depth and sweetness.
  • 1 tsp salt: Essential for seasoning.
  • 1/2 tsp black pepper: For a hint of spice.
  • 1 package refrigerated biscuit dough: This is what makes the magic happen—flaky and buttery!
  • 2 tbsp melted butter: Brushed on top for that golden finish.
  • 1 tbsp fresh parsley, chopped: For a touch of freshness.
  • 1/4 tsp garlic powder: Enhances the garlicky goodness.

Let’s Make Some Magic!

Ready to get cooking? Follow these simple steps to create your very own cheeseburger bombs:

  1. Preheat your oven to 375°F (190°C).
  2. In a mixing bowl, combine the ground beef, cheddar cheese, parmesan cheese, minced garlic, onion powder, salt, and black pepper. Mix until well combined.
  3. Shape the mixture into small balls, about 1 inch in diameter. Think of them as little flavor bombs!
  4. Open the package of biscuit dough and separate it into individual biscuits. Flatten each biscuit with your hands or a rolling pin.
  5. Place a meatball in the center of each flattened biscuit, then wrap the dough around the meatball, pinching the edges to seal tightly.
  6. Position the stuffed biscuits on a baking sheet lined with parchment paper to prevent sticking.
  7. In a small bowl, mix melted butter, chopped parsley, and garlic powder. Brush this mixture over the tops of the biscuit bombs for a golden, flavorful crust.
  8. Bake in the preheated oven for 15-18 minutes or until they’re golden brown and irresistible.
  9. Let them cool for a few minutes before serving—trust me, you’ll want to avoid those lava-hot cheese burns!

Pro Tips for Perfection

Want to elevate your cooking game? Here are some expert insights:

  • Don’t Overmix: When combining your beef and spices, mix just until combined to keep the texture tender.
  • Seal Well: Make sure to pinch the biscuit edges tightly to prevent any leaks during baking.
  • Experiment with Fillings: Try adding sautéed mushrooms, bell peppers, or different cheeses for a personal twist.
  • Make Ahead: Assemble the bombs and refrigerate them up to a day in advance—just bake them fresh when your guests arrive!
  • Freezing Option: You can freeze uncooked bombs. Just pop them straight into the oven from frozen, adding a few extra minutes to the baking time.
  • Serving Style: Pair with a dipping sauce like ranch or a spicy ketchup for an extra flavor kick.
  • Herbs for Freshness: Don’t hesitate to toss in some fresh herbs like thyme or basil for added flavor.
  • Watch Them Bake: Keep an eye on them in the last few minutes to ensure they don’t over-brown!

Common Mistakes and Troubleshooting

Every kitchen adventure has its hiccups. Here’s how to avoid common pitfalls:

  • Leaking Filling: If you notice filling leaking out while baking, it may be due to insufficient sealing. Ensure edges are pinched well.
  • Dough Not Cooking Through: If the outside cooks too quickly, try lowering the oven temperature and baking for a longer time.
  • Overbaking: Keep an eye on the color; take them out as soon as they turn golden to avoid dryness.
  • Too Greasy: If the filling is too greasy, opt for leaner ground beef or drain excess fat after cooking.

Variations to Try

Feel free to get creative with these variations:

  • Spicy Jalapeño Cheeseburger Bombs: Add diced jalapeños to the beef mixture for a spicy kick.
  • BBQ Chicken Bombs: Swap ground beef for shredded BBQ chicken and use mozzarella cheese.
  • Mediterranean Twist: Mix in feta cheese, olives, and spinach for a Mediterranean flavor.
  • Veggie Bombs: Replace the beef with a mix of sautéed vegetables like mushrooms, zucchini, and bell peppers for a vegetarian-friendly option.

Storage and Make-Ahead Instructions

Want to save some for later? Here’s how:

  • Refrigeration: Store leftovers in an airtight container in the fridge for up to 3 days.
  • Freezing: Freeze unbaked bombs individually on a baking sheet, then transfer to a freezer bag. They can be frozen for up to 3 months.
  • Reheating: To reheat, pop them in the oven at 350°F (175°C) for 10-15 minutes, or until heated through.

Nutritional Insights and Dietary Adaptations

Let’s talk nutrition! Here’s how you can adapt this recipe:

  • Low-Carb Option: Use cauliflower dough instead of biscuit dough for a low-carb alternative.
  • Dairy-Free: Substitute dairy cheeses with plant-based alternatives.
  • Gluten-Free: Opt for gluten-free biscuit dough or make your own from gluten-free flour.
  • Protein Boost: Add cooked quinoa or lentils to the beef mixture for extra protein and fiber.

Equipment Recommendations

To make your cooking experience smooth, here’s what you’ll need:

  • Baking Sheet: A sturdy baking sheet lined with parchment paper helps prevent sticking.
  • Mixing Bowls: Have a large bowl for mixing the beef and a small one for the garlic butter.
  • Measuring Cups and Spoons: Accurate measurements are key to success in cooking.
  • Rolling Pin: Useful for flattening the biscuit dough evenly.

Serving Suggestions

Want to elevate your serving game? Here are some ideas:

  • On a Platter: Arrange the bombs on a large platter with a variety of dipping sauces—think ranch, BBQ, or spicy mustard.
  • Garnish: Sprinkle fresh herbs like parsley or chives over the bombs for a pop of color.
  • Side Dishes: Pair with a crisp salad or some sweet potato fries to balance the meal.
  • Perfect for Game Day: Serve alongside nachos and wings for the ultimate game day spread!

Frequently Asked Questions

Got questions? I’ve got answers!

  • Can I use turkey instead of beef? Absolutely! Ground turkey works beautifully in this recipe.
  • How do I make these vegetarian? Substitute ground beef with a mix of your favorite vegetables or plant-based meat alternatives.
  • Can I prepare these in advance? Yes, you can assemble them ahead of time and bake them when ready to serve.
  • What’s the best way to reheat leftovers? Reheat in the oven to retain that crispy texture. Avoid microwaving if possible.
  • How long do they take to cook? Bake for 15-18 minutes until golden brown and cooked through.
  • What dipping sauces pair well? Ranch, honey mustard, and spicy ketchup are all wonderful options!
  • Can I freeze the cooked bombs? Yes! Freeze them after cooking, then reheat in the oven.
  • What’s the secret to a good seal? Pinch the edges tightly and ensure no filling is exposed for the best results.

And there you have it! A comprehensive guide to making the most delicious Garlic Parmesan Cheeseburger Bombs. With these tips, tricks, and variations, you’ll be the star of every gathering. So roll up your sleeves, gather your ingredients, and let the magic begin. Happy cooking, friend!

Garlic Parmesan Cheeseburger Bombs

Prep Time 15 minutes
Cook Time 18 minutes
Total Time 33 minutes
Servings 8 pieces
Calories 350
These savory cheeseburger bombs wrapped in biscuit dough are perfect for a quick, crowd-pleasing appetizer or main dish.

Ingredients

Meat and Cheese

  • 1 lb ground beef
  • 1 cup shredded cheddar cheese
  • 1/2 cup grated parmesan cheese
  • 1 clove garlic, minced
  • 1 tsp onion powder
  • 1 tsp salt
  • 1/2 tsp black pepper
  • 1 package refrigerated biscuit dough
  • 2 tbsp melted butter
  • 1 tbsp fresh parsley, chopped
  • 1/4 tsp garlic powder

Instructions 

  • Preheat oven to 375°F (190°C). Mix beef, cheeses, garlic, onion powder, salt, and pepper. Form into 1-inch balls.
  • Separate biscuit dough, flatten each, and place a meatball in the center. Wrap and seal.
  • Place stuffed biscuits on a parchment-lined baking sheet. Mix melted butter, parsley, and garlic powder; brush over tops.
  • Bake for 15-18 minutes until golden. Let cool slightly before serving.

Notes

For extra flavor, add a dash of hot sauce or serve with your favorite dipping sauce.
Calories: 350kcal
Cost: $15
Course: Appetizer
Cuisine: American
Keyword: Biscuit, Cheeseburger, Party Food

Loved this recipe? Save it to your favorite Pinterest board so you can easily find it later! It’s the perfect way to keep all your sweet ideas in one place. ✨

Mouthwatering Garlic Parmesan Cheeseburger Bombs displayed in an inviting manner, highlighting their cheesy interior and appetizing garnishes.

Unleash the Flavor: The Cheesy Garlic Chicken Wrap Journey

Welcome to my kitchen, where every recipe is a little adventure! Today, I’m thrilled to share with you my Cheesy Garlic Chicken Wraps—a dish that’s not just a meal but a warm embrace of flavor. These wraps are loaded with tender chicken, gooey cheese, and a delightful garlicky punch. Perfect for busy weeknights or a late-night snack, they’ll quickly become a family favorite. So grab your spatula and let’s dive into a culinary experience that’s both comforting and delicious!

Why You’ll Love This Recipe

Let’s face it, the kitchen can sometimes feel like a battleground, but this recipe is your secret weapon. Here’s why you’ll fall head over heels for these wraps:

  • Quick and Easy: Whip these up in under 30 minutes, making them perfect for those hectic nights when you just want to eat!
  • Customizable: Tailor these wraps to your liking—swap the chicken for turkey, add in your favorite veggies, or switch up the cheese blend!
  • Kid Approved: With their cheesy goodness and fun wrap format, even the pickiest eaters will be asking for seconds.
  • Meal Prep Friendly: Make a double batch and store leftovers for easy lunches throughout the week—just reheat and enjoy!
  • Perfect for Any Occasion: Whether it’s a cozy family dinner or a party with friends, these wraps are sure to impress!

Ingredient Breakdown: What You Need

Deliciously stuffed chicken wraps with melted cheese and garlic, beautifully presented in natural light.

Before we get cooking, let’s gather our ingredients. Here’s what you’ll need for these Cheesy Garlic Chicken Wraps:

  • 2 cups cooked chicken: Shredded or diced, you can use rotisserie chicken for a quick shortcut!
  • 1 cup shredded cheese: Cheddar, mozzarella, or a blend—whatever melts your heart!
  • 4 large flour tortillas: Soft and pliable, perfect for wrapping all that goodness inside.
  • 4 cloves garlic: Minced, because garlic makes everything better!
  • 1/4 cup cream cheese: For that creamy texture that binds everything together.
  • 1/4 cup sour cream: Adds a tangy richness to the filling.
  • 1 tablespoon olive oil: For sautéing; feel free to swap with butter for extra flavor.
  • 1 teaspoon paprika: A dash of smokiness to elevate the flavor profile.
  • Salt and pepper: To taste, always important!
  • Fresh parsley: Chopped, for a pop of color and freshness at the end.

Step-by-Step Instructions to Deliciousness

Now that we have our ingredients ready, let’s jump into the cooking process. Follow these simple steps to create your Cheesy Garlic Chicken Wraps:

  1. In a large bowl, combine the shredded chicken, minced garlic, cream cheese, sour cream, paprika, salt, and pepper. Mix well until everything is thoroughly combined.
  2. Heat the olive oil in a skillet over medium heat. Add the chicken mixture and cook it for about 5-7 minutes, or until heated through.
  3. Remove the skillet from the heat and stir in the shredded cheese until it melts and creates a gooey filling.
  4. Warm the flour tortillas in a separate skillet or microwave until they are soft and pliable.
  5. Spoon the cheesy garlic chicken mixture onto the center of each tortilla.
  6. Fold in the sides of the tortilla and roll it up tightly from the bottom to the top.
  7. Optional: Place the wraps seam-side down in the skillet for 2-3 minutes to crisp the outside.
  8. Slice in half, garnish with fresh parsley, and serve hot!

Pro Tips for Perfect Wraps

To elevate your wrap game, keep these expert tips in mind:

  • Don’t Overfill: Less is more! Overstuffing can lead to messy wraps. Aim for about 1/2 cup of filling per tortilla.
  • Add Veggies: Sneak in some sautéed bell peppers, spinach, or mushrooms for extra nutrition and flavor.
  • Grate Your Own Cheese: Pre-shredded cheese often has anti-caking agents that affect melting. Grate your own for that ooey-gooey texture!
  • Let It Rest: After cooking, let your wraps sit for a minute before slicing. This helps the filling set and reduces spillage.
  • Experiment with Flavors: Try adding hot sauce to the filling or mixing in some taco seasoning for a kick!
  • Storage Tips: Store leftovers in an airtight container in the fridge for up to 3 days. Reheat in the oven or skillet for best results.
  • Make Ahead: Prepare the filling a day in advance and assemble the wraps right before cooking.
  • Freezing: These wraps freeze beautifully! Wrap in foil and store in a freezer-safe bag for up to 3 months. Reheat directly from the freezer.

Common Mistakes and Troubleshooting

Even seasoned chefs can face hiccups in the kitchen. Here are some common mistakes to avoid:

  • Using Cold Ingredients: Ensure your cream cheese is softened to combine smoothly. Let it sit out for about 30 minutes before using.
  • Skipping the Seasoning: Don’t forget to season your filling. A little salt and pepper go a long way in enhancing the flavors.
  • Not Toasting the Tortillas: Warming the tortillas is crucial for flexibility. Cold tortillas can crack when you try to wrap them.
  • Overcooking the Chicken: If you’re using raw chicken, be sure not to overcook it to keep it moist and tender.

Creative Variations to Try

Feel like mixing things up? Here are some delicious variations you can try:

  • Buffalo Chicken Wraps: Add buffalo sauce for a spicy twist and top with blue cheese crumbles!
  • Veggie Lovers Wrap: Replace the chicken with roasted veggies like zucchini, bell peppers, and mushrooms.
  • BBQ Chicken Wraps: Mix in BBQ sauce and some diced red onion for a smoky flavor.
  • Breakfast Wrap: Use scrambled eggs, bacon, and cheddar cheese for a hearty breakfast option!

Storage and Make-Ahead Instructions

These wraps are not just delicious on the day they’re made; they also hold up beautifully for future meals. Here’s how to store and prepare them:

  • Refrigerate: Store any leftovers in an airtight container in the fridge for up to 3 days.
  • Freeze: Wrap each individual wrap in foil and then place them in a freezer-safe bag. They can be frozen for up to 3 months.
  • Make Ahead: Prepare the filling ahead of time and assemble the wraps just before cooking for a fresh taste.

Frequently Asked Questions

Got questions? I’ve got answers! Here are some FAQs about these Cheesy Garlic Chicken Wraps:

  • Can I use raw chicken? Yes! Just cook it thoroughly before mixing it with the other ingredients.
  • What if I don’t have cream cheese? You can substitute with Greek yogurt or ricotta cheese for a similar texture.
  • Can I make these wraps vegetarian? Absolutely! Replace chicken with beans or tofu and add your favorite veggies.
  • How do I reheat these wraps? Reheat in an oven at 350°F for about 10-15 minutes or in a skillet over medium heat until warmed through.
  • What kind of tortillas should I use? Flour tortillas work best, but you can also use whole wheat or corn tortillas if you prefer.
  • Can I add more garlic? If you’re a garlic lover, feel free to add an extra clove or two!
  • How do I make these gluten-free? Simply use gluten-free tortillas and ensure all other ingredients are gluten-free.
  • How long do leftovers last? Store in the fridge for up to 3 days, or freeze for up to 3 months.

Nutritional Information and Dietary Adaptations

These Cheesy Garlic Chicken Wraps can fit into various dietary needs. Here are some nutrition tips and adaptations:

  • Low-Carb: Use lettuce wraps instead of tortillas for a low-carb option.
  • Dairy-Free: Substitute cream cheese and sour cream with dairy-free alternatives.
  • High-Protein: Load up on chicken or add protein-rich beans to the filling.
  • Low-Calorie: Use less cheese, or opt for lower-fat cheese options to reduce calories.

Essential Equipment for Making Wraps

To ensure your cooking experience is smooth and enjoyable, consider having the following equipment on hand:

  • Large Mixing Bowl: For mixing the filling ingredients.
  • Skillet: A non-stick skillet is ideal for sautéing and warming tortillas.
  • Spatula: For stirring and flipping your wraps.
  • Knife and Cutting Board: For chopping ingredients and slicing your wraps.

Serving Suggestions to Wow Your Guests

Once you’ve crafted these delectable wraps, it’s time to serve them with style! Consider these serving suggestions:

  • Pair with Dips: Serve with ranch, guacamole, or salsa for extra flavor.
  • Add a Side Salad: A fresh garden salad complements the richness of the wraps beautifully.
  • Garnish: Sprinkle additional parsley or even some chili flakes on top for a pop of color and flavor.
  • Offer a Variety: Make a platter of different wraps to cater to different tastes—variety is the spice of life!

So there you have it—my ultimate guide to making mouthwatering Cheesy Garlic Chicken Wraps. I hope you find joy in the process and love every bite of these delicious wraps. Remember, cooking is all about having fun and creating memories. Until next time, happy cooking!

Cheesy Garlic Chicken Wraps – The Ultimate Flavor Explosion!

Prep Time 10 minutes
Cook Time 10 minutes
Total Time 20 minutes
Servings 4 servings
Calories 450
Enjoy these flavorful cheesy garlic chicken wraps that are quick to make and packed with delicious ingredients.

Ingredients

Protein

  • 2 cups cooked chicken, shredded
  • 1 cup shredded cheese (cheddar, mozzarella, or a blend)

Dairy

  • 1/4 cup cream cheese, softened
  • 1/4 cup sour cream

Other ingredients

  • 4 cloves garlic, minced
  • 1 tablespoon olive oil
  • 1 teaspoon paprika
  • salt and pepper to taste salt and pepper
  • 4 large flour tortillas

Garnish

  • to taste fresh parsley, chopped

Instructions 

  • Mix shredded chicken, garlic, cream cheese, sour cream, paprika, salt, and pepper.
  • Heat olive oil and cook the chicken mixture for 5-7 minutes.
  • Stir in shredded cheese until melted.
  • Warm tortillas and fill with the chicken mixture.
  • Roll up the wraps, optionally crisp in skillet, garnish with parsley, and serve.

Notes

For extra flavor, add a dash of hot sauce or your favorite herbs.
Calories: 450kcal
Cost: $15
Course: Main Course
Cuisine: American
Keyword: Chicken

Loved this recipe? Save it to your favorite Pinterest board so you can easily find it later! It’s the perfect way to keep all your sweet ideas in one place. ✨

Gourmet chicken wraps filled with cheese and garlic, showcased with a soft-focused background.

Welcome to Flavor Town: An Irresistible Journey with Keto Philly Cheesesteak Rolls

Hey there, fellow food lover! If you’re here, it’s because you’re ready to roll into a world of flavor with my delicious Keto Philly Cheesesteak Rolls. These tasty little bundles are not just a meal; they’re an experience, a cozy hug for your taste buds, and a perfect way to enjoy a classic dish while keeping it low-carb! This recipe is so easy to whip up, it’s perfect for busy weeknights or when you want to impress your friends at a gathering. Let’s dive into the magic of these rolls, shall we?

Why You’ll Love This Recipe ❤️

Here’s why my Keto Philly Cheesesteak Rolls will have you saying, “Wow!” with every bite:

  • Comfort Food Classic: These rolls deliver all the cheesy, savory goodness of a traditional Philly cheesesteak, but with a keto twist!
  • Quick & Easy: With just a handful of ingredients, you can whip these up in under 30 minutes. Perfect for a busy weeknight!
  • Meal Prep Friendly: Make a big batch and store them in the fridge for easy lunches or dinners throughout the week.
  • Customizable: Want to switch things up? Add your favorite veggies or spices to make them your own!
  • Kid-Approved: They’re so tasty that even the pickiest eaters will come back for seconds!

Ingredient Breakdown: What You’ll Need

Appetizing Keto Philly Cheesesteak Rolls made with ribeye steak on a rustic table.

Let’s make sure you have everything for these delightful Keto Philly Cheesesteak Rolls:

  • 1 lb ribeye steak: Thinly sliced for the perfect texture. You can substitute with flank steak or sirloin if you prefer.
  • 1 tablespoon olive oil: For sautéing the veggies and adding flavor.
  • 1 medium onion: Sliced, adds sweetness and depth.
  • 1 medium green bell pepper: Sliced, for a pop of color and crunch.
  • 4 oz cream cheese: Softened, it makes the filling creamy and rich.
  • 1 cup shredded provolone cheese: The cheese that ties it all together—feel free to use Monterey Jack or cheddar for a twist!
  • 1 teaspoon garlic powder: A must for that delicious savory flavor.
  • Salt and pepper to taste: Essential for seasoning your filling.
  • Almond flour tortillas or low-carb wraps: These keep it keto while still being soft and pliable.

How to Make Keto Philly Cheesesteak Rolls: Step-by-Step Instructions

Ready to get cooking? Let’s make these rolls come to life!

  1. Heat the olive oil: In a skillet over medium heat, add the olive oil.
  2. Sauté the veggies: Add the sliced onion and bell pepper, cooking until softened, about 5-7 minutes.
  3. Add the steak: Push the veggies to the side of the skillet and add the thinly sliced ribeye steak. Season with garlic powder, salt, and pepper. Cook until browned, about 3-5 minutes.
  4. Mix in cream cheese: Reduce the heat and mix in the softened cream cheese until well combined.
  5. Stir in the cheese: Remove from heat and stir in the shredded provolone cheese until melted and gooey.
  6. Roll it up: Spoon the steak mixture onto almond flour tortillas or low-carb wraps and roll them up tightly.
  7. Serve & enjoy!: Serve warm with your favorite dipping sauce and enjoy your Keto Philly Cheesesteak Rolls!

Pro Tips for Perfect Rolls

  • Use a sharp knife: A sharp knife makes slicing the ribeye easier and results in tender pieces.
  • Let the cream cheese soften: For a smoother mix, let the cream cheese sit out for about 30 minutes before use.
  • Don’t overcrowd the pan: If you have a large amount of filling, cook it in batches for even cooking.
  • Experiment with spices: Add red pepper flakes for a kick or Italian seasoning for a flavor twist.
  • Try different cheeses: Mix it up with gouda or cheddar for different flavor profiles.
  • Use fresh herbs: Chopped parsley or basil can add a fresh touch right before serving!
  • Check for doneness: Ensure the steak is cooked through but still tender by checking it towards the end of cooking.
  • Keep it warm: If making in batches, keep the rolls in a warm oven while you finish cooking the rest.

Avoiding Common Mistakes

Even the best chefs make mistakes! Here are a few common pitfalls to watch out for:

  • Overcooking the steak: Keep a close eye on the steak—it cooks quickly and should remain tender.
  • Too much filling: Don’t overstuff your rolls, or they may burst while cooking!
  • Skipping the seasoning: Don’t forget to season generously; it makes a world of difference in flavor.
  • Using cold cream cheese: Cold cream cheese won’t mix well, so make sure it’s soft before adding it to the skillet.

Delicious Variations to Try

Feeling adventurous? Here are some tasty variations to switch up your Keto Philly Cheesesteak Rolls:

  • Mushroom Lovers: Add sautéed mushrooms for an earthy flavor boost.
  • Spicy Kick: Incorporate jalapeños into the filling for an extra layer of heat.
  • Veggie Delight: Swap the meat for a mix of zucchini and eggplant for a vegetarian option.
  • Buffalo Style: Mix in buffalo sauce for a spicy twist that pairs perfectly with ranch dressing.

Storage and Make-Ahead Instructions

Want to make these rolls ahead of time? Here’s how to keep them fresh:

  • Refrigerator: Store in an airtight container in the fridge for up to 3 days.
  • Freezer: Freeze rolls tightly wrapped in plastic wrap for up to 2 months. Thaw in the refrigerator before reheating.
  • Reheating: Warm in the oven at 350°F for about 10-15 minutes, or until heated through.

Frequently Asked Questions

Got questions? I’ve got answers! Here are some FAQs about Keto Philly Cheesesteak Rolls:

  • Can I use a different type of meat? Absolutely! Flank steak, chicken, or even turkey work well.
  • Are these rolls gluten-free? Yes, as long as you use gluten-free almond flour tortillas!
  • Can I make these vegan? Yes! Substitute the meat with tofu or tempeh and use vegan cream cheese.
  • What can I serve these with? They pair beautifully with a side salad, some steamed veggies, or a lovely dipping sauce!
  • How can I add more flavor? Try marinating the steak in your favorite spices or sauces before cooking!
  • What’s the best way to store leftovers? Keep them in an airtight container in the fridge or freezer, as mentioned above.
  • Can I use regular tortillas? While that’s possible, it will increase the carb count significantly. Stick to low-carb options for the best results!
  • How do I know when the steak is done? It should be browned and cooked through, but still juicy and tender!

Nutritional Tips and Dietary Adaptations

Eating well doesn’t have to be boring! Here are some tips to keep your Keto Philly Cheesesteak Rolls both delicious and nutritious:

  • Choose lean cuts: Opt for leaner cuts of steak to reduce fat while keeping flavor.
  • Load up on veggies: Increase the vegetable content to add fiber and nutrients without adding carbs.
  • Mind the cheese: While cheese is low-carb, it can add up in calories quickly—use it sparingly!

Equipment Recommendations

Here’s what you’ll need in your kitchen to create these rolls:

  • Skillet: A good non-stick skillet makes cooking and cleanup a breeze.
  • Sharp Knife: Essential for slicing your steak and veggies evenly.
  • Spatula: For flipping and mixing your filling without making a mess.
  • Measuring Cups & Spoons: To ensure your ingredients are just right!

Serving Suggestions to Impress

Make your meal even more special with these serving ideas:

  • Garnish with fresh herbs: A sprinkle of parsley or chives adds a pop of color and freshness.
  • Serve with sauces: Pair with a side of homemade ranch or a zesty dipping sauce for extra flavor.
  • Plate creatively: Arrange your rolls on a beautiful platter with colorful veggies for a stunning presentation!

Now that you have all the tools and tips to make the best Keto Philly Cheesesteak Rolls, it’s time to gather your ingredients and get cooking! These rolls are more than just a meal; they’re a way to bring joy to your table and warmth to your heart. So roll up your sleeves, let your creativity shine, and enjoy every delicious bite. Happy cooking, my friend! And as always, remember: cooking is about love, laughter, and a little bit of magic! 🍽️✨

Keto Philly Cheesesteak Rolls - So Tasty & Easy To Make

Prep Time 10 minutes
Cook Time 15 minutes
Total Time 25 minutes
Servings 4 servings
Calories 650
Enjoy these low-carb, cheesy Philly cheesesteak rolls that are quick to prepare and perfect for a satisfying meal.

Ingredients

Meat

  • 1 lb ribeye steak, thinly sliced
  • 1 tablespoon olive oil
  • 1 medium onion, sliced
  • 1 medium green bell pepper, sliced
  • 4 oz cream cheese, softened
  • 1 cup shredded provolone cheese
  • 1 teaspoon garlic powder
  • to taste salt and pepper
  • 4 large almond flour tortillas or low-carb wraps

Instructions 

  • Cook onions and peppers in olive oil until softened, about 5-7 minutes.
  • Add sliced steak, season with garlic powder, salt, and pepper, cook until browned, about 3-5 minutes.
  • Reduce heat, stir in cream cheese until melted and combined.
  • Mix in shredded provolone cheese until melted.
  • Spoon mixture onto tortillas, roll up, and serve warm.

Notes

For best results, use thinly sliced steak and low-carb wraps to keep it keto-friendly.
Calories: 650kcal
Cost: $15
Course: Main Course
Cuisine: American
Keyword: Keto, Low-Carb, Philly Cheesesteak

Loved this recipe? Save it to your favorite Pinterest board so you can easily find it later! It’s the perfect way to keep all your sweet ideas in one place. ✨

Mouthwatering Keto Philly Cheesesteak Rolls featuring melted cheese and sliced peppers.

Transform Your Family Dinners with This Irresistible Chicken Quesadilla Recipe

Welcome to my kitchen, dear friend! Today, we’re diving into a dish that’s as vibrant as a fiesta and as comforting as a hug from your favorite aunt—Chicken Quesadillas! If you’re looking for a meal that not only satisfies your taste buds but also brings your loved ones together, you’ve come to the right place. This quesadilla recipe is designed to make your family dinners memorable, and trust me, you’ll find everyone asking for seconds.

In my journey as a home cook, I’ve learned that the best recipes often combine simplicity with flavor, and this one is no exception. With just a handful of ingredients and a sprinkle of love, we’ll create a meal that’s bound to become a household favorite. So, let’s roll up our sleeves and get started!

Why You’ll Love This Chicken Quesadilla Recipe

  • Quick and Easy: This recipe comes together in under 30 minutes, making it perfect for busy weeknights.
  • Kid-Friendly: With gooey cheese and savory chicken, even the pickiest eaters will clean their plates.
  • Customizable: Feel free to throw in your favorite veggies or proteins—this recipe is a blank canvas!
  • Make-Ahead Friendly: You can prep the filling in advance and assemble the quesadillas when you’re ready to eat.
  • Perfect for Leftovers: Any extras can be stored and reheated easily, making for delightful lunches!

Ingredients for Chicken Quesadillas

A beautifully arranged chicken quesadilla with melted cheese and colorful bell peppers, topped with a dollop of sour cream.

Let’s gather our ingredients for this delightful dish. Here’s what you’ll need:

  • 2 cups cooked chicken, shredded: You can use leftover rotisserie chicken or boil chicken breasts for a fresh start.
  • 1 cup shredded cheese: Cheddar or Monterey Jack works perfectly, but feel free to mix it up!
  • 1/2 cup diced bell peppers: Add a pop of color and crunch; any color works!
  • 1/2 cup diced onions: These add a lovely sweetness when sautéed.
  • 1 tablespoon olive oil: For cooking; you can substitute with any neutral oil.
  • 4 large flour tortillas: Soft and pliable, they’ll hold all the goodness inside.
  • 1 teaspoon taco seasoning: This gives the chicken a burst of flavor; homemade or store-bought works great.
  • Sour cream and salsa: For serving—don’t skip these, they add the finishing touch!

How to Make Chicken Quesadillas

Now that we have everything ready, let’s dive into the cooking process!

Step 1: Sauté the Vegetables

In a skillet, heat olive oil over medium heat. Add the diced bell peppers and onions, and sauté until softened, about 5 minutes. This step is crucial as it enhances the flavors!

Step 2: Add Chicken and Seasoning

Stir in the shredded chicken and taco seasoning, mixing well to combine. Let it cook for another 2-3 minutes until everything is heated through.

Step 3: Assemble the Quesadillas

Place a tortilla in the skillet and sprinkle half with cheese. Spoon the chicken mixture over the cheese, then top with more cheese and fold the tortilla in half. This layering is key for that melty goodness!

Step 4: Cook to Golden Perfection

Cook the quesadilla until the tortilla is golden brown and the cheese is melted, about 3-4 minutes per side. Remember to flip carefully to keep everything intact!

Step 5: Cut and Serve

Remove from the skillet and cut into wedges. Serve hot with sour cream and salsa on the side, and watch as your family gathers around the table.

Pro Tips for Quesadilla Perfection

  • Use Fresh Ingredients: The fresher your ingredients, the more vibrant your quesadillas will taste.
  • Don’t Overfill: A little filling goes a long way—overstuffing can lead to messy quesadillas.
  • Experiment with Cheese: Try adding pepper jack for a spicy kick or a blend of cheeses for depth of flavor.
  • Keep it Warm: If making multiple quesadillas, keep them warm in a low oven while you cook the rest.
  • Rest Before Cutting: Allow the quesadillas to rest for a minute before cutting; this helps them hold their shape.

Common Mistakes and Troubleshooting

Even the most seasoned cooks can make mistakes. Here are a few common pitfalls and how to avoid them:

  • Quesadillas falling apart: Ensure you’re not overfilling them and let them cook long enough to seal properly.
  • Cheese not melting: If your cheese isn’t melting, it might be too cold. Let it come to room temperature before using.
  • Burnt tortillas: Keep an eye on the heat; too high can scorch the tortillas before the cheese melts.

Delicious Variations to Try

Feeling adventurous? Here are some fun twists on the classic chicken quesadilla:

  • Vegetarian Quesadilla: Swap the chicken for black beans or roasted vegetables for a hearty meatless option.
  • Buffalo Chicken Quesadilla: Use shredded buffalo chicken and blue cheese for a spicy twist.
  • Southwestern Quesadilla: Add corn, jalapeños, and cilantro for a fresh Southwestern flair.
  • Breakfast Quesadilla: Scramble some eggs and add them with cheese for a delicious breakfast option.

Storage and Make-Ahead Instructions

Want to prep ahead? Here’s how to keep your quesadillas fresh:

  • Refrigerate: Store cooked quesadillas in an airtight container for up to 3 days.
  • Freeze: You can freeze uncooked quesadillas, separating them with parchment paper. Thaw before cooking.
  • Reheat: Use a skillet or microwave to reheat leftovers, keeping the tortillas crispy.

Frequently Asked Questions

Let’s address some common questions about making chicken quesadillas:

  • Can I make these quesadillas gluten-free? Absolutely! Just use gluten-free tortillas.
  • How do I keep the shells from splitting? Use medium heat and avoid overfilling to keep them intact.
  • Can I use other meats? Yes! Feel free to use turkey, pork, or even tofu for a protein boost.
  • What’s the best cheese for quesadillas? Cheddar and Monterey Jack are favorites, but feel free to experiment!
  • How do I make them spicier? Add jalapeños or a sprinkle of cayenne pepper to the filling.
  • Can I bake these instead of frying? Yes! Brush with oil and bake at 400°F until golden brown.
  • What sides pair well with quesadillas? Serve with a fresh salad, guacamole, or a bowl of chili for a complete meal!
  • How do I prevent sogginess? Allow the filling to cool slightly before assembling, and don’t overstuff.

Nutritional Tips and Dietary Adaptations

For those watching their diet, here are some tips to enjoy this recipe guilt-free:

  • Lean Protein: Use skinless chicken breast for a lower-fat option.
  • Cheese Alternatives: Opt for low-fat cheese or nutritional yeast for a dairy-free option.
  • Vegetable Boost: Load up on veggies to increase fiber and nutrients.

Essential Equipment

Here’s what I recommend having on hand for making these quesadillas:

  • Non-stick skillet: Makes flipping quesadillas easy and prevents sticking.
  • Spatula: A good spatula is essential for flipping without breaking your quesadilla.
  • Knife and cutting board: For chopping ingredients and cutting your finished quesadillas.

Serving Suggestions

To elevate your quesadilla experience, consider these serving ideas:

  • Garnish with fresh herbs: A sprinkle of cilantro or green onions adds a fresh touch.
  • Pair with a simple salad: A side salad can balance the meal and add freshness.
  • Offer a variety of dips: Besides sour cream and salsa, try guacamole or pico de gallo.

As we wrap up this culinary adventure, remember that the best meals are made with love. I hope you find joy in creating this Chicken Quesadilla Recipe that not only fills bellies but also warms hearts. Whether you’re cooking for family or just treating yourself, let this dish be a reminder that good food brings people together. Now, get cooking, and let’s make some magic happen in your kitchen!

Family Favorite Chicken Quesadilla Recipe

Prep Time 10 minutes
Cook Time 10 minutes
Total Time 20 minutes
Servings 4 servings
Calories 550
A quick and delicious chicken quesadilla perfect for family dinners or casual gatherings. Loaded with melted cheese and flavorful chicken, it's easy to make and always a hit.

Ingredients

Main

  • 2 cups cooked chicken, shredded
  • 1 cup shredded cheese (cheddar or monterey jack)
  • 0.5 cup diced bell peppers
  • 0.5 cup diced onions
  • 1 tablespoon olive oil
  • 4 large flour tortillas
  • 1 teaspoon taco seasoning
  • sour cream and salsa for serving

Instructions 

  • Heat olive oil in a skillet over medium heat.
  • Sauté bell peppers and onions until softened, about 5 minutes.
  • Add chicken and taco seasoning, mixing well.
  • Place a tortilla in the skillet, sprinkle with cheese, add chicken mixture, top with more cheese, and fold in half.
  • Cook until golden and cheese melts, about 3-4 minutes per side. Cut into wedges and serve with sour cream and salsa.

Notes

For extra flavor, add chopped cilantro or a squeeze of lime before serving.
Calories: 550kcal
Cost: $15
Course: Main Course
Cuisine: Mexican
Keyword: Chicken

Loved this recipe? Save it to your favorite Pinterest board so you can easily find it later! It’s the perfect way to keep all your sweet ideas in one place. ✨

A delicious chicken quesadilla cut into wedges, showcasing its cheesy interior and served alongside salsa in a soft-lit setting.