Author

Ava

Browsing

Welcome to Comfort in a Bowl

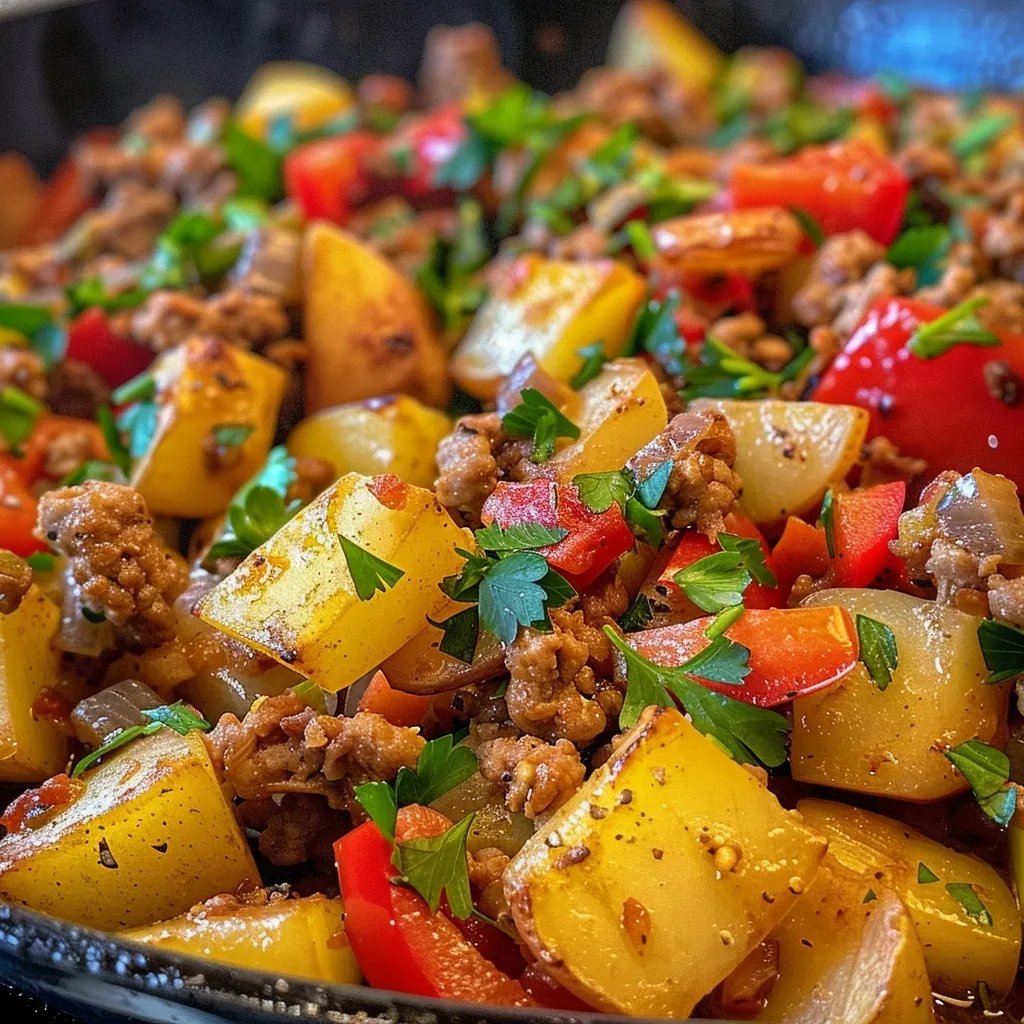
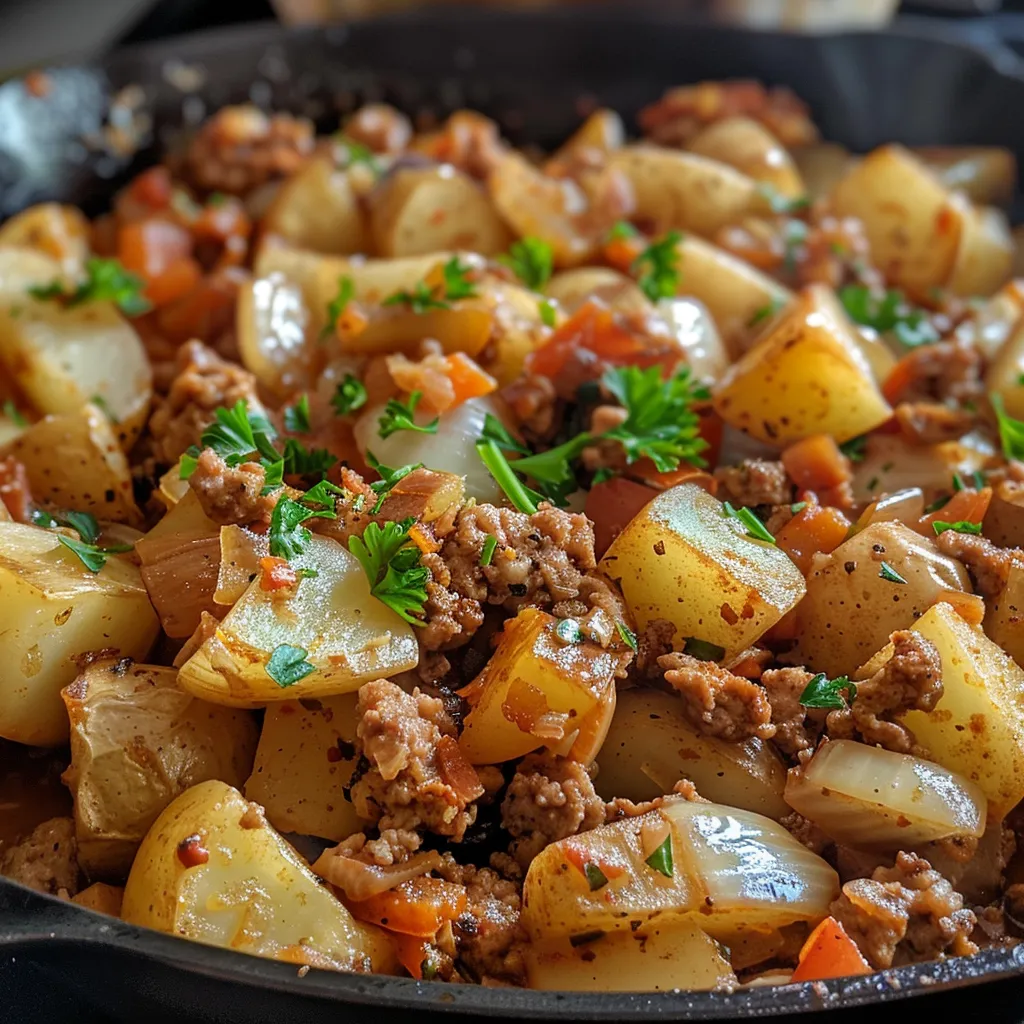
There’s something magical about a hearty meal that brings warmth not just to your belly but to your soul. If you’re searching for a recipe that’s both comforting and delicious, let me introduce you to my favorite go-to dish: **Hearty Ground Turkey with Potatoes**. This dish is a delightful blend of flavors that will have everyone asking for seconds. Trust me, it’s one of those meals where each bite feels like a warm hug on a chilly evening.

Growing up, meals like these were the heart of our family gatherings. Picture this: the smell of savory spices wafting through the air, the sound of laughter echoing in the kitchen, and the joy of gathering around the table with loved ones. Now, as I whip up this recipe in my Seattle kitchen, I can’t help but feel that same sense of nostalgia and love. So, let’s dive into what makes this dish truly special!

Why You’ll Love This Recipe

This dish isn’t just about filling your stomach; it’s about nourishing your spirit. Here are some reasons why you’ll adore this **Ground Turkey with Potatoes** recipe:

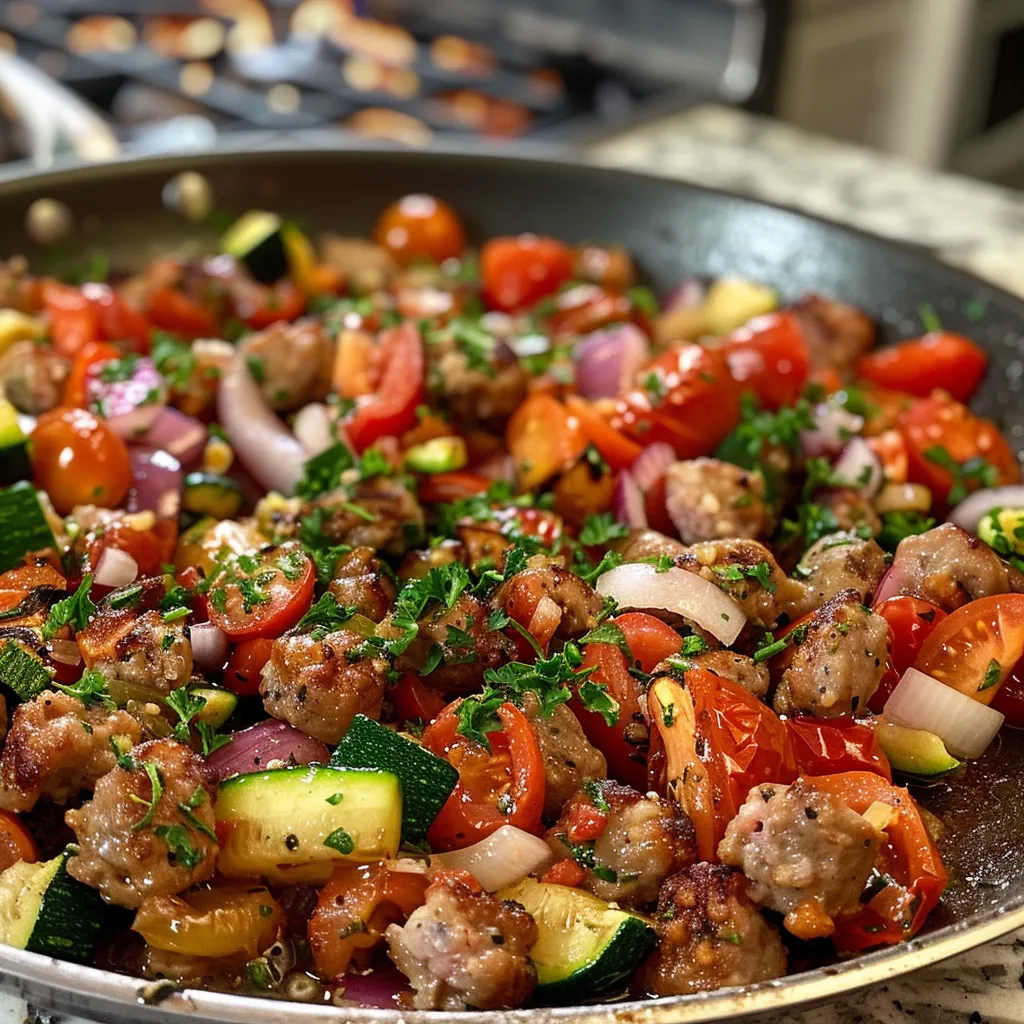
  • Comfort Food Classic: This recipe is a beautiful twist on traditional comfort food, combining lean ground turkey and hearty potatoes for a satisfying meal.
  • Quick and Easy: With just a few ingredients and about 30 minutes of cooking time, you can whip this up on a busy weeknight without breaking a sweat.
  • Nutritious and Healthy: Ground turkey is a lean protein packed with nutrients, making this dish an excellent choice for a healthy dinner.
  • Versatile Variations: Feel free to customize this dish with your favorite veggies or spices. The possibilities are endless!
  • Perfect for Meal Prep: This recipe stores beautifully, making it a great option for meal prep or leftovers that taste even better the next day.

Ingredients Breakdown

Let’s gather our ingredients! Here’s what you’ll need for this delicious **Ground Turkey with Potatoes** recipe:

  • 1 pound ground turkey: This lean protein serves as the star of our dish, providing flavor and texture.
  • 4 medium potatoes, diced: These will soak up all the wonderful flavors and become perfectly tender.
  • 1 onion, chopped: Adds a sweet, aromatic base to the dish.
  • 2 cloves garlic, minced: For that extra punch of flavor—because who doesn’t love garlic?
  • 1 teaspoon paprika: This spice brings warmth and depth to the dish.
  • Salt and pepper to taste: Essential for enhancing the overall flavor.
  • 2 tablespoons olive oil: Used for sautéing the aromatics and turkey.
  • 1 cup chicken broth: The liquid that ties everything together, making it hearty and comforting.
  • Fresh parsley for garnish: A sprinkle at the end adds a fresh touch.

If you find yourself missing an ingredient, no worries! Here are some quick substitutions you can make:

  • Ground turkey: Swap in ground chicken or even lean beef for a different flavor profile.
  • Potatoes: Sweet potatoes can add a delightful sweetness.
  • Chicken broth: Vegetable broth works just as well, or even water in a pinch.
  • Onion: Shallots or leeks can be a lovely alternative.

How to Make Hearty Ground Turkey with Potatoes

Side view of a delicious plate featuring ground turkey and potatoes, showcasing their colors and textures.

Now, let’s get cooking! Here’s how to create this comforting dish step by step:

  1. Heat the olive oil in a large skillet over medium heat.
  2. Add the onion and garlic; sauté until softened (about 3-4 minutes).
  3. Add the ground turkey to the skillet and cook until browned, breaking it apart with a spatula.
  4. Stir in the diced potatoes, paprika, salt, and pepper.
  5. Pour in the chicken broth and bring to a simmer.
  6. Cover and cook for about 20 minutes, or until the potatoes are tender, stirring occasionally.
  7. Garnish with fresh parsley before serving.

Pro Tips for Success

To ensure your **Ground Turkey with Potatoes** turns out perfectly every time, keep these tips in mind:

  • Use a non-stick skillet: This helps prevent sticking and makes for easier cleanup.
  • Uniform potato sizes: Cut your potatoes into even pieces for consistent cooking.
  • Don’t rush the browning: Allow the turkey to brown well for deeper flavor—this step is key!
  • Adjust seasoning: Taste and adjust the spices to your preference; you might want more paprika or a pinch of cayenne for heat.
  • Leftovers are gold: This dish tastes even better the next day, so don’t hesitate to make a larger batch!
  • Try different herbs: Experiment with rosemary or thyme for a fragrant twist.
  • Make it saucy: If you prefer a saucier dish, add more broth or a splash of cream at the end.
  • Garnish creatively: Top with shredded cheese or a dollop of sour cream for added richness.

Common Mistakes and Troubleshooting

Even the best cooks can face challenges in the kitchen. Here are some common mistakes and how to avoid them:

  • Under-seasoning: Don’t skip the salt and pepper; they’re crucial for enhancing flavors.
  • Overcooked potatoes: Keep an eye on the cooking time to ensure your potatoes don’t become mushy.
  • Not browning the turkey: If you skip this step, you might miss out on that deep, savory flavor.
  • Too much liquid: If the dish seems soupy, remove the lid and let it simmer for a bit longer.

Variations to Spice Things Up

One of the best things about cooking is the ability to get creative. Here are some variations you can try:

  • Veggie-packed: Toss in some frozen peas or carrots for added nutrition and color.
  • Spicy twist: Add chopped jalapeños or a dash of hot sauce for a kick.
  • Herbed delight: Mix in fresh herbs like basil or dill for a fragrant finish.
  • Cheesy goodness: Stir in some cheese during the last few minutes of cooking for a creamy, indulgent touch.

Storage and Make-Ahead Instructions

This recipe is perfect for meal prepping! Here’s how to store it:

  • Refrigerating: Store leftovers in an airtight container in the fridge for up to 3 days.
  • Freezing: This dish freezes well! Just be sure to cool it completely before transferring to a freezer-safe container. It will last up to 3 months.
  • Reheating: When reheating, add a splash of broth or water to loosen it up, and warm it on the stovetop or in the microwave.

Frequently Asked Questions

Got questions? I’ve got answers! Here are some FAQs about this recipe:

  • Can I use ground beef instead of turkey? Yes, ground beef works perfectly, but it will change the flavor profile slightly.
  • What can I serve with this dish? It’s great on its own, but you can pair it with a simple salad or crusty bread for a complete meal.
  • How do I make this dish vegetarian? Substitute ground turkey with lentils or a plant-based meat alternative and use vegetable broth instead of chicken broth.
  • Can I double the recipe? Absolutely! Just ensure your skillet is large enough to accommodate everything.
  • What if I don’t have paprika? You can use chili powder or even cumin for a different flavor.
  • Is this dish gluten-free? Yes, all the ingredients used are gluten-free, making it suitable for those with gluten sensitivities.
  • How do I add more flavor? Consider marinating the turkey in spices before cooking or adding a splash of soy sauce for depth.
  • Can I make this in a slow cooker? Yes! Brown the turkey and onions first, then transfer to a slow cooker with the rest of the ingredients and cook on low for 4-6 hours.

Nutritional Tips and Dietary Adaptations

This dish is not only comforting but can be tailored to fit various dietary needs:

  • Low-carb option: Swap out potatoes for cauliflower to keep it low-carb and keto-friendly.
  • Whole30 compliant: Ensure all ingredients are compliant and skip any non-compliant additives.
  • High-protein boost: Add beans or lentils for an extra protein punch.

Essential Equipment Recommendations

Before you start cooking, ensure you have the right tools at hand:

  • Large skillet: A good non-stick skillet is essential for easy cooking and cleanup.
  • Spatula: To break up the turkey and stir the ingredients.
  • Cutting board and knife: For chopping the veggies and preparing your ingredients.

Serving Suggestions

Now that your dish is ready, how should you serve it? Here are a few ideas:

  • Garnish: A sprinkle of fresh parsley or a dollop of sour cream can elevate the presentation.
  • Serve with bread: A crusty loaf is perfect for soaking up the delicious juices.
  • Pair with a side salad: A fresh green salad can provide a refreshing contrast to the hearty dish.

This **Hearty Ground Turkey with Potatoes** is more than just a meal; it’s an experience—one that wraps you in warmth and comfort. Whether you’re cooking for your family or welcoming friends over, this dish is sure to impress and create lasting memories around the dinner table. So pull up a chair, grab a spatula, and let’s make some magic in the kitchen together!

Hearty Ground Turkey with Potatoes: A Comforting Delight

Prep Time 10 minutes
Cook Time 20 minutes
Total Time 30 minutes
Servings 4 servings
Calories 350
A warm and satisfying dish combining ground turkey and potatoes, perfect for a comforting meal.

Ingredients

Meat

  • 1 pound ground turkey
  • 4 medium potatoes, diced
  • 1 onion chopped onion
  • 2 cloves garlic, minced
  • 1 teaspoon paprika
  • Salt to taste Salt
  • Pepper to taste Pepper
  • 2 tablespoons olive oil
  • 1 cup chicken broth
  • Fresh parsley for garnish Fresh parsley (for garnish)

Instructions 

  • Heat olive oil in a skillet over medium heat.
  • Sauté onion and garlic until softened.
  • Add ground turkey and cook until browned.
  • Add potatoes, paprika, salt, and pepper; pour in broth and simmer.
  • Cover and cook for 20 minutes until potatoes are tender.
  • Garnish with parsley before serving.

Notes

Use fresh parsley for the best flavor and adjust salt and pepper to taste.
Calories: 350kcal
Cost: $15
Course: Main Course
Cuisine: homestyle
Keyword: ground turkey

Welcome to the Comfort Zone: One-Pot Beef Pasta

If you’re on the hunt for a dish that brings warmth to your kitchen and joy to your dinner table, look no further than this One-Pot Beef Pasta with Garlic Butter. As someone who believes in the magic of cooking, I can assure you that this recipe is not just easy to whip up, but it’s also a delightful blend of creamy, savory goodness that will have your loved ones asking for seconds. Let’s dive into what makes this dish a must-try for any night of the week!

Why You’ll Love This Recipe

There are countless reasons to adore this creamy pasta, but here are just a few highlights:

  • Quick and Easy: Ready in under 30 minutes, this recipe is perfect for busy weeknights.
  • One-Pot Wonder: With everything cooked in a single pot, you’ll save time on cleanup, leaving more time to enjoy your meal.
  • Comforting Flavors: The combination of ground beef, garlic butter, and cream creates a rich flavor profile that’s hard to resist.
  • Customizable: This dish is versatile and can easily be adapted to include your favorite vegetables or spices.
  • Feed a Crowd: With a hearty serving size, it’s a fantastic option for family dinners or gatherings with friends.

Ingredients You’ll Need

Let’s break down the ingredients to make this creamy one-pot beef pasta. Here’s what you’ll need:

  • 8 oz penne or spaghetti: Choose your favorite pasta shape for this dish.
  • 1 lb ground beef: Lean ground beef works well, but you can substitute with turkey or chicken for a lighter option.
  • 2 tbsp butter: Adds richness and flavor to the sauce.
  • 4 cloves garlic, minced: Fresh garlic is key to flavoring the dish.
  • 1 medium onion, chopped: Sweet onions enhance the overall taste.
  • 1 tsp Italian seasoning: A blend of herbs that adds depth to the flavor.
  • ½ tsp salt: Enhances the flavors of the dish.
  • ¼ tsp black pepper: Adds a subtle kick.
  • ½ cup beef broth: Used for deglazing and adding moisture.
  • 1 cup heavy cream: Provides that creamy texture.
  • ½ cup Parmesan cheese, grated: Cheese adds flavor and helps thicken the sauce.
  • Fresh chopped parsley: For garnish and a pop of color.
  • Red pepper flakes: Optional, for a bit of spice.

Step-by-Step Instructions

Side view of a delicious one-pot beef pasta dish, highlighting the creamy sauce and sprinkled red pepper flakes.

Ready to cook? Follow these simple steps to create your creamy beef pasta:

  1. Brown the Beef: Melt butter in a skillet over medium heat. Add ground beef and cook for 5–7 minutes until browned, breaking it into crumbles.
  2. Sauté the Aromatics: Add the chopped onion and cook for 3–4 minutes until soft. Stir in minced garlic and cook for an additional 1–2 minutes until fragrant.
  3. Season It Up: Mix in Italian seasoning, salt, and black pepper to enhance the flavor profile.
  4. Deglaze the Pan: Pour in beef broth, scraping the bottom of the pan to release any flavorful bits stuck to it. Stir in heavy cream and let it simmer gently.
  5. Cook the Pasta: Add the dry pasta to the skillet, stirring to submerge it in the sauce. Cover and simmer for 10–12 minutes, stirring occasionally, until pasta is al dente and the sauce thickens.
  6. Finish with Cheese: Stir in grated Parmesan until melted and creamy.
  7. Garnish and Serve: Top with fresh parsley and optional red pepper flakes. Serve hot with garlic bread or a fresh salad.

Pro Tips for Success

Want to elevate your cooking game? Here are some expert insights for making this dish even better:

  • Use Fresh Ingredients: Fresh garlic and herbs can significantly enhance the flavor of your dish.
  • Don’t Overcook the Pasta: Aim for al dente; it will continue to cook in the sauce, absorbing flavors.
  • Adjust the Creaminess: For a lighter version, you can use half-and-half instead of heavy cream.
  • Mix in Vegetables: Add spinach, bell peppers, or mushrooms for a nutritious boost.
  • Save Some Pasta Water: If the sauce is too thick, add a splash of reserved pasta water to adjust the consistency.
  • Experiment with Cheeses: Try substituting Parmesan with Pecorino Romano for a different flavor profile.
  • Make It Spicy: If you love heat, sauté some chopped jalapeños with the onions.
  • Let It Rest: Allow the dish to sit for a few minutes after cooking to thicken the sauce further.

Common Mistakes and Troubleshooting

Even the best chefs have off days. Here are some common pitfalls to avoid:

  • Undercooking the Beef: Ensure the beef is fully cooked before adding other ingredients to avoid any food safety issues.
  • Skipping the Deglazing Step: Don’t forget to deglaze the pan; it adds a depth of flavor!
  • Overcooking the Pasta: Keep an eye on the pasta’s cooking time; it should be slightly firm when you take it off the heat.
  • Using Cold Ingredients: Let your cream and broth come to room temperature for a smoother sauce.

Variations to Try

Feeling adventurous? Here are some delicious variations you can try:

  • Vegetarian Option: Substitute ground beef with lentils or mushrooms for a hearty vegetarian meal.
  • Spicy Beef Pasta: Incorporate diced chilies or ground red pepper for a spicy kick.
  • Cheesy Garlic Butter Pasta: Add more cheese and garlic for an extra indulgent dish.
  • Herbed Pasta: Infuse the sauce with fresh herbs like basil or thyme for a fragrant twist.

Storage and Make-Ahead Instructions

Want to enjoy your creamy beef pasta later? Here’s how to store it:

  • Refrigeration: Store leftovers in an airtight container in the fridge for up to 3 days.
  • Freezing: This dish can be frozen for up to 3 months. Make sure to cool it completely before transferring it to a freezer-safe container.
  • Reheating: Reheat on the stovetop over low heat, adding a splash of broth or cream to loosen the sauce.

Frequently Asked Questions

Here are some questions I often get asked about this recipe:

  • Can I use a different type of pasta? Absolutely! Feel free to substitute with your favorite short pasta.
  • Is this recipe suitable for gluten-free diets? Yes, you can use gluten-free pasta for this dish.
  • How spicy is this dish? It’s mild, but you can add red pepper flakes to increase the heat level.
  • Can I make this dish in advance? Yes, it stores well, and you can reheat it for quick meals.
  • What can I use instead of beef? Ground turkey or chicken are great alternatives.
  • How do I make it creamier? Add more cream or cheese to achieve your desired richness.
  • Can I add vegetables to this dish? Absolutely! Spinach, zucchini, or bell peppers work beautifully.
  • What’s the best way to serve this pasta? It pairs wonderfully with garlic bread and a fresh salad.

Nutrition Tips and Dietary Adaptations

Looking to make this dish healthier? Here are some tips:

  • Lean Proteins: Use lean ground beef or turkey to cut down on fat.
  • Whole Wheat Pasta: Opt for whole wheat pasta for added fiber and nutrients.
  • Low-Fat Dairy: Use low-fat cream or Greek yogurt as a substitute for heavy cream.

Equipment Recommendations

To make this dish, you’ll need:

  • Skillet: A large skillet works best for cooking everything in one pot.
  • Wooden Spoon: For stirring and breaking up the beef.
  • Measuring Cups and Spoons: To accurately measure your ingredients.

Serving Suggestions

Make your dining experience even better with these serving ideas:

  • Garlic Bread: Serve with warm, crusty garlic bread for a truly comforting meal.
  • Fresh Salad: A simple green salad with a light vinaigrette balances the richness of the pasta.
  • Wine Pairing: Pair this dish with a medium-bodied red wine for a lovely complement to the flavors.

In conclusion, this One-Pot Beef Pasta is more than just a meal; it’s a comforting hug in a bowl, a reminder that cooking can be both simple and magical. So gather your ingredients, summon your inner chef, and let’s create something truly special in your kitchen. Because at the end of the day, it’s all about spreading love, one delicious dish at a time! Happy cooking!

Creamy One-Pot Beef Pasta with Garlic Butter

Prep Time 10 minutes
Cook Time 20 minutes
Total Time 30 minutes
Servings 4 servings
Calories 650
A quick and flavorful one-pot pasta dish combining tender beef, creamy sauce, and garlic butter for a satisfying meal.

Ingredients

Pasta

  • 8 oz penne or spaghetti

Ground Beef

  • 1 lb ground beef

Butter

  • 2 tbsp butter

Garlic

  • 4 cloves garlic, minced

Onion

  • 1 medium medium onion, chopped

Italian Seasoning

  • 1 tsp Italian seasoning

Salt

  • ½ tsp salt

Black Pepper

  • ¼ tsp black pepper

Beef Broth

  • ½ cup beef broth

Heavy Cream

  • 1 cup heavy cream

Parmesan Cheese

  • ½ cup Parmesan cheese, grated

Parsley

  • Fresh chopped parsley fresh chopped parsley

Red Pepper Flakes

  • for spice red pepper flakes (optional)

Instructions 

  • Melt butter in a skillet, cook beef until browned, then add onion and garlic, cooking until soft.
  • Stir in Italian seasoning, salt, and pepper, then add beef broth and heavy cream, simmering gently.
  • Add pasta, cover, and cook until al dente, stirring occasionally.
  • Stir in Parmesan cheese, then garnish with parsley and red pepper flakes. Serve hot.

Notes

For extra flavor, sprinkle with additional Parmesan or red pepper flakes before serving.
Calories: 650kcal
Cost: $15
Course: Main Course
Cuisine: Italian
Keyword: pasta

A Wholesome One-Pan Wonder: Discover the Magic of Sausage and Vegetable Skillet

Welcome to my kitchen, dear friend! If you’re here, you’re probably on the lookout for a recipe that’s not just delicious, but also comforting and easy to whip up. Let me introduce you to my Sausage and Vegetable Skillet. This dish is a delightful blend of savory ground sausage and vibrant veggies, creating a meal that feels like a warm hug on a plate. Whether you’re cooking for a busy weeknight dinner or a cozy weekend gathering, this skillet meal is sure to steal hearts—and taste buds!

As we dive into this culinary adventure, you’ll find that this recipe is not just about following steps; it’s about embracing the magic of cooking. So, let’s get started!

Why You’ll Love This Recipe

  • Quick and Easy: With a total prep and cook time of just 30 minutes, this dish is perfect for those hectic weeknights.
  • One-Pan Wonder: Less cleanup means more time to relax after dinner. Who doesn’t love that?
  • Flavor-Packed: The combination of sausage and fresh vegetables creates a mouthwatering medley that’s hard to resist.
  • Customizable: You can easily swap ingredients to cater to your dietary needs or use whatever you have on hand.
  • Meal Prep Friendly: This dish can be made ahead and stored, making it a great option for meal prep enthusiasts!

Ingredients Overview

Before we jump into cooking, let’s gather our ingredients. Here’s what you’ll need:

  • 1 lb (450g) ground sausage: Choose between mild and spicy based on your preference.
  • 1 medium onion, diced: This will add sweetness and depth to our skillet.
  • 1 red bell pepper, diced: For a pop of color and crunch.
  • 1 zucchini, sliced: This veggie adds nutrition and a delightful texture.
  • 1 cup (150g) cherry tomatoes, halved: Their juiciness brings everything together.
  • 2 cloves garlic, minced: Because garlic makes everything better!
  • 2 tbsp olive oil: For sautéing our ingredients to perfection.
  • 1 tsp paprika: A touch of smokiness that elevates the flavor.
  • Salt and pepper, to taste: Essential for seasoning.
  • Fresh parsley, chopped (for garnish): A sprinkle of freshness to finish.

Substitution Tips for Dietary Preferences

Side view of a hot sausage and vegetable skillet, showcasing juicy ground sausage and fresh vegetables.

Cooking should always be accessible, so here are some easy substitutions based on dietary needs:

  • For a Leaner Option: Substitute ground sausage with ground turkey or chicken for a lower-fat version.
  • Vegetarian/Vegan Twist: Use plant-based sausage or crumbles, or even lentils for a hearty texture.
  • Gluten-Free: Ensure your sausage is gluten-free, and serve with gluten-free grains like quinoa or rice.
  • Extra Veggies: Feel free to add or replace any vegetables with what’s in season or what you have in your fridge!

Step-by-Step Instructions

Now that we have everything ready, let’s get cooking!

  1. Prepare the Ingredients: Dice the onion and bell pepper, slice the zucchini, and halve the cherry tomatoes. Mince the garlic for added flavor.
  2. Cook the Sausage: Heat 1 tablespoon of olive oil in a large skillet over medium heat. Add the ground sausage and cook until browned, breaking it into crumbles. Remove the sausage and set aside.
  3. Sauté the Vegetables: In the same skillet, add the remaining olive oil. Sauté the onion and garlic until fragrant, about 2 minutes. Add the bell pepper, zucchini, and cherry tomatoes. Sprinkle with paprika, salt, and pepper. Cook for 5-7 minutes until the veggies are tender.
  4. Combine and Serve: Return the sausage to the skillet, stirring to combine with the vegetables. Let it cook for another 2-3 minutes to meld the flavors. Garnish with chopped parsley and serve warm.

Pro Tips for the Best Sausage and Vegetable Skillet

  • Don’t Rush the Sauté: Allow the vegetables to cook until they are just tender to enhance their natural sweetness.
  • Use a Cast-Iron Skillet: For even heat distribution and a beautiful sear on your sausage.
  • Experiment with Herbs: Add fresh herbs like basil or thyme for an aromatic twist.
  • Adjust Spice Levels: If you enjoy heat, add red pepper flakes or a splash of hot sauce.
  • Save Leftovers: This dish tastes even better the next day as the flavors meld!

Common Mistakes and Troubleshooting

Even the best cooks have their off days! Here are some common pitfalls and how to avoid them:

  • Overcooking the Sausage: Keep an eye on the sausage to prevent it from becoming dry. Cook until just browned.
  • Not Enough Seasoning: Don’t be shy with salt and pepper! Taste as you go to find the right balance.
  • Soggy Vegetables: Ensure your skillet is hot enough to sauté the veggies properly without steaming them.
  • Too Many Ingredients: Stick to the recommended amounts for the best results. Less is sometimes more!

Variations to Spice Things Up

This recipe is incredibly versatile! Here are a few variations to keep things exciting:

  • Italian Sausage and Broccoli Rabe: Swap ground sausage for Italian sausage and add sautéed broccoli rabe for a flavor-packed twist.
  • Mexican-Inspired: Use chorizo and add black beans and corn, topped with avocado and cilantro.
  • Asian Flare: Substitute sausage with ground chicken, add bok choy, and toss in some soy sauce and sesame oil.
  • Breakfast Skillet: Use breakfast sausage and toss in some scrambled eggs for a hearty breakfast option.

Storage and Make-Ahead Instructions

This dish is perfect for meal prep! Here’s how to store and reheat your skillet:

  • Refrigeration: Store leftovers in an airtight container in the fridge for up to 3 days.
  • Freezing: Freeze in a freezer-safe container for up to 2 months. Thaw overnight in the fridge before reheating.
  • Reheating: Reheat on the stovetop over medium heat until warmed through. Add a splash of broth or water if it seems dry.

Frequently Asked Questions

Got questions? I’ve got answers! Here are some common queries about this recipe:

  • Can I use different types of sausage? Absolutely! Feel free to use chicken, turkey, or even plant-based sausage.
  • Can I make this ahead of time? Yes, this dish is great for meal prep. Just store it in the fridge and reheat when ready to enjoy!
  • What can I serve with this dish? It pairs beautifully with rice, quinoa, or even crusty bread for a complete meal.
  • Is this dish spicy? The spice level depends on the sausage you choose. Mild sausage will yield a milder dish!
  • How can I make it more nutritious? Add more vegetables or serve it over a bed of greens for extra nutrients.
  • Is it gluten-free? Yes, as long as you choose gluten-free sausage and serve with gluten-free grains.
  • Can I use frozen vegetables? Yes! Just add them directly to the skillet and adjust the cooking time as needed.
  • What’s the best way to store leftovers? Store in an airtight container in the fridge for up to 3 days or freeze for later!

Nutrition Tips and Dietary Adaptations

This dish can easily be tailored to fit various dietary needs:

  • Low-Carb: Serve over cauliflower rice instead of traditional grains.
  • High-Protein: Add more sausage or even a side of eggs to boost protein content.
  • Vegan Option: Use plant-based sausage and pack in additional veggies for a hearty meal.
  • Low-Sodium: Use low-sodium sausage and limit added salt for a heart-healthier option.

Equipment Recommendations

To create this delicious Sausage and Vegetable Skillet, here’s what you’ll need:

  • Large Skillet: A good quality non-stick or cast-iron skillet is ideal for even cooking.
  • Sharp Knife: For efficient chopping and dicing of your veggies.
  • Cutting Board: A sturdy board to prep your ingredients.
  • Spatula: For stirring and serving your beautiful meal.

Serving Suggestions

To make your meal even more enjoyable, consider these serving ideas:

  • Top with Cheese: A sprinkle of shredded cheese can add a delightful creaminess.
  • Serve with a Side Salad: A crisp salad with a tangy vinaigrette complements the richness of the skillet.
  • Pair with Bread: Serve with crusty bread or rolls to soak up the delicious juices.
  • Add Fresh Herbs: A sprinkle of fresh herbs like basil or parsley can brighten the dish.

In conclusion, this Sausage and Vegetable Skillet isn’t just a recipe; it’s a celebration of simple ingredients coming together to create something truly delightful. I hope you’ve enjoyed this little culinary journey with me. Remember, cooking is all about experimenting, having fun, and most importantly, sharing love through food. So pull up a chair, grab a fork, and get ready to impress your family and friends with this beautiful dish. Happy cooking!

Sausage and Vegetable Skillet

Prep Time 10 minutes
Cook Time 15 minutes
Total Time 25 minutes
Servings 4 servings
Calories 350
A quick and flavorful one-pan meal combining savory sausage with fresh vegetables, perfect for a satisfying dinner.

Ingredients

Meat

  • 1 lb ground sausage (mild or spicy)
  • 1 medium onion, diced
  • 1 red bell pepper, diced red bell pepper, diced
  • 1 zucchini, sliced zucchini, sliced
  • 1 cup (150g) cherry tomatoes, halved
  • 2 cloves garlic, minced
  • 2 tbsp olive oil
  • 1 tsp paprika
  • to taste Salt and pepper Salt and pepper
  • for garnish Fresh parsley chopped parsley

Instructions 

  • Dice the onion and bell pepper, slice the zucchini, halve the cherry tomatoes, and mince the garlic.
  • Cook the sausage: Heat 1 tbsp olive oil in a skillet, cook sausage until browned, then remove and set aside.
  • Sauté onion and garlic in the same skillet, then add bell pepper, zucchini, and tomatoes. Season with paprika, salt, and pepper; cook until tender.
  • Return sausage to skillet, stir to combine, and cook for 2-3 minutes. Garnish with parsley and serve.

Notes

Feel free to add your favorite herbs for extra flavor.
Calories: 350kcal
Cost: $15
Course: Main Course
Cuisine: American
Keyword: sausage, vegetables

Dive into a Flavorful Adventure with Turkish Pasta

Welcome to my cozy corner of the internet! If you’ve found yourself searching for a delightful dish to warm your heart and fill your belly, you’re in for a treat with this recipe for Turkish Pasta with Ground Turkey. Growing up in Oregon, the kitchen was always bustling, and the aroma of savory meals drifted through the house, creating a sense of comfort and joy. This dish embodies that spirit, intertwining rich flavors and hearty ingredients that make it perfect for any gathering, or even just a quiet night in.

So, if you’re ready to experience a taste of Turkey in your own kitchen, let’s roll up our sleeves and get cooking!

Why You’ll Love This Recipe

  • Comforting and Hearty: This dish brings together the warmth of pasta and the richness of ground turkey, making it the ideal comfort food after a long day.
  • Quick and Easy: With minimal prep and cooking time, you can whip up this meal in under 30 minutes!
  • Versatile Ingredients: The ingredient list allows for substitutions, making it easy to tailor to your preferences or what you have on hand.
  • Family-Friendly: Even the pickiest eaters will enjoy this dish, which is flavorful yet mild enough for everyone to appreciate.
  • Perfect for Leftovers: This Turkish pasta keeps well in the fridge and actually tastes even better the next day, making it a fantastic meal prep option.

Ingredient Breakdown

Before we dive into the cooking, let’s take a closer look at what you’ll need to create this delicious Turkish Pasta:

  • 12 oz pasta (penne or fusilli): Feel free to substitute with any similar pasta type you adore.
  • 1 lb ground turkey: Can be swapped with ground beef or even meat alternatives if you prefer a vegetarian option.
  • 1 medium onion, finely chopped: Fresh shallots or leeks can add a unique flavor twist!
  • 3 cloves garlic, minced: If you’re in a pinch, garlic powder will do the trick.
  • 14 oz crushed tomatoes: Diced or fresh tomatoes work well, bringing vibrant color and taste.
  • 2 tbsp tomato paste: For those busy nights, prepared sauce can save you time.
  • 1 tsp paprika: Smoked paprika can elevate the flavors further, giving it a depth that’s hard to resist.
  • 0.5 tsp ground cumin: This spice adds warmth; feel free to omit or replace it with coriander if you prefer.
  • 0.5 tsp red pepper flakes (optional): Adjust according to your spice preference; it’s all about what makes your taste buds sing!
  • Salt and black pepper, to taste: Opt for Himalayan salt or sea salt for added depth.
  • 3 tbsp olive oil: Can substitute with canola oil or butter if needed.
  • 0.5 cup plain Greek yogurt: A creamy delight! Substitute with sour cream or omit for a dairy-free option.
  • Fresh parsley, chopped: Cilantro can work too, or skip if desired for a simpler finish.

Pro Tips for Perfect Turkish Pasta

Juicy Turkish pasta with ground turkey, garnished and displayed in a rustic bowl.
  • Flavor Boost: For extra flavor, add a sprinkle of grated Parmesan or feta cheese before serving. You can never go wrong with a little cheese magic!
  • Cooking Pasta: Make sure to salt your pasta water—it’s the only chance you have to season the pasta itself!
  • Texture Check: Cook your pasta until al dente; it will continue to cook when mixed with the sauce.
  • Layering Flavors: Sauté the onions and garlic until fragrant before adding the ground turkey to enhance the sauce’s flavor profile.
  • Spice Adjustment: If you’re unsure about spice levels, start with less red pepper flakes and add more to your taste.
  • Garnishing: A sprinkle of parsley not only adds color but also a fresh burst of flavor that brightens the dish.
  • Meal Prep: This dish is perfect for meal prepping! Just store portions in airtight containers and reheat when you’re ready to enjoy.
  • Storage Tips: Keep leftovers in the fridge for up to 4 days, and they’ll taste even better!

Common Mistakes and Troubleshooting

Even the best of us make mistakes in the kitchen! Here are some common pitfalls to avoid:

  • Overcooking Pasta: Keep an eye on your pasta; overcooked noodles can become mushy and lose their appeal.
  • Skipping the Seasoning: Don’t forget to season your sauce as you go; taste testing is key to a well-balanced dish!
  • Using Cold Ingredients: Let your ingredients come to room temperature before cooking for the best flavor integration.
  • Not Enough Sauce: If your sauce seems too thick, add a splash of pasta water to loosen it up.

Exciting Variations You Can Try

This dish is wonderfully adaptable! Here are some variations to keep things fresh:

  • Vegetarian Delight: Swap the ground turkey for lentils or chickpeas for a hearty vegetarian version.
  • Cheesy Burst: Stir in some shredded cheese towards the end of cooking for a creamy, cheesy sauce.
  • Veggie-Packed: Toss in some chopped spinach, bell peppers, or zucchini for added nutrition.
  • Spicy Twist: Add diced jalapeños or a dash of hot sauce for an extra kick!

Storage and Make-Ahead Instructions

This dish is perfect for making ahead of time. Here’s how to store and reheat:

  • Refrigeration: Store leftovers in an airtight container in the fridge for up to 4 days.
  • Freezing: You can freeze this dish for up to 3 months. Thaw overnight in the fridge before reheating.
  • Reheating: Reheat in the microwave or on the stovetop, adding a splash of water or broth to keep it moist.

Frequently Asked Questions

  • Can I use a different type of meat? Absolutely! Ground beef, chicken, or even plant-based meats work beautifully.
  • What can I serve with Turkish Pasta? A simple green salad or garlic bread pairs wonderfully with this dish.
  • Can I make this dish ahead of time? Yes! It’s perfect for meal prep and tastes even better the next day.
  • How spicy is this dish? The spice level can be adjusted based on your preference; feel free to omit the red pepper flakes!
  • Can I use whole wheat pasta? Certainly! Whole wheat pasta adds a nutty flavor and boosts the nutritional content.
  • Is this recipe gluten-free? You can use gluten-free pasta to make this dish suitable for a gluten-free diet.
  • How do I store leftovers? Keep leftovers in an airtight container in the fridge for up to 4 days.
  • Can I add more vegetables? Yes! Feel free to add any vegetables you enjoy, like bell peppers, spinach, or mushrooms.

Nutritional Information and Dietary Adaptations

This Turkish Pasta is not only delicious but also adaptable for various dietary needs:

  • High Protein: Ground turkey provides lean protein, making it a healthy choice.
  • Low Carb Option: For a low-carb version, substitute pasta with zucchini noodles or spaghetti squash.
  • Gluten-Free: Use gluten-free pasta to accommodate gluten sensitivities.

Essential Equipment Recommendations

To make your cooking experience smooth and enjoyable, here are some essential tools:

  • Large Pot: For boiling pasta.
  • Skillet: Ideal for sautéing and combining ingredients.
  • Wooden Spoon: Perfect for stirring without scratching your cookware.
  • Measuring Cups and Spoons: To ensure accurate ingredient amounts for the best results.

Serving Suggestions

When it comes to serving your Turkish Pasta, presentation is key! Here are some suggestions:

  • Garnish with Fresh Herbs: A sprinkle of parsley or cilantro adds a pop of color.
  • Serve with a Side Salad: A refreshing side salad balances the meal perfectly.
  • Offer Grated Cheese: Provide grated Parmesan or feta on the side for those who love a cheesy finish.

Conclusion: Your New Favorite Recipe Awaits!

As we wrap up this culinary journey, I hope you feel inspired to make this delightful Turkish Pasta with Ground Turkey. It’s more than just a recipe; it’s an invitation to gather around the table, share stories, and create memories with loved ones. So pull up a chair, grab your spatula, and let’s make something unforgettable together. Happy cooking!

Easy Turkish Pasta with Ground Turkey for a Cozy Dinner

Prep Time 10 minutes
Cook Time 20 minutes
Total Time 30 minutes
Servings 4 servings
Calories 550
This flavorful and comforting Turkish-inspired pasta dish combines ground turkey, rich tomato flavors, and aromatic spices for a quick and satisfying meal.

Ingredients

Pasta

  • 12 oz pasta (penne or fusilli) (Feel free to substitute with any similar pasta type.)

Ground Meat

  • 1 lb ground turkey (Can be swapped with ground beef if desired.)

Vegetables

  • 1 medium onion, finely chopped (Consider fresh shallots or leeks for variation.)
  • 3 cloves garlic, minced (Garlic powder can work in a pinch.)

Canned & Condiments

  • 14 oz crushed tomatoes (Diced or fresh tomatoes can be used instead.)
  • 2 tbsp tomato paste (Feel free to use prepared sauce if you're short on time.)
  • 1 tsp paprika (Smoked paprika can elevate the flavors further.)
  • 0.5 tsp ground cumin (Omit or replace with coriander based on your palate.)
  • 0.5 tsp red pepper flakes (Optional, adjust according to your spice preference.)
  • to taste Salt and black pepper (Opt for Himalayan salt or sea salt for added depth.)
  • 3 tbsp olive oil (Can substitute with canola oil or butter if needed.)

Dairy & Herbs

  • 0.5 cup plain Greek yogurt (Substitute with sour cream or omit for a dairy-free option.)
  • to taste Fresh parsley, chopped (Cilantro can work too, or skip if desired.)

Instructions 

  • Cook the pasta according to package instructions until al dente. Drain and set aside.
  • In a large skillet, heat olive oil over medium heat. Add chopped onion and cook until translucent, about 5 minutes.
  • Add minced garlic and cook for 1 minute. Then, add ground turkey and cook until browned, about 7-8 minutes.
  • Stir in crushed tomatoes, tomato paste, paprika, cumin, red pepper flakes, salt, and pepper. Simmer for 10 minutes to let flavors meld.
  • Mix cooked pasta into the sauce. Remove from heat and stir in Greek yogurt. Garnish with chopped parsley before serving.

Notes

For a creamier texture, add a splash of milk or more yogurt. Adjust spice levels to taste.
Calories: 550kcal
Cost: $12
Course: Main Course
Cuisine: Turkish
Keyword: easy, ground turkey, pasta

Discover the Magic of One-Pan Cooking

Welcome to the delightful world of one-pan meals! If you’ve ever found yourself overwhelmed by the chaos of dinner prep, you’re not alone. Enter the Easy One-Pan Ground Turkey & Potatoes Meal. This gem is not just a recipe; it’s a comforting embrace on a busy weeknight. With just a few simple ingredients, you’ll create a dish that’s as flavorful as it is easy to make. Trust me, your taste buds are in for a treat!

In this article, we’ll explore everything you need to know about making this meal—from key ingredients to expert tips, variations, and common mistakes to avoid. So, grab your spatula and let’s dive into the deliciousness!

Why You’ll Love This Recipe

  • One-Pan Convenience: Say goodbye to a mountain of dishes! Everything cooks together in one pan, making cleanup a breeze.
  • Flavor Explosion: With the perfect blend of spices like smoked paprika and Italian seasoning, this dish is bursting with flavor.
  • Nutritious Ingredients: Packed with protein from the ground turkey and wholesome carbs from the potatoes, it’s a balanced meal!
  • Quick and Easy: Ready in under 30 minutes, it’s perfect for busy weeknights when time is of the essence.
  • Customizable: Feel free to swap in your favorite vegetables or spices for a personal touch!

Ingredient Breakdown and Substitutions

Let’s talk about what goes into this hearty meal. Here’s what you’ll need:

  • 1 pound ground turkey: A lean protein option that cooks quickly and absorbs flavors beautifully.
  • 4 medium potatoes, diced: These give the dish its comforting heartiness. You can use any variety you like—russets, reds, or even sweet potatoes!
  • 1 bell pepper, chopped: Adds a pop of color and sweetness. Feel free to use any color—red, yellow, or green.
  • 1 onion, diced: A must for flavor! Yellow onions work best, but you can also use red for a sweeter taste.
  • 3 cloves garlic, minced: Because everything’s better with garlic, right?
  • 2 tablespoons olive oil: For sautéing; it adds richness and helps the ingredients cook evenly.
  • 1 teaspoon smoked paprika: This gives a lovely depth of flavor and a hint of smokiness.
  • 1 teaspoon Italian seasoning: A blend that brings a taste of the Mediterranean to your plate.
  • Salt and pepper, to taste: Essential for enhancing all the flavors.
  • Fresh parsley, chopped (for garnish): Not just for looks! It adds a fresh, bright finish.

If you’re missing any of these ingredients, don’t worry! Here are some great substitutions:

  • Ground turkey: You can use ground chicken, beef, or even plant-based meat alternatives.
  • Potatoes: Cauliflower or zucchini can be good low-carb substitutes.
  • Bell pepper: Any other vegetable like carrots or peas can be swapped in.
  • Olive oil: Any cooking oil will work; try avocado or canola oil.

How to Make Your One-Pan Ground Turkey & Potatoes Meal

Juicy ground turkey and diced potatoes in a skillet, garnished with fresh parsley.

Creating this delightful dish is easier than you think! Follow these simple steps:

  1. Heat the oil: In a large skillet over medium heat, add the olive oil.
  2. Cook the turkey: Add the ground turkey and cook until browned, about 5-7 minutes. Remember to break it apart for even cooking!
  3. Add vegetables: Stir in the diced potatoes, chopped bell pepper, and diced onion. Let them cook for about 5 minutes.
  4. Incorporate garlic and spices: Add the minced garlic, smoked paprika, Italian seasoning, salt, and pepper. Stir well to combine.
  5. Cover and cook: Reduce the heat to low, cover the skillet, and let everything simmer for 15-20 minutes, or until the potatoes are tender.
  6. Final touch: Once the potatoes are cooked, give it a final stir to mix everything.
  7. Garnish: Sprinkle with chopped fresh parsley for that extra flair.
  8. Serve hot: Enjoy your meal straight from the pan!

Pro Tips for Success

Here are some expert insights to ensure your one-pan meal turns out perfectly:

  • Don’t rush the cooking: Allow the turkey to brown properly for the best flavor.
  • Cut potatoes evenly: This ensures they cook through at the same time.
  • Experiment with spices: Feel free to add a pinch of cayenne for some heat or a dash of cumin for a different flavor profile.
  • Add veggies at different times: If you prefer softer vegetables, add them earlier in the cooking process.
  • Use a lid: Covering the skillet helps steam the potatoes, making them tender faster.
  • Taste as you go: Adjust seasoning to your liking throughout the cooking process.
  • Let it sit: After cooking, let the dish sit for a few minutes before serving; it allows the flavors to meld.
  • Pair with sides: Consider serving with a simple green salad for balance.

Common Mistakes and Troubleshooting

Even the best chefs encounter hiccups. Here’s how to avoid common pitfalls:

  • Overcooking the turkey: Keep an eye on it; overcooked turkey can become dry.
  • Under-cooked potatoes: Ensure they’re diced small enough for even cooking.
  • Not enough seasoning: Taste the dish before serving; it may need an extra pinch of salt!
  • Skipping the garnish: Don’t skip the parsley; it adds freshness and visual appeal!

Delicious Variations to Try

Once you’ve mastered the basic recipe, why not mix things up? Here are some fun variations:

  • Mexican Twist: Add black beans, corn, and top with avocado and lime juice.
  • Italian Style: Toss in diced tomatoes and sprinkle with mozzarella cheese before serving.
  • Vegetable Medley: Use any leftover vegetables you have on hand—broccoli, carrots, or spinach work great!
  • Spicy Kick: Add diced jalapeños for a spicy version that’ll warm you up!

Storage and Make-Ahead Instructions

This recipe is not only delicious but also great for meal prep! Here’s how to store and reheat:

  • Storing leftovers: Keep any leftovers in an airtight container in the fridge for up to 4 days.
  • Freezing: You can freeze this meal for up to 3 months. Just make sure to cool it completely before transferring to a freezer-safe container.
  • Reheating: To reheat, microwave until hot or warm it up in a skillet over medium heat, adding a splash of water to prevent drying out.

Frequently Asked Questions

Got questions? Here are some common queries about this recipe:

  • Can I make this dish ahead of time? Absolutely! You can prepare it a day in advance and simply reheat when ready to serve.
  • Can I use beef instead of ground turkey? Yes, ground beef or chicken works well too!
  • How do I make this dish spicier? Add more smoked paprika, a dash of cayenne pepper, or fresh jalapeños.
  • What other vegetables can I add to this recipe? Feel free to add any vegetables you love, like zucchini, carrots, or spinach.
  • Is this recipe gluten-free? Yes, all ingredients listed are gluten-free!
  • How can I make it dairy-free? The recipe is naturally dairy-free, just ensure any toppings comply.
  • What can I serve with this meal? A fresh salad or some crusty bread pairs wonderfully!
  • Can I double the recipe? Yes, just ensure your pan can accommodate the larger volume!

Nutritional Tips and Dietary Adaptations

This recipe is already a nutritious choice, but here are some tips for varying dietary needs:

  • Low-carb option: Substitute potatoes with cauliflower for a lower-carb meal.
  • High-protein boost: Add a can of drained chickpeas for extra protein!
  • Vegetarian version: Replace the turkey with a plant-based meat option or even mushrooms.

Recommended Equipment

To make this dish, you’ll need:

  • A large skillet: Preferably non-stick or cast iron for easy cooking and cleanup.
  • A spatula: For stirring and serving your delicious creation.
  • A sharp knife: Essential for chopping vegetables efficiently.

Serving Suggestions

When it comes to serving this meal, simplicity is key. Here are some ideas:

  • Serve it family-style: Place the pan in the center of the table for a cozy, communal feel.
  • Pair with a crisp salad: A simple green salad with a light vinaigrette complements the richness of the dish.
  • Accompany with crusty bread: Perfect for soaking up all those delicious flavors!

Conclusion

There you have it! The Easy One-Pan Ground Turkey & Potatoes Meal is not just a recipe; it’s a comforting reminder that delicious meals don’t have to be complicated. With its warm flavors and easy prep, this dish is sure to become a staple in your kitchen. So, next time you’re looking for a quick weeknight dinner, remember this one-pan wonder. Happy cooking, friends! May your kitchen always be filled with warmth and laughter!

Easy One-Pan Ground Turkey & Potatoes Meal: An Incredible Ultimate Recipe

Prep Time 10 minutes
Cook Time 25 minutes
Total Time 35 minutes
Servings 4 servings
Calories 450
This quick and flavorful one-pan meal combines ground turkey and potatoes with fresh vegetables, perfect for a satisfying dinner.

Ingredients

Meat

  • 1 pound ground turkey

Vegetables

  • 4 medium potatoes, diced
  • 1 chopped bell pepper
  • 1 diced onion

Aromatics & Spices

  • 3 cloves garlic, minced
  • 2 tablespoons olive oil
  • 1 teaspoon smoked paprika
  • 1 teaspoon Italian seasoning
  • to taste Salt and pepper
  • for garnish Fresh parsley, chopped

Instructions 

  • Heat olive oil in a large skillet over medium heat.
  • Add ground turkey and cook until browned, about 5-7 minutes, breaking it apart.
  • Stir in diced potatoes, chopped bell pepper, and onion. Cook for 5 minutes.
  • Add garlic, smoked paprika, Italian seasoning, salt, and pepper. Mix well.
  • Cover and cook on low for 15-20 minutes until potatoes are tender. Stir occasionally.

Notes

Garnish with fresh parsley before serving for added flavor.
Calories: 450kcal
Cost: $15
Course: Main Course
Cuisine: American
Keyword: ground turkey, potatoes

Welcome to the Comfort of Creamy Beef and Bowtie Pasta!

There’s something magical about a bowl of creamy pasta that instantly transports you back to simpler times—like cozy evenings spent in the kitchen with your loved ones. Today, I’m inviting you into my home to share a recipe that’s not just about filling bellies, but about creating memories. This Creamy Beef and Bowtie Pasta is a dish that feels like a warm hug on a chilly day, combining the heartiness of ground beef with the delightful shape of bowtie pasta, all enveloped in a luscious creamy sauce.

Perfect for busy weeknights or special gatherings, this recipe is designed to impress while being simple enough for anyone to whip up. Let’s dive into why you’re going to love this dish!

Why You’ll Love This Recipe

  • Quick and Easy: Ready in under 30 minutes, making it perfect for those hectic evenings when you want something satisfying without spending hours in the kitchen.
  • Comfort Food Classic: This dish combines familiar ingredients that everyone loves, creating a comforting meal that’s sure to please picky eaters.
  • Customizable: With simple substitutions and variations, you can easily adapt this recipe to fit your family’s preferences or dietary needs.
  • Great for Leftovers: This creamy pasta reheats beautifully, making it an excellent choice for meal prep or enjoying the next day.
  • Flavorful and Satisfying: The rich blend of beef, cream, and cheese creates a depth of flavor that will keep you coming back for seconds.

Ingredients You’ll Need

Gathering your ingredients is the first step to creating this delicious pasta dish. Here’s what you’ll need:

  • 12 oz bowtie pasta (farfalle): A fun shape that holds onto the creamy sauce beautifully.
  • Salted water: Essential for cooking the pasta to perfection.
  • 1 lb ground beef: The heart of the dish, providing protein and richness.
  • 1 small onion, finely diced: Adds a touch of sweetness and depth of flavor.
  • 3 cloves garlic, minced: Because more garlic is always better!
  • 1 tbsp olive oil: For sautéing the onion and garlic.
  • 1 cup heavy cream: The secret to that luscious, creamy sauce.
  • ¾ cup beef broth: Adds moisture and flavor to the sauce.
  • 1 cup grated Parmesan cheese: For that cheesy goodness that ties everything together.
  • ½ tsp Italian seasoning: A blend of herbs that enhances the overall flavor.
  • Salt & pepper, to taste: Essential for seasoning your dish to perfection.
  • Optional: red pepper flakes: For a little kick if you’re feeling adventurous.

Step-by-Step Instructions

Side view of a serving of bowtie pasta with ground beef and creamy sauce.

Now that you have everything at hand, let’s get cooking! Follow these easy steps to create your Creamy Beef and Bowtie Pasta:

  1. In a large pot of salted water, cook the bowtie pasta until al dente. Reserve ½ cup of the pasta water for later, then drain and set aside.
  2. In a large skillet over medium heat, add the olive oil. Sauté the onion until soft (about 3–4 minutes), then add the garlic and cook until fragrant (about 30 seconds).
  3. Add the ground beef to the skillet, breaking it up with a spoon, and cook until fully browned. Drain excess fat if needed.
  4. Pour in the beef broth and heavy cream. Stir well, bring to a gentle simmer, and let it cook for 5–7 minutes until slightly thickened.
  5. Stir in the Parmesan cheese, Italian seasoning, salt, and pepper. Add a splash of reserved pasta water if the sauce is too thick.
  6. Toss in the cooked bowtie pasta and mix until every piece is coated in the creamy sauce. Garnish with fresh parsley or extra cheese if desired.

Pro Tips for Perfect Pasta

  • Don’t rush the sauté: Allowing the onions to caramelize slightly adds sweetness and depth to your dish.
  • Reserve pasta water: This starchy liquid is gold for adjusting the sauce’s consistency.
  • Experiment with cheeses: Swap out Parmesan for Pecorino Romano or add a mix of cheeses for a richer flavor.
  • Season at every step: Layer your flavors by seasoning the beef and sauce as you go.
  • Fresh herbs elevate: Consider adding fresh basil or parsley at the end for a pop of color and freshness.
  • Make it creamy: If you want an extra creamy texture, stir in a dollop of cream cheese or mascarpone cheese at the end.
  • Adjust spice levels: If you love heat, don’t hesitate to double the red pepper flakes!
  • Make it a one-pot meal: You can cook the pasta right in the sauce for even more flavor!

Common Mistakes and Troubleshooting

Even the best cooks can have hiccups in the kitchen. Here are some common mistakes and how to avoid them:

  • Overcooking the pasta: Keep an eye on it; you want it al dente, which means it should still have a little bite.
  • Not seasoning enough: Don’t forget to season your beef and sauce throughout the cooking process.
  • Too thick of a sauce: If your sauce is too thick, simply add more reserved pasta water or broth.
  • Forgetting to stir: Stir the pasta into the sauce gently to ensure even coating without breaking the pasta.

Variations to Try

This recipe is versatile and can be adapted in many delicious ways:

  • Vegetarian Option: Substitute the ground beef with lentils or mushrooms for a hearty vegetarian twist.
  • Cheesy Broccoli Bowties: Add steamed broccoli florets for a nutritious boost and a pop of color.
  • Spicy Sausage: Swap out the ground beef for Italian sausage for a kick of flavor.
  • One-Pot Wonder: Cook the pasta directly in the sauce, adding water as needed to cook everything together.

Storage and Make-Ahead Instructions

This dish is perfect for meal prep! Here’s how to store and reheat it:

  • Refrigeration: Store leftovers in an airtight container for up to 3 days.
  • Freezing: You can freeze this dish for up to 2 months; just be sure to let it cool completely before transferring it to a freezer-safe container.
  • Reheating: Gently reheat in a saucepan over low heat, adding a splash of milk or broth if needed to loosen the sauce.

Frequently Asked Questions

  • Can I use a different type of pasta? Absolutely! Any pasta shape you love will work well, but remember to adjust cooking times.
  • Is there a dairy-free option? Yes! Substitute the heavy cream with coconut cream and use nutritional yeast instead of cheese.
  • Can I make this ahead of time? Yes, you can prepare the sauce in advance and just cook the pasta right before serving.
  • How do I make this dish spicier? Add more red pepper flakes or a dash of hot sauce to elevate the heat.
  • What can I serve with this pasta? A simple side salad or garlic bread pairs beautifully with this dish.
  • Can I double the recipe? Of course! Just make sure you have a large enough pot to accommodate everything.
  • What should I do if the sauce is too thick? Add a bit of reserved pasta water or broth until you reach your desired consistency.
  • How can I make this dish more nutritious? Add in some veggies like spinach, zucchini, or bell peppers to boost the nutrition without sacrificing flavor.

Nutritional Tips and Dietary Adaptations

This Creamy Beef and Bowtie Pasta can be adjusted to accommodate various dietary preferences:

  • Low-Carb Option: Use zucchini noodles or spaghetti squash instead of pasta for a low-carb version.
  • Gluten-Free: Opt for gluten-free pasta to make this dish friendly for those with gluten sensitivities.
  • Heart-Healthy: Use lean ground turkey instead of beef and replace heavy cream with half-and-half.

Essential Equipment Recommendations

To make your cooking experience smoother, here’s what I recommend keeping on hand:

  • Large Pot: For boiling the pasta and making the sauce.
  • Skillet: A good non-stick skillet is key for sautéing and simmering your sauce evenly.
  • Wooden Spoon: Perfect for stirring without scratching your cookware.
  • Measuring Cups and Spoons: Accurate measurements can make or break a recipe!

Serving Suggestions

This dish is fantastic on its own, but here are some ideas to elevate your meal:

  • Fresh Herbs: Garnish with fresh parsley or basil for a burst of flavor and color.
  • Crusty Bread: Serve with a side of garlic bread for dipping into that creamy sauce.
  • Salad on the Side: A bright, crisp salad balances the richness of the pasta beautifully.

Conclusion

And there you have it! A delightful Creamy Beef and Bowtie Pasta recipe that’s not only easy to make but also rich in flavors and comfort. Whether you’re cooking for family or entertaining friends, this dish is sure to impress. Remember, cooking is all about experimenting and having fun, so don’t hesitate to make it your own. I can’t wait to hear how your pasta turns out—so pull up a chair, grab a fork, and let’s create some magic in the kitchen together!

Creamy Beef and Bowtie Pasta

Prep Time 10 minutes
Cook Time 15 minutes
Total Time 25 minutes
Servings 4 servings
Calories 650
A rich and creamy pasta dish combining tender ground beef with al dente bowtie pasta in a flavorful sauce.

Ingredients

Pasta

  • 12 oz bowtie pasta (farfalle)
  • 1 lb ground beef
  • 1 small onion, finely diced
  • 3 cloves garlic, minced
  • 1 tbsp olive oil
  • 1 cup heavy cream
  • ¾ cup beef broth
  • 1 cup grated Parmesan cheese
  • ½ tsp Italian seasoning
  • to taste Salt & pepper
  • Optional red pepper flakes (for a touch of heat)

Instructions 

  • Cook the bowtie pasta in salted water until al dente, then drain and set aside.
  • Sauté diced onion in olive oil until soft, then add garlic and cook until fragrant.
  • Add ground beef and cook until browned; drain excess fat if needed.
  • Pour in beef broth and heavy cream, simmer for 5–7 minutes until slightly thickened.
  • Stir in Parmesan, Italian seasoning, salt, pepper, and red pepper flakes if using. Toss with cooked pasta and serve.

Notes

For extra flavor, garnish with fresh parsley or additional cheese.
Calories: 650kcal
Cost: $15
Course: Main Course
Cuisine: Italian-American
Keyword: Beef, creamy, pasta

Why This Creamy Ground Beef Pasta Will Steal Your Heart

Welcome to the cozy haven of my kitchen, where the magic of culinary comfort comes alive! Today, we’re diving into a dish that’s not just a meal but a celebration of flavors and memories—the Easy Creamy Ground Beef Pasta. Whether you’re racing against the clock on a busy weeknight or looking to impress friends with an effortless yet delightful dinner, this recipe is your go-to solution. It’s the kind of dish that makes you feel right at home, warming your heart and filling your belly with happiness.

With a delightful blend of ground beef, creamy sauce, and perfectly cooked pasta, this dish has everything you need for a satisfying meal. Let’s not forget that cooking should be fun and stress-free, so grab your apron and let’s get started!

Why You’ll Love This Recipe

  • One-Pan Wonder: Say goodbye to labor-intensive meals! This recipe is cooked in one pan, making cleanup a breeze.
  • Comfort Food Classic: It’s creamy, hearty, and utterly delicious—perfect for comforting your soul after a long day.
  • Kid-Approved: Even the pickiest eaters will fall in love with this dish, making family dinners a delight.
  • Quick & Easy: Ready in under 30 minutes, this recipe fits perfectly into your busy schedule.
  • Customizable: Feel free to mix things up! Add your favorite veggies or spices to make it uniquely yours.

Ingredients You’ll Need

Here’s what you need to whip up this delightful dish:

  • 8 ounces uncooked pasta: Any shape you prefer! I love using fusilli for its ability to hold onto sauce.
  • 1 tablespoon olive oil: For sautéing the onion and beef to perfection.
  • 1/2 medium onion (chopped): Adds sweetness and depth to the sauce.
  • 1 pound lean ground beef: The star of the show, providing protein and flavor.
  • 3 cloves garlic (minced): Because everything is better with garlic!
  • 1 (14 ounce) can diced tomatoes (with juices): Brings acidity and freshness to the dish.
  • 2 tablespoons tomato paste: Enhances the tomato flavor and adds richness.
  • 1/2 teaspoon Dijon mustard: A secret ingredient that elevates the sauce—trust me!
  • 1/4 teaspoon Italian seasoning: A medley of herbs that complements the beef beautifully.
  • 3/4 cup heavy/whipping cream: For that luscious, creamy texture.
  • Salt & pepper (to taste): Essential for bringing all the flavors together.
  • Freshly grated parmesan cheese (optional): A sprinkle of cheese takes it over the top!

Pro Tips for Success

Side view of a bowl filled with Easy Creamy Ground Beef Pasta, showcasing its creamy sauce and pasta texture.
  • Season generously: Don’t be shy with the salt and pepper. Proper seasoning is key to a flavorful dish.
  • Brown the beef well: Aim for a nice golden color on your ground beef for maximum flavor.
  • Don’t skip the mustard: It adds a subtle tang that enhances the overall taste of the sauce.
  • Reserve some pasta water: If your sauce is too thick, adding a splash of starchy pasta water can help thin it out.
  • Experiment with spices: If you like a little heat, add some red pepper flakes or a dash of cayenne pepper.
  • Make it a veggie dish: Toss in some spinach or zucchini for added nutrients and color.
  • Use freshly grated cheese: It melts beautifully and contributes to a creamier texture.
  • Let it sit for a few minutes: Allow the pasta to absorb the sauce before serving for the best flavor.

Common Mistakes and Troubleshooting

Cooking can be a bit tricky, but don’t worry! Here are some common pitfalls and how to avoid them:

  • Overcooking the pasta: Make sure to cook it al dente, as it will continue to cook when mixed with the sauce.
  • Too much fat in the pan: If there’s excess fat from the beef, spoon it out before adding the sauce to keep it light.
  • Under-seasoning: Taste and adjust seasoning as you go. The sauce should be vibrant and flavorful.
  • Using dried herbs: Fresh herbs can elevate the dish, but if you use dried, adjust the quantity since they’re more potent.

Delicious Variations to Try

Want to spice things up? Here are some fun variations:

  • Vegetarian Option: Swap out the ground beef for lentils or chickpeas for a hearty, plant-based dish.
  • Spicy Sausage: Use Italian sausage instead of ground beef for a flavorful twist.
  • Mediterranean Style: Incorporate olives, feta cheese, and artichokes into the sauce.
  • Creamy Pesto: Stir in a few tablespoons of pesto for a vibrant flavor boost.

Storage and Make-Ahead Instructions

This dish is perfect for meal prep! Here’s how to store and reheat:

  • Refrigeration: Store leftovers in an airtight container in the fridge for up to 3 days.
  • Freezing: You can freeze the dish for up to 2 months. Just make sure to cool it completely before transferring it to a freezer-safe container.
  • Reheating: Reheat in the microwave or on the stovetop. If it’s too thick, add a splash of cream or broth to loosen it up.

Frequently Asked Questions

Here are some common queries about this recipe:

  • Can I use whole wheat pasta?: Absolutely! Whole wheat pasta adds a nutty flavor and extra fiber.
  • What can I substitute for heavy cream?: You can use half-and-half or a non-dairy cream alternative for a lighter version.
  • How can I make this dish gluten-free?: Substitute regular pasta with gluten-free pasta and ensure other ingredients are gluten-free.
  • Can I add vegetables to this recipe?: Yes! Bell peppers, mushrooms, or spinach work wonderfully.
  • What type of ground beef should I use?: Lean ground beef is best for a healthier option, but feel free to use ground turkey or chicken!
  • How do I make it dairy-free?: Omit the cream and cheese and use a dairy-free alternative instead.
  • Can I prepare this ahead of time?: Yes! You can make the sauce in advance and simply cook the pasta when you’re ready to serve.
  • What’s the best way to serve this dish?: Serve it with a side salad and garlic bread for a complete meal.

Nutritional Tips and Dietary Adaptations

To make this dish even healthier, consider these adaptations:

  • Lean Protein: Choose lean ground beef or substitute with ground turkey for fewer calories.
  • Whole Grains: Opt for whole grain or legume-based pasta for added fiber and nutrients.
  • Add greens: Incorporate spinach or kale into the sauce for an extra boost of vitamins.

Essential Equipment

Before you start cooking, make sure you have the following:

  • Large Skillet or Dutch Oven: For cooking the pasta and sauce together.
  • Wooden Spoon: Perfect for stirring and breaking up the beef as it cooks.
  • Measuring Cups and Spoons: To accurately measure your ingredients.
  • Colander: For draining the pasta.

Serving Suggestions

This creamy ground beef pasta is delicious on its own, but here are some ideas to elevate your meal:

  • Garnish with fresh herbs: A sprinkle of parsley or basil adds a pop of color and flavor.
  • Pair with a side salad: A light salad with a tangy vinaigrette complements the richness of the pasta.
  • Serve with crusty bread: Perfect for soaking up that creamy sauce!

Conclusion: Embrace the Magic of Cooking

There you have it—your ultimate guide to creating the Easy Creamy Ground Beef Pasta that feels like home! Remember, cooking is all about experimentation and joy. Don’t be afraid to make this recipe your own, whether through different ingredients or personal touches. I hope this dish becomes a staple in your kitchen, just like it has in mine. Now, let’s gather around the table and enjoy the magic of food together!

Easy Creamy Ground Beef Pasta

Prep Time 10 minutes
Cook Time 20 minutes
Total Time 30 minutes
Servings 4 servings
Calories 650
A quick and delicious pasta dish with a creamy tomato sauce and ground beef, perfect for a satisfying weeknight dinner.

Ingredients

Pasta

  • 8 ounces uncooked pasta
  • 1 tablespoon olive oil
  • 1/2 medium onion (chopped)
  • 1 pound lean ground beef
  • 3 cloves garlic (minced)
  • 14 ounce can diced tomatoes (with juices)
  • 2 tablespoons tomato paste
  • 1/2 teaspoon Dijon mustard (see note)
  • 1/4 teaspoon Italian seasoning
  • 3/4 cup heavy/whipping cream
  • to taste Salt & pepper Salt & pepper
  • optional to taste Freshly grated parmesan cheese

Instructions 

  • Cook pasta in salted boiling water until al dente, then drain.
  • Sauté onion and olive oil in a skillet for 4-5 minutes.
  • Add ground beef and garlic; cook until browned, then drain excess fat.
  • Stir in tomatoes, tomato paste, mustard, and Italian seasoning; simmer 4-5 minutes.
  • Add cream; cook 3-5 minutes until warmed and slightly reduced. Season with salt and pepper.
  • Toss sauce with drained pasta, top with parmesan if desired, and serve.

Notes

For a richer flavor, let the sauce simmer longer to deepen the taste.
Calories: 650kcal
Cost: $15
Course: Main Course
Cuisine: American
Keyword: creamy, ground beef, pasta

Welcome to the Comfort of the Cheesy Hamburger Rice Casserole

Ah, the Cheesy Hamburger Rice Casserole—a dish that brings back memories of cozy family dinners and the warmth of home-cooked meals. This recipe combines the richness of ground beef, the creaminess of cheese, and the satisfying texture of rice into a comforting casserole that’s perfect for busy weeknights or when you need a little nostalgia on your plate. Whether you’re cooking for a crowd or just for yourself, this casserole is bound to impress and soothe the soul.

Why You’ll Love This Recipe

There are countless reasons to fall in love with this Cheesy Hamburger Rice Casserole, but here are a few of my top favorites:

  • Quick and Easy: With simple prep and minimal ingredients, you can whip this up in no time—perfect for those hectic evenings.
  • One-Dish Wonder: Everything cooks in a single baking dish, which means less cleanup for you and more time enjoying your meal.
  • Customizable: Feel free to swap out ingredients based on what you have on hand or your family’s preferences—this dish is as flexible as it is delicious!
  • Kid-Friendly: The combination of beef, cheese, and rice is sure to please even the pickiest eaters in your family.
  • Leftover Magic: This casserole tastes even better the next day, making it ideal for meal prep or leftovers.

Ingredient Breakdown

An appetizing Cheesy Hamburger Rice Casserole in a dish, showcasing layers of rice, ground beef, and cheese under soft, warm light.

Before we dive into the cooking process, let’s take a closer look at the ingredients that make this casserole so special, along with some handy substitutions:

  • Ground Beef: The star of the show! You can substitute with ground turkey or chicken for a lighter version.
  • Uncooked Rice: Long-grain white rice works best, but feel free to use brown rice (just adjust the cooking time).
  • Beef Broth: For added flavor, homemade or low-sodium store-bought beef broth is ideal. You can also use vegetable broth for a vegetarian option.
  • Cream of Mushroom Soup: This adds creaminess and flavor. You can substitute with cream of chicken or even a homemade white sauce.
  • Shredded Cheddar Cheese: Cheddar is classic, but mix it up with Monterey Jack or pepper jack for a kick!
  • Frozen Mixed Vegetables: A great way to sneak in some veggies. You can use fresh vegetables; just sauté them first to soften.
  • Onion and Garlic: Essential for flavor; shallots or leeks can be used as alternatives.
  • Italian Seasoning: A blend of herbs that complements the dish. You can use individual herbs like oregano or basil if you prefer.
  • Salt and Pepper: Essential for seasoning; adjust to taste!

How to Make Cheesy Hamburger Rice Casserole

Ready to make some magic in your kitchen? Here’s how to prepare this delicious casserole:

  1. Preheat the oven: Set your oven to 350°F (175°C) so it’s ready when the casserole is assembled.
  2. Brown the beef: In a large skillet over medium heat, brown 1 pound of ground beef. Drain any excess fat.
  3. Sauté the aromatics: Add 1 chopped onion and 2 cloves of minced garlic to the skillet. Sauté until softened and fragrant.
  4. Combine the ingredients: Stir in 1 cup of uncooked rice, 2 cups of beef broth, 1 can (10.5 oz) of cream of mushroom soup, 1 cup of frozen mixed vegetables, salt, pepper, and 1 teaspoon of Italian seasoning.
  5. Bring to a boil: Allow the mixture to come to a boil, then reduce the heat and let it simmer for about 5 minutes.
  6. Transfer to baking dish: Pour the mixture into a greased 9×13 inch baking dish. Spread it out evenly.
  7. Add cheese: Top the casserole with 1 cup of shredded cheddar cheese, ensuring every bite will have that cheesy goodness.
  8. Bake: Cover the dish with aluminum foil and bake for 30 minutes. Then, remove the foil and bake for an additional 10-15 minutes, or until the cheese is bubbly and golden.
  9. Cool and serve: Let the casserole cool for a few minutes before serving to allow the flavors to meld.

Pro Tips for Perfect Casserole

  • Use a non-stick spray: Greasing your baking dish prevents the casserole from sticking and makes for easier serving.
  • Don’t skip the simmer: Allowing the mixture to simmer before baking enhances the flavors and ensures the rice cooks properly.
  • Experiment with toppings: Add breadcrumbs or crushed crackers on top for an extra crunch before baking.
  • Let it rest: Allow the casserole to sit for a few minutes after baking for the best texture when serving.
  • Cover leftovers: Store any leftovers in an airtight container in the refrigerator to keep them fresh.
  • Add fresh herbs: Top with fresh parsley or chives for a burst of color and flavor just before serving.
  • Mix up the cheese: Combine different cheeses like mozzarella or gouda for complex flavors.
  • Make it spicy: Add jalapeños or hot sauce to the mixture for a spicy twist.
  • Use a thermometer: Ensure the internal temperature reaches 165°F (73.8°C) for food safety.
  • Stay patient: If you find the rice isn’t fully cooked after the suggested baking time, cover it and bake for an additional 10 minutes.

Common Mistakes and Troubleshooting

No one wants a casserole flop! Here are some common pitfalls and how to avoid them:

  • Too dry: If your casserole comes out dry, try adding a splash more beef broth before baking next time.
  • Undercooked rice: Ensure that the rice is fully combined with the liquid before baking; if it’s not done, cover and bake longer.
  • Burnt cheese: If the cheese gets too brown, cover with foil to prevent further browning while baking.
  • Flavorless dish: Always taste and adjust seasoning before baking. Don’t be shy with salt and pepper!

Variations to Try

This casserole is super versatile! Here are some fun variations to keep things exciting:

  • Mexican Twist: Add black beans, corn, and taco seasoning for a southwestern flair.
  • Vegetarian Version: Substitute the beef with lentils or chickpeas, and use vegetable broth for a meat-free delight.
  • Cheesy Broccoli Version: Stir in fresh or frozen broccoli florets for a veggie boost.
  • Italian Style: Use marinara sauce instead of cream of mushroom soup and add Italian sausage for a hearty meal.

Storage and Make-Ahead Instructions

This casserole is perfect for meal prep! Here are some tips on how to store and make it ahead:

  • Refrigerate: Store leftovers in an airtight container for up to 3 days.
  • Freeze: This casserole freezes well! Just ensure it’s fully cooled before wrapping tightly and placing in the freezer for up to 3 months.
  • Reheat: To reheat, thaw overnight in the fridge and warm in the oven until heated through.
  • Make ahead: Assemble the casserole a day in advance, cover, and refrigerate before baking. Just add an extra 10-15 minutes to the baking time.

Frequently Asked Questions

Here are some common questions about the Cheesy Hamburger Rice Casserole:

  • Can I use brown rice instead of white rice? Yes, but you’ll need to adjust the cooking time since brown rice takes longer to cook.
  • What can I use instead of cream of mushroom soup? You can use homemade white sauce or cream of chicken soup as a substitute.
  • Can I add more vegetables? Absolutely! Feel free to add your favorites as long as you keep the ratios similar.
  • How do I prevent my casserole from being too dry? Make sure you have enough liquid, and consider covering it while baking.
  • Is it okay to use leftover cooked rice? Yes! Just reduce the amount of beef broth to prevent the casserole from becoming too mushy.
  • Can I make this casserole in advance? Yes, you can assemble it ahead of time and bake it when you’re ready to eat.
  • What side dishes go well with this casserole? A fresh salad or garlic bread pairs wonderfully with this hearty dish.
  • How can I make it healthier? Use lean ground beef or turkey, and add more vegetables for extra nutrients.

Nutritional Tips and Dietary Adaptations

This casserole can be adapted to fit various dietary needs:

  • Low-Carb: Substitute rice with cauliflower rice for a low-carb option.
  • Gluten-Free: Ensure you’re using gluten-free cream of mushroom soup or make your own.
  • Dairy-Free: Use dairy-free cheese alternatives and coconut milk instead of cream soup.

Equipment Recommendations

To make your cooking experience seamless, here’s what I recommend:

  • Large Skillet: A non-stick skillet is perfect for browning the ground beef.
  • 9×13 Inch Baking Dish: Ideal for this casserole size; glass or ceramic works best.
  • Measuring Cups and Spoons: Accurate measurements are key to a successful casserole!
  • Wooden Spoon: For stirring and combining ingredients—always a kitchen essential.

Serving Suggestions

Serve this casserole hot from the oven for the best experience. Here are a few ideas to elevate your meal:

  • Garnish: Top with freshly chopped parsley or green onions for a pop of color.
  • Accompaniments: Serve with a simple side salad or roasted vegetables to balance the richness.
  • Bread: Pair with warm garlic bread or a crusty loaf for a comforting touch.

Cooking is about bringing joy into your kitchen and your home. This Cheesy Hamburger Rice Casserole is not just a meal; it’s a celebration of flavors and memories. I hope you find as much joy in making it as I do. So grab your ingredients, heat up that oven, and let’s create something magical that will have everyone asking for seconds!

Cheesy Hamburger Rice Casserole

Prep Time 10 minutes
Cook Time 40 minutes
Total Time 50 minutes
Servings 6 servings
Calories 650
A hearty and cheesy casserole combining ground beef, rice, vegetables, and flavorful seasonings, baked to perfection.

Ingredients

Meat and grains

  • 1 pound ground beef
  • 1 cup uncooked rice
  • 2 cups beef broth
  • 1 can (10.5 oz) cream of mushroom soup
  • 1 cup shredded cheddar cheese
  • 1 cup frozen mixed vegetables
  • 1 onion chopped onion
  • 2 cloves garlic, minced
  • to taste salt and pepper
  • 1 teaspoon italian seasoning

Instructions 

  • Preheat oven to 350°F (175°C).
  • Brown ground beef, sauté onion and garlic, then mix with rice, broth, soup, vegetables, and seasonings.
  • Transfer to a greased baking dish, top with cheese, cover, and bake for 30 minutes.
  • Remove foil, bake 10-15 minutes until bubbly and golden, then serve.

Notes

For a creamier texture, add a splash of milk or more cheese on top before baking.
Calories: 650kcal
Cost: $15
Course: Main Course
Cuisine: American
Keyword: Beef, cheese, Rice

Loved this recipe? Save it to your favorite Pinterest board so you can easily find it later! It’s the perfect way to keep all your sweet ideas in one place. ✨

A vibrant close-up of a Cheesy Hamburger Rice Casserole, highlighting the creamy texture and colorful ingredients within the dish.

Welcome to Your New Favorite Comfort Food: Sticky Chicken Rice Bowls

If you’re looking for a dish that’s as comforting as a warm hug on a chilly evening, you’ve come to the right place! These Sticky Chicken Rice Bowls are all about flavor, simplicity, and that magical feeling of home-cooked goodness. With a sweet and savory sauce that clings to perfectly cooked chicken, nestled on a bed of fluffy rice, this dish is bound to become a staple in your kitchen. Let’s dive into what makes this recipe so special—and how you can make it your own!

Why You’ll Love This Recipe

There are countless reasons to adore these Sticky Chicken Rice Bowls, but here are just a few:

  • Quick to Prepare: In just about 30 minutes, you can have a hearty meal on the table, making it perfect for busy weeknights.
  • Endless Customization: You can easily swap out ingredients based on your preferences or what you have on hand, ensuring variety in your meals.
  • Healthy and Delicious: Packed with protein and veggies, this dish balances nutrition with incredible flavor.
  • Family-Friendly: Even picky eaters will love the sweet, sticky sauce that makes every bite irresistible.
  • Meal Prep Champion: These bowls are great for meal prep, allowing you to enjoy leftovers throughout the week!

Ingredient Breakdown

Colorful bowl of chicken rice with glossy sauce, green onions, and a warm background.

Let’s take a closer look at the ingredients you’ll need and some substitutions to make this recipe shine.

  • 2 cups cooked jasmine rice: This fragrant rice is the perfect base. You can substitute with brown rice for a nuttier flavor or cauliflower rice for a low-carb option.
  • 1 lb chicken thighs, boneless and skinless: Chicken thighs provide richer flavor and moisture. You can use chicken breasts if you prefer a leaner option.
  • 1/4 cup soy sauce: This gives the dish its salty depth. Use tamari for a gluten-free version.
  • 2 tablespoons honey: Adds a touch of sweetness; maple syrup is a great vegan alternative.
  • 2 tablespoons rice vinegar: Essential for balancing flavors. You can substitute apple cider vinegar if needed.
  • 2 cloves garlic, minced: Fresh garlic infuses the dish with aromatic goodness.
  • 1 teaspoon grated ginger: A little zing goes a long way! Ground ginger can work in a pinch.
  • 1 tablespoon sesame oil: Adds a nutty flavor; olive oil can be used, though it will alter the taste slightly.
  • 2 green onions, sliced: For garnish and a fresh crunch.
  • Sesame seeds for garnish: Optional, but they add a delightful texture.
  • Salt and pepper to taste: Essential for seasoning your chicken!

Instructions: Step-by-Step Cooking Process

Ready to bring this dish to life? Follow these straightforward steps:

  1. In a bowl, whisk together the soy sauce, honey, rice vinegar, garlic, ginger, and sesame oil to create a marinade.
  2. Season the chicken thighs with salt and pepper, then add them to the marinade. Allow them to marinate for at least 30 minutes for maximum flavor.
  3. Heat a skillet over medium heat. Remove the chicken from the marinade, reserving the marinade for later.
  4. Cook the chicken in the skillet for about 6-7 minutes on each side or until it’s cooked through and beautifully caramelized.
  5. Add the reserved marinade to the skillet and cook for an additional 2-3 minutes, allowing the sticky sauce to thicken.
  6. While the chicken is cooking, prepare the rice in serving bowls.
  7. Once the chicken is done, slice it and place it over the rice.
  8. Drizzle the sticky sauce from the skillet over the chicken and rice, then garnish with sliced green onions and sesame seeds before serving.

Pro Tips for Perfect Sticky Chicken Rice Bowls

Want to elevate your cooking game? Here are some expert insights:

  • Marinate Longer: For even more flavor, marinate the chicken overnight.
  • Use Fresh Ingredients: Fresh garlic and ginger make a noticeable difference in flavor.
  • Don’t Rush the Sauce: Allow the sauce to thicken properly for that perfect sticky consistency.
  • Experiment with Heat: Add sriracha or red pepper flakes to the marinade for a spicy kick.
  • Try Different Proteins: Shrimp or tofu can be great alternatives if you want to mix things up.
  • Serve with Veggies: Add steamed broccoli or snap peas for extra nutrition and color.
  • Adjust the Sweetness: If you prefer a sweeter sauce, add more honey or a splash of orange juice.
  • Garnish Wisely: Fresh cilantro or crushed peanuts can add a unique twist to the dish.

Common Mistakes and Troubleshooting

Even the best cooks have off days! Here are some common pitfalls and how to avoid them:

  • Overcooking the Chicken: Keep an eye on the chicken to prevent it from drying out. Use a meat thermometer to check for doneness (165°F).
  • Too Much Sauce: If your sauce is too salty, add a splash of water or more honey to balance it out.
  • Sticky Rice: If your rice is too sticky, rinse it before cooking to remove excess starch.
  • Burnt Garlic: Add garlic towards the end of cooking if you’re worried about it burning.

Variations to Try

Want to switch things up? Here are some fun variations:

  • Curry Flavor: Add curry powder to the marinade for a spicy twist.
  • Teriyaki Style: Replace honey with brown sugar and add sesame seeds to the marinade.
  • Veggie-Packed: Toss in bell peppers, carrots, and snap peas while cooking the chicken.
  • Low-Carb Option: Serve over zucchini noodles or cauliflower rice instead of traditional rice.

Storage and Make-Ahead Instructions

These bowls can easily become a meal-prep superstar! Here’s how to store and reheat:

  • Refrigerate: Store leftovers in an airtight container for up to 4 days.
  • Freeze: For longer storage, freeze the chicken and sauce together for up to 3 months.
  • Reheat: Thaw overnight in the fridge, then reheat in the microwave or on the stovetop until heated through.

Frequently Asked Questions

Let’s tackle some of your burning questions!

  • Q: Can I use chicken breasts instead of thighs?
    A: Yes, but remember that chicken breasts can dry out more easily, so be careful not to overcook them!
  • Q: Is this recipe gluten-free?
    A: Yes, just use gluten-free soy sauce (like tamari) to keep it safe for gluten-free diets.
  • Q: How can I make this recipe vegetarian?
    A: Substitute chicken with tofu or tempeh, and use vegetable broth instead of soy sauce.
  • Q: What if I don’t have sesame oil?
    A: You can use olive oil, but expect a slightly different flavor profile.
  • Q: Can I add more vegetables?
    A: Absolutely! Feel free to add any vegetables you have on hand—zucchini, bell peppers, or carrots work great!
  • Q: Is there a way to make this dish spicier?
    A: Yes! Add sriracha to the marinade or sprinkle red pepper flakes on top before serving.
  • Q: What’s the best way to serve this dish?
    A: These bowls are best served warm, with a sprinkle of sesame seeds and green onions on top.
  • Q: How can I make this dish ahead of time?
    A: You can marinate the chicken earlier in the day and then cook it right before serving for a fresh taste!

Nutritional Information and Dietary Adaptations

Cooking is all about balance, so let’s dive into some nutrition tips:

  • Protein Power: Chicken thighs are rich in protein, perfect for muscle repair and growth.
  • Healthy Fats: Sesame oil provides healthy fats, enhancing nutrient absorption.
  • Fiber Boost: Consider using brown rice or adding beans for an extra fiber boost.
  • Low-Carb Diet Friendly: Swap rice for cauliflower rice to keep the dish low-carb.
  • Vegan Option: Use tofu and maple syrup for a plant-based alternative that doesn’t skimp on flavor!

Essential Equipment Recommendations

Having the right tools can make all the difference in your cooking experience:

  • Non-stick Skillet: A non-stick skillet will help you achieve that beautifully caramelized chicken without making a mess.
  • Mixing Bowls: Use mixing bowls for prepping your marinade and storing ingredients.
  • Sharp Knife: A good knife is essential for slicing chicken and chopping vegetables.
  • Meat Thermometer: Ensure your chicken is perfectly cooked and safe to eat.

Serving Suggestions

Now that your Sticky Chicken Rice Bowls are ready, here are some ideas for making your meal even more delightful:

  • Accompany with Fresh Greens: A simple side salad with a light vinaigrette can balance out the richness of the dish.
  • Add Pickled Vegetables: Pickled cucumbers or carrots can add a refreshing crunch.
  • Pair with a Cold Drink: A chilled ginger ale or iced tea complements the sticky sweetness perfectly.
  • Offer Extra Sauce: Serve extra sauce on the side for those who like to drizzle more on their bowls!

Conclusion

There you have it—your ultimate guide to making Sticky Chicken Rice Bowls! This dish is not just a recipe; it’s a celebration of flavors and a reminder of home-cooked love. Whether you’re cooking for family, friends, or just for yourself, these bowls promise to deliver smiles and satisfied bellies. So, roll up your sleeves and get cooking. I can’t wait to hear how your Sticky Chicken Rice Bowls turn out—happy cooking!

Delicious Sticky Chicken Rice Bowls Recipe

Prep Time 10 minutes
Cook Time 20 minutes
Total Time 30 minutes
Servings 4 servings
Calories 550
Enjoy a flavorful and easy-to-make chicken rice bowl with a sweet and savory sauce, perfect for a quick dinner.

Ingredients

Main ingredients

  • 2 cups cooked jasmine rice
  • 1 lb chicken thighs, boneless and skinless
  • 1/4 cup soy sauce
  • 2 tablespoons honey
  • 2 tablespoons rice vinegar
  • 2 cloves garlic, minced
  • 1 teaspoon grated ginger
  • 1 tablespoon sesame oil
  • 2 green onions sliced
  • for garnish sesame seeds
  • to taste salt and pepper

Instructions 

  • Whisk soy sauce, honey, rice vinegar, garlic, ginger, and sesame oil to make marinade.
  • Season chicken with salt and pepper, then marinate for 30 minutes.
  • Cook chicken in a skillet until caramelized, then add marinade to thicken sauce.
  • Prepare rice in bowls, slice cooked chicken, and place over rice.
  • Drizzle sauce over chicken and rice, garnish with green onions and sesame seeds.

Notes

For extra flavor, toast sesame seeds before garnishing.
Calories: 550kcal
Cost: $15
Course: Main Course
Cuisine: Asian
Keyword: Chicken, Rice

Loved this recipe? Save it to your favorite Pinterest board so you can easily find it later! It’s the perfect way to keep all your sweet ideas in one place. ✨

Tasty sticky chicken rice bowl featuring tender chicken, jasmine rice, and sesame garnish.

Welcome to the Cozy World of Homemade Hamburger Helper

Ah, Hamburger Helper! It’s a name that evokes warm memories of cozy dinners, laughter around the table, and a hint of nostalgia that wraps around you like a favorite blanket. If you’re on a quest for a delightful, one-pan comfort food that brings together the hearty flavors of ground beef and pasta, you’ve stumbled upon the right recipe! This isn’t just any Hamburger Helper; this is my Easy Homemade Hamburger Helper that whispers comfort and love in every bite. Let’s get to it!

Why You’ll Love This Recipe

Before we dive into the nitty-gritty details, let me share why this particular recipe will become your new favorite:

  • Quick and Easy: In just 30 minutes, you can create a wholesome meal that serves the whole family!
  • One-Pot Wonder: Less cleanup means more time enjoying your delicious creation and less time scrubbing pots!
  • Customizable: Easily swap out ingredients to suit your taste or what you have on hand, making it versatile for any occasion.
  • Budget-Friendly: With simple ingredients, this dish is kind on your wallet while delivering big on flavor.
  • Nostalgic Comfort: This recipe brings back childhood memories while providing the warmth that only a good home-cooked meal can offer.

Ingredient Breakdown

Delicious homemade Hamburger Helper featuring ground beef, macaroni, and a creamy cheese sauce illuminated by soft light.

Let’s talk ingredients! Here’s what you’ll need for your scrumptious Hamburger Helper, along with some handy substitutions:

  • Ground Beef: 1 pound of lean ground beef is ideal. You can substitute with ground turkey or chicken for a lighter option.
  • Elbow Macaroni: 1 cup of this classic pasta is perfect, but any pasta shape you have will work!
  • Beef Broth: 2 cups add depth to the flavor. You can use vegetable broth if you prefer a vegetarian version.
  • Milk: 1 cup gives it creaminess. Feel free to use almond or soy milk for a dairy-free option.
  • Shredded Cheese: 1 cup of cheddar or your favorite cheese makes it ooey-gooey delicious!
  • Onion: A small diced onion adds sweetness. If you’re not a fan, feel free to skip it or use shallots instead.
  • Garlic: 2 cloves minced for that rich aroma. Garlic powder can also work in a pinch.
  • Seasonings: Paprika, salt, and black pepper to taste. You can also play with other spices like Italian seasoning or chili powder for a kick!
  • Olive Oil: 1 tablespoon for sautéing; any cooking oil will do.

How to Make Easy Homemade Hamburger Helper

Now that you have your ingredients ready, let’s get cooking! Follow these simple steps:

  1. In a large skillet, heat the olive oil over medium heat. Add the diced onion and minced garlic, sautéing until softened and fragrant.
  2. Add the ground beef to the skillet, cooking until browned and fully cooked, breaking it apart with a spoon as you go.
  3. Stir in the paprika, salt, and black pepper, mixing well to coat the beef.
  4. Pour in the elbow macaroni, beef broth, and milk, bringing everything to a boil. Once boiling, reduce the heat to low.
  5. Cover and let simmer for about 10-12 minutes, or until the macaroni is tender and the liquid is mostly absorbed.
  6. Remove the skillet from heat, then stir in the shredded cheese until it’s melted and creamy.
  7. Serve hot and enjoy your homemade Hamburger Helper, with a sprinkle of fresh herbs if desired!

Pro Tips for the Perfect Homemade Hamburger Helper

Before you start cooking, consider these pro tips to elevate your dish:

  • Use Fresh Ingredients: Fresh herbs and quality meats can significantly enhance the flavor of your dish.
  • Don’t Overcook the Pasta: Keep an eye on the macaroni; you want it tender but not mushy. A little bite is perfect!
  • Cheese Choices: Experiment with different cheeses! Gouda, pepper jack, or even a mix can add exciting flavors.
  • Season to Taste: Always taste your dish before serving. Adjust the seasoning as needed for the best flavor.
  • Keep it Covered: Covering the skillet while simmering retains moisture, ensuring a creamy consistency.
  • Make it Spicy: If you’re a heat lover, add crushed red pepper flakes or diced jalapeños to the ground beef for an extra kick.
  • Mix in Veggies: Stir in some spinach or bell peppers for added nutrition and color!
  • Let it Rest: Allow the dish to sit for a few minutes after cooking. This helps all the flavors meld together beautifully.

Common Mistakes and Troubleshooting

Even the best of us can run into a few hiccups while cooking. Here are some common mistakes and how to fix them:

  • Too Watery: If your dish is too liquidy, let it simmer uncovered for a few extra minutes to thicken it up.
  • Pasta Overcooked: If the pasta turns mushy, reduce the cooking time next time and keep a close watch!
  • Not Enough Flavor: If it lacks seasoning, don’t hesitate to add more salt, pepper, or your favorite spices to amp it up.
  • Cheese Not Melting: Ensure you’re using freshly shredded cheese for the best melting results.

Delicious Variations to Try

Feeling adventurous? Here are a few variations to keep things exciting:

  • Mexican Style: Add taco seasoning and top with diced tomatoes, cilantro, and avocado for a fun twist.
  • Buffalo Chicken: Swap ground beef for shredded rotisserie chicken and stir in buffalo sauce for a spicy kick.
  • Veggie-Packed: Incorporate zucchini, carrots, or peas to boost the nutrition and color of your dish.
  • Italian Delight: Mix in Italian sausage and top with mozzarella cheese for an Italian-inspired meal.

Storage and Make-Ahead Instructions

Want to make this dish ahead of time? Here’s how to store it:

  • Refrigerate: Store leftovers in an airtight container in the fridge for up to 3-4 days.
  • Freeze: For longer storage, freeze the dish in a freezer-safe container for up to 2 months. Thaw overnight in the fridge before reheating.
  • Reheat: Gently reheat on the stove over low heat, adding a splash of milk or broth if it seems dry.

Frequently Asked Questions (FAQ)

Let’s address some common questions about this recipe:

  • Can I use whole wheat pasta? Absolutely! Whole wheat pasta works just as well and adds a nutty flavor.
  • Is this recipe gluten-free? You can substitute regular pasta with gluten-free options, like rice or quinoa pasta.
  • Can I add more cheese? Yes! Feel free to add more cheese if you love that cheesy goodness.
  • What if I don’t have beef broth? Using water with additional seasonings can also work in a pinch.
  • How do I make it creamier? Add a splash of heavy cream or sour cream when mixing in the cheese for extra creaminess.
  • Can I double the recipe? Yes! Just ensure your skillet is large enough to accommodate the extra ingredients.
  • What’s the best way to serve it? This dish is delicious on its own, but you could pair it with a simple side salad or garlic bread.
  • Can I make it vegetarian? Definitely! Substitute ground beef with lentils or mushrooms for a hearty vegetarian alternative.

Nutritional Tips and Dietary Adaptations

This recipe can easily be adapted for various dietary preferences:

  • Low-Carb Option: Swap pasta for cauliflower rice or spiralized zucchini for a low-carb meal.
  • Dairy-Free: Use dairy-free cheese and milk alternatives to make it suitable for lactose intolerance or dairy allergies.
  • High-Protein: Adding beans or chickpeas can increase the protein content significantly.

Essential Equipment Recommendations

To make your cooking experience smooth, here’s what you’ll need:

  • Large Skillet: A good quality skillet ensures even cooking and prevents sticking.
  • Wooden Spoon: Perfect for stirring and breaking up the ground beef without scratching your skillet.
  • Measuring Cups and Spoons: Accurate measurements make a big difference in cooking!

Serving Suggestions

And now for the fun part—serving your delicious Hamburger Helper! Here are some ideas:

  • Garnish: Top with fresh parsley, chives, or a sprinkle of paprika for a pop of color.
  • Accompaniments: Serve alongside a crisp green salad or some crusty bread to soak up the creamy goodness.
  • Leftover Magic: This dish can also be enjoyed cold as a pasta salad the next day—just mix in a bit of vinaigrette!

Now that you have all the secrets to making the ultimate Homemade Hamburger Helper, it’s time to get cooking! I hope this recipe brings as much joy and warmth to your kitchen as it has to mine. Remember, cooking is an adventure—embrace it with a sprinkle of love and a dash of humor!

Simple Ground Beef Recipes: Easy Homemade Hamburger Helper

Prep Time 10 minutes
Cook Time 15 minutes
Total Time 25 minutes
Servings 4 servings
Calories 650
A quick and delicious homemade hamburger helper made with ground beef, pasta, and cheese, perfect for a comforting meal.

Ingredients

Meat

  • 1 pound ground beef
  • 1 cup elbow macaroni
  • 2 cups beef broth
  • 1 cup milk
  • 1 cup shredded cheese (cheddar or your choice)
  • 1 small onion, diced
  • 2 cloves garlic, minced
  • 1 teaspoon paprika
  • 1 teaspoon salt
  • 0.5 teaspoon black pepper
  • 1 tablespoon olive oil

Instructions 

  • Heat olive oil in a skillet, sauté onion and garlic until softened.
  • Add ground beef, cook until browned and fully cooked.
  • Stir in paprika, salt, and black pepper.
  • Add macaroni, beef broth, and milk; bring to a boil, then simmer for 10-12 minutes.
  • Stir in shredded cheese until melted; serve hot.

Notes

For extra flavor, add chopped herbs or spices as desired.
Calories: 650kcal
Cost: $15
Course: Main Course
Cuisine: American
Keyword: ground beef

Loved this recipe? Save it to your favorite Pinterest board so you can easily find it later! It’s the perfect way to keep all your sweet ideas in one place. ✨

Eye-level shot of a steaming bowl of Hamburger Helper made with ground beef and elbow macaroni, showcasing rich textures.