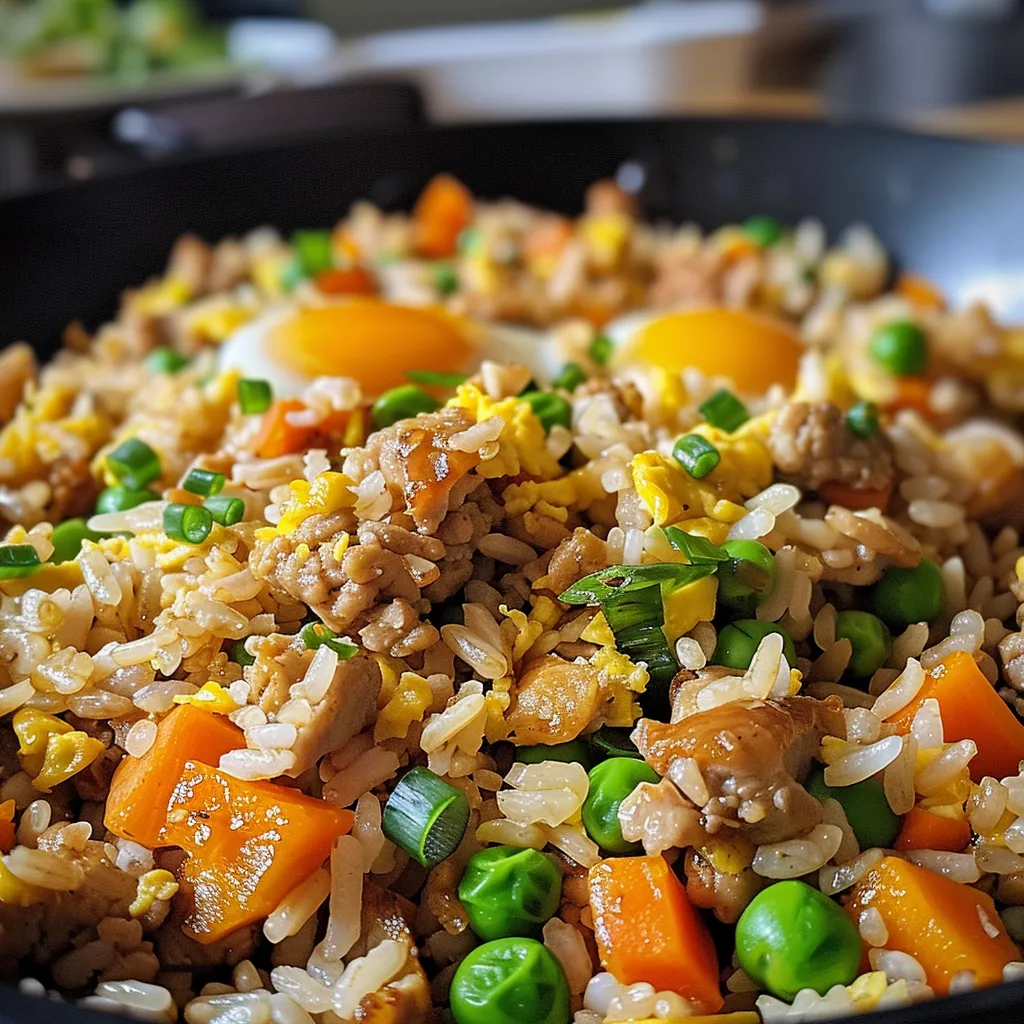
Why Ground Chicken Fried Rice Will Be Your New Favorite Weeknight Dinner
When it comes to quick and satisfying meals, Ground Chicken Fried Rice stands out as a true weeknight hero. This dish is not only a delightful way to transform humble ingredients into something magical, but it also encapsulates the warmth and comfort that home-cooked meals bring. With its vibrant colors, tantalizing flavors, and hearty texture, you’ll find yourself reaching for this recipe time and again. But why should this dish earn a prime spot in your weekly dinner rotation? Let me share some reasons that make this fried rice recipe a genuine winner!
Why You’ll Love This Recipe
- Quick and Easy: Ready in under 30 minutes! Perfect for those busy weeknights when you want something delicious without a lot of fuss.
- Family-Friendly: Kids and adults alike will love the savory flavors and colorful veggies, making it a hit for everyone at the dinner table.
- Customizable: Feel free to toss in whatever veggies or proteins you have on hand—this recipe is incredibly versatile!
- Budget-Friendly: Ground chicken is an economical protein choice, and with rice and frozen veggies, you can whip up a meal without breaking the bank.
- Meal Prep Champion: Great for leftovers! This dish reheats beautifully, making it a fantastic option for meal prepping.
Ingredient Breakdown
Let’s dive into the ingredients that make this Ground Chicken Fried Rice so delectable:
- Jasmine Rice: This fragrant rice is the perfect base for fried rice. If you don’t have jasmine, long-grain white rice or brown rice can work too.
- Ground Chicken: A lean protein that cooks quickly. You can also use ground turkey or even diced chicken breast as substitutes.
- Vegetable Oil: Essential for stir-frying. If you prefer, you can use olive oil or coconut oil for a different flavor profile.
- Onion and Garlic: These aromatics add depth and fragrance. Use shallots for a milder flavor, or add some ginger for an extra kick.
- Frozen Peas and Carrots: Convenient and packed with nutrients. Feel free to swap in any frozen veggies you like—bell peppers or broccoli work wonderfully!
- Eggs: These add richness and protein. You can replace them with tofu for a plant-based version.
- Soy Sauce: The backbone of the dish’s savory flavor. Use low-sodium soy sauce if you’re watching your salt intake.
- Oyster Sauce: Adds a hint of sweetness and depth. If you need a vegetarian option, look for mushroom sauce.
- Sesame Oil: A drizzle at the end enhances the dish with its nutty aroma. If unavailable, peanut oil can be a substitute.
- Green Onions: Fresh and crunchy, these add a pop of color and flavor. You can also use cilantro or chives.
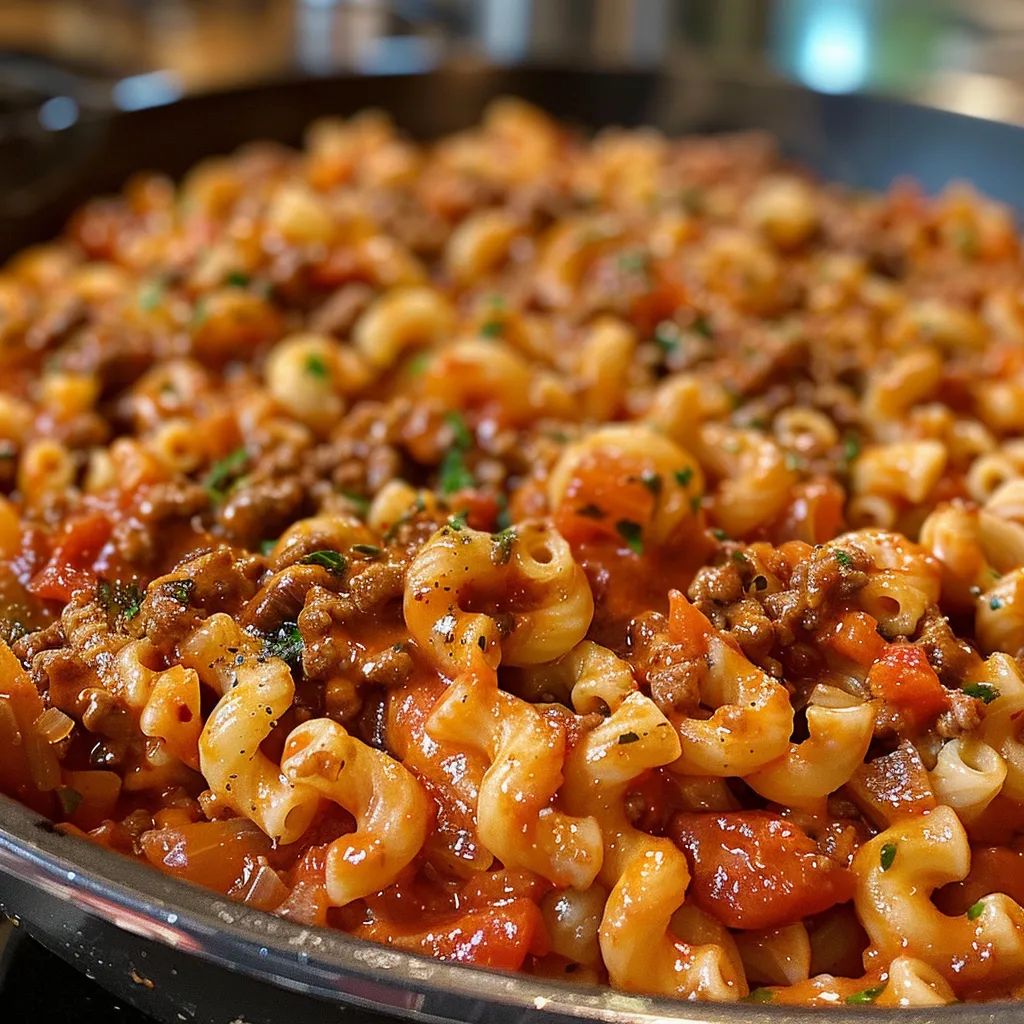
How to Make Ground Chicken Fried Rice
Ready to bring this dish to life? Follow these simple steps to create your own ground chicken fried rice:
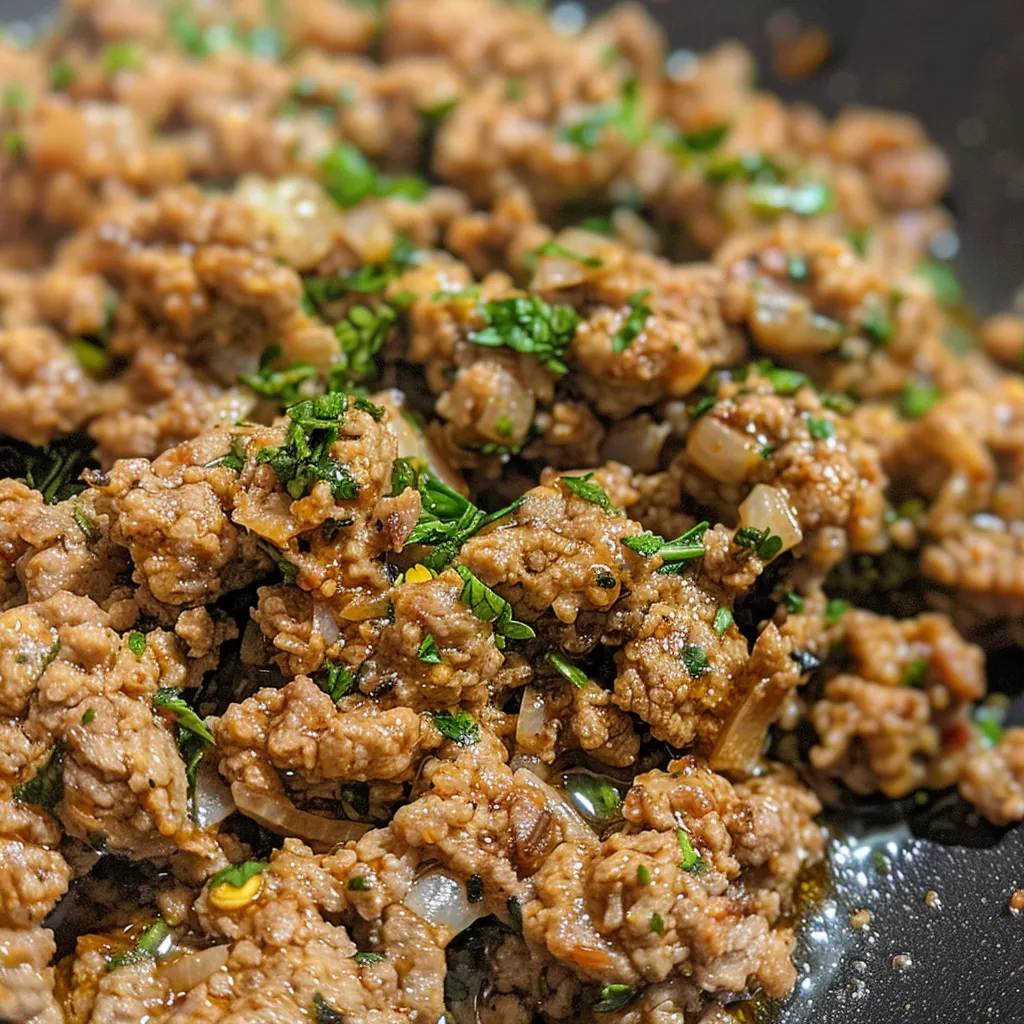
- Heat a large wok or skillet over medium-high heat and add 1 tablespoon of vegetable oil.
- Add the ground chicken to the pan and cook, breaking it up with a wooden spoon, until it is browned and cooked through, about 5-7 minutes. Season with a pinch of salt and pepper. Remove the cooked chicken from the pan and set aside.
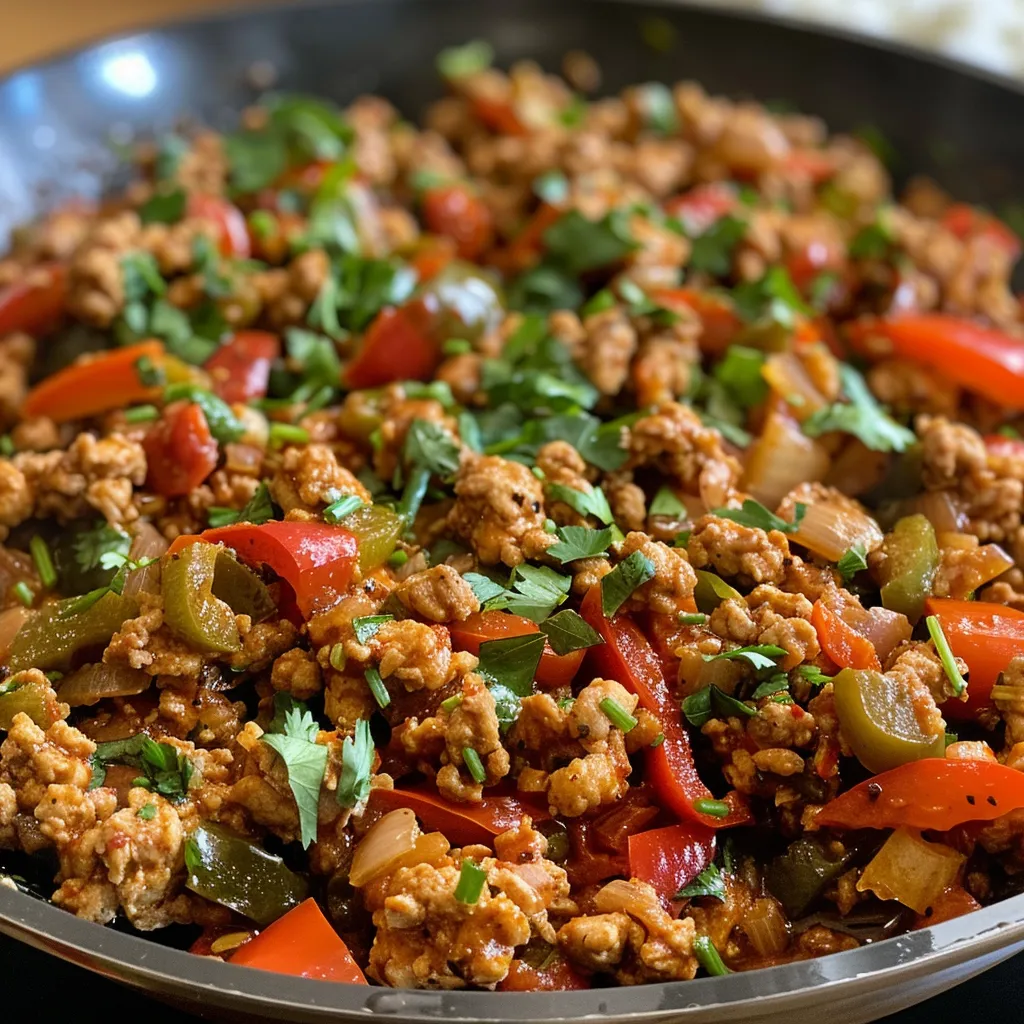
- In the same pan, add the remaining tablespoon of vegetable oil, followed by the chopped onion and minced garlic. Sauté until the onion becomes translucent and the garlic is fragrant.
- Add the peas and carrots to the pan and stir-fry for about 2 minutes until they are just tender.
- Push the vegetables to one side of the pan and pour the beaten eggs into the other side. Allow the eggs to set slightly, then scramble them gently until fully cooked.
- Return the cooked ground chicken to the pan, mixing it with the vegetables and scrambled eggs.
- Add the chilled rice to the pan, breaking up any clumps with a spatula. Stir everything together until well combined.
- Pour the soy sauce, oyster sauce, and sesame oil over the rice mixture, and stir-fry for about 3-4 minutes until everything is heated through and evenly coated with the sauces.
- Taste the fried rice and adjust seasoning if necessary with more salt or soy sauce.
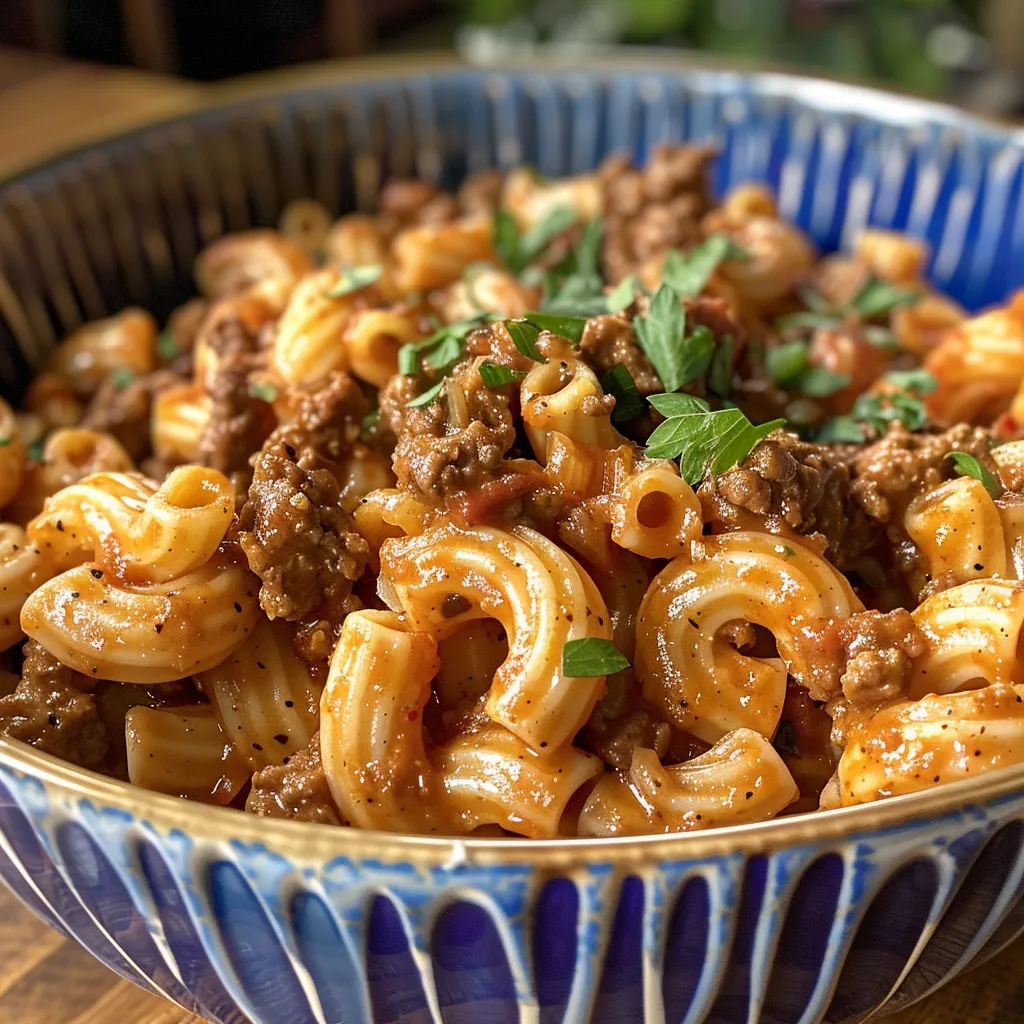
- Sprinkle the chopped green onions over the fried rice and give it a final toss before serving hot.
Expert Tips for Perfect Fried Rice
- Use Chilled Rice: For the best texture, use rice that has been cooked and then cooled. This prevents mushiness and allows the grains to fry nicely.
- Don’t Overcrowd the Pan: Frying in batches can help maintain high heat, ensuring everything cooks evenly and retains its flavor.
- Adjust Soy Sauce to Taste: Start with less soy sauce and add more as needed to avoid making the dish too salty.
- Experiment with Proteins: Feel free to try different proteins like shrimp, beef, or even tofu to switch things up.
- Fresh Herbs Matter: Garnish with fresh herbs like cilantro or basil for a burst of flavor.
- Heat is Key: Make sure your pan is hot enough to achieve that slight char on the rice, giving it a wonderful depth of flavor.
- Mind Your Timing: Add each ingredient at the right moment to ensure nothing overcooks; keep everything vibrant and crunchy!
- Season in Layers: Season the chicken, then the veggies, and finally the rice to build flavor complexity.
Common Mistakes and Troubleshooting
Even the best cooks run into hiccups! Here are a few common mistakes to avoid:
- Using Fresh Rice: Freshly cooked rice tends to clump and can make your fried rice soggy. Always use chilled rice for the best results.
- Skipping the Seasoning: Don’t forget to taste and adjust seasoning throughout the cooking process. It’s crucial for achieving the perfect flavor balance.
- Not Stir-Frying Properly: Stir-frying is not just about mixing; it’s about cooking quickly at high heat. Ensure your pan is hot and don’t be afraid to let things sit for a moment to achieve that lovely char.
- Overcooking the Veggies: You want your vegetables to retain some crunch. Add them into the pan at the right time to keep their freshness.
Delicious Variations
Want to get creative with your Ground Chicken Fried Rice? Here are some fun variations:
- Spicy Fried Rice: Add a tablespoon of chili paste or sriracha for a spicy kick that elevates the dish.
- Pineapple Fried Rice: Toss in some diced pineapple for a sweet and savory blend that is downright addictive.
- Thai Basil Fried Rice: Incorporate fresh Thai basil for a fragrant twist that pairs beautifully with the chicken.
- Vegetarian Delight: Omit the chicken and double the veggies for a hearty vegetarian version that’s equally satisfying.
Storage and Make-Ahead Instructions
This fried rice is great for meal prep! Here’s how to store and reheat:
- Storage: Allow the fried rice to cool completely, then transfer it to an airtight container. It will keep well in the refrigerator for up to 5 days.
- Freezing: If you want to store it longer, freeze the fried rice in individual portions. It can be stored for up to 3 months.
- Reheating: To reheat, simply microwave it until hot, or stir-fry in a pan with a splash of oil to revive the texture.
Frequently Asked Questions
Let’s tackle some common questions about this recipe:
- Can I use brown rice instead of jasmine? Yes! Brown rice works well but may require longer cooking time.
- What’s the best way to prevent mushiness? Use chilled, day-old rice to prevent mushiness and achieve the ideal texture.
- Can I make this dish vegan? Absolutely! Substitute ground chicken with crumbled tofu and use plant-based sauces.
- How can I make it spicier? Add chili sauce or fresh chopped chilies to the pan while stir-frying.
- What other vegetables can I include? Bell peppers, broccoli, or even corn make great additions!
- Is this dish gluten-free? Yes, just choose a gluten-free soy sauce and oyster sauce.
- Can I double the recipe? Definitely! Just make sure you have a large enough pan to handle the increased volume.
- How do I know when the chicken is cooked? The chicken should be white and no longer pink in the center, approximately 5-7 minutes of cooking.
Nutrition Tips and Dietary Adaptations
This ground chicken fried rice can be tailored to fit various dietary needs:
- Low-Carb Option: Substitute rice with cauliflower rice for a lighter version.
- High-Protein Adaptation: Add more eggs or a side of edamame for an added protein boost.
- Heart-Healthy Version: Use less oil and incorporate more veggies, making it nutrient-dense.
Essential Equipment Recommendations
To make your cooking experience seamless, here are a few tools I recommend:
- Wok or Large Skillet: Perfect for stir-frying at high heat.
- Wooden Spoon or Spatula: Great for mixing and breaking up the chicken while cooking.
- Measuring Cups and Spoons: Ensures accuracy in your ingredients, especially with sauces and seasonings.
Serving Suggestions
Looking to pair your Ground Chicken Fried Rice with something special? Here are a few ideas:
- Egg Rolls: Crunchy and delicious, they make a fantastic appetizer.
- Asian Salad: A light salad with sesame dressing complements the richness of the fried rice.
- Hot and Sour Soup: A comforting soup to start your meal.
Conclusion
There you have it, my friends! A comprehensive guide to making the ultimate Ground Chicken Fried Rice that is sure to bring joy to your dinner table. With its delightful balance of flavors and textures, this dish is not just a meal; it’s a heartwarming experience. So grab your ingredients, gather your loved ones, and let’s create something unforgettable together!
Ground Chicken Fried Rice
Ingredients
Main ingredients
- 2 cups cooked jasmine rice (preferably chilled)
- 1 lb ground chicken
- 2 tablespoons vegetable oil
- 1 medium onion, finely chopped
- 2 cloves garlic, minced
- 1 cup frozen peas and carrots, thawed
- 2 eggs beaten
- 3 tablespoons soy sauce
- 1 tablespoon oyster sauce
- 1 teaspoon sesame oil
- 2 green onions, chopped
- to taste Salt and pepper
Instructions
- Heat 1 tbsp vegetable oil in a wok over medium-high heat. Cook ground chicken until browned, about 5-7 minutes. Remove and set aside.
- Add remaining oil, sauté onion and garlic until translucent and fragrant.
- Add peas and carrots; stir-fry for 2 minutes. Push to side, scramble eggs until cooked.
- Return chicken, add rice, and stir to combine. Pour soy, oyster, and sesame oil; stir-fry 3-4 minutes. Garnish with green onions and serve.