Author

Ava

Browsing

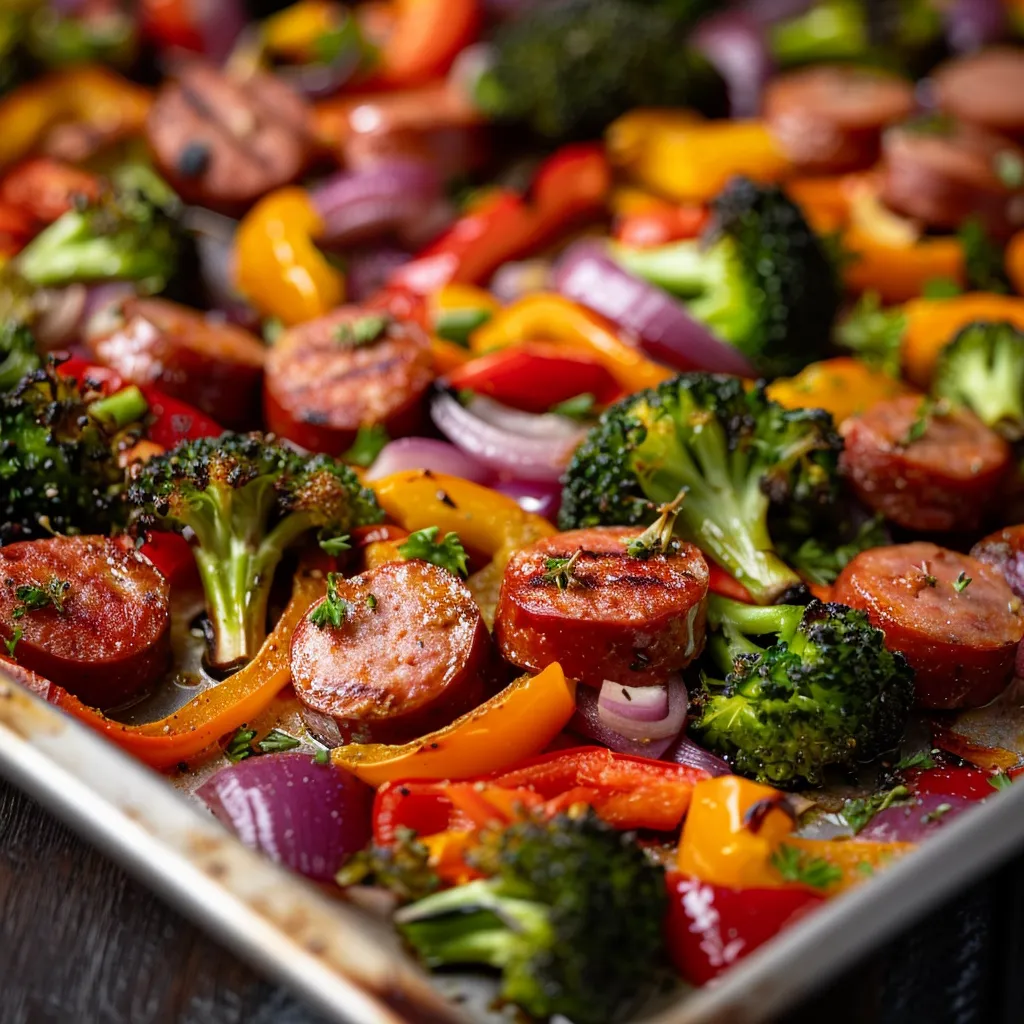
Why Sheet Pan Sausage and Veggies Will Become Your Go-To Recipe

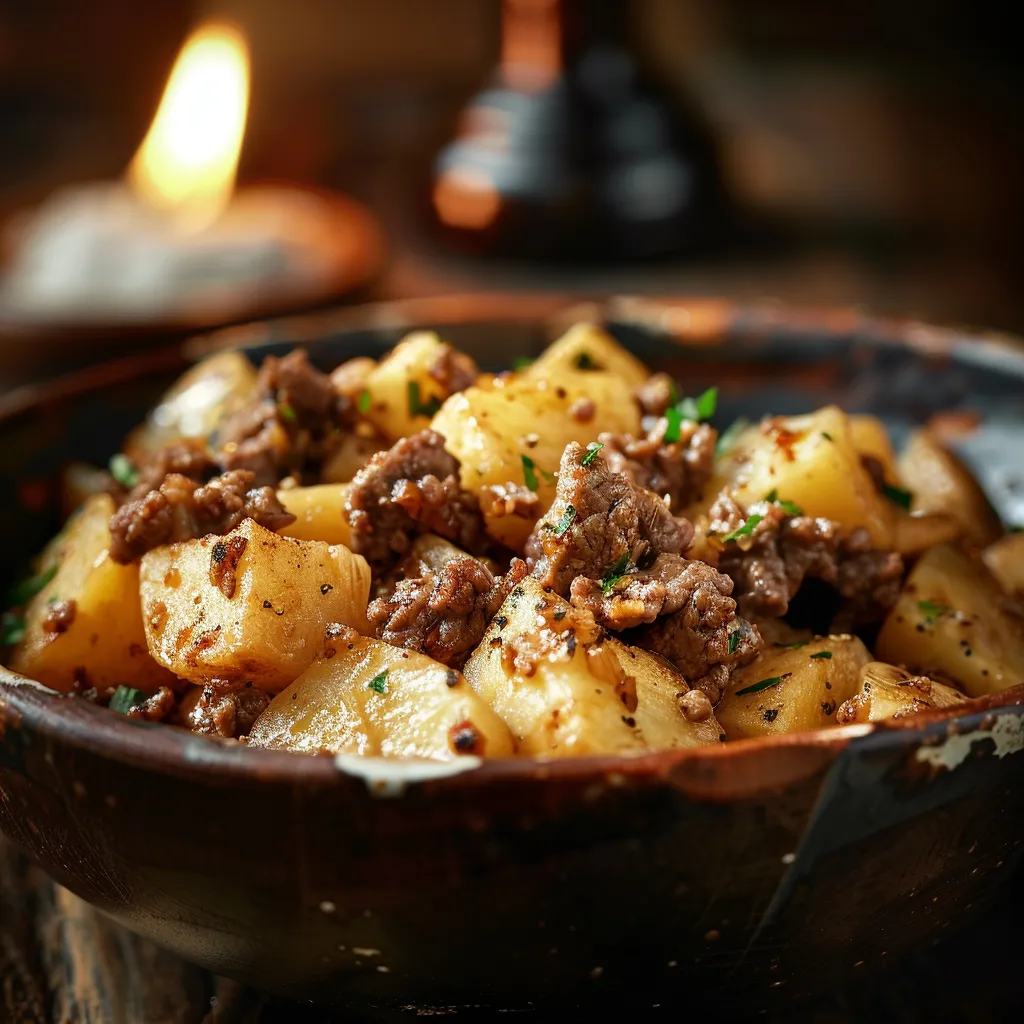
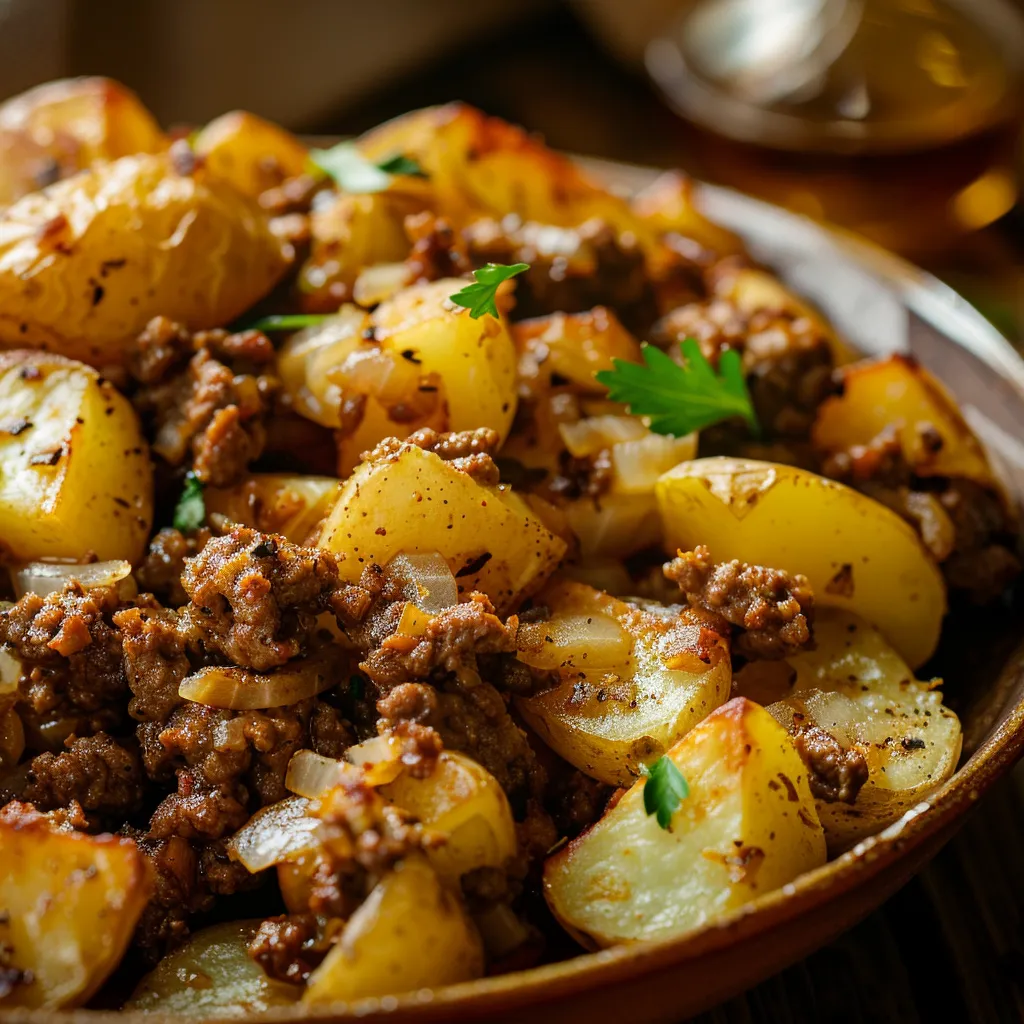
Welcome to a culinary adventure that’s as comforting as it is delicious! If you’re looking for a hassle-free meal that whispers warmth and flavor, you’ve stumbled upon the right recipe. My Sheet Pan Sausage and Veggies dish is not just a recipe; it’s a friendly hug from your kitchen. This one-pan wonder combines savory sausage with colorful veggies, making it perfect for busy weeknights or casual dinners with friends. Ready to dive in? Let’s explore why you’ll fall in love with this dish!

Why You’ll Love This Recipe

  • Quick and Easy Preparation: With just a handful of ingredients and minimal prep time, you can have a delicious meal on the table in no time.
  • Healthy and Nutritious: Packed with vibrant vegetables, this dish not only satisfies your taste buds, but also contributes to a well-balanced meal.
  • Versatile Ingredients: Feel free to customize the veggies and sausage to suit your preferences or whatever you have in your fridge!
  • One-Pan Cleanup: Say goodbye to a mountain of dishes! Everything cooks together on one sheet pan, making cleanup a breeze.
  • Perfect for Meal Prep: This recipe is ideal for batch cooking—make it ahead of time for easy lunches or dinners throughout the week.

Ingredient Breakdown and Substitutions

A vibrant assortment of colorful vegetables and sausage laid out on a sheet pan, illuminated by natural light.

Let’s talk about what makes this dish truly shine—its ingredients! Below is the list of what you’ll need along with some handy substitutions:

  • Smoked Sausage (1 pound): I love using smoked sausage for its rich flavor. You can substitute with chicken sausage, turkey sausage, or even plant-based sausage for a lighter option.
  • Broccoli Florets (2 cups): For a nutritious crunch, but feel free to swap in asparagus or green beans if you prefer.
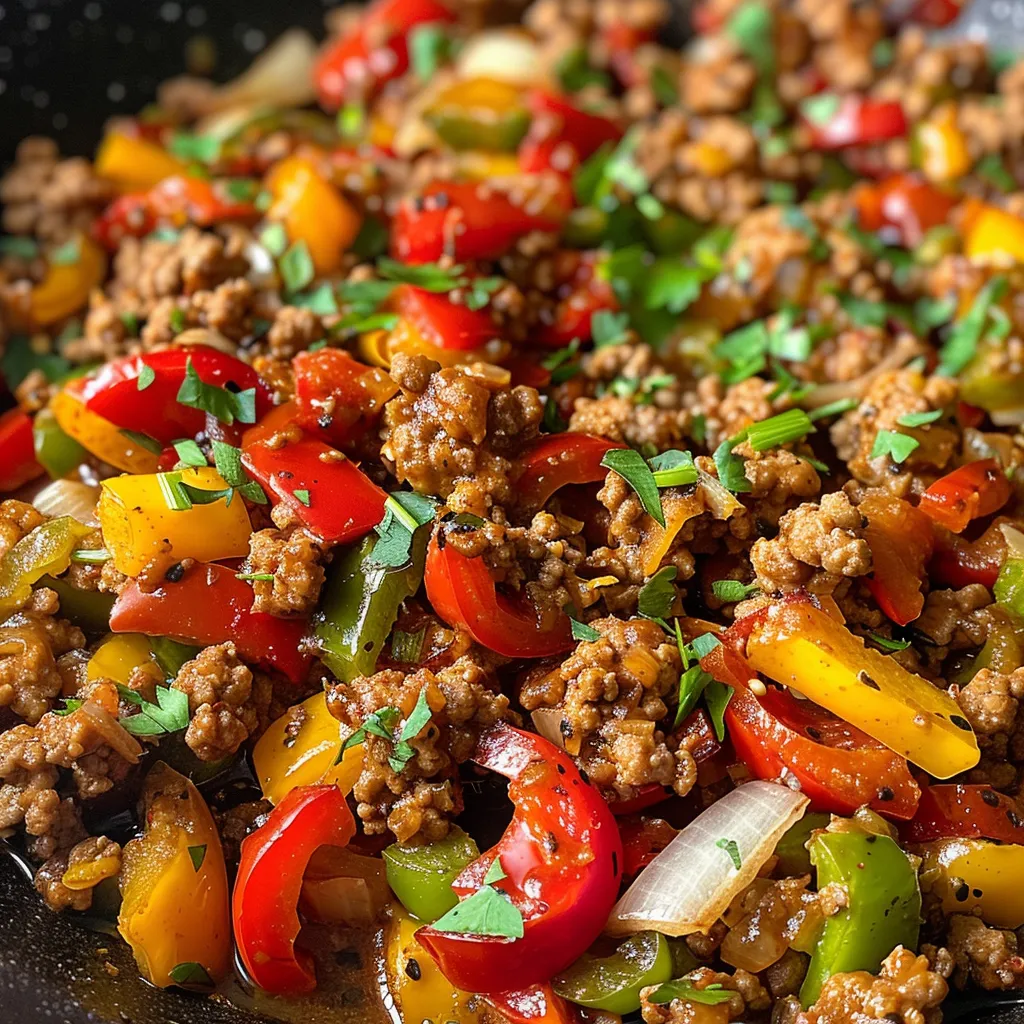
  • Bell Peppers (2 cups): A colorful addition! Mix and match red, yellow, or green peppers based on your taste or availability.
  • Red Onion (1 cup, sliced): Adds sweetness and depth. Yellow or white onions work well too!
  • Olive Oil (2 tablespoons): This helps everything roast beautifully. Canola or avocado oil are great alternatives.
  • Garlic Powder (1 teaspoon): For a hint of flavor. Fresh minced garlic can be used if you want a stronger taste.
  • Paprika (1 teaspoon): Adds a smoky touch. You can use smoked paprika for an extra kick!
  • Salt and Pepper: To taste. Always season to your liking!
  • Fresh Parsley (for garnish): Optional, but it adds a lovely color and fresh flavor.

How to Make Sheet Pan Sausage and Veggies

Now, let’s get cooking! Follow these simple steps to create a delightful meal that will have everyone asking for seconds:

  1. Preheat the Oven: Set your oven to 400°F (200°C) to ensure it’s hot and ready for roasting.
  2. Prepare the Ingredients: In a large bowl, combine the sliced sausage, broccoli, bell peppers, and red onion.
  3. Season: Drizzle the mixture with olive oil, then sprinkle with garlic powder, paprika, salt, and pepper. Toss everything together until evenly coated.
  4. Spread on a Sheet Pan: Arrange the mixture in a single layer on a baking sheet. This helps everything cook evenly!
  5. Bake: Place the pan in the oven and bake for 25-30 minutes, stirring halfway through. You want the sausage to be browned and the veggies tender.
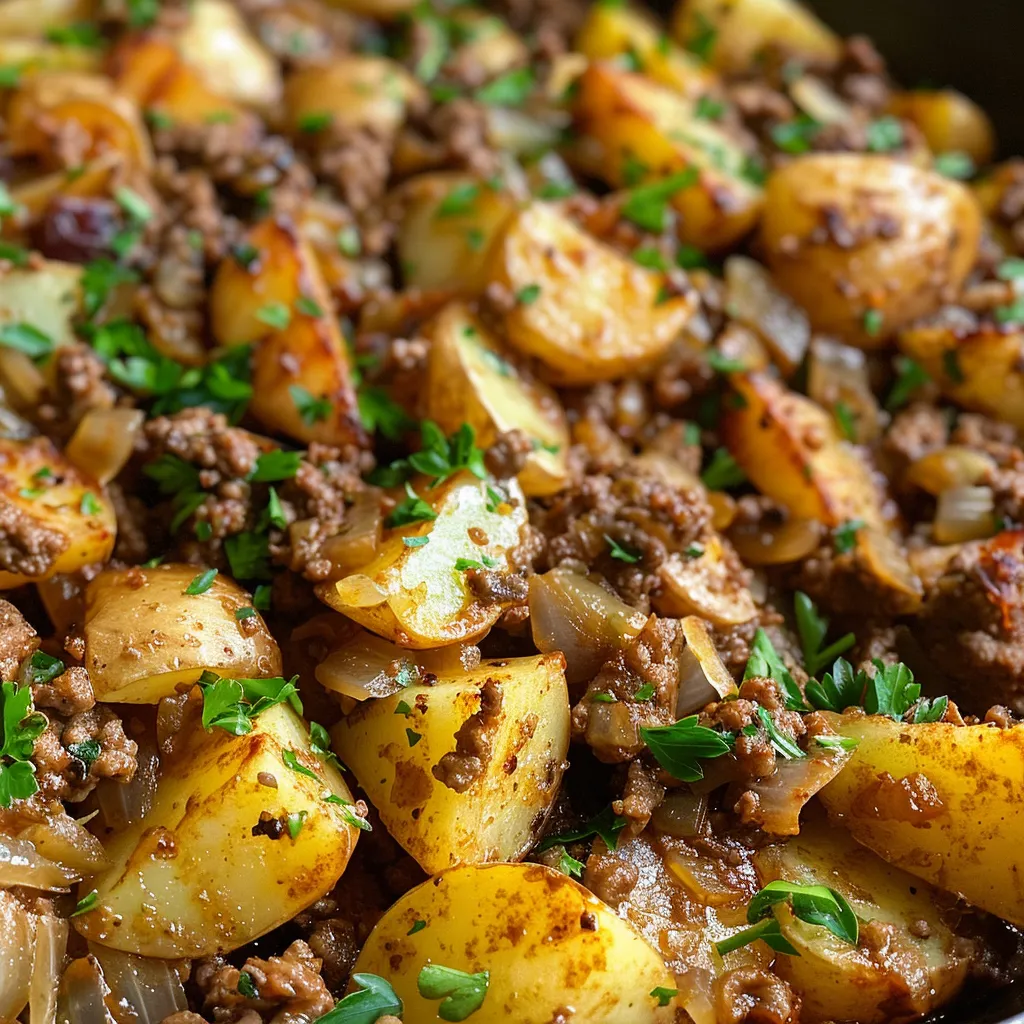
  6. Garnish and Serve: Once out of the oven, garnish with fresh parsley if desired. Serve warm and enjoy the delightful flavors!

Pro Tips for Perfecting Your Dish

  • Don’t Overcrowd the Pan: Spread the ingredients out to allow for even cooking and caramelization.
  • Mix Up the Veggies: Try seasonal vegetables like zucchini, carrots, or Brussels sprouts for a new twist!
  • Adjust Cooking Time: Depending on your oven and how thick the sausage is sliced, cooking times may vary. Keep an eye on it!
  • Use Parchment Paper: Lining the pan with parchment makes cleanup even easier.
  • Experiment with Spices: Don’t hesitate to add your favorite spices or herbs for added flavor.
  • Make It a Meal: Serve over rice, quinoa, or alongside crusty bread for a complete dinner.
  • Store Leftovers Properly: Allow to cool before refrigerating in airtight containers. Reheat in the oven or microwave.
  • Invite Friends Over!: This dish is perfect for gathering around the table with loved ones, so don’t hesitate to share!

Common Mistakes and Troubleshooting

Even the best of us can make a misstep in the kitchen. Here are some common mistakes and how to avoid them:

  • Overcooking Vegetables: Keep an eye on your veggies to prevent them from becoming mushy. Aim for tender-crisp!
  • Not Seasoning Enough: Be generous with your seasonings. Taste as you go to ensure balanced flavors.
  • Using Cold Ingredients: Let your ingredients come to room temperature before cooking for the best results.
  • Skipping the Stir: Make sure to stir halfway through cooking to promote even browning and prevent sticking.

Delicious Variations to Try

Feeling adventurous? Here are some variations to spice things up:

  • Italian Flair: Add Italian seasoning and use Italian sausage for a classic taste.
  • Spicy Kick: Toss in some red pepper flakes or use chorizo sausage for a fiery twist.
  • Sweet and Savory: Include sweet potatoes for a delightful contrast to the savory sausage.
  • Herb Garden: Mix in fresh herbs like rosemary or thyme for an aromatic touch.

Storage and Make-Ahead Instructions

This dish is great for meal prep! Here’s how to store and enjoy it later:

  • Refrigeration: Store leftovers in airtight containers for up to 4 days.
  • Freezing: Freeze in portions for up to 3 months. Thaw overnight in the fridge before reheating.
  • Make Ahead: You can chop your veggies and sausage the night before, storing them in the fridge until you’re ready to cook.

Comprehensive FAQ

Got questions? I’ve got answers! Here are some common queries about this recipe:

  • Can I use different types of sausage? Yes! Feel free to swap in your favorite sausage type.
  • What vegetables work best? Any sturdy vegetables that roast well, like carrots, zucchini, or cauliflower, will work.
  • Can this be made in an air fryer? Absolutely! Just adjust the cooking time accordingly.
  • How can I make this dish spicy? Add some jalapeños or use spicy Italian sausage for heat.
  • Is this recipe gluten-free? Yes, as long as you choose gluten-free sausage and check your spices.
  • How do I know when it’s done? The sausage should be browned and the veggies tender-crisp.
  • Can I add cheese? Definitely! Sprinkle some cheese on top during the last few minutes of baking for a gooey finish.
  • What should I serve this with? It pairs wonderfully with rice, couscous, or a fresh salad.

Nutritional Tips and Dietary Adaptations

Cooking should be inclusive! Here are some nutritional tips to consider:

  • Low-Carb Option: Swap out the sausage for a plant-based alternative and use non-starchy vegetables.
  • Dairy-Free: This recipe is naturally dairy-free, making it suitable for lactose-intolerant individuals.
  • High-Protein Boost: Add chickpeas or lentils for an extra protein punch.

Equipment Recommendations

To make your cooking experience smooth and enjoyable, here’s what I recommend having on hand:

  • High-Quality Sheet Pan: A sturdy, non-stick sheet pan is key for even roasting.
  • Mixing Bowls: Use large mixing bowls for tossing ingredients together.
  • Spatula or Tongs: Handy tools for flipping and serving your roasted goodness!

Serving Suggestions

When it comes to serving this dish, the options are endless! Here are a few of my favorites:

  • Over Rice or Quinoa: Serve the sausage and veggies over a bed of rice or quinoa for a hearty meal.
  • With Crusty Bread: A warm, crusty loaf is perfect for soaking up any delicious juices.
  • As Part of a Salad: Toss with greens for a vibrant salad that’s both filling and fresh.

There you have it! My Sheet Pan Sausage and Veggies recipe is a delightful, easy-to-make dish that brings the magic of home-cooked meals right to your table. Whether you’re cooking for family or friends, this dish promises to impress and satisfy. So gather your ingredients, preheat that oven, and let’s create something unforgettable together!

Sheet Pan Sausage and Veggies

Prep Time 10 minutes
Cook Time 30 minutes
Total Time 40 minutes
Servings 4 servings
Calories 450
A quick and flavorful sheet pan meal combining smoky sausage with colorful vegetables, perfect for a wholesome dinner.

Ingredients

Meat

  • 1 pound smoked sausage, sliced

Vegetables

  • 2 cups broccoli florets
  • 2 cups bell peppers, sliced
  • 1 cup red onion, sliced

Other

  • 2 tablespoons olive oil
  • 1 teaspoon garlic powder
  • 1 teaspoon paprika
  • to taste salt and pepper
  • for garnish fresh parsley (optional)

Instructions 

  • Preheat oven to 400°F (200°C).
  • Combine sausage and vegetables in a bowl, then toss with olive oil and seasonings.
  • Spread mixture on a sheet pan in a single layer.
  • Bake for 25-30 minutes, stirring halfway, until browned and tender.
  • Garnish with parsley if desired, then serve warm.

Notes

Feel free to add your favorite herbs or adjust seasonings to taste.
Calories: 450kcal
Cost: $15
Course: Main Course
Cuisine: American
Keyword: sausage, vegetables

Loved this recipe? Save it to your favorite Pinterest board so you can easily find it later! It’s the perfect way to keep all your sweet ideas in one place. ✨

A detailed view of roasted sausage and veggies on a sheet pan, highlighting the textures and colors of the dish.

Cozy Up with a One-Pan Fall Chicken Dinner

As the leaves turn golden and the air turns crisp, there’s nothing quite like the aroma of a comforting meal wafting from the kitchen. Enter my One-Pan Fall Chicken Dinner, a recipe that not only brings warmth to your table but also encapsulates the essence of autumn in every bite. With tender chicken, vibrant seasonal vegetables, and a symphony of herbs, this dish is a reminder that cooking can be both effortless and deeply satisfying. So, grab your apron and let’s dive into a recipe that will fill your home with love and laughter!

Why You’ll Love This Recipe

  • Minimal Cleanup: Cooking everything in one pan means less time scrubbing dishes and more time enjoying your meal.
  • Seasonal Flavors: This dish celebrates autumn with brussels sprouts, sweet potatoes, and fresh herbs, making every bite a taste of the season.
  • Quick and Easy: Perfect for busy weeknights, you can have this dish ready in under an hour, making it ideal for families or last-minute guests.
  • Health-Conscious: Packed with wholesome ingredients, it’s a delicious way to enjoy a balanced meal without sacrificing flavor.
  • Impressive Presentation: The vibrant colors of the roasted vegetables and the beautifully browned chicken thighs create a dish that looks as good as it tastes.

Ingredient Breakdown

Delicious one-pan chicken dinner with vibrant seasonal ingredients, shot at eye level with warm lighting.

Let’s take a closer look at the ingredients that make this dish shine. Don’t worry if you don’t have everything on hand; I’ve included some handy substitutions!

  • Chicken Thighs: I use bone-in, skin-on chicken thighs for their flavor and juiciness, but boneless, skinless thighs or breasts can work too.
  • Brussels Sprouts: These little gems are roasted to perfection, but you can substitute with green beans or broccoli if that’s what you have.
  • Sweet Potatoes: Their natural sweetness complements the savory elements beautifully. If you prefer, you can swap in regular potatoes or even butternut squash.
  • Red Onion: Adds a touch of sweetness and depth; yellow or white onions will do in a pinch.
  • Garlic: Fresh minced garlic infuses the dish with flavor, but garlic powder can be used as an alternative.
  • Olive Oil: For roasting; feel free to use vegetable oil or melted butter if you prefer.
  • Herbs: Dried thyme and rosemary enhance the fall flavors, but fresh herbs can elevate this dish even more.
  • Balsamic Vinegar: A splash at the end adds brightness; red wine vinegar can be substituted if needed.

How to Make Your One-Pan Fall Chicken Dinner

Now, let’s get cooking! Here’s a step-by-step guide to achieving that magical one-pan wonder.

  1. Preheat your oven to 400°F (200°C).
  2. In a large bowl, toss together the brussels sprouts, sweet potatoes, red onion, and garlic with 2 tablespoons of olive oil, 1 teaspoon of thyme, 1 teaspoon of rosemary, salt, and pepper until well coated.
  3. Spread the seasoned vegetables on one side of a large baking sheet.
  4. Season the chicken thighs with salt and pepper and place them on the other side of the baking sheet.
  5. Pour 1 cup of chicken broth and 1 tablespoon of balsamic vinegar over the chicken and vegetables.
  6. Bake in the preheated oven for 35-40 minutes, or until the chicken is cooked through and the vegetables are tender.
  7. Let it rest for a few minutes before serving to allow the flavors to meld.

Pro Tips for the Perfect One-Pan Dinner

  • Use a Meat Thermometer: Ensure your chicken reaches an internal temperature of 165°F (74°C) for safety and juiciness.
  • Don’t Crowd the Pan: If your baking sheet is too crowded, the veggies won’t roast properly. Use two sheets if necessary!
  • Experiment with Flavors: Feel free to add a pinch of cayenne pepper or smoked paprika for a hint of heat.
  • Let it Rest: Resting the chicken for a few minutes after baking helps keep it juicy.
  • Double the Recipe: This dish is perfect for meal prep! Make extra and enjoy leftovers throughout the week.
  • Season to Taste: Always taste and adjust seasoning before serving—this dish is your canvas!
  • Garnish for Flair: Fresh herbs or a drizzle of olive oil can elevate the presentation.
  • Use Seasonal Veggies: Don’t hesitate to switch up the vegetables based on what you have available; seasonal produce adds incredible flavor!

Avoid These Common Mistakes

  • Overcooking the Chicken: Keep an eye on the time to avoid dry chicken; use a thermometer!
  • Underseasoning: Don’t be shy with the salt and pepper—it brings the flavors to life.
  • Not Preheating the Oven: Always preheat for even cooking and proper browning.
  • Skipping the Resting Time: This crucial step retains moisture in the chicken.

Delicious Variations to Try

  • Herb-Infused Chicken: Marinate the chicken in herbs and olive oil for a few hours before baking for extra flavor.
  • Maple-Glazed Chicken: Drizzle maple syrup over the chicken thighs before roasting for a sweet twist.
  • Spicy Kick: Add sliced jalapeños or red pepper flakes to the vegetables for some heat.
  • Veggie-Loaded: Include carrots, parsnips, or any seasonal veggies you enjoy for added nutrition.

Storage and Make-Ahead Instructions

This dish is as versatile in storage as it is in preparation. Here’s how to keep it fresh:

  • Refrigerate: Store leftovers in an airtight container in the fridge for up to 3 days.
  • Freeze: This meal can be frozen for up to 3 months; just thaw overnight in the fridge before reheating.
  • Make Ahead: Prep the veggies and season the chicken the night before and keep them in the fridge, ready to bake when you are!

Nutritional Tips and Dietary Adaptations

This One-Pan Fall Chicken Dinner is not only delicious but also nutritious! Here are some tips to cater it to your dietary needs:

  • Low-Carb Option: Substitute sweet potatoes with cauliflower for a lower-carb version.
  • Dairy-Free: This dish is naturally dairy-free, making it suitable for those with lactose intolerance.
  • Gluten-Free: All ingredients are gluten-free; just ensure your broth is certified gluten-free.
  • Vegan Alternative: Swap the chicken for chickpeas and use vegetable broth for a hearty plant-based version.

Essential Equipment

To make this delightful one-pan dish, you’ll need:

  • Large Baking Sheet: A sturdy baking sheet ensures even cooking and browning.
  • Mixing Bowl: For tossing your veggies and seasoning.
  • Meat Thermometer: To check the doneness of your chicken easily.

Serving Suggestions

To really make this meal shine, consider pairing it with:

  • Crusty Bread: Perfect for soaking up the delicious juices from the pan.
  • Simple Salad: A fresh green salad with a light vinaigrette complements the hearty chicken.
  • Wine Pairing: A glass of Chardonnay or Pinot Noir enhances the flavors of the dish beautifully.

Frequently Asked Questions

  • Can I use other types of chicken? Yes! Boneless chicken breasts or drumsticks can be substituted.
  • What if I don’t have brussels sprouts? Feel free to use any seasonal vegetables you prefer!
  • Can I cook this in a slow cooker? Yes, you can! Just adjust the cooking time to 4-6 hours on low.
  • How do I know when the chicken is done? Use a meat thermometer to ensure it reaches 165°F (74°C).
  • Can I double the recipe? Absolutely! Just ensure your pan has enough space for everything to roast properly.
  • What should I do with leftovers? Store in an airtight container in the fridge or freeze for later.
  • Can I add cheese to this dish? Yes, a sprinkle of feta or parmesan before serving can add a delightful touch!
  • How long does this dish last in the fridge? Leftovers can be kept in the fridge for up to 3 days.

In conclusion, my One-Pan Fall Chicken Dinner is the perfect blend of convenience, flavor, and seasonal cheer. Whether you’re cooking for your family or hosting friends, this recipe promises to deliver warmth and joy. So, pull up a chair, grab your spatula, and let’s create some unforgettable memories in the kitchen!

One-Pan Fall Chicken Dinner Recipe - Easy & Cozy

Prep Time 10 minutes
Cook Time 40 minutes
Total Time 50 minutes
Servings 4 servings
Calories 450
A warm, hearty dish perfect for fall evenings, combining tender chicken thighs with roasted vegetables and flavorful herbs.

Ingredients

Protein

  • 4 pieces bone-in, skin-on chicken thighs

Vegetables

  • 2 cups brussels sprouts, halved
  • 2 medium sweet potatoes, cubed
  • 1 red onion, sliced

Aromatics & Herbs

  • 3 cloves garlic, minced
  • 1 tablespoon olive oil
  • 1 teaspoon dried thyme
  • 1 teaspoon dried rosemary
  • to taste salt and pepper salt and pepper

Liquids

  • 1 cup chicken broth
  • 1 tablespoon balsamic vinegar

Instructions 

  • Preheat oven to 400°F (200°C). Toss vegetables with olive oil, garlic, herbs, salt, and pepper.
  • Spread vegetables on one side of a baking sheet. Season chicken thighs and place on the other side.
  • Pour broth and balsamic over chicken and vegetables. Bake for 35-40 minutes.
  • Let rest briefly before serving.

Notes

Use fresh herbs if available for extra flavor.
Calories: 450kcal
Cost: $15
Course: dinner
Cuisine: American
Keyword: Chicken, Fall, roasted

Loved this recipe? Save it to your favorite Pinterest board so you can easily find it later! It’s the perfect way to keep all your sweet ideas in one place. ✨

A cozy, appetizing one-pan meal showcasing chicken and autumn vegetables, beautifully arranged.

Welcome to Your New Favorite Comfort Dish!

If you’re on the hunt for a cozy, heartwarming recipe that will have your loved ones coming back for seconds (or thirds!), you’ve landed in the right place. My Baked Chicken and Rice Casserole is not just a meal; it’s a hug served in a dish. Imagine tender chicken, creamy rice, and vibrant vegetables all baked to perfection. Let’s dive into why this recipe will become a staple in your kitchen.

Why You’ll Love This Recipe

  • One-Pan Wonder: Everything cooks together in one baking dish, making cleanup a breeze!
  • Comforting and Hearty: This casserole is the ultimate comfort food, perfect for chilly nights or when you need a little pick-me-up.
  • Simple Ingredients: You probably have these pantry staples at home already—no last-minute grocery runs required!
  • Customizable: Feel free to swap out the vegetables or add your favorite spices. This dish can adapt to suit your tastes.
  • Perfect for Meal Prep: Make a big batch and enjoy leftovers throughout the week. It’s just as delicious the next day!

Ingredients You’ll Need

Deliciously baked chicken breast on top of fluffy rice and mixed vegetables in a casserole dish.

Here’s what you’ll need for this delicious casserole:

  • 4 boneless, skinless chicken breasts: You can also use chicken thighs for a juicier option.
  • 1 cup uncooked long-grain white rice: Basmati or jasmine works beautifully, too.
  • 1 can (10.5 oz) cream of chicken soup: This adds creaminess and flavor; you can substitute it with a homemade version if you prefer.
  • 2 cups chicken broth: For a richer taste, use low-sodium broth.
  • 1 cup frozen mixed vegetables: Feel free to use fresh vegetables if you have them on hand!
  • 1 teaspoon garlic powder: A must for that aromatic flavor.
  • 1 teaspoon onion powder: This enhances the overall taste.
  • Salt and pepper to taste: Don’t skimp on seasoning!
  • 1 cup shredded cheddar cheese (optional): For a cheesy finish that everyone loves.

How to Make the Recipe

Time to roll up your sleeves and get cooking! Here’s how to prepare this scrumptious casserole:

  1. Preheat the oven to 375°F (190°C).
  2. In a large mixing bowl, combine the uncooked rice, cream of chicken soup, chicken broth, frozen mixed vegetables, garlic powder, onion powder, salt, and pepper. Mix well.
  3. Spread the rice mixture evenly in the bottom of a greased 9×13 inch baking dish.
  4. Place the chicken breasts on top of the rice mixture and season with additional salt and pepper.
  5. Cover the baking dish with aluminum foil and bake in the preheated oven for 45 minutes.
  6. Remove the foil and sprinkle shredded cheddar cheese on top (if using).
  7. Return to the oven and bake uncovered for an additional 15-20 minutes, or until the chicken is cooked through and the rice is tender.
  8. Let it rest for a few minutes before serving. Enjoy your meal!

Pro Tips for Perfecting Your Casserole

  • Use a Meat Thermometer: Ensure your chicken reaches an internal temperature of 165°F (74°C) for safety.
  • Broil for a Crispy Finish: For a crispy top, broil the casserole for an additional 2-3 minutes at the end of baking.
  • Rest Before Serving: Allow the casserole to rest for about 5-10 minutes after baking to help the flavors meld together.
  • Consider Adding Herbs: Fresh parsley or thyme can elevate the flavor profile significantly.
  • Swap the Cheese: Experiment with different cheeses like mozzarella or pepper jack for a unique twist.
  • Make it Creamy: Add a splash of heavy cream for an extra creamy texture.
  • Layer It Up: For added texture, layer some crispy onions or breadcrumbs on top before broiling.
  • Serve with a Side Salad: Balance the richness of the casserole with a fresh side salad for a complete meal.

Common Mistakes and Troubleshooting

  • Overcooking the Chicken: Keep an eye on the cooking time; overcooking can lead to dry chicken.
  • Not Enough Liquid: Ensure you have enough broth; dry rice can ruin the dish.
  • Skipping the Resting Period: Letting it rest enhances flavor and texture.

Variations to Try

Feel free to get creative with this casserole! Here are a few variations you might enjoy:

  • Southwestern Twist: Add black beans, corn, and diced tomatoes with green chilies for a zesty kick.
  • Italian Style: Stir in Italian seasoning and replace the mixed veggies with spinach and artichokes.
  • Asian Influence: Use soy sauce, sesame oil, and add broccoli and snap peas for a flavorful twist.
  • Vegetarian Version: Substitute chicken with chickpeas and use vegetable broth for a hearty meatless option.

Storage and Make-Ahead Instructions

This casserole is perfect for meal prep! Here’s how to store and reheat:

  • Refrigerate: Store any leftovers in an airtight container in the fridge for up to 4 days.
  • Freeze: You can freeze the casserole (before baking) for up to 3 months. Just thaw in the refrigerator overnight before baking.
  • Reheat: To reheat, simply cover with foil and warm in the oven at 350°F (175°C) until heated through.

Frequently Asked Questions

  • Can I use brown rice instead of white? Yes, but you’ll need to increase the cooking time and add more liquid.
  • Is it necessary to cover the casserole while baking? Yes, covering it helps trap steam and ensures the rice cooks properly.
  • Can I make this casserole ahead of time? Absolutely! Prepare it a day in advance and bake it when you’re ready to serve.
  • What can I add for extra flavor? Fresh herbs or spices like paprika or cayenne pepper can elevate the flavor.
  • How can I make this dish healthier? Use brown rice and add more vegetables for added nutrition.
  • Can I use frozen chicken? Yes, but you may need to adjust the cooking time to ensure it’s fully cooked.
  • What sides go well with this casserole? A light salad or steamed veggies pair nicely.
  • How do I know when the chicken is done? Use a meat thermometer to check for an internal temperature of 165°F (74°C).

Nutritional Tips and Dietary Adaptations

For those watching their diet or with specific dietary needs:

  • Gluten-Free: Use gluten-free cream of chicken soup and ensure your chicken broth is gluten-free.
  • Dairy-Free: Substitute cream of chicken soup with a dairy-free alternative and skip the cheese.
  • Low-Carb: Replace rice with cauliflower rice for a low-carb version.

Equipment Recommendations

Here’s what you’ll need to make this recipe:

  • 9×13 inch baking dish: Essential for even baking.
  • Mixing bowl: For combining your ingredients.
  • Aluminum foil: To cover the casserole while baking.
  • Meat thermometer: To ensure your chicken is perfectly cooked.

Serving Suggestions

Serve this casserole warm, straight from the oven. Pair it with:

  • Garlic Bread: A crunchy side that complements the creamy casserole.
  • Seasonal Salad: A fresh salad with vinaigrette can brighten the meal.
  • Steamed Veggies: Broccoli or green beans add color and nutrition.

So, are you ready to create some magic in your kitchen? This Baked Chicken and Rice Casserole isn’t just a recipe; it’s a way to bring warmth and comfort into your home. Happy cooking, and I can’t wait to hear how yours turns out! Let’s make meals that create memories together!

Best Baked Chicken and Rice Casserole Recipe

Prep Time 10 minutes
Cook Time 1 hour
Total Time 1 hour 10 minutes
Servings 4 servings
Calories 550
A hearty and easy-to-make baked casserole combining tender chicken, flavorful rice, and vegetables, topped with cheese for extra deliciousness.

Ingredients

Protein

  • 4 pieces boneless, skinless chicken breasts

Grains

  • 1 cup uncooked long-grain white rice

Canned Goods

  • 1 can cream of chicken soup (10.5 oz)

Broth & Liquids

  • 2 cups chicken broth

Vegetables

  • 1 cup frozen mixed vegetables

Spices & Seasonings

  • 1 teaspoon garlic powder
  • 1 teaspoon onion powder
  • to taste salt and pepper

Cheese (Optional)

  • 1 cup shredded cheddar cheese

Instructions 

  • Preheat oven to 375°F (190°C).
  • Mix rice, soup, broth, vegetables, garlic, onion, salt, and pepper; spread in a greased baking dish.
  • Place chicken on top, season, cover with foil, and bake for 45 minutes.
  • Remove foil, sprinkle cheese, and bake uncovered for 15-20 minutes.
  • Let rest briefly before serving. Enjoy!

Notes

For a richer flavor, add herbs like thyme or parsley.
Calories: 550kcal
Cost: $15
Course: Main Course
Cuisine: American
Keyword: baked, Casserole, Chicken

Loved this recipe? Save it to your favorite Pinterest board so you can easily find it later! It’s the perfect way to keep all your sweet ideas in one place. ✨

Creamy chicken and rice casserole, showcasing tender chicken and vibrant vegetables under warm light.

Welcome to a Cozy Dinner Experience!

Imagine walking into a kitchen filled with the warm aroma of garlic and roasted potatoes, the kind of scent that wraps around you like a soft blanket. That’s exactly what this Garlic Parmesan Chicken and Potatoes recipe offers. It’s not just a meal; it’s an experience that feels like home. This dish is perfect for any night of the week, whether you’re cooking for family, friends, or just treating yourself to some well-deserved comfort food.

Why You’ll Love This Recipe

This recipe isn’t just about great taste; it’s about simplicity, satisfaction, and a touch of magic. Here are five reasons why you’ll want to make this a staple in your kitchen:

  • One-Pan Wonder: Everything cooks together on a single baking sheet, making cleanup a breeze and allowing all the flavors to meld beautifully.
  • Quick and Easy: With just a few ingredients and minimal prep time, you can have a delicious meal ready in about 30 minutes.
  • Kid-Friendly: The cheesy, savory flavors of garlic and Parmesan are universally loved, making it a hit with picky eaters and adults alike.
  • Versatile: This recipe is adaptable; you can easily swap in different vegetables or proteins based on what you have on hand.
  • Meal Prep Friendly: Make a double batch and enjoy leftovers for lunch or dinner throughout the week!

Ingredients Breakdown

Deliciously arranged Garlic Parmesan Chicken with golden potatoes on a plate.

Let’s dive into the heart of the recipe: the ingredients. Each one plays a crucial role in creating the delicious dish you’re about to make.

  • 4 boneless, skinless chicken breasts: These are the stars of the show! You can also use thighs for a juicier option.
  • 4 medium potatoes, diced: Yukon Gold or red potatoes are ideal for their creamy texture and ability to crisp up nicely.
  • 1/2 cup grated Parmesan cheese: Adds a rich, nutty flavor that elevates the dish to a new level.
  • 1/4 cup olive oil: This not only helps with cooking but also enhances the flavor of the spices.
  • 4 cloves garlic, minced: Fresh garlic is key to bringing that delightful aroma and flavor.
  • 1 teaspoon Italian seasoning: A blend of herbs that complements the chicken and potatoes perfectly.
  • Salt and pepper to taste: Essential for bringing out the flavors of the other ingredients.
  • Fresh parsley for garnish (optional): A pop of color and freshness to finish off your dish.

Making Your Garlic Parmesan Chicken and Potatoes

Ready to get cooking? Follow these steps to create your masterpiece!

  1. Preheat the oven: Set your oven to 400°F (200°C) to get it nice and hot.
  2. Prepare the garlic mixture: In a large bowl, mix the olive oil, minced garlic, Italian seasoning, salt, and pepper until well combined.
  3. Coat the potatoes: Add the diced potatoes to the bowl and toss to coat them evenly with the garlic mixture.
  4. Spread the potatoes: Arrange the potatoes in a single layer on a baking sheet. This ensures they roast evenly.
  5. Coat the chicken: In the same bowl, add the chicken breasts and coat them with the remaining olive oil mixture.
  6. Combine on the baking sheet: Place the chicken breasts on the baking sheet with the potatoes, ensuring enough space for everything to cook perfectly.
  7. Cheese it up: Sprinkle the grated Parmesan cheese evenly over the chicken and potatoes for that cheesy goodness.
  8. Bake to perfection: Bake in the preheated oven for 25-30 minutes, or until the chicken is cooked through (internal temperature of 165°F) and the potatoes are tender.
  9. Garnish and serve: If desired, garnish with fresh parsley before serving hot.

Pro Tips for Success

Want to take your dish to the next level? Here are some expert insights:

  • Marinate the chicken: For extra flavor, consider marinating the chicken in the garlic mixture for a few hours or even overnight.
  • Customize the veggies: Feel free to add in other vegetables like bell peppers, zucchini, or carrots for added nutrition and flavor.
  • Use fresh herbs: If you have fresh herbs like rosemary or thyme, chop some up and add them to the mixture for an aromatic boost.
  • Check your oven: Ovens can vary significantly, so check the chicken a few minutes early to avoid overcooking.
  • Let it rest: Allow the chicken to rest for a few minutes after baking before slicing to keep it juicy.
  • Pair with a salad: Serve alongside a fresh green salad or steamed vegetables to balance the richness of the dish.
  • Leftovers are gold: Store leftovers in an airtight container for up to 3 days, perfect for quick lunches or dinners.
  • Cheese variations: Try different cheeses like mozzarella or cheddar for a unique twist.

Common Mistakes and Troubleshooting

Even the best cooks have their moments! Here are some common pitfalls and how to avoid them:

  • Overcrowding the pan: Ensure your chicken and potatoes are spread out; this helps them roast instead of steam.
  • Not enough seasoning: Don’t skimp on the salt and pepper; they are essential for flavor.
  • Skipping the resting period: Letting the chicken rest before slicing ensures it retains its juices.
  • Under or overcooking: Use a meat thermometer to check for doneness and avoid any guesswork.

Variations to Try

Want to mix things up? Here are some delightful variations to try:

  • Garlic Lemon Chicken and Potatoes: Add the zest and juice of one lemon for a bright, zesty flavor.
  • Spicy Garlic Parmesan: Toss in some red pepper flakes for a kick of heat.
  • Herb-Infused Chicken: Incorporate fresh herbs like basil or cilantro for a fresh twist.
  • Cheesy Veggie Bake: Replace half the chicken with your favorite veggies for a vegetarian version.

Storage and Make-Ahead Instructions

This dish is perfect for meal prepping! Here’s how to store and reheat:

  • Refrigeration: Store leftovers in an airtight container in the fridge for up to 3 days.
  • Freezing: You can freeze the cooked dish for up to 2 months. Just ensure it’s in a freezer-safe container.
  • Reheating: Reheat in the oven at 350°F until heated through, or in the microwave for a quick meal.

Frequently Asked Questions

Got questions? I’ve got answers! Here are some common queries about this recipe:

  • Can I use frozen chicken? Yes, but be sure to thaw it completely before cooking for even results.
  • What can I serve with this dish? A green salad, garlic bread, or steamed vegetables pair beautifully.
  • Can I make this recipe in advance? Absolutely! You can prep the ingredients ahead of time and bake when ready.
  • What if I don’t have Parmesan? Other cheeses like mozzarella or pecorino can work in a pinch.
  • Is this recipe gluten-free? Yes, all the ingredients listed are gluten-free.
  • How do I know when the chicken is done? Use a meat thermometer; the internal temperature should reach 165°F.
  • Can I add more vegetables? Yes! Feel free to toss in your favorites for added nutrition.
  • What’s the best way to slice the chicken? Always slice against the grain for tender pieces.

Nutritional Tips and Dietary Adaptations

Cooking isn’t just about flavor; it’s also about nutrition. Here are some tips for healthier adaptations:

  • Lean protein: Opt for chicken thighs instead of breasts for a juicier, more flavorful option.
  • Low-fat cheese: Use low-fat Parmesan or nutritional yeast for a lighter version.
  • Add greens: Incorporate leafy greens or broccoli to boost fiber and nutrients.
  • Oil alternatives: Swap olive oil for a cooking spray to reduce fat content.

Equipment Recommendations

To make this recipe as easy as possible, here’s what you’ll need:

  • Baking sheet: A large, rimmed baking sheet is perfect for cooking everything in one go.
  • Mixing bowl: A medium-sized bowl to combine your garlic and oil mixture.
  • Meat thermometer: Essential for ensuring your chicken is cooked to perfection.
  • Cutting board and knife: For chopping and prepping your ingredients.

Serving Suggestions

Now that your dish is ready, here are a few ideas for serving it:

  • Garnish: Top with fresh parsley or extra Parmesan for a beautiful presentation.
  • Pair with wine: A crisp white wine like Sauvignon Blanc complements the flavors wonderfully.
  • Serve family style: Place the baking sheet directly on the table for a cozy, communal dining experience.
  • Side dishes: Serve alongside a simple green salad or a light soup to balance the richness of the chicken and potatoes.

In conclusion, this Garlic Parmesan Chicken and Potatoes recipe is more than just a meal; it’s an invitation to create memories around the dinner table. With its comforting flavors and easy preparation, you’ll find yourself coming back to this recipe time and time again. So grab your ingredients, preheat that oven, and let’s make some magic in the kitchen!

A Must-Try Garlic Parmesan Chicken and Potatoes Recipe!

Prep Time 10 minutes
Cook Time 30 minutes
Total Time 40 minutes
Servings 4 servings
Calories 550
This flavorful dish combines tender chicken breasts with crispy potatoes, topped with Parmesan cheese and fresh herbs for a satisfying meal.

Ingredients

Protein

  • 4 pieces boneless, skinless chicken breasts

Vegetables

  • 4 medium potatoes, diced

Dairy

  • 1/2 cup grated parmesan cheese

Oils & Condiments

  • 1/4 cup olive oil

Spices & Herbs

  • 4 cloves garlic, minced
  • 1 teaspoon italian seasoning
  • to taste salt and pepper

Garnish

  • optional fresh parsley for garnish

Instructions 

  • Preheat oven to 400°F (200°C).
  • Mix olive oil, garlic, Italian seasoning, salt, and pepper.
  • Toss potatoes in the mixture and spread on a baking sheet.
  • Coat chicken with remaining mixture and place on the sheet.
  • Sprinkle Parmesan, bake for 25-30 mins, then garnish with parsley.

Notes

Ensure chicken is cooked through and potatoes are tender before serving.
Calories: 550kcal
Cost: $15
Course: Main Course
Cuisine: American
Keyword: Chicken, garlic, parmesan, potatoes

Loved this recipe? Save it to your favorite Pinterest board so you can easily find it later! It’s the perfect way to keep all your sweet ideas in one place. ✨

A warm dish of Garlic Parmesan Chicken and crispy potatoes, highlighted by natural light.

Welcome to a Culinary Adventure: Creamy Keto Turkey Meatballs That Wow!

Welcome, dear friend, to my cozy kitchen where comfort food meets healthy eating! If you’ve been on the hunt for a recipe that satisfies your cravings while keeping your diet in check, you’ve landed in the right place. These keto turkey meatballs are not just any meatballs; they’re a delightful blend of tender ground turkey, the richness of heavy cream, and the sharpness of Parmesan cheese, all wrapped up in a creamy sauce that will make your taste buds dance.

In this recipe, we’ll dive deep into the magical world of keto turkey cooking, ensuring that every bite is as flavorful as it is healthy. So, grab your apron and let’s get started!

Why You’ll Love This Recipe

Here are just a few reasons why these turkey meatballs will become a staple in your kitchen:

  • Low Carb Delight: Perfect for those following a keto lifestyle, each meatball is low in carbs but high in flavor.
  • Easy to Make: With simple ingredients and straightforward steps, you can whip up this dish in no time, making it great for weeknight dinners.
  • Versatile Meal: Serve them with zoodles, over cauliflower rice, or in a cozy bowl of soup—these meatballs fit seamlessly into any meal.
  • Meal Prep Friendly: Make a big batch and enjoy leftovers throughout the week, perfect for busy schedules.
  • Impress Your Guests: With their creamy sauce and mouthwatering taste, these meatballs are bound to impress at your next dinner party!

Ingredient Breakdown: What You’ll Need

Let’s gather our ingredients and talk about some possible substitutions to make this recipe your own.

  • Ground Turkey (1 pound): You can use a mix of dark and white meat for a richer flavor, or substitute with ground chicken if preferred.
  • Egg (1 large): Acts as a binder. If you’re avoiding eggs, try using a flax egg (1 tablespoon ground flaxseed mixed with 2.5 tablespoons water).
  • Salt (1/2 teaspoon + 1 teaspoon): Enhances flavor; feel free to adjust according to taste.
  • Black Pepper (1/2 teaspoon + 1/4 teaspoon): Adds a kick; you can swap it for white pepper for a milder flavor.
  • Garlic (1 teaspoon + garlic powder, 1 teaspoon): Fresh is always best, but garlic powder can be a great alternative.
  • Parsley (2 teaspoons): Fresh parsley adds color and freshness. Dried parsley can be used in a pinch.
  • Heavy Cream (1 3/4 cup): The star of the sauce; you can substitute with coconut cream for a dairy-free version.
  • Parmesan Cheese (1 cup, cut from the block): Freshly grated cheese adds depth; nutritional yeast can be a good substitute for a vegan option.

Let’s Cook: Step-by-Step Instructions

Side view of tender turkey meatballs coated in a rich, creamy sauce.

Now that we have everything ready, let’s get cooking!

  1. Preheat the oven: Set it to broil to get that golden-brown finish on your meatballs.
  2. Mix the meatball ingredients: In a large bowl, combine the ground turkey, egg, 1/2 teaspoon salt, 1/2 teaspoon black pepper, garlic, and parsley. The mixture will be sticky, so be sure to oil your hands before forming the meatballs.
  3. Form the meatballs: Roll the mixture into meatballs about the size of a quarter. This recipe should yield approximately 15 meatballs.
  4. Brown the meatballs: Heat a skillet over medium heat and add a splash of oil. Cook the meatballs in batches, ensuring not to overcrowd the pan. Brown on all sides until cooked through.
  5. Make the creamy sauce: Remove the meatballs and lower the heat. Pour in the heavy cream and stir in the Parmesan cheese, garlic powder, remaining salt, and pepper. Simmer gently, stirring until the cheese melts and the sauce thickens.
  6. Combine: Add the meatballs back to the skillet, coating them in that luscious sauce. Pop the skillet under the broiler for a few minutes to brown the tops slightly.
  7. Garnish and serve: Remove from the oven, garnish with extra parsley and Parmesan, and let cool slightly before serving.

Pro Tips for Perfection

Want to take your meatballs to the next level? Here are some expert insights:

  • Don’t skip the browning: Browning the meatballs not only adds flavor through caramelization but also helps them hold their shape.
  • Adjust the sauce thickness: If the sauce is too thick, add a splash of chicken broth; if it’s too thin, let it simmer longer.
  • Experiment with spices: Add red pepper flakes for heat or Italian seasoning for an herby touch.
  • Use a meat thermometer: Ensure your meatballs reach an internal temperature of 165°F for perfect doneness.
  • Let them rest: Allow the meatballs to sit in the sauce for a few minutes after cooking; this helps them absorb flavors.
  • Customize your toppings: Try adding sautéed mushrooms or spinach for extra nutrition and flavor.
  • Double the recipe: These meatballs keep well in the fridge, so make a big batch to enjoy throughout the week.
  • Think outside the box: Serve the meatballs in lettuce wraps for a fun, low-carb twist!

Common Mistakes and Troubleshooting

Even the best chefs have their off days. Here are some tips to avoid common pitfalls:

  • Overmixing the meat: This can lead to tough meatballs. Mix just until combined for a tender texture.
  • Using lean turkey: While it’s healthier, it can also result in dry meatballs. Consider using a mix of dark and white meat.
  • Skipping the oil: Without oil, the meatballs may stick to the pan. Always use a little oil for browning.
  • Not enough seasoning: Taste your mixture before cooking! Adjust the seasoning to your preference for optimal flavor.

Delicious Variations to Try

Feeling adventurous? Here are some tasty variations on this classic recipe:

  • Creamy Spinach Meatballs: Add chopped spinach to the meatball mixture for extra greens and flavor.
  • Italian Style: Mix in chopped sun-dried tomatoes and Italian herbs for a Mediterranean twist.
  • Buffalo-Style Meatballs: Add hot sauce to the mix and serve with a side of blue cheese dressing.
  • Sweet and Sour Turkey Meatballs: Incorporate a bit of pineapple juice into the sauce for a tangy kick.

Storage and Make-Ahead Instructions

These meatballs are perfect for meal prep! Here’s how to store and reheat:

  • Refrigerate: Store leftover meatballs in an airtight container in the fridge for up to 4 days.
  • Freeze: Place cooled meatballs in a freezer-safe bag for up to 3 months. Thaw in the fridge overnight before reheating.
  • Reheat: Warm in the microwave or on the stovetop with a splash of cream to bring back that luscious sauce.

Frequently Asked Questions

Let’s tackle some common questions about these keto turkey meatballs:

  • Can I use ground chicken instead of turkey? Yes! Ground chicken can be a great substitute.
  • Is this recipe gluten-free? Absolutely! All ingredients used are naturally gluten-free.
  • How can I make this dairy-free? Substitute the heavy cream with coconut cream and use nutritional yeast instead of Parmesan.
  • What can I serve with these meatballs? They pair wonderfully with zoodles, cauliflower rice, or even a fresh salad.
  • Can I bake these instead of pan-frying? Yes, baking at 400°F for about 20 minutes works well too!
  • How do I know when the meatballs are done? Use a meat thermometer; they should reach 165°F internally.
  • Can I make these meatballs ahead of time? Yes! Prepare and store in the fridge or freezer until you’re ready to cook.
  • What’s the best way to reheat them? Gently warm them in a skillet with a little cream for the best texture.

Nutritional Benefits and Dietary Adaptations

These meatballs are not only delicious but also packed with nutritional benefits:

  • High Protein: Ground turkey is a lean source of protein, essential for muscle repair and growth.
  • Low Carb: Perfect for those on a ketogenic diet, helping to maintain energy without spiking blood sugar.
  • Rich in Calcium: With the addition of Parmesan cheese, you’re also boosting your calcium intake!
  • Customizable: Easily adapt the recipe to fit various dietary needs, whether gluten-free, dairy-free, or low-carb.

Essential Equipment Recommendations

To make this recipe a breeze, here’s what I recommend having on hand:

  • Mixing Bowl: A large bowl for combining the meatball ingredients.
  • Skillet: Non-stick or cast iron works best for browning the meatballs.
  • Meat Thermometer: Essential for ensuring the meatballs are cooked to perfection.
  • Spatula: A sturdy spatula for flipping and serving the meatballs.

Serving Suggestions: Make It a Meal

Now that your meatballs are ready, let’s talk about how to serve them:

  • Over Zoodles: Serve the meatballs on a bed of spiralized zucchini for a light, low-carb option.
  • With Cauliflower Rice: For a hearty meal, pair with cauliflower rice sautéed in garlic and olive oil.
  • In a Sandwich: Use keto-friendly bread to create a delicious meatball sandwich.
  • As an Appetizer: Serve them on toothpicks with a side of dipping sauce for parties!

Final Thoughts: Your Journey to Flavor Awaits

And there you have it! A comprehensive guide to making creamy keto turkey meatballs that are sure to impress. I hope you enjoy creating these delicious bites as much as I do. Remember, cooking is all about love and sharing special moments with those around you. So, gather your loved ones, whip up a batch of these meatballs, and let the good times roll! Happy cooking, friends! 🍽️✨

Amazing Keto Turkey Meatballs In A Creamy Sauce: This Is How

Prep Time 15 minutes
Cook Time 20 minutes
Total Time 35 minutes
Servings 4 servings
Calories 550
Delicious keto-friendly turkey meatballs smothered in a rich, creamy sauce, perfect for a satisfying meal.

Ingredients

Meat

  • 1 pound ground turkey
  • 1 large egg
  • 1/2 teaspoon Salt
  • 1/2 teaspoon black pepper
  • 1 teaspoon garlic
  • 2 teaspoon parsley
  • 1 3/4 cup Heavy cream
  • 1 cup Parmesan cheese (cut from the block)
  • 1 teaspoon Salt
  • 1 teaspoon garlic powder
  • 1/4 teaspoon black pepper

Instructions 

  • Preheat oven on broil. Mix turkey with egg, salt, pepper, garlic, and parsley; form into meatballs.
  • Cook meatballs in a skillet on medium heat until browned and cooked through. Remove and set aside.
  • In the same skillet, add heavy cream, Parmesan, garlic powder, salt, and pepper. Simmer until thickened.
  • Return meatballs to the sauce, then transfer to oven to brown the top slightly. Garnish with parsley and Parmesan before serving.

Notes

Use fresh parsley for best flavor and ensure sauce thickens before serving.
Calories: 550kcal
Cost: $15
Course: Main Course
Cuisine: American
Keyword: Keto, meatballs, Turkey

Discover the Magic of One Pot Lemon Herb Chicken and Rice

Welcome to my kitchen, where I invite you to dive into a delightful culinary experience with my One Pot Lemon Herb Chicken and Rice. This dish is like a warm hug on a plate, perfect for busy weeknights or cozy gatherings. In just 40 minutes, you’ll create a meal that bursts with flavor, comfort, and a hint of sunshine, making it a staple in your home just like it is in mine.

Why You’ll Love This Recipe

This recipe isn’t just about cooking; it’s about creating memories, sharing joy, and savoring every bite. Here’s why you’re going to adore this dish:

  • Quick & Easy: In just 40 minutes, you’ll have a delicious, hearty meal ready to serve, making it perfect for busy nights.
  • One Pot Wonder: Less cleanup means more time to enjoy with family and friends—just one pot to wash!
  • Flavorful & Zesty: The combination of lemon and herbs infuses the chicken and rice with a fresh, vibrant taste that’s hard to resist.
  • Customizable: This recipe is versatile! You can easily swap ingredients to cater to your pantry or dietary needs.
  • Healthy & Wholesome: Packed with protein and fresh ingredients, it’s a nutritious choice for your family.

Ingredients You’ll Need

A comforting dish of One Pot Lemon Herb Chicken and Rice, showcasing tender chicken and fluffy rice.

Here’s what you’ll need to create this tasty dish:

  • 1 lb boneless, skinless chicken thighs: Tender chicken that cooks beautifully.
  • 1 cup long-grain rice: The perfect grain to absorb all those delicious flavors.
  • 2 cups chicken broth: Adds depth and richness to the rice.
  • 1 medium onion, chopped: For a savory base that builds flavor.
  • 3 cloves garlic, minced: Because garlic makes everything better!
  • 1 lemon (zested and juiced): Brightens up the dish with a zesty kick.
  • 1 teaspoon dried oregano: Adds a lovely herbal note.
  • 1 teaspoon dried thyme: Complements the lemon and chicken perfectly.
  • Salt and pepper to taste: Essential seasonings to enhance flavors.
  • 2 tablespoons olive oil: For sautéing and flavor.
  • Fresh parsley for garnish: Adds a pop of color and freshness.

Step-by-Step Instructions

Now, let’s get cooking! Follow these simple steps to whip up your One Pot Lemon Herb Chicken and Rice.

  1. In a large pot, heat the olive oil over medium heat.
  2. Season the chicken thighs with salt, pepper, oregano, and thyme. Add them to the pot and cook until browned on both sides, about 5-7 minutes. Remove and set aside.
  3. In the same pot, add the chopped onion and minced garlic, sautéing until translucent, about 3-4 minutes.
  4. Stir in the rice, cooking for 1-2 minutes until lightly toasted.
  5. Add the chicken broth, lemon juice, and lemon zest to the pot, stirring to combine.
  6. Return the chicken to the pot, ensuring it’s submerged in the liquid.
  7. Bring to a boil, then reduce heat to low, cover, and simmer for 20 minutes or until the rice is cooked and has absorbed the liquid.
  8. Remove from heat, let it sit covered for an additional 5 minutes.
  9. Fluff the rice with a fork, garnish with fresh parsley, and serve!

Pro Tips for Perfecting Your Dish

To elevate your cooking experience, here are some expert insights:

  • Use bone-in chicken: If you prefer, bone-in chicken thighs can add even more flavor to the dish, just adjust the cooking time.
  • Rice variety: While long-grain rice works best, feel free to use jasmine or basmati for a different flavor profile.
  • Don’t skip the resting time: Letting the dish sit for 5 minutes after cooking allows the flavors to meld beautifully.
  • Experiment with herbs: Fresh herbs like thyme or dill can be used instead of dried for a more intense flavor.
  • Make it a one-pot meal: Add vegetables such as peas, carrots, or bell peppers during the last 10 minutes of cooking for added nutrition.
  • Watch the liquid: If you’re using brown rice, you might need to increase the cooking time and liquid slightly.
  • Garnish creatively: Try topping with toasted almonds or a sprinkle of feta for added texture and flavor.
  • Scale up or down: This recipe is easily adjustable; simply maintain the rice-to-liquid ratio for perfect results.

Common Mistakes and Troubleshooting

Even seasoned cooks can encounter hiccups. Here’s how to avoid some common pitfalls:

  • Overcooking the chicken: Keep an eye on your chicken to avoid dryness; it should be tender and juicy.
  • Burnt rice: If your rice starts to stick, ensure there’s enough liquid and keep the heat low.
  • Insufficient seasoning: Don’t be shy with your seasonings; taste and adjust as needed for a well-balanced flavor.
  • Skipping the resting phase: Letting the dish rest helps the rice absorb any remaining moisture and enhances the flavors.

Variations to Keep Things Exciting

Here are some fun variations to keep your meals exciting:

  • Spicy Kick: Add a pinch of red pepper flakes or a dash of hot sauce for some heat.
  • Vegetarian Delight: Substitute the chicken with chickpeas and vegetable broth for a hearty vegetarian option.
  • Herb Medley: Mix in fresh herbs like basil or cilantro for a unique twist.
  • Cheesy Goodness: Stir in some grated Parmesan or cheddar cheese right before serving for a creamy finish.

Storage and Make-Ahead Instructions

Want to prepare ahead of time? Here’s how:

  • Make-Ahead: You can marinate the chicken with herbs and lemon juice a few hours before cooking for extra flavor.
  • Storage: Store leftovers in an airtight container in the fridge for up to 3 days.
  • Freezing: This dish freezes well—just ensure it’s cooled completely before transferring to a freezer-safe container.
  • Reheating: When reheating, add a splash of chicken broth to keep the rice moist.

Comprehensive FAQ

Got questions? I’ve got answers! Here are some frequently asked questions about this recipe:

  • Can I use brown rice instead of white? Yes, but adjust the cooking time and liquid amount as brown rice takes longer to cook.
  • Is it okay to use frozen chicken? Yes, but ensure it’s fully thawed before cooking for even results.
  • What can I substitute for chicken broth? Vegetable broth or even water can work in a pinch.
  • How do I know when the chicken is done? It should reach an internal temperature of 165°F (75°C) and be tender.
  • Can I add more veggies? Absolutely! Peas, spinach, or bell peppers can be excellent additions.
  • What if I want it creamier? Stir in some heavy cream or Greek yogurt just before serving for a rich finish.
  • Can I make this in advance? Yes, you can prepare it ahead of time and reheat it for a quick meal.
  • How long does it take to cook? The total time is about 40 minutes, including prep and cooking!

Nutrition Tips and Dietary Adaptations

This dish is not only delicious but can also be adapted to fit various dietary needs:

  • Low-carb option: Substitute rice with cauliflower rice to lighten the dish.
  • Gluten-free: Ensure your broth and any additional ingredients are certified gluten-free.
  • Dairy-free: This recipe is naturally dairy-free, making it suitable for lactose intolerant individuals.

Equipment Recommendations

Here’s what I recommend for making this recipe as seamless as possible:

  • Large pot or Dutch oven: Ideal for cooking everything in one pot, ensuring even heat distribution.
  • Wooden spoon: Perfect for stirring and preventing scratches on your cookware.
  • Meat thermometer: Helps you check the chicken’s doneness accurately.

Serving Suggestions

Serve your One Pot Lemon Herb Chicken and Rice with:

  • Simple side salad: A fresh green salad with a light vinaigrette pairs beautifully.
  • Crusty bread: Perfect for soaking up any leftover sauce.
  • Steamed vegetables: Brightly colored veggies make a nutritious addition to your meal.

So there you have it! A comprehensive guide to creating a One Pot Lemon Herb Chicken and Rice that’s sure to wow your family and friends. Remember, cooking is all about enjoyment, so have fun and make this recipe your own. Cheers to delicious meals and wonderful memories!

One Pot Lemon Herb Chicken and Rice (40-Minutes)

Prep Time 10 minutes
Cook Time 30 minutes
Total Time 40 minutes
Servings 4 servings
Calories 450
A quick and flavorful one-pot meal combining tender chicken, fragrant herbs, and zesty lemon rice, perfect for a weeknight dinner.

Ingredients

Protein

  • 1 lb boneless, skinless chicken thighs

Grains

  • 1 cup long-grain rice

Broth & Liquids

  • 2 cups chicken broth
  • 1 medium onion, chopped
  • 3 cloves garlic, minced
  • 1 lemon lemon (zested and juiced)
  • 1 teaspoon dried oregano
  • 1 teaspoon dried thyme
  • salt and pepper to taste salt and pepper
  • 2 tablespoons olive oil

Garnish

  • fresh parsley fresh parsley for garnish

Instructions 

  • Heat olive oil in a large pot, season chicken with salt, pepper, oregano, and thyme, then brown for 5-7 minutes. Remove and set aside.
  • Sauté chopped onion and garlic until translucent, about 3-4 minutes.
  • Add rice, cook 1-2 minutes, then stir in chicken broth, lemon juice, and zest.
  • Return chicken to the pot, bring to a boil, then reduce heat, cover, and simmer for 20 minutes.
  • Let sit covered for 5 minutes, then fluff rice, garnish with parsley, and serve.

Notes

For extra flavor, add a pinch of red pepper flakes or a squeeze of additional lemon before serving.
Calories: 450kcal
Cost: $15
Course: Main Course
Cuisine: American
Keyword: Chicken, lemon, Rice

Loved this recipe? Save it to your favorite Pinterest board so you can easily find it later! It’s the perfect way to keep all your sweet ideas in one place. ✨

A detailed view of One Pot Lemon Herb Chicken and Rice, garnished with fresh parsley and bright lemon zest.

Welcome to a Flavorful Adventure!

Welcome to my kitchen, where we’re about to embark on a culinary journey that’s as comforting as your favorite sweater. Today, I’m sharing my Ground Turkey and Peppers recipe. This dish is not just a meal; it’s a celebration of flavors, colors, and memories. Whether you’re cooking for a family dinner or a cozy night in, this recipe is guaranteed to make your taste buds dance with joy!

This recipe combines the heartiness of ground turkey with the vibrant crunch of bell peppers, creating a dish that’s not only delicious but also packed with nutrition. And let’s be honest—who doesn’t love a quick, easy dish that feels like a warm hug?

So, grab your apron and let’s get started!

Why You’ll Love This Recipe

  • Quick and Easy: Perfect for busy weeknights, this dish takes less than 30 minutes from prep to plate.
  • Healthy Ingredients: Ground turkey is a lean protein source, and combined with colorful bell peppers, this meal is nutritious without sacrificing flavor.
  • Customizable: Feel free to add your favorite veggies or spices to make this dish your own.
  • One-Pan Wonder: Minimal cleanup means more time to savor your delicious meal.
  • Family-Friendly: Even picky eaters will love this dish, making it a go-to for family dinners.

Ingredient Breakdown

Let’s dive into what you’ll need for this scrumptious meal. Here’s a detailed look at each ingredient:

  • 1 lb ground turkey: A lean protein that cooks quickly and absorbs flavors beautifully.
  • 3 bell peppers (red, yellow, green), sliced: Adds a burst of color and sweetness—feel free to mix and match based on what you have!
  • 1 small onion, diced: A must-have for building a savory base.
  • 2 garlic cloves, minced: Because garlic makes everything better!
  • 1 tablespoon olive oil: For sautéing and adding healthy fats.
  • 2 tablespoons soy sauce: This adds depth and umami flavor to the dish.
  • 1 tablespoon tomato paste: Provides richness and a touch of sweetness.
  • 1/2 teaspoon paprika: For a hint of warmth and smokiness.
  • Salt and pepper to taste: Essential for enhancing all the flavors.
  • Chopped fresh parsley for garnish (optional): A pop of freshness to finish off your dish.

Pro Tips for Perfecting Your Dish

Juicy ground turkey stir-fried with diced onions and garlic, garnished with fresh parsley.

Now that we have our ingredients ready, here are some expert insights to elevate your cooking:

  • Brown the Turkey Well: Make sure to cook the ground turkey until it’s browned to enhance the flavor.
  • Don’t Overcook the Peppers: Aim for a tender-crisp texture for the peppers to keep their vibrant color and bite.
  • Use Fresh Ingredients: Fresh garlic and herbs can make a noticeable difference in flavor.
  • Adjust the Soy Sauce: Depending on your salt preference, you may wish to adjust the soy sauce to taste.
  • Experiment with Spices: Feel free to add red pepper flakes for heat or Italian seasoning for a twist.
  • Let It Simmer: Allowing the dish to simmer for a few minutes helps meld the flavors together.
  • Prep Ahead: Chop your veggies in advance to make cooking even quicker!
  • Serve with a Side: Pair it with rice, quinoa, or a simple salad for a complete meal.

Common Mistakes and Troubleshooting

Even the best chefs have their off days! Here are some common pitfalls and how to avoid them:

  • Greasy Dish: If your dish turns out greasy, ensure the turkey is lean and drain excess fat after browning.
  • Too Salty: If it’s too salty, add a splash of vinegar or a bit of sugar to balance the flavors.
  • Overcooked Peppers: If you accidentally overcook your peppers, add a splash of water and cover to steam them back to life.
  • Flavorless Turkey: Make sure to season the turkey well as it cooks to build flavor from the start.

Variations to Try

This recipe is wonderfully versatile! Here are some variations to keep things exciting:

  • Spicy Twist: Add diced jalapeños or a splash of hot sauce for a little heat.
  • Veggie-Loaded: Toss in additional vegetables like zucchini or mushrooms for extra nutrition.
  • Mexican-Inspired: Season with taco spices and serve in tortillas for a delicious taco night!
  • Pasta Delight: Combine with cooked pasta and a splash of cream for a hearty pasta dish.

Storage and Make-Ahead Instructions

This dish keeps well, making it perfect for meal prep:

  • Refrigerate: Store leftovers in an airtight container in the fridge for up to 4 days.
  • Freeze: Freeze in portions for up to 3 months. Thaw in the refrigerator overnight before reheating.
  • Reheat: Warm it up in a skillet over medium heat or in the microwave until heated through.

Frequently Asked Questions

Let’s tackle some common questions about this beloved dish:

  • Can I use ground beef instead of turkey? Absolutely! Ground beef works well, but it may be richer in flavor.
  • What can I substitute for soy sauce? Try tamari for a gluten-free option, or coconut aminos for a sweeter alternative.
  • Is this dish kid-friendly? Yes! It’s mild and colorful, making it appealing to kids.
  • Can I add cheese? Of course! Sprinkle some cheese over the top before serving for extra creaminess.
  • How do I make it vegetarian? Substitute turkey with cooked lentils or plant-based meat alternatives.
  • What’s the best way to serve this? It’s delicious on its own or served over rice, quinoa, or in wraps.
  • Can I cook it in advance? Yes! You can prepare it a day ahead and reheat when ready to serve.
  • How do I store leftovers? Keep in an airtight container in the fridge for up to 4 days or freeze for up to 3 months.

Nutrition Tips and Dietary Adaptations

This Ground Turkey and Peppers recipe is not only delicious but also nutritious! Here are some tips to consider:

  • Protein-Packed: Ground turkey is a fantastic source of lean protein, ideal for muscle maintenance.
  • Low-Calorie Option: This dish is low in calories, making it suitable for those watching their intake.
  • Vegetable Boost: Feel free to add any vegetables you enjoy to increase fiber and vitamins.
  • Gluten-Free: Use gluten-free soy sauce or tamari for those with gluten sensitivities.

Equipment Recommendations

To make this recipe seamless, here’s a quick list of equipment you’ll need:

  • Large Skillet: For sautéing the turkey and vegetables.
  • Wooden Spoon: For mixing and breaking up the turkey.
  • Chopping Board: Essential for prepping your ingredients.
  • Knife: A sharp knife makes chopping easier and safer.

Serving Suggestions

Now that your Ground Turkey and Peppers dish is ready, here are some delightful ways to serve it:

  • With Rice: Serve it over a bed of fluffy rice for a filling meal.
  • In Tortillas: Wrap it in tortillas for quick and tasty burritos.
  • On a Salad: Top a mixed greens salad with this mixture for a fresh twist.
  • With Quinoa: Pair with quinoa for a protein-packed, wholesome option.

There you have it! My Ground Turkey and Peppers recipe is not just a meal; it’s a way to bring people together, create memories, and enjoy wholesome flavors. I hope you find joy in making this dish as much as I do. Happy cooking, and may your kitchen always be filled with love and laughter!

Ground Turkey and Peppers

Prep Time 10 minutes
Cook Time 15 minutes
Total Time 25 minutes
Servings 4 servings
Calories 250
A quick and flavorful dish combining lean ground turkey with colorful bell peppers, perfect for a healthy weeknight dinner.

Ingredients

Meat

  • 1 lb ground turkey
  • 3 pieces bell peppers (red, yellow, green), sliced
  • 1 small onion, diced
  • 2 cloves garlic, minced
  • 1 tablespoon olive oil
  • 2 tablespoons soy sauce
  • 1 tablespoon tomato paste
  • 0.5 teaspoon paprika
  • to taste Salt and pepper
  • Chopped fresh parsley for garnish (optional) parsley (for garnish)

Instructions 

  • Heat olive oil in a skillet over medium heat.
  • Sauté diced onion and garlic for 2 minutes.
  • Add ground turkey and cook until browned, breaking it apart.
  • Stir in sliced peppers and cook for 5 minutes until tender.
  • Add tomato paste, soy sauce, paprika, salt, and pepper; cook for 2-3 minutes.
  • Remove from heat and garnish with parsley if desired.

Notes

For extra flavor, add a squeeze of lemon or a dash of hot sauce.
Calories: 250kcal
Cost: $12
Course: Main Course
Cuisine: American
Keyword: ground turkey

If you’re on the hunt for a recipe that combines ease, flavor, and a touch of magic, you’ve landed in the right spot! My Chicken Kofta with Garlic Yogurt Sauce is not just another dish; it’s a celebration of flavors that will make your dinner table come alive. With juicy ground chicken shaped into delightful kofta and a creamy garlic yogurt sauce that dances on your palate, this recipe is perfect for family dinners or gatherings with friends. Let’s dive in and discover why you’ll love this recipe and how to make it shine in your kitchen!

Why You’ll Love This Recipe

  • Flavor Explosion: The combination of spices and fresh ingredients creates a symphony of flavors that will have your taste buds singing.
  • Quick and Easy: This recipe can be whipped up in under 30 minutes—perfect for those busy weeknights or last-minute gatherings!
  • Healthy and Wholesome: Packed with protein and fresh herbs, chicken kofta is a nutritious choice that doesn’t skimp on flavor.
  • Versatile Serving Options: Whether you serve it with rice, on a salad, or in pita bread, it adapts beautifully to your meal plans.
  • Kid-Friendly: The fun shape and tasty yogurt sauce make it a hit with the little ones, ensuring happy faces all around!

Ingredients You’ll Need

Gathering the right ingredients is essential for success in any recipe. Here’s what you’ll need to create your chicken kofta:

  • Ground Chicken: 500 grams (about 1 pound) – The star of our dish, providing a light and juicy base.
  • Onion: 1 medium, finely chopped – Adds sweetness and depth to the kofta.
  • Garlic: 3 cloves, minced – Essential for that aromatic punch.
  • Fresh Parsley: 1/4 cup, finely chopped – Brings a burst of freshness.
  • Ground Cumin: 1 teaspoon – Offers a warm, earthy flavor.
  • Ground Coriander: 1 teaspoon – Complements the cumin beautifully with its citrusy notes.
  • Salt: 1 teaspoon (or to taste) – Enhances all the flavors.
  • Black Pepper: 1/2 teaspoon (or to taste) – Adds a hint of heat.
  • Plain Yogurt: 1 cup – The base for our creamy garlic sauce.
  • Lemon Juice: 2 tablespoons – Brightens up the sauce.
  • Olive Oil: 2 tablespoons (for grilling) – Helps achieve that perfect char.

Step-by-Step Instructions

Now that we have our ingredients, let’s get cooking! Follow these simple steps to create your chicken kofta:

  1. In a large mixing bowl, combine ground chicken, chopped onion, minced garlic, and parsley.
  2. Add ground cumin, coriander, salt, and black pepper. Mix until all ingredients are well combined.
  3. Wet your hands and shape the mixture into elongated oval kofta.
  4. Preheat the grill or grill pan over medium-high heat and brush with olive oil.
  5. Grill the kofta for 5-7 minutes on each side until golden brown and cooked through.
  6. In a small bowl, mix yogurt, lemon juice, and a pinch of salt to create your garlic yogurt sauce.
  7. Serve the kofta with the garlic yogurt sauce and your choice of sides!

Pro Tips for Perfect Kofta

Close-up of grilled chicken kofta garnished with herbs, accompanied by creamy garlic yogurt sauce.
  • Resting Time: Let the kofta rest for a few minutes after grilling for enhanced flavor and juiciness.
  • Use Fresh Ingredients: Fresh herbs and spices make a world of difference in flavor.
  • Don’t Overmix: Mix just until combined to keep the kofta tender.
  • Check Internal Temperature: Ensure the kofta reaches at least 165°F to be safely cooked.
  • Experiment with Spices: Feel free to add your favorite spices for a personalized twist.
  • Grill Pan Option: If you don’t have a grill, you can easily cook these on the stove in a grill pan.
  • Make Ahead: Shape the kofta in advance and store in the fridge for a hassle-free dinner.
  • Freeze for Later: If you have leftovers, freeze the cooked kofta in an airtight container for up to 3 months.

Common Mistakes and Troubleshooting

Even the best cooks run into hiccups! Here are some common mistakes and how to avoid them:

  • Dry Kofta: If your kofta comes out dry, try adding a bit more yogurt or olive oil to the mixture next time.
  • Falling Apart: If they fall apart on the grill, ensure your mixture is well combined and not too wet.
  • Underseasoned: Always taste the mixture before cooking! Adjust seasoning as needed.
  • Overcooked: Keep an eye on the grill; kofta cooks quickly and can dry out if overcooked.
  • Flavorless Sauce: Adjust the garlic and lemon in your sauce to find the perfect balance for your taste.

Variations to Try

Want to mix things up? Here are some fun variations to try:

  • Spicy Kofta: Add chopped jalapeños or red pepper flakes to the mixture for a kick.
  • Vegetarian Option: Substitute the ground chicken with lentils or chickpeas for a plant-based version.
  • Herb-Infused: Experiment with different herbs like cilantro or mint for a fresh twist.
  • Cheesy Surprise: Add crumbled feta or mozzarella cheese into the kofta for a creamy center.

Storage and Make-Ahead Instructions

Planning ahead? Here’s how to store and prepare your chicken kofta:

  • Refrigeration: Store cooked kofta in an airtight container in the fridge for up to 3 days.
  • Freezing: Freeze uncooked kofta on a parchment-lined tray, then transfer to a freezer bag for up to 3 months.
  • Reheating: Reheat cooked kofta in a skillet over medium heat or in the microwave until warmed through.
  • Make-Ahead: Prepare the kofta mixture a day in advance; just shape and cook when ready to serve!

Frequently Asked Questions

Got questions? I’ve got answers! Here are some common queries about chicken kofta:

  • Can I use ground turkey instead of chicken? Absolutely! Ground turkey works wonderfully in this recipe.
  • What can I serve with chicken kofta? These kofta are great with rice, pita, or a fresh salad.
  • How do I know when the kofta is done? They should be golden brown and reach an internal temperature of 165°F.
  • Can I grill these indoors? Yes, use a grill pan on the stovetop for a similar effect.
  • Is this recipe gluten-free? Yes, as long as you use gluten-free yogurt and seasonings!
  • Can I make this ahead of time? Yes! You can prepare the mixture in advance and store it in the fridge.
  • How long do leftovers last? Cooked kofta can be stored in the fridge for up to 3 days.
  • What’s the best way to reheat kofta? Reheat in a skillet or microwave until warmed through for best results.

Nutrition Tips and Dietary Adaptations

Keeping health in mind? Here are some nutrition tips:

  • Lower Fat: Use lean ground chicken or turkey to reduce fat content.
  • Dairy-Free: Substitute yogurt with a dairy-free yogurt alternative for a lactose-free version.
  • Whole Grain: Serve kofta with whole grain pita or brown rice for added fiber.
  • Add Veggies: Incorporate finely chopped vegetables, such as bell peppers or zucchini, into the kofta mixture for extra nutrition.

Equipment Recommendations

To make your cooking experience seamless, here are some must-have tools:

  • Mixing Bowls: A large mixing bowl for combining ingredients easily.
  • Measuring Cups and Spoons: Accurate measurements ensure perfect flavor balance.
  • Grill Pan: Ideal for indoor grilling if you don’t have an outdoor grill.
  • Spatula: A sturdy spatula is essential for flipping your kofta on the grill.
  • Food Processor: Optional, but useful for finely chopping ingredients quickly.

Serving Suggestions

Now that you’ve created your delicious kofta, let’s talk about how to serve them:

  • With Garlic Yogurt Sauce: Drizzle the creamy sauce generously over the kofta for a delightful contrast.
  • On a Bed of Rice: Serve the kofta over fluffy rice for a hearty meal.
  • In Pita Bread: Create a kofta sandwich with fresh veggies and sauce for a fun twist.
  • As Part of a Mezze Platter: Pair with hummus, olives, and fresh veggies for an impressive spread.

Cooking is a journey, and I’m thrilled to have you on this one with me! The next time you’re looking to impress or simply want a comforting meal, whip up these Chicken Kofta Bites. They’re bound to become a regular in your kitchen, bringing smiles and satisfaction with every bite. Happy cooking, my friend! Remember, in the world of cooking, every mistake is just a stepping stone to something delicious. So, let’s embrace the mess and the magic together!

Chicken Kofta with Garlic Yogurt Sauce

Prep Time 15 minutes
Cook Time 15 minutes
Total Time 30 minutes
Servings 4 servings
Calories 350
Enjoy these flavorful chicken koftas grilled to perfection, served with a creamy garlic yogurt sauce for a delicious and satisfying meal.

Ingredients

Main

  • 500 grams Ground Chicken (about 1 pound)
  • 1 medium Onion (finely chopped)
  • 3 cloves Garlic (minced)
  • 1/4 cup Fresh Parsley (finely chopped)
  • 1 teaspoon Ground Cumin
  • 1 teaspoon Ground Coriander
  • 1 teaspoon Salt (or to taste)
  • 1/2 teaspoon Black Pepper (or to taste)
  • 1 cup Plain Yogurt
  • 2 tablespoons Lemon Juice
  • 2 tablespoons Olive Oil (for grilling)

Instructions 

  • Combine ground chicken, onion, garlic, and parsley in a bowl.
  • Add cumin, coriander, salt, and pepper; mix well.
  • Shape mixture into oval kofta with wet hands.
  • Preheat grill, brush with olive oil, and grill kofta 5-7 minutes per side until golden.
  • Mix yogurt, lemon juice, and a pinch of salt to make sauce.
  • Serve kofta with garlic yogurt sauce and sides.

Notes

Ensure not to overmix the meat to keep the kofta tender.
Calories: 350kcal
Cost: $15
Course: Main Course
Cuisine: Middle Eastern
Keyword: Chicken

Discover the Comfort of Ground Beef and Potatoes

Welcome to the cozy haven of hearty meals! Today, we’re diving into the world of ground beef and potatoes, a classic dish that warms the soul and fills the belly. If you’re looking for a meal that’s not just about eating but about creating memories, you’ve come to the right place. This recipe is a tribute to my childhood, where each bite was a celebration of flavors, warmth, and family gatherings. So, roll up your sleeves, and let’s make something unforgettable together!

Why You’ll Love This Recipe

  • Quick and Easy: With just a handful of ingredients and minimal prep time, this dish is perfect for busy weeknights.
  • Comfort Food Classic: The combination of savory ground beef and tender potatoes is a timeless comfort food that evokes nostalgia.
  • Budget-Friendly: Ground beef and potatoes are affordable staples, making this dish easy on the wallet while still being satisfying.
  • One-Pan Wonder: Enjoy a delicious meal with minimal cleanup—everything cooks in one skillet!
  • Customizable: This recipe serves as a fantastic base for adding your favorite veggies or spices to suit your taste.

Ingredients You’ll Need

Gathering the right ingredients is key to any successful dish. Here’s what you’ll need for this cozy bowl of ground beef and potatoes:

  • 1 pound ground beef: The star of the show, providing rich flavor and protein.
  • 3 large potatoes, diced: Choose russet or Yukon gold for the best texture.
  • 1 small onion, chopped: Adds depth and sweetness to the dish.
  • 2 cloves garlic, minced: Because garlic makes everything better!
  • 1 teaspoon salt: Essential for enhancing flavors.
  • ½ teaspoon black pepper: For a hint of warmth.
  • 1 teaspoon paprika: Adds a lovely color and subtle smokiness.
  • ½ teaspoon onion powder: Enhances the onion flavor.
  • ½ teaspoon garlic powder: Boosts that garlicky goodness.
  • 1 tablespoon olive oil: To sauté the ingredients.
  • ½ cup beef broth: For moisture and flavor.
  • 1 cup shredded cheddar cheese (optional): Because cheese makes everything better!
  • 1 tablespoon fresh parsley, chopped (optional, for garnish): Adds a pop of color and freshness.

How to Make Ground Beef and Potatoes

Side view of a delicious dish showcasing ground beef and potatoes, with melted cheese on top.

Now that we have our ingredients ready, let’s dive into the cooking process. This step-by-step guide will ensure your dish turns out perfectly every time!

Step 1: Prepare the Ingredients

Start by washing and dicing your potatoes, chopping the onion, and mincing the garlic. Having everything prepped makes the cooking process smooth and enjoyable.

Step 2: Cook the Ground Beef

In a large skillet, heat the olive oil over medium heat. Add the ground beef and cook until browned. Break it apart with a wooden spoon, ensuring it cooks evenly.

Step 3: Add the Onions and Garlic

Once the beef is browned, add the chopped onion and minced garlic. Sauté until the onion becomes translucent and fragrant, about 3-4 minutes.

Step 4: Cook the Potatoes

Add the diced potatoes to the skillet, stirring to combine. Pour in the beef broth and season with salt, pepper, paprika, onion powder, and garlic powder. Cover the skillet and let everything simmer for about 15-20 minutes, or until the potatoes are tender.

Step 5: Bring It All Together

Once the potatoes are cooked through, give everything a good stir. If you’re adding cheese, sprinkle it on top and cover the skillet for a few minutes until melted.

Step 6: Garnish and Serve

Sprinkle fresh parsley over the top for a burst of color and flavor. Serve hot, and watch as your loved ones enjoy every bite!

Pro Tips for Making the Best Ground Beef and Potatoes

  • Choose the Right Potatoes: For a fluffy texture, opt for russet potatoes; for creaminess, go with Yukon gold.
  • Don’t Rush the Browning: Allow the ground beef to brown well before adding other ingredients. This enhances flavor!
  • Experiment with Spices: Don’t hesitate to add your favorite spices, such as cumin or chili powder, for an extra kick.
  • Check for Doneness: Use a fork to pierce the potatoes; they should be tender but not mushy.
  • Make It Ahead: This dish can be made in advance and reheated, making it a great option for meal prep.
  • Try Different Meats: Swap ground beef for turkey or chicken if you prefer a leaner option.
  • Add Colorful Veggies: Toss in bell peppers, spinach, or carrots for added nutrition and vibrancy.
  • Serve with Something Fresh: A side salad or steamed vegetables can brighten up the meal.

Common Mistakes and Troubleshooting

Even the best can have off days in the kitchen. Here are some common pitfalls and how to avoid them:

  • Undercooked Potatoes: If your potatoes aren’t soft enough, cover the skillet and let them steam for a few more minutes.
  • Too Much Liquid: If the mixture is too soupy, uncover the skillet and let it simmer for a few minutes to reduce the liquid.
  • Flavorless Beef: Make sure to season the beef well before adding other ingredients to ensure every layer is flavorful.
  • Burnt Garlic: Add garlic later in the cooking process to prevent it from burning and becoming bitter.

Variations on Ground Beef and Potatoes

One of the best parts of cooking is making a recipe your own. Here are some ideas to switch things up:

  • Cheesy Beef and Potato Bake: After cooking, transfer the mixture to a baking dish, top with cheese, and bake until bubbly.
  • Spicy Beef and Potato Skillet: Add diced jalapeños or a splash of hot sauce for a spicy twist.
  • Vegetarian Version: Replace ground beef with lentils or a plant-based meat alternative for a vegetarian-friendly meal.
  • Herbed Twist: Stir in fresh herbs like thyme or rosemary for a fragrant and earthy flavor.

Storage and Make-Ahead Instructions

This dish is perfect for meal prep! Here’s how to store and reheat your creations:

  • Refrigeration: Store leftovers in an airtight container in the fridge for up to 4 days.
  • Freezing: Allow the dish to cool completely before transferring to a freezer-safe container. It can be frozen for up to 3 months.
  • Reheating: Reheat in the microwave or on the stovetop, adding a splash of broth if necessary to prevent drying out.

Frequently Asked Questions

  • Can I use other types of meat? Yes! Ground turkey, chicken, or even plant-based options work well.
  • What can I serve with this dish? A fresh green salad or crusty bread pairs perfectly!
  • How spicy is this recipe? It’s mild, but feel free to add spices to suit your taste.
  • Can I make this dish in advance? Absolutely! It tastes even better the next day as flavors meld.
  • What if I don’t have beef broth? You can substitute with chicken broth or even water in a pinch.
  • How can I make this dish healthier? Swap ground beef for leaner meat and add more vegetables.
  • Can I add more vegetables? Yes! Bell peppers, zucchini, or carrots are great additions.
  • What’s the best way to store leftovers? Keep them in an airtight container in the fridge or freezer for later enjoyment.

Nutrition Tips and Dietary Adaptations

This dish can easily be tailored to fit various dietary needs:

  • Gluten-Free: Naturally gluten-free, just ensure your broth is gluten-free as well.
  • Dairy-Free: Omit cheese or use a dairy-free alternative to keep it dairy-free.
  • Low-Carb: Substitute potatoes with cauliflower for a low-carb version.
  • High-Protein: Add beans or lentils for an extra protein boost.

Essential Equipment for Your Kitchen

Having the right tools makes cooking so much easier. Here’s what you’ll need:

  • Large Skillet: A sturdy skillet is essential for browning meat and cooking everything evenly.
  • Wooden Spoon: Perfect for stirring and breaking up ground beef.
  • Knife and Cutting Board: For chopping all your ingredients with ease.
  • Measuring Cups and Spoons: Accurate measurements ensure consistent results every time.

Serving Suggestions for Ground Beef and Potatoes

As you serve this heartwarming dish, consider adding these delightful touches:

  • Fresh Herbs: A sprinkle of fresh parsley or chives adds a burst of color and flavor.
  • Hot Sauce: For those who enjoy a little heat, serve with a side of your favorite hot sauce.
  • Crusty Bread: A slice of crusty bread is perfect for mopping up any delicious sauce.
  • Side Salad: A light salad balances the heartiness of the dish and adds freshness.

Cooking is about finding joy in the process and sharing that joy with others. This hearty ground beef and potatoes recipe is not just a meal; it’s an experience filled with love, laughter, and deliciousness. So gather your loved ones, savor every bite, and remember that every meal is an opportunity to create wonderful memories. Happy cooking!

Hearty Ground Beef and Potatoes

Prep Time 10 minutes
Cook Time 30 minutes
Total Time 40 minutes
Servings 4 servings
Calories 650
A comforting and filling dish combining seasoned ground beef with tender potatoes, perfect for a satisfying meal.

Ingredients

Meat

  • 1 pound ground beef

Vegetables

  • 3 large potatoes, diced
  • 1 small onion, chopped
  • 2 cloves garlic, minced

Spices & Oils

  • 1 teaspoon salt
  • ½ teaspoon black pepper
  • 1 teaspoon paprika
  • ½ teaspoon onion powder
  • ½ teaspoon garlic powder
  • 1 tablespoon olive oil

Broth & Cheese

  • ½ cup beef broth
  • 1 cup shredded cheddar cheese (optional)
  • 1 tablespoon fresh parsley, chopped (optional, for garnish)

Instructions 

  • Heat olive oil in a large skillet over medium heat. Add ground beef and cook until browned, about 5-7 minutes.
  • Add chopped onion and minced garlic; cook until softened, about 3 minutes.
  • Stir in diced potatoes, salt, black pepper, paprika, onion powder, and garlic powder. Cook for 10 minutes, stirring occasionally.
  • Pour in beef broth, cover, and simmer for 10-15 minutes until potatoes are tender.
  • If desired, sprinkle shredded cheddar cheese on top and garnish with chopped parsley before serving.

Notes

For a healthier option, use lean ground beef and reduce the cheese amount.
Calories: 650kcal
Cost: $15
Course: Main Course
Cuisine: American
Keyword: ground beef

Welcome to Your New Favorite Dinner: Ground Turkey Rice Bowls with Bang Bang Sauce

If you’re searching for a meal that is not only delicious but also quick and easy to whip up, you’ve landed in the right kitchen! These Ground Turkey Rice Bowls topped with a zesty Bang Bang Sauce are a delightful blend of flavors and textures that will leave you craving more. Imagine a bowl filled with fluffy rice, savory turkey, and a kick of spice that dances on your palate—sounds magical, right? Well, let’s dive into the comforting world of these rice bowls, perfect for a weeknight dinner or impressing friends on the weekend.

Why You’ll Love This Recipe

  • Quick and Easy: This recipe comes together in under 30 minutes, making it perfect for busy weeknights when you want something satisfying without spending hours in the kitchen.
  • Customizable: You can easily swap in your favorite vegetables or adjust the spice level to suit your taste, making this dish as unique as you are.
  • Healthy Ingredients: Packed with lean ground turkey and fresh veggies, this dish is not just comforting but also nutritious, offering a balanced meal that won’t weigh you down.
  • Family-Friendly: With flavors that appeal to both kids and adults, these bowls are sure to be a hit at your dinner table, making mealtime a breeze.
  • Meal Prep Friendly: These bowls store well in the fridge, making them a great choice for meal prep. You can make a big batch and have lunches ready to go!

Ingredient Breakdown

Every great dish starts with quality ingredients. Here’s what you’ll need to make your Ground Turkey Rice Bowls with Bang Bang Sauce, along with some handy substitutions:

  • 1 lb ground turkey: A lean protein that cooks quickly and absorbs flavors beautifully. You can substitute it with ground chicken or beef if you prefer.
  • 1 Tbsp sesame oil: This adds a lovely nutty flavor. Feel free to use olive oil or any other cooking oil you have on hand.
  • 2-3 garlic cloves (minced): Fresh garlic elevates the flavor. If you’re in a pinch, garlic powder works too.
  • 2 tsp grated ginger: Fresh ginger adds warmth and a bit of zing. If you don’t have fresh ginger, ground ginger can be used, though the flavor will be less intense.
  • ½ tsp smoked paprika: This provides a subtle smokiness. If you don’t have it, regular paprika or cayenne pepper can be good alternatives.
  • ½ tsp onion powder: For added depth of flavor. You can skip it if you prefer fresh onions, just sauté them with the turkey.
  • 3 Tbsp soy sauce (low sodium): Adds umami and saltiness to the dish. Tamari or coconut aminos can be used as gluten-free alternatives.
  • 1-2 Tbsp sriracha: For that spicy kick! Adjust based on your heat preference.
  • 2-3 Tbsp chicken broth: Keeps the turkey moist while cooking. Vegetable broth is a great substitute for a vegetarian option.
  • 2 tsp honey: Balances out the spices beautifully. Maple syrup or agave nectar can be used if you want a vegan option.
  • ½ tsp black pepper: Freshly cracked is best for flavor.
  • ½ tsp sea salt: Adjust to taste.
  • 2 tsp corn starch: This is used to thicken the turkey mixture.
  • For the Bang Bang Sauce: Mix together ½ cup mayonnaise, 3 Tbsp sweet chili sauce, ½-1 Tbsp sriracha, 1 tsp rice vinegar, and 2 tsp honey.

Step-by-Step Instructions

Side view of a juicy ground turkey rice bowl filled with colorful ingredients.

Follow these easy steps to create your Ground Turkey Rice Bowls:

  • Prep Bang Bang Sauce: In a small bowl, whisk together all the Bang Bang Sauce ingredients. Taste and adjust the heat with more sriracha or sweetness with extra honey. Chill until ready to serve.
  • Prepare the Ground Turkey Mixture: Heat sesame oil in a large skillet over medium-high heat. Once glistening, add the ground turkey, breaking it into smaller pieces. Cook until browned and it reaches an internal temperature of 165°F.
  • Add Seasonings: Lower the heat and stir in garlic, ginger, smoked paprika, onion powder, soy sauce, sriracha, chicken broth, honey, black pepper, and salt. Cook for 2-3 minutes until heated through.
  • Thicken the Mixture: Sprinkle corn starch over the turkey and stir to combine. This will help thicken your mixture beautifully.
  • Assemble Rice Bowls: In serving bowls, layer rice, veggies, and spoon the turkey mixture on top. Drizzle with Bang Bang Sauce, and garnish with sliced green onion and sesame seeds.

Pro Tips for Perfect Bowls

  • Use Fresh Ingredients: Fresh veggies not only taste better but also add vibrant colors to your bowls, making them visually appealing.
  • Adjust the Spice: If you’re not a fan of heat, reduce the sriracha in the turkey mixture and the sauce. You can always add more at the table!
  • Don’t Skip the Sauce: The Bang Bang Sauce is what ties everything together. It adds creaminess and a delightful kick that you won’t want to miss.
  • Mix and Match: Feel free to add any toppings you love: avocado, pickled onions, or crunchy nuts can elevate your bowls further.
  • Cook in Batches: If you’re meal prepping, cook the turkey in batches to save time for future meals.
  • Let It Chill: If you have time, let the turkey mixture cool slightly before serving; this helps the flavors meld together.
  • Experiment with Grains: Switch out rice for quinoa, farro, or even cauliflower rice to add variety to your meal prep.
  • Store Properly: Keep leftover turkey and sauce in separate airtight containers to maintain the texture of your rice.

Common Mistakes and Troubleshooting

Even the best chefs can face hiccups in the kitchen. Here are some common mistakes and how to fix them:

  • Turkey is Dry: This can happen if it’s overcooked. Always use a meat thermometer; ground turkey should reach 165°F to be safe.
  • Too Watery: If your turkey mixture is too watery, add a bit more corn starch mixed with water to thicken it up.
  • Too Spicy: If you’ve made it too spicy, balance it with a touch more honey or mayonnaise in the sauce.
  • Rice Isn’t Fluffy: Make sure to rinse your rice before cooking to remove excess starch, which helps in achieving that fluffy texture.

Recipe Variations

Get creative with these variations of the classic Ground Turkey Rice Bowls:

  • Mexican Fiesta Bowls: Replace the Bang Bang sauce with a spicy avocado crema and add black beans, corn, and diced tomatoes.
  • Asian-Inspired Bowls: Incorporate stir-fried vegetables and a drizzle of teriyaki sauce for an entirely different flavor profile.
  • Breakfast Bowls: Top your turkey and rice with a fried egg and some salsa for a delicious breakfast twist!
  • Vegetarian Alternative: Swap the ground turkey for crumbled tofu or tempeh, seasoned the same way, for a meatless version.

Storage and Make-Ahead Instructions

These Ground Turkey Rice Bowls are perfect for meal prep! Here’s how to store and prepare them in advance:

  • Refrigeration: Store the turkey mixture and sauce in airtight containers in the fridge for up to 4 days.
  • Freezing: You can freeze the turkey mixture for up to 3 months. Just thaw in the fridge before reheating.
  • Make-Ahead: Prepare the turkey mixture and sauce a day ahead, then simply assemble your bowls when ready to eat.

Frequently Asked Questions

Let’s address some common queries about Ground Turkey Rice Bowls:

  • Can I use ground beef instead of turkey? Absolutely! Ground beef will add a richer flavor but may be higher in fat.
  • What else can I add to my bowls? Feel free to add any vegetables you like; bell peppers, broccoli, and snap peas all work wonderfully!
  • Can I make this dish gluten-free? Yes, just use gluten-free soy sauce or tamari for the sauce and ensure your rice is gluten-free.
  • How spicy is the Bang Bang Sauce? The spice level can be adjusted based on how much sriracha you add. Start with a small amount and taste as you go!
  • What sides pair well with these bowls? A simple side salad, steamed vegetables, or even egg rolls can complement the meal nicely.
  • How do I reheat leftovers? The turkey mixture and rice can be reheated in the microwave or on the stovetop; just add a splash of water to prevent drying out.
  • Can I use brown rice instead of white? Yes! Brown rice will add more fiber and nutrients but may require a longer cooking time.
  • Is this recipe kid-friendly? Definitely! The flavors are mild enough for children, and they can customize their bowls with their favorite toppings.

Nutrition Tips and Dietary Adaptations

This dish is naturally lower in fat and calories due to the use of ground turkey, but here are some extra tips you could consider:

  • Increase Fiber: Add more vegetables or swap rice for quinoa or brown rice to boost fiber content.
  • Reduce Calories: Use light mayonnaise for the Bang Bang sauce or cut the amount of sauce used.
  • Low-Carb Option: Substitute rice with cauliflower rice or spiralized zucchini for a low-carb meal.
  • Dairy-Free: Ensure your mayonnaise and other sauces are dairy-free to keep the recipe suitable for those with dairy sensitivities.

Equipment Recommendations

Having the right tools can make cooking more enjoyable and efficient. Here are some must-haves:

  • Non-stick skillet: Ideal for cooking ground turkey without it sticking.
  • Whisk: For mixing the Bang Bang sauce thoroughly.
  • Meat thermometer: To ensure your turkey is cooked safely and perfectly.
  • Sharp knife: For chopping veggies and mincing garlic and ginger.

Serving Suggestions

To make your Ground Turkey Rice Bowls even more delightful, consider these serving ideas:

  • Garnish: Add fresh herbs like cilantro or basil for an aromatic touch.
  • Crunch Factor: Top with nuts or crispy fried onions for added texture.
  • Extra Sauce: Serve with extra Bang Bang sauce on the side for those who want more kick!

Conclusion

There you have it! Your complete guide to creating mouthwatering Ground Turkey Rice Bowls with Bang Bang Sauce. This recipe is not just about food; it’s about bringing comfort and joy to your table. So, gather your ingredients, channel your inner chef, and let’s make some magic in the kitchen! Remember, cooking is all about exploration, so don’t be afraid to tweak things to your liking. Happy cooking, my friend!

Ground Turkey Rice Bowls with Bang Bang Sauce

Prep Time 10 minutes
Cook Time 15 minutes
Total Time 25 minutes
Servings 4 servings
Calories 550
Enjoy a flavorful and healthy rice bowl featuring seasoned ground turkey topped with a spicy, creamy bang bang sauce and fresh vegetables.

Ingredients

Meat and Oils

  • 1 lb ground turkey
  • 1 Tbsp sesame oil ((or favorite cooking oil))

Aromatics and Spices

  • 2-3 cloves garlic cloves (minced)
  • 2 tsp grated ginger
  • ½ tsp smoked paprika
  • ½ tsp onion powder

Sauces and Sweeteners

  • 3 Tbsp soy sauce ((low sodium))
  • 1-2 Tbsp sriracha
  • 2 tsp honey
  • 3 Tbsp sweet chili sauce
  • 1 tsp rice vinegar
  • 2 tsp honey

Vegetables and Garnishes

  • as needed rice, shredded carrots, sliced cucumbers, shelled edamame, pickled onions, avocado, shredded cabbage, sliced green onion, sesame seeds

Other

  • 2 Tbsp corn starch

Instructions 

  • Whisk all bang bang sauce ingredients in a bowl; chill until ready.
  • Cook ground turkey in sesame oil until browned; add remaining ingredients (except cornstarch) and simmer 2-3 minutes.
  • Thicken mixture with cornstarch, stir in optional bang bang sauce before serving.
  • Assemble bowls with rice, veggies, turkey, and drizzle with bang bang sauce; garnish with green onion and sesame seeds.

Notes

Adjust spice levels with more or less sriracha to taste.
Calories: 550kcal
Cost: $15
Course: Main Course
Cuisine: fusion
Keyword: ground turkey