Welcome to the Creamy Goodness
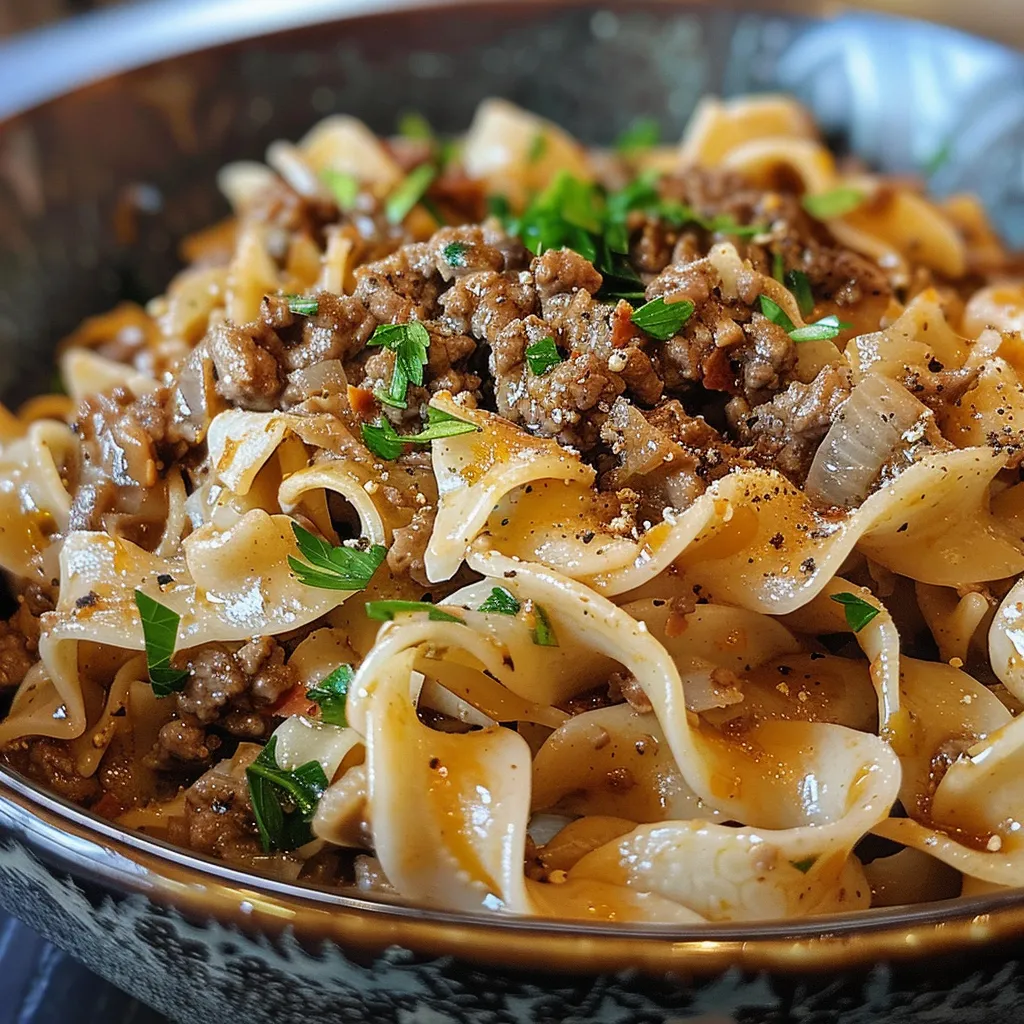
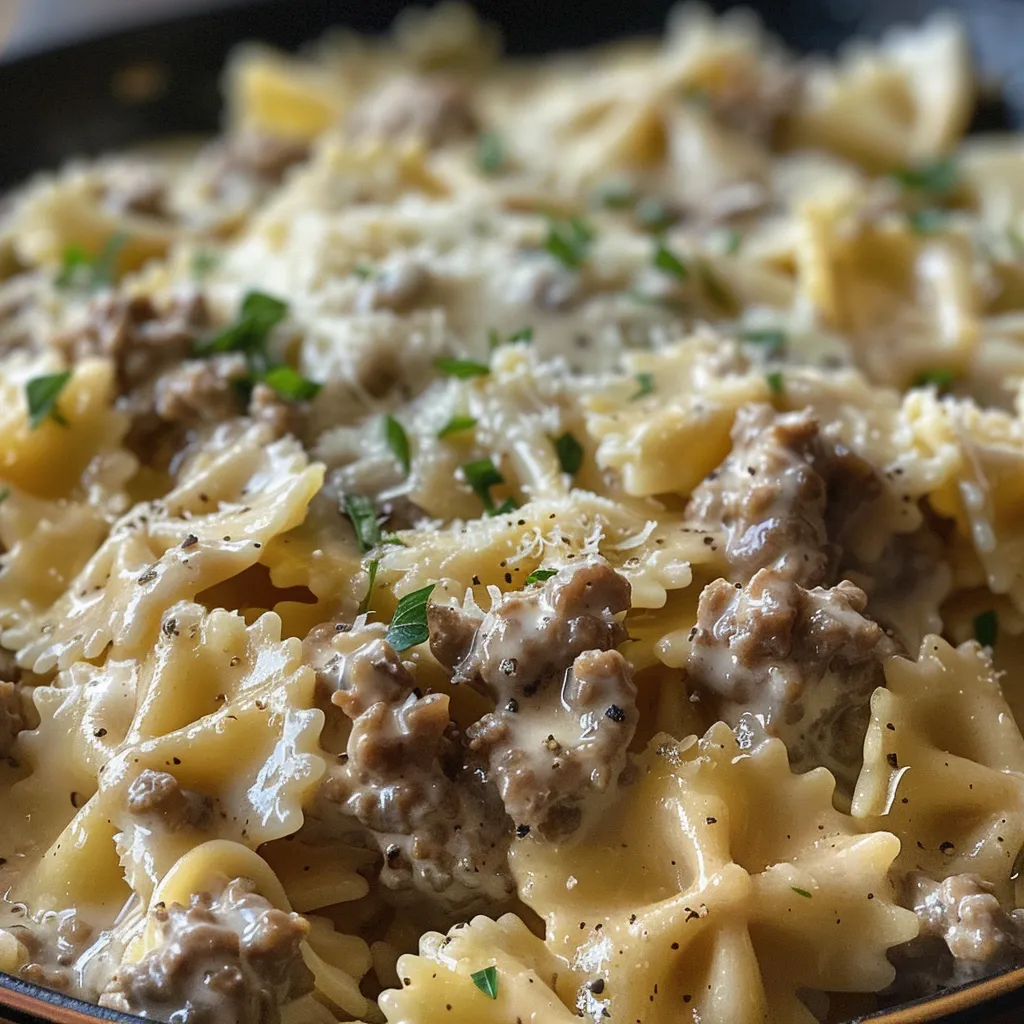
Hey there, friend! If you’ve found your way to my kitchen today, you’re in for a treat—my Creamy Parmesan Garlic Beef Bowtie Pasta is a dish that brings warmth and joy to any dinner table. Picture this: a comforting bowl of perfectly cooked bowtie pasta enveloped in a rich, creamy sauce, with savory ground beef and a punch of garlic that dances on your palate. This recipe is not just a meal; it’s a celebration of flavors and memories, perfect for busy weeknights or those special moments when you want to impress. Let’s dive in!
Why You’ll Love This Recipe
There are countless reasons to adore this creamy parmesan garlic masterpiece, but here are my top five:
- Quick and Easy: From start to finish, this dish takes less than 30 minutes, making it ideal for those hectic weeknights.
- Comfort Food Classic: With its rich flavors and creamy texture, this pasta is the ultimate comfort food that everyone will love.
- Customizable: This recipe is incredibly forgiving—swap ingredients based on what you have on hand, and it’ll still turn out delicious!
- Kid-Friendly: Even the pickiest of eaters will clean their plates, thanks to the familiar flavors of parmesan and garlic.
- Make Ahead and Store: Perfect for meal prep! You can make it ahead of time and enjoy leftovers that taste just as good.
Gathering Your Ingredients
Before we get cooking, let’s gather our ingredients. Here’s what you’ll need:
- 8 oz bowtie pasta: The fun shape holds onto the creamy sauce beautifully.
- 1 lb ground beef: This hearty protein adds depth and satisfaction to the dish.
- 2 tbsp butter: For richness and to help sauté the aromatic garlic.
- 3 cloves garlic, minced: Fresh garlic is key to that irresistible flavor.
- 1 cup heavy cream: This is what makes the sauce truly creamy and luxurious.
- ¾ cup grated Parmesan cheese: A must for that signature parmesan flavor.
- Salt and black pepper: To taste, seasoning is crucial!
- Fresh parsley, chopped (for garnish): Adds a pop of color and freshness.
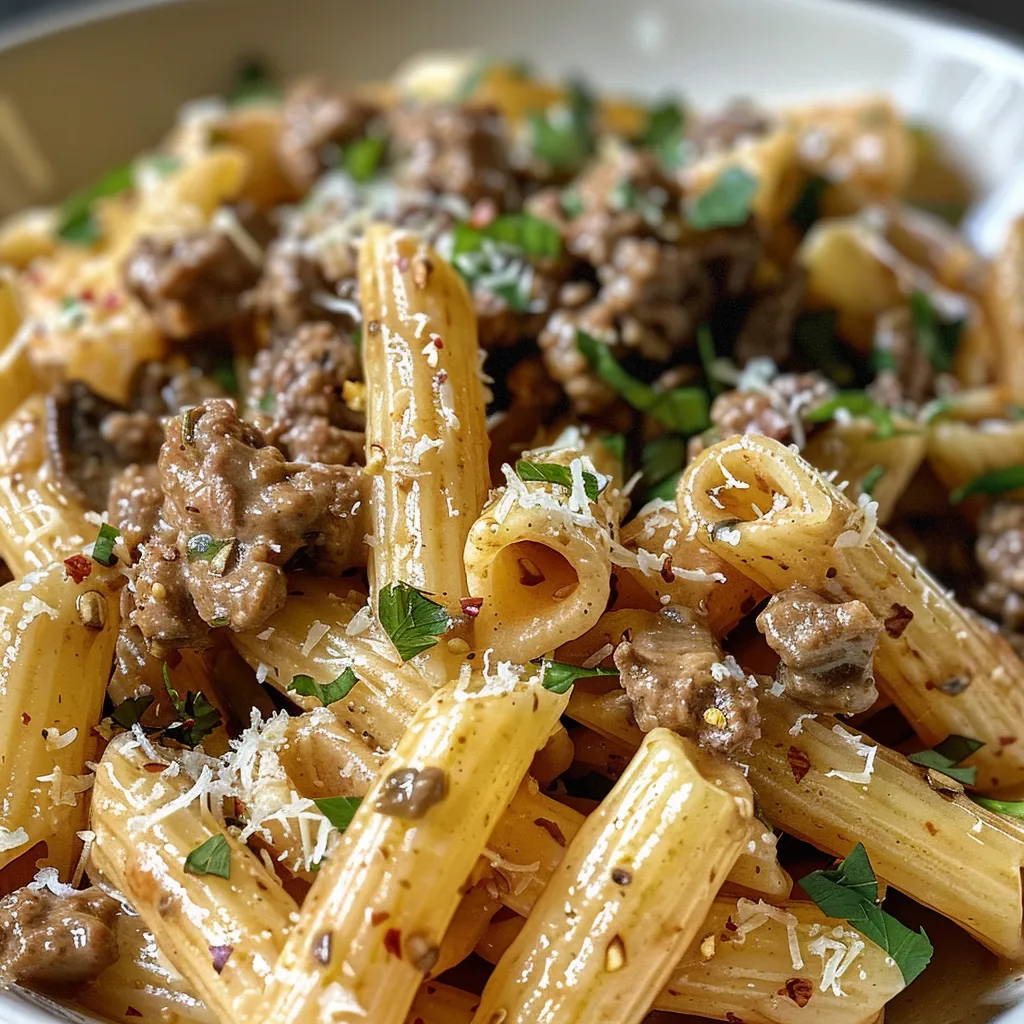
How to Make Creamy Parmesan Garlic Beef Bowtie Pasta
Ready to cook? Let’s get started with these easy steps:
Step 1: Cook the Bowtie Pasta
Bring a large pot of salted water to a boil. Add the bowtie pasta and cook according to package instructions until al dente. Remember to reserve ½ cup of the pasta cooking water for later; it’s liquid gold for your sauce!
Step 2: Brown the Ground Beef
In a large skillet over medium-high heat, crumble and brown the ground beef until fully cooked and no longer pink, about 6-8 minutes. Drain any excess grease to keep the sauce from becoming greasy.
Step 3: Sauté the Garlic
Reduce the heat to medium. Add the butter to the skillet with the beef and sauté the minced garlic for about 1 minute until fragrant but not browned. This step infuses the beef with delicious garlic flavor!
Step 4: Create the Creamy Sauce
Pour in the heavy cream while stirring frequently. Let the mixture simmer gently until it thickens slightly, about 3-5 minutes. Stir in the grated parmesan cheese until melted and smooth. Season with salt and black pepper to taste.
Step 5: Combine and Serve
Add the cooked bowtie pasta to the skillet and toss everything together. Use reserved pasta water a little at a time to reach your desired sauce consistency. Garnish with chopped fresh parsley and serve warm!
Pro Tips for Pasta Perfection
Want to ensure your dish is absolutely unforgettable? Here are some expert insights:
- Don’t Overcook the Pasta: Aim for al dente; it’ll continue cooking in the sauce, absorbing flavors.
- Use Fresh Garlic: Freshly minced garlic packs a stronger punch than pre-minced garlic.
- Adjust the Cream: For a lighter version, consider using half-and-half instead of heavy cream.
- Play with Cheese: Mix in a bit of mozzarella or fontina for extra creaminess and flavor.
- Experiment with Proteins: Ground turkey or chicken can be swapped for the beef if you prefer!
- Add Veggies: Sneak in some spinach or cherry tomatoes for added nutrition and color.
- Save Some Pasta Water: The starchy pasta water helps emulsify the sauce for a silky finish.
- Let It Sit: Allow the pasta to sit for a few minutes before serving; it thickens and flavors meld beautifully.
Common Mistakes and Troubleshooting
Even the best cooks make mistakes! Here are some common pitfalls and how to avoid them:
- Too Thick Sauce: If your sauce is too thick, add extra reserved pasta water gradually to loosen it up.
- Too Greasy: Make sure to drain excess grease from the beef to keep your sauce creamy, not oily.
- Overcooked Garlic: Garlic can become bitter if overcooked; sauté just until fragrant, not brown.
- Flavorless Sauce: Always taste and adjust seasoning—salt and pepper can make a world of difference!
Variations to Try
Feeling adventurous? Here are some fun variations to switch things up:
- Spicy Garlic Beef Bowtie: Add red pepper flakes for a kick of heat.
- Vegetable-Loaded Bowtie: Toss in your favorite vegetables like bell peppers or zucchini.
- Pesto Parmesan Bowtie: Stir in a couple of tablespoons of pesto for a fresh twist.
- Creamy Tomato Bowtie: Add a can of diced tomatoes to the sauce for a tangy flavor boost.
Make-Ahead and Storage Instructions
This dish is perfect for meal prep! Here’s how to store:
- Storing Leftovers: Keep in an airtight container in the fridge for up to 3 days.
- Reheating: Gently reheat on the stove over low heat, adding a splash of milk or pasta water to loosen the sauce.
- Freezing: You can freeze portions in airtight containers for up to 2 months. Just remember to thaw in the refrigerator overnight before reheating.
Frequently Asked Questions
1. Can I use a different type of pasta?
Absolutely! While this recipe calls for bowtie pasta, feel free to substitute with penne, fusilli, or whatever pasta shape you have on hand.
2. Is there a vegetarian version of this dish?
Yes! Substitute the ground beef with a plant-based meat alternative or mushrooms for a hearty, vegetarian option.
3. What should I serve with this pasta?
A simple side salad or garlic bread complements this dish beautifully. You could also serve it with steamed veggies for a balanced meal.
4. Can I make this gluten-free?
Certainly! Just swap out the bowtie pasta for a gluten-free pasta alternative, and you’re good to go!
5. How do I enhance the flavor?
Consider adding a dash of Worcestershire sauce or a sprinkle of Italian seasoning for added depth.
6. Can I use low-fat cream?
Yes, but keep in mind that the sauce may not be as rich and creamy as it would be with heavy cream.
7. What if I don’t have parmesan cheese?
You can use any hard cheese you have on hand, like Pecorino Romano or even a cheddar for a different flavor profile!
8. How do I adjust the recipe for a larger crowd?
Simply multiply the ingredients by the number of servings you need. This recipe is easily scalable!
Nutritional Tips and Dietary Adaptations
Want to make this dish even healthier? Here are some tips:
- Whole Wheat Pasta: For added fiber, use whole wheat bowtie pasta instead of regular.
- Lean Protein: Opt for lean ground beef or turkey to reduce the fat content.
- Dairy-Free Option: Swap heavy cream with coconut milk or a dairy-free cream alternative.
- Load Up on Veggies: Add more vegetables to increase nutrition without compromising flavor.
Equipment Recommendations
Before you start, here’s what you’ll need:
- Large Pot: For boiling the pasta.
- Skillet: A good non-stick skillet works great for browning the meat and making the sauce.
- Wooden Spoon: For stirring the sauce and pasta together.
- Measuring Cups and Spoons: Accurate measurements ensure the flavor balance is just right!
Serving Suggestions
This creamy dish is best served warm. Here are a couple of ideas to elevate your dining experience:
- Garnish with Fresh Herbs: A sprinkle of fresh parsley or basil can brighten up the dish.
- Pair with a Salad: A simple arugula salad with lemon vinaigrette complements the richness beautifully.
- Add a Crunch: Serve alongside crispy garlic bread for a delightful contrast of textures.
So there you have it! My Creamy Parmesan Garlic Beef Bowtie Pasta is here to become your next favorite recipe. With its easy steps and comforting flavors, you’re bound to have everyone asking for seconds. Now, roll up those sleeves, put on your apron, and let’s create some magic together in the kitchen!
Creamy Parmesan Garlic Beef Bowtie Pasta Recipe
Ingredients
Pasta
- 8 oz bowtie pasta
Meat
- 1 lb ground beef
Dairy
- 2 tbsp butter
- 3 cloves garlic, minced
- 1 cup heavy cream
- ¾ cup grated Parmesan cheese
Seasonings
- to taste Salt
- to taste Black pepper
Garnish
- Fresh parsley, chopped (for garnish)
Instructions
- Cook pasta in salted boiling water until al dente; drain and reserve ½ cup of water.
- Brown ground beef in a skillet; remove excess grease.
- Add butter and garlic; sauté until fragrant. Pour in cream, simmer until slightly thickened.
- Stir in Parmesan, season with salt and pepper, then add cooked pasta, tossing to combine. Add reserved pasta water as needed.
- Garnish with parsley and serve warm.