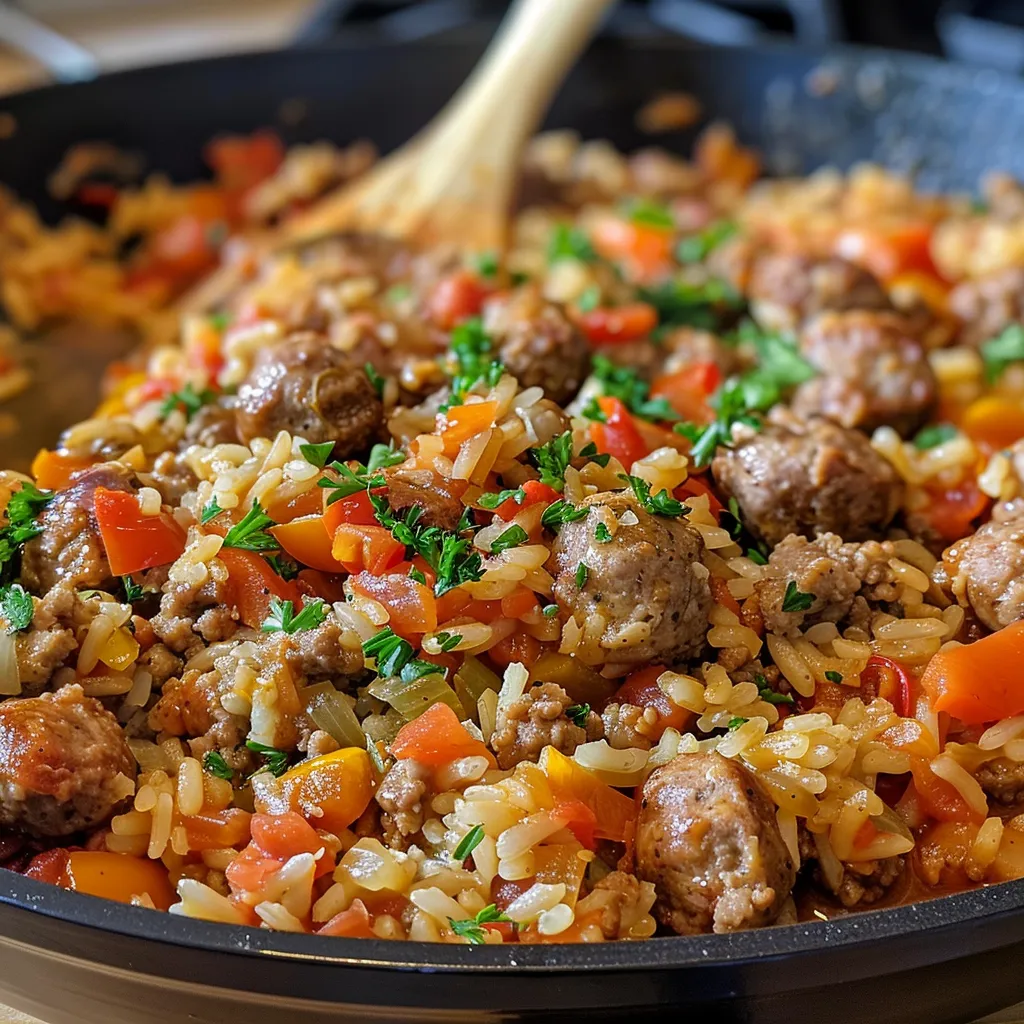
Welcome to the Heart of Comfort Food: Dirty Rice with Ground Beef
Ah, dirty rice with ground beef—a dish that dances between comfort and flavor, inviting you to savor every bite. If you’ve ever found yourself longing for a meal that feels like home, this recipe is your golden ticket. Growing up in Oregon, my kitchen was often filled with the tantalizing aromas of hearty meals. My mother’s cooking was a love language, and this dirty rice is a page from that cherished story. As we dive into this recipe, get ready to experience a blend of spices that not only warms your belly but also your heart. So, pull up a chair and let’s whip up some magic in the kitchen!
Why You’ll Love This Recipe
Dirty rice with ground beef is not just a meal; it’s a celebration of flavors and textures. Here are a few reasons why this dish will become your new go-to:
- Comforting and Hearty: This recipe combines wholesome ingredients that provide warmth and satisfaction, perfect for family gatherings or cozy nights in.
- Simple Ingredients: With just a handful of common pantry staples, you can create a dish that feels gourmet without the fuss.
- Customizable: Whether you want to add extra veggies or spice it up with hot sauce, this recipe allows for endless variations to suit your taste.
- Nutritious: Packed with protein from ground beef and nutrients from fresh vegetables, this dish strikes a great balance between indulgence and health.
- Quick to Prepare: In under 30 minutes, you’ll have a delicious meal on the table, making it ideal for busy weeknights.
Ingredients for Dirty Rice with Ground Beef
Let’s gather our ingredients! Here’s what you’ll need:
- 1 tablespoon olive oil: For sautéing and flavor.
- 1 pound ground beef: The star of the dish, bringing richness and protein.
- 1 small onion, finely diced: Adds sweetness and depth.
- 1 green or red bell pepper, diced: For color and crunch.
- 2 cloves garlic, minced: Because garlic makes everything better.
- 1 1/2 cups long-grain white rice: The base, soaking up all those delicious flavors.
- 3 cups chicken broth: For cooking the rice and adding savory goodness.
- 1 teaspoon Cajun seasoning: The secret to a robust flavor profile.
- 1/2 teaspoon thyme: Earthy notes that complement the dish.
- 1/2 teaspoon paprika: For a hint of smokiness.
- 1/2 teaspoon salt: To taste.
- 1/4 teaspoon black pepper: A touch of heat.
- 1/4 cup chopped green onions, for garnish: Freshness to finish.
Step-by-Step Instructions
Ready to get cooking? Here’s how to make this delicious dirty rice:
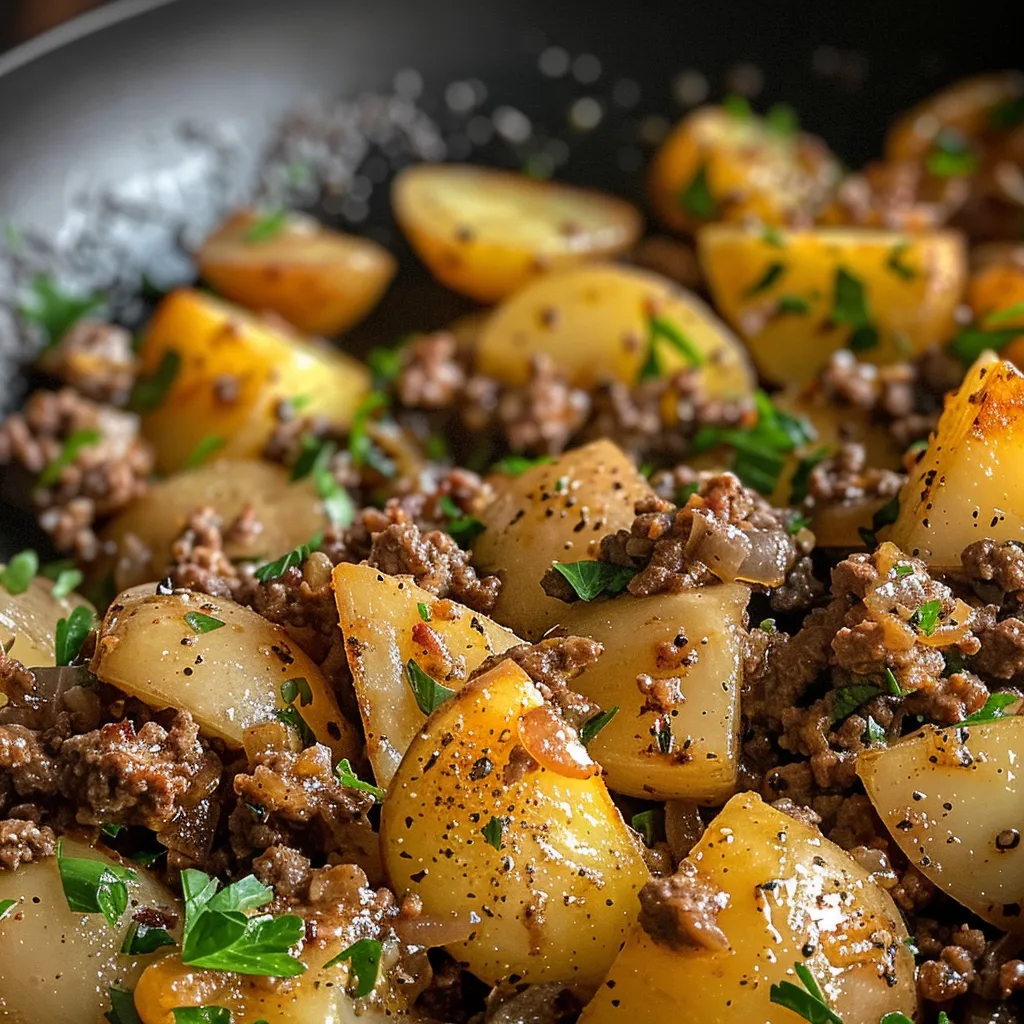
- In a large skillet, heat the olive oil over medium heat. Add the ground beef and cook, breaking it apart, until browned and cooked through. Remove excess fat if necessary.
- Add diced onion, bell pepper, and garlic to the skillet. Cook for 3-5 minutes, until softened and fragrant.
- Stir in the Cajun seasoning, thyme, paprika, salt, and pepper. Cook for another minute to let the spices bloom.
- Add the rice to the skillet and stir to coat it in the seasoning mix.
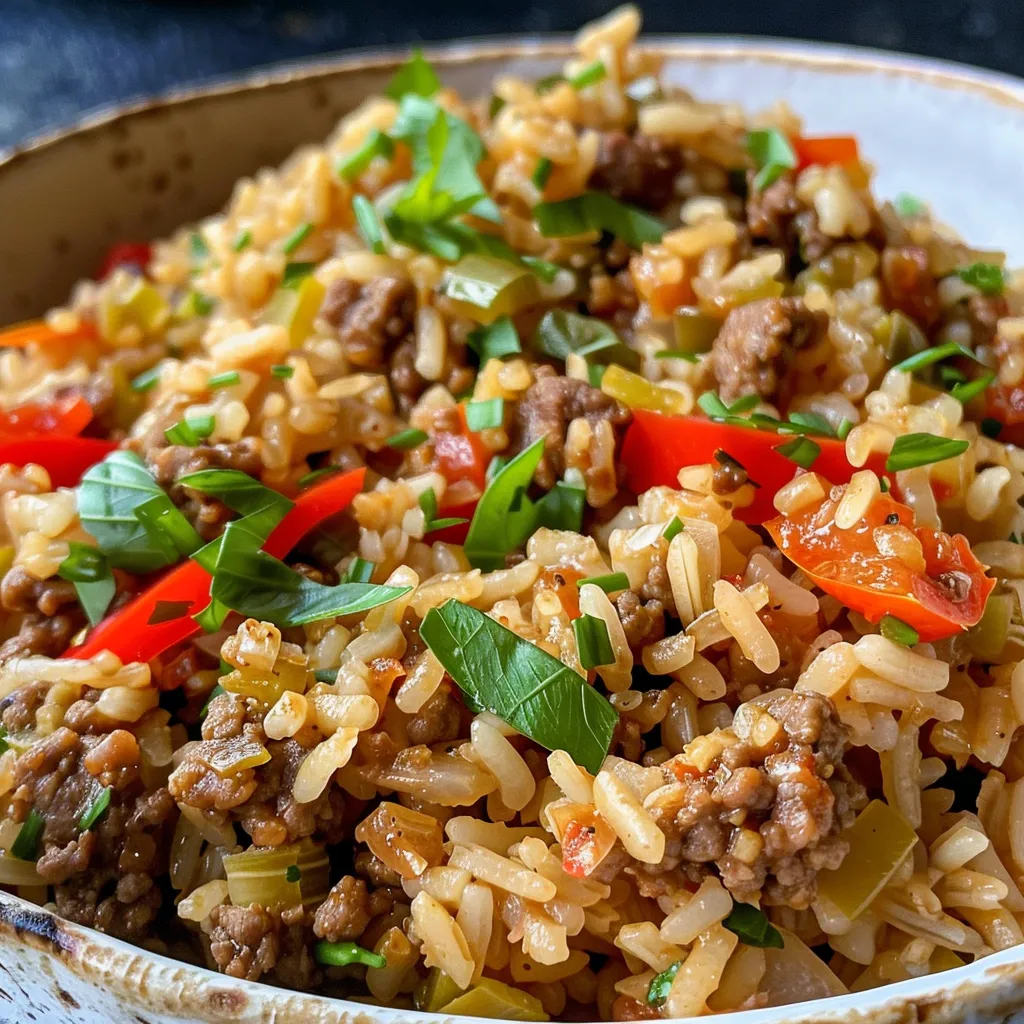
- Pour in the chicken broth and bring the mixture to a boil. Once boiling, reduce the heat to low, cover, and simmer for 20-25 minutes, or until the rice is cooked and the liquid has been absorbed.
- Remove from heat and let sit for 5 minutes, then fluff the rice with a fork.
- Garnish with chopped green onions and serve hot.
Pro Tips for Perfect Dirty Rice
Here are some expert insights to elevate your dirty rice game:
- Use Quality Ground Beef: Opt for 80/20 ground beef for a perfect balance of flavor and fat.
- Adjust the Spice Level: If you love heat, feel free to add cayenne pepper or a splash of hot sauce during cooking.
- Resting Is Key: Allowing the rice to sit after cooking helps the flavors meld beautifully.
- Experiment with Broth: Try using homemade broth or vegetable broth for a different flavor profile.
- Incorporate Vegetables: Sneak in some diced carrots or peas for extra nutrition.
- Leftovers Make Magic: This dish tastes even better the next day, making it great for meal prep.
- Storage Tips: Store leftovers in an airtight container in the fridge for up to 3 days.
- Freezing for Later: You can freeze portions in freezer-safe bags for up to 3 months—perfect for quick meals!
Common Mistakes and Troubleshooting
Even the best chefs have their share of kitchen mishaps. Here are common mistakes to avoid:
- Not Browning the Beef: Ensure you get good color on the beef; it adds depth to the flavor.
- Overcooking the Rice: Keep an eye on the cooking time to avoid mushy rice.
- Ignoring the Spice: Don’t skimp on the Cajun seasoning—it’s what makes this dish sing!
- Too Much Liquid: Measure your broth carefully; too much can lead to soupy rice.
Delicious Variations
Want to mix things up? Here are some fun variations to try:
- Vegetarian Dirty Rice: Swap out the ground beef for black beans or lentils for a plant-based twist.
- Seafood Edition: Add shrimp or crawfish for a coastal flair, adjusting the cooking time accordingly.
- Spicy Sausage Addition: Mix in cooked and crumbled sausage for an extra kick.
- Herbed Version: Add fresh herbs like parsley or cilantro before serving for a fresh burst of flavor.
How to Store Dirty Rice with Ground Beef
Proper storage is essential to keep your dirty rice fresh:
- Refrigerating: Store in an airtight container in the fridge for up to 3 days.
- Freezing: Freeze in individual portions for easy reheating later. Just thaw overnight in the fridge before reheating.
Frequently Asked Questions
Got questions? Let’s tackle some common ones:
- Can I use brown rice instead of white?: Yes, but you’ll need to adjust the cooking time and liquid—brown rice typically takes longer to cook.
- What can I serve with dirty rice?: This dish pairs wonderfully with cornbread, salad, or steamed vegetables.
- Can I make this dish ahead of time?: Absolutely! Prepare it a day in advance and reheat before serving.
- Is it gluten-free?: Yes, as long as your broth is gluten-free, this dish is safe for those with gluten sensitivities.
- How spicy is this recipe?: It’s mild to medium; feel free to adjust the spices to your liking.
- What type of ground beef is best?: Aim for 80/20 for a nice balance of flavor and juiciness.
- Can I add chicken?: Yes! Cook diced chicken alongside the beef for a protein-packed version.
- Is this dish kid-friendly?: Definitely! Its comforting flavors make it a hit with kids.
Nutrition Tips and Dietary Adaptations
Want to make this dish fit your dietary needs? Here are some tips:
- Lean Protein: Use lean ground turkey or chicken for a lighter version.
- Vegetable Boost: Add more veggies like spinach or zucchini for added nutrients.
- Low-Sodium Options: Use low-sodium broth and season to taste to control sodium intake.
Essential Equipment You’ll Need
Before you start, make sure you have the right tools:
- Large Skillet: Ideal for sautéing and simmering.
- Measuring Cups and Spoons: For accurate ingredient amounts.
- Wooden Spoon: Perfect for stirring without scratching your cookware.
- Sharp Knife: For chopping vegetables efficiently.
Serving Suggestions
Ready to serve? Here are a few ideas:
- Garnish: Top with fresh herbs or additional green onions for color and freshness.
- Sides: Consider pairing with a simple green salad or crusty bread.
- Drinks: Serve with a cold beverage—iced tea or lemonade complements the flavors beautifully.
Your New Kitchen Adventure Awaits
There you have it! A soul-warming dirty rice with ground beef recipe that’s easy to make, packed with flavor, and perfect for any occasion. I can’t wait for you to dive into this dish and make it your own. Cooking is all about sharing love and creating memories, so gather your loved ones around the table and enjoy every bite. Happy cooking, my friend!
Dirty Rice with Ground Beef
Ingredients
Main ingredients
- 1 tablespoon olive oil
- 1 pound ground beef
- 1 small onion, finely diced
- 1 green or red bell pepper, diced bell pepper
- 2 cloves garlic, minced
- 1 1/2 cups long-grain white rice
- 3 cups chicken broth
- 1 teaspoon Cajun seasoning
- 1/2 teaspoon thyme
- 1/2 teaspoon paprika
- 1/2 teaspoon salt
- 1/4 teaspoon black pepper
- 1/4 cup chopped green onions, for garnish
Instructions
- Heat olive oil in a skillet, cook ground beef until browned. Remove excess fat.
- Add diced onion, bell pepper, and garlic; cook until softened.
- Stir in seasonings, cook for 1 minute.
- Add rice, stir to coat, then pour in broth. Bring to boil, cover, and simmer 20 minutes.
- Let sit 5 minutes, fluff with a fork, garnish with green onions, and serve.