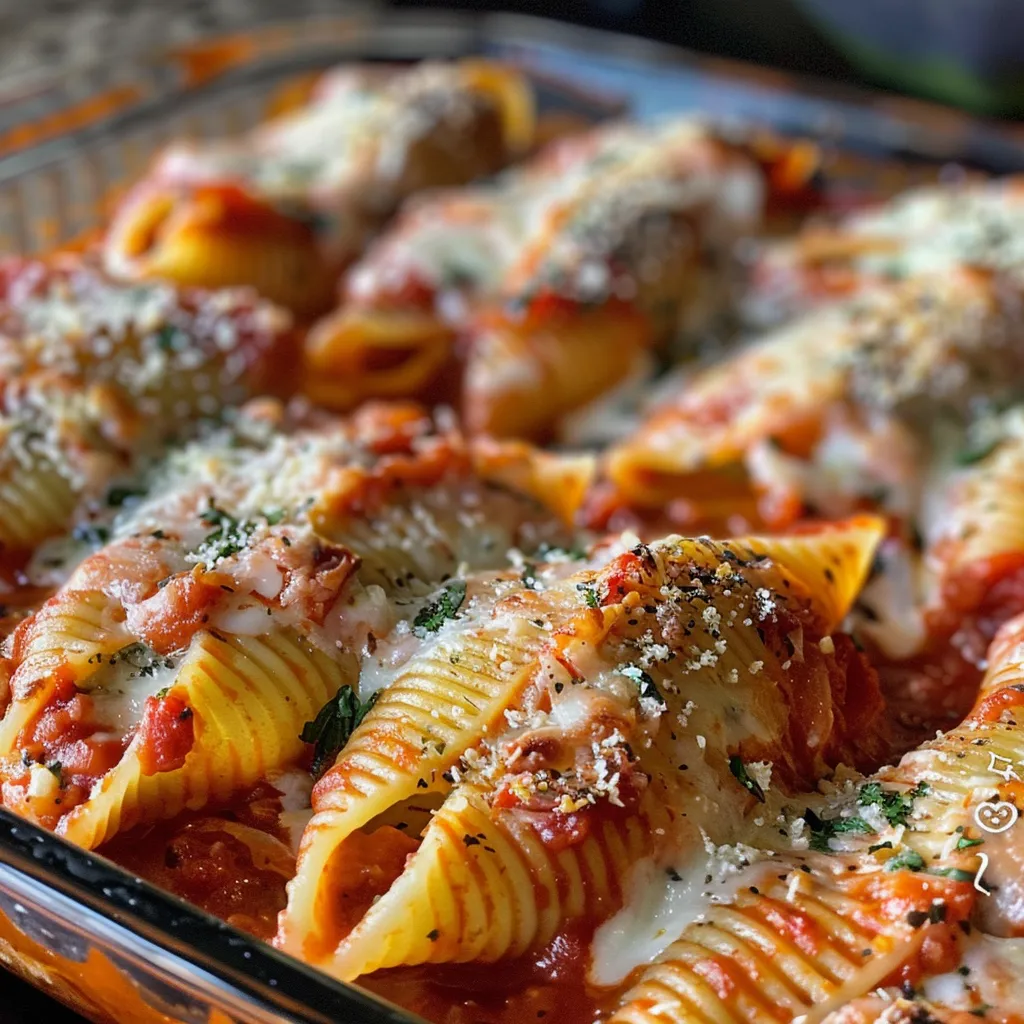
Author

Ava

Browsing

Embrace the Creamy Goodness: Discovering Potato Au Gratin

Ah, potato au gratin! Just saying the name brings a wave of warmth and comfort, doesn’t it? This dish isn’t just food; it’s a hug in a casserole dish. Imagine layers of thinly sliced russet potatoes, lovingly enveloped in a rich creamy cheese sauce, baked to golden perfection. If you’ve ever been enchanted by the aroma of cheesy potatoes wafting through the kitchen, you’re in for a treat. Not only will I guide you through crafting this classic dish, but I’ll also sprinkle it with tips, tricks, and a dash of humor to make your cooking journey as enjoyable as the eating! Let’s dive deep into the world of potato au gratin.

Why You’ll Love This Recipe

This isn’t just any potato dish; this is a celebration of comfort food that brings people together. Here are five reasons why you’ll adore making and devouring this potato au gratin:

  • Unmatched Creaminess: The combination of heavy cream and sharp cheddar creates a sauce that’s luxuriously rich, enveloping every slice of potato in creamy goodness.
  • Layered Delight: With thinly sliced potatoes layered perfectly, each bite offers a delightful contrast between the tender potatoes and the crispy, golden top.
  • Perfect for Any Occasion: Whether it’s a cozy family dinner or a festive gathering, this dish is sure to impress your guests and have them coming back for seconds.
  • Easy to Customize: Love garlic? Add more! Want to sneak in some veggies? Go for it! This recipe is versatile and forgiving.
  • Make-Ahead Marvel: Prepare it in advance and pop it in the oven just before serving, allowing you to enjoy your guests without the last-minute stress.

Ingredients for Cozy Evenings

Let’s gather our ingredients! Here’s what you’ll need to create this cheesy masterpiece:

  • 3 pounds russet potatoes: Peeled and sliced 1/8 inch thick for optimal cooking.
  • 2 cups heavy cream: Or half-and-half if you’re looking for a lighter option.
  • 2 cups sharp cheddar cheese: Shredded, to ensure it melts beautifully into the sauce.
  • 2 cloves garlic: Freshly minced for that aromatic kick.
  • 4 tablespoons unsalted butter: Or olive oil, depending on your preference.
  • Salt and pepper: To taste, enhancing all the flavors.

Crafting the Ultimate Potato Au Gratin

Side view of delicious potato au gratin layered with cheese and potatoes.

Now that we have our ingredients ready, let’s jump into the steps that will lead us to cheesy potato heaven!

Step 1: Preheat Your Oven

First, preheat your oven to 375°F (190°C). This ensures your potatoes will bake evenly and get that lovely golden brown top.

Step 2: Prepare Your Baking Dish

Grease a large baking dish with butter or olive oil to prevent sticking and enhance the flavor.

Step 3: Slice the Potatoes

Using a sharp knife or a mandoline, slice your russet potatoes into thin rounds. Aim for about 1/8 inch thick—this allows them to cook evenly and soak up all that creamy goodness.

Step 4: Make the Creamy Sauce

In a saucepan over medium heat, melt the butter and sauté the minced garlic until fragrant. Then pour in the heavy cream, adding salt and pepper to taste. Stir until combined and heated through, but don’t let it boil.

Step 5: Layer the Potatoes

In your baking dish, start layering the sliced potatoes. Pour a portion of the creamy sauce over the first layer, followed by a sprinkle of shredded cheddar cheese. Repeat this process, creating layers until all ingredients are used, ending with a generous layer of cheese on top.

Step 6: Bake to Perfection

Cover the dish with foil and bake for 45 minutes. Then, remove the foil and continue baking for an additional 30 minutes, or until the top is bubbly and golden brown.

Step 7: Rest and Serve

Once baked, let your potato au gratin rest for about 10-15 minutes. This allows the layers to set, making it easier to serve. Cut into squares, serve warm, and watch as everyone dives in!

Pro Tips for the Perfect Potato Au Gratin

To ensure your dish is a showstopper, here are some expert tips to keep in mind:

  • Choose the Right Potatoes: Russet potatoes are ideal for their starchy content, ensuring a creamy texture. However, Yukon Golds will add a buttery flavor.
  • Don’t Rush the Slicing: Thin, even slices are key to uniform cooking. A mandoline can be a great tool for consistency.
  • Experiment with Cheeses: Try incorporating Gruyère or Parmesan for a flavor twist, or mix different cheeses for a complex profile.
  • Season Between Layers: Sprinkle salt and pepper on each layer of potatoes to build flavor throughout the dish.
  • Add Fresh Herbs: Thyme or rosemary can elevate the flavor, adding freshness that complements the creaminess.
  • Use Homemade Broth: For a richer flavor, substitute some of the cream with homemade chicken or vegetable broth.
  • Cover with Foil Initially: This traps steam and helps the potatoes cook through before browning the top.
  • Let It Rest: Allowing the dish to rest after baking makes it easier to serve and enhances the texture.

Common Mistakes and Troubleshooting

Even the best chefs can have their moments! Here are some common pitfalls and how to avoid them:

  • Dish Too Runny: If your gratin comes out soupy, it may be due to over-slicing the potatoes or using too much liquid. Make sure to follow the ratios closely.
  • Potatoes Not Cooked Through: If your potatoes are still crunchy, they may need more time in the oven. Trust your instincts and bake until tender.
  • Top Not Browning: If your cheese isn’t browning, try broiling for a few minutes at the end, but keep a close eye to prevent burning!

Delicious Variations to Try

Feeling adventurous? Here are some fun twists on the classic potato au gratin:

  • Vegetable Medley: Add layers of sautéed spinach, mushrooms, or zucchini for added nutrition and flavor.
  • Buffalo Chicken Au Gratin: Mix in shredded rotisserie chicken with buffalo sauce for a spicy kick.
  • Herb-Infused: Incorporate fresh herbs like thyme and rosemary into the cream for a fragrant twist.
  • Mexican Style: Add jalapeños and Monterey Jack cheese, topping with cilantro before serving for a zesty flavor.

Storage and Make-Ahead Instructions

This dish is perfect for meal prep! Here’s how to store and reheat:

  • Make-Ahead: Assemble the dish without baking, cover tightly with foil, and refrigerate for up to a day before baking.
  • Storing Leftovers: Once cooled, store leftovers in an airtight container in the fridge for up to 4 days.
  • Reheating: Reheat individual portions in the microwave or warm the entire dish in the oven at 350°F (175°C) until heated through.

Frequently Asked Questions

Let’s tackle some common queries to make your potato au gratin experience smoother:

  • Can I use other types of cheese? Absolutely! Feel free to mix in your favorites, just remember to balance strong flavors.
  • What if I don’t have heavy cream? You can substitute with half-and-half or a combination of milk and butter for a lighter version.
  • Can I freeze potato au gratin? Yes, but the texture may change. It’s best to freeze before baking and bake from frozen.
  • What should I serve with this dish? It pairs beautifully with roasted meats, a fresh salad, or even a simple grilled chicken.
  • Can I make it dairy-free? Yes, use coconut milk or a cashew cream mix and dairy-free cheese alternatives.
  • How do I know when it’s done? When the top is golden brown and the potatoes are tender when pierced with a fork.
  • Can I add proteins? Absolutely! Cooked bacon, ham, or shredded chicken can be delicious additions.
  • Is it necessary to peel the potatoes? While peeling is traditional, you can leave the skins on for added texture and nutrients!

Nutritional Tips and Dietary Adaptations

For those watching their diet or seeking healthier options, consider these adaptations:

  • Lower Fat: Use low-fat cheese and substitute part of the cream with vegetable broth.
  • Gluten-Free: This recipe is naturally gluten-free; just ensure your cheese is free from additives.
  • Vegan: Use plant-based cream and cheese alternatives, and consider adding nutritional yeast for a cheesy flavor.

Essential Equipment for Success

Before you begin, make sure you have these kitchen essentials:

  • Sharp Knife or Mandoline: For evenly slicing the potatoes.
  • Large Baking Dish: A 9×13 inch dish works wonders for this recipe.
  • Mixing Bowls: For combining your creamy sauce and layering the ingredients.
  • Measuring Cups and Spoons: Precision is key in cooking!

Serving Suggestions

When it comes to serving your potato au gratin, consider pairing it with:

  • Herbed Roasted Chicken: The savory flavors complement each other beautifully.
  • Garlic Green Beans: A fresh, crunchy side that balances the creaminess.
  • Mixed Green Salad: Tossed with a light vinaigrette to cut through the richness.

So there you have it—your ultimate guide to creating the most delicious potato au gratin! Remember, cooking is about love, creativity, and a sprinkle of magic. I can’t wait for you to gather your ingredients and dive into this cozy recipe. Let it become a staple in your home, just as it has in mine. Happy cooking, my friends! May your kitchens be filled with laughter, warmth, and, of course, the irresistible smell of cheesy potatoes!

Irresistibly Delicious Potato Au Gratin for Cozy Nights

Prep Time 15 minutes
Cook Time 45 minutes
Total Time 1 hour
Servings 6 servings
Calories 450
Enjoy a creamy, cheesy potato au gratin that's perfect for comforting evenings with family and friends.

Ingredients

Main

  • 3 pounds russet potatoes (peeled and sliced 1/8 inch thick)
  • 2 cups heavy cream (or half-and-half for a lighter option)
  • 2 cups sharp cheddar cheese (shredded)
  • 2 cloves garlic (freshly minced)
  • 4 tablespoons unsalted butter (or olive oil for a lighter touch)
  • to taste salt salt
  • to taste pepper pepper

Instructions 

  • Preheat oven to 375°F (190°C). Grease a baking dish.
  • Layer sliced potatoes in the dish, seasoning with salt and pepper.
  • In a saucepan, heat heavy cream with minced garlic and butter until warm.
  • Pour the cream mixture over the potatoes and sprinkle shredded cheese on top.
  • Bake for 45 minutes until golden and bubbly.

Notes

For a lighter version, use half-and-half and olive oil instead of butter.
Calories: 450kcal
Cost: $15
Course: Side Dish
Cuisine: French
Keyword: potatoes

Welcome to Your New Favorite Comfort Food

Let’s talk about the magic of loaded veggie baked potatoes. Picture this: a warm, fluffy potato, its skin perfectly crisp, and inside, a colorful medley of fresh vegetables and melted cheese. It’s like a cozy hug from your kitchen, and trust me, you’re going to want to make these again and again. Not only are they delicious, but they’re also incredibly versatile, making them a go-to meal for any night of the week.

Why You’ll Love This Recipe

  • Quick and Easy: This recipe requires minimal prep and cook time, perfect for busy weeknights when you want to whip up something satisfying without the fuss.
  • Customizable: Got leftover veggies? You can easily mix and match with whatever you have on hand, making these baked potatoes a great way to reduce food waste.
  • Healthy and Wholesome: Packed with nutrients from fresh vegetables, this dish is not just comfort food; it’s a nourishing meal that you can feel good about.
  • Kid-Friendly: The cheesy goodness and colorful veggies make these potatoes appealing to little ones, ensuring everyone at the table will enjoy them.
  • Perfect for Meal Prep: Make a batch at the beginning of the week, and you’ll have quick meals ready to go, making your life a bit easier.

Ingredients Breakdown

Here’s what you’ll need to create these delightful veggie stuffed potatoes:

  • 4 large russet potatoes: They provide the ideal fluffy interior and sturdy skin.
  • 1 tablespoon olive oil: For that perfect crisp on the potato skin.
  • 1 cup broccoli florets, chopped: A great source of vitamins and adds a nice crunch.
  • 1 bell pepper, diced (any color): Sweet and colorful, bell peppers brighten up any dish.
  • 1/2 cup corn kernels: Adds a touch of sweetness and texture.
  • 1/2 cup cherry tomatoes, halved: For a burst of juicy flavor.
  • 1 cup shredded cheddar cheese: Because cheese makes everything better!
  • Salt and pepper, to taste: Essential for bringing out the flavors.
  • Optional toppings: Sour cream, green onions, avocado, or salsa to elevate your creation.

Feel free to swap in your favorite veggies or even add some protein like black beans or shredded chicken for a heartier meal.

Pro Tips for Perfect Potatoes

Side view of a baked potato filled with broccoli, bell pepper, corn, and cherry tomatoes.

Before we dive into the cooking part, here are some expert insights to ensure your baked potatoes turn out perfectly:

  • Choose the right potatoes: Russet potatoes are ideal because they have a high starch content, which creates that fluffy texture.
  • Pierce your potatoes: Don’t skip this step! Piercing the potatoes allows steam to escape during cooking, preventing them from bursting.
  • Oil and salt the skin: Rubbing olive oil and sprinkling salt on the skins before baking enhances flavor and texture.
  • Let them cool slightly: After baking, allow the potatoes to cool for a few minutes before cutting. This helps the steam escape and makes them easier to handle.
  • Don’t overstuff: When filling the potatoes, leave some space at the top to allow for cheese and toppings.
  • Experiment with cheese: Try different types of cheese like mozzarella, feta, or even a spicy pepper jack for a flavor twist.
  • Add herbs: Fresh herbs like parsley or chives can elevate the taste and add a pop of color.
  • Check for doneness: The potatoes are done when they’re tender throughout, so use a fork or knife to test them.

Common Mistakes and Troubleshooting

Even the best chefs can have off days, so here are some common pitfalls and how to avoid them:

  • Potatoes not cooked through: If they’re still firm, give them more time. Every oven is different, so check them at 45 minutes but be prepared for up to 60.
  • Watery filling: If your veggie mixture turns out watery, make sure to sauté vegetables until they’re tender and any excess moisture has evaporated.
  • Cheese not melting: If your cheese isn’t melting, your potatoes may still be too hot. Let them sit for a bit after baking before adding the toppings.

Delicious Variations

Feeling adventurous? Here are some fun variations to try:

  • Southwestern Style: Add black beans, corn, diced jalapeños, and top with avocado and salsa for a zesty twist.
  • Italian Delight: Stuff with sautéed mushrooms, spinach, and mozzarella cheese, then drizzle with balsamic glaze.
  • Breakfast Baked Potatoes: Fill with scrambled eggs, diced bell peppers, and cheese, topped with crispy bacon or sausage.
  • Greek-Inspired: Use feta cheese, Kalamata olives, and sun-dried tomatoes, finished with a drizzle of olive oil and oregano.

Storage and Make-Ahead Instructions

These veggie stuffed potatoes are great for meal prepping:

  • Refrigeration: Store any leftovers in an airtight container for up to 4 days.
  • Freezing: You can freeze the stuffed potatoes before baking. Just wrap them tightly in foil and freeze for up to 3 months.
  • Reheating: To reheat, bake from frozen at 375°F (190°C) for 30-40 minutes or until heated through.

Frequently Asked Questions

Here are some common questions about making loaded veggie baked potatoes:

  • Can I use sweet potatoes instead? Absolutely! Sweet potatoes will add a lovely sweetness and are a nutritious alternative.
  • What other fillings can I use? You can use virtually any veggie or protein you like. Try spinach, zucchini, or even leftover stir-fry.
  • Can I make these vegan? Yes! Simply omit the cheese or use a vegan cheese alternative.
  • What’s the best way to bake potatoes? Baking directly on the oven rack allows for even cooking and crispier skins.
  • Can I microwave the potatoes? You can, but the skins won’t be as crisp. For best results, bake them in the oven.
  • How do I know when they’re done? They should feel soft when squeezed gently, and a fork should easily pierce through.
  • Can I prepare these ahead of time? Yes! You can prep the fillings in advance and assemble just before baking.
  • What are the nutritional benefits? These potatoes are rich in fiber, vitamins, and antioxidants from the veggies, making them a hearty yet healthy meal.

Nutritional Tips and Dietary Adaptations

These loaded baked potatoes can be adapted to fit various dietary needs:

  • Gluten-Free: This recipe is naturally gluten-free, making it suitable for those with gluten sensitivities.
  • Low-Carb Option: Use cauliflower instead of potatoes for a lower-carb version.
  • Dairy-Free: Substitute the cheese with nutritional yeast or a dairy-free cheese alternative.
  • High-Protein: Add cooked quinoa, lentils, or chickpeas to the veggie filling for a protein boost.

Recommended Equipment

Here’s what you’ll need to make these delightful potatoes:

  • Baking sheet: For roasting the potatoes and melting the cheese.
  • Large skillet: For sautéing the veggies.
  • Sharp knife: To cut and scoop the potatoes.
  • Mixing bowl: For combining the potato filling.
  • Foil: If you choose to wrap your potatoes before baking, foil is essential.

Serving Suggestions

These loaded veggie baked potatoes are best enjoyed warm, straight from the oven. Here are some ideas for serving:

  • Garnish generously: Top with your favorite garnishes like fresh herbs, a dollop of sour cream, or spicy salsa.
  • Pair with a salad: A fresh garden salad or a simple coleslaw complements the heartiness of the potatoes.
  • Serve with a protein: Add grilled chicken or tofu for a complete meal.
  • Enjoy with family: These potatoes make for a fun family dinner where everyone can customize their toppings!

Final Thoughts

I hope you feel inspired to try these loaded veggie baked potatoes in your own kitchen. They’re not just a meal; they’re a canvas for your creativity and a way to bring comfort and joy to your dining table. Remember, cooking should feel like a delightful adventure, so trust your instincts, have fun, and don’t forget to share them with the ones you love. Now, grab your apron, and let’s make some potato magic!

Loaded Veggie Baked Potatoes

Prep Time 15 minutes
Cook Time 55 minutes
Total Time 1 hour 10 minutes
Servings 4 servings
Calories 450
A hearty and nutritious dish featuring baked potatoes loaded with colorful vegetables and cheese, perfect for a satisfying meal.

Ingredients

Potatoes

  • 4 large russet potatoes
  • 1 tablespoon olive oil
  • 1 cup broccoli florets, chopped
  • 1 diced bell pepper (any color)
  • 0.5 cup corn kernels (fresh, frozen, or canned)
  • 0.5 cup cherry tomatoes, halved
  • 1 cup shredded cheddar cheese
  • to taste Salt and pepper
  • optional sour cream, green onions, avocado, salsa (for toppings)

Instructions 

  • Preheat oven to 400°F (200°C). Wash potatoes, pierce with a fork, then bake for 45-60 minutes.
  • Steam or microwave broccoli until tender. Sauté bell pepper and corn until tender, then add cherry tomatoes for 2 minutes.
  • Let potatoes cool slightly, cut in half, and scoop out some flesh, leaving a border.
  • Mix potato flesh with broccoli, sautéed vegetables, and half of cheese. Season with salt and pepper.
  • Fill potato skins with mixture, top with remaining cheese, and bake for 10 minutes until bubbly. Add optional toppings before serving.

Notes

For extra flavor, try adding herbs like chives or parsley.
Calories: 450kcal
Cost: $15
Course: Main Course
Cuisine: American
Keyword: vegetables

Welcome to Your New Favorite Comfort Dish: Hashbrown Casserole!

Ah, the humble hashbrown casserole—a dish that feels like a warm hug on a chilly evening. If you’re searching for a recipe that combines crispy, golden hash browns with creamy goodness, then you’ve landed in the right place! This Hashbrown Casserole Recipe is perfect for family gatherings, cozy nights in, or anytime you want to impress your guests with minimal effort. Trust me; it’s the kind of dish that makes people pause mid-bite and say, ‘Wow.’

Let’s be real: cooking can sometimes feel like a chore, but this casserole is a celebration of flavors and textures that will make it feel like a joyous occasion. With just the right balance of cheesy, creamy, and savory elements, it’s not just food—it’s an experience. And the best part? It’s so easy to prepare, you’ll wonder why you didn’t add it to your dinner rotation sooner!

Why You’ll Love This Recipe

This hashbrown casserole isn’t just delicious; it’s a versatile dish that can adapt to any occasion. Here’s why you’ll adore it:

  • Ultimate Comfort Food: Creamy, cheesy, and oh-so-satisfying, this casserole is the epitome of comfort food.
  • Easy Preparation: With simple steps and common ingredients, you can whip this up in no time.
  • Versatile Serving Options: Perfect as a side dish or a main course, this casserole fits into any meal.
  • Make-Ahead Friendly: Prepare it in advance and just pop it in the oven when you’re ready to serve!
  • Crowd-Pleaser: This dish is guaranteed to impress both family and friends, making it a hit at any gathering.

Ingredient Breakdown

Let’s dive into the ingredients that make this hashbrown casserole so special. Each component plays a vital role in creating that irresistible flavor and texture.

  • 30 oz frozen shredded hash brown potatoes (thawed): The star of the dish! Make sure they’re thoroughly thawed for even cooking.
  • 2 tbsp olive oil: Adds a lovely richness while sautéing the onions.
  • 1 yellow onion (diced): Provides a savory base that enhances the overall flavor.
  • 3 large garlic cloves (minced): Because, let’s face it, garlic makes everything better.
  • 1/4 cup all-purpose flour: Helps to thicken the casserole, creating that creamy texture.
  • 2 cups whole milk: You can use reduced fat if you prefer, but whole milk gives the best richness.
  • 1 cup chicken stock: Adds depth of flavor and keeps the casserole moist.
  • 1 cup sour cream: This is the secret to the creamy goodness!
  • 8 oz shredded sharp cheddar cheese: For that melty, cheesy goodness throughout.
  • 1 1/2 tbsp minced parsley (can use dried parsley if needed): Adds a pop of color and freshness.
  • Salt and fresh cracked black pepper: Essential for seasoning to taste.
  • 1 cup shredded sharp cheddar cheese (topping): Because who doesn’t love an extra cheesy layer on top?

Pro Tips for the Perfect Casserole

Side view of a hearty Hashbrown Casserole, showcasing crispy edges and creamy interior.

Before you dive in, here are some expert insights to ensure your hashbrown casserole turns out perfectly:

  • Thaw Your Hash Browns: Make sure your hash browns are completely thawed to avoid a soggy casserole.
  • Sauté the Onions: Take the time to caramelize the onions; it adds a depth of flavor that makes a difference.
  • Mix Cheese Gradually: Stir in cheese a handful at a time to achieve a smooth, creamy texture.
  • Check Seasoning: Taste as you go! Adjust salt and pepper to suit your palate.
  • Experiment with Cheeses: Try mixing different cheeses like Monterey Jack or Fontina for a unique flavor.
  • Cover While Baking: If the top browns too quickly, cover it with aluminum foil to prevent burning.
  • Use Fresh Ingredients: Fresh garlic and herbs can elevate the dish significantly.
  • Let it Rest: Allow the casserole to sit for a few minutes after baking; this helps it set up nicely.
  • Garnish for Presentation: A sprinkle of fresh parsley on top makes it look as good as it tastes!

Avoiding Common Mistakes

Even the best cooks make mistakes sometimes! Here’s how to troubleshoot:

  • Soggy Casserole: Ensure hash browns are thoroughly thawed and drained before mixing.
  • Too Dry: If your casserole comes out dry, consider adding a splash more chicken stock or milk before baking.
  • Uneven Cooking: Spread the mixture evenly in the dish to ensure it bakes uniformly.
  • Burnt Top: If the top is getting too dark, cover it with foil during the last 10-15 minutes of baking.

Delicious Variations to Try

Don’t be afraid to put your spin on this classic dish! Here are some variations to consider:

  • Loaded Hashbrown Casserole: Add cooked, crumbled bacon or sausage for an extra hearty meal.
  • Veggie-Loaded: Toss in some sautéed bell peppers, spinach, or broccoli for a nutritious twist.
  • Spicy Cheesy Casserole: Incorporate diced jalapeños or a dash of hot sauce for a kick!
  • Breakfast Hashbrown Casserole: Add scrambled eggs and breakfast sausage for a brunch favorite.

Storage and Make-Ahead Instructions

This casserole is perfect for meal prep! Here’s how to store and reheat:

  • Refrigerate: Store leftovers in an airtight container for up to 4 days.
  • Freeze: This casserole freezes well! Just make sure to wrap it tightly. It can be frozen for up to 2 months.
  • Reheat: To reheat, simply pop it in a preheated oven at 350°F for about 20-30 minutes or until warmed through.

Frequently Asked Questions (FAQs)

Got questions? I’ve got answers! Here are some common queries about this delicious dish:

  • Can I use fresh hash browns? Yes! Just shred your potatoes and make sure to squeeze out excess moisture.
  • Can I make this vegetarian? Absolutely! Just omit any meat and use vegetable stock instead of chicken stock.
  • Is it gluten-free? You can make it gluten-free by using a gluten-free flour substitute.
  • How do I make it dairy-free? Substitute with dairy-free cheese, sour cream, and milk alternatives.
  • Can I add protein? Yes! Shredded chicken or cooked ground beef work beautifully in this dish.
  • How long should I bake it? Bake for 30-35 minutes, or until the top is golden and bubbly.
  • Can I prepare it the night before? Yes! Assemble it in advance, cover, and refrigerate overnight. Just add a few extra minutes to the baking time.
  • What’s the best way to serve it? It pairs wonderfully with a simple side salad or steamed veggies.

Nutritional Tips and Dietary Adaptations

Want to make this dish fit your dietary needs? Here are some suggestions:

  • Low-Calorie Option: Use reduced-fat cheese and sour cream to cut down on calories without sacrificing flavor.
  • High-Protein Twist: Add in some cooked quinoa or beans for a protein-packed version.
  • Whole Foods Focus: Opt for organic ingredients to keep it wholesome and healthy.

Essential Equipment for Success

Before you start cooking, make sure you have the right tools on hand:

  • 9×13 Casserole Dish: The perfect size for this recipe.
  • Medium Pot: For sautéing and mixing the cheese sauce.
  • Wooden Spoon or Whisk: Essential for mixing and stirring.
  • Sharp Knife: For dicing onions and mincing garlic.

Serving Suggestions

How you serve this dish can elevate the entire meal! Here are a few ideas:

  • Garnish: A sprinkle of fresh parsley or chives adds a lovely touch.
  • Side Salad: A crisp green salad balances the richness of the casserole.
  • Hot Sauce: A drizzle of your favorite hot sauce can add a delightful kick!

Conclusion: Let’s Get Cooking!

Now that you have all the tools, tips, and tricks, it’s time to roll up your sleeves and get cooking! This Hashbrown Casserole is not just a meal; it’s a celebration of comfort and flavor that’s sure to become a staple in your kitchen. I can’t wait for you to try it and make it your own. Remember, cooking is all about experimenting and having fun, so don’t be shy about adding your own flair. Happy cooking, my friend! Let’s make something unforgettable together!

Hashbrown Casserole Recipe

Prep Time 15 minutes
Cook Time 35 minutes
Total Time 50 minutes
Servings 8 servings
Calories 650
A creamy, cheesy hashbrown casserole perfect for family dinners or potlucks. Easy to prepare and full of flavor.

Ingredients

Main ingredients

  • 30 oz frozen shredded hash brown potatoes (thawed)
  • 2 tbsp olive oil
  • 1 yellow onion yellow onion (diced)
  • 3 large garlic cloves (minced)
  • 1/4 cup all purpose flour
  • 2 cups whole milk ((can use reduced fat if needed))
  • 1 cup chicken stock
  • 1 oz sour cream
  • 8 oz shredded sharp cheddar cheese
  • 1 1/2 tbsp minced parsley ((can use dried parsley if needed))
  • salt salt
  • fresh cracked black pepper black pepper
  • 1 cup shredded sharp cheddar cheese (topping)

Instructions 

  • Preheat oven to 350°F (175°C) and grease a 9x13 inch baking dish.
  • Cook onions and garlic in oil until browned, then stir in flour and gradually add chicken stock and milk, cooking until thickened.
  • Mix in sour cream, season with salt and pepper, then melt in cheese and parsley off heat.
  • Combine hash browns with cheese sauce, spread evenly in the dish, top with extra cheese, and bake for 30-35 minutes until bubbly and browned.

Notes

For a crispier top, broil for a few seconds after baking.
Calories: 650kcal
Cost: $15
Course: Main Course
Cuisine: American
Keyword: Casserole, cheese, hashbrown

Welcome to Your New Favorite Comfort Food

Hey there, fellow food lover! If you’re here, chances are you’re on the hunt for a recipe that not only satisfies your cravings but also warms your heart. Enter the Ultimate Cheesy Ground Beef Melt—a dish that’s hearty, cheesy, and downright irresistible. With each mouthful, you’ll feel like you’re wrapped in a cozy blanket, no matter the season. Let’s dive into why this recipe deserves a spot in your kitchen and on your dinner table!

Why You’ll Love This Recipe

Now, I know what you’re thinking: What makes this cheesy ground beef melt so special? Here are five reasons you’ll fall head over heels for it:

  • Quick and Easy: Ready in just about 30 minutes, this recipe is perfect for busy weeknights when you want something delicious without spending hours in the kitchen.
  • Comfort Food at Its Best: With the melty cheeses and savory ground beef, this dish is the ultimate comfort food to brighten your day.
  • Customizable: Use whatever cheese or bread you have on hand. Whether it’s cheddar, mozzarella, or even a sprinkle of blue cheese, the options are endless!
  • Kid-Approved: Even the pickiest eaters can’t resist the cheesy goodness. It’s a surefire way to get everyone at the table excited.
  • Great for Leftovers: Make a big batch and enjoy the leftovers for lunch or dinner the next day—this beef melt just gets better with time!

Ingredient Breakdown

Before we get cooking, let’s gather our ingredients! Here’s what you’ll need to whip up this delightful dish:

  • 1 lb ground beef: The star of the show! Use lean ground beef for a healthier option.
  • 1 small onion, finely chopped: Adds sweetness and depth of flavor.
  • 2 cloves garlic, minced: Because garlic makes everything better!
  • Salt and pepper to taste: Essential for seasoning your beef mixture.
  • 1 tsp Worcestershire sauce: For that umami kick.
  • 1/2 cup beef broth: Keeps the beef juicy and adds flavor.
  • 1 cup shredded cheddar cheese: The classic choice for melty goodness.
  • 1 cup shredded mozzarella cheese: For that gooey, stretchy texture.
  • 4 slices sourdough or white bread: Choose your favorite type of bread to hold all that deliciousness.
  • 2 tbsp unsalted butter, softened: For grilling the sandwiches to golden perfection.
  • Fresh parsley, chopped (optional): A sprinkle for freshness and color.

Substitutions: Don’t have all the ingredients? No problem! Here are some easy swaps you can make:

  • Ground turkey or chicken for a lighter option.
  • Gluten-free bread for a gluten-free version.
  • Any cheese variety you love—experiment with gouda or pepper jack for a twist!

How to Make the Ultimate Cheesy Ground Beef Melt

Close-up of a cheesy ground beef melt with melted cheese.

Ready to get cooking? Let’s walk through the steps to create this cheesy masterpiece:

  1. Cook the Ground Beef: In a skillet over medium-high heat, cook the ground beef until browned. Drain excess fat if needed.
  2. Add Onions and Garlic: Incorporate the chopped onion and minced garlic, sautéing until the onion turns translucent and fragrant.
  3. Season the Mixture: Sprinkle in salt, pepper, Worcestershire sauce, and beef broth. Let it simmer until the liquid reduces, creating a savory beef mixture.
  4. Prep the Bread: Butter one side of each slice of bread. Preheat a skillet or griddle over medium heat.
  5. Assemble the Sandwiches: Place two slices of bread butter side down in the skillet. Layer with cheddar cheese, followed by the beef mixture, and top with mozzarella. Finish with remaining bread slices, butter side up.
  6. Grill to Perfection: Grill each side for 3-4 minutes until golden brown and the cheese melts. Flip carefully to avoid a cheesy disaster!
  7. Serve and Enjoy: Slice your sandwiches in half and serve warm, garnished with fresh parsley if desired.

Pro Tips for the Perfect Beef Melt

Want to take your Ultimate Cheesy Ground Beef Melt to the next level? Here are some expert tips:

  • Use lean ground beef: This helps reduce excess grease and makes for a healthier meal.
  • Experiment with cheeses: Mixing different cheeses can enhance flavor and texture.
  • Don’t rush the grilling: Allow the sandwiches to cook slowly for that perfect golden crust.
  • Press down gently: Use a spatula to press the sandwich while grilling for better cheese melting.
  • Consider adding veggies: Sauté some bell peppers or mushrooms with the onions for added flavor.
  • Try different breads: Sourdough, ciabatta, or even a bagel can add unique flavors!
  • Let it rest: Allow the sandwiches to sit for a minute after grilling to avoid a cheesy mess when cutting.
  • Serve with sides: Pair with a crisp salad or fries for a complete meal.

Common Mistakes and Troubleshooting

Even the best of us can stumble in the kitchen. Here are some common mistakes and how to avoid them:

  • Overcooking the beef: Keep an eye on your beef; overcooking can lead to dryness.
  • Not seasoning enough: Don’t skimp on the salt and pepper! They enhance the flavor of the beef.
  • Using cold bread: Make sure your bread is at room temperature for even grilling.
  • Skipping the butter: Butter helps achieve that delicious golden crust—don’t skip it!

Delicious Variations

Feeling adventurous? Here are some variations to switch things up:

  • Spicy Beef Melt: Add diced jalapeños or a splash of hot sauce to the beef mixture for a kick.
  • Mediterranean Twist: Use feta cheese and add spinach or sun-dried tomatoes.
  • BBQ Beef Melt: Mix in some BBQ sauce with the beef for a smoky flavor.
  • Veggie Lover’s Melt: Replace half the beef with cooked mushrooms, zucchini, or bell peppers.

Storage and Make-Ahead Instructions

Planning ahead? Here’s how to store and prepare your Ultimate Cheesy Ground Beef Melt:

  • Make Ahead: Prepare the beef mixture a day in advance and store it in the fridge.
  • Storing Leftovers: Keep any leftover sandwiches in an airtight container in the fridge for up to 3 days.
  • Reheating: To reheat, place the sandwich in a skillet over low heat until warmed through, or use a toaster oven for that crispy crust.

Frequently Asked Questions

Got questions? I’ve got answers! Here are some of the most common inquiries:

  • Can I freeze the beef mixture?: Yes, you can freeze the cooked beef mixture for up to 3 months. Just thaw and reheat before assembling sandwiches.
  • What bread works best?: Sourdough, whole grain, or even a baguette can enhance the flavor and texture.
  • Can I use different meats?: Absolutely! Ground turkey, chicken, or even pork can work in this recipe.
  • Is this recipe gluten-free?: It can be! Just use gluten-free bread and ensure no cross-contamination.
  • How can I make it dairy-free?: Substitute dairy-free cheese and butter alternatives.
  • What sides go well with this dish?: Pair it with a light salad, sweet potato fries, or a bowl of soup for a well-rounded meal.
  • How can I spice it up?: Add hot sauce or spicy cheese for a kick!
  • Can I make it vegetarian?: Yes! Substitute the beef with lentils or a mix of your favorite vegetables.

Nutritional Tips and Dietary Adaptations

Looking to make this dish healthier? Here are some tips:

  • Lean Meat Options: Opt for lean ground beef or turkey to cut down on fat.
  • Whole Grain Bread: Use whole grain or sprouted bread for added fiber.
  • Load Up on Veggies: Enhance nutrition by adding sautéed vegetables to the beef mixture.
  • Cheese Choices: Choose reduced-fat cheese options for lighter fare.

Equipment Recommendations

Before you start cooking, make sure you have these essentials on hand:

  • Non-stick skillet: Perfect for grilling your sandwiches without sticking.
  • Spatula: A sturdy spatula will help you flip those sandwiches with ease.
  • Cutting board and knife: For prepping your vegetables and slicing the finished product.

Serving Suggestions

Ready to serve your Ultimate Cheesy Ground Beef Melt? Here are some delightful pairing ideas:

  • Classic French Fries: Crispy fries add the perfect crunch to your meal.
  • Simple Green Salad: A fresh salad with vinaigrette balances the richness of the melt.
  • Vegetable Soup: A warm bowl of soup complements the cheesy goodness.
  • Pickles or Chips: A side of crunchy pickles or potato chips adds an extra layer of texture.

Conclusion

There you have it—the Ultimate Cheesy Ground Beef Melt that’s sure to steal your heart! With its comforting flavors and customizable options, this recipe is destined to become a favorite in your household. Whether you’re cooking for your family on a weeknight or impressing friends at a gathering, this melt is sure to receive rave reviews. So, roll up your sleeves, grab your spatula, and let’s make some kitchen magic happen! Happy cooking, my friend!

Ultimate Cheesy Ground Beef Melt

Prep Time 10 minutes
Cook Time 10 minutes
Total Time 20 minutes
Servings 4 servings
Calories 650
A deliciously cheesy and savory sandwich featuring seasoned ground beef and melted cheeses, perfect for a quick and satisfying meal.

Ingredients

Meat and Dairy

  • 1 lb ground beef
  • 1 small onion, finely chopped
  • 2 cloves garlic, minced
  • 1 tsp Worcestershire sauce
  • 1/2 cup beef broth
  • 1 cup shredded cheddar cheese
  • 1 cup shredded mozzarella cheese
  • 4 slices sourdough or white bread
  • 2 tbsp unsalted butter, softened
  • Fresh parsley, chopped optional

Instructions 

  • Cook ground beef in a skillet until browned. Add onion and garlic; sauté until translucent.
  • Season with salt, pepper, Worcestershire sauce, and beef broth; simmer until liquid reduces.
  • Butter one side of each bread slice. Preheat skillet over medium heat.
  • Assemble sandwiches with cheese and beef mixture, grill until golden and cheese melts, about 3–4 minutes per side.
  • Slice and serve warm, garnished with parsley if desired.

Notes

For extra flavor, add a dash of hot sauce or your favorite herbs.
Calories: 650kcal
Cost: $15
Course: Main Course
Cuisine: American
Keyword: ground beef

Welcome to Your New Favorite Cozy Dish

Are you ready to elevate your weeknight dinners with a dish that feels like a warm hug? Meet the Veggie Pasta Bake, a delightful concoction that blends wholesome ingredients with comforting flavors. This recipe is not just about filling bellies; it’s about bringing families together, sparking joy, and creating those magical moments around the dinner table. Whether you’re cooking for your family, hosting friends, or simply treating yourself after a long day, this veggie-packed pasta bake is here to brighten your day!

Why You’ll Love This Recipe

  • Healthful and Wholesome: Packed with fresh vegetables, this pasta bake offers a nutritious boost without sacrificing flavor. Your body will thank you for the extra greens!
  • Quick and Easy: With minimal prep and fuss, this recipe can be on the table in under an hour, making it perfect for busy weeknights.
  • Customizable: Feel free to swap in your favorite veggies or pantry staples. Almost anything goes, and that’s what makes this dish so versatile!
  • Family-Friendly: Even the pickiest eaters will appreciate this cheesy, comforting dish. It’s a surefire way to get everyone excited about dinner.
  • Make-Ahead Marvel: This pasta bake can be prepared in advance and stored in the fridge or freezer, making meal prep a breeze!

Key Ingredients

Let’s dive into the star players of this dish! Here’s what you’ll need to whip up your Veggie Pasta Bake:

  • Pasta: 12 ounces of whole wheat or regular penne pasta. You can use gluten-free pasta if needed.
  • Olive Oil: 2 tablespoons, for sautéing those fragrant veggies.
  • Onion: 1 medium onion, diced finely to add sweetness.
  • Garlic: 3 cloves, minced—because everything is better with garlic!
  • Bell Peppers: 1 red and 1 yellow bell pepper, chopped for color and crunch.
  • Zucchini: 1 medium zucchini, sliced into half-moons for added texture.
  • Broccoli: 1 cup of broccoli florets to pack in the nutrients.
  • Cherry Tomatoes: 1 cup, halved, to bring a burst of sweetness.
  • Marinara Sauce: 1 cup—your favorite store-bought variety or homemade if you’re feeling adventurous!
  • Herbs and Seasoning: 1 teaspoon each of dried oregano and basil, plus salt and pepper to taste.
  • Cheese: 1 cup shredded mozzarella and ½ cup grated Parmesan for that gooey, melty goodness.
  • Fresh Basil: ¼ cup, chopped, to sprinkle on top for freshness.

Ingredient Substitutions

Don’t have all the ingredients? No problem! Here are some easy swaps:

  • Pasta: Use any short pasta shape you like—penne, rotini, or even shells will work!
  • Vegetables: Feel free to use whatever you have in your fridge—spinach, kale, or even artichokes can make a great addition!
  • Cheese: Try mixing in some ricotta or feta for a different flavor profile.
  • Marinara Sauce: Swap for pesto or alfredo sauce for a unique twist!

Pro Tips for the Perfect Pasta Bake

A side photo of a hearty Veggie Pasta Bake, showcasing layers of pasta and fresh veggies.

To ensure your Veggie Pasta Bake turns out perfectly every time, here are some expert insights:

  • Cook the Pasta Al Dente: Since the pasta will bake further, you want it to be just undercooked so it doesn’t become mushy.
  • Don’t Skip the Sauté: Sautéing your vegetables before adding them to the mix enhances their flavor and ensures they’re tender.
  • Layer Wisely: For even melting, layer your cheeses at different levels within the pasta mixture.
  • Let it Rest: After baking, let the dish cool for a few minutes. This helps it set up and makes serving easier.
  • Add a Crunch: For extra texture, top with breadcrumbs mixed with a little olive oil before baking.
  • Use Fresh Herbs: Fresh basil added right before serving elevates the flavors significantly.
  • Experiment with Spices: A pinch of red pepper flakes can add a delightful kick!
  • Check for Doneness: Oven temperatures can vary, so keep an eye on your bake to avoid overcooking the cheese.

Common Mistakes and Troubleshooting

Even the best cooks make mistakes! Here’s how to avoid common pitfalls:

  • Mushy Pasta: Always cook your pasta al dente; it will continue to cook in the oven.
  • Dry Bake: If your bake seems dry, consider adding a splash of pasta water or more marinara sauce before baking.
  • Uneven Cooking: Ensure your vegetables are chopped to similar sizes for even cooking.

Variations to Try

Feeling adventurous? Here are some fun variations to keep things exciting:

  • Cheesy Spinach and Artichoke: Mix in some spinach and canned artichokes for a deliciously creamy twist.
  • Pesto Pasta Bake: Swap marinara for basil pesto and add sun-dried tomatoes for a flavor explosion.
  • Mexican-Inspired: Use taco seasoning, black beans, and corn with some pepper jack cheese for a Southwestern flair.
  • Italian Sausage Addition: Brown some Italian sausage before adding it to the mix for extra protein and flavor.

Storage and Make-Ahead Instructions

This Veggie Pasta Bake is perfect for meal prep! Here’s how to store it:

  • Fridge: Store leftovers in an airtight container for up to 4 days. Reheat in the oven or microwave.
  • Freezer: Freeze before baking for up to 3 months. Thaw in the fridge overnight before baking.
  • Make-Ahead: Assemble the dish a day in advance and bake it when you’re ready to eat.

Frequently Asked Questions

Got questions? I’ve got answers! Here are some common queries about the Veggie Pasta Bake:

  • Can I use any type of pasta? Absolutely! Feel free to use what you have on hand.
  • Is this recipe gluten-free? Yes, just swap out the pasta for gluten-free options.
  • Can I make this vegan? Yes! Use vegan cheese and omit the Parmesan.
  • How long does it take to bake? Bake at 375°F for 20-25 minutes or until the cheese is bubbly and golden.
  • Can I use frozen vegetables? Certainly! Just thaw and drain them before adding to the mixture.
  • What should I serve with this dish? A fresh salad and crusty bread make excellent companions!
  • How do I know when it’s done? Look for melted cheese and bubbly sauce; a light golden color on top is a good sign!
  • Can I add meat to this recipe? Yes! Cooked chicken or ground beef can be excellent additions.

Nutritional Tips and Dietary Adaptations

Want to make this bake even healthier? Here are some tips:

  • Increase Fiber: Opt for whole wheat pasta or add lentils to the mix.
  • Reduce Fat: Use less cheese or substitute with low-fat options.
  • Boost Nutrients: Add more vegetables or mix in some legumes for extra protein.

Equipment Recommendations

Before you get started, here’s what you’ll need:

  • 9×13-inch Baking Dish: Perfect for this family-sized dish.
  • Large Skillet: For sautéing your veggies and combining everything.
  • Pasta Pot: To cook the pasta to perfection.
  • Wooden Spoon: For mixing and stirring your delicious concoction.

Serving Suggestions

Ready to dig in? Here are some ideas to elevate your serving game:

  • Garnish: Top with fresh basil or a sprinkle of red pepper flakes for a pop of color and flavor.
  • Pair It Up: Serve alongside a crisp green salad or garlic bread for a complete meal.
  • Presentation: Consider serving straight from the baking dish for a cozy, family-style feel.

Conclusion

And there you have it! Your new favorite cozy dish, the Veggie Pasta Bake, is not only simple and delicious but also adaptable to your taste buds and dietary needs. So go ahead, gather your ingredients, and let’s create something magical in the kitchen! Remember, cooking is all about joy, experimentation, and a little bit of love. Happy cooking!

Veggie Pasta Bake

Prep Time 15 minutes
Cook Time 25 minutes
Total Time 40 minutes
Servings 4 servings
Calories 550
A hearty and colorful baked pasta dish packed with fresh vegetables and melted cheese, perfect for a satisfying meal.

Ingredients

Pasta

  • 12 ounces whole wheat or regular penne pasta

Vegetables

  • 2 tablespoons olive oil
  • 1 medium onion, diced
  • 3 cloves garlic, minced
  • 1 red bell pepper chopped red bell pepper
  • 1 yellow bell pepper chopped yellow bell pepper
  • 1 zucchini sliced zucchini
  • 1 cup broccoli florets
  • 1 cup cherry tomatoes, halved

Sauces & Herbs

  • 1 cup marinara sauce
  • 1 teaspoon dried oregano
  • 1 teaspoon dried basil
  • to taste Salt and pepper

Cheese

  • 1 cup shredded mozzarella cheese
  • ½ cup grated Parmesan cheese
  • ¼ cup chopped fresh basil

Instructions 

  • Preheat oven to 375°F (190°C). Cook pasta until al dente, then drain.
  • Sauté onion and garlic in olive oil until soft, then add peppers, zucchini, and broccoli; cook until tender.
  • Stir in cherry tomatoes, marinara sauce, oregano, basil, salt, and pepper; simmer for 5 minutes.
  • Combine cooked pasta with sauce, transfer to baking dish, top with cheeses, and bake for 20-25 minutes.
  • Garnish with fresh basil before serving.

Notes

Feel free to add extra vegetables or switch up the cheese for variety.
Calories: 550kcal
Cost: $15
Course: Main Course
Cuisine: Italian
Keyword: vegetables

Welcome to Your New Favorite Comfort Meal

Picture this: it’s a busy weeknight, the clock is ticking, and your stomach is growling. You want something hearty, comforting, and, most importantly, delicious. Enter the One Pot Ground Beef Pasta recipe that whispers ‘home.’ Not only does this dish come together in under 30 minutes, but it also fills your kitchen with the warm, nostalgic aroma of a family meal. Perfect for busy nights or cozy weekends, this recipe is a delightful blend of flavors that will leave everyone at the table asking for seconds.

Why You’ll Love This Recipe

This ground beef pasta dish isn’t just another recipe; it’s a culinary hug in a bowl. Here are just a few reasons why you’ll adore it:

  • One-Pot Wonder: Say goodbye to mountains of dirty dishes! Everything cooks in one pot, making cleanup a breeze.
  • Quick and Easy: Ready in just 30 minutes, this recipe is perfect for those hectic weeknights when time is of the essence.
  • Versatile Flavor: The combination of ground beef, spices, and creamy sauce creates a symphony of flavors that pleases even the pickiest eaters.
  • Kid-Friendly: With its cheesy goodness and pasta, this dish is a surefire hit with children (and adults!) alike.
  • Make Ahead: Prep ahead of time or store leftovers for a quick reheat—this meal is as adaptable as it is delicious!

Gather Your Ingredients

Before we dive into the cooking, let’s make sure you have everything you need. Here’s a detailed breakdown of the ingredients for this fantastic ground beef pasta:

  • 1 pound ground beef (500 grams): Choose a mixture with at least 20% fat for the best flavor and texture.
  • 12 oz small pasta (350 grams): Any small pasta will do; penne or elbow macaroni works great!
  • 1 tablespoon olive oil: For sautéing the aromatics and browning the meat.
  • 1 large onion (diced): Adds sweetness and depth.
  • 3-4 cloves garlic (minced): Because everything is better with garlic!
  • 2.5 teaspoons Italian seasoning: A blend of herbs that brings a Mediterranean flair.
  • 1/2 teaspoon black pepper: For a hint of heat.
  • 1/4 teaspoon red pepper flakes: Adjust to taste for those who like it spicy.
  • 1 teaspoon salt (adjust to taste): Essential for enhancing flavors.
  • 2 tablespoons flour: Helps thicken the sauce and gives it a creamy texture.
  • 18 oz tomato passata/puree (500 g): The base of our sauce, add richness and color.
  • 1.5-2 cups beef stock: Adds moisture and flavor; chicken stock works in a pinch.
  • 1/2 cup heavy cream: This is where the magic happens—creamy and luxurious!
  • 100 g cheddar/mozzarella cheese: Cheese makes everything better; feel free to use your favorite variety.

Let’s Get Cooking: Step-by-Step Instructions

Juicy One Pot Ground Beef Pasta in a deep dish, showcasing pasta and ground beef.

Ready to whip up this delicious dish? Follow these simple steps to create your One Pot Ground Beef Pasta:

  1. Heat the oil: In a heavy-bottom skillet, heat the olive oil over medium-high heat.
  2. Brown the beef: Add the ground beef, spreading it into a single layer. Cook undisturbed for about 3-4 minutes. Then, use a spatula to break it apart and stir for another 2-3 minutes until browned.
  3. Add aromatics: Reduce the heat to medium, then add the diced onion and minced garlic. Sauté for 2 minutes until the onion is translucent.
  4. Incorporate spices: Sprinkle in the flour, Italian seasoning, red pepper flakes, salt, and pepper. Stir to combine and cook for an additional minute, until the flour is no longer raw.
  5. Mix in the sauce: Pour in the tomato passata and beef stock, then add the dry pasta. Stir well, cover, and let cook for 10 minutes, or until the pasta is al dente. If the skillet looks dry, add more stock as necessary.
  6. Finish with cream and cheese: Once the pasta is cooked, reduce the heat and stir in the heavy cream and shredded cheese. Cover the skillet and let it sit for 5 minutes to melt the cheese.
  7. Serve hot: Taste and adjust seasoning if needed. Garnish with freshly grated Parmesan cheese if desired.

Pro Tips for Perfect Pasta

Want to elevate your dish even further? Here are some expert insights to take your One Pot Ground Beef Pasta to the next level:

  • Don’t rush the browning: Let the ground beef sear without stirring for a few minutes to develop flavor.
  • Use high-quality stock: A rich beef stock enhances the sauce significantly; homemade is best if you have it!
  • Experiment with spices: Feel free to add your favorite herbs or a splash of red wine for depth.
  • Adjust creaminess: If you prefer a lighter dish, reduce the amount of cream or substitute with half-and-half.
  • Perfect pasta: Don’t overcook the pasta initially; it will continue to cook in the sauce.
  • Leftover love: This dish is fantastic for meal prep—just store in an airtight container in the fridge for up to 3 days.
  • Make it vegetarian: Swap ground beef for lentils or your favorite meat substitute for a hearty vegetarian option.
  • Garnish wisely: Fresh herbs like basil or parsley add a pop of color and freshness to your final dish.

Common Mistakes to Avoid

Even the best cooks can make mistakes! Here are a few pitfalls to watch for:

  • Overcrowding the pan: Cooking too much meat at once can steam it instead of browning it. Brown in batches if necessary.
  • Not seasoning adequately: Make sure to taste as you go and adjust seasoning to suit your palate.
  • Skipping the cheese: Don’t omit the cheese—it’s key to achieving that creamy texture!

Delicious Variations to Try

Feeling adventurous? Here are some variations to customize your pasta dish:

  • Spicy Sausage: Swap ground beef for spicy Italian sausage for an extra kick.
  • Veggie Boost: Add chopped bell peppers, mushrooms, or spinach for more nutrition and flavor.
  • Cheesy Broccoli: Stir in steamed broccoli florets along with the pasta for a pop of color and health.
  • Buffalo Style: Mix in buffalo sauce and blue cheese for a zesty twist if you’re a fan of heat!

Storage and Make-Ahead Instructions

Want to prepare ahead? Here’s how to store and reheat your delicious pasta:

  • Refrigeration: Store in an airtight container in the fridge for up to 4 days.
  • Freezing: Freeze leftovers in an airtight container for up to 3 months. Thaw overnight in the fridge before reheating.
  • Reheating: To reheat, add a splash of beef stock or water in a skillet over low heat until warmed through. Stir often to prevent sticking.

Frequently Asked Questions

Let’s tackle some common queries about this delightful dish:

  • Can I use any type of pasta? Yes! Feel free to use your favorite small pasta shapes.
  • What can I substitute for ground beef? Ground turkey or chicken works well, or opt for lentils for a vegetarian version.
  • Can I make this recipe gluten-free? Absolutely! Use gluten-free pasta and flour for a delicious alternative.
  • How can I make this dish spicier? Add more red pepper flakes or some diced jalapeños with the onions.
  • What should I serve with this pasta? A simple side salad or garlic bread complements the dish perfectly.
  • Can I add cream cheese? Yes! Mixing in cream cheese at the end adds a delightful tanginess.
  • How do I know when the pasta is done? Cook until it’s al dente, then taste a piece to ensure it’s cooked to your liking.
  • Can I use fresh herbs? Certainly! Fresh herbs can elevate the flavor—just add them at the end for a burst of freshness.

Nutritional Tips and Dietary Adaptations

This ground beef pasta is not only delicious but can also be adapted to fit various dietary needs:

  • Low-carb options: Substitute pasta with zucchini noodles or spaghetti squash for a lighter dish.
  • Dairy-free: Use coconut cream and dairy-free cheese alternatives to achieve a creamy texture.
  • High-protein: Add extra protein by including beans or chickpeas to the sauce.

Essential Kitchen Equipment

Here’s what you’ll need to whip up this delicious dish:

  • Heavy-bottom skillet: Ideal for even cooking and browning.
  • Spatula: For stirring and breaking up the ground beef.
  • Measuring cups and spoons: Ensure accuracy in ingredient quantities.
  • Wooden spoon: Perfect for mixing ingredients together with ease.

Serving Suggestions

To make your meal even more satisfying, consider these serving suggestions:

  • Fresh herbs: Sprinkle chopped basil or parsley on top for a pop of color and flavor.
  • Parmesan cheese: A generous grating of Parmesan adds a rich, savory touch.
  • Crusty bread: Serve with warm, crusty bread to soak up the delicious sauce.
  • Side salad: A light green salad with a vinaigrette pairs wonderfully with the richness of the pasta.

Final Thoughts

There you have it—the ultimate One Pot Ground Beef Pasta recipe that’s sure to become your go-to for cozy nights in. With its rich flavors, ease of preparation, and comforting nature, this dish encapsulates everything a great meal should be. Whether you’re cooking for family, friends, or just for yourself, this recipe is a reminder that home-cooked meals can be simple yet spectacular. So grab your ingredients and get ready to create something truly magical in your kitchen. Happy cooking!

One pot ground beef pasta

Prep Time 10 minutes
Cook Time 20 minutes
Total Time 30 minutes
Servings 4 servings
Calories 850
A quick and hearty one-pot meal combining ground beef, pasta, and rich tomato sauce, perfect for a satisfying dinner.

Ingredients

Meat

  • 1 pound beef mince
  • 12 oz small pasta

Sauces & Oils

  • 1 tablespoon Olive oil
  • 1 large onion (diced)
  • 3-4 cloves Garlic
  • 2.5 teaspoons Italian Seasoning
  • 1/2 tsp black pepper
  • 1/4 tsp Red pepper flakes
  • 1 tsp salt (adjust to taste)
  • 2 tablespoons flour
  • 18 oz tomato passata/puree
  • 1.5-2 cups beef stock
  • 1/2 cup Heavy cream
  • 100 g cheddar/mozzarella cheese

Instructions 

  • Heat oil, cook beef until browned, then set aside.
  • Saute onion and garlic, add flour, seasonings, then cook briefly.
  • Add tomato passata, beef stock, and pasta. Cover and cook until al dente, adding more stock if needed.
  • Stir in cream and cheese, cover and let melt for 5 minutes.
  • Serve hot, optionally garnished with Parmesan.

Notes

Adjust seasoning and cheese to taste. Keep an eye on liquid levels while cooking.
Calories: 850kcal
Cost: $12
Course: Main Course
Cuisine: Italian
Keyword: Beef, pasta

Discover the Cheddar Bay Green Bean Casserole that Steals the Show

Welcome to the cozy world of Cheddar Bay Green Bean Casserole! If you’re looking for a dish that combines the fresh crunch of green beans with a rich, cheesy goodness, you’ve hit the jackpot. This delightful recipe is perfect for family dinners, holiday feasts, or even a simple weeknight meal. It’s time to roll up your sleeves and bring a sprinkle of magic into your kitchen with a dish that’s bound to impress your loved ones.

Let’s dive into why you’ll absolutely love this casserole. Here are just a few reasons:

Why You’ll Love This Recipe

  • Comfort Food Classic: This casserole is the epitome of comfort food, bringing warmth to every bite.
  • Easy to Prepare: With simple ingredients and straightforward steps, you’ll have this dish ready in no time.
  • Family-Favorite: The cheesy, creamy goodness combined with crispy onions makes it a hit with both kids and adults.
  • Versatile Side Dish: Perfect for holidays, potlucks, or a cozy dinner, this casserole fits any occasion.
  • Make-Ahead Friendly: Prepare it in advance and pop it in the oven when you’re ready to serve!

Ingredient Breakdown

Let’s look at the ingredients that make this casserole so special. Understanding each component will help you appreciate the magic that happens when they come together.

  • Fresh Green Beans: One pound gives a satisfying crunch. You can substitute with frozen green beans if needed, just adjust cooking times accordingly.
  • Cream of Mushroom Soup: This adds creaminess and depth. Feel free to use homemade soup for a fresher taste!
  • Shredded Cheddar Cheese: A must for that gooey, cheesy texture. Go for sharp cheddar for a more robust flavor.
  • Milk: Helps to thin the soup for better mixing. You can use whole milk, almond milk, or any milk of your choice.
  • Garlic and Onion Powder: These seasonings enhance the flavor profile without the fuss of chopping.
  • French Fried Onions: They provide the perfect crunch on top. You can also use crispy breadcrumbs if you prefer.
  • Unsalted Butter: This adds richness. If you’re watching your salt intake, use unsalted, but you can also substitute with olive oil.
  • Seafood Seasoning: This secret ingredient adds a unique twist. You can replace it with Cajun seasoning for a spicy kick!

Step-by-Step Instructions

Side angle of a bubbling Cheddar Bay Green Bean Casserole in a baking dish.

Now that we have our ingredients ready, let’s jump into the cooking process!

  1. Blanch the Green Beans: Bring a pot of salted water to a boil. Add one pound of fresh green beans and cook for 3-4 minutes until they are bright green. Drain and shock them in ice water to stop the cooking process.
  2. Prepare the Casserole Mixture: In a mixing bowl, combine one can of cream of mushroom soup, ½ cup of shredded cheddar cheese, one cup of milk, one teaspoon of garlic powder, one teaspoon of onion powder, and a pinch of salt and pepper. Whisk until smooth.
  3. Combine With Green Beans: Stir in the blanched green beans until they’re well coated with the creamy mixture.
  4. Transfer to Baking Dish: Pour the mixture into a greased 9×13 inch baking dish, spreading it out evenly.
  5. Prepare Topping: In a small bowl, mix one cup of French fried onions with ¼ cup of melted unsalted butter and one teaspoon of seafood seasoning. Sprinkle this mixture over the casserole.
  6. Add Remaining Cheese: Top with the remaining ½ cup of shredded cheddar cheese for that melty goodness.
  7. Bake: Preheat your oven to 350°F (175°C) and bake for 25-30 minutes until the casserole is bubbly and golden brown.

Pro Tips for the Perfect Casserole

  • Don’t Overcook the Beans: Blanching should leave them slightly crisp; they will continue cooking in the oven.
  • Use Quality Cheese: Opt for freshly shredded cheese for better melting and flavor.
  • Mix it Up: Feel free to add cooked bacon or sausage for a meaty version!
  • Herbs Add Freshness: Try adding fresh thyme or parsley for a pop of color and flavor.
  • Control the Creaminess: Adjust the amount of milk to suit your preference for consistency.
  • Let It Rest: Allow the casserole to sit for 5-10 minutes after baking to set before serving.
  • Pair with Proteins: This casserole goes great with roasted chicken or grilled fish.
  • Experiment with Toppings: Swap French fried onions for crushed crackers or potato chips for a different crunch.

Common Mistakes and Troubleshooting

Even the best cooks have their off days! Here are some common pitfalls to avoid:

  • Overcooked Green Beans: Keep an eye on the blanching time; you want them bright and crisp.
  • Too Much Liquid: If the mixture is too runny, add a bit more cheese or breadcrumbs to thicken.
  • Burnt Topping: Cover the casserole with foil if the topping browns too quickly in the oven.

Delicious Variations to Try

Want to shake things up a bit? Here are some tasty variations:

  • Mexican Twist: Add diced jalapeños and swap the cheddar for pepper jack cheese.
  • Italian Flair: Mix in marinara sauce and top with mozzarella for an Italian vibe.
  • Loaded Green Bean Casserole: Add cooked bacon, sautéed mushrooms, and a sprinkle of crispy shallots.
  • Gluten-Free Version: Use gluten-free fried onions and check your soup for gluten-free ingredients.

Storage and Make-Ahead Instructions

This casserole is perfect for meal prep. Here’s how to store and prep in advance:

  • Make Ahead: Assemble the casserole up to a day in advance, cover tightly, and refrigerate. Add the topping just before baking.
  • Storage: Store leftovers in an airtight container in the fridge for up to 4 days.
  • Freezing: You can freeze the unbaked casserole for up to 3 months. Thaw in the fridge overnight before baking.

Frequently Asked Questions

Got questions? I’ve got answers! Here are some common inquiries about this casserole:

  • Can I use frozen green beans? Yes, just adjust the cooking time as needed.
  • Can I make this vegetarian? Absolutely! Just ensure your soup is vegetarian-friendly.
  • What if I don’t have cream of mushroom soup? You can substitute with cream of chicken soup or make your own creamy sauce.
  • How can I make it spicier? Add crushed red pepper flakes or diced green chilies for a kick!
  • What’s the best way to reheat leftovers? Reheat in the oven at 350°F until warmed through for the best texture.
  • Is this casserole suitable for potlucks? Definitely! It travels well and is sure to be a crowd-pleaser.
  • Can I make this without dairy? Yes, use dairy-free cheese and non-dairy milk for a tasty alternative.
  • How do I know when it’s done baking? The casserole should be bubbly and the cheese golden brown.

Nutritional Tips and Dietary Adaptations

This Cheddar Bay Green Bean Casserole can be adapted for various dietary needs:

  • Low-Carb: Substitute the soup with homemade cream sauce and skip the topping for fewer carbs.
  • Vegan: Use a plant-based soup and cheese substitute, along with olive oil instead of butter.
  • Low-Calorie: Reduce the amount of cheese and use low-fat milk for a lighter option.

Essential Equipment Recommendations

Before you start, make sure you have the right tools in your kitchen:

  • 9×13 Inch Baking Dish: Perfect size for baking and serving this casserole.
  • Mixing Bowls: For combining ingredients easily.
  • Whisk: Essential for blending the creamy mixture smoothly.
  • Cutting Board and Knife: Handy for prepping ingredients.

Serving Suggestions

This casserole pairs beautifully with a variety of dishes. Here are some serving ideas:

  • Roasted Chicken: A classic pairing that complements the flavors of the casserole.
  • Grilled Salmon: The freshness of fish balances the richness of the casserole.
  • Garlic Bread: Serve alongside for an extra dose of comfort.
  • Simple Salad: A crisp green salad adds freshness and crunch.

So there you have it! The Cheddar Bay Green Bean Casserole is not just a side dish; it’s a celebration of flavors that brings people together. Whether it’s a holiday feast or a cozy family dinner, this casserole will be the star of the show. So grab your apron, roll up your sleeves, and let’s make something magical together!

Cheddar Bay Green Bean Casserole

Prep Time 10 minutes
Cook Time 30 minutes
Total Time 40 minutes
Servings 6 servings
Calories 250
A delicious green bean casserole topped with cheddar cheese, French fried onions, and seafood seasoning, perfect for a comforting side dish.

Ingredients

Green Beans

  • 1 pound fresh green beans
  • 1 can cream of mushroom soup (10.5 ounces)
  • 1 cup shredded cheddar cheese (divided)
  • 1 cup milk
  • 1 teaspoon garlic powder
  • 1 teaspoon onion powder
  • 1 cup French fried onions
  • ¼ cup unsalted butter (melted)
  • 1 teaspoon seafood seasoning

Instructions 

  • Blanch green beans in boiling salted water for 3-4 minutes, then drain and shock in ice water.
  • Mix cream of mushroom soup, ½ cup cheddar cheese, milk, garlic powder, and onion powder until smooth.
  • Stir in green beans, transfer to a greased 9×13 inch dish.
  • Mix fried onions with melted butter and seafood seasoning; sprinkle over casserole, then top with remaining cheddar cheese.
  • Bake at 350°F (175°C) for 25-30 minutes until bubbly and golden.

Notes

For extra flavor, add a dash of hot sauce or paprika before baking.
Calories: 250kcal
Cost: $15
Course: Side Dish
Cuisine: American
Keyword: green beans

Welcome to the Cozy Vegetable Pasta Bake Adventure!

Hey there, fellow food lover! If you’ve found your way into my kitchen today, you’re about to embark on a delightful journey of flavors with my Cozy Vegetable Pasta Bake. This dish is more than just a meal; it’s a warm embrace after a long day, a celebration of vibrant veggies, and a cheesy hug that’ll make you ask for seconds. Trust me, this recipe is not just about filling your belly; it’s about creating moments that linger long after the last bite.

Let’s dive into the magic of this pasta bake, where every ingredient is chosen with love and care, and each step is designed to bring out the best in your kitchen. So grab your apron, and let’s cook up something unforgettable!

Why You’ll Love This Recipe

  • Comforting flavors: The combination of creamy cheese and roasted veggies creates a rich, satisfying dish that feels like home.
  • Flexible ingredients: Use whatever veggies you have on hand! This recipe is a great way to clean out your fridge.
  • Make-ahead friendly: Prepare it in advance and pop it in the oven on a busy weeknight for a quick dinner solution.
  • Perfect for leftovers: This pasta bake tastes even better the next day, making it a fantastic choice for meal prep.
  • Kid-approved: With melted cheese and colorful veggies, it’s a hit with the little ones too!

Ingredient Breakdown

Before we start cooking, let’s gather our ingredients. Here’s what you’ll need for this cozy delight:

  • 400 g (14 oz) dried pasta shapes (I used rigatoni, but feel free to swap in penne or fusilli!)
  • 1 tbsp vegetable oil
  • 1 large red onion, peeled and chopped into wedges
  • 1 red bell pepper, de-seeded and chopped into large chunks
  • 1 yellow bell pepper, de-seeded and chopped into large chunks
  • 1 large or 2 small courgette (zucchini), chopped into chunks
  • 1/4 tsp salt
  • 1/4 tsp pepper
  • 2 cloves garlic, peeled and minced
  • 1 tbsp tomato puree (or paste for US)
  • ½ tsp dried oregano
  • ½ tsp dried thyme
  • 2 x 400 g (2 x 14 oz) tins chopped tomatoes
  • 120 ml (1/2 cup) double (heavy) cream
  • 100 g (3 packed cups) fresh baby spinach
  • 100 g (1 cup) strong cheddar cheese, grated
  • 100 g (1 cup) mozzarella, grated
  • A small bunch of parsley, roughly torn for garnish

Now, let’s talk substitutions! If you’re dairy-free, try using a plant-based cream and cheese. For added protein, consider tossing in some cooked chickpeas or lentils. The beauty of this recipe is in its adaptability—make it your own!

Pro Tips for the Perfect Pasta Bake

Side view of a hearty vegetable pasta bake featuring rigatoni and fresh vegetables.
  • Cook the pasta al dente: Since the pasta will continue to cook in the oven, be sure to cook it for just 1 minute less than the package instructions.
  • Use a large skillet: A big, safe skillet helps combine all the ingredients without making a mess.
  • Don’t skip the roasting: Sauté the veggies until they’re slightly caramelized to boost their flavor.
  • Mix up the cheeses: Experiment with different cheese blends for a unique flavor profile.
  • Layer it up: For an extra cheesy crust, add a layer of cheese on top before baking.
  • Let it rest: Allow the pasta bake to sit for a few minutes after taking it out of the oven. This helps it set up and makes for easier serving.
  • Use fresh herbs: Fresh basil or oregano can elevate the dish’s flavor profile.
  • Save the pasta water: Add a splash of pasta water to the sauce for extra creaminess.
  • Customize your spices: Feel free to add red pepper flakes for some heat or Italian seasoning for a flavor boost.

A Step-by-Step Guide to Making Your Cozy Vegetable Pasta Bake

Now that we have our ingredients and tips, let’s get cooking! Here’s how to whip up this delightful dish:

  1. Preheat your oven to 190C/375F (fan).
  2. Boil a large pan of water and cook the pasta for 1 minute less than recommended on the pack. Drain and set aside.
  3. In a large frying pan, heat the vegetable oil over medium heat. Add the red onion and cook for 3-4 minutes until it starts to soften.
  4. Add the chopped peppers, courgette, salt, pepper, garlic, tomato puree, oregano, and thyme. Stir and cook for about 2-3 minutes.
  5. Stir in the tinned tomatoes and cream, bringing everything to a gentle bubble.
  6. Once the pasta is cooked, drain it and add it along with the spinach to the sauce and veggies. Mix everything together, then transfer to a large baking dish.
  7. Top with grated cheddar and mozzarella cheese, then place in the oven for 20-25 minutes until the cheese is golden brown.
  8. Remove from the oven and sprinkle with torn parsley before serving.

Common Mistakes and Troubleshooting

Even the best cooks have their oops moments! Here are a few common mistakes and how to avoid them:

  • Pasta too mushy: Always cook pasta al dente for the best texture.
  • Too dry: If your pasta bake seems dry, consider adding a splash of pasta water or extra cream.
  • Cheese doesn’t melt: Make sure to use cheese that melts well, like mozzarella or a blend.
  • Veggies undercooked: Give your veggies enough time to soften and develop flavor before combining them with the pasta.

Variations to Spice Up Your Pasta Bake

Want to mix things up? Here are some fun variations you can try:

  • Italian Sausage Addition: Crumble cooked Italian sausage for a heartier dish.
  • Pesto Twist: Stir in some basil pesto for a fresh, herby flavor.
  • Roasted Veggie Bake: Use roasted seasonal vegetables like butternut squash or Brussels sprouts for a different taste.
  • Cheesy Spinach Bake: Add more spinach and ricotta cheese for a creamier texture.

Storage and Make-Ahead Instructions

This pasta bake is perfect for meal prep! Here’s how to store it:

  • Refrigerator: Store leftovers in an airtight container for up to 3 days. Reheat in the oven or microwave.
  • Freezer: Freeze portions in airtight containers for up to 3 months. Thaw in the fridge before reheating.
  • Make-Ahead: Assemble the pasta bake a day in advance, cover, and refrigerate. Bake it when you’re ready for a cozy dinner.

Comprehensive FAQ

Let’s tackle some common questions:

  • Can I use whole wheat pasta? Absolutely! Whole wheat pasta adds extra fiber and nutrients.
  • Is this recipe gluten-free? You can use gluten-free pasta for a delicious alternative.
  • Can I add meat? Yes, feel free to add cooked chicken, sausage, or ground beef!
  • What can I substitute for cream? Use coconut cream or a cashew cream for a dairy-free option.
  • How can I make it spicier? Add some crushed red pepper flakes or diced jalapeños.
  • Can I use frozen vegetables? Definitely! Just add them directly to the pan without thawing.
  • What’s the best way to reheat leftovers? Reheat in the oven for the best texture, or microwave for convenience.
  • How do I know when it’s done? The cheese should be bubbly and golden brown!

Nutritional Tips and Dietary Adaptations

This Cozy Vegetable Pasta Bake can fit into a variety of dietary preferences:

  • Vegetarian: Naturally vegetarian, packed with nutrients from the veggies.
  • Dairy-Free: Swap cheese for dairy-free alternatives and use coconut cream.
  • Low-Carb: Try using spaghetti squash or zucchini noodles instead of pasta.

Recommended Equipment

Having the right tools makes cooking easier and more enjoyable:

  • Large Pot: For boiling the pasta.
  • Large Skillet: Ideal for sautéing veggies and mixing ingredients.
  • Baking Dish: An oven-safe dish for your pasta bake.
  • Wooden Spoon: Perfect for stirring and mixing ingredients together.

Serving Suggestions

This Cozy Vegetable Pasta Bake is delicious on its own, but here are some fun serving ideas:

  • Side Salad: Pair it with a fresh green salad dressed with a light vinaigrette.
  • Garlic Bread: Serve with warm, buttery garlic bread for the ultimate comfort meal.
  • Wine Pairing: Enjoy with a glass of white wine, like a crisp Sauvignon Blanc or a light Pinot Grigio.
  • Extra Toppings: Consider adding a sprinkle of parmesan or fresh herbs on top before serving.

Wrap-Up

And there you have it! A Cozy Vegetable Pasta Bake that’s not just a recipe but a way to bring warmth and joy into your kitchen. I hope you enjoy making this dish as much as I do. Remember, cooking is all about having fun and sharing love through food. So gather your friends and family, serve up generous portions, and watch as everyone falls in love with this comforting creation. Happy cooking, my friends!

Vegetable Pasta Bake Recipe

Prep Time 15 minutes
Cook Time 25 minutes
Total Time 40 minutes
Servings 4 servings
Calories 650
A hearty and colorful baked pasta dish packed with fresh vegetables and melted cheese, perfect for a comforting meal.

Ingredients

Pasta

  • 400 g dried pasta shapes (rigatoni)

Vegetable oil

  • 1 tbsp vegetable oil

Red onion

  • 1 large red onion (peeled and chopped into wedges)

Red bell pepper

  • 1 large red bell pepper (de-seeded and chopped into large chunks)

Yellow bell pepper

  • 1 large yellow bell pepper (de-seeded and chopped into large chunks)

Courgette (zucchini)

  • 1 large courgette (chopped into chunks)

Salt

  • 0.25 tsp salt

Pepper

  • 0.25 tsp pepper

Garlic

  • 2 cloves garlic (peeled and minced)

Tomato puree

  • 1 tbsp tomato puree (paste for US)

Dried oregano

  • 0.5 tsp dried oregano

Dried thyme

  • 0.5 tsp dried thyme

Chopped tomatoes

  • 2 x 400 g tinned chopped tomatoes

Heavy cream

  • 120 ml double (heavy) cream

Baby spinach

  • 100 g fresh baby spinach

Strong cheddar cheese

  • 100 g grated strong cheddar cheese

Mozzarella

  • 100 g grated mozzarella

Parsley

  • small bunch parsley (roughly torn)

Instructions 

  • Cook pasta in boiling water for 1 minute less than package instructions; drain.
  • Heat oil and cook onion for 3-4 minutes until soft.
  • Add peppers, courgette, salt, pepper, garlic, tomato puree, oregano, and thyme; cook 2-3 minutes.
  • Stir in tomatoes and cream; simmer gently.
  • Combine pasta, spinach, and sauce; transfer to baking dish. Top with cheeses and bake 20-25 minutes until golden. Garnish with parsley before serving.

Notes

Use fresh vegetables for best flavor and consider adding extra herbs for more aroma.
Calories: 650kcal
Cost: $15
Course: Main Course
Cuisine: international
Keyword: vegetables

Why Baked Ziti with Roasted Vegetables Will Become Your New Favorite

Welcome to my cozy corner of the internet! If you’ve landed here, you’re probably craving a dish that’s not just filling, but also bursting with flavor and comfort. Enter my Baked Ziti with Roasted Vegetables—a dish that embodies everything I love about cooking. It’s simple, delightful, and guaranteed to make your taste buds dance with joy. Picture this: tender ziti pasta enveloped in a rich marinara sauce, paired with the sweetness of roasted veggies, all topped with gooey, melted cheese. Sound tempting? Let’s dive in!

Baked ziti is more than just a meal; it’s an experience. It’s the kind of recipe you can whip up for a family dinner, serve at a casual gathering with friends, or keep as a comforting option for those cozy nights at home. And trust me, once you make this, you’ll want to add it to your regular rotation. So, grab your apron, and let’s get started!

Why You’ll Love This Recipe

This baked ziti recipe isn’t just about filling your stomach; it’s about filling your heart too. Here are a few reasons why it’s going to win you over:

  • Comforting and Satisfying: The combination of cheesy goodness, hearty pasta, and roasted vegetables creates a dish that feels like a warm hug on a plate.
  • Easy to Customize: Whether you want to swap in different veggies, use gluten-free pasta, or make it vegan, this recipe is incredibly adaptable to your taste and dietary needs.
  • Perfect for Meal Prep: You can make this dish in advance and either freeze it or store it in the fridge for an easy weeknight dinner.
  • Great for Feeding a Crowd: This recipe makes a generous portion, making it perfect for gatherings, potlucks, or family dinners.
  • Leftover Magic: The flavors get even better the next day, making leftovers something to look forward to!

Ingredient Breakdown: What You’ll Need

Let’s talk ingredients! The beauty of this baked ziti recipe lies in its simplicity and the quality of the components. Here’s what you’ll need:

  • 1 medium head of cauliflower: Cut into bite-sized florets. This adds a hearty texture and absorbs the flavors beautifully.
  • 1 red bell pepper: Cut into 1″ squares. Sweet and vibrant, it brings color and taste.
  • 1 medium yellow onion: Sliced into wedges. This adds depth and sweetness when roasted.
  • 2 tablespoons extra-virgin olive oil: For roasting the veggies and adding flavor.
  • ¼ teaspoon fine salt: To enhance the natural flavors of the ingredients.
  • 8 ounces ziti: You can also use rigatoni or penne. This pasta shape holds onto the sauce well.
  • 4 cups marinara sauce: Homemade or store-bought, this is the base of your dish.
  • ¼ cup chopped fresh basil: For a fresh, aromatic touch that brightens the dish.
  • 8 ounces grated part-skim mozzarella cheese: Divided for layers of cheesy goodness.
  • 2 cups cottage cheese or ricotta cheese: Creates a creamy texture that complements the pasta perfectly.

Expert Tips for Perfect Baked Ziti

An appetizing side view of baked ziti, highlighting layers of pasta, marinara sauce, and assorted roasted vegetables.

Before we jump into the cooking, here are some pro tips to ensure your baked ziti turns out perfectly every time:

  • Don’t Overcook the Pasta: Cook your pasta just until al dente, as it will continue to cook when baked. This keeps it from becoming mushy.
  • Roast Until Golden: Aim for caramelized edges on your vegetables. This enhances their sweetness and adds depth to the dish.
  • Layering is Key: When assembling, alternate layers of pasta, veggies, and cheese to create a harmonious blend of flavors.
  • Let it Rest: After baking, allow the ziti to cool for about 10 minutes before serving. This helps it set and makes slicing easier.
  • Experiment with Cheese: Try using a blend of cheeses like gouda or fontina for a twist on flavor.
  • Herb Variations: Fresh herbs like thyme or oregano can add a delightful aromatic quality to your dish.
  • Make it a One-Pan Dish: If you’re short on time, consider using a large skillet that can go from stovetop to oven.
  • Garnish with Fresh Basil: A sprinkle of fresh torn basil on top just before serving adds a lovely touch and bright flavor.

Common Mistakes and How to Avoid Them

Even the best cooks make mistakes! Here are some common pitfalls and how to sidestep them:

  • Overcrowding the Pan: If your veggies are packed too tightly, they’ll steam instead of roast. Give them space!
  • Skipping the Salt: Salt enhances flavor. Don’t forget to season your pasta water and veggies!
  • Using Cold Ingredients: Make sure your cottage cheese or ricotta is at room temperature for easier mixing and a creamier texture.
  • Not Preheating the Oven: Always preheat your oven before baking to ensure even cooking.
  • Forgetting to Cover: If your ziti is browning too quickly, cover it with foil during baking to prevent burning.

Variations to Spice Up Your Baked Ziti

Feeling adventurous? Here are some fun variations to try with this baked ziti recipe:

  • Meat Lovers: Add cooked ground beef, sausage, or turkey for a protein-packed version.
  • Vegan Delight: Substitute cheese with vegan cheese and use a plant-based marinara sauce.
  • Spicy Ziti: Add red pepper flakes or diced jalapeños to the marinara for a kick.
  • Cheesy Pesto Ziti: Mix in some pesto with the marinara for an herby twist.

How to Store and Make Ahead

Planning ahead? Here’s how to store and reheat your baked ziti:

  • Refrigeration: Store leftovers in an airtight container in the fridge for up to 4 days.
  • Freezing: Assemble the dish but do not bake. Wrap tightly and freeze for up to 3 months. When ready, bake from frozen, adding additional time.
  • Reheating: To reheat, cover with foil and warm in a preheated oven at 350°F until heated through.

FAQ: Your Baked Ziti Questions Answered

Here are some frequently asked questions to help you out:

  • Can I use gluten-free pasta? Absolutely! Just ensure you follow the cooking instructions on the package as gluten-free pasta can vary.
  • What if I don’t have marinara sauce? You can use any tomato-based sauce, such as arrabbiata or pomodoro.
  • Can I use frozen vegetables? Yes, frozen veggies can work in a pinch, just make sure to thaw and drain them before use.
  • Is this recipe good for meal prep? It sure is! You can prepare it ahead and bake it when you’re ready to eat.
  • How can I make it spicier? Add crushed red pepper flakes to the marinara or include some spicy sausage in the mix!
  • Can I make this dish vegetarian? Yes! This recipe is already vegetarian, just make sure to use cheese that suits your dietary preferences.
  • How do I prevent it from getting dry? Make sure to cover it with foil while baking if you notice it’s drying out, and consider adding a little extra marinara or cheese on top.
  • Can I use different cheeses? Of course! Feel free to mix and match your favorite cheeses for added flavor.

Nutritional Tips and Dietary Adaptations

Want to make this dish fit your nutritional goals? Here are some tips:

  • Increase the Veggies: Add more vegetables like spinach, zucchini, or mushrooms for extra fiber and nutrients.
  • Lighten It Up: Use part-skim cheese and whole grain pasta for a healthier version.
  • Protein Boost: Add beans or lentils for added protein if you’re looking to make it heartier.
  • Low-Carb Option: Swap pasta for zucchini noodles or spaghetti squash for a low-carb alternative.

Equipment Recommendations

Here’s what you’ll need to make this recipe:

  • Large Baking Dish: A 9×13-inch dish works perfectly for this recipe.
  • Roasting Pans: Use rimmed baking sheets for roasting vegetables.
  • Pot for Pasta: A large pot to boil your pasta is essential.
  • Mixing Bowls: For combining ingredients and layering.

Serving Suggestions

Now that your baked ziti is ready, here are some ideas for serving:

  • With a Side Salad: A simple green salad with a light vinaigrette complements the richness of the ziti.
  • Garlic Bread: Who can resist warm, buttery garlic bread with pasta?
  • Wine Pairing: A glass of red wine, like Chianti, pairs beautifully with this comforting dish.
  • Fresh Herbs: Top with extra fresh basil or parsley for a pop of color and flavor.

Final Thoughts

Cooking is more than just following a recipe; it’s about creating moments and memories in the kitchen. I hope this Baked Ziti with Roasted Vegetables fills your home with warmth and delicious aromas. Remember, it’s perfectly fine to make it your own—add your favorite ingredients, adjust the spices, and make it a dish that you love. So grab your loved ones, and get ready to share a meal that’s not just food but a little piece of magic from my kitchen to yours. Happy cooking, my friends!

Baked Ziti with Roasted Vegetables

Prep Time 20 minutes
Cook Time 40 minutes
Total Time 1 hour
Servings 6 servings
Calories 650
A hearty baked pasta dish featuring roasted vegetables, fresh basil, and melted cheese, perfect for a comforting meal.

Ingredients

Vegetables

  • 1 head cauliflower (cut into bite-sized florets)
  • 1 piece red bell pepper (cut into 1" squares)
  • 1 medium yellow onion (sliced into wedges about ½" wide)

Pasta and sauces

  • 8 ounces ziti, rigatoni or penne pasta
  • 4 cups marinara sauce (divided)
  • ¼ cup chopped fresh basil (plus extra for garnish)
  • 8 ounces grated part-skim mozzarella cheese (divided)
  • 2 cups cottage cheese or ricotta cheese (divided)

Instructions 

  • Preheat oven to 425°F. Roast cauliflower, peppers, and onion on separate pans with oil and salt until tender and caramelized, about 30-35 minutes.
  • Cook pasta until al dente, drain, and return to pot. Mix in 2 cups marinara, basil, and ½ cup mozzarella.
  • Layer 1 cup marinara in a 9x13-inch dish, add half of pasta mixture, roasted vegetables, dollops of cottage cheese, and ½ cup mozzarella. Repeat with remaining ingredients.
  • Place a baking sheet underneath and bake uncovered at 425°F for 30 minutes, then broil for 2-5 minutes until cheese is golden. Cool for 10 minutes, garnish with basil, and serve.

Notes

Use fresh basil for the best flavor and keep an eye on the cheese during broiling to prevent burning.
Calories: 650kcal
Cost: $15
Course: Main Course
Cuisine: Italian-American
Keyword: pasta, vegetables

Welcome to Your New Favorite Comfort Dish

Let’s talk comfort food—specifically, the kind of food that wraps you in a warm hug and makes you feel right at home. If you’ve ever had a long day and craved something that soothes the soul, you’re in the right place. Today, we’re diving into the magic of my Creamy Chicken Potato Casserole. This dish is everything you want: creamy, cheesy, and oh-so-satisfying. With tender chicken, layers of Yukon Gold potatoes, and a rich sauce, this casserole is perfect for family dinners, cozy nights in, or even impressing unexpected guests.

Why You’ll Love This Recipe

  • Ultimate Comfort Food: The combination of creamy sauce and tender chicken creates a dish that’s not just a meal, but a cozy experience.
  • Easy to Prepare: With simple steps and minimal ingredients, this casserole is perfect for busy weeknights.
  • Customizable: Feel free to swap in your favorite veggies or proteins—this recipe is flexible!
  • Perfect for Leftovers: This casserole reheats beautifully, making it a great option for meal prep.
  • Kid-Friendly: With familiar flavors and cheesy goodness, this dish is sure to please even the pickiest eaters.

Ingredients & Substitutions

Before we get cooking, let’s gather our ingredients. Here’s what you’ll need for this delicious casserole:

  • 2.5 lbs Yukon Gold Potatoes: Peeled and sliced thinly for even cooking.
  • 3 cups Cooked Chicken: Shredded (don’t worry, rotisserie chicken works like a charm).
  • 1 medium Yellow Onion: Finely chopped to add depth of flavor.
  • 3 cloves Garlic: Minced for that aromatic touch.
  • 4 tbsp Unsalted Butter: The base for our creamy sauce.
  • 0.25 cup All-Purpose Flour: To thicken the sauce.
  • 2 cups Whole Milk: Warmed slightly for a smooth sauce.
  • 1 cup Heavy Cream: For that luscious creaminess.
  • 1.5 cups Sharp Cheddar Cheese: Shredded, divided for layers of cheesy goodness.
  • 0.5 cup Parmesan Cheese: Grated, because who doesn’t love a little extra flavor?
  • 1 tsp Smoked Paprika: Adds a hint of warmth and smokiness.
  • 1 tsp Dried Thyme: For a touch of herbal brightness.
  • 1 tsp Salt: Or to taste.
  • 0.5 tsp Black Pepper: Freshly ground for best flavor.
  • 2 tbsp Fresh Parsley: Chopped, for garnish and a pop of color.

Substitutions: If you’re looking to switch things up, here are some ideas:

  • Potatoes: Sweet potatoes can add a delightful twist.
  • Chicken: Use turkey or a plant-based protein for a lighter option.
  • Milk & Cream: Substitute with non-dairy options like almond milk and coconut cream.
  • Cheese: Feel free to mix different types of cheese for unique flavors.

Step-by-Step Instructions to Make the Casserole

Juicy and delicious creamy chicken potato casserole with visible melted cheese and golden potato slices.

Now that we have everything ready, let’s get to the fun part—cooking!

1. Prepare the Potatoes

Start by preheating your oven to 375°F (190°C). Peel and slice the Yukon Gold potatoes into 1/8-inch thick rounds. This ensures they cook evenly and absorb all that delicious sauce.

2. Make the Creamy Sauce

In a large saucepan, melt the butter over medium heat. Once melted, add the chopped onion and cook until translucent, about 5 minutes. Stir in the minced garlic and cook for another minute.

Next, sprinkle the flour over the onions and garlic, stirring continuously for about 2 minutes to create a roux. Gradually whisk in the warmed milk and heavy cream, ensuring no lumps remain. Stir in the smoked paprika, thyme, salt, and pepper, and let the sauce simmer until it thickens slightly, about 5-7 minutes.

3. Layer the Casserole

In a greased 9×13 inch baking dish, start layering: half of the sliced potatoes at the bottom, followed by half of the shredded chicken, and then half of the creamy sauce. Repeat the layers, finishing with a sprinkle of the remaining cheddar and parmesan cheese on top.

4. Bake the Casserole

Cover the casserole with aluminum foil (to prevent the cheese from burning) and bake in the preheated oven for 40 minutes. Then, remove the foil and bake for an additional 20-30 minutes, or until the potatoes are tender and the cheese is bubbly and golden.

5. Garnish and Serve

Once out of the oven, let the casserole rest for about 10 minutes. This will make serving easier! Garnish with fresh parsley before diving in.

Pro Tips for the Perfect Casserole

  • Prep Ahead: You can prepare the casserole a day in advance. Just add a little cooking time when baking!
  • Layering Technique: Ensure each layer is evenly spread for consistent flavor in every bite.
  • Don’t Overcook: Keep an eye on the casserole during the last baking phase; you want it bubbly, not burnt!
  • Cheese Choices: For a twist, mix in some mozzarella or gouda with your cheddar.
  • Vegetable Add-Ins: Consider adding frozen peas, spinach, or broccoli for extra nutrition.
  • Texture Check: Use a fork to test the potatoes for tenderness before removing from the oven.
  • Resting Time: Letting the casserole sit after baking helps it set, making it easier to serve.
  • Freeze for Later: This casserole freezes well! Just ensure it’s tightly covered before freezing.

Common Mistakes and Troubleshooting

Even the best cooks face hiccups! Here are some common issues and how to avoid them:

  • Gummy Potatoes: Make sure to slice your potatoes evenly and avoid overcooking.
  • Runny Sauce: If your sauce is too thin, let it simmer longer before layering.
  • Burnt Cheese: Always cover your casserole with foil at the beginning of baking.
  • Uneven Cooking: Rotate your casserole halfway through baking for even heat distribution.
  • Flavorless Dish: Don’t skimp on seasoning! Taste as you go and adjust accordingly.

Variations to Try

Feel free to play with this recipe! Here are some variations to consider:

  • Vegetable Lovers: Add sautéed mushrooms, bell peppers, or zucchini to the layers.
  • Spicy Kick: Mix in some diced jalapeños or a dash of cayenne pepper for heat.
  • Herb Infusion: Fresh herbs like rosemary or basil can elevate the flavor profile significantly.
  • Cheesy Spin: Experiment with different cheese blends, like pepper jack or feta, for a unique twist.

Storage and Make-Ahead Instructions

This casserole is a fantastic option for meal prep! Here’s how to store it:

  • Refrigerate: Store leftovers in an airtight container for up to 4 days.
  • Freeze: For longer storage, freeze the unbaked casserole for up to 3 months. Just thaw it in the fridge overnight before baking.
  • Reheat: Warm leftovers in the oven at 350°F (175°C) until heated through, about 20-25 minutes.

Frequently Asked Questions

Got questions? I’ve got answers! Here are some frequently asked questions about this casserole:

  • Can I use frozen chicken?: Absolutely! Just ensure it’s fully cooked before shredding.
  • What can I serve with it?: This casserole pairs well with a fresh salad or steamed veggies.
  • How do I make it gluten-free?: Use gluten-free flour and ensure your chicken broth (if using) is also gluten-free.
  • Can I add more cheese?: You bet! Cheese lovers can’t go wrong with extra layers of cheese.
  • What’s the best way to store leftovers?: Store in an airtight container in the fridge for up to 4 days or freeze for longer storage.
  • Can I make this dairy-free?: Yes! Substitute the milk and cream with almond milk and coconut cream, and use dairy-free cheese.
  • How long does it take to bake?: Approximately 60 minutes total, but it can vary depending on your oven.
  • Is it okay to use different types of potatoes?: Sure! Just keep in mind that different potatoes may affect the texture.

Nutritional Tips and Dietary Adaptations

This casserole is not only delicious but can also be adapted to fit various dietary needs:

  • Protein Boost: Add legumes like chickpeas or lentils for added protein and fiber.
  • Low-Carb Option: Substitute potatoes with cauliflower for a lighter version.
  • Vegetarian Version: Replace chicken with a hearty plant-based protein like tofu or tempeh.
  • Low-Fat Adaptation: Use low-fat milk and skip the heavy cream for a lighter dish.

Essential Equipment for Baking

Before we wrap this up, here’s what you’ll need:

  • 9×13 inch Baking Dish: Perfect for layering everything beautifully.
  • Large Saucepan: For making that creamy sauce.
  • Sharp Knife: For slicing your potatoes and chicken.
  • Whisk: Essential for preventing lumps in your sauce.
  • Measuring Cups and Spoons: To get your ingredients just right.

Final Thoughts

There you have it—my Creamy Chicken Potato Casserole, a recipe that embodies comfort and warmth. I can’t wait for you to try it out and make it your own! Remember, cooking is about joy, experimentation, and a little magic. So, grab your apron and let’s create some unforgettable memories in the kitchen. Happy cooking!

Creamy Chicken Potato Casserole

Prep Time 15 minutes
Cook Time 45 minutes
Total Time 1 hour
Servings 6 servings
Calories 650
A comforting and hearty casserole combining tender potatoes, shredded chicken, and a rich, cheesy sauce, perfect for family dinners.

Ingredients

Potatoes

  • 2.5 lbs Yukon Gold Potatoes (peeled and sliced 1/8-inch thick)

Chicken

  • 3 cups Cooked Chicken (shredded (rotisserie chicken works well))

Vegetables

  • 1 medium Yellow Onion (finely chopped)
  • 3 cloves Garlic (minced)

Dairy & Fats

  • 4 tbsp Unsalted Butter
  • 0.25 cup All-Purpose Flour
  • 2 cups Whole Milk (warmed slightly)
  • 1 cup Heavy Cream

Cheese

  • 1.5 cups Sharp Cheddar Cheese (shredded, divided)
  • 0.5 cup Parmesan Cheese (grated)

Spices & Herbs

  • 1 tsp Smoked Paprika
  • 1 tsp Dried Thyme
  • 1 tsp Salt (or to taste)
  • 0.5 tsp Black Pepper (freshly ground)

Fresh Herbs

  • 2 tbsp Fresh Parsley (chopped)

Instructions 

  • Preheat oven to 375°F (190°C). Lightly grease a baking dish.
  • Layer sliced potatoes in the dish, then top with shredded chicken and chopped onion.
  • In a saucepan, melt butter, whisk in flour, then gradually add warm milk and heavy cream, stirring until smooth. Add spices and half the cheese, stirring until melted.
  • Pour sauce over the layered ingredients, then sprinkle remaining cheese and Parmesan on top.
  • Bake uncovered for 45 minutes until bubbly and golden. Garnish with chopped parsley before serving.

Notes

For extra flavor, use rotisserie chicken and fresh herbs.
Calories: 650kcal
Cost: $15
Course: Main Course
Cuisine: American
Keyword: cheese, Chicken, potatoes