")
Introduction
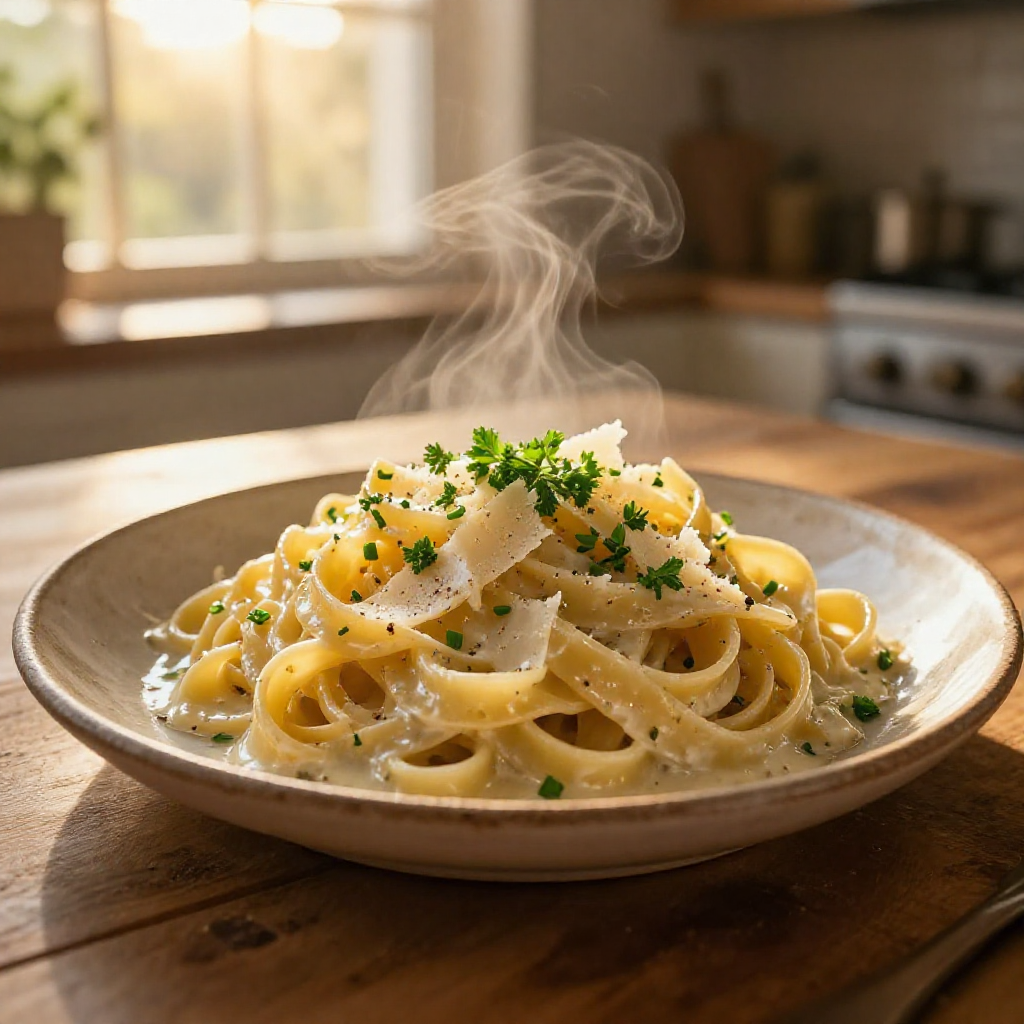
My name’s Ava, and if you’ve stumbled upon my kitchen, you’re probably here for one thing—the kind of recipes that make people pause mid-bite and say, ‘Wow.’ I grew up in a small town in Oregon, where the smell of fresh bread and roasted vegetables often drifted out of my mother’s kitchen window. Cooking wasn’t just something we did to eat—it was how we marked occasions, provided support, and created bonds. I was the kid who would rather stir a pot of chili than go ride my bike, and by the time I was twelve, I could whip up a pie from scratch that made my grandmother proud. These days, I’m 34 and living in Seattle, where my kitchen has become my favorite corner of the world. I believe the best recipes aren’t always the fanciest—they’re the ones that feel like a familiar friend, the ones you make over and over because they just work. Sure, I’ve had my share of flops (ask me about the infamous triple-layer cake that collapsed right before a dinner party), but I’ve learned that every ‘oops’ moment is just an invitation to try again—this time with a little more patience and maybe a pinch more salt. And speaking of things that just *work*, let me tell you about my latest kitchen obsession: One Pot Creamy Garlic Pasta. Seriously, this recipe is a game-changer. It’s the kind of dish that comes together in under 20 minutes, uses ingredients you probably already have in your pantry, and tastes like you spent hours slaving away in the kitchen. Perfect for those hectic weeknights when you need something quick, satisfying, and utterly delicious. It’s also a fantastic base recipe that you can customize to your liking. Ready to dive in? Let’s get started!
Table of Contents
- Why This Recipe Works
- Ingredients You’ll Need
- Step-by-Step Instructions
- Pro Tips
- Variations & Substitutions
- FAQ
- Final Thoughts
Why This Recipe Works
Okay, so what makes this one-pot creamy garlic pasta so amazing? Here are a few reasons why it’s about to become your new go-to recipe:
- Minimal Cleanup: Seriously, one pot! That means fewer dishes to wash, which is always a win in my book. Everything cooks together in a single pot, from the pasta to the sauce.
- Quick & Easy: As the title suggests, this dish is ready in just 20 minutes. Perfect for those nights when you’re short on time and need a satisfying meal fast.
- Customizable: This recipe is a blank canvas. You can easily add your favorite vegetables, proteins, or spices to make it your own. Feel free to experiment and get creative!
Ingredients You’ll Need
Here’s what you’ll need to whip up this creamy garlic pasta:
- 8 oz pasta: Spaghetti, linguine, or penne work best. I usually go for spaghetti because it’s what I always have on hand.
- 1 tablespoon butter or olive oil: Use whichever you prefer. Butter will give the pasta a richer flavor, while olive oil keeps it a bit lighter.
- 4 cloves garlic: Minced. And don’t be shy with the garlic! It’s what gives this pasta its signature flavor.
- 2 cups milk: Whole milk is preferred for the creamiest results, but you can use any milk you have on hand. Even non-dairy milk works!
- 1 cup water: Or as needed to just cover the pasta. You might need a little more or less depending on the shape of your pasta.
- ¾ cup freshly grated Parmesan cheese: Freshly grated is key here. It melts better and has a much richer flavor than the pre-shredded stuff.
- ½ teaspoon salt: Or to taste. Remember, you can always add more salt, but you can’t take it away!
- ¼ teaspoon black pepper: Freshly ground is always best.
- 1 teaspoon Italian seasoning: This adds a nice depth of flavor to the pasta.
- Optional: 2 tablespoons cream cheese or sour cream: For extra creaminess. This is totally optional, but it does take the pasta to the next level.
- Optional: garnish: Chopped parsley or basil. Fresh herbs add a pop of color and flavor.
Step-by-Step Instructions
Alright, let’s get cooking! Here’s how to make this one-pot creamy garlic pasta:
- Combine ingredients: In a large pot or Dutch oven, combine the pasta, butter (or olive oil), minced garlic, milk, water, Parmesan cheese, salt, pepper, and Italian seasoning.
- Cook the pasta: Bring the mixture to a boil over medium-high heat. Once boiling, reduce the heat to medium and cook, stirring frequently, until the pasta is cooked through and the sauce has thickened. This should take about 15-20 minutes. If the sauce becomes too thick before the pasta is cooked, add a little more water.
- Stir in cream cheese (optional): If using cream cheese or sour cream, stir it in during the last few minutes of cooking until it’s melted and the sauce is extra creamy. This adds richness similar to the cheesy garlic sauce we all enjoy.
- Serve: Remove the pot from the heat and let the pasta sit for a minute or two to allow the sauce to thicken further. Garnish with chopped parsley or basil, if desired.
- Enjoy: Serve immediately and enjoy every creamy, garlicky bite! For a protein boost, consider pairing it with creamy garlic chicken.
Pro Tips
Here are a few tips to help you make the perfect one-pot creamy garlic pasta every time:
- Don’t overcook the pasta: Keep a close eye on the pasta while it’s cooking. You want it to be al dente, not mushy. Start checking for doneness around the 15-minute mark.
- Stir frequently: Stirring the pasta frequently prevents it from sticking to the bottom of the pot and ensures that the sauce cooks evenly.
- Adjust the sauce: If the sauce is too thick, add a little more milk or water until it reaches your desired consistency. If the sauce is too thin, continue cooking it for a few more minutes, stirring constantly, until it thickens up.
- Grate your own cheese: Pre-shredded cheese often contains cellulose, which can prevent it from melting properly. Freshly grated Parmesan cheese melts beautifully and has a much better flavor.
Variations & Substitutions
Want to switch things up a bit? Here are a few variations and substitutions you can try:
- Add vegetables: Toss in some chopped broccoli, spinach, mushrooms, or bell peppers for added nutrients and flavor. Add them to the pot along with the pasta and other ingredients.
- Add protein: Cooked chicken, shrimp, or sausage would be delicious additions to this pasta. Add them during the last few minutes of cooking to heat them through. You could even try adding ground beef, similar to garlic butter pasta.
- Spice it up: Add a pinch of red pepper flakes to the pot for a little heat.
- Use different cheese: Instead of Parmesan cheese, try using Pecorino Romano, Asiago, or a blend of Italian cheeses.
- Make it vegan: Use plant-based milk, vegan Parmesan cheese, and olive oil instead of butter.
- Add a tomato twist: For a creamy tomato garlic pasta variation, add a can of diced tomatoes or a few tablespoons of tomato paste to the pot along with the other ingredients.
FAQ
- Can I use a different type of pasta?
- Yes, you can use any type of pasta you like. Just keep in mind that different types of pasta may require slightly different cooking times. Adjust the amount of water accordingly.
- Can I make this recipe ahead of time?
- While this pasta is best served immediately, you can make it ahead of time and reheat it. The sauce may thicken as it sits, so you may need to add a little more milk or water when reheating.
- Can I freeze this pasta?
- I don’t recommend freezing this pasta, as the sauce may separate when thawed. It’s best to make it fresh.
- Is this recipe gluten-free?
- No, this recipe is not gluten-free as written. However, you can easily make it gluten-free by using gluten-free pasta.
Final Thoughts
So there you have it—my One Pot Creamy Garlic Pasta recipe. I hope you’ll give this recipe a try. It’s simple, delicious, and perfect for those busy weeknights when you need a quick and satisfying meal. Plus, it’s a great base recipe that you can customize to your liking. Let me know in the comments how you liked it!
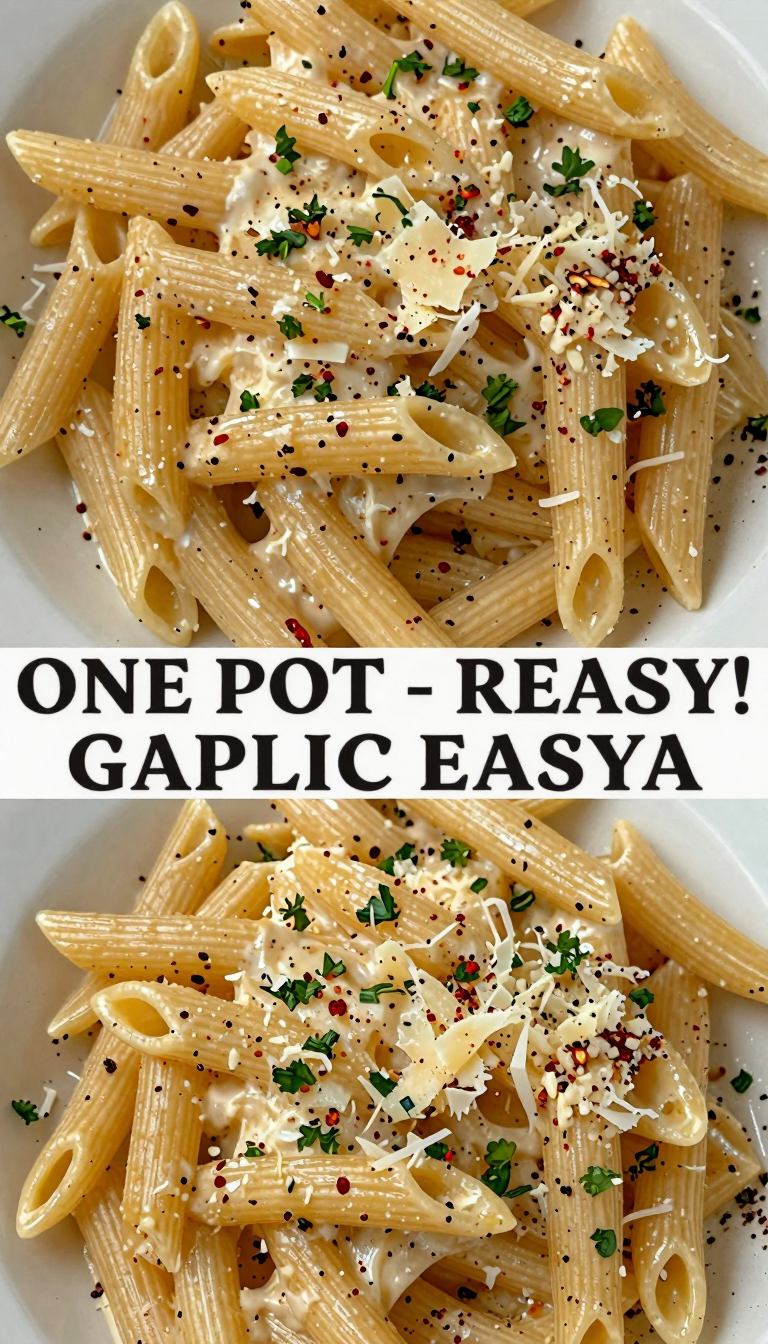
One Pot Creamy Garlic Pasta (Just 20 Minutes!)
Ingredients
Pasta
- 8 oz pasta (spaghetti, linguine, or penne)
Base
- 1 tablespoon butter or olive oil
- 4 cloves garlic (minced)
- 2 cups milk (whole preferred, or use any you have)
- 1 cup water (or as needed to just cover the pasta)
Seasoning
- 0.75 cup freshly grated Parmesan cheese
- 0.5 teaspoon salt (or to taste)
- 0.25 teaspoon black pepper
- 1 teaspoon Italian seasoning
Optional
- 2 tablespoons cream cheese or sour cream (for extra creaminess)
garnish
- Chopped parsley or basil
Notes
Loved this recipe? Save it to your favorite Pinterest board so you can easily find it later! ✨


")