Author

Ava

Browsing

Welcome to the World of Stuffed Shells

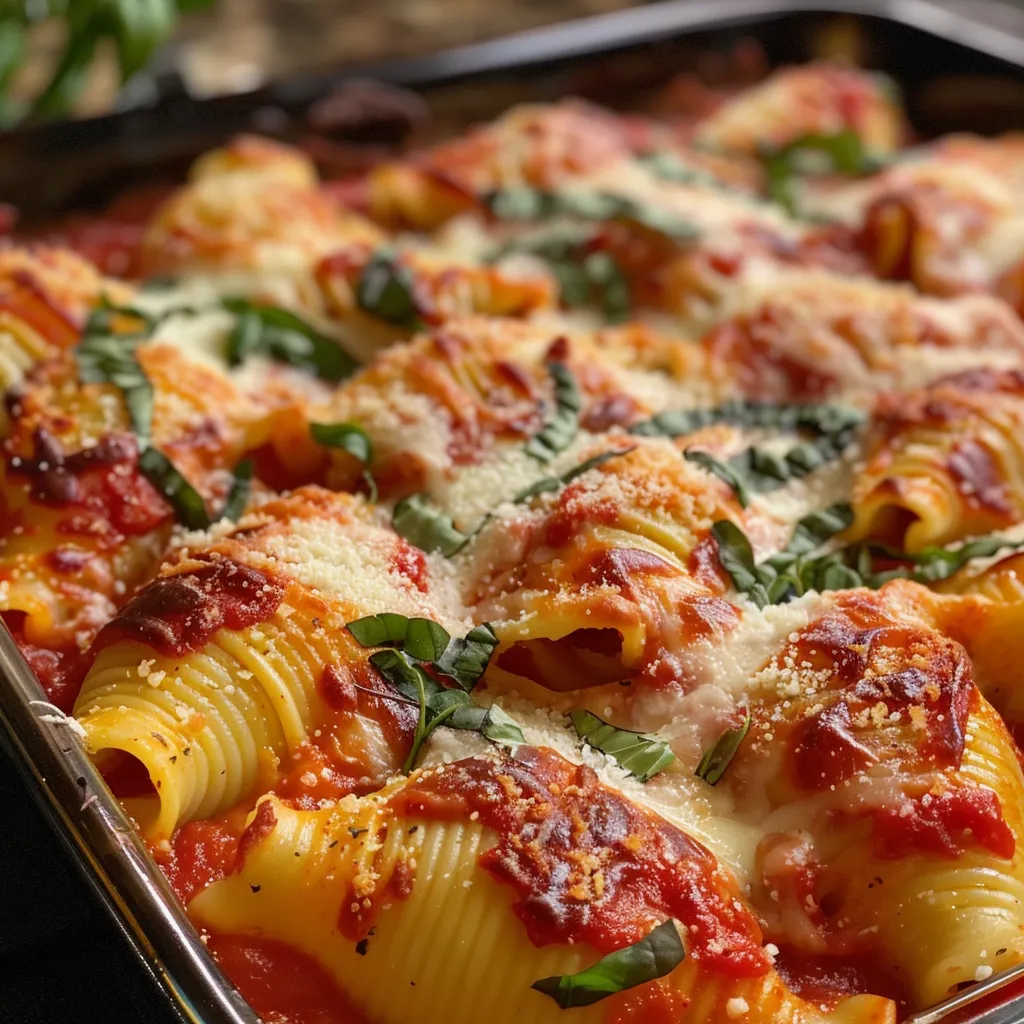
Ah, stuffed shells! Just the mention of this comforting dish makes my heart flutter like a freshly baked loaf of bread. If you’ve ever found yourself longing for a cozy, satisfying meal that brings back memories of family dinners, you’re in the right place. These stuffed pasta shells are filled with a creamy ricotta mixture, topped with zesty marinara, and baked to golden perfection. Who could resist?

In this article, we’ll dive deep into why you’ll love this recipe, explore delicious variations, and equip you with expert tips to ensure your stuffed shells turn out perfectly every time. Ready to fill your kitchen with the enchanting aroma of baked cheese? Let’s get started!

Why You’ll Love This Recipe

  • Comfort in Every Bite: These stuffed shells are the epitome of comfort food. Each bite offers a delightful combination of creamy, savory, and tangy flavors that will warm your soul.
  • Simple Yet Impressive: Perfect for weeknight dinners or special occasions, this dish is both easy to prepare and visually stunning, guaranteed to impress your guests.
  • Flexible Ingredients: You can easily customize the filling or sauce based on your preferences or what you have on hand, making it a versatile option for any meal.
  • Make Ahead Convenience: Prepare these shells in advance, pop them in the oven when you’re ready, and enjoy a hassle-free dinner.
  • Kid-Friendly Fun: Get the little ones involved! Stuffing the shells can be a fun kitchen activity for children, making it a family affair.

Ingredients Needed for Stuffed Shells

Before we roll up our sleeves, let’s gather what we need! Here’s a detailed breakdown of the essential ingredients for our stuffed shells recipe:

  • 12 jumbo pasta shells: These large shells are perfect for holding the creamy filling. You can find them in any grocery store.
  • 1 cup ricotta cheese: This creamy cheese is the heart of our filling, providing a rich, smooth texture.
  • 1 cup shredded mozzarella cheese: Melty mozzarella adds the gooey goodness we all love.
  • 1/2 cup grated Parmesan cheese: For that salty, nutty flavor, Parmesan is a must. Feel free to use freshly grated for an extra boost!
  • 1 large egg: This binds the filling together, ensuring it holds its shape.
  • 1/4 cup chopped fresh basil: Fresh herbs elevate the dish with a burst of flavor. You could also use parsley or spinach.
  • 2 cups marinara sauce: Whether store-bought or homemade, marinara is the perfect complement to our stuffed shells.
  • Salt and pepper to taste: Simple seasonings make a world of difference.
  • 1 tsp garlic powder: For that aromatic kick, garlic powder is a flavorful addition.

How to Prepare the Stuffed Shells

Side view of juicy jumbo stuffed shells topped with melted mozzarella and fresh basil.

Now that we have everything ready, let’s dive into the cooking process! Follow these easy steps to create your masterpiece:

  • Preheat the oven: Set your oven to 375°F (190°C) so it’s hot and ready for our delicious shells.
  • Boil the pasta shells: Cook the jumbo pasta shells in salted water for about 9 minutes until they’re al dente (firm to the bite). Drain and set them aside.
  • Make the cheese filling: In a mixing bowl, combine the ricotta, half the mozzarella, Parmesan, egg, chopped basil, garlic powder, salt, and pepper. Mix well until smooth.
  • Stuff each shell: Generously fill each cooked shell with the cheese mixture. Don’t be shy—stuff them full!
  • Prepare the baking dish: Spread a thin layer of marinara sauce in a large baking dish. This prevents sticking and adds flavor.
  • Arrange the stuffed shells: Place the filled shells in the dish, then cover them with the remaining marinara sauce and sprinkle the rest of the mozzarella on top.
  • Cover and bake: Cover the dish with foil and bake for 25 minutes. Then, uncover and bake an additional 10 minutes until bubbly and golden.

Pro Tips for Perfect Stuffed Shells

To ensure your stuffed shells turn out perfectly every time, here are some expert insights:

  • Use fresh ingredients: Fresh herbs and quality cheese make a noticeable difference in flavor.
  • Don’t overcook the pasta: Remember, the shells will continue to cook in the oven, so aim for al dente.
  • Let them rest: Allow the shells to cool for a few minutes before serving. This helps the filling set up a bit.
  • Experiment with flavors: Try adding cooked spinach, sun-dried tomatoes, or even cooked ground meat to the cheese filling for a twist.
  • Make it saucy: If you love saucy dishes, don’t hesitate to add more marinara sauce on top of the shells during baking.
  • Use a baking dish with high sides: This prevents the sauce from bubbling over and makes for easier cleanup.
  • Double the recipe: These shells freeze beautifully, making them perfect for meal prep or unexpected guests.
  • Grate your cheese: Freshly grated cheese melts better and tastes superior than pre-packaged shredded cheese.

Common Mistakes and Troubleshooting

Even the best chefs have their off days! Here are some common pitfalls and how to avoid them:

  • Filling spills out: Ensure you don’t overstuff the shells and seal the baking dish well with foil during the first bake.
  • Dry filling: Adding a splash of cream or an extra egg can help keep your filling moist and creamy.
  • Shells breaking: Handle the shells gently to avoid breaking them. If they do crack, don’t stress! Just fill them as best as you can.

Delicious Variations

Want to switch things up? Here are some fun variations you can try:

  • Spinach and Ricotta: Add sautéed spinach to the cheese mixture for a nutritious twist.
  • Meat Lovers: Incorporate cooked ground beef or Italian sausage into the filling for a heartier dish.
  • Vegetable Medley: Mix in chopped bell peppers, mushrooms, or zucchini for extra veggies in your meal.
  • Buffalo Chicken: For a spicy kick, use shredded buffalo chicken instead of the traditional filling.

Storage and Make-Ahead Instructions

These stuffed shells are perfect for meal prep! Here’s how to store and reheat them:

  • Fridge: Store any leftovers in an airtight container in the fridge for up to 3 days.
  • Freezer: You can freeze unbaked stuffed shells. Simply prepare them, cover tightly with plastic wrap, and freeze for up to 3 months.
  • Reheating: To reheat, bake from frozen at 375°F (190°C) for 45-50 minutes or until heated through.

Comprehensive FAQ

Let’s address some common questions you might have:

  • Can I use different pasta shapes? Yes! While jumbo shells are traditional, you could use manicotti or even large cannelloni.
  • Can I use homemade marinara sauce? Absolutely! Homemade sauce often tastes better and adds a personal touch.
  • What if I don’t have ricotta cheese? Cream cheese or cottage cheese can work as substitutes, though the flavor will differ slightly.
  • Can I make these shells vegan? Yes! Substitute the cheeses with vegan alternatives and skip the egg.
  • How can I make them spicy? Add crushed red pepper flakes to the cheese mixture or use spicy marinara sauce.
  • Can I add extra cheese on top? Definitely! More cheese equals more flavor! Just keep an eye on it to prevent burning.
  • How long can I store leftovers? Leftovers can be refrigerated for up to 3 days or frozen for up to 3 months.
  • What’s a good side dish to serve with stuffed shells? A fresh garden salad or garlic bread pairs beautifully with stuffed shells!

Nutritional Tips and Dietary Adaptations

Cooking for dietary needs? Here are some helpful tips:

  • Gluten-free: Use gluten-free pasta shells, which are widely available in stores.
  • Low-carb: Try substituting pasta with zucchini noodles for a lighter option.
  • High-protein: Add cooked chicken or turkey to the filling to boost protein content.

Essential Equipment for Stuffed Shells

Here’s a quick rundown of tools that will make your cooking process smoother:

  • Large pot: For boiling the pasta, ensure it has enough space for the shells to move around.
  • Baking dish: A deep, large baking dish works best for holding all your stuffed shells.
  • Mixing bowls: Use a large bowl for the filling and a smaller one for mixing seasonings.
  • Wooden spoon or spatula: Perfect for mixing your cheese filling.

Serving Suggestions

Now that your stuffed shells are ready, here are some delightful ways to serve them:

  • Garnish with fresh herbs: Sprinkle chopped basil or parsley on top for a pop of color and flavor.
  • Offer extra sauce: Serve with additional marinara sauce on the side for those who like it saucy.
  • Pair with a salad: A light Caesar or mixed greens salad makes for a refreshing contrast to the rich shells.

Conclusion: Your New Favorite Recipe Awaits!

There you have it! A comprehensive guide to crafting the ultimate stuffed shells that will have your family dreaming of dinner. With this recipe, every meal can be a celebration, filled with laughter, warmth, and deliciousness. So roll up your sleeves, gather your loved ones, and get ready to create some magic in your kitchen. Trust me, these stuffed shells are more than just a dish—they’re the heart of a home-cooked meal. Happy cooking, friends!

Stuffed Shells

Prep Time 15 minutes
Cook Time 35 minutes
Total Time 50 minutes
Servings 4 servings
Calories 450
A delicious baked pasta dish featuring jumbo shells filled with a cheesy herb mixture and topped with marinara sauce.

Ingredients

Pasta

  • 12 pieces jumbo pasta shells
  • 1 cup ricotta cheese
  • 1 cup shredded mozzarella cheese
  • 1/2 cup grated Parmesan cheese
  • 1 large egg
  • 1/4 cup chopped fresh basil
  • 2 cups marinara sauce
  • to taste Salt and pepper
  • 1 tsp garlic powder

Instructions 

  • Preheat oven to 375°F (190°C). Boil shells until al dente, then drain.
  • Mix ricotta, half the mozzarella, Parmesan, egg, basil, garlic powder, salt, and pepper.
  • Stuff shells with the cheese mixture and place in a baking dish with sauce.
  • Top with remaining sauce and mozzarella, cover, and bake for 25 minutes, then uncover and bake 10 more minutes.

Notes

You can prepare the dish ahead and refrigerate before baking for added convenience.
Calories: 450kcal
Cost: $15
Course: Main Course
Cuisine: Italian
Keyword: pasta

Why You’ll Want to Make This Dish

Let’s face it: we all have those days when we crave something special, yet simple to prepare. This maple glazed salmon paired with roasted sweet potatoes is just the ticket! Not only does it deliver a delightful explosion of flavors, but it also brings a touch of elegance to your dinner table without demanding hours of your time in the kitchen. Imagine the sweet aroma wafting through your home, inviting everyone in for a feast that feels indulgent yet is incredibly healthy. This dish turns an ordinary evening into a memorable experience, whether it’s a casual family dinner or an intimate gathering with friends.

A Closer Look at the Ingredients

Understanding the components of this dish will help you appreciate each layer of flavor and how they work together seamlessly. Let’s break it down:

  • Salmon Fillets: The star of the show! Salmon is not only rich in omega-3 fatty acids and protein, but its buttery texture makes it perfect for absorbing flavors. Whether you choose Atlantic, Sockeye, or King salmon, each variety brings its unique taste to the table.
  • Maple Syrup: This natural sweetener provides a rich, caramel-like flavor that’s hard to resist. It’s the secret to that glossy glaze that coats the salmon beautifully.
  • Soy Sauce: Adding a touch of umami, soy sauce balances the sweetness of the maple syrup, bringing depth to the dish.
  • Dijon Mustard: A little bit of this spicy condiment adds a tangy kick that elevates the overall flavor profile. It’s the unexpected twist that makes your taste buds dance!
  • Sweet Potatoes: Creamy, sweet, and nutritious, they roast to perfection, offering a delightful contrast to the salmon. Their natural sweetness pairs beautifully with the glaze.
  • Olive Oil, Salt, and Pepper: Simple seasonings that enhance the flavors of both the salmon and sweet potatoes.
  • Fresh Parsley: A sprinkle of fresh herbs adds a pop of color and a hint of freshness to the final presentation.

The Cooking Process: Step-by-Step

Delicious salmon with a shiny maple glaze, accompanied by cubed sweet potatoes.

Cooking this dish is as easy as it is delicious! Here’s how to bring it all together:

  1. Preheat the Oven: Set your oven to 400°F (200°C). This ensures your sweet potatoes roast evenly and the salmon cooks perfectly.
  2. Make the Glaze: In a small bowl, whisk together 1/4 cup pure maple syrup, 2 tablespoons soy sauce, and 1 tablespoon Dijon mustard. This three-ingredient glaze is where the magic happens—sweet, savory, and just a little tangy.
  3. Prepare the Sweet Potatoes: On a baking sheet, toss 2 medium sweet potatoes (peeled and cubed) with 1 tablespoon olive oil, and season with salt and pepper to taste. Make sure each piece is well-coated—this helps them caramelize beautifully in the oven.
  4. Roast the Sweet Potatoes: Place the baking sheet in the preheated oven and roast for about 20-25 minutes, or until they’re tender and slightly caramelized, turning halfway through.
  5. Cook the Salmon: While the sweet potatoes are roasting, heat a skillet over medium heat. Place the salmon fillets skin-side down in the skillet. Brush them generously with the maple glaze and cook for about 4-5 minutes on each side, or until they are cooked through and flake easily with a fork.
  6. Serve: Once everything is cooked, plate your salmon alongside the roasted sweet potatoes. Don’t forget to drizzle any remaining glaze over the salmon and sprinkle with fresh parsley for that finishing touch.

Pro Tips for Perfect Results

To ensure your meal turns out perfect every time, consider these tips:

  • Choose Quality Salmon: Opt for fresh, wild-caught salmon if possible. It makes a world of difference in flavor and texture.
  • Watch the Cooking Time: Salmon can cook quickly, so keep an eye on it to avoid overcooking. You want it to remain moist and flaky.
  • Don’t Crowd the Pan: When cooking salmon, ensure there’s enough space in the skillet for even cooking. If necessary, cook in batches.
  • Mix Up the Seasonings: Feel free to add garlic powder or paprika to your sweet potatoes for an additional layer of flavor.

Fun Variations and Substitutions

This recipe is versatile, so feel free to experiment! Here are a few ideas:

  • Different Vegetables: Swap sweet potatoes for other root vegetables like carrots or parsnips for a different flavor profile.
  • Add Citrus: A splash of orange or lemon juice in the glaze can brighten the flavors even more.
  • Herbs and Spices: Try adding fresh dill or thyme to the salmon for an aromatic twist.

Serving and Storage

Serving Suggestions

This dish is as beautiful as it is delicious, so consider plating it on rustic wooden boards or elegant white dinnerware. Pair it with a light green salad dressed in vinaigrette or steamed asparagus for a complete meal. For a drink pairing, a chilled glass of Sauvignon Blanc or Pinot Grigio complements the flavors beautifully.

Storing and Reheating Leftovers

Leftovers? No problem! Store any uneaten salmon and sweet potatoes in an airtight container in the refrigerator for up to three days. To reheat, place them on a baking sheet and warm them in an oven preheated to 275°F (135°C) for about 10-15 minutes. This gentle reheating method ensures your salmon remains moist and delicious.

FAQs

Can I use frozen salmon for this recipe?

Absolutely! Just be sure to thaw it completely in the refrigerator before cooking to ensure even cooking and optimal texture.

What can I serve with salmon and sweet potatoes?

Besides the suggested salad or asparagus, consider pairing it with quinoa, wild rice, or a side of steamed broccoli for a nutritious balance.

Can I make the glaze ahead of time?

Yes, the glaze can be prepared a day in advance and stored in the refrigerator. Just give it a good stir before using it on your salmon.

The Complete Recipe

Ingredients

  • 2 salmon fillets
  • 1/4 cup pure maple syrup
  • 2 tablespoons soy sauce
  • 1 tablespoon Dijon mustard
  • 1 tablespoon olive oil
  • 2 medium sweet potatoes, peeled and cubed
  • Salt and pepper to taste
  • Fresh parsley for garnish

Instructions

  1. Preheat the oven to 400°F (200°C).
  2. In a small bowl, mix together the maple syrup, soy sauce, and Dijon mustard to create the glaze.
  3. Place the cubed sweet potatoes on a baking sheet, drizzle with olive oil, and season with salt and pepper. Toss to coat.
  4. Roast the sweet potatoes in the oven for about 20-25 minutes, or until tender and slightly caramelized.
  5. While the sweet potatoes are roasting, heat a skillet over medium heat. Add the salmon fillets skin-side down.
  6. Brush the maple glaze over the salmon and cook for about 4-5 minutes on each side, or until the salmon is cooked through and flakes easily.
  7. Once the sweet potatoes are done, remove them from the oven and serve alongside the glazed salmon.
  8. Garnish with fresh parsley and enjoy your savory-sweet meal!

Cook and Prep Times

Prep time: 10 minutes | Cook time: 25 minutes | Total time: 35 minutes

Nutrition Information

This dish is a balanced meal packed with protein, healthy fats, and fiber, making it a nutritious choice for any day of the week.

Conclusion

There you have it—the perfect recipe for maple glazed salmon with roasted sweet potatoes. It’s simple, satisfying, and filled with flavors that dance on your taste buds. Whether you’re a seasoned cook or a kitchen novice, this dish will impress and delight everyone at your table. So why not give it a try this weekend? I’d love to hear how it turns out for you! Remember, cooking is all about creating joy, so have fun with it, and don’t hesitate to make it your own. Happy cooking, friends!

Enjoy maple glazed salmon with roasted sweet potatoes – a perfect mix of savory and sweet for … in 2025

Prep Time 10 minutes
Cook Time 25 minutes
Total Time 35 minutes
Servings 4 servings
Calories 450
Delight in this flavorful dish combining tender maple-glazed salmon with caramelized roasted sweet potatoes, perfect for a satisfying meal.

Ingredients

Protein

  • 2 fillets salmon fillets

Sauces & Condiments

  • 1/4 cup pure maple syrup
  • 2 tablespoons soy sauce
  • 1 tablespoon dijon mustard

Oils

  • 1 tablespoon olive oil

Vegetables

  • 2 medium sweet potatoes (peeled and cubed)
  • to taste salt and pepper

Garnish

  • for garnish fresh parsley (chopped)

Instructions 

  • Preheat oven to 400°F (200°C).
  • Mix maple syrup, soy sauce, and Dijon mustard to make the glaze.
  • Toss sweet potatoes with olive oil, salt, and pepper; roast for 20-25 minutes.
  • Heat a skillet over medium heat, cook salmon skin-side down, brush with glaze, and cook 4-5 minutes per side.
  • Serve salmon with roasted sweet potatoes, garnished with parsley.

Notes

Adjust seasoning as needed and enjoy!
Calories: 450kcal
Cost: $15
Course: Main Course
Cuisine: fusion
Keyword: Salmon

Loved this recipe? Save it to your favorite Pinterest board so you can easily find it later! It’s the perfect way to keep all your sweet ideas in one place. ✨

Eye-level shot of salmon drizzled with maple syrup, showcasing sweet potatoes and parsley.

Why You’ll Love This Ultimate Comfort Dish

When it comes to cozy meals that warm your heart and fill your belly, few dishes can rival the Ultimate Chicken Parmesan Gnocchi Bake. This delightful concoction marries the soft, pillowy texture of gnocchi with succulent, shredded chicken, all enveloped in a rich marinara sauce and topped with generous heaps of melted cheese. Imagine walking into your home after a long day, the enticing aroma wafting through your kitchen, inviting you to dig in. It’s not just a meal—it’s an experience! Perfect for family dinners, date nights, or even a cozy night in with friends, this dish is bound to steal the show at any gathering.

Overview of Key Ingredients

To create this cheesy masterpiece, you’ll need a handful of simple yet delicious ingredients:

  • 1 lb gnocchi: These delightful little dumplings are the star of the show, providing a tender, comforting base.
  • 2 cups cooked chicken, shredded: A great way to use up leftovers, the chicken adds protein and heartiness.
  • 2 cups marinara sauce: This rich sauce ties everything together, infusing the dish with classic Italian flavors.
  • 1 cup mozzarella cheese, shredded: The gooey goodness that melts beautifully on top, creating that perfect cheesy layer.
  • 1/2 cup parmesan cheese, grated: Adds a nutty, sharp flavor that elevates the dish.
  • 1 teaspoon Italian seasoning: A blend of herbs that brings a taste of Italy right to your kitchen.
  • 1 tablespoon olive oil: Just a drizzle for flavor and a lovely golden finish.
  • Salt and pepper to taste: Essential for enhancing the flavors in your dish.
  • Fresh basil for garnish: A touch of freshness that brightens up the whole dish.

Why This Recipe Stands Out

A savory dish of Ultimate Chicken Parmesan Gnocchi Bake, featuring a golden brown crust and fresh basil.

There are countless variations of baked pasta dishes, but what sets this Ultimate Chicken Parmesan Gnocchi Bake apart is its versatility and ease of preparation. This dish is not only satisfying but also incredibly quick to whip up—perfect for those busy weeknights when you want something comforting without spending hours in the kitchen. Plus, it’s a fantastic way to incorporate leftover chicken into a delightful meal that feels fresh and exciting. And let’s not forget about the joy of cheese! The melted mozzarella and parmesan create a deliciously gooey topping that makes every bite utterly irresistible.

Step-by-Step Instructions

Ready to dive into the magic of cooking? Let’s get started with the Ultimate Chicken Parmesan Gnocchi Bake!

  1. Preheat your oven: Set it to 375°F (190°C) so it’s nice and hot when your dish is ready.
  2. Cook the gnocchi: In a large pot of boiling salted water, cook the gnocchi according to package instructions. They are done when they float to the top. Drain and set aside.
  3. Combine the ingredients: In a large bowl, combine the cooked gnocchi, shredded chicken, marinara sauce, Italian seasoning, and half of the mozzarella cheese. Mix well until everything is evenly coated.
  4. Season to taste: Add salt and pepper according to your preference, giving it a little taste test to ensure it’s just right.
  5. Transfer to baking dish: Grease a baking dish and spread the gnocchi mixture evenly in it.
  6. Add the cheese: Top with the remaining mozzarella cheese and the grated parmesan cheese, spreading it out to cover the gnocchi.
  7. Drizzle with olive oil: This will help achieve that golden, crispy topping that everyone loves.
  8. Bake: Place in the preheated oven and bake for 25-30 minutes, or until the cheese is bubbly and golden brown.
  9. Cool and garnish: Once it’s out of the oven, let it cool for a few minutes. Garnish with fresh basil before serving.

Tips for the Perfect Bake

Cooking is all about experimentation and making it your own. Here are some tips to ensure your Ultimate Chicken Parmesan Gnocchi Bake turns out perfectly:

  • Don’t overcook the gnocchi: They should be al dente before mixing with other ingredients to prevent them from becoming mushy during baking.
  • Use quality marinara sauce: If you have the time, homemade sauce is fantastic, but a good store-bought brand works wonders too! A pinch of sugar can balance the acidity if needed.
  • Broil for a crispy finish: For that extra touch, broil the top for a couple of minutes at the end of baking to achieve a beautifully browned layer of cheese.
  • Experiment with spices: Feel free to add red pepper flakes for a spicy kick or some garlic powder for an extra depth of flavor.

Variations and Substitutions

This recipe is a canvas for creativity! Here are some ideas to switch things up:

  • Add vegetables: Sautéed spinach, bell peppers, or zucchini can be mixed in for added nutrition and flavor.
  • Meat alternatives: For a vegetarian version, swap out the chicken for mushrooms or a meat substitute.
  • Cheese variations: Experiment with different cheeses like provolone or gouda for a unique twist.
  • Gluten-free option: Make sure to use gluten-free gnocchi and ensure all other ingredients are gluten-free as well.

Equipment You’ll Need

Before you start, make sure you have the following kitchen gadgets:

  • A large pot for boiling the gnocchi.
  • A colander for draining.
  • A large mixing bowl for combining the ingredients.
  • A greased baking dish for the final bake.
  • A sharp knife and cutting board for any chopping.

Storage and Freezing Tips

If you happen to have leftovers (though we doubt you will), here’s how to store and enjoy them later:

  • Refrigeration: Store in an airtight container in the fridge for up to three days. Reheat in the oven or microwave until warmed through.
  • Freezing: You can freeze the assembled but unbaked dish for up to two months. Just cover it with foil and pop it in the freezer. When you’re ready to cook, bake it straight from the freezer, adding a few extra minutes to the cooking time.

FAQs About the Ultimate Chicken Parmesan Gnocchi Bake

Curious about the dish? Here are some common questions and answers:

  • Can I make this dish ahead of time? Absolutely! Prepare it up to the baking stage and refrigerate. When you’re ready, just pop it in the oven.
  • Is it suitable for gluten-free diets? Yes, just ensure you use gluten-free gnocchi and check your marinara sauce for gluten content.
  • What if I don’t have gnocchi? You can substitute with small pasta shapes like macaroni or cavatappi, although the texture will be different.
  • How do I store leftovers? Keep them in an airtight container in the refrigerator for up to three days, or freeze for longer storage.

Troubleshooting Common Issues

Even the best cooks encounter hiccups now and then. Here are some troubleshooting tips:

  • Dish too dry? Consider adding a little more marinara sauce before baking or a splash of chicken broth.
  • Cheese not browning? Make sure your oven is preheated, and consider broiling for a couple of minutes for that golden top.
  • Gnocchi mushy? Make sure you cook them only until they float and drain them well before mixing.

Final Thoughts

The Ultimate Chicken Parmesan Gnocchi Bake is not just a recipe; it’s a comforting hug on a plate that brings warmth and joy to any dinner table. It’s simple to prepare yet bursting with flavor, making it perfect for any occasion—from family gatherings to a quiet night in. So gather your loved ones, whip up this delightful dish, and watch as it quickly becomes a favorite in your home. Remember, cooking is all about sharing love and creating memories, one delicious bite at a time. Happy cooking, friends!

Ultimate Chicken Parmesan Gnocchi Bake Recipe

Prep Time 15 minutes
Cook Time 30 minutes
Total Time 45 minutes
Servings 4 servings
Calories 650
A hearty and cheesy baked gnocchi dish featuring tender chicken, marinara, and melted cheeses, perfect for a comforting meal.

Ingredients

Gnocchi

  • 1 lb gnocchi
  • 2 cups cooked chicken, shredded
  • 2 cups marinara sauce
  • 1 cup mozzarella cheese, shredded
  • 0.5 cup parmesan cheese, grated
  • 1 teaspoon italian seasoning
  • 1 tablespoon olive oil
  • to taste salt and pepper
  • for garnish fresh basil

Instructions 

  • Preheat oven to 375°F (190°C).
  • Cook gnocchi until they float, then drain.
  • Mix gnocchi, chicken, marinara, Italian seasoning, and half the cheese.
  • Transfer to a greased dish, top with remaining cheese, drizzle olive oil.
  • Bake 25-30 mins until bubbly and golden, then garnish with basil.

Notes

For extra flavor, add a sprinkle of red pepper flakes or extra basil before serving.
Calories: 650kcal
Cost: $15
Course: Main Course
Cuisine: Italian-American
Keyword: bake, Chicken, Gnocchi

Loved this recipe? Save it to your favorite Pinterest board so you can easily find it later! It’s the perfect way to keep all your sweet ideas in one place. ✨

An appetizing serving of chicken and gnocchi baked in marinara with cheese, presented in a rustic dish.

Why You’ll Love This Dish

Ah, the slow cooker! It’s like having a kitchen fairy that works its magic while you go about your day. And when it comes to comfort food, few dishes are as delightful as a bowl of Slow Cooker Honey Garlic Salmon. This recipe combines the rich, flaky goodness of salmon with a sweet and savory honey garlic sauce that makes you feel warm and fuzzy inside. It’s perfect for busy weeknights or lazy Sundays when you want something wholesome without spending hours in the kitchen.

Imagine coming home to the tantalizing aroma of honey and garlic wafting through your home. You walk into the kitchen, and there it is—a fragrant bowl of happiness, ready to be devoured. This dish not only satisfies your cravings but also nourishes your soul, making it a go-to recipe for any occasion. Plus, it’s a breeze to make, which means more time enjoying the meal and less time stressing in the kitchen!

What You’ll Need for a Wholesome Bowl of Happiness

Complete Ingredients List

Deliciously plated Slow Cooker Honey Garlic Salmon Bowl featuring salmon fillets and garnishes.
  • 4 salmon fillets
  • 1/4 cup honey
  • 1/4 cup soy sauce
  • 3 cloves garlic, minced
  • 1 tablespoon fresh ginger, grated
  • 1 tablespoon sesame oil
  • 1 teaspoon black pepper
  • 2 cups cooked rice
  • 1 cup steamed broccoli
  • 1/4 cup green onions, sliced
  • Sesame seeds for garnish

Ingredient Substitutions & Alternatives

Cooking should be flexible, and sometimes you might find yourself missing an ingredient or two. No worries! Here are some substitutions:

  • Honey: If you’re looking for a vegan option, feel free to swap it with maple syrup.
  • Soy Sauce: For a gluten-free alternative, use tamari.
  • Sesame Oil: Can be replaced with olive oil if you prefer a lighter flavor.
  • Rice: Experiment with quinoa or cauliflower rice for a low-carb twist.

How to Create This Culinary Masterpiece

Now, let’s dive into the steps to whip up this delicious Slow Cooker Honey Garlic Salmon Bowl.

Step 1: Whip Up the Honey Garlic Sauce

In a medium bowl, whisk together the honey, soy sauce, minced garlic, grated ginger, sesame oil, and black pepper. This sauce is the heart of the dish, so make sure all the flavors meld beautifully.

Step 2: Prep the Salmon

Place your gorgeous salmon fillets into the slow cooker. You want them to be skin-side down for optimal cooking. Pour that luscious honey garlic sauce over the fillets, ensuring every piece is generously coated. Trust me; this is where the magic begins!

Step 3: Let the Slow Cooker Do Its Thing

Cover the slow cooker and set it on low for 2-3 hours. The cooking time may vary depending on the thickness of your fillets, so keep an eye on them. You’ll know they’re ready when they flake easily with a fork. The anticipation is half the fun!

Step 4: Prepare the Rice and Broccoli

While the salmon is cooking, prepare your rice according to package instructions if you haven’t done so already. And don’t forget the broccoli! Steaming it for a few minutes will give you that vibrant green color and crunch that complements the salmon perfectly.

Step 5: Flake and Serve

Once the salmon is cooked, carefully remove it from the slow cooker. Use a fork to flake it into large, beautiful pieces. You want those tender morsels to be ready for the grand assembly!

Step 6: Assemble Your Bowl

Grab your bowls! Start with a generous scoop of cooked rice, followed by a heap of steamed broccoli. Top it off with the flaked salmon, and don’t be shy—drizzle some of that leftover sauce over the top. It’s the finishing touch that elevates this dish to pure bliss!

Step 7: Garnish for Glory

Finally, sprinkle sliced green onions and sesame seeds over your bowl for that extra flair. Not only do they add a pop of color, but they also bring in some crunch and flavor!

Serving Suggestions for Your Honey Garlic Salmon Bowl

How to Serve

This dish is a meal in itself, but if you want to take it up a notch, consider serving it with a side of pickled ginger or a light cucumber salad. The acidity will balance the sweetness of the honey garlic sauce beautifully.

Perfect Pairings & Toppings

  • Add a sprinkle of chili flakes for a bit of heat.
  • Top with avocado slices for creaminess.
  • Consider adding a soft-boiled egg for a protein boost.

Storing & Preserving Your Creation

Best Storage Methods

If you have leftovers (which I highly doubt!), store them in an airtight container in the refrigerator for up to 3 days. Just keep the salmon and rice separate to maintain texture.

Reheating or Freezing Tips

To reheat, simply warm the salmon and rice in the microwave or on a stovetop until heated through. If you want to freeze it, place the salmon and sauce in a freezer-safe container for up to 2 months. Thaw it in the refrigerator before reheating.

Tips for Perfect Honey Garlic Salmon Every Time

Avoid These Common Mistakes

  • Don’t overcook the salmon! It should be tender and flaky, not dry and tough.
  • Make sure the sauce is well-balanced; if it’s too sweet, a dash of soy sauce can help.

Helpful Tricks for Success

  • Marinate the salmon for 30 minutes before cooking for an extra flavor boost.
  • Use fresh ingredients for the best taste—fresh garlic and ginger make all the difference!

Fun Variations of Your Honey Garlic Salmon Bowl

Flavor Variations or Recipe Twists

Feeling adventurous? Try adding different vegetables like bell peppers, snap peas, or even carrots for color and crunch. You can also switch up the sauce with teriyaki or sweet chili for a new twist on flavors!

Dietary-Friendly Adjustments

This recipe is quite versatile. For a low-carb option, serve the salmon on a bed of cauliflower rice instead of regular rice. You can easily make this dish gluten-free by using tamari instead of soy sauce.

FAQs

What If My Salmon Doesn’t Turn Out Right?

No worries! If your salmon is overcooked, it may be dry. Make sure to check it at the 2-hour mark. If it’s undercooked, simply cook it a bit longer until it flakes easily.

Can I Prepare This in Advance?

Absolutely! You can make the sauce and marinate the salmon a day ahead. Just store them separately in the fridge until you’re ready to cook.

What Ingredients Can I Swap?

You can replace honey with maple syrup for a vegan version. For a gluten-free option, use tamari, and feel free to add your favorite vegetables!

Conclusion

Cooking is all about creating memories, and this Slow Cooker Honey Garlic Salmon Bowl is sure to become a cherished recipe in your repertoire. With its perfect blend of sweet and savory flavors, it’s not just a meal; it’s an experience that brings joy to your table. Whether you’re cooking for family, friends, or just treating yourself, this dish is bound to impress and satisfy. So, roll up your sleeves, grab those ingredients, and let the magic begin in your kitchen. Enjoy every delicious bite!

Slow Cooker Honey Garlic Salmon Bowl

Prep Time 10 minutes
Cook Time 3 hours
Total Time 3 hours 10 minutes
Servings 4 servings
Calories 450
A delicious and easy-to-make salmon bowl featuring a sweet honey garlic sauce, perfect for a quick dinner.

Ingredients

Protein

  • 4 fillets salmon fillets
  • 1/4 cup honey
  • 1/4 cup soy sauce
  • 3 cloves garlic, minced
  • 1 tablespoon fresh ginger, grated
  • 1 tablespoon sesame oil
  • 1 teaspoon black pepper

Carbohydrates

  • 2 cups cooked rice
  • 1 cup steamed broccoli
  • 1/4 cup green onions, sliced

Garnish

  • to taste sesame seeds (for garnish)

Instructions 

  • Whisk honey, soy sauce, garlic, ginger, sesame oil, and pepper.
  • Place salmon in slow cooker and pour sauce over.
  • Cook on low for 2-3 hours until flaky.
  • Flake salmon and serve over rice and broccoli, drizzle with sauce, and garnish with green onions and sesame seeds.

Notes

Use fresh salmon for best flavor and ensure not to overcook.
Calories: 450kcal
Cost: $15
Course: Main Course
Cuisine: American
Keyword: Salmon

Loved this recipe? Save it to your favorite Pinterest board so you can easily find it later! It’s the perfect way to keep all your sweet ideas in one place. ✨

An appetizing Slow Cooker Honey Garlic Salmon Bowl showcasing salmon, steamed broccoli, and rice.

Why You’ll Love This Dish

When it comes to creating a cozy dinner that warms both the body and soul, my Spicy Hot Honey Chicken Bowl is a total game-changer. Imagine a bowl filled with fluffy rice, tender chicken glazed in a sweet and spicy honey sauce, and colorful, sautéed vegetables. It’s the perfect marriage of flavors and textures that not only satisfies your hunger but also brings a comforting vibe to your table.

This dish is not just a meal; it’s an experience. The crispy chicken, kissed by the sweet heat of hot honey, paired with the crunch of fresh veggies, creates a balance that will have you craving it again and again. Each bite is an explosion of flavor, and it’s all made in one skillet, which means less cleanup and more time to enjoy your meal. What’s not to love?

Overview

Let’s dive into what makes this Spicy Hot Honey Chicken Bowl a must-try:

  • Quick and Easy: Ready in just about 30 minutes, it’s perfect for busy weeknights.
  • Customizable: Use your favorite veggies or grains to make it your own.
  • Healthier Options: By incorporating fresh ingredients and healthy swaps, this dish can fit into various dietary needs.
  • Family-Friendly: The sweet and spicy flavor is a hit with both kids and adults.

Ingredients You’ll Need

A vibrant Spicy Hot Honey Chicken Bowl with tender chicken, mixed vegetables, and garnished with green onions and sesame seeds.

To create this delightful dish, here’s what you’ll need:

  • 2 boneless chicken breasts
  • 1 cup cooked rice (I recommend jasmine rice for its fragrant flavor)
  • 1/4 cup hot honey
  • 1 tablespoon olive oil
  • 1 teaspoon salt
  • 1/2 teaspoon black pepper
  • 1 teaspoon garlic powder
  • 1 teaspoon paprika
  • 1 cup mixed vegetables (like broccoli, bell peppers, and carrots)
  • 2 green onions, sliced
  • Sesame seeds for garnish

How to Make the Spicy Hot Honey Chicken Bowl

Ready to get cooking? Follow these simple steps to create your own Spicy Hot Honey Chicken Bowl:

  1. Start by preheating a skillet over medium heat and adding the olive oil.
  2. While the skillet is heating, season the chicken breasts with salt, pepper, garlic powder, and paprika. This blend adds a depth of flavor that pairs perfectly with the hot honey.
  3. Once the skillet is hot, cook the chicken for about 6-7 minutes on each side, or until it’s cooked through and golden brown on the outside. You want that crispy exterior!
  4. After cooking, remove the chicken from the skillet and drizzle it with hot honey, allowing it to coat the chicken generously. Let it rest for a moment; this will help the flavors meld.
  5. In the same skillet, toss in your mixed vegetables and sauté until they’re tender, about 5 minutes. This step allows you to soak up any leftover flavors from the chicken.
  6. Now it’s time to build your bowl! Start with a bed of cooked rice, then layer on those sautéed veggies and the sliced chicken. Don’t be shy with that hot honey drizzle; it’s the star of the show!
  7. Finally, garnish with sliced green onions and a sprinkle of sesame seeds before serving. Voila, your Spicy Hot Honey Chicken Bowl is ready to impress!

Helpful Tips

  • Cooking Jasmine Rice: For perfectly fluffy jasmine rice, rinse it under cold water before cooking to remove excess starch. This prevents it from becoming sticky!
  • Vegetable Variations: Feel free to play with the mixed vegetables. Roasted broccoli, snap peas, or even a bit of shredded cabbage can add an exciting twist.
  • Healthy Swaps: For a low-carb version, try swapping the rice for cauliflower rice or quinoa. It’s a great way to keep things light without sacrificing flavor.

Variations

This recipe is super versatile! Here are a few variations to consider:

  • Protein Swaps: Feel free to use thighs instead of breasts for a juicier option, or even grilled shrimp for a seafood twist.
  • Spice Level: Adjust the heat by adding more or less hot honey, or even a splash of your favorite hot sauce if you’re feeling daring.
  • Grain Alternatives: Experiment with other grains like brown rice, quinoa, or even couscous for a different texture and flavor profile.

Equipment Needed

To whip up this delightful dish, you’ll need a few basic kitchen tools:

  • A large skillet or frying pan
  • A sharp knife for slicing the chicken and vegetables
  • A cutting board
  • A spatula or tongs for flipping and serving

Storage and Freezing

If you happen to have leftovers (which I doubt because it’s that good), you can store them in an airtight container in the fridge for up to 3 days. Reheat in the microwave or on the stovetop until warmed through. If you want to freeze your bowl, I recommend freezing the chicken and veggies separately from the rice to maintain texture. They can last in the freezer for up to 2 months.

FAQs

Here are some common questions about this recipe:

  • Can I make this dish in the air fryer? Absolutely! Cook the seasoned chicken in the air fryer at 400°F (200°C) for 12-15 minutes, flipping halfway through, and then drizzle with hot honey.
  • What’s the best rice to use? While jasmine rice is my go-to, brown rice, basmati, or even quinoa all work wonderfully.
  • Is this dish gluten-free? Yes, just ensure you use gluten-free soy sauce or tamari for the hot honey sauce.

Troubleshooting

If your chicken isn’t browning properly, check to make sure your skillet is hot enough before adding the chicken. Also, avoid overcrowding the pan, as this can lead to steaming instead of searing. If your hot honey sauce is too thick, a splash of water or vinegar can help loosen it up.

Conclusion

My Spicy Hot Honey Chicken Bowl is more than just a meal; it’s a dish that brings warmth and joy to your dinner table. With its delightful balance of sweet and spicy, vibrant veggies, and fluffy rice, it’s sure to become a family favorite. The best part? You can make it your own with various ingredients and flavors. So, whether you’re cooking for a crowd or enjoying a cozy night in, this bowl is here to bring a little magic to your kitchen. Grab your ingredients, and let’s make some unforgettable memories together!

Spicy Hot Honey Chicken Bowl

Prep Time 10 minutes
Cook Time 20 minutes
Total Time 30 minutes
Servings 4 servings
Calories 550
A flavorful and spicy chicken bowl featuring tender chicken, sweet hot honey, and colorful vegetables, perfect for a quick and satisfying meal.

Ingredients

Protein

  • 2 pieces boneless chicken breasts

Carbohydrate

  • 1 cup cooked rice

Sauce & Flavorings

  • 1/4 cup hot honey
  • 1 tablespoon olive oil
  • 1 teaspoon salt
  • 1/2 teaspoon black pepper
  • 1 teaspoon garlic powder
  • 1 teaspoon paprika

Vegetables

  • 1 cup mixed vegetables (broccoli, bell peppers, carrots)

Garnish

  • 2 green onions sliced green onions
  • sesame seeds for garnish sesame seeds

Instructions 

  • Heat olive oil in a skillet over medium heat.
  • Season chicken with salt, pepper, garlic powder, and paprika, then cook for 6-7 minutes per side.
  • Remove chicken, drizzle with hot honey, and sauté vegetables until tender.
  • Layer rice, vegetables, and sliced chicken in a bowl, then drizzle remaining hot honey.
  • Garnish with green onions and sesame seeds before serving.

Notes

For extra flavor, marinate the chicken in hot honey for 15 minutes before cooking.
Calories: 550kcal
Cost: $15
Course: Main Course
Cuisine: American
Keyword: Chicken, honey, Spicy

Loved this recipe? Save it to your favorite Pinterest board so you can easily find it later! It’s the perfect way to keep all your sweet ideas in one place. ✨

A beautifully arranged Spicy Hot Honey Chicken Bowl showcasing glistening honey and rich textures in a cozy setting.

Experience the Comfort of Chicken Alfredo Bake

Welcome to my kitchen! Today, we’re diving into a dish that warms the soul and brings everyone together: the Chicken Alfredo Bake. This creamy, cheesy casserole is not just a meal; it’s an experience that invites laughter, love, and a little bit of magic around the dinner table. With tender chicken, rich cheeses, and perfectly cooked penne rigata, this recipe is destined to become your family’s new favorite. So, grab your apron, and let’s make some culinary memories!

Why You’ll Love This Recipe

Wondering why you should roll up your sleeves for this Chicken Alfredo Bake? Here are five irresistible reasons:

  • Comfort Food Classic: This dish is the epitome of comfort food, combining creamy alfredo sauce with hearty chicken and pasta.
  • One-Pan Wonder: Everything comes together in one baking dish, making cleanup a breeze and allowing you to savor precious moments with loved ones.
  • Customizable: You can tweak the ingredients to suit your tastes, whether you prefer a bit of spice or a veggie-packed version!
  • Make Ahead Friendly: Prepare it in advance and simply pop it in the oven when you’re ready to eat.
  • Guaranteed Leftovers: This recipe yields a generous portion, ensuring delicious leftovers that taste even better the next day.

Ingredient Breakdown

Before we start cooking, let’s gather our ingredients. Here’s what you’ll need for the ultimate Chicken Alfredo Bake:

  • 16 ounces penne rigata pasta: This shaped pasta holds the creamy sauce beautifully, but you can use any pasta you love.
  • 6 tablespoons butter: For a rich, flavorful base.
  • 2 tablespoons all-purpose flour: This will help thicken our sauce.
  • 1 tablespoon minced garlic: Adds a fragrant kick to the dish.
  • 4 cups heavy whipping cream: The secret to a luscious, creamy sauce.
  • 1/2 teaspoon salt: Enhances the flavors.
  • 1 teaspoon garlic salt (optional): For an extra layer of garlic goodness.
  • 1/2 teaspoon white pepper: Adds a subtle heat and depth.
  • 2 cups shredded Parmesan cheese: A must-have for that cheesy goodness!
  • 1 1/2 cups mozzarella cheese: For a melty, gooey texture.
  • 2 ounces cream cheese, softened: Ensures extra creaminess.
  • 2–3 chicken breasts, cooked and diced: Use leftover chicken or rotisserie chicken for convenience.
  • Chopped fresh parsley for garnish (optional): A pop of color and freshness to finish off your dish.

Expert Tips for the Best Chicken Alfredo Bake

Side view of a delicious Chicken Alfredo Bake, showcasing gooey cheese and diced chicken.

As with any recipe, there are always ways to elevate your dish. Here are some pro tips to ensure your Chicken Alfredo Bake is a showstopper:

  • Don’t Overcook the Pasta: Cook the pasta until al dente; it will continue to cook in the oven.
  • Make a Roux: When you melt the butter and stir in the flour, make sure to cook it enough to eliminate the raw flour taste.
  • Stir Consistently: When adding the cream and cheeses, stir until completely melted to avoid clumps.
  • Adjust Seasonings: Taste your sauce before mixing in the pasta. Feel free to add more salt or garlic to suit your palate!
  • Layer Your Cheese: For an extra cheesy top, reserve some cheese to sprinkle on just before baking.
  • Cover with Foil: During the first half of baking, cover the dish with foil to prevent excessive browning.
  • Garnish Generously: Fresh parsley not only adds color but also a burst of freshness!
  • Serve with Love: The best ingredient is always a little love—serve it up with a smile!

Avoiding Common Mistakes

Even the best cooks can make mistakes. Here are some common pitfalls and how to avoid them:

  • Too Much Sauce: Don’t drown the pasta in sauce; a little goes a long way.
  • Undercooked Chicken: Ensure your chicken is fully cooked and seasoned for the best flavor.
  • Burnt Cheese: Keep an eye on your bake; cheese can burn quickly if left too long.
  • Overmixing: When combining ingredients, mix just enough to combine, but don’t overdo it to keep the texture fluffy.

Delicious Variations

Ready to switch things up? Here are a few fun variations to try:

  • Veggie Lover’s Delight: Add sautéed spinach, mushrooms, and bell peppers for a colorful, nutritious twist.
  • Spicy Alfredo: Stir in some crushed red pepper flakes for a bit of heat.
  • Pesto Chicken Alfredo: Mix in some basil pesto to the sauce for an herby flavor explosion.
  • Buffalo Chicken Alfredo: Replace the chicken with shredded buffalo chicken for a spicy kick.

Storage & Make-Ahead Instructions

This Chicken Alfredo Bake is perfect for meal prep. Here’s how to store it:

  • Refrigerate: Allow the casserole to cool completely, then cover tightly with plastic wrap or aluminum foil. It will keep for 3-4 days in the fridge.
  • Freeze: Once cooled, wrap tightly and freeze for up to 3 months. Thaw overnight in the fridge before baking.
  • Reheat: Bake at 350°F for 20-25 minutes, covered with foil until heated through.

Frequently Asked Questions

Got questions? I’ve got answers! Here are some FAQs to help you master this recipe:

  • Can I use a different type of pasta? Absolutely! Any pasta shape works, but I recommend something that holds sauce well.
  • Can I make this gluten-free? Yes! Use gluten-free pasta and a gluten-free flour blend for the roux.
  • What if I don’t have heavy cream? You can substitute half-and-half or whole milk, but the sauce may not be as rich.
  • Can I add vegetables? Definitely! Broccoli, peas, or even cherry tomatoes work beautifully in this dish.
  • How do I know when it’s done? The casserole is ready when the cheese is bubbly and slightly golden on top.
  • What can I serve with this dish? A crisp green salad or garlic bread pairs nicely with this creamy bake.
  • Can I make this vegetarian? Sure! Skip the chicken and add more veggies or use a meat substitute.
  • How do I store leftovers? Keep leftovers in an airtight container in the fridge for up to 4 days.

Nutritional Tips & Dietary Adaptations

Looking to make this dish a bit lighter? Here are a few tips:

  • Lower Fat Options: Use low-fat milk instead of cream and reduce the amount of cheese.
  • Protein Variations: Swap chicken for beans or lentils for a plant-based protein option.
  • Reduce Sodium: Opt for low-sodium broth and cheese to keep the sodium content in check.

Essential Equipment

Before diving into this recipe, make sure you have the right tools on hand:

  • Large Pot: For boiling pasta.
  • Large Saucepan: For making the sauce.
  • Whisk: To ensure a smooth sauce.
  • 9×13 Baking Dish: For baking your creamy masterpiece.
  • Spatula: For mixing everything together.

Serving Suggestions

To make your meal even more delightful, consider these serving suggestions:

  • Fresh Salad: A light arugula salad with lemon vinaigrette complements the richness of the casserole.
  • Garlic Bread: Because who can resist warm, buttery garlic bread?
  • Wine Pairing: A crisp white wine like Pinot Grigio pairs beautifully with the creamy flavors.

In Conclusion

And there you have it, friends! The Cozy Chicken Alfredo Bake that will not only steal your heart but also become a staple in your home. With its creamy sauce, hearty pasta, and succulent chicken, this dish is bound to create lasting memories. So, whether you’re cooking for a crowd or indulging in a cozy dinner for two, remember that the kitchen is where the magic happens. Enjoy every bite and happy cooking!

Chicken Alfredo Bake

Prep Time 15 minutes
Cook Time 30 minutes
Total Time 45 minutes
Servings 6 servings
Calories 850
A creamy, cheesy baked pasta dish featuring tender chicken and rich Alfredo sauce, perfect for a comforting family meal.

Ingredients

Pasta

  • 16 ounces penne rigata pasta
  • 6 tablespoons butter
  • 2 tablespoons all-purpose flour
  • 1 tablespoon minced garlic
  • 4 cups heavy whipping cream
  • 1/2 teaspoon salt
  • 1 teaspoon garlic salt (optional)
  • 1/2 teaspoon white pepper
  • 2 cups shredded Parmesan cheese
  • 1 1/2 cups mozzarella cheese
  • 2 ounces cream cheese, softened
  • 2–3 pieces chicken breasts, cooked and diced

Chopped fresh parsley for garnish (optional)

Instructions 

  • Cook pasta to al dente, drain and set aside.
  • Melt butter in a saucepan, stir in flour, cook 2–3 minutes.
  • Add garlic, cream, salt, pepper, and Parmesan; cook 8–10 minutes until thickened.
  • Remove from heat, stir in mozzarella and cream cheese until smooth.
  • Mix pasta, chicken, and sauce; transfer to baking dish, top with Parmesan.
  • Freeze cooled dish, or bake at 350°F for 20–25 minutes until bubbly. Garnish with parsley.

Notes

For best results, use freshly grated Parmesan and cook chicken thoroughly.
Calories: 850kcal
Cost: $15
Course: Main Course
Cuisine: American
Keyword: Chicken, pasta

Why You’ll Adore This Dish

Let’s be honest—when it comes to weeknight dinners, we all want something that feels special without requiring a culinary degree or hours of labor. This Honey Garlic Salmon Baked recipe is the epitome of that perfect balance: it’s quick, delicious, and will transform your dinner table into a mini-celebration. Imagine the aroma of sweet honey and savory garlic wafting through your kitchen, inviting everyone to gather around the table. Seriously, it’s like a warm hug from your favorite aunt, but in meal form.

In just under 30 minutes, you can serve up a dish that not only pleases the palate but also looks stunning on the plate. Whether you’re cooking for family or friends, this salmon dish is guaranteed to elicit a chorus of “wow” from your guests. Plus, it’s a simple yet impressive way to show off your cooking skills without breaking a sweat. Let’s dive into why this dish deserves a spot in your recipe rotation!

Ingredients You’ll Need

Before we get into the nitty-gritty of cooking, let’s gather our ingredients. Here’s what you’ll need to make this scrumptious Honey Garlic Salmon:

  • 4 salmon fillets
  • 1/4 cup honey
  • 1/4 cup soy sauce
  • 3 cloves garlic, minced
  • 1 tablespoon olive oil
  • 1 teaspoon ginger, grated
  • Salt and pepper to taste
  • Chopped green onions (for garnish)

These ingredients are simple, yet they hold the magic that transforms your salmon from ordinary to extraordinary. The honey provides a lovely sweetness, while the soy sauce adds depth and umami. And let’s not forget the garlic and ginger, which bring a warmth and warmth that’s truly irresistible.

Step-by-Step Cooking Instructions

A delicious Honey Garlic Salmon dish, showcasing a glazed salmon fillet with a soft, warm glow and a blurred background.

Ready to get cooking? Let’s walk through the steps to create your new favorite meal.

  1. Preheat your oven: Start by preheating your oven to 375°F (190°C). This will ensure that your salmon cooks evenly and gets that nice, flaky texture we all love.
  2. Mix the marinade: In a small bowl, combine the honey, soy sauce, minced garlic, olive oil, grated ginger, salt, and pepper. Whisk everything together until it’s well blended. This marinade is where the magic happens—sweet, savory, and full of flavor!
  3. Prepare the salmon: Take your salmon fillets and place them in a baking dish. Pour the honey garlic mixture over the top of the fillets, making sure they’re well coated. If you have time, let the salmon marinate for 15-30 minutes. This step is optional, but it enhances the flavors even more.
  4. Bake the salmon: Once you’re done marinating (or if you skipped that step), pop the baking dish into your preheated oven. Bake the salmon for 15-20 minutes, or until it’s cooked through and flakes easily with a fork. You’ll know it’s done when the edges start to caramelize a bit—yum!
  5. Garnish and serve: Finally, take your gorgeous salmon out of the oven and garnish it with chopped green onions. This adds a lovely pop of color and a fresh crunch that complements the dish beautifully.

Serving Suggestions

Now that your Honey Garlic Salmon is ready, the question remains: what should you serve it with? There are endless possibilities! Here are a few of my favorites:

  • Steamed Vegetables: Broccoli, asparagus, or green beans make wonderful companions. Their vibrant colors and fresh flavors pair perfectly with the rich salmon.
  • Rice or Quinoa: A fluffy bed of jasmine rice or nutty quinoa is a fantastic way to soak up all that delicious honey garlic sauce.
  • Salad: A light, crisp salad with a tangy vinaigrette can balance the sweetness of the salmon beautifully. Think mixed greens, cherry tomatoes, and cucumber.
  • Mashed Potatoes: For a more indulgent option, creamy mashed potatoes will add a comforting touch to your meal.

Tips for Success

Want to ensure your salmon turns out perfect every time? Here are a few tips:

  • Choose Quality Salmon: Fresh, high-quality salmon makes all the difference. Look for fillets that are vibrant and smell like the ocean.
  • Don’t Overcook: Salmon is best cooked until just opaque and flaky. Keep an eye on it during the last few minutes of baking to avoid dryness.
  • Adjust Seasonings: Feel free to tweak the marinade to suit your tastes. Want it spicier? Add a dash of sriracha or red pepper flakes!

Variations to Try

Love experimenting in the kitchen? Here are a few variations to make this dish your own:

  • Herb Infusion: Add fresh herbs like cilantro or basil to the marinade for an aromatic twist.
  • Citrus Zing: Incorporate some fresh orange or lemon juice into the marinade for a zesty kick.
  • Maple Glaze: Swap honey for maple syrup for a unique flavor profile that’s equally delicious.

Substitutions

No soy sauce on hand? No worries! Here are some substitutions:

  • Coconut Aminos: A great soy sauce alternative that’s a bit sweeter and perfect for gluten-free diets.
  • Agave Nectar: Need a vegan option? Agave nectar works beautifully in place of honey.

Equipment You’ll Need

Before you start cooking, make sure you have the following tools:

  • Baking dish
  • Small mixing bowl
  • Whisk or fork
  • Measuring cups and spoons
  • Knife and cutting board

Storage and Freezing

If you find yourself with leftovers (which is rare, but it happens!), here’s how to store and reheat:

  • Refrigeration: Store cooked salmon in an airtight container in the fridge for up to 3 days.
  • Freezing: You can freeze salmon for up to 3 months. Just make sure it’s well-wrapped to prevent freezer burn.
  • Reheating: To reheat, simply place it in the oven at a low temperature until warmed through, or microwave it for a quick fix.

FAQs

Here are some frequently asked questions that might help as you prepare your Honey Garlic Salmon:

  • Can I use frozen salmon? Yes! Just make sure to thaw it completely before cooking.
  • What if I don’t have ginger? You can omit it or use a pinch of ground ginger as a substitute.
  • Can this recipe be made on the grill? Absolutely! Just use a grill-safe pan or wrap the salmon in foil.

Troubleshooting

If you encounter any hiccups while making this dish, here’s how to solve them:

  • Salmon is dry: Make sure not to overbake it. Check for doneness a few minutes earlier than the recipe suggests.
  • Too salty: If the marinade is too salty for your taste, add a bit more honey to balance it out.

Conclusion

There you have it—the ultimate Honey Garlic Salmon Baked recipe that’s bound to become a staple in your home. It’s a dish that not only brings joy to your taste buds but also makes your kitchen feel warm and inviting. So gather your ingredients, channel your inner chef, and enjoy the magic of cooking. I can’t wait to hear how it turns out for you! Remember, cooking is all about love, laughter, and a little bit of experimentation. Let’s make some delicious memories together!

Honey Garlic Salmon Baked

Prep Time 10 minutes
Cook Time 20 minutes
Total Time 30 minutes
Servings 4 servings
Calories 350
A delicious baked salmon recipe glazed with honey and garlic, perfect for a quick and flavorful meal.

Ingredients

Salmon

  • 4 fillets salmon fillets
  • 0.25 cup honey
  • 0.25 cup soy sauce
  • 3 cloves garlic, minced
  • 1 tablespoon olive oil
  • 1 teaspoon ginger, grated
  • to taste salt and pepper
  • chopped green onions green onions (for garnish)

Instructions 

  • Preheat oven to 375°F (190°C).
  • Mix honey, soy sauce, garlic, olive oil, ginger, salt, and pepper.
  • Pour mixture over salmon in a baking dish.
  • Marinate for 15-30 minutes, then bake for 15-20 minutes.
  • Garnish with green onions before serving.

Notes

For extra flavor, broil for the last 2 minutes for a slightly caramelized top.
Calories: 350kcal
Cost: $15
Course: Main Course
Cuisine: American
Keyword: Salmon

Loved this recipe? Save it to your favorite Pinterest board so you can easily find it later! It’s the perfect way to keep all your sweet ideas in one place. ✨

Eye-level view of Honey Garlic Salmon, highlighting its rich texture and golden honey glaze with soft natural lighting.

Welcome to your next culinary adventure! If you’re dreaming of a lasagna recipe that’s not only comforting but also packed with protein and flavor, you’ve landed in the right spot. We’re diving into a delightful high protein cottage cheese lasagna that will have your taste buds dancing and your family begging for seconds. This isn’t just any lasagna; it’s a dish that wraps you in warmth and nostalgia, reminiscent of cozy dinners with loved ones.

Lasagna has a special place in my heart. Growing up in a small Oregon town, I remember the aroma of bubbling cheese wafting through the air, drawing everyone to the table. Now, as I whip up my own version in my Seattle kitchen, I can’t help but feel that same magic. Trust me, this recipe will not only satisfy your cravings but also nourish your body with wholesome ingredients.

Ready to impress your family and friends? Let’s get started!

Why You’ll Love This Recipe

  • High Protein Boost: Incorporating cottage cheese adds a creamy texture and vital protein, making this meal both delicious and nutritious.
  • Comforting Layers: Each bite features layers of rich meat sauce, creamy cheese, and tender noodles, creating a symphony of flavors.
  • Meal Prep Friendly: This lasagna is perfect for make-ahead meals. Prep it in advance and simply pop it in the oven when you’re ready to eat.
  • Versatile Ingredients: You can easily customize this recipe with your favorite veggies or swap the meat for a plant-based option.
  • Family Favorite: This dish is a guaranteed hit with everyone, from kids to adults. It’s the kind of meal that brings everyone together.

Ingredients

Let’s gather our ingredients for this mouthwatering lasagna:

  • 1 tablespoon olive oil: For sautéing the aromatic veggies.
  • 4 cloves garlic (roughly chopped): Because everything’s better with garlic!
  • 1 small yellow onion (chopped): Adds sweetness and depth.
  • 1 pound lean ground beef (96/4 works best): You can substitute with turkey or a plant-based option.
  • 1 teaspoon oregano: A classic seasoning for Italian dishes.
  • 1 teaspoon Italian seasoning: A blend that enhances the flavor profile.
  • 1 teaspoon paprika: For a hint of smokiness.
  • 0.5 teaspoon chili powder: Just a pinch to spice things up!
  • 1 teaspoon salt and 0.5 teaspoon black pepper: Essential for seasoning.
  • 32 oz jar marinara sauce: Choose your favorite brand or homemade version.
  • 16 oz low-fat small curd cottage cheese: The star of our high protein show!
  • 2 eggs: Helps bind the cheese mixture.
  • 0.5 cup shredded parmesan cheese: Adds a nutty flavor.
  • 0.5 teaspoon oregano (for cottage cheese filling): A touch for our creamy mix.
  • 0.5 teaspoon Italian seasoning (for cottage cheese filling): Enhances the filling flavor.
  • 0.5 teaspoon salt (for cottage cheese filling): A little more seasoning.
  • 1 pinch fresh cracked pepper (to taste): Because you can never have too much flavor.
  • 10 oz frozen spinach (defrosted and well-drained): Adds nutrition and color.
  • 8 oven-ready lasagna noodles: The convenience of no-boil noodles saves time.
  • 2 cups shredded low-moisture mozzarella cheese: For that gooey, cheesy topping.

Step-by-Step Instructions

Now that we have everything ready, let’s dive into the cooking process!

  • Preheat your oven to 375°F (190°C) and heat the olive oil in a large skillet over medium heat.
  • Add the chopped garlic and onions, cooking until golden and fragrant, about 3-5 minutes.
  • Add the ground beef, breaking it into bite-sized pieces and cooking for about 5 minutes until no pink remains.
  • Stir in the oregano, Italian seasoning, paprika, chili powder, salt, and pepper, ensuring the meat is evenly coated.
  • Pour in the marinara sauce and let simmer while you prepare the cottage cheese mixture.
  • In a large bowl, combine the cottage cheese, eggs, parmesan cheese, oregano, Italian seasoning, salt, and pepper, mixing until well incorporated.
  • Add the defrosted and thoroughly drained spinach to the cottage cheese mixture, folding it gently.
  • Spray a 9×13 inch baking dish with cooking spray and add a dollop of meat sauce to the bottom.
  • Layer 4 oven-ready noodles across the width of the dish, then add 1/2 cup of mozzarella, followed by half of the meat mixture.
  • Add half of the cottage cheese mixture, spreading it evenly.
  • Repeat with the remaining noodles, 1/2 cup cheese, remaining meat sauce, and remaining cottage cheese mixture.
  • Top with the final cup of mozzarella cheese.
  • Place the baking dish on a cookie sheet, cover tightly with foil, and bake for 50 minutes. Remove the foil and bake for an additional 10-15 minutes until the cheese is golden and bubbly.

Pro Tips for Perfect Lasagna

Side view of a serving of cottage cheese lasagna showcasing its layers of pasta and cheese.
  • Let it rest: Allow the lasagna to sit for about 10-15 minutes after baking. This helps the layers set and makes for easier slicing.
  • Use high-quality ingredients: Fresh herbs and good-quality cheese can elevate your dish significantly.
  • Mix it up: Feel free to add your favorite vegetables, like bell peppers or mushrooms, to the meat sauce for extra flavor.
  • Try different cheeses: Experiment with ricotta or a mix of cheeses for a different texture and taste.
  • Make it gluten-free: Use gluten-free noodles or zucchini slices as a substitute for traditional noodles.
  • Spice it up: If you love heat, add crushed red pepper flakes to the meat sauce.
  • Cheese layer: Mixing a bit of mozzarella into the cottage cheese layer adds a delightful stringy texture.
  • Don’t skip the spinach: It’s a sneaky way to incorporate more greens into your meal without sacrificing flavor.

Common Mistakes and Troubleshooting

Even the best cooks have their off days! Here are some common pitfalls to avoid:

  • Too watery: If you find your lasagna is too watery, make sure to thoroughly drain the spinach and not over-sauce the layers.
  • Overcooked noodles: If you’re using regular noodles, avoid cooking them too long before layering; they’ll continue to cook in the oven.
  • Uneven layers: Use a spatula to evenly spread out your layers for a balanced bite every time.

Variations to Try

This lasagna is a canvas for your creativity! Here are some delicious variations:

  • Vegetarian Delight: Substitute the ground beef with chopped mushrooms, zucchini, or lentils for a hearty vegetarian version.
  • Spicy Sausage: Use Italian sausage instead of ground beef for a spicy twist.
  • White Lasagna: Swap out the marinara for a creamy alfredo sauce and use chicken and spinach for the filling.
  • Mexican Lasagna: Layer with taco-seasoned ground beef, black beans, and corn, and top with salsa instead of marinara.

Storage and Make-Ahead Instructions

This lasagna is perfect for meal prep! Here’s how to store and reheat:

  • Refrigerator: Store leftovers in an airtight container for up to 4 days.
  • Freezer: To freeze, wrap the uncooked lasagna tightly in plastic wrap and foil. It can be frozen for up to 3 months. Bake from frozen at 375°F (190°C) for about 1 hour, covered with foil.
  • Reheating: To reheat, cover with foil and warm in a 350°F (175°C) oven for 25-30 minutes, or until heated through.

FAQs About High Protein Cottage Cheese Lasagna

Here are some common questions you might have:

  • Can I use ricotta cheese instead of cottage cheese? Yes, ricotta can be used, but it will alter the protein content and texture.
  • What if I don’t have oven-ready noodles? You can use regular lasagna noodles, just cook them al dente according to package instructions.
  • Can I add more vegetables? Absolutely! Feel free to add spinach, bell peppers, or even roasted eggplant.
  • Is this recipe gluten-free? To make it gluten-free, use gluten-free lasagna noodles or zucchini slices.
  • How do I know when the lasagna is done? The cheese should be melted and bubbly, and the edges should be golden brown.
  • Can I make this in advance? Yes! Assemble and refrigerate or freeze it before baking for a quick meal later.
  • What can I serve with lasagna? A simple side salad or garlic bread pairs wonderfully with lasagna.
  • How long does it last in the fridge? Leftover lasagna is best eaten within 4 days when stored properly.

Nutritional Tips and Dietary Adaptations

This dish is not only tasty but also adaptable for various dietary needs:

  • Low-carb option: Swap traditional noodles for thinly sliced zucchini or eggplant.
  • Low-fat version: Use low-fat ground beef and cottage cheese to reduce calories.
  • Dairy-free adaptation: Substitute with dairy-free cheeses and plant-based ground meat.

Equipment Recommendations

Here’s what you’ll need to create this lasagna:

  • Large skillet: For sautéing and simmering your meat sauce.
  • Mixing bowls: For combining your cheese mixtures.
  • 9×13 inch baking dish: To hold your beautifully layered lasagna.
  • Aluminum foil: Essential for covering your dish during baking.

Serving Suggestions

Serve this lasagna with a light green salad dressed with a simple vinaigrette, or perhaps some garlic bread for that perfect crunch. A glass of red wine pairs beautifully too, bringing out the flavors of the dish.

So there you have it! A high protein cottage cheese lasagna that truly loves you back. Whether you’re cooking for a crowd or just for yourself, this dish will warm your heart and fill your belly. I hope you enjoy making it as much as I do. Happy cooking!

High Protein Cottage Cheese Lasagna

Prep Time 15 minutes
Cook Time 1 hour
Total Time 1 hour 15 minutes
Servings 8 servings
Calories 650
A nutritious and protein-packed lasagna featuring cottage cheese, spinach, and lean ground beef, perfect for a hearty meal.

Ingredients

olive oil

  • 1 tablespoon olive oil

garlic

  • 4 cloves garlic (roughly chopped)

yellow onion

  • 1 small yellow onion (chopped)

lean ground beef

  • 1 pound lean ground beef (96/4 works best)

oregano

  • 1 teaspoon oregano

Italian seasoning

  • 1 teaspoon Italian seasoning

paprika

  • 1 teaspoon paprika

chili powder

  • 0.5 teaspoon chili powder

salt

  • 1 teaspoon salt

black pepper

  • 0.5 teaspoon black pepper

marinara sauce

  • 32 oz marinara sauce

cottage cheese

  • 16 oz low-fat small curd cottage cheese

eggs

  • 2 eggs

parmesan cheese

  • 0.5 cup shredded parmesan cheese

oregano (for cottage cheese filling)

  • 0.5 teaspoon oregano (for cottage cheese filling)

Italian seasoning (for cottage cheese filling)

  • 0.5 teaspoon Italian seasoning (for cottage cheese filling)

salt (for cottage cheese filling)

  • 0.5 teaspoon salt (for cottage cheese filling)

fresh cracked pepper

  • 1 pinch fresh cracked pepper (to taste)

frozen spinach

  • 10 oz frozen spinach (defrosted and well-drained)

oven-ready lasagna noodles

  • 8 noodles oven-ready lasagna noodles

shredded mozzarella cheese

  • 2 cups shredded low-moisture mozzarella cheese

Instructions 

  • Preheat oven to 375°F. Cook meat with garlic and onions, then add spices and marinara sauce.
  • Mix cottage cheese, eggs, parmesan, herbs, salt, pepper, and spinach to make filling.
  • Layer sauce, noodles, cheese, and meat mixture in a baking dish; repeat layers.
  • Top with mozzarella, cover with foil, and bake for 50 minutes. Remove foil and bake 10-15 minutes until bubbly and golden.

Notes

Use oven-ready noodles for convenience and drain spinach thoroughly to prevent excess moisture.
Calories: 650kcal
Cost: $15
Course: Main Course
Cuisine: Italian
Keyword: lasagna

Why You’ll Love This Recipe

If you’re anything like me, you crave weeknight meals that not only satisfy your hunger but also feel like a little celebration at the end of a long day. Enter Healthy Honey Garlic Salmon—a dish that brings the perfect balance of sweet and savory right to your table in under 30 minutes! This recipe is a game-changer for busy weeknights, transforming ordinary dinners into memorable feasts. Trust me, once you try this salmon, you’ll be counting down the days until you can make it again.

Overview of Ingredients

Before we dive into the cooking process, let’s take a moment to appreciate the beautifully simple ingredients that come together to create this magic:

  • 4 salmon fillets: Fresh or frozen, just make sure they’re thawed!
  • 2 tablespoons honey: This will give your salmon that lovely sweetness.
  • 3 cloves garlic, minced: Because garlic makes everything better!
  • 2 tablespoons soy sauce: For that umami punch.
  • 1 tablespoon olive oil: To keep things nice and moist.
  • Salt and pepper to taste: Always essential!
  • Lemon wedges for serving: A squeeze of lemon elevates the flavors.
  • Chopped fresh parsley for garnish: A pop of color and freshness!

Steps to Culinary Delight

Cooked salmon drizzled with honey garlic sauce, served on a plate with lemon and herbs.

Now, let’s get to the good part—the cooking! Follow these simple steps, and you’ll have a plate of salmon that’s sure to impress:

  1. Preheat the oven: Set your oven to 400°F (200°C). Preheating is crucial for achieving that perfect flaky texture.
  2. Make the sauce: In a small bowl, whisk together the honey, minced garlic, soy sauce, and olive oil. This mixture is the star of the show!
  3. Prepare the salmon: Place the salmon fillets on a baking sheet lined with parchment paper. This will help with easy cleanup!
  4. Season: Sprinkle salt and pepper over the salmon. Then, brush the honey garlic mixture generously over each fillet. Don’t be shy; this is where the flavor comes from!
  5. Bake: Pop the salmon in the preheated oven and bake for 12-15 minutes, or until the salmon flakes easily with a fork. The aroma will be irresistible!
  6. Rest and serve: Remove the salmon from the oven and let it rest for a few minutes. Serve with lemon wedges and a sprinkle of chopped parsley for that finishing touch.

Serving Suggestions

This honey garlic salmon is rich in flavor, so I like to keep the sides simple and light. Here are a few ideas that pair beautifully:

  • Garlic Butter Broccoli: A quick sauté adds a lovely crunch.
  • Garlic Green Beans: Sautéed with a bit of olive oil and garlic, they’re a perfect match!
  • 5-Minute Cucumber Salad: Refreshing and light, it balances the richness of the salmon.
  • Plain Rice or Veggie Rice: A great base to soak up the delicious honey garlic sauce.
  • Roasted Cauliflower: Simple yet elegant; toss with olive oil, salt, and pepper, and roast until golden.
  • Mashed Potatoes: Comfort food at its finest, creamy and dreamy!

Tips for the Perfect Salmon

Here are some of my favorite tips to ensure your salmon turns out perfectly every time:

  • Freshness Matters: Always opt for fresh salmon if you can. It makes a noticeable difference in flavor and texture.
  • Don’t Overcook: Keep a close eye on your salmon while it’s baking. It should be opaque and easily flake with a fork when done.
  • Baste for Extra Flavor: Halfway through cooking, spoon some of the honey garlic sauce over the salmon to enhance the flavor.
  • Let It Rest: Allowing the salmon to rest for a few minutes after baking helps it retain moisture.

Variations and Substitutions

Feel free to get creative! Here are some variations and substitutions you can try:

  • Different Proteins: This sauce works wonders with chicken or tofu, too! Just adjust the cooking times accordingly.
  • Sweeteners: If you’re looking for a healthier option, maple syrup can be a delightful substitute for honey.
  • Gluten-Free: Use tamari instead of soy sauce for a gluten-free version.
  • Herbs and Spices: Add a pinch of red pepper flakes for heat or fresh herbs like dill or thyme for an aromatic twist.

Equipment You’ll Need

To make this recipe, you won’t need much—just a few basic kitchen tools:

  • Baking Sheet: A sturdy one will do the trick.
  • Parchment Paper: For easy cleanup and to prevent sticking.
  • Small Bowl: For mixing the sauce.
  • Whisk: To combine the sauce ingredients.
  • Spatula or Brush: For spreading the sauce on the salmon.

Storage and Freezing

If you happen to have leftovers (which is rare, but it happens!), here’s how to store them:

  • Refrigeration: Store any leftovers in an airtight container in the fridge for up to 2 days.
  • Freezing: You can freeze the cooked salmon for up to 3 months. For best results, wrap it tightly in plastic wrap and then place it in a freezer-safe bag.

FAQs

Here are some questions I often get about this recipe:

  • Can I use skin-on salmon fillets? Absolutely! Just be sure to adjust the cooking time slightly, as skin-on fillets may take a bit longer to cook through.
  • What if I don’t have honey? You can substitute with agave syrup or brown sugar; just keep in mind that the flavor will vary slightly.
  • Can I make this recipe in a skillet? Yes! Just heat a bit of olive oil in a skillet over medium heat, sear the salmon for a few minutes on each side, then add the sauce and let it simmer until cooked through.

Troubleshooting Common Issues

If you run into any hiccups, here are some solutions:

  • Salmon is dry: This can happen if it’s overcooked. Use an instant-read thermometer to check for doneness—145°F (63°C) is the target.
  • Burnt edges: If you notice the edges browning too quickly, simply cover the salmon loosely with foil for the remainder of the cooking time.

Final Thoughts

Cooking should be a joyous experience, and my Healthy Honey Garlic Salmon recipe is designed to bring that joy into your kitchen. It’s a dish that’s not just about feeding your family; it’s about creating moments that matter, sharing stories over dinner, and making the ordinary feel extraordinary. So grab your apron, gather your loved ones, and let’s make this delicious salmon together! Happy cooking, friends!

Healthy Honey Garlic Salmon Recipe

Prep Time 10 minutes
Cook Time 15 minutes
Total Time 25 minutes
Servings 4 servings
Calories 350
This delicious and healthy honey garlic salmon is quick to prepare and perfect for a nutritious dinner.

Ingredients

Salmon

  • 4 fillets salmon fillets
  • 2 tablespoons honey
  • 3 cloves garlic, minced
  • 2 tablespoons soy sauce
  • 1 tablespoon olive oil
  • to taste salt and pepper
  • lemon wedges lemon wedges for serving
  • chopped parsley chopped fresh parsley for garnish

Instructions 

  • Preheat oven to 400°F (200°C).
  • Mix honey, garlic, soy sauce, and olive oil.
  • Place salmon on a baking sheet, season, and brush with sauce.
  • Bake for 12-15 minutes until flaky.
  • Serve with lemon wedges and parsley.

Notes

For extra flavor, marinate the salmon for 30 minutes before baking.
Calories: 350kcal
Cost: $15
Course: Main Course
Cuisine: American
Keyword: Salmon

Loved this recipe? Save it to your favorite Pinterest board so you can easily find it later! It’s the perfect way to keep all your sweet ideas in one place. ✨

Appetizing salmon fillet, golden brown with a glaze, surrounded by fresh ingredients.

Why You’ll Fall in Love with This Dish

Ah, the Honey Garlic Salmon Bowl! If you’re looking for a meal that dances on your taste buds while wrapping you in a cozy embrace, you’ve come to the right place. This dish is not just a meal; it’s a celebration of flavors that come together in a way that feels both comforting and exciting. Imagine the sweet, sticky goodness of honey paired with the savory depth of soy sauce, all enveloping tender, flaky salmon. Sounds dreamy, right? And let’s not forget the vibrant colors and textures from the fresh veggies and creamy avocado that make this bowl a feast for the eyes as well as the stomach.

Ingredients You’ll Need

Let’s gather our ingredients. Don’t worry; it’s a small list that packs a flavorful punch! Here’s what you’ll need to create your own Honey Garlic Salmon Bowl:

  • 2 salmon fillets – Fresh, high-quality salmon fillets are key to achieving that melt-in-your-mouth texture.
  • 2 tablespoons honey – This will give your dish that lovely sticky sweetness.
  • 2 tablespoons soy sauce – A splash of umami magic!
  • 2 cloves garlic, minced – Because garlic makes everything better, am I right?
  • 1 tablespoon olive oil – We’ll use this for cooking the salmon.
  • 1 cup cooked rice – I prefer jasmine for its fragrant aroma, but feel free to use your favorite.
  • 1 cup steamed broccoli – This adds a nutritious crunch.
  • 1/2 avocado, sliced – A creamy element that balances the dish beautifully.
  • Sesame seeds for garnish – A little crunch and class!
  • Green onions for garnish – Freshness and a bit of zing!

Step-by-Step Cooking Instructions

An appetizing Honey Garlic Salmon Bowl showcasing salmon fillets glazed with honey sauce alongside rice and vegetables.

Now that we have our ingredients ready, let’s dive into the cooking process. It’s straightforward and quick, making it perfect for a weeknight dinner or a special occasion!

  1. In a small bowl, mix together the honey, soy sauce, and minced garlic to create a delightful marinade.
  2. Place the salmon fillets in a shallow dish and pour the marinade over them, ensuring they’re well-coated. Let it marinate for about 15-20 minutes. This is the perfect time to prepare your rice and steam your broccoli!
  3. Heat the olive oil in a skillet over medium heat. Once hot, add the marinated salmon fillets, skin-side down.
  4. Cook the salmon for about 5-6 minutes on each side, or until cooked through and flaky. You’ll know it’s ready when it easily flakes apart with a fork.

Putting It All Together

Now comes the fun part—building your bowl! Here’s how to assemble your Honey Garlic Salmon Bowl:

  1. In serving bowls, layer your cooked rice first. This will be the cozy base.
  2. Add a generous portion of steamed broccoli on top of the rice.
  3. Slice the cooked salmon and place it over the rice and broccoli.
  4. Top it off with sliced avocado and drizzle any remaining marinade from the skillet over everything.
  5. Finally, garnish with sesame seeds and chopped green onions for that extra flair!

Tips for the Perfect Bowl

Here are a few tips to ensure your Honey Garlic Salmon Bowl turns out perfectly every time:

  • Quality Matters: Choose high-quality salmon for the best flavor. Fresh is always better.
  • Don’t Rush the Marinade: Allowing the salmon to marinate is crucial for flavor. If you have time, let it sit longer!
  • Watch the Heat: Cooking the salmon at medium heat allows it to cook evenly and prevents burning.
  • Customize: Feel free to swap out the veggies based on what you have on hand. Snap peas, bell peppers, or even kale work beautifully!

Variations and Substitutions

This recipe is incredibly versatile. Here are some variations you might consider:

  • Different Proteins: Swap the salmon for shrimp, tofu, or even grilled chicken for a different flavor profile.
  • Grains: Use quinoa, brown rice, or cauliflower rice instead of white rice for a nutritious twist.
  • Extra Veggies: Add some shredded carrots, radishes, or even edamame for an additional crunch!

Equipment You’ll Need

Before you start cooking, make sure you have the following equipment:

  • A mixing bowl for the marinade
  • A shallow dish for marinating the salmon
  • A skillet or frying pan for cooking the salmon
  • A pot or rice cooker for preparing the rice
  • A steamer basket or microwave-safe dish for steaming the broccoli

Storage and Freezing Tips

If you’re planning to make this dish ahead of time or want to save leftovers, here’s how to store it:

  • Refrigeration: Store the components separately in airtight containers for up to 3-4 days. This will help maintain freshness and texture.
  • Freezing: While it’s best enjoyed fresh, you can freeze the salmon before cooking. Just make sure to wrap it tightly! Cooked bowls are best eaten fresh but can be stored in the fridge.

Common Questions

Here are some frequently asked questions about this recipe:

  • Can I make it in advance? Absolutely! Just prepare all the components separately and combine them when you’re ready to eat.
  • Is it gluten-free? You can make this dish gluten-free by using tamari instead of soy sauce.
  • What can I serve it with? Pair this bowl with a light salad or some crispy spring rolls for a delightful meal.

Troubleshooting

If things don’t go as planned, here are some solutions:

  • Salmon Sticking to the Pan: Ensure your skillet is adequately heated and add enough oil before placing the salmon in.
  • Overcooked Salmon: Keep an eye on the cooking time; salmon cooks quickly and is best enjoyed flaky and tender.

Final Thoughts

This Honey Garlic Salmon Bowl is a delightful way to bring a taste of home to your kitchen. It’s an easy recipe that doesn’t skimp on flavor, making it perfect for any occasion. Whether you’re cooking for family, friends, or just treating yourself after a long day, this bowl is sure to impress. So grab your ingredients, put on your favorite playlist, and let’s create some kitchen magic together! I can’t wait for you to take that first bite and feel all the love and warmth that comes with it. Happy cooking!

Honey Garlic Salmon Bowl

Prep Time 10 minutes
Cook Time 15 minutes
Total Time 25 minutes
Servings 2 servings
Calories 450
A delicious and healthy salmon bowl featuring a sweet honey garlic marinade, served over rice with vegetables and garnished with sesame seeds and green onions.

Ingredients

Protein

  • 2 fillets salmon fillets

Sauces & Marinades

  • 2 tablespoons honey
  • 2 tablespoons soy sauce
  • 2 cloves garlic, minced

Oils

  • 1 tablespoon olive oil

Grains & Vegetables

  • 1 cup cooked rice
  • 1 cup steamed broccoli
  • 1/2 avocado sliced avocado

Garnishes

  • to taste sesame seeds for garnish
  • to taste green onions for garnish

Instructions 

  • Mix honey, soy sauce, and minced garlic to make the marinade.
  • Marinate salmon for 15-20 minutes.
  • Cook salmon in olive oil over medium heat for 5-6 minutes per side.
  • Assemble bowls with rice, broccoli, and avocado, then top with salmon.
  • Drizzle remaining marinade, garnish with sesame seeds and green onions, and serve.

Notes

Use fresh salmon for best flavor and ensure proper cooking.
Calories: 450kcal
Cost: $15
Course: Main Course
Cuisine: fusion
Keyword: Salmon

Loved this recipe? Save it to your favorite Pinterest board so you can easily find it later! It’s the perfect way to keep all your sweet ideas in one place. ✨

A beautifully arranged Honey Garlic Salmon Bowl with salmon, rice, and garnishes, set against a soft, blurred background.