Author

Ava

Browsing

Why This Recipe Will Become Your New Favorite

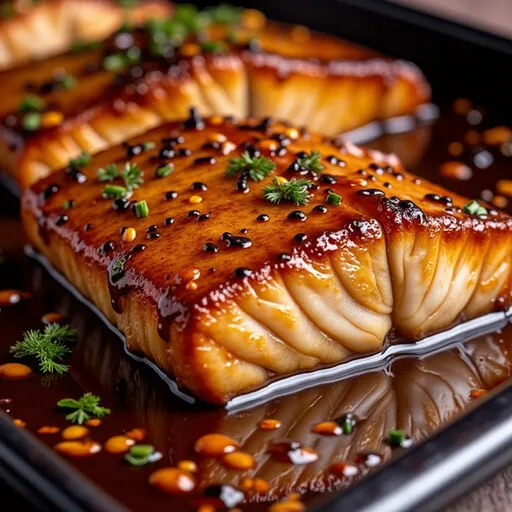
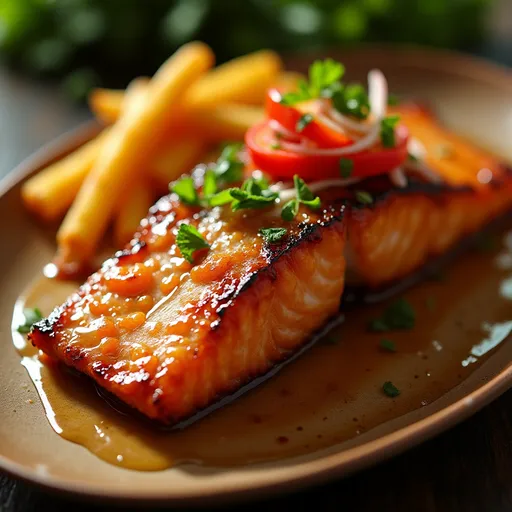
Let’s be honest, life can get pretty hectic. Between work, family commitments, and the occasional Netflix binge, it can be easy to let dinner slip into the realm of takeout and frozen meals. But what if I told you that you could whip up a restaurant-quality dish in under 30 minutes? Enter the world of Chili Garlic Salmon, a dish that not only brings a punch of flavor but also transforms your dinner table into a vibrant feast! This recipe combines the richness of salmon with a sweet and spicy marinade that’s bound to impress everyone—from the pickiest eaters to your most discerning dinner guests.

Growing up in a kitchen where flavors were celebrated, I learned early on that a good meal can turn an ordinary day into something magical. This Chili Garlic Salmon is one of those meals. It’s incredibly easy to make, and the best part? You probably have most of the ingredients in your pantry right now. So, let’s dive into this culinary adventure together!

Overview of the Ingredients

Before we get started, let’s take a look at what you’ll need to create this delightful dish:

  • 2 salmon fillets
  • 2 tablespoons olive oil
  • 3 cloves garlic, minced
  • 1 tablespoon chili paste (adjust to taste)
  • 1 tablespoon soy sauce
  • 1 tablespoon honey
  • Salt and pepper to taste
  • Fresh cilantro or green onions for garnish (optional)

These ingredients come together beautifully, creating a medley of flavors that will make your taste buds sing! The garlic adds a fragrant aroma, while the chili paste introduces the perfect amount of heat. And let’s not forget the honey, which balances everything out with a delightful sweetness. It’s like a flavor party in your mouth!

Preparation Steps for Chili Garlic Salmon

Salmon fillets with a glossy chili garlic sauce, served on a rustic plate.

Now that we’ve gathered our ingredients, let’s get cooking! Follow these simple steps, and in no time, you’ll have a plate of deliciousness ready to devour:

  1. Preheat the Oven: Start by preheating your oven to 400°F (200°C). This ensures that the salmon will cook evenly.
  2. Mix the Marinade: In a small bowl, whisk together the olive oil, minced garlic, chili paste, soy sauce, and honey until well combined. This marinade is the star of the show, so don’t be shy with the flavors!
  3. Prepare the Salmon: Line a baking sheet with parchment paper for easy cleanup. Place the salmon fillets skin-side down on the sheet. Pour the chili garlic mixture over the fillets, ensuring they are well coated. A good coating is key to infusing the salmon with flavor.
  4. Season: Sprinkle with salt and pepper to taste. A little seasoning goes a long way in enhancing the flavors.
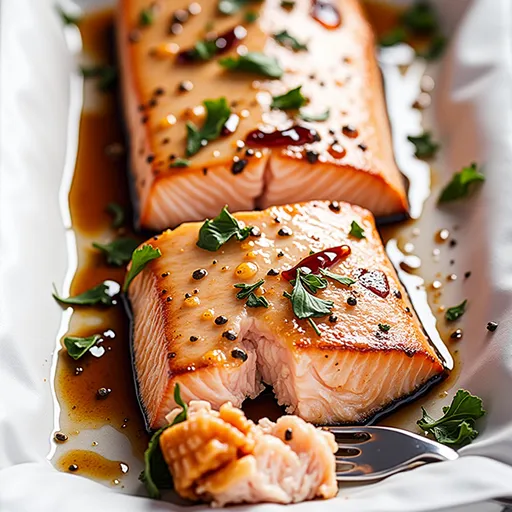
  5. Bake: Place the baking sheet in the oven and bake the salmon for 12-15 minutes, or until it flakes easily with a fork. Keep an eye on it—overcooking can turn salmon into a dry disappointment!
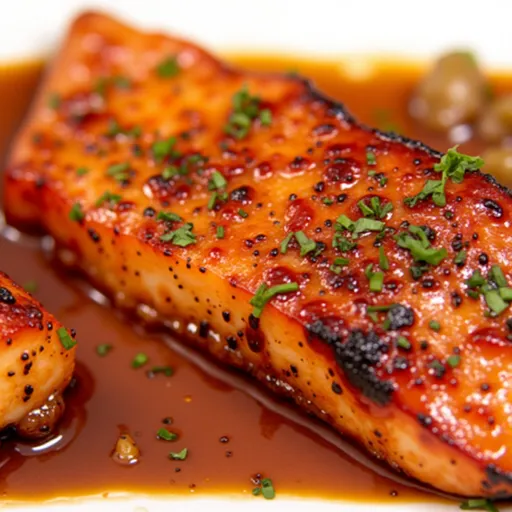
  6. Garnish and Serve: Once done, take the salmon out of the oven and let it rest for a minute. Garnish with fresh cilantro or sliced green onions, if desired. Serve hot with your choice of sides, and watch the smiles bloom around the table!

Tips for Perfect Chili Garlic Salmon

Cooking is an art, and like all artists, we need a few tips and tricks to make our masterpiece shine. Here are some insights to ensure your Chili Garlic Salmon turns out perfectly every time:

  • Quality Salmon: Opt for fresh, high-quality salmon for the best flavor and texture. Look for bright color and firm flesh.
  • Adjust the Heat: If you’re sensitive to spice, feel free to reduce the amount of chili paste. Start with less, taste, and adjust as needed. Cooking should always feel good!
  • Don’t Skip the Marinade: If time allows, marinate the salmon for a few hours or even overnight in the refrigerator. This extra step enhances the flavors.
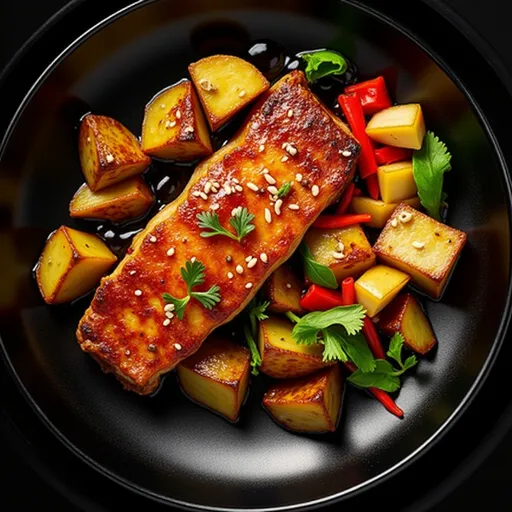
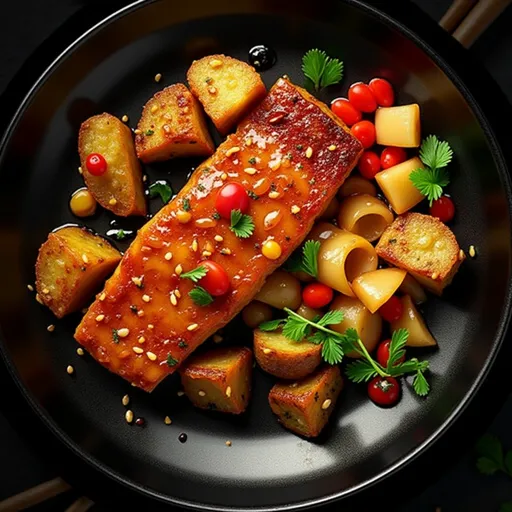
  • Pairing: This salmon pairs beautifully with a variety of sides. Consider serving it with roasted vegetables, rice, or a crisp salad to round out the meal.

Variations to Explore

Feeling adventurous? Here are a few variations to try with this base recipe:

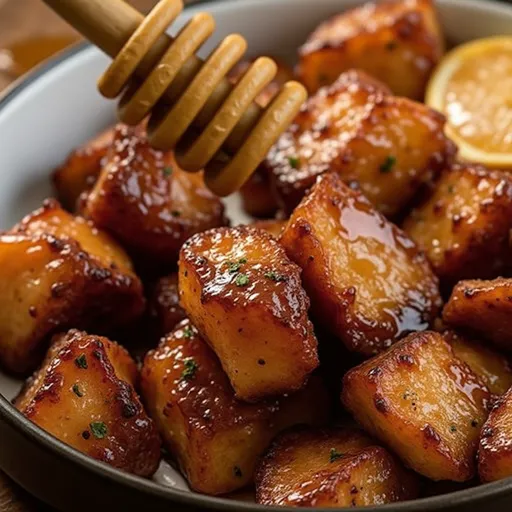
  • Sweet Chili Garlic Salmon: Swap the chili paste for sweet chili sauce for a milder, sweeter flavor.
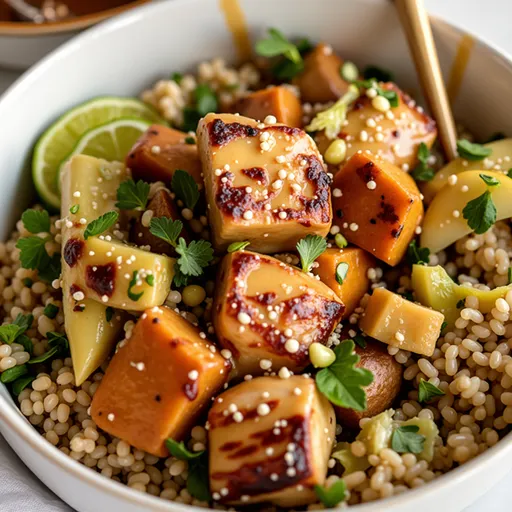
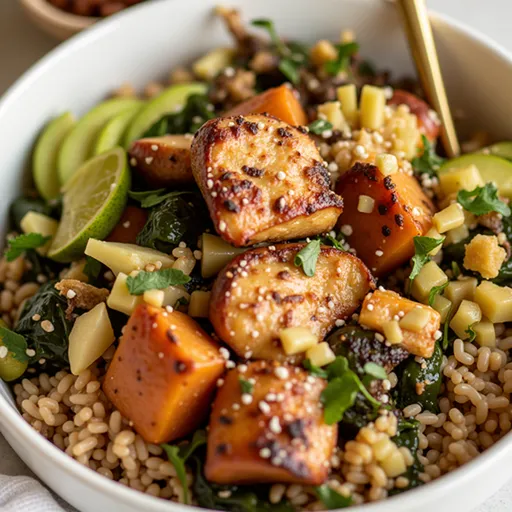
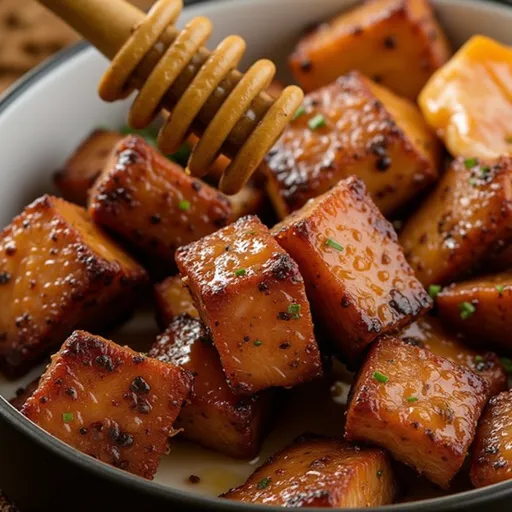
  • Chili Salmon Rice Bowl: Flake the cooked salmon and serve it over a bed of rice with steamed veggies and a drizzle of extra sauce for a satisfying bowl meal.
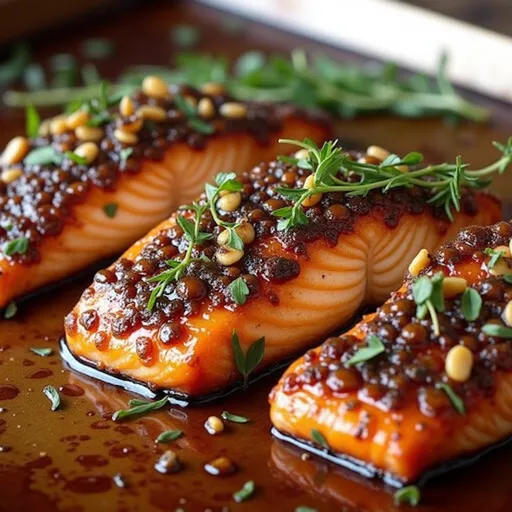
  • Chili Crisp Salmon: Add a sprinkle of chili crisp on top just before serving for an extra layer of crunch and flavor.

Equipment You’ll Need

Before you begin, ensure you have the following equipment handy:

  • Oven
  • Baking sheet
  • Parchment paper
  • Mixing bowl
  • Whisk or fork

Storage and Freezing Tips

Did you make too much? Not a problem! Here’s how to store your leftover Chili Garlic Salmon:

  • Refrigeration: Store any leftovers in an airtight container in the refrigerator for up to 3 days. Reheat gently in the oven to avoid drying it out.
  • Freezing: You can freeze cooked salmon, but it’s best to eat it fresh. If you need to freeze it, wrap it tightly in plastic wrap and then place it in a freezer bag. It can be frozen for up to 2 months. Thaw in the refrigerator before reheating.

FAQs About Chili Garlic Salmon

Here are some common questions about this dish:

  • Can I use frozen salmon? Yes! Just thaw it in the refrigerator overnight before marinating and cooking.
  • What if I don’t have chili paste? You can substitute with sriracha or even a mix of crushed red pepper and a bit of water.
  • How do I know when salmon is done? Salmon is done when it flakes easily with a fork and is opaque in color. A food thermometer should read 145°F (63°C).

Troubleshooting Common Issues

If your salmon doesn’t turn out as expected, here are some tips to troubleshoot:

  • Too Dry: Ensure you’re not overcooking. Keep an eye on the time and check for doneness a few minutes before the timer goes off.
  • Not Flavorful Enough: Next time, consider marinating longer or increasing the marinade quantity. You want every bite bursting with flavor!

Conclusion: A Dish Worth Sharing

As you take your first bite of this Chili Garlic Salmon, I hope you feel the warmth and love that went into creating it. Cooking is more than just a means to an end; it’s a way to connect with others and share experiences. Whether you’re serving this dish to family, friends, or enjoying it solo after a long day, it’s bound to become a cherished recipe in your culinary repertoire. So gather your ingredients, roll up your sleeves, and let’s create a moment that will ignite not just your dinner, but your spirit as well! Happy cooking!

Chili Garlic Salmon Recipe

Prep Time 10 minutes
Cook Time 15 minutes
Total Time 25 minutes
Servings 2 servings
Calories 350
A quick and flavorful dish featuring tender salmon glazed with a spicy chili garlic sauce, perfect for a satisfying meal.

Ingredients

Main ingredients

  • 2 fillets salmon fillets
  • 2 tablespoons olive oil
  • 3 cloves garlic, minced
  • 1 tablespoon chili paste (adjust to taste)
  • 1 tablespoon soy sauce
  • 1 tablespoon honey
  • to taste salt and pepper
  • optional fresh cilantro or green onions (for garnish)

Instructions 

  • Preheat oven to 400°F (200°C).
  • Mix olive oil, garlic, chili paste, soy sauce, and honey.
  • Place salmon on a baking sheet and coat with the sauce.
  • Season with salt and pepper, then bake for 12-15 minutes.
  • Garnish with cilantro or green onions and serve.

Notes

Adjust chili paste for desired spice level.
Calories: 350kcal
Cost: $15
Course: Main Course
Cuisine: Asian
Keyword: Salmon

Loved this recipe? Save it to your favorite Pinterest board so you can easily find it later! It’s the perfect way to keep all your sweet ideas in one place. ✨

Eye-level view of a delicious salmon dish featuring vibrant chili and garlic sauce.

Why You’ll Adore These Bowls

Picture this: it’s a cozy evening, and you’re craving something that feels like a warm hug, yet is packed with flavor and nutrients. That’s where my Maple Dijon Chicken & Pear Bowls come in! This delightful dish marries the sweetness of maple syrup with the tangy zest of Dijon mustard, creating a marinade that makes chicken thighs sing. Add in roasted sweet potatoes, crunchy cabbage, and a refreshing pear slaw, and you’ve got a meal that’s not just good for you, but also incredibly satisfying. It’s perfect for busy weeknights or those special occasions when you want to impress without spending hours in the kitchen.

What Makes This Recipe Stand Out?

This recipe is all about balance. The sweet meets savory combo is a classic for a reason! The maple syrup adds a delightful sweetness that complements the savory depth of the Dijon mustard, creating a harmonious flavor profile that’s hard to resist. Each bite of juicy chicken, paired with the creamy avocado and crunchy pecans, is a symphony of textures and tastes that will have everyone asking for seconds. Plus, it’s all beautifully arranged in a bowl, making it as pleasing to the eyes as it is to the palate.

Ingredients You’ll Need

A vibrant Maple Dijon Chicken & Pear Bowl with colorful ingredients like cabbage and pear slaw, shot in natural light.

Before we dive into the cooking process, let’s gather our ingredients. For these delicious Maple Dijon Chicken & Pear Bowls, you will need:

  • Chicken Thighs: Juicy and flavorful, they are perfect for marinating.
  • Maple Dijon Marinade: A delightful mix of maple syrup and Dijon mustard that gives the chicken a sweet and tangy kick.
  • Sweet Potatoes: Roasted to perfection, adding a nice sweetness and earthy flavor.
  • Cabbage: For crunch and freshness; it also adds a lovely color contrast.
  • Brown Rice: A hearty base that makes these bowls filling and nutritious.
  • Pear Slaw: Made with fresh pears for a refreshing twist, balancing the savory elements of the dish.
  • Avocado: Creamy and rich, avocado takes these bowls to the next level.
  • Toasted Pecans: For that perfect crunch and nutty flavor.

How to Create These Flavorful Bowls

Now that we have our ingredients ready, let’s get cooking! Follow these simple steps to whip up your Maple Dijon Chicken & Pear Bowls:

  1. Marinate the Chicken: Start by marinating the chicken thighs in a mixture of maple syrup and Dijon mustard. Let it sit for at least 30 minutes; if you have more time, marinating overnight enhances the flavors even more.
  2. Roast the Chicken: Preheat your oven to 400°F (200°C). Place the marinated chicken thighs on a baking sheet and roast for about 25-30 minutes, or until they reach an internal temperature of 165°F (74°C) and are golden brown.
  3. Add Sweet Potatoes and Cabbage: While the chicken is roasting, chop up your sweet potatoes and cabbage. Toss them in a bit of olive oil, salt, and pepper, and add them to the baking sheet for the last 20 minutes of cooking. This way, they’ll roast perfectly alongside the chicken.
  4. Prepare the Brown Rice: Cook your brown rice according to package instructions. It’s the perfect hearty base for your bowls!
  5. Make the Pear Slaw: Thinly slice fresh pears and mix them with a little lemon juice and a pinch of salt. You can even add some shredded carrots for extra color and crunch!
  6. Assemble Your Bowls: Once everything is cooked, layer your bowls: start with a scoop of brown rice, then add your roasted chicken, sweet potatoes, and cabbage. Top with the pear slaw, sliced avocado, and sprinkle with toasted pecans for that extra crunch!

Tips for Success

Cooking is an adventure, and I’m here to help you avoid some common bumps along the way. Here are a few tips to make your Maple Dijon Chicken & Pear Bowls even better:

  • Don’t Rush the Marinade: The longer you marinate the chicken, the more flavorful it will be. If you can, let it sit overnight in the fridge.
  • Uniform Sizes: Cut your sweet potatoes and cabbage into similar sizes to ensure even cooking.
  • Customize Your Bowls: Feel free to get creative with your toppings. Roasted chickpeas or crumbled feta can add an exciting twist!

Variations and Substitutions

One of the best things about cooking is the freedom to adapt recipes to your liking. Here are some ideas:

  • Chicken Alternatives: If you’re not a fan of chicken thighs, you can use chicken breasts or even tofu for a vegetarian option!
  • Sweet Potato Substitute: Butternut squash or even zucchini can be used in place of sweet potatoes for a different flavor profile.
  • Nut-Free Option: If you have nut allergies, simply omit the pecans or replace them with sunflower seeds for that crunch factor.

Storage and Freezing

Leftovers? No problem! These bowls store beautifully. Here’s how to keep them fresh:

  • Refrigeration: Store any leftover components in an airtight container in the fridge for up to 3-4 days. Keep the slaw separate to maintain its crunch.
  • Freezing: You can freeze the cooked chicken and sweet potatoes, but it’s best to enjoy the fresh slaw and rice right away for optimal texture.

Frequently Asked Questions

Here are some common questions I get about this recipe:

  • Can I use other proteins? Absolutely! This marinade works well with salmon, pork, or even chickpeas for a plant-based option.
  • What can I serve with these bowls? A side of steamed broccoli or a light salad would pair perfectly with these bowls!
  • Can I prepare this ahead of time? Yes! You can marinate the chicken and chop the veggies the night before, making it a quick dinner option for busy nights.

Troubleshooting Common Issues

Even the most seasoned cooks run into hiccups. Here’s how to tackle some common challenges:

  • Dry Chicken: If your chicken turns out dry, it may have overcooked. Use a meat thermometer to ensure it’s perfectly cooked without going over.
  • Soggy Cabbage: If your cabbage is mushy, try adding it to the pan later in the cooking process next time, so it retains its crunch.

Final Thoughts

Cooking is a journey, and I hope this recipe brings a little magic into your kitchen! These Maple Dijon Chicken & Pear Bowls are not just a meal; they’re a way to gather loved ones around the table, share stories, and create lasting memories. So, roll up your sleeves, get your apron on, and let’s make something beautiful together. I can’t wait to hear how your bowls turn out! Happy cooking!

Maple Dijon Chicken & Pear Bowls

Prep Time 15 minutes
Cook Time 30 minutes
Total Time 45 minutes
Servings 4 servings
Calories 550
A delicious and wholesome bowl combining roasted chicken, sweet potatoes, cabbage, and fresh pear slaw topped with avocado and toasted pecans.

Ingredients

Protein

  • 4 pieces chicken thighs (bone-in or boneless)
  • 0.25 cup maple dijon marinade

Vegetables

  • 2 medium sweet potatoes (cubed)
  • 2 cups chopped cabbage

Grains

  • 1 cup brown rice

Toppings

  • 1 cup pear slaw
  • 1 avocado avocado (sliced)
  • 0.25 cup toasted pecans

Instructions 

  • Roast chicken thighs in maple Dijon marinade.
  • Add sweet potatoes and cabbage to the sheet pan and roast.
  • Cook brown rice separately.
  • Assemble bowls with rice, roasted vegetables, sliced pear slaw, avocado, and pecans.

Notes

For extra flavor, brush the chicken with additional marinade before roasting.
Calories: 550kcal
Cost: $15
Course: Main Course
Cuisine: American
Keyword: Chicken, healthy, pear

Loved this recipe? Save it to your favorite Pinterest board so you can easily find it later! It’s the perfect way to keep all your sweet ideas in one place. ✨

Delicious Maple Dijon Chicken & Pear Bowl with a mix of textures, including toasted pecans and brown rice.

Why You’ll Adore This Recipe

Welcome to my kitchen, where the air is infused with the delightful aroma of melting butter and sweet honey! If you’re searching for a dish that’s as easy to whip up as it is impressive, look no further than my Air Fryer Honey Glazed Salmon. This recipe marries the buttery richness of salmon with a sweet and savory glaze that will have your taste buds doing a happy dance. Not only is it delicious, but it’s also packed with nutrients, making it a perfect choice for weeknight dinners or those special occasions when you want to impress without the fuss.

Growing up, salmon was a staple in my home, and I’ve always adored its versatility. Whether grilled, baked, or pan-seared, it’s a fish that never fails to deliver on flavor. However, cooking it in the air fryer is a game changer! The fish cooks quickly and evenly while retaining moisture, resulting in a tender, flaky texture. Plus, the air fryer gives it a delightful caramelized crust that complements the luscious honey glaze beautifully. So, put on your apron, and let’s dive into this culinary adventure!

Ingredients You’ll Need

This recipe is simple yet packed with flavor, and you might already have most of these ingredients in your pantry. Here’s what you’ll need:

  • 1 1/4 lb boneless salmon fillets, cut into 4 pieces (5 oz each, about 1″ thick)
  • 2 tablespoons melted butter
  • 2 tablespoons olive oil
  • 2 tablespoons soy sauce
  • 2 tablespoons honey
  • 4 cloves garlic, minced
  • 2 tablespoons brown sugar
  • 2 tablespoons Dijon mustard
  • 1/4 teaspoon black pepper (or to taste)
  • 1/8 teaspoon kosher salt
  • 4 slices of lemon
  • Fresh dill for garnish

How to Make Air Fryer Honey Glazed Salmon

Air fryer honey glazed salmon with a shiny glaze, set against a blurred cozy background.

Now that we have our ingredients ready, it’s time to get cooking! This recipe is straightforward and quick, making it perfect for busy weekday evenings. Let’s break it down step-by-step:

  1. In a large mixing bowl, combine the melted butter, olive oil, soy sauce, honey, minced garlic, brown sugar, Dijon mustard, salt, and black pepper. Mix well until everything is thoroughly combined.
  2. Add the salmon fillets to the bowl, ensuring they are fully coated in the marinade. Cover the bowl and refrigerate for at least 30 minutes. This marinating time is crucial for the flavors to permeate the salmon.
  3. While the salmon is marinating, preheat your air fryer to 390°F (200°C) for about 3-5 minutes.
  4. Line the air fryer basket with aluminum foil to trap the delicious juices. Place lemon slices on top of the foil and then lay the marinated salmon fillets on top.
  5. Air fry the salmon at 390°F for approximately 12 minutes, or until the internal temperature reaches 145°F (63°C). The salmon should be opaque and flake easily with a fork.
  6. Once cooked, spoon any remaining marinade over the salmon. Garnish with fresh dill for a pop of color and flavor. Serve over white rice or your favorite side dish, and enjoy your culinary masterpiece!

Tips for Perfect Salmon

To make your Air Fryer Honey Glazed Salmon even better, here are some tips:

  • Marinate Longer: If you have the time, marinating the salmon for a few hours or overnight can intensify the flavors.
  • Adjust Cooking Time: Depending on the thickness of your salmon fillets, you may need to adjust the cooking time slightly. Thicker fillets will require a bit more time.
  • Check for Doneness: Use a food thermometer to ensure the salmon reaches an internal temperature of 145°F (63°C) for safety and optimal flavor.
  • Experiment with Garnishes: While dill is a fantastic garnish, feel free to get creative! Chopped chives, parsley, or even a sprinkle of sesame seeds can add a new twist.

Variations You Can Try

This recipe is incredibly versatile! Here are a few variations you might consider:

  • Spicy Kick: Add a dash of red pepper flakes or a splash of sriracha to the marinade for a spicy version.
  • Maple Glaze: Substitute honey with maple syrup for a different flavor profile that’s equally delightful.
  • Herb Infusion: Mix in fresh herbs like thyme or rosemary with the marinade for an aromatic touch.

Substitutions to Consider

If you’re missing an ingredient or want to make this dish healthier, here are some substitutions:

  • Low-Sodium Soy Sauce: Swap regular soy sauce for a low-sodium version to reduce salt intake.
  • Agave Nectar: If you’re looking for a vegan option, agave nectar can replace honey.
  • Mustard Alternatives: If you don’t have Dijon mustard, yellow mustard works in a pinch.

Equipment You’ll Need

Here’s a quick list of equipment to make this recipe a breeze:

  • Air Fryer
  • Mixing Bowl
  • Measuring Cups and Spoons
  • Food Thermometer
  • Aluminum Foil (optional)

Storage and Freezing Tips

Leftovers? No problem! Here’s how to store and freeze your delicious salmon:

  • Refrigeration: Store any leftover salmon in an airtight container in the fridge for up to 2 days.
  • Freezing: You can also freeze the marinated salmon before cooking. Just place it in a freezer-safe bag or container. Thaw in the fridge before cooking.

FAQs About This Recipe

Have questions? Here are some common queries and answers:

  • Can I use skinless salmon fillets? Absolutely! Skinless fillets work just fine. Just adjust the cooking time if needed.
  • What if I don’t have an air fryer? No worries! You can bake the salmon in the oven at 400°F (200°C) for about 15-20 minutes.
  • Can I marinate the salmon overnight? Yes! Marinating overnight will enhance the flavors even more.
  • How do I know when the salmon is done? The salmon is ready when it flakes easily with a fork and has turned opaque.

Troubleshooting Common Issues

If you run into any hiccups, here’s how to troubleshoot:

  • Dry Salmon: If your salmon turns out dry, you may have overcooked it. Keep an eye on the cooking time next time.
  • Sticking to the Basket: If your salmon sticks to the air fryer, try giving it a light spritz of cooking spray before cooking.

Conclusion: A Dish to Savor

There you have it—a delightful Air Fryer Honey Glazed Salmon that’s sure to impress. Cooking should be fun, engaging, and a little adventurous, and this recipe brings all of that to your kitchen. Whether you’re cooking for a cozy family dinner or entertaining friends, this dish is bound to become a favorite. So, roll up your sleeves, embrace the magic of cooking, and let this recipe transport you to flavor paradise. I can’t wait for you to try it; I promise it won’t disappoint! Happy cooking, my friends!

Air Fryer Honey Glazed Salmon

Prep Time 10 minutes
Cook Time 12 minutes
Total Time 22 minutes
Servings 4 pieces
Calories 350
Enjoy tender, flavorful salmon glazed with honey and cooked to perfection in the air fryer for a quick and healthy meal.

Ingredients

Salmon

  • 1.25 lb boneless salmon fillets (cut into 4 pieces (5 oz each, about 1" thick))
  • 2 tablespoons melted butter
  • 2 tablespoons olive oil
  • 2 tablespoons soy sauce
  • 2 tablespoons honey
  • 4 cloves garlic, minced
  • 2 tablespoons brown sugar
  • 2 tablespoons dijon mustard
  • 0.25 teaspoon black pepper (or to taste)
  • 0.125 teaspoon kosher salt
  • 4 slices lemon (for garnish)

fresh dill

Instructions 

  • Mix melted butter, olive oil, soy sauce, honey, garlic, brown sugar, Dijon mustard, salt, and pepper.
  • Marinate salmon in mixture for at least 30 minutes.
  • Preheat air fryer to 390°F (200°C). Line basket with foil, add lemon slices, then salmon.
  • Air fry for 12 minutes until internal temp reaches 145°F (63°C).
  • Drizzle remaining marinade over salmon, garnish with dill, and serve.

Notes

Ensure not to overcook the salmon for best results.
Calories: 350kcal
Cost: $15
Course: Main Course
Cuisine: American
Keyword: Salmon

Loved this recipe? Save it to your favorite Pinterest board so you can easily find it later! It’s the perfect way to keep all your sweet ideas in one place. ✨

Detail of glazed salmon pieces, showcasing texture and color with soft, natural lighting.

Why This Dish is a Family Favorite

There’s something magical about a meal that combines sweet and savory flavors, don’t you think? It’s like a culinary love story unfolding right on your plate. When it comes to easy weeknight dinners that pack a punch, my Crispy Honey Garlic Salmon takes center stage. This delightful dish balances the sweetness of honey with the savory depth of garlic and soy sauce, creating a flavor profile that dances on your taste buds.

As a busy mom, I cherish meals that bring my family together without spending hours in the kitchen. This dish is not only quick to prepare—taking just about 20 minutes—but it also fills the room with an irresistible aroma that beckons everyone to the table. Plus, it’s a feast for the eyes with its glistening salmon topped with crunchy sesame seeds and fresh green onions. Every bite is a warm hug that makes you feel right at home.

Ingredients Breakdown & Prep Tips

Before we dive into the kitchen, let’s gather our ingredients and prepare for a delicious culinary adventure.

Essential Ingredients

Appetizing shot of salmon with a glossy honey garlic glaze, featuring sesame seeds and soft shadows.
  • 4 salmon fillets
  • 2 tablespoons honey
  • 3 cloves garlic, minced
  • 2 tablespoons soy sauce
  • 1 tablespoon olive oil
  • 1 teaspoon salt
  • 1/2 teaspoon black pepper
  • 1 tablespoon sesame seeds (optional)
  • 2 green onions, chopped (for garnish)

These ingredients are not just staples; they’re the building blocks for a meal that’s sure to impress. The salmon serves as the perfect canvas, while the marinade transforms it into an irresistible dish. Feel free to play around with the quantities if you’re feeling adventurous or if you prefer a more robust flavor.

Preparation Method with Sensory Cues

Now, let’s get cooking! Here’s how you can create this masterpiece:

  1. In a small bowl, mix together the honey, minced garlic, soy sauce, olive oil, salt, and black pepper. The aroma of garlic and sweet honey will fill your kitchen, creating a welcoming atmosphere.
  2. Place the salmon fillets in a shallow dish and pour the marinade over them, ensuring they are well-coated. Let them marinate for at least 15 minutes. This step is crucial for the flavors to penetrate the fish.
  3. Preheat your oven to 400°F (200°C). A hot oven is key to achieving that perfect crispy texture.
  4. Line a baking sheet with parchment paper and place the marinated salmon fillets on it, skin-side down. This creates an easy cleanup and helps the salmon cook evenly.
  5. Bake the salmon in the preheated oven for 12-15 minutes, or until it’s cooked through and flakes easily with a fork. Pro tip: if you love a crispy exterior, switch your oven to broil for the last 2 minutes of baking!
  6. Once out of the oven, sprinkle with sesame seeds and chopped green onions for a pop of color and flavor. Your dish is ready to serve!

Nutritional Benefits

This Crispy Honey Garlic Salmon is not only a delight for your palate but also a nutritious choice for dinner. Salmon is rich in omega-3 fatty acids, which are known to support heart health and boost brain function. Plus, the garlic not only adds flavor but also has numerous health benefits, including anti-inflammatory properties.

Common Mistakes & Fixes

Avoid These Common Pitfalls

While cooking is an art, it’s also a science. Here are a few mistakes to avoid when preparing your salmon:

  • Overcooking: Salmon can dry out quickly, so keep an eye on it while baking. It should be just opaque and flaky when done.
  • Skipping the marination: Allowing the salmon to marinate enhances its flavor. Don’t rush this step!
  • Using too much heat: If your oven is too hot, the outside may cook too quickly, leaving the inside underdone. Stick to the recommended temperature for best results.

Pro Tips for Perfect Salmon

Here are some golden nuggets of wisdom to ensure you nail this recipe every time:

  • For an extra layer of flavor, consider adding a splash of lemon juice to the marinade. It brightens the dish beautifully.
  • If you like a bit of spice, add red pepper flakes to the marinade for a kick.
  • Don’t skip the broiling step! It’s what gives the salmon that coveted crispy finish.

Serving, Storage & Creative Variations

Best Ways to Serve It

This dish is as versatile as it is delicious! Here are some of my favorite ways to serve Crispy Honey Garlic Salmon:

  • Pair it with fluffy rice or quinoa for a hearty meal.
  • Serve alongside roasted vegetables for a colorful plate.
  • For a light touch, add a fresh salad with a citrus vinaigrette.

Storage + Seasonal or Dietary Variations

If you have leftovers (though I doubt you will, because it’s that good!), store them in an airtight container in the fridge for up to two days. Reheating in a skillet on low heat helps maintain that crispy texture.

Feeling adventurous? You can easily modify this recipe to suit your dietary needs:

  • For a gluten-free option: Substitute soy sauce with a gluten-free variety.
  • For a vegetarian twist: Swap salmon for firm tofu or tempeh. Just be sure to adjust the cooking time accordingly.
  • For a fresh summer dish: Serve it cold on a bed of mixed greens with a mango salsa.

Frequently Asked Questions

Can I use frozen salmon?

Absolutely! Just ensure it’s completely thawed and patted dry before cooking. Frozen salmon can still turn out delicious when prepared correctly.

What can I serve with this dish?

Pair it with rice, quinoa, or a fresh salad. Adding grilled vegetables also makes for a wholesome meal.

Can I bake instead of broil?

Yes, you can bake the salmon at 400°F for about 12-15 minutes. Just brush it with the sauce before baking.

Conclusion

Cooking is not just about making meals; it’s about creating memories and cherishing moments with loved ones. This Crispy Honey Garlic Salmon recipe embodies that spirit, blending simplicity with flavor and elegance. Whether you’re cooking for a busy weeknight or a special occasion, this dish is sure to impress and satisfy. So, gather your ingredients, put on your favorite playlist, and let’s make some culinary magic happen!

Remember, every time you share a meal, you’re sharing love. Let this crispy, sweet, and savory salmon be the centerpiece of your family dinners, inviting laughter and connection around the table. Happy cooking, my friends!

Crispy Honey Garlic Salmon – Sweet and Savory Salmon Recipes

Prep Time 15 minutes
Cook Time 15 minutes
Total Time 30 minutes
Servings 4 servings
Calories 350
This crispy honey garlic salmon combines sweet, savory, and crispy elements for a delicious and easy-to-make seafood dish.

Ingredients

Main ingredients

  • 4 fillets salmon fillets
  • 2 tablespoons honey
  • 3 cloves garlic, minced
  • 2 tablespoons soy sauce
  • 1 tablespoon olive oil
  • 1 teaspoon salt
  • 0.5 teaspoon black pepper
  • 1 tablespoon sesame seeds (optional)
  • 2 green onions chopped green onions (for garnish)

Instructions 

  • Mix honey, garlic, soy sauce, olive oil, salt, and pepper to make the marinade.
  • Marinate salmon for at least 15 minutes.
  • Preheat oven to 400°F (200°C). Place salmon on a parchment-lined baking sheet.
  • Bake for 12-15 minutes, then broil for 2 minutes for crispiness.
  • Garnish with sesame seeds and green onions before serving.

Notes

For extra crispiness, broil the salmon for the last 2 minutes of baking.
Calories: 350kcal
Cost: $15
Course: Main Course
Cuisine: American
Keyword: Salmon

Loved this recipe? Save it to your favorite Pinterest board so you can easily find it later! It’s the perfect way to keep all your sweet ideas in one place. ✨

Delicious salmon fillet drizzled with honey and garlic sauce, presented on a blurred cozy background.

Why You’ll Love These Crispy Air Fryer Salmon Bites

Let’s face it: life can get busy, and sometimes we all need a quick dinner solution that doesn’t compromise on flavor or nutrition. That’s where these crispy Air Fryer Salmon Bites come in! They’re not just any weeknight meal; they’re a delightful blend of crispy, savory, and downright scrumptious. Imagine sinking your teeth into tender salmon, perfectly seasoned and bursting with flavor, all while knowing you whipped it up in under 15 minutes. Yes, please!

These bites are a testament to the magic of the air fryer, which transforms humble ingredients into crispy, flavorful bites that make dinner feel special. Whether you’re cooking for your family, hosting a casual gathering, or simply treating yourself, these salmon bites are sure to impress. Plus, they’re low-carb and packed with protein, making them a perfect healthy option that feels indulgent.

Ingredients You’ll Need

Gathering the right ingredients is key to making your salmon bites delicious. Here’s what you’ll need:

  • 1 pound salmon fillet (skinless and boneless) – Look for fresh, vibrant fillets for the best flavor.
  • 2 tablespoons olive oil – This adds richness and helps the spices adhere.
  • 1 teaspoon garlic powder – A must-have for that savory kick.
  • 1 teaspoon paprika – This brings a subtle smokiness and a beautiful color.
  • 1 teaspoon salt – Essential for enhancing all the flavors.
  • 1/2 teaspoon black pepper – For a little heat.
  • 1 tablespoon lemon juice – Brightens up the dish and adds a refreshing zing.
  • Chopped fresh parsley (for garnish, optional) – A sprinkle of green always makes a dish pop!

Step-by-Step Instructions

Crispy air fryer salmon bites on a plate, accented with lemon wedges and herbs in soft lighting.

Ready to dive into making these delicious bites? Let’s get cooking!

  1. Preheat the air fryer. Start by setting your air fryer to 400°F (200°C). This ensures your salmon bites will cook evenly and get that perfect crispy exterior.
  2. Cut the salmon. Take your salmon fillet and cut it into bite-sized cubes. Aim for uniform pieces to ensure they cook evenly. You want them to be just the right size for popping into your mouth!
  3. Make the marinade. In a mixing bowl, combine the olive oil, garlic powder, paprika, salt, black pepper, and lemon juice. Whisk it all together until you have a lovely, smooth mixture. This will be the flavor bomb that coats our salmon!
  4. Coat the salmon. Toss the salmon cubes in the marinade, making sure each piece is evenly coated with that delicious mixture. Don’t rush this step—it’s where all the flavor happens!
  5. Prepare the air fryer basket. Lightly spray the air fryer basket with olive oil to prevent sticking. This step is crucial for keeping your bites crispy and intact.
  6. Air fry the salmon. Arrange the marinated salmon bites in a single layer in the air fryer basket. Remember, don’t overcrowd them—this is key to getting that wonderful crispiness. Air fry for about 8-10 minutes, shaking the basket halfway through to ensure even cooking.
  7. Garnish and serve. Once the salmon bites are cooked through and flaky, carefully remove them from the air fryer. If you like, sprinkle with chopped parsley for a fresh touch and serve warm. Enjoy!

Tips for Perfect Salmon Bites

Here are some tips to ensure your salmon bites turn out perfect every time:

  • Choose the right salmon: Look for fresh salmon fillets that are bright in color without any dark spots. Wild-caught salmon tends to have a richer flavor, but farmed salmon works just as well.
  • Don’t skip the marinade: If you have time, let the salmon marinate for at least 30 minutes (or up to 4 hours). This extra time allows the flavors to penetrate the salmon more deeply.
  • Space is key: Avoid overcrowding the air fryer basket. If needed, cook in batches to maintain that coveted crispiness.
  • Watch the cooking time: Every air fryer is a little different, so keep an eye on your salmon bites after about 8 minutes. You want them golden brown but not overcooked.

Variations to Try

Feeling adventurous? Here are some fun variations to customize your salmon bites:

  • Spicy Twist: Add cayenne pepper or a splash of hot sauce to the marinade for a spicy kick.
  • Herb-Infused: Swap out the parsley for fresh dill or cilantro for a different flavor profile.
  • Asian-Inspired: Use soy sauce instead of olive oil and add sesame seeds for a nutty flavor.

Substitutions

If you’re missing an ingredient or looking for alternatives, consider these substitutions:

  • Olive oil: You can use avocado oil or melted coconut oil if you prefer.
  • Garlic powder: Fresh minced garlic can be used for a more intense flavor—just be cautious, as fresh garlic can burn faster.
  • Lemon juice: Fresh lime juice works beautifully as an alternative.

Equipment You’ll Need

To make these delicious salmon bites, you’ll need:

  • Air fryer: Obviously, this is the star of the show!
  • Mixing bowl: For combining your marinade and salmon.
  • Sharp knife: To cut the salmon into uniform pieces.
  • Measuring spoons: For accurate measurements of your ingredients.

How to Store and Freeze

If you have leftovers (if!), here’s how to store them:

  • Refrigerator: Store leftover salmon bites in an airtight container for up to 3 days. Make sure they’re completely cooled before sealing.
  • Freezer: For longer storage, freeze the cooled salmon bites on a baking sheet until solid, then transfer them to a freezer-safe bag. They’ll keep well for up to 2 months.
  • Reheating: To reheat, pop them back in the air fryer at 350°F (175°C) for about 4-5 minutes until heated through and crispy again.

FAQs About Air Fryer Salmon Bites

Here are some common questions you might have:

  • Can I use frozen salmon? Yes, but make sure to thaw it completely before cutting and marinating.
  • What should I serve with these bites? They pair wonderfully with steamed rice, a fresh salad, or even in tacos!
  • How do I know when the salmon is done? Salmon should flake easily with a fork and have an internal temperature of 145°F (63°C).

Troubleshooting Tips

If you run into any issues, here’s what to do:

  • My salmon bites are soggy: This usually happens from overcrowding the air fryer. Try cooking in smaller batches next time.
  • They’re too dry: Make sure not to overcook them. Keep a close eye on the cooking time.

Conclusion

There you have it—crispy, flavorful Air Fryer Salmon Bites that are perfect for any night of the week. They’re quick to make, easy to customize, and packed with nutrition. Whether you’re sharing them with loved ones or enjoying a quiet dinner at home, these bites are sure to bring a smile to your face and warmth to your heart. So grab your air fryer, and let’s make magic happen in the kitchen!

Air Fryer Salmon Bites for Quick and Healthy Dinners

Prep Time 10 minutes
Cook Time 10 minutes
Total Time 20 minutes
Servings 4 servings
Calories 250
Enjoy tender, flavorful salmon bites cooked quickly in the air fryer for a healthy dinner option.

Ingredients

Salmon

  • 1 pound salmon fillet, skinless and boneless
  • 2 tablespoons olive oil
  • 1 teaspoon garlic powder
  • 1 teaspoon paprika
  • 1 teaspoon salt
  • 1/2 teaspoon black pepper
  • 1 tablespoon lemon juice

Chopped fresh parsley for garnish (optional)

Instructions 

  • Preheat air fryer to 400°F (200°C).
  • Cut salmon into bite-sized cubes and toss with olive oil, garlic powder, paprika, salt, black pepper, and lemon juice.
  • Place salmon bites in the air fryer basket in a single layer.
  • Air fry for 8-10 minutes, shaking halfway, until cooked through and flaky.
  • Remove, garnish with parsley if desired, and serve warm.

Notes

For extra flavor, add a squeeze of lemon before serving.
Calories: 250kcal
Cost: $15
Course: Main Course
Cuisine: American
Keyword: Salmon

Loved this recipe? Save it to your favorite Pinterest board so you can easily find it later! It’s the perfect way to keep all your sweet ideas in one place. ✨

Deliciously cooked salmon bites displayed in an elegant arrangement with a blurred background.

Why You’ll Fall in Love with This Dish

Ah, salmon! This magnificent fish has a way of bringing the ocean’s charm right to your plate. Growing up, I remember my mom preparing salmon for special occasions, and it always felt like a treat. Fast forward to my adult years, and I’ve discovered that salmon doesn’t have to be reserved for celebrations. With its rich flavor and buttery texture, it’s a canvas waiting for your culinary creativity.

Now, let’s talk about the star of the show: this Crispy Honey Garlic Glazed Salmon Recipe. Imagine this: crispy on the outside, tender and flaky on the inside, all enveloped in a sweet and savory glaze that dances on your taste buds. It’s not just a meal; it’s an experience, a hug from the inside out. This delightful dish comes together in less than 30 minutes, making it perfect for weeknight dinners or impressing guests on a leisurely weekend.

Ingredients You’ll Need

Before we dive into the cooking process, let’s gather our ingredients. Here’s what you’ll need for this enchanting salmon dish:

  • 2 salmon fillets
  • 2 tablespoons honey
  • 2 tablespoons soy sauce
  • 2 cloves garlic, minced
  • 1 tablespoon olive oil
  • Salt and pepper to taste
  • Chopped green onions for garnish (optional)
  • Sesame seeds for garnish (optional)

Steps to Culinary Bliss

Eye-level shot of a delicious salmon fillet topped with a glossy honey garlic glaze, presented on a rustic plate.

Ready to get cooking? Let’s turn your kitchen into a flavor wonderland!

Step 1: Prep Your Ingredients

First things first! Gather all your ingredients and prepare them. This is the fun part! Mince your garlic, measure out your honey and soy sauce, and season your salmon fillets with salt and pepper. Pro tip: Let your salmon sit at room temperature for about 15 minutes before cooking. This helps it cook evenly.

Step 2: Whisk Up the Magic

In a small bowl, combine the honey, soy sauce, minced garlic, and a pinch of salt and pepper. Whisk it all together until you have a smooth, sweet-salty concoction that will make your taste buds sing. Trust me; this glaze is the secret to making your salmon unforgettable!

Step 3: Heat Things Up

Warm up a skillet over medium-high heat and drizzle in the olive oil. When the oil is shimmering but not smoking, it’s time to add the salmon fillets. Place them skin-side down in the skillet and let them sizzle for about 4-5 minutes. You want that skin to get crispy and golden brown, creating a delightful contrast with the tender flesh of the fish.

Step 4: Glaze and Finish Cooking

Once your salmon is beautifully crispy, gently flip the fillets over. Now, here’s where the magic happens: pour your honey garlic mixture over the top of the salmon. Let it bubble and caramelize for about 3-4 minutes, or until the salmon is cooked through and glistening with that irresistible glaze. You’ll know it’s done when it flakes easily with a fork.

Step 5: Serve and Garnish

Remove the skillet from the heat and transfer your glazed salmon to a serving plate. For a touch of color and flavor, sprinkle some chopped green onions and sesame seeds on top. And voila! Your Crispy Honey Garlic Glazed Salmon is ready to steal the show.

Tips for Perfectly Crispy Salmon

  • Pat the Salmon Dry: Before seasoning, make sure to pat the salmon fillets dry with a paper towel. This helps achieve that crispy skin you’re dreaming of!
  • Don’t Rush the Cooking: Salmon benefits from a gentle cooking method. Keep an eye on the heat, as too high can lead to burnt garlic or overcooked fish.
  • Use Fresh Ingredients: The quality of your ingredients matters! Fresh salmon, real honey, and good soy sauce will elevate your dish.
  • Tweak the Glaze: Feel free to adjust the sweetness or saltiness of the glaze to suit your taste. Add a splash of lime juice for a zesty kick!

Delicious Variations to Try

Who says you can’t get creative? Here are some fun variations to keep things exciting:

  • Spicy Kick: Add a pinch of red pepper flakes or a drizzle of sriracha to the glaze for a spicy twist.
  • Herb Infusion: Mix in some fresh herbs like cilantro or parsley into your glaze for an herby freshness.
  • Fruit Fusion: Try adding a tablespoon of orange or pineapple juice to the glaze for a fruity twist!

Equipment You’ll Need

No need for fancy gadgets here! Just grab:

  • A skillet (non-stick or cast iron works great)
  • A whisk
  • A small bowl for mixing the glaze
  • A spatula for flipping your salmon

Storage and Reheating Tips

Leftovers? Yes, please! Here’s how to store and enjoy your crispy salmon later:

  • Refrigerator: Store your leftover salmon in an airtight container for up to 3 days.
  • Freezing: If you have extra salmon, it can be frozen for up to 3 months. Just make sure to wrap it tightly!
  • Reheating: Reheat gently in a skillet over low heat to maintain that crispy texture. You can also pop it in the microwave for a quicker option, but the texture may suffer a bit.

FAQs About This Recipe

Can I use this glaze for other proteins?

Absolutely! This honey garlic glaze works wonders on chicken, shrimp, or even tofu. Just adjust the cooking times accordingly.

What sides pair well with this salmon?

Oh, I’m glad you asked! This dish pairs beautifully with steamed vegetables, fluffy rice, or a fresh salad. You could even serve it with mashed potatoes for a comforting touch.

Is this recipe suitable for meal prep?

Yes! You can make this salmon ahead of time and enjoy it throughout the week. Just store it properly, and you’ll have a delicious meal ready to go!

Troubleshooting Common Issues

Even the best of us have our off days. Here are some common issues and how to fix them:

  • Salmon sticking to the pan: Make sure your skillet is adequately heated and oiled before adding the salmon.
  • Overcooked salmon: If your salmon is dry, it may have cooked too long. Keep an eye on it while it’s in the skillet.
  • Too sweet or too salty: Adjust the balance of honey and soy sauce to suit your taste. You can always add more, but it’s hard to take it out once it’s in!

Final Thoughts

And there you have it, my dear friends! This Crispy Honey Garlic Glazed Salmon is not just a recipe; it’s a culinary journey that brings comfort and joy to your table. Whether you’re cooking for yourself, a special someone, or a gathering of friends, this dish is sure to impress and delight. Don’t forget to pour yourself a glass of something nice, set the table, and enjoy every delightful bite. Happy cooking, and may your kitchen always be filled with love and laughter!

Crispy Honey Garlic Glazed Salmon Recipe

Prep Time 10 minutes
Cook Time 10 minutes
Total Time 20 minutes
Servings 2 servings
Calories 350
This flavorful salmon recipe features a crispy exterior topped with a sweet and savory honey garlic glaze, perfect for a quick and delicious meal.

Ingredients

Main ingredients

  • 2 fillets salmon fillets
  • 2 tablespoons honey
  • 2 tablespoons soy sauce
  • 2 cloves garlic, minced
  • 1 tablespoon olive oil
  • to taste salt and pepper (for seasoning)
  • optional chopped green onions for garnish
  • optional sesame seeds for garnish

Instructions 

  • Whisk honey, soy sauce, minced garlic, salt, and pepper in a bowl.
  • Heat olive oil in a skillet over medium-high heat.
  • Season salmon with salt and pepper, then cook skin-side down for 4-5 minutes until crispy.
  • Flip salmon, pour honey garlic mixture over, and cook 3-4 minutes until glazed and cooked through.
  • Remove from heat, garnish with green onions and sesame seeds if desired, and serve immediately.

Notes

For extra flavor, marinate the salmon in the honey garlic mixture for 15 minutes before cooking.
Calories: 350kcal
Cost: $15
Course: Main Course
Cuisine: American
Keyword: Salmon

Loved this recipe? Save it to your favorite Pinterest board so you can easily find it later! It’s the perfect way to keep all your sweet ideas in one place. ✨

Detailed view of a beautifully cooked salmon fillet with a golden honey garlic glaze, accompanied by soft, blurred background elements.

Why You’ll Fall in Love with These Bites

Imagine biting into a perfectly cooked piece of salmon, where sweet and spicy notes dance on your palate, and a burst of citrus lifts the entire experience. Welcome to the world of Hot Honey Salmon Bites! These little gems are more than just a meal; they’re an experience. Whether you’re hosting a gathering or enjoying a cozy night in, these bites are sure to steal the show, leaving your taste buds singing and your heart fluttering.

Growing up, my family had a rule: every meal should be an occasion. And what better way to make an occasion special than with food that’s delightful and easy to prepare? With just a handful of ingredients, you can create a dish that feels both gourmet and heartwarming. So, roll up your sleeves, grab your apron, and let’s dive into the magic of these sweet and spicy salmon bites!

Ingredients & Substitutions

Let’s talk about what you’ll need to create these Sweet And Spicy Salmon Bites. Here’s a list of the ingredients:

  • 1 pound salmon fillet, cut into bite-sized pieces
  • 2 tablespoons olive oil
  • 1 teaspoon salt
  • 1/2 teaspoon black pepper
  • 1/4 teaspoon paprika
  • 1/4 cup honey
  • 1 tablespoon hot sauce (adjust to taste)
  • 1 tablespoon lemon juice
  • Fresh parsley, chopped (for garnish)

Now, let’s be real: cooking is all about improvisation. If you’re missing an ingredient, don’t sweat it! Here are some substitutions you can consider:

  • Salmon: If you’re not a fan of salmon, try using chicken or tofu for a different twist.
  • Honey: For a vegan option, agave nectar or maple syrup can work wonders.
  • Hot Sauce: If you prefer milder flavors, you can swap this out for a dash of soy sauce or leave it out altogether.
  • Olive Oil: Avocado oil or melted coconut oil are great alternatives.

Getting the Spice Just Right

Savory Hot Honey Salmon Bites on a rustic plate, showcasing vibrant colors and textures.

One of the best parts about these Honey Lemon Pepper Salmon Bites is the flexibility in spice. The balance of sweet and heat can be tailored to your taste. Here’s how:

  • For a milder kick, reduce the amount of hot sauce or replace it with a sweet chili sauce.
  • If you’re feeling adventurous, add a pinch of cayenne pepper or a sprinkle of red pepper flakes to elevate the heat.
  • For those who love a fiery punch, consider adding a few dashes of your favorite hot sauce into the honey mix!

How to Serve Hot Honey Salmon Bites

These bites are incredibly versatile and can be served in various ways:

  • As an appetizer, they’re perfect for parties or game nights.
  • Serve them over a bed of greens, drizzled with leftover hot honey, for a refreshing salad.
  • Pair them with rice or quinoa for a satisfying main course.
  • They also make excellent additions to a charcuterie board, bringing a unique flavor profile to the mix.

Don’t forget to garnish with fresh parsley for that pop of color and flavor!

How to Store Hot Honey Salmon Bites

Planning on leftovers? Here’s how to store them:

  • Allow the salmon bites to cool to room temperature.
  • Store them in an airtight container in the refrigerator for up to 3 days.
  • For best results, separate the salmon from the hot honey sauce to maintain texture.
  • To reheat, place them in the oven or air fryer until warmed through.

Cooking Instructions

Now, let’s get to the heart of the matter: the cooking process!

  1. Preheat your oven to 400°F (200°C).
  2. In a mixing bowl, whisk together the olive oil, salt, pepper, and paprika.
  3. Toss the salmon pieces in the olive oil mixture until they’re evenly coated. This step is crucial for infusing flavor!
  4. Spread the salmon bites on a baking sheet lined with parchment paper for easy cleaning.
  5. In a separate bowl, combine the honey, hot sauce, and lemon juice. This is where the magic happens!
  6. Drizzle half of the hot honey mixture over the salmon bites, ensuring they’re well-coated.
  7. Bake in the preheated oven for 12-15 minutes, or until the salmon is cooked through and flakes easily with a fork.
  8. Remove from the oven and drizzle the remaining hot honey sauce over the salmon bites.
  9. Garnish with chopped parsley and serve immediately. Enjoy the satisfied sighs!

Tips for Perfect Bites

To ensure your Hot Honey Salmon Bites turn out perfectly every time, keep these tips in mind:

  • Choose the freshest salmon you can find for the best flavor.
  • Don’t overcrowd the baking sheet; give the salmon space to cook evenly.
  • Keep an eye on the baking time—salmon can go from perfectly cooked to overdone quickly!

Variations to Try

Ready to shake things up? Here are some variations you can try:

  • Asian-Inspired: Add a touch of sesame oil to the olive oil mixture and sprinkle with sesame seeds before serving.
  • Herbed Delight: Mix in fresh herbs like dill or cilantro into the hot honey sauce for an aromatic twist.
  • Sweet and Savory Combo: Add diced mango or pineapple to the baking sheet for a sweet contrast to the salmon.

FAQs

Can I use frozen salmon? Yes! Just make sure to thaw it completely before cutting and seasoning.

What sides go well with these salmon bites? They pair beautifully with steamed veggies, rice, or a light salad.

Can I make these in an air fryer? Absolutely! Cook them at 375°F for about 8-10 minutes for a crispy finish.

Troubleshooting Common Issues

If you find your salmon isn’t cooking evenly:

  • Check your oven’s temperature with an oven thermometer to ensure it’s accurate.
  • Make sure the salmon pieces are cut to similar sizes for even cooking.

Conclusion

Now that you have the scoop on these Hot Honey Salmon Bites, it’s time to get cooking and make some delicious memories. Whether you whip these up for a family dinner or as a show-stopping appetizer for guests, I promise they won’t disappoint. The blend of sweet honey, zesty lemon, and a hint of spice creates a flavor explosion that’s hard to resist. So gather your ingredients, invite your loved ones to the kitchen, and let’s create something magical together. Happy cooking!

Hot Honey Salmon Bites

Prep Time 10 minutes
Cook Time 15 minutes
Total Time 25 minutes
Servings 4 servings
Calories 250
Delicious bite-sized salmon coated in a sweet and spicy hot honey glaze, perfect for a quick and flavorful meal.

Ingredients

Salmon

  • 1 pound salmon fillet, cut into bite-sized pieces
  • 2 tablespoons olive oil
  • 1 teaspoon salt
  • 1/2 teaspoon black pepper
  • 1/4 teaspoon paprika
  • 1/4 cup honey
  • 1 tablespoon hot sauce (adjust to taste)
  • 1 tablespoon lemon juice

Garnish

  • to taste fresh parsley, chopped (for garnish)

Instructions 

  • Preheat oven to 400°F (200°C). Mix olive oil, salt, pepper, and paprika.
  • Toss salmon pieces in the oil mixture and place on a parchment-lined baking sheet.
  • Combine honey, hot sauce, and lemon juice; drizzle half over salmon.
  • Bake for 12-15 minutes until cooked through, then drizzle remaining sauce and garnish with parsley.

Notes

Ensure not to overcook the salmon for best texture.
Calories: 250kcal
Cost: $15
Course: Main Course
Cuisine: American
Keyword: Salmon

Loved this recipe? Save it to your favorite Pinterest board so you can easily find it later! It’s the perfect way to keep all your sweet ideas in one place. ✨

Deliciously glazed Hot Honey Salmon Bites with a blurred cozy background, highlighting the dish.

Why This Marinade Will Become Your Go-To

Salmon is one of those magical ingredients that can transform any meal from ordinary to extraordinary with just a little love and attention. Whether you’re hosting a dinner party or simply trying to impress yourself on a cozy weeknight, this easy salmon marinade recipe will elevate your fish game to new heights. With a perfect balance of sweet, savory, and tangy flavors, you’ll find that this marinade complements the rich taste of salmon beautifully. Plus, it’s incredibly simple to whip up, making it accessible for both novice cooks and seasoned chefs alike.

Key Ingredients for a Flavorful Marinade

When it comes to creating a standout salmon dish, the quality and combination of ingredients play a crucial role. Below are the star players that make this marinade shine:

  • 1/4 cup olive oil: This acts as the base, ensuring the marinade clings to the salmon while adding a rich, fruity flavor.
  • 2 tablespoons soy sauce: A touch of umami that enhances all the other flavors while helping to tenderize the fish.
  • 2 tablespoons honey: This natural sweetener balances the saltiness of the soy sauce and adds a delightful caramelization during cooking.
  • 2 tablespoons lemon juice: Freshly squeezed for a bright acidity that cuts through the richness of the salmon.
  • 2 cloves garlic, minced: Adds depth and robustness to the marinade.
  • 1 teaspoon Dijon mustard: This brings a subtle tanginess that complements the overall flavor profile.
  • 1/2 teaspoon black pepper: For a touch of warmth and spice.
  • 1/2 teaspoon salt: Essential for enhancing the flavors of the marinade.
  • 1/2 teaspoon dried dill: An aromatic herb that pairs beautifully with salmon.

How to Prepare Your Salmon Marinade

A beautifully arranged salmon marinade featuring herbs and spices, captured in soft natural light with a blurred background.

Ready to dive into the cooking process? Let’s break it down step-by-step:

Step 1: Whisk the Ingredients Together

In a medium bowl, combine 1/4 cup olive oil, 2 tablespoons soy sauce, 2 tablespoons honey, 2 tablespoons lemon juice, 2 cloves minced garlic, 1 teaspoon Dijon mustard, 1/2 teaspoon black pepper, 1/2 teaspoon salt, and 1/2 teaspoon dried dill. Use a whisk to mix everything until well combined and emulsified. You should see a beautiful, cohesive mixture that smells heavenly!

Step 2: Marinate Your Salmon

Place your salmon fillets in a shallow dish or a resealable plastic bag. Pour the marinade over the salmon, making sure each piece is well coated. Cover the dish with plastic wrap or seal the bag, and allow it to marinate in the refrigerator for at least 30 minutes or up to 2 hours for more intense flavor. Just remember: the longer you marinate, the more pronounced the flavors will be!

Step 3: Cook Your Salmon

Now that your salmon is beautifully marinated, it’s time to cook! Preheat your grill or oven to medium-high heat. Remove the salmon from the marinade and discard the leftover liquid. Grill the salmon for about 4-6 minutes per side or bake it in the oven for 12-15 minutes, until the fish flakes easily with a fork. The internal temperature should reach 145°F (63°C). Voilà! Your perfectly cooked salmon is ready to serve!

Serving Suggestions and Storage Tips

Once your salmon is cooked to perfection, it’s time to plate up! Here are some delightful serving suggestions:

  • Pair your salmon with steamed vegetables, like asparagus or broccoli, drizzled with a bit of olive oil and lemon.
  • Serve alongside fluffy quinoa or a lightly seasoned rice pilaf for a complete meal.
  • For a fun twist, place the salmon in mini tacos with shredded cabbage and spicy mango salsa for a vibrant, summery dish.

If you have leftovers (which is unlikely because it’s so delicious!), here’s how to store them:

  • Let your salmon cool completely before placing it in an airtight container. It should last in the fridge for up to 3 days.
  • If you want to extend the life of your leftovers, consider freezing them. Wrap the pieces tightly in foil and place them in a freezer bag, labeled with the date. They can be stored for up to 3 months.

Tips for the Perfect Salmon Marinade

Even though this recipe is straightforward, here are some tips to ensure that your salmon turns out perfectly every time:

  • Choose the Right Salmon: Opt for fresh, wild-caught salmon if possible. Its flavor and texture will elevate your dish.
  • Don’t Over-marinate: While marinating is essential for flavor, avoid marinating for too long, especially with acidic ingredients like lemon juice. Aim for 30-60 minutes for optimal results.
  • Use Fresh Ingredients: Fresh herbs, citrus juice, and good-quality olive oil can make all the difference in flavor.

Variations and Substitutions

Feeling adventurous? Here are some ways to mix it up:

  • Swap out the honey for maple syrup for a different type of sweetness.
  • Add a pinch of red pepper flakes if you enjoy a bit of heat.
  • Try replacing the dried dill with fresh dill or other herbs like parsley or thyme.

FAQs About This Marinade

Here are some common questions folks have about this salmon marinade:

Can I use this marinade for other types of fish?

Absolutely! This marinade works beautifully with other fish like trout, tilapia, or even chicken!

Can I make the marinade ahead of time?

Yes! You can prepare the marinade in advance and store it in the fridge for up to a week. Just give it a good stir before using.

What if I don’t have Dijon mustard?

No problem! You can substitute it with yellow mustard or simply omit it altogether.

Troubleshooting Common Issues

If you encounter any hiccups, don’t fret! Here are some troubleshooting tips:

  • If your salmon is too salty, it may have marinated too long. Next time, try a shorter marinating time.
  • If your salmon isn’t as flavorful as you’d like, consider adding more garlic or herbs to the marinade.

Conclusion: Your New Favorite Salmon Recipe Awaits

This easy salmon marinade recipe is not just a meal; it’s a celebration of flavors that brings people together. With a handful of simple ingredients, you can create a dish that’s sure to impress anyone at your table. So gather your loved ones, fire up your grill or oven, and let this delightful salmon shine. From my kitchen to yours, happy cooking!

Easy Salmon Marinade Recipe for Flavorful Fish

Prep Time 10 minutes
Cook Time 15 minutes
Total Time 25 minutes
Servings 4 servings
Calories 250
This simple marinade enhances the natural flavor of salmon with a delicious blend of herbs and citrus, perfect for a quick and tasty meal.

Ingredients

Marinade

  • 0.25 cup olive oil
  • 2 tablespoons soy sauce
  • 2 tablespoons honey
  • 2 tablespoons lemon juice
  • 2 cloves garlic, minced
  • 1 teaspoon dijon mustard
  • 0.5 teaspoon black pepper
  • 0.5 teaspoon salt
  • 0.5 teaspoon dried dill

Instructions 

  • Whisk together all marinade ingredients until well combined.
  • Place salmon in a dish or bag, pour marinade over, and coat evenly.
  • Refrigerate for at least 30 minutes.
  • Preheat grill or oven to medium-high.
  • Cook salmon for 4-6 minutes per side on grill or 12-15 minutes in oven until flaky.
  • Serve immediately and enjoy!

Notes

Marinating for longer than 2 hours may overpower the fish's delicate flavor.
Calories: 250kcal
Cost: $15
Course: Main Course
Cuisine: American
Keyword: Salmon

Loved this recipe? Save it to your favorite Pinterest board so you can easily find it later! It’s the perfect way to keep all your sweet ideas in one place. ✨

An appetizing view of marinated salmon in a bowl, showcasing fresh ingredients like garlic and lemon juice under warm lighting.

Why You’ll Love This Dish

Let’s be honest—life can sometimes get a little hectic, and finding the time to make a delicious, wholesome dinner can feel like a daunting task. That’s where my Honey Teriyaki Air Fryer Salmon comes in like a culinary superhero! This recipe is not just quick and easy; it’s a delightful dance of sweet and savory flavors that turns a simple meal into something special. Imagine sinking your teeth into perfectly cooked salmon, drizzled with a glossy, sticky teriyaki glaze that makes your taste buds sing. What’s not to love?

This dish is perfect for those busy weeknights when you want something that feels fancy but doesn’t require a culinary degree. Plus, it’s nutritious! Salmon is packed with omega-3 fatty acids, which are great for heart health. It’s a win-win situation. Trust me, after you try this recipe, it will likely become a staple in your dinner rotation.

Gather Your Ingredients

Let’s get down to business! Here’s what you’ll need to make this mouthwatering dish:

  • 4 salmon fillets (about 6 oz each, skin-on or skinless)
  • ¼ cup soy sauce
  • 2 tablespoons honey
  • 1 tablespoon rice vinegar
  • 1 tablespoon sesame oil
  • 2 cloves garlic, minced
  • 1 teaspoon grated ginger
  • 1 tablespoon green onions, chopped (for garnish)
  • Sesame seeds (for garnish)

Steps to Salmon Perfection

Succulent salmon fillet glazed with honey teriyaki sauce, showcasing a golden-brown exterior.

Are you ready to embark on this flavor-packed journey? Let’s dive into the steps!

  1. Mix the Marinade: In a medium-sized bowl, whisk together the soy sauce, honey, rice vinegar, sesame oil, minced garlic, and grated ginger until well combined. This marinade is where the magic happens, blending sweet and savory into a delightful concoction.
  2. Marinate the Salmon: Place your salmon fillets in a shallow dish or a resealable bag. Pour the marinade over the fillets, ensuring they’re well coated. Let them soak up all that flavor for at least 30 minutes, or if you have a bit more time, up to 2 hours in the refrigerator. The longer, the better!
  3. Preheat Your Air Fryer: Set your air fryer to 400°F (200°C). This ensures that your salmon gets that lovely crispy exterior while remaining tender and flaky inside.
  4. Prepare the Salmon: After marinating, remove the salmon from the marinade, letting any excess drip off. Discard the leftover marinade—our salmon is ready for the air fryer!
  5. Cook: Place the salmon fillets in the air fryer basket, skin-side down if applicable. Cook for about 8-10 minutes, or until the salmon flakes easily with a fork and has reached an internal temperature of 145°F (63°C).
  6. Garnish and Serve: Once the salmon is done, remove it from the air fryer and let it rest for a couple of minutes. Garnish with chopped green onions and a sprinkle of sesame seeds for that extra touch of flair.

Tips for Success

Cooking is an art, and while this recipe is pretty straightforward, a few tips can elevate it even further:

  • Don’t Rush the Marinade: If possible, let the salmon marinate longer than the minimum time. This allows the flavors to penetrate deeper into the fish.
  • Choose Quality Salmon: Fresh, high-quality salmon makes a world of difference. Look for bright, firm fillets with no fishy smell.
  • Check for Doneness: If you’re unsure about the doneness of your salmon, use a meat thermometer to ensure it’s reached the perfect temperature.

Variations to Try

Once you’ve mastered this basic recipe, feel free to play around with it! Here are some fun variations:

  • Spicy Kick: Add a teaspoon of sriracha or chili flakes to the marinade for a spicy twist.
  • Sweet and Tangy: Replace honey with maple syrup for a different kind of sweetness.
  • Herb Infusion: Mix in fresh herbs like cilantro or basil to add layers of flavor.

Substitutions

Got a few ingredients missing or need to make adjustments? No worries! Here are some substitutions:

  • Soy Sauce: You can use tamari for a gluten-free version or coconut aminos for a soy-free option.
  • Rice Vinegar: Apple cider vinegar or white wine vinegar can work in a pinch.
  • Sesame Oil: If you don’t have sesame oil, olive oil can be a decent substitute, though it will alter the flavor slightly.

Equipment You’ll Need

To whip up this delicious dish, you’ll need a few essential kitchen tools:

  • An air fryer (of course!)
  • A mixing bowl for the marinade
  • A whisk or fork for blending
  • A meat thermometer (optional but recommended)
  • A spatula or tongs for handling the salmon

Storage and Freezing

If you happen to have leftovers (which I doubt because it’s that good), here’s how to store them:

  • Refrigerator: Store any leftover salmon in an airtight container for up to 2 days. Reheat gently in the air fryer or microwave.
  • Freezer: You can freeze the marinated salmon before cooking it. Just place the fillets in a freezer bag, pour in the marinade, and freeze for up to 3 months. When you’re ready to cook, thaw it in the refrigerator overnight and follow the cooking instructions.

Frequently Asked Questions

Let’s tackle some common queries about this recipe:

  • Can I use frozen salmon? Yes! Just make sure to thaw it completely before marinating.
  • What can I serve with this salmon? It pairs beautifully with rice, quinoa, or a fresh salad. You can also serve it with steamed vegetables for a complete meal.
  • Can I make this in an oven instead? Absolutely! Bake at 400°F (200°C) for about 12-15 minutes, or until cooked through.

Troubleshooting Common Issues

Cooking can sometimes come with its own set of challenges. Here’s how to handle a few potential hiccups:

  • Salmon Sticking to the Basket: Ensure your air fryer basket is well-oiled or use a non-stick spray to prevent sticking.
  • Overcooked Salmon: Keep an eye on the cooking time, as air fryers can vary in temperature. It’s better to check a minute or two early!

A Warm Conclusion

And there you have it—your new go-to recipe for Honey Teriyaki Air Fryer Salmon! This dish is more than just a meal; it’s an experience that brings warmth and joy to your table. Whether it’s a busy weeknight or a special occasion, this salmon is sure to impress. I hope you enjoy making (and eating) this dish as much as I do. Remember, cooking is all about having fun and sharing love through food. So gather your family, set the table, and let the magic happen. Happy cooking!

Gather - Honey 💞 Teriyaki Air Fryer Salmon 🍣🐟

Prep Time 10 minutes
Cook Time 10 minutes
Total Time 20 minutes
Servings 4 servings
Calories 350
Enjoy tender, flavorful salmon glazed with honey and soy, cooked perfectly in the air fryer for a quick and healthy meal.

Ingredients

Salmon

  • 4 fillets salmon fillets (about 6 oz each, skin-on or skinless)
  • 0.25 cup soy sauce
  • 2 tablespoons honey
  • 1 tablespoon rice vinegar
  • 1 tablespoon sesame oil
  • 2 cloves garlic, minced
  • 1 teaspoon grated ginger
  • 1 tablespoon green onions, chopped (for garnish)
  • sesame seeds (for garnish)

Instructions 

  • Mix soy sauce, honey, rice vinegar, sesame oil, garlic, and ginger to make marinade.
  • Marinate salmon for at least 30 minutes in the refrigerator.
  • Preheat air fryer to 400°F (200°C).
  • Remove salmon from marinade, place in air fryer basket, skin-side down if applicable, and cook for 8-10 minutes.
  • Let rest briefly, then garnish with green onions and sesame seeds before serving.

Notes

Ensure not to overcook the salmon for best tenderness.
Calories: 350kcal
Cost: $15
Course: Main Course
Cuisine: Asian
Keyword: Salmon

Loved this recipe? Save it to your favorite Pinterest board so you can easily find it later! It’s the perfect way to keep all your sweet ideas in one place. ✨

Deliciously cooked salmon drizzled with teriyaki sauce and garnished, captured in soft natural light.

Why You’ll Love This Recipe

If you’re on the hunt for a dish that feels like a warm hug on a chilly evening, look no further than Braised Chinese Cabbage in Oyster Sauce. This delightful recipe transforms humble napa cabbage into a luscious, tender dish that’s brimming with flavor. The combination of oyster sauce, garlic, and ginger creates a savory embrace that will make you want to curl up with a bowl of this goodness every night of the week.

What I adore about this dish is its versatility. Whether you’re serving it alongside a perfectly grilled protein or making it the star of your vegetarian spread, it delivers comfort without fuss. Plus, the ingredients are simple and likely already in your pantry—so you can whip it up without a last-minute grocery run!

Ingredients You’ll Need

Let’s gather our magic ingredients for this cozy recipe:

  • Napa Cabbage Leaves: The star of the show! Their soft, delicate leaves soak up the flavors beautifully.
  • Oyster Sauce: For a salty, umami kick that elevates the dish.
  • Garlic: Freshly minced for that aromatic touch that makes your kitchen smell divine.
  • Ginger: A hint of warmth and spice to balance the flavors.
  • Sesame Oil: Just a splash to finish it off with a nutty aroma.

Let’s Get Cooking: Step-by-Step Instructions

Eye-level shot of vibrant Napa cabbage leaves glistening in oyster sauce, surrounded by garlic and ginger.

Ready to dive into this culinary adventure? Follow these simple steps, and you’ll have a comforting dish on your table in no time!

  1. Prepare the Cabbage: Start by washing the napa cabbage leaves thoroughly under cool water. Pat them dry with a kitchen towel.
  2. Chop It Up: Slice the cabbage into bite-sized pieces. This makes it easier to cook and serve.
  3. Heat the Pan: In a large skillet or wok, heat a tablespoon of oil over medium heat. A splash of sesame oil can really enhance the flavor at this stage.
  4. Garlic and Ginger: Add the minced garlic and ginger to the pan, stirring continuously for about a minute until fragrant. Be careful not to burn them—nobody likes bitter garlic!
  5. Braise the Cabbage: Toss in the chopped napa cabbage, and give it a good stir to coat the leaves in the garlic and ginger mixture. Cook for about 2-3 minutes until they start to wilt.
  6. Oyster Sauce Magic: Pour in the oyster sauce, stirring to combine. The sauce will caramelize slightly, giving the cabbage a glossy finish.
  7. Cook Until Tender: Cover the skillet and let the cabbage braise in the sauce for about 5-7 minutes, stirring occasionally. You want the cabbage to become tender but not mushy, retaining a bit of crunch.
  8. Finishing Touches: Once the cabbage is perfectly cooked, drizzle a bit of sesame oil over the top for that final layer of flavor.
  9. Serve and Enjoy: Transfer your braised cabbage to a serving dish and enjoy it warm, either on its own or as a delightful side to your favorite proteins.

Tips for Perfect Braised Cabbage

Here are a few tips to ensure your dish turns out perfectly:

  • Don’t Rush the Cooking: Allow the cabbage to braise gently. Rushing can lead to overcooked, mushy leaves.
  • Adjust the Sauce: If you prefer a sweeter flavor, feel free to add a teaspoon of sugar or honey to balance the saltiness of the oyster sauce.
  • Experiment with Add-Ins: Consider adding protein like tofu or shrimp during the cooking process to make it a complete meal.

Variations to Try

The beauty of this recipe lies in its adaptability:

  • Spicy Kick: Add a dash of red pepper flakes or a drizzle of chili oil for those who like it hot.
  • Vegetable Medley: Mix in other vegetables like bell peppers, carrots, or mushrooms for added texture and nutrients.
  • Vegan Twist: Swap oyster sauce for a mushroom-based sauce to keep it plant-based while still enjoying the umami flavor.

Substitutions You Can Make

If you’re missing an ingredient or two, these substitutes work well:

  • Oyster Sauce: Soy sauce or hoisin sauce can work in a pinch, though they will change the flavor profile slightly.
  • Sesame Oil: Canola or vegetable oil can be used if you don’t have sesame oil handy, but the flavor won’t be quite the same.
  • Fresh Garlic and Ginger: Garlic powder and ground ginger can be used, but fresh is always best for the vibrant taste.

Equipment You’ll Need

Here’s what I recommend having ready before you start:

  • Large Skillet or Wok: Essential for braising the cabbage evenly.
  • Cutting Board and Knife: For chopping your vegetables with ease.
  • Measuring Spoons: To ensure you get the right amount of sauce and seasonings.

Storage and Freezing Tips

If you find yourself with leftovers (which is rare because it’s so good!), here’s how to store them:

  • Refrigeration: Store any leftovers in an airtight container in the fridge for up to 3 days.
  • Freezing: You can freeze the braised cabbage in a freezer-safe container for up to a month. Just be aware that the texture may change slightly after thawing.

Frequently Asked Questions

Got questions? I’ve got answers!

  • Can I use regular cabbage instead of napa cabbage? Absolutely! Green or red cabbage can be used, but napa cabbage has a more tender texture.
  • Is this dish suitable for meal prep? Yes! It reheats wonderfully and can be made ahead of time for quick lunches or dinners.
  • What should I serve this with? It pairs beautifully with rice, grilled chicken, or even as a topping for noodles. The options are endless!

Troubleshooting Common Issues

If something goes awry, here are a few solutions:

  • Cabbage is too soggy: If you’ve overcooked it, try adding a splash of vinegar to brighten the flavor.
  • Too salty: Balance it out with a little sugar or honey to counteract the saltiness from the oyster sauce.
  • Not enough flavor: A splash of soy sauce or a squeeze of fresh lime juice can help liven things up.

Conclusion

There you have it! Braised Chinese Cabbage in Oyster Sauce is a simple, yet utterly comforting dish that’s sure to become a staple in your home. It’s a great way to enjoy a vegetable dish that feels indulgent yet is healthy and satisfying. Whether you’re cooking for yourself or a crowd, this recipe invites everyone to gather around the table and enjoy the wonderful flavors of home-cooked goodness. So grab your ingredients, put on your favorite playlist, and let’s make some magic happen in the kitchen! If you try this recipe, I’d love to hear how it turned out for you. Happy cooking!

Braised Chinese Cabbage in Oyster Sauce

Prep Time 5 minutes
Cook Time 10 minutes
Total Time 15 minutes
Servings 4 people
Calories 150
A simple and flavorful Chinese vegetable dish featuring tender napa cabbage braised in savory oyster sauce with garlic, ginger, and sesame.

Ingredients

Vegetables

  • 1 head napa cabbage leaves
  • 2 tablespoons oyster sauce
  • 2 cloves garlic (minced)
  • 1 inch ginger (sliced)
  • 1 teaspoon sesame (toasted)

Instructions 

  • Heat a wok or skillet over medium heat.
  • Add garlic and ginger; sauté until fragrant.
  • Add napa cabbage and stir-fry briefly.
  • Pour in oyster sauce and cook until cabbage is tender and coated.
  • Sprinkle with sesame and serve hot.

Notes

Use fresh ingredients for best flavor.
Calories: 150kcal
Cost: $12
Course: Side Dish
Cuisine: Chinese
Keyword: Cabbage

Loved this recipe? Save it to your favorite Pinterest board so you can easily find it later! It’s the perfect way to keep all your sweet ideas in one place. ✨

Detailed image of cooked Chinese cabbage in oyster sauce, highlighting soft shadows and rich colors.