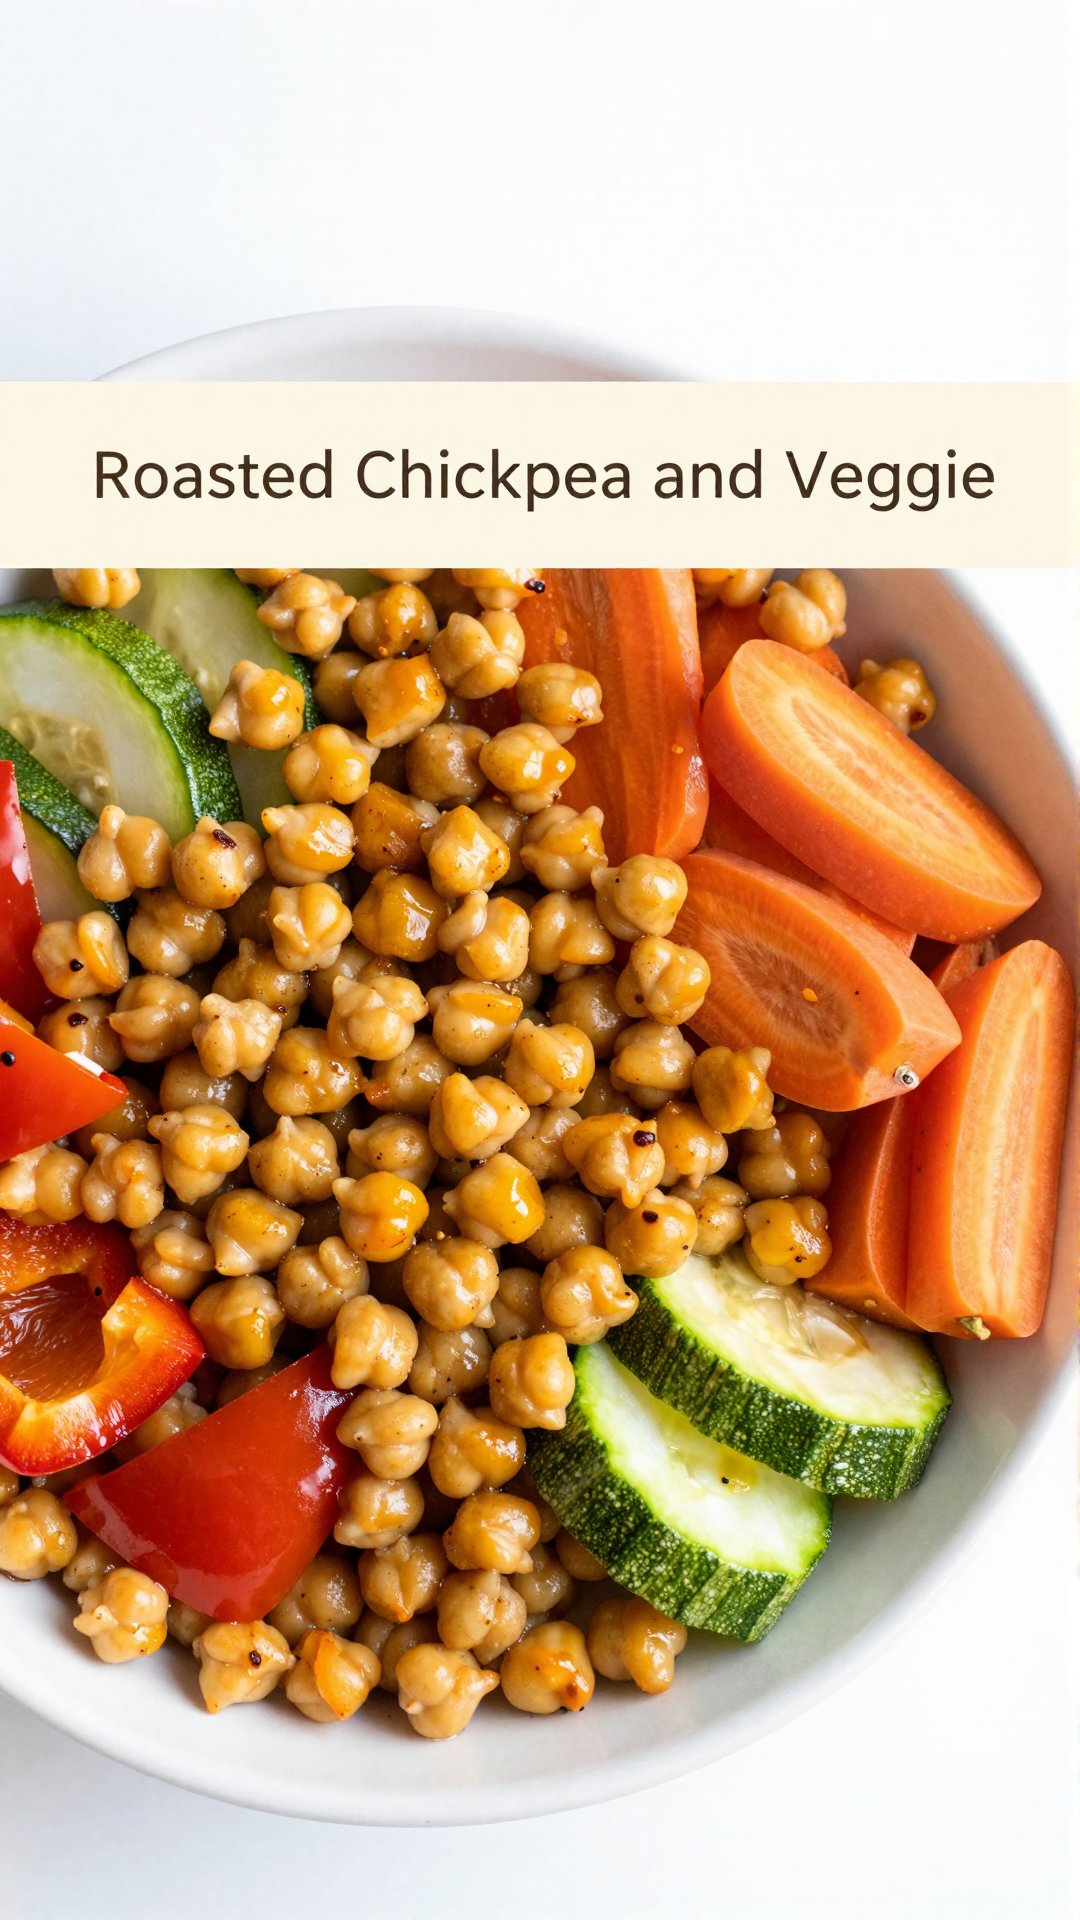
Hey there, friend! Ava here, and welcome to my little corner of the internet where good food and good vibes collide. Today, we’re diving headfirst into a recipe that’s become a staple in my kitchen: The Ultimate Roasted Chickpea and Veggie Bowl. It’s more than just a meal; it’s a celebration of simple, wholesome ingredients that come together to create something truly magical. I remember the first time I made a version of this bowl. I was trying to clean out my fridge before a trip and ended up throwing together a bunch of random veggies with some chickpeas. The result was surprisingly delicious, and I’ve been tweaking and perfecting it ever since.
This recipe is perfect for those days when you want something healthy, satisfying, and easy to throw together. It’s also incredibly versatile—feel free to swap in your favorite veggies or add a dollop of creamy tahini dressing for an extra layer of flavor. Trust me; this bowl is about to become your new go-to!
Why You’ll Love This Recipe
Okay, let’s get real for a second. There are a million and one recipes out there, so why should you bother with this one? Well, let me tell you, this isn’t just any roasted chickpea and veggie bowl. It’s a game-changer. I’ve packed it with everything you need for a satisfying and nutritious meal. Here’s why I think you’re going to fall in love:
- Flavor Explosion: The combination of roasted veggies and crispy chickpeas, seasoned with garlic and paprika, is simply irresistible.
- Healthy & Nutritious: Packed with plant-based protein, fiber, and vitamins, this bowl is a nutritional powerhouse. It’s the perfect way to nourish your body from the inside out.
- Easy to Customize: This recipe is incredibly versatile. Feel free to swap in your favorite veggies, add different spices, or drizzle with your favorite sauce. The possibilities are endless!
- Quick & Easy: From start to finish, this bowl comes together in under an hour. It’s perfect for busy weeknights or lazy weekend lunches.
- Meal Prep Friendly: You can easily make a big batch of this bowl on Sunday and enjoy it throughout the week. It’s perfect for meal prepping and taking to work or school.
It’s really the kind of recipe that adapts to whatever you have on hand. I’ve made versions with sweet potatoes, broccoli, even Brussels sprouts, and they’ve all been amazing. So don’t be afraid to get creative and make this bowl your own!
Ingredients You’ll Need
Alright, let’s talk ingredients! Here’s what you’ll need to whip up this delicious roasted chickpea and veggie bowl:
- 1 can chickpeas, drained and rinsed
- 1 bell pepper, diced
- 1 zucchini, diced
- 1 carrot, sliced
- 2 tablespoons olive oil
- 1 teaspoon garlic powder
- 1 teaspoon paprika
- Salt and pepper to taste
- Fresh parsley for garnish
How To Make The Ultimate Roasted Chickpea and Veggie Bowl
Okay, let’s get cooking! Here’s a step-by-step guide to making the ultimate roasted chickpea and veggie bowl:
- Preheat your oven: Preheat your oven to 400°F (200°C). This ensures that the veggies and chickpeas roast evenly and become perfectly tender and crispy.
- Prep the veggies and chickpeas: In a large mixing bowl, toss together the drained chickpeas, diced bell pepper, zucchini, and carrot. Make sure everything is evenly diced or sliced so that they cook at the same rate.
- Season: Drizzle with olive oil, then sprinkle on garlic powder, paprika, salt, and pepper. Toss to coat, ensuring that every piece is evenly seasoned. This is where the magic happens!
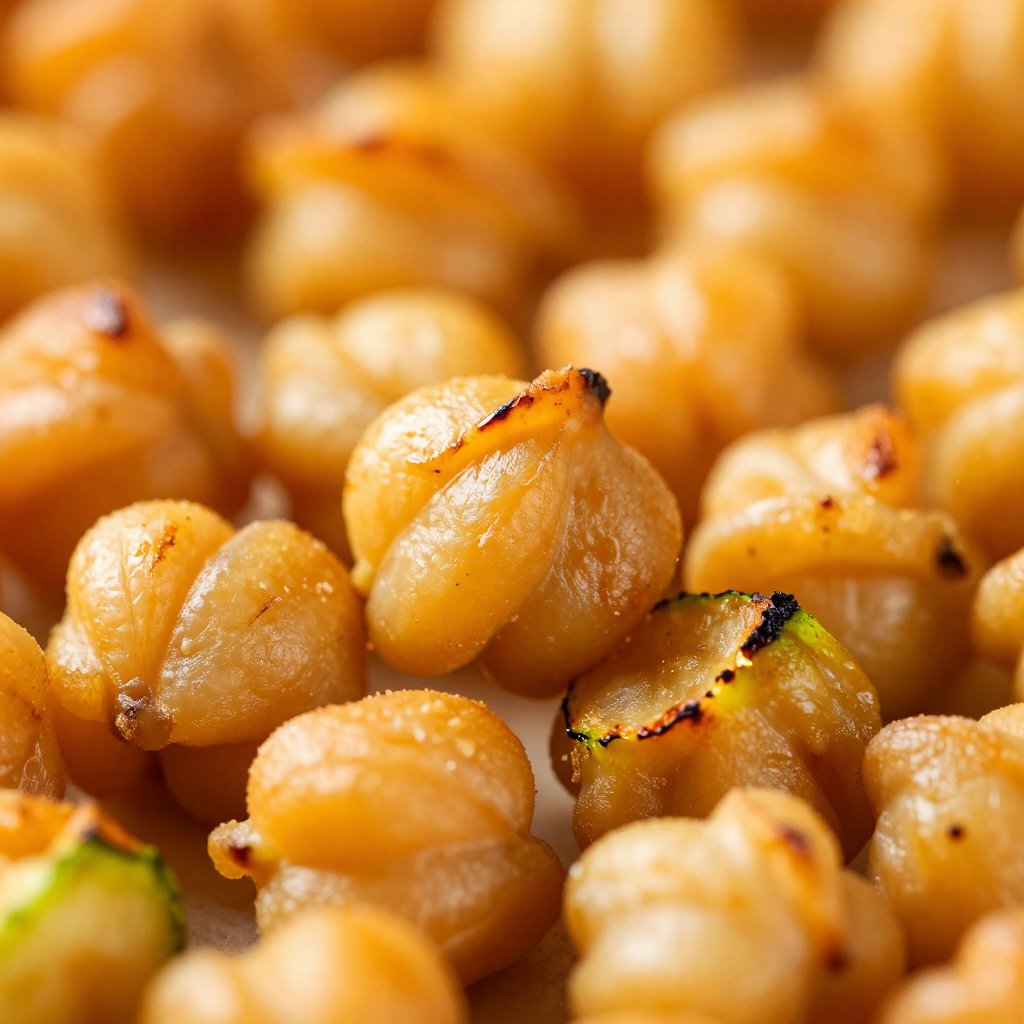
- Roast: Spread the mixture on a lined or greased baking sheet in a single layer. This prevents the veggies from steaming and ensures that they roast properly. Bake for 25-30 minutes until veggies are tender and chickpeas are slightly crispy.
- Garnish and serve: Garnish with freshly chopped parsley and serve warm. You can enjoy this bowl as is, or you can add it to a bed of quinoa or rice for a more substantial meal.
And there you have it! A simple, healthy, and delicious roasted chickpea and veggie bowl that’s perfect for lunch or dinner. I promise you, it’s going to become a regular in your rotation.
Pro Tips for the Perfect Bowl
Want to take your roasted chickpea and veggie bowl to the next level? Here are a few pro tips to help you achieve bowl perfection:
- Dry the Chickpeas: Pat the chickpeas dry with a paper towel before roasting. This helps them get extra crispy in the oven.
- Don’t Overcrowd the Pan: Make sure to spread the veggies and chickpeas in a single layer on the baking sheet. Overcrowding can lead to steaming instead of roasting.
- Roast at High Heat: Roasting at 400°F (200°C) ensures that the veggies and chickpeas get nice and caramelized.
- Add a Sauce: Drizzle with your favorite sauce for an extra layer of flavor. Tahini dressing, sriracha mayo, or even a simple vinaigrette work wonders.
- Fresh Herbs: Don’t skimp on the fresh herbs! A sprinkle of fresh parsley, cilantro, or dill adds a burst of freshness to the bowl.
Common Mistakes to Avoid
We all make mistakes in the kitchen—it’s part of the learning process! Here are a few common mistakes to avoid when making this roasted chickpea and veggie bowl:
- Not Drying the Chickpeas: As mentioned earlier, drying the chickpeas is crucial for achieving that crispy texture.
- Overcrowding the Pan: This is a big one! Overcrowding the pan can lead to soggy veggies and chickpeas.
- Under-Seasoning: Don’t be afraid to season generously! Taste as you go and adjust the seasonings as needed.
- Overcooking: Keep an eye on the veggies and chickpeas while they’re roasting. Overcooking can lead to mushy veggies and burnt chickpeas.
- Not Using Fresh Herbs: Fresh herbs add a burst of flavor and freshness to the bowl. Don’t skip them!
I’ve definitely been guilty of overcrowding the pan more than once. The key is to use a large baking sheet or roast in batches if necessary. It’s worth the extra effort!
Variations to Try
One of the best things about this recipe is how versatile it is. Here are a few variations to try:
- Spicy Chickpea and Veggie Bowl: Add a pinch of cayenne pepper or a drizzle of sriracha to the veggies and chickpeas before roasting for a spicy kick.
- Mediterranean Chickpea and Veggie Bowl: Add chopped Kalamata olives, feta cheese, and a drizzle of olive oil and lemon juice after roasting for a Mediterranean-inspired bowl.
- Curried Chickpea and Veggie Bowl: Toss the veggies and chickpeas with curry powder before roasting for a warm and flavorful bowl.
- Sweet Potato and Chickpea Bowl: Swap out some of the veggies for diced sweet potato for a slightly sweet and savory bowl.
- Broccoli and Chickpea Bowl: Use broccoli florets instead of zucchini for a cruciferous twist.
I especially love the Mediterranean version with a dollop of hummus. It’s like a little taste of sunshine in a bowl!
How to Store Leftovers
If you have any leftovers (which is rare in my house!), here’s how to store them:
- In the Fridge: Store the roasted chickpea and veggie bowl in an airtight container in the fridge for up to 3-4 days.
- Reheating: Reheat in the microwave or in a skillet over medium heat until warmed through.
- Freezing: While you can technically freeze this bowl, the texture of the veggies may change slightly. If you do freeze it, store in an airtight container for up to 2-3 months.
I usually just keep it in the fridge and enjoy it for lunch the next day. It’s just as delicious cold!
Frequently Asked Questions (FAQ)
Got questions? I’ve got answers! Here are a few frequently asked questions about this roasted chickpea and veggie bowl:
- Can I use frozen veggies? Yes, you can use frozen veggies, but keep in mind that they may release more water during roasting. Make sure to pat them dry before tossing with the chickpeas and seasonings.
- Can I add other veggies? Absolutely! Feel free to add your favorite veggies to this bowl. Some great options include sweet potatoes, Brussels sprouts, and cauliflower.
- Can I make this ahead of time? Yes, you can roast the veggies and chickpeas ahead of time and store them in the fridge. When you’re ready to eat, simply reheat and add your favorite toppings.
- Is this recipe vegan? Yes, this recipe is vegan and plant-based.
- Can I use dried chickpeas instead of canned? Yes, but you’ll need to soak and cook the dried chickpeas before roasting.
Serving Suggestions
This roasted chickpea and veggie bowl is delicious on its own, but here are a few serving suggestions to take it to the next level:
- Over Quinoa or Rice: Serve the bowl over a bed of quinoa or rice for a more substantial meal.
- With a Sauce: Drizzle with your favorite sauce, such as tahini dressing, sriracha mayo, or a simple vinaigrette.
- In a Wrap: Wrap the bowl in a whole-wheat tortilla for a quick and easy lunch.
- With a Side Salad: Serve with a side salad for a light and refreshing meal.
- Topped with Avocado: Add sliced avocado for a creamy and healthy boost.
I often serve this with a side of my homemade tahini dressing. It’s the perfect complement to the roasted veggies and chickpeas.
So, there you have it – The Ultimate Roasted Chickpea and Veggie Bowl! I hope you love this recipe as much as I do. It’s a simple, healthy, and delicious way to nourish your body and enjoy the flavors of fresh, wholesome ingredients. Whether you’re a seasoned cook or just starting out, I’m confident that you can make this recipe with ease. And remember, cooking is all about having fun and experimenting, so don’t be afraid to get creative and make this bowl your own. Happy cooking, friends! And don’t forget to share your creations with me – I can’t wait to see what you come up with!
This recipe is not just a meal; it’s an experience. It’s about taking simple ingredients and transforming them into something extraordinary. It’s about nourishing your body with wholesome foods and enjoying the process of cooking. And most importantly, it’s about sharing good food with the people you love. So gather your ingredients, preheat your oven, and let’s make some magic in the kitchen!
If you ever want a quick and easy plant based meal, make this veggie bowl. It’s perfect for a light dinner or lunch. If you re looking for something healthy, this recipe is definitely it! You can keep it in the fridge for several days. The best part, you ll be able to impress your friends with this dish!
The Ultimate Roasted Chickpea and Veggie Bowl
Ingredients
Vegetables & Legumes
- 1 can chickpeas (drained and rinsed)
- 1 bell pepper (diced)
- 1 zucchini (diced)
- 1 carrot (sliced)
Seasoning
- 2 tablespoons olive oil
- 1 teaspoon garlic powder
- 1 teaspoon paprika
- to taste Salt and pepper
Garnish
- Fresh parsley (for garnish)
Instructions
- Preheat oven to 400°F (200°C).
- Toss chickpeas, bell pepper, zucchini, and carrot in a bowl.
- Drizzle with olive oil, sprinkle with garlic powder, paprika, salt, and pepper.
- Spread on a baking sheet in a single layer.
- Bake for 25-30 minutes until veggies are tender and chickpeas are crispy.
- Garnish with parsley and serve warm.
Notes