Author

Ava

Browsing

Why This One-Pot Wonder Will Become Your New Favorite

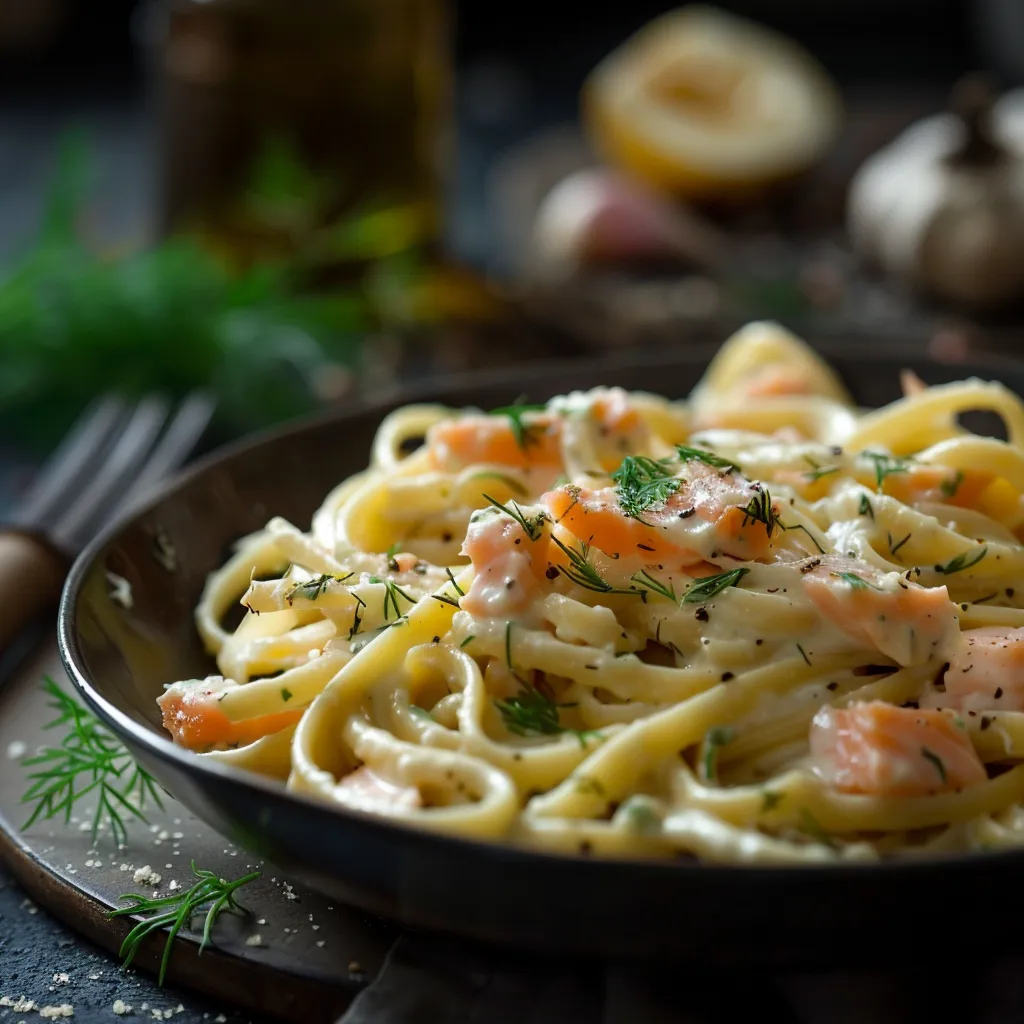
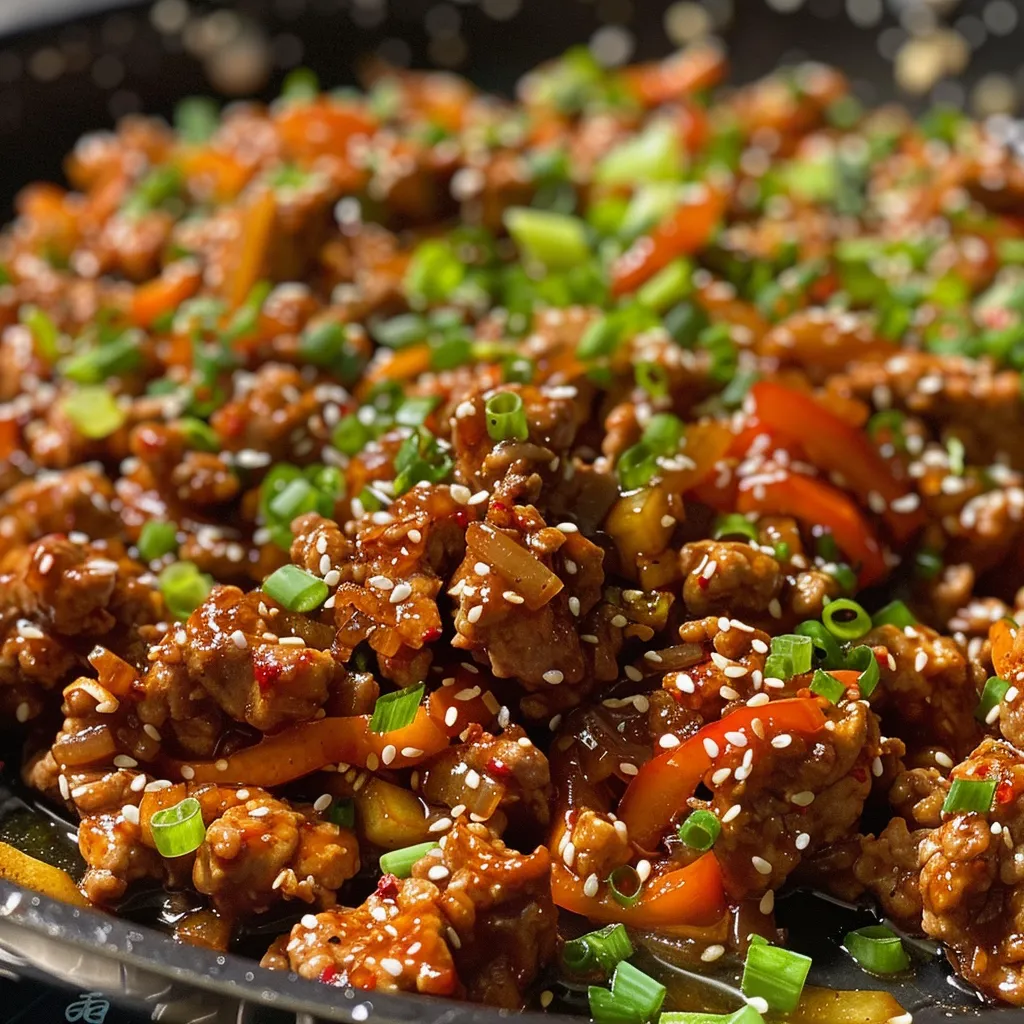
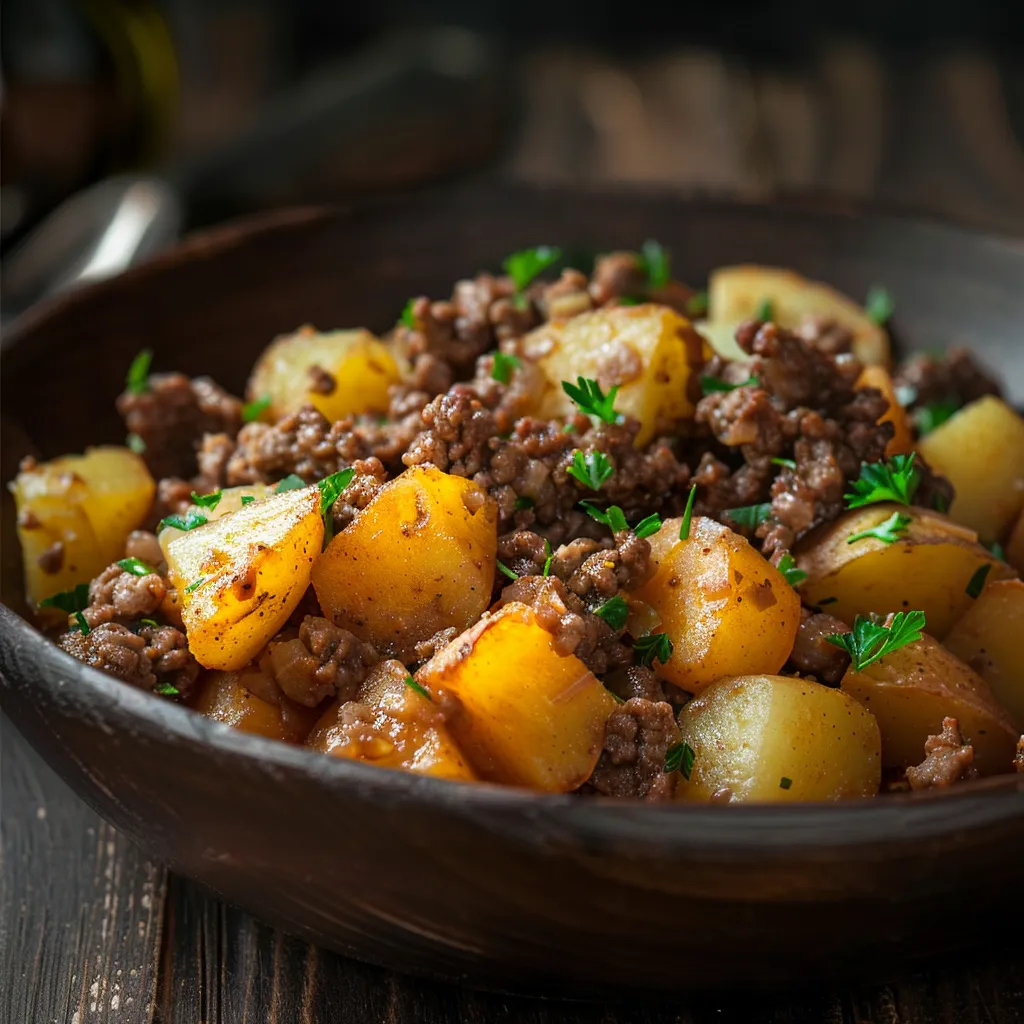
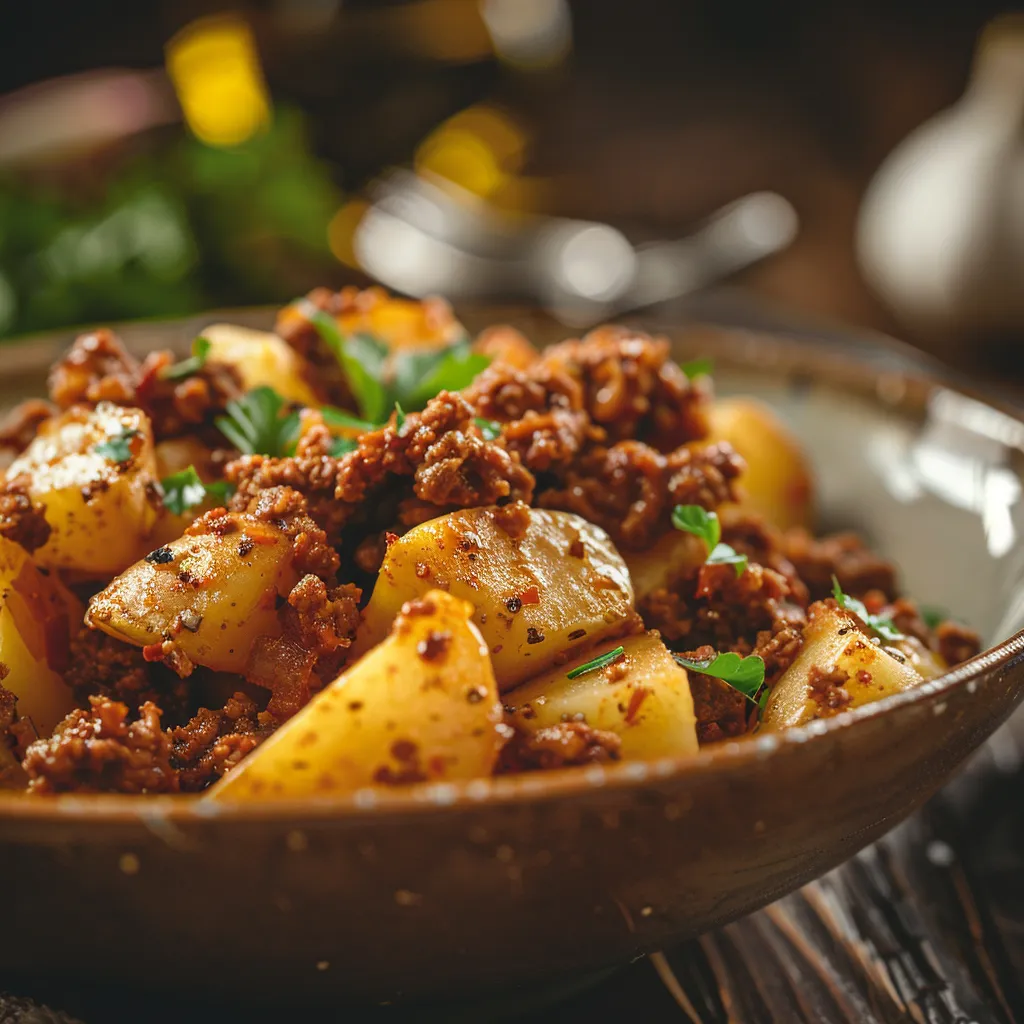
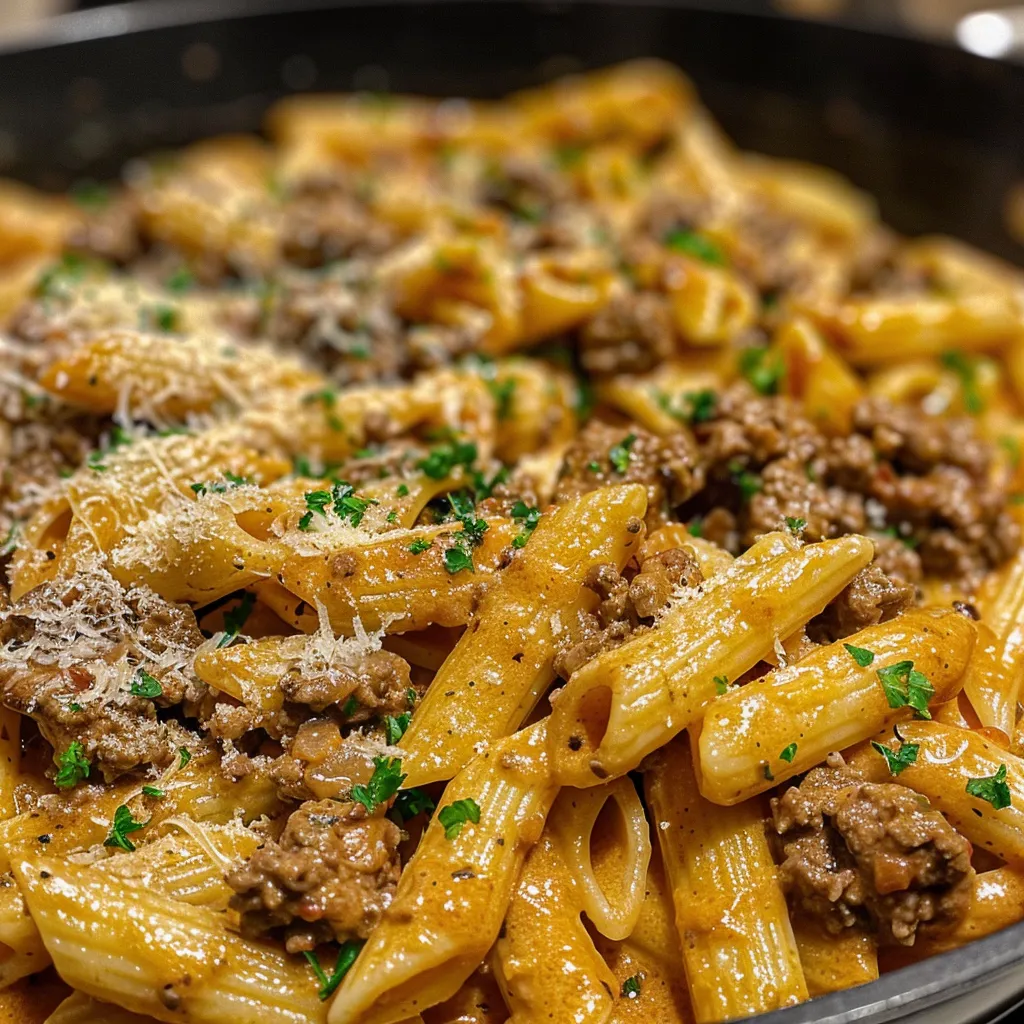
Welcome to your new weeknight hero: the One-Pot Creamy Beef and Garlic Butter Pasta. This dish is not just a meal; it’s an experience, a nostalgic hug from your childhood, and a time-saver all rolled into one. If you’ve ever been in a rush but still wanted something hearty and comforting, this recipe is for you. It combines the rich flavors of ground beef with the aromatic allure of garlic butter, all while being incredibly simple and quick to prepare. Plus, who doesn’t love a dish that only dirties one pot? Let’s dive in!

Why You’ll Love This Recipe

  • Quick and Easy: This meal comes together in under 30 minutes, making it perfect for busy weeknights.
  • One-Pot Cooking: With everything cooked in a single pot, cleanup is a breeze. More time for you to relax!
  • Rich and Creamy: The combination of heavy cream, Parmesan, and mozzarella creates a luscious sauce that clings perfectly to the pasta.
  • Versatile Ingredients: Use pantry staples like ground beef and pasta, with optional add-ins to customize the dish to your taste.
  • Comfort Food at Its Best: This dish feels like a warm hug, bringing together beloved flavors that both kids and adults will adore.

Ingredients Breakdown & Substitutions

Let’s gather our ingredients! This recipe calls for a few straightforward items, and I’ll also share some handy substitutions to make it work for you.

  • 1 lb Ground Beef: You can swap this with ground turkey or chicken for a leaner option.
  • 8 oz Short Pasta: Use penne, rotini, or even gluten-free pasta if you prefer.
  • 4 cups Beef Broth: If you don’t have beef broth, chicken broth or vegetable broth will work just fine.
  • 1 tbsp Olive Oil: Any cooking oil like canola or avocado oil can be used.
  • 3 tbsp Butter: You can substitute with margarine or a plant-based butter for a dairy-free version.
  • 4 Garlic Cloves: Fresh garlic is best, but you can use 1 tsp of garlic powder in a pinch.
  • 1 tsp Italian Seasoning: A mix of dried basil, oregano, and thyme will suffice.
  • 1/2 tsp Red Pepper Flakes: Adjust based on your heat preference or omit entirely.
  • 1/2 tsp Smoked Paprika: This adds depth; if you don’t have any, regular paprika works too.
  • Salt & Black Pepper: Season to taste.
  • 1/2 cup Grated Parmesan Cheese: Nutritional yeast can be an excellent dairy-free substitute.
  • 1/2 cup Heavy Cream: Use coconut cream for a dairy-free alternative.
  • 1/2 cup Shredded Mozzarella: Feel free to use any melty cheese you love.
  • 2 tbsp Fresh Parsley: Fresh herbs brighten the dish, but dried herbs can work in a pinch.

Step-by-Step Cooking Instructions

Juicy One-Pot Creamy Beef Pasta in a bowl, garnished with parsley.

Now that we have our ingredients prepped, let’s get cooking! Follow these simple steps for a delicious dinner.

  • Step 1: Brown the Ground Beef (8 minutes) – Heat olive oil in a large deep skillet or Dutch oven over medium-high heat. Add the ground beef, breaking it up into small crumbles as it cooks until browned, about 6-8 minutes.
  • Step 2: Create the Garlic Butter Base (3 minutes) – Add butter to the pan with the cooked beef. Once melted, stir in minced garlic, Italian seasoning, red pepper flakes, smoked paprika, salt, and black pepper. Cook for 1-2 minutes until fragrant.
  • Step 3: Add Pasta & Broth (15 minutes) – Pour in beef broth and add uncooked pasta. Stir to ensure pasta is submerged. Bring to a boil, then reduce heat to medium-low and cover. Simmer for 12-15 minutes, stirring occasionally.
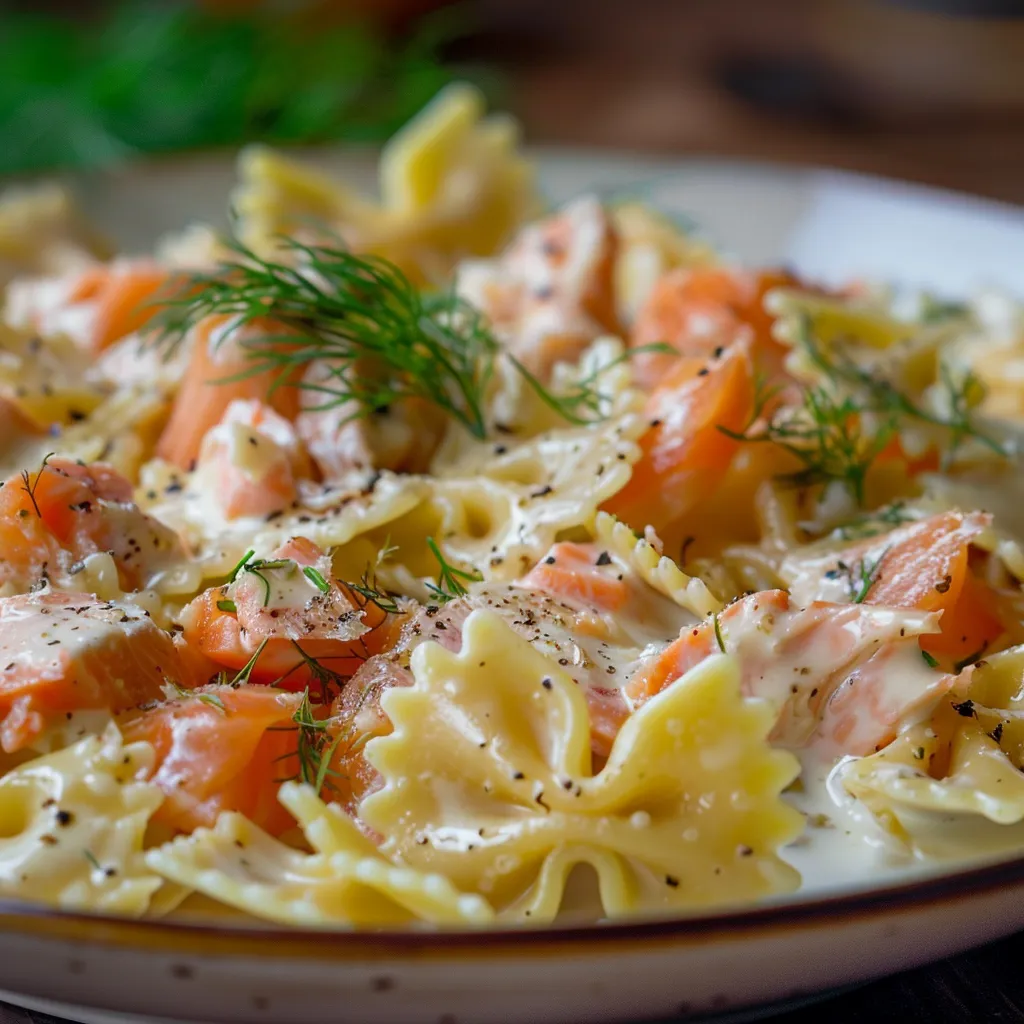
  • Step 4: Make It Ridiculously Creamy (3 minutes) – Once the pasta is tender, reduce heat to low. Stir in heavy cream, grated Parmesan, and shredded mozzarella until melted and creamy.
  • Step 5: Rest & Thicken (5 minutes) – Turn off heat and let the pasta sit uncovered for 5 minutes to thicken.
  • Step 6: The Finishing Touches – Sprinkle fresh chopped parsley over the top before serving. Enjoy your meal!

Pro Tips for Perfecting Your Pasta

  • Don’t Overcook the Pasta: Keep an eye on the pasta; it should be al dente, as it will continue to cook while resting.
  • Use Fresh Garlic: Fresh garlic gives the best flavor, so skip the pre-minced stuff if you can.
  • Adjust the Creaminess: If you prefer a lighter dish, reduce the amount of heavy cream or substitute with milk.
  • Experiment with Seasoning: Taste and adjust the seasonings as you go. Every palate is different!
  • Save Some Pasta Water: If the sauce is too thick, add a splash of reserved pasta water for a creamy consistency.
  • Mix in Veggies: For a nutritious boost, add spinach, peas, or bell peppers in the last few minutes of cooking.
  • Garnish Generously: Fresh herbs not only add flavor but also make the dish visually appealing.
  • Make It Ahead: This dish can be made ahead of time and reheated, making it a great meal prep option.

Common Mistakes & Troubleshooting

Even the best of us have kitchen flops, so here are some common pitfalls and how to avoid them:

  • Too Much Liquid: If your pasta is swimming in broth, you may have added too much. Ensure you measure accurately and let it simmer long enough to absorb.
  • Dry Meat: If your ground beef turns out dry, it might be overcooked. Keep an eye on it and remove it from heat once it’s browned.
  • Flavorless Sauce: Always taste as you go! If the dish seems bland, a little more salt or seasoning can elevate it significantly.
  • Sticky Pasta: Stirring occasionally during cooking helps prevent the pasta from sticking together.

Delicious Variations to Try

Want to mix things up? Here are some variations to keep your dinners exciting:

  • Spicy Garlic Butter: Add more red pepper flakes or even a splash of hot sauce for a kick.
  • Mushroom Medley: Incorporate sautéed mushrooms for an earthy flavor.
  • Cheesy Spinach: Stir in fresh spinach and extra cheese for a creamy, veggie-packed dish.
  • Pesto Twist: Add a few tablespoons of pesto for a vibrant twist on the classic.

Storage & Make-Ahead Instructions

This dish stores well in the fridge for up to 3 days. To reheat, simply add a splash of broth or water to bring back the creamy texture. You can also make it ahead of time—just follow the recipe and store it in an airtight container until you’re ready to enjoy it!

Nutrition Tips & Dietary Adaptations

For those looking to maintain a balanced diet, here are some tips:

  • Swap for Whole Grains: Use whole grain or legume-based pasta for added fiber.
  • Lean Proteins: Choose lean ground turkey or chicken to reduce fat content.
  • Load on Vegetables: Add a variety of vegetables for more nutrients and flavor.
  • Control Portions: Serve with a side salad to balance your meal and control portion sizes.

Equipment Recommendations

No special equipment is needed for this recipe, but here are some helpful tools:

  • Large Deep Skillet or Dutch Oven: Ideal for browning meat and cooking pasta.
  • Wooden Spoon: Perfect for stirring and breaking up ground beef.
  • Measuring Cups and Spoons: Essential for accurate ingredient measurements.

Serving Suggestions

Serve this dish with a side of garlic bread and a fresh garden salad for a complete meal. And don’t forget to top it off with a sprinkle of extra Parmesan and parsley for that gourmet touch!

Frequently Asked Questions

  • Can I use different types of meat? Absolutely! Ground turkey or chicken work great as alternatives.
  • How do I make this dish vegetarian? Substitute ground beef with lentils or mushrooms and use vegetable broth.
  • What pasta types can I use? Any short pasta works well, including penne, rotini, or farfalle.
  • Can I prepare this dish in advance? Yes! You can make it ahead of time and reheat when ready to serve.
  • How do I store leftovers? Store in an airtight container in the fridge for up to 3 days.
  • What if I don’t have heavy cream? You can use half-and-half or coconut cream as alternatives.
  • Can I freeze this dish? Yes, but it may affect the texture of the cream. Reheat gently when ready to eat.
  • Is this recipe suitable for kids? Definitely! The flavors are mild and comforting, perfect for little palates.

Now that you have everything you need to make this incredible One-Pot Creamy Beef and Garlic Butter Pasta, get ready to impress your family and friends. Cooking should be fun and rewarding, so embrace your inner chef and enjoy the process. Happy cooking, and may your kitchen always be filled with love and laughter!

One-Pot Creamy Beef and Garlic Butter Pasta

Prep Time 10 minutes
Cook Time 20 minutes
Total Time 30 minutes
Servings 4 servings
Calories 650
A quick and hearty one-pot pasta dish combining savory beef, garlic butter, and creamy cheese for a satisfying meal.

Ingredients

Meat and Pasta

  • 1 lb Ground Beef
  • 8 oz Short Pasta (Penne, rotini, rigatoni, or farfalle)
  • 4 cups Beef Broth
  • 1 tbsp Olive Oil
  • 3 tbsp Butter
  • 4 cloves Garlic Cloves
  • 1 tsp Italian Seasoning
  • 1/2 tsp Red Pepper Flakes
  • 1/2 tsp Smoked Paprika
  • to taste Salt & Black Pepper Salt & Black Pepper
  • 1/2 cup Grated Parmesan Cheese
  • 1/2 cup Heavy Cream
  • 1/2 cup Shredded Mozzarella
  • 2 tbsp Fresh Parsley

Instructions 

  • Heat olive oil and brown ground beef for 6-8 minutes until browned.
  • Add butter and garlic, cook for 1-2 minutes with seasonings until fragrant.
  • Pour in beef broth, add pasta, bring to boil, then simmer covered for 12-15 minutes.
  • Stir in heavy cream, Parmesan, and mozzarella until creamy, cook 3 minutes.
  • Turn off heat, let sit uncovered for 5 minutes to thicken, then garnish with parsley.

Notes

For extra flavor, sprinkle additional Parmesan or fresh herbs before serving.
Calories: 650kcal
Cost: $15
Course: Main Course
Cuisine: American
Keyword: pasta

Welcome to Your New Favorite Comfort Dish!

When the weather turns chilly and you’re craving something warm and hearty, nothing beats a cozy bowl of One-Pot Sausage and Rice. This recipe is not just about the ingredients; it’s about the memories it creates and the comfort it brings to your table. Imagine the aroma of sautéing sausage mingling with the sweetness of bell peppers, all enveloped in creamy, cheesy goodness. It’s the kind of dish that whispers, “Everything will be alright,” as you gather around the table with your loved ones.

In this article, we’re diving deep into everything you need to know to master this dish, from the essential ingredients to the perfect technique. So, pull up a chair, grab your spatula, and let’s get cooking!

Why You’ll Love This Recipe

This One-Pot Sausage and Rice dish is more than just a meal; it’s a celebration of flavors and convenience. Here are five reasons why you’ll want to make it a regular in your kitchen:

  • Quick and Easy: Ready in under 30 minutes, making it perfect for busy weeknights.
  • One-Pot Wonder: All ingredients cook together, saving you time on cleanup.
  • Flavor Packed: Juicy sausage, creamy cheese, and vibrant peppers create a taste explosion.
  • Customizable: Easily swap out ingredients to suit your taste or what you have on hand.
  • Great for Leftovers: This dish reheats beautifully, making it perfect for meal prep.

Ingredients Breakdown

Here’s what you’ll need for this One-Pot Sausage and Rice recipe:

  • 3 Tablespoons olive oil: For sautéing and flavor.
  • 11 oz. sausage: Smoked sausage works best, but feel free to use chicken or turkey sausage for a lighter option.
  • 2 Tablespoons butter: Adds richness and depth.
  • ½ cup yellow onion (diced): For sweetness and aroma.
  • 2 cloves garlic (minced): A must for that savory kick.
  • 2 ½ cups chicken broth: The cooking liquid that infuses flavor into the rice.
  • 1 ¼ cups white long grain rice (uncooked): The base of the dish.
  • 1 small red bell pepper (sliced): Adds color and crunch.
  • 1 small green bell pepper (sliced): For a fresh flavor contrast.
  • 10.75 oz. cream of chicken soup: Adds creaminess and a hint of nostalgia.
  • ½ cup sour cream: For tang and creaminess.
  • ¾ cup milk: To adjust the consistency.
  • 1 cup cheddar cheese (shredded): Because cheese makes everything better!
  • 1 pinch red pepper flakes (optional): For a touch of heat if desired.

**Substitutions:** If you’re looking to mix it up, here are some great alternatives:

  • Rice: Quinoa or brown rice can be used, but be sure to adjust the cooking time.
  • Sausage: Swap for vegetarian sausage or even canned beans for a meatless option.
  • Broth: Vegetable broth works well for a lighter flavor.
  • Vegetables: Feel free to add in broccoli, peas, or corn for more color and nutrients.

Cooking Steps: Your Guide to Perfection

Side view of delicious sausage and rice with colorful bell peppers.

This recipe is designed for simplicity, allowing you to prepare everything in one pot. Here’s how to make it:

  • Step 1: Heat 2 tablespoons of olive oil in a large pot over medium heat. Slice and brown your sausage until golden.
  • Step 2: Add the diced onion and sauté until translucent, about 3-4 minutes. Then, stir in the minced garlic for an additional minute until fragrant.
  • Step 3: Toss in the sliced bell peppers and cook for 2-3 minutes until they begin to soften.
  • Step 4: Add the rice to the pot, stirring to coat it in the oil and flavors.
  • Step 5: Pour in the chicken broth, cream of chicken soup, sour cream, and milk. Stir well to combine.
  • Step 6: Bring the mixture to a boil, then reduce to a simmer. Cover and cook for 18-20 minutes until the rice is tender and has absorbed the liquid.
  • Step 7: Remove from heat, fluff with a fork, and stir in the shredded cheddar cheese until melted.
  • Step 8: Serve warm, garnished with a sprinkle of red pepper flakes if desired.

Pro Tips for a Flawless Dish

Want to ensure your One-Pot Sausage and Rice turns out perfectly? Here are some expert insights:

  • Don’t Rush the Browning: Take your time browning the sausage; it adds depth of flavor.
  • Rice Rinsing: Rinse the rice before cooking to remove excess starch and prevent stickiness.
  • Liquid Adjustments: Always check the rice package for liquid ratios; you may need to adjust based on the type of rice.
  • Cheese Variations: Experiment with different cheeses like pepper jack or gouda for a unique twist.
  • Herbs and Spices: Fresh herbs like parsley or thyme can elevate the dish even more.
  • Leftover Magic: This dish makes excellent leftovers; just reheat with a splash of broth to bring back the creaminess.
  • Meal Prep Friendly: Make a double batch for easy lunches throughout the week!
  • Don’t Forget the Garnish: A sprinkle of fresh herbs or a dollop of sour cream adds the finishing touch.

Common Mistakes and Troubleshooting

Even the best chefs have off days. Here are some common pitfalls to avoid:

  • Overcooking the Rice: Make sure to follow the cooking time; overcooked rice can become mushy.
  • Not Enough Liquid: If your rice isn’t cooking properly, it might need a splash more broth.
  • Skipping the Cheese: Don’t skip the cheese; it’s what makes this dish so creamy and comforting!

Delicious Variations to Try

Feel free to mix and match! Here are some fun variations of this recipe you can experiment with:

  • Spicy Sausage and Rice: Use spicy Italian sausage and add jalapeños for a kick.
  • Vegetarian Delight: Replace sausage with black beans and add extra veggies like zucchini and carrots.
  • Mexican Twist: Add taco seasoning and swap the cheddar for a Mexican blend cheese.
  • Asian-Inspired: Use soy sauce, ginger, and sesame oil for a delicious Asian flavor profile.

Storage and Make-Ahead Instructions

This dish is perfect for meal prep! Here’s how to store and reheat:

  • Refrigerate: Store leftovers in an airtight container for up to 4 days.
  • Freeze: This dish can be frozen for up to 3 months. Thaw in the refrigerator overnight before reheating.
  • Reheat: Add a splash of broth or water when reheating to bring back the creamy texture.

FAQs About One-Pot Sausage and Rice

Here are some frequently asked questions to help you navigate this recipe:

  • Can I use brown rice instead of white? Yes, but brown rice requires more liquid and a longer cooking time.
  • What’s the best sausage to use? Smoked sausage adds great flavor, but feel free to use any your family loves!
  • Can I make this in a slow cooker? Absolutely! Just follow the same steps, but adjust cooking times to 4-6 hours on low.
  • How do I make this dairy-free? Substitute dairy ingredients with coconut milk and omit cheese.
  • Can I add other vegetables? Yes! Peas, carrots, or spinach can be great additions.
  • Is this dish gluten-free? Yes, as long as you use gluten-free sausage and check the broth.
  • How do I make it spicier? Add more red pepper flakes or use a spicy sausage for heat.
  • Can I double the recipe? Yes! Just be sure to use a larger pot to accommodate the increased volume.

Nutritional Tips and Dietary Adaptations

This dish can be adapted to meet various dietary needs:

  • Low-Carb Option: Substitute rice with cauliflower rice for a low-carb alternative.
  • Dairy-Free: Use non-dairy cream and cheese alternatives.
  • High-Protein: Add beans or lentils to increase protein content.

Essential Equipment You’ll Need

To make this recipe, you’ll need:

  • Large Pot or Dutch Oven: Ideal for one-pot cooking.
  • Wooden Spoon: Perfect for stirring ingredients without scratching your pot.
  • Measuring Cups and Spoons: For accurate ingredient measurements.
  • Knife and Cutting Board: To prep your veggies and sausage.

Serving Suggestions

This One-Pot Sausage and Rice dish is delightful on its own, but here are a few ideas to elevate your meal:

  • Fresh Salad: Pair with a bright, crisp salad for a refreshing contrast.
  • Garlic Bread: Serve with warm garlic bread to soak up all the creamy goodness.
  • Wine Pairing: A chilled white wine complements the dish beautifully.

Conclusion: Let’s Cook Together!

Now that you have all the tools to create this delicious One-Pot Sausage and Rice dish, it’s time to put on your apron and make some magic in the kitchen! This recipe is about more than just filling bellies; it’s about creating moments and memories with every bite. So gather your loved ones, share a laugh, and enjoy the process. Happy cooking, friends!

Sausage and Rice - One Pot!

Prep Time 10 minutes
Cook Time 30 minutes
Total Time 40 minutes
Servings 4 servings
Calories 650
A flavorful one-pot meal combining sausage, rice, and colorful peppers for a satisfying dinner.

Ingredients

Oil and fats

  • 3 tablespoons olive oil (separated)
  • 2 tablespoons butter

Meat and protein

  • 11 oz. sausage (see notes)

Vegetables

  • ½ cup yellow onion (diced)
  • 2 cloves garlic (minced)
  • 1 small red bell pepper (sliced)
  • 1 small green bell pepper (sliced)

Canned and processed foods

  • 10.75 oz. cream of chicken soup
  • ½ cup sour cream
  • ¾ cup milk
  • 1 cup cheddar cheese (shredded)
  • 1 pinch optional red pepper flakes

Instructions 

  • Cook sausage and vegetables in one pot, then add broth, rice, and seasonings.
  • Simmer until rice is cooked and flavors meld.
  • Stir in cream of chicken, sour cream, milk, and cheese; cook until heated through.

Notes

You can cook the rice separately if preferred to save time.
Calories: 650kcal
Cost: $15
Course: Main Course
Cuisine: American
Keyword: one-pot, Rice, sausage

Why This Creamy Salmon Pasta Will Be Your New Favorite

Welcome to the world of culinary hugs, where every bite feels like a warm embrace! If you’re looking for a dish that’s quick, comforting, and absolutely delicious, you’ve landed in the right spot. This 15-minute creamy salmon pasta is not just a meal; it’s an experience of flavors that dance together in perfect harmony. Whether you’re a busy parent or a culinary novice, this dish is designed to deliver happiness on a plate.

Let’s dive into why this recipe will quickly become a staple in your kitchen:

  • Quick Preparation: With just 15 minutes from start to finish, this meal is perfect for those hectic weeknights when time is of the essence.
  • Flavor Explosion: The combination of smoky salmon, creamy sauce, and fresh herbs creates a scrumptious flavor profile that will leave everyone asking for seconds.
  • Versatile Ingredients: Using easily accessible ingredients means you can whip this up any day of the week without a trip to the specialty store.
  • Comforting and Satisfying: This dish is not just about filling your stomach; it’s about warming your soul with every luscious bite.
  • Impressive Presentation: The vibrant colors of the dish make it visually appealing, making it perfect for a dinner party or festive gathering.

Ingredient Breakdown

Let’s take a closer look at what you’ll need to create this creamy salmon delight:

  • Pasta: 200g of your choice (fettuccine, penne, or spaghetti work wonderfully). Feel free to use whole grain or gluten-free options for dietary preferences.
  • Smoked Salmon: 150g, chopped into tender pieces. If you prefer, you can substitute with cooked salmon or even canned salmon for convenience.
  • Heavy Cream: 200ml for that rich, creamy sauce. You can substitute with half-and-half or coconut cream for a lighter or dairy-free version.
  • Olive Oil: 1 tablespoon for sautéing; this adds a layer of flavor. Avocado oil can also be a great alternative.
  • Garlic: 2 cloves, minced. Garlic powder can be used in a pinch—just a teaspoon will do.
  • Lemon Juice: 1 tablespoon for a zesty kick; you can swap this for white wine for a different flavor profile.
  • Seasoning: Salt and pepper to taste enhance the flavors. Don’t forget a sprinkle of fresh dill or parsley for garnish!

Let’s Make It Together

A detailed shot of pasta coated in a creamy sauce, featuring pieces of salmon and garlic.

Ready to create this beautiful dish? Let’s break it down step-by-step:

  1. Cook the Pasta: Begin by boiling your pasta according to package instructions until it’s al dente. Drain and set aside, reserving a cup of pasta water.
  2. Sauté the Garlic: In a large pan, heat olive oil over medium heat. Add the minced garlic and sauté until fragrant, about 1 minute.
  3. Create the Creamy Sauce: Pour in the heavy cream and bring to a gentle simmer. This is where the magic happens!
  4. Add the Salmon: Stir in the chopped smoked salmon and lemon juice. Cook for 2-3 minutes until everything is heated through and beautifully combined.
  5. Combine: Toss the cooked pasta into the sauce, mixing well to coat every piece. If the sauce is too thick, add a splash of reserved pasta water.
  6. Serve It Up: Plate your creamy salmon pasta and garnish with fresh dill or parsley. Enjoy immediately!

Pro Tips for Perfection

To elevate your dish even further, consider these expert insights:

  • Don’t Overcook the Salmon: If using raw salmon, ensure it’s cooked just until tender; overcooking can lead to dry pieces.
  • Reserve Pasta Water: This starchy water is a secret weapon for achieving the perfect sauce consistency.
  • Experiment with Herbs: Fresh basil or chives can add a wonderful twist to the flavor profile.
  • Make it Spicy: A pinch of red pepper flakes can introduce a delightful kick if you’re feeling adventurous!
  • Balance the Flavors: Taste as you go! Adjust salt, pepper, and lemon juice for a balanced flavor.
  • Meal Prep: This dish can be made ahead and reheats beautifully—just add a splash of cream when reheating to maintain texture.
  • Garnish Generously: A sprinkle of fresh herbs not only adds flavor but makes your dish pop visually.
  • Pair with Wine: A glass of chilled white wine complements the richness beautifully—think Sauvignon Blanc or Chardonnay.

Common Mistakes and Troubleshooting

Even the best of us can make a few blunders in the kitchen! Here are some tips to avoid common pitfalls:

  • Overcooking Pasta: Always follow package instructions for the best results—al dente is key!
  • Skipping the Seasoning: Don’t forget to season your sauce; it’s essential for flavor depth.
  • Using Low-Quality Salmon: Invest in good-quality smoked salmon; it makes a noticeable difference in flavor.
  • Forgetting the Garnish: A little fresh herb goes a long way in making your dish look and taste gourmet.

Delicious Variations to Try

Want to mix things up? Here are a few variations that can keep this recipe exciting:

  • Veggie Lovers: Add fresh spinach or kale for a nutrient boost!
  • Seafood Extravaganza: Incorporate shrimp or scallops for a seafood medley.
  • Pasta Primavera: Toss in seasonal vegetables like bell peppers, zucchini, or asparagus for a colorful addition.
  • Spicy Cajun Style: Add Cajun seasoning for a flavorful, zesty twist!

Storage and Make-Ahead Instructions

This creamy salmon pasta is not only quick to prepare but also easy to store:

  • Refrigeration: Store any leftovers in an airtight container for up to 3 days. Reheat gently on the stove, adding a splash of cream or pasta water.
  • Make Ahead: You can prepare the sauce a day in advance; just reheat and toss with freshly cooked pasta before serving.

FAQ about Creamy Salmon Pasta

Still have questions? Let’s address some common queries:

  • Can I use frozen salmon? Yes, just ensure it’s fully thawed and cooked properly before adding it to the sauce.
  • What type of pasta works best? Fettuccine and penne are popular choices, but feel free to use your favorite type!
  • Can I make this dish dairy-free? Absolutely! Substitute heavy cream with coconut cream or a cashew cream alternative.
  • How can I enhance the flavor? Consider adding capers or a splash of white wine for added depth.
  • Can I freeze this dish? While it’s best fresh, you can freeze the sauce separately; just add freshly cooked pasta when ready to eat.
  • What sides pair well? A fresh green salad or garlic bread complements this dish beautifully.
  • Is this dish kid-friendly? Yes! The creamy sauce and tender salmon are generally a hit with kids.
  • How do I keep the sauce from curdling? Maintain a gentle heat and avoid boiling the cream to keep it smooth.

Nutritional Tips and Dietary Adaptations

For those keeping an eye on nutrition, here are a few adjustments you can make:

  • Protein Boost: Add additional salmon or a side of grilled chicken for extra protein.
  • Whole Grain Pasta: Opt for whole grain or legume-based pasta for added fiber and nutrients.
  • Low-Calorie Cream: Use low-fat cream or Greek yogurt to reduce calorie intake while maintaining creaminess.
  • Herb Infusion: Fresh herbs are low in calories and can be added generously without worry!

Essential Equipment for Success

To make this creamy salmon pasta, you’ll need a few basic kitchen tools:

  • Large Pot: For boiling the pasta; a pot with a lid will help speed up the boiling process.
  • Skillet: A large skillet for sautéing and combining the sauce.
  • Measuring Cups and Spoons: Precision makes a difference, especially with liquids.
  • Cooking Spoon: A sturdy spoon for stirring the sauce and pasta together.

Serving Suggestions

This dish is perfect for any occasion. Serve it with:

  • Garlic Bread: A crispy side that complements the creamy sauce.
  • Mixed Green Salad: A light salad with a vinaigrette dressing brightens the meal.
  • Wine Pairing: A chilled glass of white wine enhances the flavors beautifully.

So, whether you’re cooking for family, friends, or just treating yourself after a long day, this 15-minute creamy salmon pasta is bound to bring joy and happiness to your table. It’s not just a meal; it’s a quick escape into comfort with every bite. Bon appétit!

15-Minute Creamy Salmon Pasta

Prep Time 5 minutes
Cook Time 10 minutes
Total Time 15 minutes
Servings 2 servings
Calories 550
A quick and delicious pasta dish featuring smoked salmon in a creamy sauce, perfect for a fast weeknight dinner.

Ingredients

pasta

  • 200 g pasta of choice
  • 150 g smoked salmon, chopped
  • 200 ml heavy cream
  • 1 tablespoon olive oil
  • 2 cloves garlic, minced
  • 1 tablespoon lemon juice
  • to taste salt and pepper
  • optional fresh dill or parsley for garnish

Instructions 

  • Cook pasta until al dente, then drain.
  • Heat olive oil and sauté garlic until fragrant.
  • Add cream and simmer gently.
  • Stir in salmon and lemon juice; cook 2-3 minutes.
  • Season with salt and pepper, then toss with pasta.
  • Serve garnished with herbs if desired.

Notes

Use fresh herbs for best flavor and adjust seasoning to taste.
Calories: 550kcal
Cost: $15
Course: Main Course
Cuisine: Italian
Keyword: Salmon

Loved this recipe? Save it to your favorite Pinterest board so you can easily find it later! It’s the perfect way to keep all your sweet ideas in one place. ✨

A beautifully styled bowl of creamy salmon pasta with soft shadows and a blurred background.

Discover the Magic of Korean-Style Ground Turkey

Welcome, dear friends! If you’re here, it’s likely because you’re on the hunt for a recipe that’s not just easy to make but also bursting with flavor. Well, you’ve hit the jackpot! This Korean-style ground turkey recipe is like a delightful dance on your taste buds, combining savory soy sauce, a hint of sweetness, and just the right amount of spice. In this article, we’ll explore everything from ingredient breakdowns to pro tips, ensuring you have all the tools to make this dish a star in your kitchen!

Why You’ll Love This Recipe

Let’s dive into why this Korean-style ground turkey will become your new favorite. Here are just a few reasons:

  • Quick Preparation: This recipe can be ready in just 30 minutes, perfect for busy weeknights when you need something delicious without spending hours in the kitchen.
  • Rich Flavor Profile: With the combination of garlic, ginger, and soy sauce, every bite is an explosion of umami that will leave everyone asking for seconds.
  • Healthy Option: Ground turkey is leaner than many other meats, making this dish a great choice for a nutritious dinner without sacrificing flavor.
  • Versatile Serving: Serve it over rice or with a side of sautéed vegetables for a complete meal. You can even wrap it in lettuce for a fun twist!
  • Easy to Customize: Want to add some crunch? Toss in some diced bell peppers or carrots! This recipe is a canvas for your creativity.

Ingredient Breakdown

Every great dish starts with quality ingredients. Here’s what you’ll need for our Korean-style ground turkey:

  • 1/4 cup soy sauce: This is the base of our flavor. If you’re looking for a low-sodium option, feel free to substitute with low-sodium soy sauce.
  • 2 tsp cornstarch: This helps thicken the sauce for a beautiful glaze. You can use arrowroot powder as a gluten-free alternative.
  • 1/2 tbsp brown sugar (packed): Adds a touch of sweetness to balance the savory notes. Coconut sugar can be used for a healthier twist.
  • 1/2 tsp red chili flakes: Adjust to your spice preference. If you prefer a milder dish, reduce the amount or omit it entirely.
  • 2 tbsp sesame oil: This oil gives a nutty flavor that enhances the dish. If you’re out, you can substitute with vegetable or canola oil, but the taste will differ.
  • 2 cloves garlic (minced): Fresh garlic adds depth. If you’re in a pinch, garlic powder can be used (1/2 tsp).
  • 1 tbsp fresh ginger (grated): Ginger brings warmth and zing to the dish. Dried ginger can be a substitute, but fresh is always best!
  • 15 oz / 450g ground turkey: The star of the show! You can swap this for ground chicken or even tofu for a vegetarian option.
  • 6 tbsp chives (chopped): Fresh herbs brighten the dish. Green onions or cilantro also work beautifully.
  • 2 tbsp sesame seeds: These add a delightful crunch and a nutty flavor at the end. Feel free to skip if you’re not a fan.

Step-by-Step Cooking Instructions

Close-up view showing a delicious serving of ground turkey, highlighted with colorful ingredients and garnishes.

Ready to get cooking? Here’s how to bring this dish to life:

  • Step 1: In a small bowl, combine soy sauce, cornstarch, brown sugar, and chili flakes. Mix until the cornstarch is dissolved and set aside.
  • Step 2: Drizzle a large skillet with sesame oil. Stir in minced garlic and grated ginger, cooking until fragrant (just about 30 seconds). Add the ground turkey, breaking it into small chunks. Sauté until it loses its raw red color.
  • Step 3: Pour the soy sauce mixture into the skillet. Keep over high heat for about 2 minutes until the sauce turns golden brown and aromatic. If the sauce thickens too much, add a tablespoon of water to adjust the consistency. Stir in chopped chives, reserving some for garnishing.
  • Step 4: Sprinkle with sesame seeds and garnish with the remaining chives. Serve hot over a bed of rice and alongside your favorite vegetables.

Pro Tips for Perfecting Your Dish

Want to elevate your Korean-style ground turkey? Here are some expert tips:

  • Don’t Overcook the Turkey: Aim for just cooked and slightly browned for the best texture.
  • Customize Your Vegetables: Add bell peppers, zucchini, or snap peas in the last few minutes of cooking for added nutrition and color.
  • Adjust the Spice: If you like it spicier, add more chili flakes or even a dash of sriracha to the sauce.
  • Meal Prep Friendly: Make this dish ahead of time and store in an airtight container for up to 3 days. Reheat in the microwave or on the stovetop.
  • Perfect Pairings: This dish goes wonderfully with steamed broccoli, snap peas, or a fresh cucumber salad to balance the flavors.
  • Add a Crunch: Top with roasted peanuts or cashews for an extra layer of texture.
  • Fresh Herbs Matter: Always use fresh herbs when possible—they make a world of difference in flavor.
  • Experiment with Sauces: Feel free to mix in a little hoisin or oyster sauce for a different flavor profile.

Common Mistakes and Troubleshooting

Even seasoned cooks can hit a snag! Here are some common issues and how to fix them:

  • Too Salty?: If your dish ends up too salty, add a bit more brown sugar or a splash of vinegar to balance it out.
  • Too Thick?: If the sauce is too thick, just add a little water or broth while cooking to loosen it.
  • Too Spicy?: If the heat level is overwhelming, serve with a side of plain rice to help tone it down.

Variations to Try

Feel free to get creative with these variations:

  • Vegetarian Delight: Swap the ground turkey for crumbled tofu or tempeh for a vegan version that’s just as tasty.
  • Spicy Korean BBQ: Add in a tablespoon of gochujang (Korean chili paste) for a deeper flavor and extra heat.
  • Curry Twist: Stir in a tablespoon of curry powder for a unique fusion dish that still has that Korean flair.
  • Sweet and Sour: Incorporate pineapple chunks for a sweet contrast that pairs beautifully with the savory elements.

Storage and Make-Ahead Instructions

This Korean-style ground turkey is perfect for meal prep! Here’s how to store it:

  • Refrigerate: Store in an airtight container in the fridge for up to 3 days.
  • Freeze: This dish freezes well! Cool completely, then transfer to a freezer-safe container for up to 2 months. Thaw overnight in the fridge before reheating.

Comprehensive FAQ

Got questions? I’ve got answers! Here are some frequently asked questions about this recipe:

  • Can I use ground chicken instead of turkey? Yes, ground chicken is a great substitute and works just as well!
  • What if I don’t have sesame oil? You can substitute with olive oil or vegetable oil, but the flavor will differ slightly.
  • Can I make this dish gluten-free? Absolutely! Use tamari instead of soy sauce to keep it gluten-free.
  • How do I make it spicier? Add more chili flakes or a splash of hot sauce to the mix!
  • What sides pair well with this dish? Serve it with rice, steamed veggies, or a light salad.
  • Can I add more vegetables? Definitely! Bell peppers, carrots, and broccoli are great additions.
  • How long does it take to cook? This recipe takes about 30 minutes from start to finish.
  • Can I double the recipe? Yes, just increase the ingredients accordingly and use a larger skillet.

Nutritional Tips and Dietary Adaptations

If you’re health-conscious or have specific dietary needs, here are some tips:

  • Low-Carb Option: Serve over cauliflower rice instead of regular rice for a low-carb alternative.
  • High-Protein Boost: Add edamame or chickpeas to increase the protein content.
  • Dairy-Free: This recipe is naturally dairy-free, making it suitable for those with lactose intolerance.

Equipment Recommendations

To make this recipe a breeze, here’s what I recommend having on hand:

  • Large Skillet: A non-stick skillet is perfect for cooking the turkey evenly without sticking.
  • Measuring Cups and Spoons: For accurate ingredient measurements, ensuring the perfect balance of flavors.
  • Spatula: For stirring and breaking up the turkey while it cooks.

Serving Suggestions

Now that your dish is ready, let’s talk about how to serve it:

  • Rice Bowl: Serve over a bed of white or brown rice, topped with extra chives and sesame seeds.
  • Lettuce Wraps: Spoon the turkey mixture into lettuce leaves for a fun, fresh meal.
  • With Noodles: Toss with cooked rice noodles for a delicious twist on a classic.

Conclusion: A Meal Worth Making Again

This Korean-style ground turkey recipe is more than just a meal; it’s an experience that brings people together. Whether you’re cooking for your family or impressing friends, this dish is sure to leave a lasting impression. Remember, cooking is all about experimenting and enjoying the process. So, gather your ingredients, let your creativity flow, and enjoy every bite! Happy cooking, friends!

Ground Turkey Recipe (Korean-Style)

Prep Time 10 minutes
Cook Time 10 minutes
Total Time 20 minutes
Servings 4 servings
Calories 250
A quick and flavorful Korean-style ground turkey dish, perfect served over rice with fresh vegetables.

Ingredients

Sauce and Seasonings

  • 1/4 cup soy sauce
  • 2 tsp cornstarch
  • 1/2 tbsp brown sugar (packed)
  • 1/2 tsp red chili flakes (or to taste)
  • 2 tbsp sesame oil
  • 2 cloves garlic (minced)
  • 1 tbsp fresh ginger (grated)
  • 15 oz ground turkey
  • 6 tbsp chives (chopped)
  • 2 tbsp sesame seeds

Instructions 

  • Mix soy sauce, cornstarch, brown sugar, and chili flakes; set aside.
  • Heat sesame oil in a skillet, sauté garlic and ginger until fragrant. Add ground turkey and cook until no longer red.
  • Stir in soy sauce mixture, cook for 2 minutes, then add chives and turn off heat.
  • Sprinkle with sesame seeds and garnish with remaining chives. Serve with rice and vegetables.

Notes

Use fresh chives for best flavor and adjust chili flakes to taste.
Calories: 250kcal
Cost: $12
Course: Main Course
Cuisine: Korean
Keyword: ground turkey

Welcome to a Whimsical Feast: Ground Beef and Potatoes

Ah, the simple yet satisfying comfort of ground beef and potatoes! If you’ve ever found yourself scrambling for a meal on a busy weeknight, you’re in good company. This dish is the kind of recipe that feels like a warm hug, perfect for gathering family around the dinner table. In this article, we’ll dive deep into the magic of this classic dish, ensuring you walk away with not just the recipe, but a wealth of knowledge to elevate your culinary skills.

This isn’t just any recipe; it’s a celebration of flavors, textures, and, most importantly, the joy of cooking. As someone who grew up in a kitchen filled with the scents of home-cooked meals, I can assure you that this ground beef and potatoes dish will not only fill bellies but also warm hearts. Let’s get cooking!

Why You’ll Love This Recipe

Here are just a few reasons why this ground beef and potatoes dish is destined to become a staple in your home:

  • Quick & Easy: Perfect for busy weeknights, it comes together in under 30 minutes, making it a go-to option when time is tight.
  • Family-Friendly: Kids and adults alike will find this dish irresistible, thanks to its hearty flavor and comforting texture.
  • Budget-Friendly: Made with simple, affordable ingredients, you probably have most of them in your pantry already!
  • One-Pan Wonder: Fewer dishes mean less cleanup, giving you more time to relax or enjoy a glass of wine after dinner.
  • Versatile: This recipe is highly adaptable; you can easily swap in different vegetables or spices to suit your taste.

Ingredient Breakdown: A Closer Look

An appealing dish of sautéed ground beef mixed with golden potatoes, highlighted by soft natural lighting.

Let’s break down the ingredients you’ll need to whip up this delightful dish, along with some potential substitutions to suit your pantry:

  • Ground Beef (1 pound): The star of the show! You can also use ground turkey or chicken for a leaner option.
  • Potatoes (4 medium, diced): These provide heartiness. Feel free to substitute with sweet potatoes for a nutritious twist.
  • Onion (1 medium, chopped): Adds sweetness and depth. Shallots work well too!
  • Garlic (2 cloves, minced): Because who doesn’t love garlic? You can use garlic powder in a pinch.
  • Beef Broth (1 cup): For moisture and flavor. Vegetable broth is a great alternative.
  • Worcestershire Sauce (1 tablespoon): This ingredient adds a savory punch; soy sauce can be used if you’re out.
  • Paprika (1 teaspoon): For a hint of warmth. Smoked paprika adds an extra layer of flavor.
  • Salt and Pepper to taste: Essential for seasoning; feel free to adjust according to your preference.
  • Olive Oil (2 tablespoons): For sautéing. You can use any cooking oil you like, such as canola or avocado oil.
  • Fresh Parsley for garnish: Adds a pop of color and freshness. Alternatively, green onions work beautifully!

Pro Tips for Perfection

Before you dive into cooking, here are some expert insights to ensure your ground beef and potatoes turn out just right:

  • Brown the meat properly: Ensure your ground beef is browned evenly for maximum flavor. Don’t overcrowd the pan!
  • Use a large skillet: A spacious skillet helps prevent steaming, ensuring your potatoes get that nice crispy exterior.
  • Don’t skip the garlic: Adding garlic at the right time (after the onions) helps to release its full flavor!
  • Adjust seasoning: Always taste your dish before serving. You might need a little extra salt or pepper!
  • Simmer gently: When adding the potatoes, allow them to simmer to absorb all the delicious flavors.
  • Let it rest: Allow the dish to sit for a few minutes after cooking; this enhances the flavors.
  • Experiment with spices: Feel free to add in your favorite spices or herbs, such as rosemary or thyme, for an added twist.
  • Garnish generously: A sprinkle of fresh parsley not only looks pretty but adds a fresh flavor punch!

Avoiding Common Mistakes

Even the best chefs have their off days. Here’s how to avoid some common pitfalls:

  • Overcooking the beef: Keep an eye on your beef. Overcooked meat can become tough and chewy.
  • Not enough liquid: If your dish seems dry, don’t hesitate to add a splash more broth or water!
  • Undercooking the potatoes: Make sure your potatoes are tender before serving. If they’re not, just cover and simmer a bit longer.
  • Forgetting to season: A pinch of salt can elevate the whole dish. Always season as you go!

Delicious Variations to Try

This recipe is incredibly versatile. Here are some fun variations to keep things fresh:

  • Vegetarian Delight: Substitute ground beef with lentils or chickpeas for a plant-based version.
  • Spicy Kick: Add diced jalapeños or a sprinkle of cayenne pepper for a spicy twist.
  • Cheesy Goodness: Stir in some shredded cheese (like cheddar or mozzarella) right before serving for a creamy finish.
  • Loaded Skillet: Top with sour cream, green onions, and bacon bits for a loaded potato experience!

Storage and Make-Ahead Instructions

This dish not only shines at the dinner table but also makes for fantastic leftovers! Here’s how to store and reheat:

  • Refrigeration: Store leftovers in an airtight container in the fridge for up to 4 days.
  • Freezing: You can freeze this dish for up to 3 months. Just make sure to cool it completely before transferring to a freezer-safe container.
  • Reheating: To reheat, simply warm it on the stovetop over low heat or in the microwave until heated through.

Frequently Asked Questions

Got questions? I’ve got answers! Here are some common queries about this recipe:

  • Can I use a different type of meat? Absolutely! Ground turkey, chicken, or even plant-based alternatives work beautifully.
  • What kind of potatoes work best? Russet or Yukon Gold potatoes are ideal, but you can use whatever you have on hand.
  • Can I add vegetables? Yes! Bell peppers, carrots, or peas can be added for extra nutrition and flavor.
  • How can I make it gluten-free? Ensure your Worcestershire sauce is gluten-free or substitute with tamari.
  • What can I serve with this dish? A crisp green salad or steamed veggies make great sides.
  • Is this recipe good for meal prep? Definitely! It stores well and is perfect for reheating throughout the week.
  • Can I make this vegetarian? Yes! Substitute the beef with lentils or your favorite meat alternative.
  • What if I don’t have Worcestershire sauce? Soy sauce or a splash of balsamic vinegar can be a great substitute!

Nutritional Tips and Dietary Adaptations

For those watching their diet, here are some nutritional tips:

  • Lean Meat: Opt for lean ground beef to reduce fat content. Ground turkey is another great alternative!
  • Increase Veggies: Add more vegetables to boost the fiber content without adding many calories.
  • Portion Control: Serve in smaller portions and pair with a side salad for balance.
  • Whole Grains: Swap out regular potatoes for quinoa or brown rice for a whole grain option.

Equipment Recommendations

Here are a few kitchen tools that will make your cooking experience smoother:

  • Non-stick skillet: Ideal for browning meat without it sticking.
  • Wooden spoon: Perfect for stirring and scraping the bottom of the pan.
  • Measuring cups and spoons: For precise ingredient measurements, especially when seasoning!
  • Cutting board and chef’s knife: Essential for chopping vegetables efficiently.

Serving Suggestions

This ground beef and potatoes dish is wonderfully satisfying on its own, but here are a few serving ideas to elevate your meal:

  • Serve with crusty bread: Perfect for scooping and soaking up all the delicious flavors.
  • Pair with a fresh salad: A light green salad with a tangy vinaigrette complements the richness of the dish.
  • Top with avocado: Sliced or diced avocado adds creaminess and a fresh twist.
  • Use as a filling: Stuff into bell peppers or tortillas for a fun twist on presentation!

And there you have it! Your ultimate guide to making the best ground beef and potatoes dish that will leave everyone asking for seconds. Remember, cooking is all about enjoying the process and sharing moments with those you love. So gather your ingredients, turn up some music, and let’s create some kitchen magic together!

Ground Beef and Potatoes - An Organized Chaos

Prep Time 10 minutes
Cook Time 25 minutes
Total Time 35 minutes
Servings 4 servings
Calories 650
A hearty and flavorful dish combining ground beef and potatoes, cooked to perfection with a touch of chaos for a delicious meal.

Ingredients

Meat

  • 1 pound ground beef
  • 4 medium potatoes, diced
  • 1 medium onion, chopped
  • 2 cloves garlic, minced
  • 1 cup beef broth
  • 1 tablespoon worcestershire sauce
  • 1 teaspoon paprika
  • to taste salt and pepper salt and pepper
  • 2 tablespoons olive oil

Garnish

  • fresh for garnish fresh parsley

Instructions 

  • Heat olive oil in a large skillet over medium heat.
  • Sauté onion and garlic until translucent, then add ground beef and cook until browned.
  • Add potatoes, beef broth, Worcestershire sauce, paprika, salt, and pepper; bring to a boil.
  • Reduce heat, cover, and simmer for 20-25 minutes until potatoes are tender.
  • Adjust seasoning, then serve hot garnished with parsley.

Notes

Stir occasionally to keep the chaos organized and prevent sticking.
Calories: 650kcal
Cost: $15
Course: Main Course
Cuisine: American
Keyword: ground beef

Loved this recipe? Save it to your favorite Pinterest board so you can easily find it later! It’s the perfect way to keep all your sweet ideas in one place. ✨

Eye-level shot of a savory ground beef and potato meal, showcasing rich textures and warm colors.

Welcome to the Cozy World of Cheesy Ground Beef and Potatoes

Hey there, friend! If you’ve wandered into my kitchen today, you’re in for a treat. We’re diving into a recipe that feels like a warm hug on a chilly evening—Cheesy Ground Beef and Potatoes. This dish combines hearty ingredients with a sprinkle of love, making it perfect for family dinners or cozy nights in. Trust me, it’s the kind of meal that will have everyone asking for seconds!

Why You’ll Love This Recipe

Before we roll up our sleeves and get cooking, let’s chat about why this cheesy delight will quickly become a staple in your home:

  • Comfort Food Classic: There’s something magical about layers of cheesy goodness and tender potatoes that just warms the soul.
  • Quick and Easy: This recipe comes together in under an hour, making it perfect for busy weeknights.
  • Customizable: With a few simple substitutions, you can make this dish your own—whether you prefer turkey, chicken, or a vegetarian twist.
  • Budget-Friendly: Ground beef and potatoes are wallet-friendly ingredients that pack a punch in flavor and satisfaction.
  • Family Favorite: Kids and adults alike will love this dish, turning dinner into a delightful gathering.

Ingredients for Cheesy Ground Beef and Potatoes

Gathering the right ingredients is key to a successful dish. Here’s what you’ll need to create this comforting masterpiece:

  • 1 lb ground beef: The star of our dish, providing rich flavor and protein.
  • 4 cups russet potatoes: Peeled and thinly sliced for perfect layering. You can also try Yukon gold for a creamier texture!
  • 1 small onion, diced: Adds sweetness and depth.
  • 2 cloves garlic, minced: Because garlic makes everything better.
  • 1 ½ cups shredded cheddar cheese: The cheesy goodness that brings it all together.
  • 1 cup milk: For a creamy cheese sauce.
  • 2 tbsp butter: To create a lovely roux.
  • 2 tbsp all-purpose flour: For thickening the sauce.
  • 1 tsp salt: Essential for enhancing flavors.
  • ½ tsp black pepper: A little kick never hurt anyone!
  • ½ tsp paprika (optional): For a hint of smokiness.
  • Chopped parsley (for garnish): Because we eat with our eyes first!

How to Make Cheesy Ground Beef and Potatoes

Side view of a layered casserole featuring ground beef, potatoes, and cheddar cheese.

Now that we have our ingredients ready, let’s dive into the step-by-step process of creating this delicious dish:

  1. Preheat your oven to 375°F (190°C). This sets the stage for a perfectly baked casserole.
  2. In a large skillet over medium heat, brown the ground beef until fully cooked. Don’t forget to drain any excess fat—nobody likes a greasy dish!
  3. Add diced onions and garlic; sauté for 2-3 minutes until fragrant. Remove from heat and set aside.
  4. In a saucepan, melt butter over medium heat. Stir in flour and cook for 1 minute to create a roux—this is the secret to a creamy sauce!
  5. Gradually whisk in milk, cooking until the sauce thickens. Stir in salt, pepper, and paprika for that extra flavor boost.
  6. In a greased 9×13-inch baking dish, layer half the sliced potatoes, then half the beef mixture, and half the cheese sauce. Repeat these layers for maximum cheesy goodness.
  7. Top with shredded cheddar cheese—because more cheese is always better!
  8. Cover with foil and bake for 45 minutes. Remove the foil and bake an additional 15 minutes until the potatoes are tender and the cheese is golden.
  9. Garnish with parsley and serve hot—enjoy the oohs and aahs!

Pro Tips for the Best Cheesy Ground Beef and Potatoes

Want to elevate your cheesy ground beef and potatoes game? Here are some expert insights:

  • Layering technique: Ensure even cooking and flavor distribution by layering your ingredients, as mentioned.
  • Use a mandoline slicer: This nifty tool helps achieve evenly thin potato slices for consistent baking.
  • Experiment with cheese: Swap cheddar for Monterey Jack or even a spicy pepper jack for a kick!
  • Don’t skip the resting time: Letting the dish sit for a few minutes after baking helps the layers set and makes serving easier.
  • Customize with veggies: Add spinach, bell peppers, or mushrooms for added nutrition and flavor.
  • Make it gluten-free: Substitute all-purpose flour with a gluten-free blend to enjoy without worry.
  • Double the recipe: This dish freezes well, so make extra for those busy nights!
  • Mind the seasoning: Adjust salt and pepper to taste—everyone’s palate is different!

Common Mistakes and Troubleshooting

Even the best chefs have their off days! Here are a few common mistakes and how to avoid them:

  • Overcooking the beef: Make sure to brown it just until it’s cooked through but not dry—nobody wants a chewy casserole.
  • Undercooking the potatoes: Ensure they are thinly sliced so they can cook through in the baking time.
  • Skipping the foil: Covering the dish initially helps steam the potatoes and prevents the cheese from burning.
  • Not letting it rest: If you serve immediately after baking, it might fall apart. Give it a few moments to set!

Delicious Variations to Try

This recipe is wonderfully versatile! Here are some fun variations:

  • Southwestern Twist: Add black beans, corn, and taco seasoning for a zesty flavor.
  • Vegetarian Version: Replace ground beef with lentils or mushrooms for a hearty plant-based option.
  • Italian Flair: Mix in marinara sauce and top with mozzarella for a cheesy lasagna-inspired dish.
  • Breakfast Style: Add scrambled eggs and serve with salsa for a brunch twist!

Storage and Make-Ahead Instructions

Want to enjoy this dish later? Here’s how to store it:

  • Refrigerate: Store leftovers in an airtight container for up to 3 days.
  • Freeze: This dish freezes beautifully! Wrap tightly and freeze for up to 3 months.
  • Reheat: Thaw overnight in the fridge before reheating in the oven at 350°F (175°C) until warmed through.

Frequently Asked Questions

Got questions? I’ve got answers! Here are some common queries:

  • Can I make this ahead of time? Absolutely! You can prepare everything in advance and bake it just before serving.
  • What type of potatoes work best? Russets are ideal for their starchy texture, but Yukon golds work well too.
  • Can I use ground turkey instead of beef? Yes! Ground turkey is a great lean alternative.
  • How do I make it gluten-free? Simply swap out the all-purpose flour for a gluten-free blend.
  • Can I add more cheese? Of course! Feel free to go wild with your cheese choices.
  • What should I serve with this dish? A fresh salad or steamed veggies make a great side.
  • Can I freeze this dish? Yes! It freezes well for a quick meal later.
  • How do I reheat leftovers? Reheat in the oven or microwave until warmed through.

Nutritional Tips and Dietary Adaptations

Looking for ways to make this dish even more nutritious? Here are some ideas:

  • Add vegetables: Incorporate your favorite veggies into the layers for added vitamins.
  • Choose lean meat: Opt for lean ground beef or turkey to reduce fat content.
  • Low-fat cheese: Use reduced-fat cheese for a lighter version.

Equipment Recommendations

Before you start cooking, make sure you have these handy:

  • Large skillet: For browning the beef and sautéing the onions.
  • 9×13-inch baking dish: Perfect for layering your ingredients.
  • Mandoline slicer: For perfectly thin potato slices.
  • Whisk: To mix your cheese sauce smoothly.

Serving Suggestions

Now that your cheesy ground beef and potatoes are out of the oven, here’s how to serve it:

  • Garnish: Sprinkle with fresh parsley for color and freshness.
  • Pair with a salad: A crisp green salad balances the richness of the dish.
  • Serve with crusty bread: Perfect for sopping up any cheesy goodness left on the plate.

Conclusion

There you have it! A cozy dish of Cheesy Ground Beef and Potatoes that will not only fill your tummy but also fill your heart with warmth. This recipe is all about comfort, flavor, and a dash of creativity. Whether you’re feeding a crowd or just treating yourself, I hope this dish brings as much joy to your kitchen as it does to mine. So grab that spatula, and let’s make some magic!

Cheesy Ground Beef and Potatoes

Prep Time 15 minutes
Cook Time 1 hour
Total Time 1 hour 15 minutes
Servings 4 servings
Calories 850
A hearty and cheesy baked dish combining ground beef, potatoes, and vegetables for a satisfying meal.

Ingredients

Meat and Potatoes

  • 1 lb ground beef
  • 4 cups russet potatoes, peeled and sliced
  • 1 small onion, diced
  • 2 cloves garlic, minced
  • 1.5 cups shredded cheddar cheese
  • 1 cup milk
  • 2 tbsp butter
  • 2 tbsp all-purpose flour
  • 1 tsp salt
  • 0.5 tsp black pepper
  • 0.5 tsp paprika (optional)

Garnish

  • Chopped parsley parsley (for garnish)

Instructions 

  • Preheat oven to 375°F (190°C). Brown ground beef in a skillet, then sauté onions and garlic. Prepare cheese sauce with butter, flour, milk, salt, pepper, and paprika.
  • Layer sliced potatoes, beef, and cheese sauce in a greased baking dish. Repeat layers and top with cheese.
  • Cover with foil and bake for 45 minutes. Remove foil and bake 15 more minutes until golden and tender. Garnish with parsley before serving.

Notes

For a creamier texture, add a splash of cream to the cheese sauce.
Calories: 850kcal
Cost: $15
Course: Main Course
Cuisine: American
Keyword: cheese, ground beef, potatoes

A Heartwarming Chicken Bake That Transforms Your Dinner Routine

Welcome to my kitchen, where the magic of cooking transforms simple ingredients into unforgettable meals! If you’re on the hunt for a recipe that not only fills your belly but also warms your heart, you’ve landed in the right spot. Today, we’re diving into the wonderful world of a One-Pan Wonder Chicken Bake that combines tender chicken, vibrant broccoli, and a delightful blend of flavors—all from the comfort of your own kitchen. This dish is perfect for those busy weeknights when you want something that’s easy to prepare yet makes everyone feel special. Let’s make this dinner a breeze!

Why You’ll Love This Recipe

  • One-Pan Simplicity: Everything cooks in one baking dish, which means less cleanup and more time to relax with your loved ones.
  • Flavor Explosion: The combination of tender chicken and fresh vegetables melds beautifully, creating a dish that’s bursting with flavor.
  • Customizable Ingredients: Swap in your favorite veggies or add spices to make this recipe uniquely yours!
  • Healthy Comfort Food: Packed with protein and nutrients, this meal is both wholesome and satisfying.
  • Meal Prep Friendly: Make it ahead of time and simply reheat for a quick, delicious dinner option!

Essential Ingredients for Your Chicken Bake

A vibrant chicken bake featuring tender chicken breasts and colorful mixed vegetables.

Here’s what you’ll need to whip up this delectable dish:

  • 4 boneless, skinless chicken breasts: Choose organic for the best flavor and quality.
  • 2 cups mixed vegetables: Broccoli, carrots, and bell peppers work beautifully together, but feel free to mix it up!
  • 1 cup uncooked rice: Brown rice for a healthier option or white rice for a classic touch.
  • 2 cups chicken broth: Homemade is best, but store-bought works just fine.
  • 1 teaspoon garlic powder: A staple for flavor; fresh minced garlic adds even more depth.
  • 1 teaspoon onion powder: Enhances the overall taste without the hassle of chopping.
  • 1 teaspoon paprika: Adds a subtle smokiness that elevates the dish.
  • Salt and pepper to taste: Always season to your liking.
  • 1 tablespoon olive oil: For drizzling over the chicken, adding richness and moisture.

Let’s Make it Together

Step-by-Step Instructions

Ready to get cooking? Let’s do this!

  1. Preheat your oven to 375°F (190°C).
  2. In a large baking dish, combine the uncooked rice and mixed vegetables.
  3. Place the chicken breasts on top of the rice and vegetables.
  4. Drizzle with olive oil and season with garlic powder, onion powder, paprika, salt, and pepper.
  5. Pour the chicken broth over the entire dish, ensuring the rice is submerged.
  6. Cover the baking dish with aluminum foil.
  7. Bake in the preheated oven for 40-45 minutes.
  8. Remove the foil and bake for an additional 10-15 minutes, until the chicken is cooked through and the rice is tender.
  9. Let it rest for a few minutes before serving. Enjoy!

Pro Tips for Perfecting Your Bake

  • Check for doneness: Ensure the chicken reaches an internal temperature of 165°F (75°C) for safety and tenderness.
  • Let the dish rest: Allowing it to sit for a few minutes after baking helps the flavors meld.
  • Experiment with herbs: Fresh thyme or rosemary can add a delightful touch to the flavor profile.
  • Adjust cooking time: If using larger chicken breasts, you may need to increase the baking time.
  • Make it cheesy: Sprinkle some shredded cheese on top during the last 10 minutes of baking for a deliciously gooey finish.
  • Use frozen veggies: They’re a great time-saver; just adjust the baking time slightly.
  • Double the recipe: Perfect for meal prepping or if you’re expecting company!
  • Serve with a salad: Pairing this dish with a fresh side salad will balance the meal beautifully.

Common Mistakes and Troubleshooting

Even the best chefs have off days! Here are some common pitfalls and how to avoid them:

  • Overcooking the chicken: Use a meat thermometer to ensure perfect doneness without dryness.
  • Undercooked rice: Make sure the rice is fully submerged in broth for even cooking.
  • Too much liquid: If your dish is too watery, reduce the broth slightly next time.
  • Burnt edges: If your dish browns too quickly, cover it with foil for part of the cooking time.

Delicious Variations to Try

Feeling adventurous? Here are some fun twists on the classic recipe:

  • Southwestern Style: Add black beans, corn, and taco seasoning for a zesty twist.
  • Italian Flair: Use marinara sauce instead of chicken broth and add Italian herbs.
  • Asian Influence: Swap the broth for teriyaki sauce and include snap peas and bok choy.
  • Cheesy Broccoli Alfredo Bake: Stir in a creamy alfredo sauce and top with mozzarella before baking.

Storing and Make-Ahead Instructions

This dish is not only delicious fresh but also excellent for leftovers! Here’s how to store it:

  • Refrigerate: Store leftovers in an airtight container for up to 3 days.
  • Freezing: Freeze portions in individual containers for up to 2 months. Thaw overnight in the fridge before reheating.
  • Reheat: Warm in the microwave or oven until heated through.

Frequently Asked Questions

  • Can I use frozen chicken?: Yes! Just increase the baking time to ensure it cooks through.
  • What vegetables can I add?: Feel free to include any favorites like zucchini, peas, or asparagus.
  • Can I make this vegetarian?: Absolutely! Substitute chicken with chickpeas or tofu and use vegetable broth.
  • How do I know when the dish is ready?: The chicken should be golden brown and the rice tender.
  • Can I make this ahead of time?: Yes! Prepare everything, cover, and refrigerate until you’re ready to bake.
  • Is it possible to make this gluten-free?: Sure! Use gluten-free rice and ensure your broth is gluten-free.
  • What can I serve with it?: A simple green salad or garlic bread pairs perfectly!
  • Can I add cheese?: Yes! Cheese can be added during the last 10 minutes of baking for a delicious topping.

Nutritional Tips and Dietary Adaptations

This Chicken Bake can easily be adapted to fit various dietary needs:

  • Low Carb: Substitute rice with cauliflower rice for a low-carb option.
  • Dairy-Free: Leave out cheese and use a dairy-free broth.
  • High Protein: Add more chicken or include lentils for a protein boost.

Equipment Recommendations

For this recipe, you’ll need:

  • Large baking dish: A 9×13 inch dish works perfectly.
  • Meat thermometer: Essential for checking chicken doneness.
  • Aluminum foil: To cover your dish while it bakes.

Serving Suggestions

Serve this dish hot, garnished with fresh herbs or a sprinkle of lemon zest for a bright finish. Pair it with a side of garlic bread or a crisp green salad to round out the meal. This is the kind of recipe that invites conversation and laughter around the dinner table, making it perfect for family gatherings or cozy nights in.

Your New Go-To Recipe

There you have it—a delicious, easy-to-make One-Pan Chicken Bake that’s sure to become a staple in your kitchen! I hope you’ll find as much joy in preparing it as I do. Remember, cooking is all about experimenting and finding what makes your taste buds dance. So gather your ingredients, put on your favorite apron, and let’s create some kitchen magic together! Until next time, happy cooking!

Simple One-Dish Chicken Bake

Prep Time 10 minutes
Cook Time 55 minutes
Total Time 1 hour 5 minutes
Servings 4 servings
Calories 450
A quick and hearty baked chicken dish with rice and vegetables, perfect for a wholesome meal.

Ingredients

Protein

  • 4 pieces boneless, skinless chicken breasts

Vegetables

  • 2 cups mixed vegetables (carrots, broccoli, bell peppers)

Grains

  • 1 cup uncooked rice

Broth

  • 2 cups chicken broth

Spices and Oils

  • 1 teaspoon garlic powder
  • 1 teaspoon onion powder
  • 1 teaspoon paprika
  • to taste salt and pepper salt and pepper

Oils

  • 1 tablespoon olive oil

Instructions 

  • Preheat oven to 375°F (190°C).
  • Combine rice and vegetables in a baking dish, place chicken on top.
  • Drizzle with olive oil, season with spices, pour broth over.
  • Cover with foil and bake for 40-45 minutes, then uncover and bake 10-15 minutes.
  • Let rest briefly before serving.

Notes

Ensure chicken is cooked through before serving.
Calories: 450kcal
Cost: $15
Course: Main Course
Cuisine: American
Keyword: Chicken

Loved this recipe? Save it to your favorite Pinterest board so you can easily find it later! It’s the perfect way to keep all your sweet ideas in one place. ✨

Detailed view of a hearty chicken bake with ingredients like rice, carrots, and broccoli.

Welcome to Your New Favorite Skillet Meal

If you’re on the lookout for a dinner recipe that feels like a warm hug, look no further than this Ground Turkey Sweet Potato Skillet. This dish combines the savory goodness of lean turkey with the natural sweetness of tender sweet potatoes, all cooked together in one pan for a meal that’s as easy to make as it is to love. Whether you’re cooking for family or just treating yourself, this hearty skillet meal is sure to impress.

Why You’ll Love This Recipe

This Ground Turkey Sweet Potato Skillet is not just a meal; it’s an experience. Here are some reasons why you will adore it:

  • Time-Saving: This is a one-pan meal, which means less cleanup time. You can focus on enjoying your food instead of scrubbing dishes.
  • Nutritious Ingredients: Packed with protein from ground turkey and vitamins from sweet potatoes and bell peppers, this dish is as healthy as it is delicious.
  • Flavor Explosion: The combination of spices like cumin and paprika elevates this dish, creating a flavor profile that will have everyone asking for seconds.
  • Flexibility: You can easily customize this recipe with your favorite vegetables or spices, making it adaptable to your tastes.
  • Comfort Food Vibes: This dish brings back memories of cozy family dinners, making it perfect for any night of the week.

Essential Ingredients

Before we dive into the cooking process, let’s talk about what you’ll need to make this delicious dish:

  • 1 lb lean ground turkey: A great source of protein that’s lower in fat than traditional beef.
  • 2 medium sweet potatoes: Peeled and diced, these provide natural sweetness and are rich in vitamins A and C.
  • 1 medium yellow onion: Chopped, it adds a savory base flavor.
  • 3 garlic cloves: Minced for an aromatic kick.
  • 1 bell pepper: Any color will do! Diced for added crunch and nutrition.
  • 2 tbsp extra virgin olive oil: For sautéing and adding healthy fats.
  • 1 tsp cumin: Adds warmth and depth.
  • 1 tsp paprika: For a hint of smokiness.
  • Salt and pepper: To taste, enhancing all the flavors.

Ingredient Substitutions

Not a fan of ground turkey? No problem! Here are some substitutes you can consider:

  • Ground Chicken: A leaner alternative with a similar flavor.
  • Vegetarian Option: Use lentils or black beans for a plant-based version.
  • Sweet Potato Alternatives: Butternut squash or regular potatoes can also work.
  • Bell Pepper Variations: Zucchini or even broccoli can add a delicious twist.

Let’s Make It Together!

Juicy Ground Turkey Sweet Potato Skillet featuring diced sweet potatoes and ground turkey.

Now that you have all your ingredients ready, let’s get cooking! Follow these simple steps to create your Ground Turkey Sweet Potato Skillet:

  1. Prep your ingredients by dicing the sweet potatoes, chopping the onion, and bell pepper, and mincing the garlic.
  2. In a large skillet, heat the olive oil over medium heat. Add the ground turkey and cook until browned, about 5-7 minutes.
  3. Add the onion, bell pepper, and garlic to the skillet; sauté until the onion is translucent, about 3-5 minutes.
  4. Stir in the diced sweet potatoes along with cumin, paprika, salt, and pepper.
  5. Add enough water to cover the sweet potatoes halfway. Bring to a simmer and cook on low until tender, about 15-20 minutes.
  6. Adjust seasoning as needed before serving hot.

Pro Tips for Perfecting Your Skillet

To make your cooking experience even better, here are some expert insights:

  • Use a Large Skillet: A bigger pan allows for even cooking and prevents overcrowding.
  • Don’t Rush the Browning: Let the turkey brown well; it adds depth of flavor.
  • Check Sweet Potato Doneness: You want them to be fork-tender but not mushy.
  • Customize Spices: Feel free to experiment with spices like chili powder or Italian herbs for a different flavor profile.
  • Be Mindful of Salt: Start with a little and add more as needed to avoid over-salting.
  • Make it Ahead: This dish can be made a day in advance and reheated for an even more flavorful meal.
  • Garnish with Fresh Herbs: A sprinkle of parsley or cilantro can brighten up the flavors.
  • Serve with a Side: Pair it with a fresh salad or crusty bread to round out your meal.

Common Mistakes & Troubleshooting

Even the best chefs make mistakes! Here’s how to avoid common pitfalls:

  • Overcooking Sweet Potatoes: Keep an eye on them to ensure they remain tender, not mushy.
  • Underseasoning: Always taste and adjust seasoning before serving!
  • Not Browning the Turkey: A good sear adds flavor—don’t skip this step!
  • Skipping the Water: Adding water helps sweet potatoes cook evenly and prevents burning.

Variations to Spice Up Your Skillet

Feeling adventurous? Here are some variations to try:

  • Spicy Kick: Add red pepper flakes or diced jalapeños for heat.
  • Cheesy Delight: Stir in some shredded cheese before serving for a creamy touch.
  • Herb-Infused: Add fresh thyme or rosemary for an aromatic twist.
  • Curry Flavor: Swap spices for curry powder and add coconut milk for an exotic flavor.

Storage and Make-Ahead Instructions

This skillet meal is perfect for meal prep! Here’s how to store it:

  • Refrigerate: Store leftovers in an airtight container in the fridge for up to 4 days.
  • Freeze: This dish can be frozen for up to 3 months. Just thaw and reheat when ready to eat.

Frequently Asked Questions

Let’s address some common queries about this recipe:

  • Can I use frozen sweet potatoes? Yes, just adjust the cooking time as needed.
  • Is this dish gluten-free? Absolutely! All ingredients are naturally gluten-free.
  • How can I make it vegetarian? Swap ground turkey for lentils or chickpeas.
  • What can I serve with this meal? It pairs wonderfully with a simple green salad or crusty bread.
  • How spicy is this recipe? It’s mild, but you can adjust the spices to your heat preference.
  • Can I double the recipe? Yes, just ensure your skillet is large enough!
  • How do I reheat leftovers? Heat in a skillet over medium heat until warm, adding a splash of water if needed.
  • Can I use different vegetables? Yes! Feel free to experiment with whatever you have on hand.

Nutrition Tips and Dietary Adaptations

This Ground Turkey Sweet Potato Skillet is a nutritious choice, but here are additional tips to customize it for your dietary needs:

  • Low-Carb Option: Substitute sweet potatoes with cauliflower for a lower-carb version.
  • Dairy-Free: Skip the cheese or use a dairy-free alternative.
  • Paleo-Friendly: Stick to whole food ingredients and avoid processed additives.

Equipment Recommendations

To make your cooking experience smooth, here’s what I recommend having on hand:

  • Large Skillet: A good quality skillet is essential for even cooking.
  • Sharp Knife: For easy chopping and dicing of your ingredients.
  • Wooden Spoon: Perfect for stirring everything together without scratching your pan.

Serving Suggestions

When it comes to serving, consider these ideas to make your meal even more delightful:

  • Garnish: Top with fresh herbs like cilantro or parsley for a pop of color.
  • Side Dishes: Pair with a light salad or steamed vegetables to balance the meal.
  • Drinks: A crisp white wine or sparkling water can complement the flavors beautifully.

Conclusion: Your Next Favorite Recipe Awaits!

There you have it—the ultimate Ground Turkey Sweet Potato Skillet recipe that’s not only delicious but also incredibly easy to make. Remember, cooking is about exploration and enjoyment, so don’t hesitate to put your spin on this dish. I hope this recipe brings warmth and joy to your kitchen, just as it has in mine. Happy cooking, and may every bite be a reminder of home!

Ground Turkey Sweet Potato Skillet

Prep Time 10 minutes
Cook Time 25 minutes
Total Time 35 minutes
Servings 4 servings
Calories 350
A quick and healthy one-pan meal combining lean ground turkey with sweet potatoes and vegetables for a satisfying dinner.

Ingredients

Meat

  • 1 lb lean ground turkey

Vegetables

  • 2 medium sweet potatoes (about 2 cups, peeled and diced)
  • 1 medium yellow onion (chopped)
  • 1 bell pepper diced bell pepper (any color)

Other

  • 2 tbsp extra virgin olive oil
  • 1 tsp cumin
  • 1 tsp paprika
  • to taste salt and pepper

Instructions 

  • Dice sweet potatoes, chop onion and bell pepper, and mince garlic.
  • Heat olive oil in a skillet, cook ground turkey until browned (5-7 min).
  • Add onion, bell pepper, and garlic; sauté until translucent (3-5 min).
  • Stir in sweet potatoes with cumin, paprika, salt, and pepper.
  • Add water to cover sweet potatoes halfway, simmer until tender (15-20 min).
  • Adjust seasoning and serve hot.

Notes

Feel free to add your favorite herbs or spices for extra flavor.
Calories: 350kcal
Cost: $15
Course: Main Course
Cuisine: American
Keyword: ground turkey, sweet potato

Welcome to the Cozy World of One-Pan Roasted Chicken and Vegetables

Hey there, friend! If you’ve wandered into my kitchen, you’re about to discover a recipe that feels like home—my One-Pan Roasted Chicken and Vegetables. This dish isn’t just about throwing ingredients together; it’s about creating a cozy, comforting meal with minimal effort. With just a handful of ingredients, you’ll have a meal that’s bursting with flavor and warmth. Let’s dive into why this recipe is sure to become a staple in your kitchen!

Why You’ll Love This Recipe

It’s not just about cooking; it’s about creating memories and enjoying the process. Here are some reasons why you’ll adore this one-pan wonder:

  • Minimal Cleanup: With everything cooked on a single pan, you’ll spend less time scrubbing dishes and more time enjoying your delicious meal.
  • Flavor Explosion: The roasting process caramelizes the natural sugars in the vegetables, making every bite a burst of flavor that’s hard to resist.
  • Healthful Ingredients: This dish combines lean chicken with vibrant vegetables, ensuring a nutritious meal that doesn’t skimp on taste.
  • Customizable: Don’t have a specific veggie on hand? No worries! This recipe is versatile and allows you to swap in whatever you have in your fridge.
  • Perfect for Busy Nights: Whether you’re cooking for your family after a long day or preparing a meal ahead of time, this recipe makes weeknight dinners a breeze.

Ingredients Breakdown

One-Pan Roasted Chicken and Vegetables featuring golden-brown chicken and vibrant veggies.

Here’s what you’ll need to create this comforting dish:

  • 4 chicken thighs (bone-in, skin-on): These are perfect for roasting, providing juicy, flavorful meat.
  • 2 cups mixed vegetables: Think carrots, bell peppers, and zucchini, but feel free to mix it up! Broccoli, asparagus, or even sweet potatoes are fantastic substitutes.
  • 2 tablespoons olive oil: This not only adds flavor but helps with the roasting process.
  • Spices: 1 teaspoon garlic powder, 1 teaspoon onion powder, 1 teaspoon paprika, plus salt and pepper to taste. These will bring your dish to life!
  • Fresh herbs (optional, for garnish): A sprinkle of fresh parsley or thyme adds a lovely finish.

How to Make One-Pan Roasted Chicken and Vegetables

Let’s get cooking! Follow these simple steps to create your cozy dinner:

  • Step 1: Preheat the Oven: Start by preheating your oven to 425°F (220°C).
  • Step 2: Prepare the Chicken and Veggies: In a large bowl, combine the chicken thighs and mixed vegetables.
  • Step 3: Season Generously: Drizzle the olive oil over the chicken and veggies. Sprinkle garlic powder, onion powder, paprika, salt, and pepper. Toss everything together until well coated.
  • Step 4: Spread on the Pan: Arrange the chicken and vegetables in a single layer on a large baking sheet.
  • Step 5: Roast Away: Pop it in the oven and roast for 35-40 minutes, or until the chicken is cooked through and the veggies are tender.
  • Step 6: Finish with Fresh Herbs: Once out of the oven, let it rest for a few minutes. Garnish with fresh herbs before serving.

Pro Tips for Perfecting Your Dish

To ensure your one-pan meal turns out perfectly every time, keep these expert tips in mind:

  • Uniform Veggies: Cut your vegetables into similar sizes to ensure even cooking—nothing worse than a burnt carrot next to an undercooked potato!
  • Pat Dry: Make sure to pat your chicken thighs dry before seasoning. This helps achieve that beautiful crispy skin.
  • Don’t Overcrowd: Give your chicken and veggies space on the pan; overcrowding can lead to steaming instead of roasting.
  • Experiment with Spices: Feel free to add your favorite herbs or spices. Rosemary, thyme, or even a pinch of cayenne can elevate the flavors!
  • Let it Rest: Allowing the chicken to rest before serving keeps it juicy and flavorful.
  • Use a Meat Thermometer: For perfectly cooked chicken, aim for an internal temperature of 165°F (75°C).
  • Make it a Meal: Serve this dish with a side of rice, quinoa, or a fresh salad for a complete dinner.
  • Leftovers? Yes, Please!: This dish tastes even better the next day, so don’t hesitate to make a little extra!

Common Mistakes and Troubleshooting

Even the best of us have those “oops” moments in the kitchen. Here are some common pitfalls and how to avoid them:

  • Dry Chicken: If your chicken comes out dry, it may have been overcooked. Always check the temperature!
  • Burnt Veggies: If your veggies are burnt, try reducing the oven temperature or checking them earlier next time.
  • Flavorless Dish: If you find the dish lacking flavor, don’t be shy with your seasoning. Salt and pepper can make a world of difference.

Delicious Variations

This recipe is a blank canvas, and I encourage you to get creative! Here are some variations to try:

  • Herbed Lemon Chicken: Add lemon slices and fresh herbs for a zesty twist.
  • Asian-Inspired: Swap the spices for soy sauce, ginger, and sesame oil, and include bok choy and snap peas.
  • Tex-Mex Flair: Use taco seasoning and add corn and black beans for a south-of-the-border vibe.
  • Italian Style: Incorporate cherry tomatoes, olives, and Italian seasoning for a Mediterranean flair.

Storage and Make-Ahead Instructions

This dish is perfect for meal prep! Here’s how to store and reheat:

  • Refrigeration: Store leftovers in an airtight container in the fridge for up to 3 days.
  • Freezer-Friendly: You can freeze cooked chicken and veggies for up to 2 months. Just make sure to cool them completely before freezing.
  • Reheating: Reheat in the oven at 350°F (175°C) until warmed through, or use the microwave for a quick fix.

Frequently Asked Questions

Got questions? I’ve got answers! Here are some FAQs about this recipe:

  • Can I use chicken breasts instead of thighs? Yes, just be mindful that breasts may cook faster, so adjust your cooking time accordingly.
  • What other vegetables work well? Almost any vegetable will do! Potatoes, green beans, or even Brussels sprouts can be great additions.
  • Can I make this recipe in advance? Absolutely! You can prep everything and store it in the fridge until you’re ready to cook.
  • How can I make this dish spicier? Add some red pepper flakes or a dash of hot sauce to the seasoning mix.
  • What should I serve this with? It pairs wonderfully with rice, quinoa, or a fresh green salad.
  • Can I use frozen vegetables? Yes, just ensure they are fully thawed and pat them dry before using.
  • What if I don’t have fresh herbs? Dried herbs can be used; just remember that dried herbs are more potent, so use less.
  • Is this recipe gluten-free? Yes! All the ingredients are naturally gluten-free.

Nutrition Tips and Dietary Adaptations

This dish can easily fit into various dietary preferences:

  • For a Low-Carb Version: Skip the starchy vegetables and opt for leafy greens or cauliflower.
  • Vegan Adaptation: Substitute chicken with tofu or chickpeas and use vegetable broth for seasoning.
  • Paleo-Friendly: Stick to the chicken and vegetables, and replace olive oil with ghee or coconut oil.

Essential Equipment

Here’s what you’ll need to make this recipe:

  • Baking Sheet: A large, rimmed baking sheet is ideal for roasting.
  • Mixing Bowl: For tossing the ingredients together.
  • Meat Thermometer: To ensure your chicken is perfectly cooked.

Serving Suggestions

Once your One-Pan Roasted Chicken and Vegetables is out of the oven, here are some ideas to elevate your meal:

  • Garnish with Fresh Herbs: A sprinkle of parsley or cilantro can brighten the entire dish.
  • Serve with a Side Salad: A light, crisp salad complements the hearty chicken and veggies.
  • Pair with a Glass of Wine: A glass of white wine or a refreshing iced tea makes for a perfect dining experience.

Final Thoughts

There you have it—my One-Pan Roasted Chicken and Vegetables recipe that’s not just easy to make but also deeply satisfying. Whether you’re cooking for family, friends, or just yourself, this meal is sure to bring comfort and joy to your table. So grab that spatula and let’s create some magic in your kitchen! Happy cooking!

One-Pan Roasted Chicken and Vegetables

Prep Time 10 minutes
Cook Time 40 minutes
Total Time 50 minutes
Servings 4 servings
Calories 450
A simple and flavorful one-pan meal featuring roasted chicken thighs and colorful vegetables, perfect for a quick dinner.

Ingredients

Protein

  • 4 pieces chicken thighs (bone-in, skin-on)

Vegetables

  • 2 cups mixed vegetables (carrots, bell peppers, zucchini)
  • 2 tablespoons olive oil
  • 1 teaspoon garlic powder
  • 1 teaspoon onion powder
  • 1 teaspoon paprika
  • to taste salt and pepper

Optional Garnish

  • as desired fresh herbs (for garnish)

Instructions 

  • Preheat oven to 425°F (220°C).
  • Combine chicken, vegetables, olive oil, garlic powder, onion powder, paprika, salt, and pepper. Toss well.
  • Spread mixture on a baking sheet in a single layer.
  • Roast for 35-40 minutes until chicken is cooked and vegetables are tender.
  • Let rest briefly, garnish with herbs if desired, and serve.

Notes

Use fresh herbs for extra flavor if desired.
Calories: 450kcal
Cost: $15
Course: Main Course
Cuisine: American
Keyword: Chicken, roasted, vegetables

Loved this recipe? Save it to your favorite Pinterest board so you can easily find it later! It’s the perfect way to keep all your sweet ideas in one place. ✨

Deliciously plated roasted chicken and mixed vegetables, showcasing warm colors and textures.

Welcome to Your New Favorite Recipe: One Pan Chicken and Potatoes

Ah, the magic of a one pan meal! If you’re anything like me, you crave recipes that are not only delicious but also easy to whip up without creating a mountain of dishes. This One Pan Chicken and Potatoes recipe is just that—a comforting dish that wraps you in warmth with every bite. Let’s dive into the enchanting world of flavors and aromas, where simple ingredients come together to create something truly special.

Why You’ll Love This Recipe

Here’s why this chicken and potatoes dish will quickly become a staple in your kitchen:

  • Simple Preparation: With minimal prep work, you can have this dish ready to bake in just a few minutes, making it ideal for busy weeknights.
  • One Pan Wonder: Everything cooks together on one baking sheet, ensuring easy cleanup while maximizing flavor.
  • Perfectly Balanced Flavors: The combination of garlic, herbs, and lemon elevates the taste, making every bite a delight.
  • Family-Friendly: This recipe is a hit with both kids and adults, making it versatile for any gathering.
  • Endless Variations: Whether you want to switch up the veggies or try different spices, the possibilities are endless!

Ingredients You’ll Need

Delicious One Pan Chicken and Potatoes garnished with fresh parsley and lemon slices.

Gather these ingredients for a delightful one pan meal:

  • 4 bone-in, skin-on chicken thighs: These provide moisture and flavor. You can substitute with skinless thighs if you prefer.
  • 4 medium potatoes: Cut into cubes for even cooking. Feel free to use red or Yukon Gold potatoes.
  • 1 tbsp olive oil: Essential for seasoning and helping the chicken crisp up beautifully.
  • 1 tsp garlic powder: For that aromatic punch.
  • 1 tsp paprika: Adds a lovely color and subtle smokiness.
  • ½ tsp dried thyme: A classic herb that pairs perfectly with chicken.
  • ½ tsp dried rosemary: For an earthy aroma.
  • Salt and pepper: To taste, essential for enhancing flavors.
  • 1 lemon: Sliced, to add a zesty brightness to the dish.
  • 2 tbsp fresh parsley: Chopped, for garnish and a pop of color.

How to Make One Pan Chicken and Potatoes

Ready to dive into the cooking process? Let’s get started!

Step 1: Preheat the Oven

Preheat your oven to 400°F (200°C). This step is crucial for achieving that perfect roast.

Step 2: Prepare the Chicken and Potatoes

Pat the chicken thighs dry with paper towels. Rub them with olive oil, then season generously with garlic powder, paprika, thyme, rosemary, salt, and pepper. In a large bowl, toss the cubed potatoes with olive oil and season with salt and pepper.

Step 3: Arrange on the Baking Sheet

Place the seasoned chicken thighs on a baking sheet. Arrange the cubed potatoes around the chicken, ensuring everything is in a single layer. Scatter lemon slices over the chicken and potatoes for an extra burst of flavor.

Step 4: Bake

Roast in the preheated oven for 35-40 minutes, or until the chicken reaches an internal temperature of 165°F (74°C) and the potatoes are tender and golden. For crispy chicken skin, broil for an additional 2-3 minutes at the end.

Step 5: Serve

Garnish with fresh chopped parsley before serving. Enjoy your easy, one-pan meal!

Pro Tips for Success

To ensure your meal comes out perfectly every time, consider these expert insights:

  • Use a Meat Thermometer: To check if your chicken is perfectly cooked, a meat thermometer should read 165°F (74°C).
  • Don’t Overcrowd the Pan: Give each piece enough space to roast properly; this prevents steaming and ensures crispiness.
  • Experiment with Seasonings: Feel free to adjust the herbs and spices based on your taste preferences. Try adding cumin or chili powder for a kick!
  • Mix Veggies In: Consider adding seasonal veggies like carrots or bell peppers for added nutrition and flavor.
  • Marinate Ahead: If time allows, marinate the chicken with the spices and olive oil for a few hours or overnight for deeper flavor.
  • Let it Rest: Allow the chicken to rest for a few minutes before serving for juicier meat.
  • Save the Juices: Drizzle any pan juices over the chicken and potatoes for added flavor.
  • Use Fresh Herbs: If you have them, fresh herbs such as thyme and rosemary can elevate the dish even further.
  • Adjust Cooking Time: Thicker chicken pieces may require additional cooking time, so always check doneness.

Common Mistakes and Troubleshooting

Even the best cooks can run into issues. Here’s how to troubleshoot:

  • Chicken Isn’t Crispy: Ensure the skin is dry before seasoning and baking. Broiling at the end can also help.
  • Potatoes Are Undercooked: Cut them into smaller pieces for faster cooking, and ensure they are spread out on the pan.
  • Too Salty: If you find the dish too salty, add a splash of lemon juice or a touch of sugar to balance it out.
  • Sticking to the Pan: Use parchment paper or a non-stick spray to prevent sticking.

Variations to Try

Want to switch things up? Here are some delightful variations:

  • Herb-Crusted Chicken: Coat the chicken with a mixture of breadcrumbs and herbs for a crunchy topping.
  • Spicy Kick: Add crushed red pepper flakes to the seasoning mix for a spicy version.
  • Honey Mustard Glaze: Brush a honey mustard sauce on the chicken before baking for a sweet and tangy flavor.
  • Vegetarian Option: Substitute chicken with hearty vegetables like cauliflower steak or eggplant for a vegetarian twist.

Storage and Make-Ahead Instructions

If you have leftovers or want to prepare in advance, here’s what to do:

  • Refrigerate Leftovers: Store in an airtight container for up to 4 days. Reheat in the oven for best results.
  • Make-Ahead: You can prep the chicken and potatoes in advance and store them in the fridge until you’re ready to cook.
  • Freezing Tips: Freeze uncooked chicken and marinated potatoes in a freezer-safe bag for up to 3 months. Thaw before cooking.

FAQs About One Pan Chicken and Potatoes

Let’s answer some common questions you might have:

  • Can I use boneless chicken? Yes, boneless chicken will work; just adjust the cooking time.
  • What should I serve with this dish? A fresh salad or steamed vegetables complements this meal perfectly.
  • How do I know when the chicken is done? Use a meat thermometer to ensure it reaches 165°F (74°C).
  • Can I add more vegetables? Absolutely! Carrots, green beans, or Brussels sprouts are great additions.
  • What if I don’t have fresh herbs? Dried herbs work well too—just use a smaller amount as they are more concentrated.
  • Can I make this recipe in advance? Yes, you can prep the ingredients a day ahead and cook them when ready.
  • Is this dish healthy? Yes! It includes lean protein and nutritious vegetables, making it balanced.
  • How can I make this dish gluten-free? All the ingredients are gluten-free, just ensure any additional sauces or ingredients are certified gluten-free.

Nutrition Tips and Dietary Adaptations

This dish can easily cater to various dietary needs:

  • Low-Carb Option: Substitute potatoes with cauliflower florets for a low-carb alternative.
  • Dairy-Free: This recipe is naturally dairy-free, perfect for those with lactose intolerance.
  • Heart-Healthy: Use skinless chicken and limit the oil to make it even healthier.

Equipment Recommendations

To make your cooking process smoother, here’s what I recommend:

  • Baking Sheet: A sturdy, non-stick baking sheet is ideal for even cooking.
  • Meat Thermometer: Essential for checking chicken doneness.
  • Mixing Bowls: Use for seasoning and tossing your ingredients.
  • Sharp Knife: For cutting potatoes and prepping chicken.

Serving Suggestions

Completing your meal is just as important as the dish itself! Here are some serving ideas:

  • Fresh Salad: A simple green salad with a light vinaigrette pairs beautifully.
  • Crusty Bread: Serve with a side of crusty bread to soak up all those delicious juices.
  • Wine Pairing: A chilled white wine, like Sauvignon Blanc, enhances the flavors.

In conclusion, this One Pan Chicken and Potatoes recipe is not just a meal; it’s a comforting hug from your kitchen. With its simple ingredients and straightforward process, it’s perfect for any occasion. So grab your apron, put on your favorite playlist, and let’s make something magical together!

One Pan Chicken and Potatoes

Prep Time 10 minutes
Cook Time 40 minutes
Total Time 50 minutes
Servings 4 servings
Calories 550
A simple and flavorful one-pan meal featuring juicy chicken thighs and crispy potatoes, perfect for a quick dinner.

Ingredients

Protein

  • 4 pieces bone-in, skin-on chicken thighs

Vegetables

  • 4 medium potatoes, cut into cubes

Seasonings & Oils

  • 1 tbsp olive oil
  • 1 tsp garlic powder
  • 1 tsp paprika
  • ½ tsp dried thyme
  • ½ tsp dried rosemary
  • to taste salt and pepper
  • 1 whole lemon, sliced

Garnish

  • 2 tbsp fresh parsley, chopped

Instructions 

  • Preheat oven to 400°F (200°C).
  • Rub chicken with olive oil and season with garlic powder, paprika, thyme, rosemary, salt, and pepper. Toss potatoes with olive oil, salt, and pepper.
  • Arrange chicken and potatoes on a baking sheet, place lemon slices on top.
  • Roast for 35-40 minutes until chicken reaches 165°F and potatoes are golden. Broil for 2-3 minutes for crispy skin.
  • Garnish with chopped parsley before serving. Enjoy!

Notes

For extra flavor, add herbs or spices of your choice.
Calories: 550kcal
Cost: $15
Course: Main Course
Cuisine: American
Keyword: Chicken, one pan, potatoes

Loved this recipe? Save it to your favorite Pinterest board so you can easily find it later! It’s the perfect way to keep all your sweet ideas in one place. ✨

Eye-level photograph of golden chicken thighs and roasted potatoes in a pan.