Author

Ava

Browsing

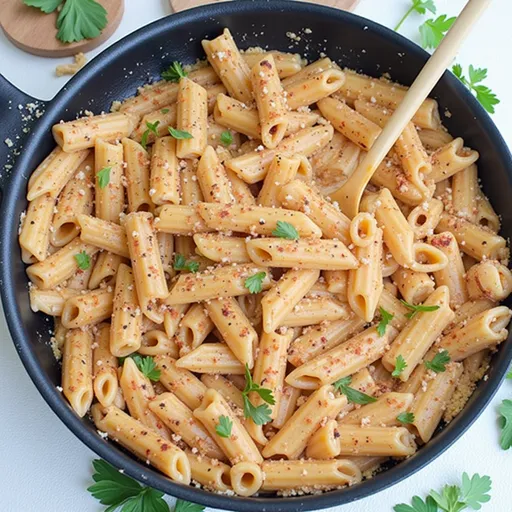
Discover the Magic of Cinnamon Toast Bread Pudding Caramel

Welcome to the cozy world of cinnamon bread pudding, where sweet nostalgia and deliciousness collide! If you’re ready to whip up a dessert that feels like a warm hug straight from the oven, you’re in the right place. This Cinnamon Toast Bread Pudding Caramel recipe combines the delightful flavors of cinnamon swirl bread with a rich caramel sauce that’s simply irresistible. Perfect for cozy nights or special gatherings, it promises smiles and requests for seconds!

Why You’ll Love This Recipe

Let’s get into why this recipe deserves a spot in your kitchen:

  • Easy to Make: With just a handful of ingredients and straightforward steps, you’ll be a bread pudding pro in no time!
  • Comforting Flavors: The warm, sweet notes of cinnamon and caramel offer a comforting treat that feels like home.
  • Versatile Dessert: You can serve it as a breakfast delight, a dessert for dinner, or even a late-night snack.
  • Make-Ahead Friendly: Prepare it the night before and bake it fresh for your guests—what’s not to love?
  • Impressive Presentation: Drizzling warm caramel over the top adds a gourmet touch that will wow your friends and family.

Ingredients Breakdown

Here’s what you’ll need to create this sweet masterpiece:

  • 8 slices cinnamon swirl bread: Cut into 2.5 cm cubes. This is the star of your dish, so choose a high-quality bread for maximum flavor!
  • 3 large eggs: These will help bind the pudding and give it a rich custard texture.
  • 2 cups whole milk: For a creamy custard. Feel free to substitute with almond or oat milk for a dairy-free option.
  • 1/2 cup heavy cream: Adds richness; you can swap it with coconut cream for a dairy-free twist.
  • 1/2 cup granulated sugar: Sweetens the pudding; you can use brown sugar for a deeper flavor.
  • 2 tablespoons unsalted butter: Melted, for moisture and flavor.
  • 2 teaspoons pure vanilla extract: For that irresistible aroma and taste.
  • 1 teaspoon ground cinnamon: A must-have spice for that cozy flavor profile.
  • 1/4 teaspoon kosher salt: Balances the sweetness.

For the caramel sauce:

  • 1 cup granulated sugar: You can use coconut sugar for a healthier option.
  • 1/4 cup water: To dissolve the sugar.
  • 6 tablespoons unsalted butter: Adds creaminess to your caramel.
  • 1/2 cup heavy cream: For a smooth finish.
  • 1/4 teaspoon kosher salt: Enhances the flavor.
  • 1/2 teaspoon pure vanilla extract: For that final touch of sweetness.

Step-by-Step Instructions

A side view of Cinnamon Toast Bread Pudding with a rich caramel glaze.

Ready to bring this delicious dessert to life? Follow these steps:

  1. Preheat your oven to 350°F (175°C). Grease a 9×9-inch baking dish with nonstick spray or butter.
  2. Arrange the bread cubes evenly in the dish, ensuring there’s no overcrowding.
  3. In a medium bowl, whisk together the eggs, whole milk, heavy cream, granulated sugar, melted butter, vanilla extract, ground cinnamon, and kosher salt until well combined.
  4. Pour the custard mixture over the bread cubes, ensuring all pieces are well coated. Let it stand for 10 minutes to soak in all that deliciousness.
  5. Bake for 40-45 minutes until the pudding is set and golden brown. The center should be firm but slightly soft.
  6. To make the caramel, combine sugar and water in a small saucepan over medium heat. Stir until the sugar dissolves, then stop stirring and cook until the mixture turns a deep amber color.
  7. Remove from heat and immediately whisk in butter, heavy cream, salt, and vanilla extract until smooth.
  8. Allow the bread pudding to cool for 10 minutes. Drizzle with warm caramel sauce before serving.

Pro Tips for Perfect Bread Pudding

Before you dive in, here are some expert insights to elevate your bread pudding game:

  • Let it Soak: Allowing the bread to soak in the custard mixture is key. Don’t rush this step!
  • Experiment with Spices: Feel free to adjust the ground cinnamon amount or add nutmeg for a unique twist.
  • Choose Your Bread Wisely: While cinnamon swirl is fantastic, brioche or challah also work beautifully for a richer pudding.
  • Don’t Overbake: Keep an eye on it! A perfectly baked pudding should be set but still a bit soft in the center.
  • Temperature Matters: Serve it warm for the best experience, as the flavors are heightened when it’s fresh out of the oven.
  • Caramel Control: If your caramel hardens, simply reheat it with a splash of cream to bring it back to life.
  • Mix It Up: Consider adding chocolate chips or dried fruits for added flavor and texture.
  • Serving Size: This dessert is rich, so a little goes a long way. A small portion is often enough!

Common Mistakes and Troubleshooting

Even the best chefs have off days. Here’s how to avoid common pitfalls:

  • Too Dry: Ensure the bread is adequately soaked. If it seems dry, add a touch more milk before baking.
  • Overly Eggy Flavor: If your pudding tastes too eggy, try reducing the eggs slightly or add more spices for balance.
  • Caramel Crystallization: Ensure to stir the sugar until dissolved and avoid stirring once it starts to bubble to prevent crystallization.
  • Burnt Top: If the top browns too quickly, cover it loosely with foil for the last 10-15 minutes of baking.

Variations to Try

Want to shake things up? Here are some fun variations:

  • Chocolate Chip Cinnamon Bread Pudding: Add 1 cup of chocolate chips to the bread mixture for a decadent twist.
  • Apple Cinnamon Bread Pudding: Incorporate 1 cup of diced apples for a fruity sensation.
  • Banana Bread Pudding: Use banana bread instead of cinnamon swirl bread for a tropical vibe.
  • Maple Pecan Bread Pudding: Swap cinnamon for maple syrup and add 1 cup of chopped pecans for crunch.

Storage and Make-Ahead Instructions

This bread pudding can be made ahead of time:

  • Refrigerate: Store leftovers in an airtight container in the fridge for up to 3 days.
  • Freeze: You can freeze the unbaked pudding for up to 2 months. Just thaw in the fridge before baking.
  • Reheat: Warm in the oven at 350°F (175°C) for about 15-20 minutes until heated through.

FAQs About Cinnamon Bread Pudding

Got questions? I’ve got answers!

  • Can I use stale bread? Yes! Stale bread works wonderfully as it soaks up the custard mixture better.
  • What if I don’t have cinnamon bread? Any bread will do; just add extra cinnamon to the custard mixture.
  • Can I make this gluten-free? Absolutely! Use gluten-free bread and ensure your other ingredients are gluten-free.
  • How do I know when it’s done? The edges should be golden, and a knife inserted in the center should come out clean.
  • Can I add nuts? Yes! Chopped walnuts or pecans can add a lovely crunch.
  • What to serve with it? Top with whipped cream, vanilla ice cream, or a drizzle of warm caramel for an extra treat!
  • How can I make it dairy-free? Substitute milk and cream with almond or coconut milk, and use dairy-free butter.
  • Can I use frozen bread? Yes! Just let it thaw and dry out a bit before using it in the recipe.

Nutrition Tips and Dietary Adaptations

Here are some tips to make this dessert fit your dietary needs:

  • Reduce Sugar: Cut down on sugar by up to half without sacrificing flavor.
  • Use Whole Grains: Opt for whole grain or whole wheat cinnamon bread for added fiber.
  • Healthy Fats: Swap heavy cream with Greek yogurt for a lighter option while maintaining creaminess.

Essential Equipment for Success

Before you start, make sure you have the following:

  • 9×9-inch Baking Dish: Perfect size for this recipe.
  • Mixing Bowls: For combining your ingredients smoothly.
  • Whisk: Essential for achieving a well-mixed custard.
  • Measuring Cups and Spoons: For precise measurements of ingredients.
  • Spatula: To help pour and spread the custard evenly over the bread.

Serving Suggestions

For an impressive presentation, consider these serving ideas:

  • Warm Caramel Drizzle: Always a crowd-pleaser! Drizzle over the top just before serving.
  • Fresh Whipped Cream: Lightly sweetened whipped cream adds a lovely touch.
  • Seasonal Fruits: Serve with fresh berries or sliced bananas for a fresh contrast.
  • Ice Cream: A scoop of vanilla or cinnamon ice cream takes it to the next level!

Let’s Wrap Up

And there you have it! A comprehensive guide to making the most comforting, delicious Cinnamon Toast Bread Pudding Caramel. I hope this recipe becomes a staple in your kitchen, just like it is in mine. Remember, cooking is all about love, experimentation, and a sprinkle of magic. So gather your ingredients, invite some friends over, and let’s create unforgettable moments together in the kitchen!

Cinnamon Toast Bread Pudding Caramel

Prep Time 15 minutes
Cook Time 45 minutes
Total Time 1 hour
Servings 8 pieces
Calories 450
A decadent dessert combining cinnamon swirl bread with rich caramel sauce, perfect for a comforting treat.

Ingredients

Bread

  • 8 slices cinnamon swirl bread, cut into 2.5 cm cubes
  • 3 large eggs
  • 2 cups whole milk
  • 1/2 cup heavy cream
  • 1/2 cup granulated sugar
  • 2 tablespoons unsalted butter, melted
  • 2 teaspoons pure vanilla extract
  • 1 teaspoon ground cinnamon
  • 1/4 teaspoon kosher salt
  • 1 cup granulated sugar
  • 1/4 cup water
  • 6 tablespoons unsalted butter
  • 1/2 cup heavy cream
  • 1/4 teaspoon kosher salt
  • 1/2 teaspoon pure vanilla extract

Instructions 

  • Preheat oven to 350°F (175°C). Grease a 9x9-inch dish and arrange bread cubes.
  • Whisk eggs, milk, cream, sugar, butter, vanilla, cinnamon, and salt until combined. Pour over bread and soak for 10 minutes.
  • Bake for 40-45 minutes until set and golden.
  • Make caramel: combine sugar and water, cook until deep amber, then whisk in butter, cream, salt, and vanilla.
  • Cool bread pudding for 10 minutes, drizzle with warm caramel before serving.

Notes

Serve warm with extra caramel for an indulgent dessert.
Calories: 450kcal
Cost: $15
Course: Dessert
Cuisine: American
Keyword: bread pudding

Why You’ll Love This Dish

Picture this: You’re bustling around your kitchen after a long day, and the aroma of sweet honey, savory garlic, and a hint of soy sauce fills the air. It’s a symphony of scents that immediately lifts your spirits and makes your stomach growl with anticipation. This is the magic of Irresistibly Crispy Honey Garlic Glazed Salmon, a dish that’s not only a feast for the eyes but a delight for your taste buds. What I love most about this recipe is its ability to transform simple ingredients into an extraordinary meal that feels special without requiring hours in the kitchen.

This salmon dish is like a warm hug from your favorite friend—comforting, satisfying, and just a little bit fancy. The perfect balance of sweet and savory, it’s ideal for weeknight dinners or when you want to impress guests with minimal effort. Trust me when I say that once you try it, you’ll find yourself making it again and again, and your family will likely ask for seconds (or thirds!).

Ingredients to Gather

Before we dive into the cooking magic, let’s make sure you have everything you need to create this mouthwatering dish. Here’s your shopping list:

  • 4 salmon fillets
  • 2 tablespoons olive oil
  • Salt and pepper to taste
  • 1/4 cup honey
  • 3 cloves garlic, minced
  • 2 tablespoons soy sauce
  • 1 tablespoon Dijon mustard
  • 1 tablespoon rice vinegar
  • 1 teaspoon grated fresh ginger
  • Sesame seeds for garnish
  • Chopped green onions for garnish

Cooking Instructions

Eye-level shot of a succulent salmon fillet with a glossy honey garlic glaze and soft shadows.

Now that your ingredients are ready, let’s get cooking! Follow these simple steps to create a delectable dinner that will leave everyone singing your praises:

  1. Preheat your oven: Set your oven to 400°F (200°C) so it’s hot and ready to give your salmon that perfect finish.
  2. Make the glaze: In a small bowl, whisk together the honey, minced garlic, soy sauce, Dijon mustard, rice vinegar, and grated ginger until everything is well combined. This glaze is the star of the show!
  3. Prepare the salmon: Season the salmon fillets generously with salt and pepper on both sides. This adds essential flavor right from the start.
  4. Sear the salmon: Heat the olive oil in an oven-safe skillet over medium-high heat. Once hot, place the salmon fillets skin-side down and sear for about 4-5 minutes. You want them crispy, so resist the urge to move them around too much!
  5. Add the sauce: Carefully flip the salmon fillets over and pour the honey garlic sauce over them. The sizzling sound is music to my ears!
  6. Bake to perfection: Transfer the skillet to the preheated oven and bake for an additional 5-7 minutes, or until the salmon is cooked through and flakes easily with a fork.
  7. Let it rest: Remove from the oven and let the salmon rest for a minute. This step is crucial for keeping the juices locked in.
  8. Garnish and serve: Top with sesame seeds and chopped green onions before serving. The garnish adds a lovely crunch and color!

Tips for Perfect Salmon

Making this dish is straightforward, but a few tips can elevate your crispy honey garlic glazed salmon to the next level:

  • Choose fresh salmon: Look for bright, firm fillets with minimal discoloration. Wild-caught salmon often has better flavor than farmed varieties.
  • Let it rest: After cooking, allowing the salmon to rest for a minute helps keep it moist and tender.
  • Watch the heat: Make sure your skillet is hot before adding the salmon for that perfect crisp.
  • Don’t crowd the pan: If you’re cooking more than four fillets, do it in batches to ensure even cooking and crispiness.

Delicious Variations

One of the joys of cooking is experimenting with flavors! Here are some fun variations to try with your honey garlic salmon:

  • Spicy Kick: Add a teaspoon of chili flakes or sriracha to the glaze for a spicy twist that balances beautifully with the sweetness.
  • Herb Infusion: Fresh herbs like thyme or dill can be added to the glaze for an aromatic lift. Just be sure to chop them finely!
  • Fruit Fusion: Consider adding a splash of orange juice or a tablespoon of orange marmalade to the glaze for a zesty flavor.
  • Maple Twist: If you’re out of honey, maple syrup makes an excellent substitute, adding a rich depth of flavor.

Equipment You’ll Need

Before you start cooking, make sure you have the right tools on hand:

  • A good-quality oven-safe skillet (cast iron works wonderfully)
  • A whisk for mixing the glaze
  • A spatula for flipping the salmon
  • Measuring cups and spoons
  • A cutting board and knife for preparing the garlic and ginger

Storage and Freezing Tips

If you happen to have leftovers (though I doubt it!), here’s how to store or freeze your crispy honey garlic glazed salmon:

  • Refrigeration: Store any leftover salmon in an airtight container in the fridge for up to 3 days. Let it cool completely before sealing to maintain freshness.
  • Freezing: Wrap the cooled salmon tightly in plastic wrap and then in aluminum foil to prevent freezer burn. It can be frozen for up to 2 months.
  • Reheating: Thaw in the refrigerator overnight and reheat gently in the oven at 350°F for about 10-15 minutes, basting with a bit of glaze to keep it moist.

Frequently Asked Questions

Got questions? I’ve got answers! Here are some common queries about this recipe:

  • Can I use other types of fish? Absolutely! This glaze works well with other firm fish like trout or halibut.
  • What if my salmon isn’t crispy? Make sure to pat the fillets dry before cooking and increase the heat if needed. You can also broil them for a minute or two for extra crispiness.
  • Can I make this dish ahead of time? Yes! You can prepare the marinade a few days in advance and season the salmon ahead of time. Just cook it fresh when you’re ready to serve!

Troubleshooting Common Issues

Every cook has a hiccup now and then! Here are some tips for troubleshooting:

  • Too sweet: If your glaze is too sweet for your liking, add a splash more soy sauce or a squeeze of lemon juice to balance the flavors.
  • Overcooked salmon: Keep an eye on your salmon while it’s in the oven. It should flake easily but still be moist. If it’s dry, you might have cooked it too long.
  • Not enough glaze: Double the glaze recipe if you prefer a more generous coating on your salmon.

Serving Suggestions

This dish can be paired with a variety of sides to create a well-rounded meal. Here are a few ideas:

  • Fresh salads: A crisp green salad with a tangy vinaigrette complements the richness of the salmon.
  • Grains: Serve it over a bed of fluffy rice or quinoa to soak up the delicious glaze.
  • Roasted vegetables: Pair with seasonal roasted veggies for a colorful and nutritious plate.

Conclusion

And there you have it! The Irresistibly Crispy Honey Garlic Glazed Salmon is not just a recipe; it’s a celebration of flavors that will light up your dinner table. With its sweet and savory glaze, crispy skin, and tender meat, this dish is bound to become a favorite in your household. So, roll up your sleeves, gather your loved ones, and let this magical dish make your next meal unforgettable. Happy cooking, my friends! 🐟✨

Irresistibly Crispy Honey Garlic Glazed Salmon Recipe

Prep Time 10 minutes
Cook Time 12 minutes
Total Time 22 minutes
Servings 4 servings
Calories 350
This flavorful salmon recipe features a crispy sear topped with a sweet and savory honey garlic glaze, perfect for a quick and impressive meal.

Ingredients

Main ingredients

  • 4 fillets salmon fillets
  • 2 tablespoons olive oil
  • salt and pepper to taste salt and pepper
  • 1/4 cup honey
  • 3 cloves garlic, minced
  • 2 tablespoons soy sauce
  • 1 tablespoon dijon mustard
  • 1 tablespoon rice vinegar
  • 1 teaspoon grated fresh ginger
  • sesame seeds for garnish sesame seeds
  • chopped green onions for garnish green onions

Instructions 

  • Preheat oven to 400°F (200°C).
  • Whisk honey, garlic, soy sauce, mustard, vinegar, and ginger. Season salmon with salt and pepper.
  • Heat oil in skillet, sear salmon skin-side down for 4-5 minutes until crispy. Flip and pour sauce over.
  • Transfer skillet to oven and bake 5-7 minutes until cooked through. Rest briefly.
  • Garnish with sesame seeds and green onions before serving.

Notes

Ensure not to overcook the salmon for best texture.
Calories: 350kcal
Cost: $15
Course: Main Course
Cuisine: American
Keyword: Salmon

Loved this recipe? Save it to your favorite Pinterest board so you can easily find it later! It’s the perfect way to keep all your sweet ideas in one place. ✨

A detailed view of honey garlic glazed salmon, showcasing crisp texture and fresh garnishes.

Why This Dish Is a Must-Try

If you’re on the hunt for a cozy, comforting dish that brings warmth to your kitchen and happiness to your heart, look no further than this delightful Cheesy Orange Pasta. Imagine a creamy, zesty sauce enveloping perfectly cooked pasta, creating a symphony of flavors that dance on your palate. This isn’t just a meal; it’s an experience that transforms any ordinary night into a special occasion. Perfect for a night in with your favorite book or impressing friends at a gathering, this recipe is a go-to in my kitchen for a reason.

The Magic of Cheesy Orange Pasta

There’s something undeniably comforting about cheese and pasta. When you add the vibrant, zesty notes of orange cheddar cheese, you create a dish that is both familiar and refreshingly unique. During chilly fall nights or even on a rainy Seattle afternoon, this pasta dish provides that warm hug we all crave. It’s creamy, cheesy, and has just the right amount of zest to keep things exciting.

Ingredients You’ll Need

Delicious cheesy orange pasta presented in a bowl with a warm, inviting lighting effect.
  • 8 oz pasta (penne or rotini)
  • 1 cup orange cheddar cheese, shredded
  • 1/2 cup cream cheese, softened
  • 1/2 cup milk
  • 1/4 cup grated parmesan cheese
  • 1 tablespoon butter
  • 1 teaspoon garlic powder
  • 1/2 teaspoon paprika
  • Salt and pepper to taste
  • Chopped parsley for garnish (optional)

Cooking Steps for Ultimate Comfort

Getting Started: Boil the Pasta

Begin by cooking your pasta according to the package instructions until it reaches that perfect al dente texture. Make sure to salt the water well; it’s the first chance you get to flavor your pasta! Once cooked, drain and set aside while you prepare the sauce.

Creating the Creamy Sauce

In a large saucepan over medium heat, melt the butter. The aroma of melting butter is like a warm welcome into your kitchen! Once melted, add the softened cream cheese and milk, stirring continuously until you achieve a smooth, creamy consistency. This is the base of your sauce, and it’s pure magic.

Cheesy Goodness Awaits

Next, stir in the orange cheddar cheese and grated parmesan cheese. As the cheeses melt into the creamy mixture, you’ll want to keep stirring until everything is beautifully combined. Sprinkle in the garlic powder, paprika, salt, and pepper, letting all these flavors mingle and dance together. The result? A rich, cheesy sauce that’s simply irresistible.

Bringing It All Together

Now, it’s time to add the cooked pasta to your luscious cheese sauce. Toss it gently, ensuring every piece of pasta is coated in that creamy goodness. This is the moment when your kitchen starts to smell divine, and you can almost hear the pasta calling your name.

Finishing Touches

Serve your Cheesy Orange Pasta hot, garnished with a sprinkle of chopped parsley for a pop of color and freshness. You can also add a dash of extra paprika on top for a little flair. This dish is not just food; it’s a celebration of comfort and joy!

Why You’ll Love This Recipe

This Cheesy Orange Pasta is not only incredibly easy to make, but it’s also versatile and customizable. Whether you’re feeding a crowd or enjoying a quiet dinner for one, this dish adapts to fit your needs. Plus, it’s a fantastic way to introduce kids to cooking and healthy eating, as they’ll love helping with the cheese stirring!

Tips for Success

  • Watch the Cheese: Make sure to stir frequently to prevent the cheese from sticking or burning. Low and slow is the way to go!
  • Customize Your Pasta: Feel free to swap in your favorite pasta shapes. While penne and rotini are my go-tos, any pasta will do.
  • Spice It Up: If you’re feeling adventurous, add a pinch of cayenne pepper or some crushed red pepper flakes to give it a little kick!
  • Leftovers: This dish keeps well in the fridge. Just reheat it gently on the stove with a splash of milk to revive the creaminess.

Variations to Try

There are countless ways to make this dish your own. Here are a few ideas:

  • Vegetable Boost: Toss in some sautéed spinach, broccoli, or roasted bell peppers for added nutrition and flavor.
  • Protein Power: Add cooked chicken, shrimp, or even crumbled sausage to make it a heartier meal.
  • Herb Infusion: Fresh herbs like basil or thyme can elevate the flavor profile beautifully.

Equipment You’ll Need

  • A large pot for boiling pasta
  • A colander for draining
  • A large saucepan for making the sauce
  • A spatula or wooden spoon for mixing

Storage and Freezing

If you’re lucky enough to have leftovers, you can store them in an airtight container in the fridge for up to three days. If you want to freeze this dish, I recommend doing so before adding the pasta, as cooked pasta can become mushy when reheated. Instead, prepare the sauce, let it cool, and then freeze it. When you’re ready to enjoy, thaw the sauce, cook your pasta fresh, and then combine!

FAQs About Cheesy Orange Pasta

Can I use a different type of cheese?

Absolutely! While orange cheddar adds a unique flavor, feel free to experiment with other cheeses like mozzarella or gouda for a different taste.

Is this recipe kid-friendly?

Yes, kids will love the creamy texture and cheesy flavors! It’s also a great way to get them involved in the kitchen.

What can I serve with this dish?

This pasta pairs wonderfully with a fresh green salad, garlic bread, or even a side of roasted vegetables to round out your meal.

Troubleshooting Common Issues

If your sauce seems too thick, you can add a splash more milk to loosen it up. If it’s too thin, let it simmer for a few more minutes until it thickens. Trust your instincts, and remember: cooking is all about adjusting and tasting!

Conclusion: Your Go-To Comfort Meal

There you have it, my friends! This Cheesy Orange Pasta is not only a celebration of flavors but also a testament to the magic that happens in the kitchen when we embrace comfort food. Whether it becomes a weeknight staple or a special dish for gatherings, it’s sure to warm your heart and satisfy your cravings. So grab that spatula, gather your loved ones, and let’s make some unforgettable memories around the dinner table. Happy cooking!

Cheesy Orange Pasta - Archived Chef

Prep Time 10 minutes
Cook Time 15 minutes
Total Time 25 minutes
Servings 4 servings
Calories 550
A vibrant and creamy pasta dish featuring the tangy flavor of orange cheddar cheese, perfect for a quick and flavorful meal.

Ingredients

Pasta

  • 8 oz pasta (penne or rotini)
  • 1 cup orange cheddar cheese, shredded
  • 1/2 cup softened cream cheese
  • 1/2 cup milk
  • 1/4 cup grated parmesan cheese
  • 1 tablespoon butter
  • 1 teaspoon garlic powder
  • 1/2 teaspoon paprika
  • to taste salt and pepper
  • chopped parsley for garnish (optional) chopped parsley (optional)

Instructions 

  • Cook pasta until al dente, then drain.
  • Melt butter in a saucepan, then stir in cream cheese and milk until smooth.
  • Add cheeses, garlic powder, paprika, salt, and pepper; cook until melted.
  • Mix cooked pasta into the cheese sauce.
  • Serve hot, garnished with parsley if desired.

Notes

For extra flavor, add a pinch of red pepper flakes.
Calories: 550kcal
Cost: $15
Course: Main Course
Cuisine: American
Keyword: cheese, Orange, pasta

Loved this recipe? Save it to your favorite Pinterest board so you can easily find it later! It’s the perfect way to keep all your sweet ideas in one place. ✨

A vibrant plate of cheesy orange pasta, showcasing its texture and garnished with parsley.

Ah, Southern peach cobbler! The very mention of it can conjure up memories of sun-drenched orchards, lazy summer afternoons, and family gatherings filled with laughter and the sweet aroma of baked peaches wafting through the air. This delightful dessert is not just any recipe; it’s a celebration of summer’s bounty and a testament to the magic of home cooking.

In this definitive guide, I’m here to share the best Southern peach cobbler recipe that will not only warm your heart but also leave everyone asking for seconds. We’ll dive deep into the ingredients, techniques, variations, and even some pro tips to ensure that your cobbler turns out perfectly every time. So, grab your apron and let’s make some culinary magic!

Why You’ll Love This Recipe

  • Simple & Quick: With minimal prep time and straightforward steps, this recipe is perfect for both novice and seasoned bakers.
  • Flavor Explosion: The combination of sweet peaches, warm spices, and a buttery crust creates a symphony of flavors in every bite.
  • Versatile Ingredients: You can use fresh, frozen, or even canned peaches, making this recipe adaptable to whatever you have on hand.
  • Perfect for Gatherings: This dessert is a crowd-pleaser, ideal for potlucks, family dinners, or cozy nights in.
  • Comfort Food Classic: It embodies the essence of Southern cooking—simple, hearty, and utterly satisfying.

Ingredient Breakdown

Let’s talk about what goes into this magical cobbler! Here’s your shopping list:

  • Frozen Peaches: 2 bags (20 ounces each) of frozen peaches are perfect for this recipe. If you have fresh peaches, feel free to substitute them! Just make sure they’re ripe and juicy.
  • Granulated Sugar: A cup of white sugar helps sweeten the peaches and balances the tartness.
  • Brown Sugar: Another cup adds depth and richness to the flavor profile.
  • Butter: You’ll need both room temperature and cold unsalted butter for the filling and crust, respectively.
  • Spices: A mix of cinnamon and nutmeg elevates the flavor and brings warmth to the dish.
  • Flour: All-purpose flour is key for a flaky crust, while cornstarch helps thicken the peach filling.
  • Almond Extract: Optional but highly recommended for a nutty flavor that complements the peaches beautifully.
  • Lemon Juice: A splash of fresh lemon juice brightens the filling and balances the sweetness.

Pro Tips for Perfect Peach Cobbler

  • Choose Ripe Peaches: If using fresh peaches, select ones that are slightly soft to the touch for the sweetest flavor.
  • Don’t Overmix: When combining the cobbler dough, mix just until combined to maintain a tender texture.
  • Texture Matters: Aim for a drop biscuit-like consistency for the topping, which should be spooned over the peaches.
  • Check for Doneness: The cobbler is ready when the crust is golden brown and the filling is bubbling.
  • Let it Cool: Allow the cobbler to sit for at least 15 minutes before serving. This helps the juices set up a bit!
  • Serve Warm: Cobblers are best enjoyed warm, perhaps with a scoop of vanilla ice cream for that extra comfort factor.
  • Experiment with Spices: Feel free to add ginger or cardamom for a unique twist on the traditional flavor.
  • Double the Recipe: If you’re expecting a big crowd, consider making a double batch! Just use two 9×13 baking dishes.

Common Mistakes & Troubleshooting

Side view of freshly baked Southern peach cobbler, showing juicy peaches and a flaky top.

Even the best bakers can face challenges. Here are some common pitfalls and how to avoid them:

  • Too Watery Filling: If your peaches are overly juicy, sprinkle a bit more cornstarch to help absorb the excess liquid.
  • Overbaked Crust: Keep an eye on your cobbler after the first 30 minutes; every oven is different, and you want to avoid a dry topping.
  • Undercooked Peaches: If using fresh peaches, make sure they are fully ripe to ensure they soften properly during baking.

Delicious Variations

While the classic Southern peach cobbler is a treasure on its own, here are some fun variations to try:

  • Mixed Berry Cobbler: Swap out half of the peaches for fresh or frozen berries like blueberries or blackberries.
  • Peach & Apple Cobbler: Combine peaches with tart apples for a delightful contrast of flavors.
  • Spiced Peach Cobbler: Add a dash of cayenne or black pepper to the peach filling for a surprising kick!
  • Gluten-Free Version: Substitute all-purpose flour with a 1:1 gluten-free flour blend.

Storage & Make-Ahead Instructions

This cobbler is best enjoyed fresh, but it can be stored and made ahead:

  • Storing Leftovers: Cover and refrigerate for up to 3 days. Reheat in the oven for the best texture.
  • Make-Ahead: You can prepare the filling and dough separately a day in advance. Assemble and bake when you’re ready to serve.

Frequently Asked Questions

Here are some burning questions you might have:

  • Can I use canned peaches? Yes! Drain the peaches and reduce the sugar slightly since canned peaches are usually sweetened.
  • What is the best way to peel peaches? Blanching them in boiling water for 30 seconds and then plunging them into cold water makes peeling easy.
  • How do I know when my cobbler is done? Look for a golden brown crust and bubbling juices around the edges.
  • Can I freeze peach cobbler? Yes! It can be frozen before or after baking. Just ensure it’s well-wrapped to prevent freezer burn.
  • What can I serve with peach cobbler? Vanilla ice cream, whipped cream, or even a drizzle of caramel sauce are great accompaniments!
  • Is this recipe suitable for a crowd? Absolutely! It’s easy to double or even triple the recipe for larger gatherings.
  • How can I enhance the peach flavor? Consider adding peach schnapps or peach preserves to the filling for an extra peachy kick!
  • What’s the secret to a flaky crust? Use cold butter and avoid overworking the dough to keep it tender and flaky.

Nutritional Tips & Dietary Adaptations

For those mindful of their dietary choices, here are some tips:

  • Reduce Sugar: You can use less sugar or substitute with natural sweeteners like honey or maple syrup.
  • Whole Wheat Flour: Swap half of the all-purpose flour for whole wheat flour for added fiber.
  • Vegan Option: Use plant-based butter and a flax egg in place of regular butter and eggs.

Essential Equipment Recommendations

To make your cobbler-making experience smooth, here are some recommended tools:

  • 9×13 Baking Dish: Perfect for baking your cobbler evenly.
  • Mixing Bowls: A set of various sizes will come in handy for combining ingredients.
  • Pastry Cutter: This tool helps in achieving that perfect crumbly texture for the topping.
  • Measuring Cups & Spoons: Accurate measurements are key for baking success!

Serving Suggestions

Serving your peach cobbler is as important as making it! Here are some delightful ideas:

  • A La Mode: Serve warm slices topped with a scoop of vanilla ice cream for a classic combo.
  • With Cream: A dollop of whipped cream adds a light and fluffy texture.
  • Drizzle of Honey: A little honey on top can enhance the sweetness and add a beautiful glaze.

And there you have it—the ultimate guide to crafting a Southern peach cobbler that’s not just a dessert but an experience. I hope you find joy in every step of the process and that this cobbler recipe becomes a cherished part of your kitchen repertoire. Happy baking, friends!

The Best Southern Peach Cobbler Recipe

Prep Time 15 minutes
Cook Time 50 minutes
Total Time 1 hour 5 minutes
Servings 8 pieces
Calories 350
A delicious and comforting peach cobbler with a flaky crust and sweet, spiced peaches. Perfect for a cozy dessert or family gathering.

Ingredients

Peaches

  • 40 ounces Frozen peaches
  • 1 cup Granulated sugar ((white sugar))
  • 1 cup Brown sugar
  • 1 teaspoon Vanilla extract
  • 1/2 teaspoon Almond extract ((optional but recommended))
  • 1/2 tablespoon Cinnamon
  • 1/2 teaspoon Nutmeg
  • 2 teaspoons Corn starch
  • 1 teaspoon Cream of tartar
  • 1/2 stick Butter (unsalted, room temperature)
  • 2 tablespoons Water
  • 1 teaspoon Fresh lemon juice
  • 2 cups All purpose Flour
  • 1/2 cup Granulated sugar ((white sugar))
  • 1/2 cup Brown sugar
  • 2 teaspoons Baking powder
  • 1 tablespoon Cinnamon (reserve 1/2 for garnishment)
  • 1 stick Unsalted cold butter
  • 1/4 cup Boiling hot water ((see notes))
  • 1/2 teaspoon Salt
  • 3 tablespoons Granulated sugar (to dust top of cobbler)

Instructions 

  • Preheat oven to 375°F (190°C). Spray a 9x13 inch dish and add peaches with sugars, vanilla, almond, spices, starch, tartar, butter, water, and lemon juice. Mix until combined.
  • Cover with foil and bake for 20 minutes. Meanwhile, prepare the biscuit topping by combining flour, sugars, baking powder, salt, and cinnamon.
  • Work cold butter into the flour mixture until crumbly. Add hot water and stir until just combined, forming a drop biscuit dough.
  • Remove peaches from oven, spoon dough over peaches in small droplets, and sprinkle with cinnamon sugar mixture. Bake uncovered for 30-45 minutes until golden brown.

Notes

Ensure dough droplets are spaced to cook through evenly.
Calories: 350kcal
Cost: $15
Course: Dessert
Cuisine: Southern
Keyword: peach

Why You’ll Love This Recipe

Imagine a dinner that tantalizes your taste buds with a perfect balance of sweetness and heat, all wrapped up in a cozy bowl that feels like a warm hug. That’s exactly what my Sriracha Honey Salmon Bowls deliver! These delightful bowls are not just a feast for the eyes; they are a celebration of flavors that will have your family asking for seconds. With juicy salmon, vibrant veggies, and a touch of magic from the Sriracha honey sauce, this recipe is the ultimate way to elevate your dinner game.

As someone who believes that cooking should be a joyful experience, I often find myself experimenting with flavors and textures in my kitchen. This Sriracha Honey Salmon Bowl is a perfect example of how a few simple ingredients can come together to create something truly spectacular. And the best part? It’s incredibly easy to make! Perfect for a busy weeknight or a special occasion, these bowls are versatile enough to suit any palate.

Ingredients You’ll Need

Gathering fresh, quality ingredients is key to making this dish shine. Here’s what you’ll need:

  • 2 salmon fillets
  • 2 tablespoons Sriracha sauce
  • 2 tablespoons honey
  • 1 tablespoon soy sauce
  • 1 tablespoon olive oil
  • 1 cup cooked rice (white or brown)
  • 1 cup steamed broccoli
  • 1 avocado, sliced
  • Sesame seeds for garnish
  • Green onions for garnish

Cooking Instructions

A delicious Sriracha Honey Salmon Bowl, showcasing salmon, steamed broccoli, avocado slices, and rice in warm natural lighting.

Now that we have our ingredients ready, let’s dive into the cooking process!

  1. Preheat your oven: Start by preheating your oven to 400°F (200°C). A hot oven is crucial for achieving perfectly cooked salmon.
  2. Mix the sauce: In a small bowl, combine the Sriracha, honey, soy sauce, and olive oil. This sauce is where the magic happens—it’s a delightful blend of spicy, sweet, and savory that complements the salmon beautifully.
  3. Prepare the salmon: Line a baking sheet with parchment paper for easy cleanup. Place the salmon fillets on the sheet and brush the Sriracha honey mixture generously over each fillet.
  4. Bake the salmon: Pop the salmon in the preheated oven and let it bake for about 12-15 minutes, or until it flakes easily with a fork. The sweet and spicy glaze will caramelize slightly, creating a mouthwatering crust.
  5. Assemble your bowls: While the salmon bakes, it’s time to prepare your bowls! Start with a base of cooked rice—white or brown, whichever you prefer. Top the rice with steamed broccoli and sliced avocado, creating a vibrant and nourishing foundation.
  6. Add the star of the show: Once the salmon is ready, carefully remove it from the oven and place it on top of the veggies in your bowl.
  7. Drizzle and garnish: Don’t forget to drizzle any remaining sauce from the baking sheet over the bowls for that extra flavor punch. Finally, garnish with sesame seeds and sliced green onions for a beautiful finish.

Tips for Perfect Sriracha Honey Salmon Bowls

Here are a few tips to ensure your Sriracha Honey Salmon Bowls turn out perfectly every time:

  • Choose quality salmon: Opt for fresh, high-quality salmon fillets for the best flavor. Wild-caught salmon is often a great choice.
  • Adjust the heat: If you’re sensitive to spice, feel free to reduce the amount of Sriracha in the sauce. You can also mix in a little extra honey for sweetness.
  • Prep ahead: This recipe is perfect for meal prep! You can cook the rice and steam the broccoli in advance, making it easy to assemble your bowls when you’re ready to eat.

Variations to Try

Want to switch things up? Here are some fun variations you can try:

  • Different proteins: Substitute salmon with chicken, shrimp, or tofu for a different protein option.
  • Grains galore: Swap the rice for quinoa, farro, or even cauliflower rice for a low-carb option.
  • Veggie overload: Feel free to add other veggies like bell peppers, snap peas, or carrots to your bowls for extra color and nutrition.

Substitutions

If you don’t have all the ingredients on hand, here are some easy substitutions:

  • Soy sauce: Use tamari for a gluten-free option or coconut aminos for a soy-free alternative.
  • Honey: Maple syrup or agave nectar can be used if you prefer a vegan option.
  • Sriracha: If you can’t find Sriracha, any hot sauce will work, though the flavor will differ slightly.

Equipment You’ll Need

To whip up these delicious bowls, you’ll need a few basic kitchen tools:

  • Baking sheet
  • Parchment paper
  • Mixing bowl
  • Measuring spoons
  • Fork for flaking the salmon

Storage and Freezing Tips

These Sriracha Honey Salmon Bowls are best enjoyed fresh, but if you have leftovers, here’s how to store them:

  • Storage: Keep any leftover salmon, rice, and veggies in an airtight container in the refrigerator for up to 3 days.
  • Freezing: While cooked salmon can be frozen, I recommend freezing the salmon separately from the rice and veggies. When ready to eat, simply reheat the salmon in the oven and assemble your bowls!

FAQs

Can I use frozen salmon? Yes! Just make sure to thaw it completely in the refrigerator before cooking for even cooking.

What if I don’t have an oven? You can grill the salmon or cook it in a skillet over medium heat. Just watch the cooking time as it may vary.

Can I make this dish vegan? Absolutely! Substitute the salmon with marinated tofu or tempeh and use a plant-based honey alternative.

Troubleshooting Common Issues

If you encounter any issues while making these bowls, here are some common problems and solutions:

  • Salmon is overcooked: Keep a close eye on your salmon as it bakes. If it starts to dry out, you can drizzle a bit of olive oil on top while it cooks.
  • Rice is too sticky: If your rice is sticky, it might have been overcooked. Make sure to follow the cooking instructions carefully, and rinse the rice before cooking to remove excess starch.

Final Thoughts

Cooking is about creating memories, and my Sriracha Honey Salmon Bowls are sure to spark delightful moments around your dinner table. Whether it’s a cozy meal for one or a festive gathering with friends, these bowls bring warmth and joy to any occasion. So, roll up your sleeves, embrace the magic of cooking, and let these beautiful bowls charm your taste buds. Trust me, once you try them, they’ll become a regular in your dinner rotation!

Thank you for joining me in this culinary adventure! I hope you enjoy making and sharing these Sriracha Honey Salmon Bowls as much as I do. Happy cooking!

Sriracha Honey Salmon Bowls

Prep Time 10 minutes
Cook Time 15 minutes
Total Time 25 minutes
Servings 2 servings
Calories 550
Enjoy a flavorful and healthy salmon bowl with spicy-sweet sriracha honey glaze, served over rice and fresh vegetables.

Ingredients

Protein

  • 2 pieces salmon fillets

Sauces & Condiments

  • 2 tablespoons sriracha sauce
  • 2 tablespoons honey
  • 1 tablespoon soy sauce
  • 1 tablespoon olive oil

Grains

  • 1 cup cooked rice (white or brown)

Vegetables & Fruits

  • 1 cup steamed broccoli
  • 1 piece avocado, sliced

Garnishes

  • to taste sesame seeds for garnish
  • to taste green onions for garnish

Instructions 

  • Preheat oven to 400°F (200°C). Mix sriracha, honey, soy sauce, and olive oil.
  • Place salmon on a baking sheet, brush with sauce, and bake for 12-15 minutes.
  • As salmon bakes, assemble bowls with rice, broccoli, and sliced avocado.
  • Top bowls with cooked salmon, drizzle with remaining sauce, and garnish with sesame seeds and green onions.

Notes

For extra flavor, marinate the salmon in the sauce for 15 minutes before baking.
Calories: 550kcal
Cost: $15
Course: Main Course
Cuisine: fusion
Keyword: Salmon

Loved this recipe? Save it to your favorite Pinterest board so you can easily find it later! It’s the perfect way to keep all your sweet ideas in one place. ✨

An eye-level view of a Sriracha Honey Salmon Bowl, highlighting salmon, rice, broccoli, and garnishes of sesame seeds and green onions.

Why You’ll Love This Recipe

Ah, the magic of seafood! There’s something truly enchanting about the way the ocean’s offerings can transform a simple meal into a feast. When it comes to Split and Roast Skull Island King Prawns, you’re not just cooking; you’re creating an experience. Imagine the aroma of garlic wafting through your kitchen, mingling with the warm, buttery scent as these prawns roast to perfection. This dish is great for impressing guests or simply treating yourself to a taste of the coastal life from the comfort of your home.

What makes this recipe particularly delightful is its simplicity. With just a handful of ingredients, you can craft a stunning seafood dish that looks like it belongs at a five-star restaurant. And let’s be honest—who doesn’t want to dig into a platter of prawns that are not only delicious but also visually appealing?

This recipe is a celebration of flavor and freshness, capturing the essence of the sea without overwhelming your palate. The sweetness of the Skull Island king prawns pairs beautifully with the richness of garlic and olive oil, while the hint of paprika adds a warm depth that makes each bite a little adventure. Let’s dive deeper into what makes this dish so special!

Behind the Recipe

My love affair with seafood started during childhood summers spent near the Oregon coast. Every visit meant fresh catches, and the thrill of watching my mother prepare meals that made our family’s taste buds dance. The first time I encountered Skull Island king prawns was at a local seafood market here in Seattle. Their size and vibrant color drew me in, and I knew I had to bring them home and experiment.

After a few trial runs, I settled on this split and roast method. It’s a technique that not only showcases the prawns beautifully but also allows the flavors to meld perfectly. Each time I serve this dish, it feels like I’m sharing a piece of my childhood and inviting loved ones to savor the ocean’s bounty with me.

Recipe Origin or Trivia

Deliciously presented Skull Island King Prawns, golden and garnished, in soft natural light.

Skull Island king prawns are native to the pristine waters of Northern Australia. They are known for their sweet flavor and firm texture, making them a favorite among seafood lovers. This recipe pays homage to coastal cooking traditions that emphasize fresh ingredients and simple preparations to highlight natural flavors. The method of roasting prawns in their shells not only locks in moisture but also enhances their rich taste.

Chef’s Pro Tips for Perfect Results

  • Don’t Overcook: Keep an eye on your prawns as they roast. They cook quickly and can become rubbery if overcooked.
  • Quality Ingredients Matter: Choose fresh, high-quality prawns for the best flavor. If possible, buy them from a trusted seafood market.
  • Use a Meat Thermometer: If you’re unsure, a quick check with a meat thermometer will confirm doneness. Prawns should reach an internal temperature of 145°F (63°C).
  • Let Them Rest: After roasting, allow the prawns to sit for a minute or two. This helps the juices redistribute, making them even more succulent.

Kitchen Tools You’ll Need

  • Sharp Knife: Essential for splitting the prawns with precision.
  • Mixing Bowl: For combining your garlic herb butter.
  • Baking Tray: A sturdy tray lined with parchment paper for easy cleanup.
  • Pastry Brush or Spoon: To spread the garlic mixture evenly.
  • Tongs: Perfect for safely handling hot prawns.

Ingredients in Split and Roast Skull Island King Prawns

  • 1 pound Skull Island king prawns, shells on
  • 2 tablespoons olive oil
  • 4 cloves garlic, minced
  • 1 teaspoon paprika
  • Salt and pepper to taste
  • Lemon wedges for serving
  • Fresh parsley, chopped (optional)

Ingredient Substitutions

While the ingredients list is already delightful, here are some substitutions you can consider:

  • Prawns: If you can’t find Skull Island king prawns, large tiger prawns or jumbo shrimp work well.
  • Olive Oil: You could swap this for melted ghee or even avocado oil for a different flavor profile.
  • Paprika: Experiment with smoked paprika for a deeper flavor or omit it for a milder taste.
  • Fresh Herbs: Instead of parsley, feel free to use cilantro or basil for a fresh twist.

Instructions for Making Split and Roast Skull Island King Prawns

  1. Preheat your oven to 400°F (200°C).
  2. Rinse the king prawns under cold water and pat dry.
  3. Using a sharp knife, carefully split the prawns down the back, leaving the shell intact.
  4. In a bowl, mix olive oil, minced garlic, paprika, salt, and pepper.
  5. Brush the mixture generously over the split prawns.
  6. Place the prawns on a baking tray, shell side down.
  7. Roast in the preheated oven for about 10-12 minutes or until the prawns are cooked through and slightly golden.
  8. Remove from the oven and serve immediately with lemon wedges and a sprinkle of fresh parsley if desired.

Texture & Flavor Secrets

The beauty of this dish lies in the contrast of textures and flavors. The shells become crispy while the flesh inside remains juicy and tender. The garlic butter caramelizes during roasting, creating delightful little crispy bits that cling to the meat. The lemon juice adds a refreshing brightness that cuts through the richness, ensuring each bite is perfectly balanced.

Cooking Tips & Tricks

Here are a few additional insights to help you nail this recipe:

  • Prep Ahead: You can prepare the garlic butter ahead of time and marinate the prawns for even deeper flavor.
  • Experiment with Spice: Add red pepper flakes for an extra kick or a dash of lemon zest for added brightness.
  • Don’t Skip the Resting: Letting your prawns rest after roasting allows for the juices to settle, making them even more enjoyable.

What to Avoid

To ensure your dish turns out perfectly, steer clear of the following:

  • Overcooking: This is the number one culprit that turns juicy prawns into rubbery bites. Keep an eye on them!
  • Skipping the Shells: Cooking them in their shells not only enhances flavor but also keeps the moisture in.
  • Using Dull Knives: A sharp knife makes splitting the prawns much easier and safer.

Nutrition Facts

For those keeping an eye on nutrition, this dish is surprisingly healthy! Here’s a rough estimate per serving:

  • Calories: 200
  • Protein: 25g
  • Fat: 10g
  • Carbohydrates: 1g
  • Sodium: 300mg

Preparation Time

This recipe comes together quickly, making it perfect for weeknight dinners or special gatherings:

  • Prep Time: 15 minutes
  • Cook Time: 12 minutes
  • Total Time: 27 minutes

Make-Ahead and Storage Tips

If you’re looking to make this dish in advance:

  • Prepare the garlic herb butter up to 3 days ahead and store it in the fridge.
  • You can also split and clean the prawns a day ahead, storing them in the fridge until you’re ready to roast.
  • Leftovers can be stored in an airtight container in the fridge for up to 2 days. Reheat gently to avoid drying them out.

How to Serve

Presentation is key when it comes to serving this dish. Here are some ideas:

  • Serve the prawns right out of the oven with lemon wedges for that fresh zing.
  • Pair them with a side of crusty bread to soak up the garlicky juices.
  • For a full meal, consider pairing with a fresh salad or creamy pasta.

Creative Leftover Transformations

If you find yourself with leftovers, fear not! Here are some fun ideas:

  • Chop the prawns and toss them into a seafood risotto for a gourmet twist.
  • Add them to tacos with avocado and fresh salsa for a delightful treat.
  • Mix with pasta, a splash of cream, and some veggies for a quick, delicious dinner.

Additional Tips

To elevate your dish even further, consider these extra touches:

  • Garnish with microgreens or edible flowers for a pop of color.
  • Drizzle additional garlic butter over the prawns right before serving.
  • Pair with a crisp white wine, like Sauvignon Blanc or a dry rosé, to enhance the meal.

Make It a Showstopper

Want to take your presentation to the next level? Arrange the prawns in a spiral on a large platter, garnish with lemon wedges and a sprinkle of parsley, and serve family-style for an impressive touch. Your guests will be raving about this dish long after they’ve finished!

Variations to Try

If you’re feeling adventurous, here are some fun variations to switch things up:

  • Spicy Version: Add more chili flakes or fresh chopped chilies for a fiery kick.
  • Herbaceous Delight: Experiment with different herbs like dill or tarragon for unique flavors.
  • Citrus Burst: Incorporate lime zest or orange juice into the garlic butter for a fruity twist.

FAQs

Q1: Can I use frozen prawns for this recipe?

Absolutely! Just make sure they’re fully thawed and drained before using.

Q2: How do I split the prawns properly?

Use sharp kitchen shears to cut along the back, stopping at the tail for easy opening.

Q3: Can I grill instead of roast?

Definitely! Just keep a close eye as they will cook faster on the grill.

Q4: What size prawns work best?

The larger, the better for this recipe — Skull Island or jumbo prawns are ideal.

Q5: Is the shell supposed to be eaten?

No, it’s mainly for flavor and presentation. Peel before eating.

Q6: Can I make it dairy-free?

Yes, swap butter for plant-based alternatives or ghee.

Q7: What can I serve this with?

Crusty bread, pasta, salad, or grilled veggies all work beautifully.

Q8: Can I marinate the prawns in the butter?

Yes, letting them sit for 20 minutes helps intensify the flavor.

Q9: How spicy is it?

It’s mildly spicy, but you can adjust the chili flakes to taste.

Q10: What wine pairs best?

A crisp white like Sauvignon Blanc or a dry rosé works wonderfully.

Conclusion

In a world filled with complicated recipes, the Split and Roast Skull Island King Prawns stand out as a beacon of simplicity and flavor. This dish not only delivers a delightful taste of the ocean but also brings together friends and family around the table. So, whether you’re making it for a special occasion or just a cozy night in, trust me—every bite is worth savoring. Grab your apron, gather your ingredients, and let’s make some magic happen in the kitchen!

Split and Roast Skull Island King Prawns

Prep Time 10 minutes
Cook Time 12 minutes
Total Time 22 minutes
Servings 4 servings
Calories 250
Enjoy succulent king prawns prepared with a simple split and roast method, perfect for a quick and flavorful seafood dish.

Ingredients

Main

  • 1 pound skull island king prawns, shells on
  • 2 tablespoons olive oil
  • 4 cloves garlic, minced
  • 1 teaspoon paprika
  • to taste salt and pepper
  • for serving lemon wedges
  • optional fresh parsley, chopped

Instructions 

  • Preheat oven to 400°F (200°C).
  • Rinse prawns, split down the back, and pat dry.
  • Mix olive oil, garlic, paprika, salt, and pepper; brush over prawns.
  • Arrange on a baking tray, shell side down, and roast for 10-12 minutes.
  • Serve with lemon wedges and parsley if desired.

Notes

Ensure prawns are cooked through and golden before serving.
Calories: 250kcal
Cost: $15
Course: Main Course
Cuisine: Seafood
Keyword: Prawns

Loved this recipe? Save it to your favorite Pinterest board so you can easily find it later! It’s the perfect way to keep all your sweet ideas in one place. ✨

Eye-level view of succulent roasted King Prawns, showcasing their texture and vibrant colors.

Why This Blueberry Cobbler Will Be Your New Favorite Dessert

Ah, blueberry cobbler—the delightful dessert that brings a smile to your face and warmth to your heart. This recipe is not just any cobbler; it’s a cozy hug wrapped in buttery goodness, made to perfection with frozen blueberries. Whether you’re looking to impress guests or satisfy a late-night craving, this moist blueberry cobbler is here to save the day.

In my journey through the culinary world, I’ve discovered that the best recipes are the ones that blend simplicity with comfort. This cobbler does just that! It’s quick to whip up, making it an ideal choice for busy weeknights or lazy weekends. Plus, it’s a fantastic way to use up those bags of frozen blueberries tucked away in your freezer. Let’s dive into why you’ll absolutely love this recipe!

Why You’ll Love This Recipe

  • Easy to Make: With just a handful of ingredients and minimal prep time, you can have this cobbler baking in the oven in no time.
  • Versatile Ingredients: You can use fresh or frozen blueberries, making it a year-round dessert.
  • Perfect for Any Occasion: Whether it’s a family gathering, a potluck, or a cozy night in, this blueberry cobbler fits the bill.
  • Comforting and Delicious: The warm, sweet flavors will transport you back to those childhood kitchen memories.
  • Customizable: Feel free to add spices or mix in other fruits for a twist on the classic recipe.

Ingredient Breakdown and Substitutions

Every great cobbler starts with quality ingredients. Here’s what you’ll need to make this scrumptious blueberry cobbler:

  • Butter: You’ll need 1/4 cup (half a stick) plus 1 tablespoon. Unsalted butter is preferable to control the saltiness.
  • Sugar: 1/2 cup plus 1 tablespoon is perfect for sweetness. You can swap half with brown sugar for a deeper flavor.
  • Flour: 1 cup plus 2 teaspoons. All-purpose flour works best, but you can substitute with whole wheat flour for a healthier version.
  • Baking Powder: 2 teaspoons to help your cobbler rise perfectly.
  • Salt: 1/2 teaspoon enhances the flavors. Don’t skip this one!
  • Cinnamon: 1 teaspoon adds a lovely warmth to the dish. Feel free to adjust based on your preference.
  • Milk: 1/2 cup. Use whole milk for richness, or almond milk for a dairy-free alternative.
  • Blueberries: 2 cups of frozen blueberries are recommended, but fresh blueberries can also shine in this recipe.

How to Make Blueberry Cobbler

Side view of a delicious blueberry cobbler, showcasing its juicy filling and crumbly crust.

Now that you have all your ingredients ready, let’s get to the fun part—making the cobbler!

  1. Preheat your oven to 350°F (175°C).
  2. In a mixing bowl, combine the flour, sugar, baking powder, salt, and cinnamon. Mix well.
  3. In another bowl, melt the butter and stir in the milk. Add the milk mixture to the dry ingredients and stir until combined.
  4. Gently fold in the frozen blueberries, making sure they’re evenly distributed.
  5. Pour the batter into a greased 8×8 inch baking dish.
  6. Sprinkle additional sugar on top for a sweet crust.
  7. Bake in the preheated oven for about 45-50 minutes, or until the top is golden brown and a toothpick inserted into the center comes out clean.
  8. Let it cool for a few minutes before serving. Enjoy warm with a scoop of vanilla ice cream!

Pro Tips for the Best Blueberry Cobbler

  • Don’t Overmix: Mix the batter just until combined. Overmixing can result in a dense cobbler instead of a light and fluffy one.
  • Frozen vs. Fresh: If using frozen blueberries, there’s no need to thaw them. Just toss them straight into the batter!
  • Brown Sugar Boost: Substitute some of the granulated sugar with brown sugar for a deeper caramel flavor.
  • Spice It Up: Consider adding a pinch of nutmeg or a splash of vanilla extract for added depth of flavor.
  • Check for Doneness: Ovens vary; check your cobbler a few minutes before the timer goes off to avoid overbaking.
  • Let It Rest: Allow the cobbler to cool slightly before serving. This helps the flavors meld together beautifully.
  • Pairing: Serve with whipped cream or a scoop of vanilla ice cream for a heavenly combination.
  • Storage: This cobbler can be stored in an airtight container in the fridge for up to 3 days. Reheat in the oven for best results.

Common Mistakes and Troubleshooting

Even the best bakers have their off days! Here are some common mistakes and how to avoid them:

  • Burnt Top: If your cobbler is browning too quickly, cover it loosely with foil during the last 10-15 minutes of baking.
  • Too Runny: If your filling is too liquidy, try adding a tablespoon of cornstarch to the blueberries before mixing them in.
  • Dry Cobber: Make sure you measure your flour correctly. Too much flour can lead to a dry cobbler.
  • Sticking to the Pan: Always grease your baking dish well before pouring in the batter to prevent sticking.

Delicious Variations of Blueberry Cobbler

If you want to mix things up a bit, consider these fun variations:

  • Peach and Blueberry Cobbler: Add 1 cup of diced fresh peaches for a delightful twist.
  • Mixed Berry Cobbler: Combine blueberries with strawberries and raspberries for a berry medley.
  • Oat Topping: Swap the traditional topping for a crumbly oat mixture for added texture.
  • Lemon Blueberry Cobbler: Add the zest of one lemon to the batter for a refreshing citrus kick.

Storage and Make-Ahead Instructions

This blueberry cobbler is perfect for make-ahead preparation! Here’s how:

  • Make Ahead: Prepare the batter and blueberries the night before, then bake just before serving.
  • Storing: Keep leftovers in the fridge for up to 3 days, and reheat in the oven for best texture.
  • Freezing: You can freeze the unbaked cobbler for up to 3 months. Just bake straight from the freezer, adding a few extra minutes to the baking time.

Frequently Asked Questions

If you’re still curious about blueberry cobbler, here are some common questions answered:

  • Can I use fresh blueberries? Yes! Fresh blueberries work perfectly in this recipe.
  • What if I don’t have baking powder? You can substitute with baking soda, but you’ll need to add an acid, like lemon juice or vinegar.
  • How do I know when my cobbler is done? The top should be golden brown and a toothpick inserted into the center should come out clean.
  • Can I use other fruits? Absolutely! This recipe is versatile; feel free to experiment with your favorite fruits.
  • Is this recipe gluten-free? You can use a gluten-free flour blend to make this cobbler gluten-free.
  • What’s the best way to serve it? It’s delicious on its own, but I love it topped with vanilla ice cream or whipped cream.
  • Can I make this cobbler in a larger batch? Yes! Simply double the ingredients and use a larger baking dish.
  • How long does it take to bake? Bake for 45-50 minutes or until golden brown.

Nutritional Tips and Dietary Adaptations

For those keeping an eye on nutrition, here are some tips:

  • Lower Sugar: Reduce the sugar by half for a less sweet variant.
  • Whole Wheat Flour: Swap out all-purpose flour for whole wheat flour for added fiber.
  • Dairy-Free: Use almond or coconut milk instead of regular milk for a dairy-free option.
  • Vegan: Replace butter with coconut oil and milk with a plant-based milk to make it vegan-friendly.

Recommended Equipment

Here’s a quick list of essential tools for making this blueberry cobbler:

  • Mixing Bowls: A set of nesting mixing bowls will make combining ingredients a breeze.
  • Baking Dish: An 8×8 inch baking dish is perfect for this recipe.
  • Measuring Cups and Spoons: Accurate measurements are crucial for baking success.
  • Whisk: A whisk is useful for mixing dry ingredients and ensuring a smooth batter.

Serving Suggestions to Elevate Your Dessert

This blueberry cobbler is delicious on its own, but why stop there? Here are some serving ideas:

  • With Vanilla Ice Cream: The classic pairing! The warm cobbler and cold ice cream create a heavenly contrast.
  • Fresh Whipped Cream: Lightly sweetened whipped cream adds a delightful touch of elegance.
  • Crumble Topping: For added texture, sprinkle a mixture of oats, flour, and brown sugar on top before baking.
  • Drizzle of Honey: A drizzle of honey or maple syrup adds a lovely sweetness and shine to your serving.

So, there you have it! This blueberry cobbler recipe is a celebration of flavors, memories, and the joy of cooking. Whether you’re baking it for yourself or sharing it with loved ones, I hope it brings you as much joy as it has brought me. Now, grab your ingredients, preheat that oven, and let’s make some magic happen in your kitchen!

Moist Blueberry Cobbler with Frozen Berries

Prep Time 10 minutes
Cook Time 30 minutes
Total Time 40 minutes
Servings 6 pieces
Calories 250
A delicious and easy blueberry cobbler made with frozen berries, perfect for a quick dessert or snack.

Ingredients

Dairy and Baking

  • 1/4 cup butter (half a stick) plus 1 tablespoon
  • 1/2 cup sugar plus 1 tablespoon
  • 1 cup flour plus 2 teaspoons
  • 2 teaspoons baking powder
  • 1/2 teaspoon salt
  • 1 teaspoon ground cinnamon
  • 1/2 cup milk
  • 2 cups frozen blueberries

Instructions 

  • Preheat oven to 375°F (190°C).
  • Melt butter and mix with sugar, flour, baking powder, salt, and cinnamon to form a batter.
  • Pour batter into a greased baking dish and spread blueberries evenly on top.
  • Bake for 30 minutes until golden and bubbly.
  • Let cool slightly before serving.

Notes

Use fresh or frozen berries; adjust baking time if using fresh.
Calories: 250kcal
Cost: $8
Course: Dessert
Cuisine: American
Keyword: blueberries

Why You’ll Love It

There’s something undeniably magical about a dish that combines the rich flavors of honey and garlic with tender salmon. My Crispy Honey Garlic Glazed Salmon is not just a meal; it’s an experience that transforms a simple weeknight dinner into a culinary celebration. The sweet and savory glaze hugs the salmon fillets perfectly, creating a dish that’s not only delicious but also visually stunning.

This recipe is particularly special because it brings together the best of both worlds: it’s quick enough for a busy weeknight yet impressive enough to serve at a dinner party. Imagine the sound of sizzling salmon in the pan, the aroma of garlic wafting through your kitchen, and the vibrant colors of the garnishes making their appearance. Delicious, right? Let’s dive into what makes this dish so fantastic and how you can easily recreate it in your own kitchen.

Ingredients

To make this delightful salmon dish, you’ll need the following ingredients:

  • 4 salmon fillets (about 6 oz each, skin-on or skinless)
  • 2 tablespoons cornstarch
  • 1/2 teaspoon salt
  • 1/4 teaspoon black pepper
  • 2 tablespoons olive oil (or avocado oil)
  • 1/3 cup honey
  • 3 tablespoons low-sodium soy sauce
  • 3 cloves garlic, minced
  • 1 tablespoon rice vinegar (or apple cider vinegar)
  • 1 teaspoon cornstarch + 2 teaspoons water (slurry)
  • Optional: red pepper flakes for a little kick
  • Garnish: sesame seeds and chopped green onions

Directions

Glazed salmon on a plate, showcasing a rich honey garlic sauce, garnished with green onions and sesame.

Now that we have our ingredients ready, let’s get cooking!

  1. Start by patting the salmon fillets dry with a paper towel. This step is crucial as it helps achieve that crispy crust we all love. Season the fillets with salt and pepper, then lightly coat each one with cornstarch.
  2. In a skillet, heat the olive oil over medium-high heat. Once the oil is shimmering, carefully place the salmon fillets skin-side down (if using skin-on). Cook for about 3–4 minutes per side until they turn golden brown and crispy. Once done, remove the fillets from the skillet and set them aside.
  3. In the same skillet, it’s time to create that irresistible glaze! Add honey, soy sauce, minced garlic, and vinegar. Let this simmer for about 2 minutes, stirring occasionally to blend the flavors.
  4. Now, stir in the cornstarch slurry (1 teaspoon of cornstarch mixed with 2 teaspoons of water) and cook until the glaze thickens, which should take about 1–2 minutes.
  5. Return the salmon to the pan and spoon the thickened glaze over the fillets, ensuring they are well coated in this luscious sauce.
  6. Finally, serve your crispy honey garlic glazed salmon hot, garnished with sesame seeds and chopped green onions for that extra pop of flavor and color!

Servings and Timing

This recipe serves four and is incredibly quick to prepare. You’ll spend about 10 minutes prepping and 15 minutes cooking, making it a total of just 25 minutes from start to finish! Perfect for those busy weeknights when you still want something special.

Variations

While the original recipe is fantastic, don’t hesitate to get creative! Here are a few variations you can try:

  • Citrusy Twist: Add a splash of orange juice to the glaze for a refreshing citrus note that complements the honey beautifully.
  • Heat Things Up: If you love a bit of spice, sprinkle in some crushed red pepper flakes when simmering the glaze. It adds a delightful kick!
  • Switch It Up: This glaze works wonders on other proteins too! Try it with shrimp or chicken for a different flavor experience.

Storage and Reheating

Leftover salmon can be stored in an airtight container in the refrigerator for up to three days. When reheating, I recommend using a skillet over low heat to keep the glaze sticky and the salmon tender. If you’re in a hurry, the microwave is fine, but cover the salmon to prevent it from drying out.

Tips for Success

Here are some personal tips that I’ve picked up along the way:

  • Patience is Key: Don’t rush the cooking process! Allow the salmon to sear properly before flipping. This helps achieve that coveted crispy crust.
  • Quality Ingredients: Using high-quality honey and soy sauce can significantly enhance the flavor of your glaze. It’s worth the little extra investment!
  • Fresh Garlic: Freshly minced garlic makes a world of difference compared to pre-minced options. It has a more potent flavor and aroma that brings the dish to life.

FAQs

Can I use frozen salmon for this recipe?

Absolutely! Just make sure to thaw it completely and pat it dry before cooking to ensure that crispy texture you’re aiming for.

Do I have to use cornstarch for the coating?

No, but I highly recommend it! Cornstarch gives the salmon that extra crunch. If you prefer a softer texture, you can skip it, and the salmon will still taste great.

Can I bake the salmon instead of pan-searing it?

Yes! For a hands-off method, bake the salmon at 400°F for about 12–15 minutes, then brush the glaze on at the end for a few minutes to caramelize.

What sides go best with honey garlic glazed salmon?

This dish pairs wonderfully with steamed rice, stir-fried vegetables, or even a fresh salad. You can also serve it over zucchini noodles for a low-carb option!

How do I know when salmon is fully cooked?

The salmon is perfectly cooked when it flakes easily with a fork and reaches an internal temperature of 145°F. A digital meat thermometer can be your best friend here!

Troubleshooting

If you find yourself in a bit of a cooking conundrum, don’t panic! Here are some common issues and how to fix them:

  • Salmon Sticking to the Pan: Make sure your skillet is hot enough before adding the salmon. A well-heated pan helps prevent sticking.
  • Glaze Too Thin: If your glaze doesn’t thicken, simply stir in a little more cornstarch mixed with water and cook for an additional minute.
  • Overcooked Salmon: If your salmon ends up a bit dry, try serving it with a drizzle of extra honey or a squeeze of fresh lemon juice to add moisture back in.

Conclusion

This Crispy Honey Garlic Glazed Salmon is more than just a meal; it’s a celebration of flavors that will have you dancing in your kitchen! Whether you’re cooking for your family, impressing your friends, or simply treating yourself, this recipe is sure to become a beloved favorite. The combination of sweet and savory elements, alongside the crispy texture of the salmon, creates a dish that feels both comforting and sophisticated.

So, gather your ingredients, put on your favorite tunes, and let’s make some kitchen magic happen together! Trust me; once you savor that first bite, you’ll understand why this recipe is a keeper. Happy cooking!

Crispy Honey Garlic Glazed Salmon Recipe

Prep Time 10 minutes
Cook Time 10 minutes
Total Time 20 minutes
Servings 4 servings
Calories 350
This crispy glazed salmon combines sweet honey and savory garlic for a quick, flavorful meal that's perfect for weeknights.

Ingredients

Salmon

  • 4 fillets salmon fillets (about 6 oz each, skin-on or skinless)
  • 2 tablespoons cornstarch
  • 0.5 teaspoon salt
  • 0.25 teaspoon black pepper
  • 2 tablespoons olive oil (or avocado oil)
  • 0.33 cup honey
  • 3 tablespoons low-sodium soy sauce
  • 3 cloves garlic, minced
  • 1 tablespoon rice vinegar (or apple cider vinegar)
  • 1 teaspoon cornstarch + water slurry (1 tsp cornstarch mixed with 2 tsp water)
  • optional red pepper flakes (for spice)
  • garnish sesame seeds
  • garnish chopped green onions

Instructions 

  • Pat salmon dry, season with salt and pepper, then coat with cornstarch.
  • Heat oil in a skillet, cook salmon skin-side down 3–4 minutes per side until crispy. Remove and set aside.
  • In the same skillet, simmer honey, soy sauce, garlic, and vinegar for 2 minutes.
  • Add cornstarch slurry, cook 1–2 minutes until thickened.
  • Return salmon to pan, spoon glaze over, garnish with sesame seeds and green onions. Serve hot.

Notes

For extra spice, add red pepper flakes to the glaze.
Calories: 350kcal
Cost: $15
Course: Main Course
Cuisine: American
Keyword: Salmon

Loved this recipe? Save it to your favorite Pinterest board so you can easily find it later! It’s the perfect way to keep all your sweet ideas in one place. ✨

Delicious salmon fillet glazed with honey garlic sauce, captured with soft lighting and a blurred background.

Why This Dish Will Capture Your Heart

Welcome to the world of cozy cooking, where every dish tells a story and every bite sparks joy. Today, I’m thrilled to share with you a recipe that’s not just about food; it’s about experiences, laughter, and maybe a little romance. This Rich, Creamy Marry Me Chicken Pasta is a dish that’s been known to make hearts flutter and taste buds sing. It’s the ultimate comfort food, blending the richness of creamy sauce with tender chicken and perfectly cooked pasta. Trust me, once you serve this to your loved ones, they’ll be begging for seconds and might even joke about proposing!

Ingredients That Make Magic Happen

Let’s gather our ingredients, shall we? Here’s what you’ll need to create this culinary masterpiece:

  • 2 boneless, skinless chicken breasts
  • Salt and pepper to taste
  • 2 tablespoons olive oil
  • 3 cloves garlic, minced
  • 1 cup heavy cream
  • 1 cup chicken broth
  • 1 cup grated parmesan cheese
  • 1 teaspoon Italian seasoning
  • 8 ounces pasta of your choice
  • Fresh parsley for garnish
  • Red pepper flakes (optional for a little kick)

These simple ingredients come together to create a dish that’s creamy, dreamy, and utterly delightful. Plus, you probably have most of these in your pantry already!

Crafting Your Culinary Masterpiece

A close-up view of Marry Me Chicken Pasta with garlic and parmesan, beautifully presented.

Now, let’s get to the fun part—cooking! Here’s how to make this delicious dish:

  1. Cook the pasta according to package instructions; drain and set aside.
  2. Season chicken breasts with salt and pepper.
  3. In a large skillet, heat olive oil over medium heat and add the chicken breasts. Cook until golden brown and cooked through, about 6-7 minutes per side. Remove from the skillet and set aside.
  4. In the same skillet, add minced garlic and sauté for about 1 minute until fragrant.
  5. Pour in the heavy cream and chicken broth, stirring to combine. Bring to a simmer.
  6. Add Parmesan cheese and Italian seasoning, stirring until the cheese is melted and the sauce is creamy.
  7. Slice the cooked chicken and return it to the skillet, coating it with the sauce.
  8. Toss the cooked pasta in the skillet with the creamy sauce until well coated.
  9. Serve hot, garnished with fresh parsley and red pepper flakes if desired.

Tips for a Perfectly Creamy Sauce

As with any recipe, a few tips can go a long way in ensuring your dish turns out perfectly:

  • Don’t Skimp on the Cheese: The parmesan is what makes this sauce creamy and rich. Use freshly grated cheese if possible—it melts better and adds more flavor.
  • Watch the Heat: When making the sauce, keep the heat at medium to avoid breaking the cream. If it gets too hot, the sauce can become grainy.
  • Add a Little Spice: If you like a kick, sprinkle some red pepper flakes into the sauce for an added layer of flavor.

Flavor Variations to Explore

While this recipe is delicious as is, don’t hesitate to experiment! Here are some variations you might enjoy:

  • Veggie Delight: Add some sautéed spinach or sun-dried tomatoes to the sauce for a pop of color and nutrition.
  • Herb Infusion: Fresh herbs like basil or thyme can elevate the flavor profile. Toss them in right at the end for a fresh burst.
  • Cheese Lovers Unite: Mix in some mozzarella or goat cheese for a unique twist on the classic parmesan.

Equipment You’ll Need

Before you start, let’s make sure you have everything you need:

  • A large skillet for cooking the chicken and sauce
  • A pot for boiling the pasta
  • A good knife for slicing the chicken
  • A wooden spoon for stirring the sauce
  • Measuring cups for accuracy

Storing and Freezing Your Pasta

If you happen to have leftovers (which I doubt, but just in case), here’s how to store them:

  • In the Fridge: Store in an airtight container for up to 3 days. Reheat gently in the microwave or on the stovetop, adding a splash of chicken broth or cream to restore the sauce’s creaminess.
  • In the Freezer: This dish freezes well! Just make sure to let it cool completely before transferring it to a freezer-safe container. It can last for up to 2 months. When you’re ready to enjoy it, thaw in the fridge overnight and reheat.

Common Questions About Marry Me Chicken Pasta

As you embark on your cooking adventure, you might have a few questions. Here are some answers to common queries:

  • Can I use different types of pasta? Absolutely! This recipe works with any pasta shape you love—penne, fusilli, or even gluten-free options.
  • Is there a way to lighten the dish? You can substitute half-and-half for the heavy cream and use less cheese. It will be slightly less rich but still delicious!
  • What if I don’t have chicken broth? You can use vegetable broth or even water in a pinch. Just keep in mind that the flavor will be milder.

Troubleshooting Tips

If you run into any bumps in the road while making this dish, here are some troubleshooting tips:

  • Grainy Sauce: If your sauce turns out grainy, it’s likely because it was cooked at too high a heat. Lower the temperature and whisk it a bit to help smooth it out.
  • Too Thick Sauce: Add a splash of chicken broth or cream to loosen it up, stirring until you reach your desired consistency.
  • Flavor Not Strong Enough: Adjust the seasoning! A pinch more salt, pepper, or Italian seasoning can make a world of difference.

Final Thoughts

Cooking should be a joyful experience filled with creativity and love. This Rich, Creamy Marry Me Chicken Pasta is the perfect embodiment of that philosophy—simple to make yet profoundly satisfying. Whether you’re cooking for a special someone or just treating yourself to a cozy night in, this dish is sure to impress. So roll up your sleeves, put on your favorite playlist, and let’s make some magic in the kitchen! Don’t forget to enjoy every moment, and remember, cooking is more than just a meal; it’s a way to express love and care. Happy cooking, my friends!

Rich, Creamy Marry Me Chicken Pasta

Prep Time 10 minutes
Cook Time 20 minutes
Total Time 30 minutes
Servings 4 servings
Calories 650
A luscious and comforting pasta dish featuring tender chicken in a creamy, cheesy sauce, perfect for a romantic dinner.

Ingredients

Protein

  • 2 pieces boneless, skinless chicken breasts
  • 2 tablespoons olive oil
  • 3 cloves garlic, minced
  • 1 cup heavy cream
  • 1 cup chicken broth
  • 1 cup grated parmesan cheese
  • 1 teaspoon italian seasoning
  • 8 ounces pasta of your choice
  • to taste fresh parsley for garnish
  • optional red pepper flakes (for spice)

Instructions 

  • Cook pasta according to package; drain and set aside.
  • Season chicken with salt and pepper. Cook in olive oil until golden and cooked through, about 6-7 minutes per side. Remove and set aside.
  • Sauté minced garlic in the same skillet for 1 minute. Add heavy cream and chicken broth; simmer.
  • Stir in parmesan cheese and Italian seasoning until sauce is creamy. Slice chicken and return to skillet, coating with sauce.
  • Toss cooked pasta with sauce. Garnish with parsley and red pepper flakes if desired. Serve hot.

Notes

For extra flavor, add a squeeze of lemon or a sprinkle of additional parmesan.
Calories: 650kcal
Cost: $15
Course: Main Course
Cuisine: American
Keyword: Chicken, creamy, pasta

Loved this recipe? Save it to your favorite Pinterest board so you can easily find it later! It’s the perfect way to keep all your sweet ideas in one place. ✨

Delicious bowl of Marry Me Chicken Pasta featuring tender chicken and rich sauce.

Welcome to my kitchen! Today, we’re diving into a comforting dish that’s not just easy to prepare but also bursting with flavor: Spinach and Cheese Manicotti. If you’re anything like me and believe that food should feel like a warm hug, this recipe is sure to become a staple in your home. So, grab your apron and let’s get started!

Why You’ll Love This Recipe

This Spinach and Cheese Manicotti is more than just a meal; it’s a delightful experience. Here are five reasons why this dish will quickly become your go-to for busy nights:

  • Quick & Easy: With minimal prep time and straightforward steps, you can whip up this dish in no time, perfect for those hectic weeknights.
  • Family Favorite: Packed with cheesy goodness and hidden veggies, it’s a dish that even picky eaters will love!
  • Make-Ahead Magic: You can prepare it a day in advance, letting the flavors meld together beautifully overnight.
  • Customizable: Whether you want to swap the spinach for kale or add some spices for a kick, this recipe is flexible to your taste.
  • Budget-Friendly: Made with simple, cost-effective ingredients, this dish won’t break the bank while still delivering delicious results.

Ingredients for Spinach and Cheese Manicotti

Before we dive into the cooking process, let’s take a closer look at what you’ll need:

  • 1 pint ricotta cheese: The creamy base that ties everything together.
  • 2 large eggs: These act as a binder for your filling.
  • 1 (10-ounce) package frozen chopped spinach: Thawed and drained, this adds nutrition and flavor.
  • 1 cup shredded mozzarella cheese: Melts beautifully on top and inside the shells.
  • ½ cup grated Parmesan cheese: Divided, for that nutty flavor.
  • 1 ½ tablespoons white sugar: A hint of sweetness to balance the savory ingredients.
  • ⅛ teaspoon salt: Enhances all the flavors.
  • ¼ teaspoon ground black pepper: Adds a bit of warmth.
  • 12 pieces manicotti shells: The stars of the dish, ready to be filled.
  • 1 (32-ounce) jar spaghetti sauce: Your favorite brand will do—this adds moisture and flavor.

Feel free to swap ingredients based on your preferences! For instance, if you want to make it gluten-free, you can use gluten-free manicotti shells or even zucchini noodles.

Directions for Preparing Spinach and Cheese Manicotti

Now, let’s get cooking! Follow these simple steps:

Step 1: Make the Filling

In a large bowl, mix the ricotta cheese and eggs together until they are well blended. Then, stir in the spinach, mozzarella cheese, ¼ cup Parmesan cheese, sugar, salt, and pepper until combined.

Step 2: Prepare the Baking Dish

Pour ½ cup of spaghetti sauce into a medium baking dish, spreading it to cover the bottom. This prevents the shells from sticking and adds flavor.

Step 3: Stuff the Shells

Using a spoon or a piping bag, stuff the uncooked manicotti shells with the cheese mixture. Place them in a single layer over the sauce.

Step 4: Add Sauce & Chill

Pour the remaining spaghetti sauce over the stuffed shells, ensuring they are well covered. Cover the dish with plastic wrap and chill in the refrigerator for at least 8 hours or overnight. This allows the flavors to develop beautifully.

Step 5: Bake the Spinach Manicotti

When you’re ready to bake, preheat your oven to 400 degrees F (200 degrees C). Remove the shells from the refrigerator and cover the dish with aluminum foil. Bake for 40 minutes. Then, uncover, sprinkle with the remaining Parmesan cheese, and bake for an additional 15 minutes until bubbly and golden.

Spinach Manicotti Variations

Juicy manicotti with a rich spinach and cheese filling, garnished and served on a plate.

Don’t be afraid to get creative! Here are some fun variations to try:

  • Meat Lovers: Add cooked ground beef or Italian sausage to the cheese filling for a hearty twist.
  • Spicy Kick: Mix in some crushed red pepper flakes or jalapeños to the cheese mixture for a spicy version.
  • Herb Infusion: Incorporate fresh herbs like basil, oregano, or parsley into the filling for an aromatic touch.
  • Vegan Option: Substitute ricotta with tofu blended with nutritional yeast, and use vegan cheese alternatives.

Storage and Make-Ahead Instructions

You can make this Spinach and Cheese Manicotti ahead of time! After assembling, just store it in the fridge for up to 24 hours before baking. Alternatively, if you want to freeze it, cover it tightly with foil or plastic wrap and store it for up to three months. When ready to bake, thaw in the refrigerator overnight and bake as directed.

Common Mistakes and Troubleshooting

Let’s ensure your manicotti comes out perfectly every time! Here are some tips:

  • Don’t Overstuff: If you overstuff the shells, they may burst while baking. Aim for a generous but not excessive filling.
  • Check Your Sauce: If your sauce is too thick, add a splash of water or broth to loosen it up before pouring over the shells.
  • Preheat the Oven: Always preheat your oven to ensure even cooking.
  • Let it Rest: After baking, let the manicotti sit for about 10 minutes before serving. This helps it set and makes serving easier.

Comprehensive FAQ

Here are some questions often asked about Spinach and Cheese Manicotti:

  • Can I use fresh spinach instead of frozen? Absolutely! Just make sure to wash, wilt, and chop it before adding to the filling.
  • Can I prepare this dish a day in advance? Yes, preparing it the day before allows the flavors to meld beautifully.
  • What can I use instead of ricotta cheese? Cottage cheese or blended tofu can work as great substitutes.
  • How long can I store leftovers? Leftovers can be kept in the fridge for up to 3 days. Reheat in the oven or microwave.
  • Can I freeze manicotti? Yes! Just cover it tightly and store it in the freezer for up to 3 months.
  • What’s the best way to serve manicotti? Serve with a side salad and some crusty garlic bread for a complete meal.
  • How do I know when it’s done? The edges should be bubbly, and the cheese should be melted and slightly golden.
  • Can I make this dish gluten-free? Yes! Use gluten-free pasta shells for a delicious alternative.

Nutrition Tips and Dietary Adaptations

This dish can easily be adapted to fit various dietary needs. Here are some tips:

  • Low-Calorie Option: Use low-fat cheese and skip the sugar for a healthier version.
  • Gluten-Free: Choose gluten-free manicotti shells or zucchini noodles.
  • High-Protein: Add cooked chicken or turkey to the filling for extra protein.

Equipment Recommendations

For this recipe, you’ll need:

  • Baking Dish: A 9×13 inch baking dish works best for this recipe.
  • Mixing Bowls: Use at least two—one for the filling and one for the sauce.
  • Aluminum Foil: To cover the dish while baking.

Serving Suggestions

Pair your Spinach and Cheese Manicotti with:

  • Garlic Bread: A classic side that complements the flavors perfectly.
  • Fresh Salad: A light green salad with vinaigrette keeps the meal balanced.
  • Sautéed Vegetables: Add some color and nutrition to your plate.

In Conclusion

This Spinach and Cheese Manicotti recipe is a delicious way to bring comfort and joy into your home. It’s more than just a meal; it’s an invitation to gather around the table with loved ones. Remember, cooking should be fun and flexible—so feel free to make this dish your own! I hope you enjoy making it as much as I do. Happy cooking!

Quick and Easy Manicotti for Busy Nights with Spinach and Cheese

Prep Time 15 minutes
Cook Time 55 minutes
Total Time 1 hour 10 minutes
Servings 4 servings
Calories 450
A delicious and quick baked manicotti recipe packed with spinach and cheese, perfect for busy weeknights.

Ingredients

Dairy

  • 1 pint ricotta cheese
  • 2 large eggs
  • 1 10 ounce frozen chopped spinach (thawed and drained)
  • 1 cup shredded mozzarella cheese
  • ½ cup grated Parmesan cheese (divided)
  • 1.5 tablespoons white sugar
  • teaspoon salt
  • ¼ teaspoon ground black pepper
  • 12 pieces manicotti shells
  • 1 32 ounce jar spaghetti sauce

Instructions 

  • Mix ricotta and eggs until blended, then stir in spinach, cheeses, sugar, salt, and pepper.
  • Stuff mixture into uncooked shells and arrange in a baking dish with sauce.
  • Pour remaining sauce over shells, cover, and refrigerate for 8 hours or overnight.
  • Preheat oven to 400°F (200°C), bake covered for 40 minutes, then uncover, sprinkle Parmesan, and bake 15 more minutes.

Notes

Ensure spinach is well drained to prevent excess moisture.
Calories: 450kcal
Cost: $15
Course: Main Course
Cuisine: Italian
Keyword: cheese, manicotti, Spinach