Author

Ava

Browsing

Why You’ll Love This Recipe

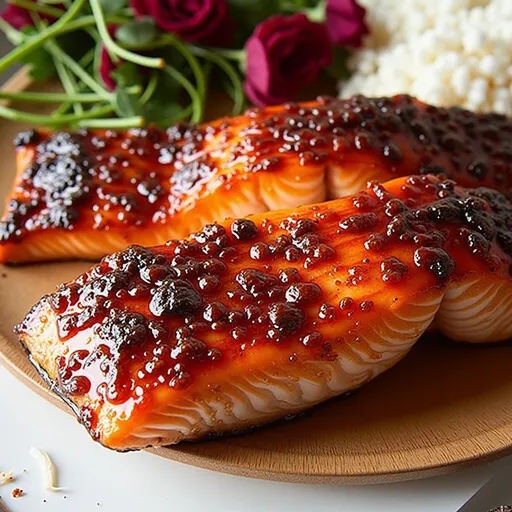
If you’re on the hunt for a dish that’s not just a meal but an experience, you’ve landed in the right place. My Irresistible Honey Garlic Butter Baked Salmon Recipe is a delightful symphony of flavors that marries the sweetness of honey with the rich, savory tones of garlic and butter. Imagine the aroma wafting through your kitchen—it’s not just food; it’s a comforting embrace at the end of a long day. This dish is perfect for family dinners, date nights, or even a little indulgent treat for yourself. Plus, it’s incredibly easy to prepare, making it accessible even for the most kitchen-challenged among us!

Ingredient Spotlight

Before we dive into the cooking process, let’s take a moment to appreciate the star players of this dish:

  • Salmon Fillets: Rich in omega-3 fatty acids, salmon is not only delicious but also incredibly healthy.
  • Honey: This natural sweetener not only adds sweetness but also gives a beautiful glaze that caramelizes beautifully in the oven.
  • Unsalted Butter: Provides a creamy richness that complements the flavors of the salmon.
  • Garlic: Freshly minced garlic adds a punch of flavor that elevates the dish to gourmet status.
  • Soy Sauce: Offers a savory depth that brings all the flavors together.
  • Lemon Juice: A splash of acidity brightens the dish and balances the sweetness of the honey.
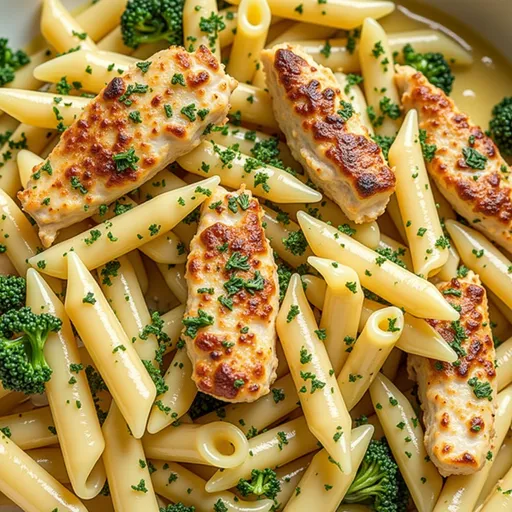
  • Fresh Parsley: Not just for garnish; it adds a fresh, herbaceous note that ties everything together.

Step-by-Step Cooking Instructions

Honey garlic butter glazed salmon on a plate, showcasing rich textures and golden hues.

Now that we’re all acquainted with our ingredients, let’s get to the fun part—cooking! Follow these simple steps to create a stunning dish that will leave your guests (or yourself!) in awe.

  1. Preheat the Oven: Start by preheating your oven to 375°F (190°C). This ensures that your salmon will cook evenly and thoroughly.
  2. Melt the Butter: In a small saucepan over medium heat, melt the unsalted butter. As it begins to melt, let the kitchen fill with the rich, buttery aroma.
  3. Add Garlic: Stir in the minced garlic and sauté for about 1 minute until it becomes fragrant. You want it to be aromatic, but be careful not to let it burn.
  4. Mix the Sauce: Next, add the honey, soy sauce, and lemon juice to the butter and garlic mixture. Stir well and bring it to a simmer. This step is where the magic happens; the flavors meld together beautifully!
  5. Prepare the Salmon: Grab your salmon fillets and place them in a baking dish. Season them generously with salt and pepper. This simple step enhances the overall flavor.
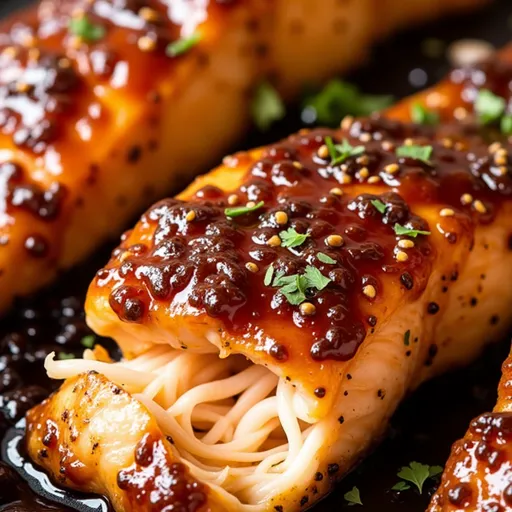
  6. Coat the Salmon: Pour the honey garlic butter mixture over the salmon, ensuring each fillet is well coated. If you love a good glaze, don’t be shy—make sure to drizzle it all over!
  7. Bake: Place the baking dish in your preheated oven and bake for 15-20 minutes. You’ll know it’s done when the salmon flakes easily with a fork. It should be tender, juicy, and glistening with that heavenly sauce.
  8. Garnish and Serve: Once out of the oven, let it rest for a couple of minutes. Garnish with fresh parsley for that pop of color and freshness before serving.

Tips for Perfect Salmon

Here are some of my favorite tips to ensure your salmon turns out perfectly every time:

  • Choose Quality Salmon: Fresh, high-quality salmon makes all the difference. Look for vibrant color and a fresh smell.
  • Don’t Overcook: Salmon is best when it’s just cooked through. Keep an eye on the time to avoid dryness.
  • Let It Rest: Allow the salmon to rest for a few minutes after baking. This helps retain moisture.

Variations to Try

While this recipe is fantastic as-is, don’t hesitate to put your own spin on it! Here are a few variations you might enjoy:

  • Spicy Kick: Add a pinch of red pepper flakes or a drizzle of sriracha to the honey garlic mixture for a spicy twist.
  • Herb Infusion: Experiment with different herbs like dill or thyme for an aromatic touch.
  • Citrus Zest: Grate some lemon or orange zest into the sauce for an extra layer of flavor.

Substitutions

Got dietary restrictions or just out of something? Here are some easy substitutions:

  • Butter: Swap out for olive oil or coconut oil for a dairy-free version.
  • Honey: Maple syrup can be a great alternative if you prefer a vegan option.
  • Soy Sauce: Use tamari for a gluten-free version or coconut aminos for a lighter alternative.

Essential Equipment

To make this dish, you’ll need some basic kitchen tools:

  • Baking dish
  • Small saucepan
  • Measuring cups and spoons
  • Spatula or whisk

Storage & Freezing

Leftovers? No problem! Here’s how to store your delicious creation:

  • Refrigerate: Store any leftovers in an airtight container in the fridge for up to 3 days.
  • Freeze: If you want to save some for later, wrap individual salmon fillets tightly in plastic wrap and then place them in a freezer-safe bag. They can last up to 3 months in the freezer.

FAQs

Let’s tackle some common questions about this recipe:

  • Can I use frozen salmon? Yes! Just make sure to thaw it completely before cooking.
  • What should I serve with this dish? It pairs wonderfully with roasted vegetables, rice, or a fresh salad.
  • Can I double the recipe? Absolutely! Just ensure your baking dish is large enough and adjust the cooking time if needed.

Troubleshooting

If things don’t go as planned, don’t worry! Here are some troubleshooting tips:

  • If the salmon is drying out, try reducing the cooking time or covering the dish with foil for part of the baking process.
  • If the glaze isn’t thickening, let it simmer a bit longer on the stove to reduce.

Conclusion

There you have it! A simple yet stunning Irresistible Honey Garlic Butter Baked Salmon Recipe that’s sure to impress. Whether you’re serving it for a special occasion or a cozy weeknight dinner, this dish is packed with flavor and love. Remember, cooking is all about making memories, so gather your loved ones around the table and savor the moment. Happy cooking, and may your kitchen always be a place of joy and deliciousness!

Irresistible Honey Garlic Butter Baked Salmon Recipe

Prep Time 10 minutes
Cook Time 20 minutes
Total Time 30 minutes
Servings 4 servings
Calories 350
This flavorful baked salmon is coated in a sweet and savory honey garlic butter sauce, making it a perfect quick and elegant dinner option.

Ingredients

Salmon

  • 4 fillets salmon fillets
  • 0.25 cup honey
  • 0.25 cup unsalted butter
  • 4 cloves garlic, minced
  • 2 tablespoons soy sauce
  • 1 tablespoon lemon juice
  • to taste salt and pepper
  • for garnish fresh parsley

Instructions 

  • Preheat oven to 375°F (190°C).
  • Melt butter and sauté garlic for 1 minute.
  • Stir in honey, soy sauce, and lemon juice; simmer briefly.
  • Season salmon with salt and pepper, place in baking dish.
  • Pour sauce over salmon and bake 15-20 minutes.
  • Garnish with parsley before serving.

Notes

For extra flavor, marinate the salmon in the sauce for 30 minutes before baking.
Calories: 350kcal
Cost: $15
Course: Main Course
Cuisine: American
Keyword: Salmon

Loved this recipe? Save it to your favorite Pinterest board so you can easily find it later! It’s the perfect way to keep all your sweet ideas in one place. ✨

Delicious salmon fillet glistening with honey garlic sauce, set against a cozy, blurred background.

Why This Dish Will Become Your New Favorite

Picture this: it’s a cozy weeknight, the sun is setting, and the kitchen is filled with the irresistible aroma of garlic sizzling in butter. You’ve just finished a long day, and all you want is something comforting yet simple to whip up for dinner. Enter Creamy Garlic Chicken Penne—a dish that not only satisfies hunger but also warms the soul.

One of the best things about this recipe is its versatility. It’s perfect for a casual family dinner or a more intimate gathering with friends. The creamy sauce, tender chicken, and al dente penne create a delightful harmony that keeps everyone coming back for seconds. Plus, it can be made in just about 30 minutes, making it a lifesaver on those busy nights!

Essential Ingredients for Creamy Garlic Chicken Penne

To embark on this culinary adventure, you’ll need a handful of simple ingredients. Here’s what you’ll be gathering:

  • 8 oz. dry penne pasta
  • 1 tbsp. olive oil
  • 1 lb. skinless boneless chicken breasts or thighs, cubed
  • 1 tsp. Italian seasoning
  • 1/2 tsp. kosher salt
  • 1/2 tsp. black pepper
  • 1/2 tsp. paprika
  • 1/4 tsp. garlic powder
  • 2 tbsps. butter
  • 6 cloves garlic, minced
  • 1 cup low-sodium chicken broth
  • 1 cup heavy cream, room temperature
  • 1/2 cup shredded parmesan cheese
  • 2 tbsps. chopped parsley

Health Benefits and Ease of Preparation

Bowl of Creamy Garlic Chicken Penne showcasing creamy sauce and chicken pieces.

This dish is not only delicious but also packs a nutritious punch. The chicken provides lean protein, while garlic is known for its myriad health benefits, including boosting the immune system. The creamy sauce, while indulgent, can be adjusted to suit your dietary preferences and health goals.

Step-by-Step Guide to Perfectly Creamy Garlic Chicken Penne

Let’s dive into the cooking process! Here’s how to master this flavorful dish:

  1. Start by cooking the penne pasta. Bring a large pot of salted water to a boil, then add the pasta and cook according to package directions. Drain and set aside.
  2. In a large skillet, heat the olive oil over medium heat for about 2-3 minutes, until it’s shimmering.
  3. Add the cubed chicken to the skillet. Season it evenly with Italian seasoning, kosher salt, black pepper, paprika, and garlic powder. Cook for about 7 minutes, or until the chicken is golden and cooked through.
  4. Next, add the butter and minced garlic to the skillet, sautéing for about 1 minute until the garlic becomes fragrant.
  5. Pour in the chicken broth, scraping the bottom of the pan to loosen any browned bits. Bring the mixture to a gentle simmer.
  6. Now, add the cooked penne pasta to the skillet, tossing to coat it with the broth and chicken.
  7. Stir in the heavy cream and shredded parmesan cheese, tossing until the sauce thickens and evenly coats all the ingredients.
  8. Finally, sprinkle with chopped parsley before serving!

Tips for Perfect Results

  • Always use fresh garlic for the best flavor.
  • Cook the pasta al dente to maintain a nice texture in the dish.
  • Don’t rush the cooking process; allowing the garlic to sauté properly enhances the dish’s flavor.
  • Taste as you go—this is key to achieving a balanced flavor profile!

Dietary Substitutions to Customize Your Dish

Not everyone has the same dietary preferences, and that’s okay! Here are some great substitutions to consider:

  • For a vegan version, swap out the chicken for tofu or chickpeas and use coconut cream in place of heavy cream.
  • If you’re looking for a gluten-free option, choose gluten-free penne pasta.
  • For a lighter dish, consider using half-and-half instead of heavy cream.

Mastering Creamy Garlic Chicken Penne: Advanced Tips and Variations

If you want to elevate your dish, consider these advanced techniques:

  • Deglaze the skillet with a splash of white wine before adding the cream for added depth of flavor.
  • Experiment with fresh herbs like basil or thyme for a fresh twist.
  • Add spinach or sun-dried tomatoes for extra nutrients and flavor.

How to Store Creamy Garlic Chicken Penne: Best Practices

Leftovers are a great way to enjoy this dish again! Here’s how to store it:

  • Place any leftovers in an airtight container in the refrigerator for up to 3 days.
  • If you want to freeze it, undercook the pasta slightly so it doesn’t become mushy when reheated.
  • To reheat, gently warm on the stove with a splash of cream to restore the sauce’s creaminess.

FAQs: Frequently Asked Questions

Can I add vegetables to creamy garlic chicken penne without making the sauce watery?

Absolutely! Choose low-moisture vegetables like sautéed mushrooms or bell peppers. Just add them towards the end to keep everything from getting soggy.

What’s the best type of Parmesan cheese to use in creamy garlic chicken penne?

Freshly grated Parmesan from a wedge is ideal, as it melts beautifully and adds a sharper flavor.

Can I substitute the heavy cream in the recipe with a lighter alternative?

Yes, but keep in mind that using half-and-half or whole milk will create a thinner sauce. Cook gently to avoid curdling.

How can I fix the sauce if it doesn’t thicken properly?

If your sauce is too thin, simmer it uncovered over medium-low heat to reduce it, or add a bit more cheese to help it thicken.

Is it possible to prepare creamy garlic chicken penne in advance?

Yes! You can prep the ingredients ahead of time and cook just before serving to keep the flavors fresh.

Conclusion

In conclusion, Creamy Garlic Chicken Penne is more than just a meal; it’s an experience that brings comfort and joy to your dinner table. With its rich flavors and simple preparation, this dish is perfect for busy weeknights or special occasions when you want to impress without the stress. So gather your ingredients, roll up your sleeves, and let’s create a dish that’s not only delicious but also filled with love and warmth. Your family and friends will be so glad you did, and who knows, this might just become their new favorite too! Happy cooking!

Creamy Garlic Chicken Penne

Prep Time 10 minutes
Cook Time 20 minutes
Total Time 30 minutes
Servings 4 servings
Calories 650
A rich and creamy pasta dish featuring tender chicken, garlic, and parmesan, perfect for a satisfying dinner.

Ingredients

Pasta

  • 8 oz dry penne pasta

Oil

  • 1 tbsp olive oil

Chicken

  • 1 lb skinless boneless chicken breasts or thighs, cubed

Spices and seasonings

  • 1 tsp italian seasoning
  • 0.5 tsp kosher salt
  • 0.5 tsp black pepper
  • 0.5 tsp paprika
  • 0.25 tsp garlic powder

Dairy and broth

  • 2 tbsp butter
  • 6 cloves garlic, minced
  • 1 cup low-sodium chicken broth
  • 1 cup heavy cream (room temperature)
  • 0.5 cup shredded parmesan cheese
  • 2 tbsp chopped parsley

Instructions 

  • Cook pasta until al dente, drain and set aside.
  • Season chicken with Italian seasoning, salt, pepper, paprika, and garlic powder.
  • Sauté chicken in olive oil until cooked through, then add garlic and butter; cook until fragrant.
  • Pour in chicken broth and heavy cream, simmer until sauce thickens.
  • Add cooked pasta and parmesan cheese, toss to coat. Garnish with parsley before serving.

Notes

For a lighter version, use half-and-half instead of heavy cream.
Calories: 650kcal
Cost: $15
Course: Main Course
Cuisine: Italian
Keyword: Chicken, creamy, pasta

Loved this recipe? Save it to your favorite Pinterest board so you can easily find it later! It’s the perfect way to keep all your sweet ideas in one place. ✨

Creamy Garlic Chicken Penne with garlic and parsley, beautifully presented.

Why You’ll Love This Recipe

There’s something undeniably magical about the combination of honey and garlic. When these two ingredients come together in a hot skillet, it’s like a symphony of flavors that fills the air and beckons everyone to the table. Imagine biting into a perfectly cooked piece of salmon, the sweet, sticky glaze clinging to the tender fish, while the aroma of roasted garlic dances around you. Trust me, this is a dish that will leave your taste buds singing!

This Honey Garlic Glazed Salmon is not just about flavor; it’s about ease. In less than 20 minutes, you can whip up a meal that rivals your favorite restaurant dish—perfect for a busy weeknight or a special occasion. Plus, with just a handful of ingredients, you likely have everything you need in your pantry already. So, let’s dive into making this dish that’s sure to become a staple in your home kitchen!

Ingredients You’ll Need

Before we get rolling, let’s gather the essentials. Here’s what you’ll need for this easy recipe:

  • 4 salmon fillets
  • 1/4 cup honey
  • 3 cloves garlic, minced
  • 2 tablespoons soy sauce
  • 1 tablespoon olive oil
  • Salt and pepper to taste
  • 2 green onions, chopped (for garnish)
  • Sesame seeds (optional, for garnish)

How to Make Honey Garlic Glazed Salmon

Delicious Honey Garlic Salmon fillets drizzled with sauce, garnished with green onions.

This recipe is as straightforward as it gets. Follow these simple steps for a delightful meal:

  1. In a small bowl, whisk together the honey, minced garlic, and soy sauce. This mixture is what will give your salmon its signature glaze.
  2. Season the salmon fillets with salt and pepper on both sides for that extra flavor boost.
  3. Heat the olive oil in a large skillet over medium-high heat. You want that oil hot enough to sizzle when the salmon hits the pan!
  4. Add the salmon fillets to the skillet, skin-side down, and cook for about 4-5 minutes until golden brown. This step is crucial for achieving that perfect sear.
  5. Carefully flip the salmon fillets and pour the honey garlic mixture over them. This is when the magic begins!
  6. Cook for an additional 4-5 minutes, basting the salmon with the sauce until it’s cooked through and beautifully caramelized.
  7. Once cooked, remove the skillet from heat and let the salmon rest for a minute. This allows the juices to redistribute for a more tender bite.
  8. Garnish with chopped green onions and sesame seeds if desired, then serve immediately with your choice of sides.

Tips for Success

Cooking is all about confidence and a few handy tips to ensure your Honey Garlic Glazed Salmon turns out perfectly every time:

  • Watch the temperature: Medium-high heat is key. Too high and your honey will burn; too low and it won’t caramelize properly.
  • Baste generously: Don’t skimp on basting the salmon with the glaze. This keeps it moist and flavorful.
  • Check for doneness: Salmon is best when it’s slightly opaque in the center. If you have a meat thermometer, aim for an internal temperature of about 125°F for perfectly cooked salmon.

Variations to Try

If you’re feeling adventurous, consider these fun variations:

  • Add some heat: A pinch of red pepper flakes in your glaze can give it a nice kick.
  • Use different proteins: This glaze works beautifully on shrimp or chicken, too!
  • Experiment with herbs: Fresh cilantro or parsley can add an extra layer of flavor when garnishing.

Substitutions for Every Diet

Whether you’re accommodating dietary restrictions or just want to switch things up, here are some easy substitutions:

  • Honey: If you’re looking for a vegan option, maple syrup is a great alternative.
  • Soy sauce: Use tamari for a gluten-free option or coconut aminos for a soy-free alternative.
  • Salmon: Try this glaze on other fish varieties like trout or even tofu for a plant-based meal.

Essential Equipment

Before you get started, make sure you have the right tools:

  • A large skillet: This is key for searing your salmon and allowing the glaze to bubble.
  • A whisk: For mixing the glaze ingredients smoothly.
  • A spatula: To flip your salmon without breaking it apart.

Storage and Freezing Tips

Leftovers? No problem! Here’s how to store your Honey Garlic Glazed Salmon:

  • Place the salmon in an airtight container and refrigerate for up to three days.
  • To reheat, warm it gently on the stovetop over low heat with a splash of water to refresh the glaze. Avoid the microwave, as it may dry out the salmon.
  • If you want to freeze it, wrap the salmon tightly and store in a freezer-safe container for up to two months. Thaw in the fridge before reheating.

FAQs

Here are some common questions I get about making this delightful dish:

  • How do you make honey garlic sauce for salmon?
    Simply whisk together honey, soy sauce, and minced garlic, then simmer it in a pan until it thickens slightly.
  • Is honey garlic sauce good on salmon?
    Absolutely! The sweet and savory combination pairs perfectly with the rich flavor of salmon.
  • What is the secret to a perfect glaze?
    Balancing the heat is crucial. You want it to bubble gently without burning to create that sticky texture.
  • What sides go well with glazed salmon?
    Light and fresh sides like steamed broccoli, garlic butter noodles, or a crisp salad complement the richness of the salmon beautifully.

Troubleshooting Common Problems

Even the best cooks run into hiccups. Here’s how to fix common issues:

  • The glaze is too thin: If your sauce looks watery, simmer it for a few more minutes while stirring.
  • The salmon feels dry: This usually means it cooked too long. Remove it from heat at the right temperature to avoid overcooking.
  • The glaze burned: Lower the heat and add a splash of water or lemon juice to loosen it up if that happens.

Conclusion

Cooking should be a joyful experience, and Honey Garlic Glazed Salmon encapsulates just that. With its perfect blend of sweet and savory flavors, this dish not only satisfies your palate but also fills your kitchen with a delightful aroma that invites everyone to gather around. Whether you’re cooking for yourself, your family, or friends, this recipe is bound to impress and become a cherished favorite. So, pull up a chair, grab your spatula, and let’s make some magic happen in the kitchen!

Honey Garlic Glazed Salmon – Easy 20-Minute Dinner with Sweet & Savory Flavor

Prep Time 5 minutes
Cook Time 15 minutes
Total Time 20 minutes
Servings 4 servings
Calories 350
Enjoy a quick and flavorful salmon dinner glazed with sweet honey and savory garlic, perfect for a weeknight meal.

Ingredients

Main

  • 4 fillets salmon fillets
  • 1/4 cup honey
  • 3 cloves garlic, minced
  • 2 tablespoons soy sauce
  • 1 tablespoon olive oil
  • to taste salt and pepper
  • 2 green onions chopped green onions (for garnish)
  • optional sesame seeds (for garnish)

Instructions 

  • Whisk honey, minced garlic, and soy sauce in a small bowl.
  • Season salmon with salt and pepper.
  • Heat olive oil in a skillet over medium-high heat and cook salmon skin-side down for 4-5 minutes.
  • Flip salmon, pour honey garlic mixture over, and cook for another 4-5 minutes, basting as needed.
  • Remove from heat, rest for a minute, then garnish with green onions and sesame seeds.

Notes

Serve with rice or vegetables for a complete meal.
Calories: 350kcal
Cost: $15
Course: Main Course
Cuisine: American
Keyword: Salmon

Loved this recipe? Save it to your favorite Pinterest board so you can easily find it later! It’s the perfect way to keep all your sweet ideas in one place. ✨

Appetizing salmon fillets glazed with honey and garlic, highlighted by soft natural light.

Why This Recipe is a Must-Try

When the weather turns chilly or you need a little pick-me-up, there’s nothing quite like a warm bowl of soup to soothe the soul. And if you’re like me, combining two of your favorite comfort foods into one delightful dish is an absolute win! Enter the Creamy Chicken Macaroni Cheese Soup—a dish that takes the beloved flavors of macaroni and cheese and transforms them into a heartwarming soup. This recipe is not just about filling your belly; it’s about creating a moment of joy at the dinner table with family and friends.

Ingredients that Make Magic Happen

First things first, let’s gather our ingredients. Each one plays a vital role in crafting this cozy masterpiece:

  • 2 cups cooked chicken, shredded: Use leftover rotisserie chicken or any cooked chicken you have on hand to save time.
  • 1 cup elbow macaroni: The classic choice that holds onto that creamy goodness.
  • 4 cups chicken broth: A flavorful base that packs a punch.
  • 1 cup heavy cream: For that luscious, velvety texture.
  • 2 cups shredded cheddar cheese: The star of the show, giving that rich, cheesy flavor.
  • 1 cup diced carrots: Adds a touch of sweetness and color.
  • 1 cup diced celery: For crunch and aromatic flavor.
  • 1 onion, chopped: The foundation of flavor.
  • 2 cloves garlic, minced: Because garlic makes everything better.
  • 2 tablespoons butter: For sautéing the vegetables.
  • 1 teaspoon dried thyme: A fragrant herb that brings warmth.
  • Salt and pepper to taste: Essential for balancing flavors.
  • Fresh parsley for garnish: A pop of color and freshness.

Preparing Your Kitchen for Soup Success

Warm, inviting soup made with chicken, macaroni, and cheddar cheese, displayed on a wooden table.

Before we dive in, let’s set the stage for our cooking adventure! Here are some tips to ensure everything goes smoothly:

  • Gather Your Ingredients: Having everything prepped and ready to go makes the cooking process enjoyable and stress-free.
  • Use a Large Pot: A big pot ensures you have enough space for everything to simmer together nicely.
  • Chop Uniformly: Try to dice your vegetables into similarly sized pieces for even cooking.

Cooking Steps to Cozy Bliss

Now, let’s bring this soup to life with some simple steps:

  1. In a large pot, melt the butter over medium heat. The aroma of melting butter is like a warm hug in your kitchen!
  2. Add the chopped onion, diced carrots, diced celery, and minced garlic. Sauté until the vegetables are tender, about 5-7 minutes. Stir occasionally and enjoy the fragrant medley!
  3. Next, add the shredded chicken to the pot and cook for another 2-3 minutes, allowing the flavors to meld together.
  4. Pour in the chicken broth and bring the mixture to a boil. This is where the magic begins!
  5. Once boiling, add the elbow macaroni and dried thyme. Reduce the heat and let it simmer until the macaroni is cooked, about 8-10 minutes. Stir occasionally to prevent sticking.
  6. Stir in the heavy cream and shredded cheddar cheese. Continue to stir until the cheese is melted and the soup is creamy and luscious.
  7. Finally, season with salt and pepper to taste, adjusting according to your preference.
  8. Serve hot, garnished with fresh parsley for a beautiful finishing touch.

Tips for Perfecting Your Soup

As you embark on making this scrumptious soup, here are some pro tips to elevate it even further:

  • Cheese Choices: While cheddar is fantastic, don’t hesitate to experiment with different cheese blends! Adding a bit of smoked gouda or pepper jack can introduce new flavors that are absolutely delightful.
  • Veggie Up! Want to sneak in more nutrition? Toss in some frozen peas or corn during the last few minutes of cooking for extra sweetness and color.
  • Season to Taste: Remember, tasting is key! Adjust the seasoning as needed, adding a dash of cayenne pepper for a little heat, if you’re feeling adventurous.

Variations to Explore

This soup is incredibly versatile, so feel free to make it your own! Here are some variations to try:

  • Vegetarian Delight: Swap the chicken for white beans or chickpeas and use vegetable broth to keep it hearty and satisfying.
  • Protein Packed: For a protein boost, consider adding some cooked ground turkey or Italian sausage instead of chicken.
  • Seasonal Twist: In the fall, add roasted butternut squash for a hint of sweetness; in spring, fresh asparagus can brighten the dish.

Storage and Freezing Tips

Made too much soup? No problem! Here’s how to store it properly:

  • Refrigerate: Allow the soup to cool completely before transferring it to an airtight container. It will last in the fridge for about 3-4 days.
  • Freeze: If you want to save some for later, ladle the cooled soup into freezer-safe containers, leaving some space for expansion. It can be frozen for up to 3 months!
  • Reheat: To reheat, simply thaw overnight in the fridge (if frozen) and warm on the stovetop over low heat, adding a splash of broth or cream to loosen it up.

FAQs About Creamy Chicken Macaroni Cheese Soup

Here are some common questions and answers that might help you as you cook:

  • Can I use a different type of pasta? Absolutely! Feel free to swap out elbow macaroni for your favorite pasta shape, like shells or fusilli.
  • Is there a way to make this recipe dairy-free? You can use coconut milk or almond milk in place of heavy cream and nutritional yeast instead of cheese for a dairy-free version.
  • What can I serve with this soup? A warm, crusty baguette or homemade garlic bread pairs perfectly with this creamy delight. A light salad on the side can also balance the richness nicely.

Troubleshooting Common Issues

If you run into any hiccups while making your soup, here are some solutions:

  • Soup Too Thick? If your soup turns out thicker than you’d like, simply stir in some additional chicken broth or water until you reach your desired consistency.
  • Cheese Not Melting? Make sure to stir the cheese in over low heat to allow it to melt smoothly. If you’re using pre-shredded cheese, it may contain anti-caking agents that can prevent smooth melting.

Conclusion: Embrace the Comfort

As you can see, my Creamy Chicken Macaroni Cheese Soup is more than just a recipe; it’s an experience. From the first comforting spoonful to the last drop, it’s designed to fill your heart and your belly with warmth. This dish is perfect for those busy weeknights or when you want to treat yourself to something special, and I can promise you that it will become a staple in your kitchen rotation.

So gather your ingredients, don your favorite apron, and let’s create something magical together! I can’t wait to hear your stories and variations of this recipe, so please share your cooking adventures in the comments below. Happy cooking!

Make Cozy Creamy Chicken Macaroni Cheese Soup

Prep Time 10 minutes
Cook Time 20 minutes
Total Time 30 minutes
Servings 4 servings
Calories 550
A comforting and creamy chicken macaroni soup perfect for chilly days, combining tender chicken, pasta, and cheese in a flavorful broth.

Ingredients

Main

  • 2 cups cooked chicken, shredded
  • 1 cup elbow macaroni
  • 4 cups chicken broth
  • 1 cup heavy cream
  • 2 cups shredded cheddar cheese
  • 1 cup diced carrots
  • 1 cup diced celery
  • 1 unit onion, chopped
  • 2 cloves garlic, minced
  • 2 tablespoons butter
  • 1 teaspoon dried thyme
  • to taste salt and pepper
  • for garnish fresh parsley

Instructions 

  • Melt butter in a large pot, sauté onion, carrots, celery, and garlic until tender.
  • Add shredded chicken and cook for 2-3 minutes.
  • Pour in chicken broth, bring to boil, add macaroni and thyme, then simmer 8-10 minutes.
  • Stir in heavy cream and cheddar cheese until melted and creamy.
  • Season with salt and pepper, serve garnished with parsley.

Notes

For extra flavor, add a pinch of paprika or hot sauce.
Calories: 550kcal
Cost: $15
Course: Soup
Cuisine: American
Keyword: cheese, Chicken, comfort food

Loved this recipe? Save it to your favorite Pinterest board so you can easily find it later! It’s the perfect way to keep all your sweet ideas in one place. ✨

A hearty bowl of mac and cheese soup showing noodles, chicken, and vegetables, highlighted by soft natural light.

Discover the Cozy Magic of Chicken Alfredo Stuffed Potatoes

Welcome to my kitchen, my friend! Today, we’re diving into a recipe that’s as comforting as a warm hug on a chilly Seattle evening—**Chicken Alfredo Stuffed Potatoes**. If you’re looking for a dish that brings together creamy, cheesy goodness with the heartiness of baked potatoes, you’re in for a treat. This recipe is perfect for family dinners, special occasions, or even a cozy night in when you just want to indulge a little. So, let’s roll up our sleeves and get cooking!

Why You’ll Love This Recipe

Here are five reasons why this will become your new go-to dish:

  • Comfort food at its best: Each bite of these stuffed potatoes is a delightful blend of creamy Alfredo sauce and tender chicken, offering a taste of home that warms the soul.
  • Versatile and customizable: You can easily switch up the ingredients based on what you have on hand. Add some veggies or swap the chicken for turkey; the possibilities are endless!
  • Make-ahead friendly: Prepare the potatoes and stuffing ahead of time, so you can pop them in the oven when you’re ready to eat.
  • Perfect for leftovers: These stuffed potatoes heat up beautifully and can be a quick lunch or dinner option, ensuring nothing goes to waste.
  • Family favorite: Kids and adults alike will be asking for seconds—this dish is sure to impress!

Ingredients You’ll Need

Let’s gather our ingredients! Here’s what you’ll need to create these delicious Chicken Alfredo Stuffed Potatoes:

  • 4 large russet potatoes: Scrubbed clean for a crispy skin that holds all the goodness.
  • 1.5 lbs. boneless, skinless chicken breasts or tenderloins: Cooked and shredded for easy mixing.
  • 2 tablespoons melted butter: Adds richness to the stuffing.
  • 1 tablespoon Italian seasoning: A must for that authentic flavor.
  • 1 teaspoon pepper: To season the filling just right.
  • 2 tablespoons parsley (chopped): For a fresh touch!
  • Olive oil: For rubbing on the potatoes.
  • Salt: To taste, enhancing all the flavors.
  • 4 tablespoons butter: For the Alfredo sauce.
  • 6-8 garlic cloves (minced): Because garlic makes everything better!
  • 2 cups heavy cream: The key to a rich Alfredo sauce.
  • 1.5 cups parmesan cheese (shredded or grated): Essential for that cheesy goodness.
  • 1 tablespoon blackened seasoning*: Optional, but it gives a nice kick!
  • Salt and pepper to taste: Because flavor matters!

Preparation Steps

Side view of a filled russet potato topped with chicken and Alfredo sauce.

Ready to make your stuffed potatoes? Follow these simple steps:

  1. Preheat your oven to 425°F and line a baking pan with parchment paper.
  2. Prepare the potatoes: Rub each potato with olive oil and sprinkle salt on all sides. Do not poke holes; we want them to steam inside!
  3. Bake the potatoes for about 50-60 minutes or until tender when pierced with a fork.
  4. While the potatoes are baking, cook the chicken; you can do this in a skillet or even bake it in the oven with a bit of seasoning.
  5. Make the Alfredo sauce: In a saucepan, melt 4 tablespoons of butter over medium heat and sauté the minced garlic until fragrant. Gradually whisk in the heavy cream, then stir in the parmesan cheese until melted and creamy. Season with blackened seasoning, salt, and pepper.
  6. Combine the shredded chicken with the Alfredo sauce, Italian seasoning, and chopped parsley.
  7. Once the potatoes are done, carefully slice them in half and scoop out some of the insides, creating a pocket for the filling.
  8. Fill each potato half with the chicken Alfredo mixture, mounding it on top.
  9. Return to the oven for an additional 10-15 minutes until heated through and slightly golden on top.

Pro Tips for Perfection

Here are a few expert insights to elevate your stuffed potatoes:

  • Choose the right potato: Russets are ideal for stuffing due to their size and fluffy texture, but you can experiment with other varieties if you prefer.
  • Don’t rush the baking: Ensure your potatoes are fully cooked for the best texture; they should feel soft when squeezed lightly.
  • Experiment with cheeses: Try adding a blend of mozzarella or cheddar for a different flavor profile in your Alfredo sauce.
  • Make it spicy: If you love heat, add diced jalapeños or a splash of hot sauce to the filling.
  • Fresh herbs are key: Don’t skip the parsley! Fresh herbs brighten the dish and add a pop of color.
  • Consider a crispy topping: Sprinkle breadcrumbs or additional cheese on top before the final bake for a crunchy texture.
  • Use leftover chicken: This is a great way to use up rotisserie chicken or any leftover cooked chicken you have on hand.
  • Adjust seasoning: Always taste and adjust seasoning before filling the potatoes to ensure maximum flavor.

Common Mistakes and Troubleshooting

Let’s avoid some common pitfalls:

  • Overbaking the potatoes: Keep an eye on them—overcooked potatoes can become dry and crumbly.
  • Too much filling: While we love a hearty potato, overfilling can lead to a messy situation. Aim for a generous but manageable mound.
  • Not enough seasoning: Don’t forget to taste your filling! Seasoning is crucial to bring out the flavors.
  • Using cold ingredients: Make sure your chicken and sauce are warm before stuffing to ensure everything stays delicious.

Variations to Try

If you’re feeling adventurous, here are some fun twists on the classic recipe:

  • Buffalo Chicken Alfredo Stuffed Potatoes: Add buffalo sauce to the chicken mixture for a spicy kick!
  • Vegetarian Alfredo Stuffed Potatoes: Swap chicken for sautéed mushrooms, spinach, and cherry tomatoes for a meat-free option.
  • BBQ Chicken Stuffed Potatoes: Replace the Alfredo with BBQ sauce and add some shredded cheddar for a smoky flavor.
  • Tex-Mex Style: Mix in black beans, corn, and taco seasoning for a fun twist, and top with avocado.

Storage and Make-Ahead Instructions

Want to prep ahead? Here’s how:

  • Make ahead: You can bake the potatoes and prepare the filling a day in advance. Just store them separately in the fridge and assemble right before baking.
  • Storage: Store any leftovers in an airtight container in the refrigerator for up to 3 days. Reheat in the oven to retain texture.
  • Freezing: You can freeze the prepared stuffed potatoes before baking. Just wrap them tightly in foil and freeze for up to 3 months. Bake from frozen, adding a little extra time.

Frequently Asked Questions

Got questions? Here are some common queries about this recipe:

  • Can I prepare the stuffed potatoes ahead of time? Yes, you can bake the potatoes and prepare the filling in advance. Just assemble and bake when ready.
  • What can I use if I don’t have Alfredo sauce? You can use a homemade white sauce or a store-bought cheese sauce as a substitute.
  • How do I ensure the potato skins remain crispy? Avoid wrapping the potatoes in foil while baking; this will keep them crispy.
  • Can I add vegetables to the filling? Absolutely! Sautéed spinach, mushrooms, or bell peppers would be delicious additions.
  • What’s the best way to reheat leftovers? Reheat in the oven at 350°F for about 20 minutes to keep them from drying out.
  • Can I use sweet potatoes instead? Yes, sweet potatoes would provide a delightful twist with their natural sweetness.
  • How do I make this recipe gluten-free? Make sure to use gluten-free Alfredo sauce and check your seasonings.
  • What’s the best way to serve these potatoes? Top with extra parsley, a sprinkle of cheese, or even a dollop of sour cream for a finishing touch!

Nutritional Tips and Dietary Adaptations

For those watching their diet, here are some tips:

  • Lower-calorie option: Use low-fat cream and cheese to reduce calories while still enjoying that creamy flavor.
  • Vegetarian adaptation: Use plant-based chicken alternatives and vegan cheese to make it vegan-friendly.
  • Protein boost: Add some cooked quinoa or legumes to the filling for extra protein.

Equipment Recommendations

Here’s what you’ll need:

  • Oven: For baking the potatoes to perfection.
  • Baking pan: A simple baking sheet lined with parchment paper works wonders.
  • Mixing bowl: For combining your chicken and Alfredo sauce.
  • Whisk: Essential for making that creamy Alfredo sauce without lumps.

Serving Suggestions

How to make your meal even better? Pair these stuffed potatoes with:

  • Fresh salad: A light side salad with vinaigrette balances the richness of the potatoes.
  • Garlic bread: Because, let’s be honest, is there ever a wrong time for garlic bread?
  • Roasted vegetables: Bright, colorful veggies add nutrition and flavor to your meal.

Wrap-Up: Your New Favorite Comfort Food Awaits!

And there you have it—your guide to creating the ultimate **Chicken Alfredo Stuffed Potatoes**. I hope this recipe becomes a staple in your kitchen, just like it has in mine. Remember, cooking is all about having fun and making it your own! Don’t hesitate to get creative and adapt this recipe to suit your taste. I can’t wait for you to try it, and when you do, let me know how it goes. Happy cooking, and here’s to many cozy meals ahead!

Chicken Alfredo Stuffed Potato

Prep Time 10 minutes
Cook Time 1 hour
Total Time 1 hour 10 minutes
Servings 4 servings
Calories 650
A hearty and creamy dish combining baked potatoes with a flavorful chicken Alfredo filling, perfect for a comforting meal.

Ingredients

Potatoes

  • 4 large russet potatoes (scrubbed clean)

Chicken

  • 1.5 lbs boneless (skinless chicken breasts or tenderloins)

Sauces and seasonings

  • 2 tablespoons melted butter
  • 1 tablespoon Italian seasoning
  • 1 tsp pepper
  • 2 tablespoons parsley (chopped)

Olive oil

  • Olive oil

Salt

  • Salt

Butter

  • 4 tablespoons butter
  • 6-8 cloves garlic (minced)

Heavy cream

  • 2 cups heavy cream

Parmesan cheese

  • 1.5 cups parmesan cheese (shredded or grated)

Blackened seasoning

  • 1 tablespoon blackened seasoning (store-bought or homemade)

Salt and pepper

  • Salt and pepper to taste

Instructions 

  • Preheat oven to 425°F (220°C) and line a baking pan with parchment paper.
  • Rub potatoes with olive oil and sprinkle with salt. Bake for 50-60 minutes until tender.

Notes

For best results, pierce the potatoes before baking to release steam, and adjust seasoning to taste.
Calories: 650kcal
Cost: $15
Course: Main Course
Cuisine: American
Keyword: Alfredo, Chicken, potato

Why You’ll Love This Recipe

There’s something incredibly magical about a meal that comes together in just 10 minutes, isn’t there? Life can get hectic, and sometimes you just need a dinner that feels special without consuming your evening. That’s where this Easy Honey Garlic Salmon shines! With its perfect balance of sweet and savory flavors, it’s a dish that’s not only quick to prepare, but also sure to impress your family or guests.

Whether you choose to use an air fryer or an oven, this recipe is versatile, delicious, and makes the perfect weeknight meal. The honey garlic glaze is simple yet packed with flavor, creating a sticky, caramelized exterior that pairs beautifully with the tender, flaky salmon. Plus, who doesn’t love a recipe that you can whip up with ingredients you likely already have on hand? Let’s dive into this culinary delight that promises to steal your heart and your taste buds!

Overview

This Honey Garlic Salmon recipe is incredibly straightforward and can be adjusted based on your preferences. Perfect for beginners, it requires minimal cooking skills and is a great way to get comfortable with cooking fish. The combination of honey and garlic brings out the natural flavors of the salmon, creating a dish that is both comforting and gourmet.

Ingredients Needed

Deliciously glazed salmon fillet drizzled with honey and soy sauce, with garlic visible.

To create this delightful dish, you’ll need the following ingredients:

  • 2 salmon fillets
  • 2 tablespoons honey
  • 2 tablespoons soy sauce
  • 2 cloves garlic, minced
  • 1 tablespoon olive oil
  • Salt and pepper to taste
  • Lemon wedges for serving
  • Chopped parsley for garnish (optional)

Essential Equipment

While you can make this recipe in either an air fryer or an oven, here’s a quick rundown of what you’ll need:

  • Small bowl for mixing the marinade
  • Air fryer or oven
  • Baking sheet lined with parchment paper (if using the oven)
  • Measuring spoons
  • Instant-read thermometer (optional but recommended for perfect doneness)

How to Prepare Your Honey Garlic Salmon

Now that we have our ingredients and equipment ready, let’s get started with the cooking process!

1. Marinating the Salmon

In a small bowl, whisk together the honey, soy sauce, minced garlic, olive oil, salt, and pepper. This simple marinade is the star of the show, bringing together sweet and savory notes that complement the salmon beautifully.

2. Preheat Your Cooking Device

For the air fryer, preheat it to 400°F (200°C). If you’re opting for the oven, set it to 425°F (220°C). Preheating ensures that your salmon cooks evenly and achieves that perfect caramelization.

3. Coating the Salmon

Place the salmon fillets in a shallow dish and pour that luscious honey garlic mixture over them. Make sure they are well coated! If you have time, letting them marinate for about 30 minutes in the fridge will enhance the flavors, but even a quick soak will do the trick.

4. Cooking Your Salmon

If you’re using the air fryer, carefully place the salmon fillets skin-side down in the basket and let them cook for 8-10 minutes. For the oven, arrange the fillets on a parchment-lined baking sheet and bake for 10-12 minutes. Keep an eye on them; they’re done when they flake easily with a fork.

Tips for Perfect Honey Garlic Salmon

Here are some handy tips to ensure your salmon turns out perfectly every time:

  • Choose Quality Salmon: Look for fillets that are firm and bright in color. Fresh, high-quality salmon makes a world of difference in flavor.
  • Don’t Overcrowd: Whether in the air fryer or oven, avoid overcrowding the cooking surface. This allows for even cooking and that coveted caramelized exterior.
  • Watch the Glaze: Honey can burn quickly, so keep an eye on your salmon, especially in the last few minutes. If it’s getting too dark, tent it with foil to protect the glaze.
  • Use an Instant-Read Thermometer: For perfectly cooked salmon, aim for an internal temperature of 145°F (63°C). This ensures your fish is safe to eat while remaining moist and flaky.

Ingredient Variations and Substitutions

Cooking is all about experimentation! Here are some variations and substitutions you can try:

  • Low-Sodium Soy Sauce: If you’re watching your sodium intake, opt for low-sodium soy sauce or coconut aminos for a healthier alternative.
  • Maple Syrup: For a different flavor profile, you can substitute honey with maple syrup, though it will alter the taste slightly.
  • Garlic Powder: In a pinch, you can use garlic powder instead of fresh garlic, but fresh offers a richer flavor.
  • Spice it Up: If you enjoy a little heat, add red pepper flakes to the marinade for a spicy kick!

Serving Suggestions

This Honey Garlic Salmon pairs beautifully with a variety of side dishes. Here are a few ideas:

  • Serve it over a bed of fluffy jasmine rice or quinoa for a wholesome meal.
  • Pair with steamed vegetables like broccoli or asparagus for a nutritious boost.
  • A crisp green salad drizzled with a light vinaigrette complements the rich flavors of the salmon perfectly.

Storage and Reheating

If you’re lucky enough to have leftovers, here’s how to store them properly:

  • Place any leftover salmon in an airtight container and refrigerate it within two hours of cooking. It will stay fresh for about 2-3 days.
  • To reheat, use the oven or air fryer to maintain its texture. For the oven, set it to 350°F (175°C) and warm for a few minutes. In the air fryer, use 300°F (150°C) until warmed through.

Frequently Asked Questions

Can I use frozen salmon?

Yes! Just be sure to thaw it completely in the fridge before marinating. This will ensure even cooking and optimal flavor.

How do I stop the honey from burning?

The key is to keep an eye on it as it cooks. If it seems to be browning too quickly, lower the temperature slightly or tent your salmon with foil.

What temperature should the salmon be?

Aim for an internal temperature of 145°F (63°C) for perfectly cooked salmon that flakes easily with a fork.

Can I cook this in the oven instead of the air fryer?

Absolutely! Just preheat your oven to 425°F (220°C) and follow the same marinating and cooking steps.

Conclusion

This Easy Honey Garlic Salmon recipe is not just about quick cooking; it’s about making delicious food accessible to everyone. With its simple ingredients and straightforward method, you can enjoy a restaurant-quality meal in the comfort of your home. So gather your ingredients, roll up your sleeves, and let’s make some magic happen in the kitchen! Don’t forget to share your experience and any personal twists you add to this delightful dish. Happy cooking!

Easy Honey Garlic Salmon: 10-Minute Air Fryer & Oven Recipe

Prep Time 5 minutes
Cook Time 10 minutes
Total Time 15 minutes
Servings 2 servings
Calories 350
Quick and flavorful salmon glazed with honey and garlic, perfect for a fast weeknight dinner.

Ingredients

Salmon

  • 2 pieces salmon fillets
  • 2 tablespoons honey
  • 2 tablespoons soy sauce
  • 2 cloves garlic, minced
  • 1 tablespoon olive oil
  • to taste salt and pepper
  • for serving lemon wedges
  • optional chopped parsley

Instructions 

  • Whisk honey, soy sauce, garlic, olive oil, salt, and pepper.
  • Preheat air fryer to 400°F (200°C) or oven to 425°F (220°C).
  • Coat salmon with the honey garlic mixture.
  • Cook in air fryer for 8-10 minutes or bake for 10-12 minutes.
  • Check doneness; serve with lemon wedges and garnish with parsley if desired.

Notes

Ensure not to overcook the salmon for best texture.
Calories: 350kcal
Cost: $15
Course: Main Course
Cuisine: American
Keyword: Salmon

Loved this recipe? Save it to your favorite Pinterest board so you can easily find it later! It’s the perfect way to keep all your sweet ideas in one place. ✨

Cooked salmon topped with garlic sauce, served with lemon slices and parsley on a rustic background.

Why You’ll Love This Washable Rug

Imagine walking into your home and feeling an immediate sense of warmth and comfort. That’s the magic a cozy rug can bring to your space. Not only does a well-chosen rug tie a room together, but it also adds layers of texture and personality. Our featured rug, the ラグカーペット 洗えるラグマット, is designed to do just that. It’s not just a pretty face; it’s practical, stylish, and oh-so-cozy—perfect for any room in your home.

Overview of the Cozy Haven Rug

This washable rug is crafted from high-quality polyester fibers, ensuring durability while providing that soft touch underfoot. One of the standout features is its non-slip backing, making it suitable for various surfaces without worrying about slips and falls. With a thick cushion material, this rug offers comfort that you can feel, transforming even the coldest floors into a cozy haven.

Key Ingredients for Comfort

High-quality shaggy rug displayed in soft light, focusing on its plush texture.

Let’s break down the essential components that make this rug a must-have:

  • 高品質ポリエステル繊維: This high-quality polyester fiber not only feels great but also stands up to everyday wear and tear.
  • 滑り止め加工: The non-slip backing ensures that the rug stays in place, providing safety while you walk or play on it.
  • 厚手のクッション素材: The thick cushion material offers comfort and warmth, making it perfect for lounging or playing.
  • 洗濯機対応: Easy care is a huge plus; just toss it in the washing machine when it needs a refresh.

Steps to Enjoy Your New Rug

Now that you’re familiar with the features, let’s discuss how to make the most of your new cozy rug:

  1. First, check the rug’s material to ensure it’s indeed machine washable. It’s essential to know how to care for your rug properly.
  2. Lay your rug flat on the floor, and if necessary, use the non-slip features to secure it in place. This step is especially important in high-traffic areas!
  3. After use, if you notice any stains or dirt, simply toss the rug into the washing machine. It’s that easy!
  4. Once washed, let the rug dry completely before placing it back on the floor to enjoy its cozy softness.

Tips for Styling Your Rug

Styling your space with a new rug is an art, and I’m here to help you with some tips!

  • Choose the Right Size: Make sure to measure your space before purchasing. A rug that’s too small can make a room feel disjointed, while one that’s too large can overwhelm the area.
  • Layering Rugs: Don’t be afraid to layer rugs for added texture and style. A small, patterned rug over a larger neutral one can create a stunning focal point.
  • Color Coordination: Consider the color palette of your room. Choose a rug that complements your existing decor for a cohesive look.

Variations and Customization

While our featured rug is a fantastic choice, you might be wondering about variations. Here are a few ideas:

  • Different Colors: Look for different color options to match your decor scheme.
  • Size Options: Check if your favorite rug comes in various sizes to fit your space perfectly.
  • Textured Rugs: Explore rugs with different textures to add depth and interest to your home.

Substitutions for Different Needs

If you’re considering alternative options, here are a few substitutions you might explore:

  • Natural Fiber Rugs: If you prefer eco-friendly options, consider rugs made from jute or sisal.
  • Outdoor Rugs: For patios or porches, opt for weather-resistant rugs to withstand the elements.

Essential Equipment for Care

Caring for your rug doesn’t require much—just a few essentials!

  • Vacuum Cleaner: Regular vacuuming keeps your rug looking fresh and free from dirt.
  • Washing Machine: Ensure it’s large enough to accommodate your rug for proper cleaning.
  • Soft Brush: For spot cleaning, a soft brush can help lift stains without damaging the fibers.

Storage and Freezing Tips

If you need to store your rug, follow these simple steps:

  • Clean the rug thoroughly before storage to avoid any odors or stains.
  • Roll the rug instead of folding it to prevent creases and damage.
  • Store it in a cool, dry place away from direct sunlight to maintain its color and integrity.

FAQs About Your Cozy Rug

Here are some frequently asked questions to help you get the most out of your new rug:

  • Can I use my rug on heated floors? Absolutely! The thick cushion material is hot carpet compatible.
  • How often should I wash my rug? Depending on use, washing it every 1-3 months should suffice, but it’s always best to check for any stains or dirt regularly.
  • Is the rug pet-friendly? Yes! Its durable materials are suitable for homes with pets.

Troubleshooting Common Issues

If you encounter any issues with your rug, here are some troubleshooting tips:

  • Rug Slipping: Ensure the non-slip backing is intact; if not, consider adding a rug pad underneath.
  • Stains: For tough stains, act quickly and use a mixture of mild detergent and warm water, dabbing gently with a cloth.

Conclusion: Your Home Deserves This Cozy Touch

In the grand tapestry of home decor, a cozy, washable rug is often the unsung hero. It enhances your space’s warmth, comfort, and style, all while being incredibly functional. The ラグカーペット 洗えるラグマット is your ticket to transforming any room into a welcoming haven. So go ahead, embrace the coziness, and let your home tell the story of warmth and comfort. Happy decorating!

ラグカーペット 洗えるラグマット ラグカーペット ベッドサイド シャギーかわいい 厚手カーペット ホットカーペット対応 シャギーラグ 洗える 滑り止

Prep Time 5 minutes
Total Time 5 minutes
Servings 1 piece
Calories 50
この洗えるシャギーラグは、快適さと安全性を兼ね備えたおしゃれなカーペットです。簡単にお手入れでき、暖房対応も安心です。

Ingredients

素材

  • 1 piece 高品質ポリエステル繊維 (ラグの主素材)
  • 1 set 滑り止め加工 (床面に貼る滑り止め)
  • 1 set 厚手のクッション素材 (クッション性を高める素材)
  • 1 set 洗濯機対応 (洗濯可能な仕様)

Instructions 

  • ラグの素材を確認し、洗濯機で洗えることを確かめます。
  • ラグを床に敷き、滑り止めを貼ります。
  • 汚れが気になったら洗濯機で洗います。
  • 乾燥させてから再び床に敷きます。

Notes

洗濯ネットを使用すると長持ちします。
Calories: 50kcal
Cost: $15
Course: インテリア
Cuisine: 日本
Keyword: シャギー, 洗える, ラグ

Loved this recipe? Save it to your favorite Pinterest board so you can easily find it later! It’s the perfect way to keep all your sweet ideas in one place. ✨

Cozy, thick rug showcased with a blurred background and natural shadows.

Welcome to the Cozy World of Slow Cooking

If you’re like me, you appreciate the magic of a good dessert that feels like a warm hug. Enter the Crock Pot Chocolate Cobbler: a delightful treat that not only satisfies your sweet tooth but also brings a sense of comfort and nostalgia. This recipe is more than just a dessert; it’s a moment, a memory, and a delicious escape from the hustle and bustle of life. So, grab your slow cooker, and let’s dive into the delicious details of this irresistible cobbler!

Why You’ll Love This Recipe

There are countless reasons to fall head over heels for this chocolate cobbler. Here are just a few:

  • Effortless Preparation: With minimal ingredients and no fancy techniques, you can whip this up even on your busiest days.
  • Gooey Goodness: The rich chocolate sauce beneath the fluffy cake layer creates a decadent experience that’s simply irresistible.
  • Perfect for Gatherings: Whether it’s a family dinner or a potluck, this dessert is sure to impress and delight your guests.
  • Versatile Dessert: Serve it warm with a scoop of ice cream for a classic treat, or enjoy it on its own for a cozy night in.
  • Make-Ahead Wonder: Prepare it in advance and let your slow cooker do the work, freeing you up to enjoy your company.

Ingredient Breakdown

Let’s talk about the ingredients that make this Crock Pot Chocolate Cobbler so special. Here’s what you’ll need:

  • 1/4 cup butter (melted): Adds richness and moisture.
  • 1 1/2 cups flour: The base of your cobbler.
  • 1 tablespoon baking powder: Helps the batter rise and become fluffy.
  • 1/2 teaspoon salt: Balances the sweetness.
  • 1 cup sugar: Sweetens the cake batter.
  • 3 tablespoons cocoa powder: Intensifies the chocolate flavor.
  • 3/4 cup milk: Creates a moist and tender texture.
  • 1/3 cup sugar: For the topping layer.
  • 3/4 cup brown sugar: Adds depth and a hint of caramel flavor.
  • 1 1/2 tablespoons cocoa powder: More chocolatey goodness for the topping.
  • 1/4 teaspoon salt: Enhances flavors.
  • 1 1/2 cups boiling water: Creates the luscious sauce underneath.

If you’re out of a particular ingredient, here are some handy substitutions:

  • Butter: Use coconut oil or a vegan butter substitute for a dairy-free option.
  • Milk: Almond milk or oat milk are great alternatives.
  • Flour: Whole wheat flour can be used for a heartier texture.

Pro Tips for the Perfect Cobbler

A mouthwatering slice of Crock Pot Chocolate Cobbler with a glossy chocolate top.

To ensure your Crock Pot Chocolate Cobbler turns out heavenly every time, keep these expert tips in mind:

  • Don’t Skimp on the Butter: The melted butter is crucial for that signature gooeyness.
  • Layer Wisely: Pour the batter over the butter without stirring to create that wonderful bottom layer of sauce.
  • Boiling Water is Key: Pour it carefully on top of the batter to ensure even cooking.
  • Monitor Cooking Time: Every slow cooker is different; check for doneness after the minimum time.
  • Let it Rest: Allow the cobbler to sit for a few minutes after cooking for the best texture.
  • Serve Warm: This dessert is best enjoyed right out of the cooker, warm and inviting.
  • Top It Off: Add whipped cream or ice cream for an extra special treat.
  • Experiment with Flavors: Feel free to add chocolate chips or nuts for a delightful twist.

Avoiding Common Mistakes

Even the best of us can stumble in the kitchen. Here’s how to sidestep some common hiccups:

  • Overmixing the Batter: This can lead to a dense texture; mix just until combined.
  • Not Checking the Doneness: Use a toothpick to check; it should come out clean from the cake part.
  • Stirring After Pouring Water: Resist the urge! Let the layers do their thing.

Delicious Variations

Looking to shake things up? Here are some fun variations on the classic Crock Pot Chocolate Cobbler:

  • Peanut Butter Bliss: Add dollops of peanut butter to the batter for a nutty twist.
  • Mint Chocolate: Mix in mint extract for a refreshing flavor.
  • Nutty Delight: Stir in chopped nuts like pecans or walnuts for added crunch.
  • Fruit Fusion: Throw in some berries or sliced bananas for a fruity surprise.

Storage and Make-Ahead Instructions

If you find yourself with leftovers (which is rare!), here’s how to store your cobbler:

  • Refrigeration: Store in an airtight container for up to 3 days.
  • Freezing: Freeze portions in a freezer-safe container for up to 2 months. Just reheat in the microwave or oven!

Frequently Asked Questions

Got questions? I’ve got answers! Here are some of the most common queries about this Crock Pot Chocolate Cobbler:

  • Can I use a different type of milk? Yes! Almond milk or oat milk works beautifully.
  • How can I make this gluten-free? Substitute with a gluten-free flour blend.
  • What if I don’t have a slow cooker? You can bake it in the oven at 350°F for about 30-35 minutes.
  • Can I double the recipe? Absolutely! Just make sure your slow cooker is large enough.
  • How do I know when it’s done? The cake should be set on top with a saucy bottom; use a toothpick to check.
  • What toppings do you recommend? Whipped cream, ice cream, or a drizzle of chocolate sauce are all fantastic!
  • Can I make this ahead of time? Yes! Prepare the ingredients and cook when you’re ready.
  • What’s the best way to reheat? Microwave individual portions or warm in the oven.

Nutritional Tips and Dietary Adaptations

For those conscious of their dietary needs, here are some tips:

  • Lower Sugar Options: Use less sugar or a sugar substitute to cut calories.
  • Vegan Version: Use plant-based butter and milk to make this dessert vegan-friendly.
  • Portion Control: Serve in small bowls to help with portion sizes.

Essential Equipment Recommendations

To make this recipe a breeze, here’s what you’ll need:

  • Slow Cooker: A reliable slow cooker is a must-have for any kitchen.
  • Mixing Bowls: For combining your ingredients.
  • Measuring Cups and Spoons: Accurate measurements ensure the best results.
  • Spatula: For mixing and pouring with ease.

Serving Suggestions

Now that your Crock Pot Chocolate Cobbler is ready, here are some delightful ways to serve it:

  • À la Mode: Add a scoop of vanilla ice cream on top for a classic combo.
  • With Whipped Cream: A dollop of homemade whipped cream adds a lovely touch.
  • Fresh Berries: Serve with berries to balance the richness.
  • Chocolate Drizzle: Drizzle extra melted chocolate over the top for a decadent finish.

In Conclusion: A Sweet Adventure Awaits

As you embark on this delicious journey with the Crock Pot Chocolate Cobbler, remember that cooking is about creating memories as much as it is about the food. Each spoonful is a reminder of the warmth and joy that comes from sharing a meal with loved ones. So, gather your ingredients, fire up that slow cooker, and prepare to be enveloped in the delightful aroma of chocolatey bliss. I can’t wait to hear how your cobbler turns out—happy cooking!

Crock Pot Chocolate Cobbler

Prep Time 10 minutes
Cook Time 2 hours
Total Time 2 hours 10 minutes
Servings 8 servings
Calories 350
A rich and gooey chocolate cobbler cooked effortlessly in your slow cooker, perfect for satisfying your sweet tooth.

Ingredients

butter

  • 0.25 cup butter (melted)

dry ingredients

  • 1.5 cups flour
  • 1 tablespoon baking powder
  • 0.5 teaspoon salt
  • 1 cup sugar
  • 3 tablespoons cocoa powder
  • 0.25 cup butter (melted)
  • 0.75 cup milk
  • 0.33 cup sugar (additional for topping)
  • 0.75 cup brown sugar (for topping)
  • 1.5 tablespoons cocoa powder (for topping)
  • 0.125 teaspoon salt (for topping)
  • 1.5 cups boiling water

Instructions 

  • Pour melted butter into the slow cooker.
  • Mix flour, baking powder, salt, sugar, cocoa, melted butter, and milk until smooth; pour over butter in slow cooker.
  • Combine sugar, brown sugar, cocoa powder, and salt; sprinkle over batter without stirring.
  • Pour boiling water on top without stirring.
  • Cook on high for 2 hours or low for 3-4 hours until set. Serve with whipped cream or ice cream.

Notes

This dessert is best enjoyed warm with a scoop of ice cream or whipped topping.
Calories: 350kcal
Cost: $15
Course: Dessert
Keyword: chocolate

Why This Dish Will Become Your New Favorite

Ah, risotto—a dish that truly embodies the spirit of comfort food while also impressing even the most discerning palates. My creamy mushroom risotto is a nostalgic nod to the cozy evenings of my childhood, where the aroma of simmering broth and sautéed mushrooms filled the air, wrapping us in warmth and love. Every bite will transport you to a place of comfort, where laughter is abundant, and every spoonful feels like a warm hug.
This recipe is not just about satisfying hunger; it’s about creating memories around the dinner table. Whether you’re cooking for family, friends, or just for yourself, this risotto is versatile enough to fit any occasion. Let’s dive into the magic of this dish and learn how to make it together!

Ingredients You’ll Need

Here’s a rundown of the ingredients that will make your creamy mushroom risotto dreams come true:

  • 1 cup Arborio rice – This special rice is key to achieving that creamy texture.
  • 4 cups low-sodium chicken or vegetable broth – Homemade if you can swing it, but store-bought works too!
  • 1 cup white wine – Use a dry variety for the best flavor.
  • 2 tablespoons olive oil – For sautéing those delicious mushrooms.
  • 1 medium onion, finely chopped – The aromatic base of our risotto.
  • 3 cloves garlic, minced – Because who doesn’t love garlic?
  • 8 ounces mushrooms, sliced – I adore cremini or shiitake for their deep flavor.
  • ½ cup grated Parmesan cheese – This adds a wonderful creaminess.
  • 2 tablespoons unsalted butter – For that final touch of richness.
  • Salt & pepper to taste – Essential for bringing all the flavors together.
  • Fresh parsley, chopped (optional) – For a sprinkle of freshness on top!

How to Create the Perfect Risotto

Detailed view of delicious mushroom risotto in a bowl, illuminated by warm natural light with textures highlighted.

Now that you have your ingredients ready, let’s walk through the steps to create this creamy masterpiece.

Step 1: Prepare the Broth

In a saucepan, heat the broth over low heat. Keeping it warm helps the rice absorb it more evenly, promoting that creamy texture we love.

Step 2: Sauté the Aromatics

In a large skillet, heat the olive oil over medium heat. Add the chopped onion and sauté until translucent, about 3-4 minutes. Then, add the minced garlic and sauté for an additional minute, until fragrant.
Next, toss in the sliced mushrooms, seasoning them with a pinch of salt and pepper. Sauté until they release their moisture and turn golden brown. This is the moment when your kitchen starts to smell divine!

Step 3: Toast the Rice

Once your mushrooms are perfectly sautéed, add the Arborio rice to the skillet. Stir well to coat the rice with the oil and let it toast for about 2 minutes. You’ll notice the rice grains become slightly translucent around the edges—this is exactly what you want!
Next, pour in the white wine, stirring constantly until it’s mostly absorbed. This step adds depth and acidity to the dish.

Step 4: Add the Broth Gradually

Now comes the fun part! Start adding the warm broth one ladleful at a time, stirring frequently. Allow each addition to be mostly absorbed before adding the next. This process will take about 20-25 minutes.
The key here is patience—stir, sip a glass of wine, and let the rice absorb all that luscious broth. You’ll know it’s ready when the rice is al dente and the mixture is creamy.

Step 5: Finish with Cheese and Butter

Once the rice is cooked to perfection, remove the skillet from the heat. Stir in the grated Parmesan cheese and unsalted butter, letting them melt into the risotto. This is where the magic happens! Season to taste with additional salt and pepper if needed.

Step 6: Serve and Enjoy

Dish up your creamy mushroom risotto into bowls and garnish with chopped fresh parsley for a pop of color. Serve it immediately while it’s hot and creamy, and watch as your loved ones swoon over this delightful dish.

Tips for Perfect Risotto

  • Stir Constantly: This helps release the starch from the rice, creating that signature creaminess.
  • Use Quality Ingredients: The better the broth and cheese, the better the flavor of your risotto!
  • Add More Broth if Needed: If your risotto looks too dry, add a bit more warm broth until you reach your desired consistency.

Variations to Consider

This recipe is wonderfully adaptable. Here are some variations to try:

  • Add Protein: Stir in cooked chicken, shrimp, or even crispy pancetta for added flavor and substance.
  • Change Up the Vegetables: Feel free to add spinach, asparagus, or peas for a pop of color and nutrition.
  • Experiment with Cheeses: Swap out Parmesan for Gouda or Fontina for a different flavor profile.

Substitutions You Can Make

If you’re in a pinch, here are some substitutions that won’t compromise the dish:

  • Broth: Vegetable broth works beautifully for a vegetarian option.
  • Wine: If you prefer to skip the wine, use an additional cup of broth instead.
  • Mushrooms: Any mushrooms can be used, but I recommend shiitake or button for their flavor.

Storage and Freezing Tips

If you find yourself with leftovers (which is always a win!), store them in an airtight container in the fridge for up to 3 days. Reheat gently on the stovetop, adding a splash of broth to revive the creamy texture.
You can freeze risotto, but keep in mind that the texture may change slightly. Store in an airtight container for up to 3 months. To reheat, thaw overnight in the fridge and warm on the stovetop, adding broth as needed.

Frequently Asked Questions

Can I make risotto without wine?
Absolutely! Just replace the wine with an equal amount of broth.

What if my risotto is too thick?
If you find your risotto has thickened too much, simply stir in a bit more warm broth until you achieve your desired consistency.

Can I prepare risotto in advance?
Risotto is best served fresh, but you can prepare the base ahead of time and add the final touches when you’re ready to serve.

Troubleshooting Common Issues

If your risotto isn’t turning out as planned, here are some common issues and how to fix them:

  • Too Salty: Add a small diced potato to absorb excess salt while cooking, then remove it before serving.
  • Too Watery: If your risotto is too runny, continue cooking it uncovered to allow excess liquid to evaporate.
  • Grainy Texture: Ensure you’re using Arborio rice, as other types of rice won’t yield the same creaminess.

Final Thoughts

As you can see, my creamy mushroom risotto is not just a meal—it’s an experience, a way to connect with those you care about, and a delightful way to treat your taste buds. It’s a dish that brings warmth to your home and comfort to your heart, perfect for cozy dinners or impressing guests.
So, grab your apron, gather your ingredients, and let’s create some magic in the kitchen together! I can’t wait to hear how your risotto turns out—be sure to share your thoughts and any personal twists you make along the way!

Classic Spaghetti Carbonara

Prep Time 10 minutes
Cook Time 15 minutes
Total Time 25 minutes
Servings 4 servings
Calories 600
A quick and creamy Italian pasta dish made with eggs, cheese, pancetta, and pepper.

Ingredients

Pasta

  • 400 grams spaghetti
  • 150 grams pancetta (diced)
  • 3 large eggs
  • 50 grams Parmesan cheese (grated)
  • 1 tsp black pepper (freshly ground)

Other

  • 1 tbsp olive oil

Instructions 

  • Cook spaghetti in boiling salted water until al dente.
  • In a pan, cook pancetta until crispy.
  • Whisk eggs and Parmesan in a bowl.
  • Drain pasta, then toss with pancetta and remove from heat.
  • Quickly mix in egg mixture, stirring to create a creamy sauce.

Notes

Use freshly grated Parmesan for best flavor.
Calories: 600kcal
Cost: $12
Course: Main Course
Cuisine: Italian
Keyword: pasta

Loved this recipe? Save it to your favorite Pinterest board so you can easily find it later! It’s the perfect way to keep all your sweet ideas in one place. ✨

Eye-level shot of a rich, creamy risotto with mushrooms, featuring a cozy, out-of-focus background.

Why You’ll Love This Recipe

There’s something undeniably comforting about a bowl of homemade soup, and when it comes to comfort food, Easy Roasted Garlic Soup truly shines. Imagine a chilly evening, the wind howling outside, and you’re nestled in your cozy kitchen, the aroma of roasted garlic filling the air. It’s that magical moment when you realize you’re about to enjoy a bowl of pure joy, made with love and just a handful of ingredients.

This recipe is not just about satisfying your hunger; it’s about creating a warm embrace in a bowl. The sweet, caramelized garlic mingles beautifully with the creamy texture, delivering a flavor that dances on your taste buds. Perfect for a cozy dinner, a gathering with friends, or even as a luxurious lunch, this soup is versatile, easy to make, and sure to impress.

Ingredients You’ll Need

To whip up this delightful garlic soup recipe, you’ll need:

  • 1 bulb of garlic
  • 2 tablespoons olive oil
  • 1 medium onion, chopped
  • 4 cups vegetable broth
  • 1 cup heavy cream
  • Salt and pepper to taste
  • Fresh parsley for garnish (optional)

How to Make Easy Roasted Garlic Soup

A warm, inviting bowl of roasted garlic soup with a smooth texture, illuminated by natural light, featuring chopped onions and herbs.

Let’s embark on this culinary adventure together! Follow these simple steps to create a soul-warming bowl of goodness:

  1. Preheat your oven to 400°F (200°C). This is where the magic begins with the garlic.
  2. Prepare the garlic: Cut the top off the garlic bulb to expose the cloves and drizzle generously with olive oil.
  3. Wrap it up: Wrap the garlic bulb in aluminum foil and place it in the oven. Roast for about 30-35 minutes, until the cloves are soft and fragrant.
  4. Sauté the onions: While the garlic roasts, heat a tablespoon of olive oil in a large pot over medium heat. Add the chopped onion and sauté until translucent and tender.
  5. Add the roasted garlic: Once your garlic is perfectly roasted, squeeze the soft cloves into the pot with the onions, allowing that heavenly aroma to fill your kitchen.
  6. Pour in the broth: Add the vegetable broth and bring the mixture to a boil. Once boiling, reduce the heat and let it simmer for about 10 minutes, allowing the flavors to meld together.
  7. Blend it up: Using an immersion blender, blend the soup until smooth and creamy. If you don’t have an immersion blender, carefully transfer the mixture to a blender in batches.
  8. Stir in the cream: Mix in the heavy cream, and season with salt and pepper to taste. Give it a gentle stir and allow it to warm through.
  9. Serve hot: Ladle the soup into bowls, garnishing with fresh parsley if desired. Enjoy with a crusty baguette or a slice of your favorite bread for dipping!

Storing Tips

If you find yourself with leftovers (which is unlikely because it’s so good!), you can store this creamy garlic soup in an airtight container in the refrigerator for up to three days. Just reheat it on the stove over medium heat, stirring occasionally to maintain its creamy texture.

For longer storage, consider freezing the soup. Allow it to cool completely before transferring to freezer-safe containers, leaving room for expansion. It can be frozen for up to three months. When you’re ready to enjoy it again, simply thaw in the refrigerator overnight and reheat on the stove.

Top Tips for Success

To make sure your roasted garlic soup turns out perfectly every time, keep these tips in mind:

  • Use fresh garlic: The quality of your garlic will greatly impact the flavor. Look for firm, plump bulbs.
  • Adjust the consistency: If you prefer a thinner soup, add more broth until you reach your desired consistency.
  • Experiment with flavors: Feel free to add herbs like thyme or rosemary for an extra layer of flavor. You can also sprinkle some chili flakes for a little heat!
  • Garnish creatively: Besides parsley, consider topping with crispy bacon bits, a drizzle of truffle oil, or a sprinkle of grated cheese for a gourmet touch.

Variations to Try

This homemade garlic soup recipe is incredibly adaptable. Here are a few variations to consider:

  • Roasted Vegetable Addition: Incorporate roasted carrots or potatoes for added texture and nutrition.
  • Dairy-Free Option: Substitute heavy cream with coconut cream or a nut-based cream for a dairy-free version.
  • Herb-Infused: Add fresh herbs like basil or chives for a fresh twist on flavor.
  • Spicy Kick: Stir in a teaspoon of harissa or sriracha for a spicier version of this comforting soup.

FAQs

Can I use different herbs in the soup?

Absolutely! Feel free to experiment with your favorite herbs such as thyme, oregano, or even a touch of dill. Each herb brings its own unique flavor, making this soup a delightful canvas for creativity.

Can I make roasted garlic soup ahead of time?

Yes! This soup actually tastes even better the next day after the flavors have had time to develop. Make it a day in advance and simply reheat when you’re ready to serve.

Can I substitute heavy cream with a lighter alternative?

Certainly! If you’re looking for a lighter version, you can use whole milk or a combination of milk and Greek yogurt. Just be mindful that the texture may be slightly different, but it will still be delicious!

Troubleshooting Common Issues

Even the best cooks encounter hiccups in the kitchen. Here are some common issues you might face and how to solve them:

  • Too thick: If your soup is thicker than you’d like, add a bit more broth and blend again until you reach your desired consistency.
  • Not enough flavor: If you find the soup lacking flavor, consider adding more salt, pepper, or a splash of lemon juice to brighten it up.
  • Over-roasted garlic: If your garlic is too brown, it may taste bitter. Next time, check on it sooner and remove it from the oven once it’s soft and golden.

Conclusion

There you have it—your guide to making a truly comforting Easy Roasted Garlic Soup that’s as delightful to make as it is to eat. This recipe is perfect for cozy nights in, gatherings with family, or even as a starter for a dinner party. Each spoonful is a warm embrace, reminding us that food not only nourishes our bodies, but also our souls.

So, gather your ingredients, channel your inner chef, and let the magic of roasted garlic transform your kitchen into a haven of warmth and flavor. And remember, I’d love to hear how your soup turns out! Share your experiences in the comments, and don’t hesitate to reach out if you have any questions. Happy cooking!

Easy Roasted Garlic Soup

Prep Time 10 minutes
Cook Time 40 minutes
Total Time 50 minutes
Servings 4 servings
Calories 250
A creamy and comforting garlic soup that's simple to prepare and perfect for a cozy meal.

Ingredients

Garlic

  • 1 bulb garlic (whole bulb)
  • 2 tablespoons olive oil
  • 1 medium onion (chopped)
  • 4 cups vegetable broth
  • 1 cup heavy cream
  • to taste salt and pepper (for seasoning)
  • fresh parsley for garnish (optional)

Instructions 

  • Preheat oven to 400°F (200°C). Roast garlic in foil for 30-35 minutes.
  • Sauté chopped onion in olive oil until translucent.
  • Squeeze roasted garlic into the pot, add vegetable broth, and simmer for 10 minutes.
  • Blend the soup until smooth, then stir in heavy cream and season with salt and pepper.
  • Serve hot, garnished with parsley if desired.

Notes

Roasting garlic brings out a sweeter, milder flavor.
Calories: 250kcal
Cost: $12
Course: Soup
Cuisine: American
Keyword: garlic

Loved this recipe? Save it to your favorite Pinterest board so you can easily find it later! It’s the perfect way to keep all your sweet ideas in one place. ✨

A detailed view of delicious roasted garlic soup drizzled with olive oil and topped with fresh parsley, highlighting its creamy consistency.