Author

Ava

Browsing

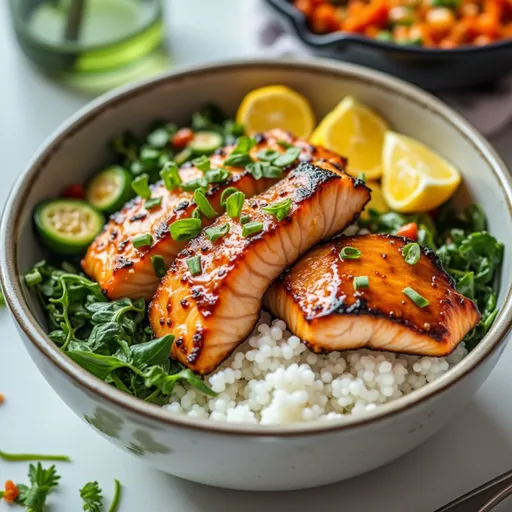
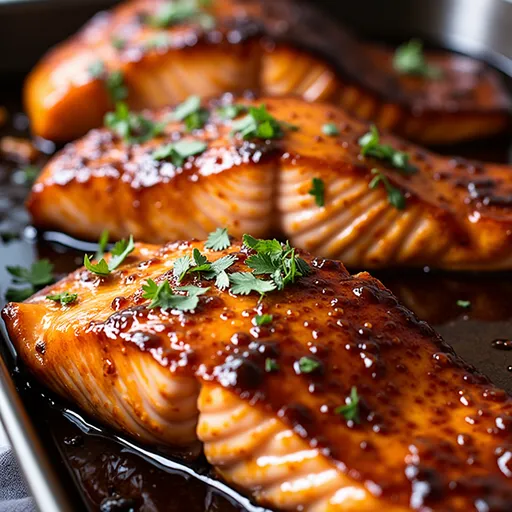
Why You’ll Love Grilled Honey Garlic Salmon

When it comes to weeknight dinners that feel special without requiring hours in the kitchen, Grilled Honey Garlic Salmon is your trusty culinary sidekick. Imagine this: you’re coming home after a long day, the sun is beginning to dip below the horizon, and you crave something that’s not just nutritious but also bursting with flavor. This dish is precisely that—a medley of sweet, savory, and subtly tangy notes that come together in a way that feels almost magical.

Salmon has long held the title of a seafood favorite, and for good reason! It’s rich in omega-3 fatty acids, making it a heart-healthy choice. But it’s not just health benefits that put salmon on the dinner table; it’s its versatility. Whether you’re grilling, baking, or pan-searing, salmon adapts beautifully to any cooking method. In this recipe, the grill impart subtle smokiness that elevates the dish wholly.

So, grab your apron and let’s dive into this delicious recipe that’s sure to become a staple in your home!

Full Recipe: Grilled Honey Garlic Salmon in 2025

Here’s what you’ll need to whip up this scrumptious dish:

Ingredients

  • 4 salmon fillets
  • 1/4 cup honey
  • 1/4 cup soy sauce
  • 3 cloves garlic, minced
  • 1 tablespoon olive oil
  • 1 teaspoon black pepper
  • 1 teaspoon salt
  • 1 tablespoon lemon juice
  • Fresh parsley for garnish

Steps

  1. In a bowl, whisk together honey, soy sauce, minced garlic, olive oil, black pepper, salt, and lemon juice.
  2. Place the salmon fillets in a shallow dish and pour the marinade over them. Let marinate for at least 30 minutes.
  3. Preheat the grill to medium-high heat.
  4. Remove the salmon from the marinade and reserve the marinade for basting.
  5. Place the salmon fillets on the grill skin-side down and cook for about 4-5 minutes.
  6. Baste the salmon with the reserved marinade and flip the fillets carefully.
  7. Grill for another 4-5 minutes or until the salmon is cooked through and flakes easily with a fork.
  8. Remove from the grill and let rest for a few minutes before serving.
  9. Garnish with fresh parsley and serve with your choice of sides.

The Ultimate Guide to Making Grilled Honey Garlic Salmon

This recipe is deceptively simple and yet incredibly satisfying. Let’s break down why this grilled salmon dish is so delightful and how you can nail it every time.

What Makes This Honey Garlic Marinade So Special?

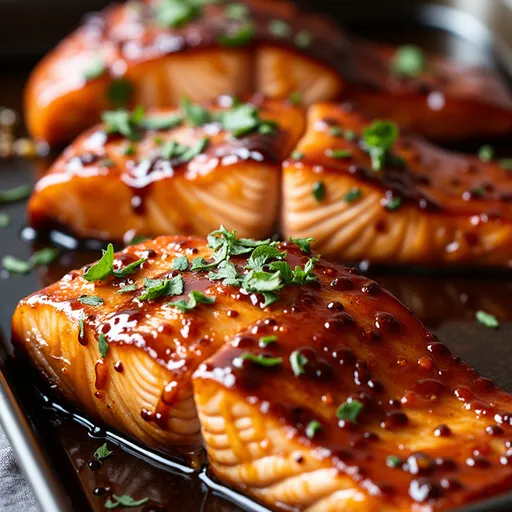
The magic truly lies in the marinade. Combining honey and soy sauce creates a beautiful balance of sweetness and umami that enhances the natural flavor of the salmon. The garlic adds depth and a hint of earthiness, while the lemon juice brightens up the whole dish. It’s like a cozy hug for your taste buds!

Tips for Grilling Salmon Like a Pro

If you’ve ever felt intimidated by grilling fish, you’re not alone! Here are some expert tips to ensure your grilled salmon turns out perfectly every time:

  • Use skin-on fillets: The skin acts as a protective layer, helping to keep the salmon moist and reducing the risk of sticking to the grill.
  • Preheat the grill: A hot grill ensures a good sear. Aim for medium-high heat, and don’t forget to oil the grates to prevent sticking.
  • Don’t flip too soon: Allow the salmon to cook for 4-5 minutes on one side before flipping. It will naturally release from the grill when it’s ready.
  • Baste for flavor: Use the reserved marinade to baste the fish as it cooks. This adds an extra layer of flavor and helps caramelize the exterior.

Health Benefits of Eating Salmon

Aside from its irresistible taste, salmon is a nutritional powerhouse. Here’s why you should include it in your meal rotation:

  • Rich in Omega-3 Fatty Acids: These healthy fats support heart health and brain function.
  • High in Protein: Salmon is a great source of lean protein, essential for muscle maintenance and repair.
  • Packed with Nutrients: It contains vitamins B12 and D, selenium, and potassium, which contribute to overall health.

Flavor Pairings and Side Dish Suggestions

Now that you’ve got your grilled honey garlic salmon ready to shine, let’s talk about what to serve alongside it. Here are some fantastic pairings that complement the flavors beautifully:

  • Grilled Vegetables: Zucchini, bell peppers, and asparagus tossed in olive oil make for a colorful and healthy side.
  • Fresh Salad: A light cucumber-dill salad or a classic garden salad adds crunch and freshness.
  • Herbed Potatoes: Roasted baby potatoes with rosemary or thyme are a hearty addition.

For a more adventurous spin, consider serving it with a zesty lemon orzo pasta salad or a creamy coleslaw for a delightful contrast. The options are endless!

Why This Recipe Works for Any Occasion

This grilled salmon dish is not only quick and easy, but it’s also versatile enough to fit any occasion. Whether you’re cooking for a cozy weeknight dinner, hosting a summer BBQ, or preparing a special meal for guests, this recipe delivers every time.

It can easily scale up or down, so whether you’re feeding two or ten, you’ll find that adjusting the ingredients is a breeze. Plus, it takes minimal hands-on time, allowing you to enjoy the company of your loved ones while the grill does its magic.

Cooking Tools and Equipment You’ll Need

Let’s ensure you have everything you need for a successful grilling session:

  • Grill: A charcoal or gas grill works well, but a grill pan can also do the trick if you’re cooking indoors.
  • Fish Spatula: This tool is perfect for flipping the salmon without breaking it apart.
  • Mixing Bowl: For whipping up that honey garlic marinade.
  • Measuring Cups and Spoons: Accuracy is key to achieving that perfect flavor balance.

Making It Ahead and Storage Tips

One of the best features of this recipe is that it can be prepped ahead of time. Here are some tips to help you get organized:

  • Marinate the Salmon: You can marinate the salmon up to 24 hours in advance. Just be sure to keep it in the fridge!
  • Store the Marinade: The marinade can be made ahead of time and kept in an airtight container in the refrigerator for up to 5 days.
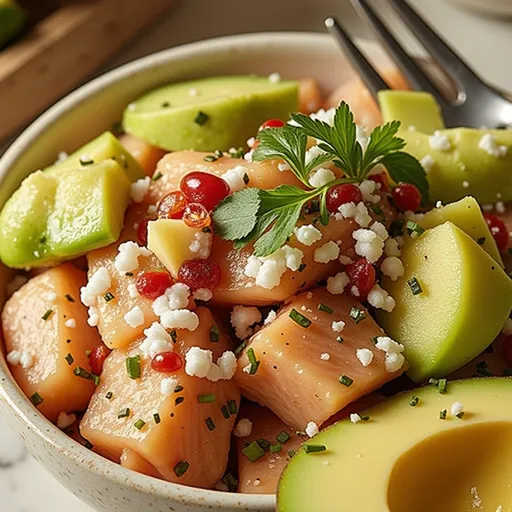
  • Leftovers: If you happen to have any leftovers, they can be stored in the fridge for up to 3 days. Enjoy it cold on salads or gently reheated.

FAQs

Can I use frozen salmon? Yes! Just make sure to thaw it completely in the refrigerator before marinating and grilling.

What if I don’t have a grill? You can make this recipe in a grill pan on the stovetop or even bake it in the oven at 400°F for about 12-15 minutes.

Troubleshooting

If your salmon sticks to the grill, make sure the grill is properly preheated and oiled. If it flakes apart when flipping, use a fish spatula to handle it gently!

Conclusion: A Recipe Worth Mastering

Grilled Honey Garlic Salmon is more than just a meal; it’s an experience that brings people together. With its sweet and savory glaze, juicy texture, and ease of preparation, this dish is destined to become a staple in your home. So, whether you’re stirring up a casual dinner or impressing guests, this recipe has got you covered. Light up the grill, gather your loved ones, and savor the joy of good food and great company! Happy cooking!

Why You’ll Love This Smash Burger Recipe

If you’ve ever bitten into a burger that made you pause and savor every single flavor, then you know the magic that a perfectly made burger can hold. The Smash Burger is all about that glorious, crispy crust and juicy interior, paired with a tangy sauce that dances on your taste buds. This isn’t just any burger; it’s a weeknight hero that transforms ordinary meals into extraordinary experiences. Whether you’re firing up the grill for a backyard gathering or whipping up a cozy dinner for one, this recipe is your ticket to burger bliss.

Overview of the Smash Burger

The beauty of a smash burger lies not only in its simplicity but also in the way it embraces indulgence while still being approachable. You don’t need to be a gourmet chef to pull this off! Just a hot skillet, some quality ingredients, and a little bit of love. And let’s talk about that sauce—it’s creamy, tangy, and oh-so-easy to whip up. In just under 30 minutes, you can create a burger that rivals your favorite diner’s. Ready to dive into the details?

Ingredients You’ll Need

A professionally photographed smash burger with a tangy sauce, set against a softly blurred background.

Gather the following ingredients to make your taste buds dance:

  • 1 pound ground beef (80/20 blend)
  • Salt and pepper to taste
  • 4 burger buns
  • 4 slices of cheddar cheese
  • 1/2 cup mayonnaise
  • 2 tablespoons ketchup
  • 1 tablespoon Dijon mustard
  • 1 tablespoon pickle relish
  • 1 teaspoon garlic powder
  • 1 teaspoon onion powder
  • Lettuce, tomato, and onion for toppings

How to Make the Best Easy Smash Burger

Creating the Tangy Sauce

Start by mixing the star of the show—the tangy sauce. In a bowl, combine:

  • 1/2 cup mayonnaise
  • 2 tablespoons ketchup
  • 1 tablespoon Dijon mustard
  • 1 tablespoon pickle relish
  • 1 teaspoon garlic powder
  • 1 teaspoon onion powder

Stir until everything is well blended. Set this delicious concoction aside. This sauce is not only perfect for the burgers but can elevate fries and sandwiches too! Talk about versatility!

Prepping the Beef Patties

Next, let’s get to the main attraction—our beef. Preheat a cast-iron skillet or griddle over medium-high heat until it’s smoking hot. While that’s heating up, divide the ground beef into 4 equal portions and form them into loose balls. Remember, the key is to keep them loose—don’t compact them too much. When the skillet is ready, place the beef balls on it and immediately smash them down with a spatula to create thin patties. This is where the magic happens!

Cooking to Perfection

Season the patties generously with salt and pepper. Let them cook for about 2-3 minutes until a beautiful crust forms on the bottom. Flip the patties and immediately place a slice of cheddar cheese on each one. Cook for another 1-2 minutes until the cheese is melted and gooey—nothing says comfort like melted cheese, right?

Toasting the Buns

While the burgers are cooking, toast your burger buns on the skillet until they turn a lovely golden brown. This step adds a delightful crunch and helps to hold up all that juicy goodness.

Assembling Your Smash Burger

Now for the fun part—assembly! On the bottom bun, spread a generous layer of your tangy sauce. Place the cheeseburger patty on top, followed by your choice of fresh toppings: crisp lettuce, juicy tomato slices, and sweet onion rings. Finish with the top bun, and voilà! You’ve just made a smash burger that’s ready to impress.

Make Ahead Options

Want to get ahead during busy weeks? You can prepare the tangy sauce and divide the ground beef into its unformed balls up to 24 hours in advance. Simply refrigerate the sauce in an airtight container and the beef balls on a parchment-lined tray, covered tightly to maintain their shape. When it’s time to cook, just grab your pre-portioned beef, heat the skillet, and follow the smashing and searing steps. Dinner is served!

Expert Tips for the Perfect Smash Burger

  • Use Quality Beef: Always choose an 80/20 blend for juicy, flavorful patties. Leaner meat may lead to dry burgers.
  • Keep it Cold: Ensure the beef balls are cold before smashing; this helps create a better sear.
  • Don’t Skip the Smash: The smashing technique is crucial for achieving that crispy edge and maximizing flavor.
  • Let it Rest: After cooking, let the patties rest for a minute to retain their juices.

What to Serve with Your Smash Burgers

Let’s turn this delicious burger into a complete meal! Here are some sides that pair beautifully:

  • Crispy Sweet Potato Fries: Their natural sweetness complements the savory burger perfectly.
  • Creamy Coleslaw: A crunchy, tangy side that balances the rich flavors of the burger.
  • Deviled Eggs: A retro classic that adds a creamy, savory element for a truly comforting meal experience.
  • Corn on the Cob: Grilled or boiled, it adds a fresh burst of summer flavor.
  • Onion Rings: Dive deeper into flavor with these crunchy, golden rings.
  • Simple Green Salad: A light, refreshing option to cut through the richness.
  • Strawberry Milkshake: A classic diner treat for dessert—sweet, creamy, and utterly decadent.

Storage Tips for Leftovers

While these burgers are best enjoyed fresh, you can certainly store leftovers. Cooked patties can be kept in an airtight container in the fridge for up to 2 days, though the crispiness will diminish. If you have assembled burgers, wrap them tightly in foil and enjoy within a few hours to prevent sogginess. You can also freeze cooked patties for up to 2 months! Just let them cool completely, then store them in freezer-safe bags, separated with parchment paper.

FAQs about Smash Burgers

Can I make this recipe gluten-free?

Absolutely! Just swap regular burger buns for your favorite gluten-free option.

What if my burgers are sticking to the pan?

Sticking often means the pan isn’t hot enough. Make sure your skillet is properly heated before you add the beef. Cold beef balls can also exacerbate sticking issues, so keep them chilled until they hit the pan!

How can I customize my smash burger?

The beauty of smash burgers is their versatility! Add your favorite toppings, experiment with different cheeses, or even try a different sauce to make it uniquely yours.

Conclusion

There you have it! A Smash Burger that’s not just a meal but an experience. With juicy beef, a crispy crust, and a tangy sauce that ties it all together, this recipe is sure to become a staple in your kitchen. Whether you’re cooking for a crowd or treating yourself, these burgers bring joy and comfort to the table. So gather your ingredients, turn up the heat, and let’s create some magic together. Happy cooking!

Make The Best Easy Smash Burger With Tangy Sauce

Prep Time 10 minutes
Cook Time 10 minutes
Total Time 20 minutes
Servings 4 pieces
Calories 650
Enjoy a juicy, flavorful smash burger topped with a tangy homemade sauce, perfect for a quick and satisfying meal.

Ingredients

Meat

  • 1 pound ground beef (80/20 blend)
  • salt and pepper to taste salt and pepper (to season the beef)

Buns and Cheese

  • 4 pieces burger buns
  • 4 slices cheddar cheese

Tangy Sauce

  • 1/2 cup mayonnaise
  • 2 tablespoons ketchup
  • 1 tablespoon dijon mustard
  • 1 teaspoon pickle relish
  • 1 teaspoon garlic powder
  • 1 teaspoon onion powder

Toppings

  • as needed lettuce, tomato, and onion (for toppings)

Instructions 

  • Mix mayonnaise, ketchup, Dijon mustard, pickle relish, garlic powder, and onion powder to make the sauce. Set aside.
  • Preheat skillet; divide beef into 4 balls and smash into thin patties.
  • Season with salt and pepper; cook 2-3 mins, flip, add cheese, cook 1-2 mins until melted.
  • Toast buns; assemble burgers with sauce, patty, and toppings; serve immediately.

Notes

Use a hot skillet for best smash and crust formation.
Calories: 650kcal
Cost: $15
Course: Main Course
Cuisine: American
Keyword: Burger

Loved this recipe? Save it to your favorite Pinterest board so you can easily find it later! It’s the perfect way to keep all your sweet ideas in one place. ✨

An appetizing view of a perfectly cooked smash burger, showcasing its textures and toppings.

Welcome to the World of Bread Pudding: A Comforting Classic

Ah, bread pudding! It’s like a warm hug on a chilly day, a treat that transforms humble ingredients into a cozy dessert that feels like home. Growing up in Oregon, I remember my mother whipping up this dish to use up stale bread, filling the house with the sweet aroma of vanilla and cinnamon. Today, I’m excited to share with you my easy bread pudding recipe—a nostalgic delight that’s perfect for any occasion, from holiday gatherings to simple weeknight dinners.

This recipe is not only straightforward but also incredibly versatile. You can customize it with your favorite ingredients and make it your own. Ready to bring a little magic to your kitchen? Let’s dive in!

Why You’ll Love This Recipe

  • Quick and Easy: With just a handful of ingredients and minimal prep time, you’ll have a delicious dessert ready to bake in no time.
  • Customizable: You can easily swap ingredients based on what you have on hand, making it a fantastic way to use up leftover bread.
  • Perfect for Any Occasion: Whether it’s a family gathering, a potluck, or just a treat for yourself, this bread pudding fits the bill.
  • Budget-Friendly: This recipe is cost-effective, using simple ingredients that won’t break the bank.
  • Impressive Results: No one will believe how easy it was to create such a comforting dessert that tastes like it took hours to make!

Ingredients for Easy Bread Pudding

Let’s gather our ingredients and get started! Here’s what you’ll need:

  • 4 cups 1″ bread cubes: I recommend using a mix of white and wheat bread for texture and flavor.
  • 1/3 cup raisins: Feel free to substitute with dried cranberries or cherries for a twist.
  • 4 large eggs: These will create that lovely custardy base.
  • 2-1/2 cups milk: Whole milk works best, but you can use any milk you prefer.
  • 1/2 cup sugar: Brown sugar can be used for a richer flavor.
  • 1 teaspoon vanilla extract: The star of the show—don’t skip this one!
  • 1/2 teaspoon cinnamon: Adds warmth and depth to the flavor.

How to Make Easy Bread Pudding from Scratch

Side view of a luscious bread pudding showcasing its soft texture and ingredients.

Now that we have everything ready, let’s roll up our sleeves and get to baking!

  1. Preheat your oven: Set it to 350°F (175°C) and grease a 12 x 9 casserole dish with nonstick cooking spray.
  2. Layer the bread: In the greased dish, layer your bread cubes evenly along with the raisins until the dish is full.
  3. Mix the custard: In a separate bowl, beat the eggs until well mixed. Then, stir in the milk, sugar, vanilla, and cinnamon until combined.
  4. Combine: Pour the egg mixture over the bread, pressing down gently with a spoon to ensure all pieces are soaked.
  5. Bake: Place the dish in the preheated oven and bake for 40-45 minutes, or until the top is golden brown and the custard is set.

Pro Tips for Perfect Bread Pudding

  • Use Stale Bread: Stale bread absorbs the custard better, resulting in a creamier texture. If you don’t have stale bread, you can dry fresh bread in the oven for a few minutes.
  • Let It Soak: Allow the bread to sit in the custard mixture for at least 30 minutes before baking to ensure every piece is soaked through.
  • Experiment with Flavors: Feel free to add spices like nutmeg or cardamom, or even incorporate chocolate chips for a decadent twist.
  • Check for Doneness: Insert a knife into the center; it should come out clean when fully baked.
  • Serve Warm: Bread pudding is best enjoyed warm, perhaps with a drizzle of vanilla sauce.
  • Make-ahead: You can assemble the bread pudding a day ahead, cover it, and refrigerate. Just pop it in the oven when you’re ready to bake!

Common Mistakes and Troubleshooting

  • Too Dry: Ensure you have enough custard mixture and let it soak long enough.
  • Too Eggy: If you find the flavor too strong, reduce the number of eggs next time or balance it with more milk.
  • Overbaking: Keep an eye on it as all ovens vary; check a few minutes early to avoid dryness.

Variations to Try

Want to switch things up? Here are some delightful variations:

  • Chocolate Chip Bread Pudding: Stir in a cup of chocolate chips for a rich, indulgent dessert.
  • Apple Cinnamon Bread Pudding: Add diced apples and increase the cinnamon for a fall-inspired twist.
  • Banana Bread Pudding: Use leftover banana bread instead of regular bread for a fruity flavor.
  • Nutty Bread Pudding: Incorporate chopped nuts like pecans or walnuts for added crunch.

Storage and Make-Ahead Instructions

This bread pudding can last for up to 3 days in the refrigerator. Just store it in an airtight container. You can also freeze it for up to 2 months. To reheat, simply thaw overnight in the fridge and warm it in the oven until heated through.

FAQs About Bread Pudding

  • Can I use any type of bread? Absolutely! French bread, brioche, or even cornbread can all work well.
  • What’s the best way to serve bread pudding? Serve it warm, topped with vanilla sauce or a scoop of ice cream for an extra treat.
  • How do I know when it’s done? The top should be golden brown, and a knife inserted in the center should come out clean.
  • Can I make it dairy-free? Yes! Substitute the milk with almond milk or coconut milk and use a dairy-free butter for greasing.
  • Is it safe to eat leftovers? Yes, as long as it has been properly stored in the refrigerator.
  • What can I do with leftover bread pudding? Use it as a topping for ice cream or blend it into smoothies for a unique twist!
  • Can I make it gluten-free? Definitely! Just use gluten-free bread in the recipe.
  • How long does bread pudding last? It can be stored in the fridge for about 3 days or frozen for up to 2 months.

Nutritional Tips and Dietary Adaptations

If you’re looking to make this dish a bit healthier, here are some tips:

  • Reduce Sugar: You can cut the sugar in half or use a sugar substitute to lower calories.
  • Incorporate Fruits: Add fresh or dried fruits to increase the nutritional value.
  • Use Whole Grain Bread: Opt for whole wheat or whole grain bread for added fiber.

Equipment Recommendations

Here’s what you’ll need:

  • Casserole Dish: A 12 x 9 dish is perfect for this recipe.
  • Mixing Bowls: One for the custard mixture and one for assembling the bread and raisins.
  • Measuring Cups and Spoons: To ensure your measurements are just right.
  • Whisk: For mixing the custard until smooth.

Serving Suggestions

To elevate your bread pudding experience, consider these delicious accompaniments:

  • Vanilla Sauce: A warm drizzle of homemade vanilla sauce takes it to the next level.
  • Fresh Fruit: Serve with berries or sliced bananas for a refreshing contrast.
  • Whipped Cream: A dollop of whipped cream adds a light touch to the rich pudding.

Conclusion: Your Bread Pudding Adventure Awaits!

There you have it! A comprehensive guide to making the easiest, most comforting bread pudding that feels like home. Whether you stick to the classic recipe or put your creative spin on it, I hope this dish fills your kitchen with warmth and joy. Remember, cooking is all about experimenting and enjoying the process. I can’t wait to hear how your bread pudding turns out. Happy baking, and may each bite bring you a little closer to feeling at home!

easy bread pudding recipe

Prep Time 10 minutes
Cook Time 45 minutes
Total Time 55 minutes
Servings 6 servings
Calories 250
A simple and delicious bread pudding perfect for using up leftover bread and dried fruits. This comforting dessert is quick to prepare and sure to satisfy.

Ingredients

Bread and dried fruits

  • 4 cups bread cubes (4 slices white bread and 4 slices wheat bread)
  • 1/3 cup raisins (or dried cranberries or cherries)
  • 4 pieces eggs
  • 2-1/2 cups milk
  • 1/2 cup sugar
  • 1 teaspoon vanilla
  • 1/2 teaspoon cinnamon

Instructions 

  • Preheat oven to 350°F (175°C) and grease a 12x9-inch casserole dish.
  • Layer bread cubes and raisins in the dish.
  • Beat eggs in a bowl, then stir in milk, sugar, vanilla, and cinnamon.
  • Pour the egg mixture over the bread, ensuring all pieces are coated.
  • Bake for 40-45 minutes until golden and set.

Notes

You can substitute dried cranberries or cherries for raisins for variation.
Calories: 250kcal
Cost: $10
Course: Dessert
Keyword: bread, dessert, easy

Why You’ll Crave This Sweet Chili Salmon Bowl

Imagine coming home after a long day, the weight of the world on your shoulders, and the moment you step into your kitchen, the tantalizing aroma of sweet chili salmon fills the air. This Healthy Sweet Chili Salmon Bowl isn’t just a meal; it’s a comforting embrace served in a bowl. Bursting with vibrant flavors and wholesome ingredients, it’s the kind of dish that makes even the busiest weeknights feel special. With the perfect balance of sweet and savory, plus a delightful medley of textures, this bowl is sure to become a go-to recipe in your household.

What I love most about this dish is its simplicity. You don’t need to be a culinary wizard to whip up a bowl that looks and tastes like it came from a fancy restaurant. In less than 30 minutes, you can serve a meal that not only nourishes the body but also warms the soul. Plus, it’s packed with omega-3 fatty acids from the salmon, making it a heart-healthy option that doesn’t skimp on flavor.

Ingredients for Your Sweet Chili Salmon Bowl

Here’s what you’ll need to create this scrumptious dish:

  • 2 salmon fillets
  • 2 tablespoons sweet chili sauce
  • 1 tablespoon olive oil
  • 1 cup cooked brown rice
  • 1 cup steamed broccoli
  • 1/2 cup shredded carrots
  • 1/4 cup chopped green onions
  • 1 tablespoon sesame seeds
  • Salt and pepper to taste

Gathering fresh ingredients is key to achieving the best flavors. I recommend looking for high-quality salmon—wild-caught if possible—because it elevates the dish significantly. Fresh vegetables not only add crunch but also a splash of color that makes your bowl appetizing and visually appealing.

How to Create Your Sweet Chili Salmon Bowl

Food photography of a vibrant bowl filled with salmon, brown rice, and fresh vegetables, highlighting sweet chili sauce drizzle.

Ready to experience the magic of this bowl? Let’s dive into the step-by-step process:

  1. Preheat your oven to 400°F (200°C).
  2. In a small bowl, mix together the sweet chili sauce, olive oil, salt, and pepper to create a delicious glaze.
  3. Place the salmon fillets on a baking sheet lined with parchment paper for easy cleanup.
  4. Generously brush the sweet chili mixture over the salmon fillets, ensuring they’re well coated.
  5. Bake the salmon in the preheated oven for 12-15 minutes, or until the fillets are cooked through and flake easily with a fork.
  6. While the salmon is baking, prepare your brown rice and steam the broccoli until it’s tender yet crisp.
  7. In a bowl, layer the cooked brown rice, steamed broccoli, and shredded carrots, creating a colorful base.
  8. Once the salmon is done, place it on top of the vegetable and rice mixture.
  9. Finally, garnish your bowl with chopped green onions and a sprinkle of sesame seeds before serving.

And voilà! You have a beautiful sweet chili salmon bowl ready to be devoured.

Tips for the Perfect Bowl

To make sure your sweet chili salmon bowl is nothing short of spectacular, keep these tips in mind:

  • Choose Quality Salmon: Opt for fresh, high-quality salmon for the best flavor and texture. Wild-caught salmon is a fantastic choice.
  • Don’t Overcook: Keep an eye on your salmon as it cooks. Overcooked salmon becomes dry, so check for doneness by seeing if it flakes easily with a fork.
  • Customize Your Vegetables: Feel free to switch out the steamed broccoli and carrots for whatever veggies you have on hand. Snap peas, bell peppers, or even zucchini would be delicious!
  • Add More Flavor: For an extra kick, consider marinating your salmon in some garlic or ginger before brushing on the sweet chili sauce.

Common Mistakes to Avoid

Even the best cooks make mistakes, so here are a few common pitfalls to watch out for:

  • Overcooking the Salmon: As mentioned, aim for a medium-rare finish. Ideally, the center should remain slightly translucent for optimal taste and texture.
  • Using Low-Quality Ingredients: Low-quality salmon or pre-packaged sauces can lead to a less satisfying dish. Invest in good ingredients for the best results.
  • Neglecting Flavor Balance: Ensure you have a mix of sweet, savory, and spicy elements in your bowl. This balance is crucial for a delicious outcome.
  • Ignoring Portion Control: While this dish is healthy, be mindful of your serving sizes to maintain a balanced diet.

Serving Suggestions

This Healthy Sweet Chili Salmon Bowl is incredibly versatile and pairs wonderfully with a variety of sides:

  • Steamed Broccoli: A classic pairing that adds nutrition and crunch.
  • Quinoa Salad: Mix cooked quinoa with diced cucumbers and cherry tomatoes for a refreshing twist!
  • Avocado Slices: Creamy avocado on top adds richness and healthy fats.
  • Cilantro Lime Rice: Jazz up your rice with chopped cilantro and a squeeze of lime for extra flavor.

Storage and Meal Prep

If you’re looking to meal prep, this dish is fantastic! You can store cooked salmon in an airtight container in the fridge for up to three days. Just assemble the bowls right before serving to keep everything fresh. If you want to freeze the salmon, it can last up to three months—just make sure to wrap it well to prevent freezer burn.

FAQs

Can I make this recipe gluten-free?
Absolutely! Just use gluten-free soy sauce or tamari when preparing the dish and ensure your sweet chili sauce is gluten-free.

How can I customize this dish?
Feel free to swap out vegetables based on what you have on hand, or try using different grains like quinoa or cauliflower rice for a low-carb option.

Is this salmon bowl good for meal prep?
Yes! It’s perfect for meal prep. Just store the components separately and assemble them before eating.

Troubleshooting Common Issues

Everyone has their off days in the kitchen, so here are a few troubleshooting tips:

  • If your salmon is dry, you may have overcooked it. Cooking times can vary based on the thickness of your fillets, so keep checking for doneness.
  • If the sweet chili sauce is too sweet for your taste, balance it with a squeeze of fresh lime juice before serving.
  • If your vegetables seem bland, add a pinch of salt or a drizzle of olive oil to enhance their flavor.

Conclusion

Cooking is a journey, and every dish tells a story. This Healthy Sweet Chili Salmon Bowl is not just a recipe; it’s a celebration of flavors and a reminder of the joy that home-cooked meals can bring. Whether you’re cooking for yourself, your family, or friends, I hope this bowl brings a little magic to your dinner table. So, grab your ingredients, put on your favorite playlist, and let’s create something delicious together. Don’t forget to share a photo of your creation with me—I can’t wait to see how your culinary adventure unfolds!

Healthy Sweet Chili Salmon Bowl: Easy Recipe

Prep Time 10 minutes
Cook Time 15 minutes
Total Time 25 minutes
Servings 2 servings
Calories 520
This vibrant and healthy salmon bowl combines sweet chili flavor with nutritious vegetables and brown rice for a quick, delicious meal.

Ingredients

Protein

  • 2 fillets salmon fillets

Sauces & Condiments

  • 2 tablespoons sweet chili sauce
  • 1 tablespoon olive oil

Grains

  • 1 cup cooked brown rice

Vegetables

  • 1 cup steamed broccoli
  • 1/2 cup shredded carrots
  • 1/4 cup chopped green onions

Seeds & Garnishes

  • 1 tablespoon sesame seeds
  • to taste salt and pepper

Instructions 

  • Preheat oven to 400°F (200°C).
  • Mix sweet chili sauce, olive oil, salt, and pepper. Brush over salmon.
  • Bake salmon for 12-15 minutes.
  • Prepare rice and steam broccoli.
  • Layer rice, broccoli, carrots; top with salmon. Garnish with green onions and sesame seeds.

Notes

For extra flavor, add a squeeze of lime before serving.
Calories: 520kcal
Cost: $15
Course: Main Course
Cuisine: fusion
Keyword: Salmon

Loved this recipe? Save it to your favorite Pinterest board so you can easily find it later! It’s the perfect way to keep all your sweet ideas in one place. ✨

Delicious salmon bowl with brown rice, broccoli, carrots, and sesame seeds, captured in soft, warm lighting.

Why You’ll Fall in Love with This Dish

There’s something truly magical about a well-cooked chicken breast, especially when it’s bursting with flavor and oozing with cheesy goodness. This Stuffed Chicken Breast With Mushrooms Easy Flavor Packed Dinner Recipe takes the humble chicken breast to new heights. Imagine tender, juicy chicken enveloping a creamy, savory filling of mushrooms and spinach. It’s the kind of meal that brings people together around the table, evoking warm memories and creating new ones.

Whether you’re cooking for a family dinner, a special gathering, or just a cozy night in, this recipe is not just a dish; it’s an experience. Plus, it’s surprisingly simple to whip up, making it the perfect choice for both novice cooks and seasoned chefs alike. So, let’s dive into the details of how to create this cozy masterpiece!

Ingredients You’ll Need

To make this delicious stuffed chicken, gather the following ingredients:

  • 2 large chicken breasts
  • 1 cup mushrooms, chopped
  • 1 cup spinach, chopped
  • 1/2 cup cream cheese, softened
  • 1/2 cup shredded mozzarella cheese
  • 2 cloves garlic, minced
  • 1 teaspoon Italian seasoning
  • Salt and pepper to taste
  • 2 tablespoons olive oil
  • 1 tablespoon fresh parsley, chopped (for garnish)

Step-by-Step Guide to the Perfect Stuffed Chicken

Deliciously presented stuffed chicken breast with a creamy mushroom filling, soft natural lighting.

Creating this stuffed chicken is as easy as 1-2-3—well, more like 1-2-9, but who’s counting? Follow these steps for a meal that’s sure to impress:

1. Preheat the Oven

Start by preheating your oven to 375°F (190°C). This ensures that your chicken will bake perfectly once it’s stuffed and ready to go.

2. Sauté the Aromatics

In a skillet over medium heat, heat the olive oil and sauté the minced garlic until it becomes fragrant—about 1-2 minutes. This step is where the magic begins; the aroma of garlic alone is enough to get anyone excited about dinner!

3. Cook the Mushrooms and Spinach

Next, add the chopped mushrooms and spinach to the skillet. Cook them together until the mushrooms are soft and the spinach is wilted, which should take about 5 minutes. This combination creates a deliciously earthy and vibrant filling that pairs perfectly with the chicken.

4. Mix the Filling

In a mixing bowl, combine the sautéed mushrooms and spinach with the softened cream cheese, shredded mozzarella, Italian seasoning, salt, and pepper. Stir until everything is well combined and creamy. This filling is going to be the heart of our dish, so make sure it’s well-mixed!

5. Prepare the Chicken Breasts

Take your chicken breasts and place them on a cutting board. Using a sharp knife, carefully cut a pocket into each chicken breast. Be cautious not to cut all the way through—think of it like making a small pouch for your delicious filling!

6. Stuff the Chicken

Now for the fun part: stuffing! Spoon the mushroom and cheese mixture into each chicken pocket. Don’t be shy—fill them up! If you find that the filling is overflowing, you can secure the openings with toothpicks to keep everything in place while cooking.

7. Season the Chicken

Sprinkle some salt and pepper on the outside of each stuffed chicken breast. This step enhances the flavor of the chicken itself, complementing the savory filling.

8. Sear the Chicken

In the same skillet you used for the filling, heat a bit more olive oil over medium-high heat. Sear the stuffed chicken breasts for about 3-4 minutes on each side, or until they’re golden brown. This step adds a lovely color and flavor to the chicken, creating that beautiful crust we all love.

9. Bake to Perfection

Transfer the seared chicken to a baking dish and pop it into your preheated oven. Bake for 20-25 minutes, or until the chicken is cooked through and the juices run clear. Always check the internal temperature; it should reach 165°F (74°C).

Tips for Success

Here are a few helpful tips to ensure your stuffed chicken comes out perfectly every time:

  • Choose the Right Chicken: Look for large, even-sized chicken breasts. If they’re uneven, consider pounding the thicker parts to ensure even cooking.
  • Don’t Overstuff: While it’s tempting to cram as much filling as possible, overstuffing can lead to leakage during cooking. Aim for a generous but manageable amount of filling.
  • Rest Before Serving: Let the chicken rest for about 5 minutes after baking. This allows the juices to redistribute, ensuring a moist and tender bite.
  • Use a Meat Thermometer: This tool is your best friend! It takes the guesswork out of cooking chicken and ensures it’s done perfectly every time.

Delicious Variations to Try

While this recipe is fantastic as is, don’t hesitate to get creative! Here are a few variations to consider:

  • Cheese Options: Swap mozzarella for your favorite cheese. Gruyère adds a nutty flavor, while goat cheese provides a tangy twist.
  • Herbs and Spices: Experiment with different herbs! Fresh basil or thyme can elevate the flavor profile even further.
  • Add Nuts: Chopped walnuts or pine nuts can add a delightful crunch to the filling.
  • Vegetable Additions: Consider adding sun-dried tomatoes or artichoke hearts for a Mediterranean flair.

Storage and Freezing Tips

Made too much? No problem! Here’s how to store and freeze your stuffed chicken:

  • Refrigeration: Leftovers can be stored in an airtight container in the refrigerator for 3-4 days.
  • Freezing: To freeze, let the cooked chicken cool completely, then wrap each piece tightly in plastic wrap and aluminum foil. They can be frozen for up to 3 months.
  • Reheating: To reheat, bake at 325°F (165°C) for about 15 minutes or microwave individual portions for 1-2 minutes.

Frequently Asked Questions

Curious about some common queries regarding this dish? Here’s what you need to know:

Can I use chicken thighs instead of breasts?

Absolutely! Chicken thighs are juicier and can work beautifully in this recipe.

What if I don’t have cream cheese?

You can substitute with sour cream or ricotta cheese, but the texture and flavor will vary slightly.

How do I know when the chicken is done?

The best way is to use a meat thermometer. It should read 165°F (74°C) at the thickest part of the breast.

Conclusion: A Cozy Meal Awaits

This Stuffed Chicken Breast With Mushrooms Easy Flavor Packed Dinner Recipe is not just a meal; it’s a celebration of flavors that brings comfort to any table. With its creamy filling and tender chicken, it’s bound to impress anyone lucky enough to join you for dinner. So, gather your ingredients, roll up your sleeves, and get ready to create a dish that’s not only delicious but also filled with love and warmth. I promise, this recipe will become a staple in your kitchen, just as it has in mine. Happy cooking!

Stuffed Chicken Breast With Mushrooms Easy Flavor Packed Dinner Recipe

Prep Time 15 minutes
Cook Time 30 minutes
Total Time 45 minutes
Servings 4 servings
Calories 450
A delicious and easy-to-make stuffed chicken breast recipe filled with mushrooms, spinach, and cheese, perfect for a flavorful dinner.

Ingredients

Protein

  • 2 large chicken breasts

Vegetables

  • 1 cup mushrooms, chopped
  • 1 cup spinach, chopped

Dairy & Cheese

  • 1/2 cup cream cheese, softened
  • 1/2 cup shredded mozzarella cheese

Other ingredients

  • 2 cloves garlic, minced
  • 1 teaspoon italian seasoning
  • to taste salt and pepper
  • 2 tablespoons olive oil
  • 1 tablespoon fresh parsley, chopped (for garnish)

Instructions 

  • Preheat oven to 375°F (190°C).
  • Sauté garlic in olive oil, then add mushrooms and spinach; cook until soft.
  • Mix cooked vegetables with cheeses, seasoning, salt, and pepper.
  • Cut pockets in chicken breasts, stuff with mixture, and secure.
  • Sear chicken in skillet, then bake for 20-25 minutes. Rest and garnish with parsley before serving.

Notes

Use toothpicks to secure stuffed chicken if needed, and ensure chicken is cooked through.
Calories: 450kcal
Cost: $15
Course: Main Course
Cuisine: American
Keyword: Chicken, Mushrooms, stuffed

Loved this recipe? Save it to your favorite Pinterest board so you can easily find it later! It’s the perfect way to keep all your sweet ideas in one place. ✨

Eye-level shot of a succulent stuffed chicken breast, showcasing its rich filling and texture.

Why This Dish Will Become Your New Favorite

If you’re on the hunt for a dish that combines simplicity, elegance, and a flavor profile that sings with sweetness and savoriness, look no further than Honey Garlic Glazed Salmon. This delightful recipe not only tantalizes your taste buds but also makes for an exquisite presentation that will impress family and friends alike. It’s perfect for those busy weeknights when you want something quick yet special, or for occasions when you want to treat your loved ones to a dinner that feels gourmet without the fuss. Trust me; once you make this dish, it’s bound to become a staple in your meal rotation.

Ingredients

  • 4 salmon fillets (about 6 oz each), skin on or off
  • Salt and pepper, to taste
  • 1/2 tsp smoked paprika
  • 2 tsp olive oil
  • 3 tbsp unsalted butter
  • 4 cloves garlic, minced
  • 1/4 cup honey
  • 2 tbsp water
  • 1 tbsp soy sauce
  • 1 tbsp fresh lemon juice
  • 1/2 tbsp chopped fresh parsley (optional, for garnish)
  • Lemon wedges (for serving)

Steps to Culinary Perfection

Eye-level view of a grilled salmon fillet coated in honey garlic sauce, served with lemon wedges on the side.

Let’s dive into the cooking process that will yield this mouthwatering salmon. You’ll find that the steps are not only easy to follow but also allow room for a little creativity!

  1. Start by patting the salmon fillets dry with paper towels. This step is crucial as it helps achieve that beautiful golden crust. Season both sides generously with salt, pepper, and smoked paprika. Trust me; this trio of seasoning works wonders!
  2. In a large skillet, heat the olive oil over medium-high heat. Once the oil is hot and shimmering, gently place the salmon fillets in the skillet, skin-side up if you’re using skin-on fillets.
  3. Let the fillets cook undisturbed for 4-5 minutes. This is where the magic happens; a golden crust will form, providing a delightful texture. Don’t rush this step—patience is key!
  4. Carefully flip the salmon fillets and cook for an additional 3-4 minutes, or until they’re cooked through. You’ll know they’re done when they flake easily with a fork. Remove the fillets from the skillet and set them aside on a plate.
  5. In the same skillet, reduce the heat to medium and add the butter. Watch it melt and coat the pan beautifully.
  6. Once the butter is melted, add the minced garlic and sauté for about 30 seconds until fragrant. The smell will be heavenly!
  7. Now, stir in the honey, water, soy sauce, and fresh lemon juice. Bring this mixture to a simmer and let it cook for 1-2 minutes, allowing it to thicken slightly. This glaze is the star of the show!
  8. Return the salmon fillets to the skillet and spoon the luscious glaze over the top. Cook for another 1-2 minutes, basting frequently until the salmon is glossy and well coated with that sweet and savory magic.
  9. Garnish with chopped parsley if you’re feeling fancy and serve immediately with lemon wedges on the side.

Tips for Success

Here are some tips to ensure your Honey Garlic Glazed Salmon comes out beautifully every time:

  • Choose Quality Salmon: The freshness of your salmon will significantly affect the flavor of your dish. Look for fillets that are bright in color and smell fresh.
  • Don’t Overcook: Salmon is best when it’s flaky but still moist. If you have a meat thermometer, aim for an internal temperature of 145°F (63°C).
  • Adjust Sweetness: If you prefer a tangier glaze, feel free to reduce the honey slightly or add a bit more lemon juice.

Variations to Try

This recipe is wonderfully versatile, allowing you to adapt it to your personal taste. Here are a few variations that you might enjoy:

  • Citrus Twist: Swap out the lemon juice for lime juice for a different citrus profile.
  • Spicy Kick: If you like heat, add a pinch of red pepper flakes or a dash of sriracha to the glaze.
  • Herb Infusion: Experiment with different herbs such as thyme or dill for an aromatic twist.

Substitutions

If you’re missing any ingredients, here are some substitutions that will still yield delicious results:

  • Maple Syrup: For a different flavor, you can substitute honey with maple syrup.
  • Butter Alternatives: If you’re looking for a dairy-free option, use olive oil or coconut oil instead of butter.

Essential Equipment

To whip up this dish, you’ll need some basic kitchen tools:

  • A large skillet (preferably non-stick for easy cleanup)
  • A spatula for flipping the salmon
  • A meat thermometer (optional but useful)
  • Measuring cups and spoons

Storage and Reheating

Leftover Honey Garlic Glazed Salmon can be stored in an airtight container in the refrigerator for up to 3 days. To reheat, gently warm it in a preheated oven at 300°F (150°C) until heated through. Avoid reheating in the microwave as it can dry out the salmon.

Frequently Asked Questions

What type of salmon should I use?

Wild-caught salmon is often recommended for its flavor and texture, but farmed salmon works just as well. Look for fillets that are about 6 oz each for the best results.

Can I use frozen salmon?

Absolutely! Just make sure to thaw it completely in the refrigerator and pat it dry before seasoning.

How do I know when the salmon is done?

The salmon is perfectly cooked when it flakes easily with a fork and has reached an internal temperature of 145°F (63°C).

Can I make the sauce ahead of time?

Yes! The sauce can be prepared in advance and stored in the refrigerator. Just reheat it before adding the salmon.

What sides go well with this dish?

This salmon pairs beautifully with steamed vegetables, rice, quinoa, or a fresh green salad. For a heartier meal, consider serving it with mashed potatoes.

Conclusion

In conclusion, this Honey Garlic Glazed Salmon recipe is a delightful blend of flavors and textures that is sure to impress anyone who takes a bite. It’s the perfect canvas for you to play with flavors and make it your own. So whether you’re cooking for a special occasion or simply want to enjoy a comforting meal at home, this dish is guaranteed to bring smiles to your table. So gather your ingredients, put on your favorite playlist, and let’s create something magical together in the kitchen!

Honey Garlic Glazed Salmon

Prep Time 10 minutes
Cook Time 15 minutes
Total Time 25 minutes
Servings 4 servings
Calories 350
Enjoy a deliciously sweet and savory honey garlic glazed salmon, perfect for a quick and elegant dinner.

Ingredients

Salmon

  • 4 fillets salmon fillets (about 6 oz each) (skin on or off)
  • salt and pepper to taste salt and pepper
  • 1/2 tsp smoked paprika
  • 2 tsp olive oil
  • 3 tbsp unsalted butter
  • 4 cloves garlic, minced
  • 1/4 cup honey
  • 2 tbsp water
  • 1 tbsp soy sauce
  • 1 tbsp fresh lemon juice
  • 1/2 tbsp chopped fresh parsley (optional) (for garnish)

lemon wedges

Instructions 

  • Pat salmon dry, season with salt, pepper, and smoked paprika.
  • Heat olive oil in a skillet over medium-high heat, cook salmon skin-side up for 4-5 minutes.
  • Flip and cook 3-4 minutes until cooked through, then set aside.
  • In the same skillet, melt butter, cook garlic 30 seconds, then add honey, water, soy sauce, and lemon juice. Simmer 1-2 minutes.
  • Return salmon to skillet, spoon glaze, cook 1-2 minutes until glossy, garnish with parsley, serve with lemon wedges.

Notes

Ensure not to overcook the salmon for best texture.
Calories: 350kcal
Cost: $15
Course: Main Course
Cuisine: American
Keyword: Salmon

Loved this recipe? Save it to your favorite Pinterest board so you can easily find it later! It’s the perfect way to keep all your sweet ideas in one place. ✨

Delicious salmon fillet glistening with a honey garlic glaze, highlighted in warm natural light against a blurred background.

Why You’ll Love This Recipe

When it comes to fresh, vibrant meals that feel both indulgent and healthy, this Delicious Salmon & Avocado Poke Bowl hits all the right notes. Imagine tender, marinated salmon nestled atop a bed of fluffy sushi rice, complemented by creamy avocado, crisp cucumber, and a sprinkle of sesame seeds. Each bite is a delightful explosion of flavors and textures that transports you straight to a sunny Hawaiian beach. Whether you’re enjoying it for lunch, dinner, or as a light snack, this poke bowl is bound to become a staple in your kitchen.

Ingredients for the Perfect Poke Bowl

Before we dive into the cooking process, let’s gather our ingredients. Here’s what you’ll need:

  • 1 cup sushi rice
  • 1 1/4 cups water
  • 1 tablespoon rice vinegar
  • 1 tablespoon sugar
  • 1/2 teaspoon salt
  • 200g fresh salmon, diced
  • 1 ripe avocado, diced
  • 1/2 cucumber, thinly sliced
  • 1/4 cup edamame, shelled
  • 2 green onions, chopped
  • 1 tablespoon soy sauce
  • 1 teaspoon sesame oil
  • 1 tablespoon sesame seeds
  • Seaweed salad (optional) for topping

Each ingredient plays a crucial role in building the flavors and textures of this poke bowl. Choosing high-quality, fresh salmon is key to achieving the best results.

Step-by-Step Preparation

A beautifully arranged Poke Bowl with fresh salmon, creamy avocado, and colorful vegetables, illuminated by natural light.

Now that we have our ingredients ready, it’s time to get cooking! Follow these simple steps to create your poke bowl masterpiece.

Marinating the Salmon

Start by combining the diced salmon with soy sauce and sesame oil in a bowl. Let it marinate for about 10 minutes. This step is essential for infusing the salmon with flavor, making each bite incredibly tasty.

Cooking the Sushi Rice

In a saucepan, rinse the sushi rice under cold water until the water runs clear. This step helps remove excess starch, ensuring your rice turns out perfectly sticky. Once rinsed, combine the rice with 1 1/4 cups of water in the saucepan. Bring it to a boil, then reduce the heat, cover it, and let it simmer for about 18 minutes, or until the rice is tender.

While the rice is cooking, mix rice vinegar, sugar, and salt in a small bowl until dissolved. This mixture will give the rice its signature sushi flavor.

After the rice has finished cooking, remove it from the heat and let it sit covered for 10 minutes. Then, gently stir in the vinegar mixture and allow the rice to cool slightly.

Assembling the Bowl

Now comes the fun part! To assemble your poke bowl, start by placing a generous scoop of sushi rice at the bottom of a bowl. This forms the base of your dish and will soak up all those delicious flavors.

Next, top the rice with the marinated salmon, followed by diced avocado, cucumber slices, and shelled edamame. Sprinkle chopped green onions over the top for a burst of color and flavor.

Final Touches

Finish your poke bowl by sprinkling sesame seeds on top. If you’re feeling extra fancy, add a little seaweed salad for a delightful touch. This not only adds texture but also enhances the oceanic flavors of the dish.

Serve immediately and enjoy the freshness of your homemade poke bowl!

Tips for Making the Perfect Poke Bowl

Cooking can be a bit of an adventure, and here are some tips to ensure your poke bowl turns out just right:

  • Use Quality Ingredients: Fresh, high-quality salmon is crucial. Ask your fishmonger for sushi-grade salmon to ensure safety and flavor.
  • Don’t Rush the Rice: Allow the rice to cool properly after cooking. Warm rice can alter the texture of the poke bowl.
  • Customize Your Bowl: Feel free to add other toppings you love! Think pickled ginger, radishes, or even mango slices for a sweet twist.

Variations and Creative Ideas

The beauty of poke bowls lies in their versatility. Here are some ideas to mix things up:

  • Different Proteins: Swap salmon for tuna, shrimp, or even tofu for a vegetarian option.
  • Different Bases: Instead of sushi rice, try quinoa or brown rice for a healthier twist.
  • Additional Toppings: Add sliced jalapeños for a spicy kick or fresh herbs like cilantro for added freshness.

Substitutions to Consider

If you’re missing an ingredient or looking to make a swap, here are some substitutions:

  • Rice: You can use cauliflower rice for a low-carb version.
  • Avocado: If avocados are out of season, try using diced mango or cucumber for creaminess.

Essential Equipment

To make this poke bowl, you’ll need:

  • A medium saucepan for cooking the rice
  • A bowl for marinating the salmon
  • A serving bowl for assembling your poke bowl
  • A sharp knife for slicing and dicing your ingredients

Storage and Freezing Tips

This poke bowl is best enjoyed fresh, but if you have leftovers, here’s how to store them:

  • Store any leftover rice in an airtight container in the fridge for up to 3 days.
  • Keep the marinated salmon separate until you’re ready to eat to maintain freshness.

FAQs

Here are some common questions about poke bowls:

  • Can I prepare the poke bowl in advance? Yes, but it’s best to keep the salmon and toppings separate until you’re ready to eat to maintain freshness.
  • What type of salmon should I use? Always opt for sushi-grade salmon for safety and best flavor.

Troubleshooting Common Issues

If you encounter any hiccups along the way, here are some solutions:

  • Rice Too Sticky: Make sure to rinse the rice properly to remove excess starch before cooking.
  • Salmon Over-Marinated: If your salmon has been in the marinade too long, it can become mushy. Stick to the recommended 10 minutes.

In Conclusion

There you have it—a delightful and refreshing Salmon & Avocado Poke Bowl that’s perfect for any occasion! With its vibrant colors and bold flavors, this dish not only satisfies your hunger but also brings a taste of the tropics to your table. I hope you enjoy making this recipe as much as I do. Remember, cooking is all about experimenting and finding joy in the process. So pull up a chair, invite some friends over, and let’s create some delicious memories together. Happy cooking!

Delicious Salmon & Avocado Poke Bowl 🥑🐟 - Fresh & Healthy!

Prep Time 15 minutes
Cook Time 20 minutes
Total Time 35 minutes
Servings 2 servings
Calories 450
A vibrant and nutritious poke bowl featuring fresh salmon, creamy avocado, and crisp vegetables, perfect for a healthy meal.

Ingredients

Rice

  • 1 cup sushi rice
  • 1 1/4 cups water
  • 1 tablespoon rice vinegar
  • 1 tablespoon sugar
  • 1/2 teaspoon salt

Protein

  • 200 g fresh salmon, diced

Vegetables & Toppings

  • 1 ripe avocado, diced
  • 1/2 cucumber cucumber, thinly sliced
  • 1/4 cup edamame, shelled
  • 2 green onions chopped
  • 1 tablespoon soy sauce
  • 1 teaspoon sesame oil
  • 1 tablespoon sesame seeds

Optional Topping

  • seaweed salad seaweed salad (for topping)

Instructions 

  • Rinse rice and cook with water until tender, then let sit covered for 10 minutes.
  • Mix rice vinegar, sugar, and salt; stir into cooked rice and cool.
  • Marinate salmon with soy sauce and sesame oil for 10 minutes.
  • Assemble bowls with rice, marinated salmon, avocado, cucumber, edamame, and green onions. Top with sesame seeds and seaweed salad if desired.

Notes

Use fresh, high-quality ingredients for best flavor.
Calories: 450kcal
Cost: $15
Course: Main Course
Cuisine: Hawaiian
Keyword: Poke Bowl, Salmon

Loved this recipe? Save it to your favorite Pinterest board so you can easily find it later! It’s the perfect way to keep all your sweet ideas in one place. ✨

A delicious Salmon & Avocado Poke Bowl captured in detail, showcasing its ingredients and textures against a blurred background.

Welcome to Your New Favorite Dessert: Berry Cobbler Bliss

There’s something magical about a warm, bubbling berry cobbler that feels like home. It’s the kind of dessert that invites you to slow down, savor each bite, and perhaps even reminisce about sun-soaked summers spent picking fresh berries. In this recipe, we’ll explore how to create a Berry Cobbler using a convenient cake mix, delivering all the flavor and heart without the fuss. Whether you’re baking for a family gathering or simply treating yourself, this delightful dish is bound to impress.

Let’s dive into the berry-filled goodness that will have everyone asking for seconds!

Why You’ll Love This Recipe

  • Effortless Preparation: With a cake mix as your base, this recipe is perfect for busy days or impromptu gatherings.
  • Flavorful Fusion: Combining sweet and tart berries creates a balance that is simply irresistible.
  • Customizable: You can use a mix of frozen or fresh berries, allowing you to adapt to what’s on hand.
  • Perfect for Everyone: This dessert is great for family dinners, potlucks, or as a cozy treat just for you.
  • Quick Clean-Up: With minimal prep and one dish to wash, you can spend more time enjoying your creation and less time scrubbing pots and pans!

Berry Cobbler Ingredients

To whip up this Berry Cobbler, you’ll need the following ingredients:

  • 6 cups mixed berries: You can use a combination of fresh or frozen berries like strawberries, blueberries, raspberries, or blackberries.
  • 3 tablespoons all-purpose flour: Helps to thicken the berry mixture.
  • 2 tablespoons corn starch: This ingredient is key for achieving a luscious filling.
  • 5 tablespoons granulated sugar: Sweetens the berries and balances their tartness.
  • 1 box yellow cake mix: The star of the show for a quick and easy topping.
  • 1/2 cup melted butter: Adds richness and helps the topping bake to a golden brown.
  • 1/2 cup milk: This can be dairy or a non-dairy alternative, depending on your dietary needs.

How to Make Berry Cobbler

A delicious berry cobbler with a light yellow cake mix topping and juicy berry filling.

Follow these simple steps for a delicious Berry Cobbler:

  1. Preheat your oven to 350°F (175°C).
  2. Prepare a 9×13 baking dish with non-stick spray for easy serving.
  3. In a small bowl, mix together the flour, cornstarch, and sugar until well combined.
  4. Layer the berries in the baking dish, then sprinkle the flour mixture over them to coat.
  5. In another bowl, combine the cake mix, melted butter, and milk, stirring until a thick batter forms.
  6. Dollop the batter over the berry mixture, spreading it out as best you can (it doesn’t need to be perfect!).
  7. Bake in the preheated oven for 55-60 minutes or until bubbly and golden brown. If it browns too quickly, cover it with foil.
  8. Let cool for a few minutes before serving—this will help the filling set up a bit.

Pro Tips for the Perfect Berry Cobbler

  • Use Seasonal Berries: Fresh berries in season will elevate your cobbler’s flavor. In the off-season, frozen berries are a fantastic alternative.
  • Experiment with Spices: A dash of cinnamon or nutmeg can add warmth to the filling.
  • Don’t Overmix the Batter: Mix just until combined for a tender topping.
  • Let it Rest: Allow the cobbler to cool for a few minutes post-baking; this helps the filling thicken.
  • Tweak the Sweetness: Adjust the sugar based on the tartness of your berries; taste as you go!
  • Consider Adding Zest: A bit of lemon or orange zest can brighten the flavors beautifully.
  • Individual Servings: For fun, make mini cobblers in ramekins for personal servings.
  • Use Buttermilk for a Richer Taste: If you want a richer biscuit topping, swap regular milk for buttermilk.

Common Mistakes and Troubleshooting

Even the best bakers have their moments! Here are some issues you might encounter and how to solve them:

  • Runny Filling: If your filling is too runny, you might need more cornstarch or flour next time!
  • Dry Topping: This can happen if the batter is overmixed. Remember, a little lumpiness is okay!
  • Burnt Edges: If the edges brown too quickly, cover the cobbler with foil during the last part of baking.
  • Too Sweet: If you find it overly sweet, reduce the sugar next time or add a pinch of salt to balance it.

Delicious Variations on Berry Cobbler

Feeling adventurous? Here are some fun twists on the classic berry cobbler:

  • Peach Berry Cobbler: Combine peaches with your favorite berries for a sweet summer treat.
  • Gluten-Free Option: Substitute the cake mix with a gluten-free blend to accommodate dietary needs.
  • Chocolate Berry Cobbler: Add cocoa powder to the cake mix for a chocolate twist that pairs beautifully with berries.
  • Coconut Cream Cobbler: Use coconut milk in the batter for a tropical flavor, and sprinkle shredded coconut on top before baking.

Storage and Make-Ahead Instructions

This cobbler is best enjoyed fresh, but you can store leftovers in the refrigerator for up to 3 days. Here’s how:

  • Refrigeration: Keep covered in an airtight container to maintain freshness.
  • Freezing: You can freeze it unbaked for up to 2 months. Just assemble and wrap tightly before freezing. When ready to bake, cook from frozen, adding a few extra minutes to the bake time.
  • Reheating: To reheat, pop it in a 350°F (175°C) oven for about 15-20 minutes until warmed through.

Frequently Asked Questions

1. Can I use frozen berries for this cobbler?

Absolutely! Frozen berries work beautifully in this recipe. Just toss them in, frozen, and proceed as directed.

2. How do I know when my cobbler is done?

Your cobbler is ready when it’s golden brown on top and bubbly around the edges. A toothpick inserted into the cake topping should come out clean.

3. Can I make this cobbler in advance?

Yes! You can prepare it ahead of time and bake it just before serving for warm, fresh dessert.

4. What should I serve with my berry cobbler?

It’s delightful on its own, but a scoop of vanilla ice cream or a dollop of whipped cream takes it to the next level!

5. Can I substitute the yellow cake mix?

Yes! You can use a white cake mix or even a spice cake mix for a different flavor profile.

6. What if I don’t have cornstarch?

You can substitute with an equal amount of arrowroot powder or additional flour.

7. Is it possible to make individual servings?

Definitely! Just divide the berry mixture and batter among ramekins and adjust the bake time accordingly.

8. How can I make this recipe vegan?

Use a plant-based cake mix, dairy-free milk, and a vegan butter substitute for a delicious vegan cobbler.

Nutritional Tips and Dietary Adaptations

This Berry Cobbler can be adapted to fit various dietary needs:

  • Low Sugar: Reduce the sugar or use a sugar substitute to cut back on sweetness.
  • Gluten-Free: Use a gluten-free cake mix and flour to accommodate gluten sensitivities.
  • Vegan: Substitute all dairy ingredients with plant-based alternatives.
  • Higher Fiber: Use whole wheat flour in place of all-purpose for a fiber boost.

Equipment Recommendations

Here’s what you’ll need to make this delicious cobbler:

  • 9×13 Baking Dish: Essential for even baking and easy serving.
  • Mixing Bowls: A set of various sizes will make mixing the ingredients a breeze.
  • Measuring Cups and Spoons: Accurate measurements are key to baking success!
  • Spatula: A silicone spatula is great for folding in ingredients and spreading the batter.

Serving Suggestions

To elevate your berry cobbler experience:

  • Serve it Warm: It’s best enjoyed fresh from the oven, warm and bubbly.
  • Pair with Ice Cream: Vanilla or cinnamon ice cream adds a delightful creaminess.
  • Garnish with Mint: A sprinkle of fresh mint leaves adds a pop of color and freshness.
  • Make it a Breakfast Treat: Serve leftovers over yogurt for a delicious breakfast twist.

Now that you know all the ins and outs of making the perfect Berry Cobbler, it’s time to gather your ingredients and get baking! I can’t wait for you to experience the joy of sharing this comforting dessert with your loved ones. Remember, every bite is a little piece of magic, just waiting to happen!

Berry Cobbler from Cake Mix

Prep Time 10 minutes
Cook Time 1 hour
Total Time 1 hour 10 minutes
Servings 8 pieces
Calories 250
A quick and delicious berry cobbler made with fresh or frozen berries and a simple cake mix topping, perfect for a comforting dessert.

Ingredients

Fruits

  • 6 cups mixed berries (frozen or fresh)
  • 3 tbsp all-purpose flour
  • 2 tbsp corn starch
  • 5 tbsp granulated sugar
  • 1 box yellow cake mix (for a 9x13 cake)
  • 1/2 cup butter (melted)
  • 1/2 cup milk

Instructions 

  • Preheat oven to 350°F (175°C). Prepare a 9x13 dish with non-stick spray.
  • Mix flour, cornstarch, and sugar. Add berries to dish, then coat with mixture and spread evenly.
  • Combine cake mix, melted butter, and milk to form a batter. Dollop over berries and spread gently.
  • Bake for 55-60 minutes until bubbly and golden. Cover with foil if browning too quickly.
  • Cool slightly before serving. Enjoy!

Notes

For best results, use fresh berries if available.
Calories: 250kcal
Cost: $10
Course: Dessert
Cuisine: American
Keyword: berries

Why This Salmon Bowl Will Steal Your Heart

Welcome to a culinary adventure that promises to delight your taste buds and nourish your soul! If you’re on the hunt for a quick yet satisfying dinner option, look no further than this Honey Garlic Salmon Bites Bowl. This dish is more than just a meal; it’s a celebration of flavors that harmoniously blend sweetness and savory goodness. Imagine tender salmon pieces glazed in a luscious honey garlic sauce, nestled on a bed of wholesome brown rice or quinoa, all topped with creamy avocado and vibrant veggies. It’s comfort food that’s easy to whip up, making it perfect for busy weeknights or when you want to impress guests without spending hours in the kitchen.

What Sets This Dish Apart?

One of the most enchanting aspects of this recipe is its balance of flavors. The honey provides a delightful sweetness, while the garlic adds depth and richness, creating a glaze that is simply irresistible. It’s not just about taste; this meal is also a powerhouse of nutrients, making it as good for your body as it is for your palate.

The Flavor Profile

A beautifully arranged bowl of Honey Garlic Salmon Bites with bright green broccoli, sliced avocado, and garnished with sesame seeds.

The combination of honey and garlic in this recipe is a match made in culinary heaven. The sweetness of the honey beautifully complements the savory notes of the soy sauce and the warm, aromatic kick from the garlic and ginger. Each bite of salmon is tender and juicy, with a slight caramelization that adds a wonderful texture. Topped with fresh ingredients like avocado and steamed broccoli, this bowl is not only colorful but also a feast for the senses.

Easy Preparation Made Simple

This recipe is designed for the home cook who values convenience without sacrificing flavor. With just a handful of ingredients and under 30 minutes of your time, you can create a dish that feels gourmet but is incredibly easy to prepare. Let’s dive into the essential components of this bowl!

Ingredients for Your Honey Garlic Salmon Bites Bowl

Here’s what you’ll need to bring this magical dish to life:

  • 1 lb salmon fillet, cut into bite-sized pieces
  • 3 tablespoons honey
  • 2 tablespoons soy sauce
  • 3 cloves garlic, minced
  • 1 tablespoon olive oil
  • 1 teaspoon ginger, grated
  • Salt and pepper to taste
  • 2 cups cooked brown rice or quinoa
  • 1 cup steamed broccoli
  • 1 avocado, sliced
  • Sesame seeds for garnish
  • Chopped green onions for garnish

Step-by-Step Instructions to Prepare the Bowl

Preparing the Salmon

The first step to achieving that sweet and savory magic is to create a marinade for the salmon. In a bowl, whisk together the honey, soy sauce, minced garlic, olive oil, grated ginger, salt, and pepper. This marinade is where the flavor explosion begins!

Once your marinade is ready, gently toss the salmon pieces in it, ensuring they are well-coated. Let them sit for about 15-20 minutes to soak up all that deliciousness. This step is crucial for infusing the salmon with flavor.

Cooking Techniques for Maximum Flavor

There are two fantastic methods you can use to cook your salmon: pan-searing for a crispy exterior or baking for a hands-off approach. Let’s explore both!

Pan-Seared Salmon

For those who crave a delightful crust, heat a non-stick skillet over medium heat. Add a splash of olive oil and once it’s shimmering, carefully place the marinated salmon pieces in a single layer. Cook for about 3-4 minutes on each side, or until the salmon is cooked through and slightly caramelized. The aroma will be heavenly!

Baked Salmon Option

If you prefer a healthier method, preheat your oven to 400°F (200°C). Arrange the salmon bites on a baking sheet lined with parchment paper, drizzle with any leftover marinade, and bake for about 10-12 minutes. You’ll achieve perfectly flaky salmon without the fuss.

Building Your Salmon Bites Bowl

Now comes the fun part—assembling your bowl! Start with a base of cooked brown rice or quinoa, both of which are packed with fiber and nutrients. Next, layer on your salmon bites, followed by a generous helping of steamed broccoli. This green veggie adds a lovely crunch and vibrant color.

Don’t forget to top it off with sliced avocado for creaminess, and sprinkle sesame seeds and chopped green onions for an extra pop of flavor and texture. It’s like a rainbow in a bowl!

Health Benefits of Salmon

Not only is this meal delicious, but it’s also incredibly nutritious. Salmon is well-known for its health benefits:

Rich in Omega-3 Fatty Acids

These essential fats are crucial for heart health and brain function. Incorporating salmon into your diet can help reduce inflammation and promote overall wellness.

High in Protein

A great source of high-quality protein, salmon supports muscle recovery and helps keep you feeling full and satisfied. It’s a wonderful addition to any balanced diet.

Tips for the Best Honey Garlic Salmon Bites

Choosing the Right Salmon

Opt for fresh, high-quality salmon for the best flavor. Wild-caught salmon is often the best choice, but farmed salmon can be delicious as well. Just ensure it looks vibrant and smells fresh!

Adjusting Sweetness

Feel free to tweak the amount of honey to suit your taste. If you prefer a less sweet dish, reduce the honey slightly or replace it with a dash of maple syrup for a different twist.

Serving Suggestions for Your Bowl

Vegetable Pairings

This dish is versatile and can be served with a variety of vegetables. Consider adding roasted bell peppers, snap peas, or even spinach for extra nutrients and color.

Side Dishes

To round out your meal, serve with a fresh salad or a light soup. A simple cucumber salad or miso soup would complement the flavors beautifully!

Storing and Reheating Leftovers

Storing Leftovers

If you find yourself with leftovers (which is unlikely because it’s so good!), store them in an airtight container in the refrigerator. They will keep well for up to 3 days.

Reheating Tips

To reheat, gently warm the salmon in a skillet over low heat or in the microwave, taking care not to overcook it. You want to maintain that tender texture!

FAQs About This Dish

Can I use frozen salmon for this recipe?

Absolutely! Just make sure to thaw it completely before cooking to ensure even results.

Is this recipe gluten-free?

Yes, simply substitute soy sauce with tamari or coconut aminos for a gluten-free option.

What can I substitute for honey?

If you’re looking for a vegan alternative, maple syrup works wonderfully in place of honey.

Can I add other vegetables to the bowl?

Of course! Feel free to mix in any of your favorite veggies—bell peppers, carrots, or zucchini would be delightful additions.

How spicy is this dish?

This dish is not inherently spicy, but if you enjoy a kick, try adding red pepper flakes or a dash of sriracha!

How long does it take to make this bowl?

From start to finish, you can have this meal ready in under 30 minutes. It’s perfect for a quick dinner!

Conclusion

In a world filled with complicated recipes that can feel overwhelming, this Honey Garlic Salmon Bites Bowl stands out as a beacon of simplicity, flavor, and health. With its irresistible combination of sweet and savory, alongside the wholesome goodness of salmon and fresh vegetables, it’s a meal that’s sure to become a staple in your kitchen. I invite you to gather your ingredients, roll up your sleeves, and create something magical. Whether you’re cooking for family, friends, or just for yourself, this dish is all about sharing love through food. Happy cooking, and don’t forget to share your creations with me—I can’t wait to see what you whip up!

Honey Garlic Salmon Bites Bowl – Quick, Flavorful & Healthy Dinner Idea!

Prep Time 15 minutes
Cook Time 10 minutes
Total Time 25 minutes
Servings 2 servings
Calories 550
Enjoy a delicious and healthy salmon bowl with sweet honey, savory soy, and fresh vegetables, perfect for a quick dinner.

Ingredients

Protein

  • 1 lb salmon fillet, cut into bite-sized pieces
  • 3 tablespoons honey
  • 2 tablespoons soy sauce
  • 3 cloves garlic, minced
  • 1 tablespoon olive oil
  • 1 teaspoon ginger, grated
  • to taste salt and pepper

Base

  • 2 cups cooked brown rice or quinoa
  • 1 cup steamed broccoli

Garnish

  • 1 avocado sliced
  • sesame seeds for garnish sesame seeds
  • chopped green onions for garnish green onions

Instructions 

  • Whisk honey, soy sauce, garlic, olive oil, ginger, salt, and pepper in a bowl.
  • Marinate salmon for 15-20 minutes.
  • Cook salmon in a skillet for 3-4 minutes per side until caramelized.
  • Layer rice, broccoli, and salmon in bowls, then top with avocado, sesame seeds, and green onions.
  • Serve immediately and enjoy!

Notes

Use fresh salmon for best flavor and texture.
Calories: 550kcal
Cost: $15
Course: dinner
Cuisine: fusion
Keyword: Salmon

Loved this recipe? Save it to your favorite Pinterest board so you can easily find it later! It’s the perfect way to keep all your sweet ideas in one place. ✨

Eye-level shot of a delicious Honey Garlic Salmon Bites Bowl, showcasing tender salmon, steamed broccoli, and grains.

Discover the Magic of Cottage Cheese Baked Ziti

Welcome to my kitchen, dear friend! If you’re here, you’re probably craving comfort food that warms your soul and makes your taste buds dance—like a beloved friend’s embrace. Let’s dive into the world of Cottage Cheese Baked Ziti, a dish that not only satisfies those hungry bellies but also brings families together around the dinner table. This creamy, dreamy pasta dish is a delightful twist on traditional baked ziti, featuring layers of ziti pasta, savory marinara sauce, and the rich, protein-packed goodness of cottage cheese. So, grab your apron, and let’s create a meal that’ll have everyone asking for seconds!

Why You’ll Love This Recipe

This isn’t just any baked ziti; it’s a **magical combination** of flavors and textures that brings joy with every bite. Here are five reasons why this Cottage Cheese Baked Ziti should be your new go-to dish:

  • Kid-approved: Packed with cheesy goodness and a familiar taste, this dish is sure to please even the pickiest eaters.
  • High-protein delight: With cottage cheese providing a protein boost, this meal is not only filling but also nutritious.
  • Easy to make: This recipe follows a straightforward process, making it perfect for busy weeknights or last-minute gatherings.
  • Customizable: Feel free to add your favorite vegetables, proteins, or spices to make it uniquely yours!
  • Make-ahead pleasure: You can prepare this dish in advance, so it’s ready to pop in the oven when you’re short on time.

Ingredients You’ll Need

Before we get into the cooking, let’s gather our ingredients. Here’s what you’ll need for this creamy masterpiece:

  • 12 oz ziti pasta: You can also use penne or any pasta shape you prefer.
  • 2 cups cottage cheese: Opt for low-fat or full-fat depending on your preference.
  • 1 egg: This helps bind the cheese mixture together.
  • 1/2 cup grated Parmesan cheese: Adds a delicious depth of flavor.
  • 2 cups marinara sauce: Store-bought or homemade, just make sure it’s your favorite!
  • 1 cup shredded mozzarella cheese: For that gooey, melty topping.
  • 1 tsp garlic powder: A must for flavor.
  • 1 tsp dried basil: Fresh or dried, it enhances the taste beautifully.
  • 1/2 tsp salt: Adjust based on your taste.
  • 1/4 tsp black pepper: For a little kick.

Step-by-Step Instructions

A delicious serving of Cottage Cheese Baked Ziti with a golden cheese crust.

Ready to bring this dish to life? Follow these simple steps to create a mouthwatering Cottage Cheese Baked Ziti:

  1. Preheat the oven: Set your oven to 375°F (190°C) so it’s hot and ready for our ziti.
  2. Cook the ziti: Boil water in a large pot, add a pinch of kosher salt, and cook the ziti according to package instructions until al dente. Drain and set aside.
  3. Prepare the cheese mixture: In a large bowl, combine cottage cheese, egg, Parmesan cheese, garlic powder, basil, salt, and pepper. Mix until well blended.
  4. Combine the pasta: Add the cooked ziti to the cheese mixture, stirring gently until the pasta is well coated.
  5. Layer the sauce: Spread half of the marinara sauce in the bottom of a baking dish. Add the ziti mixture on top and then pour the remaining marinara over the top.
  6. Add the mozzarella: Sprinkle the shredded mozzarella cheese generously on top for that perfect golden finish.
  7. Bake to perfection: Place the dish in the oven and bake for 25 minutes, or until bubbly and golden brown on top.

Pro Tips for the Perfect Baked Ziti

Here are some expert insights to take your Cottage Cheese Baked Ziti to the next level:

  • Don’t overcook the pasta: Since the ziti will continue to cook in the oven, aim for al dente to prevent mushiness.
  • Use high-quality marinara: The sauce is a key player here, so choose a brand or recipe that you absolutely love.
  • Experiment with cheese: Feel free to mix in different cheeses like ricotta or cheddar for added flavor.
  • Add veggies: Incorporate spinach, bell peppers, or mushrooms for extra nutrients and flavor.
  • Let it rest: Allow the baked ziti to sit for 5-10 minutes after baking. This helps it set up for cleaner slices.
  • Make it spicy: Add red pepper flakes for a bit of heat if that’s your style.
  • Double the recipe: This dish freezes beautifully, so consider making two batches—one for now and one for later!
  • Layer strategically: Alternate layers of sauce and cheese to ensure every bite is packed with flavor.

Common Mistakes and Troubleshooting

Even the best of us can run into hiccups while cooking. Here are some common mistakes and how to avoid them:

  • Too much sauce: If you find your baked ziti swimming in sauce, reduce the amount of marinara slightly or ensure the pasta is well-drained.
  • Dry texture: If your baked ziti comes out dry, consider adding a splash of water or more marinara before baking next time.
  • Melted cheese mess: If your cheese isn’t melting properly, cover the dish with aluminum foil for the first 15 minutes of baking.
  • Flavorless dish: Always taste and adjust seasonings before baking. A little more salt or spice can make a world of difference!

Delicious Variations

Why stick to one recipe when you can explore? Here are some fun variations of baked ziti:

  • Vegetarian Delight: Add layers of cooked zucchini, sautéed spinach, or roasted bell peppers for a veggie-packed dish.
  • Meat Lovers: Incorporate cooked ground beef, turkey, or sausage into the pasta mixture for a heartier meal.
  • Spicy Italian: Mix in some spicy Italian sausage or add jalapeños for a kick.
  • Cheesy Alfredo Ziti: Swap out marinara for Alfredo sauce and add broccoli for a creamy twist.

Storage and Make-Ahead Instructions

Planning ahead? Here’s how to store your baked ziti:

  • Refrigerator: Store leftover baked ziti in an airtight container for up to 4 days.
  • Freezer: Baked ziti freezes well. Allow it to cool completely, then wrap tightly in foil and freeze for up to 3 months.
  • Reheating: To reheat, thaw overnight in the fridge, then bake at 350°F (175°C) until heated through.
  • Make-ahead: Assemble the dish, cover tightly, and refrigerate for up to 24 hours before baking. Just add a few extra minutes to the baking time.

Comprehensive FAQ

Got questions? I’ve got answers! Here are some frequently asked questions about this recipe:

  • Can I use ricotta instead of cottage cheese? Absolutely! Ricotta will give you a creamier texture, but cottage cheese adds great protein.
  • What if I don’t have ziti? Any short pasta will work, such as penne or fusilli.
  • Can I make this gluten-free? Yes, just use gluten-free pasta and check your marinara for gluten-free ingredients.
  • Is cottage cheese healthy? Yes! It’s high in protein, low in fat, and packed with nutrients.
  • How can I make this dairy-free? Substitute cottage cheese with tofu or a dairy-free cream cheese alternative and use vegan cheese on top.
  • Can I add meat to this recipe? Definitely! Ground beef, turkey, or sausage can be mixed in for a heartier meal.
  • How can I spice it up? Consider adding red pepper flakes or jalapeños for a spicy kick.
  • What’s the best way to serve this dish? Serve it warm, with a side salad and some crusty bread for a complete meal.

Nutritional Tips and Dietary Adaptations

Let’s talk nutrition! Here’s how to adapt this dish to fit your dietary needs:

  • Low-carb option: Substitute ziti with zucchini noodles or spaghetti squash.
  • Low-fat option: Use low-fat cottage cheese and mozzarella to cut down on calories while keeping the flavor.
  • Vegan alternative: Replace dairy ingredients with plant-based alternatives and add lentils for protein.

Essential Equipment Recommendations

Before you start cooking, make sure you have the right tools on hand:

  • Large pot: For boiling the pasta.
  • Mixing bowls: For combining your cheese mixture and pasta.
  • Baking dish: A 9×13 inch baking dish works perfectly for this recipe.
  • Spatula: For mixing and layering your ingredients.
  • Aluminum foil: Useful for covering the dish while baking, if needed.

Serving Suggestions

Now that you have your Cottage Cheese Baked Ziti ready, it’s time to serve! Here are some delightful ideas:

  • Fresh salad: Pair it with a simple green salad tossed in a light vinaigrette.
  • Garlic bread: Serve with warm, crusty garlic bread for the ultimate comfort meal.
  • Wine pairing: A glass of red wine, like Chianti or Merlot, complements the flavors beautifully.
  • Dessert: Finish off the meal with a light dessert, such as panna cotta or fruit sorbet.

In conclusion, this Cottage Cheese Baked Ziti is more than just a meal; it’s a way to create memories and share moments with loved ones. Whether you’re cooking for family or friends, this dish is sure to impress and delight. So, roll up your sleeves, unleash your inner chef, and let’s make some magic happen in the kitchen. Happy cooking!

20g Protein Cottage Cheese Baked Ziti – Creamy & Kid-Approved

Prep Time 10 minutes
Cook Time 25 minutes
Total Time 35 minutes
Servings 4 servings
Calories 450
This creamy baked ziti combines cottage cheese and mozzarella for a protein-packed, kid-friendly meal that’s easy to prepare and delicious.

Ingredients

Pasta

  • 12 oz ziti pasta

Dairy

  • 2 cups cottage cheese
  • 1 egg egg
  • 1/2 cup grated Parmesan cheese

Sauces & Seasonings

  • 2 cups marinara sauce
  • 1 cup shredded mozzarella cheese
  • 1 tsp garlic powder
  • 1 tsp dried basil
  • 1/2 tsp salt
  • 1/4 tsp black pepper

Instructions 

  • Preheat oven to 375°F (190°C).
  • Cook ziti according to package, then drain.
  • Mix cottage cheese, egg, Parmesan, garlic, basil, salt, and pepper.
  • Combine cooked ziti with cheese mixture and layer with marinara and mozzarella in a baking dish.
  • Bake for 25 minutes until bubbly and golden.

Notes

Use whole wheat pasta for added fiber.
Calories: 450kcal
Cost: $15
Course: Main Course
Cuisine: Italian-American
Keyword: cottage cheese, Ziti