Author

Ava

Browsing

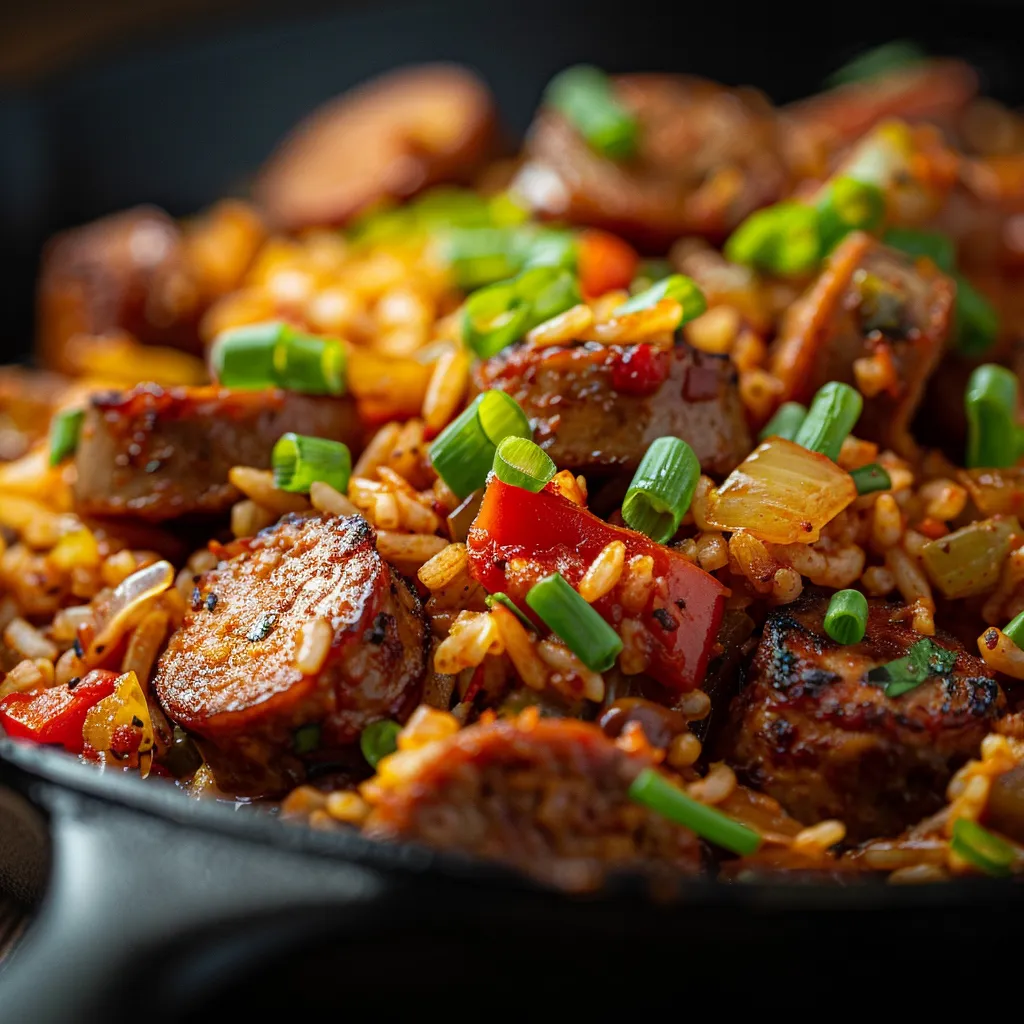
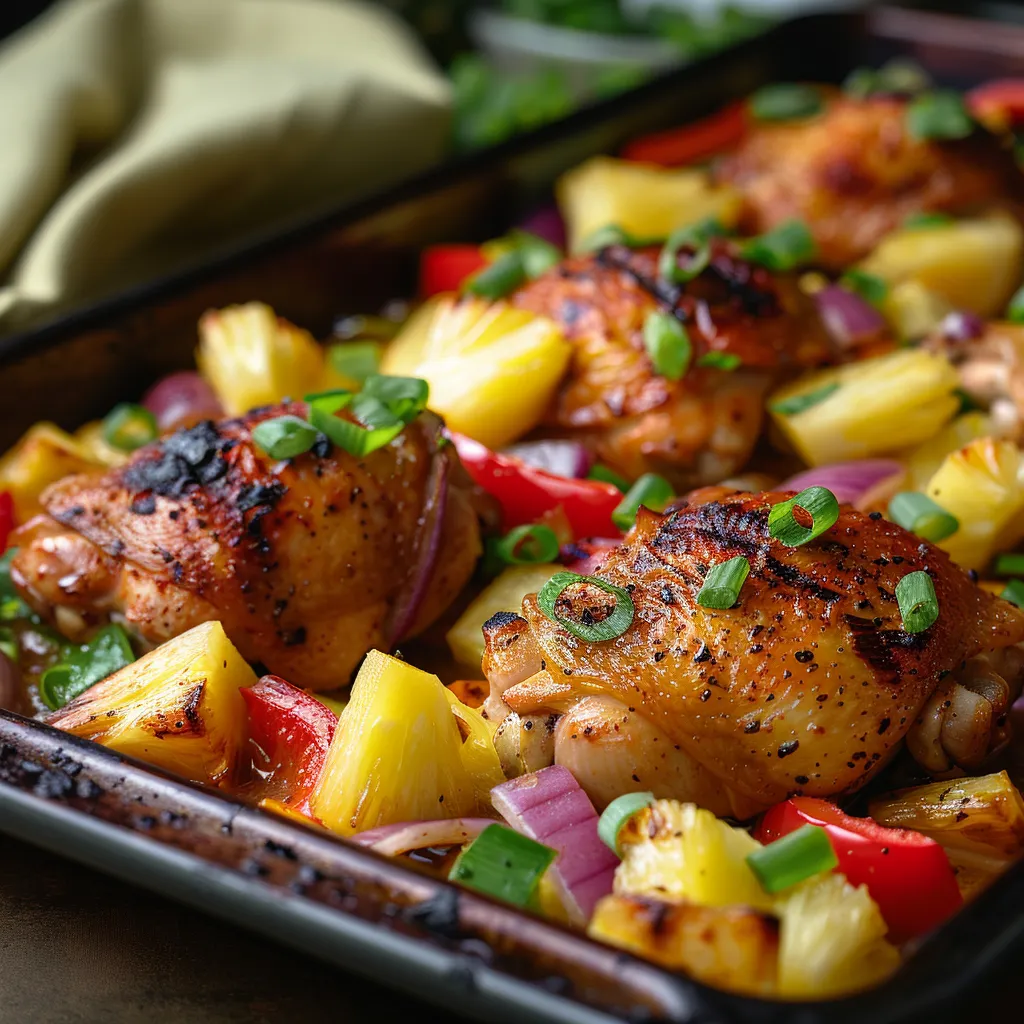
One-Pan Cajun Sausage and Rice: A Flavorful Escape in 30 Minutes

Welcome to my kitchen, friends! If you’re looking for a dish that wraps you in a warm hug and transports you to the vibrant streets of New Orleans, you’ve landed in the right place. Today, we’re diving into the world of bold flavors with a delightful Cajun Sausage and Rice Skillet. This one-pan wonder is not only quick and easy to whip up in just 30 minutes, but it also packs a punch of flavor that’s sure to become a family favorite.

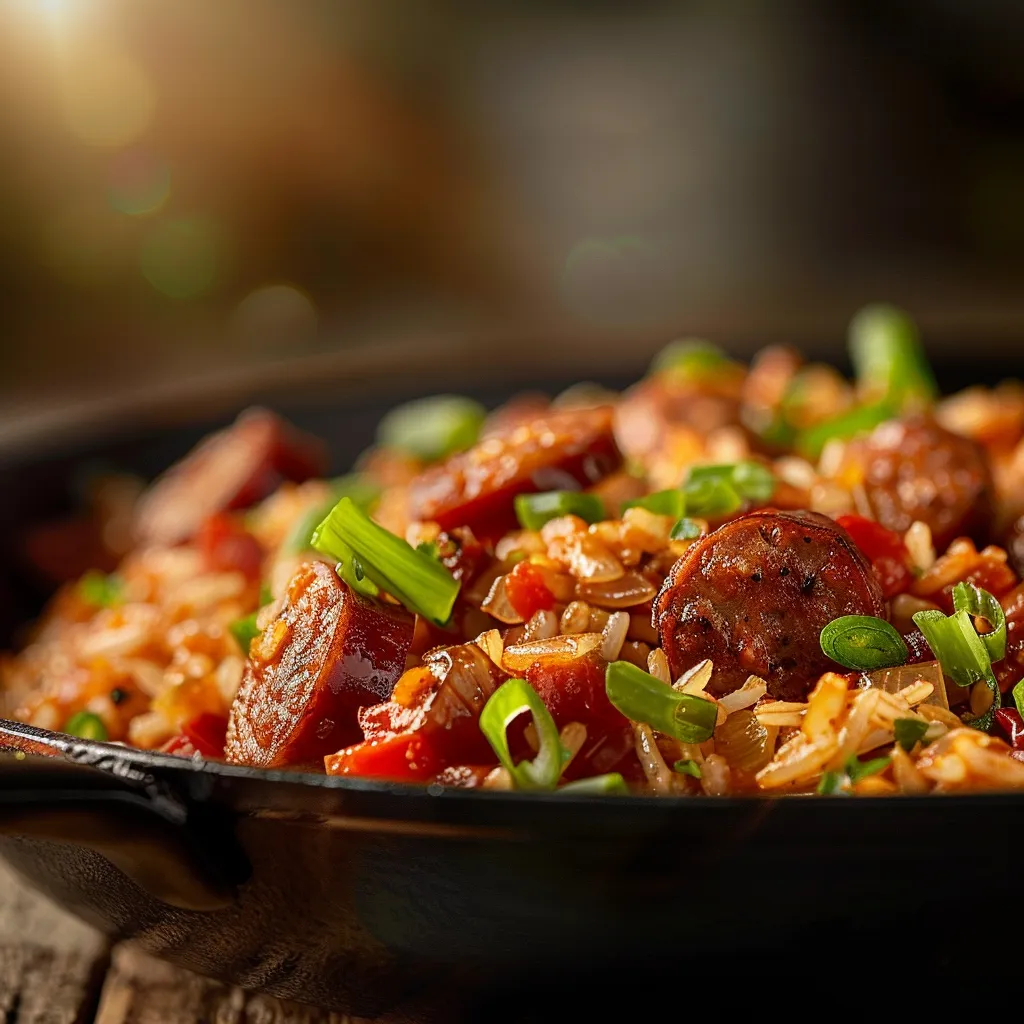
Picture this: the sizzle of Cajun sausage hitting the hot skillet, the aroma of sautéed onions and garlic dancing through the air, and the sight of colorful vegetables mingling with fluffy rice. It’s comfort food that makes you feel good from the inside out. So, grab your apron, and let’s get cooking!

Ingredients You’ll Need

Before we get started, let’s gather our ingredients. This recipe is all about simplicity and flavor. Here’s what you’ll need:

  • 1 pound Cajun sausage, sliced (smoked sausage works beautifully too!)
  • 1 cup long-grain rice
  • 1 medium onion, diced
  • 1 bell pepper, diced (red or green, whatever you have on hand)
  • 2 cloves garlic, minced
  • 1 can (14.5 oz) diced tomatoes, undrained
  • 2 cups chicken broth
  • 1 tablespoon Cajun seasoning
  • 1 teaspoon olive oil
  • Salt and pepper to taste
  • Chopped green onions for garnish

Step-by-Step Instructions

A vibrant Cajun Sausage and Rice dish in a skillet, showcasing rich textures and colors.

Ready to make some magic happen? Let’s break down the steps to create this mouthwatering dish:

  1. Heat the Olive Oil: In a large skillet, heat the olive oil over medium heat. You want just enough heat to get things sizzling without burning any of that precious flavor.
  2. Brown the Sausage: Add the sliced Cajun sausage to the skillet. Cook until browned and slightly crispy, about 3-5 minutes. The smell is fantastic and will have your family wondering what’s cooking!
  3. Add the Vegetables: Toss in the diced onion, bell pepper, and minced garlic. Cook until the vegetables soften, about 3-4 minutes. The colors are vibrant, and the aroma is making my mouth water already.
  4. Incorporate the Rice: Stir in the long-grain rice, making sure it’s well combined with the sausage and veggies. This is where it all starts to come together.
  5. Pour in the Goodness: Add the undrained diced tomatoes, chicken broth, and Cajun seasoning to the skillet. Give it a good stir to combine everything. Bring the mixture to a boil.
  6. Simmer to Perfection: Once it’s boiling, reduce the heat to low. Cover the skillet and let it simmer for about 20 minutes, or until the rice is cooked through and the liquid is absorbed. Your kitchen will smell incredible during this time!
  7. Season and Fluff: After the rice is cooked, season with salt and pepper to taste. Fluff the rice gently with a fork, and garnish with chopped green onions before serving. This adds a lovely pop of color!

Tips for Perfecting Your Cajun Skillet

Here are some tips to ensure that your Cajun Sausage and Rice Skillet turns out perfectly every time:

  • Don’t Skip the Browning: Browning the sausage adds depth of flavor. Don’t rush this step!
  • Adjust the Spice: If you prefer a milder dish, start with half the Cajun seasoning and add more to taste.
  • Use Quality Ingredients: Fresh ingredients make a difference. If you can, opt for high-quality sausage and fresh vegetables.

Serving Suggestions and Variations

This dish is wonderfully versatile! Here are some serving suggestions and variations to consider:

  • Pair with a Salad: A crisp green salad with a tangy vinaigrette complements the richness of the Cajun flavors.
  • Add More Veggies: Feel free to toss in some chopped kale, spinach, or even corn for added nutrition and color.
  • Switch Up the Protein: Try using chicken sausage for a lighter option or even shrimp for a seafood twist!

Storage and Freezing

Let’s talk about what to do with any leftovers (though I doubt there will be many!). This dish keeps well in the fridge and can be a lifesaver for busy weeknights:

  • Refrigeration: Store any leftovers in an airtight container in the fridge for up to 3 days. Just reheat in the microwave or on the stovetop.
  • Freezing: You can freeze this dish for up to 2 months. Make sure to let it cool completely before transferring to a freezer-safe container.

Recipe FAQs

Can I use brown rice instead of white rice?

Absolutely! Just keep in mind that brown rice takes longer to cook, about 35-40 minutes. You’ll also need to add a bit more liquid. Aim for about 2 1/2 cups of chicken broth.

Can I use a different type of sausage?

Yes! Feel free to substitute with chicken sausage, turkey sausage, or even a plant-based sausage if you’re looking for a lighter or vegetarian option. Just adjust cooking times as necessary.

Can I make this dish ahead of time?

Definitely! This Cajun Sausage and Rice Skillet is great for meal prep. Just store it in the fridge and reheat when you’re ready to enjoy!

Wrapping Up: A Flavorful Journey Awaits

And there you have it, a delightful Cajun Sausage and Rice Skillet that’s bursting with flavor and made in one pan! Whether you’re cooking for a busy weeknight dinner, hosting friends, or just treating yourself, this dish is sure to impress.

Cooking is a journey, and I’m so glad you chose to embark on this flavorful adventure with me. Don’t forget to explore variations and make this recipe your own. I’d love to hear how it turns out for you, so feel free to share your creations!

Now, let’s continue to fill our kitchens with love and laughter—after all, that’s what cooking is all about. Until next time, happy cooking!

Cajun Sausage and Rice Skillet (One-Pan Dinner in 30 minutes!)

Prep Time 5 minutes
Cook Time 25 minutes
Total Time 30 minutes
Servings 4 servings
Calories 450
A quick and flavorful one-pan dinner featuring spicy Cajun sausage, rice, and vegetables, ready in just 30 minutes.

Ingredients

Main

  • 1 pound cajun sausage, sliced
  • 1 cup long-grain rice
  • 1 medium onion, diced
  • 2 cloves garlic, minced
  • 1 can (14.5 oz) diced tomatoes, undrained
  • 2 cups chicken broth
  • 1 tablespoon cajun seasoning
  • 1 teaspoon olive oil
  • to taste salt and pepper salt and pepper
  • for garnish chopped green onions green onions (for garnish)

Instructions 

  • Heat olive oil in a skillet over medium heat.
  • Add sausage and cook until browned, about 3-5 minutes.
  • Stir in onion, bell pepper, and garlic; cook until softened, 3-4 minutes.
  • Add rice, tomatoes, broth, and Cajun seasoning; stir to combine.
  • Bring to a boil, then reduce heat, cover, and simmer 20 minutes until rice is cooked.
  • Season with salt and pepper, fluff rice, and garnish with green onions before serving.

Notes

Adjust seasoning to taste and serve hot.
Calories: 450kcal
Cost: $15
Course: Main Course
Cuisine: American
Keyword: Cajun, Rice, sausage

Loved this recipe? Save it to your favorite Pinterest board so you can easily find it later! It’s the perfect way to keep all your sweet ideas in one place. ✨

Detailed view of Cajun Sausage and Rice, highlighting the ingredients and cooking style.

One-Pan Wonder: A Greek Chicken Feast You’ll Want on Repeat

Welcome to my kitchen, dear friends! If you’re looking for a quick, healthy, and utterly delicious dinner that doesn’t leave you with a sink full of dishes, then you have landed in the right place. Today, we’re diving into the vibrant world of Mediterranean flavors with my Sheet Pan Greek Chicken and Veggies recipe. In just 30 minutes, you can create a meal that’s not only a feast for the eyes but also a delight for the taste buds. So, let’s roll up our sleeves and get cooking!

Why You’ll Love This Recipe

This recipe is a true one-pan wonder that combines juicy chicken thighs with an array of colorful vegetables—all roasted to perfection. Imagine the sizzle of chicken, the aroma of fresh herbs, and the vibrant colors of roasted veggies filling your kitchen. Not only is this dish a feast for the senses, but it’s also a lifesaver for busy weeknights. You can have a wholesome, hearty meal on the table in no time, leaving you with more moments to enjoy with your loved ones.

Ingredients for Greek Chicken & Veggies

Eye-level view of Greek chicken and veggies on a sheet pan, showcasing vibrant colors and textures.

For the Chicken:

  • 4 boneless, skinless chicken thighs
  • 3 tablespoons olive oil
  • 2 tablespoons lemon juice
  • 2 teaspoons dried oregano
  • 1 teaspoon garlic powder
  • Salt and pepper to taste

For the Vegetables:

  • 2 cups cherry tomatoes, halved
  • 1 bell pepper, sliced
  • 1 zucchini, sliced
  • 1 red onion, sliced
  • Feta cheese for topping (optional)
  • Fresh parsley for garnish (optional)

How to Make Sheet Pan Greek Chicken & Veggies

Ready to embark on this culinary adventure? Let’s break it down step-by-step so you can whip this up with confidence!

Step 1: Marinate the Chicken

Start by preheating your oven to 425°F (220°C). In a large mixing bowl, combine the olive oil, lemon juice, dried oregano, garlic powder, and a sprinkle of salt and pepper. This marinade is where the magic begins—each ingredient adds a layer of flavor that seeps into the chicken, making it juicy and aromatic. Toss the chicken thighs into the bowl and ensure they’re well-coated with the marinade. Let them soak up those flavors while you prep the veggies.

Step 2: Prepare the Vegetables

On a large sheet pan, spread out the cherry tomatoes, bell pepper, zucchini, and red onion. The colors should pop against the shiny surface of the pan—it’s like a painter’s palette! Drizzle a touch of olive oil over the veggies and season with a pinch of salt and pepper. Give them a gentle toss to coat them evenly. These veggies will not only add texture to the dish but also a sweetness that complements the savory chicken beautifully.

Step 3: Assemble on a Sheet Pan

Now it’s time to bring it all together! Place the marinated chicken thighs right on top of the colorful bed of veggies on the sheet pan. This allows the chicken juices to drip down as it cooks, infusing the vegetables with even more flavor. Drizzle any remaining marinade over the veggies for that extra oomph!

Step 4: Roast to Perfection

Pop the sheet pan into your preheated oven and let it work its magic. Bake for 20-25 minutes, or until the chicken is cooked through and the veggies are tender and slightly caramelized. You’ll know it’s ready when your kitchen is filled with an enticing aroma that will have everyone clamoring to the table.

Step 5: Garnish & Serve

For an extra touch of flavor, sprinkle some feta cheese over the dish and return it to the oven for an additional 5 minutes, just until the cheese is melty and golden. Once out of the oven, garnish with fresh parsley for a pop of freshness. Serve immediately and watch as your family and friends marvel at your culinary prowess!

Tips for the Best Greek Chicken Sheet Pan Dinner

  • Chicken Choices: While this recipe calls for chicken thighs, feel free to use chicken breasts if you prefer. Just keep an eye on the cooking time, as breasts can dry out quicker.
  • Chop Ahead: For meal prep, chop the vegetables the night before and marinate the chicken up to 24 hours in advance.
  • Flavor Boost: Add kalamata olives for a briny kick that pairs wonderfully with the other flavors.

What to Serve with Greek Chicken & Veggies

This dish is wonderfully versatile. Here are a few ideas for sides that will round out your meal:

  • Rice or Quinoa: Serve over fluffy rice or quinoa to soak up the delicious juices.
  • Pita Bread: Warm pita bread is perfect for scooping up the chicken and veggies.
  • Greek Salad: A fresh Greek salad with cucumbers, olives, and feta makes a refreshing accompaniment.

Storage & Meal Prep Tips

If you happen to have leftovers (which is rare in my house!), store them in an airtight container in the fridge for up to 3 days. You can reheat the chicken and veggies in the oven or microwave, although I recommend the oven to keep everything crispy. For longer storage, you can freeze the dish before cooking. Just marinate the chicken and chop the veggies, then freeze them together. When you’re ready to eat, just thaw overnight in the fridge and bake as directed.

Variations & Substitutions

Cooking is all about creativity! Here are a few ways to mix things up:

  • Vegetarian Version: Substitute the chicken with chickpeas or tofu for a plant-based meal that’s still hearty and satisfying.
  • Different Veggies: Feel free to swap out the veggies based on what you have on hand. Asparagus, broccoli, or even sweet potatoes would work beautifully!
  • Spice it Up: If you like a bit of heat, add red pepper flakes or some sliced jalapeños to the mix.

Recipe FAQs

Can I use chicken thighs instead of breasts?

Absolutely! In fact, chicken thighs are juicier and more flavorful, making them an excellent choice for this recipe.

Can I make this recipe ahead of time?

Yes! You can marinate the chicken and chop the veggies a day in advance. Just store them separately in the fridge until you’re ready to cook.

Can I make this dish vegetarian?

Definitely! Swap the chicken for chickpeas, tofu, or even halloumi cheese for a delicious vegetarian alternative.

Conclusion

And there you have it, lovely friends—a Sheet Pan Greek Chicken and Veggies recipe that’s sure to become a staple in your home. It’s not just a meal; it’s a celebration of flavors, colors, and the joy of cooking. Whether you’re treating yourself to a cozy dinner or impressing guests, this dish is a surefire way to make everyone feel special. So, what are you waiting for? Gather your ingredients, unleash your inner chef, and create some kitchen magic. Happy cooking!

Sheet Pan Greek Chicken and Veggies (30-Minutes)

Prep Time 10 minutes
Cook Time 20 minutes
Total Time 30 minutes
Servings 4 servings
Calories 450
A quick and flavorful dish combining tender chicken thighs with fresh vegetables, all baked on a single sheet pan for easy cleanup.

Ingredients

Protein

  • 4 pieces boneless, skinless chicken thighs

Vegetables

  • 2 cups cherry tomatoes, halved
  • 1 piece bell pepper, sliced
  • 1 piece zucchini, sliced
  • 1 red onion, sliced red onion

Seasonings & Liquids

  • 3 tablespoons olive oil
  • 2 tablespoons lemon juice
  • 2 teaspoons dried oregano
  • 1 teaspoon garlic powder
  • to taste salt and pepper salt and pepper

Optional Toppings

  • feta cheese to taste feta cheese for topping (optional)
  • fresh parsley to taste fresh parsley for garnish (optional)

Instructions 

  • Preheat oven to 425°F (220°C). Mix olive oil, lemon juice, oregano, garlic powder, salt, and pepper.
  • Toss chicken with marinade, then spread vegetables on a sheet pan and place chicken on top.
  • Bake for 20-25 minutes until chicken is cooked and veggies are tender. Optional: add feta and bake 5 more minutes.
  • Garnish with parsley and serve immediately.

Notes

For extra flavor, marinate the chicken longer or add your favorite herbs.
Calories: 450kcal
Cost: $15
Course: Main Course
Cuisine: Greek
Keyword: Chicken, Sheet Pan, vegetables

Loved this recipe? Save it to your favorite Pinterest board so you can easily find it later! It’s the perfect way to keep all your sweet ideas in one place. ✨

Deliciously arranged Greek chicken and mixed vegetables on a sheet pan, illuminated by natural light.

Noodles That Stick Around: My Irresistible Garlic Chicken Delight

Welcome to my cozy kitchen, where the aroma of sizzling garlic mingles with the warmth of home-cooked meals. Today, we’re diving into a recipe that has a special place in my heart: Sticky Garlic Chicken Noodles. This dish is not just a meal; it’s a hug on a plate, perfect for busy weeknights or those moments when you want to impress someone special without spending hours in the kitchen.

Imagine this: tender chicken pieces, perfectly cooked noodles, and a rich, garlicky sauce that clings to every strand, making every bite a delightful experience. If you’re looking for a quick yet satisfying way to bring the flavors of Asian cuisine into your home, you’ve come to the right place. Let’s embark on this culinary adventure together!

Why You’ll Love This Recipe

This recipe checks all the boxes: it’s quick, easy, and above all, incredibly delicious. Here’s why you’ll adore it:

  • Speedy Preparation: With just a few simple steps, you can have a mouthwatering dinner on the table in under 30 minutes.
  • Customizable: The beauty of Sticky Garlic Chicken Noodles is in its adaptability. You can swap in your favorite vegetables, experiment with different proteins, or adjust the spice level to suit your taste.
  • Family-Friendly: Kids love noodles, and the sweet-savory sauce is a hit with little ones and adults alike!
  • Meal Prep Friendly: Make it ahead of time and store it for quick lunches or dinners throughout the week.

Ingredients

Delicious Sticky Garlic Chicken Noodles served in a bowl, featuring sliced chicken and noodles.

Before we get cooking, let’s gather our ingredients. You’ll need:

  • 200g chicken breast, sliced
  • 200g noodles (your choice, but I’m partial to egg noodles)
  • 3 cloves garlic, minced
  • 2 tablespoons soy sauce
  • 1 tablespoon honey
  • 1 tablespoon vegetable oil
  • 1 tablespoon sesame oil
  • 1 tablespoon rice vinegar
  • 1/2 teaspoon red pepper flakes (optional, for a little heat)
  • 2 green onions, chopped
  • Salt and pepper to taste

Directions

Alright, let’s roll up our sleeves and get cooking! Follow these simple steps for a dish that’s sure to impress:

  1. Start by cooking the noodles according to the package instructions. Once they’re perfectly al dente, drain them and set aside. The key here is to ensure they’re not overcooked, as we’ll be tossing them into the hot pan later!
  2. In a small bowl, whisk together the soy sauce, honey, rice vinegar, and red pepper flakes. This sweet and tangy sauce is the heart of our dish, and it will coat the chicken and noodles beautifully.
  3. Heat the vegetable oil in a large skillet over medium-high heat. Add the sliced chicken, season it with salt and pepper, and cook until browned and cooked through, about 5-7 minutes. The sizzle of the chicken hitting the hot pan is music to my ears!
  4. Once the chicken is cooked, add the minced garlic to the skillet. Sauté for about 1-2 minutes, until the garlic is fragrant and golden. Be careful not to burn it; burnt garlic can turn bitter and ruin the dish!
  5. Pour the sauce over the chicken, stirring to coat evenly. Let it simmer for another 2-3 minutes until the sauce becomes sticky and luscious.
  6. Add the cooked noodles to the pan, tossing everything together so the noodles are thoroughly coated in the garlicky goodness.
  7. Finish off with a drizzle of sesame oil and a sprinkle of chopped green onions for that fresh, vibrant touch. Serve immediately and watch everyone’s eyes light up with joy!

Servings and Timing

This recipe serves about 2-3 people, making it perfect for a cozy dinner or a delightful lunch the next day. The total time from start to finish? Just about 25-30 minutes! So you can whip this up even on the busiest of nights.

Variations

Feeling adventurous? Here are some variations you can try with your Sticky Garlic Chicken Noodles:

  • Vegetable Medley: Toss in some bell peppers, broccoli, or snap peas for a colorful and nutritious boost.
  • Protein Swap: Substitute the chicken with shrimp, beef, or even tofu for a vegetarian option.
  • Herb Infusion: Add a sprinkle of fresh cilantro or basil for an aromatic twist.
  • Spicy Kick: Increase the red pepper flakes or add a drizzle of sriracha to amp up the heat.

Storage and Reheating

Leftovers? Yes, please! Here’s how to store and reheat your delicious creation:

  • Storage: Keep any leftovers in an airtight container in the fridge for up to 3 days. The flavors will continue to meld, making it even tastier!
  • Freezing: While it’s best enjoyed fresh, you can freeze the chicken and sauce mixture (without the noodles) for up to 2 months. Just be aware that the noodles may change texture upon reheating.
  • Reheating: To reheat, simply toss it in a skillet over medium heat until warmed through, adding a splash of water or broth if needed to loosen the sauce.

FAQs

Can I use pre-cooked chicken for this recipe?

Absolutely! Simply add it to the skillet when you pour in the sauce to heat through.

What type of noodles works best?

You can use rice noodles, egg noodles, or even spaghetti—whatever you have on hand!

Can I make this dish ahead of time?

Yes! You can prepare the chicken and sauce ahead of time and store them separately. Just toss everything together right before serving.

Is this recipe gluten-free?

To make it gluten-free, substitute soy sauce with tamari and ensure your noodles are gluten-free.

How can I make the sauce thicker?

Increase the amount of cornstarch or let the sauce simmer longer to reduce and thicken it.

Can I freeze this dish?

While the chicken and sauce can be frozen, it’s best to avoid freezing the noodles due to potential texture changes.

What vegetables can I add?

Bell peppers, broccoli, snap peas, or even carrots make great additions to this dish.

Can I use other proteins?

Yes! Feel free to substitute chicken with shrimp, beef, or tofu based on your preference.

How do I prevent the noodles from sticking?

Toss the cooked noodles with a bit of oil before adding them to the skillet to prevent them from clumping together.

Is it necessary to marinate the chicken?

While marinating isn’t required, you can marinate the chicken in the sauce for about 30 minutes for an extra flavor boost.

Conclusion

There you have it—my Sticky Garlic Chicken Noodles recipe that’s bound to become a staple in your kitchen! This dish is not just about satisfying your hunger; it’s about creating memories around the dinner table, sharing laughter, and enjoying the simple pleasures of life. So grab your ingredients, and let’s make some magic together. And remember, whether it’s a cozy night in or a gathering with friends, these noodles are sure to stick around in more ways than one!

If you loved this recipe, be sure to check out my other creations like Wrap Yourself in Flavor: Cheesy Garlic Chicken Magic Awaits and The Simple Garlic Parmesan Chicken Pasta That Always Brightens My Day. Happy cooking!

Sticky Garlic Chicken Noodles

Prep Time 10 minutes
Cook Time 15 minutes
Total Time 25 minutes
Servings 4 servings
Calories 550
A quick and flavorful Asian-inspired dish featuring tender chicken, garlic, and noodles coated in a savory sticky sauce.

Ingredients

Protein

  • 200 g chicken breast, sliced

Carbohydrates

  • 200 g noodles (your choice)

Flavorings & Oils

  • 3 cloves garlic, minced
  • 2 tablespoons soy sauce
  • 1 tablespoon honey
  • 1 tablespoon vegetable oil
  • 1 tablespoon sesame oil
  • 1 tablespoon rice vinegar
  • 0.5 teaspoon red pepper flakes (optional)
  • 2 green onions chopped

Seasoning

  • to taste salt and pepper

Instructions 

  • Cook noodles as per package, drain, and set aside.
  • Mix soy sauce, honey, rice vinegar, and red pepper flakes to make the sauce.
  • Cook chicken in oil until browned (5-7 min), add garlic, then stir in sauce and cook until sticky (2-3 min).
  • Add noodles, toss to coat, drizzle with sesame oil, and garnish with green onions.

Notes

For extra flavor, add a splash of lime juice or sprinkle with sesame seeds.
Calories: 550kcal
Cost: $12
Course: Main Course
Cuisine: Asian
Keyword: Chicken, garlic, Noodles

Loved this recipe? Save it to your favorite Pinterest board so you can easily find it later! It’s the perfect way to keep all your sweet ideas in one place. ✨

A vibrant plate of Sticky Garlic Chicken Noodles, showcasing glossy chicken pieces and herbs.

A Tropical Escape on a Plate: My Hawaiian Chicken Sheet Pan Delight

There’s something undeniably enchanting about the flavors of Hawaii—the sweet, tropical notes of pineapple, bright bursts of fresh veggies, and succulent chicken that just begs to be savored. This Hawaiian Chicken Sheet Pan Dinner brings that island magic right to your kitchen, transforming a busy weeknight into a mini-vacation for your taste buds. With minimal prep and a single pan to clean, you’ll be amazed at how easy it is to create a meal that feels like a celebration!

Why You’ll Love This Recipe

Imagine this: as you pull the sheet pan from the oven, the aroma of garlic and honey mingles with the scent of caramelizing pineapple and peppers, making your mouth water in anticipation. This dish is not just about taste; it’s about the experience—bringing family and friends together around a table, sharing hearty laughter and delightful bites. Plus, it’s healthy and simple, making it perfect for those nights when you want to feel good about what you’re eating.

Key Ingredients in Hawaiian Chicken Sheet Pan Dinner

A colorful Hawaiian Chicken Sheet Pan Dinner with chicken, pineapple chunks, and sliced vegetables arranged on a baking sheet.

Let’s dive into the star players of this vibrant dish:

  • 1.5 lbs chicken thighs: These juicy cuts are perfect for roasting, delivering a rich flavor that stays moist even when cooked at high temperatures.
  • 1 cup pineapple chunks: Fresh or canned, pineapple is the tropical soul of this dish, adding sweetness and acidity that brightens every bite.
  • 1 red bell pepper & 1 green bell pepper: Their sweet crunch and colorful hues not only enhance the dish visually but also add a lovely texture.
  • 1 red onion: Caramelizing in the oven, the onion brings a mild sweetness that complements the other flavors beautifully.
  • 3 cloves garlic: Minced garlic adds a depth of flavor that’s hard to resist.
  • 1/4 cup soy sauce: This savory element ties everything together, providing a rich umami flavor.
  • 1/4 cup honey: A touch of sweetness that balances the savory and acidic elements, creating a delicious glaze.
  • 2 tablespoons olive oil: Helps with roasting and brings a smooth richness to the dish.
  • 1 teaspoon ground ginger: This spice adds warmth and a hint of earthiness.
  • Salt and pepper to taste: Essential for enhancing the flavors of all the ingredients.
  • Cooked rice for serving (optional): A fluffy base to soak up all those delicious juices.
  • Chopped green onions for garnish (optional): A fresh finish that adds color and a mild onion flavor.

How to Make Hawaiian Chicken Sheet Pan Dinner

Ready to create this tropical delight? Let’s get cooking!

  1. Preheat your oven to 400°F (200°C). This step ensures that you achieve that perfect caramelization on your ingredients.
  2. In a large bowl, whisk together the soy sauce, honey, olive oil, minced garlic, ground ginger, salt, and pepper until smooth. This marinade is where the magic begins!
  3. Add the chicken thighs to the bowl, coating them thoroughly with the marinade. Allow them to marinate for at least 15 minutes—if you have more time, let it soak even longer for extra flavor.
  4. On a large sheet pan, arrange the marinated chicken thighs in the center. Surround them with the vibrant sliced bell peppers, red onion, and pineapple chunks.
  5. Drizzle any remaining marinade over the vegetables to ensure they get that delicious flavor too.
  6. Bake in the preheated oven for 25-30 minutes, or until the chicken is cooked through and reaches an internal temperature of 165°F (74°C). Stir halfway through to promote even browning.
  7. Remove from the oven and let it rest for a few minutes—this allows the juices to redistribute for maximum tenderness.
  8. Serve the chicken and vegetables over cooked rice, garnished with chopped green onions if desired. Enjoy every bite of this colorful and flavorful feast!

Tips for Perfecting Your Hawaiian Chicken Sheet Pan Dinner

  • Don’t skip the marinating step: The longer you marinate, the more flavor your chicken will absorb.
  • Use parchment paper: Lining your sheet pan with parchment makes cleanup a breeze and prevents sticking.
  • Experiment with veggies: Feel free to add or substitute your favorite vegetables. Zucchini, snap peas, or even carrots would work beautifully!

Variations and Substitutions

  • Chicken Breast: You can use chicken breasts instead of thighs if you prefer leaner meat. Just be mindful of the cooking time, as they may cook faster.
  • Vegetarian Option: Swap the chicken for tofu or tempeh for a vegetarian version that’s equally satisfying.
  • Rice Alternatives: Serve it over quinoa for a nutty flavor or cauliflower rice for a low-carb option.

Storage and Freezing Tips

Leftovers? Yes, please! Here’s how to store them:

  • Refrigeration: Allow the dish to cool slightly, then transfer it to an airtight container. It will keep in the fridge for up to three days.
  • Freezing: For longer storage, freeze in individual portions. Use freezer-safe bags or containers, removing as much air as possible. This meal can last up to two months in the freezer.
  • Reheating: Thaw overnight in the refrigerator, then reheat in the oven at 350°F (175°C) for about 10-12 minutes, covered loosely with foil to retain moisture.

Frequently Asked Questions

Can I use chicken breasts instead of thighs for this recipe?

Absolutely! Just keep an eye on the cooking time, as chicken breasts can cook faster than thighs.

What kind of vegetables can I add to this dish?

You can mix and match with whatever you have on hand! Zucchini, broccoli, or even corn would be delightful additions.

Is it necessary to marinate the chicken before cooking?

While it’s not strictly necessary, marinating significantly enhances the flavor of the chicken. Aim for at least 15 minutes!

How should I store leftovers and how long will they last?

Store in an airtight container in the fridge for up to three days, or freeze for up to two months.

What can I serve with the Hawaiian Chicken Sheet Pan Dinner?

Pair it with fluffy rice, a green salad, or even grilled corn for a complete meal!

Conclusion

This Hawaiian Chicken Sheet Pan Dinner is more than just a recipe; it’s an experience that brings a taste of the islands to your home. With its vibrant colors, tantalizing aromas, and a symphony of flavors, it’s a dish that makes busy weeknights feel special. So gather your ingredients, preheat that oven, and let’s create something magical together! If you try this recipe, I’d love to hear how it turns out—feel free to leave a comment below or share your own variations. Here’s to many delicious meals ahead!

Hawaiian Chicken Sheet Pan Dinner

Prep Time 15 minutes
Cook Time 25 minutes
Total Time 40 minutes
Servings 4 servings
Calories 450
A quick and flavorful sheet pan meal combining tender chicken, sweet pineapple, and colorful peppers for a tropical-inspired dinner.

Ingredients

Protein

  • 1.5 lbs chicken thighs

Fruits

  • 1 cup pineapple chunks (fresh or canned)

Vegetables

  • 1 red bell pepper red bell pepper (sliced)
  • 1 green bell pepper green bell pepper (sliced)
  • 1 red onion red onion (sliced)

Aromatics & Sauces

  • 3 cloves garlic (minced)
  • 0.25 cup soy sauce
  • 0.25 cup honey
  • 2 tablespoons olive oil
  • 1 teaspoon ground ginger
  • to taste salt and pepper

Optional

  • cooked rice for serving
  • chopped green onions for garnish

Instructions 

  • Preheat oven to 400°F (200°C).
  • Mix soy sauce, honey, olive oil, garlic, ginger, salt, and pepper. Marinate chicken for 15 minutes.
  • Arrange chicken on a sheet pan, surround with peppers, onion, and pineapple. Drizzle remaining marinade.
  • Bake for 25-30 minutes until cooked through. Rest briefly before serving.
  • Serve over rice, garnished with green onions if desired.

Notes

For extra flavor, marinate longer or add a splash of lime before serving.
Calories: 450kcal
Cost: $15
Course: dinner
Cuisine: Hawaiian
Keyword: Chicken, pineapple, Sheet Pan

Loved this recipe? Save it to your favorite Pinterest board so you can easily find it later! It’s the perfect way to keep all your sweet ideas in one place. ✨

A vibrant, delicious Hawaiian Chicken Sheet Pan Dinner display with chicken thighs, pineapple, and mixed bell peppers.

The Bread Machine Recipe That Turns Every Slice into a Slice of Heaven

Welcome to my cozy corner of the internet! If you’ve ever been tempted to fill your kitchen with the warm, inviting aroma of freshly baked bread, you’re in for a treat. Today, I’m sharing a collection of bread machine recipes that will not only fill your home with delightful scents but will also turn every slice into a slice of heaven. Imagine a warm loaf of pumpkin white chocolate chip bread, or perhaps some gluten-free pumpkin bread, all effortlessly made right in your trusty bread machine. Let’s dive into this delicious journey together, shall we?

Why Use a Bread Machine?

Now, you might be wondering, “Why should I use a bread machine?” Well, let me tell you, my friend, using a bread machine is like having a personal baker at your service! The beauty of these machines lies in their simplicity. You can toss in your ingredients and let the machine do all the work. No more kneading by hand or worrying about the dough rising perfectly. With just a few buttons to press, you can create a variety of breads that taste homemade, even if you’re a beginner. Plus, it saves you from spending a fortune on artisanal bread at the bakery!

Essential Ingredients for Heavenly Bread

A slice of warm bread machine zucchini bread surrounded by cooking ingredients.

Before we jump into the recipes, let’s gather our magical ingredients. Here’s what you’ll need:

  • Flour: All-purpose flour is a staple, but you can also use whole wheat or gluten-free flour depending on your dietary needs.
  • Yeast: Active dry yeast or instant yeast works wonders to help your bread rise.
  • Liquid: Water, milk, or even pumpkin puree can add moisture and flavor.
  • Sweeteners: Sugar or honey can give a lovely sweetness to your bread.
  • Fats: Butter, oil, or eggs contribute to the richness and texture.
  • Flavorings: Think spices, nuts, chocolate chips, or herbs to elevate your loaf.

Let’s Get Baking: Easy Recipes to Try

Now, let’s roll up our sleeves and get to baking! Here are some of my favorite bread machine recipes that are sure to impress:

Pumpkin White Chocolate Chip Bread

This recipe combines the warm flavors of pumpkin with the sweetness of white chocolate chips. It’s perfect for fall, but honestly, who can resist pumpkin bread any time of the year?

Ingredients:

  • 1 cup pumpkin puree
  • 1/2 cup white sugar
  • 1/2 cup brown sugar
  • 1/2 cup vegetable oil
  • 3 eggs
  • 2 1/2 cups all-purpose flour
  • 1 teaspoon baking soda
  • 1 teaspoon baking powder
  • 1 teaspoon cinnamon
  • 1/2 teaspoon nutmeg
  • 1/2 teaspoon salt
  • 1 cup white chocolate chips

Instructions:

  1. In your bread machine, combine the pumpkin puree, sugars, and oil. Mix well.
  2. Add the eggs and beat until combined.
  3. In a separate bowl, whisk together the flour, baking soda, baking powder, spices, and salt.
  4. Gradually add the dry ingredients to the wet mixture in the bread machine.
  5. After the mixture is well combined, fold in the white chocolate chips.
  6. Select the quick bread setting on your machine and start the cycle.
  7. Once baked, allow it to cool, slice, and enjoy!

Gluten-Free Bread Machine Recipe

For my gluten-sensitive friends, this gluten-free bread recipe is a lifesaver. It’s soft, fluffy, and perfectly delicious!

Ingredients:

  • 2 cups gluten-free all-purpose flour
  • 1 tablespoon sugar
  • 1/2 teaspoon salt
  • 1 tablespoon baking powder
  • 1 cup warm water
  • 1/4 cup oil
  • 3 eggs

Instructions:

  1. In your bread machine, combine the warm water, sugar, and eggs. Mix gently.
  2. Add the oil and mix again.
  3. In a separate bowl, combine the gluten-free flour, salt, and baking powder.
  4. Gradually add the dry mixture to the wet ingredients in the bread machine.
  5. Select the gluten-free setting and start the cycle.
  6. After baking, let it cool before slicing.

Delicious Variations to Explore

Once you get the hang of these basic recipes, feel free to get creative! Here are some variations you might enjoy:

  • Apple Bread: Add chopped apples and a sprinkle of cinnamon for a fruity twist.
  • Zucchini Bread: Grate fresh zucchini into the batter for extra moisture and nutrition.
  • Cranberry Bread: Toss in some dried cranberries for a tart flavor that balances sweetness.
  • Cheese Bread: Fold in shredded cheese for a savory option that’s perfect for sandwiches.

Tips for Perfect Bread Every Time

To ensure your bread turns out perfectly every time, here are some of my top tips:

  • **Measure Ingredients Accurately:** Use a kitchen scale for precise measurements, especially with flour.
  • **Check Your Yeast:** Make sure your yeast is fresh for optimal rising. If you’re unsure, proof it in warm water with a pinch of sugar before adding.
  • **Don’t Open the Lid:** Resist the temptation to peek inside while it’s baking. This can cause your bread to collapse!
  • **Cool Before Slicing:** Let your bread cool completely before slicing to maintain its texture.

Storage & Freezing Your Bread

Wondering how to store that delicious loaf? Here’s the scoop:

  • Room Temperature: Store bread in an airtight container or bag for up to 3 days.
  • Freezing: Wrap slices tightly in plastic wrap and place them in a freezer-safe bag. Your bread can last up to 3 months in the freezer. Just thaw at room temperature when you’re ready to enjoy!

Frequently Asked Questions

Can I substitute whole wheat flour for all-purpose flour?

Yes, but it may change the texture. Whole wheat flour absorbs more liquid, so you might need to adjust the liquid in the recipe.

How can I tell if my bread is done baking?

The bread should be golden brown on top, and when you tap it, it should sound hollow. A thermometer inserted into the center should read about 190°F.

Can I add nuts or fruit to my bread machine recipes?

Absolutely! Just be mindful of the total weight of the additions; they can affect the rising process.

Conclusion: Your Baking Adventure Awaits!

There you have it! A collection of comforting and delicious bread machine recipes that will turn your kitchen into a haven of warm, homemade goodness. Remember, baking is an adventure, so don’t be afraid to experiment with flavors and textures. Whether you’re whipping up a loaf of pumpkin bread or trying your hand at gluten-free options, each slice is a step toward culinary magic. So grab your bread machine, gather your ingredients, and let’s make some heavenly bread together! Happy baking!

Bread Machine Recipes

Prep Time 15 minutes
Cook Time 1 hour
Total Time 1 hour 15 minutes
Servings 8 slices
Calories 150
A collection of versatile bread machine recipes perfect for homemade loaves, from sweet to savory, tested in popular bread makers.

Ingredients

Dough

  • 3 cups all-purpose flour
  • 1 cup warm water (about 110°F)
  • 2 tablespoons sugar
  • 1 teaspoon salt
  • 2 1/4 teaspoons instant yeast
  • 2 tablespoons olive oil

Instructions 

  • Combine all ingredients in the bread machine pan.
  • Select the basic or white bread cycle and start.
  • Once baking is complete, remove the bread and let it cool.

Notes

For best results, use fresh yeast and measure ingredients accurately.
Calories: 150kcal
Cost: $15
Course: Bread
Cuisine: Various
Keyword: Bread Machine

Loved this recipe? Save it to your favorite Pinterest board so you can easily find it later! It’s the perfect way to keep all your sweet ideas in one place. ✨

A loaf of homemade cranberry bread displayed on a rustic wooden table.

A Cozy Culinary Hug: The Best Pesto Grilled Cheese That Whispers Comfort

Welcome to my cozy corner of the internet, where we embrace the magic of simple ingredients and transform them into something unforgettable! Today, we’re diving into a recipe that’s more than just a sandwich; it’s a warm hug on a chilly day, a nostalgic nod to childhood lunches, and a quick solution for those moments when you need a culinary pick-me-up. Allow me to introduce you to the Best Pesto Grilled Cheese—a delightful creation that pairs gooey mozzarella with vibrant pesto, all nestled between two slices of crispy, golden bread.

Why You’ll Love This Pesto Grilled Cheese

Let’s talk about the enchantment that is this grilled cheese. Imagine sinking your teeth into that perfectly toasted exterior, giving way to warm, melted mozzarella cheese that stretches like a dream. The nutty, aromatic notes of pesto dance with the rich creaminess of the cheese, and if you decide to add sliced tomatoes or fresh spinach, you elevate this comfort food to a whole new level. This isn’t just a meal; it’s an experience that tantalizes your taste buds and feels like a warm embrace. Plus, it’s fantastically easy to make!

What You’ll Need

A beautifully arranged Best Pesto Grilled Cheese with vibrant green pesto and golden crust, served on a rustic plate.

Before we jump into the cooking, let’s gather our ingredients. For the Best Pesto Grilled Cheese, you’ll need:

  • 2 slices of bread (your choice, but sourdough or whole grain is recommended for that perfect crunch)
  • 2 tablespoons pesto (homemade or store-bought, your call!)
  • 2 slices of mozzarella cheese (fresh mozzarella is a treat, but any melty cheese will do)
  • 1 tablespoon butter (for that irresistible golden crust)
  • Optional: sliced tomatoes or spinach (for an extra pop of flavor and color)

Let’s Get Cooking!

Step 1: Spread the Pesto

Start by spreading 1 tablespoon of pesto on one side of each slice of bread. This is where the magic starts—smell that fragrant basil and garlic? It’s like a little Italian vacation right in your kitchen!

Step 2: Layer Up

On the non-pesto side of one slice, layer your mozzarella cheese. If you’re feeling adventurous, add a handful of sliced tomatoes or a few leaves of fresh spinach on top of the cheese. These additions not only enhance the flavor but also add a beautiful burst of color and nutrition.

Step 3: Assemble the Sandwich

Now, it’s time to bring it all together! Top your cheesy goodness with the other slice of bread, making sure the pesto side is facing out. This will ensure that the outside gets that lovely, flavorful crust.

Step 4: Heat It Up

Heat a skillet over medium heat and add your tablespoon of butter. Once the butter is melted and bubbly, gently place the sandwich in the skillet. You should hear a lovely sizzle—that’s the sound of comfort cooking!

Step 5: Cook to Perfection

Cook for about 3-4 minutes on each side, or until the bread is golden brown and the cheese is melting into gooey perfection. Keep an eye on it; we want that crispy outside and melty inside, not a burnt offering!

Step 6: Serve and Enjoy

Once your sandwich is beautifully golden and the cheese is oozing, remove it from the skillet. Slice it in half (or quarters, if you’re feeling generous) and serve it warm. The aroma alone will have everyone flocking to the kitchen!

Tips for the Perfect Pesto Grilled Cheese

  • Choose Your Bread Wisely: The best bread for this recipe is one that can hold up to the fillings. Sourdough or whole grain works wonderfully. Avoid overly airy breads that might become soggy.
  • Pesto Dosage: Less is more when it comes to pesto. Spread just enough to taste without overwhelming the sandwich.
  • Pat Down the Cheese: If you’re using fresh mozzarella, make sure to pat it dry with a paper towel. This prevents excess moisture from making your sandwich soggy.
  • Butter Method: For an extra crispy sandwich, butter the outside of the bread instead of melting butter in the pan.

Variations and Substitutions

Feeling creative? Here are a few fun variations to try:

  • Cheese Lovers Delight: Swap mozzarella for provolone or gouda for a different flavor profile.
  • Veggie Boost: Add other veggies like roasted red peppers or arugula for an added crunch.
  • Meat It Up: Crispy bacon, turkey slices, or even ham can be delicious additions.

Storage and Freezing

While this sandwich is best enjoyed fresh, you can prepare it ahead of time. If you have leftovers:

  • Wrap any uneaten sandwiches in foil and store them in the fridge for up to two days. When you’re ready to eat, reheat in a skillet over medium heat to restore that crispy exterior.
  • If you want to make this sandwich ahead of time, you can assemble it but wait to cook. Cover the uncooked sandwich tightly in plastic wrap and store it in the fridge for up to 24 hours.

FAQs

Can I substitute the mozzarella cheese?

Absolutely! Feel free to use any cheese that melts well, such as gouda, cheddar, or pepper jack for a spicy kick.

How can I make this sandwich healthier?

Opt for whole grain bread, and don’t hesitate to load up on veggies. You can also use less cheese or choose lower-fat cheese options.

What should I serve with my Pesto Grilled Cheese?

This sandwich pairs beautifully with a bowl of tomato soup, a fresh salad, or even some crispy sweet potato fries. The options are endless!

Conclusion

The Best Pesto Grilled Cheese is a delightful blend of comfort and convenience, perfect for any occasion—whether it’s a quick lunch, a cozy dinner, or a picnic treat. With its gooey cheese, fragrant pesto, and crispy bread, it’s a dish that brings a little magic to your table. So why not gather your ingredients, fire up that skillet, and treat yourself to a sandwich that’s as comforting as it is delicious? I can’t wait to hear how yours turns out! Enjoy every melty, cheesy bite!

Best Pesto Grilled Cheese

Prep Time 5 minutes
Cook Time 8 minutes
Total Time 13 minutes
Servings 1 serving
Calories 400
A delicious twist on the classic grilled cheese, infused with flavorful pesto and optional fresh toppings.

Ingredients

Bread

  • 2 slices bread (your choice)

Pesto

  • 2 tablespoons pesto

Cheese

  • 2 slices mozzarella cheese

Butter

  • 1 tablespoon butter

Optional toppings

  • as desired sliced tomatoes or spinach (optional)

Instructions 

  • Spread 1 tablespoon of pesto on one side of each bread slice.
  • Layer mozzarella on the non-pesto side of one slice, add optional toppings if desired.
  • Top with the other bread slice, pesto side facing out.
  • Heat a skillet over medium heat, melt butter, and cook the sandwich 3-4 minutes per side until golden and cheese melts.
  • Remove, slice in half, and serve warm.

Notes

For extra flavor, add fresh basil or a drizzle of balsamic vinegar.
Calories: 400kcal
Cost: $8
Course: Lunch, Snack
Cuisine: American
Keyword: Grilled Cheese, Pesto

Loved this recipe? Save it to your favorite Pinterest board so you can easily find it later! It’s the perfect way to keep all your sweet ideas in one place. ✨

Mouthwatering grilled cheese sandwich featuring pesto and mozzarella, highlighted by soft natural lighting.

Butter Chicken Bliss: A Heartwarming Recipe That Dances on Your Taste Buds

Welcome to my cozy corner of the internet! If you’re here, you’re probably craving something that’s not just a meal, but a delightful experience for your taste buds. Let me introduce you to the magic of Easy Homemade Butter Chicken—a dish that wraps you in warmth and flavor, making it perfect for any occasion, whether it’s a family dinner or a gathering with friends.

Why Butter Chicken?

Butter chicken, or murgh makhani as it’s lovingly known in India, isn’t just a dish; it’s a celebration of flavors. Imagine tender chicken pieces marinated in creamy yogurt and spices, then simmered in a rich, buttery sauce that’s slightly sweet and just the right amount of spicy. Each bite feels like a warm hug, reminding you of home-cooked meals shared with loved ones. This recipe is my go-to for busy weeknights or when company is coming over. It’s surprisingly easy to whip up, and the aroma that fills your kitchen? Pure bliss.

Ingredients You’ll Need

Delicious homemade butter chicken served in a bowl with a blurred background.

To create this culinary delight, you’ll need the following ingredients:

  • 1 lb boneless chicken thighs, cut into bite-sized pieces
  • 1 cup plain yogurt
  • 2 tablespoons lemon juice
  • 2 teaspoons garam masala
  • 1 teaspoon ground cumin
  • 1 teaspoon ground coriander
  • 1 teaspoon turmeric
  • 1 teaspoon chili powder
  • 4 tablespoons butter
  • 1 large onion, finely chopped
  • 3 garlic cloves, minced
  • 1 inch ginger, grated
  • 1 can (15 oz) tomato puree
  • 1 cup heavy cream
  • Salt to taste
  • Fresh cilantro for garnish

How to Make Easy Homemade Butter Chicken

Let’s dive into the heart of the matter—making this delicious butter chicken. Don’t worry; I’ll guide you through each step, and before you know it, you’ll have a dish that even your favorite restaurant would envy!

Step 1 – Marinate the Chicken

In a large mixing bowl, combine the yogurt, lemon juice, garam masala, cumin, coriander, turmeric, and chili powder. This marinade is the secret to infusing flavor into the chicken. Add the chicken pieces, ensuring they are well-coated in the marinade. Cover the bowl and let it marinate for at least 30 minutes—or even overnight in the fridge if you have the time. The longer, the better!

Step 2 – Sauté the Onions

In a large skillet, melt 2 tablespoons of butter over medium heat. As the butter sizzles and starts to smell divine, add the chopped onions. Sauté them until they turn a beautiful golden brown; this usually takes about 5-7 minutes. The aroma of caramelizing onions will fill your kitchen, setting the stage for a fantastic meal.

Step 3 – Add Garlic and Ginger

Once your onions are perfectly golden, add the minced garlic and grated ginger to the pan. Cook for an additional minute, stirring often until everything is fragrant. This is when the magic really begins—the combination of garlic and ginger is a game changer!

Step 4 – Cook the Chicken

Now it’s time to incorporate the marinated chicken into the mix. Add the chicken to the skillet, reserving any leftover marinade. Cook until the chicken is browned on all sides. This step typically takes about 10 minutes. The chicken should be sizzling and enticing, filling your kitchen with mouthwatering scents.

Step 5 – Build the Sauce

Next, stir in the tomato puree along with the reserved marinade. Mix everything together and allow it to simmer for about 15 minutes. The sauce will begin to thicken and bubble, enveloping the chicken in rich, velvety goodness. You can adjust the heat to low if it starts bubbling too vigorously. This is the moment to stir your heart out—watch the colors deepen and the sauce transform!

Step 6 – Finish with Cream and Butter

Reduce the heat to low and add in the heavy cream and the remaining 2 tablespoons of butter. Stir gently until everything combines beautifully. Allow it to cook for another 5 minutes—this allows the sauce to thicken even more, making it perfectly luscious. Season with salt to taste, and garnish with fresh cilantro before serving. Your kitchen will smell heavenly by now!

Serving Suggestions

This butter chicken is best served hot alongside fluffy rice or warm naan. You might also want to try it with a side of cheesy garlic chicken wraps for an extra treat!

Ingredient Swaps & Dietary Substitutions

Want to customize this dish? Here are a few suggestions:

  • For a dairy-free version, you can swap the heavy cream with coconut cream or cashew cream.
  • If you don’t have boneless chicken thighs, chicken breasts work well too, but be cautious not to overcook them as they can dry out.
  • For a vegetarian option, substitute chicken with paneer or chickpeas for a hearty meal.

Storage & Reheating Tips

Got leftovers? Butter chicken stores beautifully! Here’s how to keep it:

  • Store in an airtight container in the fridge for up to 3 days.
  • For longer storage, you can freeze it for up to 2 months. Just make sure to let it cool completely before freezing.
  • When you’re ready to enjoy it again, simply reheat gently on the stove over low heat, adding a splash of water if it’s too thick.

Top Tips for the Best Butter Chicken

  • Marinate your chicken for at least 30 minutes, but if you can, let it marinate for a few hours or overnight for deeper flavor.
  • Don’t skip the butter! It’s what makes the sauce rich and luxurious.
  • Feel free to adjust the spice levels by adding more chili powder or a pinch of cayenne if you like it hot!

Frequently Asked Questions

Can I use chicken breast instead of thighs?

Absolutely! Just be aware that chicken breast cooks faster and can dry out if overcooked, so keep an eye on it.

What can I use instead of heavy cream?

You can use coconut cream for a dairy-free alternative, or half-and-half for a lighter version.

How spicy is this butter chicken?

This recipe is mildly spiced, but you can always amp up the heat by adding more chili powder or cayenne pepper to suit your taste.

More Recipes You’ll Love

If you enjoyed this butter chicken, you might also like:

Final Thoughts

And there you have it! A dish that’s not only easy to make but also a crowd-pleaser that will have everyone coming back for seconds. Cooking should feel like a warm embrace, and I hope this Easy Homemade Butter Chicken brings you as much joy in the kitchen as it does on the plate. Remember, every dish has a story, and this one is sure to become a beloved chapter in your cooking adventures. So grab your ingredients, put on your favorite playlist, and let’s make some magic happen in the kitchen! I can’t wait to hear how your butter chicken turns out—feel free to share your experiences or tweaks in the comments below. Happy cooking!

Easy Homemade Butter Chicken That Melts in Your Mouth

Prep Time 15 minutes
Cook Time 30 minutes
Total Time 45 minutes
Servings 4 servings
Calories 550
This creamy, flavorful butter chicken is quick to prepare and perfect for a comforting meal. Enjoy tender chicken in a rich tomato and cream sauce.

Ingredients

Meat

  • 1 lb boneless chicken thighs, cut into bite-sized pieces

Dairy

  • 1 cup plain yogurt
  • 2 tablespoons lemon juice
  • 1 cup heavy cream

Spices & Condiments

  • 2 teaspoons garam masala
  • 1 teaspoon ground cumin
  • 1 teaspoon ground coriander
  • 1 teaspoon turmeric
  • 1 teaspoon chili powder
  • 4 tablespoons butter

Vegetables

  • 1 large onion, finely chopped
  • 3 cloves garlic, minced
  • 1 inch ginger, grated

Canned & Jarred Goods

  • 1 can tomato puree (15 oz)

Other

  • salt to taste salt

Instructions 

  • Mix yogurt, lemon juice, spices, and marinate chicken for 30 minutes.
  • Sauté onions in 2 tbsp butter until golden. Add garlic and ginger, cook 1 minute.
  • Add marinated chicken and cook until browned. Stir in tomato puree and reserved marinade, simmer 15 minutes.
  • Reduce heat, stir in heavy cream and remaining butter, cook 5 minutes until thickened.
  • Season with salt, garnish with cilantro, and serve with rice or naan.

Notes

For a milder flavor, reduce chili powder; for extra richness, add more cream.
Calories: 550kcal
Cost: $15
Course: Main Course
Cuisine: Indian
Keyword: Butter Chicken

Loved this recipe? Save it to your favorite Pinterest board so you can easily find it later! It’s the perfect way to keep all your sweet ideas in one place. ✨

A plate of butter chicken garnished with cilantro and surrounded by warm lighting.

Noodles That Bring the Family Together: My Sticky Garlic Chicken Delight

Hey there, fellow food lovers! If you’re anything like me, there are days when you crave a meal that feels like a warm hug after a long day. Well, I have just the recipe for you—Sticky Garlic Chicken Noodles. This dish combines the savory magic of garlic, tender chicken, and slurp-worthy noodles into a symphony of flavors that will have your family gathering around the table in delight. Whether you’re feeding a hungry crew after a long day or just want something comforting, this recipe is sure to impress. So, let’s dive in!

Why You’ll Love This Sticky Garlic Chicken Noodles

Imagine this: the rich aroma of garlic wafting through your kitchen as the chicken sizzles in the pan, creating a golden-brown crust. You can practically taste the anticipation! Here’s why this Sticky Garlic Chicken Noodles is the perfect addition to your dinner repertoire:

  • Quick and Easy: In just about 30 minutes, you’ll have a delicious, homemade meal ready to serve. Perfect for those busy weeknights!
  • Kid-Friendly: The sweet and savory flavor profile appeals to both kids and adults. It’s a dish that even the pickiest eaters will love.
  • Versatile: You can easily customize it with your favorite veggies or proteins, making it a flexible option for any dietary needs.
  • Comforting and Satisfying: The combination of sticky sauce and noodles is simply irresistible, making it the ultimate comfort food.

Ingredients for Sticky Garlic Chicken Noodles

Delicious sticky garlic chicken served on noodles, showcasing texture and vibrant colors.

Let’s gather our ingredients for this delightful dish! Here’s what you need:

  • 200g chicken breast, sliced
  • 200g noodles (rice or egg noodles)
  • 4 cloves garlic, minced
  • 2 tablespoons soy sauce
  • 2 tablespoons honey
  • 1 tablespoon vegetable oil
  • 1 teaspoon sesame oil
  • 2 green onions, chopped
  • Salt and pepper to taste
  • Sesame seeds for garnish (optional)

How to Make Sticky Garlic Chicken Noodles

Now for the exciting part! Making Sticky Garlic Chicken Noodles is a straightforward process that’s bursting with flavor. Follow these steps, and you’ll be serving up a dish that will have everyone asking for seconds!

Step 1: Cook the Noodles

First, let’s get those noodles cooking! Bring a pot of salted water to a boil and cook the noodles according to the package instructions. Once they’re al dente, drain and set aside. This is where the magic begins, so don’t forget to save a splash of that starchy water in case you need to loosen up the sauce later!

Step 2: Prepare the Sauce

In a small bowl, mix together the soy sauce and honey. This sweet and savory mixture will be the star of our show, coating the chicken and noodles with sticky goodness. Set this aside for later—it’s going to add so much flavor!

Step 3: Sauté the Chicken

Heat the vegetable oil in a large pan over medium heat. Once the oil is shimmering, carefully add the sliced chicken. Sauté for about 5-7 minutes, or until the chicken is browned and cooked through. The sizzle of the chicken is music to my ears, and I can already smell the deliciousness!

Step 4: Add the Garlic

Now it’s time to add the minced garlic to the pan. Stir it in and cook for an additional 1-2 minutes, stirring constantly to prevent it from burning. The aroma will be heavenly, and you’ll want to make sure it’s perfectly fragrant before moving on!

Step 5: Combine Everything

Pour the soy sauce and honey mixture over the chicken, stirring well to coat. Then, add the cooked noodles to the pan and toss everything together until the noodles are well coated and heated through. The sticky sauce will cling beautifully to the chicken and noodles, creating a delightful dish.

Step 6: Finish with Flavor

Drizzle the dish with sesame oil for that nutty flavor that brings everything together. Season with salt and pepper to taste, adjusting as necessary. You might even want to sneak a taste here—just to ensure it’s perfect!

Step 7: Garnish and Serve

To finish, garnish your Sticky Garlic Chicken Noodles with chopped green onions and a sprinkle of sesame seeds if desired. Serve hot and watch as everyone digs in with smiles on their faces. It’s a meal that not only satisfies hunger but warms the heart.

Tips for Success

  • Always taste your sauce before adding it to the chicken. This way, you can adjust the sweetness or saltiness to your preference.
  • Prep your ingredients ahead of time to make cooking smoother and more enjoyable.
  • Don’t overcrowd the skillet when sautéing the chicken. This allows for even cooking and that lovely golden-brown color.
  • If you want to incorporate more veggies, consider adding bell peppers, snap peas, or broccoli for color and nutrition!

Variations for Sticky Garlic Chicken Noodles

Feeling adventurous? Here are some variations to keep things exciting:

  • Vegetable Loaded: Toss in your favorite vegetables like bell peppers, snap peas, or carrots for extra color and nutrition.
  • Protein Swap: Substitute chicken with shrimp, tofu, or tempeh for a different twist. Each option brings its own unique flavor!
  • Spicy Kick: For those who love a little heat, add fresh chilies or a splash of sriracha to turn up the flavor!
  • Low-Carb Option: Try using zucchini noodles or cauliflower rice instead of traditional noodles for a healthy twist.
  • Herbal Freshness: Incorporate fresh herbs like cilantro or basil at the end for a fresh, fragrant layer.

Equipment Needed

Here’s what you’ll need to whip up this delicious meal:

  • Large skillet or wok: Essential for sautéing the chicken and combining everything.
  • Mixing bowls: For preparing your sauce and tossing the chicken.
  • Colander: Useful for draining cooked noodles.
  • Knife and cutting board: To slice up your chicken and veggies.
  • Spatula or tongs: For tossing and mixing everything together.

Storage & Freezing

If you have leftovers (which is unlikely because it’s so good!), store them in an airtight container in the refrigerator for up to 3 days. To reheat, simply warm it up in the microwave or in a pan over low heat. If you want to freeze it, let it cool completely before placing it in a freezer-safe container. It should keep well for about a month. Just remember to thaw it in the fridge overnight before reheating!

FAQs about Sticky Garlic Chicken Noodles

Can I make Sticky Garlic Chicken Noodles with gluten-free noodles?

Absolutely! Just swap the regular noodles for gluten-free options like rice noodles or quinoa noodles, and you’re good to go!

What can I substitute for honey?

If you prefer not to use honey, maple syrup or agave nectar can work as a great alternative in this recipe.

Is this dish kid-friendly?

Definitely! The sweet and savory flavor of the sauce typically appeals to kids. If you have picky eaters, you can reduce the garlic or omit the chili flakes.

How can I adjust the sweetness of the sauce?

If you find it too sweet, just add a splash more soy sauce to balance it out. Alternatively, decrease the honey amount when mixing the sauce.

Final Thoughts

Bringing Sticky Garlic Chicken Noodles to your kitchen is like welcoming a new friend—one who constantly delights! This dish combines simplicity with flavor, making it perfect for busy days or special family gatherings. The joy of seeing your loved ones savor each bite is unmatched. As you whip this up, remember that cooking is a journey filled with laughter, stories, and heartwarming memories. So, tie on that apron and let the sticky goodness of garlic chicken noodles brighten your table. Enjoy every bite and happy cooking!

Sticky Garlic Chicken Noodles

Prep Time 10 minutes
Cook Time 15 minutes
Total Time 25 minutes
Servings 4 servings
Calories 450
A quick and flavorful Asian-inspired dish featuring tender chicken, garlic, and noodles coated in a sweet and savory sauce.

Ingredients

Protein

  • 200 g chicken breast, sliced

Carbohydrates

  • 200 g noodles (rice or egg noodles)

Flavorings & Oils

  • 4 cloves garlic, minced
  • 2 tablespoons soy sauce
  • 2 tablespoons honey
  • 1 tablespoon vegetable oil
  • 1 teaspoon sesame oil

Garnish

  • 2 green onions green onions, chopped
  • to taste salt and pepper
  • for garnish sesame seeds (optional)

Instructions 

  • Cook noodles as per package instructions, drain and set aside.
  • Mix soy sauce and honey; set aside.
  • Cook chicken in oil until browned, then add garlic and cook 1-2 minutes.
  • Add sauce mixture to chicken, then toss in noodles and heat through.
  • Finish with sesame oil, season with salt and pepper, garnish with green onions and sesame seeds, then serve.

Notes

For extra flavor, add a splash of rice vinegar or chili flakes.
Calories: 450kcal
Cost: $12
Course: Main Course
Cuisine: Asian
Keyword: Chicken, garlic, Noodles

Loved this recipe? Save it to your favorite Pinterest board so you can easily find it later! It’s the perfect way to keep all your sweet ideas in one place. ✨

Eye-level shot of sticky garlic chicken noodles, highlighted by warm natural light.

30-Minute One Pot Beef Taco Pasta: A Flavorful Fiesta in a Bowl

Picture this: it’s a bustling weeknight, the clock is ticking, and the last thing you want is a sink full of dishes to tackle after dinner. Enter my 30-Minute One Pot Beef Taco Pasta, a dish that brings the vibrant flavors of taco night right into the comforting embrace of pasta. This meal is not only quick to whip up but also a crowd-pleaser that wraps you in a warm hug with every bite. If you’re juggling kids, work, and life’s endless to-dos, this recipe is your new best friend.

Ingredients You’ll Need for One Pot Beef Taco Pasta

Before you roll up your sleeves and dive into cooking, let’s gather our ingredients. Trust me, having everything prepped will make your cooking experience smoother and more enjoyable. Here’s what you’ll need:

  • 1 pound ground beef
  • 1 medium onion, diced
  • 3 cloves garlic, minced
  • 1 packet taco seasoning
  • 1 can diced tomatoes (14.5 oz)
  • 2 cups beef broth
  • 8 ounces pasta (like rotini or penne)
  • 1 cup shredded cheddar cheese
  • Salt and pepper to taste
  • Fresh cilantro, for garnish (optional)

Step-by-Step Instructions for Making Taco Pasta

Bowl of One Pot Beef Taco Pasta garnished with cilantro in warm natural light.

Now that we have our ingredients, let’s get cooking! Follow these simple steps to create your delicious One Pot Beef Taco Pasta:

  1. In a large pot over medium heat, brown the ground beef until fully cooked, about 5-7 minutes. You’ll know it’s ready when it’s no longer pink and has a lovely sizzle.
  2. Add the diced onion and minced garlic to the pot, cooking until the onion is soft and translucent, about 3-4 minutes. This combination will fill your kitchen with the most inviting aroma!
  3. Stir in the taco seasoning, diced tomatoes (with juices), and beef broth. This is where the magic begins—bring the mixture to a boil, letting those flavors meld beautifully.
  4. Once boiling, add the pasta. Reduce heat to a simmer, cover, and cook for about 10-12 minutes, stirring occasionally, until the pasta is al dente and most of the liquid is absorbed. The pasta will soak up all that taco goodness!
  5. Remove from heat and stir in the shredded cheddar cheese until melted. This step transforms the dish into a creamy, cheesy delight.
  6. Season with salt and pepper to taste. Trust your palate—don’t be afraid to adjust for the perfect flavor.
  7. Garnish with fresh cilantro if desired, and serve warm. Watch as everyone digs in eagerly, and don’t forget to enjoy your creation!

Why One Pot Meals Are a Game-Changer

If you’ve ever dreaded the cleanup after a big cooking session, you’ll appreciate the brilliance of one pot meals. Not only do they save you time, but they also minimize mess and stress. In this One Pot Beef Taco Pasta recipe, everything cooks together, allowing the flavors to intensify while you focus on the fun part—enjoying your meal! Plus, you can impress your family or guests with a delicious dish that looks like it took hours to prepare.

Customizing Your Beef Taco Pasta

One of the best things about this recipe is its versatility. Here are some fun ways to customize it according to your taste preferences or what you have on hand:

  • Different Pasta Shapes: Feel free to swap in your favorite pasta! Short shapes like macaroni or fusilli work wonderfully.
  • Protein Swaps: Not a fan of beef? You can substitute ground turkey, chicken, or even plant-based meat crumbles for a healthier option.
  • Add Veggies: Sneak in some bell peppers, corn, or black beans for extra nutrients and texture.
  • Spice Level: If you like it spicy, add diced jalapeños, a pinch of cayenne pepper, or a splash of your favorite hot sauce.

Tips for Storing and Reheating

Lucky you if you have leftovers! Here’s how to store and reheat your One Pot Beef Taco Pasta:

  • Storage: Allow the pasta to cool completely, then transfer it to an airtight container. It can be stored in the refrigerator for up to 3-4 days.
  • Freezing: You can freeze the pasta for up to 3 months. Just make sure to store it in a freezer-safe container. When ready to eat, thaw it in the fridge overnight before reheating.
  • Reheating: Reheat gently on the stovetop over low heat, adding a splash of beef broth or water to prevent it from drying out. Stir until heated through.

Serving Suggestions and Pairings

This dish is a meal in itself, but if you want to elevate the experience, consider these serving suggestions:

  • Pair with a crisp side salad topped with avocado and lime vinaigrette.
  • Serve with warm tortillas or tortilla chips for a delightful crunch.
  • Add a dollop of sour cream or a sprinkle of diced green onions for an extra layer of flavor.

Recipe FAQs

Can I use a different type of pasta?

Absolutely! Short pasta shapes like macaroni, fusilli, or even bow ties work great. Just adjust the cooking time as needed.

What can I use instead of ground beef?

You can easily substitute ground turkey, chicken, or plant-based meat crumbles for a lighter or vegetarian option.

How can I make this dish spicier?

Add diced jalapeños, a pinch of cayenne pepper, or a splash of hot sauce to kick up the heat. Adjust according to your spice tolerance!

Why This Recipe Stands Out

This One Pot Beef Taco Pasta isn’t just another weeknight meal; it’s a celebration of flavors and comfort. It’s the perfect representation of how simple ingredients can come together to create something truly magical. The creamy cheese, savory beef, and zesty taco seasoning combine for an explosion of taste that will have your family begging for seconds.

Conclusion

There you have it—your new favorite 30-Minute One Pot Beef Taco Pasta recipe that’s sure to become a staple in your kitchen. It’s quick, it’s delicious, and best of all, it’s one pot! As you gather around the table with loved ones, sharing stories and laughter, this meal will not only fill bellies but also create lasting memories. So grab your ingredients, put on your favorite apron, and let’s create some kitchen magic together!

One Pot Beef Taco Pasta (30 minutes)

Prep Time 10 minutes
Cook Time 20 minutes
Total Time 30 minutes
Servings 4 servings
Calories 650
A quick and flavorful one-pot meal combining beef, pasta, and taco seasonings for a satisfying dinner in just 30 minutes.

Ingredients

Meat

  • 1 pound ground beef
  • 1 medium onion, diced
  • 3 cloves garlic, minced
  • 1 packet taco seasoning
  • 1 can diced tomatoes (14.5 oz)
  • 2 cups beef broth
  • 8 ounces pasta (like rotini or penne)
  • 1 cup shredded cheddar cheese
  • to taste salt and pepper
  • optional fresh cilantro, for garnish

Instructions 

  • Brown the ground beef in a large pot over medium heat, about 5-7 minutes.
  • Add diced onion and minced garlic; cook until soft, about 3-4 minutes.
  • Stir in taco seasoning, diced tomatoes, and beef broth; bring to a boil.
  • Add pasta, reduce heat, cover, and simmer 10-12 minutes until al dente.
  • Remove from heat, stir in cheddar cheese until melted, season with salt and pepper, and garnish with cilantro if desired.

Notes

For a spicier kick, add some hot sauce or jalapeños.
Calories: 650kcal
Cost: $15
Course: Main Course
Cuisine: Mexican-American
Keyword: Beef, pasta, taco

Loved this recipe? Save it to your favorite Pinterest board so you can easily find it later! It’s the perfect way to keep all your sweet ideas in one place. ✨

Delicious One Pot Beef Taco Pasta showcasing ingredients and textures.

One-Pan Wonder: The Easy Sheet Pan Gnocchi That’ll Steal Your Heart

Welcome to your new favorite weeknight dinner! If you’re looking for a dish that is not only easy to prepare but also bursting with flavor and color, then you’ve just hit the jackpot with Easy Sheet Pan Gnocchi. This delightful recipe combines the magic of roasted veggies and pillowy gnocchi into one glorious meal that practically cooks itself. Picture this: your kitchen filled with the inviting aroma of caramelized vegetables mingling with the scent of golden-brown gnocchi. It’s a culinary hug that you can serve any night of the week!

Why You’ll Love This Recipe

Let’s be real—life gets busy. Between work, family obligations, and that endless to-do list, finding time to whip up a wholesome meal can feel daunting. But that’s where this recipe shines! Here are a few reasons why you’ll fall head over heels for this one-pan wonder:

  • Minimal Cleanup: Cooking everything on one sheet pan means fewer dishes to wash!
  • Customizable: You can easily swap in your favorite veggies or proteins. It’s like a choose-your-own-adventure book, but for dinner!
  • Quick Cooking Time: Ready in under 30 minutes, it’s perfect for those hectic weeknights.
  • Deliciously Satisfying: The combination of textures—from crispy to tender—keeps every bite exciting!

Ingredients for Easy Sheet Pan Gnocchi

Delicious sheet pan gnocchi with red and yellow bell peppers, zucchini, and red onion.

Let’s gather our ingredients! You won’t need a shopping cart for this one; just a handful of fresh produce and some gnocchi. Here’s what you’ll need:

  • 1 pound gnocchi (store-bought)
  • 1 red bell pepper, sliced
  • 1 yellow bell pepper, sliced
  • 1 medium zucchini, sliced into half-moons
  • 1 medium red onion, cut into wedges
  • 3 tablespoons olive oil
  • 2 teaspoons Italian seasoning
  • Salt and pepper to taste

How to Make Easy Sheet Pan Gnocchi

Ready to transform your kitchen into a flavor wonderland? Let’s get cooking! Follow these simple steps, and you’ll have a delicious meal on the table in no time.

  1. Preheat Your Oven: Start by preheating your oven to 425°F (220°C). This high temperature is key to achieving that delightful crispiness on the gnocchi and veggies that we all crave.
  2. Chop Your Vegetables: Slice the bell peppers into strips, the zucchini into half-moons, and cut the red onion into wedges. Aim for bite-sized pieces so they cook evenly and get that beautiful caramelization.
  3. Combine Ingredients: In a large bowl, toss together the gnocchi and your chopped vegetables. Drizzle with olive oil, sprinkle with Italian seasoning, salt, and pepper, then toss until everything is evenly coated. This is where the magic happens—imagine the colors coming together like a sunset!
  4. Spread on a Baking Sheet: Line a baking sheet with parchment paper for easy cleanup or simply spray it with nonstick spray. Spread the gnocchi and vegetables out in a single layer, making sure not to overcrowd the pan. Give them room to breathe so they can roast beautifully.
  5. Roast Away: Place the sheet pan in your preheated oven and roast for about 20-25 minutes. Halfway through, give everything a gentle toss to ensure even cooking and that lovely golden-brown color.
  6. Serve Up the Goodness: Once everything is crispy and perfectly roasted, remove it from the oven. Let it cool slightly, then serve hot, optionally topped with grated Parmesan cheese for that extra touch of indulgence.

Perfecting the Cooking Process

To achieve that magical texture of your Easy Sheet Pan Gnocchi, keep these tips in mind:

  • Don’t Overcrowd the Pan: If your sheet pan is too crowded, the veggies will steam instead of roast, which isn’t the goal here! Give each piece some space.
  • Check for Doneness: Ovens can vary, so keep an eye on your gnocchi and vegetables. You want them golden brown and slightly crispy, not burnt!
  • Season Generously: Don’t be shy with salt and pepper; they elevate the flavors. Taste as you go to find the perfect balance.

Add Your Touch

The beauty of this recipe lies in its versatility. Feel free to customize it according to your taste. Here are some ideas to get your creative juices flowing:

  • Swap Vegetables: Got broccoli, asparagus, or cherry tomatoes? Toss them in! Seasonal vegetables work wonders in this dish.
  • Add Protein: For a heartier meal, mix in cooked chicken, sausage, or chickpeas. Just remember to adjust cooking times if necessary.
  • Experiment with Herbs: While Italian seasoning is a great go-to, try adding fresh basil, oregano, or even a pinch of red pepper flakes for some heat!

Storing & Reheating

Got leftovers? Lucky you! Here’s how to store and reheat your Easy Sheet Pan Gnocchi:

  • Storage: Keep any leftovers in an airtight container in the fridge for up to three days. This dish is a great candidate for meal prep!
  • Reheating: To bring back that crispy texture, pop it back in the oven at 350°F (175°C) for about 10 minutes. If you’re in a hurry, a quick microwave session will work, but you might lose some of that crunch.

Chef’s Helpful Tips

Here are a few more nuggets of wisdom to elevate your dish:

  • Use Quality Ingredients: Opt for good-quality gnocchi and fresh vegetables for the best flavor.
  • Don’t Skip the Seasoning: It’s amazing how much difference a little seasoning can make! Be generous with your herbs and spices.
  • Make It Ahead: You can prep everything ahead of time and roast it just before serving. Perfect for those busy evenings!

FAQs

Let’s tackle some common questions that might pop up as you embark on this culinary adventure:

  • Can I substitute the gnocchi? Absolutely! While gnocchi provides a unique texture, you can swap it for other pasta shapes or even quinoa for a gluten-free option.
  • What if I don’t have Italian seasoning? No worries! A mix of dried oregano, basil, thyme, and parsley will do the trick.
  • Can I freeze leftovers? Yes! Freeze in an airtight container for up to a month. Just know that the texture may change slightly after thawing, but still delicious!

Conclusion for Easy Sheet Pan Gnocchi

And there you have it! A simple yet delightful dish that will undoubtedly become a staple in your kitchen. This Easy Sheet Pan Gnocchi is not just a meal; it’s an experience. From the colorful veggies dancing in the oven to the comforting aroma wafting through your home, it’s a recipe that brings warmth to your table and joy to your heart.

So, whether you’re cooking for yourself, your family, or hosting a casual get-together with friends, this dish is sure to impress. Pull up a chair, grab a fork, and let’s make some unforgettable memories over this one-pan wonder together. Don’t forget to share your creations with me—happy cooking!

Easy Sheet Pan Gnocchi

Prep Time 10 minutes
Cook Time 25 minutes
Total Time 35 minutes
Servings 4 servings
Calories 350
A quick and flavorful sheet pan meal featuring crispy roasted gnocchi and colorful vegetables, perfect for a weeknight dinner.

Ingredients

Main

  • 1 pound gnocchi (store-bought)
  • 1 red bell pepper red bell pepper, sliced
  • 1 yellow bell pepper yellow bell pepper, sliced
  • 1 medium zucchini, sliced into half-moons
  • 1 medium red onion, cut into wedges
  • 3 tablespoons olive oil
  • 2 teaspoons italian seasoning
  • to taste salt and pepper salt and pepper

Instructions 

  • Preheat oven to 425°F (220°C).
  • Chop vegetables into bite-sized pieces and toss with gnocchi, olive oil, Italian seasoning, salt, and pepper.
  • Spread on a lined baking sheet in a single layer.
  • Roast for 20-25 minutes, tossing halfway.
  • Serve hot, optionally topped with Parmesan.

Notes

For extra flavor, sprinkle with grated Parmesan before serving.
Calories: 350kcal
Cost: $15
Course: Main Course
Cuisine: Italian-American
Keyword: Gnocchi

Loved this recipe? Save it to your favorite Pinterest board so you can easily find it later! It’s the perfect way to keep all your sweet ideas in one place. ✨

Plate of golden-brown gnocchi surrounded by assorted roasted vegetables.