Noodles That Bring the Family Together: My Sticky Garlic Chicken Delight
Hey there, fellow food lovers! If you’re anything like me, there are days when you crave a meal that feels like a warm hug after a long day. Well, I have just the recipe for you—Sticky Garlic Chicken Noodles. This dish combines the savory magic of garlic, tender chicken, and slurp-worthy noodles into a symphony of flavors that will have your family gathering around the table in delight. Whether you’re feeding a hungry crew after a long day or just want something comforting, this recipe is sure to impress. So, let’s dive in!
Why You’ll Love This Sticky Garlic Chicken Noodles
Imagine this: the rich aroma of garlic wafting through your kitchen as the chicken sizzles in the pan, creating a golden-brown crust. You can practically taste the anticipation! Here’s why this Sticky Garlic Chicken Noodles is the perfect addition to your dinner repertoire:
- Quick and Easy: In just about 30 minutes, you’ll have a delicious, homemade meal ready to serve. Perfect for those busy weeknights!
- Kid-Friendly: The sweet and savory flavor profile appeals to both kids and adults. It’s a dish that even the pickiest eaters will love.
- Versatile: You can easily customize it with your favorite veggies or proteins, making it a flexible option for any dietary needs.
- Comforting and Satisfying: The combination of sticky sauce and noodles is simply irresistible, making it the ultimate comfort food.
Ingredients for Sticky Garlic Chicken Noodles
Let’s gather our ingredients for this delightful dish! Here’s what you need:
- 200g chicken breast, sliced
- 200g noodles (rice or egg noodles)
- 4 cloves garlic, minced
- 2 tablespoons soy sauce
- 2 tablespoons honey
- 1 tablespoon vegetable oil
- 1 teaspoon sesame oil
- 2 green onions, chopped
- Salt and pepper to taste
- Sesame seeds for garnish (optional)
How to Make Sticky Garlic Chicken Noodles
Now for the exciting part! Making Sticky Garlic Chicken Noodles is a straightforward process that’s bursting with flavor. Follow these steps, and you’ll be serving up a dish that will have everyone asking for seconds!
Step 1: Cook the Noodles
First, let’s get those noodles cooking! Bring a pot of salted water to a boil and cook the noodles according to the package instructions. Once they’re al dente, drain and set aside. This is where the magic begins, so don’t forget to save a splash of that starchy water in case you need to loosen up the sauce later!
Step 2: Prepare the Sauce
In a small bowl, mix together the soy sauce and honey. This sweet and savory mixture will be the star of our show, coating the chicken and noodles with sticky goodness. Set this aside for later—it’s going to add so much flavor!
Step 3: Sauté the Chicken
Heat the vegetable oil in a large pan over medium heat. Once the oil is shimmering, carefully add the sliced chicken. Sauté for about 5-7 minutes, or until the chicken is browned and cooked through. The sizzle of the chicken is music to my ears, and I can already smell the deliciousness!
Step 4: Add the Garlic
Now it’s time to add the minced garlic to the pan. Stir it in and cook for an additional 1-2 minutes, stirring constantly to prevent it from burning. The aroma will be heavenly, and you’ll want to make sure it’s perfectly fragrant before moving on!
Step 5: Combine Everything
Pour the soy sauce and honey mixture over the chicken, stirring well to coat. Then, add the cooked noodles to the pan and toss everything together until the noodles are well coated and heated through. The sticky sauce will cling beautifully to the chicken and noodles, creating a delightful dish.
Step 6: Finish with Flavor
Drizzle the dish with sesame oil for that nutty flavor that brings everything together. Season with salt and pepper to taste, adjusting as necessary. You might even want to sneak a taste here—just to ensure it’s perfect!
Step 7: Garnish and Serve
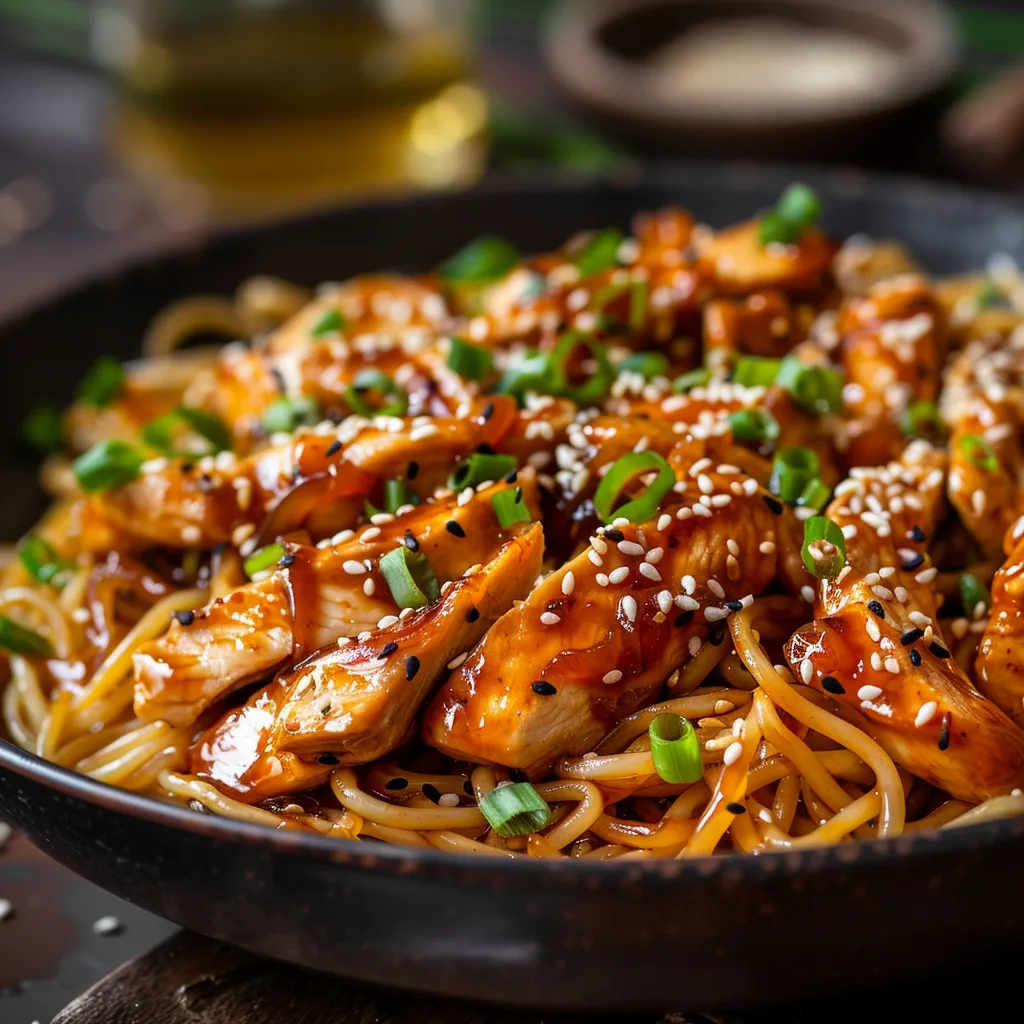
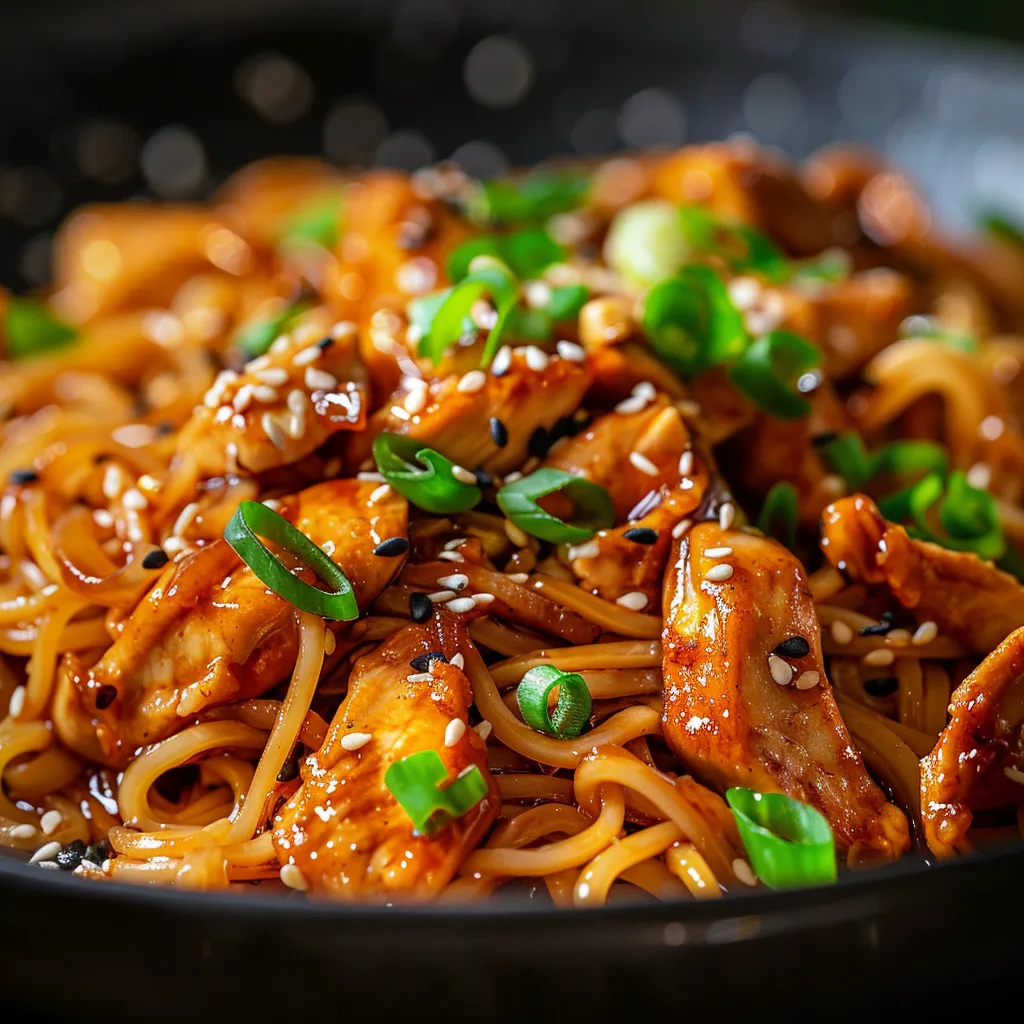
To finish, garnish your Sticky Garlic Chicken Noodles with chopped green onions and a sprinkle of sesame seeds if desired. Serve hot and watch as everyone digs in with smiles on their faces. It’s a meal that not only satisfies hunger but warms the heart.
Tips for Success
- Always taste your sauce before adding it to the chicken. This way, you can adjust the sweetness or saltiness to your preference.
- Prep your ingredients ahead of time to make cooking smoother and more enjoyable.
- Don’t overcrowd the skillet when sautéing the chicken. This allows for even cooking and that lovely golden-brown color.
- If you want to incorporate more veggies, consider adding bell peppers, snap peas, or broccoli for color and nutrition!
Variations for Sticky Garlic Chicken Noodles
Feeling adventurous? Here are some variations to keep things exciting:
- Vegetable Loaded: Toss in your favorite vegetables like bell peppers, snap peas, or carrots for extra color and nutrition.
- Protein Swap: Substitute chicken with shrimp, tofu, or tempeh for a different twist. Each option brings its own unique flavor!
- Spicy Kick: For those who love a little heat, add fresh chilies or a splash of sriracha to turn up the flavor!
- Low-Carb Option: Try using zucchini noodles or cauliflower rice instead of traditional noodles for a healthy twist.
- Herbal Freshness: Incorporate fresh herbs like cilantro or basil at the end for a fresh, fragrant layer.
Equipment Needed
Here’s what you’ll need to whip up this delicious meal:
- Large skillet or wok: Essential for sautéing the chicken and combining everything.
- Mixing bowls: For preparing your sauce and tossing the chicken.
- Colander: Useful for draining cooked noodles.
- Knife and cutting board: To slice up your chicken and veggies.
- Spatula or tongs: For tossing and mixing everything together.
Storage & Freezing
If you have leftovers (which is unlikely because it’s so good!), store them in an airtight container in the refrigerator for up to 3 days. To reheat, simply warm it up in the microwave or in a pan over low heat. If you want to freeze it, let it cool completely before placing it in a freezer-safe container. It should keep well for about a month. Just remember to thaw it in the fridge overnight before reheating!
FAQs about Sticky Garlic Chicken Noodles
Can I make Sticky Garlic Chicken Noodles with gluten-free noodles?
Absolutely! Just swap the regular noodles for gluten-free options like rice noodles or quinoa noodles, and you’re good to go!
What can I substitute for honey?
If you prefer not to use honey, maple syrup or agave nectar can work as a great alternative in this recipe.
Is this dish kid-friendly?
Definitely! The sweet and savory flavor of the sauce typically appeals to kids. If you have picky eaters, you can reduce the garlic or omit the chili flakes.
How can I adjust the sweetness of the sauce?
If you find it too sweet, just add a splash more soy sauce to balance it out. Alternatively, decrease the honey amount when mixing the sauce.
Final Thoughts
Bringing Sticky Garlic Chicken Noodles to your kitchen is like welcoming a new friend—one who constantly delights! This dish combines simplicity with flavor, making it perfect for busy days or special family gatherings. The joy of seeing your loved ones savor each bite is unmatched. As you whip this up, remember that cooking is a journey filled with laughter, stories, and heartwarming memories. So, tie on that apron and let the sticky goodness of garlic chicken noodles brighten your table. Enjoy every bite and happy cooking!
Sticky Garlic Chicken Noodles
Ingredients
Protein
- 200 g chicken breast, sliced
Carbohydrates
- 200 g noodles (rice or egg noodles)
Flavorings & Oils
- 4 cloves garlic, minced
- 2 tablespoons soy sauce
- 2 tablespoons honey
- 1 tablespoon vegetable oil
- 1 teaspoon sesame oil
Garnish
- 2 green onions green onions, chopped
- to taste salt and pepper
- for garnish sesame seeds (optional)
Instructions
- Cook noodles as per package instructions, drain and set aside.
- Mix soy sauce and honey; set aside.
- Cook chicken in oil until browned, then add garlic and cook 1-2 minutes.
- Add sauce mixture to chicken, then toss in noodles and heat through.
- Finish with sesame oil, season with salt and pepper, garnish with green onions and sesame seeds, then serve.
Notes
Loved this recipe? Save it to your favorite Pinterest board so you can easily find it later! It’s the perfect way to keep all your sweet ideas in one place. ✨