Author

Ava

Browsing

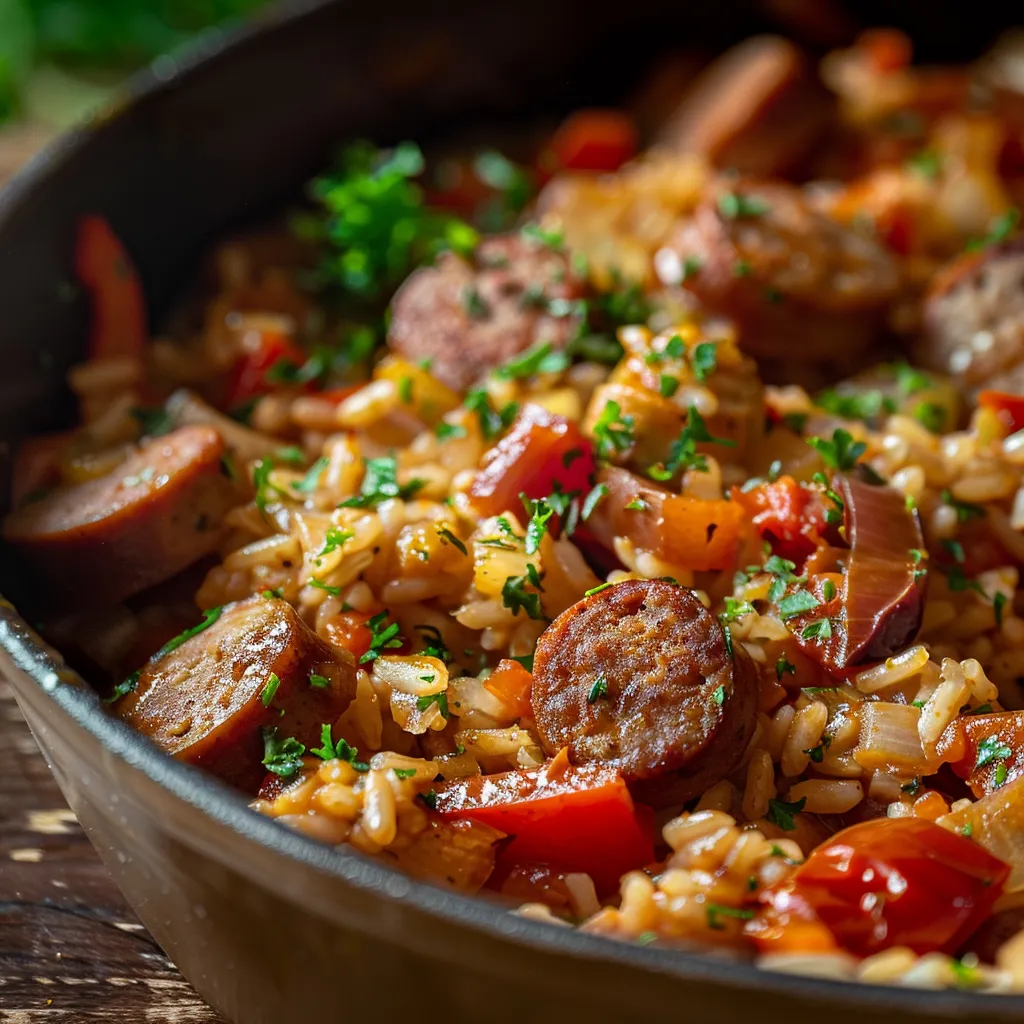
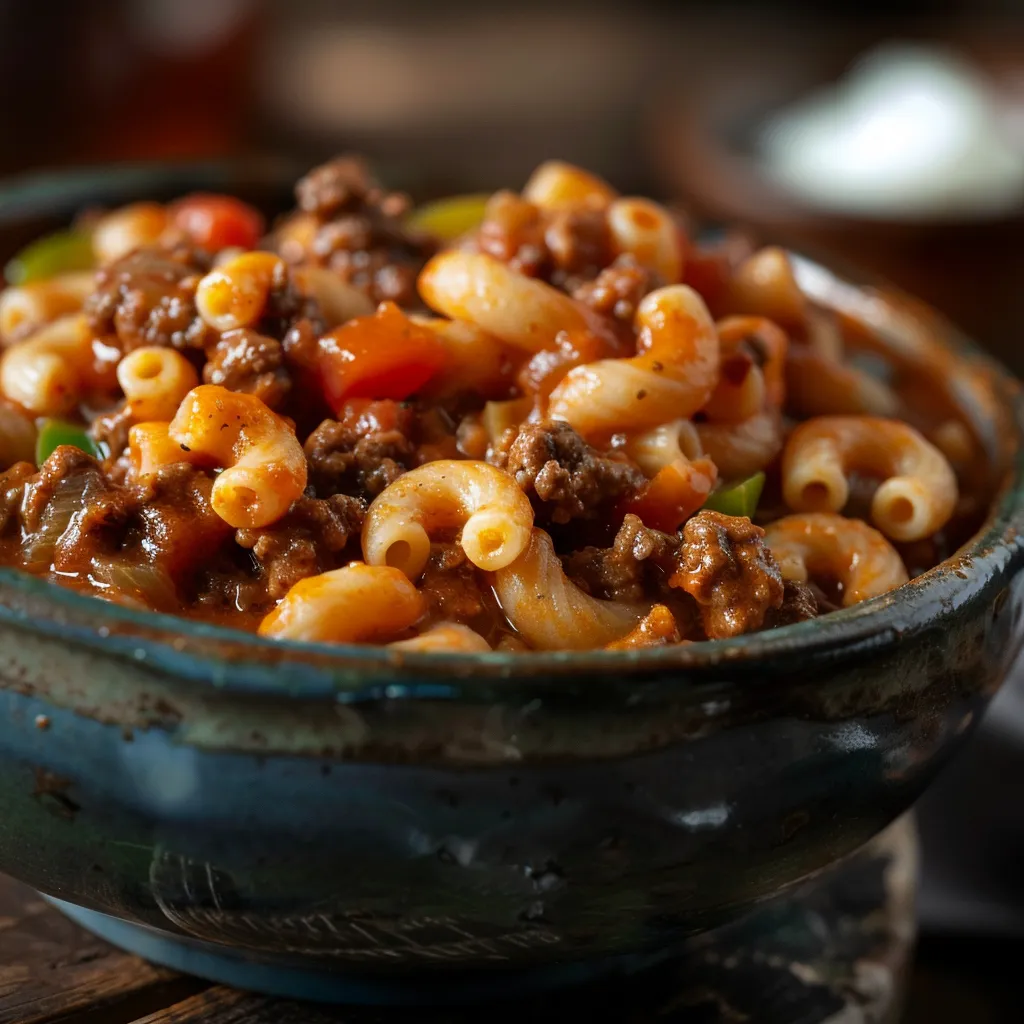
Discover the Enchantment of One-Pan Marry Me Chicken Orzo

If you’re looking for a dish that’s not only delicious but also has the power to steal hearts, look no further than this One-Pan Marry Me Chicken Orzo. This recipe combines succulent chicken, tender orzo, and a medley of flavors that will have your loved ones asking for seconds—and possibly more! With its creamy texture and vibrant ingredients, this dish is perfect for weeknight dinners or special occasions. Plus, the convenience of cooking everything in a single pan means minimal cleanup and maximum flavor. Let’s dive into the magic of this charming recipe!

Why You’ll Love This Recipe

There are countless reasons to fall head over heels for this One-Pan Marry Me Chicken Orzo. Here are just a few:

  • Time-Saving Delight: With everything cooked in one pan, you’ll save time on both cooking and cleanup, leaving you more time to enjoy your meal.
  • Flavor Explosion: The combination of sun-dried tomatoes, fresh spinach, and Parmesan cheese creates a rich and satisfying flavor profile that’s simply irresistible.
  • Family-Friendly: This dish is sure to please even the pickiest eaters, making it a perfect choice for family dinners.
  • Versatile and Adaptable: Whether you’re in the mood for a creamy version or a lighter take, this recipe can easily be adjusted to fit your dietary needs.
  • Impressive Presentation: Serve it straight from the pan for a rustic and appealing look that’ll wow your guests!

Ingredients You’ll Need

A served dish of One-Pan Marry Me Chicken Orzo with vibrant colors and textures visible.

Gathering the right ingredients is essential for crafting the perfect One-Pan Marry Me Chicken Orzo. Here’s what you’ll need:

  • 4 boneless, skinless chicken breasts: Tender and juicy, they form the heart of this dish.
  • 1 cup orzo pasta: This small pasta shape cooks quickly and absorbs all the delicious flavors.
  • 2 cups chicken broth: Provides a savory base that enhances the overall taste.
  • 1 cup cherry tomatoes, halved: Fresh and sweet, they add brightness to the dish.
  • 1 cup fresh spinach: Packed with nutrients and adds a lovely color.
  • 4 cloves garlic, minced: For that aromatic kick!
  • 1 teaspoon dried oregano: A classic herb that complements chicken beautifully.
  • 1 teaspoon dried basil: Adds a touch of sweetness and depth.
  • Salt and pepper to taste: Essential for seasoning.
  • 2 tablespoons olive oil: For sautéing and enhancing flavor.
  • 1/2 cup grated Parmesan cheese: Adds creaminess and a savory finish.
  • Fresh basil leaves for garnish: A lovely touch that elevates the presentation.

How to Make Marry Me Chicken Orzo

Now that you have your ingredients ready, let’s walk through the steps to create this delightful dish.

  1. Heat olive oil in a large skillet over medium heat.
  2. Season the chicken breasts with salt, pepper, oregano, and basil.
  3. Add the chicken to the skillet and cook for 6-7 minutes per side until browned and cooked through. Remove from skillet and set aside.
  4. In the same skillet, add the minced garlic and sauté for 1 minute until fragrant.
  5. Add the orzo pasta and chicken broth to the skillet, stirring to combine.
  6. Bring the mixture to a boil, then reduce heat to a simmer. Cook for 10 minutes, stirring occasionally.
  7. Add cherry tomatoes and spinach to the skillet, stirring until the spinach wilts.
  8. Return the chicken to the skillet, nestling it into the orzo. Cook for an additional 2-3 minutes to heat through.
  9. Sprinkle grated Parmesan cheese over the top and garnish with fresh basil leaves before serving.

Pro Tips for Perfecting Your Dish

Here are some expert insights to ensure your One-Pan Marry Me Chicken Orzo turns out perfectly:

  • Don’t Overcook the Chicken: Keep an eye on the chicken while cooking to avoid dryness. It should be juicy and tender.
  • Use High-Quality Broth: The flavor of your chicken broth can elevate the entire dish, so choose one that’s rich and flavorful.
  • Add a Splash of Lemon Juice: For an extra zing, drizzle some fresh lemon juice over the dish before serving.
  • Experiment with Herbs: Feel free to mix up the herbs based on your preference. Thyme or rosemary can add a delightful twist.
  • Make it Creamier: For a richer dish, stir in a dollop of cream or sour cream towards the end of cooking.
  • Consider Adding Veggies: Feel free to toss in other vegetables like bell peppers or zucchini for added nutrition and color.
  • Use a Lid: Covering the skillet while the orzo cooks helps trap steam, cooking it evenly and quickly.
  • Let it Rest: After cooking, let the dish rest for a few minutes before serving. This allows the flavors to meld beautifully.

Common Mistakes and Troubleshooting

We all have our cooking mishaps, but here are some common mistakes to avoid:

  • Undercooking or Overcooking the Orzo: Keep an eye on the cooking time. Orzo should be al dente, not mushy.
  • Skipping the Seasoning: Don’t skip on salt and pepper; they are crucial for enhancing flavors.
  • Not Using Enough Liquid: Ensure you have enough chicken broth to cook the orzo properly; it should be fully submerged.
  • Forgetting to Stir: Stirring occasionally prevents the orzo from sticking to the bottom of the pan.

Variations You Can Try

If you want to change things up, here are some variations on the One-Pan Marry Me Chicken Orzo:

  • Make it Creamier: Add a splash of heavy cream or cream cheese at the end for a luscious texture.
  • Swap the Protein: Use shrimp or tofu for a different protein option that still delivers on flavor.
  • Go Gluten-Free: Substitute orzo with gluten-free pasta or quinoa for a similar texture.
  • Add a Kick: Toss in some red pepper flakes or a dash of hot sauce for a spicy twist.

Storage and Make-Ahead Instructions

This dish is perfect for meal prep! Here’s how to store and reheat:

  • Refrigeration: Store leftover Marry Me Chicken Orzo in an airtight container in the fridge for up to 3 days.
  • Freezing: You can freeze leftovers for up to 2 months. Thaw in the refrigerator before reheating.
  • Reheating: To reheat, add a splash of chicken broth to the pan and warm over low heat until heated through.

Comprehensive FAQ

Let’s tackle some common questions about this delightful recipe:

  • Can I use frozen chicken? Yes, but make sure to thaw it completely before cooking for even results.
  • What can I substitute for orzo? You can use rice or other small pasta shapes as a substitute.
  • Can I make this dish vegetarian? Absolutely! Substitute chicken with chickpeas or your favorite plant-based protein.
  • How do I know when the chicken is done? The internal temperature should reach 165°F (75°C).
  • Can I prepare this ahead of time? You can prep the ingredients a day in advance and cook when you’re ready.
  • Is it possible to make this dish dairy-free? Yes! Omit the Parmesan or use a dairy-free alternative.
  • What should I serve with this dish? A simple green salad or crusty bread pairs perfectly with this meal.
  • Can I add more vegetables? Absolutely! Feel free to add in your favorite veggies like bell peppers or zucchini.

Nutritional Tips and Dietary Adaptations

This One-Pan Marry Me Chicken Orzo can be easily adapted to fit various dietary needs:

  • Low-Carb Option: Swap out the orzo for cauliflower rice for a lighter, low-carb version.
  • Dairy-Free: Use nutritional yeast instead of Parmesan for that cheesy flavor without the dairy.
  • High-Protein: For extra protein, consider adding beans or legumes to the dish.

Equipment Recommendations

For this recipe, you’ll need:

  • Large Skillet: A non-stick or cast-iron skillet works best for even cooking.
  • Measuring Cups and Spoons: For precise ingredient measurements.
  • Wooden Spoon: Perfect for stirring and sautéing.

Serving Suggestions

When it comes to serving, presentation is key! Here are some tips:

  • Garnish with Fresh Herbs: A sprinkle of fresh basil or parsley can elevate the dish’s appearance.
  • Serve with a Side Salad: A crisp, refreshing salad balances the richness of the orzo.
  • Pair with Crusty Bread: This is perfect for soaking up all the delicious sauce!

In conclusion, this One-Pan Marry Me Chicken Orzo is a magical recipe that brings comfort and joy to your table. Whether you’re cooking for loved ones or treating yourself, this dish is bound to create warm memories and leave everyone wanting more. So, roll up your sleeves, gather your ingredients, and let’s make some culinary magic together!

One-Pan Marry Me Chicken Orzo

Prep Time 10 minutes
Cook Time 20 minutes
Total Time 30 minutes
Servings 4 servings
Calories 550
A flavorful and easy one-pan dish combining tender chicken, orzo, and fresh vegetables for a satisfying meal.

Ingredients

protein

  • 4 pieces boneless, skinless chicken breasts
  • 1 cup orzo pasta
  • 2 cups chicken broth
  • 1 cup cherry tomatoes, halved
  • 1 cup spinach, fresh
  • 4 cloves garlic, minced
  • 1 teaspoon dried oregano
  • 1 teaspoon dried basil
  • to taste salt and pepper
  • 2 tablespoons olive oil
  • 1/2 cup grated parmesan cheese
  • for garnish fresh basil leaves

Instructions 

  • Heat olive oil in a skillet and cook seasoned chicken until browned, then set aside.
  • Sauté garlic in the same skillet, then add orzo and chicken broth, bringing to a boil.
  • Reduce heat, simmer for 10 minutes, then add cherry tomatoes and spinach, stirring until wilted.
  • Return chicken to skillet, cook for 2-3 minutes, then sprinkle with Parmesan and garnish with basil.

Notes

Use fresh basil for the best flavor and adjust salt and pepper to taste.
Calories: 550kcal
Cost: $15
Course: Main Course
Cuisine: American
Keyword: Chicken

Loved this recipe? Save it to your favorite Pinterest board so you can easily find it later! It’s the perfect way to keep all your sweet ideas in one place. ✨

Detailed view of One-Pan Marry Me Chicken Orzo showing juicy chicken and colorful vegetables.

Welcome to Your New Favorite Dinner Recipe!

Picture this: a cozy evening at home, the aroma of olive oil and roasted veggies wafting through the air, and a delicious One-Pan Herb Chicken & Roasted Veggie Bake sizzling away in your kitchen. Trust me, it’s as delightful as it sounds! This dish is not just another meal; it’s a heartfelt hug on a plate. Made with tender chicken thighs and colorful veggies, this recipe is perfect for busy weeknights or when you want to impress guests without spending the whole day in the kitchen.

Let’s dive into why this one-pan wonder is about to steal your heart—and your dinner table!

Why You’ll Love This Recipe

  • One-Pan Convenience: Say goodbye to a mountain of dishes! Everything cooks together on one pan, making cleanup a breeze.
  • Flavor Explosion: The combination of Italian herbs and the zing of fresh lemon makes each bite a burst of flavor that will leave you craving more.
  • Customizable Ingredients: Use seasonal vegetables or whatever you have on hand—this recipe is flexible!
  • Quick Preparation: With just a few simple steps, you can have a wholesome meal ready in under 30 minutes.
  • Perfect for Meal Prep: Make a big batch and have leftovers ready for lunches during the week!

Ingredients Breakdown

Eye-level view of a One-Pan Herb Chicken dish with vibrant mixed veggies, illuminated by soft natural light.

Here’s what you’ll need for your One-Pan Herb Chicken & Roasted Veggie Bake:

  • 4 boneless, skinless chicken breasts: If you prefer chicken thighs, they work beautifully here too!
  • 2 cups mixed vegetables: Use a mix of bell peppers, zucchini, and carrots. Feel free to swap in your favorites or whatever you have on hand.
  • 3 tablespoons olive oil: Extra virgin olive oil adds depth of flavor.
  • 2 teaspoons dried Italian herbs: A mix of oregano, basil, and thyme gives this dish its aromatic charm.
  • 1 teaspoon garlic powder: For that extra punch of flavor.
  • Salt and pepper to taste: Essential for bringing out the best in your ingredients.
  • 1 lemon, sliced: The fresh citrus brightens the dish and adds a lovely tang.

How to Make Your One-Pan Wonder

Ready to bring this magic to life? Let’s get cooking!

Step 1: Preheat the Oven

Preheat your oven to 400°F (200°C). This ensures your chicken and veggies roast beautifully.

Step 2: Prepare the Vegetables

In a large bowl, toss the mixed veggies with 2 tablespoons of olive oil, salt, pepper, and 1 teaspoon of Italian herbs. This will coat them perfectly and enhance their natural flavors.

Step 3: Spread and Assemble

Spread the seasoned vegetables evenly on one side of a large baking sheet. In that same bowl, coat the chicken breasts with the remaining olive oil, garlic powder, the rest of the Italian herbs, salt, and pepper. Place the seasoned chicken on the other side of the baking sheet. Top the chicken with lemon slices for an extra zing!

Step 4: Bake to Perfection

Place the baking sheet in the preheated oven and bake for 25-30 minutes, or until the chicken is cooked through and the veggies are tender. You can check the chicken’s doneness with a meat thermometer; it should read 165°F (75°C).

Pro Tips for a Flawless Dinner

  • For Extra Crisp: If you prefer crispy chicken skin, broil it for the last 2-3 minutes of cooking.
  • Seasonal Veggies: Don’t hesitate to swap out the vegetables based on what’s in season or what you have on hand—sweet potatoes or Brussels sprouts work great too!
  • Make it Spicy: Add a pinch of red pepper flakes to the chicken for a little heat.
  • Infuse More Flavor: For a Mediterranean twist, add kalamata olives or feta cheese before serving.
  • Leftover Love: This dish stores well in the fridge for up to 3 days, making it perfect for meal prep!
  • Resting Time: Let the chicken rest for a few minutes before slicing to keep it juicy.
  • Garnish: Fresh herbs like parsley or basil can add a lovely finish on top!
  • Pairing Suggestions: Serve alongside a fresh salad or over a bed of quinoa for a complete meal.

Common Mistakes and Troubleshooting

Even the best chefs have their off days, so here are a few tips to avoid common pitfalls:

  • Overcrowding the Pan: Make sure the chicken and veggies have room to roast. If they’re too close together, they’ll steam instead of roast.
  • Undercooking the Chicken: Always check the internal temperature with a meat thermometer to ensure it’s safe to eat.
  • Too Much Oil: While olive oil adds flavor, too much can make your dish greasy. Stick to the recommended amounts.
  • Skipping the Seasoning: Don’t be shy with the salt and pepper! It’s crucial for enhancing the flavors.

Variations to Elevate Your Dish

Want to shake things up? Here are some delicious variations:

  • Herb-Crusted Chicken: Mix breadcrumbs with Italian herbs and lemon zest for a crunchy topping.
  • Honey Mustard Glaze: Brush chicken with a mix of honey and mustard for a sweet and tangy twist.
  • Mexican Fiesta: Use taco seasoning instead of Italian herbs and add corn and black beans to the veggies.
  • Asian Infusion: Marinade the chicken in soy sauce, ginger, and garlic, and include snap peas and bell peppers.

Storage and Make-Ahead Instructions

This dish is perfect for meal prep! Here’s how to store and reheat:

  • Refrigerate: Store leftovers in an airtight container in the fridge for up to 3 days.
  • Freezing: You can freeze the cooked chicken and veggies for up to 2 months. Just thaw overnight in the fridge before reheating.
  • Reheating: Reheat in the microwave or in the oven at 350°F (175°C) until warmed through.

Frequently Asked Questions

  • Can I use bone-in chicken? Yes, but adjust the cooking time to ensure it cooks through.
  • What vegetables work best? Root vegetables like carrots, potatoes, and seasonal greens are great options!
  • Can I use fresh herbs? Absolutely! Use 3 times the amount of fresh herbs in place of dried.
  • Is this recipe gluten-free? Yes, all the ingredients are gluten-free, making it perfect for a gluten-free diet.
  • What side dishes pair well with this recipe? A simple green salad or crusty bread would complement this dish beautifully.
  • How can I make this dish dairy-free? This recipe is naturally dairy-free, so you’re all set!
  • Can I add cheese? Definitely! Feta or goat cheese sprinkled on top before serving can add a nice creaminess.
  • What’s the best way to know when chicken is done? Use a meat thermometer; chicken should reach an internal temperature of 165°F (75°C).

Nutritional Insights

This One-Pan Herb Chicken & Roasted Veggie Bake is not only delicious but also packed with nutrients:

  • Lean Protein: Chicken breasts provide a healthy source of protein to keep you full.
  • Vitamins and Minerals: The mixed vegetables are loaded with vitamins A and C, potassium, and fiber.
  • Low Carb Option: This dish is great for those looking to maintain a low-carb diet.
  • Healthy Fats: Olive oil is a source of heart-healthy fats that can support overall health.

Essential Equipment

Here’s what you’ll need to make this dish:

  • Large Baking Sheet: A sturdy baking sheet is essential for even cooking.
  • Mixing Bowl: For tossing your veggies and chicken with oil and seasonings.
  • Meat Thermometer: A must-have for ensuring your chicken is cooked to perfection.

Serving Suggestions

Once your One-Pan Herb Chicken & Roasted Veggie Bake is ready, here are some delightful ways to serve it:

  • On a Bed of Quinoa: Serve over fluffy quinoa for a nutritious grain boost.
  • With a Side Salad: A fresh salad with a light vinaigrette pairs wonderfully with the roasted flavors.
  • With Crusty Bread: A piece of warm crusty bread is perfect for soaking up any leftover juices.
  • As Part of a Meal Prep: Portion out the chicken and veggies into containers for quick lunches throughout the week.

With this One-Pan Herb Chicken & Roasted Veggie Bake, you’re not just making dinner; you’re creating memories. So, gather your loved ones, set the table, and enjoy every bite of this magical meal. Happy cooking, my friends!

One-Pan Herb Chicken & Roasted Veggie Bake

Prep Time 10 minutes
Cook Time 25 minutes
Total Time 35 minutes
Servings 4 servings
Calories 350
A simple and flavorful one-pan dish combining tender herb-seasoned chicken with roasted vegetables, perfect for a quick and healthy meal.

Ingredients

Protein

  • 4 pieces boneless, skinless chicken breasts

Vegetables

  • 2 cups mixed vegetables (bell peppers, zucchini, and carrots)

Seasonings & Oils

  • 3 tablespoons olive oil
  • 2 teaspoons dried Italian herbs (oregano, basil, thyme)
  • 1 teaspoon garlic powder
  • to taste salt and pepper
  • 1 whole lemon, sliced

Instructions 

  • Preheat oven to 400°F (200°C).
  • Toss vegetables with 2 tbsp olive oil, salt, pepper, and 1 tsp Italian herbs. Spread on one side of a baking sheet.
  • Coat chicken with remaining olive oil, garlic powder, Italian herbs, salt, and pepper. Place on the other side of the sheet.
  • Top chicken with lemon slices. Bake for 25-30 minutes until cooked and vegetables are tender.
  • Remove from oven and rest for a few minutes before serving.

Notes

Use fresh herbs for more flavor and adjust seasoning to taste.
Calories: 350kcal
Cost: $15
Course: Main Course
Cuisine: American
Keyword: Chicken, herbs, roasted vegetables

Loved this recipe? Save it to your favorite Pinterest board so you can easily find it later! It’s the perfect way to keep all your sweet ideas in one place. ✨

Detailed photograph of a One-Pan Herb Chicken & Roasted Veggie Bake featuring tender chicken breast and assorted roasted vegetables.

Discover the Comfort of One Pan Lasagna Hamburger Helper

If you’re anything like me, weeknight dinners can often feel like a race against the clock. Between work, family commitments, and the occasional Netflix binge, finding the time and energy to whip up a satisfying meal can be a challenge. That’s where this One Pan Lasagna Hamburger Helper comes in—a cozy dish that feels like home and is ready in a snap! With a delightful blend of savory ground beef, rich marinara, and gooey cheese, this recipe is the ultimate comfort food that will have everyone at the table asking for seconds.

In just about thirty minutes, you can serve up a hearty, creamy lasagna-style meal that’s sure to impress. And the best part? It’s all made in one pan, which means fewer dishes to wash—something I know we can all appreciate! Let’s dive into the magic of this homemade gem, shall we?

Why You’ll Love This Recipe

  • One-Pan Wonder: Less clean-up means more time to savor your meal and connect with loved ones.
  • Quick and Easy: With a prep and cook time of about 30 minutes, this dish fits perfectly into your busy weeknight routine.
  • Kid-Friendly: Picky eaters will love the cheesy, saucy goodness, making dinner stress-free.
  • Customizable: Feel free to add your favorite veggies or swap proteins—this recipe is versatile!
  • Budget-Friendly: Ground beef is an economical choice, and this recipe makes a generous amount, perfect for feeding a family.

Ingredients You’ll Need

This recipe combines simple ingredients that you likely already have on hand. Here’s what you’ll need:

  • 1 lb ground beef: The star protein that adds flavor and heartiness.
  • 1 chopped onion: For sweetness and depth.
  • 1/2 tsp salt: Enhances the overall flavor.
  • 1/2 tsp pepper: Adds a bit of spice.
  • 1 tsp paprika: A touch of smokiness that elevates the dish.
  • 1 tsp Italian seasoning: Brings the classic lasagna flavor profile.
  • 1/4 tsp red pepper flakes: For those who like a little heat!
  • 1 TBSP minced garlic: Because garlic makes everything better.
  • 2 cups beef broth: The base that adds richness.
  • 2 cups marinara: For that iconic lasagna taste.
  • 1/2 cup heavy cream: For creaminess that ties it all together.
  • 8 oz pasta: Use your favorite shape (I recommend penne or rotini).
  • 1-2 cups shredded mozzarella cheese: The ultimate melty topping.
  • Parmesan cheese: A sprinkle for serving.

How To Make One Pan Lasagna Hamburger Helper

Juicy One Pan Lasagna Hamburger Helper garnished with melted cheese.

Ready to get cooking? Follow these simple steps to create your very own One Pan Lasagna Hamburger Helper:

  1. In a large skillet, brown the ground beef over medium heat along with the chopped onion until the meat is no longer pink. Drain any excess grease.
  2. Season the beef with salt, pepper, paprika, Italian seasoning, and red pepper flakes. Stir to combine.
  3. Add minced garlic and cook for an additional minute until fragrant.
  4. Pour in the beef broth, marinara, heavy cream, and pasta. Stir well to ensure everything is evenly mixed.
  5. Cover the skillet and let it simmer on medium-low heat for about 10-15 minutes, stirring occasionally, until the pasta is cooked al dente.
  6. Once the pasta is cooked, remove the lid and sprinkle the shredded mozzarella cheese on top. Let it sit for a few minutes until the cheese melts, or pop it under the broiler for a few minutes if using an oven-safe skillet.
  7. Top with grated Parmesan cheese and serve hot. Enjoy every bite!

Expert Tips for Success

  • Don’t skip the seasoning: Properly seasoning your beef is crucial for depth of flavor—you want every bite to be delicious!
  • Adjust the heat: If you’re sensitive to spice, feel free to omit the red pepper flakes or use less.
  • Use quality marinara: A good-quality marinara sauce can significantly elevate your dish, so choose one you love.
  • Experiment with pasta: While this recipe works well with short pasta, feel free to try different shapes based on your preference.
  • Cheese choices: Mix in other cheeses like cheddar or provolone for a unique twist.
  • Make it vegetarian: Substitute the ground beef for lentils or mushrooms for a delicious plant-based option.
  • Don’t overcook the pasta: Since the pasta will continue to cook in the sauce, it’s best to keep it slightly al dente during the initial cooking.
  • Serve immediately: This dish is best enjoyed fresh, as the pasta can become mushy if left in the sauce too long.

Common Mistakes and Troubleshooting

Even the best cooks encounter hiccups in the kitchen. Here are a few common mistakes to avoid:

  • Overcrowding the pan: If your skillet is too small, the beef won’t brown properly. Use a large skillet for even cooking.
  • Not draining the beef: Leaving excess grease can make your dish oily. Drain it after browning!
  • Skipping the simmer: Skipping the simmering step can result in undercooked pasta—patience is key!
  • Using too much liquid: If your sauce ends up too watery, let it simmer uncovered for a few minutes to reduce.

Variations to Try

If you’re feeling adventurous, here are a few variations you can try:

  • Veggie-Packed: Add chopped spinach, zucchini, or bell peppers for added nutrition.
  • Spicy Kick: Incorporate diced jalapeños or use a spicy marinara sauce for a heat boost.
  • Cheesy Broccoli: Stir in steamed broccoli during the last few minutes of cooking for a delicious twist.
  • Southwestern Style: Swap the marinara for enchilada sauce and add black beans and corn for a Tex-Mex flair.

Storage and Make-Ahead Instructions

This dish is perfect for meal prep. Here’s how to store and reheat:

  • Storing leftovers: Allow the dish to cool completely before transferring it to an airtight container. It will keep in the fridge for up to 3 days.
  • Freezing: This recipe can be frozen for up to 3 months. Just make sure to use a freezer-safe container.
  • Reheating: To reheat, simply microwave individual portions or warm it in a saucepan over low heat, adding a splash of broth to loosen it up.

Frequently Asked Questions

Got questions? Let me help you out with some common queries:

  • Can I make this dish ahead of time? Yes! You can prepare it a day in advance; just reheat it before serving.
  • What can I substitute for ground beef? Ground turkey, chicken, or even lentils can be used for a lighter or vegetarian option.
  • Can I use whole wheat pasta? Absolutely! Just be aware that whole wheat pasta may require a longer cooking time.
  • Is this dish gluten-free? You can make it gluten-free by using gluten-free pasta and ensuring your marinara is also gluten-free.
  • What if I don’t have heavy cream? You can substitute with half-and-half or a non-dairy milk mixed with a little cornstarch for thickness.
  • Can I add more cheese? Yes! Feel free to add extra mozzarella or your favorite cheese blend. The cheesier, the better!
  • How do I make it spicier? Add more red pepper flakes or a dash of hot sauce to the mix for an extra kick.
  • How do I know when the pasta is cooked? The pasta should be al dente—cooked but still firm when bitten.

Nutrition Tips and Dietary Adaptations

This recipe is not only delicious but can also be tailored to fit various dietary needs:

  • Low-carb option: Substitute pasta with zucchini noodles or cauliflower rice.
  • High-protein option: Incorporate additional lean ground turkey or chicken to boost protein content.
  • Dairy-free alternative: Use a non-dairy cream and nutritional yeast for the cheesy flavor without the dairy.

Essential Equipment Recommendations

To make this dish, you’ll need:

  • Large skillet: A wide, heavy-bottomed skillet is ideal for even cooking.
  • Wooden spoon or spatula: Perfect for mixing and breaking up the ground beef.
  • Measuring cups and spoons: Accurate measurements will ensure the best flavor.
  • Serving spoon: For dishing out portions and enjoying all that cheesy goodness!

Serving Suggestions

Pair your One Pan Lasagna Hamburger Helper with:

  • Garlic bread: A classic companion to soak up all the delicious sauce.
  • Side salad: Fresh greens with a light vinaigrette balance the richness of the pasta.
  • Steamed vegetables: Broccoli or green beans add a healthy touch to your meal.

So there you have it—your ultimate guide to creating a heartwarming and satisfying One Pan Lasagna Hamburger Helper! I hope this recipe brings as much joy to your kitchen as it has to mine. Remember, cooking is about love, creativity, and a little bit of magic. Now, let’s get cooking and make some unforgettable memories together!

One Pan Lasagna Hamburger Helper

Prep Time 10 minutes
Cook Time 15 minutes
Total Time 25 minutes
Servings 4 servings
Calories 650
A quick and cheesy one-pan meal combining classic lasagna flavors with ground beef and pasta for a satisfying dinner.

Ingredients

Meat and Vegetables

  • 1 lb ground beef
  • 1 chopped onion onion
  • 1/2 tsp salt
  • 1/2 tsp pepper
  • 1 tsp paprika
  • 1 tsp Italian seasoning
  • 1/4 tsp red pepper flakes
  • 1 TBSP minced garlic
  • 2 cups beef broth
  • 2 cups marinara
  • 1/2 cup heavy cream
  • 8 oz pasta
  • 1-2 cups shredded mozzarella cheese
  • Parmesan cheese Parmesan cheese

Instructions 

  • Brown ground beef and onion in a skillet, then season with salt, pepper, paprika, Italian seasoning, and red pepper flakes.
  • Add garlic, beef broth, marinara, heavy cream, and pasta; stir, cover, and simmer for 10-15 minutes until pasta is cooked.
  • Stir in mozzarella cheese until melted, then top with Parmesan and serve.

Notes

For extra cheesy flavor, add more mozzarella or Parmesan on top before serving.
Calories: 650kcal
Cost: $15
Course: Main Course
Cuisine: American
Keyword: ground beef, lasagna, pasta

Welcome to Your New Favorite Dinner Recipe

If you’re looking for a meal that combines bold flavors, vibrant colors, and a quick cooking time, you’ve landed in the right place! This Spicy Ground Beef Stir-Fry Bowl is not just a dish; it’s an experience. Bursting with garlic veggies and served over fluffy steamed white rice, this recipe is perfect for weeknight dinners when you want something comforting yet exciting. With just a handful of ingredients and minimal prep, you’ll be able to whip up a dinner that will have everyone asking for seconds.

Why You’ll Love This Recipe

This stir-fry bowl isn’t just about great taste—it’s a complete package. Here are five reasons why this recipe will become a staple in your kitchen:

  • Quick and Easy: With a prep and cook time of under 30 minutes, you can have dinner on the table in no time.
  • Customizable: Feel free to swap out vegetables or proteins, making this dish versatile for any palate.
  • Balanced Nutrition: This recipe is packed with protein from the ground beef and nutrients from the fresh vegetables.
  • One-Pan Wonder: Minimal cleanup is required, as everything cooks in a single skillet or wok.
  • Flavor Explosion: The combination of soy sauce and sriracha creates a deliciously spicy kick that will satisfy your taste buds.

Ingredients for Your Stir-Fry Bowl

An eye-level view of a vibrant stir-fry bowl with ground beef, broccoli, and bell peppers.

Let’s dive into the ingredients you’ll need to create this delicious Spicy Ground Beef Stir-Fry Bowl. Each ingredient plays a crucial role in building flavor and texture.

  • 1 lb ground beef: The star of the show! You can also use ground turkey or chicken for a leaner option.
  • 2 cups broccoli florets: Adds crunch and nutrition. Feel free to substitute with green beans or asparagus.
  • 1 bell pepper, sliced: For sweetness and color. Any variety (red, yellow, or green) works well.
  • 1 cup snap peas: These provide a delightful snap and fresh flavor.
  • 4 cloves garlic, minced: A must-have for that aromatic base.
  • 2 tablespoons soy sauce: The umami flavor that ties everything together.
  • 1 tablespoon sriracha: Adjust this to your spice preference for a kick!
  • 1 tablespoon vegetable oil: Needed for sautéing the ingredients.
  • 2 cups cooked rice: Perfect as a base for your stir-fry. You can use white or brown rice.
  • Salt and pepper: To taste, ensuring all flavors shine through.
  • Sesame seeds and green onions: Optional garnishes that add flair and flavor.

Instructions: How to Make Your Stir-Fry Bowl

Ready to cook? Follow these simple steps to create a delicious meal:

  1. Cook rice according to package instructions and set aside.
  2. In a large skillet or wok, heat vegetable oil over medium-high heat.
  3. Add minced garlic and sauté for 30 seconds until fragrant.
  4. Add ground beef to the skillet, breaking it apart with a spatula. Cook until browned and fully cooked, about 5-7 minutes.
  5. Stir in soy sauce and sriracha, mixing well to combine. Season with salt and pepper to taste.
  6. Add broccoli, bell pepper, and snap peas to the skillet. Stir-fry for an additional 4-5 minutes until veggies are tender-crisp.
  7. Serve the spicy ground beef and veggies over a bed of steaming rice.
  8. Garnish with sesame seeds and chopped green onions if desired.

Pro Tips for Success

To ensure your stir-fry turns out perfectly every time, check out these expert tips:

  • Prep Ahead: Chop your vegetables and mince garlic ahead of time to save time during cooking.
  • High Heat: Cooking on high heat helps achieve a nice sear and retains the crispness of the vegetables.
  • Don’t Overcrowd: If you’re making a larger batch, cook in batches to avoid steaming the ingredients.
  • Adjust Spice Levels: If you’re sensitive to heat, start with less sriracha and add more as needed.
  • Fresh Herbs: Consider adding fresh herbs like cilantro or basil for a fresh flavor boost.
  • Texture Matters: Aim for tender-crisp veggies to maintain their texture in the stir-fry.
  • Experiment with Sauces: Mix in oyster sauce or hoisin for a different flavor profile.
  • Meal Prep Friendly: This recipe stores well, making it perfect for meal prep!

Common Mistakes and Troubleshooting

Even the best chefs make mistakes! Here are some common pitfalls and how to avoid them:

  • Overcooked Veggies: Be mindful of cooking times—remove them from heat once they are tender-crisp.
  • Too Watery: If your stir-fry ends up watery, increase the heat to evaporate excess moisture.
  • Flavorless Beef: Ensure you season the beef well with salt and pepper while cooking.
  • Sticking Ingredients: Make sure your skillet or wok is hot enough before adding the oil and ingredients.

Variations to Spice Things Up

Want to mix things up? Here are four variations of this recipe:

  • Vegetarian Version: Substitute ground beef with firm tofu or tempeh for a plant-based option.
  • Mediterranean Twist: Add olives, sun-dried tomatoes, and feta for a unique flavor profile.
  • A Fruity Kick: Toss in pineapple chunks for a sweet and savory combination.
  • Noodle Bowl: Swap rice for cooked noodles for a different take on this recipe.

Storing and Make-Ahead Instructions

This stir-fry bowl is perfect for meal prep! Here’s how to store it:

  • Refrigerate: Store in an airtight container in the fridge for up to 4 days.
  • Freeze: You can freeze the stir-fry (without the rice) for up to 3 months. Reheat on the stove or microwave when ready to eat.
  • Make-Ahead: Prepare the ingredients a day in advance and simply cook them when you’re ready to eat.

Comprehensive FAQ

Here are some frequently asked questions about this stir-fry recipe:

  • Can I use frozen vegetables? Yes! Just make sure to thaw and drain them before adding to the stir-fry.
  • What if I don’t have sriracha? You can substitute with chili garlic sauce or omit it for less heat.
  • How do I know when the beef is cooked? Ground beef is fully cooked when it reaches an internal temperature of 160°F.
  • Can I use other meats? Absolutely! Chicken, pork, or shrimp can be great alternatives.
  • What is the best way to reheat leftovers? Reheat in a pan over medium heat, adding a splash of water to keep it moist.
  • Can I add more spices? Definitely! Feel free to experiment with red pepper flakes or ginger for added flavor.
  • Is this recipe gluten-free? Use gluten-free soy sauce for a gluten-free option.
  • Can I serve this with different grains? Yes! Quinoa or cauliflower rice would be excellent alternatives to white rice.

Nutritional Tips and Dietary Adaptations

This stir-fry bowl is not only delicious but also packed with nutrients. Here’s how to make it even healthier:

  • Lean Protein: Opt for lean ground beef or substitute with lean turkey or chicken.
  • Whole Grains: Use brown rice or quinoa for added fiber and nutrients.
  • More Veggies: Increase the veggie count for extra vitamins and minerals.
  • Low-Sodium Options: Choose low-sodium soy sauce to reduce sodium intake.

Essential Equipment Recommendations

Having the right tools can make cooking easier and more enjoyable:

  • Wok or Large Skillet: Essential for stir-frying to achieve the right heat and cooking technique.
  • Spatula: A sturdy spatula will help in breaking up the meat and stirring the veggies.
  • Measuring Cups and Spoons: For accurate ingredient measurements, which is key in cooking.
  • Cutting Board and Knife: A good knife and board make chopping veggies a breeze!

Serving Suggestions

To elevate your stir-fry bowl, consider these serving ideas:

  • Garnish: Top with fresh herbs, lime wedges, or a sprinkle of toasted sesame seeds.
  • Pair with: Serve alongside crispy spring rolls or a light salad for a complete meal.
  • Make it a Feast: Prepare a few different stir-fries for a fun family-style dinner.

Conclusion

Now that you have all the tools and tips for making the perfect Spicy Ground Beef Stir-Fry Bowl, it’s time to dive into the kitchen! Remember, cooking is an adventure, and it’s all about finding joy in the process. So gather your ingredients, invite a friend or family member to join, and create a meal that not only fills the stomach but warms the heart. Happy cooking!

Spicy Ground Beef Stir-Fry Bowl with Garlic Veggies & Steamy Rice

Prep Time 10 minutes
Cook Time 15 minutes
Total Time 25 minutes
Servings 4 servings
Calories 650
A quick and flavorful stir-fry combining seasoned ground beef, crisp vegetables, and spicy sauce served over steaming rice.

Ingredients

Meat and Vegetables

  • 1 lb ground beef
  • 2 cups broccoli florets
  • 1 piece bell pepper, sliced
  • 1 cup snap peas
  • 4 cloves garlic, minced
  • 2 tablespoons soy sauce
  • 1 tablespoon sriracha (or to taste)
  • 1 tablespoon vegetable oil
  • 2 cups cooked rice
  • to taste salt and pepper
  • for garnish sesame seeds and green onions (optional)

Instructions 

  • Cook rice according to package instructions and set aside.
  • Heat oil in a skillet, sauté garlic for 30 seconds.
  • Add ground beef, cook until browned, then stir in soy sauce and sriracha. Season with salt and pepper.
  • Add vegetables, stir-fry until tender-crisp, about 4-5 minutes.
  • Serve beef and veggies over rice, garnish with sesame seeds and green onions if desired.

Notes

Adjust sriracha for desired spice level.
Calories: 650kcal
Cost: $15
Course: Main Course
Cuisine: Asian
Keyword: Beef, stir fry

Loved this recipe? Save it to your favorite Pinterest board so you can easily find it later! It’s the perfect way to keep all your sweet ideas in one place. ✨

A detailed shot of a delicious stir-fry bowl with garlic veggies and steaming rice.

The Magic of One Pan Chicken and Potatoes

Welcome to the cozy world of One Pan Chicken and Potatoes! This dish is more than just a recipe; it’s a culinary hug that transforms your weeknight dinners into delightful family gatherings. With simple ingredients and minimal cleanup, it’s the kind of meal that makes you feel accomplished without the stress of complicated techniques. Perfectly seasoned chicken paired with tender potatoes creates a balanced dish that’s sure to impress. Now, let’s dive into why you’ll absolutely love this dish!

Why You’ll Love This Recipe

  • Effortless Preparation: Toss everything together in one pan, and let the oven do the work. You’ll have more time to relax!
  • Family-Friendly Flavors: Tender chicken and crispy potatoes are a hit with both kids and adults. It’s the meal everyone will ask for again!
  • Minimal Cleanup: Forget about multiple pots and pans. This one-pan wonder means less time scrubbing and more time enjoying the meal.
  • Flexible Ingredients: Whether you prefer chicken thighs or breasts, and russet or baby potatoes, you can customize this recipe to suit your tastes.
  • Perfect for Meal Prep: Make this dish ahead of time and enjoy delicious leftovers throughout the week. It’s a practical choice for busy nights!

Ingredients You’ll Need

A beautifully arranged dish of One Pan Chicken and Potatoes, showcasing succulent chicken and perfectly roasted potatoes.

Let’s gather our ingredients for this cozy dish! Here’s what you’ll need:

  • 4 chicken thighs (bone-in, skin-on for flavor and moisture)
  • 4 medium potatoes (cut into wedges; feel free to swap for baby potatoes)
  • 3 tablespoons olive oil (for richness and to help the spices stick)
  • 1 teaspoon garlic powder (for that aromatic kick)
  • 1 teaspoon onion powder (adds depth of flavor)
  • 1 teaspoon paprika (for a subtle smokiness)
  • 1 teaspoon dried thyme (herbaceous goodness)
  • Salt and pepper to taste
  • Fresh parsley (optional, for garnish)

How to Make One Pan Chicken and Potatoes

Now that we have our ingredients ready, let’s get cooking! Follow these simple steps:

  1. Preheat your oven to 400°F (200°C).
  2. In a large mixing bowl, combine olive oil, garlic powder, onion powder, paprika, dried thyme, salt, and pepper.
  3. Add the chicken thighs to the bowl and coat them evenly with the seasoning mixture.
  4. In the same bowl, add the potato wedges and toss them until well coated.
  5. Spread the chicken and potatoes in a single layer on a large baking sheet.
  6. Bake in the preheated oven for 35-40 minutes, or until the chicken is cooked through and the potatoes are golden and tender.
  7. Optional: Broil for an additional 2-3 minutes for extra crispiness on the chicken skin.
  8. Remove from the oven and let rest for a few minutes. Garnish with fresh parsley before serving.

Pro Tips for Success

  • Use a Meat Thermometer: Ensure your chicken reaches an internal temperature of 165°F (74°C) for safe eating.
  • Don’t Crowd the Pan: For crispy potatoes, ensure they’re spread out in a single layer. This ensures even cooking!
  • Let It Rest: Allow the chicken to rest for a few minutes after baking to keep it juicy.
  • Make It Zesty: Add a squeeze of lemon juice right before serving for an extra burst of flavor.
  • Switch Up the Herbs: Feel free to experiment with different herbs like rosemary or oregano for a new twist!
  • Customize Your Veggies: Add in seasonal vegetables like carrots, bell peppers, or Brussels sprouts for added nutrition and variety.
  • Use Leftover Chicken: If you have leftover chicken, simply add it to the pan for a quick reheating!
  • Season to Taste: Don’t hesitate to adjust salt and spices based on your preference. Trust your palate!

Common Mistakes and Troubleshooting

Even the best cooks can make mistakes. Here’s how to troubleshoot:

  • Dry Chicken: If your chicken turns out dry, try using bone-in cuts and don’t overcook.
  • Undercooked Potatoes: If your potatoes aren’t done, cut them smaller next time or bake longer.
  • Flavorless Dish: Adjust your seasoning; don’t be afraid to use more herbs and spices!

Variations to Try

Want to switch things up? Here are some fun variations:

  • Herb & Lemon Chicken: Add fresh herbs and lemon zest to the marinade for a refreshing twist.
  • Spicy Kick: Incorporate red pepper flakes or paprika for a spicy version.
  • Honey Garlic Glaze: Brush a mixture of honey and garlic on the chicken during the last 10 minutes of baking.
  • Vegetarian Option: Substitute chicken with hearty vegetables like eggplant or portobello mushrooms.

Storage and Make-Ahead Instructions

If you want to prep ahead or store leftovers, here’s what to do:

  • Make-Ahead: You can prep the chicken and potatoes the night before and store them in the fridge. Just season and bake when ready!
  • Storing Leftovers: Store any leftovers in an airtight container in the fridge for up to 4 days. Reheat in the oven or microwave.
  • Freezing: You can freeze cooked chicken and potatoes for up to 3 months. Thaw overnight in the fridge before reheating.

Frequently Asked Questions

Got questions? Here are the answers to some common queries:

  • Can I use boneless chicken? Yes, boneless chicken thighs or breasts can work, but adjust cooking time accordingly.
  • What can I substitute for olive oil? You can use melted butter or avocado oil for a different flavor.
  • How do I know when the chicken is done? Use a meat thermometer; the chicken should reach 165°F (74°C).
  • Can I add other vegetables? Absolutely! Carrots, green beans, or asparagus can be great additions.
  • What if I don’t have thyme? You can substitute with rosemary or Italian seasoning.
  • Can I make this dish in a slow cooker? Yes, you can adapt the recipe for your slow cooker, adjusting the cooking time as needed.
  • Is this recipe gluten-free? Yes, all the ingredients are gluten-free, making it suitable for gluten-sensitive diets.
  • How long does it take to cook? The total cooking time is about 35-40 minutes for the chicken and potatoes.

Nutritional Information

This dish is not only comforting but can also be made nutritious!

  • Protein Power: Chicken provides lean protein, which is essential for muscle repair and growth.
  • Fiber Boost: Potatoes are a great source of dietary fiber, aiding in digestion and promoting satiety.
  • Healthy Fats: Olive oil is rich in monounsaturated fats, beneficial for heart health.

Equipment Recommendations

To make your cooking experience smoother, here’s what I recommend:

  • Large Baking Sheet: A sturdy, rimmed baking sheet is essential for even cooking.
  • Mixing Bowls: Use a large bowl for mixing ingredients before transferring to the baking sheet.
  • Meat Thermometer: This handy tool ensures your chicken reaches the safe temperature without overcooking.

Serving Suggestions

Now that you’ve created a delicious meal, here’s how to serve it:

  • Garnish: A sprinkle of fresh parsley adds color and a hint of freshness.
  • Pair with a Salad: A crisp green salad complements the heartiness of the chicken and potatoes.
  • Serve with Bread: Freshly baked bread or rolls are perfect for soaking up those delicious juices!

Conclusion

There you have it! A cozy, flavorful, and incredibly easy One Pan Chicken and Potatoes recipe that will become a staple in your dinner rotation. Remember, cooking is all about joy and connection—so gather your loved ones, savor each bite, and create beautiful memories in your kitchen. Happy cooking, friends!

The BEST One Pan Chicken And Potatoes

Prep Time 10 minutes
Cook Time 40 minutes
Total Time 50 minutes
Servings 4 servings
Calories 550
A simple and flavorful one-pan meal featuring tender chicken thighs and crispy potatoes, perfect for a quick dinner.

Ingredients

Meat

  • 4 pieces chicken thighs (bone-in, skin-on)

Vegetables

  • 4 medium potatoes (cut into wedges)

Seasonings & Oils

  • 3 tablespoons olive oil
  • 1 teaspoon garlic powder
  • 1 teaspoon onion powder
  • 1 teaspoon paprika
  • 1 teaspoon dried thyme
  • to taste salt and pepper

Garnish

  • for garnish fresh parsley (optional)

Instructions 

  • Preheat oven to 400°F (200°C).
  • Mix olive oil, garlic powder, onion powder, paprika, thyme, salt, and pepper.
  • Coat chicken and potatoes with the seasoning mixture.
  • Arrange on a baking sheet and bake for 35-40 minutes.
  • Garnish with parsley before serving.

Notes

For extra crispiness, broil for 2-3 minutes at the end.
Calories: 550kcal
Cost: $15
Course: Main Course
Cuisine: American
Keyword: Chicken, one pan, potatoes

Loved this recipe? Save it to your favorite Pinterest board so you can easily find it later! It’s the perfect way to keep all your sweet ideas in one place. ✨

One Pan Chicken and Potatoes featured in a professional food photography style, highlighting textures and colors.

Welcome to Your New Favorite One-Pan Dinner

If you’re searching for a recipe that combines convenience, flavor, and wholesome ingredients, you’ve arrived at the right place! My Ground Beef & Veggie Skillet Dinner is not just a meal; it’s an experience that will make your taste buds dance and your kitchen feel like a cozy haven. This recipe is perfect for busy weeknights when you want something quick yet satisfying. Trust me, after one bite, you’ll be wondering how you ever cooked without it!

Why You’ll Love This Recipe

  • Quick and Easy: This recipe takes just 30 minutes from start to finish, making it a fantastic choice for those hectic evenings.
  • One-Pan Wonder: Less mess means more time enjoying dinner with loved ones. One pan to cook, one pan to clean—what’s not to love?
  • Packed with Nutrients: With a variety of colorful vegetables, this dish is not only delicious but also loaded with vitamins and minerals.
  • Customizable: Use whatever vegetables you have on hand or your favorite ground meat. The possibilities are endless!
  • Comfort Food at Its Best: The savory flavors meld beautifully, making each bite a comforting experience that feels like a warm hug.

Ingredient Breakdown

Let’s dive into the ingredients that make this dish shine. Here’s what you’ll need to create this delicious skillet dinner:

  • 1 pound lean ground beef: This is the star of the show! You can substitute with ground turkey or chicken for a lighter option.
  • 2 tablespoons olive oil: For sautéing the vegetables and beef. Feel free to use avocado oil if you prefer.
  • 1 medium onion, finely chopped: Adds a flavorful base to the dish.
  • 3 garlic cloves, minced: Because garlic makes everything better!
  • 1 red bell pepper, diced: Adds sweetness and color.
  • 1 yellow bell pepper, diced: For a pop of color and a slightly different flavor.
  • 1 medium zucchini, sliced into half-moons: A fantastic way to sneak in some green!
  • 1 medium carrot, thinly sliced: Adds a nice crunch and sweetness.
  • 1 cup corn kernels: Fresh, canned, or frozen will work perfectly.
  • 1 can (14.5 ounces) diced tomatoes, drained: For a juicy and flavorful addition.
  • 1 teaspoon paprika: Adds warmth and depth of flavor.
  • 1 teaspoon onion powder: Enhances the onion flavor without the chopping!
  • 1 teaspoon Italian seasoning: A lovely blend of herbs that complements the dish.
  • ½ teaspoon garlic powder: For an extra punch of flavor.
  • ½ teaspoon crushed red pepper flakes (optional): If you like a bit of heat, add this!
  • Salt and black pepper to taste: Essential for bringing out all the flavors.
  • 1 cup shredded cheddar or mozzarella cheese (optional): Because who doesn’t love melted cheese?
  • 2 tablespoons chopped fresh parsley, for garnish: A touch of freshness to finish it off.

Step-by-Step Cooking Instructions

A side view of a hearty ground beef and veggie skillet, rich in color and texture.

Now that we have our ingredients ready, let’s get cooking! Follow these simple steps to whip up your Ground Beef & Veggie Skillet Dinner:

  1. In a large skillet, heat 1 tablespoon of olive oil over medium-high heat. Add the ground beef, breaking it apart as it cooks. Season lightly with salt and black pepper. Cook until browned and no longer pink, about 6–8 minutes. Drain any excess grease and set aside.
  2. Add the remaining tablespoon of olive oil to the skillet. Toss in the chopped onion and minced garlic, cooking for 2–3 minutes until the onion becomes soft and fragrant.
  3. Stir in the diced bell peppers, zucchini, carrots, and corn. Cook for about 5–6 minutes, stirring occasionally, until the vegetables begin to soften but still have a slight crunch.
  4. Return the cooked beef to the skillet with the vegetables. Add the diced tomatoes, paprika, onion powder, Italian seasoning, garlic powder, and red pepper flakes (if using). Mix well to coat everything in the seasonings.
  5. Reduce heat to medium and let the mixture simmer for 5–7 minutes, allowing all the flavors to blend together beautifully.
  6. If using cheese, sprinkle it evenly over the top. Cover the skillet for 2–3 minutes until the cheese melts.
  7. Remove from heat, garnish with chopped parsley, and serve warm.

Pro Tips for the Best Skillet Dinner

  • Prep Ahead: Chop all your vegetables beforehand to save time when cooking.
  • Use Fresh Ingredients: Fresh vegetables not only taste better but also enhance the nutritional value of your meal.
  • Experiment with Spices: Feel free to add your favorite spices to customize the flavor to your liking!
  • Don’t Overcook the Vegetables: Aim for a slight crunch for a more vibrant texture.
  • Make it a Meal: Serve this dish over rice, quinoa, or even pasta for a heartier meal.
  • Leftovers are Gold: This dish stores well in the fridge and can be reheated for quick lunches.
  • Mix Up the Meats: Try ground chicken, turkey, or even plant-based protein for a different twist.
  • Add Some Crunch: Top with crushed tortilla chips or nuts for an unexpected texture!

Common Mistakes and Troubleshooting

Even the best cooks can run into a few hiccups. Here’s how to avoid common pitfalls:

  • Overcooked Beef: Keep an eye on the beef while it cooks. You want it browned but not dry.
  • Vegetables Mushy: Don’t cook the vegetables for too long. Aim for that perfect balance of tender and crisp.
  • Too Much Liquid: If your skillet has too much liquid, let it simmer uncovered for a few extra minutes to reduce.
  • Missing Flavor: Always season your dish throughout the cooking process, not just at the end!

Delicious Variations to Try

Feel free to get creative! Here are some fun variations to keep things exciting:

  • Southwestern Style: Add black beans, corn, and taco seasoning for a southwestern twist.
  • Italian Flair: Mix in some marinara sauce instead of diced tomatoes and top with mozzarella cheese for an Italian-inspired dish.
  • Asian Influence: Swap in soy sauce and sesame oil, and add broccoli and snap peas for an Asian-inspired flavor.
  • Vegetarian Option: Replace the beef with lentils or chickpeas for a hearty vegetarian meal.

Storage and Make-Ahead Instructions

You can make this dish ahead of time and enjoy it later or store it for lunch. Here’s how:

  • Refrigeration: Store leftovers in an airtight container in the fridge for up to 3 days.
  • Freezing: This dish freezes well! Store it in a freezer-safe container for up to 3 months. Thaw overnight in the fridge before reheating.
  • Reheating: Reheat in a skillet over medium heat, adding a splash of water or broth to keep it moist.

Frequently Asked Questions

  • Can I use frozen vegetables? Absolutely! Just add them to the skillet straight from the freezer.
  • What can I serve with this dish? It pairs wonderfully with rice, quinoa, or a simple green salad.
  • How can I make it spicier? Add more crushed red pepper flakes or a dash of hot sauce!
  • Can I make this in a slow cooker? Yes! Brown the beef first, then add all ingredients to the slow cooker and cook on low for 6-8 hours.
  • What if I don’t have all the vegetables? Use what you have! This recipe is flexible and forgiving.
  • Can I add more cheese? Yes, cheese is always a great idea! Just remember to adjust cooking time to allow it to melt.
  • Is this recipe gluten-free? Yes, as long as all your ingredients are gluten-free!
  • Can I double the recipe? Definitely! Just make sure your skillet is large enough or cook in batches.

Nutritional Tips and Dietary Adaptations

This dish can easily be adapted to fit various dietary needs:

  • Low-Carb: Skip the corn or substitute with cauliflower rice.
  • Keto-Friendly: Use ground beef and add more non-starchy vegetables.
  • Vegetarian/Vegan: Substitute with lentils or plant-based ground meat.
  • Paleo: Omit cheese and corn and use organic, grass-fed beef.

Essential Equipment Recommendations

To make this dish, you’ll need:

  • Large Skillet: A good-quality skillet ensures even cooking.
  • Cutting Board and Knife: For chopping your veggies.
  • Spatula: Perfect for stirring and serving.

Serving Suggestions

To elevate your dining experience, consider these serving ideas:

  • Garnish: Top with freshly chopped herbs or a dollop of sour cream.
  • Side Dishes: Serve with crusty bread or over a bed of fluffy rice.
  • Drinks: Pair with a refreshing iced tea or a crisp white wine.

In conclusion, my Ground Beef & Veggie Skillet Dinner is more than just a meal; it’s a ritual of love, comfort, and nourishment. I hope this recipe brings joy to your kitchen as it has in mine. So gather your ingredients, rally your loved ones, and let’s create something magical together!

Ground Beef & Veggie Skillet Dinner Recipe

Prep Time 10 minutes
Cook Time 15 minutes
Total Time 25 minutes
Servings 4 servings
Calories 450
A quick and nutritious skillet dish combining lean ground beef with colorful vegetables and flavorful seasonings, perfect for a wholesome weeknight dinner.

Ingredients

Meat

  • 1 pound lean ground beef

Oil

  • 2 tablespoons olive oil

Vegetables

  • 1 medium onion, finely chopped
  • 3 cloves garlic, minced
  • 1 red red bell pepper, diced
  • 1 yellow yellow bell pepper, diced
  • 1 medium zucchini, sliced into half-moons
  • 1 medium carrot, thinly sliced
  • 1 cup corn kernels (fresh, canned, or frozen)
  • 1 can (14.5 ounces) diced tomatoes, drained

Spices & Seasonings

  • 1 teaspoon paprika
  • 1 teaspoon onion powder
  • 1 teaspoon Italian seasoning
  • ½ teaspoon garlic powder
  • ½ teaspoon crushed red pepper flakes (optional)
  • to taste Salt and black pepper
  • 1 cup shredded cheddar or mozzarella cheese (optional)
  • 2 tablespoons chopped fresh parsley, for garnish

Instructions 

  • Cook ground beef in 1 tablespoon olive oil until browned, then drain excess grease.
  • Sauté onion and garlic in remaining oil until fragrant and soft.
  • Add diced peppers, zucchini, carrots, and corn; cook until vegetables soften slightly.
  • Return beef to skillet, add tomatoes and seasonings; simmer for 5–7 minutes.
  • If using cheese, sprinkle on top, cover, and cook until melted. Garnish with parsley and serve.

Notes

You can customize the vegetables and cheese to your preference for a personalized touch.
Calories: 450kcal
Cost: $15
Course: Main Course
Cuisine: American
Keyword: ground beef, skillet, vegetables

Welcome to Your New Favorite Comfort Dish

Hey there, fellow food lovers! I’m Ava, and I’m so thrilled you’ve found your way to my kitchen. Today, we’re diving into a dish that’s not just a meal but a heartfelt hug on a plate: my Quick One Pot Sausage and Rice Delight. If you’re looking for an easy, satisfying recipe that brings together juicy sausage and fluffy rice with a rainbow of veggies, you’re in for a treat. So, roll up your sleeves, and let’s get cooking!

Why You’ll Love This Recipe

This dish isn’t just a quick fix for dinner; it’s a crowd-pleaser that you’ll want to make over and over again. Here’s why:

  • One-Pot Wonder: Less cleanup means more time enjoying your meal—and who doesn’t love that?
  • Flavor Explosion: The combination of spices, smoked sausage, and vibrant vegetables creates a rich tapestry of flavors that will make your taste buds dance.
  • Customizable: Whether you’re a meat lover or a veggie enthusiast, this recipe is versatile enough to adapt to your preferences.
  • Quick Prep Time: Ready in under 30 minutes, it’s perfect for busy weeknights when you need something delicious without the fuss.
  • Hearty and Filling: This dish packs protein, carbs, and veggies all into one comforting meal, making it a complete dinner solution.

Essential Ingredients

A delicious serving of sausage and rice in a warm, inviting setting, showcasing the dish's vibrant ingredients.

Let’s break down what you’ll need to whip up this delightful dish. Here’s the list:

  • 1 lb Italian sausage: Sliced. Use your favorite type—whether it’s spicy, sweet, or turkey sausage, it all works!
  • 1 cup long grain rice: This is the backbone of the dish, providing that fluffy texture.
  • 2 cups chicken broth: The liquid gold that infuses flavor into the rice.
  • 1 cup diced bell peppers: Choose a mix of colors for added vibrancy.
  • 1 cup diced onion: For that aromatic base that makes everything taste better.
  • 1 can diced tomatoes (14.5 oz): Adds moisture and a hint of acidity.
  • 2 cloves garlic, minced: Because garlic makes everything better!
  • 1 teaspoon paprika: For a smoky depth of flavor.
  • Salt and pepper to taste: Essential for balancing flavors.
  • 2 tablespoons olive oil: For sautéing and flavor.
  • Fresh parsley for garnish (optional): A pop of color and freshness.

Let’s Make It Together

Now that you’ve gathered all your ingredients, let’s cook!

Step 1: Heat Up the Pot

In a large pot, heat the olive oil over medium heat. You want it hot enough to sauté but not smoking!

Step 2: Brown the Sausage

Add the sliced sausage and cook until browned, about 5-7 minutes. This step is crucial as it develops the flavor base for the dish.

Step 3: Sauté the Veggies

Next, toss in the diced onion, bell peppers, and minced garlic. Sauté for another 3-4 minutes until the vegetables are tender and fragrant.

Step 4: Stir in the Rice

Now, add the rice, chicken broth, diced tomatoes, paprika, salt, and pepper. Stir everything together, ensuring the rice is well-coated.

Step 5: Bring to a Boil

Bring the mixture to a boil, then reduce the heat to low. Cover the pot and let it simmer for 20-25 minutes, or until the rice is fluffy and has absorbed all the liquid.

Step 6: Final Touches

Remove from heat and let it sit for 5 minutes. Fluff with a fork and garnish with fresh parsley if desired. And there you have it—your one-pot masterpiece!

Pro Tips for Perfection

Want to elevate your one-pot sausage and rice game? Here are some expert insights:

  • Brown the sausage well: The browning process adds depth of flavor, so don’t rush it!
  • Adjust the broth for flavor: Use low-sodium chicken broth to control the salt level, or swap with vegetable broth for a vegetarian option.
  • Mix in some greens: Adding spinach or kale in the last few minutes of cooking boosts nutrition and color.
  • Experiment with spices: A dash of cayenne or red pepper flakes can spice things up!
  • Let it rest: Allowing the dish to sit after cooking helps the flavors meld beautifully.
  • Use a tight-fitting lid: This ensures all the steam stays in, cooking the rice evenly.
  • Try different proteins: Swap the sausage for chicken, shrimp, or even a meat substitute for a new twist.
  • Don’t forget the garnish: A sprinkle of fresh herbs or a squeeze of lemon can brighten up the dish.

Common Mistakes and Troubleshooting

Even the best chefs have their off days! Here’s how to avoid common pitfalls:

  • Overcooking the rice: Keep an eye on the cooking time—too long can lead to mushy rice.
  • Not enough liquid: If your rice is undercooked, it may need more liquid. Add a splash of broth as needed.
  • Skimping on seasoning: Taste as you go! Adjust the salt and spices to match your preference.
  • Skipping the resting time: Letting the dish rest allows flavors to deepen and the rice to set.

Delicious Variations to Try

Looking to mix things up? Here are a few fun variations:

  • Spicy Cajun Style: Use Andouille sausage and add Cajun seasoning for a kick.
  • Vegetarian Delight: Replace sausage with your favorite plant-based alternative and load up on more veggies.
  • Cheesy Version: Stir in some shredded cheese just before serving for a creamy, cheesy dish.
  • Southwestern Twist: Add black beans, corn, and taco seasoning for a Tex-Mex flair.

Storing and Make-Ahead Instructions

Want to enjoy this dish later? Here’s how to store and prepare ahead:

  • Refrigerate: Store leftovers in an airtight container in the fridge for up to 3 days.
  • Freeze: This dish freezes well! Portion into freezer-safe bags or containers for up to 3 months.
  • Reheat: For best results, reheat on the stovetop with a splash of broth to restore moisture.

Comprehensive FAQ

Got questions? I’ve got answers! Here are some frequently asked questions about this recipe:

  • Can I use brown rice instead of white? Yes, but you’ll need to adjust the cooking time and liquid.
  • What can I substitute for sausage? Ground turkey, chicken, or plant-based sausage work well.
  • Can I add more vegetables? Absolutely! Zucchini, carrots, or snap peas would be delightful additions.
  • Is this dish gluten-free? Yes, as long as your sausage and broth are gluten-free.
  • How can I make it spicier? Add red pepper flakes or use spicy sausage for extra heat.
  • Can I make this dish in advance? Yes, it stores nicely in the fridge or freezer for future meals.
  • What sides go well with this dish? A simple green salad or crusty bread pairs beautifully.
  • Can I double the recipe? Definitely! Just make sure your pot is large enough to hold everything.

Nutrition Tips and Dietary Adaptations

If you’re looking for ways to adapt this recipe to fit nutritional goals, here are some suggestions:

  • For a lower-carb option: Substitute rice with cauliflower rice for a lightened-up version.
  • For added fiber: Incorporate beans or lentils into the mix.
  • Dairy-free option: Use nutritional yeast in place of cheese for a cheesy flavor without dairy.

Equipment Recommendations

To make your cooking experience smooth and enjoyable, here’s what I recommend:

  • Large pot or Dutch oven: Perfect for one-pot meals and ensures even cooking.
  • Wooden spoon: Ideal for stirring and won’t scratch your pot.
  • Measuring cups and spoons: To ensure you’re adding just the right amounts!

Serving Suggestions

Once your dish is ready, here are some fun ways to serve it:

  • Garnish with fresh herbs: A sprinkle of parsley or cilantro adds color and freshness.
  • Pair with crusty bread: Perfect for soaking up those delicious flavors!
  • Serve with a side salad: A simple green salad balances the meal beautifully.
  • Offer hot sauce on the side: For those who like an extra kick!

In Conclusion

There you have it, my Quick One Pot Sausage and Rice Delight—a dish that’s sure to become a staple in your home. It’s comforting, easy to make, and oh-so-delicious. Just like the warm memories of cooking with my mom, I hope this recipe brings joy and connection to your table. So gather your loved ones, dig in, and enjoy every bite. Happy cooking, my friends!

Quick One Pot Sausage and Rice Delight

Prep Time 10 minutes
Cook Time 25 minutes
Total Time 35 minutes
Servings 4 servings
Calories 550
A flavorful and easy one-pot meal combining sausage, rice, and vegetables for a satisfying dinner.

Ingredients

Meat

  • 1 lb italian sausage, sliced

Grains

  • 1 cup long grain rice

Broth & Liquids

  • 2 cups chicken broth

Vegetables

  • 1 cup diced bell peppers
  • 1 cup diced onion

Canned Goods

  • 1 can diced tomatoes (14.5 oz)

Aromatics & Spices

  • 2 cloves garlic, minced
  • 1 teaspoon paprika
  • to taste salt and pepper

Oils

  • 2 tablespoons olive oil

Garnish

  • optional fresh parsley for garnish

Instructions 

  • Heat olive oil in a large pot over medium heat.
  • Add sausage and cook until browned, about 5-7 minutes.
  • Add onion, bell peppers, and garlic; sauté until tender, 3-4 minutes.
  • Stir in rice, broth, tomatoes, paprika, salt, and pepper; bring to boil.
  • Reduce heat, cover, and simmer 20-25 minutes until rice is cooked.
  • Let sit for 5 minutes, garnish with parsley, and serve.

Notes

For extra flavor, add a pinch of red pepper flakes or your favorite herbs.
Calories: 550kcal
Cost: $15
Course: Main Course
Cuisine: American
Keyword: sausage

Loved this recipe? Save it to your favorite Pinterest board so you can easily find it later! It’s the perfect way to keep all your sweet ideas in one place. ✨

Mouthwatering view of Quick One Pot Sausage and Rice Delight with visible textures of sausage, rice, and diced vegetables.

Welcome to a Flavorful Journey!

Welcome to my kitchen! Today, we’re diving into a dish that’s not just a recipe but an experience that will warm your heart and fill your belly—Sautéed Potatoes and Green Beans with Smoked Sausage. This dish is a celebration of flavors that will have your family asking for seconds, and trust me, it’s as easy to make as it is delicious!

Imagine the smoky aroma of sausage sizzling in the pan, the vibrant green of fresh beans, and the golden-brown potatoes that soak up all the savory goodness. This recipe is perfect for busy weeknights or a cozy weekend dinner. So, grab your apron, and let’s whip up something magical together!

Why You’ll Love This Recipe

Here are just a few reasons why this Sautéed Potatoes and Green Beans with Smoked Sausage recipe will become a staple in your home:

  • Quick and Easy: Ready in under 30 minutes, this dish is perfect for those busy evenings when time is tight but you still want a home-cooked meal.
  • One-Pan Wonder: Minimal cleanup required! Cook everything in one skillet, making it not only delicious but also convenient.
  • Healthy and Wholesome: Packed with nutrients from fresh green beans and baby potatoes, balanced with the richness of smoked sausage.
  • Versatile Ingredients: You can easily substitute ingredients based on what you have on hand, making this recipe adaptable to your pantry.
  • Impressive Flavor: The combination of spices and smokiness creates a dish that’s bursting with flavor, sure to impress even the pickiest eaters!

Ingredients You’ll Need

Gather these ingredients to bring this delightful dish to life:

  • 1 pound baby potatoes: Halved or quartered for even cooking.
  • ¾ pound fresh green beans: Trimmed to add a fresh, crunchy texture.
  • 1 small onion: Sliced for a sweet, aromatic base.
  • 2 garlic cloves: Minced for that irresistible flavor boost.
  • 1 pound smoked sausage: Sliced into ¼-inch rounds—this is the flavor hero of your dish!
  • 1 tablespoon olive oil: To sauté the ingredients and add a rich, fruity note.
  • ½ teaspoon paprika: For a hint of smokiness and color.
  • Salt and black pepper: To taste, enhancing all the flavors.
  • ¼ cup water or chicken broth: To create steam and moisture.
  • Chopped fresh parsley (optional): For garnish, adding a pop of color and freshness.

How to Make Sautéed Potatoes and Green Beans with Smoked Sausage

Side view of vibrant sautéed potatoes mixed with green beans and sausage slices.

Let’s get cooking! Follow these simple steps to create a dish that’s sure to impress:

Step 1: Brown the Smoked Sausage

Heat the olive oil in a large skillet over medium heat. Add the smoked sausage slices and cook until browned on both sides, about 5 to 6 minutes. Remove the sausage from the skillet and set it aside to keep warm.

Step 2: Sauté the Potatoes

In the same skillet, add the halved or quartered baby potatoes. Sauté the potatoes for 8 to 10 minutes, stirring occasionally, until they develop a golden brown color and start to soften.

Step 3: Add Onion and Garlic

Add the sliced onion and minced garlic to the skillet with the potatoes. Cook together for 2 minutes until the onion becomes translucent and the garlic is fragrant.

Step 4: Incorporate Green Beans and Seasonings

Stir in the trimmed green beans along with the paprika, salt, and black pepper. Mix well to coat the vegetables evenly with the seasonings.

Step 5: Steam for Tenderness

Pour in ¼ cup water or chicken broth to add moisture, then cover the skillet with a lid. Let the mixture steam for 8 to 10 minutes, or until the green beans and potatoes are tender when pierced with a fork.

Step 6: Combine Everything

Remove the lid and return the browned sausage slices to the skillet. Stir everything together and cook uncovered for an additional 2 to 3 minutes, allowing the sausage to heat through and the liquid to reduce slightly.

Step 7: Serve and Enjoy!

Remove from heat, sprinkle with chopped fresh parsley if desired, and serve the sautéed potatoes, green beans, and smoked sausage warm as a satisfying gluten-free main course.

Pro Tips for Perfecting This Dish

Want to take your sautéed potatoes and green beans with smoked sausage to the next level? Here are some expert tips:

  • Cut Evenly: Ensure all your potatoes are cut to similar sizes for even cooking.
  • Don’t Rush the Browning: Allow the sausage to brown well for maximum flavor.
  • Add a Splash of Acid: A dash of vinegar or lemon juice at the end brightens the flavors beautifully.
  • Experiment with Spices: Try adding herbs like thyme or rosemary for an aromatic touch.
  • Use Fresh Ingredients: Fresh produce makes a significant difference in flavor and texture.
  • Keep the Heat Steady: Don’t turn the heat too high; a steady medium heat ensures everything cooks evenly.
  • Adjust Cooking Time: If your veggies are thicker, add a few extra minutes to the steaming time.
  • Don’t Skip the Parsley: It adds not just flavor but also a lovely color contrast.

Common Mistakes and Troubleshooting

Even the best cooks make mistakes! Here’s how to troubleshoot common issues:

  • Too Salty: If your dish turns out too salty, add a few more potatoes and green beans to balance the flavors.
  • Not Enough Flavor: If it lacks flavor, consider adding more seasoning or a dash of soy sauce for depth.
  • Overcooked Vegetables: If your beans or potatoes are mushy, reduce the steaming time next time.
  • Burnt Sausage: If the sausage burns, lower the heat and keep an eye on it during cooking.

Variations to Try

This recipe is versatile! Here are some fun variations you might enjoy:

  • Swap the Sausage: Use chicken sausage or turkey sausage for a lighter option.
  • Go Vegan: Replace the sausage with tempeh or mushrooms for a plant-based version.
  • Spicy Kick: Add red pepper flakes or jalapeños for a spicy twist.
  • Seasonal Veggies: Incorporate seasonal vegetables like bell peppers or zucchini for added color and nutrition.

Make-Ahead and Storage Instructions

This dish can be made ahead of time and stored for later enjoyment:

  • Make-Ahead: Cook the dish, allow it to cool, then refrigerate in an airtight container for up to 3 days.
  • Freezing: This dish can be frozen. Store it in a freezer-safe container for up to a month. Reheat in the microwave or on the stovetop.
  • Reheating: Reheat gently in a skillet over low heat, adding a splash of water or broth to prevent sticking.

FAQs About Sautéed Potatoes and Green Beans with Smoked Sausage

Here are answers to some common questions:

  • Can I use frozen green beans? Yes, but reduce the cooking time slightly as they cook faster.
  • What can I serve with this dish? It pairs well with a crisp salad or crusty bread to soak up the delicious juices.
  • Is this dish gluten-free? Yes, as long as you ensure your sausage is gluten-free.
  • Can I add other vegetables? Absolutely! Carrots or bell peppers would be great additions.
  • How spicy is this dish? It’s not spicy, but you can add heat if you like!
  • Can I make this dish in advance? Yes! It reheats beautifully.
  • What’s the best type of sausage to use? Smoked sausage adds the best flavor, but any cooked sausage will work.
  • How do I store leftovers? Store in an airtight container in the fridge for up to 3 days.

Nutrition Tips and Dietary Adaptations

Here are some tips for making this dish more nutritious:

  • Increase Veggies: Add more green beans or other veggies to boost fiber and nutrients.
  • Healthy Fats: Use olive oil instead of butter for healthier fat content.
  • Low-Sodium Options: Choose low-sodium sausage and broth to reduce salt intake.

Equipment Recommendations

Here’s what you’ll need for this recipe:

  • Large Skillet: Essential for sautéing and bringing all the flavors together.
  • Spatula: Use a sturdy spatula to stir and flip your ingredients.
  • Measuring Cups and Spoons: For precise ingredient measurements.

Serving Suggestions

This hearty dish can be enjoyed on its own or paired with:

  • Crusty Bread: Perfect for mopping up the flavorful juices.
  • Fresh Salad: A light, refreshing side to balance the richness of the sausage.
  • Rice or Quinoa: Serve over rice or quinoa for a filling meal.

Final Thoughts

This Sautéed Potatoes and Green Beans with Smoked Sausage recipe is more than just a meal; it’s a way to gather loved ones around the table, share stories, and enjoy a heartwarming dish that never fails to impress. With its comforting flavors and simple preparation, it’s bound to become a cherished favorite in your kitchen. So, what are you waiting for? Grab those ingredients and let the magic begin! Happy cooking!

Sautéed Potatoes and Green Beans with Smoked Sausage Recipe

Prep Time 10 minutes
Cook Time 20 minutes
Total Time 30 minutes
Servings 4 servings
Calories 450
A hearty and flavorful dish combining tender potatoes, crisp green beans, and savory smoked sausage, perfect for a satisfying meal.

Ingredients

Vegetables

  • 1 pound baby potatoes (halved or quartered)
  • ¾ pound fresh green beans (trimmed)
  • 1 small onion (sliced)
  • 2 cloves garlic (minced)
  • 1 pound smoked sausage (sliced into ¼-inch rounds)
  • 1 tablespoon olive oil
  • ½ teaspoon paprika
  • to taste Salt and black pepper
  • ¼ cup water or chicken broth

Instructions 

  • Cook sausage slices in olive oil until browned, then remove and set aside.
  • Sauté potatoes in the same skillet for 8-10 minutes until golden and starting to soften.
  • Add onion and garlic; cook for 2 minutes until fragrant and translucent.
  • Mix in green beans, paprika, salt, and pepper; pour in water or broth, cover, and steam for 8-10 minutes.
  • Uncover, return sausage to skillet, cook for 2-3 minutes, then garnish with parsley and serve.

Notes

For extra flavor, add a dash of smoked paprika or fresh herbs.
Calories: 450kcal
Cost: $15
Course: Main Course
Keyword: green beans, potatoes, sausage

Welcome to the Heart of Comfort Food: Cheesy Ranch Potatoes and Smoked Sausage

If you’re searching for a dish that brings warmth to your table and smiles to your loved ones, you’ve landed in the right spot. This recipe for Cheesy Ranch Potatoes and Smoked Sausage is not just a meal; it’s an experience, a celebration of flavors that will have everyone coming back for seconds. Imagine tender, golden potatoes mingling with smoky sausage, all enveloped in a creamy ranch sauce, topped with a generous sprinkle of melted cheese. Sounds inviting, right? Let’s dive into the magic of this dish, where every bite feels like a cozy hug.

Why You’ll Love This Recipe

This recipe isn’t just about putting food on the table—it’s about creating moments. Here are some reasons why this dish will become a staple in your kitchen:

  • One-Pan Wonder: Effortless cleanup with only one baking sheet needed, making it perfect for busy weeknights.
  • Comforting Flavors: The combination of smoky sausage and ranch seasoning brings a delightful tang that’s hard to resist.
  • Family-Friendly: Loved by kids and adults alike, it’s an easy way to please a crowd.
  • Easy to Customize: Feel free to adapt ingredients based on what you have on hand or your personal preferences.
  • Meal Prep Friendly: This dish can easily be made ahead of time and stored for a busy day.

Ingredients Breakdown

Delicious dish of cheesy ranch potatoes mixed with smoked sausage, garnished with green onions.

Let’s talk ingredients! Here’s what you’ll need to whip up this delicious meal:

  • 1 lb smoked sausage: Opt for your favorite brand, whether it’s kielbasa, andouille, or turkey sausage for a lighter option.
  • 4 cups potatoes: I recommend using Yukon Gold or red potatoes for their creamy texture.
  • 1 cup shredded cheddar cheese: Feel free to mix it up with Monterey Jack or a spicy pepper jack for an extra kick.
  • 1 packet ranch seasoning mix: This is where the flavor magic happens! You can also make your own ranch seasoning if you prefer.
  • 1/2 cup sour cream: Adds creaminess and a slight tang.
  • 1/4 cup milk: Adjust based on your desired creaminess.
  • 2 tablespoons olive oil: For roasting the potatoes to perfection.
  • Salt and pepper to taste: Season to your liking!
  • Chopped green onions for garnish: A fresh finish to your dish.

How to Make Cheesy Ranch Potatoes and Smoked Sausage

Ready to cook? Here’s how to bring this dish to life:

  1. Preheat the oven to 400°F (200°C).
  2. Mix it up: In a large mixing bowl, combine the cubed potatoes, sliced smoked sausage, olive oil, ranch seasoning mix, salt, and pepper. Toss until everything is well-coated.
  3. Spread it out: Evenly distribute the mixture on a baking sheet.
  4. Bake to perfection: Roast in the preheated oven for 25-30 minutes, stirring halfway through, until the potatoes are golden and tender.
  5. Finish strong: Remove from the oven, drizzle with milk and sour cream, and top with shredded cheddar cheese.
  6. Back to the oven: Return to the oven and bake for an additional 5-10 minutes, or until the cheese is melted and bubbly.
  7. Garnish: Sprinkle with chopped green onions before serving.

Pro Tips for Success

Want to elevate your dish even further? Check out these expert insights:

  • Prep Ahead: Cut the potatoes and sausage a day in advance and store them in the fridge for easy assembly.
  • Roast the Potatoes First: For extra crispiness, consider roasting the potatoes for 10-15 minutes before adding sausage.
  • Experiment with Flavors: Try adding bell peppers, zucchini, or even jalapeños for a fresh twist.
  • Cheese Variations: Mix different cheeses for a more complex flavor profile.
  • Use Fresh Herbs: Adding fresh thyme or parsley can elevate the taste of your dish significantly.
  • Watch the Cooking Time: Keep an eye on your dish in the last few minutes to prevent over-browning the cheese.
  • Mix it Up: Substitute the smoked sausage with chicken or tofu for a different take.
  • Garnish Well: A sprinkle of freshly chopped herbs can make your dish pop visually and flavor-wise.

Common Mistakes and Troubleshooting

Even the best cooks can run into issues. Here’s how to avoid common pitfalls:

  • Overcrowding the Pan: Make sure the potatoes and sausage are spread out to ensure even cooking and browning.
  • Undercooked Potatoes: If your potatoes aren’t tender after 30 minutes, give them more time in the oven.
  • Cheese Burning: If you notice the cheese browning too quickly, cover the dish loosely with foil.

Variations to Try

Want to mix things up? Here are some fun variations:

  • Loaded Ranch Potatoes: Add crispy bacon bits and a dollop of ranch dressing on top when serving.
  • Vegetarian Version: Swap the sausage for chickpeas or a plant-based sausage.
  • Spicy Option: Include diced jalapeños or a dash of cayenne pepper in the seasoning mix.
  • Herb-infused Potatoes: Toss in fresh rosemary or dill for an aromatic twist.

Storage and Make-Ahead Instructions

Thinking ahead? Here’s how to store your leftovers:

  • Refrigerate: Store any leftovers in an airtight container in the fridge for up to 3 days.
  • Reheat: To reheat, place in the oven at 350°F (175°C) for about 15-20 minutes until warmed through.
  • Make-Ahead: Assemble the dish and store it uncooked in the fridge for up to 24 hours. Just pop it in the oven when ready to cook.

Frequently Asked Questions

Got questions? Here are some answers!

  • Can I use different types of sausage? Absolutely! Kielbasa, andouille, or even vegetarian sausage works well.
  • What kind of cheese works best? Cheddar is classic, but feel free to experiment with mozzarella or pepper jack.
  • How do I make this dish healthier? Use turkey sausage and reduce the cheese for a lighter option.
  • Can I prepare the potatoes ahead of time? Yes! You can cut the potatoes and sausage ahead of time and store them in the fridge.
  • What can I serve with this dish? It pairs wonderfully with a fresh salad or steamed vegetables.
  • Is this recipe gluten-free? Yes, just ensure your ranch seasoning is gluten-free.
  • How spicy is this dish? It’s not spicy unless you add jalapeños or hot sausage. Adjust to your taste!
  • Can I freeze leftovers? Yes, but the texture of the potatoes may change. Store in an airtight container for up to 2 months.

Nutritional Tips and Dietary Adaptations

Cooking for specific dietary needs? Here are some tips:

  • Low-Carb Option: Substitute potatoes with cauliflower for a keto-friendly version.
  • Dairy-Free: Use non-dairy cheese and coconut yogurt in place of sour cream.
  • Low Sodium: Use low-sodium sausage and ranch seasoning to reduce the salt content.

Equipment Recommendations

Here’s what you’ll need to make this dish:

  • Baking Sheet: A sturdy baking sheet is essential for even roasting.
  • Mixing Bowl: A large bowl for mixing ingredients is a must.
  • Spatula: Use a spatula for easy tossing and serving.

Serving Suggestions

How to serve it up with flair? Here are some ideas:

  • Fresh Salad: Pair your dish with a crisp garden salad for a refreshing contrast.
  • Crusty Bread: Serve with warm, crusty bread to soak up the delicious ranch sauce.
  • Fruit Compote: A side of fruity compote can provide a sweet balance to the savory flavors.

Final Thoughts

Cooking is more than just feeding your family; it’s about creating memories and experiences. This Cheesy Ranch Potatoes and Smoked Sausage recipe is designed to do just that. It’s about warming hearts and bellies, whether it’s a casual weeknight dinner or a family gathering. So roll up your sleeves, embrace the magic of cooking, and let this dish transform your dining experience into something special. Happy cooking!

Cheesy Ranch Potatoes and Smoked Sausage

Prep Time 10 minutes
Cook Time 35 minutes
Total Time 45 minutes
Servings 4 servings
Calories 650
A hearty and flavorful dish combining smoked sausage, tender potatoes, and melted cheese, perfect for a comforting meal.

Ingredients

Main Ingredients

  • 1 lb smoked sausage, sliced
  • 4 cups potatoes, cubed
  • 1 cup shredded cheddar cheese
  • 1 packet ranch seasoning mix
  • 0.5 cup sour cream
  • 0.25 cup milk
  • 2 tablespoons olive oil
  • to taste salt and pepper
  • chopped green onions for garnish green onions

Instructions 

  • Preheat oven to 400°F (200°C).
  • Mix potatoes, sausage, olive oil, ranch seasoning, salt, and pepper; spread on a baking sheet.
  • Bake for 25-30 minutes, stirring halfway.
  • Drizzle with milk and sour cream, sprinkle cheese, then bake 5-10 more minutes until bubbly.
  • Garnish with chopped green onions before serving.

Notes

For extra flavor, add your favorite herbs or spices.
Calories: 650kcal
Cost: $15
Course: Main Course
Cuisine: American
Keyword: cheese, potatoes, sausage

Loved this recipe? Save it to your favorite Pinterest board so you can easily find it later! It’s the perfect way to keep all your sweet ideas in one place. ✨

Plate of Cheesy Ranch Potatoes with smoked sausage slices, showcasing textures and colors.

Welcome to Your New Favorite Comfort Dish

Ah, the magic of Chicken Stroganoff! If you’re looking for a dish that wraps you in warmth and nostalgia, you’ve landed in the right place. This creamy, savory meal is not just a recipe; it’s an experience—a comforting hug in a bowl that can be made in about 30 minutes! Perfect for busy weeknights or cozy weekends, this dish is sure to impress your family and friends and leave them asking for seconds. So roll up your sleeves, and let’s dive into the heartwarming world of Chicken Stroganoff.

Why You’ll Love This Recipe

  • Quick and Easy: In just 30 minutes, you’ll have a delicious meal on the table, making it ideal for those hectic weeknights.
  • Rich and Creamy Flavor: The addition of sour cream creates a velvety sauce that perfectly complements the tender chicken and earthy mushrooms.
  • One-Pan Wonder: Minimal cleanup is required since everything is cooked in one skillet, letting you enjoy more time with your loved ones.
  • Customizable: This recipe allows for ingredient substitutions, so you can make it your own based on what you have on hand.
  • Perfect for Any Occasion: Whether it’s a family dinner or a gathering with friends, this dish is sure to impress and satisfy.

Ingredients for Your Chicken Stroganoff

Delicious creamy chicken stroganoff garnished with fresh parsley, showcasing its rich texture.

Let’s take a closer look at what you’ll need to create this delightful dish. Here’s your shopping list:

  • 1 pound boneless, skinless chicken breasts: Cut into strips for quick cooking.
  • 1 tablespoon olive oil: For sautéing the chicken.
  • 1 medium onion: Chopped, adding sweetness and depth.
  • 2 cloves garlic: Minced for aromatic goodness.
  • 8 ounces mushrooms: Sliced, they add an earthy flavor that pairs beautifully with the sauce.
  • 1 cup chicken broth: The base for your sauce, lending richness.
  • 1 tablespoon Worcestershire sauce: A little umami to elevate the dish.
  • 1 teaspoon Dijon mustard: For a subtle tang that enhances the flavors.
  • 1 cup sour cream: The star of the show, creating a creamy texture.
  • Salt and pepper: To taste, enhancing the overall flavor.
  • 8 ounces egg noodles: The perfect base for your stroganoff.
  • Fresh parsley: For garnish, adding a pop of color and freshness.

Ingredient Substitutions

If you’re missing something or want to switch it up, here are some substitutions you can make:

  • Chicken: Use turkey or tofu for a different protein option.
  • Egg noodles: Serve over rice, quinoa, or even mashed potatoes for variation.
  • Sour cream: Greek yogurt or cream cheese can be used for a lighter option.
  • Broth: Vegetable broth can replace chicken broth for a vegetarian version.

Step-by-Step Instructions

Now that you have all your ingredients, let’s get cooking! Follow these simple steps for your Chicken Stroganoff:

  1. Cook the egg noodles according to package instructions. Drain and set aside.
  2. In a large skillet, heat olive oil over medium-high heat. Add the sliced chicken and cook until browned and cooked through, about 5-7 minutes. Remove chicken from the skillet and set aside.
  3. In the same skillet, add chopped onion and cook until translucent, about 3 minutes. Add minced garlic and sliced mushrooms, cooking until mushrooms are tender, about 5 minutes.
  4. Pour in chicken broth, Worcestershire sauce, and Dijon mustard. Stir to combine and bring to a simmer.
  5. Reduce heat to low and stir in the sour cream. Return the cooked chicken to the skillet and mix well. Season with salt and pepper to taste.
  6. Serve the creamy chicken stroganoff over the cooked egg noodles and garnish with fresh parsley.

Expert Tips for the Best Chicken Stroganoff

  • Don’t Overcook the Chicken: Ensure the chicken is just cooked through for the best texture.
  • Use Fresh Ingredients: Fresh garlic and onions will enhance the flavors significantly.
  • Adjust the Consistency: If the sauce is too thick, add a splash more chicken broth until desired consistency is achieved.
  • Season as You Go: Taste and adjust the seasoning at each stage to build flavor.
  • Let It Rest: Allow the dish to sit for a few minutes before serving for the flavors to meld.
  • Garnish Generously: Fresh parsley adds a lovely color and freshness that brightens the dish.
  • Make It Ahead: You can prepare the sauce in advance and just reheat before serving.
  • Pair with the Right Sides: Serve with a side salad or crusty bread for a complete meal.

Common Mistakes and Troubleshooting

Even the best of us have kitchen blunders! Here are some common mistakes to avoid when making Chicken Stroganoff:

  • Overcooking the Mushrooms: Mushrooms should be tender but not mushy. Cook them just until softened.
  • Using Low-Quality Chicken: Opt for fresh, high-quality chicken for the best flavor and texture.
  • Skipping the Worcestershire Sauce: This ingredient is crucial for depth; don’t leave it out!
  • Not Tasting the Sauce: Always taste before serving to ensure it’s seasoned just right.

Variations on the Classic Recipe

Once you master this basic recipe, feel free to get creative! Here are some fun variations:

  • Mushroom Lovers: Add more types of mushrooms like shiitake or portobello for an earthy twist.
  • Spicy Stroganoff: Add a pinch of red pepper flakes or a splash of hot sauce for heat.
  • Vegetarian Version: Substitute chicken with hearty vegetables like zucchini and bell peppers.
  • Herbed Stroganoff: Add fresh herbs like thyme or dill for an aromatic touch.

Storage and Make-Ahead Instructions

Want to make this dish ahead of time? Here’s how:

  • Refrigerate: Store in an airtight container for up to 3-4 days. Reheat gently on the stove.
  • Freeze: You can freeze the stroganoff (without sour cream) for up to 3 months. Thaw and add sour cream after reheating.

Frequently Asked Questions

Here are some common questions about Chicken Stroganoff:

  • Can I make Chicken Stroganoff ahead of time? Yes, you can prepare the sauce in advance and add the sour cream just before serving.
  • What can I serve with Chicken Stroganoff? This dish pairs wonderfully with egg noodles, rice, or mashed potatoes.
  • Can I use leftover chicken? Absolutely! Just add it in during the sauce-making process to heat through.
  • Is Chicken Stroganoff healthy? While it’s a comfort food, you can make it healthier by using leaner cuts of chicken and reducing the sour cream.
  • Can I substitute the sour cream? Yes, Greek yogurt or heavy cream can be used for a different texture.
  • How spicy is this recipe? This recipe is mild, but you can add spices to suit your taste.
  • Are there vegetarian options? Yes! Substitute chicken with mushrooms or other veggies.
  • How do I make this dish gluten-free? Use gluten-free noodles and ensure your broth is gluten-free as well.

Nutritional Tips and Dietary Adaptations

Health-conscious cooks can adapt this recipe to fit various dietary needs:

  • Low-Carb: Serve over steamed broccoli or cauliflower rice instead of noodles.
  • Dairy-Free: Use coconut cream instead of sour cream and adjust flavors accordingly.
  • Protein-Packed: Add chickpeas or lentils to increase the protein content.

Essential Equipment for Success

To make your cooking experience smoother, here’s a quick list of equipment you’ll need:

  • Large Skillet: A good non-stick skillet is essential for even cooking.
  • Wooden Spoon: For stirring and mixing ingredients effectively.
  • Measuring Cups and Spoons: Accurate measurements ensure the best flavor.
  • Colander: For draining pasta easily.

Serving Suggestions to Elevate Your Meal

To make your meal even more delightful, consider these serving ideas:

  • Fresh Salad: A simple green salad with a light vinaigrette complements the richness of the stroganoff.
  • Crusty Bread: A warm loaf of bread is perfect for scooping up every last bit of sauce.
  • Roasted Vegetables: Add a side of seasonal roasted veggies for color and nutrition.

Final Thoughts on Your New Favorite Recipe

There you have it—your ultimate guide to making a comforting Chicken Stroganoff that’s bound to become a staple in your kitchen. With its quick preparation time and rich flavors, this dish is truly a crowd-pleaser. So, gather your loved ones around the table, serve up this delightful meal, and enjoy the magic of home-cooked comfort food. Remember, cooking is all about experimenting and finding joy in the process. Happy cooking, my friends!

Creamy Chicken Stroganoff – The Ultimate Comfort Food in 30 Minutes!

Prep Time 10 minutes
Cook Time 20 minutes
Total Time 30 minutes
Servings 4 servings
Calories 550
This creamy chicken stroganoff is a quick and satisfying dish perfect for a comforting weeknight dinner.

Ingredients

Protein

  • 1 pound boneless, skinless chicken breasts, sliced into strips

Oils

  • 1 tablespoon olive oil

Vegetables

  • 1 medium onion, chopped
  • 2 cloves garlic, minced
  • 8 ounces mushrooms, sliced

Broth & Sauces

  • 1 cup chicken broth
  • 1 tablespoon worcestershire sauce
  • 1 teaspoon dijon mustard

Dairy

  • 1 cup sour cream

Seasonings

  • to taste salt and pepper

Pasta

  • 8 ounces egg noodles

Garnish

  • as needed fresh parsley for garnish

Instructions 

  • Cook egg noodles according to package instructions. Drain and set aside.
  • Cook chicken in olive oil until browned, then remove from skillet.
  • Sauté onion and garlic until translucent; add mushrooms and cook until tender.
  • Stir in chicken broth, Worcestershire sauce, and mustard; simmer briefly.
  • Reduce heat, stir in sour cream, add chicken back, season, and serve over noodles garnished with parsley.

Notes

Use fresh parsley for the best flavor. Adjust seasoning to taste.
Calories: 550kcal
Cost: $15
Course: Main Course
Cuisine: Russian
Keyword: Chicken

Loved this recipe? Save it to your favorite Pinterest board so you can easily find it later! It’s the perfect way to keep all your sweet ideas in one place. ✨

A comforting serving of creamy chicken stroganoff, featuring onions and mushrooms in a cozy setting.