Author

Ava

Browsing

Why You’ll Adore These Crispy Air Fryer Salmon Bites

Ah, the joys of cooking! There’s something truly special about transforming simple ingredients into a dish that dances on your taste buds. If you’re on the lookout for a recipe that’s not only easy to make but also packed with flavor, then let me introduce you to the world of crispy Air Fryer Salmon Bites. These little gems are perfect for any occasion, whether it’s a cozy weeknight dinner, an elegant appetizer for guests, or a fun snack while binge-watching your favorite show.

Imagine the aroma of seasoned salmon filling your kitchen, the anticipation building as you watch them crisp up beautifully in the air fryer. It’s a delightful experience that makes you feel like a culinary genius. Trust me, once you try these, they’ll quickly become a staple in your cooking repertoire.

Overview of Ingredients

Let’s dive into what makes these salmon bites so irresistible. Here’s what you’ll need:

  • 1 lb salmon fillet: Look for skinless and boneless fillets, as they make the prep easier.
  • 2 tablespoons olive oil: This is essential for that golden, crispy texture.
  • 1 teaspoon garlic powder: Adds a savory depth that elevates the dish.
  • 1 teaspoon smoked paprika: This brings a beautiful smoky flavor that’s hard to resist.
  • 1 teaspoon salt: Enhances all the flavors.
  • 1/2 teaspoon black pepper: A dash of heat to balance the richness of the salmon.
  • 1 tablespoon fresh lemon juice: Brightens everything up with a zesty kick.
  • Fresh parsley, chopped: For garnish and a pop of color.

With this simple list, you’re on your way to creating something magical!

Cooking Steps Made Simple

Crispy Air Fryer Salmon Bites with a sprinkle of chopped parsley, captured in soft natural light.

Now, let’s get started on making these crispy bites. Here’s how you can whip them up in no time:

  1. Preheat your air fryer: Set it to 400°F (200°C). This step is crucial for achieving that perfect crispiness.
  2. Prepare the salmon: Cut the salmon fillet into bite-sized cubes. Aim for uniform pieces so they cook evenly.
  3. Mix your seasonings: In a bowl, combine the olive oil, garlic powder, smoked paprika, salt, black pepper, and lemon juice. This mixture is where the magic begins!
  4. Toss the salmon: Add the salmon cubes to the bowl and gently toss until they are well coated with the seasoning mixture. Don’t be too rough; you want to keep those lovely cubes intact!
  5. Air fry: Place the salmon bites in a single layer in the air fryer basket. Cook for 8-10 minutes, shaking the basket halfway through to ensure they cook evenly. Keep an eye on them to avoid overcooking!
  6. Garnish and serve: Once they’re golden and crispy, remove the salmon bites from the air fryer and sprinkle with fresh parsley before serving. Voilà!

Tips to Perfect Your Salmon Bites

Cooking should be fun, and a few tips can help you elevate your salmon bites to the next level:

  • Quality Matters: Choose fresh, high-quality salmon for the best flavor. If possible, look for wild-caught salmon.
  • Don’t Overcrowd: Make sure not to overcrowd the air fryer basket. Cook in batches if necessary to ensure even cooking and crispiness.
  • Experiment with Spices: Don’t hesitate to play around with different spices. Adding a little cayenne pepper or chili powder can give it a spicy kick!
  • Rest the Salmon: Let the salmon rest for a few minutes before cutting. This helps retain moisture and flavor.

Variations to Try

If you’re feeling adventurous, here are a few variations you might want to try:

  • Sweet and Spicy: Add a tablespoon of honey or maple syrup to the seasoning mix for a sweet contrast to the savory spices.
  • Herb-Infused: Mix in some fresh dill or thyme for an aromatic twist that complements the salmon beautifully.
  • Asian-Inspired: Substitute olive oil with sesame oil and add soy sauce, ginger, and sesame seeds for an Asian flair.

Substitutions You Can Make

No salmon on hand? No problem! Here are some easy substitutions:

  • Other Fish: Try using other fish fillets like cod, tilapia, or even shrimp if you’re in the mood for something different.
  • Oil Alternatives: If you’re looking to cut down on oil, you can use cooking spray or an oil mister to keep it lighter.
  • Herb Variants: If you’re out of parsley, feel free to use chives or cilantro for a different flavor profile.

Essential Equipment

To make these salmon bites, you’ll need:

  • Air Fryer: This is the star of the show! If you don’t have one yet, it’s time to consider this game-changing kitchen gadget.
  • Mixing Bowl: For mixing your seasoning and tossing the salmon.
  • Cutting Board and Knife: For cutting your salmon into bite-sized pieces.
  • Spatula or Tongs: To help you turn and transfer the salmon bites with ease.

Storage and Freezing Tips

If you happen to have leftovers (which is rare because they’re just that good!), here’s how to store them:

  • Refrigeration: Store leftover salmon bites in an airtight container in the fridge for up to 3 days. Reheat them in the air fryer for a few minutes to regain that crispy texture.
  • Freezing: You can freeze uncooked, seasoned salmon bites. Just place them on a baking sheet in a single layer until frozen, then transfer to a freezer bag. When you’re ready to cook, no need to thaw; simply adjust the cooking time as they will need a few extra minutes.

FAQs About Air Fryer Salmon Bites

Let’s tackle some common questions about this delightful recipe:

  • Can I use frozen salmon? Yes! Just make sure to thaw it thoroughly before cutting and seasoning.
  • How do I know when the salmon is cooked? Salmon is typically done when it flakes easily with a fork and has reached an internal temperature of 145°F (63°C).
  • Can I make these without an air fryer? Absolutely! You can bake them in the oven at 425°F (220°C) for about 12-15 minutes, flipping halfway through.

Troubleshooting Common Issues

If your salmon bites aren’t turning out as expected, here are some troubleshooting tips:

  • Too Dry? Ensure you’re not overcooking them. Use a food thermometer to check the internal temperature.
  • Not Crispy? Make sure you preheat the air fryer and don’t overcrowd the basket.
  • Flavor Lacking? Adjust your seasoning. Don’t shy away from experimenting with herbs and spices!

Wrapping It Up

So there you have it, my dear cooking enthusiasts—a delicious dive into the world of crispy Air Fryer Salmon Bites. This recipe is not just about the food; it’s about the joy of cooking and sharing delightful meals with those you love. I hope you give these a try and enjoy the magic that unfolds in your kitchen. Remember, cooking is all about creating memories, and what better way to do that than with a plate of crispy, flavorful salmon bites? Happy cooking, and as always, I’d love to hear how your culinary adventure goes!

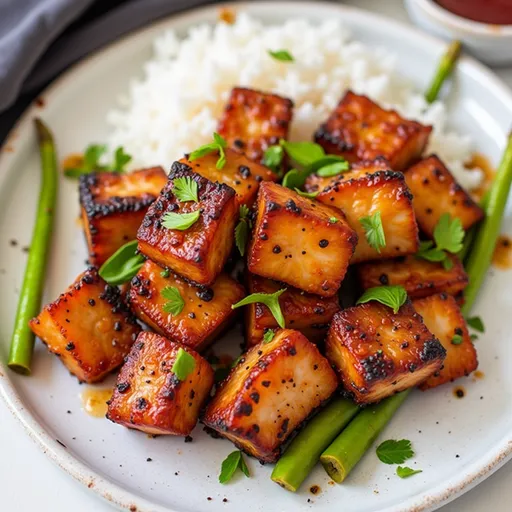
Air Fryer Salmon Bites in 2025

Prep Time 10 minutes
Cook Time 10 minutes
Total Time 20 minutes
Servings 4 servings
Calories 250
Enjoy tender, flavorful salmon bites cooked to perfection in your air fryer, perfect for a quick and healthy meal.

Ingredients

Salmon

  • 1 lb salmon fillet, skinless and boneless
  • 2 tablespoons olive oil
  • 1 teaspoon garlic powder
  • 1 teaspoon smoked paprika
  • 1 teaspoon salt
  • 0.5 teaspoon black pepper
  • 1 tablespoon fresh lemon juice
  • fresh parsley, chopped (for garnish)

Instructions 

  • Preheat air fryer to 400°F (200°C).
  • Cut salmon into bite-sized cubes and toss with olive oil, garlic powder, paprika, salt, pepper, and lemon juice.
  • Place salmon bites in a single layer in the air fryer basket.
  • Cook for 8-10 minutes, shaking halfway through.
  • Garnish with chopped parsley before serving.

Notes

Ensure not to overcrowd the air fryer for even cooking.
Calories: 250kcal
Cost: $15
Course: Main Course
Cuisine: American
Keyword: Salmon

Loved this recipe? Save it to your favorite Pinterest board so you can easily find it later! It’s the perfect way to keep all your sweet ideas in one place. ✨

Delicious salmon bites, perfectly cooked and seasoned, served on a rustic background.

Why You’ll Love This Chicken Chasseur Delight

Picture this: a cozy evening, the soft glow of kitchen lights, and your favorite tunes playing softly in the background. You’re about to embark on a culinary adventure that promises to fill your home with warmth and delight. That adventure? My Simple Chicken Chasseur Delight, a veggie-focused twist on the classic French dish that brings comfort and flavor to your dinner table.

This isn’t just any chicken recipe; it’s a story of flavors coming together, a dance of vegetables in a savory sauce that will have your loved ones asking for seconds. Each bite is a little hug from the inside, making it perfect for those chilly nights or when you simply want to impress at a dinner gathering.

The Magic of Chicken Chasseur

Chicken Chasseur, also known as Hunter’s Chicken, is a classic French dish that traditionally combines chicken with mushrooms, herbs, and a rich sauce. The beauty of this dish lies in its adaptability. My version embraces the vibrant flavors of fresh vegetables, creating a dish that not only delights the palate but also nourishes the soul.

In this recipe, we’ll use boneless, skinless chicken breasts, sautéed to golden perfection, then enveloped in a luscious sauce made from earthy mushrooms, sweet bell peppers, and juicy cherry tomatoes. With the added depth of vegetable broth and a hint of Dijon mustard, this dish is sure to impress. Let’s dive into the nitty-gritty of what you’ll need!

Ingredients You’ll Need

A plate of Simple Chicken Chasseur with a rich sauce, garnished with parsley.
  • 4 boneless, skinless chicken breasts
  • 2 tablespoons olive oil
  • 1 onion, finely chopped
  • 2 cloves garlic, minced
  • 1 cup mushrooms, sliced
  • 1 bell pepper, diced
  • 1 cup cherry tomatoes, halved
  • 1 cup vegetable broth
  • 1 tablespoon Dijon mustard
  • 1 tablespoon fresh thyme, chopped (or 1 teaspoon dried thyme)
  • Salt and pepper to taste
  • Fresh parsley for garnish

Cooking Steps to Deliciousness

Ready to create some magic in the kitchen? Here’s how to whip up this delightful dish:

  1. Heat the olive oil in a large skillet over medium heat.
  2. Season the chicken breasts with salt and pepper, then add them to the skillet. Cook for 5-7 minutes on each side until golden brown and cooked through. Remove and set aside.
  3. In the same skillet, add the chopped onion and minced garlic, sautéing until soft and fragrant, about 3 minutes.
  4. Add the sliced mushrooms and diced bell pepper to the skillet, cooking until they begin to soften, about 5 minutes.
  5. Stir in the halved cherry tomatoes, vegetable broth, Dijon mustard, and thyme. Bring to a simmer.
  6. Return the chicken to the skillet, nestling it into the sauce. Cover and simmer for 10 minutes to allow flavors to meld.
  7. Taste and adjust seasoning with additional salt and pepper if needed.
  8. Serve hot, garnished with fresh parsley.

Tips for the Perfect Chicken Chasseur

Cooking is an art, and like any good artist, you’ll want to refine your technique. Here are some tips to elevate your Chicken Chasseur:

  • Don’t rush the browning: Take your time to achieve a nice golden crust on the chicken. This adds depth and flavor to the dish.
  • Fresh herbs: If you have fresh thyme, use it! The aroma and flavor are unbeatable. If using dried, remember that it’s more concentrated, so use less.
  • Season wisely: Always taste your dish as you cook. Adjusting the seasoning as you go ensures a perfectly balanced flavor.
  • Make it ahead: This dish can be made a day in advance. The flavors deepen overnight, making it even more delicious!

Variations to Try

While I adore this veggie-focused version, here are some fun variations to consider:

  • Mushroom Medley: Experiment with different mushrooms like shiitake or portobello for a more robust flavor.
  • Spice it up: Add a pinch of red pepper flakes for a touch of heat!
  • Vegetarian Option: Swap chicken for hearty vegetables such as eggplant or zucchini, and use vegetable broth for a delightful veggie stew.

Substitutions You Can Make

Cooking should be flexible! Here are a few substitutions you can consider based on what you have at home:

  • Chicken: Bone-in chicken thighs can be used for added flavor, just adjust the cooking time accordingly.
  • Vegetable broth: Chicken broth can also be used for a richer flavor.
  • Dijon mustard: If you’re out of Dijon, whole grain mustard or even a bit of honey mustard can work in a pinch.

Essential Equipment

To make this Chicken Chasseur Delight, you’ll need a few kitchen essentials:

  • A large skillet for sautéing
  • A sharp knife and cutting board for chopping
  • A wooden spoon for stirring
  • A lid to cover the skillet while simmering

Storage and Freezing Tips

Leftovers? Yes, please! Here’s how to store and freeze your Chicken Chasseur:

  • Refrigerator: Store in an airtight container in the fridge for up to 3 days.
  • Freezer: Freeze in a freezer-safe container for up to 3 months. Thaw in the fridge before reheating.
  • Reheating: Gently reheat in a skillet over low heat until warmed through, adding a splash of broth if needed to moisten.

FAQs About Chicken Chasseur

Before you embark on your culinary journey, here are some common questions that might arise:

  • Can I use frozen chicken? Yes! Just ensure it’s fully thawed before cooking for even results.
  • What side dishes pair well? This dish goes wonderfully with crusty bread, rice, or a fresh green salad.
  • Is Chicken Chasseur traditionally served with wine? Absolutely! A nice white wine complements the dish beautifully.

Troubleshooting Common Issues

Every cook encounters a hiccup now and then. Here are some common issues and how to fix them:

  • Too salty: If your dish ends up too salty, adding a bit of sugar can help balance the flavors.
  • Too thick: If the sauce thickens too much, simply add a bit more broth to loosen it.
  • Overcooked chicken: If the chicken becomes dry, serve it with the sauce to keep it moist.

Let’s Wrap It Up!

This Simple Chicken Chasseur Delight is more than just a meal; it’s a celebration of flavors and a chance to gather around the table with loved ones. As you embark on this cooking adventure, I hope you find joy in each step, from chopping vegetables to savoring the final dish. Remember, cooking is all about love, patience, and a sprinkle of creativity.

So, don your apron, grab your favorite wooden spoon, and let’s create something magical together! Whether it’s a quiet weeknight dinner or a gathering with friends, this recipe is sure to make memories. Happy cooking, my friend!

Simple Chicken Chasseur Delight from a Veggie-Focused Kitchen

Prep Time 10 minutes
Cook Time 20 minutes
Total Time 30 minutes
Servings 4 servings
Calories 350
A flavorful and colorful chicken dish packed with vegetables and herbs, perfect for a wholesome meal.

Ingredients

Protein

  • 4 pieces boneless, skinless chicken breasts
  • 2 tablespoons olive oil
  • 1 piece onion, finely chopped
  • 2 cloves garlic, minced
  • 1 cup mushrooms, sliced
  • 1 diced bell pepper
  • 1 cup cherry tomatoes, halved
  • 1 cup vegetable broth
  • 1 tablespoon dijon mustard
  • 1 tablespoon fresh thyme, chopped (or 1 teaspoon dried thyme)
  • to taste salt and pepper
  • for garnish fresh parsley

Instructions 

  • Heat olive oil in a skillet, season chicken, and cook until golden, then set aside.
  • Sauté onion and garlic until fragrant, then add mushrooms and bell pepper, cooking until softened.
  • Stir in cherry tomatoes, broth, mustard, and thyme; bring to a simmer.
  • Return chicken to skillet, cover, and simmer for 10 minutes. Adjust seasoning and garnish with parsley.

Notes

Use fresh herbs for the best flavor and adjust seasoning to taste.
Calories: 350kcal
Cost: $15
Course: Main Course
Cuisine: French-inspired
Keyword: Chicken, vegetables

Loved this recipe? Save it to your favorite Pinterest board so you can easily find it later! It’s the perfect way to keep all your sweet ideas in one place. ✨

Delicious chicken chasseur served in a rustic setting, highlighting fresh ingredients.

Why You’ll Love This Dish

When it comes to weeknight dinners, we all crave something that feels special but doesn’t require a degree from a culinary school. Enter the Sweet & Spicy Salmon Bowl with Roasted Sweet Potatoes. This dish is not only a feast for the eyes but also a delightful explosion of flavors that will have your taste buds dancing. The combination of tender, flaky salmon paired with perfectly roasted sweet potatoes brings together sweet, savory, and a hint of spice, making it incredibly satisfying. Plus, it’s quick to whip up, which means more time to enjoy your meal and less time stressing in the kitchen.

Overview of Ingredients

This recipe is all about simplicity and flavor. Here’s what you’ll need:

  • 2 salmon fillets – the star of the show, packed with protein and omega-3 fatty acids.
  • 2 tablespoons honey – for that sweet touch that caramelizes beautifully.
  • 1 tablespoon soy sauce – to add that umami depth.
  • 1 teaspoon sriracha – to spice things up (adjust to your heat preference).
  • 1 tablespoon olive oil – for roasting and flavor.
  • 2 medium sweet potatoes, cubed – they add a creamy texture and sweetness.
  • 1 teaspoon paprika – for a warm, smoky flavor.
  • Salt and pepper to taste.
  • 2 cups cooked quinoa or rice – your hearty base.
  • 1 avocado, sliced – for creaminess.
  • Fresh cilantro for garnish – a pop of freshness.
  • Lime wedges for serving – because a squeeze of lime makes everything better!

Cooking Instructions

Delicious Sweet & Spicy Salmon Bowl with vibrant ingredients including quinoa, sweet potatoes, and fresh cilantro, captured in warm lighting.

Ready to get cooking? Here’s how to bring this vibrant bowl to life:

  1. Preheat the oven: Set your oven to 400°F (200°C) and let it warm up while you prep your ingredients.
  2. Make the marinade: In a bowl, mix together the honey, soy sauce, and sriracha. This sticky-sweet glaze is what makes the salmon shine.
  3. Marinate the salmon: Place the salmon fillets in a shallow dish and pour the marinade over them. Let them soak up those flavors for at least 15 minutes—trust me, it’s worth the wait!
  4. Prepare the sweet potatoes: On a baking sheet, toss the cubed sweet potatoes with olive oil, paprika, salt, and pepper. Make sure they’re all well-coated and spread them out in a single layer for even roasting.
  5. Roast away: Pop those sweet potatoes in the oven and roast for about 25-30 minutes, or until they’re tender and slightly crispy. Don’t forget to toss them halfway through to ensure they cook evenly!
  6. Cook the salmon: While the sweet potatoes are roasting, heat a non-stick skillet over medium heat. Carefully place the marinated salmon in the skillet and cook for about 4-5 minutes on each side, or until cooked through and flaky.
  7. Assemble the bowl: Start with a base of quinoa or rice. Top it with the roasted sweet potatoes, then add the cooked salmon. Garnish with avocado slices and fresh cilantro for that extra burst of flavor.
  8. Serve: Present your bowls with lime wedges on the side, inviting everyone to squeeze a bit of zesty goodness over their meal.

Health Benefits of This Dish

This Sweet & Spicy Salmon Bowl is not just delicious; it’s also packed with health benefits:

  • Salmon: Rich in protein and omega-3 fatty acids, salmon supports heart health and brain function.
  • Sweet Potatoes: These vibrant tubers are high in fiber, vitamins A and C, and antioxidants, making them a powerhouse for your immune system.
  • Quinoa or Rice: A great source of complex carbohydrates, providing sustained energy throughout your day.
  • Avocado: Packed with healthy fats, avocados contribute to heart health and keep you satiated longer.
  • Cilantro: This fresh herb not only brightens your dish but also offers anti-inflammatory properties.

Tips for Perfecting Your Bowl

Here are some tips to ensure your Sweet & Spicy Salmon Bowl turns out perfect every time:

  • Don’t rush the marination: The longer the salmon marinates, the more flavorful it will be.
  • Use parchment paper: Lining your baking sheet with parchment paper makes for easy cleanup and prevents sticking.
  • Check for doneness: Salmon should flake easily with a fork when it’s done. If you have a thermometer, aim for an internal temperature of 145°F (63°C).
  • Customize your base: Feel free to swap quinoa for brown rice or even cauliflower rice for a low-carb option.

Variations to Try

This recipe is wonderfully versatile! Here are a few variations you can experiment with:

  • Different Proteins: Swap salmon for cod, chicken, or even crispy tofu for a vegetarian twist.
  • Sweet Potato Alternatives: Try butternut squash or carrots if you’re looking for a change.
  • Spice it Up: Add more sriracha for heat, or include spices like cumin or coriander to the sweet potatoes for an extra layer of flavor.
  • Fresh Herbs: Experiment with different herbs like parsley or dill for a fresh finish.

Storage and Freezing Tips

If you find yourself with leftovers (which I doubt since it’s so good!), here’s how to store them:

  • Refrigeration: Store leftovers in airtight containers in the fridge for up to 3 days.
  • Freezing: The salmon and sweet potatoes can be frozen separately. Just ensure they are well-packaged to avoid freezer burn.
  • Reheating: When reheating, try to do so in the oven to maintain the crispness of the sweet potatoes. The microwave works, but you may lose that lovely texture.

FAQs About This Recipe

Here are some common questions about the Sweet & Spicy Salmon Bowl:

  • Can I make this dish ahead of time? Absolutely! You can prepare the components in advance and assemble them right before serving.
  • Is this recipe gluten-free? Yes, as long as you use gluten-free soy sauce, this dish is naturally gluten-free.
  • Can I use frozen salmon? Yes, just be sure to thaw it completely before marinating and cooking.

Troubleshooting Common Issues

If you encounter any issues while making your Sweet & Spicy Salmon Bowl, here are some quick fixes:

  • Salmon is dry: Ensure you’re not overcooking it. Salmon cooks quickly, so keep an eye on it.
  • Sweet potatoes aren’t crispy: Make sure they’re spread out in a single layer on the baking sheet and don’t overcrowd them.
  • Marinade is too sweet: Adjust the honey next time or balance it with more soy sauce or sriracha.

Conclusion

The Sweet & Spicy Salmon Bowl with Roasted Sweet Potatoes is a delightful, healthful dish that’s sure to impress. It encapsulates everything we love about cooking: the joy of bringing together simple ingredients and transforming them into something magical. Whether you’re cooking for family or enjoying a quiet night in, this bowl offers comfort, flavor, and nourishment all in one. So grab your apron, channel your inner chef, and get ready to create a bowl that will leave everyone craving more. Happy cooking!

Sweet & Spicy Salmon Bowl with Roasted Sweet Potatoes

Prep Time 10 minutes
Cook Time 30 minutes
Total Time 40 minutes
Servings 2 servings
Calories 550
A vibrant and flavorful bowl combining tender salmon, roasted sweet potatoes, and fresh toppings for a satisfying meal.

Ingredients

Protein

  • 2 pieces salmon fillets
  • 2 tablespoons honey
  • 1 tablespoon soy sauce
  • 1 teaspoon sriracha (or to taste)
  • 1 tablespoon olive oil

Vegetables

  • 2 medium sweet potatoes, cubed
  • 1 teaspoon paprika
  • salt and pepper to taste salt and pepper

Base

  • 2 cups cooked quinoa or rice
  • 1 avocado avocado, sliced
  • fresh cilantro fresh cilantro for garnish
  • lime wedges lime wedges for serving

Instructions 

  • Preheat oven to 400°F (200°C). Toss sweet potatoes with olive oil, paprika, salt, and pepper; roast for 25-30 minutes.
  • Mix honey, soy sauce, and sriracha to make marinade. Marinate salmon for at least 15 minutes.
  • Cook salmon in a skillet over medium heat for 4-5 minutes per side until cooked through.
  • Assemble bowls with quinoa, roasted sweet potatoes, salmon, avocado slices, and cilantro. Serve with lime wedges.

Notes

Feel free to adjust sriracha for spice level and garnish with additional herbs.
Calories: 550kcal
Cost: $15
Course: Main Course
Cuisine: fusion
Keyword: Salmon

Loved this recipe? Save it to your favorite Pinterest board so you can easily find it later! It’s the perfect way to keep all your sweet ideas in one place. ✨

An appetizing bowl of Sweet & Spicy Salmon with quinoa, roasted sweet potatoes, and avocado, highlighting textures and colors.

Why You’ll Love This Recipe

Ah, comfort food. It’s that magical category of cooking that wraps you in a warm embrace, much like a cozy blanket on a chilly evening. Today, we’re diving into a whimsical take on a beloved classic: a delightful cheese puff filled with the vibrant flavors of zucchini flowers. If you’re wondering how to elevate your comfort food game, you’re in the right place. This recipe is not just about satisfying your hunger; it’s about crafting a dish that brings joy to your table and smiles to your loved ones’ faces.

Imagine biting into a golden, flaky pastry that gives way to a creamy, cheesy filling, punctuated with the subtle sweetness of fresh zucchini flowers. This dish isn’t just a recipe; it’s an experience that blends nostalgia with a touch of creativity. Perfect for cozy nights in or a special gathering with friends, these cheese puffs are bound to become a staple in your kitchen.

Ingredients You’ll Need

Before we roll up our sleeves and get cooking, let’s gather our ingredients. Here’s what you’ll need to whip up these delightful cheese puffs:

  • 1 package puff pastry (thawed)
  • 1 cup zucchini flowers (carefully cleaned and chopped)
  • 1 cup ricotta cheese
  • 1 cup shredded mozzarella cheese
  • 1/2 cup grated Parmesan cheese
  • 1 egg (beaten, for egg wash)
  • 1 tablespoon fresh herbs (like basil or parsley, finely chopped)
  • Salt and pepper to taste

Step-by-Step Instructions

Eye-level view of a delicious recipe with warm lighting, highlighting rich textures and colorful components.

Now that we have everything prepped, let’s get down to business! Here’s how to make these scrumptious cheese puffs:

  1. Preheat Your Oven: Start by preheating your oven to 400°F (200°C). This ensures that your cheese puffs will bake to perfection—golden and crispy on the outside, gooey on the inside.
  2. Prepare the Puff Pastry: Roll out your thawed puff pastry on a lightly floured surface. Aim for a thickness of about 1/8 inch. If you’re feeling adventurous, you can even cut the pastry into fun shapes—think hearts or stars!
  3. Mix the Filling: In a large mixing bowl, combine the ricotta, mozzarella, and Parmesan cheese. Add the chopped zucchini flowers, fresh herbs, and a sprinkle of salt and pepper. Mix until everything is well incorporated and the filling looks creamy and inviting.
  4. Assemble the Puffs: Cut the pastry into squares (about 4×4 inches). Place a generous scoop of the cheesy filling in the center of each square. Fold the pastry over to form a triangle or rectangle, pressing the edges to seal. For an extra touch, crimp the edges with a fork for that classic pastry look.
  5. Egg Wash Time: Brush the tops of the assembled puffs with the beaten egg. This will give them that beautiful golden color as they bake.
  6. Baking: Place the puffs on a baking sheet lined with parchment paper. Bake in the preheated oven for about 20-25 minutes or until they are puffed and golden brown. Your kitchen will soon be filled with an irresistible aroma!

Tips for Perfect Cheese Puffs

  • Keep it Cold: Make sure your puff pastry is chilled before you work with it. This will help ensure that your puffs rise beautifully in the oven.
  • Don’t Overfill: While it’s tempting to add more filling, be cautious. Overfilling can lead to messy explosions in the oven!
  • Experiment with Cheese: Feel free to play around with different cheeses. Goat cheese or feta can add a tangy twist!
  • Fresh Herbs: Incorporating fresh herbs not only enhances flavor but also adds a pop of color to your dish.

Variations to Try

One of the joys of cooking is the ability to get creative! Here are some fun variations to consider:

  • Spinach and Feta: Swap out the zucchini flowers for fresh spinach and use feta cheese for a Mediterranean flair.
  • Mushroom Medley: Sauté some mushrooms and mix them into the cheese filling for an earthy twist.
  • Spicy Kick: Add a pinch of red pepper flakes to the filling for those who enjoy a little heat!

Substitutions and Dietary Considerations

If you have specific dietary needs, fear not! Here are some substitutions you can make:

  • Gluten-Free Option: Use gluten-free puff pastry to make this dish suitable for gluten-sensitive friends.
  • Dairy-Free: Substitute ricotta with a dairy-free alternative and use vegan cheese for the other cheesy components.

Essential Equipment

Before you start, let’s make sure you have the right tools:

  • Baking sheet
  • Parchment paper
  • Rolling pin
  • Mixing bowls
  • Fork (for crimping the edges)

Storage and Freezing

These cheese puffs can be made ahead of time, making them perfect for meal prep or entertaining!

  • Storage: Store any leftovers in an airtight container in the fridge for up to three days. Simply reheat in the oven for a few minutes to regain that crispy texture.
  • Freezing: You can freeze the unbaked puffs. Just prepare them and place them on a baking sheet to freeze individually before transferring to a freezer bag. When you’re ready to bake, no need to thaw—just pop them straight into the oven and add a few extra minutes to the baking time.

FAQs

Here are some common questions I get about this recipe:

  • Can I use frozen zucchini flowers? Yes, you can! Just make sure to thaw and drain them well before using.
  • What should I serve with these cheese puffs? They pair wonderfully with a fresh salad or a light soup. Consider a simple tomato basil salad for a refreshing side!
  • How can I tell when they’re done? Look for a beautiful golden color and a puffed-up appearance. If you’re unsure, a quick tap on the bottom should sound hollow.

Troubleshooting Common Issues

If you run into any hiccups, here are a few tips:

  • Pastry Not Rising: Make sure your puff pastry is cold before baking. If it’s too warm, it won’t puff up properly.
  • Filling Leaking: This can happen if the puffs are overfilled or not sealed well. Make sure to press the edges firmly and crimp them for a tight seal.

A Little Final Note

Cooking is an adventure, and every recipe tells a story. With this whimsical take on cheese puffs, you’re not just making a meal; you’re creating a moment of joy, warmth, and connection in your kitchen. Whether you’re sharing these with friends or savoring them solo, I hope they bring as much happiness to your table as they have to mine. So grab your apron, channel your inner chef, and let’s make something delicious together! Happy cooking!

Classic Spaghetti Carbonara

Prep Time 10 minutes
Cook Time 15 minutes
Total Time 25 minutes
Servings 4 servings
Calories 550
A quick and creamy Italian pasta dish made with eggs, cheese, pancetta, and pepper.

Ingredients

Pasta

  • 400 grams spaghetti
  • 150 grams pancetta (diced)
  • 3 large eggs
  • 50 grams Parmesan cheese (grated)
  • 1 tsp black pepper (freshly ground)

Salt

  • to taste salt

Instructions 

  • Cook spaghetti in boiling salted water until al dente, then drain.
  • Cook pancetta in a skillet until crispy.
  • Whisk eggs and Parmesan in a bowl.
  • Combine hot pasta with pancetta, then remove from heat and stir in egg mixture.
  • Season with black pepper and salt, then serve immediately.

Notes

Use freshly grated Parmesan for best flavor.
Calories: 550kcal
Cost: $12
Course: Main Course
Cuisine: Italian
Keyword: pasta

Loved this recipe? Save it to your favorite Pinterest board so you can easily find it later! It’s the perfect way to keep all your sweet ideas in one place. ✨

Detailed presentation of a scrumptious meal, showcasing fresh ingredients and an inviting atmosphere.

Why You’ll Fall in Love with This Dish

Are you ready to elevate your weeknight dinners with minimal effort and maximum flavor? Meet the 13-Minute Air Fryer Salmon with Honey Garlic Glaze—a dish that’s as delightful to eat as it is simple to prepare. Picture this: tender, flaky salmon with a sweet and savory glaze that caramelizes beautifully in the air fryer, all while you sip a glass of wine and contemplate which series to binge-watch next. Sounds heavenly, right?

This recipe is a game-changer, perfect for those busy evenings when you want something that feels gourmet but doesn’t require hours in the kitchen. With just a handful of ingredients, you can whip up a meal that will have your taste buds dancing and your family asking for seconds. Let’s dive into this culinary adventure!

Ingredients for Air Fryer Salmon with Honey Garlic Glaze

Here’s what you’ll need to create this delicious dish:

  • 2 salmon fillets
  • 2 tablespoons honey
  • 1 tablespoon soy sauce
  • 2 cloves garlic, minced
  • 1 teaspoon olive oil
  • Salt and pepper to taste
  • Lemon wedges for serving
  • Chopped parsley for garnish

These ingredients are not just easy to find; they also come together to create a flavor profile that will make your heart skip a beat. The honey brings a lovely sweetness, while the soy sauce adds a touch of umami, and the garlic? Well, garlic makes everything better, doesn’t it?

Ingredient Substitutions

Air Fryer Salmon with a glossy honey garlic glaze, elegantly arranged with lemon and parsley on a rustic surface.

If you’re missing an ingredient or want to customize your dish, no worries! Here are some easy substitutions:

  • Salmon: You can use other types of fish, like trout or tilapia, but adjust the cooking time accordingly.
  • Honey: Maple syrup or agave nectar can work as a sweet substitute.
  • Soy Sauce: Tamari or coconut aminos for a gluten-free option.
  • Garlic: Garlic powder can be used if you’re in a pinch. Use about 1/2 teaspoon for every clove.
  • Parsley: Fresh cilantro or chives can add a different flavor twist.

How to Make This Irresistible Salmon

Ready to get cooking? Let’s turn that air fryer into a flavor factory!

  1. Preheat: Start by preheating your air fryer to 400°F (200°C). This step is crucial for achieving that perfect crispy exterior.
  2. Whisk the Glaze: In a small bowl, combine the honey, soy sauce, minced garlic, olive oil, salt, and pepper. Whisk until well blended. This glaze is where the magic happens—sweet, savory, and oh-so-scrumptious!
  3. Prepare the Salmon: Place your salmon fillets in the air fryer basket, skin-side down. This helps keep the fillets moist and allows the glaze to soak in.
  4. Brush with Love: Generously brush the honey garlic glaze over the salmon, ensuring every inch is coated with that irresistible goodness.
  5. Air Fry: Air fry the salmon for 8-10 minutes, depending on the thickness of your fillets. You’re looking for that beautiful flakiness—when it easily flakes with a fork, it’s ready to shine!
  6. Rest and Serve: Once done, gently remove the salmon from the air fryer and let it rest for a minute. Serve with lemon wedges and a sprinkle of chopped parsley for that extra pop of flavor.

Pro Tips for Perfect Salmon

To ensure you nail this recipe every time, keep these pro tips in mind:

  • Thickness Matters: If your salmon fillets are thicker than 1 inch, add an extra 1-2 minutes of cooking time. Trust me; no one wants to bite into undercooked salmon!
  • Don’t Overcrowd: If you’re cooking multiple fillets, make sure not to overcrowd the air fryer basket. Give them space to breathe and crisp up.
  • Check for Doneness: If you’re unsure, use a meat thermometer—salmon should reach an internal temperature of 145°F (63°C).
  • Let It Rest: Allowing the salmon to rest for a minute after cooking helps retain its moisture.

Serving Suggestions for Your Salmon Delight

This dish is versatile, and you can pair it with a variety of sides:

  • Steamed Vegetables: Broccoli, green beans, or asparagus make for a delightful complement.
  • Rice or Quinoa: Serve over fluffy rice or quinoa to soak up that glorious glaze.
  • Salad: A fresh garden salad or a simple spinach salad with a lemon vinaigrette pairs wonderfully.
  • Mashed Potatoes: For a comforting touch, creamy mashed potatoes make a fantastic side.

Storage and Reheating Instructions

Got leftovers? Here’s how to store and reheat your delicious salmon:

  • Storage: Place any leftover salmon in an airtight container in the refrigerator. It should stay fresh for up to 3 days.
  • Reheating: To reheat, pop it back in the air fryer for 3-4 minutes at 350°F (175°C) to regain that crispy texture. Microwaving works too, but you’ll sacrifice some of that lovely crispiness.

Nutritional Information for a Healthy Dinner

Let’s talk numbers! Here’s a rough breakdown of what you’re getting per serving:

  • Calories: Approximately 300
  • Protein: 25g
  • Fat: 18g
  • Carbohydrates: 10g
  • Sugar: 7g

This dish is not only delicious but also packed with protein and healthy fats, making it a well-rounded option for dinner.

Frequently Asked Questions

Here are some common questions to help you out:

  • Can I use frozen salmon? Yes! Just make sure to thaw it completely before cooking for even results.
  • What can I use if I don’t have an air fryer? You can bake the salmon in a preheated oven at 400°F (200°C) for about 12-15 minutes.
  • How do I know when the salmon is done? Look for the fish to flake easily with a fork, or use a meat thermometer to check for 145°F (63°C).
  • What if I don’t like garlic? You can reduce the amount or omit it entirely; the honey soy glaze will still taste fantastic!

Troubleshooting Common Issues

As with any dish, you might face a few hiccups. Here’s how to troubleshoot:

  • Salmon is dry: Ensure you’re not overcooking it. Air fryers can vary, so keep an eye on the time!
  • Glaze is too runny: If your glaze isn’t thickening, try simmering it on the stove for a few minutes to reduce it before applying it to the salmon.
  • Salmon sticking to the air fryer: A light brush of oil on the basket can prevent sticking!

Conclusion: Your New Go-To Recipe

This 13-Minute Air Fryer Salmon with Honey Garlic Glaze is bound to become a staple in your kitchen, bringing joy and flavor to your table with every bite. It’s quick, easy, and oh-so-delicious—what more could you ask for? I hope you enjoy making this dish as much as I do, and that it brings a little magic to your dinner table. Whether you’re cooking for yourself or hosting friends, this salmon is sure to impress. So, roll up your sleeves, gather those ingredients, and let’s make some culinary memories together!

13-Minute Air Fryer Salmon with Honey Garlic Glaze

Prep Time 5 minutes
Cook Time 8 minutes
Total Time 13 minutes
Servings 2 servings
Calories 350
This quick and flavorful salmon recipe is perfect for a healthy weeknight dinner, featuring a sweet and savory honey garlic glaze cooked to perfection in the air fryer.

Ingredients

Main Ingredients

  • 2 pieces salmon fillets
  • 2 tablespoons honey
  • 1 tablespoon soy sauce
  • 2 cloves garlic, minced
  • 1 teaspoon olive oil
  • to taste salt and pepper
  • for serving lemon wedges
  • for garnish chopped parsley

Instructions 

  • Preheat the air fryer to 400°F (200°C).
  • Mix honey, soy sauce, minced garlic, olive oil, salt, and pepper in a bowl.
  • Place salmon in the air fryer basket, skin-side down, and brush with glaze.
  • Air fry for 8-10 minutes until cooked through and flaky.
  • Let rest briefly, then serve with lemon wedges and parsley.

Notes

Ensure not to overcook the salmon for the best texture.
Calories: 350kcal
Cost: $15
Course: Main Course
Cuisine: American
Keyword: Salmon

Loved this recipe? Save it to your favorite Pinterest board so you can easily find it later! It’s the perfect way to keep all your sweet ideas in one place. ✨

Deliciously glazed Air Fryer Salmon, showcasing its golden-brown texture, accompanied by fresh lemon and herbs.

Why You’ll Love These Skewers

If you’re on the lookout for a dish that combines the thrill of grilling with a zesty kick, look no further than Bang Bang Chicken Skewers! This recipe is not just a meal; it’s an experience that promises to dance on your taste buds and leave your guests asking for more. With juicy chicken marinated to perfection and a creamy, spicy dipping sauce, these skewers are perfect for summer barbecues, cozy family dinners, or any gathering where you want to impress.

Imagine the aroma of marinated chicken sizzling on the grill, mingling with laughter and the clinking of glasses. Each bite is a burst of flavor, a delightful crunch from the grill marks, and the perfect balance of sweet and spicy. Trust me, these skewers will quickly become a staple in your culinary repertoire!

Ingredients You’ll Need

To create this mouthwatering dish, you’ll need the following ingredients:

For the Chicken Skewers:

Deliciously grilled chicken skewers with a glossy sauce, served on a wooden platter.
  • 1 pound chicken breast, cut into bite-sized pieces
  • 2 tablespoons soy sauce
  • 1 tablespoon sesame oil
  • 1 tablespoon honey
  • 2 teaspoons cornstarch
  • 1 teaspoon garlic powder
  • 1 teaspoon ginger powder
  • 1/2 teaspoon salt
  • 1/4 teaspoon black pepper
  • skewers (wooden or metal)

For the Bang Bang Sauce:

  • 1/2 cup mayonnaise
  • 2 tablespoons sweet chili sauce
  • 1 tablespoon sriracha (optional, for those who like it spicy!)

How to Make Bang Bang Chicken Skewers (Step-by-Step)

Now that you have your ingredients ready, let’s dive into the cooking process. It’s easier than you might think!

  1. Marinate the Chicken: In a medium-sized bowl, combine the soy sauce, sesame oil, honey, cornstarch, garlic powder, ginger powder, salt, and black pepper. Mix well to create a flavorful marinade. Add the bite-sized chicken pieces to the marinade, ensuring they are well coated. Cover the bowl with plastic wrap or a lid and refrigerate for at least 30 minutes. This step is crucial as it allows the flavors to penetrate the chicken.
  2. Preheat Your Grill: While the chicken is marinating, preheat your grill or grill pan over medium-high heat. You want it nice and hot to achieve those beautiful grill marks!
  3. Skewer the Chicken: Once the chicken has marinated, take it out of the fridge. Thread the marinated chicken pieces onto the skewers, leaving a little space between each piece to ensure even cooking.
  4. Grill to Perfection: Place the skewers on the grill and cook for about 10-12 minutes. Turn them occasionally to get that lovely golden color and ensure they are cooked through. You’ll know they are done when the internal temperature reaches 165°F (75°C) and the chicken is no longer pink inside.
  5. Make the Bang Bang Sauce: While the chicken is grilling, prepare the Bang Bang sauce. In a separate bowl, mix together the mayonnaise, sweet chili sauce, and sriracha (if using) until smooth and well combined. Taste it and adjust the spice level to your liking.
  6. Serve and Enjoy: Once the chicken skewers are done, remove them from the grill and serve immediately with the Bang Bang sauce on the side for dipping. Enjoy the explosion of flavors!

Tips for the Best Flavor and Texture

To ensure your Bang Bang Chicken Skewers are the best they can be, here are some tips:

  • Don’t Skip the Marinade: Allowing the chicken to marinate for at least 30 minutes (or even overnight!) enhances the flavor and tenderness.
  • Use Fresh Ingredients: Fresh garlic and ginger can elevate the flavors even more. If you have fresh ginger, grate a small piece instead of using ginger powder.
  • Soak Wooden Skewers: If you’re using wooden skewers, soak them in water for about 30 minutes before grilling to prevent them from burning.
  • Don’t Overcrowd the Skewers: Give each piece of chicken some space on the skewer. This helps them cook evenly and get those gorgeous grill marks.

Serving Suggestions and Pairings

These Bang Bang Chicken Skewers are incredibly versatile and can be served in various ways. Here are some ideas:

  • With a Fresh Salad: Pair the skewers with a refreshing cucumber and tomato salad drizzled with a light vinaigrette for a balanced meal.
  • On a Bed of Rice: Serve the skewers over a bed of jasmine or brown rice for a hearty dinner option.
  • With Grilled Vegetables: Add some color to your plate by grilling bell peppers, zucchini, or corn alongside your skewers.
  • As Appetizers: Cut the skewers into smaller pieces and serve them as bite-sized appetizers at your next gathering. They’re sure to be a hit!

Variations and Customizations

Feel free to get creative with this recipe! Here are some variations you might enjoy:

  • Switch Up the Protein: Try using shrimp, tofu, or beef instead of chicken for a different flavor profile.
  • Add Veggies: Thread some bell peppers, cherry tomatoes, or onion pieces onto the skewers for added flavor and nutrition.
  • Spice Levels: Adjust the amount of sriracha in the Bang Bang sauce according to your heat preference. If you love heat, consider adding diced jalapeños to the marinade!

Storage and Freezing

Leftovers? No problem! Here’s how to store and freeze your Bang Bang Chicken Skewers:

  • Refrigeration: Store any leftover chicken skewers in an airtight container in the fridge for up to 3 days. When you’re ready to eat, reheat gently on the grill or in a skillet to avoid drying them out.
  • Freezing: If you want to make a batch ahead of time, freeze the marinated chicken (before grilling) in a freezer-safe bag for up to 3 months. Thaw overnight in the fridge before grilling.

Frequently Asked Questions

Can I use store-bought bang bang sauce?

Absolutely! While homemade is often fresher and allows you to control the spice level, store-bought sauces can save time and still taste delicious.

How spicy is it?

The spice level can vary based on how much sriracha you use. Start with a small amount, and you can always add more to suit your taste!

Can I cook this in the oven or air fryer?

Yes! Both methods work well. For the oven, preheat to 400°F (200°C) and bake for about 15-20 minutes until cooked through. In an air fryer, cook at 375°F (190°C) for about 10-12 minutes, turning halfway through.

How long do leftovers last?

Leftovers will keep in the fridge for up to 3 days. Just make sure they are stored in an airtight container!

Final Thoughts

There you have it—my favorite Bang Bang Chicken Skewers that are sure to elevate any meal. Whether you’re hosting a lively barbecue or enjoying a quiet dinner at home, these skewers are a fantastic way to bring joy and flavor to your table. So, roll up your sleeves and get ready for some kitchen magic!

Don’t forget to share your creations with friends and family. I can’t wait for you to experience the joy of these skewers. Happy cooking, and may your kitchen always be filled with love and laughter!

Bang Bang Chicken Skewers

Prep Time 30 minutes
Cook Time 12 minutes
Total Time 42 minutes
Servings 4 servings
Calories 350
Enjoy these flavorful grilled chicken skewers coated in a spicy, creamy Bang Bang sauce for a perfect appetizer or main dish.

Ingredients

Chicken

  • 1 pound chicken breast, cut into bite-sized pieces
  • 2 tablespoons soy sauce
  • 1 tablespoon sesame oil
  • 1 tablespoon honey
  • 2 teaspoons cornstarch
  • 1 teaspoon garlic powder
  • 1 teaspoon ginger powder
  • 1/2 teaspoon salt
  • 1/4 teaspoon black pepper
  • 1/2 cup mayonnaise
  • 2 tablespoons sweet chili sauce
  • 1 tablespoon sriracha (optional)

Skewers

Instructions 

  • Mix soy sauce, sesame oil, honey, cornstarch, garlic powder, ginger powder, salt, and black pepper to make marinade.
  • Marinate chicken for at least 30 minutes.
  • Preheat grill, thread chicken onto skewers, and grill for 10-12 minutes.
  • Mix mayonnaise, sweet chili sauce, and sriracha for the Bang Bang sauce.
  • Serve skewers with the sauce for dipping.

Notes

Ensure chicken is cooked through for safety.
Calories: 350kcal
Cost: $15
Course: Main Course
Cuisine: Asian
Keyword: Chicken

Loved this recipe? Save it to your favorite Pinterest board so you can easily find it later! It’s the perfect way to keep all your sweet ideas in one place. ✨

Appetizing skewers of chicken with a rich sauce, highlighted by natural lighting.

Welcome to the Cozy World of Chicken Alfredo Biscuit Casserole

Ah, the magic of home cooking! If you’re looking for a dish that wraps you in warmth and comfort, you’ve just stumbled upon the right recipe. The Chicken Alfredo Biscuit Casserole is not just a meal; it’s an experience that takes you back to those cozy nights spent around the dinner table with family. With layers of tender chicken, creamy Alfredo sauce, and fluffy biscuits, this dish is sure to make your taste buds sing and your heart flutter. So, pull up a chair and let’s dive into this delightful journey of flavors!

Why You’ll Love This Recipe

  • Perfect for Busy Weeknights: This casserole is a one-dish wonder that comes together quickly, making it ideal for those hectic evenings when you want something comforting without the fuss.
  • Family-Friendly: With its creamy Alfredo sauce and soft biscuits, it caters to even the pickiest eaters in your household—everyone will be asking for seconds!
  • Customizable: Feel free to switch up the ingredients based on what you have on hand; whether it’s using leftover turkey or adding in some veggies, this recipe can adapt to your kitchen.
  • Hearty and Filling: It’s a satisfying dish that fills you up without feeling heavy. Perfect for adults and children alike after a long day.
  • Easy Cleanup: With just one baking dish and minimal utensils, it leaves you with more time to enjoy your meal and less time scrubbing pots and pans!

Ingredient Breakdown and Substitutions

Let’s gather our ingredients for this magical casserole. Here’s what you’ll need:

  • 1 tablespoon butter: Adds a rich flavor to your vegetables.
  • 2 cups sliced fresh mushrooms: For an earthy taste; you can substitute with canned mushrooms if you’re in a pinch.
  • 1/2 cup chopped onion: This adds sweetness; shallots could also work well here.
  • 1 jar (16 oz) Alfredo pasta sauce: Feel free to make your own for an extra touch of love!
  • 1/4 cup milk: This helps lighten the sauce; use almond or oat milk for a dairy-free version.
  • 2 cups chopped cooked chicken: Rotisserie chicken works wonders for saving time.
  • 2 cups Green Giant® SELECT® frozen broccoli florets, thawed: A great way to sneak in some greens; you could also use spinach or mixed vegetables.
  • 1/4 teaspoon dried basil leaves: Fresh basil can provide a more vibrant flavor.
  • 1 can (7.5 oz) Pillsbury® refrigerated buttermilk biscuits: These create a fluffy topping; you can also try homemade biscuits if you’re feeling adventurous!
  • 1 tablespoon butter, melted: For drizzling over biscuits before baking.
  • 1 tablespoon grated Parmesan cheese: A sprinkle of cheese just elevates everything—feel free to use nutritional yeast for a vegan option.

Cooking Instructions

Side view of a creamy Chicken Alfredo Biscuit Casserole in a baking dish, showing layers of biscuits and chicken.

Now that we have all our ingredients ready, let’s get cooking!

  1. Preheat your oven to 375°F (190°C). Spray an 8-inch square baking dish with cooking spray to prevent sticking.
  2. In a 10-inch nonstick skillet, melt 1 tablespoon of butter over medium heat. Add the sliced mushrooms and chopped onion. Cook for about 5 minutes until tender, stirring occasionally.
  3. Stir in the Alfredo sauce, milk, chicken, broccoli, and basil. Heat the mixture until it’s bubbly and warmed through, stirring constantly.
  4. Transfer the delicious mixture into your prepared baking dish.
  5. Separate the biscuit dough into 10 biscuits. Cut each biscuit in half crosswise and arrange them around the edge of the baking dish, overlapping slightly.
  6. Drizzle the biscuits with melted butter and sprinkle with Parmesan cheese.
  7. Bake for 15 to 20 minutes, or until the biscuits are golden brown and cooked through.

Pro Tips for the Best Casserole

  • Use Fresh Ingredients: Fresh mushrooms and onions will enhance the flavor significantly compared to canned versions.
  • Don’t Overcook the Chicken: If you’re cooking your chicken from scratch, ensure it’s just cooked through to avoid dryness.
  • Mix Up the Cheese: Try adding different cheeses like mozzarella or cheddar for a richer flavor profile.
  • Don’t Skip the Basil: Fresh herbs can make a world of difference—don’t shy away from using more than the recipe calls for!
  • Let it Rest: Allow the casserole to sit for about 5 minutes after baking. This helps it set up a bit, making serving easier.
  • Add Spice: If you like a little heat, sprinkle in some crushed red pepper flakes before baking!
  • Make It Ahead: This casserole can be assembled the night before and stored in the fridge, just pop it in the oven when you’re ready.
  • Experiment with Toppings: Try adding breadcrumbs or additional cheese on top for an extra crunch.

Common Mistakes and Troubleshooting

  • Dry Biscuits: Ensure you’re not overbaking the casserole. Keep an eye on the biscuits and remove when golden brown.
  • Too Much Liquid: If your casserole seems too soupy, you might have added too much milk or sauce. Adjust the next time by reducing the liquid ingredients slightly.
  • Burnt Edges: If you notice the edges cooking faster than the center, cover the casserole with aluminum foil halfway through baking.

Delicious Variations You Can Try

  • Vegetarian Delight: Swap the chicken for chickpeas or lentils and add more vegetables like zucchini and bell peppers.
  • Spicy Chicken Alfredo: Add jalapeños or a sprinkle of taco seasoning for a fun twist.
  • Cheesy Chicken Alfredo: Incorporate a mix of your favorite cheeses into the sauce for a cheesy explosion.
  • Herb-Infused Alfredo: Add fresh herbs like thyme or rosemary to the sauce for an aromatic experience.

Storage and Make-Ahead Instructions

This Chicken Alfredo Biscuit Casserole is perfect for meal prep! Here’s how to store and reheat it:

  • Refrigerator: Store leftovers in an airtight container for up to 3 days. Reheat in the microwave or oven until warmed through.
  • Freezer: You can freeze leftovers for up to 3 months. Thaw overnight in the fridge before reheating.
  • Make-Ahead: Assemble the casserole, cover tightly, and refrigerate for up to 24 hours before baking. This is great for dinner parties!

Frequently Asked Questions

  • Can I use frozen chicken? Yes, just ensure it is fully cooked and shredded before adding it to the casserole.
  • What can I substitute for the Alfredo sauce? You can use a homemade white sauce or a creamy soup if you prefer.
  • Can I use other types of biscuits? Absolutely! Any kind of refrigerated biscuit will work.
  • How do I know when the casserole is done? The biscuits should be golden brown, and the filling should be bubbly.
  • Is this recipe gluten-free? You can make it gluten-free by using gluten-free biscuits and checking your sauce for gluten content.
  • Can I add more vegetables? Yes, feel free to add any vegetables you like; just ensure they are pre-cooked or thawed.
  • What’s the best way to reheat leftovers? The oven works best to maintain the texture, but the microwave is a quick option.
  • Can I make this casserole dairy-free? Definitely! Substitute with almond milk and a dairy-free Alfredo sauce.

Nutritional Tips and Dietary Adaptations

Want to keep this dish on the healthier side? Here are some tips:

  • Whole Grain Biscuits: Look for whole grain options to add more fiber.
  • Low-Fat Alfredo Sauce: Opt for a low-fat sauce to reduce calories.
  • Add Lean Protein: Use grilled chicken breast or shredded turkey for a healthier protein choice.

Essential Equipment You’ll Need

  • 8-inch Square Baking Dish: Perfect for this casserole size.
  • Nonstick Skillet: For cooking the chicken and vegetables without sticking.
  • Measuring Cups and Spoons: Accurate measurements are key in cooking!
  • Mixing Spoon: A sturdy spoon for stirring your casserole mixture.

Serving Suggestions

This casserole is wonderful on its own, but here are some ideas to complement your meal:

  • Green Salad: A simple side salad with vinaigrette can balance the richness of the casserole.
  • Garlic Bread: Because who doesn’t love extra carbs?
  • Wine Pairing: A light white wine, like Pinot Grigio, complements the creamy flavors beautifully.

Conclusion: Make Your Kitchen Your Happy Place

There you have it, my dear friends—a recipe that’s not just about food but about creating memories. The Chicken Alfredo Biscuit Casserole brings comfort, joy, and a hint of magic to your kitchen. So, whether you’re cooking for family, friends, or just treating yourself, remember that cooking is a journey filled with love and laughter. Now, let’s get cooking and make something unforgettable together!

Chicken Alfredo Biscuit Casserole

Prep Time 10 minutes
Cook Time 20 minutes
Total Time 30 minutes
Servings 4 servings
Calories 650
A creamy, cheesy casserole combining chicken, broccoli, and mushrooms topped with flaky biscuits for a comforting meal.

Ingredients

Dairy and Sauces

  • 1 tablespoon butter
  • 1/2 cup chopped onion
  • 1 jar (16 oz) Alfredo pasta sauce
  • 1/4 cup milk
  • 2 cups chopped cooked chicken
  • 2 cups frozen broccoli florets, thawed
  • 1/4 teaspoon dried basil leaves
  • 1 can (7.5 oz) Pillsbury® refrigerated buttermilk biscuits
  • 1 tablespoon melted butter
  • 1 tablespoon grated Parmesan cheese

Instructions 

  • Preheat oven to 375°F (190°C). Spray an 8-inch square baking dish.
  • Cook mushrooms and onion in butter until tender, then stir in Alfredo sauce, milk, chicken, broccoli, and basil. Heat thoroughly.
  • Arrange biscuit halves around edge of dish, drizzle with melted butter, and sprinkle Parmesan cheese.
  • Bake for 15-20 minutes until biscuits are golden brown.

Notes

For extra flavor, sprinkle with fresh basil or parsley before serving.
Calories: 650kcal
Cost: $15
Course: Main Course
Cuisine: American
Keyword: Biscuit, Casserole, Chicken

Why You’ll Love These Salmon Bites

Welcome to my kitchen, where fresh ingredients and a dash of creativity come together to create magic! If you’re looking for a quick and delicious meal that doesn’t skimp on flavor, then you’ve stumbled upon the perfect recipe. These Air Fryer Salmon Bites are not only healthy but also incredibly easy to whip up in just 10 minutes. Yes, you read that right! In less time than it takes to scroll through your social media feed, you can present a gourmet dish that will leave everyone asking for seconds.

Salmon is a powerhouse of nutrition, packed with omega-3 fatty acids, which are essential for a healthy heart and brain. But let’s be real: the best part about these crispy bites is their delightful texture and flavor. Picture this: tender, flaky salmon encased in a golden-brown crust, seasoned to perfection. It’s a dish that’s both sophisticated and comforting, making it an ideal choice for busy weeknights, family gatherings, or even a relaxed dinner date at home. Plus, you can serve them as an elegant appetizer or toss them on top of a salad for a nutritious lunch. Let’s dive into what makes this recipe special!

Ingredient Highlights

Let’s talk about the star of the show: salmon. You’ll want to choose a fresh, high-quality salmon fillet for the best results. Here’s what you need:

  • 1 lb salmon fillet – Boneless and skinless, of course! If you can, opt for wild-caught salmon for a richer flavor and texture.
  • 2 tablespoons olive oil – This is essential for that crispy, golden exterior. You could also use avocado oil if you prefer.
  • 1 teaspoon garlic powder – A flavor powerhouse that adds depth without the risk of burning.
  • 1 teaspoon paprika – This adds a beautiful color and a hint of sweetness. Smoked paprika can elevate the flavor even further!
  • 1 teaspoon salt – Essential for enhancing the natural flavor of the salmon.
  • 1/2 teaspoon black pepper – Freshly cracked gives the best flavor.
  • 1 tablespoon fresh lemon juice – The perfect zing that brightens up the dish.
  • Chopped parsley for garnish (optional) – A fresh touch to make your dish pop!

Essential Equipment

Juicy salmon bites cooked in an air fryer, served with lemon wedges.

You don’t need a fully stocked kitchen to make these salmon bites. Here’s what you will need:

  • Air Fryer – The hero of this recipe. If you don’t own one yet, I highly recommend investing in this kitchen gadget. It’s a game-changer!
  • Mixing Bowl – For tossing those salmon bites in the seasoning.
  • Sharp Knife – For cutting the salmon into perfectly sized pieces.
  • Measuring Spoons – For accurate ingredient measurements.
  • Cooking Spray or Brush – To prevent sticking in the air fryer.

Making the Salmon Bites

Now that we’ve gathered our ingredients and equipment, let’s jump into the cooking process! Here’s the step-by-step guide to making these delightful Air Fryer Salmon Bites.

Ingredients

Here’s a quick recap of what you’ll need:

  • 1 lb salmon fillet, skinless and boneless
  • 2 tablespoons olive oil
  • 1 teaspoon garlic powder
  • 1 teaspoon paprika
  • 1 teaspoon salt
  • 1/2 teaspoon black pepper
  • 1 tablespoon fresh lemon juice
  • Chopped parsley for garnish (optional)

Instructions

  1. Preheat your air fryer to 400°F (200°C). This is a crucial step to ensure your salmon bites get that crispy exterior.
  2. Cut the salmon fillet into bite-sized pieces, about 1 to 1.5 inches. Aim for uniformity so they cook evenly.
  3. In a mixing bowl, combine the olive oil, garlic powder, paprika, salt, black pepper, and lemon juice. This mixture is where the magic begins!
  4. Add the salmon bites to the bowl and toss gently to coat them evenly with the seasoning mixture.
  5. Arrange the salmon bites in the air fryer basket in a single layer. Make sure they’re not overlapping; give them space to breathe!
  6. Air fry for 8-10 minutes, shaking the basket halfway through to ensure even cooking.
  7. Check for doneness – the salmon should reach an internal temperature of 145°F and flake easily with a fork. If you like it a little less cooked, aim for 125-130°F.
  8. Let the salmon bites rest for a minute after removing them from the air fryer. This helps keep them juicy.
  9. Garnish with chopped parsley if desired and serve immediately. Enjoy your delicious creation!

Tips & Variations

If you want to jazz up the flavor profile or cater to your taste preferences, here are some tips and variations:

  • Spice it Up: Feel free to add a pinch of cayenne pepper or chili powder to the seasoning mix for a little kick.
  • Herb Infusion: Fresh herbs like dill or cilantro can be added to the seasoning mix or used as a garnish for an extra pop of flavor.
  • Different Oils: Experiment with different oils like sesame oil for an Asian twist or melted butter for a richer taste.
  • Sweet and Savory: Try adding a drizzle of honey or maple syrup for a sweet glaze that complements the salmon beautifully.

Storage & Meal Prep

These salmon bites are perfect for meal prep! Here’s how to store and reheat them:

  • Refrigeration: Store leftover salmon bites in an airtight container in the fridge for up to 3 days.
  • Freezing: You can freeze cooked salmon bites in a single layer on a baking sheet, then transfer them to a freezer-safe bag once solid. They’ll keep for about a month.
  • Reheating: For the best results, reheat in the air fryer at 350°F for about 5 minutes to regain that crispiness.

FAQs About Air Fryer Salmon Bites

Let’s address some common questions about this delightful dish:

  • Can I use frozen salmon? Yes! Just make sure to thaw it completely and pat it dry before cutting it into pieces.
  • What if I don’t have an air fryer? You can bake these in the oven at 400°F for about 12-15 minutes, flipping halfway through.
  • How do I know when salmon is done? The fish should flake easily with a fork and reach an internal temperature of 145°F.

Troubleshooting Common Issues

Sometimes things don’t go as planned. Here’s how to troubleshoot:

  • Salmon is dry: This could mean it was overcooked. Use an instant-read thermometer next time to monitor the temperature.
  • Not crispy enough: Ensure you’re preheating your air fryer and give the salmon enough space in the basket.
  • Flavor not strong enough: Don’t shy away from seasoning; taste as you go, and adjust according to your preference.

Conclusion

Cooking doesn’t have to be complicated to be delicious, and these Air Fryer Salmon Bites are the perfect testament to that. They embody everything I love about cooking: simplicity, flavor, and a bit of creativity. Whether you’re serving them up for a family dinner, packing them in a lunchbox, or enjoying them as a snack, these salmon bites are sure to impress. So, gather your ingredients, fire up that air fryer, and enjoy a little culinary magic right in your own kitchen. Happy cooking, friends! Your taste buds will thank you!

Air Fryer Salmon Bites Recipe – Crispy Healthy Salmon in 10 Minutes

Prep Time 5 minutes
Cook Time 8 minutes
Total Time 13 minutes
Servings 4 servings
Calories 250
Enjoy these quick and healthy crispy salmon bites made effortlessly in the air fryer, perfect for a nutritious snack or main dish.

Ingredients

Salmon

  • 1 lb salmon fillet, skinless and boneless
  • 2 tablespoons olive oil
  • 1 teaspoon garlic powder
  • 1 teaspoon paprika
  • 1 teaspoon salt
  • 1/2 teaspoon black pepper
  • 1 tablespoon fresh lemon juice
  • chopped parsley for garnish (optional) chopped parsley (for garnish)

Instructions 

  • Preheat the air fryer to 400°F (200°C).
  • Cut the salmon into bite-sized pieces and toss with olive oil, garlic powder, paprika, salt, black pepper, and lemon juice.
  • Place the seasoned salmon bites in the air fryer basket in a single layer.
  • Air fry for 8-10 minutes, shaking halfway through.
  • Remove, rest for a minute, garnish with parsley if desired, and serve.

Notes

Ensure not to overcrowd the air fryer for even cooking.
Calories: 250kcal
Cost: $15
Course: Appetizer, Main Course
Cuisine: American
Keyword: Air Fryer, healthy, Salmon

Loved this recipe? Save it to your favorite Pinterest board so you can easily find it later! It’s the perfect way to keep all your sweet ideas in one place. ✨

Golden-brown air fryer salmon bites displayed on a plate with a blurred background.

Why This Dish is Your Next Favorite

Imagine a dish that wraps you in a warm embrace after a long day, making you feel at home no matter where you are. That’s exactly what this recipe for Chicken Pot Pie brings to the table. It’s all about comfort food, and this one-pot wonder combines tender chicken, a rich creamy sauce, and a flaky crust that’ll make you wonder why you ever settled for takeout. Not only is it satisfying, but it’s also customizable, making it perfect for any occasion—from family dinners to cozy gatherings with friends.

Overview of the Recipe

Creating the ultimate Chicken Pot Pie is a delightful journey filled with aromatic ingredients and the kind of satisfying flavors that linger in your memory. This recipe is designed to be approachable, even if you’re not a seasoned cook. The beauty of it lies in its simplicity—everything comes together in one pot, minimizing cleanup while maximizing flavor. Plus, who doesn’t love a meal that can be prepared ahead of time and tastes even better the next day? Let’s dive into the ingredients and steps so we can get to the good part—enjoying a slice of this comforting goodness!

The Recipe

An appetizing plate of a homemade recipe, highlighted with soft shadows and a blurred cozy background.

Recipe Name: Chicken Pot Pie

Ingredients:

  • 2 cups cooked chicken, shredded
  • 1 cup frozen mixed vegetables (peas, carrots, corn)
  • 1/3 cup butter
  • 1/3 cup all-purpose flour
  • 1/2 teaspoon onion powder
  • 1/2 teaspoon garlic powder
  • 1 3/4 cups chicken broth
  • 2/3 cup milk
  • Salt and pepper, to taste
  • 1 pie crust (store-bought or homemade)

Steps:

  1. Preheat your oven to 425°F (220°C).
  2. In a large saucepan, melt the butter over medium heat. Stir in the flour, onion powder, and garlic powder, cooking for about 2 minutes until lightly golden.
  3. Gradually whisk in the chicken broth and milk, stirring constantly until the mixture thickens. This creamy sauce is the heart of your pot pie!
  4. Add the shredded chicken and mixed vegetables to the sauce, seasoning it with salt and pepper to taste. Stir everything together until well combined.
  5. Pour the chicken mixture into a pie dish and cover it with the pie crust, sealing the edges. Cut slits in the top of the crust to allow steam to escape.
  6. Bake in the preheated oven for 30-35 minutes, or until the crust is golden brown. Your kitchen will smell divine, and you’ll be counting down the minutes until you can dig in!

Tips for the Perfect Pot Pie

To elevate your Chicken Pot Pie game, keep these tips in mind:

  • Use Rotisserie Chicken: If you’re short on time, grab a rotisserie chicken from your local grocery store. It’s a great shortcut that saves you the hassle of cooking chicken from scratch.
  • Homemade vs. Store-bought Crust: While a store-bought crust is convenient, making your own flaky crust can add a special touch. If you want to try your hand at a homemade crust, check out my easy pie crust recipe.
  • Seasoning Matters: Don’t be shy with seasoning! Taste your sauce as you go and adjust the salt and pepper to your liking. Fresh herbs like thyme or rosemary can add an aromatic twist.

Variations to Try

There are countless ways to make this dish your own. Here are a few variations that can add a bit of excitement to your Chicken Pot Pie:

  • Vegetarian Delight: Swap the chicken for hearty vegetables like mushrooms, zucchini, and bell peppers for a vegetarian option. Use vegetable broth instead of chicken broth for the creamy sauce.
  • Cheesy Twist: Add a cup of shredded cheese to the filling for a creamy, cheesy delight. Cheddar or Gruyère works wonderfully!
  • Spicy Kick: If you like a little heat, toss in some diced jalapeños or a dash of hot sauce for an unexpected kick.

Substitutions You Can Make

Need to make some adjustments based on what you have on hand? No problem! Here are a few substitutions you can make:

  • Chicken: Turkey works well too! If you have leftovers from Thanksgiving, this is a perfect way to use them up.
  • Vegetables: Feel free to mix and match vegetables. Broccoli, green beans, or even sweet potatoes can add variety.
  • Milk: Half-and-half or cream can be used for a richer sauce, while almond or oat milk can serve as a dairy-free alternative.

Essential Equipment

Before you get started, make sure you have the following equipment handy:

  • A large saucepan
  • A whisk
  • A measuring cup and spoons
  • A pie dish
  • A rolling pin (if making your own crust)

Storage and Freezing Tips

This Chicken Pot Pie is excellent for meal prep! Here’s how to store it:

  • Refrigeration: Store leftovers in an airtight container in the fridge for up to 3 days. Just reheat in the oven or microwave before serving!
  • Freezing: You can freeze the unbaked pie for up to 2 months. Just wrap it tightly in plastic wrap and aluminum foil. When you’re ready to bake it, no need to thaw—just pop it in the oven and add a few extra minutes to the baking time.

Frequently Asked Questions

Can I make this Chicken Pot Pie ahead of time?
Yes! You can prepare the filling a day in advance and assemble the pie when you’re ready to bake it.

What can I serve with it?
A simple side salad or some crusty bread pairs wonderfully with this dish.

Can I use a different protein?
Absolutely! Feel free to substitute with cooked beef or even seafood for a different flavor profile.

Troubleshooting Common Issues

If you encounter any issues while making your Chicken Pot Pie, here’s how to fix them:

  • Too Soupy: If your filling is too runny, you can add a bit more flour to the sauce or let it simmer longer to thicken.
  • Crust Not Browning: If the crust isn’t browning, consider placing it under a broiler for a minute or two at the end of baking. Just watch it closely!

Conclusion

There you have it! A comforting Chicken Pot Pie that’s sure to become a staple in your kitchen. Whether you’re cooking for a crowd or just treating yourself to a hearty meal, this recipe will deliver every time. Remember, the best recipes are those that evolve with you, so don’t hesitate to experiment and make it your own. I can’t wait for you to gather around the table, share this dish with your loved ones, and witness the delight on their faces. Happy cooking!

Classic Spaghetti Carbonara

Prep Time 10 minutes
Cook Time 15 minutes
Total Time 25 minutes
Servings 4 servings
Calories 550
A quick and creamy Italian pasta dish made with eggs, cheese, pancetta, and pepper.

Ingredients

Pasta

  • 400 grams spaghetti
  • 150 grams pancetta or bacon (diced)
  • 3 large eggs (beaten)
  • 1 cup Parmesan cheese (grated)
  • 1 teaspoon black pepper (freshly ground)

Other

  • Salt (to taste)

Instructions 

  • Cook spaghetti in salted boiling water until al dente, then drain.
  • Cook pancetta in a skillet until crispy.
  • Mix eggs, cheese, and pepper in a bowl.
  • Combine hot pasta with pancetta, then quickly mix in egg mixture to create a creamy sauce.
  • Serve immediately with extra cheese and pepper if desired.

Notes

Use fresh black pepper for best flavor.
Calories: 550kcal
Cost: $12
Course: Main Course
Cuisine: Italian
Keyword: pasta

Loved this recipe? Save it to your favorite Pinterest board so you can easily find it later! It’s the perfect way to keep all your sweet ideas in one place. ✨

A detailed shot of a delicious meal, featuring vibrant ingredients and enticing presentation, illuminated softly.

Discover the Magic of Apple Cobbler

Welcome to your new favorite dessert! If you’re anything like me, the mention of **apple cobbler** brings forth warm memories of cozy kitchens and sweet aromas wafting through the air. This **cozy apple cobbler** is not just a dessert; it’s an experience that whispers sweet nothings to your taste buds. With its warm, cinnamon-kissed apples enveloped in a buttery, crumbly topping, it’s the perfect blend of comfort and indulgence. Trust me, once you make this easy apple cobbler, it will become a cherished part of your culinary repertoire, just like it is in my kitchen!

Why You’ll Love This Recipe

This apple cobbler recipe isn’t just easy to follow; it’s also packed with delightful surprises. Here’s why you’ll want to make it:

  • Quick and Easy: With straightforward steps and minimal prep time, you can whip this up even on a busy weeknight.
  • Flavorful Variety: Using a mix of apples gives you a depth of flavor that keeps every bite interesting.
  • Customizable Topping: Feel free to adjust the topping ingredients to suit your taste, whether you prefer it more crumbly or cake-like.
  • Perfect for Sharing: This recipe yields a generous amount, making it perfect for gatherings or family dinners.
  • Pairs Delightfully: Serve it warm with a scoop of vanilla ice cream for an indulgent treat that feels like a warm hug!

Ingredient Breakdown

Making a standout apple cobbler starts with quality ingredients. Here’s what you’ll need:

  • 5 pounds of apples: Use a mix like Granny Smith, Gala, and Golden Delicious for the best flavor.
  • 1/2 teaspoon lemon zest: Adds brightness and balances the sweetness.
  • 3 tablespoons lemon juice: Helps prevent the apples from browning and adds acidity.
  • Granulated and brown sugar: A combination provides the perfect sweetness and depth of flavor.
  • All-purpose flour: Essential for both the filling and the topping. For gluten-free, consider using a gluten-free flour blend.
  • Cinnamon, nutmeg, and cardamom: These spices create a warm, inviting aroma that’s synonymous with fall.
  • Buttermilk: Adds moisture and a slight tang; you can substitute with regular milk mixed with vinegar.
  • Butter: Cold butter is key for a flaky topping.
  • Vanilla extract: A splash of this enhances the overall flavor.
  • Ice cream for serving: A must-have for that perfect dessert experience!

Expert Pro Tips

A side shot of a warm apple cobbler topped with a scoop of vanilla ice cream.

Ready to elevate your apple cobbler game? Here are some tips from my kitchen to yours:

  • Choose the right apples: Combining tart and sweet apples will give your cobbler a complex flavor.
  • Don’t overcook the apples: You want them tender but not mushy. They’ll continue to cook in the oven.
  • Chill the butter: Using cold butter in your topping creates a flaky texture that’s to die for.
  • Experiment with spices: Don’t be afraid to add a pinch of ginger or allspice for a unique twist.
  • Let it cool: Allowing the cobbler to set for a few minutes after baking will help it slice better.
  • Use a rimmed baking dish: This will catch any bubbling juices and keep your oven clean.
  • For a crispy top: Broil the cobbler for the last 1-3 minutes of baking for a beautifully browned crust.
  • Personalize your serving: Consider drizzling caramel sauce over the top for an extra touch of sweetness.

Common Mistakes and Troubleshooting

Even the best chefs have their mishaps. Here’s how to avoid common pitfalls:

  • Apples too soft?: If they turn mushy, check your cooking time and adjust as needed next time.
  • Topping too dry?: Make sure your butter is cold and don’t overmix the topping ingredients.
  • Not enough flavor?: Always taste your apple mixture before baking and adjust sugar or spices accordingly.
  • Overbaking?: Keep an eye on the cobbler towards the end of the baking time to prevent burning.

Delicious Variations

Feel free to get creative! Here are a few variations you can try:

  • Berry Apple Cobbler: Add a cup of fresh or frozen berries for a fruity twist.
  • Nutty Topping: Mix in chopped walnuts or pecans with the topping for added crunch.
  • Caramel Apple Cobbler: Drizzle caramel sauce over the filling before adding the topping for extra decadence.
  • Spiced Rum Cobbler: Add a splash of dark rum to the apple mixture for a sophisticated flavor.

Storage and Make-Ahead Instructions

Want to make this ahead of time? Here’s how to store your delightful cobbler:

  • Room temperature: Keep it loosely covered for up to 2 days.
  • Refrigerate: Store leftovers in the fridge for up to a week, but it’s best enjoyed fresh!
  • Make-ahead: You can prepare the apple filling and topping separately, refrigerating them until ready to bake.

Frequently Asked Questions

Got questions? I’ve got answers! Here are some common queries about apple cobbler:

  • Can I use frozen apples? Yes, but be mindful that they may have more moisture, so adjust the sugar accordingly.
  • How do I know when it’s done? The topping should be golden brown and the filling bubbly.
  • Can I make it gluten-free? Absolutely! Substitute all-purpose flour with a gluten-free blend.
  • What’s the best way to serve it? Warm, with a generous scoop of vanilla ice cream on top!
  • Can I add other fruits? Yes! Peaches, pears, or cherries can be wonderful additions.
  • How do I reheat leftovers? Warm it in the oven at 350°F until heated through, or microwave individual portions.
  • Is it okay to eat cold? While warm is best, it’s still delicious cold!
  • How can I make it more decadent? Consider adding a dollop of whipped cream or a drizzle of chocolate sauce!

Nutritional Tips and Dietary Adaptations

For those mindful of dietary needs, here are some tips:

  • Lower Sugar: Reduce the sugar in the filling for a less sweet version.
  • Dairy-Free: Use almond milk and coconut oil instead of buttermilk and butter.
  • Vegan Option: Substitute eggs with flaxseed meal and use vegan butter.
  • Whole Wheat Flour: For a healthier twist, try using whole wheat flour in the topping.

Equipment Recommendations

To make your cooking experience easier, here’s what I recommend:

  • Microplane grater: Perfect for zesting lemons and grating spices.
  • High-sided skillet: Ideal for cooking your apples without mess.
  • Pastry cutter: Makes blending butter into the flour a breeze.
  • 9×13-inch baking dish: The perfect size for this recipe, ensuring even cooking.

Serving Suggestions

When it comes to serving your apple cobbler, here are some ideas:

  • Classic pairing: Serve it warm with a scoop of vanilla ice cream for the ultimate comfort dessert.
  • Drizzle with caramel: A caramel sauce drizzle takes it to the next level.
  • Top with whipped cream: Light and fluffy whipped cream adds a delightful touch.
  • Add a sprinkle of nuts: Chopped pecans or walnuts can add a nice crunch.

So there you have it! An apple cobbler that’s not only simple to make but also rich in flavor and comfort. I can’t wait for you to try this recipe and enjoy the warmth and joy it brings. Whether it’s for a special occasion or just a cozy night in, this dessert is sure to impress. Now, pull up a chair, grab your apron, and let’s make some **magic** happen in the kitchen!

Easy Recipe for Apple Cobbler

Prep Time 30 minutes
Cook Time 50 minutes
Total Time 1 hour 20 minutes
Servings 8 servings
Calories 350
A delicious and comforting apple cobbler with a crisp topping, perfect for cozy gatherings or family dessert.

Ingredients

Apple Filling

  • 5 pounds apples (peeled, about 9-11 large apples; use a variety of flavors)
  • 0.5 teaspoon lemon zest (from 1 small lemon)
  • 3 tablespoons lemon juice (from 1 small lemon)
  • 0.75 cup granulated sugar
  • 0.75 cup brown sugar (packed)
  • 5 tablespoons all purpose flour (See notes if making without cooking apples)
  • 1.5 teaspoons cinnamon
  • 0.75 teaspoon nutmeg
  • 0.5 teaspoon cardamom (optional)
  • 0.25 teaspoon kosher salt
  • 1 teaspoon vanilla extract

Cobbler Topping

  • 2.5 cups all purpose flour (spooned and leveled)
  • 1.5 cups granulated sugar
  • 1 teaspoon kosher salt
  • 1 teaspoon baking powder
  • 0.5 cup buttermilk (cheater version okay)
  • 1 egg egg
  • 0.5 cup cold butter (chopped into chunks)
  • 2 tablespoons sugar (granulated or raw) (or both)

For Serving

  • to taste vanilla ice cream (for serving, not optional)

Instructions 

  • Prepare apple filling: zest lemon, squeeze juice, peel and slice apples thinly, then cook with sugars and spices for 20 minutes until tender.
  • Stir in vanilla, transfer apples to a 9x13 dish, and let cool slightly.
  • Make cobbler topping: whisk dry ingredients, add buttermilk and egg, cut in butter, then sprinkle over apples.
  • Bake at 375°F (190°C) for 45-55 minutes until golden and bubbling. Broil briefly for extra crisp if desired.
  • Let cool for 15 minutes, then serve with vanilla ice cream.

Notes

Use a mix of apple varieties for best flavor. Adjust cooking time for desired apple tenderness. Serve warm with ice cream for the best experience.
Calories: 350kcal
Cost: $15
Course: Dessert
Cuisine: American
Keyword: apple, cobbler