Author

Ava

Browsing

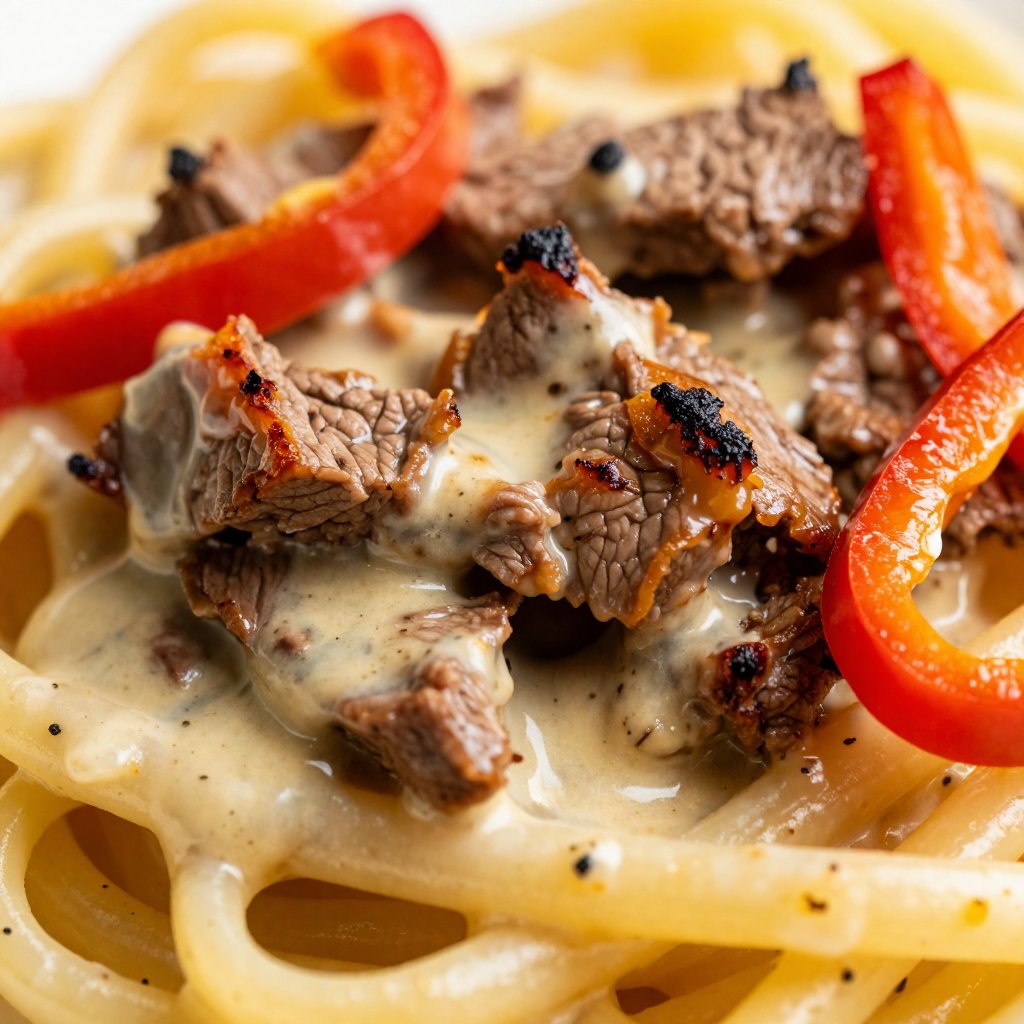
Hey there, friend! Ava here, back in my Seattle kitchen, ready to share a recipe that’s become a total weeknight staple: Steak Fajita Pasta. If you’re anything like me, you’re always on the hunt for meals that are quick, satisfying, and packed with flavor. Well, look no further because this dish ticks all the boxes. It’s the perfect blend of creamy pasta, tender steak, and vibrant fajita veggies, all brought together with a zesty fajita seasoning. Trust me, once you try it, this one will be in your regular rotation!

Growing up in Oregon, my mom always had a way of making dinner feel like a celebration. This recipe reminds me of those cozy nights, but with a fun, modern twist. I’ve taken the classic steak fajita and transformed it into a comforting pasta dish that’s ready in under 30 minutes. Are you crazy for recipes that are simple but deliver big on taste? Then, you’re in the right place!

Why You’ll Love This Steak Fajita Pasta

Seriously, what’s not to love? This dish is a flavor explosion, and it’s incredibly easy to make. Here’s why I think you’ll be obsessed:

  • Quick and Easy: From start to finish, this recipe is ready in about 30 minutes. Perfect for those busy weeknights when you don’t have a lot of time to cook. This easy weeknight dinner recipe is a game changer!
  • Flavorful: The combination of steak, fajita seasoning, and creamy sauce is simply irresistible. It’s got that perfect balance of savory, spicy, and creamy that I absolutely adore.
  • Versatile: You can easily customize this recipe to your liking. Use different types of pasta, add your favorite veggies, or adjust the spice level. You can even substitute the steak for chicken!
  • One-Pot Wonder (Almost!): While you do need to cook the pasta separately, the rest of the dish comes together in one skillet, making cleanup a breeze. We love those one pot recipes that save on dishes!
  • Crowd-Pleaser: This dish is always a hit with both kids and adults. It’s a guaranteed win for family dinners or casual gatherings.

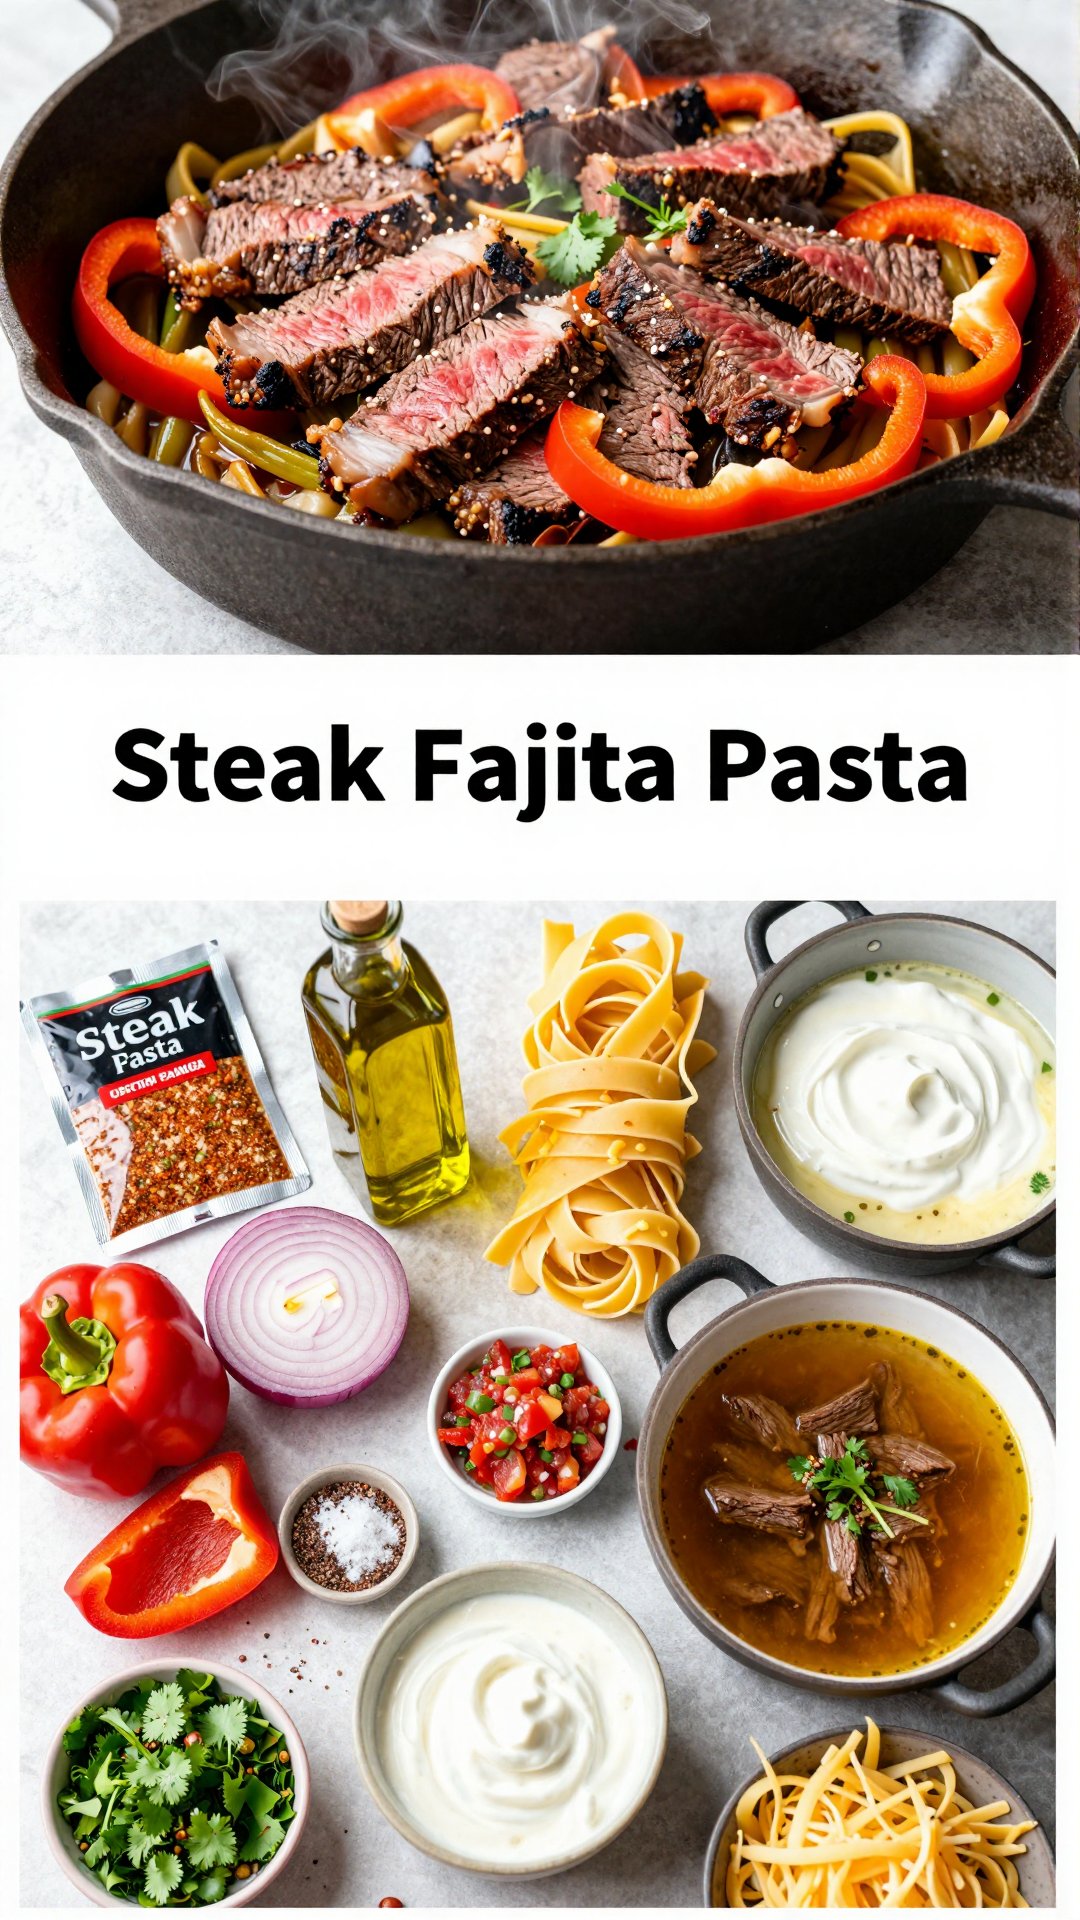
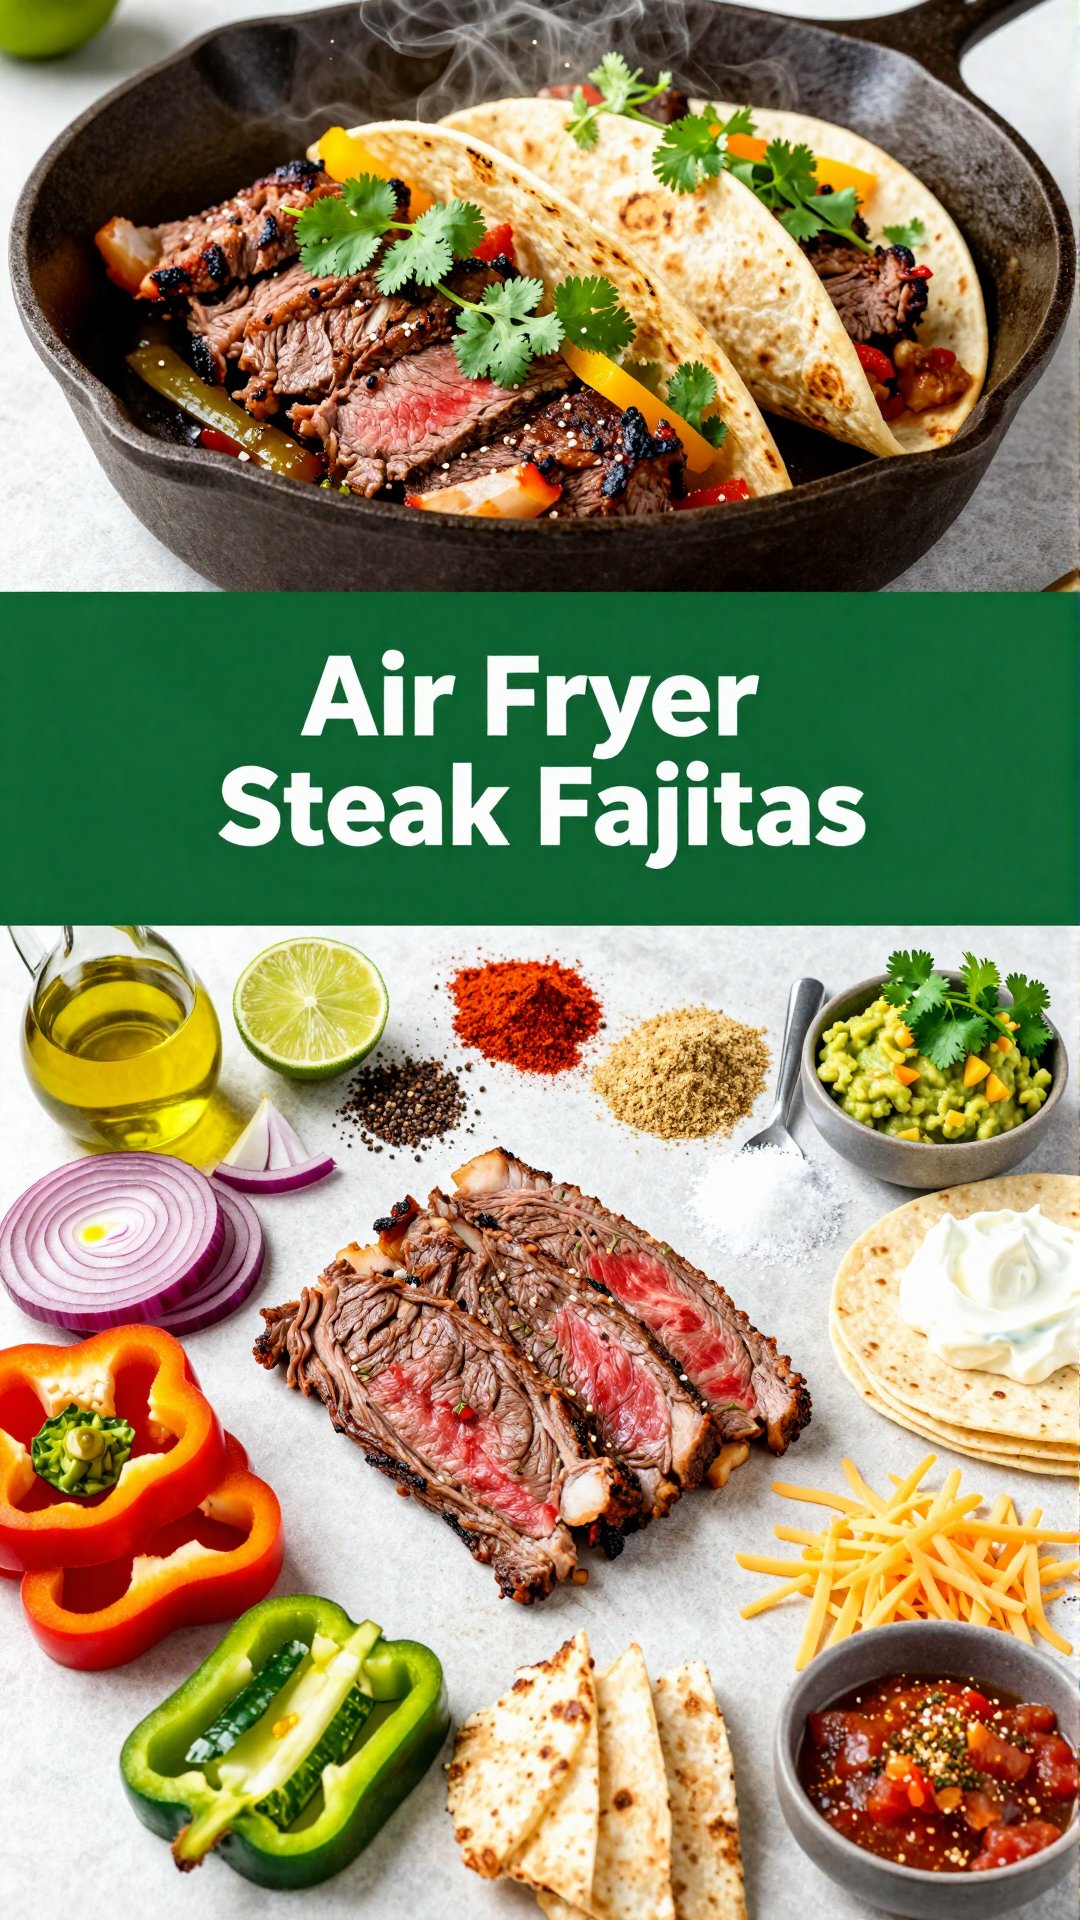
Ingredients for Steak Fajita Pasta

Here’s what you’ll need to create this masterpiece. Don’t worry, you probably have many of these ingredients in your pantry already!

  • 1 lb steak (skirt or flank), thinly sliced: I prefer skirt steak for its tenderness and flavor, but flank steak works great too.
  • 1 bell pepper (any color), sliced: Use whatever color you like! I often use a mix of red and yellow for a pop of color.
  • 1 onion, sliced: Yellow or white onion works best.
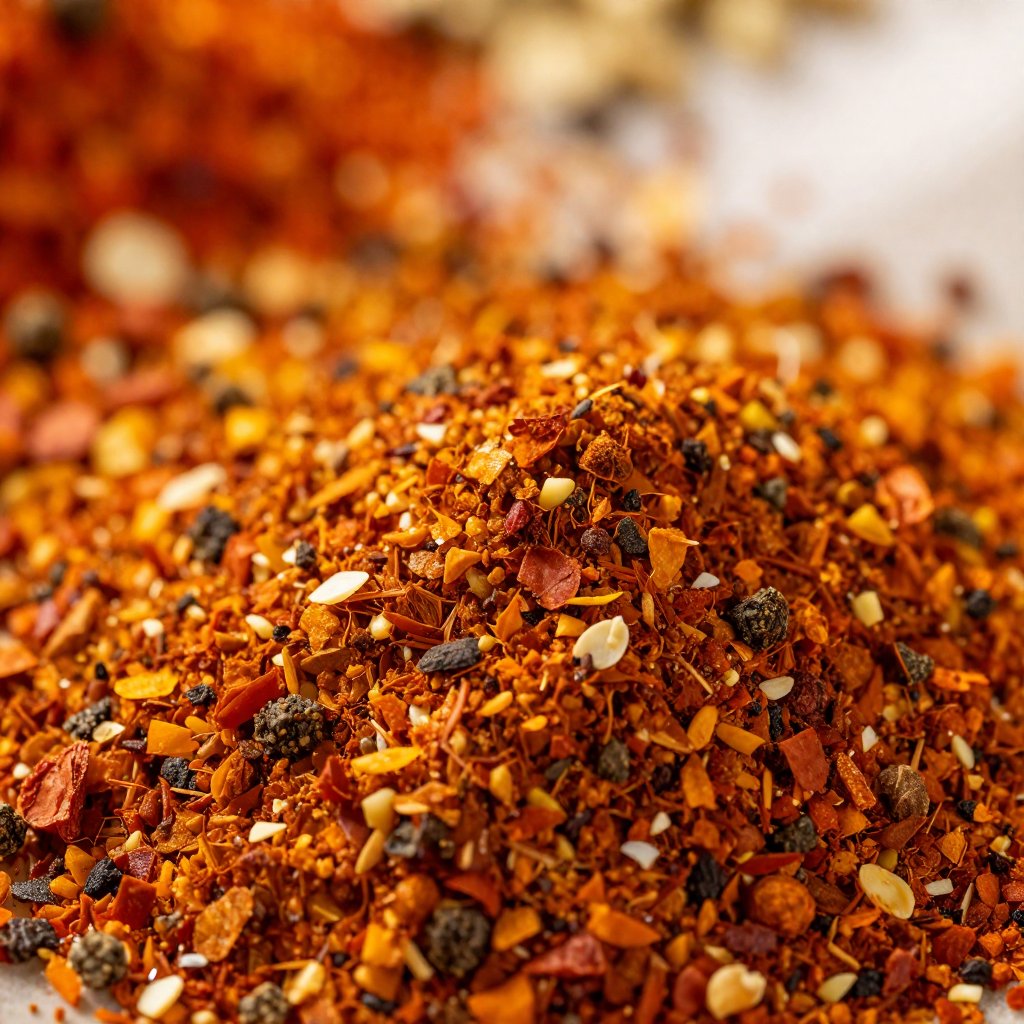
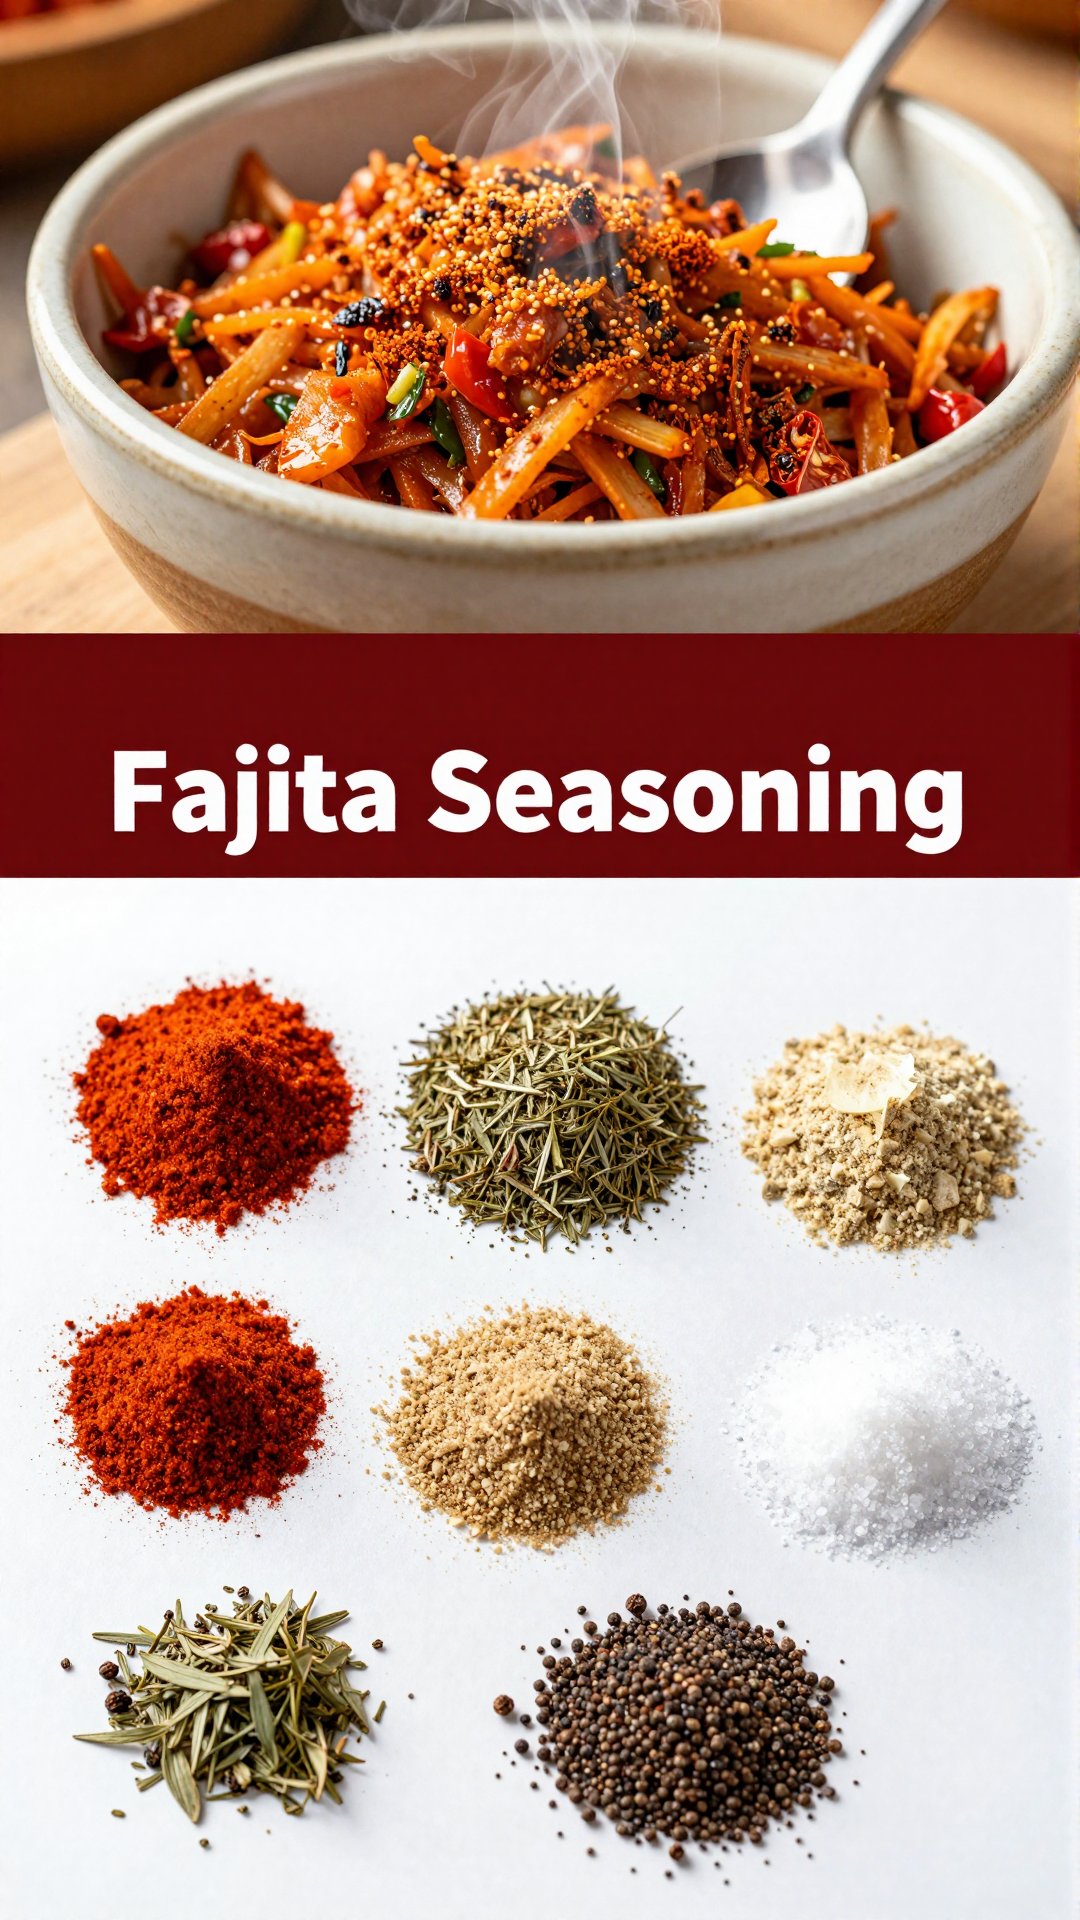
  • 1 packet fajita seasoning: You can use store-bought or make your own. I often make my own fajita seasoning, but store-bought is a great time saver.
  • 1 tbsp olive oil: For sautéing the steak and veggies.
  • 1 lb pasta (fettuccine or linguine): I love using fettuccine because it holds the sauce beautifully, but linguine is also a great choice. The pasta is the perfect base for this dish.
  • 1 cup beef broth: Adds depth of flavor to the sauce.
  • 1/2 cup heavy cream: For a rich and creamy sauce.
  • 1/4 cup chopped cilantro: For a fresh, vibrant garnish.
  • Salt and pepper to taste: Season to perfection!
  • Optional: Sour cream, shredded cheese, salsa for topping: These are fantastic additions for extra flavor and texture.
Recipe Image

How to Make Steak Fajita Pasta: Step-by-Step

Alright, let’s get cooking! Here’s how to bring this delicious dish to life. Remember, cooking is all about having fun, so don’t be afraid to experiment and make it your own.

  1. Cook the pasta: Cook pasta according to package directions. Drain and set aside. Make sure you don’t overcook the pasta; al dente is the way to go!
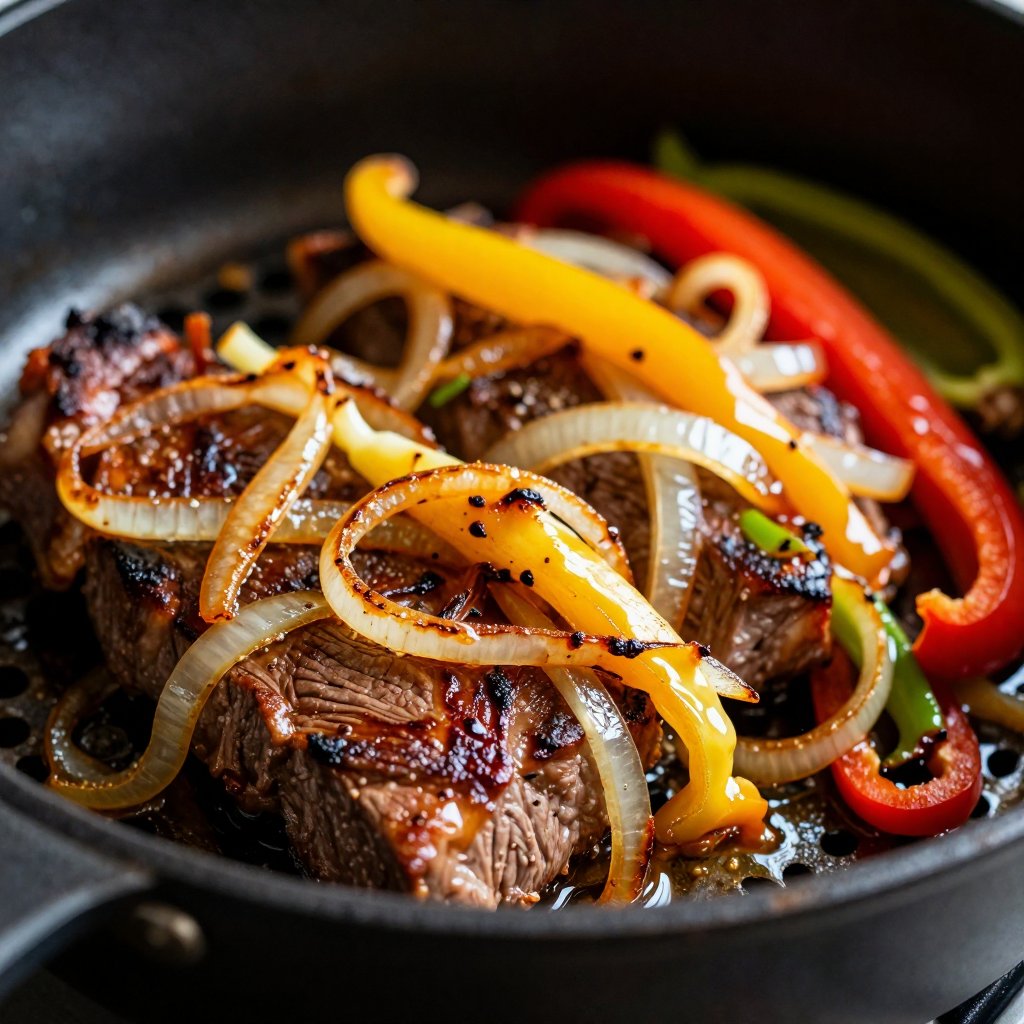
  2. Sauté the steak and veggies: In a large skillet, heat olive oil over medium-high heat. Add steak, bell pepper, and onion. Cook until steak is browned and vegetables are tender, about 5-7 minutes. The steak should be nicely seared and the veggies slightly softened.
  3. Add fajita seasoning: Stir in fajita seasoning and cook for 1 minute more. This step is crucial for infusing the dish with that classic fajita flavor.
  4. Create the sauce: Add beef broth and bring to a simmer. Cook until slightly reduced, about 2-3 minutes. This helps to concentrate the flavors and create a richer sauce.
  5. Combine everything: Stir in heavy cream and cooked pasta. Toss to combine. Make sure the pasta is well coated in the creamy sauce.
  6. Season and serve: Season with salt and pepper to taste. Garnish with cilantro and serve immediately. Top with sour cream, shredded cheese, and salsa, if desired.

Pro Tips for Perfect Steak Fajita Pasta

Want to take your Steak Fajita Pasta to the next level? Here are a few of my favorite pro tips that will make the steak fajita pasta even better:

  • Use High-Quality Steak: The better the steak, the better the dish. Look for well-marbled skirt or flank steak for the best flavor and tenderness. The steak is the star of this dish, so don’t skimp!
  • Don’t Overcook the Steak: Overcooked steak can be tough and dry. Aim for medium-rare to medium for the most tender results.
  • Slice the Steak Thinly: Thinly sliced steak cooks quickly and evenly, and it’s easier to eat in the pasta.
  • Cook the Pasta Al Dente: Overcooked pasta can become mushy in the sauce. Cook it al dente, so it still has a slight bite.
  • Adjust the Spice Level: If you like it spicy, add a pinch of cayenne pepper or some chopped jalapeño to the skillet along with the fajita seasoning. A little spice can really wake up the flavors!
  • Use Fresh Ingredients: Fresh bell peppers, onions, and cilantro will add the most vibrant flavors to your dish.

Common Mistakes to Avoid

Even the best cooks make mistakes! Here are a few common pitfalls to watch out for when making Steak Fajita Pasta:

  • Overcooking the Steak: As mentioned earlier, overcooked steak is a no-no. Keep a close eye on it and pull it off the heat when it’s still slightly pink inside.
  • Using Too Much Sauce: Too much sauce can make the pasta soggy. Start with the recommended amount and add more if needed.
  • Forgetting to Season: Seasoning is key! Don’t forget to season the steak, veggies, and sauce with salt and pepper to taste. The fajita seasoning adds a lot of flavor, but you still need to season the individual components.
  • Adding the Pasta Too Early: Adding the pasta too early can cause it to absorb too much sauce and become mushy. Add it right before serving.

Variations on Steak Fajita Pasta

One of the best things about this recipe is how easy it is to customize. Here are a few fun variations to try:

  • Chicken Fajita Pasta: Substitute the steak with chicken breast or thighs.
  • Vegetarian Fajita Pasta: Omit the steak and add more veggies, such as mushrooms, zucchini, or corn.
  • Spicy Fajita Pasta: Add a pinch of cayenne pepper, chopped jalapeños, or a dash of hot sauce.
  • Creamy Tomato Fajita Pasta: Add a can of diced tomatoes to the sauce for a tangy twist.
  • Cheesy Fajita Pasta: Stir in some shredded cheddar or Monterey Jack cheese at the end for extra cheesy goodness. This makes it similar to steak fajitas casserole!

How to Store and Reheat Steak Fajita Pasta

If you have leftovers (which is rare in my house!), here’s how to store and reheat them:

  • Storage: Store the pasta in an airtight container in the refrigerator for up to 3 days.
  • Reheating: Reheat the pasta in a skillet over medium heat, adding a splash of beef broth or water if needed to loosen the sauce. You can also microwave it, but it may not be as creamy.

Frequently Asked Questions (FAQ)

Got questions? I’ve got answers! Here are some common questions about making Steak Fajita Pasta:

  • Can I use a different type of pasta? Absolutely! Penne, rotini, or even bow tie pasta would work well.
  • Can I make this ahead of time? You can cook the steak and veggies ahead of time and store them in the refrigerator. Then, when you’re ready to serve, cook the pasta and combine everything.
  • Can I freeze this? I don’t recommend freezing this dish, as the pasta and sauce may become mushy when thawed.
  • Can I make my own fajita seasoning? Yes! There are tons of recipes online for homemade fajita seasoning. It usually includes chili powder, cumin, paprika, garlic powder, onion powder, and oregano.
  • What kind of steak is best for fajitas? Skirt steak and flank steak are both great choices. They’re flavorful and tender when cooked properly.

Serving Suggestions for Steak Fajita Pasta

This dish is delicious on its own, but here are a few ideas to make it a complete meal:

  • Side Salad: A simple green salad with a vinaigrette dressing.
  • Garlic Bread: For soaking up all that delicious sauce.
  • Corn on the Cob: A classic side dish that pairs perfectly with fajitas.
  • Guacamole and Chips: For a fun and festive appetizer.
  • Mexican Rice: A hearty side that complements the flavors of the dish.

So there you have it—my go-to recipe for Steak Fajita Pasta. I hope you love it as much as I do! Remember, cooking is all about having fun and making something delicious that you and your loved ones will enjoy. This easy dinner recipe is sure to be a hit with the whole family! If you try this recipe, be sure to let me know in the comments below. I can’t wait to hear what you think! Happy cooking!

Steak Fajita Pasta

Prep Time 15 minutes
Cook Time 20 minutes
Total Time 35 minutes
Servings 6 people
Calories 550
A delicious and easy weeknight meal that combines the flavors of steak fajitas with creamy pasta. This dish is sure to be a family favorite!

Ingredients

Ingredients

  • 1 lb steak (skirt or flank), thinly sliced
  • 1 bell pepper (any color), sliced
  • 1 onion, sliced
  • 1 packet fajita seasoning
  • 1 tbsp olive oil
  • 1 lb pasta (fettuccine or linguine)
  • 1 cup beef broth
  • 0.5 cup heavy cream
  • 0.25 cup chopped cilantro
  • Salt and pepper to taste
  • Optional: Sour cream, shredded cheese, salsa for topping

Instructions 

  • Cook pasta according to package directions. Drain and set aside.
  • In a large skillet, heat olive oil over medium-high heat. Add steak, bell pepper, and onion.
  • Cook until steak is browned and vegetables are tender, about 5-7 minutes.
  • Stir in fajita seasoning and cook for 1 minute more.
  • Add beef broth and bring to a simmer. Cook until slightly reduced, about 2-3 minutes.
  • Stir in heavy cream and cooked pasta. Toss to combine.
  • Season with salt and pepper to taste.
  • Garnish with cilantro and serve immediately. Top with sour cream, shredded cheese, and salsa, if desired.

Notes

For a spicier dish, add a pinch of cayenne pepper or a dash of hot sauce.
Calories: 550kcal
Cost: $20
Course: dinner
Cuisine: Italian, Mexican
Keyword: Steak
pin

Hey there, spice enthusiasts! Ava here, back in my Seattle kitchen, ready to share another one of my absolute favorite recipes. This time, we’re ditching the store-bought packets and diving headfirst into the world of homemade fajita seasoning. Trust me, once you taste the difference, you’ll never go back. I grew up thinking that the only way to make fajitas was with those little packets I’d find at the store, but then I discovered how easy it is to make your own, and how much better it tastes!

If you’ve been following my culinary adventures, you know I’m all about simple, flavorful recipes that bring people together. And what’s more fun than a sizzling platter of fajitas, loaded with your favorite toppings? The secret to truly amazing fajitas, though, isn’t just about the meat and veggies – it’s about the seasoning. This authentic fajita seasoning recipe is the real deal, and I’m so excited to share it with you!

Why You’ll Love This Homemade Fajita Seasoning

Okay, let’s talk about why this recipe is about to become your new best friend. I’ve been perfecting this blend for years, and I’m convinced it’s the best out there. Seriously, I’m happy to hear you’re going to try this! If you are anything like me, you are going to love it!

  • Unmatched Flavor: The combination of spices creates a depth of flavor that store-bought mixes simply can’t match. It’s warm, smoky, and just a little bit spicy – the perfect balance.
  • Control Over Ingredients: No more mystery ingredients or excessive sodium! You know exactly what’s going into your seasoning, which means you can adjust it to your liking.
  • Cost-Effective: Making your own fajita seasoning is significantly cheaper than buying pre-made packets, especially if you cook fajitas often.
  • Customizable Heat: Want to kick up the heat? Add more cayenne pepper. Prefer a milder flavor? Reduce or omit it altogether. It’s all up to you!
  • Versatile: While it’s perfect for fajitas, this seasoning blend is also fantastic on grilled chicken, roasted vegetables, or even sprinkled on popcorn.

Homemade Fajita Seasoning Ingredients

Here’s what you’ll need to create this magic in your own kitchen. Don’t worry, most of these spices are probably already in your pantry!

  • 2 tablespoons chili powder
  • 1 tablespoon cumin
  • 1 tablespoon paprika
  • 1 tablespoon garlic powder
  • 1 tablespoon onion powder
  • 1 teaspoon dried oregano
  • 1 teaspoon salt
  • 1/2 teaspoon black pepper
  • 1/4 teaspoon cayenne pepper (optional, for heat)
Recipe Image

How to Make Homemade Fajita Seasoning: Step-by-Step

Ready to get started? This recipe is so easy, even a novice cook can nail it. I’ve made this fajita seasoning more times than I can count, and it always turns out perfectly. To make it, just follow these simple steps:

  1. Combine all ingredients in a small bowl.
  2. Whisk together until well blended, ensuring there are no clumps.
  3. Store in an airtight container in a cool, dry place.
  4. Use 2-3 tablespoons per pound of meat or vegetables when preparing your fajitas.

Pro Tips for the Best Fajita Seasoning

Want to take your homemade fajita seasoning to the next level? Here are a few of my favorite tips and tricks:

  • Use Fresh Spices: The fresher your spices, the more flavorful your seasoning will be. Check the expiration dates on your spice jars and replace any that are past their prime.
  • Toast Your Spices: For an even deeper, richer flavor, toast the spices in a dry skillet over medium heat for a few minutes before combining them. Be careful not to burn them!
  • Adjust to Taste: Don’t be afraid to experiment with the ratios of the spices to find your perfect blend. If you like it smokier, add more smoked paprika. If you prefer it saltier, add more salt.
  • Grind Whole Spices: If you really want to elevate your fajita seasoning, start with whole spices and grind them yourself. The flavor will be incredibly vibrant.

Common Mistakes to Avoid

Even though this recipe is super simple, there are a few common mistakes you’ll want to avoid:

  • Burning the Spices: If you decide to toast your spices, keep a close eye on them and stir frequently to prevent burning. Burnt spices will taste bitter and ruin your seasoning.
  • Using Too Much Salt: Salt is essential for flavor, but too much can overpower the other spices. Start with the recommended amount and adjust to taste.
  • Not Storing Properly: To keep your fajita seasoning fresh, store it in an airtight container in a cool, dry place away from direct sunlight.

Fajita Seasoning Variations

One of the best things about making your own fajita seasoning is that you can customize it to your liking. Here are a few variations to try:

  • Smoked Paprika Fajita Seasoning: Substitute regular paprika with smoked paprika for a smoky flavor.
  • Spicy Fajita Seasoning: Add more cayenne pepper or a pinch of red pepper flakes for extra heat.
  • Lime Fajita Seasoning: Add 1-2 teaspoons of lime zest to the spice blend for a citrusy twist.
  • Chipotle Fajita Seasoning: Add 1-2 teaspoons of chipotle powder for a smoky, spicy flavor.

How to Store Homemade Fajita Seasoning

Proper storage is key to keeping your fajita seasoning fresh and flavorful. Store it in an airtight container (like a glass jar or a resealable plastic bag) in a cool, dry place away from direct sunlight. When stored properly, homemade fajita seasoning will last for up to 6 months.

Frequently Asked Questions (FAQ)

Got questions? I’ve got answers! Here are some of the most common questions I get about homemade fajita seasoning:

  • Can I use this seasoning for other dishes? Absolutely! This fajita seasoning is delicious on chicken, beef, pork, vegetables, and even tofu.
  • How much seasoning should I use? I recommend using 2-3 tablespoons per pound of meat or vegetables, but you can adjust to taste.
  • Can I make a big batch of this seasoning? Yes! This recipe can easily be doubled or tripled. Just make sure you have a large enough container to store it in.
  • Is this seasoning gluten-free? Yes, as long as you use gluten-free spices.

Serving Suggestions

Now that you’ve made your amazing homemade fajita seasoning, it’s time to put it to good use! Here are a few serving suggestions:

  • Classic Chicken Fajitas: Marinate chicken in the fajita seasoning, then grill or pan-fry it until cooked through. Serve with sautéed bell peppers and onions, warm tortillas, and your favorite toppings.
  • Beef Fajitas: Use the fajita seasoning to season steak, then grill or pan-fry it to your desired level of doneness. Serve with the same accompaniments as chicken fajitas.
  • Vegetarian Fajitas: Toss sliced bell peppers, onions, zucchini, and mushrooms with the fajita seasoning, then roast or grill them until tender. Serve in tortillas with your favorite vegetarian toppings.
  • Fajita Bowls: Create a deconstructed fajita bowl with rice, black beans, your choice of protein or vegetables, and all your favorite toppings.

And there you have it – my go-to recipe for the best homemade fajita seasoning! I hope you love this recipe as much as I do. If you give it a try, be sure to let me know in the comments below. I’m always happy to hear you’re enjoying my recipes. Happy cooking! I’m so glad you enjoyed this easy to make recipe! Thanks for stopping by my kitchen!

Homemade Fajita Seasoning Recipe

Prep Time 5 minutes
Total Time 5 minutes
Servings 20 servings
Calories 15
Create your own flavorful fajita seasoning at home! This blend is perfect for adding a zesty kick to your favorite dishes.

Ingredients

Spices

  • 2 tablespoons chili powder
  • 1 tablespoon cumin
  • 1 tablespoon paprika
  • 1 tablespoon garlic powder
  • 1 tablespoon onion powder
  • 1 teaspoon dried oregano
  • 1 teaspoon salt
  • 0.5 teaspoon black pepper
  • 0.25 teaspoon cayenne pepper (optional, for heat)

Instructions 

  • Combine all ingredients in a small bowl.
  • Whisk together until well blended.
  • Store in an airtight container in a cool, dry place.
  • Use 2-3 tablespoons per pound of meat or vegetables.

Notes

Adjust the amount of cayenne pepper to your preferred level of spiciness.
Calories: 15kcal
Cost: $3
Course: Spice Blend
Cuisine: Mexican
Keyword: fajita
pin

Hey there, friend! Ava here, welcoming you into my little corner of the internet where we whip up magic in the kitchen. Today, we’re ditching the stovetop and embracing the glorious world of air frying to create something truly spectacular: Air Fryer Steak Fajitas! If you’re anything like me, you crave those sizzling, flavorful fajitas but don’t always have the time (or energy) for the traditional method. Well, get ready to have your weeknight dinner game completely revolutionized. This recipe is quick, easy, and delivers restaurant-quality fajitas right to your table. So, grab your apron, and let’s get cooking!

Why You’ll Love This Air Fryer Steak Fajitas Recipe

Seriously, where do I even begin? This recipe is a game-changer. I used to make steak fajitas the traditional way, but once I discovered the air fryer method, I never looked back. Here’s why you’ll be obsessed:

  • Speed Demon: Forget slaving over a hot stove for ages. These fajitas are ready in under 30 minutes, from prep to plate. Perfect for those busy weeknights when you need a delicious meal, fast.
  • Flavor Explosion: The air fryer works its magic by circulating hot air around the ingredients, resulting in perfectly seared steak and tender-crisp veggies. The flavor is intense and oh-so-satisfying.
  • Easy Cleanup: One basket to clean? Yes, please! Say goodbye to multiple pans and hello to a stress-free post-dinner cleanup.
  • Customizable: Don’t like bell peppers? Swap them for zucchini or mushrooms! Want extra heat? Add a pinch of cayenne pepper to the fajita seasoning. This recipe is your blank canvas.
  • Healthier Option: Using an air fryer means less oil is needed compared to pan-frying, making this a slightly healthier option without sacrificing any of the flavor.

I promise, you’re going to love how simple and delicious these air fryer steak fajitas are. It’s one of my favorite recipes to make for a quick and satisfying meal. It’s also a great way to use flank steak.

Air Fryer Steak Fajitas Ingredients

Here’s everything you’ll need to whip up these incredible fajitas. Don’t worry, the list is short and sweet:

  • 1 pound skirt or flank steak, sliced against the grain into ¼-inch strips
  • 3 tablespoons fajita seasoning, divided
  • 2 tablespoons extra virgin olive oil, divided
  • 1 tablespoon lime juice, plus more for garnish
  • 1 red bell pepper, seeded, halved, thinly sliced
  • 1 green bell pepper, seeded, halved, thinly sliced
  • 1 yellow onion, halved, thinly sliced into half-moons
  • Gluten Free Corn Tortillas or Flour Tortillas
Recipe Image

How to Make Air Fryer Steak Fajitas: Step-by-Step Instructions

Alright, let’s get down to business. Here’s how to make these mouthwatering air fryer steak fajitas:

  1. Marinate the Steak: In a large bowl, combine the steak strips, 2 tablespoons fajita seasoning, 1 tablespoon olive oil, and lime juice. Stir to combine, cover, and refrigerate for 1 hour. This is where the magic happens, infusing the steak with all that delicious flavor.
  2. Prep the Veggies: In a medium bowl, combine the peppers, onions, remaining fajita seasoning, and remaining oil. Toss to evenly coat.
  3. Air Fry the Veggies: Preheat the air fryer to 390°F. Add the veggie mixture to the air fryer basket and cook for 7 minutes. Shake the basket to turn the veggies.
  4. Add the Steak: Add the marinated steak on top of the veggies in the air fryer. Cook for an additional 7-8 minutes, or until the steak is cooked to your liking. I like my steak medium-rare, but you do you!
  5. Serve and Enjoy: Serve on tortillas with your favorite toppings like pico de gallo, cheese, sour cream, or a squeeze of lime.

See? It’s that easy! I promise, these air fryer steak fajitas will become a regular in your dinner rotation. It’s quick, easy, and packed with flavor. I like to use our air fryer for this recipe because it’s so convenient.

Pro Tips for the Best Air Fryer Steak Fajitas

Want to take your fajitas to the next level? Here are a few of my tried-and-true tips:

  • Don’t Overcrowd the Basket: Work in batches if necessary to ensure even cooking. Overcrowding can lead to steaming instead of searing.
  • Use High-Quality Steak: The better the steak, the better the fajitas. Skirt or flank steak are my go-to choices, but feel free to experiment.
  • Marinate, Marinate, Marinate: Don’t skimp on the marinating time. It makes a world of difference in the flavor and tenderness of the steak.
  • Preheat Your Air Fryer: This ensures that the steak and veggies start cooking immediately, resulting in a beautiful sear.
  • Adjust Cooking Time to Your Liking: Every air fryer is different, so adjust the cooking time as needed to achieve your desired level of doneness.

These tips will help you achieve restaurant-quality fajitas right in your own kitchen. Remember, cooking is all about experimenting and finding what works best for you. It’s all about the flavor and the experience!

Common Mistakes to Avoid When Making Air Fryer Steak Fajitas

We all make mistakes in the kitchen (remember my triple-layer cake disaster?), but here are a few common pitfalls to avoid when making air fryer steak fajitas:

  • Not Slicing the Steak Against the Grain: This is crucial for tender steak. Slicing against the grain shortens the muscle fibers, making the steak easier to chew.
  • Overcooking the Steak: Air fryers can cook quickly, so keep a close eye on the steak to avoid overcooking it. Use a meat thermometer to ensure it reaches your desired level of doneness.
  • Using Too Much Oil: Air fryers don’t need a lot of oil. Too much oil can make the fajitas greasy.
  • Forgetting to Shake the Basket: Shaking the basket halfway through cooking ensures that the veggies cook evenly.
  • Not Allowing the Steak to Rest: Let the steak rest for a few minutes after cooking to allow the juices to redistribute, resulting in a more tender and flavorful steak.

These mistakes are easily avoidable with a little attention to detail. Remember, practice makes perfect! You’re going to become a fajita master in no time.

Air Fryer Steak Fajitas Variations

Want to mix things up? Here are a few fun variations to try:

  • Spicy Fajitas: Add a pinch of cayenne pepper or a diced jalapeño to the fajita seasoning for an extra kick.
  • Mushroom Fajitas: Add sliced mushrooms to the veggie mixture for a heartier fajita.
  • Shrimp Fajitas: Replace the steak with shrimp for a lighter option. Adjust the cooking time accordingly.
  • Vegetarian Fajitas: Skip the steak altogether and load up on extra veggies like zucchini, squash, and corn.
  • Pineapple Fajitas: Add chunks of pineapple to the veggie mixture for a sweet and tangy twist.

The possibilities are endless! Feel free to experiment with different ingredients and flavors to create your own signature fajitas. You can add to the meat while it’s in the air fryer to get the flavors to meld together.

How to Store and Reheat Air Fryer Steak Fajitas

Got leftovers? No problem! Here’s how to store and reheat your air fryer steak fajitas:

  • Storage: Store the steak and veggies separately in airtight containers in the refrigerator for up to 3 days.
  • Reheating: Reheat the steak and veggies in the air fryer at 350°F for a few minutes, or until heated through. You can also reheat them in a skillet over medium heat.

Leftovers are great for lunch the next day or for a quick and easy dinner. The steak is still good, even after being reheated.

Air Fryer Steak Fajitas: Frequently Asked Questions

Got questions? I’ve got answers! Here are a few frequently asked questions about air fryer steak fajitas:

  • Can I use frozen steak? Yes, but thaw it completely before marinating.
  • Can I use different types of steak? Absolutely! Skirt steak, flank steak, and sirloin steak all work well.
  • Can I make these ahead of time? Yes, you can marinate the steak and prep the veggies ahead of time. Store them separately in the refrigerator until you’re ready to cook.
  • Do I need to use fajita seasoning? You can use any seasoning blend you like, but fajita seasoning is my go-to for that classic fajita flavor.
  • What kind of tortillas should I use? Corn or flour tortillas both work well. Choose your favorite!

I hope these FAQs help! If you have any other questions, feel free to leave a comment below.

Serving Suggestions for Air Fryer Steak Fajitas

Now that you’ve made these amazing fajitas, it’s time to serve them up! Here are a few of my favorite serving suggestions:

  • Toppings: Load up on your favorite toppings like pico de gallo, guacamole, sour cream, cheese, and salsa.
  • Sides: Serve with a side of rice and beans for a complete meal.
  • Drinks: Pair with a refreshing margarita or a cold beer.
  • Presentation: Arrange the fajitas on a platter with all the toppings for a beautiful and inviting presentation.

And there you have it! Air Fryer Steak Fajitas that are quick, easy, and absolutely delicious. I hope you enjoy this recipe as much as I do. Happy cooking!

I like to add some extra lime juice to the steak once it’s ready. It really brightens up the flavor. You’re going to love these fajitas!

Air Fryer Steak Fajitas

Prep Time 15 minutes
Cook Time 15 minutes
Total Time 30 minutes
Servings 4 people
Calories 350
Enjoy delicious and easy steak fajitas made in your air fryer! This recipe delivers tender steak and perfectly cooked veggies in under 30 minutes.

Ingredients

Ingredients

  • 1 pound skirt or flank steak (sliced against the grain into ¼-inch strips)
  • 3 tablespoons fajita seasoning (divided)
  • 2 tablespoons extra virgin olive oil (divided)
  • 1 tablespoon lime juice (plus more for garnish)
  • 1 red bell pepper (seeded, halved, thinly sliced)
  • 1 green bell pepper (seeded, halved, thinly sliced)
  • 1 yellow onion (halved, thinly sliced into half-moons)
  • Gluten Free Corn Tortillas or Flour Tortillas

Instructions 

  • Combine steak, 2 tablespoons fajita seasoning, 1 tablespoon olive oil, and lime juice. Refrigerate for 1 hour.
  • Combine peppers, onions, remaining fajita seasoning, and remaining oil. Toss to coat.
  • Preheat air fryer to 390°F. Cook veggies for 7 minutes, shaking halfway.
  • Add steak on top of veggies. Cook for 7-8 minutes, or until steak is cooked to your liking.
  • Serve on tortillas with your favorite toppings.

Notes

For best results, marinate the steak for at least 30 minutes to enhance flavor and tenderness.
Calories: 350kcal
Cost: $20
Course: dinner
Cuisine: Mexican
Keyword: Steak
pin

Hey there, fellow food lovers! Ava here, back with a recipe that’s going to revolutionize your weeknight dinners. If you’re anything like me, you’re always on the lookout for meals that are quick, easy, and bursting with flavor. And let me tell you, these Air Fryer Steak Fajitas check all the boxes. Forget slaving over a hot stove – we’re talking tender, juicy steak and perfectly charred veggies, all cooked in your air fryer in minutes. It’s Tex-Mex magic, simplified!

Growing up, fajitas were a staple in our house. My mom had this incredible way of making even the simplest meals feel special. But let’s be honest, sometimes life gets in the way, and we need shortcuts without sacrificing taste. That’s where the air fryer comes in. It’s like having a personal chef who can whip up restaurant-quality fajitas in a fraction of the time. So, grab your apron, and let’s get cooking!

Why You’ll Love This Air Fryer Steak Fajitas Recipe

Seriously, where do I even begin? This recipe is a game-changer. Here’s why you’ll be making these Air Fryer Steak Fajitas on repeat:

  • Speedy Gonzales: From prep to plate, you’re looking at about 30 minutes, tops. Perfect for those hectic weeknights when you barely have time to breathe.
  • Minimal Mess: One of the best things about using the air fryer is the easy cleanup. No more scrubbing greasy pans!
  • Incredible Flavor: The air fryer gives the steak and veggies a beautiful char, enhancing their natural flavors and creating a slightly smoky taste that’s simply irresistible.
  • Customizable: Whether you’re a spice fanatic or prefer milder flavors, this recipe is easy to adapt to your liking. Swap out the veggies, adjust the seasoning, and make it your own!
  • Healthy-ish: Okay, maybe not health food, but compared to traditional pan-fried fajitas, using the air fryer requires less oil, making this a slightly lighter option.

This recipe is one of my absolute favorites, and I know it will quickly become one of yours too. It’s so easy, you’ll feel like you’re cheating!

Ingredients for the Best Air Fryer Steak Fajitas

Here’s what you’ll need to create these flavor-packed fajitas:

  • 1 lb steak (flank steak or skirt steak, thinly sliced)
  • 2 bell peppers (any color, sliced)
  • 1 medium onion (red or yellow, thinly sliced)
  • 2 tbsp olive oil
  • Juice of 1 lime
  • 2 tsp chili powder
  • 1 tsp paprika
  • 1 tsp garlic powder
  • 1 tsp cumin
  • ½ tsp salt
  • ½ tsp black pepper
  • Tortillas (flour or corn, warmed for serving)
  • Optional toppings: sour cream, guacamole, shredded cheese, fresh cilantro, salsa
Recipe Image

Step-by-Step: Making Air Fryer Steak Fajitas

Ready to get cooking? Here’s how to make these delicious Air Fryer Steak Fajitas:

  1. Slice the steak into thin strips. Wash and slice the bell peppers into strips and thinly slice the onion.
  2. In a small bowl, combine chili powder, paprika, garlic powder, cumin, salt, and pepper to make the seasoning mix.
  3. Place steak strips in a mixing bowl, drizzle with 1 tbsp olive oil and half the lime juice, and sprinkle with half the seasoning mix. Toss to coat and marinate for 10-15 minutes.
  4. In another mixing bowl, add sliced bell peppers and onions. Drizzle with remaining olive oil and lime juice, and sprinkle with remaining seasoning mix. Toss until evenly coated.
  5. Preheat your air fryer to 400°F (200°C) for 2-3 minutes.
  6. Place marinated steak strips in a single layer in the air fryer basket. Cook for 7-8 minutes, flipping halfway through.
  7. Transfer cooked steak to a plate and cover with foil to keep warm. Add seasoned veggies to the air fryer basket and cook for 10 minutes, shaking the basket halfway through.
  8. Warm tortillas and assemble fajitas with steak, veggies, and desired toppings. Serve immediately.

Pro Tips for Perfect Air Fryer Steak Fajitas

Want to take your fajitas to the next level? Here are a few of my secret weapons:

  • Don’t Overcrowd the Basket: This is crucial for even cooking. Work in batches if necessary to ensure the steak and veggies get that beautiful char.
  • Marinate, Marinate, Marinate: The longer you marinate the steak, the more flavorful and tender it will be. Even 30 minutes can make a big difference.
  • Preheat is Key: Always preheat your air fryer for the best results. This helps ensure the steak and veggies cook evenly and get that perfect sear.
  • Shake It Up: When cooking the veggies, shake the air fryer basket halfway through to ensure they cook evenly.
  • Use a Meat Thermometer: For perfectly cooked steak, use a meat thermometer to check the internal temperature. Medium-rare is around 130-135°F.

Common Mistakes to Avoid When Making Air Fryer Steak Fajitas

We all make mistakes in the kitchen, but here are a few common pitfalls to avoid when making these fajitas:

  • Overcooking the Steak: Air fryers can cook quickly, so keep a close eye on the steak to prevent it from becoming tough and dry.
  • Skipping the Marinade: The marinade is essential for adding flavor and tenderizing the steak. Don’t skip this step!
  • Using Too Much Oil: A little oil is necessary to help the steak and veggies crisp up, but too much can make them greasy. Stick to the recommended amount.
  • Forgetting to Preheat: Preheating the air fryer is crucial for even cooking and preventing the steak and veggies from steaming instead of searing.
  • Not Seasoning Properly: Don’t be afraid to season generously! The spice mix is what gives these fajitas their signature flavor.

Air Fryer Steak Fajitas: Fun Variations to Try

Want to mix things up a bit? Here are a few fun variations to try:

  • Spicy Fajitas: Add a pinch of cayenne pepper to the seasoning mix for an extra kick.
  • Chicken Fajitas: Substitute the steak with chicken breast or thighs for a lighter option. Adjust cooking times accordingly.
  • Shrimp Fajitas: Use shrimp instead of steak for a seafood twist. Shrimp cooks very quickly in the air fryer, so keep a close eye on it.
  • Veggie-Packed Fajitas: Add other veggies like zucchini, mushrooms, or corn to the mix for a heartier meal.
  • Pineapple Fajitas: Add chunks of pineapple to the veggies for a sweet and savory flavor combination.

How to Store and Reheat Leftover Air Fryer Steak Fajitas

Got leftovers? Here’s how to store and reheat them:

  • Storage: Store leftover steak and veggies in an airtight container in the refrigerator for up to 3 days.
  • Reheating: Reheat the steak and veggies in the air fryer at 350°F (175°C) for 3-5 minutes, or until heated through. You can also reheat them in a skillet over medium heat.
  • Pro Tip: To prevent the steak from drying out, add a splash of water or broth to the skillet while reheating.

Air Fryer Steak Fajitas: Frequently Asked Questions

Here are some common questions about making Air Fryer Steak Fajitas:

  • What kind of steak is best for fajitas? Flank steak and skirt steak are the most popular choices, as they are flavorful and tender when cooked properly.
  • Can I use frozen veggies? Yes, you can use frozen veggies, but they may release more moisture during cooking. Be sure to pat them dry before adding them to the air fryer.
  • How do I prevent the steak from drying out? Marinating the steak and not overcooking it are the best ways to prevent it from drying out.
  • Can I make these fajitas ahead of time? Yes, you can marinate the steak and chop the veggies ahead of time. Store them separately in the refrigerator until ready to cook.
  • What if I don’t have an air fryer? You can also cook these fajitas in a skillet over medium-high heat.

Serving Suggestions for Air Fryer Steak Fajitas

These fajitas are delicious on their own, but here are a few serving suggestions to complete the meal:

  • Classic Fajitas: Serve the steak and veggies in warm tortillas with your favorite toppings like sour cream, guacamole, shredded cheese, fresh cilantro, and salsa.
  • Fajita Bowls: Create a fajita bowl by serving the steak and veggies over rice or quinoa with black beans, corn, and your choice of toppings.
  • Fajita Salad: Toss the steak and veggies with mixed greens, avocado, and a lime vinaigrette for a light and refreshing salad.
  • Fajita Nachos: Load tortilla chips with the steak and veggies, then top with cheese, sour cream, and guacamole for a crowd-pleasing appetizer.

And there you have it – the easiest, most delicious Air Fryer Steak Fajitas you’ll ever make! I hope you love this recipe as much as I do. Happy cooking!

Easy Air Fryer Steak Fajitas Recipe for Busy Weeknights

Prep Time 15 minutes
Cook Time 18 minutes
Total Time 33 minutes
Servings 4 servings
Calories 450
Enjoy delicious and quick steak fajitas made easily in your air fryer. Perfect for a flavorful weeknight meal with minimal cleanup!

Ingredients

Fajita Ingredients

  • 1 lb steak (flank steak or skirt steak, thinly sliced) (thinly sliced)
  • 2 bell peppers (any color, sliced) (sliced)
  • 1 medium onion (red or yellow, thinly sliced) (thinly sliced)
  • 2 tbsp olive oil
  • 1 Juice of 1 lime
  • 2 tsp chili powder
  • 1 tsp paprika
  • 1 tsp garlic powder
  • 1 tsp cumin
  • 0.5 tsp salt
  • 0.5 tsp black pepper
  • Tortillas (flour or corn, warmed for serving) (warmed for serving)
  • Optional toppings: sour cream, guacamole, shredded cheese, fresh cilantro, salsa

Instructions 

  • Slice steak, bell peppers, and onion into thin strips.
  • Combine chili powder, paprika, garlic powder, cumin, salt, and pepper.
  • Marinate steak with olive oil, lime juice, and seasoning mix for 10-15 minutes.
  • Toss bell peppers and onions with olive oil, lime juice, and seasoning mix.
  • Preheat air fryer to 400°F (200°C) for 2-3 minutes.
  • Cook steak in air fryer for 7-8 minutes, flipping halfway.
  • Keep steak warm. Cook veggies in air fryer for 10 minutes, shaking halfway.
  • Warm tortillas and assemble fajitas with steak, veggies, and toppings. Serve.

Notes

For extra flavor, marinate the steak for a longer period, up to 2 hours.
Calories: 450kcal
Cost: $20
Course: dinner
Cuisine: Mexican
Keyword: Steak
pin

Hey there, kitchen adventurers! Ava here, ready to whisk you away on a flavor-packed journey that’s as simple as it is scrumptious. If you’re anything like me, you’re always on the lookout for meals that deliver big on taste without demanding hours in the kitchen. And let me tell you, this Queso Steak Fajita Skillet is about to become your new weeknight hero. Picture this: tender, juicy steak, vibrant bell peppers, and onions, all mingling in a creamy, dreamy queso sauce, served over fluffy rice. Sound good? Trust me, it’s even better than it sounds.

Growing up, fajitas were a staple in our household. My mom had this knack for making them feel special, even though they were incredibly easy to throw together. This recipe is my ode to her, with a twist that adds a little extra indulgence – queso! Because, let’s be honest, who doesn’t love a good cheese dip?

Why You’ll Love This Queso Steak Fajita Skillet

Okay, let’s get down to brass tacks. Why should you clear your schedule (well, maybe just 30 minutes) to make this dish? Here’s the lowdown:

  • One-Pan Wonder: Fewer dishes mean more time for Netflix (or, you know, spending time with your family). This entire meal comes together in a single skillet.
  • Quick and Easy: From prep to plate, you’re looking at about 30 minutes. Perfect for those hectic weeknights when you’re short on time but still craving something delicious.
  • Customizable: Don’t have steak? Use chicken! Not a fan of bell peppers? Swap them for zucchini! This recipe is incredibly versatile.
  • Crowd-Pleaser: Whether you’re feeding a family of four or hosting a casual get-together, this skillet is guaranteed to be a hit.
  • That Queso Though: Need I say more? The creamy, cheesy goodness takes this fajita skillet to a whole new level.

This Queso Steak Fajita Skillet is a delightful combination of Tex-Mex flavors, perfect for busy weeknights or casual gatherings. It’s a dish that combines tender steak, vibrant vegetables, and creamy cheese into one unforgettable meal. So, if you’re looking for a quick, easy, and incredibly satisfying dinner, look no further. This is it.

Ingredients You’ll Need

Alright, let’s gather our ingredients. Here’s what you’ll need to whip up this masterpiece:

  • ‘2 cups Minute Rice’
  • ‘2 cups Chicken Broth’
  • ‘1 package Fajita Seasoning’
  • ‘8 ounces Tomato Sauce’
  • ‘3 Bell Peppers (sliced)’
  • ‘½ Yellow Onion (diced)’
  • ‘1 pound Chicken Breast (cut into strips)’
  • ‘2 tablespoons Olive Oil’
  • ‘Gordo’s Cheese Dip’
Recipe Image

How to Make Queso Steak Fajita Skillet: Step-by-Step

Ready to get cooking? Here’s the breakdown:

  1. Sauté the Veggies: Heat olive oil in a skillet over medium-high heat. Sauté onions and bell peppers for 2–3 minutes until softened. The skillet is your canvas, and these veggies are your vibrant starting colors.
  2. Cook the Steak: Add chicken strips to the skillet; cook until done, seasoning with fajita seasoning. Make sure the steak is cooked through but still tender. Fajita seasoning is the key to that authentic Tex-Mex flavor.
  3. Rice Time: Stir in Minute Rice and chicken broth; mix in tomato sauce. This creates the base for our delicious, flavorful rice.
  4. Simmer to Perfection: Bring to a simmer and cook according to rice package instructions until tender. The rice should absorb all the liquid and become fluffy and delicious.
  5. Queso Magic: Drizzle Gordo’s Cheese Dip on top before serving hot. This is where the magic happens! The queso melts into the mixture, creating a creamy, cheesy delight.

Pro Tips for the Perfect Fajita Skillet

Want to take your Queso Steak Fajita Skillet to the next level? Here are a few of my tried-and-true tips:

  • Preheat Your Skillet: Make sure your skillet is nice and hot before adding the olive oil and veggies. This will help them caramelize and develop a deeper flavor.
  • Don’t Overcrowd the Pan: Cook the steak in batches if necessary. Overcrowding the pan will lower the temperature and cause the steak to steam instead of sear.
  • Taste as You Go: Seasoning is key! Taste the mixture as it cooks and adjust the seasoning as needed. A little extra fajita seasoning or a pinch of salt can make all the difference.
  • Use High-Quality Queso: The queso is the star of the show, so don’t skimp on quality! Choose a cheese dip that you love and that melts well.
  • Garnish with Goodies: Fresh cilantro, a dollop of sour cream, or a squeeze of lime juice can add a burst of freshness and flavor to your finished skillet.

Common Mistakes to Avoid

We all make mistakes in the kitchen, but here are a few to watch out for when making this recipe:

  • Overcooking the Steak: Nobody likes tough, chewy steak. Be sure to cook the steak just until it’s done, and don’t overcook it.
  • Using Too Much Liquid: Adding too much chicken broth can result in soggy rice. Follow the package instructions for the rice and adjust the liquid accordingly.
  • Burning the Queso: The queso should be melted and creamy, not burnt and crusty. Keep a close eye on it and stir it frequently to prevent it from sticking to the pan.
  • Forgetting to Season: Seasoning is crucial for flavor! Don’t forget to season the veggies, steak, and rice mixture.
  • Rushing the Process: Good food takes time. Don’t rush the cooking process. Allow the flavors to meld together and the rice to cook properly.

Variations to Try

Want to mix things up? Here are a few variations to try:

  • Chicken Fajita Skillet: Substitute chicken for steak. Chicken works just as well and is a great option if you’re looking for a lighter meal.
  • Vegetarian Fajita Skillet: Omit the steak and add more veggies, such as zucchini, mushrooms, or corn. You can even add black beans for extra protein.
  • Spicy Fajita Skillet: Add a pinch of cayenne pepper or a diced jalapeño to the skillet for a little extra heat.
  • Creamy Fajita Skillet: Stir in a dollop of sour cream or cream cheese for an even creamier texture.
  • Loaded Fajita Skillet: Top your skillet with all your favorite toppings, such as guacamole, salsa, and shredded cheese.

How to Store and Reheat Leftovers

Got leftovers? Lucky you! Here’s how to store and reheat them:

  • Storage: Store the leftovers in an airtight container in the refrigerator for up to 3 days.
  • Reheating: Reheat the leftovers in a skillet over medium heat or in the microwave until heated through. Add a splash of chicken broth if the rice seems dry.

Frequently Asked Questions

Got questions? I’ve got answers!

  • Can I use brown rice instead of white rice?: Yes, you can use brown rice, but keep in mind that it will take longer to cook. Adjust the cooking time and liquid accordingly.
  • Can I make this recipe ahead of time?: You can prep the veggies and steak ahead of time, but I recommend cooking the rice and adding the queso just before serving.
  • Can I freeze this recipe?: I don’t recommend freezing this recipe, as the rice and queso may not thaw well.
  • Can I use a different type of cheese dip?: Absolutely! Feel free to use your favorite type of cheese dip.
  • Is this recipe gluten-free?: Yes, this recipe is naturally gluten-free. Just be sure to use a gluten-free fajita seasoning.

Serving Suggestions

Want to make this meal even more special? Here are a few serving suggestions:

  • Serve with Tortillas: Warm tortillas make a great addition to this meal. Fill them with the fajita mixture and top with your favorite toppings.
  • Add a Side Salad: A simple side salad with a light vinaigrette is a great way to balance out the richness of the skillet.
  • Serve with Guacamole and Salsa: Guacamole and salsa are classic Tex-Mex accompaniments that pair perfectly with this dish.
  • Make it a Fiesta: Add some festive decorations, play some music, and invite your friends over for a fajita fiesta!

So there you have it, my friends! A Queso Steak Fajita Skillet that’s guaranteed to become a staple in your kitchen. Give it a try, and let me know what you think. And remember, cooking is all about having fun and experimenting, so don’t be afraid to put your own spin on this recipe. Happy cooking!

Queso Steak Fajita Skillet

Prep Time 10 minutes
Cook Time 20 minutes
Total Time 30 minutes
Servings 4 people
Calories 450
A delicious and easy skillet recipe combining steak fajitas with cheesy goodness. Perfect for a quick weeknight meal!

Ingredients

Ingredients

  • 2 cups Minute Rice
  • 2 cups Chicken Broth
  • 1 package Fajita Seasoning
  • 8 ounces Tomato Sauce
  • 3 Bell Peppers (sliced) (sliced)
  • 0.5 Yellow Onion (diced) (diced)
  • 1 pound Chicken Breast (cut into strips) (cut into strips)
  • 2 tablespoons Olive Oil
  • 1 Gordo’s Cheese Dip

Instructions 

  • Heat olive oil in a skillet over medium-high heat. Sauté onions and bell peppers for 2–3 minutes until softened.
  • Add chicken strips to the skillet; cook until done, seasoning with fajita seasoning.
  • Stir in Minute Rice and chicken broth; mix in tomato sauce.
  • Bring to a simmer and cook according to rice package instructions until tender.
  • Drizzle Gordo’s Cheese Dip on top before serving hot.

Notes

Adjust fajita seasoning to taste. Serve with your favorite toppings like sour cream or salsa.
Calories: 450kcal
Cost: $20
Course: Main Course
Cuisine: Mexican
Keyword: Chicken
pin

Hey there, friend! Ava here, ready to share a recipe that’s become a staple in my Seattle kitchen: Slow-Cooked Thai Peanut Chicken. If you’re craving a dish that’s both incredibly flavorful and ridiculously easy to make, you’ve come to the right place. This isn’t just a meal; it’s a warm hug in a bowl, perfect for those busy weeknights or lazy weekends when you want something comforting without spending hours in the kitchen. My family absolutely loves this dish, and I know yours will too!

Growing up, my mom had a knack for turning simple ingredients into extraordinary meals. This recipe reminds me of those cozy evenings, but with a fun, Thai-inspired twist. The magic happens in the slow cooker, transforming ordinary chicken into tender, flavorful perfection. So, let’s dive in and create some kitchen magic together!

Why You’ll Love This Crockpot Thai Peanut Chicken

Trust me, once you try this recipe, it’ll become a regular in your rotation. Here’s why:

  • Effortless Cooking: The slow cooker does all the work! Just dump, set, and forget.
  • Incredible Flavor: The combination of peanut butter, coconut milk, and spices creates a rich, savory sauce that’s simply irresistible.
  • Tender Chicken: Slow cooking ensures the chicken is perfectly moist and tender, practically falling apart.
  • Versatile: Serve it over rice, noodles, or even in lettuce wraps for a lighter option.
  • Customizable: Adjust the spice level to your liking, add veggies, or swap out ingredients to suit your preferences.
  • Perfect for Meal Prep: Make a big batch on Sunday and enjoy it throughout the week.
  • Aromatic Heaven: The aroma that fills your home while this is cooking is simply divine.

This Thai peanut chicken is truly a game-changer. The peanut sauce is what makes this dish exceptional. It’s also gluten free, which is great for those with dietary restrictions. I’m always looking for ways to make dinner time easier and more enjoyable, and this recipe ticks all the boxes.

Ingredients You’ll Need

Here’s everything you’ll need to create this masterpiece. Don’t worry, most of these are pantry staples!

  • 1 ½ pounds boneless, skinless chicken breasts or thighs
  • 1 cup canned coconut milk
  • ¾ cup natural peanut butter (creamy or crunchy)
  • 3 tablespoons low-sodium soy sauce
  • 2 tablespoons honey
  • 2 tablespoons rice grape juice vinegar
  • 1 tablespoon freshly grated ginger
  • 3 cloves garlic, minced
  • ½ teaspoon crushed red pepper flakes (adjust to taste)
  • 1 tablespoon lime juice
  • 2 tablespoons cornstarch mixed with 2 tablespoons water (optional, for thickening)
  • Chopped fresh cilantro, for garnish
  • Chopped peanuts, for garnish
  • Cooked rice or rice noodles, for serving

How to Make Slow-Cooked Thai Peanut Chicken: Step-by-Step

Ready to get cooking? Here’s the simple process:

  1. Prepare the Sauce: In a medium bowl, whisk together the coconut milk, peanut butter, soy sauce, honey, rice grape juice vinegar, grated ginger, minced garlic, and crushed red pepper flakes until smooth. This ensures all the flavors meld together beautifully.
  2. Combine Ingredients: Place the chicken breasts or thighs in the bottom of a 6-quart slow cooker. Pour the prepared peanut sauce over the chicken, ensuring each piece is well-coated. The chicken should be fully submerged in the sauce for maximum flavor.
  3. Slow Cook: Cover the slow cooker and cook on low for 4 to 5 hours, or until the chicken is tender and fully cooked. The exact cooking time may vary depending on your slow cooker, so keep an eye on it.
  4. Shred the Chicken: Once cooked, remove the chicken from the slow cooker and shred it using two forks. Return the shredded chicken to the slow cooker, stirring it into the sauce. Shredding the chicken allows it to absorb even more of the delicious sauce.
  5. Thicken the Sauce (Optional): If a thicker sauce is desired, stir in the cornstarch slurry (2 tablespoons cornstarch mixed with 2 tablespoons water) and the lime juice. Cover and cook on high for an additional 20 to 30 minutes, or until the sauce has thickened to your liking. This step is optional but highly recommended for a richer, more decadent sauce.
  6. Serve and Garnish: Serve the Thai peanut chicken over cooked rice or rice noodles. Garnish with chopped fresh cilantro and chopped peanuts. This adds a pop of freshness and crunch that complements the savory flavors perfectly.

And that’s it! You’ve just created a restaurant-quality meal with minimal effort. I promise, the aroma alone will have your family lining up for seconds.

Pro Tips for Perfect Peanut Chicken Every Time

Here are a few tricks I’ve learned over the years to ensure your Thai peanut chicken is always a hit:

  • Use High-Quality Peanut Butter: Opt for natural peanut butter with no added sugar or oils. It’ll give you the best flavor and texture.
  • Don’t Overcook: Overcooked chicken can become dry and tough. Keep an eye on it and shred it as soon as it’s cooked through.
  • Adjust the Spice Level: If you’re sensitive to spice, start with a smaller amount of crushed red pepper flakes and add more to taste. You can also add a pinch of cayenne pepper for extra heat.
  • Toast the Peanuts: Toasting the peanuts before garnishing adds a deeper, nuttier flavor.
  • Add Veggies: Feel free to add your favorite veggies to the slow cooker, such as bell peppers, broccoli, or carrots. They’ll soak up the delicious sauce and add extra nutrients.
  • Lime Juice is Key: Don’t skip the lime juice! It brightens up the flavors and adds a zesty kick.

These tips are simple but make a world of difference. Trust me, a little extra effort goes a long way in the kitchen.

Common Mistakes to Avoid

We all make mistakes, but here are a few common ones to watch out for:

  • Using Processed Peanut Butter: As mentioned, natural peanut butter is the way to go. Avoid brands with added sugar and oils.
  • Skipping the Ginger and Garlic: These ingredients add essential flavor and depth to the sauce. Don’t skimp on them!
  • Not Adjusting the Spice: Everyone has different spice preferences, so adjust the crushed red pepper flakes to your liking.
  • Adding Too Much Liquid: The chicken will release moisture as it cooks, so you don’t need to add extra liquid.
  • Forgetting to Thicken the Sauce: If you prefer a thicker sauce, don’t forget to add the cornstarch slurry.

Learning from mistakes is part of the fun! Don’t be afraid to experiment and find what works best for you.

Delicious Variations to Try

Want to mix things up? Here are a few variations to try:

  • Spicy Peanut Chicken: Add more crushed red pepper flakes or a dash of cayenne pepper for extra heat.
  • Coconut Curry Chicken: Add a tablespoon of curry powder to the sauce for a fragrant, flavorful twist.
  • Peanut Chicken Stir-Fry: Cook the chicken in a skillet with your favorite veggies and toss with the peanut sauce.
  • Peanut Chicken Lettuce Wraps: Serve the chicken in lettuce cups with shredded carrots, cucumbers, and chopped peanuts for a light and refreshing meal.
  • Honey Garlic Peanut Chicken: Increase the honey to 4 tablespoons and add an extra clove of minced garlic for a sweeter, more garlicky flavor.

These variations are just a starting point. Feel free to get creative and come up with your own unique twists!

How to Store and Reheat Leftovers

If you’re lucky enough to have leftovers, here’s how to store and reheat them:

  • Storage: Store the chicken in an airtight container in the refrigerator for up to 3-4 days.
  • Reheating: Reheat the chicken in the microwave or on the stovetop until heated through. Add a splash of water or coconut milk to prevent it from drying out.
  • Freezing: For longer storage, freeze the chicken in an airtight container for up to 2-3 months. Thaw it overnight in the refrigerator before reheating.

Leftovers are perfect for meal prepping or enjoying a quick and easy lunch.

Frequently Asked Questions (FAQ)

Here are some common questions I get about this recipe:

  • Can I use chicken thighs instead of breasts? Absolutely! Chicken thighs are a great option and will result in even more tender and flavorful chicken.
  • Can I make this in an Instant Pot? Yes, you can! Cook on high pressure for 10-12 minutes, followed by a natural pressure release.
  • Can I add vegetables to the slow cooker? Of course! Add your favorite veggies, such as bell peppers, broccoli, or carrots, during the last hour of cooking.
  • Is this recipe gluten-free? Yes, as long as you use gluten-free soy sauce.
  • Can I make this ahead of time? Yes, you can prepare the sauce ahead of time and store it in the refrigerator for up to 2 days.
  • Can I use a different type of nut butter? While peanut butter is traditional, you can experiment with almond butter or cashew butter for a different flavor profile.

If you have any other questions, feel free to ask in the comments below!

Serving Suggestions for Your Thai Peanut Chicken

Here are some delicious ways to serve your Slow-Cooked Thai Peanut Chicken:

  • Over Rice: Serve it over a bed of fluffy white rice or brown rice for a classic and satisfying meal.
  • With Noodles: Toss it with rice noodles or egg noodles for a delicious and comforting dish.
  • In Lettuce Wraps: Serve it in lettuce cups with shredded carrots, cucumbers, and chopped peanuts for a light and refreshing meal.
  • As a Salad Topping: Add it to a salad with mixed greens, shredded carrots, and a peanut dressing for a healthy and flavorful lunch.
  • In a Sandwich: Use it as a filling for a sandwich or wrap with shredded lettuce and a drizzle of peanut sauce.

No matter how you choose to serve it, this Thai peanut chicken is sure to be a hit!

So there you have it—my go-to recipe for Slow-Cooked Thai Peanut Chicken. I hope you enjoy it as much as my family does. Happy cooking, and I’ll see you in the kitchen!

Why You’ll Love This Recipe

Are you ready to embark on a culinary journey that will whisk your taste buds away to the vibrant streets of Korea? This Korean-Inspired Grilled Salmon with Sweet and Spicy Glaze is not just a meal; it’s an adventure waiting to happen. Imagine succulent salmon fillets kissed by a fiery yet sweet glaze, sizzling on the grill, filling your kitchen with an irresistible aroma. Whether you’re hosting a summer BBQ, treating your family to a special dinner, or just indulging in a self-care night with delicious food, this recipe is here to elevate your dining experience.

Growing up, I learned that the best meals are the ones that tell a story. This dish does just that. It’s a celebration of flavors, a delightful fusion of sweet, spicy, and umami that dances on your palate and leaves you longing for another bite. Plus, it’s easy to prepare, making it perfect for both novice cooks and seasoned chefs looking for something new. So, grab your apron, and let’s dive into the magic of grilled salmon!

Ingredients You’ll Need

Before we get cooking, let’s gather our ingredients. I promise, the combination of these simple yet bold flavors will make you feel like a culinary wizard in no time. Here’s what you’ll need:

  • 3 tbsp gochujang (Korean chili paste)
  • 2 tbsp honey
  • 1 tbsp soy sauce
  • 1 tbsp rice vinegar
  • 1 tsp sesame oil
  • 4 salmon fillets
  • Salt and pepper to taste
  • Sesame seeds for garnish
  • Chopped green onions for garnish

As you can see, this recipe is all about embracing bold ingredients. Gochujang, with its sweet and spicy profile, is the star of the show, while honey adds a delightful touch of sweetness. The soy sauce and rice vinegar balance the flavors, and a drizzle of sesame oil rounds it all out with a nutty finish.

Let’s Get Grilling!

Eye-level shot of Korean-inspired grilled salmon, showcasing a glossy glaze and warm side lighting with a soft-focus background.

Now that we have our ingredients ready, it’s time to cook! Follow these simple steps to create a dish that will impress even the pickiest eaters.

  1. In a small bowl, whisk together the gochujang, honey, soy sauce, rice vinegar, and sesame oil to create a luscious glaze.
  2. Preheat your grill to medium-high heat, allowing it to reach the perfect temperature for that lovely char.
  3. While the grill is heating up, season the salmon fillets generously with salt and pepper on both sides. This step is crucial for enhancing the natural flavors of the salmon.
  4. Brush the gochujang glaze generously over the salmon fillets, ensuring each fillet is coated with that sweet and spicy goodness.
  5. Place the salmon on the grill and cook for about 4-5 minutes on each side. You’ll know it’s ready when it flakes easily with a fork and has those beautiful grill marks.
  6. During the last minute of grilling, brush on some additional glaze for an extra punch of flavor. Trust me, this is where the magic happens!
  7. Once cooked, remove the salmon from the grill and let it rest for a couple of minutes to allow the juices to redistribute.
  8. Finally, garnish with sesame seeds and chopped green onions before serving. Voilà! Your meal is ready to be devoured!

Tips for Perfect Grilled Salmon

Grilling salmon can be a little tricky, but with these tips, you’ll be a pro in no time:

  • Choose the Right Salmon: Fresh salmon is key to this dish. Look for fillets that are bright in color with no signs of browning.
  • Don’t Overcook: Salmon can go from perfect to dry in a matter of minutes. Keep an eye on it and use a meat thermometer if you have one; the internal temperature should be around 145°F.
  • Let It Rest: Allowing the salmon to rest before serving enhances the flavor and texture. It’s a step worth waiting for!

Variations to Try

One of the best things about this recipe is its versatility. Here are a few variations to consider:

  • Veggie Twist: Grill some seasonal vegetables alongside the salmon for a complete meal. Bell peppers, zucchini, and asparagus work beautifully.
  • Different Proteins: Love the glaze? Try it on chicken or tofu for a delicious alternative!
  • Spice Level: Adjust the level of gochujang to suit your taste. If you prefer milder flavors, start with less and add more as you go.

Substitutions You Can Make

If you’re missing an ingredient or two, don’t fret! Here are some easy substitutions:

  • Honey: Maple syrup can be a great alternative if you’re looking for a vegan option.
  • Soy Sauce: Use tamari for a gluten-free version.
  • Rice Vinegar: Apple cider vinegar can be used in a pinch; just keep in mind it may alter the flavor slightly.

Essential Equipment

To make this recipe, you’ll need a few key pieces of equipment:

  • A grill (charcoal or gas will work!)
  • A whisk for blending the glaze
  • A grill brush for cleaning
  • A spatula or grilling tongs for flipping the salmon

Storage and Freezing

If you happen to have leftovers (which I highly doubt!), here’s how to store them:

  • Refrigerate: Store any leftover salmon in an airtight container in the fridge for up to 3 days.
  • Freeze: You can freeze the grilled salmon for up to 3 months. Just make sure it’s wrapped tightly to prevent freezer burn.

FAQs

Let’s answer some common questions you might have about this recipe:

  • Can I use skin-on salmon fillets? Absolutely! Just keep an eye on the skin as it can crisp up quickly. It adds a nice texture!
  • What can I serve with this dish? This salmon pairs wonderfully with steamed rice, quinoa, or a fresh salad. Don’t forget a light vinaigrette to complement the flavors!
  • Can I make the glaze ahead of time? Yes! You can prepare the glaze in advance and store it in a jar in the fridge for up to a week.

Troubleshooting Common Issues

If things don’t go as planned, here are some quick fixes:

  • If the glaze is too thick: Add a splash of water to thin it out.
  • If the salmon sticks to the grill: Make sure the grill is hot enough before placing the salmon and use a little cooking oil to prevent sticking.
  • If the salmon is overcooked: Don’t worry! Serve it with a drizzle of the glaze; it’ll add moisture back in.

Conclusion

And there you have it! A stunning Korean-Inspired Grilled Salmon with Sweet and Spicy Glaze that’s sure to impress. This dish embodies everything I love about cooking—the joy of experimentation, the comfort of familiar flavors, and the delight of sharing good food with great company. As you enjoy each bite, remember that every meal is a chance to create memories, whether it’s a quiet dinner for one or a lively gathering with friends. I can’t wait for you to try this recipe, and I promise, it will become a staple in your kitchen. Happy cooking!

KOREAN- INSPIRED GRILLED SALMON WITH SWEET AND SPICY GLAZED

Prep Time 10 minutes
Cook Time 10 minutes
Total Time 20 minutes
Servings 4 servings
Calories 350
Enjoy tender grilled salmon glazed with a sweet and spicy Korean-inspired sauce, garnished with sesame seeds and green onions.

Ingredients

Sauce

  • 3 tbsp gochujang
  • 2 tbsp honey
  • 1 tbsp soy sauce
  • 1 tbsp rice vinegar
  • 1 tsp sesame oil

Salmon

  • 4 fillets salmon fillets
  • to taste salt and pepper

Garnish

  • for garnish sesame seeds
  • for garnish chopped green onions

Instructions 

  • Whisk together gochujang, honey, soy sauce, rice vinegar, and sesame oil to make the glaze.
  • Preheat grill to medium-high. Season salmon with salt and pepper.
  • Brush the salmon with the glaze and grill for 4-5 minutes per side.
  • During the last minute, brush additional glaze on the salmon.
  • Remove from grill, garnish with sesame seeds and green onions, and serve.

Notes

Ensure not to overcook the salmon for best flavor and texture.
Calories: 350kcal
Cost: $15
Course: Main Course
Cuisine: Korean
Keyword: Salmon

Loved this recipe? Save it to your favorite Pinterest board so you can easily find it later! It’s the perfect way to keep all your sweet ideas in one place. ✨

A beautifully presented plate of grilled salmon with a vibrant red glaze, highlighted by natural light and details of garnishes.

Why You’ll Love These Salmon Bites

Picture this: a gathering of friends, laughter echoing around the kitchen, and the tantalizing aroma of honey, garlic, and butter wafting through the air. That’s the magic of Honey Butter Garlic Glazed Salmon Bites. Not only are they incredibly simple to whip up, but they also deliver a flavor punch that leaves everyone asking for seconds. These little morsels are perfect for any occasion, be it a festive holiday party, a casual game night, or a cozy dinner at home. Trust me, they’ll be the star of your next get-together!

What Ingredients You Will Need

Gathering the right ingredients is key to crafting these delightful bites. Here’s what you’ll need:

  • 1 pound salmon fillet, skin removed and cut into bite-sized pieces
  • 2 tablespoons unsalted butter
  • 2 tablespoons honey
  • 3 cloves garlic, minced
  • 1 tablespoon soy sauce
  • 1 teaspoon lemon juice
  • Salt and pepper to taste
  • Chopped parsley for garnish (optional)

These ingredients are not only easy to find but also wholesome, making your salmon bites both delicious and nutritious. If you’re feeling adventurous, feel free to experiment with fresh herbs or a pinch of spice!

Equipment Needed

Appetizing salmon bites drizzled with honey garlic glaze, garnished with parsley.

Before you dive into cooking, make sure you have the following equipment handy:

  • A small saucepan for the glaze
  • A large skillet for searing the salmon
  • A spatula or tongs for flipping
  • A cutting board and knife for prepping
  • A serving platter to showcase your delicious creation

Preparation Method

Let’s get down to the nitty-gritty of how to make these scrumptious bites!

  1. In a small saucepan, melt the butter over medium heat.
  2. Add the minced garlic and sauté for about 1 minute until fragrant. This is where the magic begins—your kitchen will smell divine!
  3. Stir in the honey, soy sauce, lemon juice, salt, and pepper. Cook for another 2-3 minutes until the sauce thickens slightly, creating a sticky, sweet glaze that will coat each salmon piece beautifully.
  4. In a large skillet, heat a little oil over medium-high heat. Make sure it’s hot before you add the salmon!
  5. Add the salmon bites to the skillet and cook for about 2-3 minutes on each side until they are golden and cooked through. You want that lovely crispy exterior!
  6. Pour the honey garlic sauce over the cooked salmon bites and toss gently to coat evenly.
  7. Remove from heat and garnish with chopped parsley if desired. Serve warm and watch them disappear!

Cooking Tips & Techniques

To ensure your salmon bites turn out perfectly every time, here are some helpful tips:

  • Don’t Rush the Sear: Allow the salmon to sear properly on each side. This creates that coveted golden crust and locks in moisture.
  • Check for Doneness: Salmon is best cooked to 145°F (63°C). Use a meat thermometer if you’re unsure.
  • Adjust the Glaze: If you find the glaze too thick, add a splash of water or lemon juice. Too thin? Just simmer it a little longer.

Variations & Adaptations

Feel free to customize these salmon bites to suit your taste:

  • Spicy Kick: Add a pinch of red pepper flakes to the glaze for some heat.
  • Herb Infusion: Toss in fresh herbs like dill or thyme for an aromatic twist.
  • Citrus Zing: Substitute lime juice for lemon to brighten up the flavors.
  • Make it Gluten-Free: Use tamari or coconut aminos instead of soy sauce.

Serving & Storage Suggestions

These salmon bites are best served immediately, while they’re warm and sticky. They make a fantastic appetizer, but you can also serve them with a light salad or over a bed of jasmine rice for a more substantial meal. If you have leftovers (which is rare!), store them in an airtight container in the fridge for up to two days. When reheating, avoid the microwave as it can dry out the salmon; instead, pop them back into the oven at 350°F (175°C) for a few minutes.

Nutritional Information & Benefits

Salmon is a powerhouse of nutrition, rich in omega-3 fatty acids, high-quality protein, and essential vitamins like B12 and D. The honey butter garlic glaze adds flavor without piling on too many calories, making these bites a guilt-free pleasure. Plus, you can easily adjust the ingredients to fit dietary needs, ensuring everyone can enjoy them.

Conclusion

In a world full of complicated recipes, these Honey Butter Garlic Glazed Salmon Bites stand out as a beacon of simplicity and flavor. They’re easy to make, require minimal ingredients, and deliver maximum satisfaction. Whether you’re hosting a party or just treating yourself to a delightful dinner, these bites are sure to impress. So grab your salmon, your honey, and your friends, and let’s make something truly special together!

FAQs

Can I use frozen salmon for honey butter garlic glazed salmon bites?

Absolutely! Just make sure to thaw it fully and pat it dry before cutting into cubes. Frozen salmon works well, just watch for excess moisture.

How do I keep the salmon bites from falling apart?

Chill your salmon cubes for 10 minutes before cooking to help them hold together better while searing.

Can I make these ahead of time?

Yes! Prep and glaze the bites, then refrigerate. Bake just before serving for the best texture and flavor.

What can I serve with these salmon bites?

They pair beautifully with light salads, steamed rice, or roasted vegetables. Don’t forget lemon wedges for a fresh touch!

Is it possible to make the glaze less sweet?

Certainly! Reduce the honey to 2 tablespoons and increase the lemon juice a bit for a tangy flavor.

Now that you’re armed with all the tips, tricks, and variations, it’s time to get cooking! These salmon bites are not just a recipe; they’re an experience waiting to happen. Dive in, have fun, and don’t forget to share your creations with friends and family. Happy cooking!

Honey Butter Garlic Glazed Salmon Bites – Easy Party Appetizer Recipe

Prep Time 10 minutes
Cook Time 10 minutes
Total Time 20 minutes
Servings 4 servings
Calories 250
Delicious salmon bites glazed with a sweet and savory honey garlic sauce, perfect for parties or as an appetizer.

Ingredients

Main

  • 1 pound salmon fillet, skin removed and cut into bite-sized pieces
  • 2 tablespoons unsalted butter
  • 2 tablespoons honey
  • 3 cloves garlic, minced
  • 1 tablespoon soy sauce
  • 1 teaspoon lemon juice
  • to taste salt and pepper
  • chopped parsley for garnish (optional) chopped parsley (optional)

Instructions 

  • Melt butter in a small saucepan over medium heat.
  • Add garlic and sauté for 1 minute, then stir in honey, soy sauce, lemon juice, salt, and pepper. Cook until slightly thickened.
  • Cook salmon bites in a skillet over medium-high heat for 2-3 minutes per side until golden and cooked through.
  • Pour sauce over salmon bites and toss to coat evenly.
  • Garnish with chopped parsley if desired and serve warm.

Notes

Ensure not to overcook the salmon for the best texture.
Calories: 250kcal
Cost: $15
Course: Appetizer
Keyword: Salmon

Loved this recipe? Save it to your favorite Pinterest board so you can easily find it later! It’s the perfect way to keep all your sweet ideas in one place. ✨

Bite-sized salmon pieces glazed in a golden honey butter sauce, beautifully styled.

Why You’ll Love This Recipe

If you’ve ever had the pleasure of tasting a dish that makes your taste buds do a little happy dance, then you’re in for a treat with this Sweet & Spicy Air Fryer Salmon recipe! Not only does it deliver a delightful balance of sweet heat, but it’s also quick and easy to whip up on a busy weeknight or for a special gathering. With just a handful of ingredients, this dish transforms humble salmon fillets into a flavor-packed masterpiece. You’ll find yourself wanting to make it again and again, and your friends and family will definitely be asking for seconds!

Essential Ingredients

Let’s dive into the pantry for the magic ingredients that will elevate our salmon into something truly special:

  • 2 salmon fillets: Look for the freshest fillets you can find; they should be bright and firm, with a slightly briny scent.
  • 2 tablespoons honey: This is where the sweetness comes into play. You can use regular honey or experiment with flavored varieties if you’re feeling adventurous!
  • 1 tablespoon soy sauce: It adds a savory depth that perfectly balances the sweetness of the honey.
  • 1 teaspoon sriracha: Adjust the heat to your liking—this spicy kick is what makes the dish pop!
  • 1 teaspoon garlic powder: This adds a warm, aromatic flavor that complements the salmon beautifully.
  • 1 teaspoon paprika: For a hint of smokiness; smoked paprika is a fantastic option here.
  • Salt and pepper: To taste, of course. These little seasonings are the unsung heroes of flavor enhancement!
  • Lemon wedges: For serving. A squeeze of fresh lemon is the perfect finishing touch!

Let’s Make it Together

Deliciously cooked salmon fillets with a shiny glaze, served with lemon on a wooden plate.

Now that we’ve gathered our ingredients, it’s time to get cooking! Follow these simple steps to create your new favorite dish:

  1. Mix the Marinade: In a small bowl, whisk together the honey, soy sauce, sriracha, garlic powder, paprika, salt, and pepper. This zesty marinade is the heart of our dish, so give it a good stir until it’s well combined.
  2. Marinate the Salmon: Place the salmon fillets in a shallow dish or a resealable plastic bag. Pour that luscious marinade over the salmon, ensuring each piece is well-coated. Let them marinate for at least 15 minutes. If you have time, marinating longer is even better, as it allows the flavors to really penetrate the fish.
  3. Preheat the Air Fryer: Set your air fryer to 400°F (200°C) and let it preheat for about 5 minutes. This step is crucial for achieving that crispy exterior we all love.
  4. Air Fry the Salmon: Remove the salmon from the marinade (don’t throw the marinade away just yet!) and place it in the air fryer basket, skin side down. Cook for about 8-10 minutes, or until the salmon flakes easily with a fork. The air fryer will work its magic, giving you a perfectly crispy finish.
  5. Finish and Serve: Once your salmon is done, carefully remove it from the air fryer. Serve immediately with lemon wedges on the side. A fresh squeeze of lemon juice will brighten everything up and add a refreshing zing!

Perfecting the Cooking Process

To ensure your salmon turns out perfectly every time, here are a few tips to keep in mind:

  • Don’t Overcrowd the Basket: If you’re making multiple batches, it’s best to cook the salmon in a single layer to ensure even cooking and crispiness.
  • Check for Doneness: Salmon is done when it flakes easily with a fork and has reached an internal temperature of 145°F (63°C). If you’re unsure, a meat thermometer is a handy tool to have!
  • Experiment with Marinades: Feel free to play around with the marinade ingredients. Add ginger for a fresh twist, or switch out the sriracha for a different hot sauce if you prefer a less spicy option.

Add Your Touch

The beauty of this recipe lies in its versatility. Here are some ideas to personalize your Sweet & Spicy Air Fryer Salmon:

  • Herb Infusion: Add fresh herbs like cilantro or parsley to the marinade for an herbal note.
  • Sweetness Variations: Try maple syrup or agave nectar instead of honey for a different sweetness profile.
  • Vegetable Sidekicks: Toss some chopped veggies like bell peppers, zucchini, or asparagus into the air fryer alongside your salmon for a complete meal in one go!

Storing & Reheating

If you happen to have leftovers (which is unlikely, trust me!), here’s how to store and reheat them:

  • Storage: Place any leftover salmon in an airtight container and refrigerate for up to 3 days.
  • Reheating: To maintain its crispy texture, reheat the salmon in the air fryer at 350°F (175°C) for about 5 minutes.

FAQ

Let’s address some common questions about this delightful recipe:

  • Can I use frozen salmon? Yes! Just make sure it’s fully thawed before marinating and cooking.
  • What can I serve with this salmon? It pairs beautifully with a side of roasted veggies or a fresh salad. Consider creamy spinach or a wild rice pilaf for a heartier side.
  • Can I adjust the spiciness? Absolutely! Feel free to increase or decrease the amount of sriracha based on your heat preference.

Troubleshooting

If you encounter any hiccups while making this recipe, don’t fret! Here are some solutions:

  • Salmon Sticking to the Basket: Make sure to lightly coat the air fryer basket with cooking spray or oil to prevent sticking.
  • Not Crispy Enough: If your salmon isn’t as crispy as you’d like, try increasing the cooking time by a minute or two, but keep an eye on it to avoid overcooking.

Conclusion

Cooking is all about creating moments that bring joy, and this Sweet & Spicy Air Fryer Salmon is no exception. With its irresistible combination of flavors and easy preparation, it’s bound to become a staple in your kitchen. Whether you’re cooking for a cozy family dinner or impressing guests at a gathering, this dish is sure to shine. So gather your ingredients, put on your favorite tunes, and let the aroma of sweet and spicy salmon fill your home. Happy cooking, my friends! I can’t wait to hear how yours turns out—don’t forget to share your culinary adventures with me!

Sweet & Spicy Air Fryer Salmon Recipe

Prep Time 15 minutes
Cook Time 10 minutes
Total Time 25 minutes
Servings 2 servings
Calories 350
Enjoy a quick and flavorful salmon dish with a sweet and spicy glaze, cooked perfectly in the air fryer.

Ingredients

Main ingredients

  • 2 fillets salmon fillets
  • 2 tablespoons honey
  • 1 tablespoon soy sauce
  • 1 teaspoon sriracha (adjust to taste)
  • 1 teaspoon garlic powder
  • 1 teaspoon paprika
  • to taste salt and pepper
  • lemon wedges for serving

Instructions 

  • Mix honey, soy sauce, sriracha, garlic powder, paprika, salt, and pepper to make the marinade.
  • Marinate salmon for at least 15 minutes.
  • Preheat air fryer to 400°F (200°C).
  • Place salmon skin side down in the air fryer and cook for 8-10 minutes.
  • Serve immediately with lemon wedges.

Notes

Adjust sriracha for desired spice level.
Calories: 350kcal
Cost: $15
Course: Main Course
Cuisine: American
Keyword: Salmon

Loved this recipe? Save it to your favorite Pinterest board so you can easily find it later! It’s the perfect way to keep all your sweet ideas in one place. ✨

Air fryer salmon fillets showcasing a shiny, spicy glaze, against a softly blurred kitchen background.

Why You’ll Adore These Bowls

Imagine a cozy evening at home, the aroma of honey and garlic wafting through your kitchen, wrapping you in a warm embrace that feels like a hug from an old friend. That’s the magic of Honey Garlic Salmon Rice Bowls! They’re not just a meal; they’re a comforting experience that combines sweet and savory in the most delightful way.

Whether you’re looking to impress friends or simply treat yourself after a long day, these bowls have got you covered. With tender salmon, fluffy rice, and vibrant veggies, this dish brings a splash of color and joy to your table. Plus, it’s incredibly easy to whip up! So, let’s dive into this culinary adventure together.

Essential Ingredients

To create these scrumptious Honey Garlic Salmon Rice Bowls, you’ll need just a handful of ingredients that you might already have in your pantry. Here’s what you’ll need:

  • 2 salmon fillets – the star of the show, rich in flavor and packed with nutrients.
  • 1/4 cup honey – to add that sweet, sticky goodness that balances perfectly with the savory elements.
  • 1/4 cup soy sauce – for depth and umami, enhancing the flavor profile.
  • 3 cloves garlic, minced – because what’s a dish without the delightful aroma of garlic?
  • 1 tablespoon olive oil – for cooking the salmon to that perfect crispy texture.
  • 2 cups cooked rice – fluffy and ready to soak up all those delicious flavors.
  • 1 cup steamed broccoli – a pop of color and a nutritious addition.
  • 1/2 cup sliced carrots – adding crunch and sweetness.
  • 2 green onions, sliced – for garnish and a fresh, zesty kick.
  • Sesame seeds – a sprinkle for that extra flair!

How to Make These Divine Bowls

A beautifully styled bowl featuring salmon fillets glazed with honey garlic sauce over rice, topped with green onions.

Alright, let’s get our hands a little messy and start cooking! Follow these simple steps to create a dish that will have everyone coming back for seconds:

  1. Prepare the Marinade: In a small bowl, combine the honey, soy sauce, and minced garlic. Whisk it all together until you have a smooth, fragrant marinade that will make your taste buds dance.
  2. Marinate the Salmon: Place the salmon fillets in a shallow dish and pour half of your glorious marinade over them. Let them soak in those flavors for at least 15 minutes. If time allows, marinating longer will deepen the flavor!
  3. Cook the Salmon: Heat the olive oil in a skillet over medium heat. Once hot, add the marinated salmon fillets, skin-side down. Cook for about 4-5 minutes, until the skin becomes crispy and golden brown. Carefully flip the salmon and cook for an additional 3-4 minutes, or until the salmon is cooked through and flakes easily with a fork. Remove from heat and let it rest for a few minutes before flaking into large pieces.
  4. Assemble Your Bowls: In serving bowls, layer the cooked rice at the bottom. Add the steamed broccoli and sliced carrots on top of the rice. Now, add those beautiful flakes of salmon and drizzle any remaining marinade over the bowls for that extra burst of flavor!
  5. Garnish: Finish it off with a sprinkle of sliced green onions and sesame seeds for a touch of elegance.

Perfecting the Cooking Process

Cooking can sometimes feel intimidating, but with a little practice, you’ll find that it’s all about timing and temperature. Here are some tips to help you along the way:

  • Watch Your Salmon: Salmon is best cooked to a tender, flaky texture. Aim for an internal temperature of 145°F (63°C). If you’re unsure, just poke it with a fork—if it flakes easily, you’re good to go!
  • Don’t Rush the Marinade: If you can, let your salmon marinate for at least 30 minutes or even overnight. This allows the flavors to penetrate deeply, making every bite a burst of flavor.
  • Perfectly Fluffy Rice: Rinse your rice under cold water until the water runs clear before cooking. This removes excess starch and helps achieve that fluffy texture we all love.

Add Your Touch

The beauty of these Honey Garlic Salmon Rice Bowls is their versatility. Feel free to customize them to suit your taste or whatever you have on hand. Here are a few ideas:

  • Swap the Rice: While jasmine rice is lovely, you can easily use quinoa, brown rice, or even cauliflower rice for a lower-carb option.
  • Add More Veggies: Incorporate your favorite veggies like snap peas, bell peppers, or even roasted sweet potatoes for added flavor and nutrition.
  • Spice It Up: If you like a little heat, sprinkle some red pepper flakes or drizzle sriracha over the top. It adds a delightful kick!

Storing & Reheating

If you find yourself with leftovers (which is rare because they’re so delicious!), here’s how to store and reheat your bowls:

  • Storage: Keep any leftovers in an airtight container in the fridge for up to three days. Just be sure to separate the rice and salmon if possible, to maintain the best texture.
  • Reheating: When you’re ready to enjoy them again, place the leftovers in a microwave-safe dish, cover with a damp paper towel to retain moisture, and heat on medium power for about 1-2 minutes until warmed through.

Chef’s Insights on Honey Garlic Salmon Rice Bowls

As a self-proclaimed kitchen adventurer, I can tell you that these bowls have become a staple in my home. The combination of flavors is simply irresistible, and they make for an impressive dish during gatherings or family dinners. Plus, it’s a dish that can be made in under 30 minutes, making it perfect for busy weeknights!

When I first made these for my family, their reactions were priceless. My cousin jokingly offered to trade his firstborn for another serving! Moments like these are what cooking is all about—sharing love and laughter over a delicious meal.

Frequently Asked Questions

Can I marinate the salmon overnight?

Absolutely! Marinating the salmon for longer will enhance the flavor. Just remember to keep it refrigerated until you’re ready to cook.

What type of rice is best for this dish?

While jasmine rice is a classic choice due to its fragrant aroma, feel free to use brown rice or quinoa for a healthier option. Just remember to adjust the cooking times accordingly.

Can I add other vegetables?

Definitely! Steamed broccoli and sliced carrots are just a starting point. Think about adding asparagus, edamame, or even a refreshing cucumber salad on the side!

Conclusion

In summary, Honey Garlic Salmon Rice Bowls are not just a recipe; they’re a culinary hug that brings warmth and joy to your dinner table. With simple ingredients and an easy cooking process, you can create a dish that’s bursting with flavor and perfect for any occasion.

So gather your ingredients, put on your favorite playlist, and let’s make some magic in the kitchen. I can’t wait to hear how your bowls turn out—don’t forget to share a photo and tag me! Happy cooking!

Irresistible Honey Garlic Salmon Rice Bowls Recipe - Time For Kitchen

Prep Time 15 minutes
Cook Time 10 minutes
Total Time 25 minutes
Servings 4 servings
Calories 520
Enjoy a flavorful and healthy salmon rice bowl with honey garlic marinade, perfect for a quick dinner.

Ingredients

Protein

  • 2 pieces salmon fillets
  • 1/4 cup honey
  • 1/4 cup soy sauce
  • 3 cloves garlic, minced
  • 1 tablespoon olive oil

Carbohydrates

  • 2 cups cooked rice

Vegetables

  • 1 cup steamed broccoli
  • 1/2 cup sliced carrots
  • 2 green onions sliced
  • for garnish sesame seeds

Instructions 

  • Mix honey, soy sauce, and garlic to make marinade.
  • Marinate salmon for at least 15 minutes.
  • Cook salmon in a skillet with olive oil for 4-5 minutes per side.
  • Flake cooked salmon and layer with rice, broccoli, and carrots in bowls.
  • Top with salmon, green onions, sesame seeds, and drizzle remaining marinade.

Notes

Use fresh salmon for best flavor and ensure rice is cooked beforehand.
Calories: 520kcal
Cost: $15
Course: Main Course
Cuisine: American
Keyword: Salmon

Loved this recipe? Save it to your favorite Pinterest board so you can easily find it later! It’s the perfect way to keep all your sweet ideas in one place. ✨

Vibrant rice bowl showcasing glazed salmon, steamed broccoli, and sliced carrots, elegantly presented.