Author

Ava

Browsing

Why You’ll Adore These Bites

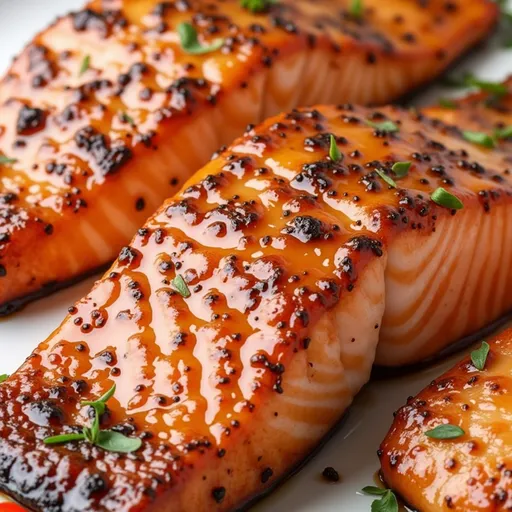
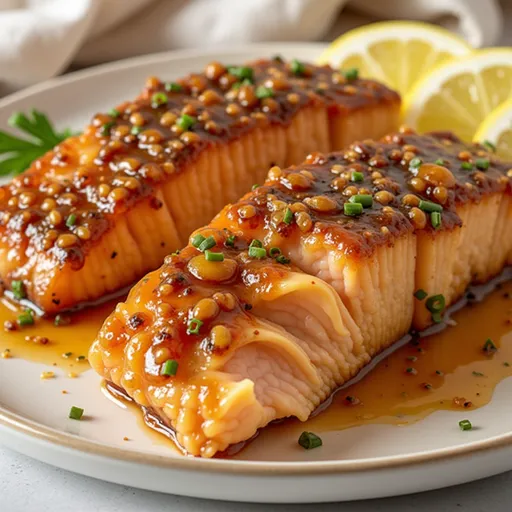
Let’s talk about Air Fryer Honey Garlic Salmon Bites. If you’re on the hunt for a dish that marries mouthwatering flavor with minimal fuss, you’ve just stumbled upon your culinary soulmate. Imagine juicy cubes of salmon, perfectly air-fried to crispy perfection and coated in a glossy, sweet-savory honey garlic sauce that dances on your taste buds. It’s a quick dish that feels gourmet, ideal for impressing guests or treating yourself after a long day. Plus, it’s a healthy option that packs a punch of nutrients without skimping on taste. Seriously, who doesn’t want a dish that’s both delicious and good for you?

Ingredients You’ll Need

Gathering your ingredients for these tasty bites couldn’t be simpler. Here’s what you’ll need:

  • 1 pound salmon fillet, skinless and cut into bite-sized pieces
  • 2 tablespoons honey
  • 2 tablespoons soy sauce
  • 2 cloves garlic, minced
  • 1 tablespoon olive oil
  • 1 teaspoon sesame oil
  • Salt and pepper to taste
  • Green onions, chopped (for garnish)
  • Sesame seeds (for garnish)

Each of these ingredients brings its own charm to the dish, transforming plain salmon into something magical!

How to Make Air Fryer Honey Garlic Salmon Bites

Delicious Air Fryer Honey Garlic Salmon Bites displayed on a plate, showcasing their golden-brown texture.

Step 1: Create the Marinade

First things first, let’s whip up that glorious marinade that makes these salmon bites sing. In a mixing bowl, combine the honey, soy sauce, minced garlic, olive oil, sesame oil, and a sprinkle of salt and pepper. Stir until well-blended; this is where the flavor magic begins! The honey brings sweetness, the soy sauce adds umami, and the garlic? Well, it’s just plain essential!

Step 2: Marinate the Salmon

Next, toss in those glorious salmon pieces. Give the bowl a gentle mix, ensuring each bite is lovingly coated in that sticky, flavorful concoction. Let it marinate for at least 15 minutes—this allows the salmon to soak up all those delicious flavors. If you have time, marinating it longer—up to an hour—will deepen the taste even further.

Step 3: Preheat Your Air Fryer

While the salmon is soaking in all that goodness, it’s time to preheat your air fryer to 400°F (200°C). A hot air fryer is essential for achieving that perfectly crispy exterior that you’re going to love. This usually takes about 3-5 minutes, so you can use this time to set your table or pour yourself a glass of wine!

Step 4: Air Fry the Salmon

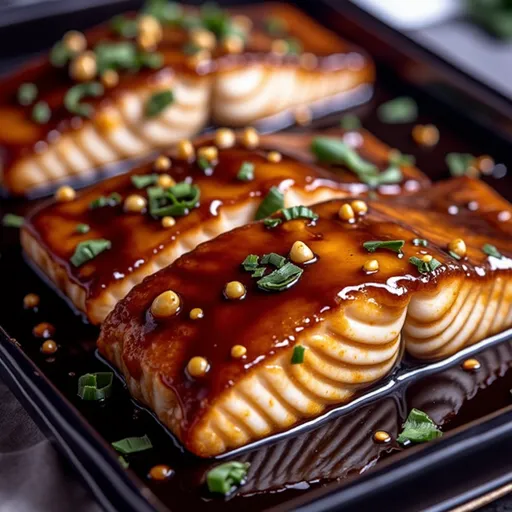
Now, it’s showtime! Place the marinated salmon bites in a single layer in the air fryer basket, ensuring they aren’t overcrowded—this helps them cook evenly and get that beautiful crisp. Air fry for 8-10 minutes, flipping halfway through to ensure each side gets that lovely golden-brown color. The smell wafting through your kitchen will be absolutely divine!

Step 5: Garnish and Serve

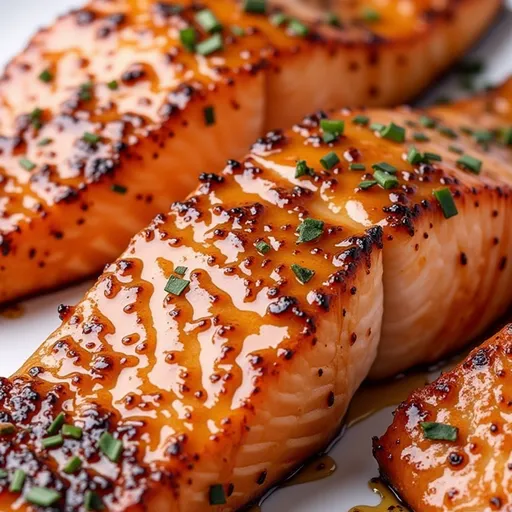
Once the salmon is cooked through and slightly crispy, carefully remove it from the air fryer. Before serving, garnish with chopped green onions and a sprinkle of sesame seeds for that extra crunch and flavor. Trust me, these little touches elevate your dish from good to unforgettable!

How to Serve Your Air Fryer Honey Garlic Salmon Bites

Garnishes

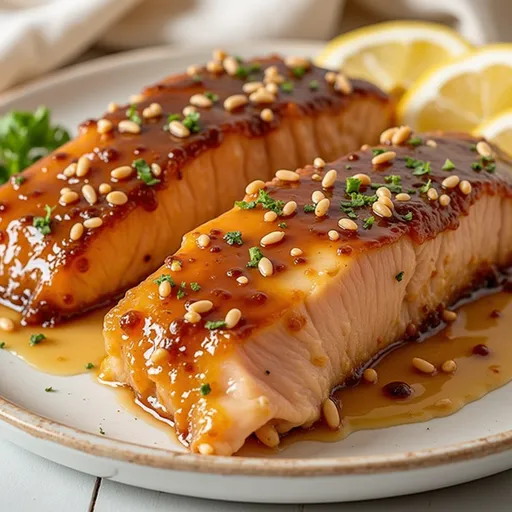
While green onions and sesame seeds are classic garnishes, don’t hesitate to get creative! A drizzle of sriracha can add a spicy kick, or a squeeze of fresh lime juice adds a zesty brightness that complements the sweetness of the sauce.

Side Dishes

Pair these succulent bites with steaming jasmine rice or quinoa to soak up that luscious sauce. For a veggie boost, consider serving them over a bed of mixed greens or alongside stir-fried veggies like broccoli or snap peas. You’ll feel like a culinary rockstar with every bite!

Creative Ways to Present

Want to impress at your next gathering? Skewer the salmon bites on toothpicks for easy serving at parties, or pile them atop crispy rice cakes for a delightful appetizer. You can also use lettuce wraps for a fun, fresh option that’s perfect for warm days.

Make Ahead and Storage

Storing Leftovers

Leftovers? If you’re lucky enough to have any, let them cool completely before transferring them to an airtight container. They’ll keep well in the fridge for up to 2 days. The flavors continue to meld, making the next-day bites just as delicious.

Freezing

If you want to prep ahead for busy nights, these salmon bites can be frozen! Just make sure they cool completely, then store them in a single layer in a freezer-safe container or bag for up to 2 months. When you’re ready to enjoy them, thaw in the fridge overnight.

Reheating

To reheat, pop the salmon bites back into the air fryer at 350°F for a few minutes, or gently warm them on the stovetop with a splash of sauce to keep them juicy. If you must use a microwave, do so in short bursts to avoid overcooking—nobody wants dry salmon!

FAQs

Can I use frozen salmon for this recipe?

Absolutely! Just be sure to thaw it completely and pat it dry before cutting and marinating. This ensures you still get that beautiful caramelization.

Is there a gluten-free version of this recipe?

Yes! Simply swap the soy sauce for gluten-free tamari or coconut aminos, and you’re good to go.

What if I don’t have an air fryer?

No problem! You can bake the salmon bites in a preheated oven at 425°F on a lined baking sheet for about 10-12 minutes, or pan-sear them in a nonstick skillet for a similar delicious outcome.

Can I make this dish ahead of time?

Definitely! You can prep the marinade and cube the salmon in advance. Just remember, the bites are best enjoyed fresh from the air fryer, but leftovers are easy to reheat!

How do I prevent overcooking the salmon?

Keep a close eye on the salmon during the last few minutes of cooking. It should flake easily but remain juicy inside. Each air fryer is a little different, so it’s always good to check a minute early.

Final Thoughts

There you have it—your new favorite dish, Air Fryer Honey Garlic Salmon Bites. Quick, flavorful, and oh-so-satisfying, these bites are perfect for any occasion. Whether you’re cooking for friends, family, or just yourself, they’re bound to become a staple in your kitchen. So, roll up those sleeves, pour yourself a drink, and let’s create something unforgettable together! Can’t wait for you to dive in!

Air Fryer Honey Garlic Salmon Bites Recipe

Prep Time 15 minutes
Cook Time 10 minutes
Total Time 25 minutes
Servings 4 servings
Calories 250
Enjoy tender, flavorful salmon bites with a sweet and savory honey garlic glaze, cooked to perfection in the air fryer.

Ingredients

Salmon

  • 1 pound salmon fillet, skinless and cut into bite-sized pieces
  • 2 tablespoons honey
  • 2 tablespoons soy sauce
  • 2 cloves garlic, minced
  • 1 tablespoon olive oil
  • 1 teaspoon sesame oil
  • to taste salt and pepper
  • green onions, chopped for garnish
  • sesame seeds for garnish

Instructions 

  • Mix honey, soy sauce, garlic, olive oil, sesame oil, salt, and pepper in a bowl.
  • Add salmon to marinade and let sit for at least 15 minutes.
  • Preheat air fryer to 400°F (200°C).
  • Place salmon bites in air fryer basket in a single layer and cook for 8-10 minutes, flipping halfway.
  • Remove and garnish with green onions and sesame seeds before serving.

Notes

For extra flavor, marinate longer or add a squeeze of lemon before serving.
Calories: 250kcal
Cost: $15
Course: Main Course
Cuisine: American
Keyword: Salmon

Loved this recipe? Save it to your favorite Pinterest board so you can easily find it later! It’s the perfect way to keep all your sweet ideas in one place. ✨

Appetizing shot of Air Fryer Honey Garlic Salmon Bites, highlighting the glistening sauce and fresh garnishes.

Why You’ll Love These Cheesy Garlic Rolls

There’s something utterly magical about the combination of garlic and cheese, isn’t there? It sings to the soul and makes your taste buds dance. Imagine a cozy evening at home, the aroma of freshly baked cheesy garlic rolls wafting through your kitchen, wrapping you in warmth and comfort. That’s what these Cheesy Garlic Rolls do—they bring everyone together for a delightful experience that’s perfect for any occasion.

Whether you’re hosting a dinner party, enjoying a family meal, or just treating yourself to something special, these rolls are sure to impress. With a soft, buttery exterior and a gooey, cheesy center, they’re a fantastic addition to any table. And the best part? They’re incredibly easy to make! Let’s dive into this delightful recipe that I promise will become a staple in your home.

Overview of Ingredients

Before we roll up our sleeves, let’s gather our ingredients. You won’t need anything too fancy here—just some basic staples that you likely have in your kitchen. Here’s what you’ll need:

  • 1 can of refrigerated pizza dough
  • 4 tablespoons unsalted butter, melted
  • 3 cloves garlic, minced
  • 1 cup shredded mozzarella cheese
  • 1/2 teaspoon dried oregano
  • 1/2 teaspoon garlic powder
  • 1/4 teaspoon salt
  • Fresh parsley, chopped (for garnish)

Each of these ingredients plays a vital role in creating the heavenly flavor of these rolls. The pizza dough is the foundation, while the garlic and butter add depth and richness. The mozzarella cheese? Well, that’s the star of the show!

Step-by-Step Instructions

A stack of warm cheesy garlic rolls, garnished with fresh parsley on a wooden background.

Now that we have our ingredients ready, let’s get to the fun part! Here’s how to make these irresistible cheesy garlic rolls:

  1. Preheat the oven: Set your oven to 375°F (190°C) to ensure it’s nice and hot when your rolls are ready to bake.
  2. Create the garlic butter: In a small bowl, combine the melted butter, minced garlic, dried oregano, garlic powder, and salt. This mixture is going to infuse the rolls with incredible flavor.
  3. Prepare the pizza dough: Roll out the refrigerated pizza dough on a lightly floured surface. Using a sharp knife or a pizza cutter, cut the dough into squares (about 2 inches each).
  4. Brush with garlic butter: Take each square and brush it generously with the garlic butter mixture. Don’t be shy—this is where the magic happens!
  5. Add the cheese: Sprinkle a handful of shredded mozzarella cheese onto each square, making sure to cover it nicely.
  6. Roll them up: Carefully roll each square into a ball, tucking the cheese inside to create a delightful pocket of gooey goodness.
  7. Arrange in a baking dish: Place the rolls close together in a greased baking dish. They’ll puff up beautifully as they bake.
  8. Brush the tops: Brush the tops of the rolls with any remaining garlic butter mixture for an extra layer of flavor.
  9. Bake: Slide the baking dish into the preheated oven and bake for 15-20 minutes, or until they’re golden brown and your kitchen smells like heaven.
  10. Garnish and serve: Once they’re out of the oven, sprinkle with fresh parsley before serving. And there you have it—your irresistible cheesy garlic rolls!

Tips for Perfect Rolls

As with any recipe, a few handy tips can elevate your dish from good to unforgettable:

  • Choose the right cheese: While mozzarella is a classic choice, feel free to experiment with other cheeses like cheddar or gouda for a twist!
  • Don’t skimp on the garlic: If you love garlic, add an extra clove or two. It enhances the flavor beautifully.
  • Let them rise: If you have time, allow the rolls to rest for about 10 minutes after assembling. This can make them even fluffier!
  • Serve warm: These rolls are best served warm, straight out of the oven. They lose some of their charm when cooled.

Variations to Try

Feel like getting a little adventurous? Here are some variations to consider:

  • Herbed Rolls: Add fresh herbs like rosemary or thyme to the garlic butter for an aromatic twist.
  • Spicy Kick: Incorporate a pinch of red pepper flakes into the garlic butter for a spicy version that packs a punch.
  • Stuffed Rolls: Try adding sautéed spinach or sun-dried tomatoes along with the cheese for a Mediterranean flair.

Equipment Needed

Gathering your kitchen tools will make the process smoother. Here’s what you’ll need:

  • Baking dish (9×9 inches works well)
  • Small bowl for mixing
  • Sharp knife or pizza cutter
  • Pastry brush for spreading the garlic butter
  • Oven mitts (safety first!)

Storage and Freezing Tips

These cheesy garlic rolls are best enjoyed fresh, but if you have leftovers (which is rare!), here’s how to store them:

  • Refrigerate: Store any leftovers in an airtight container in the fridge for up to 3 days.
  • Freeze: You can also freeze the rolls after baking. Just place them in a freezer-safe container or bag and they’ll last up to 2 months. To reheat, simply thaw in the fridge overnight and warm in the oven until heated through.

FAQs About Cheesy Garlic Rolls

Can I use homemade dough instead of refrigerated pizza dough?

Absolutely! If you have a favorite homemade dough recipe, feel free to use it. Just ensure it’s rolled out thin enough to create those delightful rolls.

What if I don’t have garlic powder?

No problem! You can just add more minced garlic to the butter mixture or skip it altogether if you prefer a milder flavor.

How can I tell if the rolls are done baking?

They should be golden brown on top and sound hollow when tapped lightly. If you’re unsure, a quick poke with a toothpick can help check for doneness.

Troubleshooting Common Issues

If things don’t go as planned, don’t worry! Here are some common issues and how to fix them:

  • Dough too sticky: If your pizza dough is too sticky, sprinkle a bit of flour on your work surface and hands while rolling.
  • Dough not rising: Ensure your baking powder is fresh, and remember that dough needs warmth to rise effectively. Place it in a warm spot while you prep.
  • Cheese oozing out: If the cheese leaks during baking, it might help to pinch the dough tightly around the filling to seal it better.

Final Thoughts

These Cheesy Garlic Rolls are more than just a recipe; they’re a way to bring people together around the table. They’re simple enough for a weeknight dinner yet impressive enough to serve at a gathering. With every bite, you’ll experience that delightful combination of garlic, butter, and melted cheese that makes everything feel just right. So go ahead, try this recipe, and let the magic of cheesy garlic rolls fill your home with warmth and happiness. Happy baking!

Cheesy garlic rolls

Prep Time 10 minutes
Cook Time 15 minutes
Total Time 25 minutes
Servings 8 pieces
Calories 250
Deliciously soft rolls filled with garlic and melted cheese, perfect as a snack or side dish.

Ingredients

Dough

  • 1 can refrigerated pizza dough
  • 4 tablespoons unsalted butter, melted
  • 3 cloves garlic, minced
  • 1 cup shredded mozzarella cheese
  • 1/2 teaspoon dried oregano
  • 1/2 teaspoon garlic powder
  • 1/4 teaspoon salt

Garnish

  • to taste fresh parsley, chopped (for garnish)

Instructions 

  • Preheat oven to 375°F (190°C).
  • Mix melted butter, garlic, oregano, garlic powder, and salt.
  • Cut dough into squares, brush with garlic butter, and add cheese.
  • Roll squares into balls, place in greased dish, and brush tops with remaining butter.
  • Bake for 15-20 minutes until golden, then garnish with parsley.

Notes

For extra flavor, sprinkle with additional herbs or cheese before baking.
Calories: 250kcal
Cost: $10
Course: Appetizer
Cuisine: American
Keyword: bread, cheese, garlic

Loved this recipe? Save it to your favorite Pinterest board so you can easily find it later! It’s the perfect way to keep all your sweet ideas in one place. ✨

Deliciously baked cheesy garlic rolls with garlic and herbs, served on a rustic plate.

Welcome to the Creamy Comfort of Baked Ziti with White Sauce

If you’re on a quest for the ultimate comfort food, look no further than this baked ziti with white sauce. Bursting with flavor and enveloped in a creamy layer of deliciousness, this dish is like a warm hug on a chilly evening. Growing up, my kitchen was filled with the aroma of pasta dishes that would make anyone’s mouth water, and this baked ziti recipe is no exception. It’s easy to make, packed with flavor, and perfect for family dinners or cozy nights in. Let’s dive into why this recipe will become a staple in your home.

Why You’ll Love This Recipe

This baked ziti isn’t just tasty; it’s also a true crowd-pleaser. Here are five reasons why this dish deserves a spot on your table:

  • Comforting Creaminess: The white sauce creates a rich, velvety texture that clings to every piece of pasta, making each bite a delight.
  • Quick and Easy: With just a few simple steps, you can whip up a satisfying meal that requires minimal prep time.
  • Customizable: Feel free to swap ingredients based on your dietary needs or what’s in your pantry—this dish is incredibly forgiving!
  • Family-Friendly: Kids and adults alike will adore this comforting dish, making it perfect for family gatherings.
  • Make-Ahead Magic: Prepare it ahead of time and pop it in the oven when you’re ready, perfect for busy weeknights!

Ingredients Breakdown

Let’s get into the nitty-gritty of what you’ll need for this delightful dish, along with some handy substitutions:

  • 300 grams penne pasta: You can substitute with any pasta shape you prefer—ziti, fusilli, or even gluten-free pasta work wonderfully.
  • 2 tablespoons cooking oil: Olive oil adds a lovely flavor, but any neutral oil will do.
  • 1 large white onion, chopped: Shallots or yellow onions can be used if that’s what you have on hand.
  • 1/2 kilogram ground chicken: Ground turkey or beef are great alternatives depending on your preference.
  • 1 packet cream of mushroom soup (68 grams): You can make your own if you prefer a fresher taste or use a different cream soup.
  • 1 cup evaporated milk: Regular milk or a non-dairy milk like almond or oat can work here.
  • 3/4 cup water: Adjust as needed based on your sauce’s thickness.
  • 200 grams mozzarella cheese, grated: Feel free to mix in other cheeses like cheddar or gouda for a flavor twist.
  • Ground black pepper and salt: Always adjust to your taste!

Pro Tips for the Best Baked Ziti

Side angle of baked ziti with white sauce and ground chicken.

Want to take your baked ziti to the next level? Here are some expert insights:

  • Cook pasta al dente: This will ensure that your pasta holds its shape and doesn’t get mushy when baked.
  • Layer it well: Alternate layers of pasta and cheese to create pockets of gooey goodness throughout.
  • Let it rest: Allow the baked ziti to sit for a few minutes after coming out of the oven; this helps it set and makes serving easier.
  • Add herbs: Consider adding fresh basil or parsley for a pop of flavor and color.
  • Experiment with spices: A pinch of red pepper flakes can add a delightful kick if you’re feeling adventurous.
  • Try different cheeses: Mixing cheeses can elevate the flavor profile; think about adding ricotta or parmesan!
  • Use a deep dish: This prevents spills and allows for generous servings.
  • Make it a meal: Serve with a side salad or garlic bread to round out your dinner.

Common Mistakes and Troubleshooting

Even the best cooks can run into hiccups. Here are some common mistakes and how to avoid them:

  • Overcooking the pasta: Remember, you want it al dente since it will continue cooking in the oven.
  • Not enough sauce: If your dish appears dry, consider adding a splash more evaporated milk or broth before baking.
  • Skipping the resting time: Cutting into it right away can lead to a messy serving—let it settle for better presentation.
  • Insufficient seasoning: Always taste and adjust your seasonings before baking for the best flavor.

Delicious Variations to Try

Looking to mix things up? Here are some delightful variations to consider:

  • Vegetable Medley: Add sautéed bell peppers, zucchini, or spinach for an extra dose of veggies.
  • Spicy Sausage: Swap ground chicken for spicy Italian sausage to kick up the heat.
  • Cheesy Spinach: Mix in fresh or frozen spinach with your cheese layers for a tasty twist.
  • Pesto Twist: Stir in a tablespoon of pesto into your sauce for a burst of flavor.

Storage and Make-Ahead Instructions

This baked ziti is perfect for meal prep! Here’s how to store it:

  • Refrigerator: Store leftovers in an airtight container for up to 3-4 days.
  • Freezer: You can freeze it before baking for up to 3 months; just thaw in the fridge overnight before baking.
  • Reheating: Warm in the oven at 350°F (175°C) until heated through, adding a splash of milk if it seems dry.

Frequently Asked Questions

Got questions? Let’s clear them up!

  • Can I use different pasta? Absolutely! Any pasta shape will work, just adjust the cooking time as needed.
  • Is this recipe gluten-free? Yes, just use gluten-free pasta and check your soup for gluten-free options.
  • Can I make it vegetarian? Sure! Substitute the meat with a hearty mix of mushrooms or lentils.
  • How do I make it creamier? Add more evaporated milk or a touch of cream to the sauce.
  • What’s the best cheese to use? Mozzarella is classic, but feel free to experiment with your favorites!
  • How can I spice it up? Consider adding red pepper flakes or even jalapeños for a spicy kick.
  • Can I prepare it in advance? Yes! Assemble it ahead of time and bake it just before serving.
  • What can I serve with baked ziti? A fresh salad or garlic bread pairs perfectly!

Nutritional Tips and Dietary Adaptations

This baked ziti can be made healthier with a few tweaks:

  • Whole grain pasta: Opt for whole grain or legume-based pasta for added fiber.
  • Lean meats: Choose lean ground chicken or turkey to reduce fat content.
  • Low-fat dairy: Use low-fat cheese and milk to cut calories without sacrificing flavor.

Essential Equipment Recommendations

To make your cooking experience smoother, here’s what you’ll need:

  • Large pot: For boiling the pasta effectively.
  • Saute pan: A sturdy pan for cooking the chicken and sauce.
  • Baking dish: A deep baking dish to hold all the delicious layers.
  • Whisk: For mixing the sauce ingredients thoroughly.

Serving Suggestions

To elevate your baked ziti experience, consider these serving ideas:

  • Garnish: Top with fresh herbs like basil or parsley for a burst of freshness.
  • Side Salad: A crisp green salad balances the richness of the ziti.
  • Garlic Bread: Nothing beats a slice of buttery garlic bread alongside this dish.

Conclusion: Your Next Family Favorite Awaits

And there you have it! This baked ziti with white sauce is not just a recipe; it’s an invitation to create lasting memories around the dinner table. The combination of creamy goodness and comforting flavors will make it a beloved staple in your kitchen. So whether you’re cooking for a crowd or just whipping up a cozy meal for yourself, this dish is sure to impress. Let’s get cooking, and remember—every great chef started just like you, with a love for food and a sprinkle of magic. Enjoy!

Baked Ziti With White Sauce Recipe

Prep Time 15 minutes
Cook Time 20 minutes
Total Time 35 minutes
Servings 4 servings
Calories 650
A comforting baked pasta dish featuring creamy white sauce, ground chicken, and melted mozzarella cheese, perfect for family dinners.

Ingredients

Pasta

  • 300 grams penne pasta
  • 2 tablespoons cooking oil
  • 1 large white onion (peeled, chopped)
  • 0.5 kilogram ground chicken
  • 1 68-gram packet cream of mushroom soup
  • 1 Cup evaporated milk
  • 3/4 Cup water (more for boiling pasta)
  • 1 200-gram pack mozzarella cheese (grated, about 2 cups)
  • to taste ground black pepper ground black pepper
  • 1 tablespoon Salt (or as needed)

Instructions 

  • Preheat oven to 350°F (180°C). Oil a 9x5-inch baking dish.
  • Cook pasta in boiling salted water until al dente, then drain and set aside.
  • Sauté onions in oil until softened, add ground chicken and cook until no longer pink.
  • Mix evaporated milk, water, and mushroom soup; add to chicken, simmer until thickened, season with pepper.
  • Combine sauce with pasta, layer in baking dish with mozzarella, then bake for 20 minutes until golden.

Notes

For a richer flavor, add herbs like basil or oregano.
Calories: 650kcal
Cost: $15
Course: Main Course
Cuisine: Italian
Keyword: pasta

Why You’ll Love This Dish

Have you ever found yourself staring into your fridge, longing for something extraordinary yet simple to prepare? Enter the delightful world of Crispy Honey Garlic Glazed Salmon. This recipe is not just a meal; it’s an experience. Picture this: succulent salmon fillets kissed by a golden glaze that dances between sweet and savory flavors, filling your kitchen with an aroma that lures everyone in. This dish is a magical way to elevate any ordinary weeknight into a culinary adventure!

What makes this recipe truly special? It’s all about the balance of flavors. The sweetness of honey, the rich umami of soy sauce, and the fragrant allure of garlic come together to create a glaze that transforms the fish into a showstopper. It’s quick enough for a busy evening but fancy enough to impress guests. Plus, it’s packed with nutrients, making it a healthy choice for any occasion. Let’s dive into the ingredients and get cooking!

Ingredients You’ll Need

  • 4 salmon fillets
  • 2 tablespoons olive oil
  • Salt and pepper to taste
  • 1/4 cup honey
  • 3 cloves garlic, minced
  • 2 tablespoons soy sauce
  • 1 tablespoon apple cider vinegar
  • 1 teaspoon ginger, grated
  • Chopped green onions for garnish
  • Sesame seeds for garnish (optional)

How to Create Your Crispy Honey Garlic Glazed Salmon

Succulent salmon fillet glistening with honey garlic sauce, served on a rustic plate.

Ready to embark on this culinary journey? Let’s get started with the steps that will lead you to a beautifully glazed salmon that’s sure to impress.

  1. Preheat the Oven: Begin by preheating your oven to 400°F (200°C). This ensures that your salmon will cook perfectly, locking in all those juicy flavors.
  2. Make the Glaze: In a small bowl, whisk together the honey, minced garlic, soy sauce, apple cider vinegar, and grated ginger. This simple mixture packs a punch and will be the star of your dish.
  3. Prepare the Skillet: Heat the olive oil in an oven-safe skillet over medium-high heat. While the oil heats up, season your salmon fillets generously with salt and pepper.
  4. Sear the Salmon: Once your oil is shimmering, place the salmon fillets skin-side down in the skillet. Let them sear for 4-5 minutes until they develop a crispy, golden crust. Resist the urge to move them around; patience is key!
  5. Flip and Glaze: Carefully flip the salmon fillets over and pour the honey garlic sauce over the top. Make sure to coat them well; this glaze is what makes the dish come alive.
  6. Bake to Perfection: Transfer the skillet to your preheated oven and bake for an additional 8-10 minutes, or until the salmon is cooked through and flakes easily with a fork. The internal temperature should reach 145°F.
  7. Rest and Garnish: Once done, remove the skillet from the oven and let the salmon rest for a couple of minutes. Garnish with chopped green onions and sesame seeds if desired before serving.

What to Serve with Your Salmon

Now that you have your star dish ready to shine, let’s talk about the perfect accompaniments. Pair your Crispy Honey Garlic Glazed Salmon with:

  • Creamy Mashed Potatoes: Their velvety texture soaks up the delicious glaze.
  • Garlic Roasted Asparagus: A tender crunch that complements the salmon beautifully.
  • Coconut Rice: The subtle sweetness pairs perfectly with honey glaze.
  • Quinoa Salad: A refreshing option loaded with veggies that adds a zesty crunch.
  • Steamed Broccoli: Bright green and nutritious, it’s a classic side that never disappoints.

Creative Variations to Try

One of the joys of cooking is experimenting and making recipes your own. Here are some fun variations to consider:

  • Spicy Kick: Add a pinch of red pepper flakes or a drizzle of sriracha to your glaze for a zesty twist.
  • Herb Infusion: Toss in fresh herbs like thyme or rosemary for an aromatic touch that enhances the salmon.
  • Maple Twist: Swap honey for maple syrup for a unique flavor profile that’s equally delicious.
  • Citrus Zest: A splash of lemon or lime juice can brighten the glaze and balance the sweetness.
  • Nutty Crunch: Top with toasted sesame seeds or chopped nuts for added texture and flavor.

Storing and Freezing Your Salmon

Leftovers? No problem! Here’s how to store and reheat your crispy salmon:

  • Refrigerator: Store any leftover salmon in an airtight container for up to 3 days. Ensure it’s cooled to room temperature before sealing to maintain its crispy texture.
  • Freezer: Wrap cooled salmon tightly in plastic wrap, then place in a freezer bag. It’s best enjoyed within 2-3 months.
  • Reheating: For the best results, reheat gently in the oven at 350°F for about 10-15 minutes. This preserves that delightful crispiness.

Expert Tips for Success

Want to ensure your salmon turns out perfectly every time? Here are a few expert tips:

  • Dry Thoroughly: Pat your salmon dry before cooking to ensure a beautifully crispy skin.
  • Right Heat: Cooking at medium-high heat is crucial. Too high can burn the glaze before the salmon cooks through.
  • Check Temperature: Use a meat thermometer for accuracy; the salmon should reach 145°F.
  • Don’t Rush Flipping: Allow the salmon to cook undisturbed for a few minutes to develop that beautiful sear.
  • Presentation Matters: Garnish with green onions and sesame seeds to elevate your dish visually and flavor-wise.

FAQs

Here are some common questions regarding this delightful recipe:

  • What type of salmon is best for this recipe? Skin-on salmon fillets are ideal, as they retain moisture and crisp up beautifully.
  • Can I make this recipe dairy-free? Absolutely! The ingredients are naturally dairy-free, making it suitable for various dietary needs.
  • What should I do if my salmon sticks to the pan? Ensure your skillet is properly preheated and your oil is hot enough before adding the salmon.

Conclusion: Your Next Culinary Adventure Awaits

There you have it—the Crispy Honey Garlic Glazed Salmon recipe that will turn any ordinary night into something extraordinary. With its perfect blend of flavors and quick cooking time, this dish is bound to become a staple in your kitchen. Whether you’re cooking for family or entertaining friends, this salmon will impress and delight.

So gather your ingredients, put on your favorite apron, and let’s create some kitchen magic together. I can’t wait to hear how your culinary adventure unfolds! Happy cooking!

Crispy Honey Garlic Glazed Salmon | Simple Elegant Dinner

Prep Time 10 minutes
Cook Time 15 minutes
Total Time 25 minutes
Servings 4 servings
Calories 350
This delicious salmon recipe features a sweet and savory honey garlic glaze with a crispy seared finish, perfect for an elegant yet simple dinner.

Ingredients

Main ingredients

  • 4 fillets salmon fillets
  • 2 tablespoons olive oil
  • salt and pepper to taste salt and pepper
  • 1/4 cup honey
  • 3 cloves garlic, minced
  • 2 tablespoons soy sauce
  • 1 tablespoon apple cider vinegar
  • 1 teaspoon ginger, grated
  • chopped green onions for garnish green onions (for garnish)
  • sesame seeds for garnish (optional) sesame seeds (optional garnish)

Instructions 

  • Preheat oven to 400°F (200°C).
  • Whisk honey, garlic, soy sauce, vinegar, and ginger. Sear salmon skin-side down in oil for 4-5 mins.
  • Flip salmon, pour sauce over, then bake for 8-10 mins until cooked.
  • Rest briefly, then garnish with green onions and sesame seeds before serving.

Notes

Ensure not to overcook the salmon for best texture.
Calories: 350kcal
Cost: $15
Course: Main Course
Cuisine: American
Keyword: Salmon

Loved this recipe? Save it to your favorite Pinterest board so you can easily find it later! It’s the perfect way to keep all your sweet ideas in one place. ✨

Eye-level shot of a beautifully plated honey garlic glazed salmon, showcasing its crispy texture.

Why You’ll Love These Easy Crockpot Recipes

There’s something undeniably magical about the slow cooker—an appliance that transforms simple ingredients into heartwarming meals while you go about your day. If you’re like me, juggling a busy schedule but still craving home-cooked comfort food, then you’re in for a treat! These easy crockpot recipes are not only simple to prepare but also packed with flavor and nostalgia. They remind us of cozy family dinners, rainy afternoons, and the joy of coming home to a warm meal. So grab your favorite bowl and let’s dive into these hearty dishes that will have everyone asking for seconds!

Ingredients You’ll Need

For these delicious recipes, here’s what you’ll need:

  • Hearty Crockpot Lentil Soup
  • Creamy Chicken Poblano Soup
  • Classic Slow Cooker Polish Dill Soup
  • Rich & Creamy Garlic Butter Chicken Rotini in Parmesan Sauce
  • Zesty Green Enchiladas Chicken Soup
  • Ultimate Cajun Seafood Pot Pie

These ingredients are not only easy to find but also versatile. Feel free to mix and match based on your preferences and what you have on hand!

How to Make These Cozy Crockpot Dishes

Creamy chicken poblano soup served in a rustic bowl, with a blurred cozy kitchen background.

Let’s break down the steps to create these comforting meals. You’ll be amazed at how effortlessly these come together, allowing you more time to enjoy life while still serving up something special.

Step 1: Choose Your Recipe

Decide which dish you’re in the mood for! Each of these recipes has a unique flavor profile waiting to be explored. Whether you’re craving the nourishing warmth of lentil soup or the creamy indulgence of garlic butter chicken, the choice is yours.

Step 2: Prepare Your Ingredients

Gather all the ingredients listed for your chosen recipe. This is where the fun begins! Chop, measure, and have everything ready to go. The prep work is minimal, which is one of the best parts about using a crockpot.

Step 3: Load Up the Crockpot

Layer your ingredients into the crockpot according to the recipe instructions. For example, if you’re making the creamy chicken poblano soup, start with the chicken, add your chopped poblanos, and then pour in the broth and seasonings. The slow cooker does the magic of melding these flavors together beautifully.

Step 4: Set and Forget

Once everything is in the pot, set your crockpot to the desired cooking time—typically 6-8 hours on low or 3-4 hours on high. Now, go about your day! You can tackle chores, run errands, or even sneak in some self-care, knowing that a delicious meal is on its way.

Step 5: Serve and Enjoy

When the cooking time is up, give your dish a good stir. The aromas wafting through your home will have your family gathering around the table in no time. Serve your meals in big, comforting bowls. Don’t forget to add a sprinkle of fresh herbs or a squeeze of lime for that extra pop of flavor!

Helpful Tips

  • Prep Ahead: Chop your vegetables and measure out your spices the night before. This makes it even easier to throw everything in the crockpot in the morning.
  • Adjust Cooking Time: If you’re short on time, you can always cook on high instead of low. Just keep an eye on it to prevent overcooking.
  • Make it a Meal: Pair your soups with crusty bread or a fresh salad to round out the meal and feed hungry bellies.

Variations and Substitutions

One of the joys of cooking with a crockpot is its flexibility. Here are some suggestions for variations:

  • Protein Swap: Feel free to substitute chicken for turkey or even switch up the lentils for beans in the hearty lentil soup.
  • Spice Level: Adjust the spices according to your taste. Add more chili powder for a kick or switch to milder spices for a family-friendly version.
  • Vegetable Options: Use whatever vegetables you have on hand—carrots, spinach, or zucchini can easily be added to most recipes!

Equipment You’ll Need

To create these slow-cooked wonders, you’ll need:

  • A reliable crockpot or slow cooker
  • Cutting board and knife
  • Measuring cups and spoons
  • A sturdy ladle for serving

Storage and Freezing Tips

Leftovers? Yes, please! Here’s how to store them:

  • Refrigeration: Store any leftovers in an airtight container in the fridge for up to 3-4 days.
  • Freezing: Most of these dishes freeze well. Allow them to cool completely, then transfer to a freezer-safe bag or container. They can be frozen for up to 3 months. Just thaw in the fridge overnight before reheating!

Frequently Asked Questions

Can I cook these recipes on the stovetop instead?

Absolutely! If you’re short on time, you can adapt these recipes for stovetop cooking. Just simmer on low heat, stirring occasionally, until everything is well-cooked and flavorful.

What can I serve with these dishes?

These meals are hearty enough on their own, but you can serve them with rice, crusty bread, or a side salad for a full meal experience.

How can I make these recipes vegetarian?

Swap out the meat for hearty vegetables or beans. For soups, vegetable broth works wonderfully in place of chicken or beef broth.

Can I adjust the thickness of the soups?

Yes! If you prefer a thicker soup, you can blend a portion of it after cooking or stir in a cornstarch slurry (1 tablespoon of cornstarch mixed with water) towards the end of cooking.

Troubleshooting Common Issues

It’s not uncommon to run into a few hiccups in the kitchen. Here are some solutions:

  • Too Thick: Add a bit of broth or water to thin it out.
  • Too Watery: Increase the cooking time with the lid off to allow for evaporation.
  • Flavor Lacking: Don’t hesitate to adjust seasonings as it cooks. A dash of salt or a sprinkle of herbs can make all the difference.

Conclusion

Cooking doesn’t have to be a chore, and with these easy crockpot recipes, you can enjoy delicious, comforting meals without spending all day in the kitchen. Each recipe is a delightful journey of flavors, perfect for cozy nights in or family gatherings. So, what are you waiting for? Dust off that slow cooker, gather your ingredients, and let’s create some culinary magic together. Here’s to hearty meals that feel like a warm hug—enjoy every bite!

EASY CROCKPOT RECIPES

Prep Time 15 minutes
Cook Time 4 hours
Total Time 4 hours 15 minutes
Servings 6 servings
Calories 350
Discover a collection of easy and comforting crockpot recipes perfect for chilly nights and busy days.

Ingredients

Main Ingredients

  • 1 cup hearty crockpot lentil soup
  • 1 cup creamy chicken poblano soup
  • 1 cup classic slow cooker polish dill soup
  • 1 cup rich & creamy garlic butter chicken rotini in parmesan sauce
  • 1 cup zesty green enchiladas chicken soup
  • 1 cup ultimate cajun seafood pot pie

Instructions 

  • Combine all ingredients in the crockpot and set to low.
  • Cook for 4 hours until flavors meld and ingredients are tender.
  • Stir occasionally and adjust seasoning as needed.
  • Serve hot and enjoy a cozy meal!

Notes

For added flavor, garnish with fresh herbs before serving.
Calories: 350kcal
Cost: $15
Course: Main Course
Cuisine: American
Keyword: comfort food, crockpot

Loved this recipe? Save it to your favorite Pinterest board so you can easily find it later! It’s the perfect way to keep all your sweet ideas in one place. ✨

Rich garlic butter chicken rotini in a parmesan sauce, beautifully plated with soft lighting.

Welcome to my kitchen, where the aroma of baked pasta mingles with the warmth of home! Today, we’re diving into a delightful dish that’s sure to become a staple in your culinary repertoire: the Baked Cream Cheese Spaghetti Casserole. With its creamy layers and comforting flavors, this dish has a way of bringing everyone together, making it the perfect choice for family dinners or cozy gatherings with friends.

As someone who has spent countless hours perfecting recipes, I can assure you that this one is a crowd-pleaser. It combines hearty spaghetti, savory ground beef, and a secret twist of cream cheese that will have your loved ones asking for seconds. So, let’s get started on this delicious journey!

Why You’ll Love This Recipe

  • Comforting flavors: This casserole is rich and creamy, combining the familiar taste of spaghetti with an indulgent cream cheese twist.
  • Easy to prepare: With simple ingredients and straightforward steps, you can whip this up even on a busy weeknight.
  • Make-ahead friendly: Perfect for meal prep, you can assemble it ahead of time and bake it just before serving.
  • Customizable: Feel free to add your favorite vegetables or swap in different proteins for a personal touch.
  • Feeds a crowd: This recipe is designed to serve multiple people, making it ideal for gatherings and family dinners.

Baked Cream Cheese Spaghetti Casserole Ingredients

Here’s what you’ll need to create this masterpiece:

  • 12 oz spaghetti
  • 1 lb lean ground beef
  • 1 jar (28 oz) spaghetti sauce
  • 1 clove garlic (minced)
  • 1 tsp Italian seasoning
  • 8 oz cream cheese (softened)
  • ½ cup grated Parmesan cheese
  • ½ cup shredded mozzarella cheese

Now, let’s talk substitutions! If you’re looking to lighten things up, you can swap ground turkey for the beef or use whole wheat spaghetti for added fiber. Don’t have cream cheese? A blend of ricotta and sour cream can work wonders too!

How to Make Baked Cream Cheese Spaghetti Casserole

Ready to dive in? Follow these simple steps for a deliciously creamy casserole:

  1. Preheat your oven to 350°F (175°C) and grease a 9×13-inch baking pan.
  2. Cook the spaghetti in salted boiling water until al dente (about 12 minutes). Drain and set aside.
  3. In a skillet over medium-high heat, brown the ground beef for 5-7 minutes. Drain excess fat and add the spaghetti sauce, stirring to combine.
  4. In a mixing bowl, combine the cooked spaghetti with softened cream cheese, minced garlic, Italian seasoning, and a pinch of salt until evenly coated.
  5. Layer half of the meat sauce into the baking pan, followed by all of the spaghetti mixture. Top with the remaining meat sauce and sprinkle with Parmesan and mozzarella cheeses.
  6. Bake for about 30 minutes, or until bubbly and golden on top.

Pro Tips for Perfect Baked Cream Cheese Spaghetti

Side view of a creamy spaghetti casserole, highlighting the layers of pasta, ground beef, and cheese.

To ensure your casserole turns out beautifully, keep these tips in mind:

  • Cook spaghetti just right: Aim for al dente to prevent mushiness during baking. It’ll absorb the sauce perfectly without losing its texture.
  • Room temperature cream cheese: Let the cream cheese soften before mixing; this helps create a smooth, creamy sauce with no lumps.
  • Layer wisely: For a balanced flavor, alternate cheese layers and meat sauce. This ensures every bite is deliciously cheesy.
  • Add veggies: Consider adding sautéed bell peppers, spinach, or mushrooms to sneak in some veggies and boost flavor.
  • Cheese choices: Feel free to mix cheeses based on your preference—provolone, gouda, or even a sprinkle of feta can elevate the dish.
  • Don’t rush the bake: Allow the casserole to bake until it’s bubbly and golden; this is where the magic happens!
  • Let it rest: After baking, let the casserole cool for about 10 minutes before serving. This helps it set and makes for easier slicing.
  • Serve with sides: Pair it with a fresh green salad or garlic bread for a complete meal.

Common Mistakes and Troubleshooting

Even the best cooks face hiccups in the kitchen! Here are some common mistakes to watch out for:

  • Overcooking the spaghetti: This can lead to a mushy casserole. Remember, al dente is key!
  • Skipping the seasoning: Don’t forget to season your ground beef and spaghetti mixture—this adds depth to the flavors.
  • Not greasing the pan: Prevent sticking by greasing your baking dish thoroughly.
  • Not mixing well: Ensure the cream cheese is fully incorporated with the spaghetti; no one likes clumps of cream cheese!

Baked Cream Cheese Spaghetti Variations

Feeling adventurous? Here are some variations to try:

  • Vegetarian Delight: Replace ground beef with lentils or your favorite plant-based meat substitute, and add more veggies!
  • Spicy Kick: Incorporate red pepper flakes into the meat sauce for a spicy version that packs a punch.
  • Cheesy Alfredo Twist: Swap spaghetti sauce for Alfredo sauce for a creamy, dreamy alternative.
  • Buffalo Chicken Style: Use shredded rotisserie chicken and mix in buffalo sauce for a zesty twist!

How to Store and Freeze Baked Cream Cheese Spaghetti

Leftovers? No problem! Here’s how to store them:

  • In the fridge: Store leftovers in an airtight container for up to 3 days. Reheat in the oven or microwave until warmed through.
  • Freezing: You can freeze the assembled casserole before baking. Just wrap it tightly in foil and freeze for up to 3 months. When ready to bake, thaw overnight in the fridge and bake as directed.
  • Individual portions: Consider portioning out leftovers into single-serving containers for quick lunches or dinners.

Baked Cream Cheese Spaghetti Recipe FAQs

Got questions? I’ve got answers! Here are some FAQs:

  • Can I use whole wheat spaghetti? Absolutely! Whole wheat spaghetti is a great alternative for added nutrition.
  • Can I make this dish gluten-free? Yes, you can substitute gluten-free pasta to make this casserole gluten-free.
  • What if I don’t have Italian seasoning? You can use a mix of dried oregano, basil, and thyme as a substitute.
  • Is there a dairy-free option? Yes, use dairy-free cream cheese and cheese alternatives for a dairy-free version.
  • How do I know when it’s done baking? The casserole should be bubbly and golden on top, and the cheese should be melted.
  • Can I use leftover spaghetti? Sure! Just mix it with the sauce and follow the layering instructions.
  • What’s the best way to reheat leftovers? Reheat in the oven for a crispy top, or microwave for convenience.
  • Can I add other meats? Definitely! Ground turkey, sausage, or shredded chicken can all work well.

Nutrition Tips and Dietary Adaptations

Want to make this dish healthier? Here are some tips:

  • Increase vegetable intake: Add spinach, zucchini, or bell peppers to boost fiber and nutrients.
  • Choose lean meats: Opt for lean ground beef or turkey to reduce fat content.
  • Control portion sizes: Serve with a side salad to fill up on vegetables and keep portions in check.
  • Watch the cheese: You can reduce the amount of cheese used or choose lower-fat options.

Equipment Recommendations

Here are a few kitchen essentials that will make your cooking experience smoother:

  • Large pot: For boiling the spaghetti.
  • Skillet: For browning ground beef and mixing sauces.
  • Baking pan: A 9×13-inch pan is perfect for this casserole.
  • Mixing bowls: Useful for combining the spaghetti and cream cheese.
  • Spatula: For layering and serving the casserole.

Serving Suggestions

To elevate your meal, consider these serving ideas:

  • Fresh salad: A simple green salad with vinaigrette pairs perfectly with the richness of the casserole.
  • Garlic bread: Serve with warm garlic bread for the ultimate comfort food experience.
  • Wine pairing: A light red wine, like Pinot Noir, complements the flavors beautifully.

Conclusion

And there you have it! A Baked Cream Cheese Spaghetti Casserole that’s not just a recipe but an experience—one that invites laughter, warmth, and a sense of home into your kitchen. I hope this dish brings you as much joy as it has brought to my table. Remember, cooking is all about experimentation and finding what works for you. So go ahead, put on your apron, and let’s create something magical together! Until next time, happy cooking!

Baked Cream Cheese Spaghetti Casserole

Prep Time 15 minutes
Cook Time 30 minutes
Total Time 45 minutes
Servings 6 servings
Calories 850
A comforting baked pasta dish combining creamy cheese, savory meat sauce, and melted mozzarella for a satisfying meal.

Ingredients

Pasta

  • 12 oz spaghetti
  • 1 lb lean ground beef
  • 1 jar (28 oz) spaghetti sauce
  • 1 clove garlic (minced)
  • 1 tsp Italian seasoning
  • 8 oz cream cheese (softened)
  • ½ cup grated Parmesan cheese
  • ½ cup shredded mozzarella cheese

Instructions 

  • Preheat oven to 350°F (175°C). Cook spaghetti until al dente, then drain.
  • Brown ground beef in a skillet, drain fat, then add spaghetti sauce.
  • Mix cooked spaghetti with cream cheese, garlic, Italian seasoning, and salt.
  • Layer half the meat sauce in a baking dish, add all spaghetti mixture, then top with remaining sauce and cheeses.
  • Bake for 30 minutes until bubbly and golden.

Notes

You can add extra vegetables like bell peppers or mushrooms for added flavor and nutrition.
Calories: 850kcal
Cost: $15
Course: Main Course
Cuisine: American
Keyword: pasta

Why You’ll Fall in Love with Ahi Tuna Poke

Hey there! If you’ve ever dreamed of a dish that captures the essence of sunny beaches, balmy breezes, and the vibrant culture of Hawaii, you’re in for a treat. Ahi Tuna Poke with Avocado is more than just a meal; it’s a refreshing escape that transports you straight to paradise with every bite. This poke bowl is not only bursting with flavor but is also quick and easy to whip up, making it perfect for a casual dinner or a festive gathering with friends. Plus, it’s a fantastic way to impress your guests with minimal effort!

My first experience with poke was during a trip to Maui, where I was captivated by the freshness of the fish and the combination of flavors. I had to recreate that magic in my own kitchen, and after several attempts, I finally perfected this classic recipe. The key to a great poke lies in using high-quality, sashimi-grade tuna and a handful of fresh ingredients that work harmoniously together. Are you ready to dive in? Let’s get started!

What Ingredients You Will Need

For this Classic Ahi Tuna Poke with Avocado, you will need:

  • Sashimi-grade tuna: Look for bright red, shiny pieces—this is the star of your dish!
  • Creamy avocado: Adds a rich texture and balances the dish.
  • Crisp vegetables: Think cucumber, radishes, or seaweed for that refreshing crunch.
  • Signature sesame-soy marinade: A blend of soy sauce, sesame oil, and a few pantry staples to elevate the flavors.

Equipment Needed

Vibrant Ahi Tuna Poke featuring diced tuna, avocado slices, and fresh toppings.

Before you start, ensure you have the following kitchen equipment on hand:

  • Sharp knife: For cutting the tuna and vegetables with precision.
  • Cutting board: A safe space to prep your ingredients.
  • Bowl: To mix your marinade and toss your poke.
  • Serving bowls: For presenting your beautiful poke bowls.

Preparation Method

Making Ahi Tuna Poke is a breeze! Follow these simple steps:

  1. Prepare the marinade: In a small bowl, whisk together soy sauce and sesame oil. You can also add a splash of rice vinegar and a sprinkle of sesame seeds for extra flavor.
  2. Cube the tuna: Using a sharp knife, carefully cut the sashimi-grade tuna into bite-sized cubes. Aim for uniform pieces to ensure even marinating.
  3. Mix it up: In a larger bowl, combine the cubed tuna with the marinade, making sure every piece is coated. Let it marinate for about 10-15 minutes—this allows the flavors to meld beautifully.
  4. Prep your veggies: While the tuna is marinating, slice your avocado and chop any other vegetables you wish to include. Cucumber and radishes work wonderfully!
  5. Assemble your poke bowl: In serving bowls, layer a generous scoop of the marinated tuna, add the avocado slices, and top with your chosen vegetables. Drizzle some extra marinade on top for good measure, and sprinkle with sesame seeds.

Cooking Tips & Techniques

Here are a few tips to help you nail your poke bowl every time:

  • Choose quality fish: Always opt for high-quality, sashimi-grade tuna. Freshness is key to a delicious poke.
  • Don’t over-marinate: Tuna is delicate, so a quick marination is all you need to enhance its flavor without compromising texture.
  • Experiment with toppings: Feel free to get creative! Try adding pickled ginger, wasabi peas, or even a sprinkle of furikake for a Japanese twist.

Variations & Adaptations

This recipe is wonderfully adaptable! Here are some ideas to customize it to your taste:

  • Add fruits: Mango or pineapple can provide a sweet contrast to the savory tuna.
  • Switch up the protein: Use salmon or even cooked shrimp if you’re not a fan of raw fish.
  • Gluten-free option: Substitute soy sauce with tamari or coconut aminos for a gluten-free version.

Serving & Storage Suggestions

Ahi Tuna Poke is best enjoyed fresh, but if you have leftovers, here’s how to store them:

  • Storage: Keep any leftover tuna poke in an airtight container in the refrigerator. It’s best consumed within 24 hours.
  • Serving suggestions: Serve poke over a bed of sushi rice, quinoa, or mixed greens for a heartier meal.

Nutritional Information & Benefits

This dish is not only delicious but also packed with nutrients:

  • Omega-3 fatty acids: Ahi tuna is an excellent source of omega-3s, which are great for heart health.
  • Rich in protein: Perfect for a filling meal that keeps you satisfied.
  • Low in carbs: A fantastic option for those following a low-carb or keto diet.

FAQs About Ahi Tuna Poke

How do I ensure the tuna is fresh?

Always purchase sashimi-grade tuna from a reputable fishmonger or grocery store. Look for bright color and a fresh ocean smell.

Can I make poke ahead of time?

While the marinade can be prepared in advance, it’s best to assemble the poke bowl right before serving to keep the ingredients fresh and vibrant.

What if I don’t like avocado?

No problem! You can skip the avocado and add extra veggies or fruits instead, like mango or cucumber.

Is this recipe suitable for meal prep?

Absolutely! Just keep the components separate until you’re ready to eat to maintain freshness.

Can I use frozen tuna?

It’s best to use fresh or thawed tuna for the best texture and flavor. If you choose frozen, ensure it is of sashimi-grade quality.

Conclusion

Ahi Tuna Poke with Avocado is a delightful dish that brings a taste of the tropics right into your kitchen. With its vibrant colors and refreshing flavors, it’s sure to become a favorite in your household. Whether you’re making it for a casual weeknight dinner or a special occasion, this poke bowl is guaranteed to impress. So grab your ingredients and let the culinary adventure begin! I can’t wait to hear how yours turns out, so be sure to share your experiences and any personal twists you added. Happy cooking, and cheers to delicious meals ahead!

Classic Ahi Tuna Poke with Avocado

Prep Time 10 minutes
Total Time 10 minutes
Servings 2 people
Calories 250
Enjoy a fresh and flavorful Hawaiian dish with tender sashimi-grade tuna and creamy avocado, perfect for a light and satisfying meal.

Ingredients

Protein

  • 200 grams sashimi-grade tuna (fresh, high-quality)

Vegetables

  • 1 avocado creamy avocado (ripe and sliced)

Additional ingredients

  • 2 tablespoons signature sesame-soy marinade (for flavor)

Instructions 

  • Dice the sashimi-grade tuna into bite-sized pieces.
  • Toss the tuna with the sesame-soy marinade.
  • Slice the avocado and add to the tuna mixture.
  • Serve immediately, garnished as desired.

Notes

Use fresh, high-quality tuna for the best flavor.
Calories: 250kcal
Cost: $15
Course: Main Course
Cuisine: Hawaiian
Keyword: Tuna

Loved this recipe? Save it to your favorite Pinterest board so you can easily find it later! It’s the perfect way to keep all your sweet ideas in one place. ✨

Appetizing view of Ahi Tuna Poke with avocado and sesame-soy dressing.

Why You’ll Adore These Cookies

Welcome, cookie enthusiasts and sweet-toothed adventurers alike! If you’ve ever found yourself daydreaming about the perfect cookie—golden brown edges, a soft and chewy center, and just the right amount of sweetness—you’re in for a treat. Today, we’re diving into the delightful realm of cookie preferences that cater to every taste. Whether you’re a classic chocolate chip lover or someone with a penchant for the more adventurous oatmeal raisin, this guide will help you create cookies that warm your heart and satisfy your sweet tooth.

As someone who grew up baking in my mom’s kitchen, cookies have always held a special place in my heart. The aroma of freshly baked cookies wafting through the house is like a warm hug on a chilly day. So, grab your mixing bowls and preheat your oven because we’re about to embark on a cookie-making journey that will tantalize your taste buds!

Understanding Cookie Preferences

Before we get into the nitty-gritty of baking, let’s talk about what makes a cookie truly special. Cookie preferences can vary widely from person to person. Some folks swear by the classic chocolate chip cookie, while others are all about the texture and flavor profile of an oatmeal raisin cookie. Here’s a quick rundown of popular cookie preferences:

  • Chocolate Chip: The classic favorite that never goes out of style. These cookies are typically soft, chewy, and loaded with chocolatey goodness.
  • Oatmeal Raisin: A chewy cookie that combines the hearty goodness of oats with the sweetness of raisins, often spiced with cinnamon for that extra warmth.
  • Peanut Butter: Rich and nutty, these cookies often come with a delightful crisscross pattern made with a fork.
  • Sugar Cookies: Sweet and slightly crisp, these cookies are a blank canvas for frosting, sprinkles, or just enjoying plain.
  • Snickerdoodle: A cinnamon-sugar coated cookie that’s soft and chewy with a delightful tang from cream of tartar.

Understanding these preferences is the first step to creating cookies that will steal hearts and maybe even a bite or two!

Ingredients You’ll Need

Soft, warm-lit cookie with a blurred background, showcasing its appetizing appearance.

For our cookie adventure, we’ll be using a delightful selection of ingredients. Here’s what you’ll need to get started:

  • Operational Cookies: These are the foundational elements of your cookie dough. Think flour, sugar, butter, eggs, and baking soda.
  • Advertising Cookies: These are the fun additions that make your cookies shine! You can choose from chocolate chips, nuts, dried fruits, or even fun sprinkles.

Every ingredient plays a role, so let’s make sure we choose high-quality options to get the best results!

Steps to Cookie Perfection

Now that we have our ingredients, let’s dive into the baking process! Follow these steps to create cookies that will make your kitchen smell heavenly:

  1. Preheat your oven to 350°F (175°C). This is crucial for getting that perfect bake!
  2. In a large mixing bowl, cream together your butter and sugar until light and fluffy. This step is essential for creating the right texture.
  3. Add in the eggs, one at a time, mixing well after each addition. This helps incorporate air into the dough, making your cookies light and tender.
  4. Gradually add in your dry ingredients (flour, baking soda, etc.), mixing until just combined. Overmixing can lead to tough cookies, so keep it gentle!
  5. Fold in your advertising cookies—chocolate chips, nuts, or whatever deliciousness you’ve chosen. Make sure they are evenly distributed throughout the dough.
  6. Using a cookie scoop or tablespoon, drop rounded balls of dough onto a baking sheet lined with parchment paper, leaving some space between each cookie.
  7. Bake in the preheated oven for 10-12 minutes, or until the edges are golden brown and the centers look slightly underbaked. They’ll continue to cook on the baking sheet.
  8. Allow the cookies to cool on the baking sheet for a few minutes before transferring them to a wire rack to cool completely.

Tips for Baking Success

Every baker has their secrets, and I’d love to share a few tips that will help you achieve cookie greatness:

  • Use Room Temperature Ingredients: Room temperature butter and eggs mix more easily and create a better texture.
  • Chill the Dough: For thicker cookies, consider chilling the dough for 30 minutes before baking. This helps prevent spreading.
  • Don’t Overbake: It’s better to underbake slightly; cookies will firm up as they cool.
  • Experiment with Flavors: Don’t hesitate to add a pinch of sea salt, vanilla extract, or even almond extract to elevate your cookies.

Variations to Try

One of the best parts of baking cookies is the endless possibilities! Here are some fun variations to switch things up:

  • Double Chocolate Chip: Replace half of the flour with cocoa powder for a rich chocolate cookie.
  • Spiced Oatmeal Raisin: Add a teaspoon of cinnamon and a pinch of nutmeg to your oatmeal raisin dough for an autumn-inspired treat.
  • Lemon Sugar Cookies: Incorporate lemon zest and a splash of lemon juice to your sugar cookie dough for a refreshing twist.

Substitutions for Dietary Needs

If you or your loved ones have dietary restrictions, don’t worry! Here are some easy substitutions:

  • Gluten-Free: Use a gluten-free flour blend in place of all-purpose flour. Make sure it’s a 1:1 blend for best results.
  • Dairy-Free: Swap out butter for coconut oil or a dairy-free butter substitute.
  • Egg-Free: Use flaxseed meal mixed with water as a binder. One tablespoon of flaxseed meal and three tablespoons of water equals one egg.

Essential Equipment

Before you start baking, make sure you have the right tools on hand:

  • Baking Sheet: A sturdy, non-stick baking sheet is a must for even baking.
  • Parchment Paper: This will help prevent sticking and make cleanup a breeze.
  • Mixing Bowls: Have a set of mixing bowls in various sizes for ease of mixing and measuring.
  • Cookie Scoop: A cookie scoop ensures uniform cookie sizes, leading to even baking.

Storage and Freezing

Once your cookies are baked to perfection, you might be wondering how to store them:

  • Room Temperature: Store cookies in an airtight container at room temperature for up to one week.
  • Freezing: You can freeze baked cookies in an airtight container for up to three months. For cookie dough, scoop the dough onto a baking sheet, freeze until firm, then transfer to a bag for longer storage.

FAQs About Cookie Baking

Let’s tackle some common cookie-baking questions:

  • Why are my cookies flat? This can happen for several reasons, including using melted butter or not enough flour. Make sure to follow the recipe closely!
  • How do I make cookies chewy? For chewier cookies, use more brown sugar than white sugar and slightly underbake them.
  • Can I add nuts or dried fruit? Absolutely! Feel free to get creative with your mix-ins according to your preferences.

Troubleshooting Common Issues

If your cookies aren’t turning out quite right, here are some solutions:

  • Cookies are too hard: You may have overbaked them. Keep an eye on your cookies and remove them when they’re just starting to brown.
  • Dough is too sticky: Add a little more flour to the dough until it reaches a workable consistency.
  • Cookies are too sweet: Consider reducing the sugar in the recipe next time or balancing with a pinch of salt.

Conclusion

There you have it, my fellow cookie lovers! A deep dive into the world of cookie preferences that will undoubtedly make your heart flutter and your taste buds dance. Whether you stick with the classics or venture into new flavor territories, the joy of baking cookies is a journey worth taking. So, gather your family around, and let’s create a batch of cookies that will be the talk of the town—or at least the kitchen!

Remember, cooking is all about experimentation and joy, so don’t be afraid to put your unique spin on these recipes. Happy baking, and may your cookies always come out perfectly golden and delicious!

Cookie Preferences

Prep Time 5 minutes
Total Time 5 minutes
Servings 1 serving
Calories 50
This recipe outlines the cookie preferences used by Amazon, detailing operational and advertising cookies to enhance user experience and advertising relevance.

Ingredients

Cookies

  • 2 cups operational cookies (Used to provide services)
  • 1 cup advertising cookies (Used for ad purposes)

Instructions 

  • We use cookies and similar tools (collectively, ‘cookies’) for the purposes described below.
  • Approved third parties also use cookies for limited ads-related purposes described below.
  • We will apply your cookie preferences on this Amazon service (website and app version) where you are signed in.
  • If you aren't signed in, we may need to ask you for your preferences again.
  • For more information about cookies and how we use them, please read our Cookies notice.
  • Operational cookies can't be deactivated to the extent we use them to provide you our services.

Notes

You can change your preferences at any time through your account settings.
Calories: 50kcal
Cost: $15
Course: Information
Cuisine: Digital
Keyword: cookies, privacy

Loved this recipe? Save it to your favorite Pinterest board so you can easily find it later! It’s the perfect way to keep all your sweet ideas in one place. ✨

Eye-level shot of a freshly baked cookie, featuring golden edges and a soft center.

Welcome to Your New Favorite Comfort Food

Hello, fellow food lovers! If you’re here, then you’re probably ready to dive into the magic of an Easy Baked Ravioli Casserole that transforms any ordinary dinner into a cozy gathering. This dish is not just about mixing ingredients; it’s about layering love, warmth, and nostalgia into each bite. Growing up, my kitchen was always buzzing with delicious aromas, and I can assure you, this casserole will make your kitchen sing! So, let’s roll up our sleeves and create something unforgettable.

Why You’ll Love This Recipe

Every great recipe has its reasons for being loved, and this one is no exception. Here are just a few reasons why you’ll want to make this Baked Ravioli Casserole part of your regular dinner rotation:

  • Easy Preparation: With just a handful of ingredients and simple steps, this casserole is perfect for busy weeknights.
  • Comforting Flavors: The combination of cheese, marinara, and pasta creates a symphony of flavors that warms the heart.
  • Make-Ahead Friendly: Prep this dish ahead of time, and simply pop it in the oven when you’re ready to eat.
  • Kid-Approved: This dish is a hit with kids and adults alike, making it a family favorite that everyone will love.
  • Versatile Options: Customize it with your favorite ingredients or dietary preferences for a unique twist every time.

Gathering Ingredients: A Closer Look

Before we get cooking, let’s take a moment to explore the ingredients that make this ravioli casserole truly special. Here’s what you’ll need:

  • 2 pounds cheese ravioli: You can use either fresh or frozen ravioli according to your preference.
  • 4 cups marinara sauce: Opt for your favorite store-bought sauce or make your own for an extra touch of love.
  • 1 1/2 cups ricotta cheese: This adds a creamy texture and a delightful richness.
  • 2 cups shredded mozzarella cheese: The gooeyness is what dreams are made of!
  • 1/2 cup grated parmesan cheese: Adds a nutty flavor that complements the other cheeses beautifully.
  • 1 teaspoon Italian seasoning: A little sprinkle of herbs brings everything together.
  • 2 tablespoons chopped fresh parsley (optional): For a pop of color and freshness on top.

Feel free to swap in different types of ravioli or pasta sauces to tailor the dish to your family’s tastes! You can even experiment with different cheeses—just remember, the more cheese, the better!

Step-by-Step Directions

Juicy cheese ravioli casserole with layers of marinara and mozzarella, served in a dish.

Now, let’s dive into the cooking process! Follow these simple steps to create a delicious Baked Ravioli Casserole:

  1. Preheat your oven to 375°F (190°C) and grease a 9×13-inch baking dish.
  2. Spread 1 cup of marinara sauce on the bottom of the dish.
  3. Add a layer of ravioli over the sauce.
  4. Dollop ricotta cheese over the ravioli.
  5. Sprinkle mozzarella and parmesan evenly on top.
  6. Repeat layers until ingredients are used up, finishing with cheese.
  7. Cover with foil and bake for 30 minutes.
  8. Remove foil and bake an additional 10–15 minutes until golden and bubbly.
  9. Let rest for 5 minutes, garnish with parsley, and serve.

Pro Tips for Perfecting Your Casserole

Want to elevate your Baked Ravioli Casserole game even more? Here are some expert insights to help you shine:

  • Layering is Key: Ensure even cooking by layering the ingredients well. Spread sauce on the bottom and between layers.
  • Mix and Match: Try different fillings for your ravioli—spinach and ricotta, or butternut squash can add delightful surprises.
  • Golden Brown Finish: For that perfect golden brown on top, broil the casserole for a couple of minutes at the end but keep a close eye on it!
  • Make Ahead: You can assemble the casserole a day in advance and store it in the fridge. Just add a few extra minutes to the baking time.
  • Check for Doneness: If you’re using frozen ravioli, ensure they are cooked through by checking the center for warmth.
  • Garnish Wisely: Fresh herbs not only add color but also enhance flavor. Basil or oregano can be lovely substitutes for parsley.
  • Customize Your Cheese: Experiment with different cheeses like gouda or fontina for a unique twist!
  • Freeze for Later: This casserole freezes beautifully; just thaw overnight in the fridge before baking.

Common Mistakes to Avoid

Even the best chefs have kitchen mishaps, so let’s ensure yours is a success by avoiding these common pitfalls:

  • Skipping the Sauce Layer: Don’t forget to put sauce on the bottom. This prevents sticking and adds moisture.
  • Overloading on Cheese: While cheese is delightful, too much can make the casserole greasy. Stick to the recommended amounts.
  • Not Allowing to Rest: Letting the casserole rest allows the layers to set, making serving easier.
  • Ignoring Cooking Times: Use a food thermometer to check if it’s heated through, especially if using frozen ravioli.

Delicious Variations to Try

Feel like changing things up? Here are some tasty variations of this casserole that you can try:

  • Veggie Lover’s Delight: Add layers of sautéed mushrooms, zucchini, and spinach for a nutrient boost.
  • Meat Lovers: Include cooked ground beef or Italian sausage for a heartier dish.
  • Spicy Kick: Add crushed red pepper flakes to the marinara for a touch of heat.
  • Cheesy Pesto Twist: Mix in pesto with the ricotta for a fresh and flavorful twist.

Storage & Make-Ahead Instructions

Wondering how to save leftovers or prepare this dish in advance? Here’s what you need to know:

  • Storing Leftovers: Keep any leftovers in an airtight container in the fridge for up to 3-4 days.
  • Freezing: This casserole can be frozen before baking for up to 3 months. Thaw overnight in the fridge before baking.
  • Reheating: To reheat, cover with foil and bake at 350°F (175°C) until heated through.

Frequently Asked Questions

Here are some common questions about the Baked Ravioli Casserole:

  • Can I use store-bought ravioli? Yes, store-bought ravioli works perfectly! Just follow the package directions for cooking times.
  • How do I know when the casserole is done? It should be golden brown on top and bubbly around the edges.
  • Can I make this vegan? Absolutely! Substitute the cheese with vegan alternatives and ensure your sauce is plant-based.
  • What’s the best way to reheat leftovers? Cover with foil and reheat in the oven at 350°F until hot.
  • Can I add meat to this recipe? Yes! Ground beef or sausage can be layered in for added flavor.
  • How can I make this dish gluten-free? Use gluten-free ravioli and check your sauce for gluten-containing ingredients.
  • What else can I serve with this casserole? A simple green salad or garlic bread pairs wonderfully!
  • Can I prepare this dish a day in advance? Yes, assemble it a day ahead, cover, and refrigerate until ready to bake.

Nutritional Information and Dietary Adaptations

For those keeping an eye on nutrition, here’s a brief overview of how to adapt this dish:

  • Protein Boost: Add cooked chicken or turkey for extra protein.
  • Low-Fat Options: Use low-fat ricotta and mozzarella to reduce calories.
  • Whole Wheat Pasta: Opt for whole wheat ravioli for added fiber.

Essential Equipment for Success

To create this delicious dish, you’ll need a few kitchen essentials:

  • 9×13-inch baking dish: Perfect for layering and baking your casserole.
  • Mixing bowls: For mixing cheeses and sauces.
  • Measuring cups and spoons: To ensure accurate ingredient amounts.
  • Spatula: For spreading the sauce and cheese evenly.
  • Aluminum foil: To cover the casserole while baking.

Serving Suggestions

This casserole deserves a delicious companion! Here are some ideas to round out your meal:

  • Garlic Bread: Perfect for soaking up the sauce!
  • Simple Green Salad: A fresh salad with a light vinaigrette balances the richness of the casserole.
  • Roasted Vegetables: Seasonal veggies add color and nutrients to your meal.

Final Thoughts: Let’s Make Some Magic!

Cooking is all about joy, connection, and a little bit of magic. This Easy Baked Ravioli Casserole is an excellent way to bring warmth to your dinner table and create memories with loved ones. Whether it’s a family gathering or a cozy night in, you’re sure to impress with this dish. So grab your apron, gather those ingredients, and let’s make something unforgettable together!

Easy Baked Ravioli Casserole

Prep Time 10 minutes
Cook Time 45 minutes
Total Time 55 minutes
Servings 6 servings
Calories 650
A delicious and easy baked ravioli casserole perfect for a comforting family dinner.

Ingredients

Pasta and Cheese

  • 2 pounds cheese ravioli (fresh or frozen)
  • 4 cups marinara sauce
  • 1.5 cups ricotta cheese
  • 2 cups shredded mozzarella cheese
  • 0.5 cup grated parmesan cheese
  • 1 teaspoon Italian seasoning
  • 2 tablespoons chopped fresh parsley (optional)

Instructions 

  • Preheat oven to 375°F (190°C). Spread 1 cup of marinara sauce in a baking dish.
  • Layer ravioli over sauce, dollop ricotta, then sprinkle mozzarella and parmesan. Repeat layers and finish with cheese.
  • Cover with foil and bake for 30 minutes. Remove foil and bake 10-15 minutes until bubbly and golden.
  • Let rest for 5 minutes, garnish with parsley, and serve.

Notes

For a healthier option, use whole wheat ravioli or add vegetables like spinach or zucchini.
Calories: 650kcal
Cost: $15
Course: Main Course
Cuisine: Italian
Keyword: Ravioli

Why You’ll Fall in Love with This Dish

Picture this: it’s a busy weeknight, and you’re feeling the familiar tug of hunger, but your time is limited. Enter Easy Air Fryer Honey Garlic Salmon—your new best friend in the kitchen! This dish not only brings a wave of sweet and savory flavor to your table but also takes mere minutes to prepare. With its juicy, flaky salmon coated in a luscious honey garlic marinade, this recipe is the epitome of comfort food that’s both satisfying and healthful.

Salmon is not just a tasty fish; it’s a powerhouse of nutrients. Rich in omega-3 fatty acids, it promotes heart health, supports brain function, and leaves you feeling great after every bite. Plus, the air fryer makes cooking this fish a breeze, ensuring a crispy exterior while keeping the inside tender and flavorful.

Ingredients You’ll Need

Here’s a quick rundown of what you’ll need to whip up this delightful dish:

  • 2 salmon fillets
  • 2 tablespoons honey
  • 2 tablespoons soy sauce
  • 2 cloves garlic, minced
  • 1 tablespoon olive oil
  • Salt and pepper to taste
  • Lemon wedges for serving
  • Chopped green onions for garnish (optional)

These simple ingredients come together to create a flavor explosion that’s sure to impress everyone at the dinner table. And the best part? Most of them are probably already in your pantry!

Steps to Create Your Culinary Masterpiece

Succulent salmon fillets glazed with honey and garlic, presented on a rustic surface.

Follow these straightforward steps to prepare your Air Fryer Honey Garlic Salmon:

  1. In a small bowl, whisk together honey, soy sauce, minced garlic, olive oil, salt, and pepper.
  2. Place the salmon fillets in a shallow dish and pour the honey garlic mixture over them, ensuring they are well coated. Let marinate for 15-20 minutes.
  3. Preheat the air fryer to 400°F (200°C).
  4. Place the marinated salmon fillets in the air fryer basket, skin side down.
  5. Air fry the salmon for 8-10 minutes, or until the salmon is cooked through and flakes easily with a fork.
  6. Remove from the air fryer and let it rest for a couple of minutes.
  7. Serve with lemon wedges and garnish with chopped green onions if desired.

Tips for Perfect Salmon Every Time

To really nail this dish, keep the following tips in mind:

  • Quality Matters: Choose fresh salmon fillets with vibrant color and firm texture. If you can, opt for wild-caught salmon for the best flavor and sustainability.
  • Marinate Wisely: Allowing the salmon to marinate for at least 15 minutes is crucial. This will not only enhance the flavor but also help keep the fish moist during cooking.
  • Preheat the Air Fryer: Preheating ensures even cooking and a nice crispy exterior. Set it to 400°F (200°C) for optimal results.
  • Check for Doneness: Salmon is perfectly cooked when it flakes easily with a fork. Aim for an internal temperature of 145°F (63°C).

Delicious Variations to Try

If you’re feeling adventurous, here are some fun variations to elevate your Honey Garlic Salmon:

  • Add Fresh Ginger: Grate a teaspoon or two of fresh ginger into the marinade for an extra kick of flavor.
  • Spicy Twist: If you like a bit of heat, add a pinch of red pepper flakes to your marinade.
  • Citrus Zest: Incorporate lemon or lime zest into the marinade for a refreshing twist.

Substitutions for Ingredients

Not all ingredients on hand? No problem! Here are some easy substitutions:

  • Honey: Maple syrup or agave nectar can be used in place of honey for a similar sweetness.
  • Soy Sauce: For a gluten-free option, use tamari or coconut aminos.
  • Olive Oil: Any neutral oil like avocado oil or grapeseed oil will work well.

Equipment You’ll Need

To make this recipe, you’ll need:

  • An air fryer
  • A small bowl for mixing the marinade
  • A shallow dish for marinating the salmon
  • A whisk or fork for mixing

Storage and Freezing Tips

If you happen to have leftovers (which is rare!), here’s how to store them:

  • Refrigeration: Store any leftover salmon in an airtight container in the fridge for up to 2 days.
  • Freezing: For longer storage, wrap the cooked salmon tightly in plastic wrap and then foil. It can be frozen for up to 3 months. Thaw in the fridge before reheating.

Frequently Asked Questions

Here are a few common questions I get about this recipe:

  • Can I use frozen salmon? Yes, you can use frozen salmon! Just remember to add a few extra minutes to your cooking time. Make sure to pat it dry before marinating.
  • What if I don’t have an air fryer? You can bake the salmon in a preheated oven at 400°F (200°C) for about 12-15 minutes. Just keep an eye on it to ensure it doesn’t overcook.
  • How can I tell if the salmon is done? The salmon is done when it flakes easily with a fork and has an opaque appearance. An internal temperature of 145°F (63°C) is the target.

Troubleshooting Common Issues

If you run into any hiccups while making your salmon, here are some solutions:

  • Salmon is overcooked: If you accidentally overcook your salmon, serve it with a sauce or dressing to add moisture back in.
  • Too salty: If your salmon turns out too salty, serve it with a squeeze of fresh lemon juice to balance the flavors.

Conclusion: Your New Favorite Weeknight Meal Awaits

In just a short time, you can create a meal that not only delights the palate but also warms the heart. This Easy Air Fryer Honey Garlic Salmon recipe is perfect for busy weeknights yet impressive enough for special occasions. So grab your ingredients, fire up that air fryer, and prepare to have everyone asking for seconds!

As you enjoy this delightful dish, remember that cooking is not just about the food—it’s about the love you put into it and the moments you share. Happy cooking, and may your kitchen always be filled with joy and laughter!

How to Make Easy Air Fryer Honey Garlic Salmon – Delicious Weeknight Dinner

Prep Time 10 minutes
Cook Time 10 minutes
Total Time 20 minutes
Servings 2 servings
Calories 350
This quick and flavorful salmon recipe is perfect for a healthy weeknight dinner, combining sweet honey and savory garlic in the air fryer.

Ingredients

Main ingredients

  • 2 fillets salmon fillets
  • 2 tablespoons honey
  • 2 tablespoons soy sauce
  • 2 cloves garlic, minced
  • 1 tablespoon olive oil
  • to taste salt and pepper
  • for serving lemon wedges
  • for garnish chopped green onions ((optional))

Instructions 

  • Whisk honey, soy sauce, garlic, olive oil, salt, and pepper in a bowl.
  • Marinate salmon in the mixture for 15-20 minutes.
  • Preheat air fryer to 400°F (200°C).
  • Place salmon in the air fryer skin side down and cook for 8-10 minutes.
  • Rest briefly, then serve with lemon wedges and green onions if desired.

Notes

Ensure not to overcook the salmon for best flakiness.
Calories: 350kcal
Cost: $15
Course: dinner
Cuisine: American
Keyword: Salmon

Loved this recipe? Save it to your favorite Pinterest board so you can easily find it later! It’s the perfect way to keep all your sweet ideas in one place. ✨

Mouthwatering honey garlic salmon with a shiny glaze, surrounded by fresh lemon and herbs.