This post contains affiliate links. As an Amazon Associate, I earn from qualifying purchases. This comes at no extra cost to you.
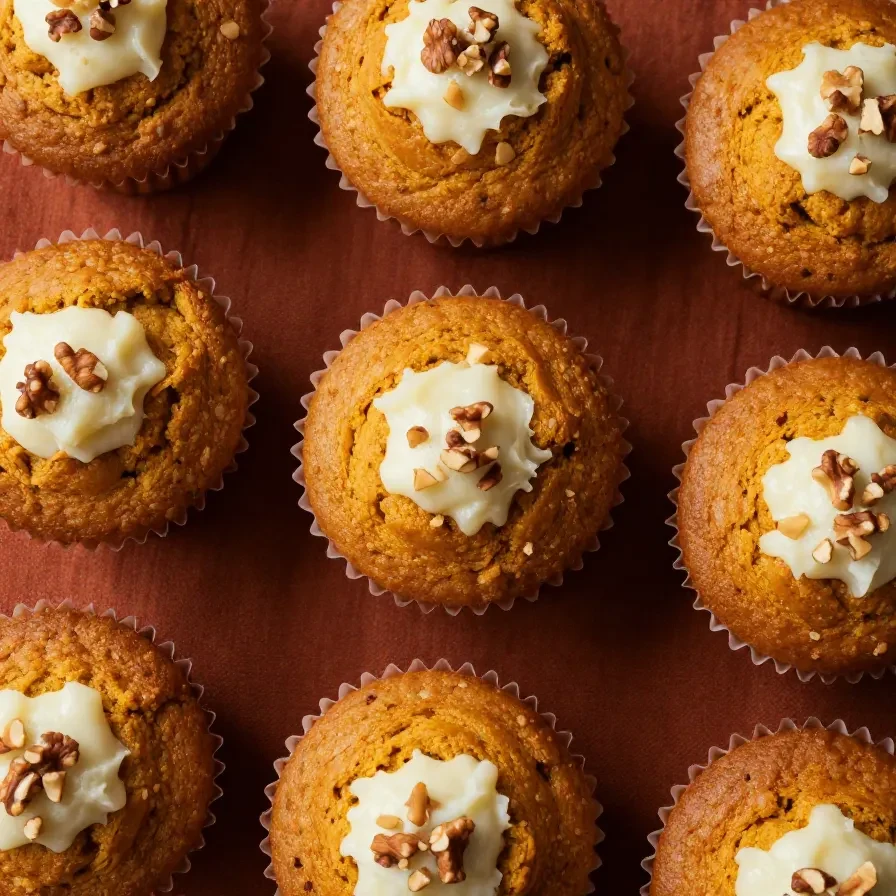
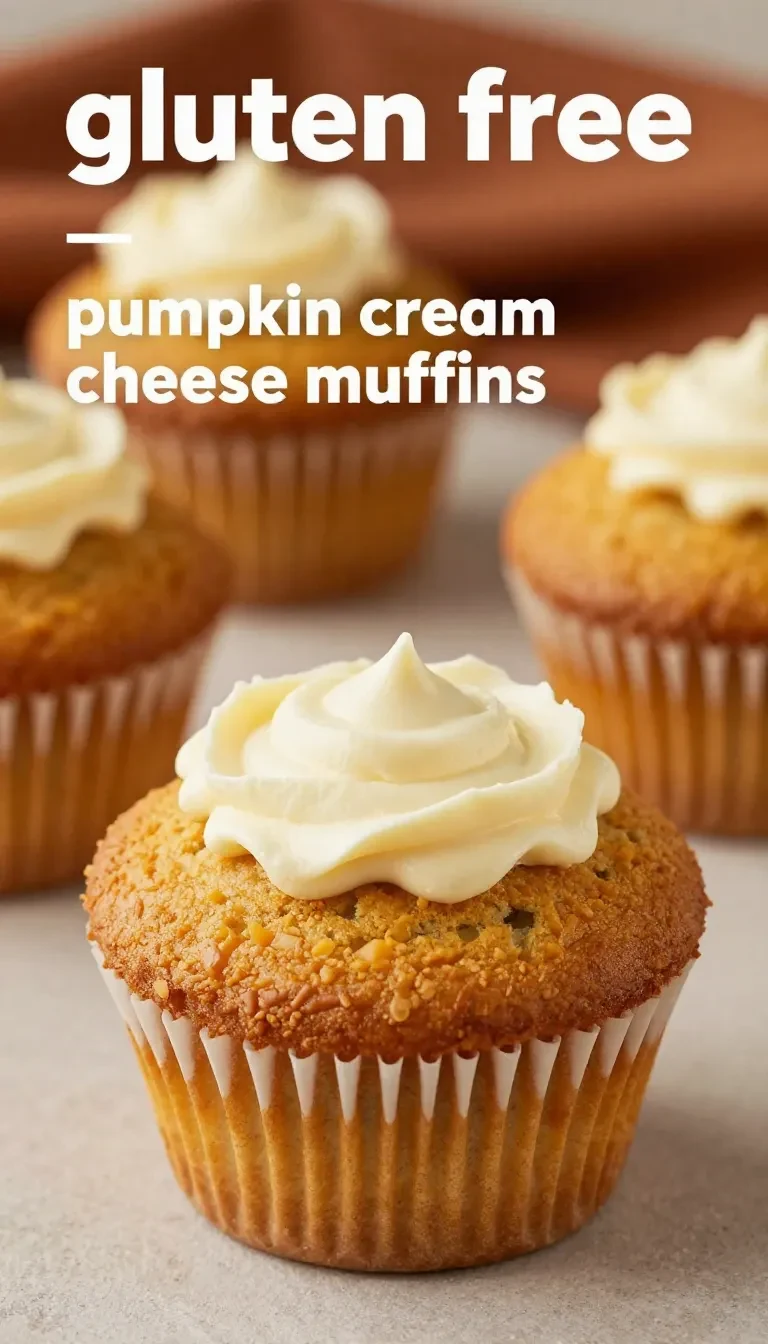
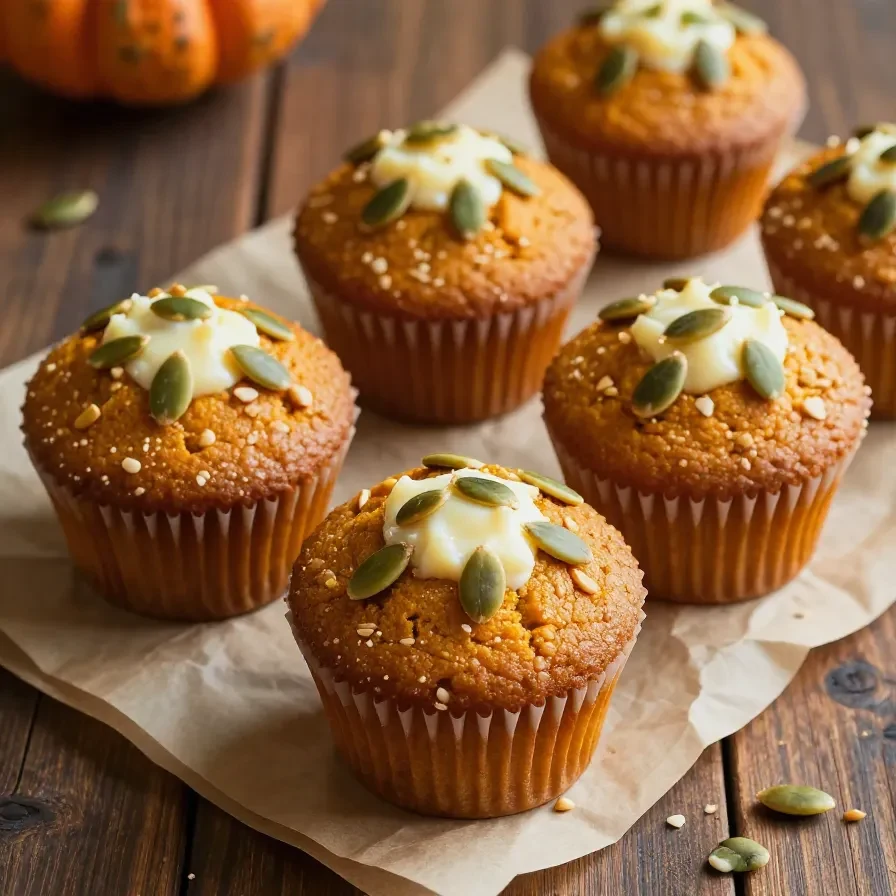
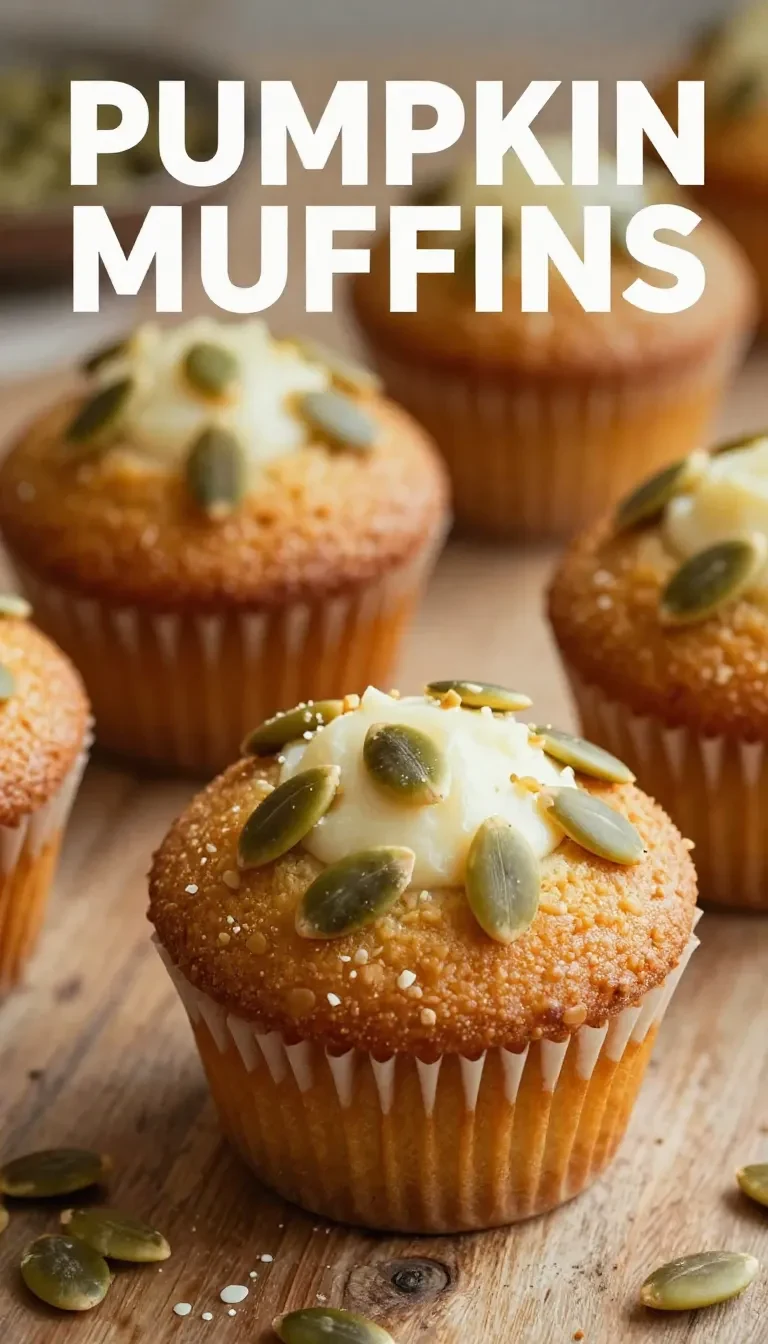
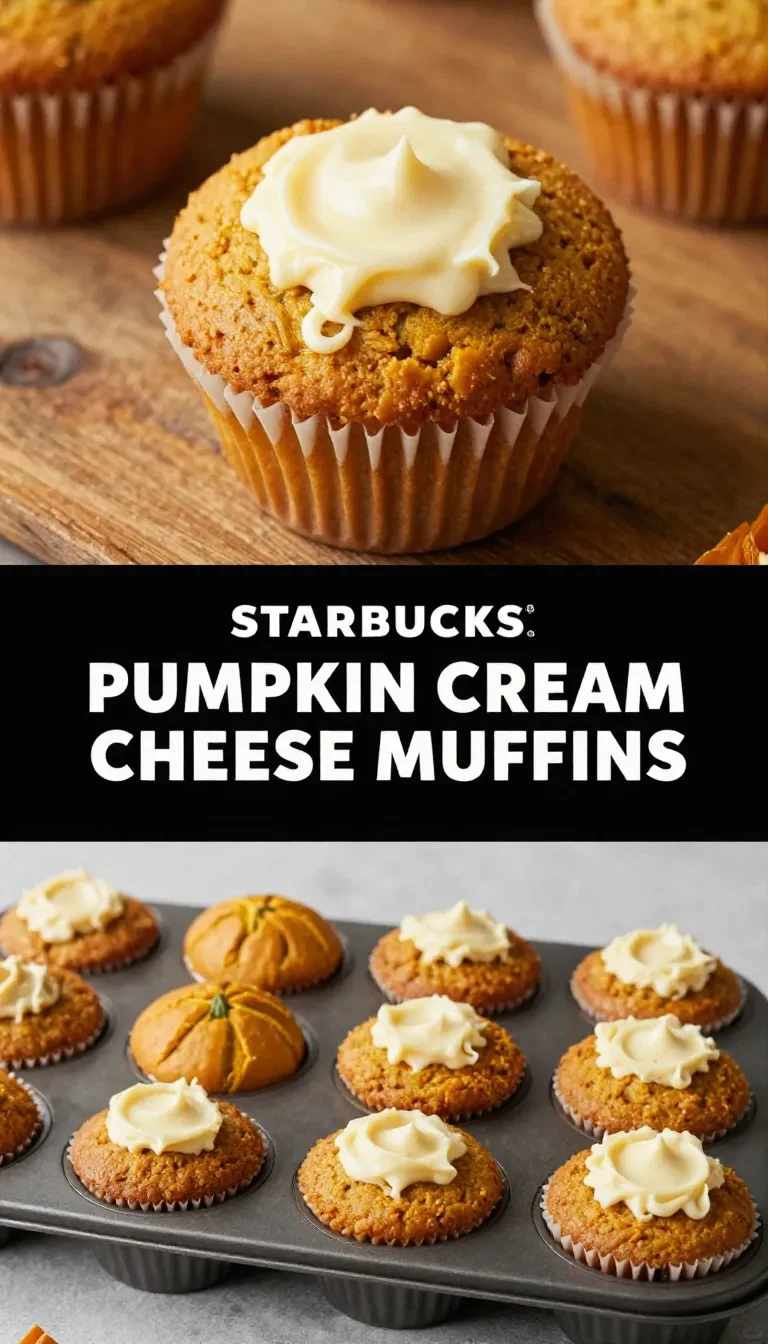
Gluten free pumpkin cream cheese muffins are the perfect combination of warm fall spices, tender pumpkin goodness, and an irresistibly smooth cream cheese filling. With their fluffy texture and sweet aroma of cinnamon, nutmeg, and cloves, these muffins bring the cozy vibes of autumn straight to your kitchen. Whether enjoyed as a quick breakfast or a satisfying snack, these gluten-free treats are packed with flavor and perfect for any pumpkin lover.
Table of Contents
- Why You’ll Love These Muffins
- Ingredients You Need
- How to Make Gluten Free Pumpkin Cream Cheese Muffins Step by Step
- Common Questions Answered
- Mistakes to Avoid When Making These Muffins
- Simple Ingredient Swaps
- Delicious Serving Ideas
Why You’ll Love These Muffins
- Perfect for anyone following a gluten-free lifestyle. The use of gluten-free all-purpose flour ensures that everyone can enjoy these muffins without sacrificing taste or texture.
- The creamy and tangy cream cheese filling sets these muffins apart. With each bite, you’ll enjoy a delightful mix of spiced pumpkin and rich creaminess.
- These muffins are quick and simple to make, requiring just 15 minutes of prep time. You can whip them up easily, even on a busy day.
- A versatile option for breakfast, snacks, or even dessert. Their cozy flavors make them the ideal sweet treat for any time of day.
Ingredients You Need
- 1 cup gluten-free all-purpose flour
- 1 teaspoon baking powder
- 1/2 teaspoon baking soda
- 1/2 teaspoon salt
- 1 teaspoon ground cinnamon
- 1/2 teaspoon ground nutmeg
- 1/4 teaspoon ground ginger
- 1/4 teaspoon ground cloves
- 1/2 cup granulated sugar
- 1/2 cup brown sugar, packed
- 1/2 cup vegetable oil or melted coconut oil
- 1 cup canned pumpkin puree
- 2 large eggs
- 1 teaspoon vanilla extract
- 8 ounces cream cheese, softened
- 1/4 cup powdered sugar
- 1 teaspoon vanilla extract (for cream cheese filling)
The canned pumpkin puree is the star ingredient in these muffins, giving them their classic fall flavor and moist texture. The mix of warm spices like cinnamon, nutmeg, ginger, and cloves perfectly complements the creamy and slightly tangy cream cheese filling.
How to Make Gluten Free Pumpkin Cream Cheese Muffins Step by Step
- Preheat the oven to 350°F (175°C) and line a muffin tin with paper liners to prevent sticking.
- In a medium bowl, whisk together the gluten-free flour, baking powder, baking soda, salt, cinnamon, nutmeg, ginger, and cloves until evenly combined.
- In a large bowl, mix the granulated sugar, brown sugar, vegetable oil, pumpkin puree, eggs, and 1 teaspoon of vanilla extract. Stir until the mixture is smooth and well-blended.
- Gradually fold the dry ingredients into the wet ingredients, mixing just until combined. Avoid overmixing to ensure light and fluffy muffins.
- In a separate bowl, beat the softened cream cheese, powdered sugar, and 1 teaspoon of vanilla extract until smooth and creamy.
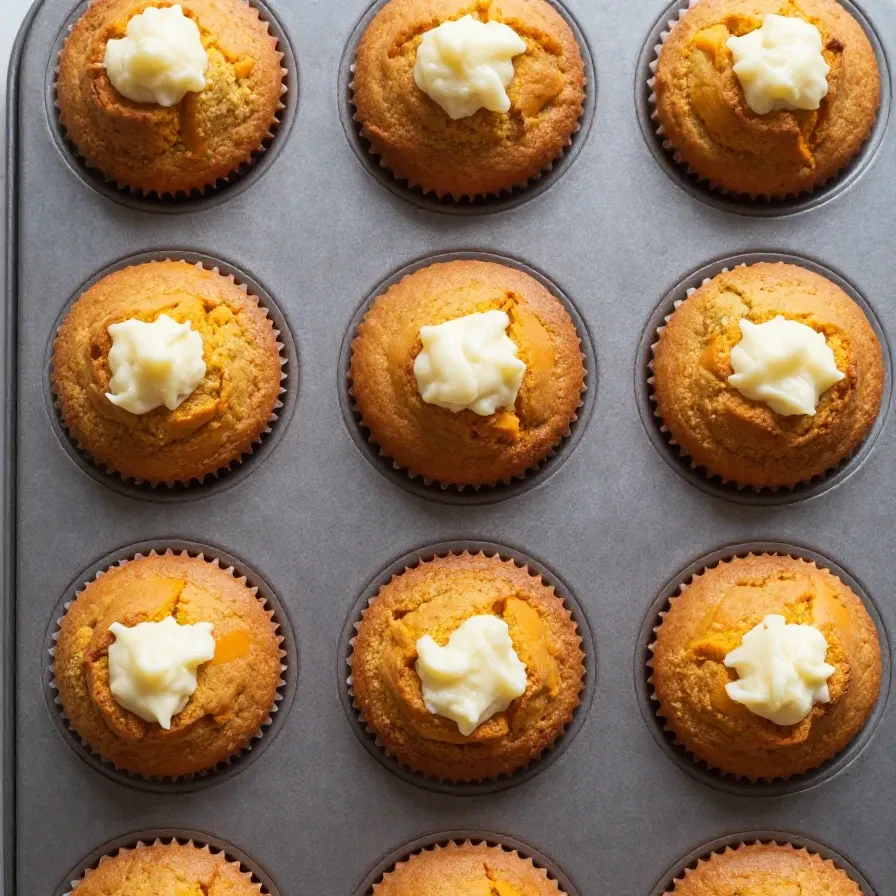
- Spoon a tablespoon of pumpkin batter into each muffin cup, followed by a small dollop of the cream cheese mixture. Cover the filling with another tablespoon of pumpkin batter.
- Repeat the layering until all muffin cups are filled to about two-thirds of their capacity.
- Bake the muffins in the preheated oven for 20-25 minutes, or until a toothpick inserted into the center comes out clean.
- Allow the muffins to cool in the pan for 5 minutes. Then, transfer them to a wire rack and let them cool completely before serving.

Makes mixing dough and batters effortless — a kitchen game-changer

Perfect for searing and baking — this recipe needs even heat distribution
Common Questions Answered
- Can I use fresh pumpkin instead of canned? Absolutely! Just make sure to puree fresh pumpkin until smooth and remove excess moisture for the best results.
- How should I store these muffins? Store them in an airtight container in the refrigerator for up to 5 days and reheat them slightly before serving.
- Can I freeze these muffins? Yes! Wrap each muffin individually in plastic wrap, place them in a freezer-safe bag, and they’ll keep for up to 2 months.
Mistakes to Avoid When Making These Muffins
- Overmixing the batter. Stir just until the ingredients are combined to avoid dense muffins.
- Skipping the paper liners. Without them, the muffins may stick to the pan, making them difficult to remove.
- Using cold cream cheese. Always make sure the cream cheese is softened so it blends smoothly without any lumps.
Simple Ingredient Swaps
- Vegetable oil: Swap out vegetable oil for melted coconut oil for a subtle, nutty flavor.
- Canned pumpkin puree: If fresh pumpkin is available, puree it and use it in place of canned. Be sure to strain any excess liquid for the right consistency.
- Cream cheese: Use dairy-free or vegan cream cheese for a lactose-free version of the muffins.
Delicious Serving Ideas
- Warm with coffee: These muffins pair wonderfully with a hot cup of coffee for a blissful morning treat.
- Afternoon pick-me-up: Serve them with a chai latte for a spicy drink and dessert combo.
- Holiday spread: Include these muffins in a Thanksgiving brunch buffet alongside our flag fruit pizza: a patriotic gluten-free dessert.
- Sweet indulgence: Pair them with our decadent & easy 5-ingredient flourless chocolate cake for an indulgent dessert table.
Gluten Free Pumpkin Cream Cheese Muffins
Ingredients
- 1 cup gluten-free all-purpose flour
- 1 tsp baking powder
- 1/2 tsp baking soda
- 1/2 tsp salt
- 1 tsp ground cinnamon
- 1/2 tsp ground nutmeg
- 1/4 tsp ground ginger
- 1/4 tsp ground cloves
- 1/2 cup granulated sugar
- 1/2 cup brown sugar (packed)
- 1/2 cup vegetable oil or melted coconut oil
- 1 cup canned pumpkin puree
- 2 large eggs
- 1 tsp vanilla extract
- 8 ounces cream cheese (softened)
- 1/4 cup powdered sugar
- 1 tsp vanilla extract (for cream cheese filling)
Instructions
- Preheat the oven to 350°F (175°C) and line a muffin tin with paper liners.
- In a medium bowl, whisk together the gluten-free flour, baking powder, baking soda, salt, cinnamon, nutmeg, ginger, and cloves.
- In a large bowl, mix the granulated sugar, brown sugar, vegetable oil, pumpkin puree, eggs, and 1 teaspoon of vanilla extract until well combined.
- Gradually add the dry ingredients to the wet ingredients and mix until just combined.
- In a separate bowl, beat the softened cream cheese, powdered sugar, and 1 teaspoon of vanilla extract until smooth and creamy.
- Scoop a tablespoon of the pumpkin muffin batter into each muffin cup, then add a small dollop of the cream cheese mixture on top, followed by another tablespoon of pumpkin batter to cover the cream cheese.
- Repeat for all muffin cups, filling them about 2/3 full.
- Bake in the preheated oven for 20-25 minutes, or until a toothpick inserted into the center comes out clean.
- Allow the muffins to cool in the pan for 5 minutes, then transfer to a wire rack to cool completely.
Notes
Loved this recipe? Save it to your favorite Pinterest board so you can easily find it later! ✨


")