Author

Ava

Browsing

This post contains affiliate links. As an Amazon Associate, I earn from qualifying purchases. This comes at no extra cost to you.


The Best Creamy Garlic Butter Steak Bites with Pasta

Introduction

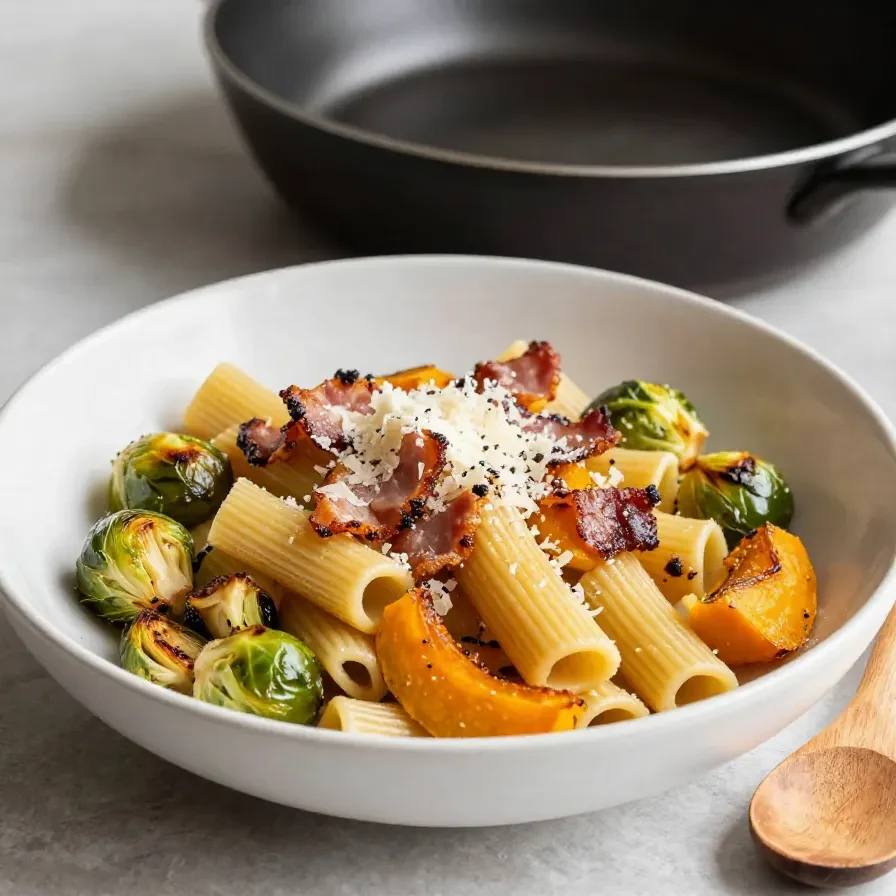
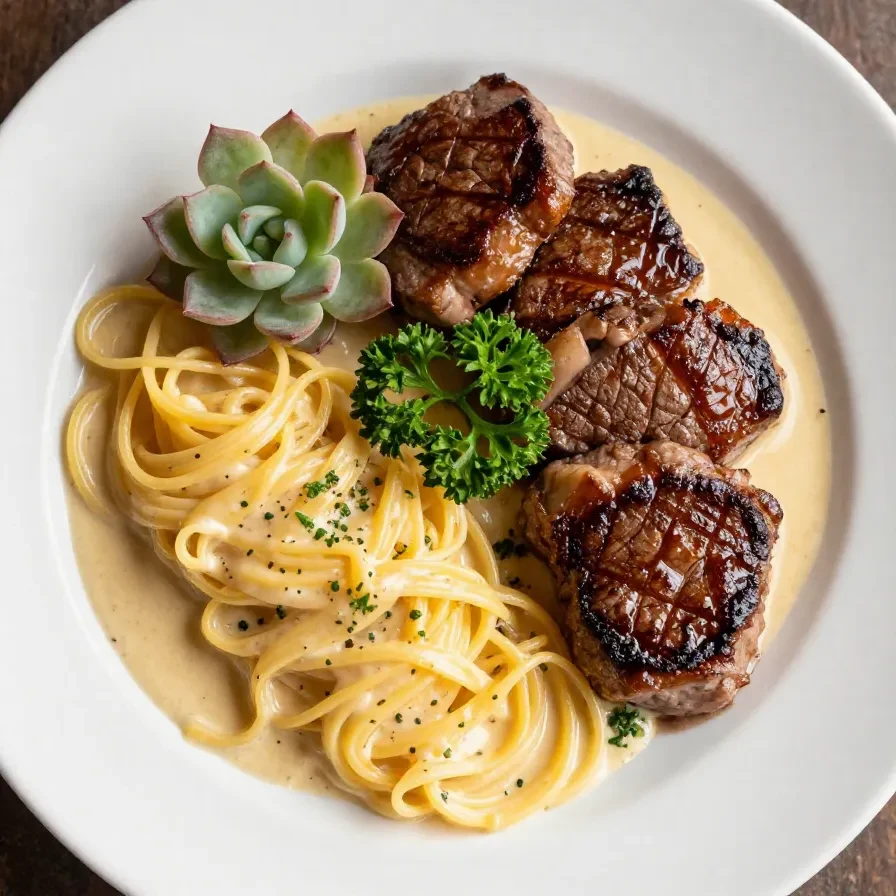
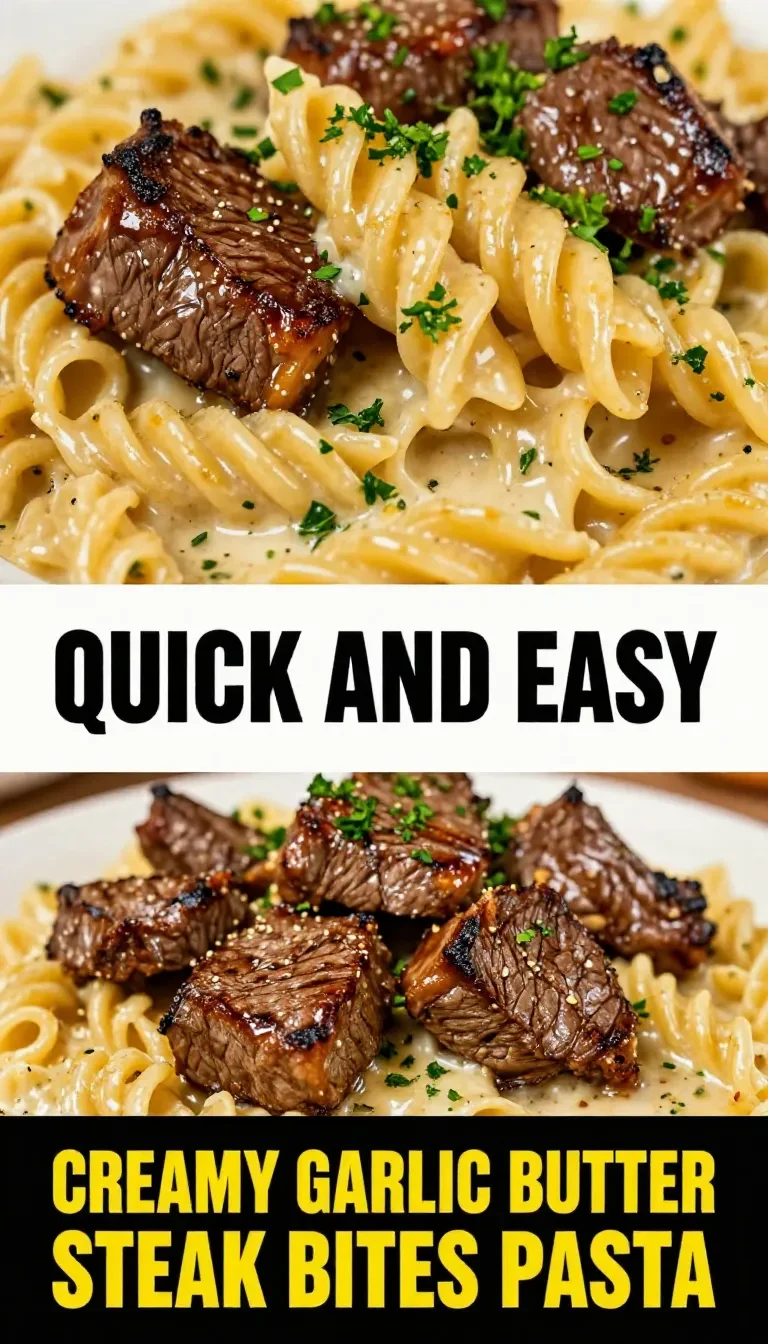
The Best Creamy Garlic Butter Steak Bites with Pasta is a savory dream come true, marrying tender, golden-browned steak bites with pasta smothered in a creamy garlic butter sauce. The richness of Parmesan cheese and the aroma of freshly minced garlic bring unmatched flavor to this dish. Whether you’re cooking for a quick weeknight dinner or a special gathering, this recipe is guaranteed to impress.

Table of Contents

Why You’ll Love This Dish

  • This recipe is fast and easy, taking just 25 minutes to prepare, making it perfect for busy weeknights. With simple steps, even beginner cooks can master this dish effortlessly.
  • The balance of tender steak bites, rich cream sauce, and al dente pasta creates a restaurant-quality meal at home. It’s an excellent way to indulge without breaking the budget.
  • Featuring a single skillet for the steak and sauce, clean-up becomes a breeze. Fewer dishes mean you can spend more time enjoying your meal.
  • The creamy garlic flavor combined with hints of Parmesan makes it a comforting and satisfying choice for any occasion. Serve it up, and watch everyone come back for seconds.

Everything You Need for The Best Creamy Garlic Butter Steak Bites with Pasta

The choice of sirloin or ribeye ensures the steak bites stay juicy and tender. Fresh garlic and Parmesan create a bold, creamy sauce that clings perfectly to the pasta.

How To Make The Best Creamy Garlic Butter Steak Bites with Pasta Step by Step

  1. Cook the pasta according to package instructions in a large pot of salted boiling water. Drain and set aside.
  2. In a large skillet, heat olive oil over medium-high heat. Add the steak bites and season with salt, pepper, and Italian seasoning.
  3. Sear the steak bites for about 2-3 minutes on each side until browned and cooked to your desired level of doneness. Remove from the skillet and set aside.
  4. In the same skillet, reduce the heat to medium and add the butter. Once melted, add the minced garlic and sauté for about 1 minute until fragrant.
  5. Delicious creamy garlic butter steak bites served with pasta on a plate

    Lodge Cast Iron Skillet 12-inch

    Essential CookwareLodge Cast Iron Skillet 12-inch

    Perfect for searing and baking — this recipe needs even heat distribution

    View on Amazon →

  6. Slowly pour in the heavy cream, stirring constantly. Allow the mixture to simmer for 2-3 minutes until it thickens slightly.
  7. Stir in the grated Parmesan cheese and mix until smooth and creamy. Adjust seasoning with salt and pepper as needed.
  8. Add the cooked pasta and steak bites to the skillet, tossing to coat everything in the creamy sauce.
  9. Sprinkle with fresh parsley before serving. Enjoy your creamy garlic butter steak bites with pasta!

Ingredient Swaps and Substitutions

If you’re out of heavy cream, half-and-half can be used, though the sauce may be slightly less thick. For a gluten-free option, substitute the pasta with gluten-free noodles without compromising the texture or flavor.

Want to cut back on dairy? Use coconut cream instead of heavy cream. While it introduces a subtle sweetness, it complements the garlic and Parmesan beautifully.

You might also enjoy our slow cooker garlic butter beef.

Meal Prep, Storage, and Reheating Tips

Store leftovers in an airtight container in the fridge for up to 3 days. For longer storage, freeze the dish in portion-sized containers for up to 1 month.

For more ideas, check out our one pot creamy garlic pasta.

Reheat in a skillet over low heat, adding a splash of cream or milk to revive the sauce. Avoid microwaving, as it may overcook the steak and cause the cream sauce to separate.

Looking for something similar? Try our creamy garlic parmesan chicken pasta.

Common Mistakes to Avoid

Avoid overcrowding the skillet when searing the steak bites, as it prevents proper browning. Cook them in batches for the best caramelization.

Don’t let the garlic burn while sautéing—keep an eye on it and stir constantly. Burnt garlic can make the entire dish taste bitter.

Be mindful when seasoning; taste the sauce before adding extra salt. The Parmesan already adds a salty kick to the dish.


The Best Creamy Garlic Butter Steak Bites with Pasta

Prep Time 10 minutes
Cook Time 20 minutes
Total Time 30 minutes
Servings 4 servings
Calories 600
Deliciously tender steak bites in a creamy garlic butter sauce served over pasta.

Ingredients

Instructions 

  • Cook the pasta according to package instructions in a large pot of salted boiling water. Drain and set aside.
  • In a large skillet, heat olive oil over medium-high heat. Add the steak bites and season with salt, pepper, and Italian seasoning.
  • Sear the steak bites for about 2-3 minutes on each side until browned and cooked to your desired level of doneness. Remove from the skillet and set aside.
  • In the same skillet, reduce the heat to medium and add the butter. Once melted, add the minced garlic and sauté for about 1 minute until fragrant.
  • Slowly pour in the heavy cream, stirring constantly. Allow the mixture to simmer for 2-3 minutes until it thickens slightly.
  • Stir in the grated Parmesan cheese and mix until smooth and creamy. Adjust seasoning with salt and pepper as needed.
  • Add the cooked pasta and steak bites to the skillet, tossing to coat everything in the creamy sauce.
  • Sprinkle with fresh parsley before serving. Enjoy your creamy garlic butter steak bites with pasta!

Notes

You can substitute the steak with chicken or shrimp for a different flavor.
Calories: 600kcal
Cost: $15
Course: Main Course
Cuisine: American
Keyword: Creamy Sauce, pasta, steak bites

Delicious creamy garlic butter steak bites served with pasta on a plate

Loved this recipe? Save it to your favorite Pinterest board so you can easily find it later! ✨

This post contains affiliate links. As an Amazon Associate, I earn from qualifying purchases. This comes at no extra cost to you.


Brussels Sprouts & Butternut Squash Pasta Recipe

This Brussels Sprouts & Butternut Squash Pasta Recipe

Brussels Sprouts & Butternut Squash Pasta combines caramelized vegetables with al dente pasta, creating a dish that’s hearty and satisfying. The roasted Brussels sprouts add a nutty crunch, while the butternut squash brings a sweet, creamy balance. A hint of garlic and thyme ties everything together with warm, savory notes.

Table of Contents

Why This Brussels Sprouts & Butternut Squash Pasta Is Perfect for Weeknights

  • This dish is a complete meal packed with veggies, perfect for those busy fall evenings. The roasted Brussels sprouts and butternut squash add flavor and nutrition without extra prep time.
  • It’s incredibly versatile—just swap the Parmesan for nutritional yeast, and you have a vegan-friendly dinner. A perfect solution for those who love hearty fall dinners that cater to various dietary preferences.
  • Simple ingredients keep this recipe budget-friendly while delivering layers of flavor. With pantry staples like pasta and olive oil, you can whip this up anytime.
  • Cooks in under 40 minutes, making it an ideal choice for dinner ideas easy for fall weeknights. Prep is straightforward, and cleanup is minimal.

Everything You Need for Brussels Sprouts & Butternut Squash Pasta

The combination of roasted Brussels sprouts and butternut squash is what gives this pasta its rich, earthy flavor. The lemon juice at the end brightens the dish, making it feel lighter while tying all the ingredients together beautifully.

How To Make Brussels Sprouts & Butternut Squash Pasta Step by Step

  1. Preheat your oven to 400°F (200°C).
  2. In a large bowl, toss the halved Brussels sprouts and diced butternut squash with 2 tablespoons of olive oil, minced garlic, dried thyme, salt, and pepper.
  3. Spread the seasoned vegetables on a baking sheet in a single layer and roast for 25-30 minutes, stirring halfway through. Roast until tender and lightly browned.
  4. A plate of pasta topped with roasted Brussels sprouts and butternut squash

    Nordic Ware Baker's Half Sheet

    Essential CookwareNordic Ware Baker’s Half Sheet

    Perfect for roasting vegetables — essential for this recipe.

    View on Amazon →

  5. While the vegetables are roasting, cook the pasta according to package instructions until al dente. Drain and set aside.
  6. Once the vegetables are done, combine them with the cooked pasta in a large bowl.
  7. Drizzle the remaining tablespoon of olive oil and lemon juice over the mixture. Sprinkle with grated Parmesan cheese (or nutritional yeast for a vegan option) and toss until evenly coated.
  8. Serve warm, garnished with freshly chopped parsley.

What to Serve with Brussels Sprouts & Butternut Squash Pasta

  • Serve alongside warm crusty garlic bread for an extra indulgent touch.
  • A light fall salad with apples and walnuts makes a refreshing side to balance the richness of the pasta.
  • Pair with a crisp, dry white wine or a sparkling water infused with lemon and thyme for a complete fall-inspired dinner.
  • For a heartier option, consider adding roasted sweet potatoes or a side of creamy mashed potatoes.

Common Mistakes to Avoid

  • Overcrowding the baking sheet can lead to steaming instead of roasting. Ensure the vegetables are spread in a single layer for optimal caramelization.
  • Skipping the lemon juice can make the pasta feel heavy. The acidity cuts through the richness and enhances the overall flavor profile.
  • Overcooking the pasta can make the dish mushy. Cook until al dente for the perfect texture that holds up to the roasted veggies.

How to Store and Reheat Brussels Sprouts & Butternut Squash Pasta

Store leftovers in an airtight container in the refrigerator for up to 4 days. To prevent the pasta from drying out, drizzle a bit of olive oil before refrigerating.

For longer storage, place the pasta in a freezer-safe container and freeze for up to 2 months. Thaw it overnight in the fridge before reheating.

You might also enjoy our one pot creamy garlic pasta.

Reheat the dish in a skillet over medium heat, adding a splash of water or broth to revive the sauce. Avoid microwaving, as it can make the pasta overly soft.

Looking for something similar? Try our one pot creamy garlic pasta.

For more ideas, check out our creamy garlic parmesan chicken pasta.

Ingredient Swaps and Substitutions

  • If you don’t have butternut squash, sweet potatoes make an excellent substitute, offering a similar sweetness and creamy texture.
  • Swap out Brussels sprouts with broccoli florets for an equally hearty but slightly less earthy flavor.
  • If Parmesan cheese isn’t available, nutritional yeast or a vegan cheese alternative provides a similar savory note.


Brussels Sprouts & Butternut Squash Pasta

Prep Time 10 minutes
Cook Time 30 minutes
Total Time 40 minutes
Servings 4 servings
Calories 400
A delicious and healthy pasta dish featuring roasted Brussels sprouts and butternut squash, perfect for any meal.

Ingredients

Instructions 

  • Preheat the oven to 400°F (200°C).
  • In a large bowl, toss the halved Brussels sprouts and diced butternut squash with 2 tablespoons of olive oil, minced garlic, dried thyme, salt, and pepper.
  • Spread the vegetables on a baking sheet in a single layer and roast for 25-30 minutes, or until tender and lightly browned, stirring halfway through.
  • Meanwhile, cook the pasta according to package instructions until al dente. Drain and set aside.
  • Once the vegetables are done roasting, add them to the cooked pasta in a large bowl.
  • Drizzle with the remaining tablespoon of olive oil, lemon juice, and sprinkle with Parmesan cheese (or nutritional yeast). Toss everything together until well combined.
  • Serve warm, garnished with chopped fresh parsley.

Notes

For a vegan option, substitute Parmesan cheese with nutritional yeast.
Calories: 400kcal
Cost: $15
Course: Main Course
Cuisine: American
Keyword: pasta, vegetarian

A plate of pasta topped with roasted Brussels sprouts and butternut squash

Loved this recipe? Save it to your favorite Pinterest board so you can easily find it later! ✨

This post contains affiliate links. As an Amazon Associate, I earn from qualifying purchases. This comes at no extra cost to you.


2 Ingredient Pizza Chips

These 2 Ingredient Pizza Chips are the ultimate combination of crispy texture and bold pizza flavors, making them an easy, irresistible snack. The tortilla bakes to crunchy perfection while the pizza sauce bubbles and slightly caramelizes, creating a snack that’s both simple and satisfying. Ready in just 15 minutes, they’re perfect to whip up whenever the craving strikes.

Table of Contents

Why You Need This Snack

  • Quick and simple with just 2 everyday ingredients. This recipe is ideal for busy days when you’re craving something delicious in under 15 minutes.
  • Satisfies pizza cravings without the hassle of making or ordering a whole pizza. It captures all the classic flavors while staying light and snack-friendly.
  • Customizable for various dietary preferences. Swap out the tortilla type or choose a specific pizza sauce to suit your taste or needs.
  • Perfect for dipping or enjoying on its own. The crispy edges and bold sauce make it versatile for casual snacking or party platters.

Everything You Need for 2 Ingredient Pizza Chips

Using a tortilla as the base creates a crisp, chip-like texture that’s ideal for snacking. The pizza sauce adds a bold, tangy flavor that pairs perfectly with the crunch of the tortilla.

Looking for something similar? Try our easy brownie pizza recipe.

For more ideas, check out our sugar cookie flag fruit pizza.

You might also enjoy our flag fruit pizza: a patriotic.

How To Make 2 Ingredient Pizza Chips Step by Step

  1. Preheat your oven to 400°F (200°C). This high temperature ensures the tortilla will crisp up quickly without becoming chewy or tough.
  2. Place the tortilla on a baking sheet. Using parchment paper underneath can make cleanup easier and prevent sticking.
  3. Spread the pizza sauce evenly over the tortilla. Use the back of a spoon to create a smooth, even layer, leaving a small border around the edges.
  4. Bake in the preheated oven for 8-10 minutes, or until the edges are golden and crisp and the sauce starts to bubble. Keep an eye on it to avoid burning.
  5. A close-up of crispy pizza chips made with just two ingredients, displayed on a wooden board.

    Essential CookwareNordic Ware Natural Aluminum Commercial Baker’s Half Sheet

    Durable and versatile baking sheet perfect for making pizza chips.

    View on Amazon →

  6. Remove from the oven and let it cool for a minute. Carefully cut the tortilla into chip-sized pieces using a pizza cutter or sharp knife, and serve.

Common Mistakes to Avoid

  • Spreading the sauce too thick. A heavy layer of sauce can make the tortilla soggy instead of crisp, so aim for a light, even coating.
  • Skipping the preheated oven. Starting with a hot oven ensures proper crisping, so don’t rush this step!
  • Overbaking the tortilla. The edges can burn quickly, so check at the 8-minute mark to ensure they don’t go too far.

Expert Tips for Perfect Pizza Chips

  • Use a pizza stone or steel for extra crispness. If you have one, preheat it along with your oven for even baking and a fantastic crunch.
  • Customize your sauce with extra flavors. Sprinkle in Italian seasoning, crushed red pepper, or garlic powder to enhance the pizza flavor.
  • Cut the tortilla after cooling slightly. This makes it easier to create clean slices without tearing the chips.
  • Store leftovers in an airtight container. If your chips soften, a quick reheat in the oven at 350°F can revive their crunch.


2 Ingredient Pizza Chips

Prep Time 5 minutes
Cook Time 10 minutes
Total Time 15 minutes
Servings 2 servings
Calories 200
A quick and easy snack made with just two ingredients, perfect for pizza lovers.

Ingredients

Instructions 

  • Preheat the oven to 400°F (200°C).
  • Place the tortilla on a baking sheet.
  • Spread the pizza sauce evenly over the tortilla.
  • Bake in the preheated oven for 8-10 minutes, or until the edges are crispy and the sauce is bubbly.
  • Remove from the oven and let cool for a minute before cutting into chips.

Notes

Feel free to add toppings like cheese or pepperoni for extra flavor.
Calories: 200kcal
Cost: $5
Course: Snack
Cuisine: American
Keyword: pizza chips

A close-up of crispy pizza chips made with just two ingredients, displayed on a wooden board.

Loved this recipe? Save it to your favorite Pinterest board so you can easily find it later! ✨

This post contains affiliate links. As an Amazon Associate, I earn from qualifying purchases. This comes at no extra cost to you.


Cowboy Queso Dip Recipe

This Cowboy Queso Dip combines the smoky kick of diced tomatoes with green chilies and the irresistible creaminess of melted cheese. Every bite of this hearty dip is packed with juicy halal ground beef, tender black beans, and bursts of fresh sweet corn. Served warm with crunchy tortilla chips, it’s the ultimate appetizer for gatherings or a satisfying snack at home.

Table of Contents

Why This Cowboy Queso Dip Is Perfect for Any Occasion

  • This dip is a true crowd favorite with its rich, creamy base that pairs perfectly with any gathering. Whether it’s game day or a potluck, the bold flavors ensure it stands out.
  • Easy to make in under 30 minutes, this recipe eliminates the stress of complicated appetizers. Perfect for busy schedules when you still want something indulgent and satisfying.
  • The combination of ground beef, black beans, and corn adds a hearty texture that sets it apart from traditional cheese dips. This isn’t just a snack—it can double as a meal!
  • The blend of spices like chili powder and cumin delivers a Tex-Mex flair that will have everyone asking for the recipe. Each bite bursts with warmth and flavor.

Everything You Need for Cowboy Queso Dip

The cream cheese creates a smooth and velvety texture, while the cheddar cheese adds a sharp, savory kick. Together, they form the base for the perfect cheesy dip that clings to every tortilla chip.

How To Make Cowboy Queso Dip Step by Step

  1. In a large skillet, heat the olive oil over medium heat. Add the diced onion and cook until translucent, about 4-5 minutes. Stir occasionally to prevent burning.
  2. Add the minced garlic and ground beef to the skillet. Cook until the beef is browned and fully cooked, breaking it apart with a spoon, about 5-7 minutes. Season lightly with salt and pepper as it cooks.
  3. Stir in the diced tomatoes with green chilies, black beans, and corn. Ensure the ingredients are evenly distributed before adding the cheeses.
  4. Add the cream cheese, shredded cheddar cheese, chili powder, and cumin. Mix well until the cheeses melt and create a creamy, cohesive dip.
    A creamy and cheesy cowboy queso dip served with tortilla chips

    KitchenAid Artisan Stand Mixer

    Kitchen ApplianceKitchenAid Artisan Stand Mixer

    Makes mixing dough and batters effortless — a kitchen game-changer

    View on Amazon →

    Essential CookwareLodge Cast Iron Skillet 12-inch

    Perfect for searing and baking — this recipe needs even heat distribution

    View on Amazon →

  5. Reduce the heat to low and let the dip simmer for about 5-10 minutes. Stir occasionally to prevent sticking and allow the flavors to meld together.
  6. Once the dip is creamy and heated through, remove from heat. Garnish with chopped cilantro and serve warm with tortilla chips.

Storing and Reheating Cowboy Queso Dip

To store, transfer any leftover dip to an airtight container and refrigerate for up to 3 days. For longer storage, it can be frozen for up to 2 months—just allow it to cool completely before freezing.

Reheat the dip on the stovetop over low heat, stirring frequently to prevent scorching. If reheating from frozen, thaw it in the fridge overnight before warming it up.

Frequently Asked Questions About Cowboy Queso Dip

  • Can I make this dip vegetarian? Yes! Simply omit the ground beef and add extra beans or vegetables for a hearty meat-free version.
  • Can I adjust the spice level? Absolutely! Swap out the diced tomatoes with green chilies for a milder or spicier version depending on your preference.
  • What’s the best way to keep it warm for a party? A small slow cooker on the “warm” setting is perfect for maintaining the creamy texture without overcooking.

Expert Tips for Perfect Cowboy Queso Dip

  • For an ultra-smooth texture, let the cream cheese fully soften before adding it. This prevents clumps and ensures a consistent dip.
  • Cook the ground beef in small batches if needed to avoid overcrowding. Browning the beef properly enhances the overall flavor.
  • Use freshly shredded cheddar cheese instead of pre-shredded for better melting. Pre-shredded cheese often contains anti-caking agents that can affect texture.
  • Don’t skip the garnishes! Fresh cilantro adds a bright, herbaceous finish that balances the richness of the cheese.

Serving Ideas for Cowboy Queso Dip

  • With tortilla chips: Classic and essential! Their salty crunch is the perfect partner to this creamy dip.
  • Over baked potatoes: Transform leftovers into a loaded potato topping for a hearty meal.
  • As a taco topping: Use it as a cheesy addition to tacos or burritos for extra indulgence.
  • With veggie sticks: Balance the richness by pairing it with crisp cucumber, celery, or bell peppers.


Cowboy Queso Dip

Prep Time 10 minutes
Cook Time 20 minutes
Total Time 30 minutes
Servings 8 servings
Calories 300
A creamy and flavorful dip made with ground beef, cheese, and beans, perfect for parties or game day.

Ingredients

Instructions 

  • In a large skillet, heat the olive oil over medium heat. Add the diced onion and cook until translucent, about 4-5 minutes.
  • Add the minced garlic and ground beef to the skillet. Cook until the beef is browned and fully cooked, breaking it apart with a spoon, about 5-7 minutes.
  • Stir in the diced tomatoes with green chilies, black beans, corn, cream cheese, cheddar cheese, chili powder, cumin, salt, and pepper. Mix well until the cheese is melted and everything is combined.
  • Reduce the heat to low and let the dip simmer for about 5-10 minutes, stirring occasionally.
  • Once the dip is creamy and heated through, remove from heat. Garnish with chopped cilantro.
  • Serve warm with tortilla chips for dipping.

Notes

For a spicier dip, add jalapeños or hot sauce to taste.
Calories: 300kcal
Cost: $15
Course: Appetizer
Cuisine: Tex-Mex
Keyword: queso dip

A creamy and cheesy cowboy queso dip served with tortilla chips

Loved this recipe? Save it to your favorite Pinterest board so you can easily find it later! ✨

This post contains affiliate links. As an Amazon Associate, I earn from qualifying purchases. This comes at no extra cost to you.


Protein Bars Recipe

Protein Bars Recipe

This protein bars recipe delivers a chewy, nutty, and slightly sweet treat packed with wholesome ingredients like oats and peanut butter. The no-bake method ensures an effortless creation of bars with a perfectly balanced texture. Aromas of honey and vanilla make these protein bars irresistible for anyone needing an energy-packed snack.

Table of Contents

Why This Protein Bars Recipe is Perfect for You

  • Skip the store-bought versions filled with preservatives and enjoy a homemade alternative. This protein bars recipe is made with natural, wholesome ingredients you can trust.
  • Perfect for busy lifestyles, they only take 10 minutes to prepare and require no baking. They’re an easy grab-and-go option for athletes, parents, or busy professionals alike.
  • Control your flavors and nutrition by customizing the ingredients. Whether you prefer chocolate chips or dried fruits, this recipe adapts to your needs.
  • Fuel your workouts with these energy-packed bars. The oats and protein powder provide long-lasting energy and aid in muscle recovery post-exercise.

Everything You Need for Protein Bars Recipe

The combination of rolled oats and protein powder makes these bars a powerhouse of energy and nutrients. Peanut butter not only binds the mixture but also adds a rich, nutty flavor that complements the sweetness of honey.

How To Make Protein Bars Recipe Step by Step

  1. In a large mixing bowl, combine the rolled oats, protein powder, cocoa powder (if using), and salt.
  2. In a separate bowl, mix the peanut butter and honey (or maple syrup) until smooth.
  3. Add the wet ingredients to the dry ingredients and stir until well combined.
  4. Fold in the chopped nuts, dried fruits, and dark chocolate chips (if using).
    Homemade protein bars arranged on a wooden cutting board

    Kitchen ApplianceKitchenAid Artisan Stand Mixer

    Makes mixing dough and batters effortless — a kitchen game-changer.

    View on Amazon →

    Essential CookwarePyrex Mixing Bowl Set

    Essential for mixing ingredients — durable and versatile for all your baking needs.

    View on Amazon →

  5. Line an 8×8 inch baking pan with parchment paper, leaving some overhang for easy removal.
  6. Press the mixture firmly into the pan, spreading it evenly.
  7. Refrigerate the bars for at least 1-2 hours to set.
  8. Once set, lift the bars out of the pan using the parchment paper and cut into desired sizes.
  9. Store the protein bars in an airtight container in the fridge for up to a week.

How to Store and Meal Prep Protein Bars

To keep your protein bars fresh, store them in an airtight container in the refrigerator. They will stay flavorful and firm for up to a week.

For longer storage, wrap individual pieces in parchment paper and place them in a freezer-safe bag. They can last up to three months in the freezer, making them a convenient snack for meal prepping.

Easy Ingredient Swaps for Protein Bars

If you’re out of natural peanut butter, almond butter makes a fantastic alternative with a slightly milder flavor. Swap honey with maple syrup for a vegan-friendly option that keeps the same sweetness.

You might also enjoy our no bake fireworks oreo cheesecake bars.

For added texture, try replacing chopped nuts with seeds like pumpkin or sunflower seeds. You can also experiment with different dried fruits for a unique flavor twist, such as chopped dates or dried blueberries.

The Story Behind Protein Bars

Protein bars have a long history of fueling athletes and adventurers. Originally designed as compact energy sources for hikers and astronauts, they have since gained popularity as convenient snacks for busy days.

For more ideas, check out our mexican churro cheesecake bars: a.

Homemade variations like this protein bars recipe are now preferred for their customizable flavors and clean ingredient list. These bars are a reflection of how simple, wholesome eating can meet modern-day nutritional needs.

Serving Ideas for Protein Bars

Enjoy these protein bars as a quick breakfast on busy mornings, paired with a cup of coffee or tea for a satisfying start. They also make excellent pre- or post-workout snacks, giving you a boost of energy and recovery nutrients.

Looking for something similar? Try our 4th of july cookie bars.

For a balanced snack, serve them alongside fresh fruit like apple slices or berries. If you’re hosting, cut the bars into smaller squares and serve them as bite-sized snacks with a selection of nuts and dried fruits for variety.


Protein Bars Recipe

Prep Time 15 minutes
Total Time 2 hours
Servings 12 servings
Calories 200
These homemade protein bars are a delicious and nutritious snack, perfect for on-the-go energy.

Ingredients

Instructions 

  • In a large mixing bowl, combine the rolled oats, protein powder, cocoa powder (if using), and salt.
  • In a separate bowl, mix the peanut butter and honey (or maple syrup) until smooth.
  • Add the wet ingredients to the dry ingredients and stir until well combined.
  • Fold in the chopped nuts, dried fruits, and dark chocolate chips (if using).
  • Line an 8x8 inch baking pan with parchment paper, leaving some overhang for easy removal.
  • Press the mixture firmly into the pan, spreading it evenly.
  • Refrigerate the bars for at least 1-2 hours to set.
  • Once set, lift the bars out of the pan using the parchment paper and cut into desired sizes.
  • Store the protein bars in an airtight container in the fridge for up to a week.

Notes

Feel free to customize the nuts and dried fruits based on your preference.
Calories: 200kcal
Cost: $10
Course: Snack
Cuisine: American
Keyword: protein bars

Homemade protein bars arranged on a wooden cutting board

Loved this recipe? Save it to your favorite Pinterest board so you can easily find it later! ✨

This post contains affiliate links. As an Amazon Associate, I earn from qualifying purchases. This comes at no extra cost to you.


Delicious Mini Taco Cups Recipe for Easy Appetizers

This Delicious Mini Taco Cups Recipe for Easy Appetizers combines crispy tortilla shells, seasoned halal meat filling, and vibrant toppings into bite-sized perfection. Each cup bursts with a medley of flavors: the savory warmth of taco seasoning, the fresh crunch of lettuce, and the creamy finish of sour cream. Perfect for parties or casual snacking, these mini tacos are just as enjoyable to look at as they are to eat.

The golden, slightly crisp edges of the tortilla cups paired with the gooey cheddar cheese topping will keep your guests reaching for more. Whether it’s a game day spread or a family gathering, these little taco appetizers are sure to impress. Ready to make snack time a delicious fiesta?

Table of Contents

Why This Delicious Mini Taco Cups Recipe for Easy Appetizers Is Perfect

  • These mini taco cups are quick and easy to make, making them perfect for busy weekdays or last-minute gatherings. The simple steps mean you can whip them together in under 30 minutes without sacrificing flavor.
  • The individual portions of this dish make it more hygienic and convenient for parties. Guests can grab their own taco cups without worrying about sharing utensils or plates.
  • This taco cups recipe combines a medley of flavors and textures to satisfy your taste buds. From the juicy seasoned meat to the fresh veggie toppings, every bite is packed with variety.
  • You can easily customize these taco appetizers with different toppings or swap out ingredients to suit your dietary needs. It’s an ideal solution for picky eaters or those with dietary restrictions.

Everything You Need for Delicious Mini Taco Cups Recipe for Easy Appetizers

The ground halal beef or turkey serves as the flavorful base for this dish, while the taco seasoning elevates its taste with bold spices. Mini flour tortillas are the perfect size and shape to create crisp, golden cups that hold all the toppings beautifully.

How To Make Delicious Mini Taco Cups Recipe for Easy Appetizers Step by Step

  1. Preheat your oven to 375°F (190°C).
  2. In a large skillet, heat olive oil over medium heat. Add the finely chopped onion and minced garlic, sautéing until softened — about 2-3 minutes.
  3. Add the ground halal beef or turkey to the skillet, breaking it apart with a spatula. Cook until browned and no longer pink, stirring frequently.
  4. Stir in the taco seasoning and water, mixing thoroughly. Let it simmer for about 5 minutes until the mixture thickens slightly.
    Mini taco cups filled with ground beef, cheese, and fresh toppings on a wooden table

    Lodge Cast Iron Skillet 12-inch

    Essential CookwareLodge Cast Iron Skillet 12-inch

    Perfect for searing and baking — this recipe needs even heat distribution

    View on Amazon →

  5. Lightly spray a muffin tin with cooking spray to prevent sticking.
  6. Use a round cutter to shape the mini flour tortillas into circles or press them directly into the muffin tin cups if they fit naturally.
  7. Press each tortilla firmly into the muffin tins to form small cup shapes.
  8. Fill each tortilla cup with the taco meat mixture, then top with shredded cheddar cheese for a gooey finish.
  9. Bake in the preheated oven for 10-12 minutes, or until the cheese melts and the edges of the tortillas turn slightly crispy.
  10. Remove the muffin tin from the oven and allow the taco cups to cool slightly for easy removal.
  11. Top each cup with shredded lettuce, diced tomatoes, sliced black olives, a dollop of sour cream, and fresh cilantro if desired.
  12. Serve these mini taco cups warm and enjoy their perfect blend of textures and flavors!

The Story Behind Mini Taco Cups

Mini taco cups are a creative evolution of the classic taco, designed for easy handling and eating at gatherings. This handheld version likely originated as a way to serve tacos in a shareable, single-serving format without the mess often associated with traditional tacos.

You might also enjoy our red white and blue dirt cups.

The use of mini tortillas and muffin tins for shaping has made this dish a modern staple for parties and celebrations. Its versatility makes it a favorite across different cuisines and occasions, from casual dinners to holiday feasts.

For more ideas, check out our red, white & blue dirt.

Expert Tips for Better Mini Taco Cups

  • Press the tortillas firmly into the muffin tins to ensure they hold their shape while baking. This prevents them from collapsing under the weight of the filling.
  • Use freshly shredded cheddar cheese instead of pre-shredded for better melting and flavor. Pre-shredded cheese often contains additives that can affect the texture when melted.
  • If you’re pressed for time, prepare the taco meat mixture a day ahead and refrigerate it. Reheat it gently before assembling the cups for a quick finish.
  • Customize your toppings to suit your preferences — try avocado slices or pickled jalapeños for an extra burst of flavor.

Prep, Storage, and Reheating Made Easy

To make these mini taco cups ahead of time, prepare the meat filling and store it in an airtight container in the refrigerator for up to 3 days. Assemble and bake the tortilla cups when you’re ready to serve.

Looking for something similar? Try our delicious peri peri chicken and.

If you have leftovers, store them in the fridge for up to 2 days in a sealed container. Reheat the taco cups in a 375°F (190°C) oven for 5-7 minutes to restore their crispness without making them soggy.

For longer storage, freeze the baked cups before adding toppings. When ready to serve, thaw them in the fridge and reheat as instructed. Add fresh toppings right before serving to maintain their vibrant texture and flavor.

Common Mistakes to Avoid

  • Not securing the tortillas firmly in the muffin tin can result in uneven or floppy cups. Press each tortilla well to ensure it molds properly.
  • Overfilling the cups may cause them to spill or become too difficult to eat. Stick to a balanced meat and cheese ratio for the best results.
  • Skipping the cooling step after baking can lead to torn or messy cups. Allow them to cool slightly before removing them from the tin for cleaner presentation.


Delicious Mini Taco Cups Recipe for Easy Appetizers

Prep Time 15 minutes
Cook Time 12 minutes
Total Time 27 minutes
Servings 12 servings
Calories 250
These mini taco cups are a fun and easy appetizer perfect for any gathering. Filled with seasoned meat and topped with fresh ingredients, they are sure to be a hit!

Ingredients

Instructions 

  • Preheat the oven to 375°F (190°C).
  • In a large skillet, heat olive oil over medium heat. Add chopped onion and garlic, sautéing until softened.
  • Add the ground halal beef or turkey to the skillet, breaking it apart with a spatula. Cook until browned and no longer pink.
  • Stir in the taco seasoning and water, mixing well. Let it simmer for about 5 minutes until the mixture thickens slightly.
  • While the meat is cooking, lightly spray a muffin tin with cooking spray.
  • Use a round cutter to cut each mini flour tortilla into a circle, or use them as they are if they fit the muffin tin.
  • Press each tortilla into the muffin tin cups to form a small cup shape.
  • Fill each tortilla cup with the taco meat mixture, then top with shredded cheddar cheese.
  • Bake in the preheated oven for 10-12 minutes, or until the cheese is melted and the edges of the tortillas are slightly crispy.
  • Remove from the oven and let cool for a few minutes. Carefully remove the taco cups from the muffin tin.
  • Top each mini taco cup with shredded lettuce, diced tomatoes, black olives, a dollop of sour cream, and cilantro if desired.
  • Serve warm and enjoy your delicious mini taco cups!

Notes

Feel free to customize the toppings based on your preferences.
Calories: 250kcal
Cost: $15
Course: Appetizer
Cuisine: Mexican
Keyword: taco cups

Mini taco cups filled with ground beef, cheese, and fresh toppings on a wooden table

Loved this recipe? Save it to your favorite Pinterest board so you can easily find it later! ✨

This post contains affiliate links. As an Amazon Associate, I earn from qualifying purchases. This comes at no extra cost to you.


Mini Macaroni and Cheese Bites: Crunchy Cracker-Crust Appetizers

Mini Macaroni and Cheese Bites: Crunchy Cracker-Crust Appetizers combine creamy, cheesy goodness with a buttery, golden crust that’s delightfully crunchy. Every bite is packed with rich cheddar flavor, while the crispy topping of crushed crackers and Parmesan adds irresistible texture. These are perfect for parties, game days, or simply when you’re craving something indulgent yet portable.

Table of Contents

Why You Need These Mini Macaroni and Cheese Bites

  • These bites are the ultimate snack idea for satisfying cheesy cravings without a mess. Their handheld size makes them perfect for parties, school lunches, or game days.
  • The combination of creamy macaroni and cheese with a crisp cracker crust is a texture lover’s dream. Each bite balances smooth, gooey filling with a golden, crunchy topping.
  • You only need simple pantry staples to whip these up. No fancy tools or gourmet groceries required, making them a budget-friendly option anytime.
  • They’re easy to transport and reheat, which makes them perfect for potlucks or on-the-go snacking. Plus, they’re a fun recipe to make with kids!

Everything You Need for Mini Macaroni and Cheese Bites

The sharp cheddar cheese is the heart of the dish, giving it its signature bold flavor. Meanwhile, the crushed crackers provide that buttery, crispy topping that takes these bites to the next level.

Looking for something similar? Try our slow cooker garlic butter beef.

For more ideas, check out our slow cooker garlic butter beef.

You might also enjoy our 3 ingredient paleo vegan no.

How To Make Mini Macaroni and Cheese Bites Step by Step

  1. Preheat the oven to 350°F (175°C) and grease a mini muffin tin thoroughly.
  2. Cook the elbow macaroni according to the package instructions until al dente. Drain the pasta well and set it aside.
  3. In a medium saucepan over medium heat, melt the unsalted butter. Stir in the all-purpose flour and cook for 1-2 minutes until the mixture is bubbly and slightly golden.
  4. Gradually whisk in the milk, making sure to stir continuously to avoid lumps. Continue cooking for 3-5 minutes until the sauce thickens.
  5. Remove from heat and mix in the shredded cheddar cheese, garlic powder, onion powder, black pepper, salt, and paprika until smooth and creamy.
  6. Combine the cheese sauce with the cooked macaroni, stirring to coat every piece of pasta evenly.
  7. In a separate small bowl, stir together the crushed crackers and grated Parmesan cheese.
  8. Fill each greased mini muffin cup about 3/4 full with the macaroni and cheese mixture.
    A plate of golden-brown mini macaroni and cheese bites with a crunchy cracker crust

    KitchenAid Artisan Stand Mixer

    Kitchen ApplianceKitchenAid Artisan Stand Mixer

    Makes mixing dough and batters effortless — a kitchen game-changer

    View on Amazon →

    Essential CookwareWilton Easy-Flex Silicone Baking Mat

    Perfect for baking without sticking — ideal for mini muffin tins

    View on Amazon →

  9. Sprinkle the cracker and Parmesan topping generously over each macaroni bite.
  10. Bake in the preheated oven for 15-20 minutes, or until the tops are golden and crisp.
  11. Allow the bites to cool for a few minutes before carefully removing them from the tin. Use a small offset spatula if needed.
  12. Garnish with chopped parsley if desired and serve these irresistible bites warm.

Make These Bites Shine with Perfect Pairings

  • Pair these mini bites with a fresh green salad for a light contrast to their rich, cheesy flavor.
  • Offer a side of tangy barbecue sauce or marinara for dipping to add a fun twist to the flavor profile.
  • Serve with crispy baked chicken wings for a game-day feast that’s sure to please snack lovers.
  • For a kid-friendly platter, add some fresh-cut fruit or crunchy veggie sticks alongside them.

Avoid These Mistakes for Perfect Mini Bites

  • Skipping the greasing step can make removal tricky. Be sure to coat every muffin cup well to prevent sticking.
  • Don’t overcook the pasta; slightly undercooking ensures it doesn’t turn mushy when baked.
  • Avoid using pre-shredded cheese, which often contains anti-caking agents that may prevent smooth melting.

Easy Ingredient Swaps for a Twist

  • Swap cheddar for pepper jack cheese to give a spicy kick to your bites.
  • Use gluten-free crackers and pasta to accommodate guests with gluten sensitivities.
  • Replace the Parmesan in the topping with a bit of mozzarella for a gooey, stretchy finish.


Mini Macaroni and Cheese Bites: Crunchy Cracker-Crust Appetizers

Prep Time 15 minutes
Cook Time 20 minutes
Total Time 35 minutes
Servings 12 servings
Calories 150
These mini macaroni and cheese bites are a delightful appetizer featuring a crunchy cracker crust and creamy cheese filling.

Ingredients

Instructions 

  • Preheat the oven to 350°F (175°C) and grease a mini muffin tin.
  • Cook the elbow macaroni according to package instructions until al dente. Drain and set aside.
  • In a medium saucepan over medium heat, melt the butter. Stir in the flour and cook for 1-2 minutes until bubbly.
  • Gradually whisk in the milk, continuing to stir until the mixture thickens, about 3-5 minutes.
  • Remove from heat and add the cheddar cheese, garlic powder, onion powder, black pepper, salt, and paprika. Stir until the cheese is completely melted and smooth.
  • Combine the cooked macaroni with the cheese sauce, mixing well to coat the pasta.
  • In a separate bowl, mix the crushed crackers and grated Parmesan cheese.
  • Spoon the macaroni and cheese mixture into the greased mini muffin cups, filling each about 3/4 full.
  • Sprinkle the cracker and Parmesan mixture evenly over the top of each macaroni bite.
  • Bake in the preheated oven for 15-20 minutes, or until the tops are golden and crispy.
  • Remove from the oven and let cool for a few minutes before carefully removing the bites from the tin.
  • Garnish with chopped parsley if desired and serve warm.

Notes

These bites can be made ahead of time and reheated before serving.
Calories: 150kcal
Cost: $10
Course: Appetizer
Cuisine: American
Keyword: macaroni and cheese

A plate of golden-brown mini macaroni and cheese bites with a crunchy cracker crust

Loved this recipe? Save it to your favorite Pinterest board so you can easily find it later! ✨

This post contains affiliate links. As an Amazon Associate, I earn from qualifying purchases. This comes at no extra cost to you.


Loaded Nachos | Easy Game Day Food

Loaded Nachos | Easy Game Day Food

This loaded nachos recipe is a flavor-packed masterpiece made for game day gatherings. Imagine crunchy tortilla chips layered with perfectly seasoned halal chicken, creamy melted cheese, and fresh toppings like avocado and pico de gallo. It’s the ultimate combination of textures and bold, zesty flavors that will keep everyone coming back for more.

Ready in just under 30 minutes, this easy nachos recipe is your go-to snack for effortless entertaining. With its loaded toppings and quick prep time, it’s guaranteed to score points with friends and family alike. Let’s dive in and create a spread-worthy dish for your big game day celebration!

Table of Contents

Why These Loaded Nachos Are Perfect for Game Day

  • They’re quick and easy to make, perfect for when you need a game day snack in a pinch.
    With just 15 minutes of prep and 12 minutes in the oven, you’ll have a piping hot snack ready to serve.
  • These nachos are layered with bold flavors like seasoned halal chicken and tangy pico de gallo.
    Packed with fresh ingredients, they’ll be the highlight of your game day spread.
  • They’re customizable so everyone’s preferences are covered.
    Add extra jalapeños for spice lovers or go heavy on avocado for a creamier bite.
  • This loaded nachos recipe creates a crispy, cheesy, and satisfying dish that pairs perfectly with cheering on your favorite team.
    The melted cheddar and mozzarella ensure that each bite is as indulgent as it is satisfying.

Everything You Need for Loaded Nachos

The combination of shredded halal chicken and a blend of cheddar and mozzarella cheese makes these nachos especially rich and satisfying. Fresh avocado and pico de gallo add brightness and balance, ensuring each bite is packed with flavor.

You might also enjoy our chicken bubble biscuit bake casserole:.

How to Make Loaded Nachos Step by Step

  1. Preheat your oven to 350°F (175°C).
  2. In a mixing bowl, combine the cooked shredded halal chicken with olive oil, ground cumin, chili powder, salt, and pepper. Mix well to coat the chicken evenly with spices.
  3. Spread the tortilla chips evenly across a large baking sheet to create a sturdy base.
  4. Evenly distribute the seasoned chicken and black beans over the tortilla chips for balanced bites.
    A plate of loaded nachos topped with cheese, jalapenos, and guacamole

    Lodge Cast Iron Skillet 12-inch

    Essential CookwareLodge Cast Iron Skillet 12-inch

    Perfect for searing and baking — this recipe needs even heat distribution

    View on Amazon →

  5. Generously sprinkle the shredded cheddar and mozzarella cheese over everything to ensure even coverage.
  6. Place the baking sheet in the oven and bake for about 10-12 minutes, or until the cheese is fully melted and bubbly.
  7. Remove the baking sheet from the oven and immediately top with diced avocado, pico de gallo, jalapeños, and fresh cilantro.
  8. Drizzle sour cream over the nachos for a creamy finish, using a spoon or piping bag for added precision.
  9. Serve the loaded nachos hot and enjoy this quick and flavorful game day snack!

Common Mistakes to Avoid

  • Avoid overloading your nachos with wet toppings before baking. Excess moisture from ingredients like beans or cheese can make the chips soggy.
  • Don’t skip preheating the oven. A hot oven ensures the cheese melts evenly and the toppings stay warm for serving.
  • Be cautious with the salt. Remember that many ingredients, like tortilla chips and cheese, are already salty.

Easy Swaps and Substitutions for Loaded Nachos

  • If you don’t have halal chicken, substitute with shredded rotisserie chicken for a quicker option. Season it the same way for consistency.
  • Try using pinto beans instead of black beans for a slightly creamier texture. They pair beautifully with the melted cheese and spices.
  • No fresh avocado? Use store-bought guacamole as a creamy alternative that still delivers the same rich flavor.

What to Serve with Loaded Nachos

  • Serve alongside a refreshing limeade or iced lemonade for a cool contrast to the spicy jalapeños.
  • Pair with a side of queso dip and extra tortilla chips for those who want even more cheese on their plate.
  • Offer a crisp side salad with a zesty vinaigrette to complement the richness of the nachos.
  • Balance the spicy and tangy flavors with a light and creamy dessert like vanilla ice cream or a fruit parfait.


Loaded Nachos | Easy Game Day Food

Prep Time 15 minutes
Cook Time 12 minutes
Total Time 27 minutes
Servings 4 servings
Calories 600
Delicious loaded nachos topped with seasoned chicken, cheese, and fresh toppings, perfect for game day.

Ingredients

Instructions 

  • Preheat your oven to 350°F (175°C).
  • In a mixing bowl, combine the cooked shredded halal chicken with olive oil, ground cumin, chili powder, salt, and pepper. Mix well to coat the chicken evenly.
  • Spread the tortilla chips evenly on a large baking sheet.
  • Evenly distribute the seasoned chicken and black beans over the tortilla chips.
  • Sprinkle the shredded cheddar and mozzarella cheese generously over the top.
  • Place the baking sheet in the preheated oven and bake for about 10-12 minutes, or until the cheese is melted and bubbly.
  • Remove from the oven and top with diced avocado, pico de gallo, jalapeños, and fresh cilantro.
  • Drizzle sour cream over the nachos before serving.
  • Serve immediately while hot and enjoy your loaded nachos!

Notes

Feel free to customize toppings based on your preferences.
Calories: 600kcal
Cost: $15
Course: Snack
Cuisine: Mexican
Keyword: Nachos

A plate of loaded nachos topped with cheese, jalapenos, and guacamole

Loved this recipe? Save it to your favorite Pinterest board so you can easily find it later! ✨

This post contains affiliate links. As an Amazon Associate, I earn from qualifying purchases. This comes at no extra cost to you.

Crack Chicken Pinwheels bring together the perfect balance of creamy, cheesy goodness and bold flavors in every bite. The combination of tender shredded halal chicken, tangy ranch dressing, and savory cheddar cheese wrapped in a soft tortilla creates a texture and flavor profile that’s irresistible. Whether you’re planning for game day, a potluck, or a quick snack, these pinwheels are guaranteed to impress while keeping prep time to a minimum.

Table of Contents

Why You’ll Love These Pinwheels

  • Perfect for parties and gatherings: These crack chicken pinwheels are bite-sized and easy to grab, making them an ideal finger food for any occasion.
  • Quick and easy to prepare: With just 15 minutes of prep time and no cooking required, you can whip these up in no time for a last-minute meal or snack.
  • Customizable flavors to suit your taste: The recipe allows for simple tweaks, so you can add more or less spice depending on your preference.
  • Make-ahead convenience: Prepare them the night before and store them in the fridge for a stress-free snack or addition to your party spread.

Everything You Need for Crack Chicken Pinwheels

The combination of softened cream cheese and ranch dressing creates the ideal creamy base for these pinwheels. The shredded halal chicken adds a hearty texture, while the cheddar cheese and spices provide the perfect savory kick.

How to Make Crack Chicken Pinwheels Step by Step

  1. In a large mixing bowl, combine the cooked and shredded halal chicken, softened cream cheese, ranch dressing, shredded cheddar cheese, chopped green onions, garlic powder, onion powder, and black pepper.
  2. Mix everything together until the ingredients are well combined, creamy, and evenly seasoned.
  3. On a clean surface, lay one tortilla flat and spread a generous portion of the chicken mixture evenly across it, leaving a small border around the edges.
  4. Delicious crack chicken pinwheels arranged on a wooden platter

    Pyrex Mixing Bowl Set

    Essential CookwarePyrex Mixing Bowl Set

    Essential for mixing and preparing ingredients for your pinwheels.

    View on Amazon →

  5. Starting at one edge, carefully roll the tortilla tightly, ensuring the filling stays inside as you roll.
  6. Repeat the process with the remaining tortillas and filling until you’ve used all of the ingredients.
  7. Place the rolled tortillas on a cutting board, seam side down, to ensure they don’t unravel.
  8. Using a sharp knife, slice each rolled tortilla into bite-sized pinwheels, about 1-2 inches thick.
  9. Arrange the pinwheels on a serving platter and, if desired, garnish them with fresh chopped parsley for a touch of color and flavor.
  10. Serve immediately for a fresh taste or refrigerate them until ready to serve, ensuring they maintain their tight shape.

Storage and Reheating Tips

To store crack chicken pinwheels, place them in an airtight container and refrigerate for up to 3 days. For the best results, layer the pinwheels between pieces of parchment paper to prevent sticking.

If you’d like to enjoy them warm, reheat individual pinwheels in the microwave on low power for about 15-20 seconds. While these pinwheels are typically served cold or at room temperature, a warm option can bring out the creaminess of the cheese even more.

You might also enjoy our creamy smothered chicken and rice.

Ingredient Swaps and Substitutions

  • Swap the cheddar cheese for pepper jack to add a spicy kick to the pinwheels.
  • Use low-fat cream cheese and a lighter ranch dressing to make this dish a bit more calorie-conscious without sacrificing flavor.
  • Opt for gluten-free tortillas if you’re serving guests with gluten sensitivities or preferences, ensuring they meet halal requirements.

Each of these swaps maintains the creamy and flavorful profile of the dish while catering to different dietary needs or personal tastes.

For more ideas, check out our creamy garlic parmesan chicken pasta.

Serving Ideas

  • Pair these pinwheels with a crisp vegetable platter for a refreshing and balanced spread.
  • Serve alongside tortilla chips and a creamy dip for a game-day finger food buffet.
  • Include these pinwheels as part of a larger halal charcuterie board with meats, cheeses, and crackers.
  • Platter them with fresh fruit for a sweet and savory combination that’s perfect for potlucks or picnics.

The versatility of these pinwheels makes them a great addition to any meal or event, offering a quick and easy way to impress guests without overcomplicating your menu.

Looking for something similar? Try our garlic parmesan chicken and pasta:.

FAQ

  • Can I make crack chicken pinwheels ahead of time?
    Yes, these pinwheels can be made up to a day in advance. Just store them in an airtight container in the refrigerator until serving time.
  • What’s the best way to keep the tortillas from getting soggy?
    To avoid soggy pinwheels, ensure your chicken mixture isn’t overly wet and leave a small border when spreading the filling on the tortillas.
  • Can I freeze crack chicken pinwheels?
    Freezing is not recommended, as the cream cheese can change in texture once thawed. However, you can prepare the chicken mixture ahead of time, freeze it, and assemble fresh pinwheels when needed.

Crack Chicken Pinwheels

Prep Time 20 minutes
Total Time 20 minutes
Servings 8 servings
Calories 250
Delicious and creamy chicken pinwheels that are perfect for parties or a quick meal.

Ingredients

Instructions 

  • In a large mixing bowl, combine the cooked and shredded halal chicken, softened cream cheese, ranch dressing, shredded cheddar cheese, chopped green onions, garlic powder, onion powder, and black pepper.
  • Mix until all ingredients are well combined and the mixture is creamy.
  • Lay one tortilla flat on a clean surface and spread a generous portion of the chicken mixture evenly over the tortilla, leaving a small border around the edges.
  • Carefully roll the tortilla tightly from one end to the other, ensuring the filling stays inside.
  • Repeat the process with the remaining tortillas and filling.
  • Once rolled, place the pinwheels seam side down on a cutting board.
  • Using a sharp knife, slice each roll into bite-sized pinwheels, about 1-2 inches thick.
  • Arrange the pinwheels on a serving platter and garnish with fresh parsley if desired.
  • Serve immediately or refrigerate until ready to serve.

Notes

These pinwheels can be made ahead of time and stored in the refrigerator.
Calories: 250kcal
Cost: $15
Course: Appetizer
Cuisine: American
Keyword: chicken pinwheels
Delicious crack chicken pinwheels arranged on a wooden platter

Loved this recipe? Save it to your favorite Pinterest board so you can easily find it later! ✨

This post contains affiliate links. As an Amazon Associate, I earn from qualifying purchases. This comes at no extra cost to you.

This Pumpkin Cream Cheese Swirl Muffins recipe combines the rich, earthy flavor of pumpkin with a luscious cream cheese swirl that melts into every bite. The warm spices like cinnamon and nutmeg create a cozy, fragrant treat perfect for fall mornings or holiday gatherings. Moist, tender, and bursting with autumn flavors, these muffins are a delightful way to elevate your baking game.

Table of Contents

Why Pumpkin Cream Cheese Swirl Muffins Are Worth Your Time

  • The pumpkin and cream cheese combination is a crowd favorite, delivering a creamy center balanced by warm spices. It’s perfect for those who love rich and flavorful baked goods.
  • These muffins are easy to make in under an hour, making them ideal for busy mornings or impromptu gatherings. Whip up a batch when you need a sweet treat without the hassle of an elaborate dessert.
  • The use of whole wheat flour adds a touch of wholesomeness without compromising texture or flavor. You’ll feel good serving these muffins knowing they’ve got a hint of extra nutrition.
  • Perfect for both breakfast and dessert, these muffins are versatile enough to satisfy any craving. Pair them with coffee or tea for a cozy moment of indulgence.

Everything You Need for Pumpkin Cream Cheese Swirl Muffins

The canned pumpkin puree is the star ingredient, giving these muffins their signature rich flavor and moist texture. Paired with warm spices like cinnamon, nutmeg, and ginger, the muffins bring home the essence of fall.

Looking for something similar? Try our one-pot veggie mac and cheese:.

For more ideas, check out our best homemade cheese pizza recipe:.

You might also enjoy our quick & easy cheese pizza.

How To Make Pumpkin Cream Cheese Swirl Muffins Step by Step

  1. Preheat your oven to 350°F (175°C) and line a muffin tin with paper liners.
  2. In a large bowl, whisk together the all-purpose flour, whole wheat flour, baking powder, baking soda, salt, cinnamon, nutmeg, and ginger. Mix thoroughly to ensure the spices are evenly distributed.
  3. In another bowl, combine the granulated sugar, brown sugar, pumpkin puree, vegetable oil, eggs, and 1 teaspoon of vanilla extract. Stir until the mixture is smooth and consistent.
  4. Gradually add the dry ingredients to the wet ingredients, stirring gently. Be careful not to overmix to maintain the muffins’ light texture.
  5. Freshly baked pumpkin cream cheese swirl muffins on a wooden table

    Kitchen ApplianceKitchenAid Artisan Stand Mixer

    Makes mixing dough and batters effortless — a kitchen game-changer.

    View on Amazon →

    Pyrex Mixing Bowl Set

    Essential CookwarePyrex Mixing Bowl Set

    Essential for mixing ingredients — these bowls are durable and versatile.

    View on Amazon →

  6. In a separate bowl, beat the softened cream cheese with the powdered sugar and 1 teaspoon of vanilla extract. Blend until smooth and creamy, ensuring no lumps remain.
  7. Spoon about 2 tablespoons of muffin batter into each muffin cup, then add a dollop of the cream cheese mixture on top. Use a toothpick or knife to swirl the cream cheese into the batter for a marbled effect.
  8. Top each muffin with additional batter until the cups are approximately 3/4 full. This allows space for the muffins to rise while baking.
  9. Bake in the preheated oven for 18-20 minutes, or until a toothpick inserted into the center comes out clean.
  10. Allow the muffins to cool in the pan for 5 minutes before transferring them to a wire rack. Let them cool completely to set the cream cheese swirl.

Expert Tips for Perfect Muffins

  • Use room-temperature cream cheese for the swirl mixture to ensure it blends smoothly without lumps.
  • When swirling the cream cheese into the batter, avoid over-swiping to maintain distinct layers of cream cheese and pumpkin.
  • Measure your flour accurately using the spoon-and-level method to prevent dense muffins.
  • Let the muffins cool completely before serving to enhance their texture and set the flavors.

Frequently Asked Questions

  • Can I use fresh pumpkin puree instead of canned? Yes, but make sure it is well-drained and smooth to match the texture of canned puree.
  • How should I store these muffins? Keep them in an airtight container in the refrigerator for up to 5 days, or freeze for longer storage.
  • Can I skip the cream cheese swirl? You can, but the cream cheese adds richness and balance to the recipe, so it’s highly recommended.

Easy Ingredient Swaps for This Recipe

  • Swap whole wheat flour with oat flour for a nuttier flavor and gluten-free option.
  • Replace granulated sugar with coconut sugar for a deeper caramel-like sweetness.
  • Opt for low-fat cream cheese in the swirl mixture to reduce calorie content without losing creaminess.

Common Mistakes to Avoid

  • Overmixing the batter can lead to dense muffins. Stir until just combined to preserve a light texture.
  • Using cold cream cheese will result in a lumpy swirl mixture—ensure it’s softened before blending.
  • Filling muffin cups too high may cause overflow during baking. Stick to 3/4 full for the perfect rise.

Pumpkin Cream Cheese Swirl Muffins

Prep Time 15 minutes
Cook Time 20 minutes
Total Time 35 minutes
Servings 12 servings
Calories 200
Deliciously moist muffins swirled with a creamy pumpkin and cream cheese mixture, perfect for fall.

Ingredients

Instructions 

  • Preheat your oven to 350°F (175°C) and line a muffin tin with paper liners.
  • In a large bowl, whisk together the all-purpose flour, whole wheat flour, baking powder, baking soda, salt, cinnamon, nutmeg, and ginger.
  • In another bowl, mix together the granulated sugar, brown sugar, pumpkin puree, vegetable oil, eggs, and 1 teaspoon of vanilla extract until well combined.
  • Gradually add the dry ingredients to the wet ingredients, stirring until just combined. Do not overmix.
  • In a separate bowl, beat the softened cream cheese with the powdered sugar and 1 teaspoon of vanilla extract until smooth and creamy.
  • Spoon about 2 tablespoons of muffin batter into each muffin cup, then add a dollop of the cream cheese mixture on top. Use a toothpick or knife to swirl the cream cheese into the muffin batter.
  • Top each muffin with additional muffin batter until the cups are about 3/4 full.
  • Bake in the preheated oven for 18-20 minutes, or until a toothpick inserted into the center comes out clean.
  • Allow the muffins to cool in the pan for 5 minutes, then transfer to a wire rack to cool completely.

Notes

For a sweeter muffin, add more sugar to the batter. You can also substitute the vegetable oil with melted butter for a richer flavor.
Calories: 200kcal
Cost: $15
Course: Breakfast
Cuisine: American
Keyword: muffins, pumpkin
Freshly baked pumpkin cream cheese swirl muffins on a wooden table

Loved this recipe? Save it to your favorite Pinterest board so you can easily find it later! ✨