Author

Ava

Browsing

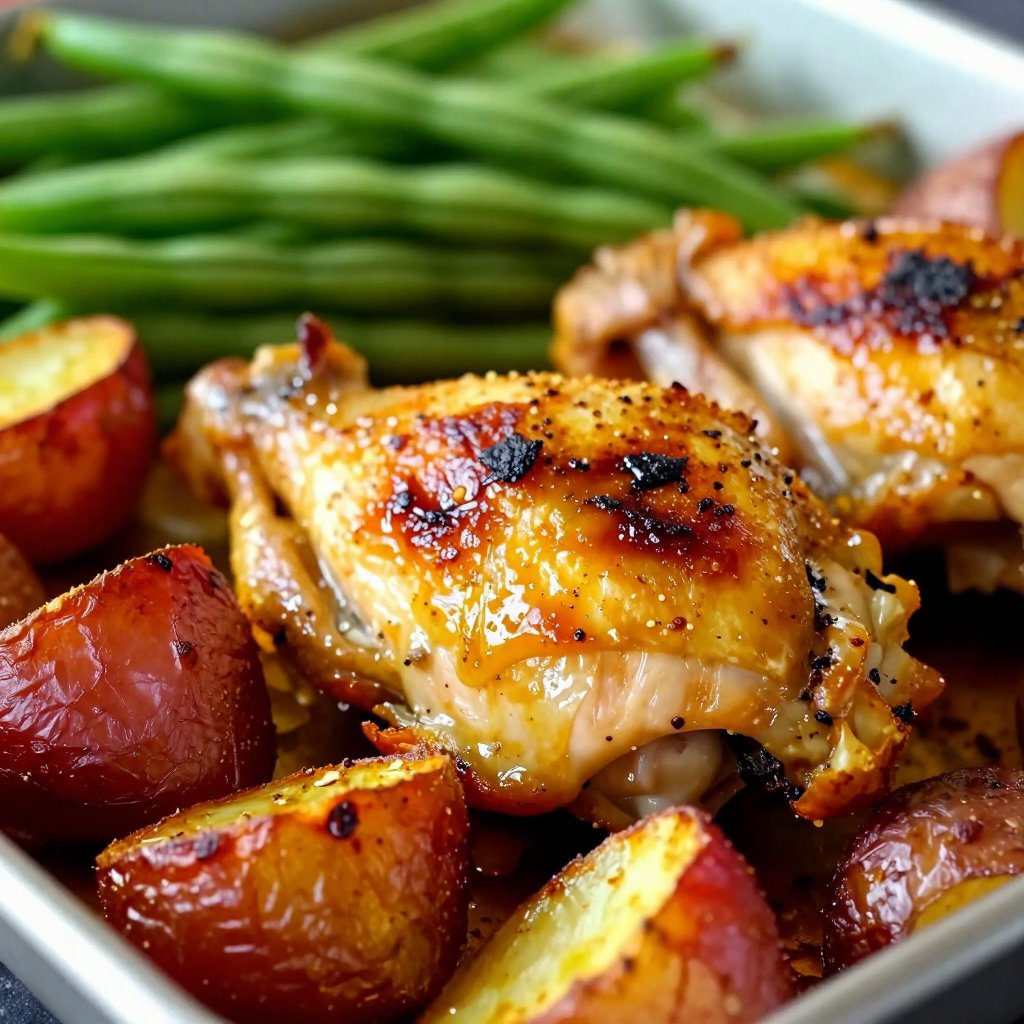
Easy Sheet Pan Italian Seasoned Chicken and Vegetables: The Weeknight Wonder You’ve Been Waiting For

Hey there, kitchen adventurers! Ava here, and I’m about to let you in on a little secret that’s saved my sanity on more than a few hectic evenings: Easy Sheet Pan Italian Seasoned Chicken and Vegetables. Yep, you heard right. One pan, minimal cleanup, and a dinner so delicious, even the pickiest eaters will be asking for seconds. If you’ve ever found yourself staring into the fridge, wondering how you’re going to conjure up a healthy and satisfying meal without spending hours in the kitchen, then you, my friend, are in the right place.

I remember one particularly chaotic Tuesday. I was juggling work deadlines, a mountain of laundry, and the sudden realization that I had absolutely nothing planned for dinner. Panic started to set in. That’s when the idea hit me: a sheet pan dinner! I threw together some chicken, veggies, a packet of Italian dressing seasoning, and hoped for the best. The result? A flavor explosion that turned that crazy Tuesday into a triumph. Since then, this recipe has become a staple in my house, and I’m so excited to share it with you.

Why You’ll Love This Sheet Pan Italian Seasoned Chicken

What makes this recipe so special? Let me count the ways:

  • Effortless Elegance: This is the kind of meal that tastes like you spent hours slaving over a hot stove, but in reality, it comes together in minutes. The magic of the oven does all the work!
  • Healthy and Wholesome: Packed with lean protein and colorful vegetables, this dish is as good for you as it is delicious. You can feel good about serving this to your family.
  • Minimal Cleanup: Seriously, who loves doing dishes? With everything cooked on one sheet pan, cleanup is a breeze. More time for relaxing, less time scrubbing.
  • Customizable: Don’t like green beans? Swap them out for broccoli! Want a little extra kick? Add a pinch of red pepper flakes. This recipe is a blank canvas for your culinary creativity.
  • Perfect for Hectic Evenings: When time is of the essence, this sheet pan chicken recipe is your secret weapon. It’s the perfect solution for those nights when you need a quick, satisfying, and healthy meal on the table fast.

Ingredients You’ll Need

Let’s gather our ingredients. This is where the magic begins!

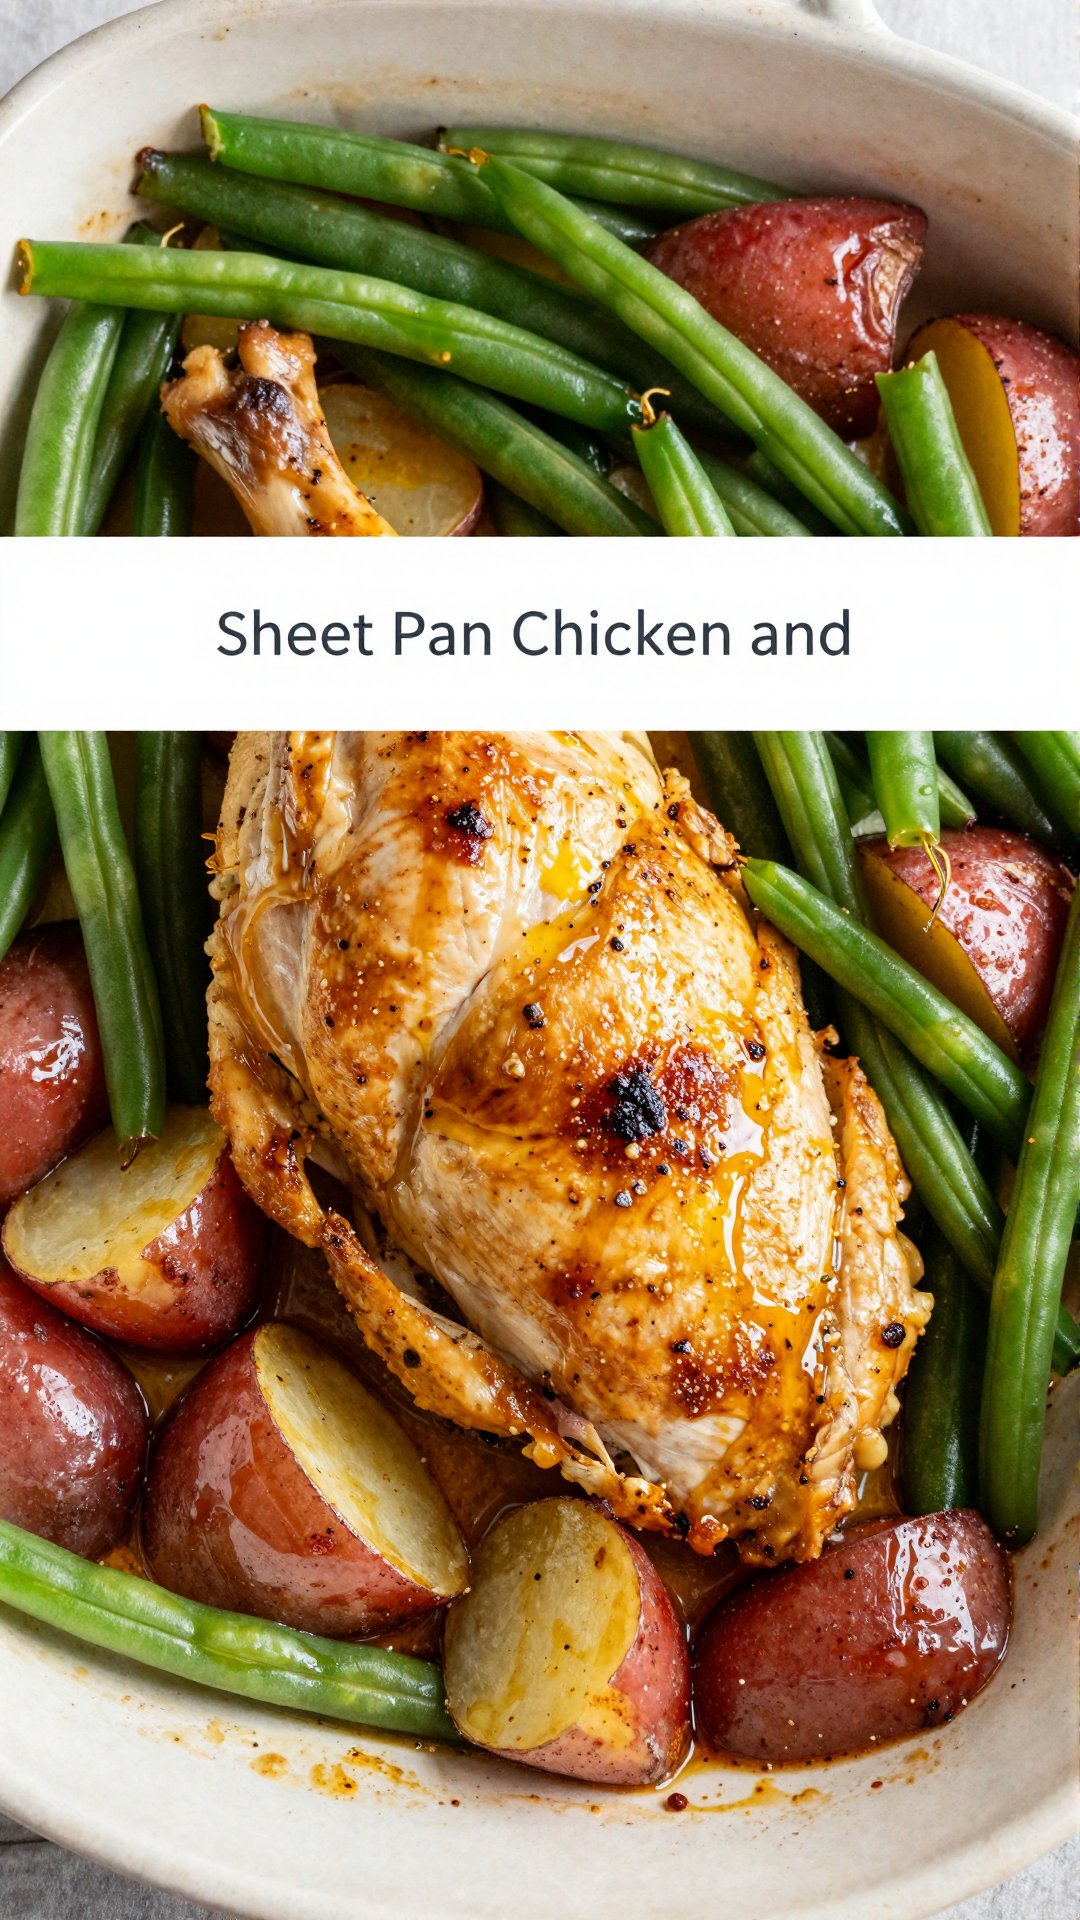
  • 2 lbs boneless skinless chicken breasts: The star of the show! Opt for chicken breasts that are roughly the same size for even cooking.
  • 1 steamer bag frozen, whole green beans: Frozen green beans are a lifesaver on busy weeknights. They’re convenient, nutritious, and add a pop of color to the dish.
  • 8 red potatoes (quartered): Red potatoes are my go-to for sheet pan dinners. They hold their shape well and have a naturally buttery flavor.
  • 8 tbsp butter (divided into 8 pieces): Butter adds richness and flavor to the chicken and vegetables. Don’t skimp on the butter!
  • 1 packet Italian Dressing seasoning: This is the secret ingredient that transforms ordinary chicken and vegetables into a flavor-packed masterpiece. I usually use the dry packet.
Recipe Image

How to Make Sheet Pan Italian Seasoned Chicken and Vegetables: Step-by-Step

Alright, let’s get cooking! Here’s how to transform those simple ingredients into a delicious and satisfying meal:

  1. Preheat oven to 350 degrees: Get that oven nice and toasty.
  2. Spray baking sheet or 4-quart baking dish with nonstick cooking spray: This prevents sticking and makes cleanup even easier. Trust me, you’ll thank me later.
  3. Arrange potatoes, chicken, and frozen green beans in 3 rows the length of the baking sheet: Presentation matters, even for a weeknight dinner! Arrange the ingredients neatly on the sheet pan for even cooking and a visually appealing dish.
  4. Sprinkle Italian Dressing seasoning over all three rows of ingredients: Don’t be shy with the seasoning! This is where all the flavor comes from. Make sure to coat everything evenly.
  5. Top with 8 tbsp of butter, evenly spaced over all three rows: The butter melts and creates a delicious sauce that coats the chicken and vegetables. It’s pure magic.
  6. Bake for 1 hour, until chicken is cooked throughout, and potatoes are fork-tender: The cooking time may vary depending on your oven. Use a meat thermometer to ensure the chicken is cooked to an internal temperature of 165 degrees Fahrenheit. The potatoes should be easily pierced with a fork.
  7. Serve and enjoy: That’s it! Dinner is served. Get ready for some happy faces around the table.

Pro Tips for the Perfect Sheet Pan Dinner

Want to take your sheet pan game to the next level? Here are a few pro tips to keep in mind:

  • Don’t overcrowd the pan: Overcrowding can lead to steaming instead of roasting, which will result in soggy vegetables and unevenly cooked chicken. If necessary, use two sheet pans.
  • Cut vegetables into uniform sizes: This ensures that everything cooks evenly. Nobody wants crunchy potatoes and overcooked chicken.
  • Use a meat thermometer: The only way to be sure that your chicken is cooked through is to use a meat thermometer. Insert it into the thickest part of the chicken breast.
  • Let the chicken rest before slicing: This allows the juices to redistribute, resulting in more tender and flavorful chicken.
  • Experiment with different vegetables: Feel free to swap out the green beans for other vegetables like broccoli, bell peppers, or zucchini. The possibilities are endless!

Common Mistakes to Avoid

Even the best cooks make mistakes. Here are a few common pitfalls to watch out for:

  • Not preheating the oven: A cold oven will result in uneven cooking and longer cooking times.
  • Overcooking the chicken: Overcooked chicken is dry and tough. Use a meat thermometer to ensure that it’s cooked to the perfect temperature.
  • Undercooking the vegetables: Nobody likes crunchy potatoes. Make sure the vegetables are fork-tender before serving.
  • Forgetting to spray the baking sheet: This will result in a sticky mess that’s difficult to clean.
  • Not seasoning enough: Don’t be afraid to add more Italian dressing seasoning to taste. It’s what makes this dish so flavorful.

Variations to Spice Things Up

Want to add a little twist to this classic recipe? Here are a few variations to try:

  • Spicy Italian Chicken: Add a pinch of red pepper flakes to the Italian dressing seasoning for a little extra kick.
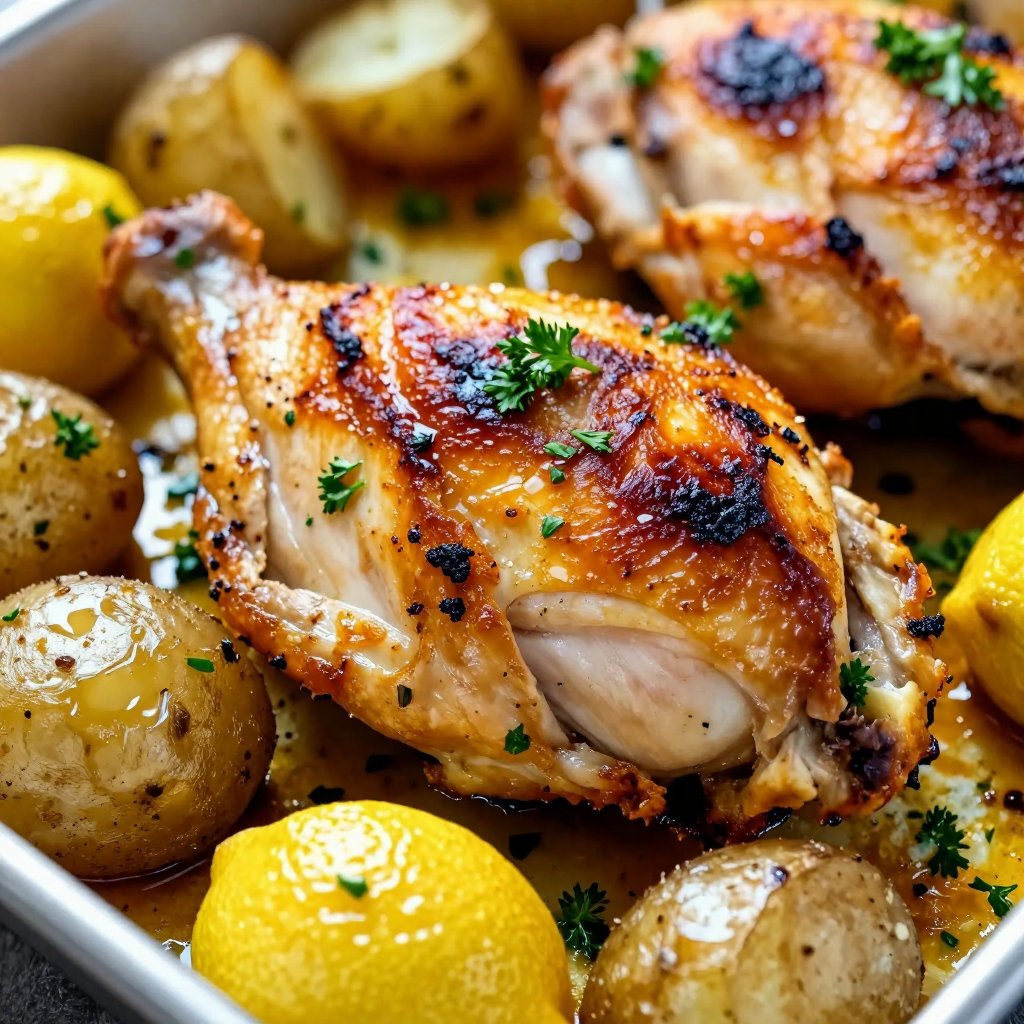
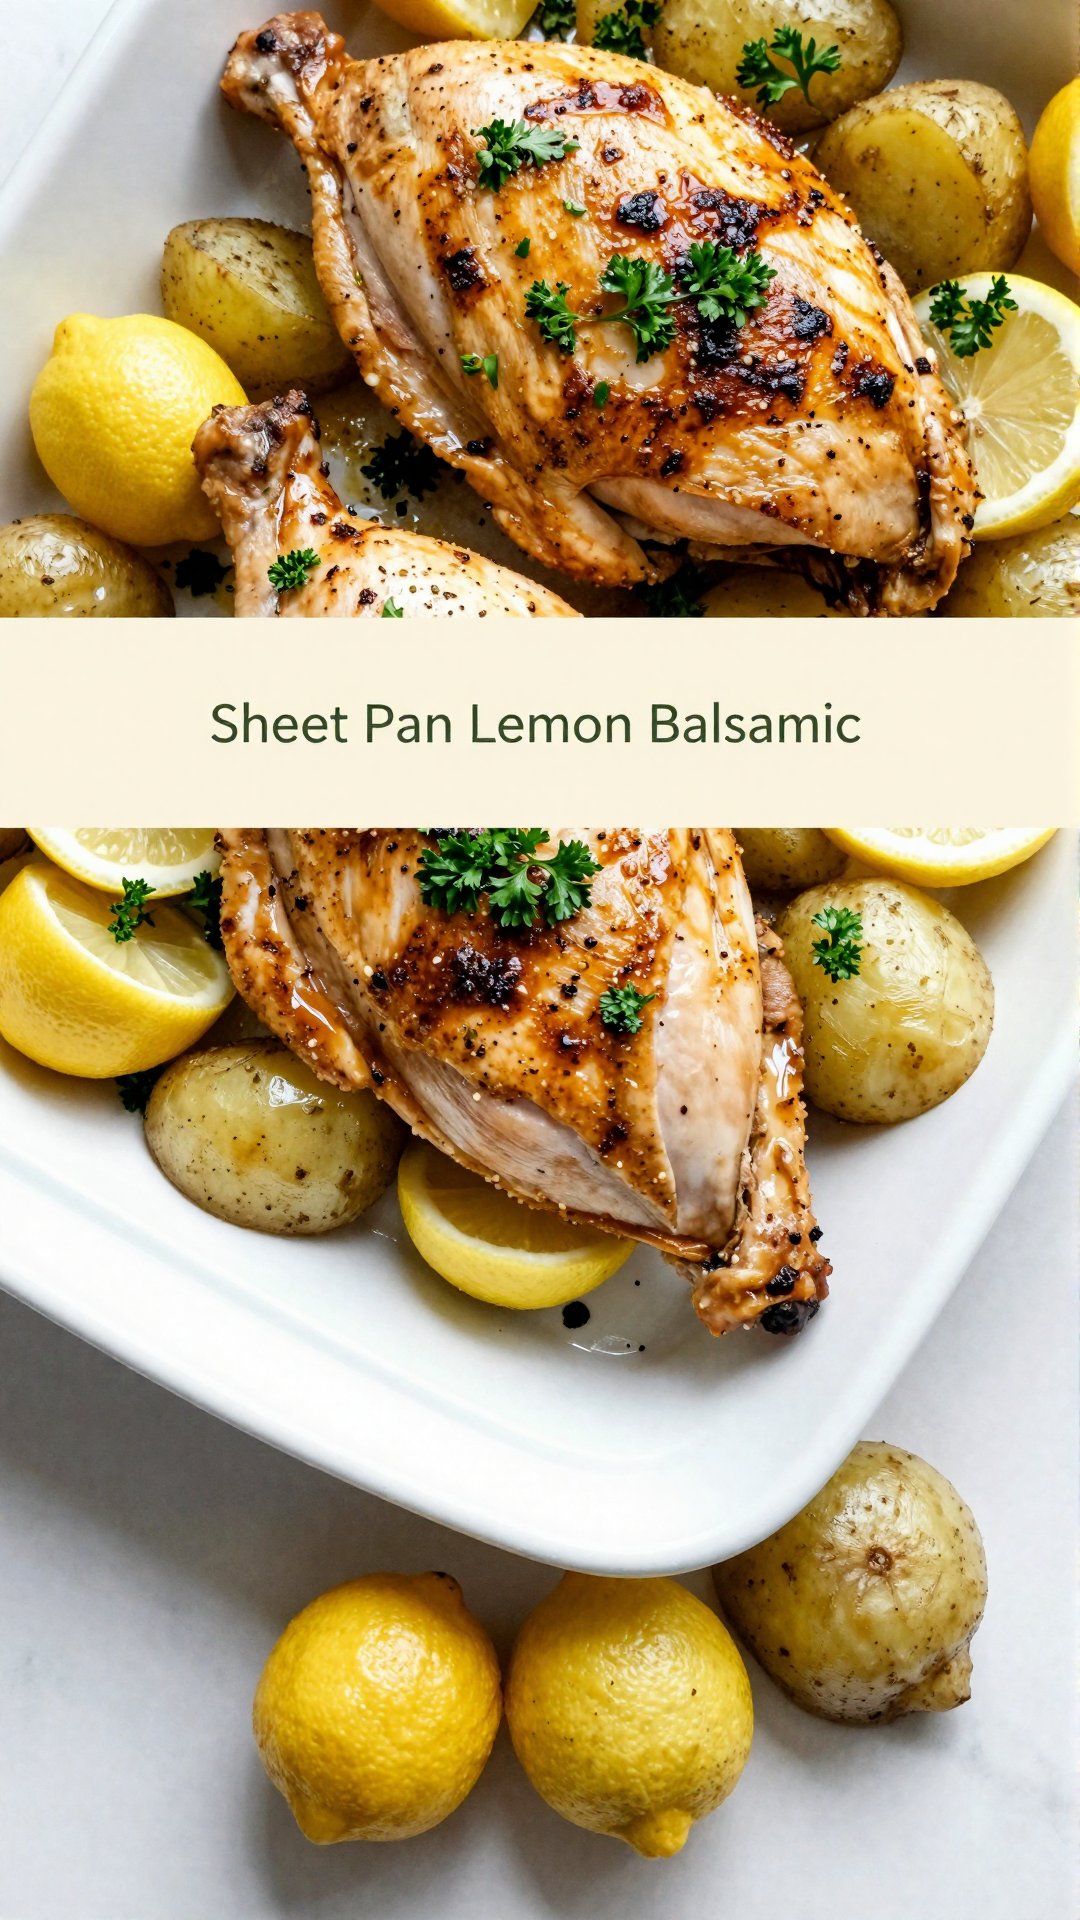
  • Lemon Herb Chicken: Add a squeeze of fresh lemon juice and some chopped fresh herbs like rosemary and thyme to the sheet pan.
  • Garlic Parmesan Chicken: Sprinkle some grated Parmesan cheese and minced garlic over the chicken and vegetables before baking.
  • Balsamic Glazed Chicken: Drizzle a balsamic glaze over the chicken and vegetables during the last 10 minutes of baking.
  • Chicken Tenderloin Sheet Pan Recipes: Substitute the chicken breasts with tenderloins. Adjust cooking time accordingly.

How to Store and Reheat Leftovers

If you’re lucky enough to have leftovers (which is rare in my house!), here’s how to store and reheat them:

  • Storage: Store the leftovers in an airtight container in the refrigerator for up to 3 days.
  • Reheating: Reheat the leftovers in the oven at 350 degrees Fahrenheit until heated through. You can also reheat them in the microwave, but the chicken may become slightly dry.

Frequently Asked Questions

Got questions? I’ve got answers!

  • Can I use other vegetables? Absolutely! Feel free to swap out the green beans for other vegetables like broccoli, bell peppers, or zucchini.
  • Can I use bone-in chicken? Yes, you can use bone-in chicken, but you’ll need to increase the cooking time.
  • Can I make this ahead of time? You can prep the vegetables and chicken ahead of time and store them in the refrigerator. However, I recommend baking the dish right before serving for the best results.
  • Is this recipe gluten-free? Yes, this recipe is naturally gluten-free. Just make sure that the Italian dressing seasoning you use is also gluten-free.
  • Can I use olive oil instead of butter? Yes, you can substitute olive oil for butter if you prefer.

Serving Suggestions: Complete the Meal

Looking to round out your meal? Here are a few serving suggestions:

  • Serve with a side salad: A simple green salad with a light vinaigrette is the perfect complement to this dish.
  • Serve with crusty bread: Crusty bread is perfect for soaking up all the delicious juices from the sheet pan.
  • Serve with quinoa or rice: Quinoa or rice adds a hearty and nutritious element to the meal.

So, there you have it! My Easy Sheet Pan Italian Seasoned Chicken and Vegetables recipe. It’s a simple, delicious, and healthy meal that’s perfect for busy weeknights. Give it a try, and let me know what you think! I’m always looking for new ways to make life in the kitchen a little easier and a lot more delicious. Happy cooking!

Sheet Pan Italian Seasoned Chicken and Vegetables

Prep Time 10 minutes
Cook Time 1 hour
Total Time 1 hour 10 minutes
Servings 6 servings
Calories 450
A simple and delicious sheet pan dinner with chicken, potatoes, and green beans, seasoned with Italian dressing and butter. Perfect for a quick and easy weeknight meal!

Ingredients

Ingredients

  • 2 lbs boneless skinless chicken breasts
  • 1 steamer bag frozen, whole green beans
  • 8 red potatoes (quartered)
  • 8 tbsp butter (divided into 8 pieces)
  • 1 packet Italian Dressing seasoning

Instructions 

  • Preheat oven to 350 degrees.
  • Spray baking sheet or 4-quart baking dish with nonstick cooking spray.
  • Arrange potatoes, chicken, and frozen green beans in 3 rows the length of the baking sheet.
  • Sprinkle Italian Dressing seasoning over all three rows of ingredients.
  • Top with 8 tbsp of butter, evenly spaced over all three rows.
  • Bake for 1 hour, until chicken is cooked throughout, and potatoes are fork-tender.
  • Serve and enjoy

Notes

For extra flavor, marinate the chicken in Italian dressing for 30 minutes before baking.
Calories: 450kcal
Cost: $20
Course: Main Course
Cuisine: Italian
Keyword: Chicken
pin

Creamy High Protein Beef Pasta: A Weeknight Wonder

Hey there, friend! Ava here, back from my Seattle kitchen with a recipe that’s been a total game-changer for our weeknight dinners. Remember those days when you craved comfort food but also wanted something healthy and quick? Well, say hello to this Creamy High Protein Beef Pasta. It’s like a warm hug in a bowl, packed with flavor and protein, and ready in under 30 minutes. Trust me, even the pickiest eaters will be asking for seconds!

Growing up, pasta was a staple in our house, but it was often loaded with heavy sauces and not-so-healthy ingredients. As I’ve gotten older, I’ve been on a mission to recreate those comforting classics with a healthier twist. This beef pasta recipe is the result of that mission—a dish that brings back those nostalgic flavors without the guilt. It’s a dish that I can always count on to satisfy my cravings while keeping things relatively light. This beef and pasta combination is truly magical.

Why You’ll Love This Creamy Beef Pasta

So, what makes this beef pasta so special? Let me tell you:

  • Quick and Easy: From start to finish, this dish comes together in about 30 minutes. Perfect for busy weeknights!
  • High in Protein: Thanks to the lean ground beef and Greek yogurt (or cottage cheese), it’s packed with protein to keep you full and satisfied.
  • Customizable: Easily adapt the ingredients to suit your taste and dietary needs. More on that in the ‘Variations’ section!
  • Deliciously Creamy: The Greek yogurt and cheese create a luscious, creamy sauce without being overly heavy.
  • Family-Friendly: Even the kids will love this one! It’s a great way to sneak in some extra protein and veggies.

It’s the kind of dish that makes you feel good from the inside out. I love that it’s so versatile. You can throw in whatever veggies you have on hand, and it always turns out delicious. This beef pasta is a guaranteed crowd-pleaser. It’s a dish that I make time and time again.

Ingredients:

  • 225g penne pasta
  • 450g lean ground beef
  • 1 tablespoon olive oil
  • 1 small onion, finely chopped
  • 2 garlic cloves, minced
  • 2 tablespoons tomato paste
  • 1 cup beef broth
  • ¾ cup plain Greek yogurt (or cottage cheese)
  • 1 cup shredded cheddar cheese (or mozzarella)
  • Salt and black pepper, to taste
  • 2 tablespoons chopped fresh parsley (optional)
Recipe Image

How to Make Creamy High Protein Beef Pasta: Step-by-Step

Alright, let’s get cooking! Here’s how to whip up this delicious dish:

  1. Cook the Pasta: Bring a large pot of salted water to a boil. Cook the penne until al dente, according to package instructions. Drain and reserve ½ cup of pasta water. The pasta should be perfectly cooked, not too mushy.
  2. Brown the Beef: In a large skillet over medium-high heat, add olive oil and the ground beef. Cook until browned and fully cooked, about 6–8 minutes. Drain excess fat. Make sure the beef is nicely browned for maximum flavor.
  3. Sauté Aromatics: Push the beef to one side of the pan, then add chopped onion and garlic. Sauté for 2–3 minutes until softened and fragrant. This step is crucial for building flavor.
  4. Add Tomato Paste: Stir in the tomato paste and cook for another 1–2 minutes to deepen the flavor. Cooking the tomato paste helps to bring out its sweetness.
  5. Simmer with Broth: Pour in the beef broth and stir everything together. Let simmer for 3–5 minutes until slightly thickened. This allows the flavors to meld together beautifully.
  6. Make it Creamy: Lower the heat. Stir in the Greek yogurt and shredded cheese. Mix until creamy and smooth. Add reserved pasta water if needed to adjust the consistency. The key here is low heat to prevent the yogurt from curdling.
  7. Combine and Toss: Add the cooked pasta to the sauce. Toss to coat everything evenly. Ensure every strand of pasta is covered in that creamy goodness.
  8. Season to Perfection: Taste and adjust with salt and pepper. Don’t be afraid to add a little extra seasoning if needed.
  9. Garnish and Serve: Garnish with fresh parsley if desired and serve warm. A sprinkle of parsley adds a pop of freshness.

Pro Tips for the Perfect Beef Pasta

Want to take your beef pasta to the next level? Here are a few of my go-to tips:

  • Use High-Quality Beef: Opt for lean ground beef (90% or higher) for a healthier option. It makes a difference in the final taste and texture.
  • Don’t Overcook the Pasta: Al dente pasta holds its shape better and has a more satisfying bite.
  • Reserve Pasta Water: This starchy water is liquid gold! It helps to create a smoother, creamier sauce.
  • Grate Your Own Cheese: Pre-shredded cheese often contains cellulose, which can prevent it from melting smoothly.
  • Taste as You Go: Seasoning is key! Taste the sauce at each stage and adjust accordingly.

Common Mistakes to Avoid

We all make mistakes in the kitchen, but here are a few to watch out for with this recipe:

  • Overcooking the Beef: Dry, tough beef is a no-no. Cook it just until browned and fully cooked.
  • Adding Cold Yogurt: Make sure your Greek yogurt is at room temperature before adding it to the sauce to prevent curdling.
  • Using Too Much Liquid: Start with less liquid and add more as needed. You can always add, but you can’t take away.
  • Forgetting to Season: A bland sauce is a sad sauce. Season generously with salt, pepper, and any other spices you love.

Variations to Make It Your Own

One of the best things about this recipe is how easy it is to customize. Here are a few ideas to get you started:

  • Add Veggies: Toss in some chopped bell peppers, mushrooms, spinach, or zucchini for extra nutrients and flavor.
  • Spice It Up: Add a pinch of red pepper flakes or a dash of hot sauce for a little heat.
  • Use Different Cheese: Try using a blend of mozzarella and provolone, or add a sprinkle of Parmesan cheese.
  • Make it Vegetarian: Substitute the ground beef with lentils or plant-based ground meat.
  • Add Herbs: Experiment with different herbs like oregano, basil, or thyme.

How to Store and Reheat Leftovers

Got leftovers? Lucky you! Here’s how to store and reheat them:

  • Storage: Store the beef pasta in an airtight container in the refrigerator for up to 3-4 days.
  • Reheating: Reheat in the microwave or on the stovetop over medium heat. Add a splash of water or broth if needed to prevent it from drying out.

Frequently Asked Questions (FAQ)

Here are some common questions I get about this recipe:

  • Can I use cottage cheese instead of Greek yogurt? Absolutely! Cottage cheese adds a similar creaminess and protein boost. Just make sure to blend it until smooth before adding it to the sauce.
  • Can I make this recipe gluten-free? Yes! Simply use gluten-free pasta.
  • Can I freeze this dish? While you can freeze it, the texture of the pasta and sauce may change slightly. If you do freeze it, thaw it overnight in the refrigerator before reheating.
  • Can I add more vegetables? Of course! Feel free to add any vegetables you like. Bell peppers, mushrooms, and spinach are all great options.
  • Is it okay to add heavy cream? You can, but it will increase the fat content. The Greek yogurt provides a creamy texture with less fat.

Serving Suggestions: Complete the Meal

What to serve with this delicious beef pasta? Here are a few of my favorite ideas:

  • Side Salad: A simple green salad with a light vinaigrette is a perfect complement.
  • Garlic Bread: Because who can resist garlic bread with pasta?
  • Roasted Vegetables: Roasted broccoli, asparagus, or Brussels sprouts add a healthy and flavorful side.
  • Crusty Bread: Serve it with crusty bread for soaking up all that delicious sauce.

For an extra touch, serve it with a sprinkle of fresh parsley and a sprinkle of grated Parmesan cheese. It’s a simple way to elevate the presentation. This dish that is so easy to make, it will quickly become a family favorite. Serve it with a side of garlic bread, and you’ve got a complete and satisfying meal. This beef pasta is a dish that is perfect for any night of the week. Try serving it with a side of roasted vegetables for an extra nutritional boost. This beef and pasta combination is a winner every time. The pasta is cooked to perfection, and the beef is tender and flavorful. This beef and pasta dish is a definite crowd-pleaser. In my kitchen, it’s a staple. The pasta absorbs all the delicious flavors of the sauce. I’ve lost count of the times I’ve made this dish. This beef pasta recipe is one that you’ll want to keep in your repertoire. It’s a dish that is both comforting and satisfying. Serve it with a sprinkle of Parmesan cheese for an extra touch of flavor. This beef pasta is a dish that is sure to impress. It’s the pasta dish that everyone loves. For an extra creamy texture, add a dollop of sour cream before serving. Serve it with a sprinkle of red pepper flakes for a touch of heat. This beef pasta is a dish that is perfect for a cozy night in. It’s a dish that is both easy to make and delicious to eat. The pasta is perfectly cooked, and the beef is tender and flavorful. Serve it with a sprinkle of fresh basil for a touch of freshness.

So there you have it—my Creamy High Protein Beef Pasta recipe. I hope you love it as much as we do! Don’t forget to share your creations with me on social media. Happy cooking, friends!

pin

Hey there, friends! Ava here, back in my Seattle kitchen, and let me tell you, I’ve stumbled upon something magical. Remember those days when you craved something delicious but didn’t want to spend hours in the kitchen? Or maybe you’re trying to hit those protein goals without sacrificing flavor? Well, get ready to meet your new best friend: 2 Ingredient Cottage Cheese Flatbread!

This recipe is not just easy; it’s ridiculously versatile. Whether you’re looking for a quick snack, a light lunch, or even a pizza crust alternative, this cottage cheese flatbread is about to become your go-to. And the best part? It only has 10g of carbs! Intrigued? Let’s dive in!

Why You’ll Love This Cottage Cheese Flatbread Recipe

Seriously, where do I even begin? I’ve been making these for weeks now, and I’m still not tired of them. Here’s why I think you’ll fall in love:

  • Simplicity: Two ingredients. Need I say more?
  • Quick & Easy: From prep to plate in under 30 minutes. Perfect for busy weeknights.
  • High Protein: Thanks to the cottage cheese, each flatbread is packed with protein, making it a satisfying and healthy choice.
  • Low Carb: Only 10g of carbs per serving. A great option if you’re watching your carb intake.
  • Versatile: Top it with your favorite savory or sweet toppings. The possibilities are endless!
  • Meal Prep Friendly: These flatbreads are perfect for meal prep. Make a batch on Sunday and enjoy them throughout the week.

I’d often find myself staring into the fridge, craving something satisfying but not wanting to derail my healthy eating habits. That’s when I started experimenting, and this cottage cheese flatbread recipe was born. It’s been a game-changer!

Ingredients for Your Cottage Cheese Flatbread

Alright, let’s get down to business. You’ll need just two simple ingredients for this amazing recipe:

  • 1 cup cottage cheese: (low-fat or full-fat)
  • 1/2 cup all-purpose flour: (or gluten-free blend)
Recipe Image

How to Make 2 Ingredient Cottage Cheese Flatbread: Step-by-Step

Ready to get cooking? Here’s how to make these delicious flatbreads:

  1. Preheat: Preheat your oven to 350°F (175°C). Line a baking sheet with parchment paper. This is crucial to prevent sticking!
  2. Combine: In a bowl, combine the cottage cheese and flour. Mix well until a dough forms. Don’t worry if it’s slightly sticky; that’s normal.
  3. Knead: Lightly flour a clean surface. Turn the dough out onto the surface and gently knead a few times until it comes together.
  4. Divide: Divide the dough into smaller portions (depending on desired flatbread size). For 10g flatbreads, divide the dough into approximately 12-15 equal pieces.
  5. Roll: Roll each portion out very thinly into a flatbread shape. The thinner, the crispier!
  6. Bake: Place the flatbreads onto the prepared baking sheet. Bake for 15-20 minutes, or until lightly golden brown and cooked through. Check frequently as baking times may vary.
  7. Cool & Enjoy: Let cool slightly before serving. Enjoy!

It’s as simple as that! I usually make a large batch of these flatbreads because they disappear so quickly in my house.

Pro Tips for Perfect Cottage Cheese Flatbreads

Okay, let’s talk pro tips. I’ve made my fair share of flatbreads, and here are a few tricks I’ve learned along the way:

  • Cottage Cheese Consistency: Make sure your cottage cheese isn’t too watery. If it is, drain it slightly before using.
  • Flour Power: If the dough is too sticky, add a tablespoon of flour at a time until it’s easier to handle. But be careful not to add too much, or the flatbreads will be tough.
  • Rolling Thin: The key to crispy flatbreads is rolling them out thinly. Use a rolling pin and a little extra flour to prevent sticking.
  • Baking Sheet Prep: Always use parchment paper! Trust me, it makes cleanup a breeze and prevents the flatbreads from sticking.
  • Even Baking: Keep an eye on the flatbreads while they’re baking. Since ovens vary, baking times may differ. You want them to be golden brown and cooked through.
  • Spice It Up: Add a pinch of garlic powder, onion powder, or Italian seasoning to the dough for extra flavor.
  • Pro Tip: For an extra crispy texture, lightly brush the flatbreads with olive oil before baking.

Common Mistakes to Avoid

We all make mistakes in the kitchen; it’s part of the fun! Here are a few common pitfalls to watch out for when making cottage cheese flatbreads:

  • Overmixing the Dough: Overmixing can lead to tough flatbreads. Mix just until the ingredients are combined.
  • Adding Too Much Flour: Resist the urge to add too much flour to combat stickiness. A little is okay, but too much will result in dry, dense flatbreads.
  • Not Rolling Thin Enough: If the flatbreads are too thick, they won’t crisp up properly. Aim for a thin, even layer.
  • Burning the Flatbreads: Keep a close eye on the oven! These flatbreads can go from golden brown to burnt in a matter of minutes.

Don’t worry if you mess up the first time. Every ‘oops’ moment is a learning opportunity! I’ve definitely had my share of flatbread fails, but that’s how I perfected this recipe.

Variations and Add-Ins

One of the best things about this recipe is how easily you can customize it. Here are a few variations to try:

  • Gluten-Free: Use a gluten-free flour blend instead of all-purpose flour. I recommend a blend that includes xanthan gum for the best texture.
  • Herbed Flatbreads: Add fresh or dried herbs like rosemary, thyme, or oregano to the dough.
  • Cheesy Flatbreads: Sprinkle grated Parmesan or mozzarella cheese on top of the flatbreads before baking.
  • Sweet Flatbreads: Add a touch of honey or maple syrup to the dough, and top with fruit and a drizzle of honey after baking.
  • Everything Bagel Flatbreads: Sprinkle everything bagel seasoning on top before baking for a savory twist.
  • Spicy Flatbreads: Add a pinch of red pepper flakes or a dash of hot sauce to the dough for a kick.

I’ve even tried adding a tablespoon of pesto to the dough for a vibrant green, flavorful flatbread. Get creative and experiment with your favorite flavors!

How to Store Your Cottage Cheese Flatbreads

If you happen to have any leftovers (which is rare in my house!), here’s how to store them:

  • Room Temperature: Store cooled flatbreads in an airtight container at room temperature for up to 2 days.
  • Refrigerator: For longer storage, keep them in the refrigerator for up to a week. Reheat in the oven or toaster oven for the best texture.
  • Freezer: You can also freeze these flatbreads. Wrap them individually in plastic wrap and store them in a freezer bag for up to 2 months. Thaw before reheating.

When reheating, I recommend popping them in the oven or toaster oven to get them nice and crispy again. Microwaving can make them a bit soggy.

Frequently Asked Questions (FAQ)

Got questions? I’ve got answers! Here are a few common questions about this recipe:

  • Can I use fat-free cottage cheese?: Yes, you can! Just keep in mind that it might affect the texture slightly. The flatbreads might be a bit drier.
  • Can I use a different type of flour?: Absolutely! Whole wheat flour, almond flour, or even oat flour can be used. Just be aware that the texture and baking time may vary.
  • Can I make these in an air fryer?: I haven’t tried it myself, but I imagine you could! Preheat your air fryer to 350°F (175°C) and bake for about 8-10 minutes, or until golden brown.
  • Why are my flatbreads not crispy?: Make sure you’re rolling them out thinly enough and baking them until they’re golden brown. Also, avoid overcrowding the baking sheet.
  • Can I add egg to the recipe?: I don’t recommend it. This recipe is designed to be simple and egg-free. Adding egg will change the texture and could make them rubbery.

Serving Suggestions: What to Eat with Cottage Cheese Flatbreads

Now for the fun part: serving! These flatbreads are incredibly versatile and can be enjoyed in so many ways:

  • Pizza Crust: Top with tomato sauce, cheese, and your favorite pizza toppings, then bake until the cheese is melted and bubbly.
  • Sandwich Bread: Use them as a base for sandwiches or wraps. They’re sturdy enough to hold fillings without getting soggy.
  • Snack: Enjoy them plain or with a dip like hummus, guacamole, or tzatziki.
  • Breakfast: Top with avocado, a fried egg, and everything bagel seasoning for a protein-packed breakfast.
  • Dessert: Spread with Nutella, peanut butter, or cream cheese and top with fruit for a sweet treat.
  • With Soup or Salad: Serve alongside your favorite soup or salad for a light and satisfying meal.

I’ve even used these as a base for mini pizzas at parties, and they’re always a hit! The possibilities are endless, so get creative and have fun with it.

Final Thoughts from Ava

Well, there you have it: my 2 Ingredient Cottage Cheese Flatbread recipe! I hope you love it as much as I do. It’s a simple, delicious, and healthy way to satisfy your cravings without spending hours in the kitchen. Remember, cooking is all about experimenting and having fun, so don’t be afraid to get creative and make this recipe your own. Happy cooking, friends! And as always, feel free to share your creations with me – I can’t wait to see what you come up with!

2 Ingredient Cottage Cheese Flatbread 10g

Prep Time 10 minutes
Cook Time 20 minutes
Total Time 30 minutes
Servings 12 flatbreads
Calories 30
These simple flatbreads are made with just cottage cheese and flour, offering a quick and easy alternative to traditional bread. Perfect for a light snack or side dish.

Ingredients

Ingredients

  • 1 cup cottage cheese (low-fat or full-fat)
  • 1/2 cup all-purpose flour (or gluten-free blend)

Instructions 

  • Preheat oven to 350°F (175°C). Line a baking sheet with parchment paper.
  • Combine cottage cheese and flour in a bowl. Mix well until a dough forms.
  • Lightly flour a surface. Knead the dough a few times.
  • Divide the dough into 12-15 equal pieces for 10g flatbreads.
  • Roll each portion out thinly.
  • Place flatbreads on the baking sheet.
  • Bake for 15-20 minutes, or until golden brown. Check frequently.
  • Let cool slightly before serving.

Notes

For a crispier flatbread, bake for a few extra minutes. You can also add herbs or spices to the dough for added flavor.
Calories: 30kcal
Cost: $5
Course: Side Dish, Snack
Cuisine: American
Keyword: cottage cheese
pin

Garlic Herb Chicken with Mashed Potatoes and Glazed Carrots: A Symphony of Flavors

Hey there, friend! Ava here, ready to whisk you away to a cozy corner of my Seattle kitchen. Tonight, we’re diving into a recipe that’s more than just a meal; it’s an experience. Imagine tender, juicy garlic herb chicken, nestled beside creamy, dreamy mashed potatoes and vibrant, glazed carrots. This isn’t just dinner; it’s a hug on a plate.

I remember the first time I made something similar. I was trying to impress my then-boyfriend (now husband!), Mark. I wanted something comforting but still a little… elevated. Let’s just say it worked! He still asks for this dish, especially on those chilly Seattle evenings. This recipe is a blend of simplicity and flavor, perfect for a weeknight dinner or a special occasion. Ready to make some magic?

Why You’ll Absolutely Love This Garlic Herb Chicken Dinner

Trust me, this isn’t just another recipe you’ll try once and forget. This Garlic Herb Chicken with Mashed Potatoes and Glazed Carrots is going to become a staple in your kitchen. Why? Let me tell you:

  • Flavor Explosion: The combination of garlic, herbs, and perfectly seared chicken is simply irresistible.
  • Comfort Food at Its Finest: Creamy mashed potatoes and sweet glazed carrots are the ultimate comfort companions.
  • Easy to Customize: Swap out herbs, add spices, or change up the veggies – this recipe is incredibly versatile.
  • Impressive Yet Approachable: It looks and tastes gourmet, but it’s surprisingly easy to make. Perfect for impressing guests or treating yourself.
  • Family-Friendly: Even the pickiest eaters will love this combination of flavors and textures.

Ingredients: Your Palette of Deliciousness

Before we get cooking, let’s gather our ingredients. Here’s what you’ll need to create this culinary masterpiece:

  • 4 boneless, skinless chicken breasts
  • 3 tablespoon olive oil, divided
  • 4 cloves garlic, minced
  • 1 teaspoon dried thyme
  • 1 teaspoon dried Italian herbs
  • 1 teaspoon salt
  • 1/2 teaspoon black pepper
  • 4 large russet potatoes, peeled and cut into 2–3 inch chunks
  • 4 tablespoon butter
  • 1/2 cup whole milk, warmed
  • 2 ounce cream cheese
  • 1 pound carrots, peeled and sliced in half if large
  • 1 tablespoon olive oil
  • 2 tablespoon butter
  • 1 tablespoon honey
  • 1 clove garlic, grated
  • 1 shallot, minced
  • 2 cloves garlic, minced
  • 1/2 cup dry white grape juice
  • 1/2 cup chicken stock
  • 2 tablespoon cold butter
Recipe Image

Step-by-Step: Crafting Your Garlic Herb Chicken with Mashed Potatoes and Glazed Carrots

Alright, let’s get cooking! Follow these easy steps, and you’ll have a restaurant-worthy meal on your table in no time. Remember, cooking is about having fun, so don’t be afraid to experiment and make it your own.

  1. To begin, add the peeled and chunked potatoes to a pot of cold salted water. Bring the water to a boil and cook the potatoes until they are fork-tender, about 15 minutes. Drain the potatoes, return them to the hot pot for 1–2 minutes to steam-off excess moisture, then cover and set them aside.
  2. Preheat your oven to 425°F. Toss the peeled and sliced carrots with 1 tablespoon of olive oil, salt, and pepper on a parchment-lined baking sheet. Roast the carrots for 25–35 minutes, or until they are tender and lightly caramelized. Near the end of the roasting time, melt 2 tablespoon of butter with 1 tablespoon of honey and 1 grated garlic clove in a small pan until the mixture is bubbly and fragrant. Pour this honey-butter glaze over the hot carrots and toss to coat them evenly.
  3. Pat the chicken breasts dry and season them with salt, pepper, half of the minced garlic, and the thyme and/or Italian herbs, rubbing the seasoning in with 1 tablespoon of olive oil. Heat the remaining 2 tablespoon of olive oil in a large skillet over medium-high heat. Sear the chicken for 5–6 minutes per side, or until it is golden brown and cooked through. Transfer the seared chicken to a plate and tent it with foil to keep it warm.
  4. In the same skillet used for the chicken, sauté the minced shallot and remaining garlic over medium heat for 1–2 minutes. Deglaze the pan with the white grape juice, scraping up any browned bits from the bottom of the skillet. Simmer the mixture for 2–3 minutes to reduce it slightly, then add the chicken stock and continue simmering until the sauce has thickened slightly. Off the heat, whisk in 2 tablespoon of cold butter until the sauce becomes silky and emulsified. Season the pan sauce with salt and pepper to taste.
  5. Mash the hot potatoes to your desired consistency. In a small saucepan, warm the 4 tablespoon of butter, cream cheese (if using), and milk just until the mixture is melted and combined. Stir this warm, creamy mixture into the mashed potatoes until they are smooth and luscious. Season the mashed potatoes with salt and pepper to taste.

Pro Tips for Garlic Herb Chicken Perfection

Want to take your Garlic Herb Chicken with Mashed Potatoes and Glazed Carrots to the next level? Here are a few of my favorite pro tips:

  • Sear Like a Pro: Make sure your skillet is nice and hot before searing the chicken. This will give you that beautiful golden-brown crust.
  • Don’t Overcook the Chicken: Use a meat thermometer to ensure the chicken is cooked through but still juicy. Aim for an internal temperature of 165°F.
  • Creamy Potatoes Secret: Warmed milk and cream cheese are the keys to extra-creamy mashed potatoes. Don’t skip them!
  • Glaze Magic: Keep a close eye on the glazed carrots while they are roasting, as the honey can burn easily.
  • Taste as You Go: Seasoning is key! Taste the chicken, potatoes, and carrots as you go and adjust the salt, pepper, and herbs to your liking.

Common Mistakes to Avoid

We all make mistakes in the kitchen, it’s part of the fun! Here are a few common pitfalls to watch out for:

  • Overcrowding the Pan: When searing the chicken, make sure not to overcrowd the pan. This will lower the temperature and prevent the chicken from browning properly.
  • Using Cold Potatoes: Always start with hot potatoes when making mashed potatoes. Cold potatoes will result in a gluey texture.
  • Burning the Garlic: Garlic can burn quickly, so keep a close eye on it while sautéing. Burnt garlic will give your dish a bitter taste.
  • Skipping the Resting Time: Let the chicken rest for a few minutes after searing. This will allow the juices to redistribute, resulting in a more tender and flavorful chicken.

Variations: Spice It Up!

One of the best things about this recipe is how easy it is to customize. Here are a few fun variations to try:

  • Spice it Up: Add a pinch of red pepper flakes to the chicken or the glaze for a little heat.
  • Herb Garden: Experiment with different herbs like rosemary, sage, or oregano.
  • Veggie Boost: Add other roasted vegetables like broccoli, Brussels sprouts, or sweet potatoes to the glazed carrots.
  • Potato Power: Try using different types of potatoes like Yukon gold or red potatoes for a different flavor and texture.
  • Lemon Zest: Brighten up the chicken with a sprinkle of lemon zest before serving.

Storage Instructions

Got leftovers? Lucky you! Here’s how to store them:

  • Chicken: Store the cooked chicken in an airtight container in the refrigerator for up to 3-4 days.
  • Mashed Potatoes: Store the mashed potatoes in an airtight container in the refrigerator for up to 2-3 days. Reheat gently in the microwave or on the stovetop, adding a splash of milk if needed.
  • Glazed Carrots: Store the glazed carrots in an airtight container in the refrigerator for up to 3-4 days. Reheat gently in the oven or microwave.

Frequently Asked Questions (FAQ)

Got questions? I’ve got answers! Here are some common questions about this Garlic Herb Chicken recipe:

  • Can I use bone-in chicken? Yes, you can use bone-in chicken thighs or drumsticks. Just adjust the cooking time accordingly.
  • Can I make this recipe ahead of time? You can prepare the mashed potatoes and glazed carrots ahead of time and reheat them before serving. The chicken is best served fresh.
  • Can I use frozen carrots? Yes, you can use frozen carrots. Just thaw them before roasting.
  • What if I don’t have white grape juice? You can substitute chicken broth or apple juice.
  • Can I freeze the mashed potatoes? I don’t recommend freezing mashed potatoes as they can become grainy when thawed.

Serving Suggestions: Complete the Experience

Ready to serve your Garlic Herb Chicken with Mashed Potatoes and Glazed Carrots? Here are a few serving suggestions to complete the experience:

  • Green Salad: A simple green salad with a light vinaigrette is the perfect complement to this rich and comforting meal.
  • Crusty Bread: Serve with a side of crusty bread for soaking up the delicious pan sauce.
  • Wine Pairing: A crisp white wine like Sauvignon Blanc or Pinot Grigio pairs beautifully with this dish.
  • Garnish: Garnish the chicken with fresh parsley or thyme for a pop of color and flavor.

And there you have it! A complete guide to making the most delicious Garlic Herb Chicken with Mashed Potatoes and Glazed Carrots. I hope this recipe brings as much joy to your kitchen as it has to mine. Happy cooking, friends!

Make Garlic Herb Chicken with Mashed Potatoes and Glazed Carrots Tonight!

Prep Time 20 minutes
Cook Time 40 minutes
Total Time 1 hour
Servings 4 people
Calories 650
Enjoy a delicious and comforting meal with garlic herb chicken, creamy mashed potatoes, and sweet glazed carrots. This recipe is perfect for a satisfying weeknight dinner.

Ingredients

Chicken

  • 4 boneless, skinless chicken breasts
  • 3 tablespoon olive oil (divided)
  • 4 cloves garlic (minced)
  • 1 teaspoon dried thyme
  • 1 teaspoon dried Italian herbs
  • 1 teaspoon salt
  • 1/2 teaspoon black pepper

Mashed Potatoes

  • 4 large russet potatoes (peeled and cut into 2–3 inch chunks)
  • 4 tablespoon butter
  • 1/2 cup whole milk (warmed)
  • 2 ounce cream cheese

Glazed Carrots

  • 1 pound carrots (peeled and sliced in half if large)
  • 1 tablespoon olive oil
  • 2 tablespoon butter
  • 1 tablespoon honey
  • 1 clove garlic (grated)

Pan Sauce

  • 1 shallot shallot (minced)
  • 2 cloves garlic (minced)
  • 1/2 cup dry white grape juice
  • 1/2 cup chicken stock
  • 2 tablespoon cold butter

Instructions 

  • Boil potatoes until fork-tender, about 15 minutes. Drain and steam-off excess moisture.
  • Roast carrots with olive oil, salt, and pepper at 425°F for 25–35 minutes. Glaze with honey-butter mixture.
  • Season chicken with garlic, thyme, Italian herbs, salt, pepper, and olive oil. Sear in skillet until golden brown and cooked through.
  • Sauté shallot and garlic in skillet. Deglaze with white grape juice, then add chicken stock and simmer. Whisk in cold butter until emulsified. Season with salt and pepper.
  • Mash potatoes. Warm butter, cream cheese, and milk. Stir into potatoes until smooth. Season with salt and pepper.

Notes

For extra flavor, add a pinch of red pepper flakes to the honey-butter glaze for the carrots.
Calories: 650kcal
Cost: $20
Course: dinner
Cuisine: American
Keyword: Chicken
pin

Hey there, friend! Ava here, back from my little Seattle kitchen to share a recipe that’s been a total game-changer for weeknight dinners. If you’re anything like me, you’re always on the hunt for meals that are quick, healthy, and, most importantly, make everyone around the table happy. Well, let me introduce you to my Sheet Pan Lemon Balsamic Chicken and Potatoes. It’s a one-pan wonder that delivers big on flavor with minimal effort. Think tender chicken, perfectly roasted potatoes, all coated in a tangy, sweet, and savory lemon balsamic glaze. Trust me; this is a recipe you’ll want to keep in your back pocket!

This Sheet Pan Lemon Balsamic Chicken and Potatoes recipe is an easy, healthy, and delicious weeknight dinner. Simple ingredients, big flavor!

Why You’ll Love This Sheet Pan Chicken and Potatoes

Okay, let’s get real for a second. We all have those days when the thought of cooking a complicated meal is enough to make us want to order takeout. That’s where this recipe shines. It’s designed for busy weeknights when you need something satisfying on the table without spending hours in the kitchen. Here’s why I think you’ll absolutely adore it:

  • **One Pan Wonder**: Less cleanup is always a win in my book. Everything cooks together on a single sheet pan.
  • **Flavor Explosion**: The lemon balsamic marinade is a total flavor bomb. It’s tangy, sweet, and savory all at once, creating a symphony of tastes that will make your taste buds sing.
  • **Healthy and Wholesome**: Packed with lean protein and nutritious potatoes, this dish is a guilt-free way to enjoy a delicious meal.
  • **Customizable**: Feel free to swap out the potatoes for other veggies or add your favorite herbs and spices to the marinade. The possibilities are endless!
  • **Family-Friendly**: Even the pickiest eaters will love the combination of tender chicken and perfectly roasted potatoes.

Seriously, this isn’t just a recipe; it’s a lifesaver for those crazy weeknights when you need a healthy and delicious meal on the table in a flash. And honestly, who doesn’t love a good sheet pan dinner? It’s the epitome of easy cooking. You can use the same method with different proteins and vegetables depending on what you have on hand. This dish is a great starting point for exploring the world of sheet pan cooking.

Ingredients You’ll Need

Let’s gather our ingredients! The best part about this recipe is that you probably already have most of these items in your pantry. Here’s what you’ll need:

  • 4 boneless, skinless chicken breasts
  • 1 lb baby potatoes, halved
  • 1/4 cup balsamic vinegar
  • 1/4 cup olive oil
  • 2 tablespoons honey
  • 2 cloves garlic, minced
  • 1 teaspoon dried oregano
  • Salt and pepper to taste
  • Fresh parsley for garnish
Recipe Image

How to Make Sheet Pan Lemon Balsamic Chicken and Potatoes

Alright, let’s get cooking! This recipe is so simple, it practically makes itself. Here’s a step-by-step guide to creating this delicious sheet pan dinner:

  1. **Get Started**: Preheat the oven to 400°F (200°C).
  2. **Make the Marinade**: In a bowl, whisk together balsamic vinegar, olive oil, honey, garlic, oregano, salt, and pepper. This lemon balsamic combination is what gives this dish its amazing flavor.
  3. **Marinate the Chicken and Potatoes**: Place chicken breasts and potatoes in a large zip-top bag or bowl and pour the marinade over them. Seal and marinate for at least 30 minutes. If you have more time, you can marinate them in the fridge for a few hours for even more flavor.
  4. **Arrange on the Sheet Pan**: Spread the chicken and potatoes on a sheet pan in a single layer. Make sure everything has enough space to roast properly.
  5. **Bake**: Bake for 25-30 minutes or until the chicken is cooked through and potatoes are tender. The internal temperature of the chicken should reach 165°F (74°C).
  6. **Garnish and Serve**: Garnish with fresh parsley before serving.

And that’s it! In just a few simple steps, you’ve created a delicious and healthy meal that your whole family will love. The beauty of this recipe is in its simplicity and the amazing flavor it delivers. The olive oil helps to roast the chicken and potatoes to perfection, while the balsamic vinegar adds a touch of sweetness and acidity. It’s a perfect balance of flavors that will leave you wanting more.

Pro Tips for the Perfect Sheet Pan Dinner

Want to take your Sheet Pan Lemon Balsamic Chicken and Potatoes to the next level? Here are a few pro tips that I’ve learned over the years:

  • **Don’t overcrowd the pan**: Make sure everything is in a single layer so that it roasts evenly. If you need to, use two sheet pans.
  • **Use high-quality balsamic vinegar**: The flavor of the balsamic vinegar really shines in this recipe, so it’s worth investing in a good one.
  • **Marinate for at least 30 minutes**: The longer you marinate the chicken and potatoes, the more flavorful they will be. If you have the time, marinate them overnight in the fridge.
  • **Check the internal temperature of the chicken**: Use a meat thermometer to make sure the chicken is cooked through. It should reach an internal temperature of 165°F (74°C).
  • **Toss the potatoes halfway through**: This will help them to roast evenly on all sides.

These tips will help you achieve the best possible results with this recipe. Remember, cooking is all about experimenting and finding what works best for you. Don’t be afraid to try new things and have fun in the kitchen! The pan is your canvas, and the ingredients are your paint.

Common Mistakes to Avoid

We’ve all been there – a cooking mishap that turns into a hilarious (or not-so-hilarious) story. Here are a few common mistakes to avoid when making this sheet pan dinner:

  • **Not preheating the oven**: This is crucial for even cooking. Make sure your oven is fully preheated before you put the sheet pan in.
  • **Overcooking the chicken**: Nobody likes dry chicken. Use a meat thermometer to ensure it’s cooked through but not overdone.
  • **Using too much oil**: While olive oil is essential for roasting, using too much can make the dish greasy. Stick to the amount specified in the recipe.
  • **Skipping the marinade**: The marinade is what gives this dish its amazing flavor. Don’t skip it!
  • **Not seasoning properly**: Make sure to season the chicken and potatoes with salt and pepper to taste. This will enhance the flavors of the dish.

Avoiding these mistakes will help you create a delicious and perfectly cooked sheet pan dinner every time. Remember, even if you do make a mistake, it’s just an opportunity to learn and improve. Cooking should be fun and relaxing, so don’t stress too much about getting everything perfect.

Variations and Substitutions

Want to mix things up? Here are a few variations and substitutions you can try with this recipe:

  • **Veggies**: Swap out the potatoes for other veggies like broccoli, carrots, or bell peppers.
  • **Protein**: Use chicken thighs instead of chicken breasts for a richer flavor. You can also use sausage or tofu for a vegetarian option.
  • **Herbs and Spices**: Add your favorite herbs and spices to the marinade, such as rosemary, thyme, or paprika.
  • **Sweetener**: Use maple syrup instead of honey for a different flavor profile.
  • **Citrus**: Add lemon slices to the sheet pan for extra lemon flavor.

These variations will allow you to customize the recipe to your liking and use what you have on hand. Don’t be afraid to get creative and experiment with different flavors and ingredients. Cooking is all about making it your own and creating dishes that you love.

How to Store and Reheat

Got leftovers? Lucky you! Here’s how to store and reheat your Sheet Pan Lemon Balsamic Chicken and Potatoes:

  • **Storage**: Store leftovers in an airtight container in the refrigerator for up to 3 days.
  • **Reheating**: Reheat in the oven at 350°F (175°C) for 10-15 minutes or until heated through. You can also reheat in the microwave, but the chicken may become slightly dry.

Leftovers are great for lunch the next day or for a quick and easy dinner later in the week. You can also use the leftover chicken and potatoes in salads, wraps, or sandwiches. The possibilities are endless!

Frequently Asked Questions

Got questions? I’ve got answers! Here are a few frequently asked questions about this recipe:

  • **Can I use frozen chicken breasts?**: Yes, but make sure to thaw them completely before marinating.
  • **Can I use sweet potatoes instead of baby potatoes?**: Absolutely! Sweet potatoes add a lovely sweetness to the dish.
  • **Can I make this ahead of time?**: Yes, you can marinate the chicken and potatoes ahead of time and store them in the fridge for up to 24 hours.
  • **Is this recipe gluten-free?**: Yes, this recipe is naturally gluten-free.
  • **Can I add other vegetables?**: Of course! Feel free to add your favorite vegetables to the sheet pan.

These are just a few of the questions I often get asked about this recipe. If you have any other questions, feel free to leave them in the comments below, and I’ll do my best to answer them.

Serving Suggestions

Looking for some side dish ideas to complete your meal? Here are a few of my favorite serving suggestions:

  • **Salad**: Serve with a simple green salad or a more elaborate salad with mixed greens, tomatoes, cucumbers, and a vinaigrette dressing.
  • **Bread**: Serve with a crusty loaf of bread for soaking up the delicious lemon balsamic sauce.
  • **Steamed Vegetables**: Serve with steamed broccoli, green beans, or asparagus for a healthy and nutritious meal.
  • **Rice or Quinoa**: Serve over a bed of rice or quinoa for a heartier meal.

These serving suggestions will help you create a complete and satisfying meal that your whole family will enjoy. Remember, the most important thing is to enjoy the process of cooking and sharing a meal with loved ones.

So there you have it – my Sheet Pan Lemon Balsamic Chicken and Potatoes recipe. I hope you love it as much as I do! If you try it, be sure to let me know in the comments below. Happy cooking!

Sheet Pan Lemon Balsamic Chicken and Potatoes Made Easy!

Prep Time 15 minutes
Cook Time 30 minutes
Total Time 45 minutes
Servings 4 servings
Calories 350
This sheet pan lemon balsamic chicken and potatoes recipe is a simple and delicious meal perfect for a weeknight dinner. It's easy to prepare and packed with flavor!

Ingredients

Ingredients

  • 4 boneless, skinless chicken breasts
  • 1 lb baby potatoes, halved
  • 1/4 cup balsamic vinegar
  • 1/4 cup olive oil
  • 2 tablespoons honey
  • 2 cloves garlic, minced
  • 1 teaspoon dried oregano
  • to taste Salt and pepper
  • Fresh parsley for garnish

Instructions 

  • Preheat the oven to 400°F (200°C).
  • Whisk together balsamic vinegar, olive oil, honey, garlic, oregano, salt, and pepper.
  • Marinate chicken and potatoes for at least 30 minutes.
  • Spread the chicken and potatoes on a sheet pan.
  • Bake for 25-30 minutes or until chicken is cooked.
  • Garnish with fresh parsley before serving.

Notes

For extra flavor, add some lemon slices to the sheet pan before baking.
Calories: 350kcal
Cost: $18
Course: Main Course
Cuisine: Mediterranean
Keyword: Chicken
pin

Hey there, dessert lovers! Ava here, back from my cozy Seattle kitchen with a recipe that’s about to become your new obsession. If you’re anything like me, you crave something sweet but don’t always have the time (or energy!) for elaborate baking. That’s where this cottage cheese microwave brownie comes in. Yes, you read that right—cottage cheese! Trust me on this one. It’s the secret ingredient that makes this brownie incredibly moist, fudgy, and surprisingly healthy. Think of it as your guilt-free indulgence, ready in minutes. You’re going to love it!

I remember the first time I experimented with cottage cheese in a dessert. I was trying to recreate a chocolate mousse I had in Paris (talk about ambitious!), and I needed a way to get that creamy texture without all the heavy cream. After a few disastrous attempts, I stumbled upon cottage cheese. The result was a revelation—a dessert that was rich, decadent, and packed with protein. This microwave brownie is a direct descendant of that experiment, perfected for those moments when you need a quick, delicious treat.

Why You’ll Love This Cottage Cheese Microwave Brownie

So, why should you try this recipe? Let me count the ways:

  • Quick and Easy: This brownie is ready in just a few minutes. Perfect for those late-night cravings or when you need a fast dessert fix.
  • Healthy Indulgence: Packed with protein from the cottage cheese, this brownie is a much healthier alternative to traditional sweets. You can enjoy it without the guilt!
  • Moist and Fudgy: The cottage cheese adds an incredible moisture and fudgy texture that you won’t believe. It’s like a little cloud of chocolatey goodness.
  • Customizable: You can easily adapt this recipe to suit your dietary needs and preferences. More on that in the variations section!
  • Single Serving: No need to worry about leftovers tempting you all day. This recipe makes the perfect single-serving brownie.

This recipe has become a staple in my kitchen, especially when I’m craving something sweet but want to keep things relatively healthy. It’s also a fantastic way to sneak in some extra protein, which is always a win in my book. Plus, it’s so simple that even the most novice cook can nail it. If you’re looking for a quick, easy, and delicious dessert, this cottage cheese microwave brownie is for you.

Ingredients for the Perfect Cottage Cheese Microwave Brownie

Here’s what you’ll need to whip up this amazing brownie:

  • 1/4 cup cottage cheese (low-fat or full-fat)
  • 2 tablespoons unsweetened cocoa powder
  • 2 tablespoons sweetener (e.g., erythritol, stevia, sugar)
  • 1/4 teaspoon baking powder
  • 1/4 teaspoon vanilla extract
  • Pinch of salt

A few notes on the ingredients: I usually opt for low-fat cottage cheese to keep the calorie count down, but full-fat works just as well if you prefer a richer flavor. As for the sweetener, I’m a big fan of erythritol or stevia, especially if I’m watching my sugar intake. However, regular sugar works perfectly fine too. Feel free to experiment with your favorite sweetener to find what you like best. If you want to lower the carbs even more, consider using monk fruit sweetener.

Recipe Image

How to Make This Cottage Cheese Microwave Brownie: Step-by-Step

Alright, let’s get baking! Here’s how to make this incredible cottage cheese microwave brownie:

  1. In a microwave-safe mug, combine all ingredients.
  2. Mix well until smooth and no lumps remain.
  3. Microwave on high for 60-90 seconds, or until cooked through. Cooking time may vary depending on your microwave.
  4. Let cool slightly before enjoying. Optional: Top with berries, nuts, or a sugar-free chocolate drizzle.

Seriously, that’s it! I told you it was easy. The key is to make sure all the ingredients are well combined before microwaving. You don’t want any pockets of dry cocoa powder or clumps of cottage cheese. When you’re mixing, really get in there and make sure everything is smooth and creamy. It’s also important to use a microwave-safe mug. I’ve learned this the hard way (trust me, cleaning up exploded brownie batter is not fun). If you’re using a smaller mug, you might want to adjust the cooking time slightly to prevent overflow.

Pro Tips for the Perfect Microwave Brownie

Want to take your cottage cheese microwave brownie to the next level? Here are a few pro tips to keep in mind:

  • Mix Thoroughly: Make sure all ingredients are well combined to avoid lumps.
  • Adjust Cooking Time: Microwaves vary, so adjust the cooking time as needed. Start with 60 seconds and add 10-second intervals until cooked through.
  • Don’t Overcook: Overcooking will result in a dry, rubbery brownie. Aim for a slightly soft center.
  • Add Chocolate Chips: For an extra chocolatey treat, stir in a few sugar-free chocolate chips before microwaving.
  • Let It Cool: Let the brownie cool for a few minutes before enjoying. This allows it to set and become even more fudgier.

These tips are based on countless batches of microwave brownies I’ve made over the years. The biggest mistake people make is overcooking the brownie. Remember, it’s better to err on the side of slightly undercooked than overcooked. The brownie will continue to set as it cools, so don’t worry if it looks a little soft when you take it out of the microwave. And speaking of chocolate chips, adding a few is a game-changer. They melt into the brownie and create little pockets of gooey deliciousness. This brownie is a great high protein dessert.

Common Mistakes to Avoid

Even with a simple recipe like this, it’s easy to make a few common mistakes. Here’s what to watch out for:

  • Not Mixing Well Enough: Lumps of cocoa powder or cottage cheese can ruin the texture.
  • Overcooking: This leads to a dry, rubbery brownie. Keep a close eye on it while microwaving.
  • Using the Wrong Mug: Make sure your mug is microwave-safe and large enough to prevent overflow.
  • Skipping the Salt: A pinch of salt enhances the sweetness and balances the flavors. Don’t skip it!

I’ve made all of these mistakes at some point. The worst was probably the time I used a mug that wasn’t microwave-safe and ended up with a cracked mug and brownie batter all over my microwave. Lesson learned! Also, don’t underestimate the power of salt. It might seem counterintuitive to add salt to a dessert, but it really does make a difference. It brings out the sweetness and adds a depth of flavor that you won’t get without it.

Variations to Try

One of the best things about this recipe is how easy it is to customize. Here are a few variations to try:

  • Peanut Butter Brownie: Add a tablespoon of peanut butter or peanut butter powder to the batter.
  • Chocolate Mint Brownie: Add a few drops of peppermint extract.
  • Mocha Brownie: Add a teaspoon of instant coffee or espresso powder.
  • Nutty Brownie: Stir in a tablespoon of chopped nuts (walnuts, pecans, or almonds).
  • Berry Brownie: Top with fresh berries after microwaving.

My personal favorite is the peanut butter brownie. The combination of chocolate and peanut butter is simply irresistible. The nutty brownie is also fantastic, especially if you use toasted nuts. Toasting the nuts beforehand really brings out their flavor and adds a nice crunch to the brownie. And if you’re a fan of coffee, the mocha brownie is a must-try. The coffee enhances the chocolate flavor and adds a little extra kick.

How to Store Leftovers (If There Are Any!)

Since this recipe makes a single serving, you probably won’t have any leftovers. But if you do, here’s how to store them:

  • Refrigerate: Store in an airtight container in the refrigerator for up to 2 days.
  • Reheat: Reheat in the microwave for a few seconds until warmed through.

Honestly, I’ve never had any leftovers of this brownie. It’s just too good to resist! But if you’re making it ahead of time, you can definitely store it in the fridge. Just make sure to cover it tightly to prevent it from drying out. When you’re ready to eat it, a quick zap in the microwave will bring it back to its fudgy glory.

Frequently Asked Questions (FAQ)

Got questions? I’ve got answers!

  • Can I use regular sugar instead of erythritol or stevia? Yes, you can use regular sugar. Just use the same amount (2 tablespoons).
  • Can I use full-fat cottage cheese? Absolutely! Full-fat cottage cheese will make the brownie even richer and more decadent.
  • Can I add chocolate chips? Of course! Stir in a few sugar-free chocolate chips before microwaving for an extra chocolatey treat.
  • My brownie is dry. What did I do wrong? You probably overcooked it. Reduce the cooking time next time.
  • My brownie is too wet. What did I do wrong? You might have undercooked it. Add a few more seconds to the cooking time.

If you’re still having trouble, don’t hesitate to reach out to me in the comments. I’m always happy to help! And remember, cooking is all about experimenting and finding what works best for you. Don’t be afraid to tweak the recipe and make it your own.

Serving Suggestions

This cottage cheese microwave brownie is delicious on its own, but here are a few serving suggestions to make it even more special:

  • Top with Berries: Fresh berries add a burst of flavor and a pop of color.
  • Add Nuts: A sprinkle of chopped nuts adds a nice crunch.
  • Drizzle with Chocolate: A sugar-free chocolate drizzle takes it to the next level.
  • Serve with Ice Cream: A scoop of sugar-free ice cream turns it into a decadent dessert.

I love topping mine with a few fresh raspberries and a dollop of whipped cream (the sugar-free kind, of course!). It’s the perfect way to end a long day. And if I’m feeling extra indulgent, I’ll add a drizzle of sugar-free chocolate sauce. It’s like a little slice of heaven in a mug. So there you have it—my go-to cottage cheese microwave brownie recipe. I hope you love it as much as I do! If you try it, be sure to let me know in the comments. And don’t forget to tag me in your photos on social media. Happy baking!

The Best Cottage Cheese Microwave Brownie

Prep Time 2 minutes
Cook Time 1 minute
Total Time 3 minutes
Servings 1 serving
Calories 150
Enjoy a quick and delicious brownie made right in your microwave! This recipe uses cottage cheese for a protein boost and a surprisingly fudgy texture.

Ingredients

Ingredients

  • 1/4 cup cottage cheese (low-fat or full-fat)
  • 2 tablespoons unsweetened cocoa powder
  • 2 tablespoons sweetener (e.g., erythritol, stevia, sugar)
  • 1/4 teaspoon baking powder
  • 1/4 teaspoon vanilla extract
  • Pinch salt

Instructions 

  • In a microwave-safe mug, combine all ingredients.
  • Mix well until smooth and no lumps remain.
  • Microwave on high for 60-90 seconds, or until cooked through.
  • Let cool slightly before enjoying. Optional: Top with berries, nuts, or a sugar-free chocolate drizzle.

Notes

Cooking time may vary depending on your microwave.
Calories: 150kcal
Cost: $3
Course: Dessert
Cuisine: American
Keyword: cottage cheese
pin

Hey there, friend! Ava here, back in my Seattle kitchen, and today we’re diving headfirst into a bowl of pure comfort, but with a little twist. We’re talking about mac and cheese, but not just any mac and cheese. This is High Protein Crockpot Cottage Cheese Mac and Cheese. That’s right, we’re using cottage cheese! Now, I know what you might be thinking: cottage cheese in mac and cheese? Trust me on this one. It’s a game-changer.

Growing up, mac and cheese was a staple. My mom had her own version, and it was always a hit. But as I’ve gotten older, I’ve been looking for ways to make my favorite comfort foods a little healthier without sacrificing flavor. Enter: cottage cheese. This recipe isn’t just about satisfying your cravings; it’s about nourishing your body too. It’s the perfect simple protein dinner that will keep you full and happy.

Why You’ll Love This Recipe

Okay, let’s get down to the nitty-gritty. Why should you try this particular mac and cheese recipe? Well, for starters, it’s incredibly easy. We’re using a slow cooker, which means minimal effort and maximum flavor. But there’s so much more to love about this dish:

  • High Protein: Cottage cheese is packed with protein, making this a satisfying and filling meal.
  • Healthy Twist: It’s a healthier mac and cheese option without sacrificing the creamy, cheesy goodness we all crave.
  • Crockpot Convenience: Set it and forget it! The slow cooker does all the work, so you can focus on other things.
  • Kid-Friendly: Even picky eaters will love this creamy, cheesy dish. It’s a great way to sneak in some extra protein.
  • Customizable: Easily adapt the recipe to your liking with different cheeses, spices, or add-ins.

If you’re looking for a healthier mac and cheese recipe that doesn’t skimp on flavor, this cottage cheese mac n cheese is for you. It’s a fantastic alternative to traditional recipes and is perfect for those seeking a low calorie mac and cheese option. This mac is especially good if you are looking to add protein to your diet.

Ingredients

Here’s what you’ll need to make this amazing High Protein Crockpot Cottage Cheese Mac and Cheese:

  • 10 oz elbow pasta
  • 16 oz cottage cheese
  • 2.5 cups shredded cheese (Tillamook cheddar recommended)
  • 1 stick butter (Kerrygold unsalted butter recommended)
  • 2.5 cups water
  • 1/2 teaspoon garlic powder
  • 1/4 teaspoon black pepper
Recipe Image

Step-by-Step Instructions

Alright, let’s get cooking! Here’s how to make this delicious and healthy mac and cheese:

  1. Combine all ingredients into a slow cooker.
  2. Mix well.
  3. Cook on low for 2-3 hours, or until the pasta is cooked to your liking.
  4. Stir occasionally to prevent sticking.
  5. Serve hot and enjoy!

Pro Tips for the Best Cottage Cheese Mac and Cheese

Okay, so you know the basics, but here are a few extra tips to make this mac and cheese truly exceptional:

  • Cheese Matters: I highly recommend Tillamook cheddar for its rich flavor and meltability, but feel free to experiment with other cheeses like Gruyere, Monterey Jack, or even a little bit of smoked Gouda.
  • Butter is Better: Kerrygold unsalted butter adds a depth of flavor that you just can’t get with other brands. It’s worth the splurge!
  • Don’t Overcook the Pasta: Keep an eye on the pasta as it cooks in the slow cooker. You want it to be al dente, not mushy.
  • Stir, Stir, Stir: Stirring occasionally will help prevent the pasta from sticking and ensure that everything cooks evenly.
  • Season to Taste: Don’t be afraid to adjust the seasonings to your liking. Add a pinch of cayenne pepper for a little kick, or some smoked paprika for a smoky flavor.

If you are using a slow cooker, make sure you keep the heat on low heat to prevent burning. The slow cooker will work its magic, transforming simple ingredients into a creamy, cheesy masterpiece. When you’re ready to serve, give it a good stir and prepare to be amazed.

Common Mistakes to Avoid

Even the best cooks make mistakes sometimes! Here are a few common pitfalls to watch out for when making this recipe:

  • Overcooking the Pasta: This is the biggest culprit of mushy mac and cheese. Keep a close eye on the pasta and test it frequently.
  • Not Stirring Enough: Neglecting to stir the mac and cheese can result in the pasta sticking to the bottom of the slow cooker.
  • Using Too Much Water: Adding too much water can make the mac and cheese watery and bland. Stick to the recommended amount.
  • Skipping the Butter: The butter adds richness and flavor, so don’t skip it!
  • Forgetting to Season: Seasoning is key to bringing out the flavors of the cheese and pasta. Don’t be afraid to add salt, pepper, and other spices to taste.

Variations to Try

One of the best things about mac and cheese is that it’s so versatile! Here are a few variations to try:

  • Spicy Mac and Cheese: Add a pinch of cayenne pepper, a dash of hot sauce, or some chopped jalapeños for a spicy kick.
  • Bacon Mac and Cheese: Cook some bacon until crispy, then crumble it over the mac and cheese before serving.
  • Vegetarian Mac and Cheese: Add some chopped vegetables like broccoli, cauliflower, or spinach for a healthy and delicious twist.
  • Lobster Mac and Cheese: Add some cooked lobster meat for a decadent and luxurious treat.
  • Bone Broth Mac and Cheese: Substitute the water for bone broth for added nutrients and flavor.

Feel free to experiment with different cheeses, spices, and add-ins to create your own signature mac and cheese. It’s really up to you!

How to Store Leftovers

If you happen to have any leftovers (which is a big ‘if’ in my house!), here’s how to store them:

  • Refrigerate: Store the mac and cheese in an airtight container in the refrigerator for up to 3 days.
  • Reheat: Reheat the mac and cheese in the microwave or on the stovetop until heated through. Add a splash of milk or water to keep it from drying out.
  • Freeze: For longer storage, freeze the mac and cheese in an airtight container for up to 2 months. Thaw it in the refrigerator overnight before reheating.

Frequently Asked Questions (FAQ)

Got questions? I’ve got answers!

  • Can I use a different type of pasta? Absolutely! Feel free to use your favorite type of pasta, such as penne, rotini, or shells.
  • Can I use low-fat cottage cheese? Yes, you can use low-fat cottage cheese to reduce the fat content of this recipe.
  • Can I make this recipe on the stovetop? Yes, you can make this recipe on the stovetop. Simply combine all of the ingredients in a large pot and cook over medium heat, stirring frequently, until the pasta is cooked and the cheese is melted.
  • Can I add breadcrumbs to the top? Absolutely! Add a layer of breadcrumbs to the top of the mac and cheese before baking for a crispy topping.
  • Is this recipe Whole 30 compliant? No, this recipe is not Whole 30 compliant because it contains pasta and cheese.

Remember, if you don’t see your question here, feel free to ask! I’m always happy to help.

Serving Suggestions

This High Protein Crockpot Cottage Cheese Mac and Cheese is delicious on its own, but here are a few serving suggestions to take it to the next level:

  • Side Dish: Serve it as a side dish with grilled chicken, steak, or pork chops.
  • Main Course: Enjoy it as a main course with a side salad or steamed vegetables.
  • Toppings: Top it with crispy bacon, chopped green onions, or a sprinkle of Parmesan cheese.
  • Garnish: Garnish with fresh parsley or a drizzle of olive oil.

And there you have it! A creamy, dreamy, protein-packed mac and cheese that’s easy to make and good for you too. I hope you love this recipe as much as I do. Happy cooking!

High Protein Crockpot Cottage Cheese Mac and Cheese - Alrightwithme

Prep Time 10 minutes
Cook Time 3 hours
Total Time 3 hours 10 minutes
Servings 6 servings
Calories 450
This high-protein mac and cheese is a delicious and easy crockpot meal. It's packed with protein from cottage cheese and is sure to be a family favorite!

Ingredients

Ingredients

  • 10 oz elbow pasta
  • 16 oz cottage cheese
  • 2.5 cups shredded cheese (Tillamook cheddar recommended) (Tillamook cheddar recommended)
  • 1 stick butter (Kerrygold unsalted butter recommended) (Kerrygold unsalted butter recommended)
  • 2.5 cups water
  • 0.5 teaspoon garlic powder
  • 0.25 teaspoon black pepper

Notes

For a creamier texture, blend the cottage cheese before adding it to the crockpot.
Calories: 450kcal
Cost: $18
Course: Main Course
Cuisine: American
Keyword: cheese
pin

Hey there, fellow food adventurers! Ava here, back in my Seattle kitchen, ready to share a recipe that’s equal parts nostalgic and ridiculously tasty. If you’re anything like me, you believe that the best meals are the ones that bring a smile to your face without requiring a culinary degree. And let me tell you, this Pizza Grilled Cheese Sandwich is a guaranteed grin-inducer. It’s the ultimate comfort food mashup, taking two classics and turning them into something even more amazing. I remember when I first made these sandwiches for my kids; their eyes lit up like it was Christmas morning! So, pull up a chair, and let’s dive into this cheesy, saucy goodness!

Why You’ll Love This Pizza Grilled Cheese

Seriously, what’s not to love? This isn’t just your average grilled cheese. It’s a flavor explosion that combines the comforting warmth of a grilled cheese with the fun, familiar flavors of pizza. It’s quick, easy, and totally customizable. This recipe is not just a meal; it’s a hug in sandwich form. When I need a quick dinner idea that satisfies both kids and adults, this pizza grilled cheese is my go-to. That’s why I want to share this with you; so you can enjoy the ultimate comfort too!

  • Quick & Easy: Ready in under 15 minutes – perfect for busy weeknights.
  • Kid-Friendly: A guaranteed hit with even the pickiest eaters.
  • Customizable: Easily adaptable to your favorite pizza toppings.
  • Comfort Food: The ultimate combination of warmth, cheese, and familiar flavors.

Ingredients for Pizza Grilled Cheese Sandwiches

  • 2 slices sourdough bread
  • 0.5 cup shredded mozzarella cheese
  • 6 slices beef pepperoni
  • 2 tablespoons pizza sauce
  • 1 tablespoon butter
  • 0.5 teaspoon Italian seasoning or dried oregano
Recipe Image

How to Make the Ultimate Pizza Grilled Cheese: Step-by-Step

Alright, let’s get cooking! Follow these simple steps, and you’ll be enjoying your own pizza grilled cheese masterpiece in no time. Remember, cooking should be fun, so don’t be afraid to experiment and add your own personal touch!

  1. Butter one side of each slice of bread. This is crucial for achieving that perfect golden brown crust.
  2. Lay bread butter-side down and spread pizza sauce on the unbuttered side. Don’t be shy with the sauce!
  3. Add a layer of mozzarella cheese. The more cheese, the better!
  4. Top with beef pepperoni slices and more mozzarella if desired. Go crazy with your toppings.
  5. Place the other slice of bread on top, sauce side in, butter side out. Make sure everything is snug.
  6. Heat a skillet over medium heat. Patience is key here.
  7. Grill sandwiches 3–4 minutes per side, until golden brown and cheese is melted. Keep an eye on them!
  8. Let rest for 1 minute before slicing. This helps the cheese set a bit.
  9. Sprinkle with Italian seasoning before serving. Adds a nice touch of flavor.

Pro Tips for the Perfect Grilled Cheese

Want to take your pizza grilled cheese to the next level? Here are a few of my secret weapons:

  • Use Quality Bread: Sourdough or a hearty Italian bread works best. The bread of your choice can make or break the sandwich.
  • Low and Slow: Cook over medium heat to ensure the cheese melts completely without burning the bread.
  • Softened Butter: Makes it easier to spread evenly and get that perfect golden brown crust.
  • Don’t Overload: Too many toppings can make the sandwich difficult to handle and cook evenly.
  • Cheese Matters: Use a good quality mozzarella for the best melt and flavor.

Common Mistakes to Avoid

Even the best cooks make mistakes! Here are a few common pitfalls to watch out for:

  • Burning the Bread: Keep the heat at medium and watch carefully.
  • Uneven Cheese Melt: Make sure the cheese is evenly distributed.
  • Soggy Sandwich: Don’t overdo the sauce.
  • Using Cold Butter: This can tear the bread when spreading.
  • Impatience: Don’t rush the cooking process!

Pizza Grilled Cheese Variations

The beauty of this recipe is its versatility. Feel free to experiment with different toppings and flavors. I made a version with mushrooms and it was delicious!

  • Veggie Lover’s: Add sliced bell peppers, onions, and mushrooms.
  • Meat Lover’s: Include sausage, bacon, or ham.
  • Spicy Kick: Add a pinch of red pepper flakes or a drizzle of hot sauce.
  • Pesto Power: Use pesto instead of pizza sauce for a different flavor profile.
  • Gourmet Twist: Try using provolone or fontina cheese instead of mozzarella.

How to Store Leftover Pizza Grilled Cheese

While these sandwiches are best enjoyed fresh, you can store leftovers in the refrigerator for up to 24 hours. Reheat in a skillet or toaster oven for best results. Keep them in mind for my kids’ lunch the next day!

Frequently Asked Questions (FAQ)

  • Can I use different types of bread? Absolutely! Just make sure it’s sturdy enough to hold the fillings.
  • Can I make this in a panini press? Yes, just adjust the cooking time accordingly.
  • Can I freeze these sandwiches? Not recommended, as the texture may change upon thawing.
  • What kind of pizza sauce should I use? Any kind you like! Homemade or store-bought works great.
  • Can I add vegetables? Yes! Just make sure they’re cooked or thinly sliced.

Serving Suggestions

This Pizza Grilled Cheese is a fantastic meal on its own, but it also pairs well with:

  • Tomato soup
  • Side salad
  • Coleslaw
  • French fries
  • Pickles

There you have it! A simple, delicious, and customizable recipe that’s sure to become a family favorite. I hope you enjoy making and eating this Pizza Grilled Cheese as much as I do. Happy cooking!

Pizza Grilled Cheese Sandwiches

Prep Time 5 minutes
Cook Time 8 minutes
Total Time 13 minutes
Servings 2 sandwiches
Calories 450
Enjoy the flavors of pizza in a grilled cheese sandwich! This recipe combines sourdough bread, mozzarella, pepperoni, and pizza sauce for a quick and delicious meal.

Ingredients

Ingredients

  • 2 slices sourdough bread
  • 0.5 cup shredded mozzarella cheese
  • 6 slices beef pepperoni
  • 2 tablespoons pizza sauce
  • 1 tablespoon butter
  • 0.5 teaspoon Italian seasoning or dried oregano

Instructions 

  • Butter one side of each slice of bread.
  • Lay bread butter-side down and spread pizza sauce on the unbuttered side.
  • Add a layer of mozzarella cheese.
  • Top with beef pepperoni slices and more mozzarella if desired.
  • Place the other slice of bread on top, sauce side in, butter side out.
  • Heat a skillet over medium heat.
  • Grill sandwiches 3–4 minutes per side, until golden brown and cheese is melted.
  • Let rest for 1 minute before slicing.
  • Sprinkle with Italian seasoning before serving.

Notes

For a crispier sandwich, use a panini press or weight down the sandwich while grilling.
Calories: 450kcal
Cost: $8
Course: dinner, Lunch
Cuisine: American, Italian
Keyword: cheese, Pepperoni
pin

Savory Ground Beef with Herb-Roasted Potatoes & Broccoli: A Weeknight Winner

Hey there, friend! Ava here, back in my Seattle kitchen, and today I’m sharing a recipe that’s a total game-changer for busy weeknights. It’s called Savory Ground Beef with Herb-Roasted Potatoes & Broccoli, and trust me, it’s about to become your new go-to. Growing up, my mom always had a knack for creating comforting meals out of simple ingredients. This dish is my modern take on that classic, feel-good cooking. It’s the kind of meal that fills you up without weighing you down, and it’s so easy to customize based on what you have on hand.

I remember one particularly hectic week when I was juggling a new job and trying to settle into my apartment. I needed something quick, healthy, and satisfying. That’s when this recipe was born. It’s now a regular in my rotation, and I can’t wait to share it with you!

Why You’ll Love This Savory Ground Beef Meal

Seriously, what’s not to love? This recipe is packed with flavor, incredibly easy to make, and uses ingredients you probably already have in your pantry. But here are a few more reasons why I think you’ll be obsessed with this satisfying recipe:

  • Quick & Easy: From prep to plate, you’re looking at about 40 minutes, max. Perfect for those nights when you’re short on time but still want a home-cooked meal.
  • Healthy & Balanced: Lean ground beef provides protein, the potatoes offer healthy carbs, and the broccoli is packed with vitamins. It’s a well-rounded meal that’s good for you and tastes amazing.
  • Customizable: Feel free to swap out the broccoli for another veggie, add some spices to the beef, or use sweet potatoes instead of regular potatoes. It’s your kitchen, your rules!
  • Comforting: There’s something so satisfying about the combination of savory ground beef, crispy herb-roasted potatoes, and tender-crisp steamed broccoli. It’s a comforting meal that feels like a warm hug.
  • Delicious Flavors: The herb-roasted potatoes are a real standout, infused with oregano, thyme, and garlic. They complement the savory ground beef perfectly, and the steamed broccoli adds a fresh, vibrant touch.

Ingredients: What You’ll Need

Here’s what you’ll need to whip up this deliciousness:

  • 200g lean ground beef
  • 2 medium potatoes, diced skin on
  • 1 cup broccoli florets
  • 2 tbsp olive oil
  • 1 tsp dried oregano
  • 1 tsp dried thyme
  • 1/2 tsp garlic powder
  • Salt & black pepper to taste
Recipe Image

Let’s Get Cooking: Step-by-Step Instructions

Alright, let’s get down to business! Here’s how to make this incredible Savory Ground Beef with Herb-Roasted Potatoes & Broccoli:

  1. Preheat & Prep: Preheat your oven to 400F (200C). This ensures the potatoes get nice and crispy.
  2. Season the Potatoes: Toss the diced potatoes with olive oil, oregano, thyme, garlic powder, salt, and black pepper. Make sure they’re evenly coated for maximum flavor.
  3. Roast ‘Em: Spread the seasoned potatoes on a baking sheet and roast for 25-30 minutes, or until they’re golden and crispy. Keep an eye on them to prevent burning.
  4. Cook the Beef: In a skillet over medium heat, cook the ground beef, breaking it up as it cooks. Season with salt and pepper until it’s no longer pink and slightly crispy on the edges. I like to use a wooden spoon to break it up into small pieces.
  5. Steam the Broccoli: In a pot, bring water to a boil and steam the broccoli florets for 2-3 minutes until they’re bright green and tender-crisp. You want them to still have a bit of bite.
  6. Plate & Serve: Arrange the ground beef, crispy roasted potatoes, and steamed broccoli on a plate. Season with a final pinch of salt and pepper if needed. Serve immediately and enjoy this comforting meal!

Pro Tips for the Perfect Savory Ground Beef Dish

Here are a few extra tips to take this dish from good to *amazing*:

  • Crispy Potatoes: For extra crispy potatoes, soak them in cold water for 30 minutes before roasting. This helps remove excess starch.
  • Don’t Overcrowd the Pan: When roasting the potatoes, make sure they’re spread out in a single layer on the baking sheet. Overcrowding will cause them to steam instead of roast.
  • Seasoning is Key: Don’t be shy with the herbs and spices! They’re what give this dish its delicious flavors. Taste and adjust as needed.
  • Lean Ground Beef: Using lean ground beef helps keep this meal healthy without sacrificing flavor. Look for 90% lean or higher. You can also substitute ground turkey for an even leaner option. Check out my take on turkey-burgers for more ground meat inspiration.
  • Fresh Herbs: If you have fresh herbs on hand, feel free to use them instead of dried. Just remember that fresh herbs are generally more potent, so you may need to use more.

Common Mistakes to Avoid

Even the simplest recipes can have a few potential pitfalls. Here’s what to watch out for:

  • Overcooking the Broccoli: Nobody likes mushy broccoli! Steam it just until it’s bright green and tender-crisp.
  • Not Seasoning Enough: Bland food is a no-go. Make sure to season the potatoes and beef generously with salt, pepper, and herbs.
  • Burning the Potatoes: Keep an eye on the potatoes while they’re roasting to prevent them from burning. If they start to brown too quickly, lower the oven temperature slightly.
  • Using Too Much Oil: While olive oil is healthy, using too much can make the potatoes greasy. Stick to the recommended amount.

Variations: Make It Your Own!

One of the best things about this recipe is how easy it is to customize. Here are a few ideas to get you started:

  • Sweet Potatoes: Swap out the regular potatoes for sweet potatoes for a sweeter, more nutritious twist.
  • Different Veggies: Try roasting other vegetables like carrots, Brussels sprouts, or bell peppers along with the potatoes.
  • Spicy Beef: Add a pinch of red pepper flakes or a dash of hot sauce to the ground beef for a little kick.
  • Cheesy Potatoes: Sprinkle some shredded cheese over the potatoes during the last few minutes of roasting for a cheesy, comforting treat.
  • Add a Sauce: Drizzle a little bit of your favorite sauce over the dish before serving. Ranch dressing, BBQ sauce, or even a simple vinaigrette would be delicious.

Storage and Reheating Instructions

Got leftovers? No problem! Here’s how to store and reheat this dish:

  • Storage: Store any leftovers in an airtight container in the refrigerator for up to 3-4 days.
  • Reheating: To reheat, you can either microwave the dish for a few minutes until heated through, or reheat it in the oven at 350F (175C) for about 10-15 minutes.
  • Reheating Potatoes: For best results, reheat the potatoes in the oven or a skillet to help them stay crispy. Microwaving can make them soggy.

Frequently Asked Questions (FAQ)

Got questions? I’ve got answers!

  • Can I use ground turkey instead of ground beef? Absolutely! Ground turkey is a great substitute. It’s leaner and still tastes delicious.
  • Can I make this dish ahead of time? Yes, you can prepare the components of this dish ahead of time. Roast the potatoes and cook the beef, then store them separately in the refrigerator. Steam the broccoli just before serving for the best texture.
  • How can I make the potatoes crispier? Soaking the diced potatoes in cold water for 30 minutes before roasting helps remove excess starch, resulting in crispier potatoes. Also, make sure not to overcrowd the baking sheet.
  • What other herbs can I use? Feel free to experiment with different herbs like rosemary, sage, or parsley.
  • Is this recipe gluten-free? Yes, this recipe is naturally gluten-free.

Serving Suggestions

This Savory Ground Beef with Herb-Roasted Potatoes & Broccoli is a complete meal on its own, but here are a few ideas to take it to the next level:

  • Side Salad: Serve with a simple green salad for a fresh, vibrant side.
  • Garlic Bread: Add a slice of garlic bread for a comforting, carb-loaded treat.
  • Dipping Sauce: Offer a variety of dipping sauces like ranch dressing, BBQ sauce, or a simple vinaigrette.

And there you have it! A simple, delicious, and comforting meal that’s perfect for any night of the week. I hope you love this recipe as much as I do. If you try it, be sure to let me know in the comments below! And don’t forget to check out my other recipes for more kitchen inspiration. Happy cooking!

Maybe you’ll also like my hamburger-patty or my bacon-cheese-stuffed-burgers

Savory Ground Beef with Herb-Roasted Potatoes & Steamed Broccoli

Prep Time 15 minutes
Cook Time 30 minutes
Total Time 45 minutes
Servings 2 people
Calories 450
A hearty and healthy meal featuring savory ground beef, flavorful herb-roasted potatoes, and tender steamed broccoli. This dish is easy to prepare and perfect for a satisfying weeknight dinner.

Ingredients

Main Ingredients

  • 200 g lean ground beef
  • 2 medium potatoes (diced skin on)
  • 1 cup broccoli florets

Seasoning

  • 2 tbsp olive oil
  • 1 tsp dried oregano
  • 1 tsp dried thyme
  • 0.5 tsp garlic powder
  • to taste Salt & black pepper

Instructions 

  • Preheat oven to 400F (200C).
  • Toss potatoes with olive oil, oregano, thyme, garlic powder, salt, and pepper.
  • Roast for 25-30 minutes until golden and crispy.
  • Cook ground beef in a skillet, breaking it up, until no longer pink.
  • Steam broccoli florets for 2-3 minutes until tender-crisp.
  • Arrange beef, potatoes, and broccoli on a plate; season with salt and pepper if needed.

Notes

For extra flavor, add a pinch of red pepper flakes to the potatoes before roasting.
Calories: 450kcal
Cost: $12
Course: dinner
Cuisine: American
Keyword: Beef
pin

Hey there, friend! Ava here, back in my Seattle kitchen, and today we’re diving headfirst into something truly magical: High Protein Chocolate Banana Bread. Yes, you read that right. We’re talking about a treat that’s not only ridiculously delicious but also packed with protein to fuel your day. As someone who believes in balance – the perfect dance between indulgence and nourishment – this recipe has become a staple. I mean, who doesn’t love banana bread? Especially when you can sneak in some extra goodness?

Growing up, banana bread was a Sunday morning ritual. My mom would let the bananas sit on the counter until they were almost too ripe, then transform them into a loaf of pure comfort. Now, I’ve taken that classic and given it a healthy, protein-packed twist. And because one recipe is never enough, I’m sharing not one, but 7 epic variations. Trust me; you’re going to want to bookmark this one!

Why You’ll Love This High Protein Chocolate Banana Bread

So, what makes this chocolate banana bread so special? Let me count the ways. It’s more than just a delicious treat; it’s a powerhouse of flavor and nutrition. Here are just a few reasons why you’ll be obsessed:

  • High Protein: Perfect for a post-workout snack or a guilt-free dessert, thanks to the addition of protein powder and Greek yogurt.
  • Moist and Delicious: No dry, crumbly banana bread here! This recipe guarantees a perfectly moist texture every time.
  • Gluten-Free Option: Made with gluten-free oat flour, it’s a fantastic option for those with dietary restrictions.
  • Easy to Make: Simple ingredients and straightforward steps make this recipe a breeze, even for beginner bakers.
  • Customizable: With 7 variations, you can mix and match flavors to create your perfect loaf.
  • Travels well: Great for on-the-go snacking.
  • Clean Dessert: Satisfies your sweet tooth without all the refined sugars and unhealthy fats.

Seriously, what’s not to love? This high protein chocolate banana bread is a game-changer.

Ingredients You’ll Need

Before we dive into the recipes, let’s gather our ingredients. Here’s what you’ll need for the base recipe:

  • ‘3 ripe bananas, mashed’
  • ‘2 large eggs’
  • ‘1/2 cup plain Greek yogurt’
  • ‘1/3 cup maple syrup or honey’
  • ‘1 tsp vanilla extract’
  • ‘1 1/2 cups gluten-free oat flour’
  • ‘1/4 cup cocoa powder’
  • ‘1 scoop chocolate or vanilla protein powder’
  • ‘1 tsp baking powder’
  • ‘1/2 tsp baking soda’
  • ‘1/4 tsp salt’
  • ‘Optional: dark chocolate chips or chopped nuts’

Make sure your bananas are nice and spotty – that’s when they’re at their sweetest and most flavorful. And don’t be shy with the cocoa powder; it’s what gives this bread that rich, chocolatey goodness.

Recipe Image

Let’s Bake: Step-by-Step Instructions

Alright, apron on? Let’s get baking! Here’s how to make the base recipe:

  1. Preheat oven to 350°F (175°C) and line a loaf pan with parchment paper.
  2. In a bowl, mix mashed bananas, eggs, Greek yogurt, maple syrup, and vanilla until smooth.
  3. Add oat flour, cocoa powder, protein powder, baking powder, baking soda, and salt. Stir until just combined.
  4. Fold in optional chocolate chips or nuts if using.
  5. Pour batter into prepared loaf pan and smooth the top.
  6. Bake for 35-40 minutes until a toothpick inserted comes out mostly clean.
  7. Let cool before slicing and serving.

See? Easy peasy! Now, let’s talk about those 7 epic variations I promised.

7 Epic High Protein Chocolate Banana Bread Variations

Ready to take your banana bread game to the next level? Here are 7 delicious variations to try:

  1. Peanut Butter Swirl: Swirl a few tablespoons of natural peanut butter into the batter before baking. The combination of chocolate, banana, and peanut butter is simply divine.
  2. Coffee Infusion: Add a tablespoon of instant coffee to the batter for a mocha-flavored bread. Perfect for coffee lovers!
  3. Cinnamon Spice: Mix in a teaspoon of cinnamon and a pinch of nutmeg for a warm, comforting flavor.
  4. Double Chocolate Chunk: Load up on dark chocolate chunks for an extra decadent treat. You can never have too much chocolate, right?
  5. Nutty Delight: Add a handful of chopped walnuts, pecans, or almonds for a crunchy texture and nutty flavor.
  6. Berry Burst: Fold in fresh or frozen berries (blueberries, raspberries, or strawberries) for a burst of fruity goodness.
  7. Orange Zest: Add the zest of one orange to the batter for a bright, citrusy twist.

Feel free to mix and match these variations to create your own signature banana bread. The possibilities are endless!

Pro Tips for the Best Banana Bread

Want to ensure your banana bread turns out perfect every time? Here are a few pro tips:

  • Use Ripe Bananas: The riper the bananas, the sweeter and more flavorful your bread will be.
  • Don’t Overmix: Overmixing can lead to a tough bread. Mix until just combined.
  • Use Parchment Paper: Lining your loaf pan with parchment paper makes it easy to remove the bread and prevents sticking.
  • Check for Doneness: Insert a toothpick into the center of the bread. If it comes out mostly clean, it’s ready. A few moist crumbs are okay.
  • Let It Cool: Resist the urge to slice into the bread while it’s still hot. Letting it cool allows the flavors to meld and the texture to set.

Common Mistakes to Avoid

We all make mistakes in the kitchen, but here are a few common ones to watch out for when making banana bread:

  • Using Underripe Bananas: They won’t provide enough sweetness or moisture.
  • Overbaking: This can result in a dry, crumbly bread.
  • Not Measuring Ingredients Accurately: Baking is a science, so precision is key.
  • Skipping the Parchment Paper: Trust me, it’s worth the extra step.

How to Store Your High Protein Chocolate Banana Bread

To keep your banana bread fresh and delicious, store it in an airtight container at room temperature for up to 3 days. For longer storage, wrap it tightly in plastic wrap and freeze for up to 2 months. Thaw overnight in the refrigerator before serving.

Frequently Asked Questions (FAQ)

Got questions? I’ve got answers! Here are some common questions about making high protein chocolate banana bread:

  • Can I use regular flour instead of oat flour? Yes, but the texture will be slightly different. All-purpose flour works well, but you may need to adjust the amount of liquid.
  • Can I use a different type of protein powder? Absolutely! Whey, casein, or plant-based protein powder all work well. Just be sure to choose a flavor that complements the chocolate and banana.
  • Can I make this recipe dairy-free? Yes, substitute the Greek yogurt with a dairy-free alternative like coconut yogurt or almond yogurt.
  • Can I reduce the amount of sugar? Yes, you can reduce the maple syrup or honey to 1/4 cup. You can also use a sugar-free sweetener like stevia or erythritol.

Serving Suggestions

Now that you’ve baked the perfect loaf, it’s time to enjoy it! Here are a few serving suggestions:

  • Plain: A simple slice of banana bread is delicious on its own.
  • With a Spread: Top with peanut butter, almond butter, or a dollop of Greek yogurt.
  • Toasted: Toast a slice and spread with butter or coconut oil.
  • With Ice Cream: Serve warm with a scoop of vanilla ice cream for a decadent dessert.
  • In a Parfait: Crumble banana bread into a parfait with yogurt, berries, and granola.

Final Thoughts

There you have it – 7 epic high-protein chocolate banana bread recipes that are guaranteed to become a new favorite. Whether you’re looking for a healthy snack, a post-workout treat, or a comforting dessert, these recipes have got you covered. So go ahead, preheat that oven, and let’s make something unforgettable together! Happy baking!

High Protein Chocolate Banana Bread

Prep Time 15 minutes
Cook Time 40 minutes
Total Time 55 minutes
Servings 10 slices
Calories 180
Enjoy this moist and delicious high-protein chocolate banana bread. It's a healthy and satisfying treat perfect for breakfast or a snack.

Ingredients

Ingredients

  • 3 ripe bananas (mashed)
  • 2 large eggs
  • 1/2 cup plain Greek yogurt
  • 1/3 cup maple syrup or honey
  • 1 tsp vanilla extract
  • 1 1/2 cups gluten-free oat flour
  • 1/4 cup cocoa powder
  • 1 scoop chocolate or vanilla protein powder
  • 1 tsp baking powder
  • 1/2 tsp baking soda
  • 1/4 tsp salt
  • dark chocolate chips or chopped nuts (Optional)

Instructions 

  • Preheat oven to 350°F (175°C) and line a loaf pan with parchment paper.
  • Mix mashed bananas, eggs, Greek yogurt, maple syrup, and vanilla until smooth.
  • Add oat flour, cocoa powder, protein powder, baking powder, baking soda, and salt. Stir until just combined.
  • Fold in optional chocolate chips or nuts if using.
  • Pour batter into prepared loaf pan and smooth the top.
  • Bake for 35-40 minutes until a toothpick inserted comes out mostly clean.
  • Let cool before slicing and serving.

Notes

For a richer flavor, use dark cocoa powder.
Calories: 180kcal
Cost: $8
Course: Breakfast, Snack
Cuisine: American
Keyword: Banana
pin