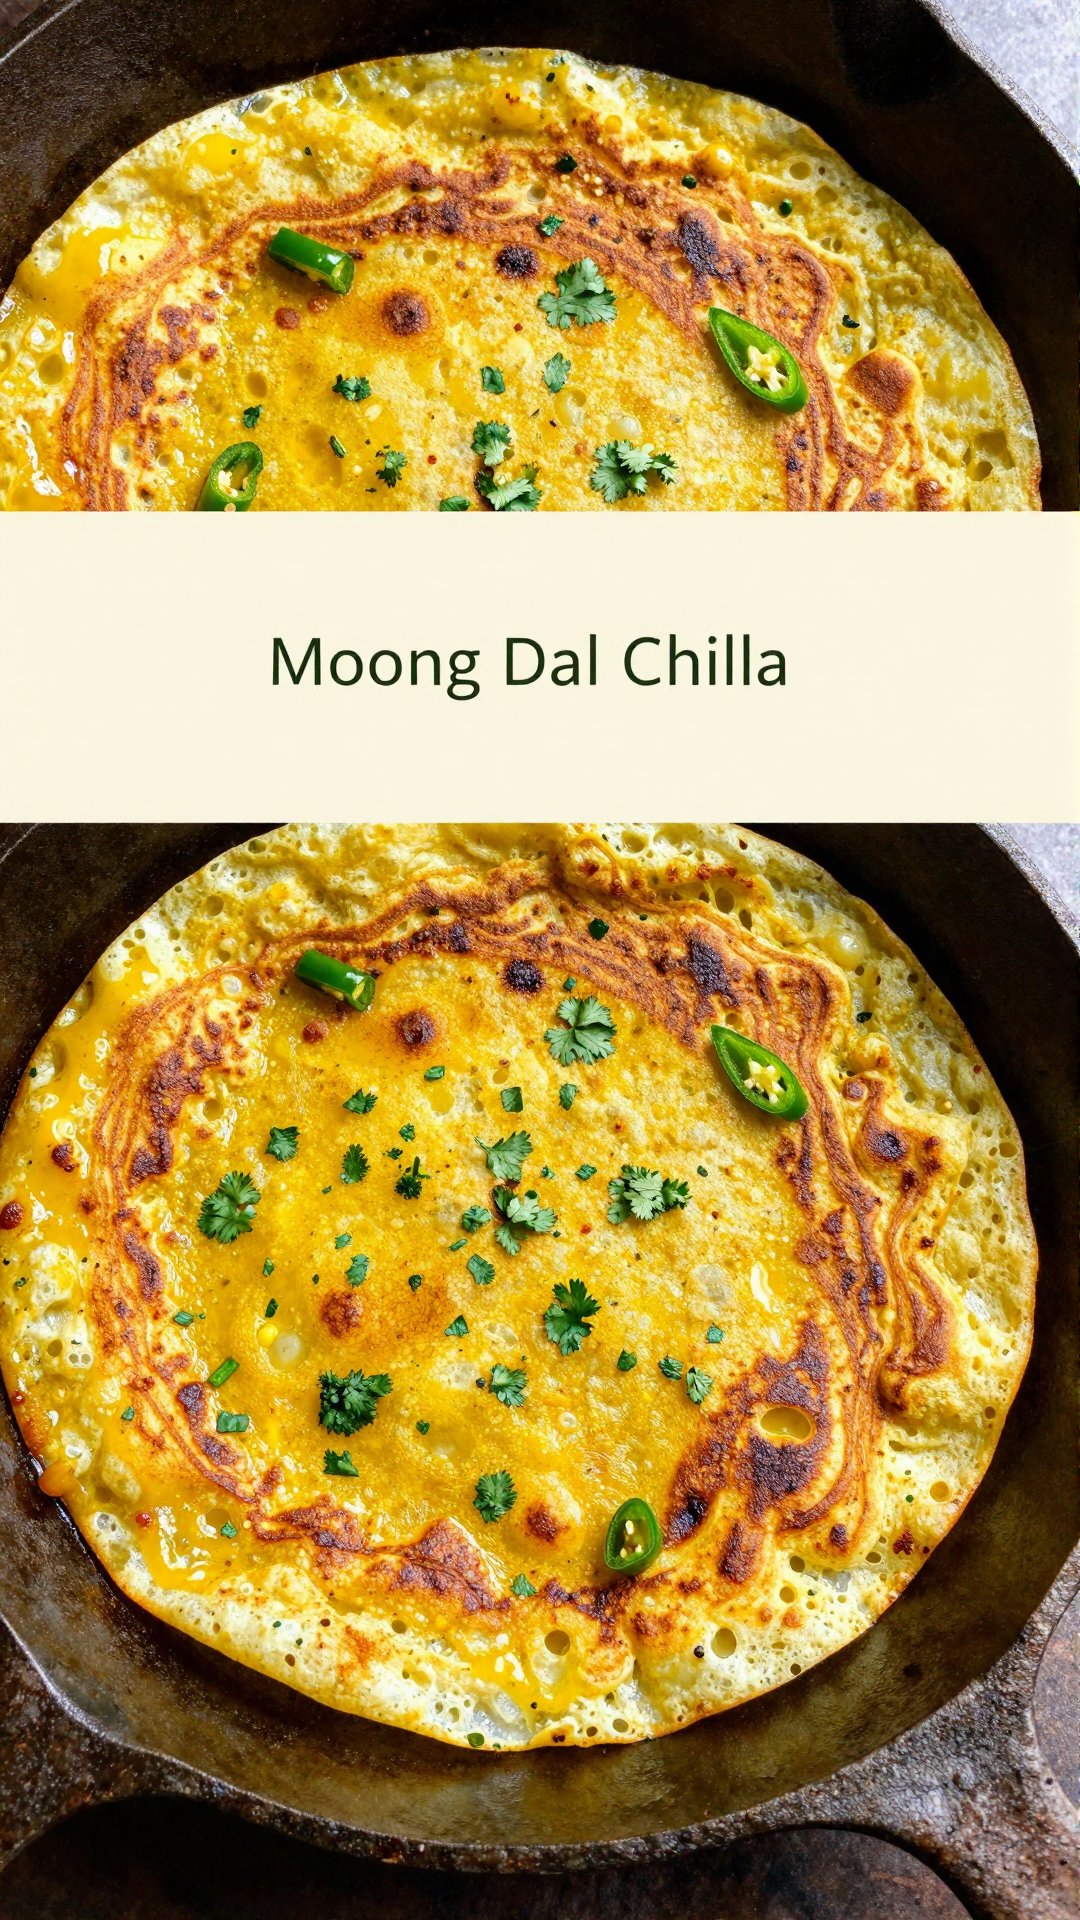
Hey there, kitchen adventurers! Ava here, ready to share one of my absolute go-to recipes: Moong Dal Chilla. If you’re on the hunt for a breakfast that’s both incredibly delicious and packed with protein, you’ve hit the jackpot. This isn’t just another recipe; it’s a warm hug in the form of a savory pancake, perfect for starting your day off right. Imagine a crispy, golden-brown pancake made from moong dal, bursting with flavor from fresh ginger, chilies, and coriander. Sounds good, right? Let’s dive in!
I remember the first time I made dal chilla. I was trying to impress a friend with my culinary skills, and let’s just say, the first few attempts were…interesting. One was too thick, another too thin, and one even stuck to the pan so badly I thought I’d ruined it forever. But, like any good cooking adventure, I learned from my mistakes, tweaked the recipe, and finally landed on a version that’s now a staple in my kitchen. And now, I’m so excited to share this with you!
This recipe is incredibly versatile and forgiving, making it perfect for both seasoned cooks and kitchen newbies. I promise, once you try it, you’ll be hooked. It’s healthy, quick, and oh-so-satisfying. Plus, it’s a fantastic way to sneak in some extra protein and nutrients into your diet without sacrificing flavor. So, grab your blender, and let’s get cooking!
Why You’ll Love This Moong Dal Chilla Recipe
Seriously, what’s not to love? This moong dal chilla recipe is a game-changer for so many reasons:
- Protein Powerhouse: Moong dal is an excellent source of plant-based protein, keeping you full and energized all morning.
- Quick and Easy: From soaking the dal to flipping the chilla, this recipe comes together in under 30 minutes (excluding the soaking time). It is a truly quick Indian breakfast recipe.
- Healthy and Nutritious: Packed with essential nutrients, this recipe is a guilt-free way to start your day.
- Versatile: Customize the flavors to your liking with different spices and toppings.
- Gluten-Free and Vegan-Friendly: Perfect for those with dietary restrictions.
- Delicious: Because at the end of the day, it tastes absolutely amazing.
I’ve made this recipe countless times, and it never fails to impress. Whether I’m cooking for myself or entertaining guests, it’s always a crowd-pleaser. Trust me, this is one recipe you’ll want to keep in your back pocket. This cheela is the perfect option for breakfast or even a light lunch!
Ingredients You’ll Need
Here’s everything you’ll need to create your own batch of delicious moong dal chilla. Don’t worry, most of these ingredients are pantry staples!
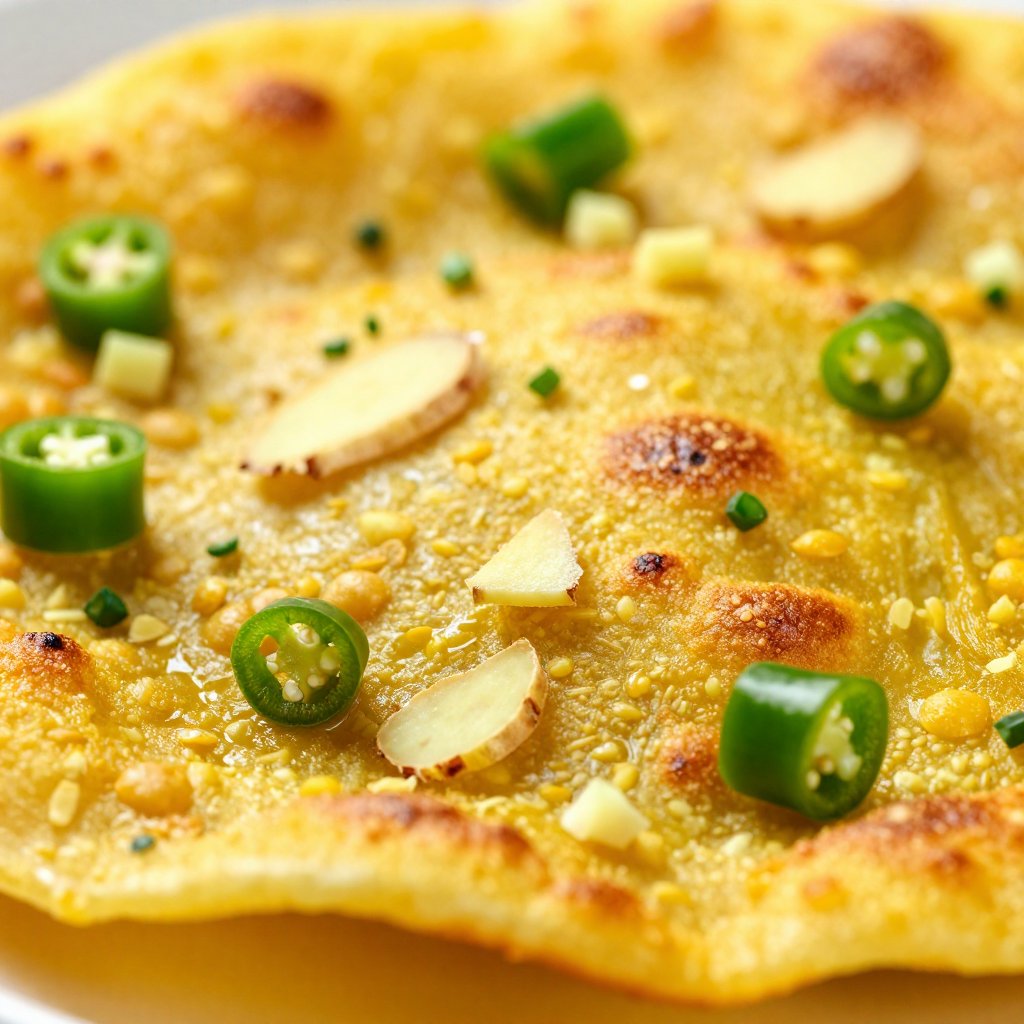
- 1 cup Moong Dal (split yellow lentils): Soaked for at least 4 hours, or overnight for best results.
- 1/2 inch Ginger: Chopped, for that zingy flavor.
- 1-2 Green Chilies: Chopped (adjust to taste), depending on how much heat you like.
- 1/4 cup Coriander Leaves: Chopped, for freshness and flavor.
- 1/4 teaspoon Turmeric Powder: For color and health benefits.
- 1/4 teaspoon Asafoetida (hing): A pinch adds a unique savory flavor.
- Salt to taste: Because everything tastes better with a little salt.
- Water: As needed, to adjust the batter consistency.
- Oil or Ghee: For cooking, ghee adds a richer flavor.
Step-by-Step Guide: Making Your Moong Dal Chilla
Alright, let’s get down to business! Here’s how to make the perfect moong dal chilla, step by step. Don’t worry, it’s easier than you think!
- Soak the Moong Dal: Rinse the moong dal thoroughly and soak it in enough water for at least 4 hours, or preferably overnight. This helps soften the dal and makes it easier to blend.
- Blend the Batter: Drain the soaked moong dal and transfer it to a blender. Add ginger, green chilies, coriander leaves, turmeric powder, asafoetida, and salt. Add a little water (about 1/4 cup) and blend to a smooth batter. Add more water if needed to achieve a dosa-like consistency (not too thick, not too thin).
- Heat the Pan: Heat a non-stick pan or griddle (tawa) over medium heat. Make sure the pan is hot before you start cooking; otherwise, the chilla might stick.
- Grease the Pan: Lightly grease the pan with oil or ghee. This helps prevent the chilla from sticking and gives it a beautiful golden color.
- Pour and Spread: Pour a ladleful of batter onto the pan and spread it evenly in a circular motion. Aim for a thin, even layer.
- Cook the Chilla: Cook for 2-3 minutes on one side, or until the bottom is golden brown. You’ll know it’s ready to flip when the edges start to lift.
- Flip and Cook: Flip the chilla and cook for another 1-2 minutes, or until the other side is also golden brown.
- Serve Hot: Remove the chilla from the pan and serve hot with your favorite chutney or yogurt.
And there you have it! A delicious, protein-packed moong dal chilla ready to be devoured. I like to make a big batch of the batter and store it in the fridge for quick and easy breakfasts throughout the week. Make the batter in advance and store it in the fridge, and you can have a healthy breakfast ready in minutes!
Pro Tips for the Perfect Chilla
Want to take your moong dal chilla game to the next level? Here are a few pro tips I’ve learned over the years:
- Soaking is Key: Don’t skip the soaking step! It makes the dal easier to blend and results in a smoother batter.
- Batter Consistency: The batter should be thin enough to spread easily but not so thin that it becomes watery. Adjust the water accordingly.
- Non-Stick Pan is a Must: Using a good quality non-stick pan or griddle is crucial to prevent the chilla from sticking.
- Medium Heat: Cook the chilla over medium heat to ensure it cooks evenly and doesn’t burn.
- Patience is a Virtue: Don’t rush the cooking process. Let the chilla cook until it’s golden brown and crispy on both sides.
- Experiment with Spices: Feel free to add other spices like red chili powder, cumin powder, or coriander powder to the batter for extra flavor.
These tips have helped me perfect my moong dal chilla recipe, and I’m confident they’ll help you too. Remember, practice makes perfect, so don’t be discouraged if your first few attempts aren’t flawless. Keep trying, and you’ll get there!
Common Mistakes to Avoid
We all make mistakes in the kitchen, but knowing what to avoid can save you time and frustration. Here are some common mistakes to watch out for when making moong dal chilla:
- Not Soaking the Dal Long Enough: This can result in a grainy batter.
- Adding Too Much Water: This can make the batter too thin and difficult to spread.
- Cooking on High Heat: This can cause the chilla to burn before it’s cooked through.
- Flipping Too Early: This can cause the chilla to break apart.
- Using a Pan That Isn’t Hot Enough: This can cause the chilla to stick to the pan.
I’ve made all of these mistakes at some point, so trust me, I know how frustrating they can be. But don’t worry, learning from your mistakes is part of the fun! If you are using a cast iron pan, make sure it is properly seasoned and heated before adding the batter in. If using a regular pan, ensure it is non-stick.
Delicious Variations to Try
One of the best things about this recipe is how easy it is to customize. Here are a few variations to spice things up:
- Paneer Chilla: Add grated paneer (Indian cheese) to the batter for an extra boost of protein and flavor.
- Vegetable Chilla: Mix in finely chopped vegetables like onions, tomatoes, carrots, and bell peppers for added nutrients and texture.
- Spinach Chilla: Blend in a handful of spinach to the batter for a healthy and vibrant twist.
- Spicy Chilla: Add a pinch of red chili powder or a dash of hot sauce to the batter for an extra kick.
- Herb Chilla: Mix in fresh herbs like mint, cilantro, or dill for a refreshing flavor.
Feel free to get creative and experiment with different ingredients to find your perfect combination. The possibilities are endless!
How to Store Leftover Chilla
If you happen to have any leftover chilla (which is rare in my house!), here’s how to store them:
- In the Fridge: Store the cooked chilla in an airtight container in the refrigerator for up to 2-3 days.
- Reheating: Reheat the chilla on a pan or in a microwave until warmed through.
The batter can also be stored in the fridge for up to 2 days. Just make sure to stir it well before using.
Frequently Asked Questions (FAQ)
Got questions? I’ve got answers! Here are some common questions about making moong dal chilla:
- Can I use other types of lentils?: While moong dal is the traditional choice, you can experiment with other lentils like masoor dal (red lentils) or chana dal (split chickpeas).
- Can I make this recipe without ginger and green chilies?: Yes, but the flavor will be milder. You can substitute with other spices like garlic powder or black pepper.
- Can I freeze the batter?: I don’t recommend freezing the batter as it may change the texture. It’s best to use it fresh.
- How do I prevent the chilla from sticking to the pan?: Make sure to use a good quality non-stick pan and grease it well with oil or ghee.
- What can I serve with moong dal chilla?: Moong dal chilla pairs well with chutney, yogurt, pickles, or even a dollop of butter.
Serving Suggestions: What to Serve with Your Chilla
Moong dal chilla is delicious on its own, but it’s even better when paired with the right accompaniments. Here are a few of my favorite serving suggestions:
- Chutney: Serve with coconut chutney, mint chutney, or tomato chutney for a burst of flavor.
- Yogurt: A dollop of plain yogurt adds a creamy and cooling contrast to the spicy chilla.
- Pickles: Indian pickles like mango pickle or lime pickle add a tangy and spicy kick.
- Butter: A simple pat of butter adds richness and flavor.
- Sambar: Serve with sambar, a South Indian lentil-based vegetable stew, for a complete and satisfying meal.
I hope you enjoyed this recipe as much as I do! Remember, cooking is all about having fun and experimenting, so don’t be afraid to put your own spin on it. Happy cooking!
Protein-Packed Moong Dal Chilla
Ingredients
Ingredients
- 1 cup Moong Dal (split yellow lentils) (soaked for at least 4 hours)
- 0.5 inch Ginger (chopped)
- 1-2 Green Chilies (chopped (adjust to taste))
- 0.25 cup Coriander Leaves (chopped)
- 0.25 teaspoon Turmeric Powder
- 0.25 teaspoon Asafoetida (hing)
- to taste Salt
- as needed Water
- for cooking Oil or Ghee
Instructions
- Drain the soaked moong dal and transfer it to a blender.
- Add ginger, green chilies, coriander leaves, turmeric powder, asafoetida, and salt.
- Add a little water (about 1/4 cup) and blend to a smooth batter. Add more water if needed to achieve a dosa-like consistency (not too thick, not too thin).
- Heat a non-stick pan or griddle over medium heat.
- Grease the pan lightly with oil or ghee.
- Pour a ladleful of batter onto the pan and spread it evenly in a circular motion.
- Cook for 2-3 minutes on one side, or until the bottom is golden brown.
- Flip the chilla and cook for another 1-2 minutes, or until the other side is also golden brown.
- Remove the chilla from the pan and serve hot with chutney or yogurt.
Notes