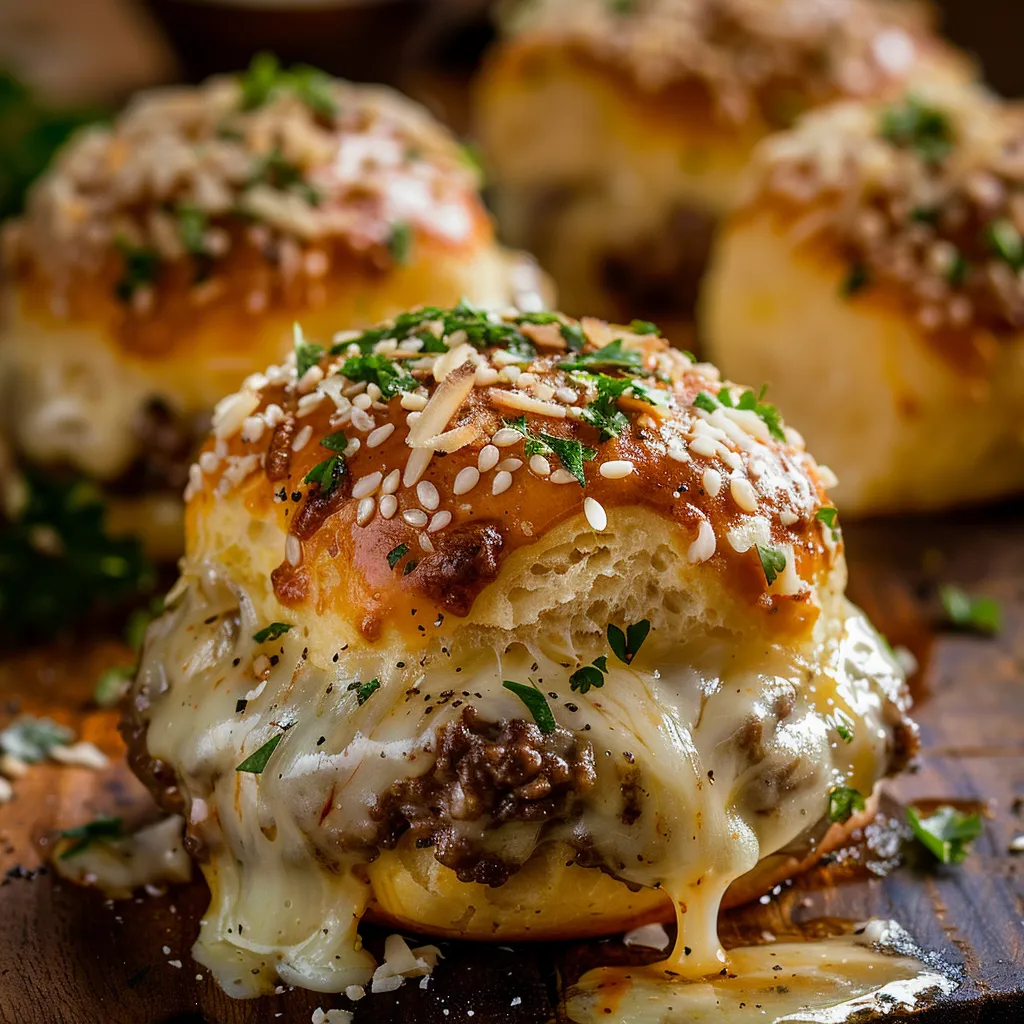
Delight in Every Bite: The Magic of Garlic Parmesan Cheeseburger Bombs
Welcome to the world of Garlic Parmesan Cheeseburger Bombs—a recipe that’s not just a meal but an experience! If you’re looking for a way to impress friends or simply want a cozy night in with a delightful snack, these bite-sized wonders will have everyone asking for seconds. The marriage of savory ground beef, gooey cheese, and garlic butter wrapped in flaky biscuit dough creates a flavor explosion that’s hard to resist. Let’s dive into this culinary adventure together, shall we?
Why You’ll Love This Recipe
Here are just a few reasons why this recipe deserves a spot in your kitchen:
- Quick and Easy: Perfect for weeknight dinners or last-minute gatherings, these cheeseburger bombs come together in under 30 minutes.
- Great for Sharing: Ideal for parties or game nights, they’re easy to grab and enjoy without any fuss.
- Customizable: Feel free to swap in your favorite ingredients—add jalapeños for a kick or substitute turkey for a lighter version.
- Mess-Free: Each bomb is neatly sealed, ensuring no mess on your hands or table—every bite is pure joy!
- Kid-Approved: With flavors that appeal to kids and adults alike, these bombs are a surefire hit for the whole family.
Gather Your Ingredients

Let’s get our hands on the essentials for these delicious Garlic Parmesan Cheeseburger Bombs:
- 1 lb ground beef: Choose a blend with some fat for juiciness—80/20 is a great option.
- 1 cup shredded cheddar cheese: Sharp cheddar adds a delightful tang; feel free to mix in other cheeses like Monterey Jack.
- 1/2 cup grated parmesan cheese: The real star for that umami richness.
- 1 clove garlic, minced: Fresh garlic enhances the flavor immensely.
- 1 tsp onion powder: A great addition for depth and sweetness.
- 1 tsp salt: Essential for seasoning.
- 1/2 tsp black pepper: For a hint of spice.
- 1 package refrigerated biscuit dough: This is what makes the magic happen—flaky and buttery!
- 2 tbsp melted butter: Brushed on top for that golden finish.
- 1 tbsp fresh parsley, chopped: For a touch of freshness.
- 1/4 tsp garlic powder: Enhances the garlicky goodness.
Let’s Make Some Magic!
Ready to get cooking? Follow these simple steps to create your very own cheeseburger bombs:
- Preheat your oven to 375°F (190°C).
- In a mixing bowl, combine the ground beef, cheddar cheese, parmesan cheese, minced garlic, onion powder, salt, and black pepper. Mix until well combined.
- Shape the mixture into small balls, about 1 inch in diameter. Think of them as little flavor bombs!
- Open the package of biscuit dough and separate it into individual biscuits. Flatten each biscuit with your hands or a rolling pin.
- Place a meatball in the center of each flattened biscuit, then wrap the dough around the meatball, pinching the edges to seal tightly.
- Position the stuffed biscuits on a baking sheet lined with parchment paper to prevent sticking.
- In a small bowl, mix melted butter, chopped parsley, and garlic powder. Brush this mixture over the tops of the biscuit bombs for a golden, flavorful crust.
- Bake in the preheated oven for 15-18 minutes or until they’re golden brown and irresistible.
- Let them cool for a few minutes before serving—trust me, you’ll want to avoid those lava-hot cheese burns!
Pro Tips for Perfection
Want to elevate your cooking game? Here are some expert insights:
- Don’t Overmix: When combining your beef and spices, mix just until combined to keep the texture tender.
- Seal Well: Make sure to pinch the biscuit edges tightly to prevent any leaks during baking.
- Experiment with Fillings: Try adding sautéed mushrooms, bell peppers, or different cheeses for a personal twist.
- Make Ahead: Assemble the bombs and refrigerate them up to a day in advance—just bake them fresh when your guests arrive!
- Freezing Option: You can freeze uncooked bombs. Just pop them straight into the oven from frozen, adding a few extra minutes to the baking time.
- Serving Style: Pair with a dipping sauce like ranch or a spicy ketchup for an extra flavor kick.
- Herbs for Freshness: Don’t hesitate to toss in some fresh herbs like thyme or basil for added flavor.
- Watch Them Bake: Keep an eye on them in the last few minutes to ensure they don’t over-brown!
Common Mistakes and Troubleshooting
Every kitchen adventure has its hiccups. Here’s how to avoid common pitfalls:
- Leaking Filling: If you notice filling leaking out while baking, it may be due to insufficient sealing. Ensure edges are pinched well.
- Dough Not Cooking Through: If the outside cooks too quickly, try lowering the oven temperature and baking for a longer time.
- Overbaking: Keep an eye on the color; take them out as soon as they turn golden to avoid dryness.
- Too Greasy: If the filling is too greasy, opt for leaner ground beef or drain excess fat after cooking.
Variations to Try
Feel free to get creative with these variations:
- Spicy Jalapeño Cheeseburger Bombs: Add diced jalapeños to the beef mixture for a spicy kick.
- BBQ Chicken Bombs: Swap ground beef for shredded BBQ chicken and use mozzarella cheese.
- Mediterranean Twist: Mix in feta cheese, olives, and spinach for a Mediterranean flavor.
- Veggie Bombs: Replace the beef with a mix of sautéed vegetables like mushrooms, zucchini, and bell peppers for a vegetarian-friendly option.
Storage and Make-Ahead Instructions
Want to save some for later? Here’s how:
- Refrigeration: Store leftovers in an airtight container in the fridge for up to 3 days.
- Freezing: Freeze unbaked bombs individually on a baking sheet, then transfer to a freezer bag. They can be frozen for up to 3 months.
- Reheating: To reheat, pop them in the oven at 350°F (175°C) for 10-15 minutes, or until heated through.
Nutritional Insights and Dietary Adaptations
Let’s talk nutrition! Here’s how you can adapt this recipe:
- Low-Carb Option: Use cauliflower dough instead of biscuit dough for a low-carb alternative.
- Dairy-Free: Substitute dairy cheeses with plant-based alternatives.
- Gluten-Free: Opt for gluten-free biscuit dough or make your own from gluten-free flour.
- Protein Boost: Add cooked quinoa or lentils to the beef mixture for extra protein and fiber.
Equipment Recommendations
To make your cooking experience smooth, here’s what you’ll need:
- Baking Sheet: A sturdy baking sheet lined with parchment paper helps prevent sticking.
- Mixing Bowls: Have a large bowl for mixing the beef and a small one for the garlic butter.
- Measuring Cups and Spoons: Accurate measurements are key to success in cooking.
- Rolling Pin: Useful for flattening the biscuit dough evenly.
Serving Suggestions
Want to elevate your serving game? Here are some ideas:
- On a Platter: Arrange the bombs on a large platter with a variety of dipping sauces—think ranch, BBQ, or spicy mustard.
- Garnish: Sprinkle fresh herbs like parsley or chives over the bombs for a pop of color.
- Side Dishes: Pair with a crisp salad or some sweet potato fries to balance the meal.
- Perfect for Game Day: Serve alongside nachos and wings for the ultimate game day spread!
Frequently Asked Questions
Got questions? I’ve got answers!
- Can I use turkey instead of beef? Absolutely! Ground turkey works beautifully in this recipe.
- How do I make these vegetarian? Substitute ground beef with a mix of your favorite vegetables or plant-based meat alternatives.
- Can I prepare these in advance? Yes, you can assemble them ahead of time and bake them when ready to serve.
- What’s the best way to reheat leftovers? Reheat in the oven to retain that crispy texture. Avoid microwaving if possible.
- How long do they take to cook? Bake for 15-18 minutes until golden brown and cooked through.
- What dipping sauces pair well? Ranch, honey mustard, and spicy ketchup are all wonderful options!
- Can I freeze the cooked bombs? Yes! Freeze them after cooking, then reheat in the oven.
- What’s the secret to a good seal? Pinch the edges tightly and ensure no filling is exposed for the best results.
And there you have it! A comprehensive guide to making the most delicious Garlic Parmesan Cheeseburger Bombs. With these tips, tricks, and variations, you’ll be the star of every gathering. So roll up your sleeves, gather your ingredients, and let the magic begin. Happy cooking, friend!
Garlic Parmesan Cheeseburger Bombs
Ingredients
Meat and Cheese
- 1 lb ground beef
- 1 cup shredded cheddar cheese
- 1/2 cup grated parmesan cheese
- 1 clove garlic, minced
- 1 tsp onion powder
- 1 tsp salt
- 1/2 tsp black pepper
- 1 package refrigerated biscuit dough
- 2 tbsp melted butter
- 1 tbsp fresh parsley, chopped
- 1/4 tsp garlic powder
Instructions
- Preheat oven to 375°F (190°C). Mix beef, cheeses, garlic, onion powder, salt, and pepper. Form into 1-inch balls.
- Separate biscuit dough, flatten each, and place a meatball in the center. Wrap and seal.
- Place stuffed biscuits on a parchment-lined baking sheet. Mix melted butter, parsley, and garlic powder; brush over tops.
- Bake for 15-18 minutes until golden. Let cool slightly before serving.
Notes
Loved this recipe? Save it to your favorite Pinterest board so you can easily find it later! It’s the perfect way to keep all your sweet ideas in one place. ✨