Welcome to Your Next Kitchen Adventure!
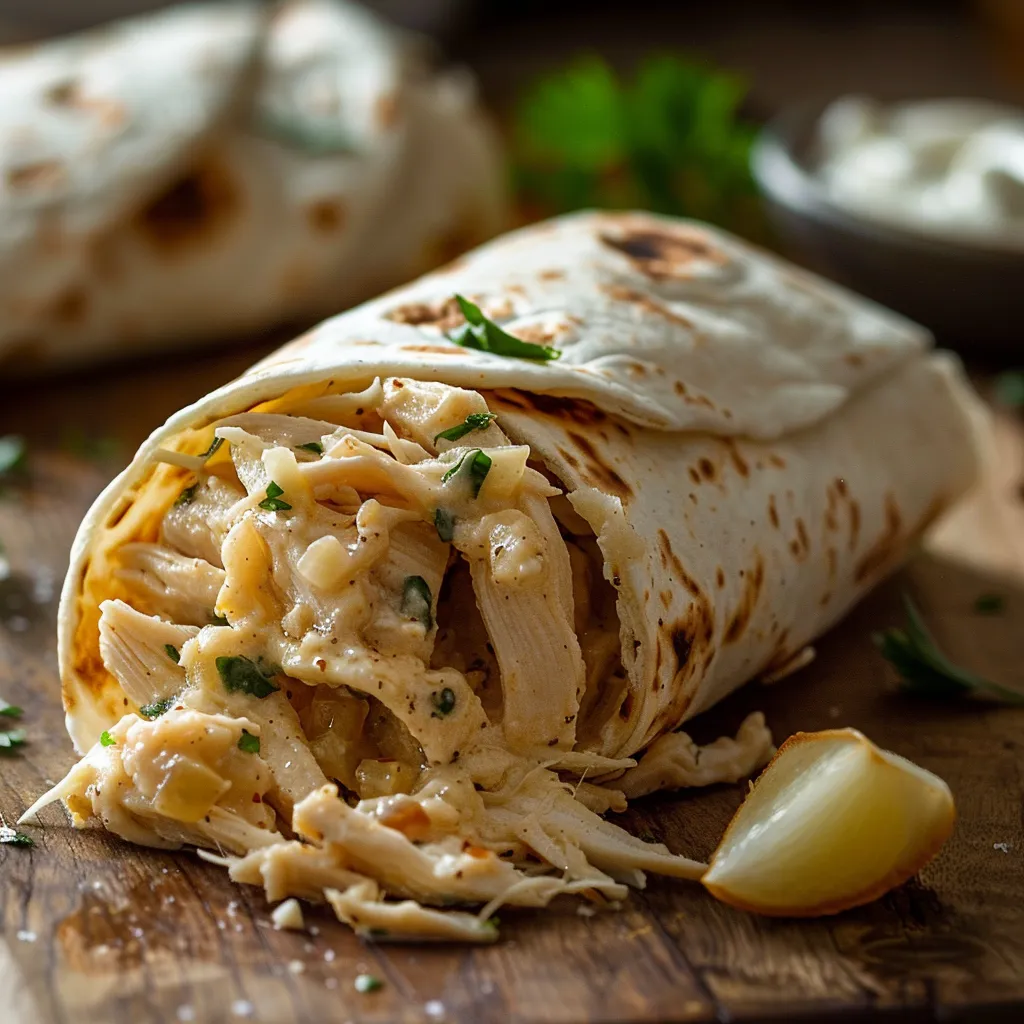
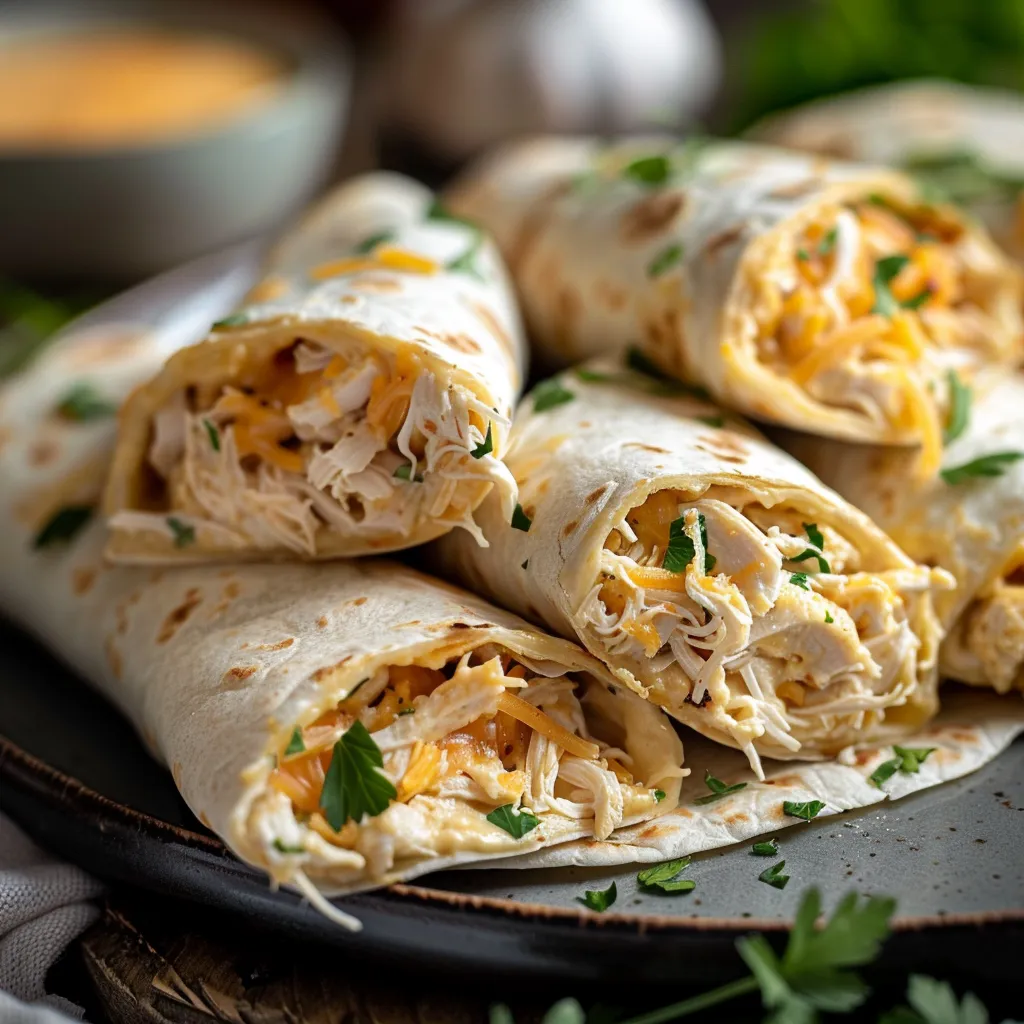
If you’re scrolling through your feed looking for a recipe that wraps comfort, flavor, and simplicity into one delicious package, then you’re in the right place! Today, we’re diving into the world of Cheesy Garlic Chicken Wraps. These ooey-gooey delights are not just a meal—they’re an experience! Perfect for a family dinner, a cozy night in, or impressing your friends with your culinary prowess. Let’s get ready to create something magical that’s sure to make your taste buds sing!
Why You’ll Love This Recipe
Here are just a few reasons why these cheesy garlic chicken wraps deserve a spot in your weekly rotation:
- Quick to Prepare: Whip these wraps up in under 30 minutes! Perfect for those busy weeknights when you want something hearty but don’t have hours to spend in the kitchen.
- Customizable: Feel free to throw in your favorite veggies or swap cheeses. This recipe adapts beautifully to your pantry staples!
- Kid-Approved: With gooey cheese and tender chicken, even the pickiest eaters will be asking for seconds.
- One-Pan Wonder: Cooking in a skillet means less cleanup, leaving you more time to enjoy your meal and less time scrubbing dishes!
- Perfect for Meal Prep: These wraps store well in the fridge, making them a great option for quick lunches throughout the week.
Ingredients Breakdown
Let’s gather our ingredients! This recipe is simple, but the flavor it packs is anything but. Here’s what you need:
- 2 cups cooked chicken, shredded: This is your star ingredient! Use leftover rotisserie chicken or any cooked chicken you have on hand. It’s a great way to use up what’s in your fridge.
- 1 cup shredded mozzarella cheese: The melty goodness that brings everything together. Swap it with cheddar for a sharper flavor or pepper jack for a kick!
- 1/2 cup cream cheese, softened: This creamy goodness binds everything together. You can use low-fat cream cheese if you’re watching calories.
- 3 cloves garlic, minced: Fresh garlic brings an aromatic depth that’s simply irresistible.
- 1/4 cup fresh parsley, chopped: Adds a pop of color and freshness. Feel free to substitute with cilantro for a different twist!
- 1 teaspoon garlic powder: For that extra punch of flavor.
- 1 teaspoon onion powder: Adds sweetness and depth.
- Salt and pepper to taste: Always adjust to your preference for that perfect seasoning.
- 4 large flour tortillas: The wrap that holds all the goodness together. You can use whole wheat or gluten-free tortillas if you prefer.
- 1 tablespoon olive oil: For cooking—this helps achieve that golden, crispy texture.
How to Make Cheesy Garlic Chicken Wraps
Ready to cook? Let’s go step by step to make these cheesy garlic chicken wraps!
Step 1: Prepare the Filling
In a large bowl, combine the shredded chicken, mozzarella cheese, cream cheese, minced garlic, chopped parsley, garlic powder, onion powder, salt, and pepper. Mix until well combined. This filling is where the magic happens, so make sure every bite is packed with flavor!
Step 2: Heat the Skillet
In your large skillet, heat the olive oil over medium heat. This will create the perfect environment for your wraps to get crispy!
Step 3: Assemble the Wraps
Place a tortilla in the skillet and spoon a generous amount of the chicken mixture onto one half of the tortilla. Be generous here; you want each wrap to be bursting with flavor!
Step 4: Fold and Cook
Fold the tortilla over to cover the filling. Cook for 3-4 minutes on each side, until golden brown and the cheese is melted. You may need to adjust the heat to ensure they don’t burn.
Step 5: Serve and Enjoy
Remove from skillet and let cool for a minute before slicing in half. Serve warm with your favorite dipping sauce—think ranch, salsa, or even a drizzle of hot sauce for those who like it spicy!
Pro Tips for Success
Want to ensure your wraps turn out perfectly every time? Here are some expert insights:
- Don’t Overfill: While it’s tempting to pile on the filling, overstuffing can lead to messy wraps. Stick to a generous but manageable amount.
- Adjust Cooking Time: Depending on the thickness of your wraps and the heat of your skillet, you may need to adjust cooking times slightly.
- Experiment with Spices: Feel free to add chili flakes or smoked paprika for a flavor twist. This recipe is forgiving and loves creativity!
- Let the Cheese Melt: If you find the cheese isn’t melting quickly enough, cover the skillet with a lid for a minute or two.
- Mix Up the Cheeses: Don’t hesitate to mix mozzarella with gouda, cheddar, or any favorite cheese for a flavor explosion.
- Keep It Warm: If you’re making multiple wraps, keep them warm in a low oven until you’re ready to serve.
- Use Fresh Ingredients: Fresh garlic and herbs elevate the flavor significantly. Always opt for fresh when possible!
- Make Ahead: Prepare the filling a day in advance and store it in the fridge to save time!
Common Mistakes and Troubleshooting
Even the best cooks can have hiccups! Here are some common mistakes and how to avoid them:
- Wraps Falling Apart: This can happen if the tortillas are too dry. Warm them up slightly before filling to keep them pliable.
- Cheese Not Melting: If your cheese isn’t melting, it may be due to low heat. Ensure your skillet is hot enough before adding the wraps.
- Overcooked Chicken: If using raw chicken, ensure it’s cooked properly but not overcooked, as this can dry it out. Use a meat thermometer to check for doneness.
Variations to Try
The beauty of these wraps is their versatility. Here are some variations to keep things exciting:
- Buffalo Chicken Wraps: Add buffalo sauce to the chicken mixture for a spicy twist that’s perfect for game day!
- Veggie Delight: Mix in sautéed bell peppers, onions, and spinach for a hearty vegetarian version.
- Pesto Chicken Wraps: Swap out the cream cheese for pesto for a fresh, herby flavor.
- Southwestern Style: Add black beans and corn to the filling and use a spicy cheese blend for a southwestern flair.
Storage and Make-Ahead Instructions
These wraps are perfect for meal prep! Here’s how to store them:
- In the Fridge: Store leftovers in an airtight container for up to 3 days. Reheat in the skillet for best results.
- Freezing: Wrap individual portions in plastic wrap and foil, then freeze. Reheat in the oven or skillet when ready to eat!
- Make-Ahead: Prepare the filling a day in advance and store it in the fridge. Assemble and cook just before serving.
Frequently Asked Questions
Here are some common questions about making cheesy garlic chicken wraps:
- Can I use raw chicken? Yes! Just ensure it’s cooked fully before making the wraps.
- What if I don’t have cream cheese? You can substitute with Greek yogurt or ricotta for a similar creamy texture.
- Can I make these gluten-free? Absolutely! Use gluten-free tortillas or lettuce wraps for a low-carb option.
- What dipping sauces work best? Ranch, salsa, or a spicy aioli are all delicious choices.
- How can I add more flavor? Consider adding herbs like cilantro or spices like cumin or cayenne for an extra kick!
- How many wraps does this recipe make? This recipe makes about 4 generous wraps, depending on how much filling you use.
- Are they freezer-friendly? Yes! Just make sure they’re wrapped well to prevent freezer burn.
- Can I use different proteins? Yes! Shredded beef or turkey would also work beautifully in this recipe.
Nutritional Tips and Dietary Adaptations
Here are some helpful tips to make this recipe fit your dietary needs:
- Lower Fat Options: Use low-fat cream cheese and part-skim mozzarella to cut down on calories without sacrificing flavor.
- Increase Fiber: Add black beans or chickpeas to the filling for added fiber and protein.
- Vegetarian Version: Use only veggies and cheese for a delicious vegetarian wrap.
Equipment Recommendations
To make your cooking experience smoother, here’s what I recommend having on hand:
- Large Skillet: A non-stick skillet is ideal for getting those wraps crispy without sticking.
- Mixing Bowl: A large bowl for combining your filling ingredients.
- Spatula: A sturdy spatula will help you flip those wraps without breaking them apart.
Serving Suggestions
Now that your wraps are ready, it’s time to serve! Here are some ideas:
- With a Side Salad: A fresh green salad pairs beautifully with these wraps!
- Chips and Salsa: Serve with a side of tortilla chips and your favorite salsa for a fun meal.
- Fresh Fruit: A light fruit salad can balance out the richness of the wraps.
So there you have it, friends! Your complete guide to making the ultimate Cheesy Garlic Chicken Wraps. I hope you feel inspired to gather your ingredients and dive into this cozy culinary adventure. Remember, cooking is all about joy, creativity, and a sprinkle of love. Happy cooking, and may your wraps always be ooey-gooey and delicious!
Ooey-Gooey Cheesy Garlic Chicken Wraps – Quick & Delicious Dinner Idea
Ingredients
Chicken
- 2 cups cooked chicken, shredded
Cheese
- 1 cup shredded mozzarella cheese
Dairy
- 1/2 cup cream cheese, softened
Produce
- 3 cloves garlic, minced
- 1/4 cup fresh parsley, chopped
Spices
- 1 teaspoon garlic powder
- 1 teaspoon onion powder
Seasonings
- to taste salt and pepper
Wraps
- 4 large flour tortillas
Oil
- 1 tablespoon olive oil
Instructions
- Mix shredded chicken, mozzarella, cream cheese, garlic, parsley, garlic powder, onion powder, salt, and pepper.
- Heat olive oil in a skillet over medium heat.
- Place a tortilla in the skillet, add filling, fold, and cook 3-4 minutes per side until golden and cheese melts.
- Remove, cool briefly, then slice and serve with dipping sauce.
Notes
Loved this recipe? Save it to your favorite Pinterest board so you can easily find it later! It’s the perfect way to keep all your sweet ideas in one place. ✨